Community Brag Posts

DIY Raised Garden Planter on Casters

Submitted by Anonymous (not verified) on Sat, 07/15/2023 - 09:47

I saw your raised garden box and decided to make it for my wife so she could garden on our deck due to medical problems. She absolutely loved it.

The only thing I did different was I added casters to the legs so it can be moved easily on the deck.

Thank you very much for the idea and plans. We really enjoy them.
 

John Sterzick

Bedside Table

This was a bedside table I built to match the headboard. My wife wanted me to add a shelf from a plan she saw on a website. I simply used Ana's plans and changed them to meet my wife's wishes. It was a very simple project. I did use a plate joiner w/ biscuits and pocket holes with 1 1/4" screws for the joinery. I also added some 1" x 3" braces underneath as support.

Estimated Cost
$36 for the legs. The rest is left overs.
Estimated Time Investment
Weekend Project (10-20 Hours)
Finish Used
I mixed my own stains to get a brown tone base and then added a Minwax red chestnut stain on top of that. The polyurethane is Minwax fast drying (2 coats). The stains were applied with a brush and then wiped down with a cotton rag. The poly was applied with a brush. I sanded between the coats of poly using 320 grit paper.
Recommended Skill Level
Beginner

Comments

kafarela

Wed, 03/07/2012 - 23:43

First off...THANK YOU SO MUCH for the Awesome Ideas you have posted! Being a Paramedic all my life I never knew how much I enjoyed working with wood.

But we have been crying over the last 2 days, it seems we cannot access the web site from our computers just our phones!

I hope and pray that this gets resolved really quickly ...we miss your site!

windjamer812

Sun, 03/11/2012 - 01:49

That would make me cry as well. I just love Ana and everyone on here. And thank you for your service in the medical field. I have known many that owe their lives to people like yourself.

Learning Tower for miss madi

Submitted by mrsmckeon on Thu, 01/02/2014 - 17:37

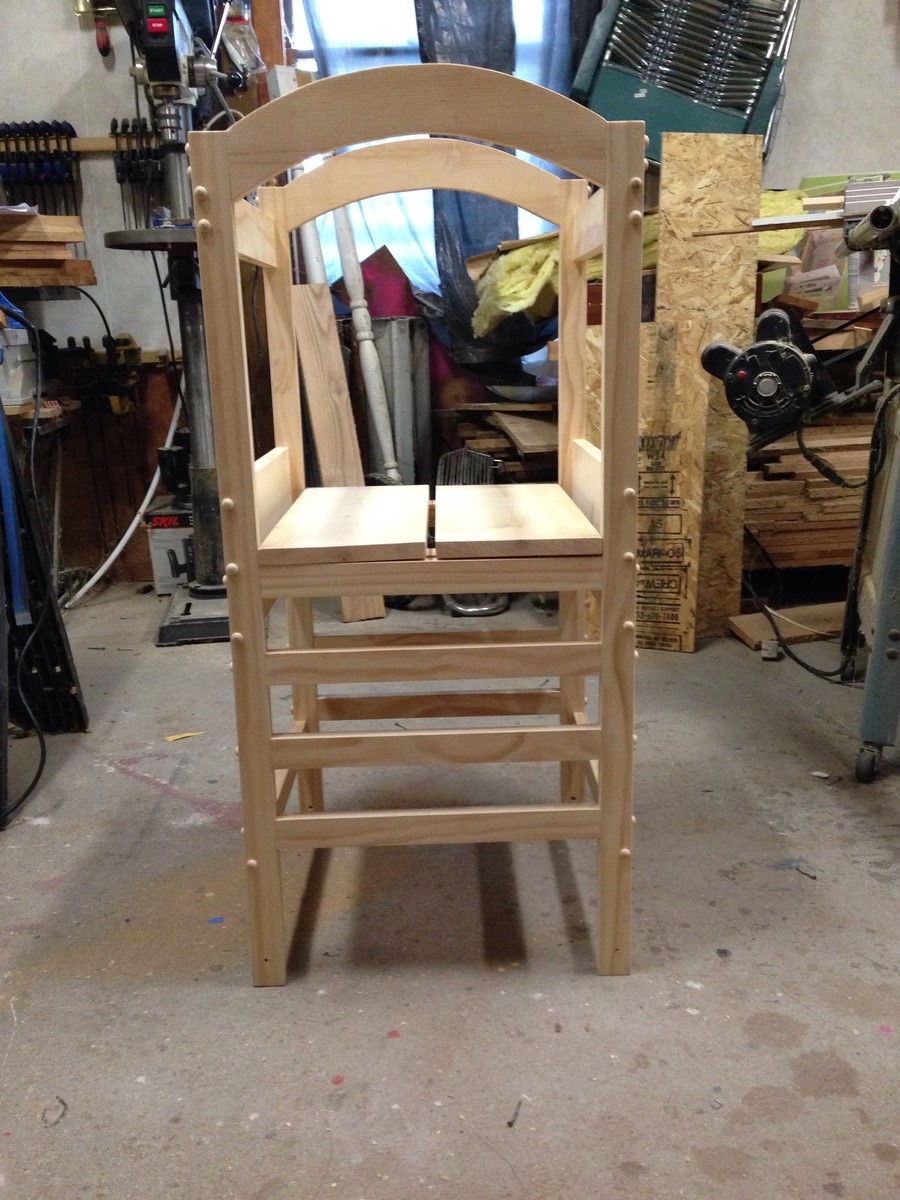
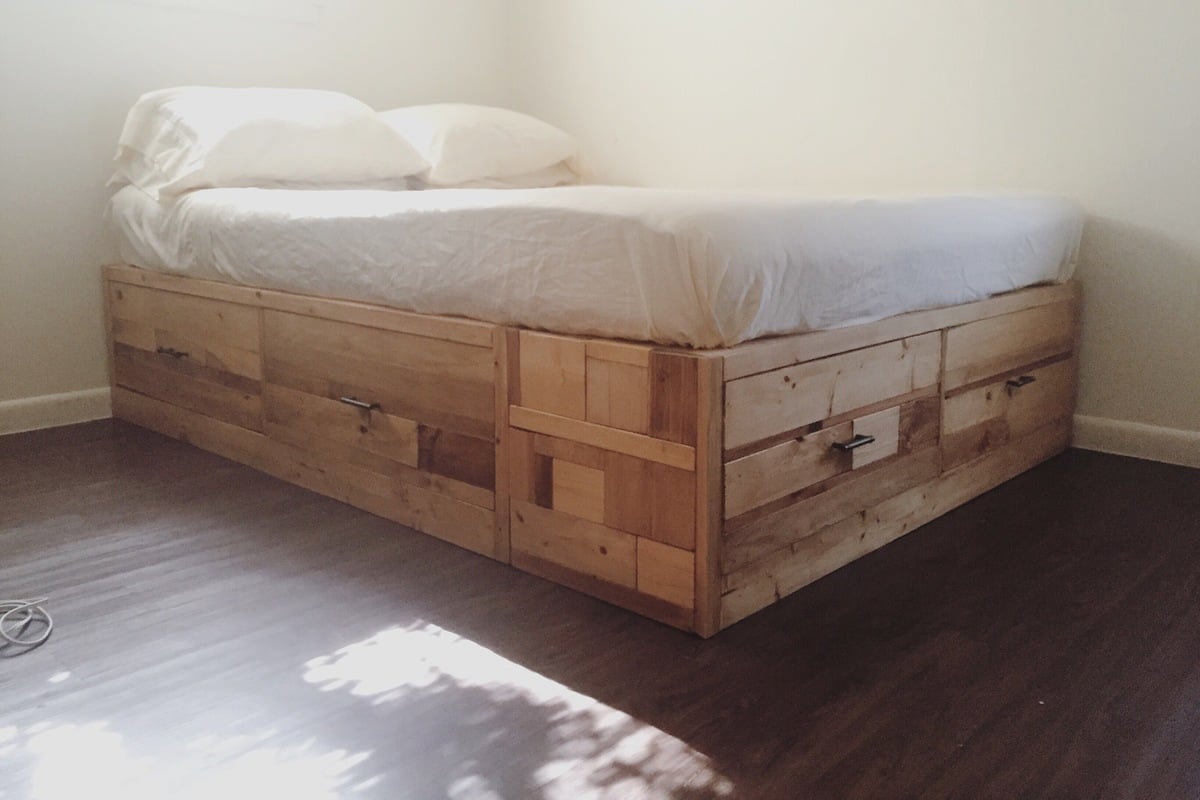
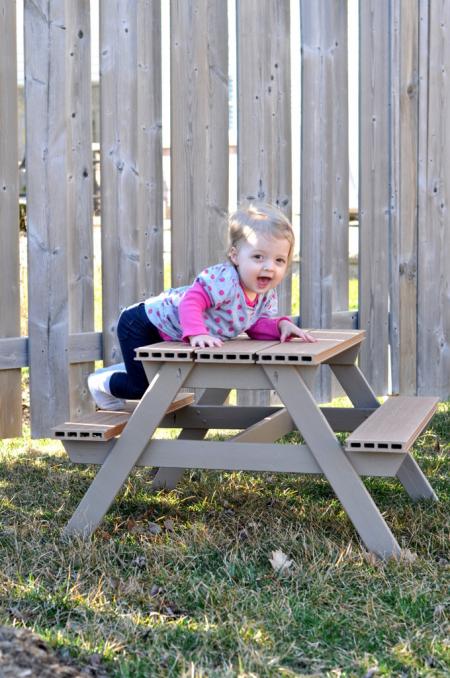
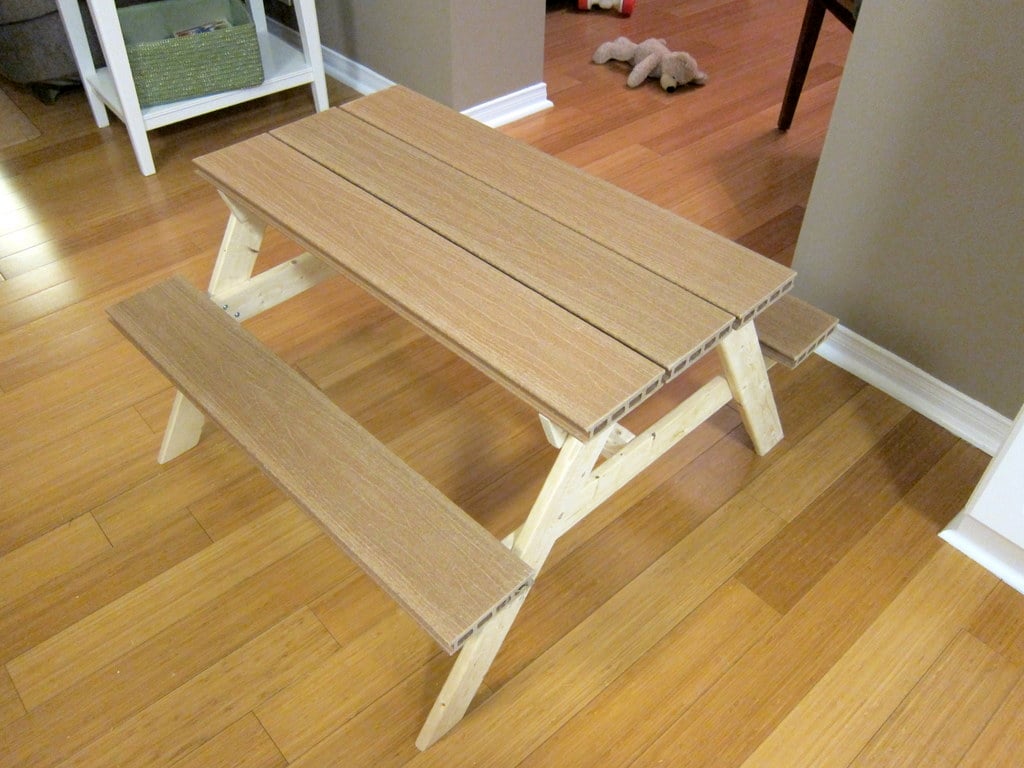
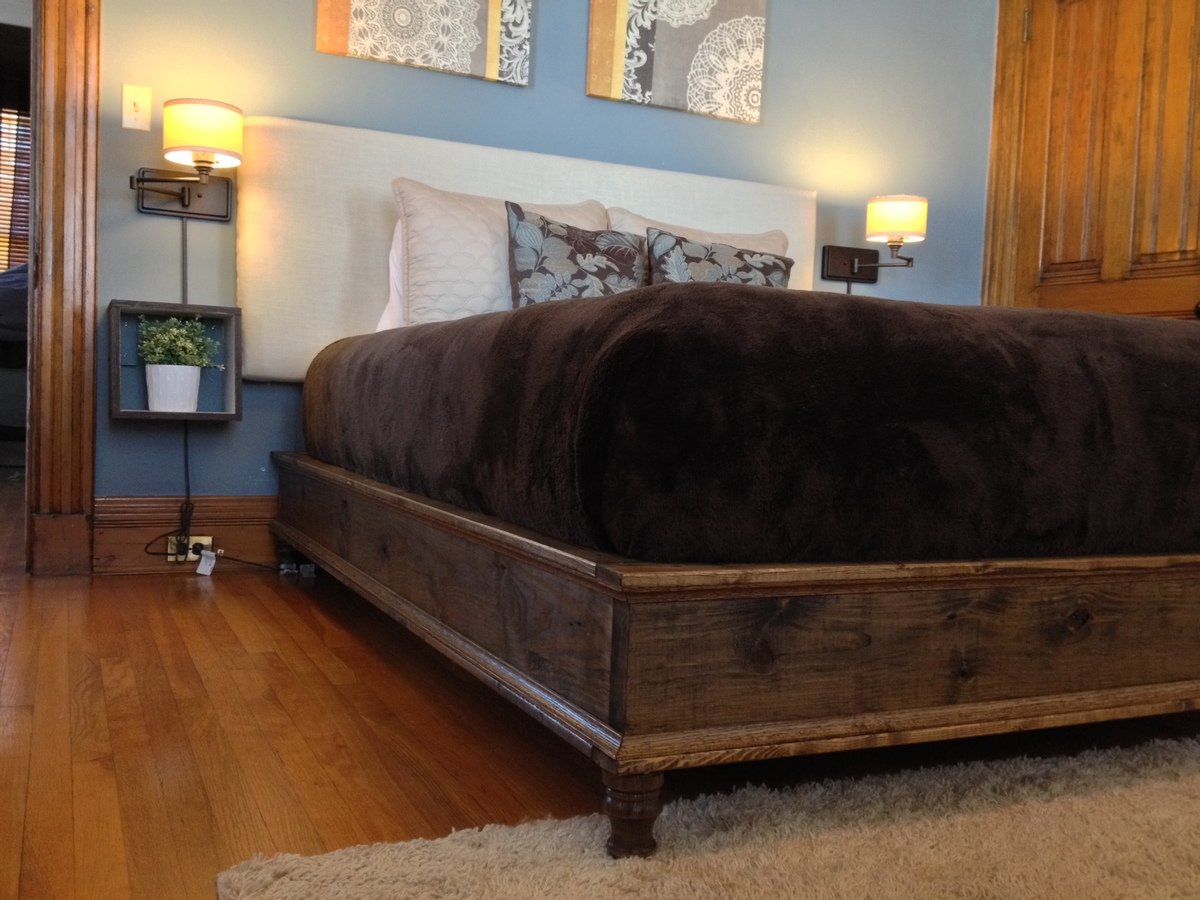
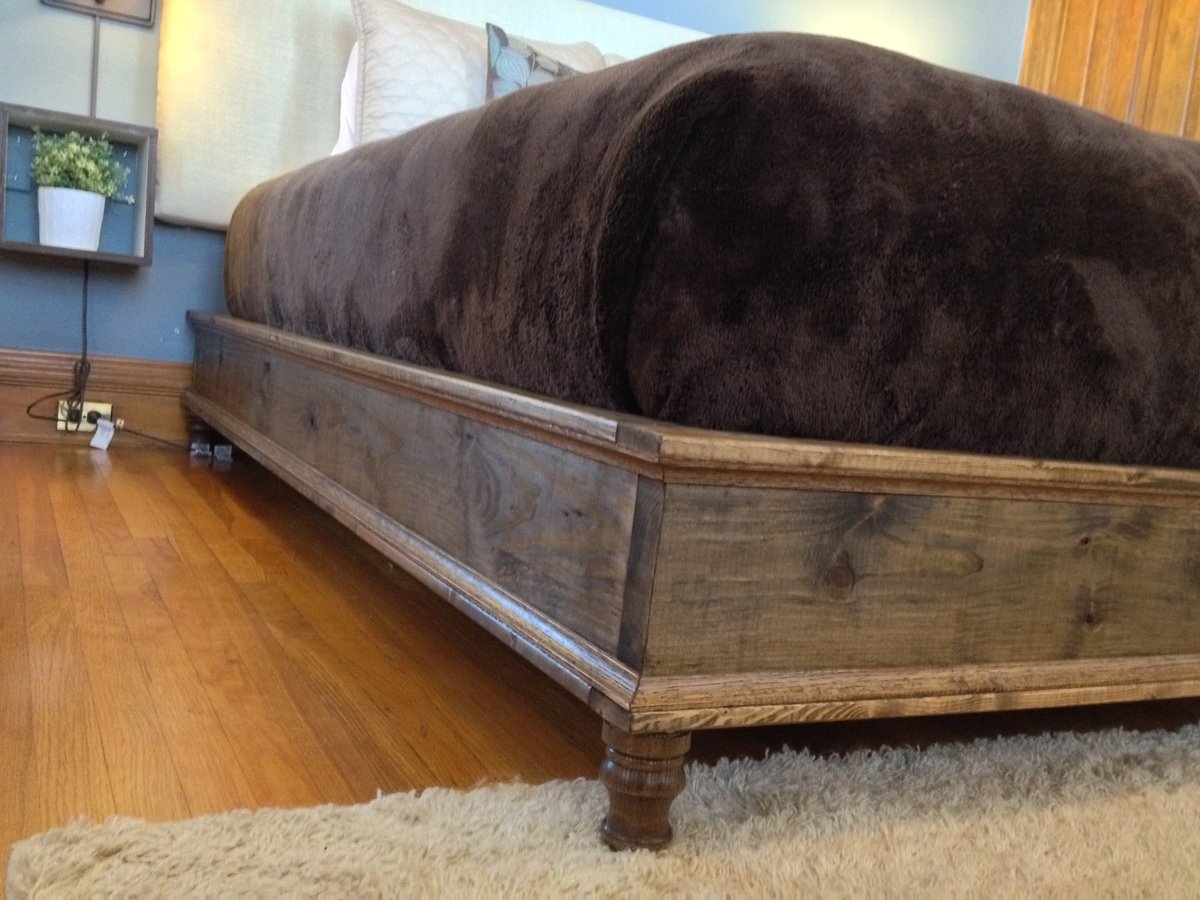
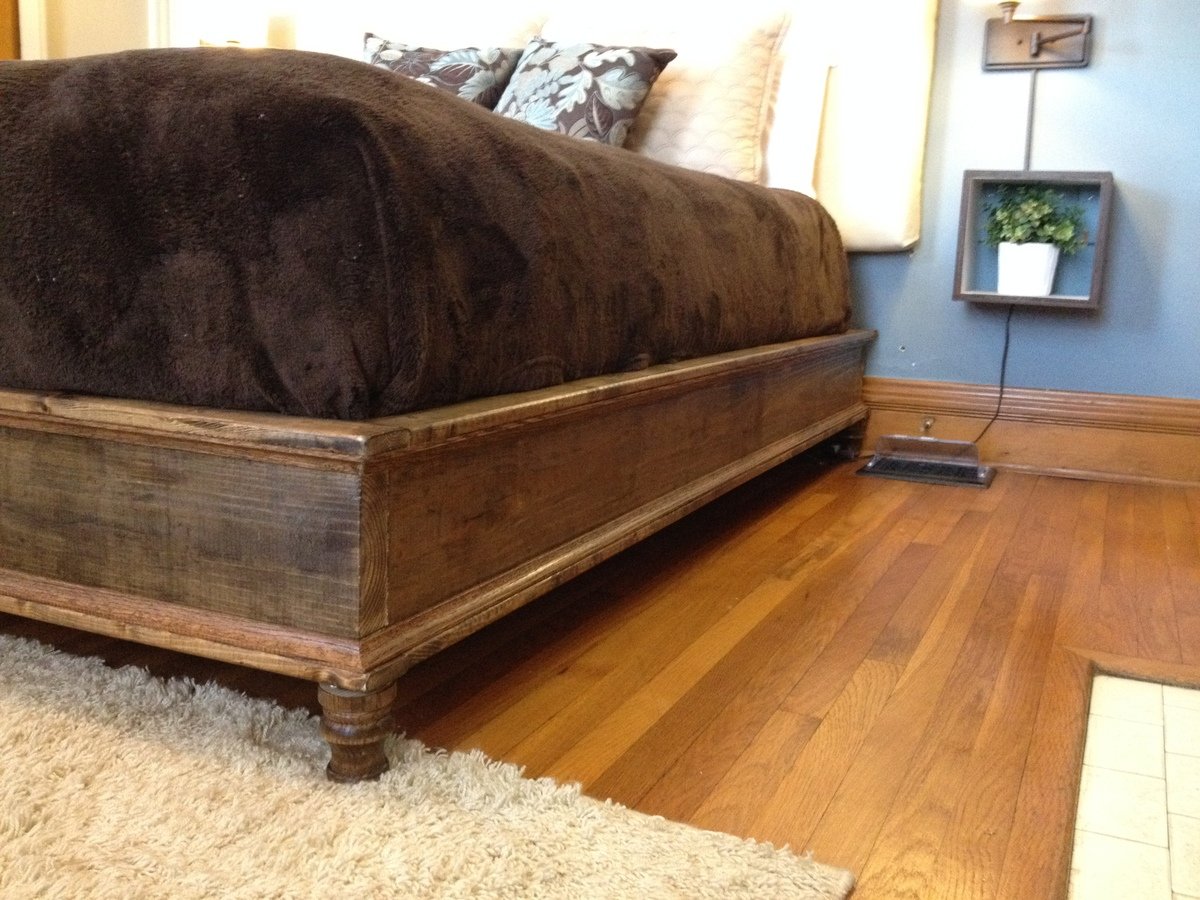
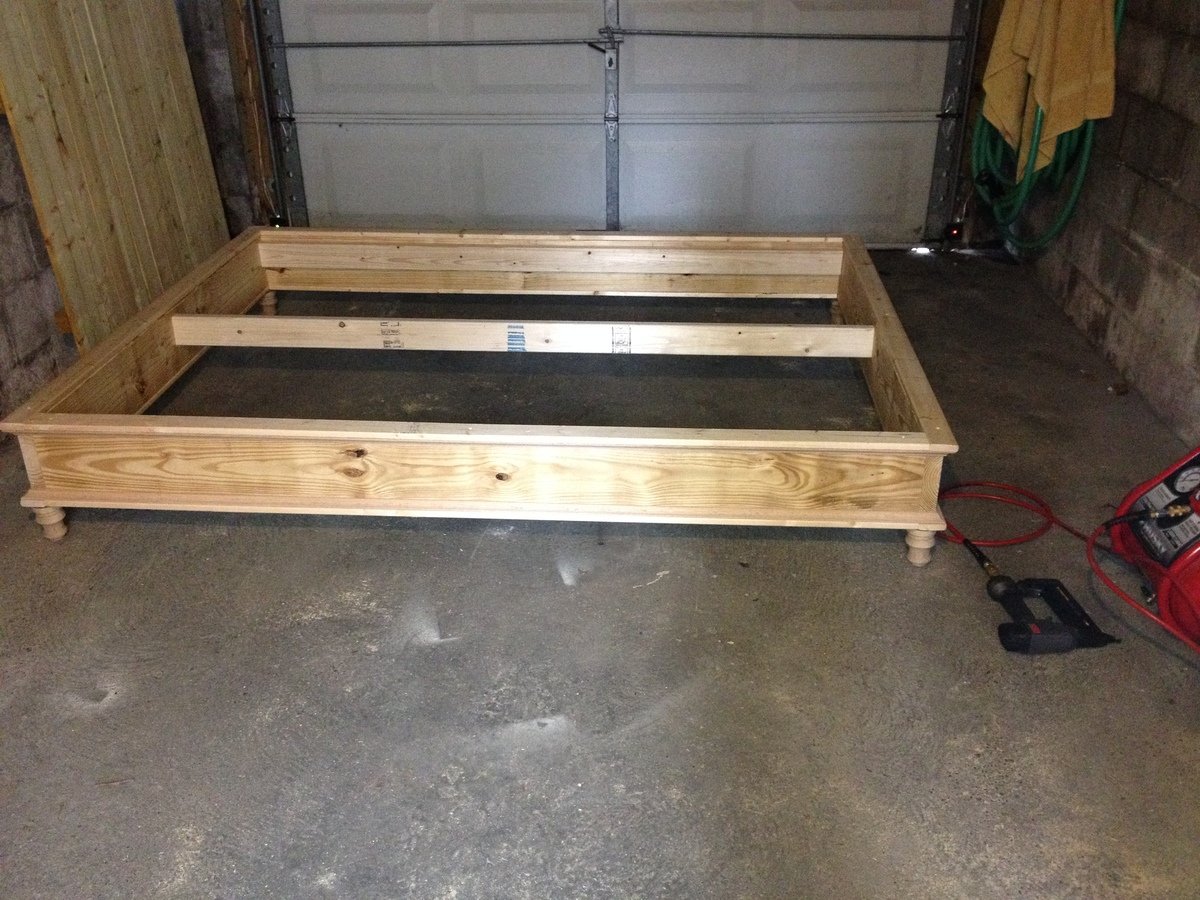
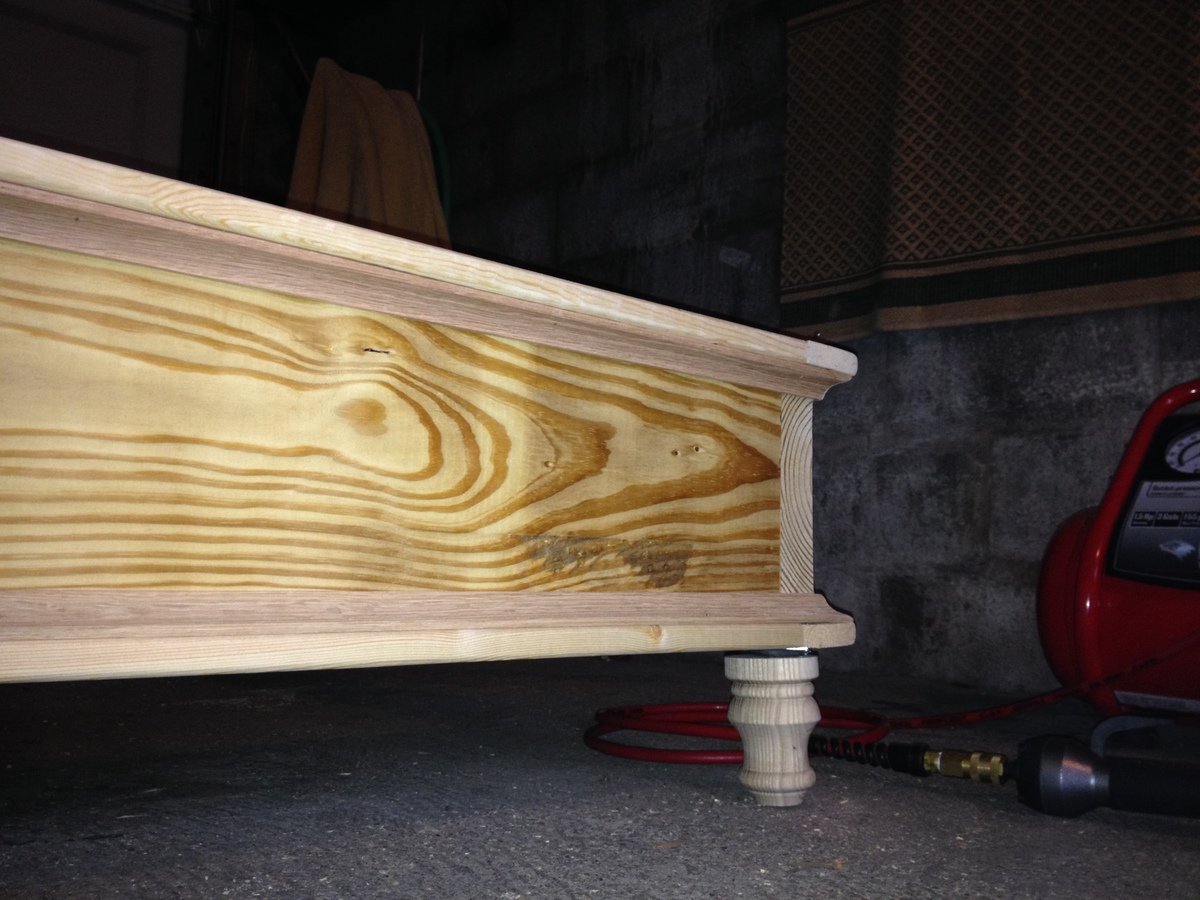
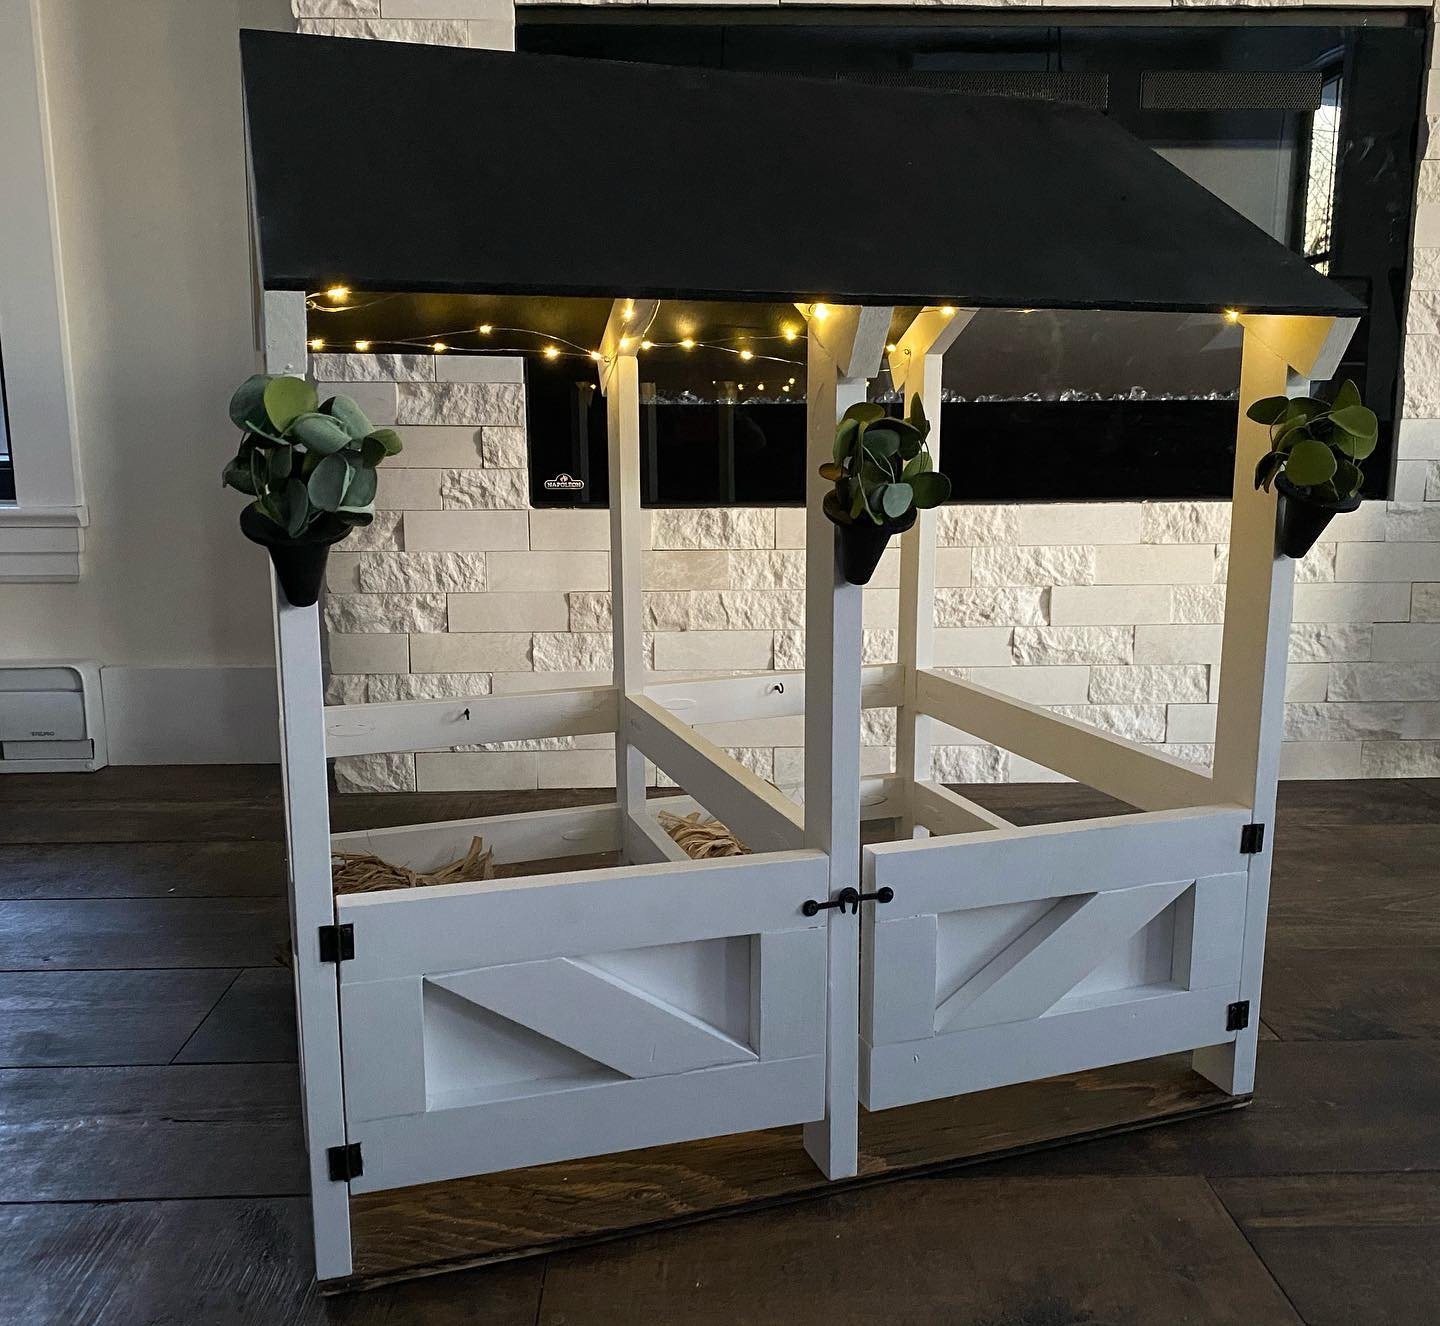
I've seen this project floating around for quite a while, and I knew immediately that I wanted to make this for my 15 month old niece. I used clear pine for this project, to minimize knotting and breaking. That said, the lumber was more expensive than the original plans called for. I think the total cost, including polyurethane for the finish ran around $50. The construction was fairly straightforward, and took a few afternoons to complete. Two changes to the instructions that I made, were to countersink my screws, rather than use pocket screws, and then to finish with wood plugs. I chose not to make the hinged version, as I was a little uneasy about little fingers near the hinged points. All in all, this was a wonderful project and made a fantastic Christmas present. My Grannie is a master carpenter, and this was a great project to work together on. I'm planning on making one for my own children when I become a momma.

Built from Plan(s)
Estimated Cost
$50
Estimated Time Investment
Weekend Project (10-20 Hours)
Finish Used
Polyurethane, two coats.
Recommended Skill Level
Beginner

Headboard

Submitted by zakany on Mon, 03/12/2012 - 10:39

Built a simple headboard for my daughter's bed. Simple pine construction, glued and brad nailed. Used the paint I had left over from painting the trim in her room. Backboard made from pine plywood that was left over from another project.

Estimated Cost
$50
Estimated Time Investment
Day Project (6-9 Hours)
Finish Used
White primer. Duration white paint.
Recommended Skill Level
Beginner

Learning / Helping Towers!

Submitted by kgtrevino on Sat, 01/04/2014 - 12:53

My husband and his Dad built the red tower for my daughter, but when my son was old enough to climb all he wanted was to be in the tower, too! Another was built, and people that come over are always asking for the plans, and we direct them to your site. Thank you for this amazing gift! My kids love to stand in their towers and help me cook, they color, have snacks, everything. Can't imagine my life with my kids, without these towers.

Built from Plan(s)
Estimated Cost
$30
Estimated Time Investment
Afternoon Project (3-6 Hours)
Recommended Skill Level
Intermediate

This Was FUN!!

Submitted by Anonymous (not verified) on Thu, 03/24/2016 - 11:40

This was my first build and the table looks great! The instructions given were right on. Thanks so much...

Estimated Time Investment
Day Project (6-9 Hours)
Recommended Skill Level
Beginner

Farmhouse Queen size bed from rough saw milled pine

This rough milled lumber had to be planed quite a bit. and the sizes  also differed. We ended up with thicker sections than on the original plan. Also used bolts to bolt the heavier headset and footrest to the base.

Screws were used instead of nails. This inland Karoo area pine is very hard and crack very easily. warps too. Well seasoned wood were used. Finish is normal sanding sealer for a mat look.

thanks for the lovely plans Ana.

this is a proven classic.

Our work bench

We changed the dimensions a little to make it up to counter height, and widened it out also. This is our third build ever, and our first time customizing a plan. How fun!

Built from Plan(s)
Estimated Cost
$40
Estimated Time Investment
Day Project (6-9 Hours)
Recommended Skill Level
Beginner

Comments

Bunnie1978

Fri, 03/16/2012 - 07:19

I was thinking about making one the same height as my table saw, so that I can set them together to increase my sawing capabilities....

Yours looks way too pretty to be getting it all dirty! :)
Nice work!

Kentwood inspired Nightstand

Submitted by AndyH on Tue, 01/07/2014 - 06:37

Based this nightstand on the Kentwood nightstand design but wanted to add a shelf. Also made a bit smaller and decided to use a metal mesh for the door and side inserts. Everybody who has seen it loves it.

Estimated Cost
$90
Estimated Time Investment
Day Project (6-9 Hours)
Finish Used
Minwax Ebony stain and Minwax Satin Polyurethane finish
Recommended Skill Level
Beginner

Comments

Linda7

Tue, 01/07/2014 - 09:52

I really like the use of the mesh insert, which will hide the contents, and yet it still has an open feel. Thanks for sharing.

Farmhouse bed, a jungle gym until my 1yr old figures out what its really for!

Submitted by motatribe on Sun, 03/18/2012 - 17:09

this is an awesome project for beginners. i had the luxury of a chop-saw which sped things up but a skill saw would have also sufficed.
4x4 posts are pine and so too the tung and groove panelling. all the rest is KD Spruce.
if your looking at this project and feeling a little intimidated (as i was) just do what i did. go out, buy all the material. this way you'll almost feel compelled to at least give it a go rather than having the material collect dust in the garage. grrrr.... i hate clutter!!!
good luck guys and great site Ana, thanks so much for helping us all out :-) i know my son is gonna love this bed in a year or so's time...
i really do recommend buying a Blk and Decker mouse sander. these are amazing and really reach into every nook.
i have to also mention that my bed is real easy to take down, i used galvanized steel plates to mount the side rails, pls see pics. i used 2x2 cleats to support the 1x4 slats which i can roll up with the fabric that i stapled to them. also used 1/4" dowels to hold the slats in place. i got this idea from ikea.

Built from Plan(s)
Estimated Cost
$200, (incl, glue, paint, filler, chop saw blade etc)
Estimated Time Investment
Weekend Project (10-20 Hours)
Finish Used
2 coats of General Paints trim paint, 2 drops blk per gallon. I chose not to prime as i wanted to see the wood grain come through... filled between 2x4/2x6 etc with wood filler and in the tight corners i used alex white w/silicone. alex w/silicone will expand and contract with the wood and is paintable.
Recommended Skill Level
Beginner

Comments

Ana White

Sun, 03/18/2012 - 23:28

So nothing is even near as special or darling as your baby! But I love your Farmhouse Bed! I can't believe this is your first project! Smart to use the brackets too! Thank you so much for sharing.

Tv media console with side DVD storage

Submitted by tommybo76 on Wed, 01/08/2014 - 20:12

I built this media console using mainly 3/4 inch maple plywood which the store cut to 2 foot by 4 foot sections for me. I used 1/2 inch plywood for the doors and DVD storage. Overall I'm happy with the look of the stained plywood, however I may have used a darker stain if I could redo it. I finished with 2 coats of polyurethane in semi gloss. I may remove the drawers and replace with baskets as I am a little unsatisfied with the design I chose which has the front face sticking past the rest of the console. I really like the hidden storage for movies and am overall very happy with this project.

Estimated Cost
$150
Estimated Time Investment
Week Long Project (20 Hours or More)
Finish Used
Water based stain and semi gloss polyurethane (2 coats)
Recommended Skill Level
Intermediate

Comments

Bunnie1978

Thu, 01/09/2014 - 08:00

You could probably fix the drawers to be inset pretty easily. May require repositioning the slides, if you used them, and trimming the face of the drawer to fit inside the cabinet. Unless the whole drawer is glued up, or the full depth of the cabinet - that might make it a little harder. You could also add a design element to the doors - such as a graphic cut out or just a frame that would bring the doors out to the same position as the drawers, so they match. Even just a rectangular frame out of plywood - perhaps stained in a darker color.
Good job!

tommybo76

Fri, 01/10/2014 - 16:07

Thanks Bonnie and Pam! I think you are both correct and I will simply modify the drawer design to be inset. They are on slides that should be easy to move/modify and I really like the idea of staining the fronts a darker color!

Farmhouse Table

Submitted by kelseyt15 on Mon, 11/25/2019 - 11:11

My first project! I was surprised how much fun and how easy it is to build something that’s beautiful & functional. I’m hooked! I can’t wait to build more!

Estimated Cost
120
Estimated Time Investment
Weekend Project (10-20 Hours)
Finish Used
Special Walnut & Weathered Oak
Recommended Skill Level
Beginner

Wood Nightstand

Submitted by Anonymous (not verified) on Sun, 07/30/2023 - 15:03

I loved the look of the original but went with more of an antique icebox feel. Made from cherry and aged with lye and a danish oil top coat.

reader build

Comments

Composite/Plastic Wood Little Kids Picnic Table

Submitted by katonca on Tue, 03/20/2012 - 15:49

I used some leftover boards from our composite deck for the surface part of this picnic table. I used a lot of Kreg joints to screw up into the boards from underneath, so I didn't have many exposed screw heads. I did have to redesign this plan slightly for me because of my composite board width. Ended up costing $5 for the 1x3 spruce, and I finished it with primer and exterior latex paint leftover from painting our garage doors.

Built from Plan(s)
Estimated Cost
$5
Estimated Time Investment
Afternoon Project (3-6 Hours)
Finish Used
Primer and exterior latex paint.
Recommended Skill Level
Beginner

Comments

ChiclyHandy - Chestwick Bed frame

Built the Chestwick Queen Size platform bed - see my blog for complete details. http://chiclyhandy.blogspot.com/2014/01/chestwick-platform-bed.html

Estimated Cost
$120
Estimated Time Investment
Day Project (6-9 Hours)
Finish Used
Minwax Dark Walnut
Minwax Polycrylic Top Coat
Recommended Skill Level
Beginner

Horse Stable

Submitted by Anonymous (not verified) on Sat, 11/30/2019 - 14:06

Loved creating the Ana White Horse Stable with a few additions! I added planters and twinkle lights for my girl!

Estimated Cost
$55
Estimated Time Investment
Afternoon Project (3-6 Hours)
Finish Used
Fusion Mineral Paint and Minwax Stain
Recommended Skill Level
Beginner
Back