Community Brag Posts

Custom Closet with Heated Floors

Submitted by Anonymous (not verified) on Fri, 10/20/2023 - 08:16

I love the outcome of this project! I removed the old wire shelving and used 3/4 inch sanded plywood and few pieces of trim and pine to build this floor to ceiling custom closet. Then I primed and painted, and installed the clothes rods. Out of the frame are new recessed lights and a tile heated floor!

Laura E.

Deck Box

This was our second build. Seemed easy enough, but definitely a 'learning experience' here! Most importantly, we learned the value of a straight board and how furring strips are anything but. Thankfully, I got my main squeeze by my side through it all. Even if he is mirroring that same confused expression I get when things don't quite pan out the way they should. LOL!

Estimated Time Investment
Day Project (6-9 Hours)
Finish Used
American Accents Colonial Red
Recommended Skill Level
Beginner

Bunk Beds, Twin Size with Raised Panel

We are currently in the process of making the plans for these bunk beds, but we wanted to share them on Ana White! I spent quite a bit of time designing the bunk beds, and then my awesome husband helped bring them to life. This project took us a few weeks, but a lot of the time was spent painting. As far as building the project, we wanted something a little bit bigger and grander than most bunk beds you find in the store. I also wanted them to look mature enough that they would grow with my young girls. When they are older, we wanted them to be able to separate the bunk beds and have a beautiful twin bed set. We designed these bunk beds to have a taller headboard (which ends up being the bottom bunk) and a shorter footboard (that is the top bunk). Then, we you separate the bunks, you use one headboard from the bottom, one footboard from the top, and one set of rails. That becomes one twin bed set. To make the bunk beds, you make two headboards and two footboards. We wanted a raised panel look, so we used plywood and 4x4 posts. We used the kreg jig to attach the plywood to the posts. Then, we used the trim to cover up the holes from the kreg. For the top, we used crown and then an mdf cap piece. We just repeated these steps four times for all headboards and footboards. We wanted to really dress these bunk beds up, so we added bun feet to the bunk beds. We also ordered extra and put the matching bun feet on their dresser, so it looked like a complete set. We finished the project by making the bed side rails, the guard rails, and the ladder. We put it together to make sure it fit, then we took it apart and began the painting process. We did about 4 coats of paint: 1 coat of primer, and three coats of latex paint. We sanded lightly between each coat for a nice smooth finish. Check our website for the detailed plans: http://www.jrlwoodworking.com/2014/03/furniture-plans-twin-over-twin-bu…

Estimated Cost
$400.00
Estimated Time Investment
Week Long Project (20 Hours or More)
Finish Used
White Latex Paint
Recommended Skill Level
Intermediate

Comments

Walkerswoodworks

Mon, 01/01/2018 - 07:36

Why is it that when I click the link for these plans, I get sent to an index of links from jrl but can't find the plans?

Buffet

Submitted by mckittt09 on Wed, 03/11/2020 - 15:32

I used the Grandy Barn Door Console as a template to build this buffet. 

Estimated Cost
$300
Estimated Time Investment
Week Long Project (20 Hours or More)
Finish Used
Varathane Briarsmoke
Recommended Skill Level
Intermediate

Coastal Mirror

Submitted by Jon Moore on Sun, 03/02/2014 - 11:09

My wife and I found some grass clothe mirrors at a local home decor store that we loved, but they were either too big or small for our space. (Not to mention they ran $300-$450!!!) Using the same height/width ratio I built my own.

For this project we used:
-spare 1x4 and 1x6 pine boards left over from other projects (SORRY, I do not have the cut list)
-brad nail gun
-miter saw
-piece of 1/4" plywood (to hold the mirror in on the back)
-8 wood screws (to fix the plywood to the frame)
-an old bathroom mirror
-glass cutter (~$6-8 at Home Depot)
-gloves (for cutting and handling the glass)
-olive oil (for lubricating the glass cutter)
-grass clothe (had to buy it online by the roll ~$75, only used half)
-scissors
-spray adhesive (~$6-8 at Home Depot)
-picture hanger hooks (~$1 at Home Depot)

I spent more time thinking about how to construct the frame than actually making the cuts and building it, which took about an hour. I then spent about a month waiting for the grass clothe to arrive in the mail. Then it was about another hour cutting and affixing it to the frame with my wife.

Estimated Time Investment
Afternoon Project (3-6 Hours)
Finish Used
grass clothe
Recommended Skill Level
Beginner

DIY Garage Workshop Bench

Submitted by leah.toth on Sun, 03/22/2020 - 14:18

I came across the plans for this workbench - exactly what I need for my basement laundry area.  I wanted a nice flat space where I can fold laundry. I started yesterday and put together the legs and frame.  I'll pickup a countertop or nicer finished plywood for the bottom and top shelves.  Here is the link to the page with plans and pics  https://www.ana-white.com/woodworking-projects/workbench-get-job-done

Thanks so much for this great project idea, plans and instructions!  Super helpful!  I can't wait to finish it - I'll post final pic when it's complete.

Estimated Cost
$100
Estimated Time Investment
Afternoon Project (3-6 Hours)
Recommended Skill Level
Beginner

Long Modern Vanity

Submitted by Anonymous (not verified) on Thu, 11/02/2023 - 08:11

Designed and built vanity, mirrors, plumbed, tiled, and wired and installed lights.

Tanni

Country Entertainment Center

Another piece that my wife saw online that she liked. We wanted a new entertainment center for the house. I looked at the photo and drew up the plans in my head and got to building. This was a one day build and came together really nice.

Estimated Cost
$60.00
Estimated Time Investment
Day Project (6-9 Hours)
Finish Used
Burgundy Behr paint, Minwax Special Walnut stain, and Antique white with stain wiped
Recommended Skill Level
Intermediate

Finishing project

Submitted by Medickep on Tue, 03/04/2014 - 14:16

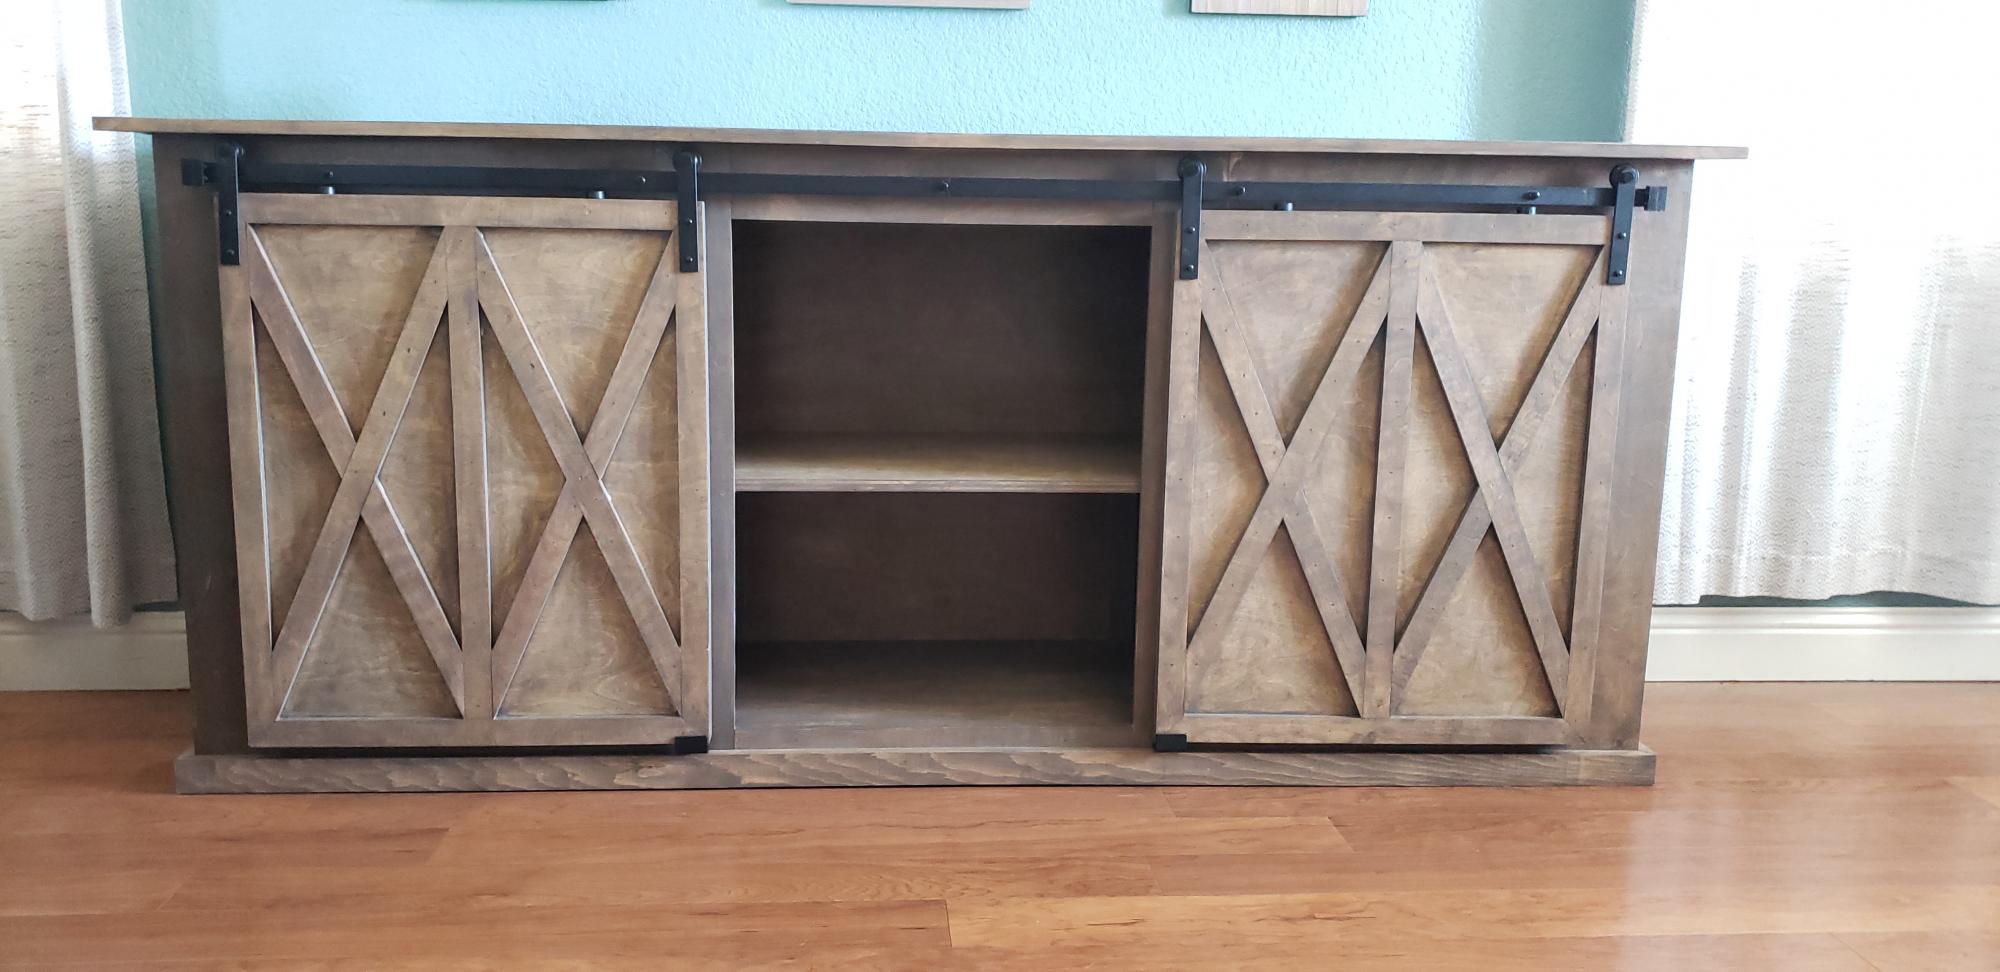
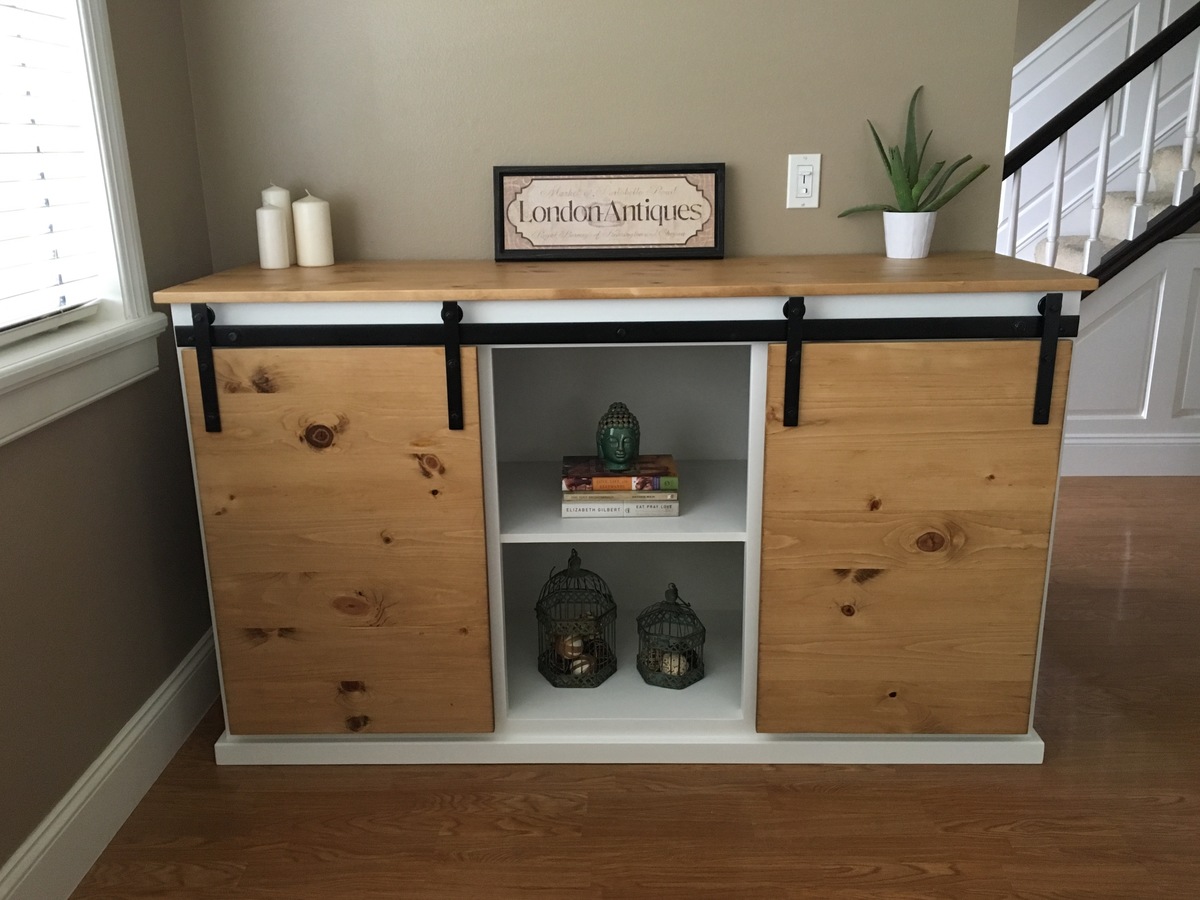
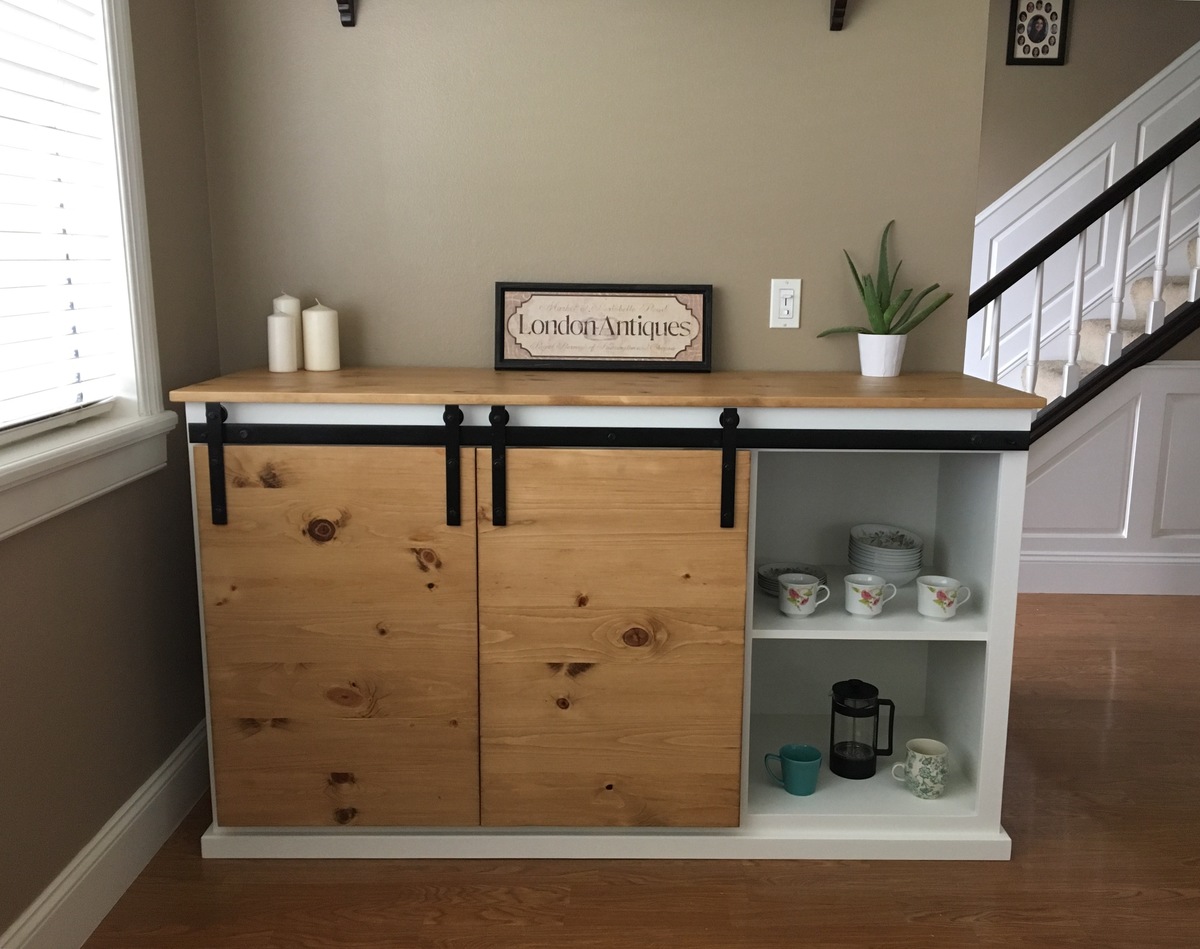
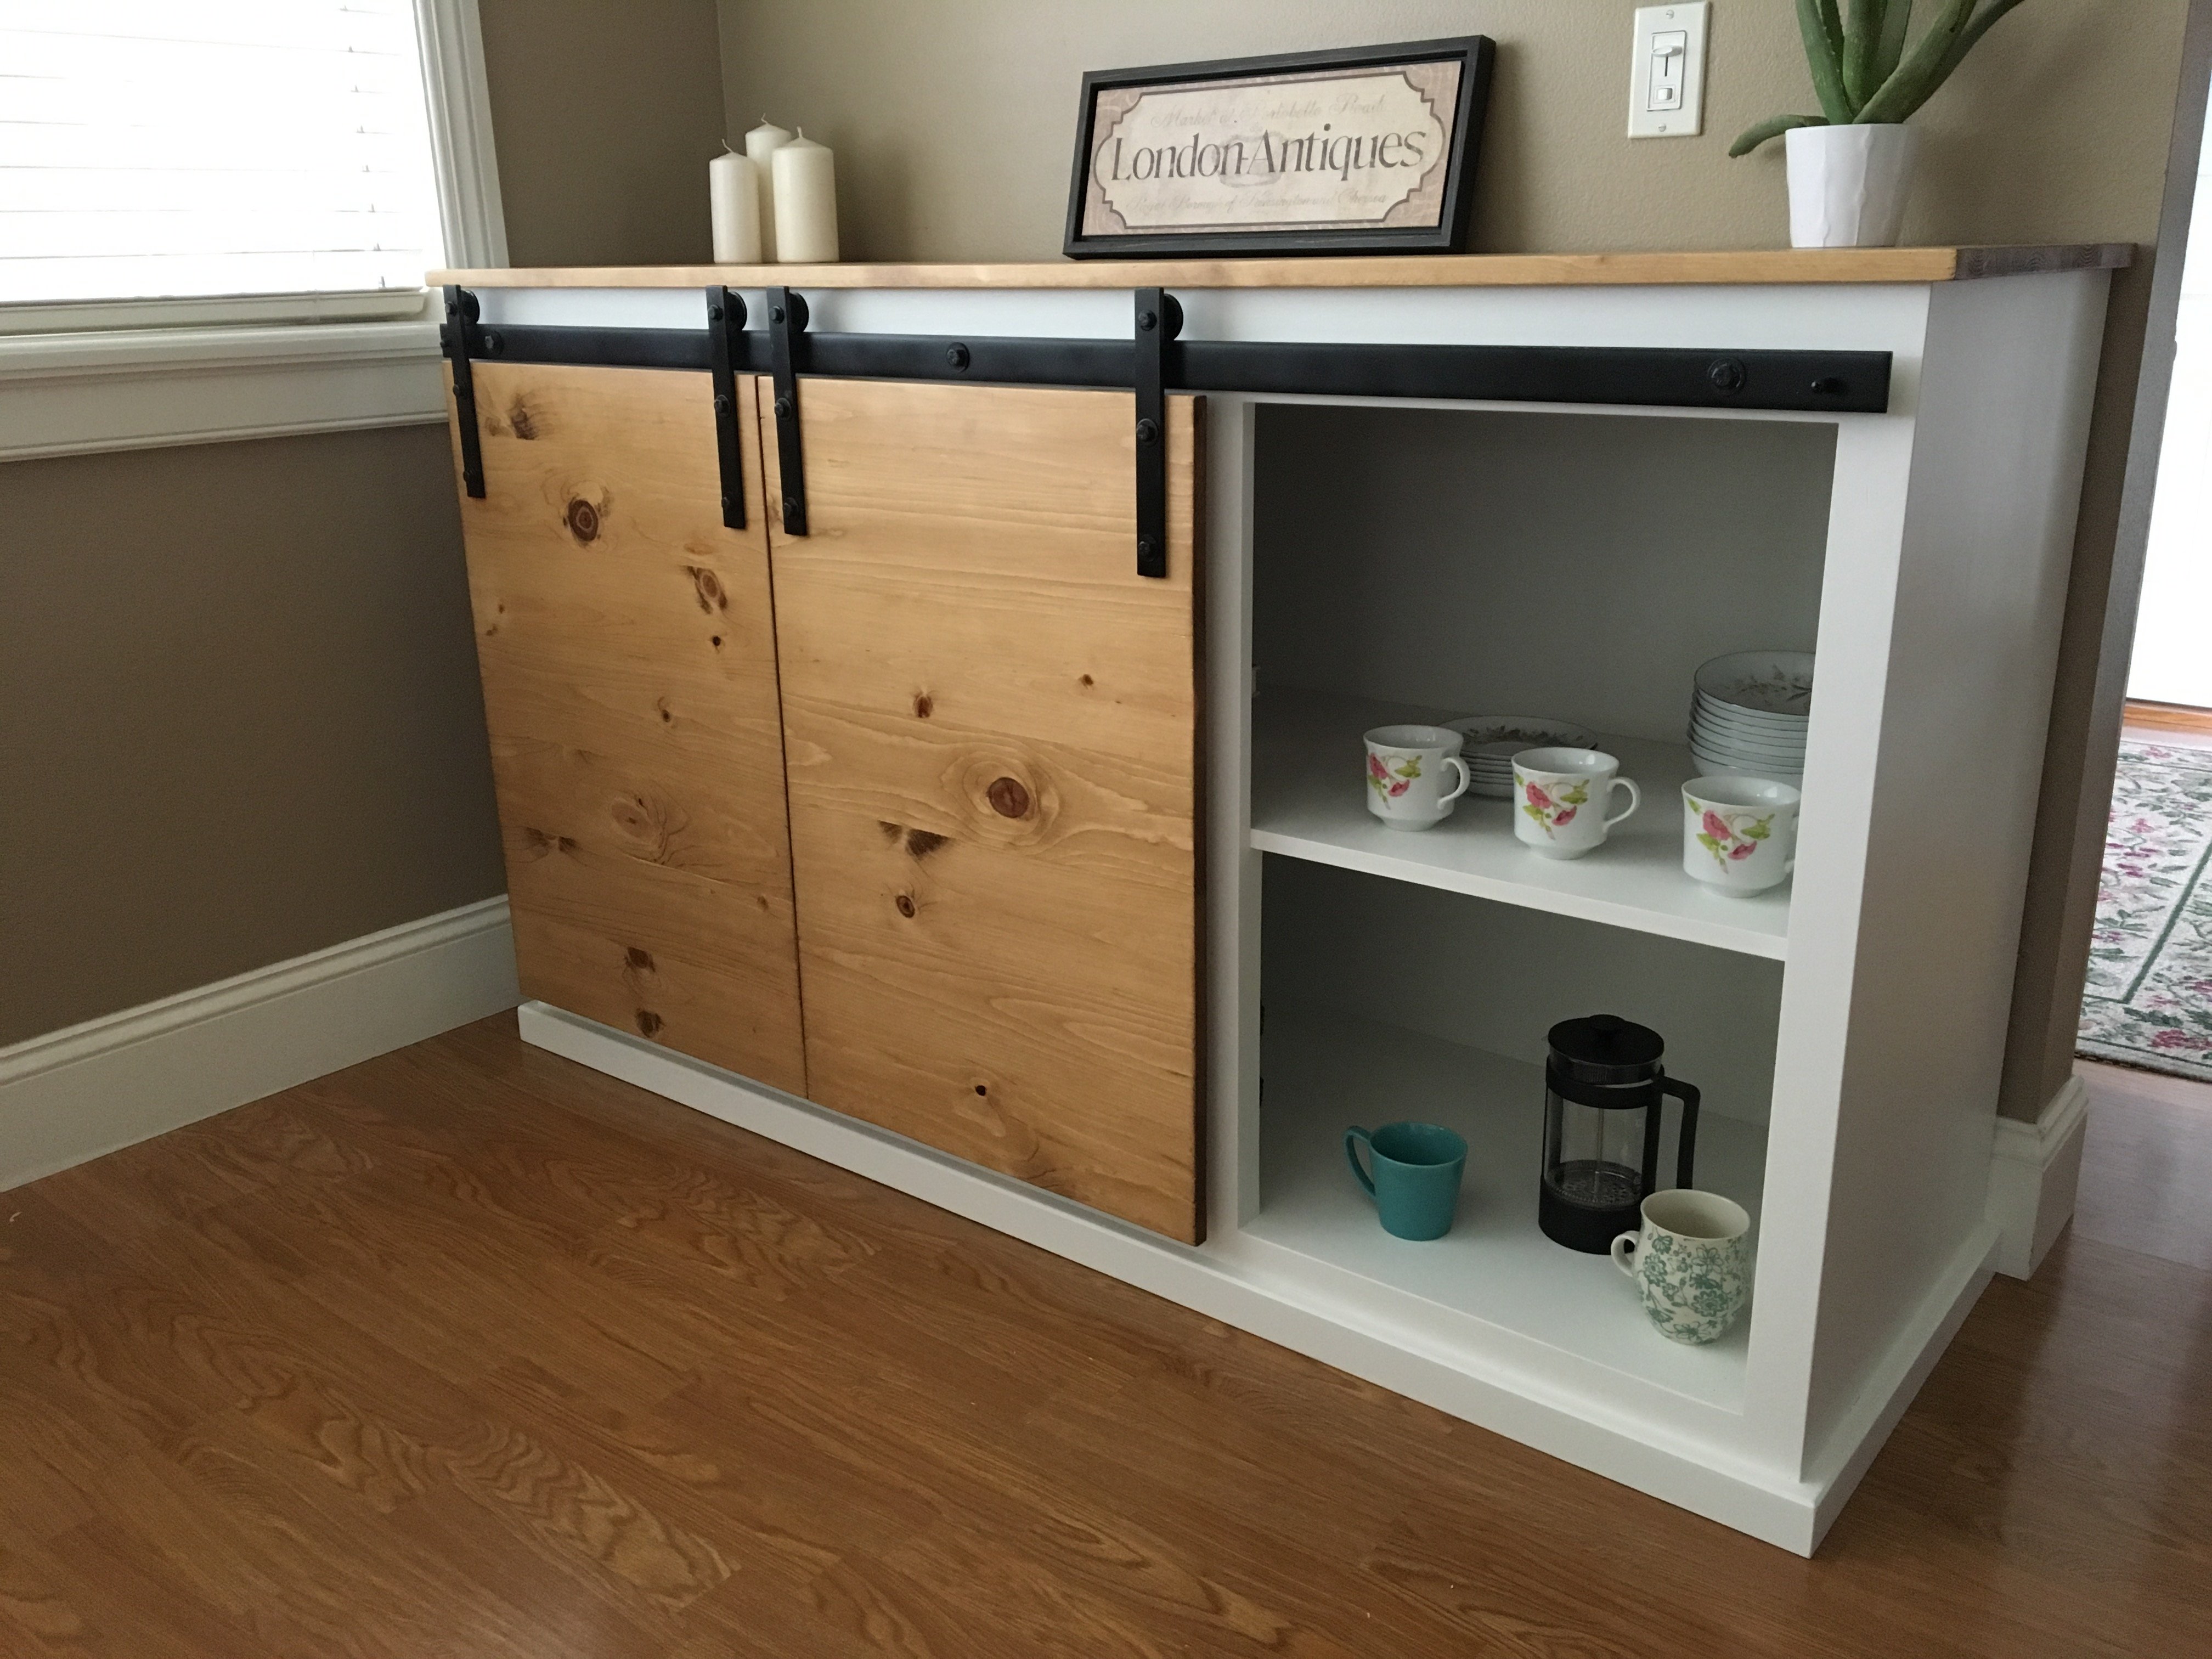
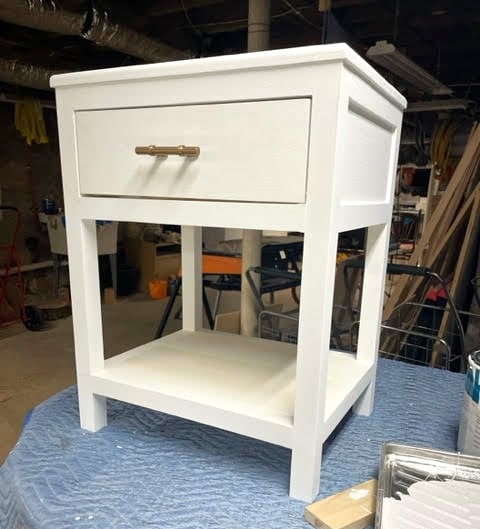
I decided to post this project as I know there is room for more information on finishing. I know I can be overwhelmed with all the different types of finish work out there as well as their associated tips/tricks, which are often not on the manufacture's directions!

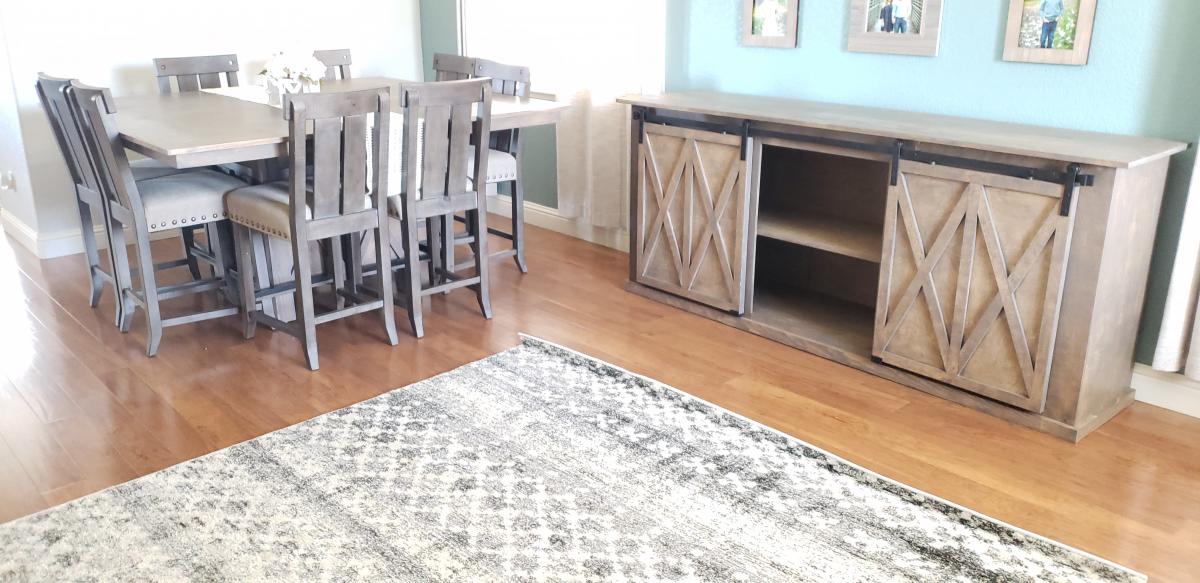
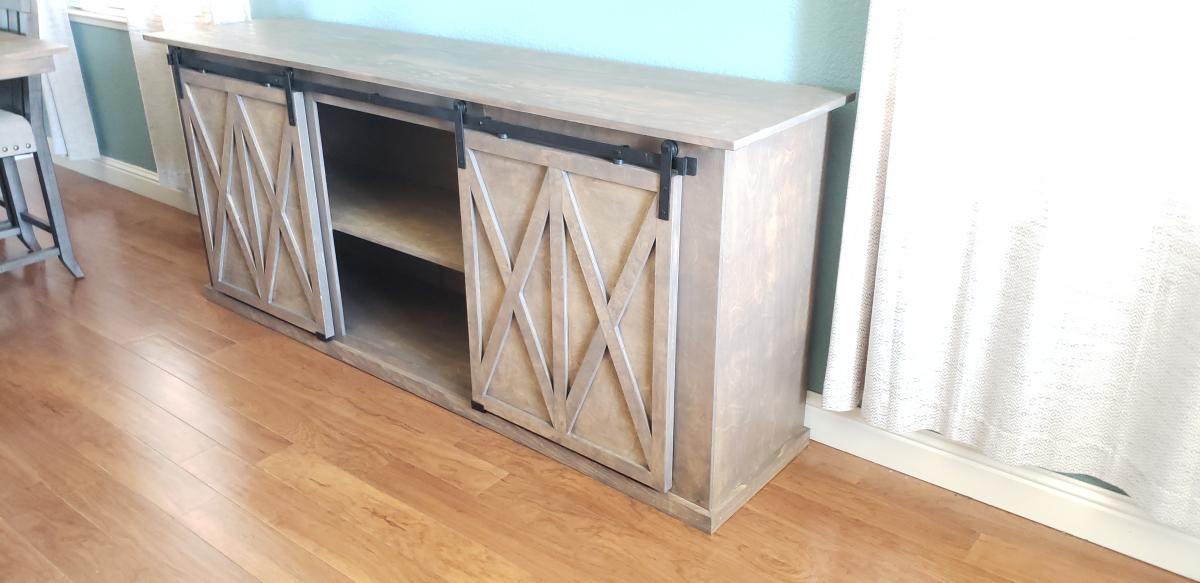
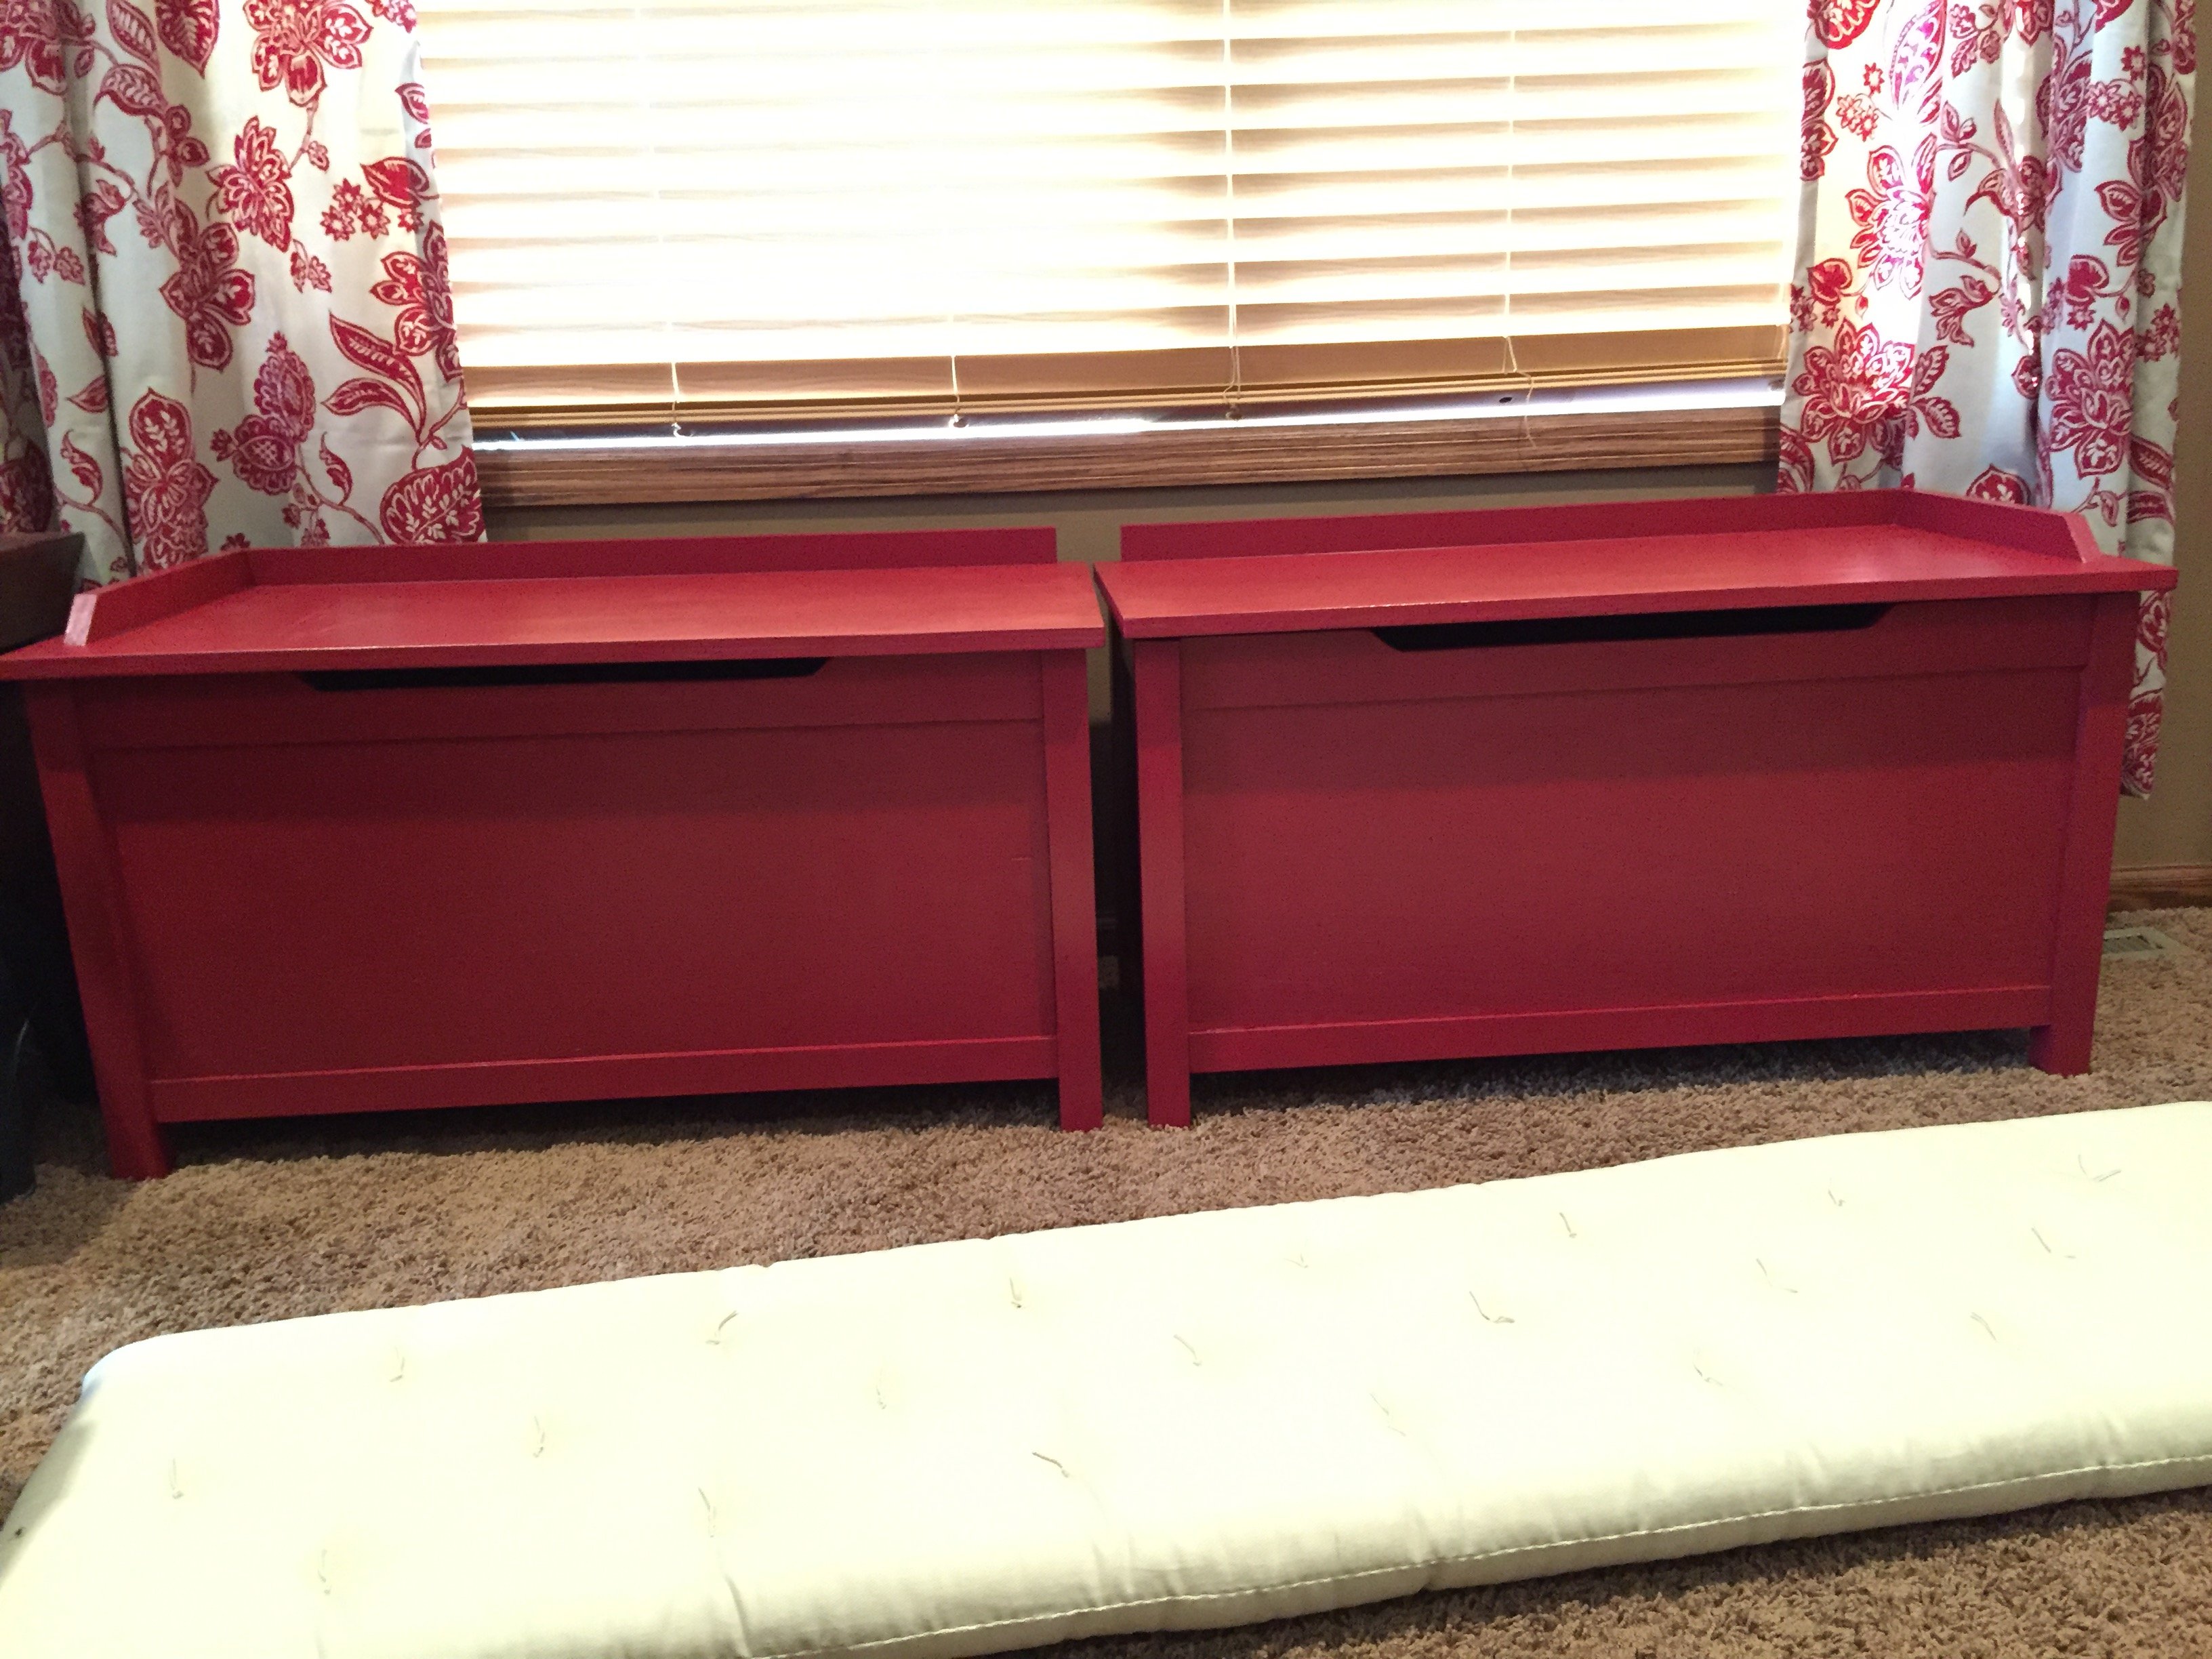
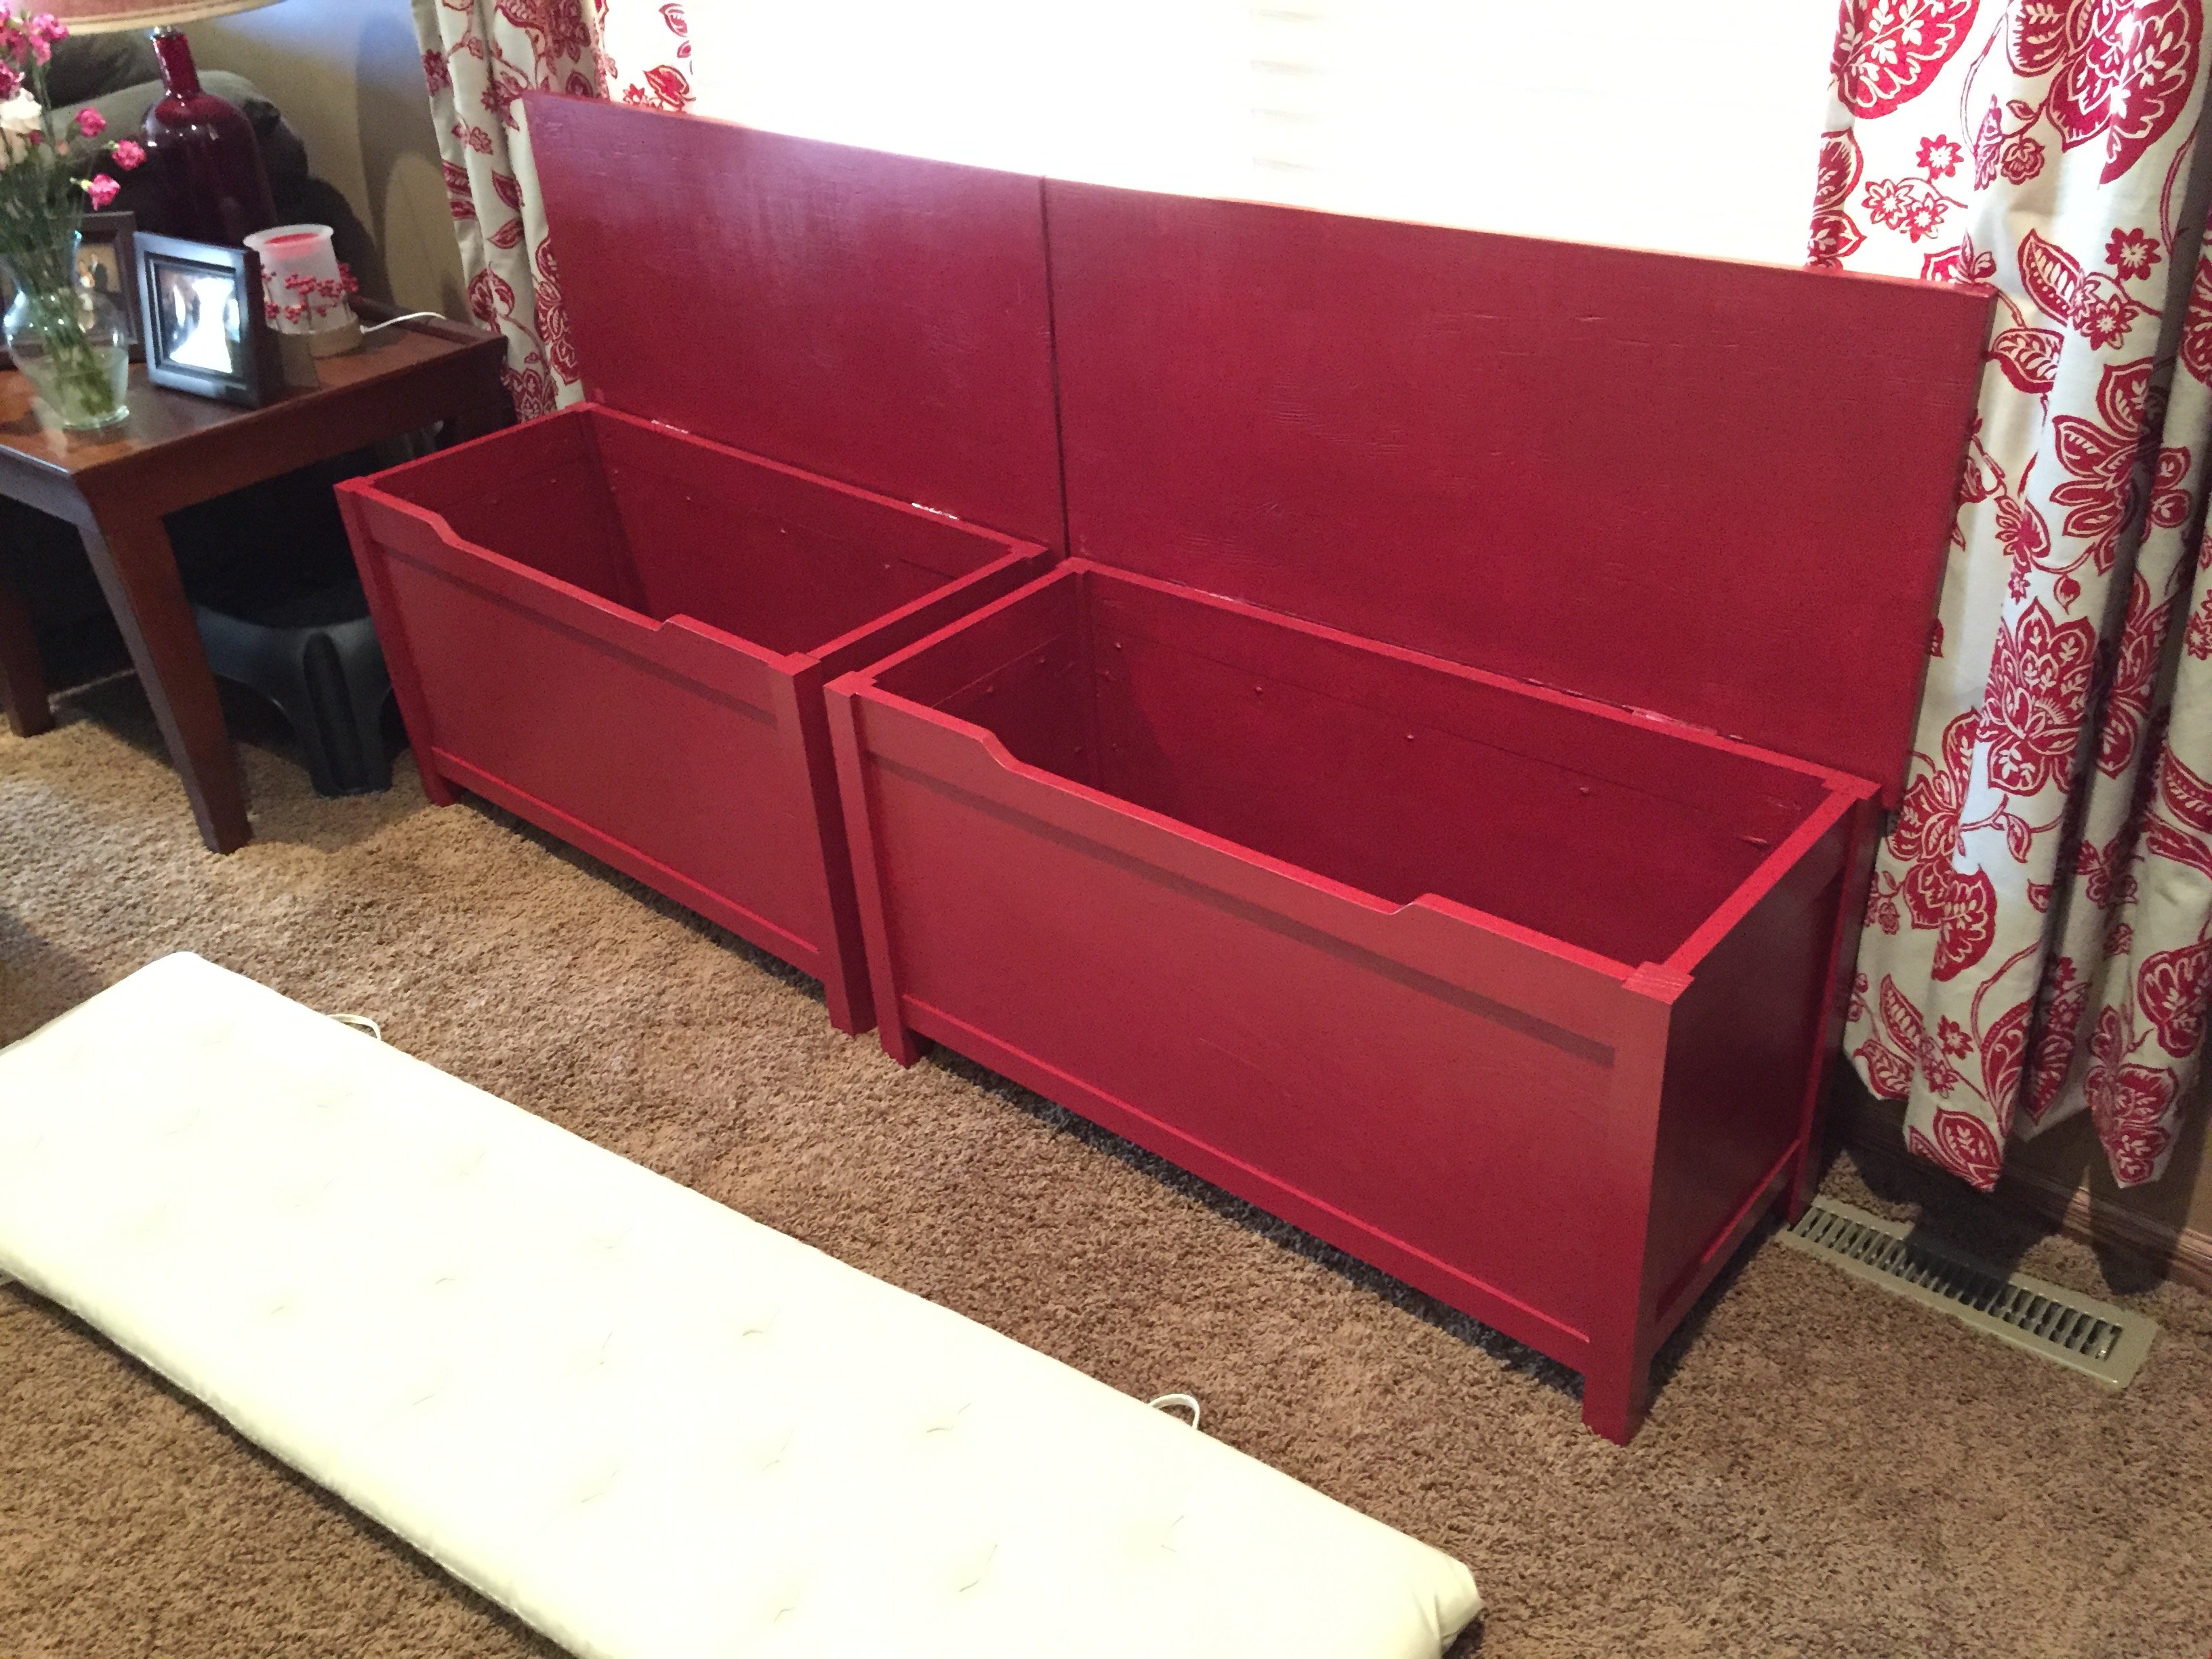
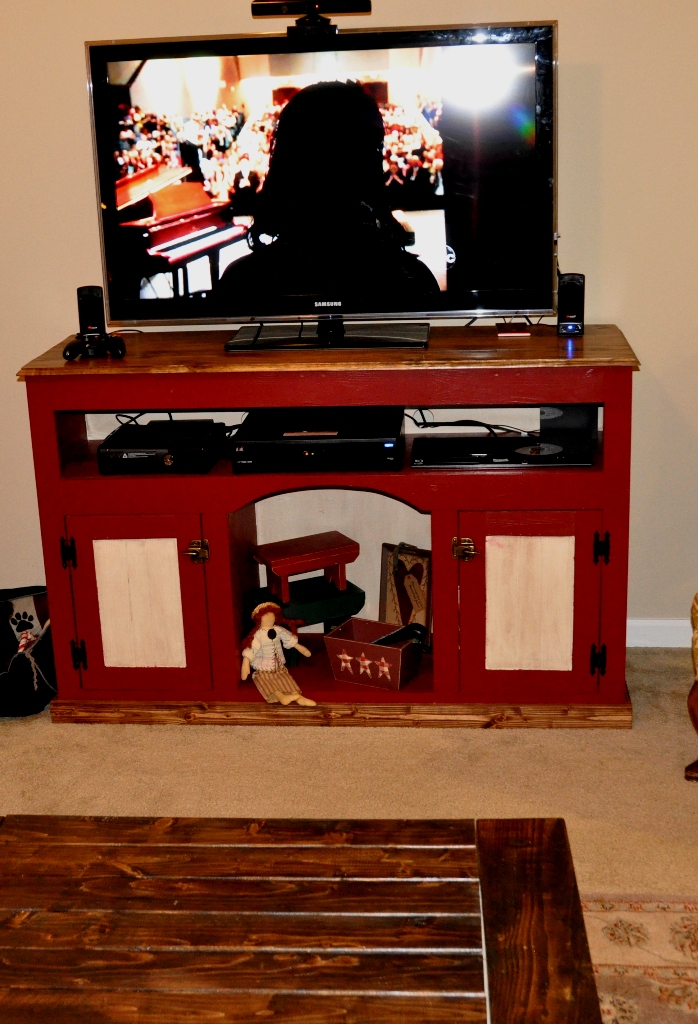
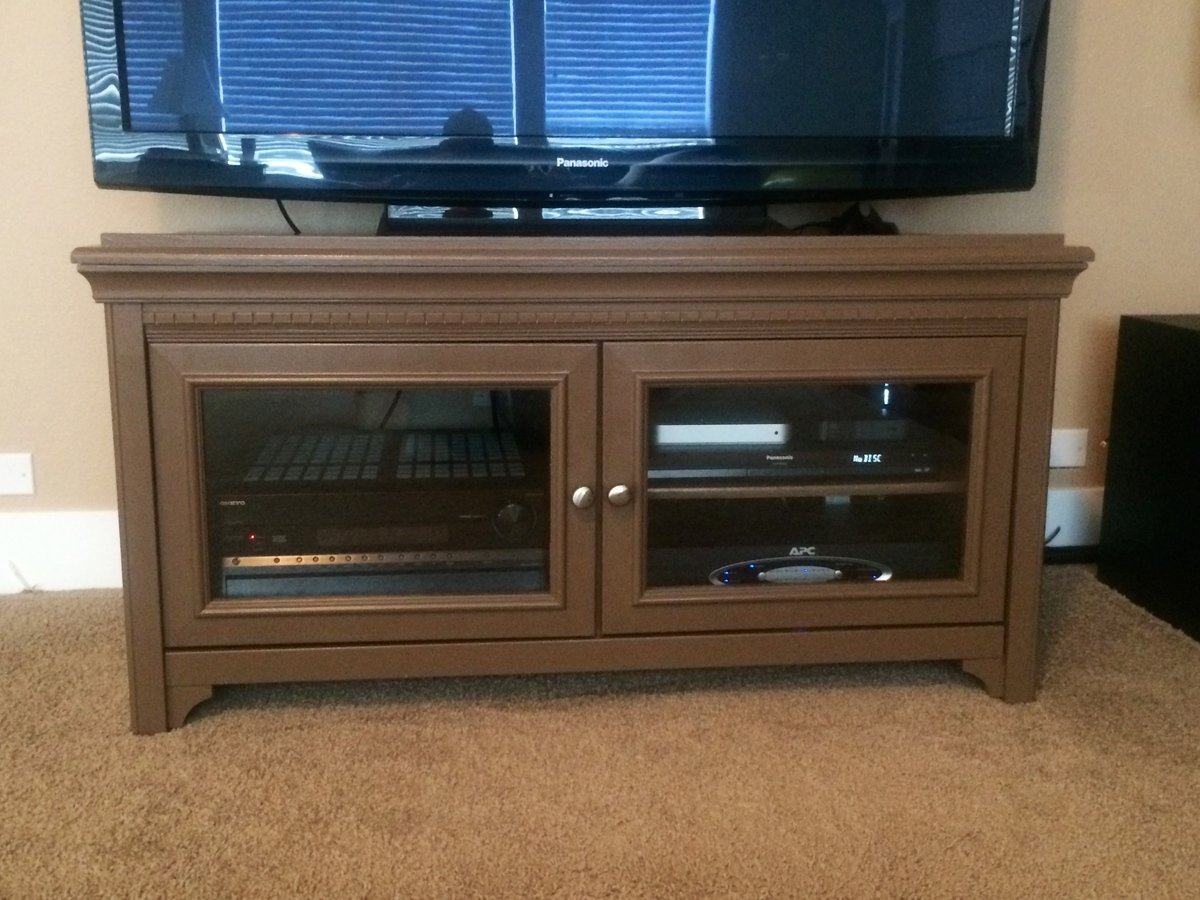
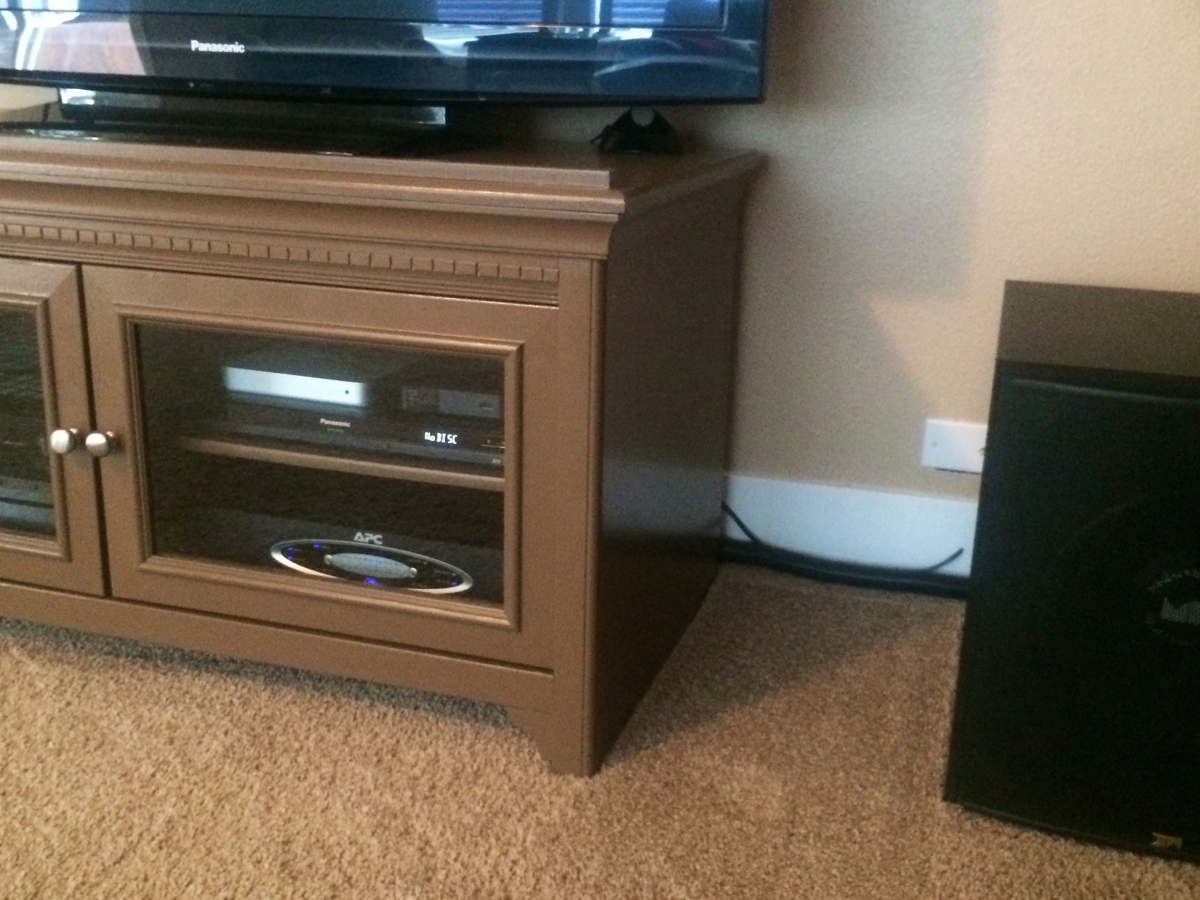
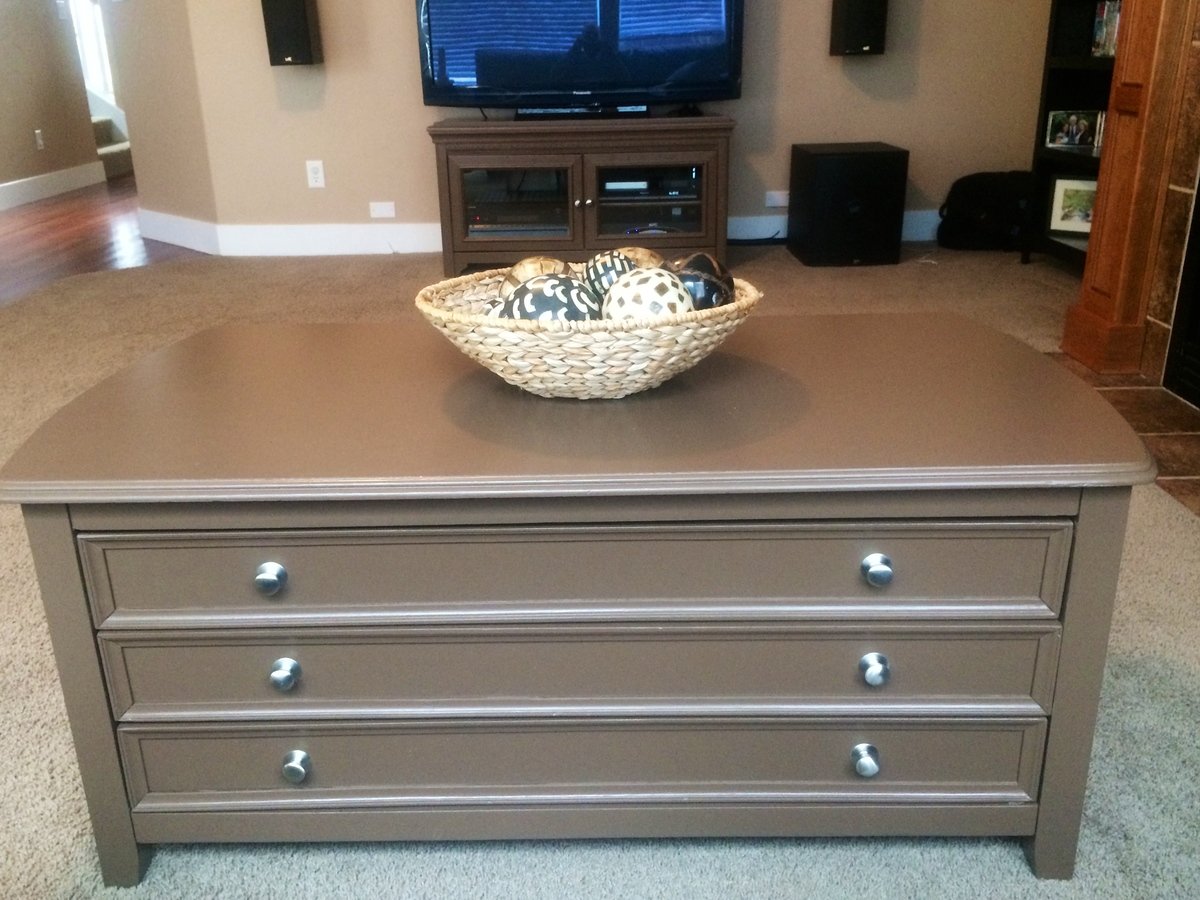
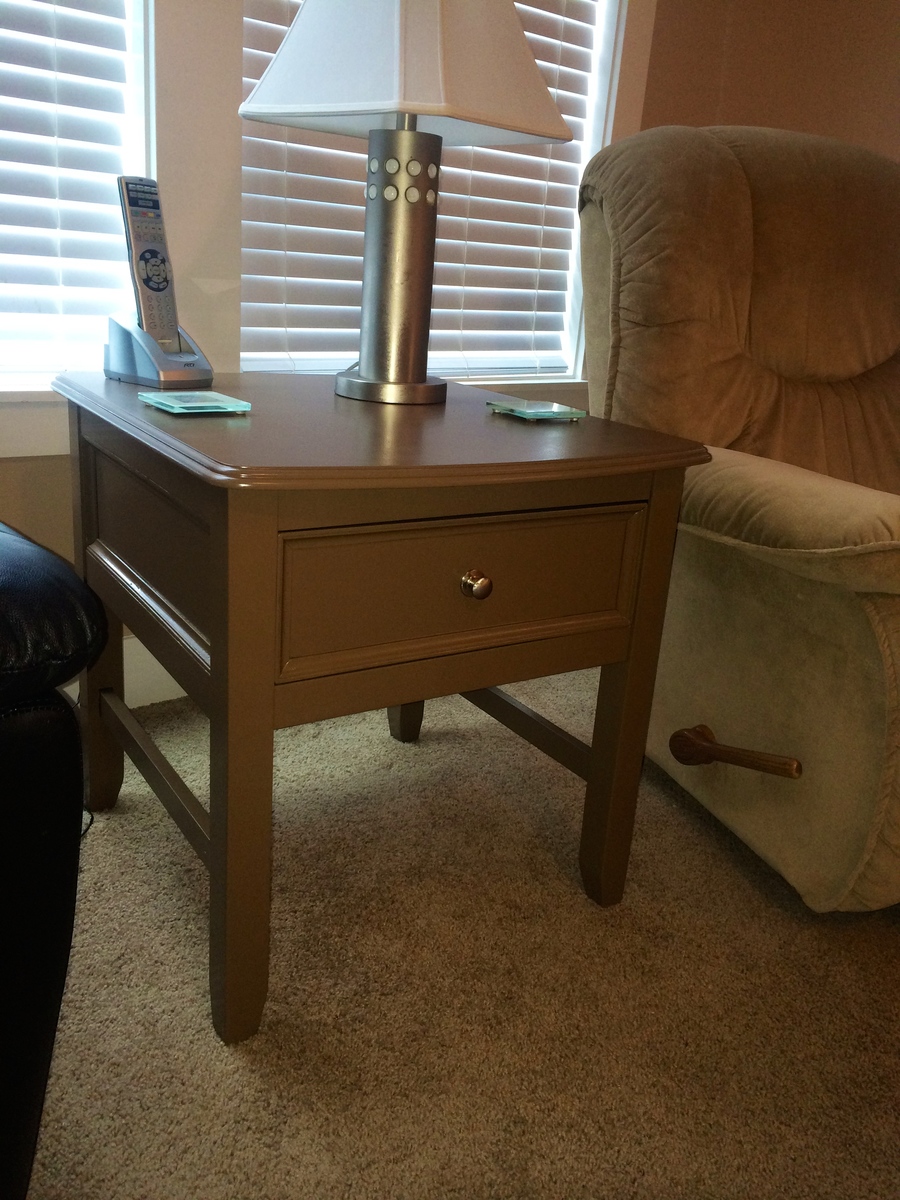
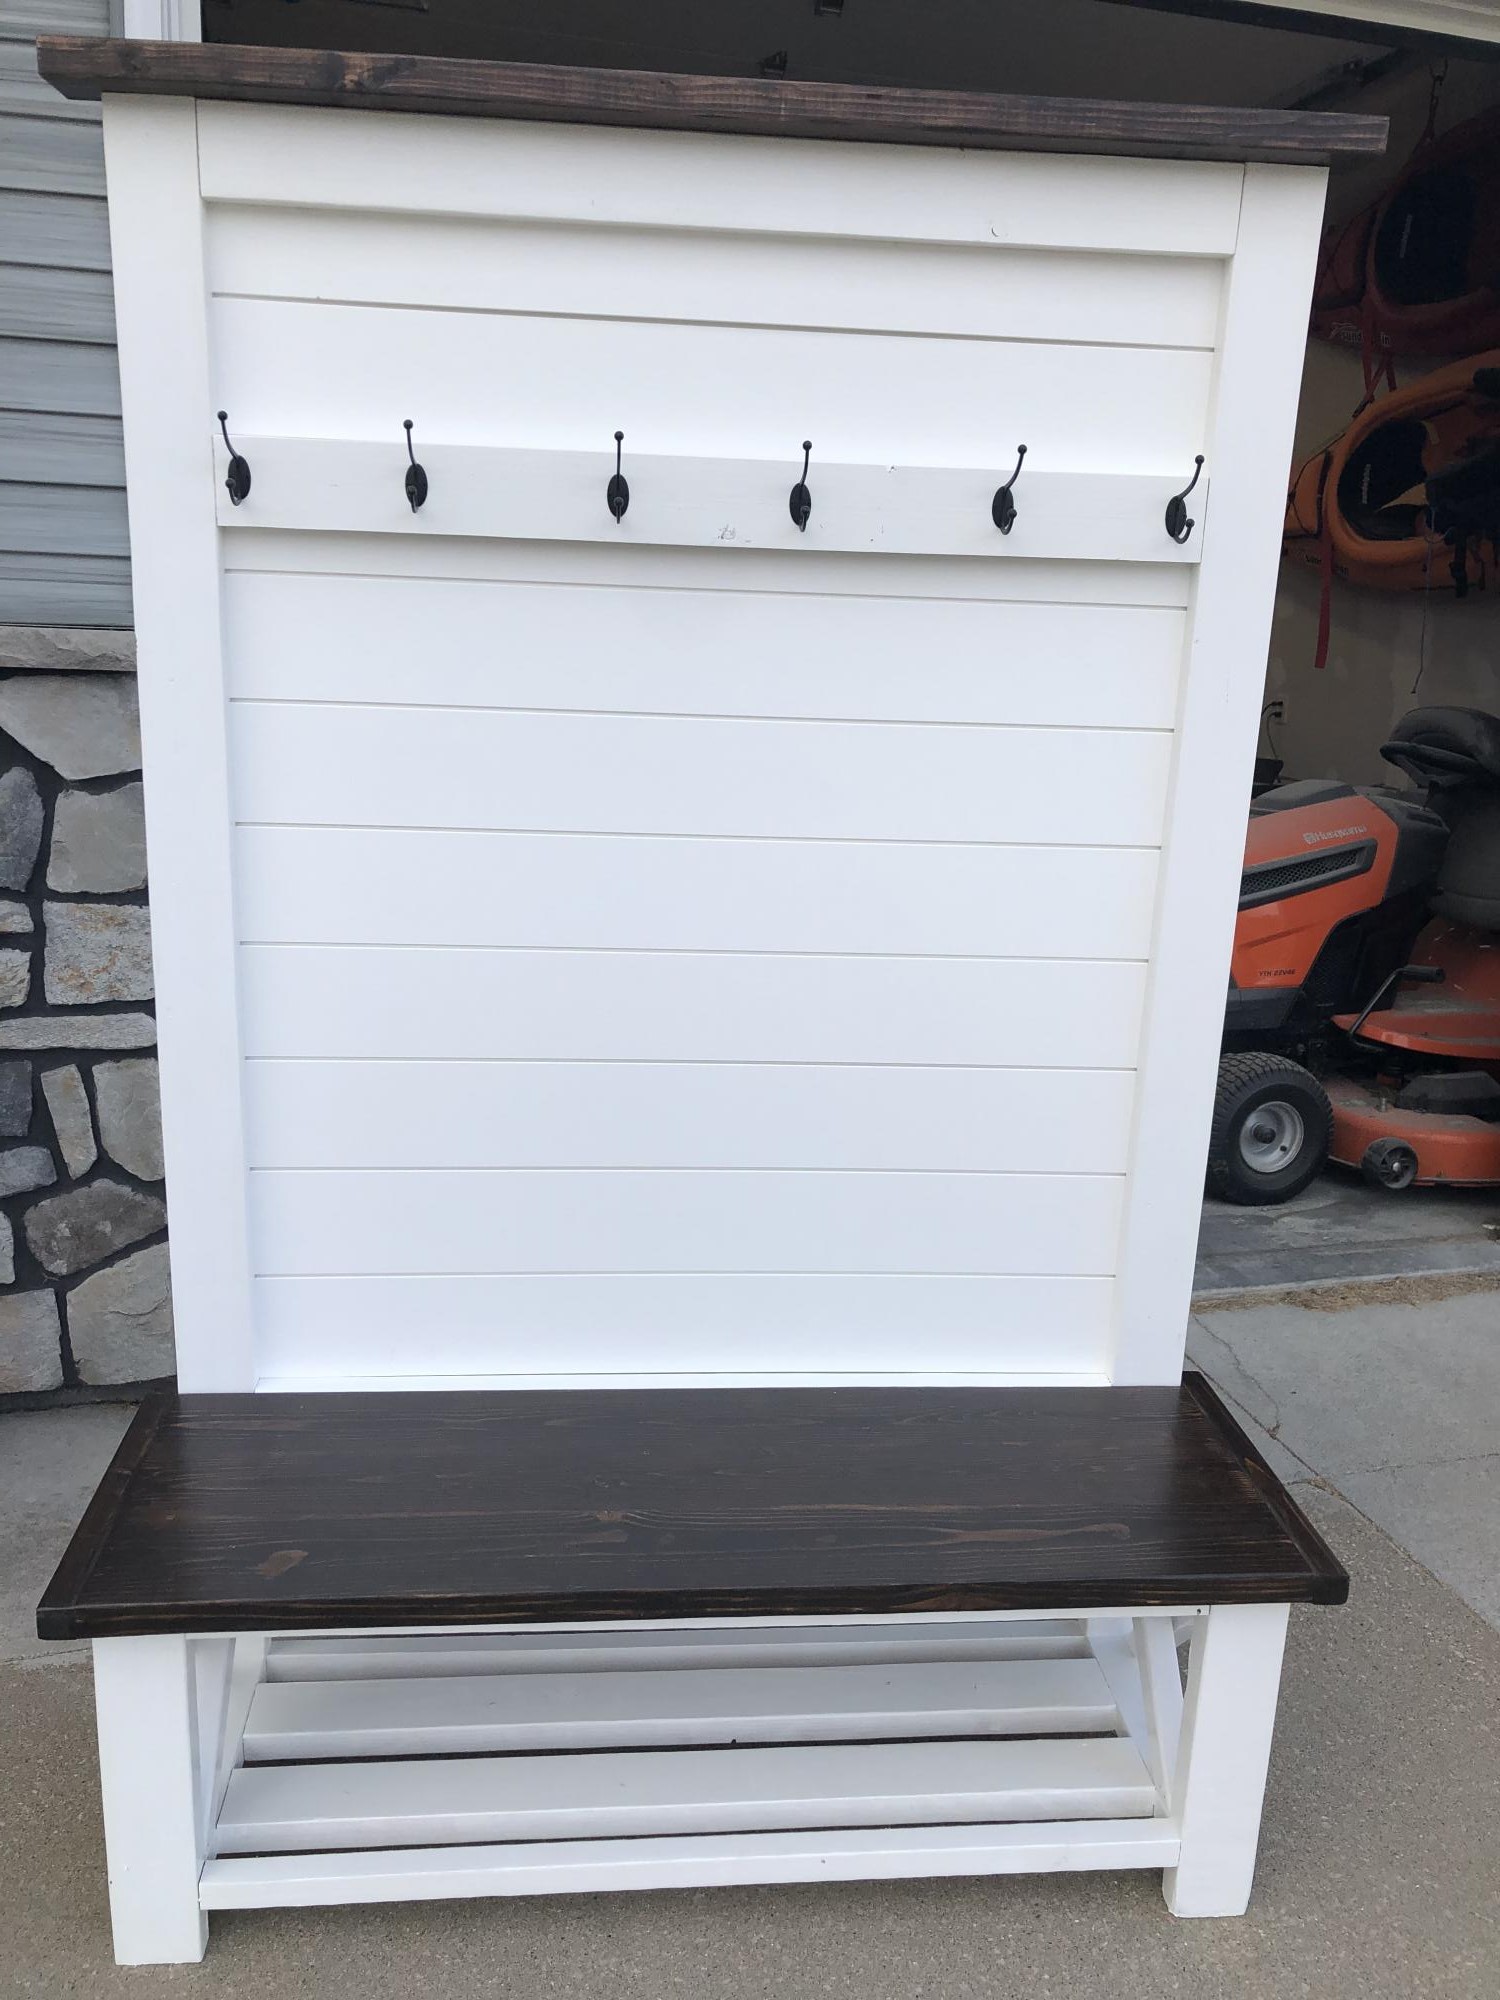
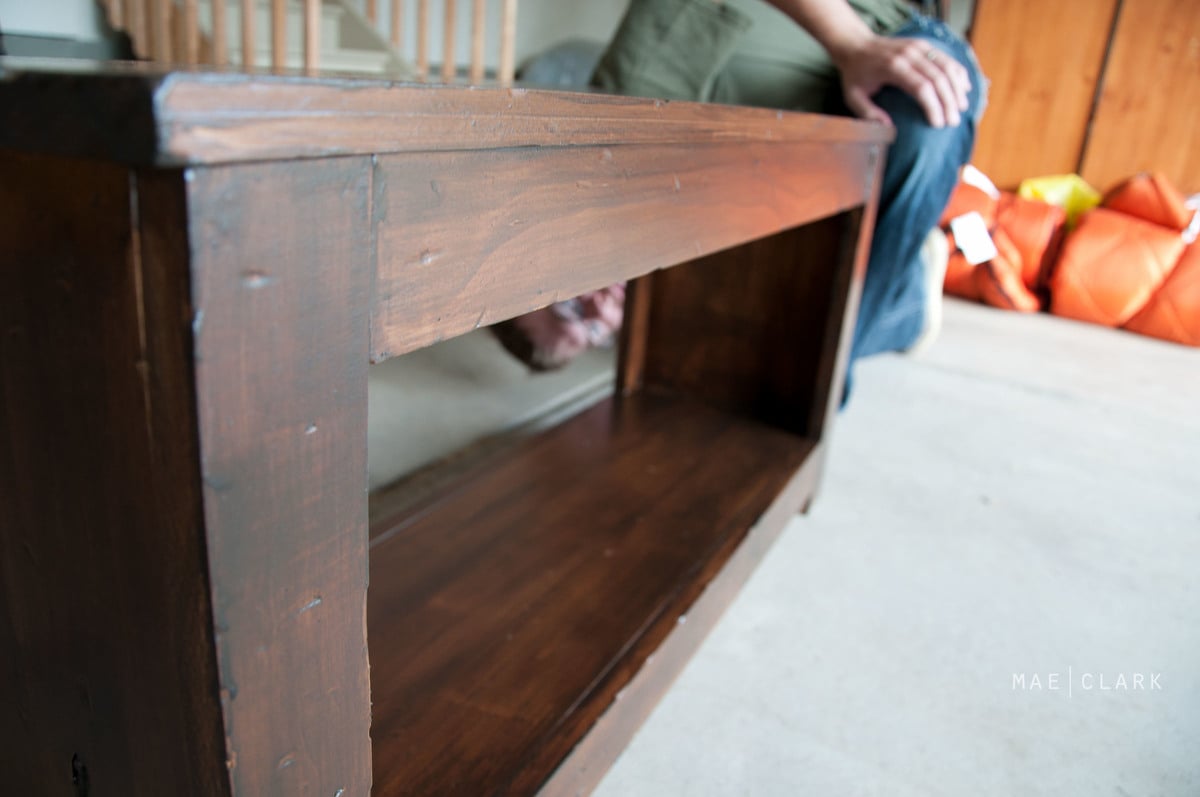
My wife and I had some black furniture, which we were tired of. Some of it started from my bachelor days and some came later just to match things we already have. I really wanted to build new stuff for our living room, but it seemed like a little a bit of a waste, considering we liked it, minus the color!

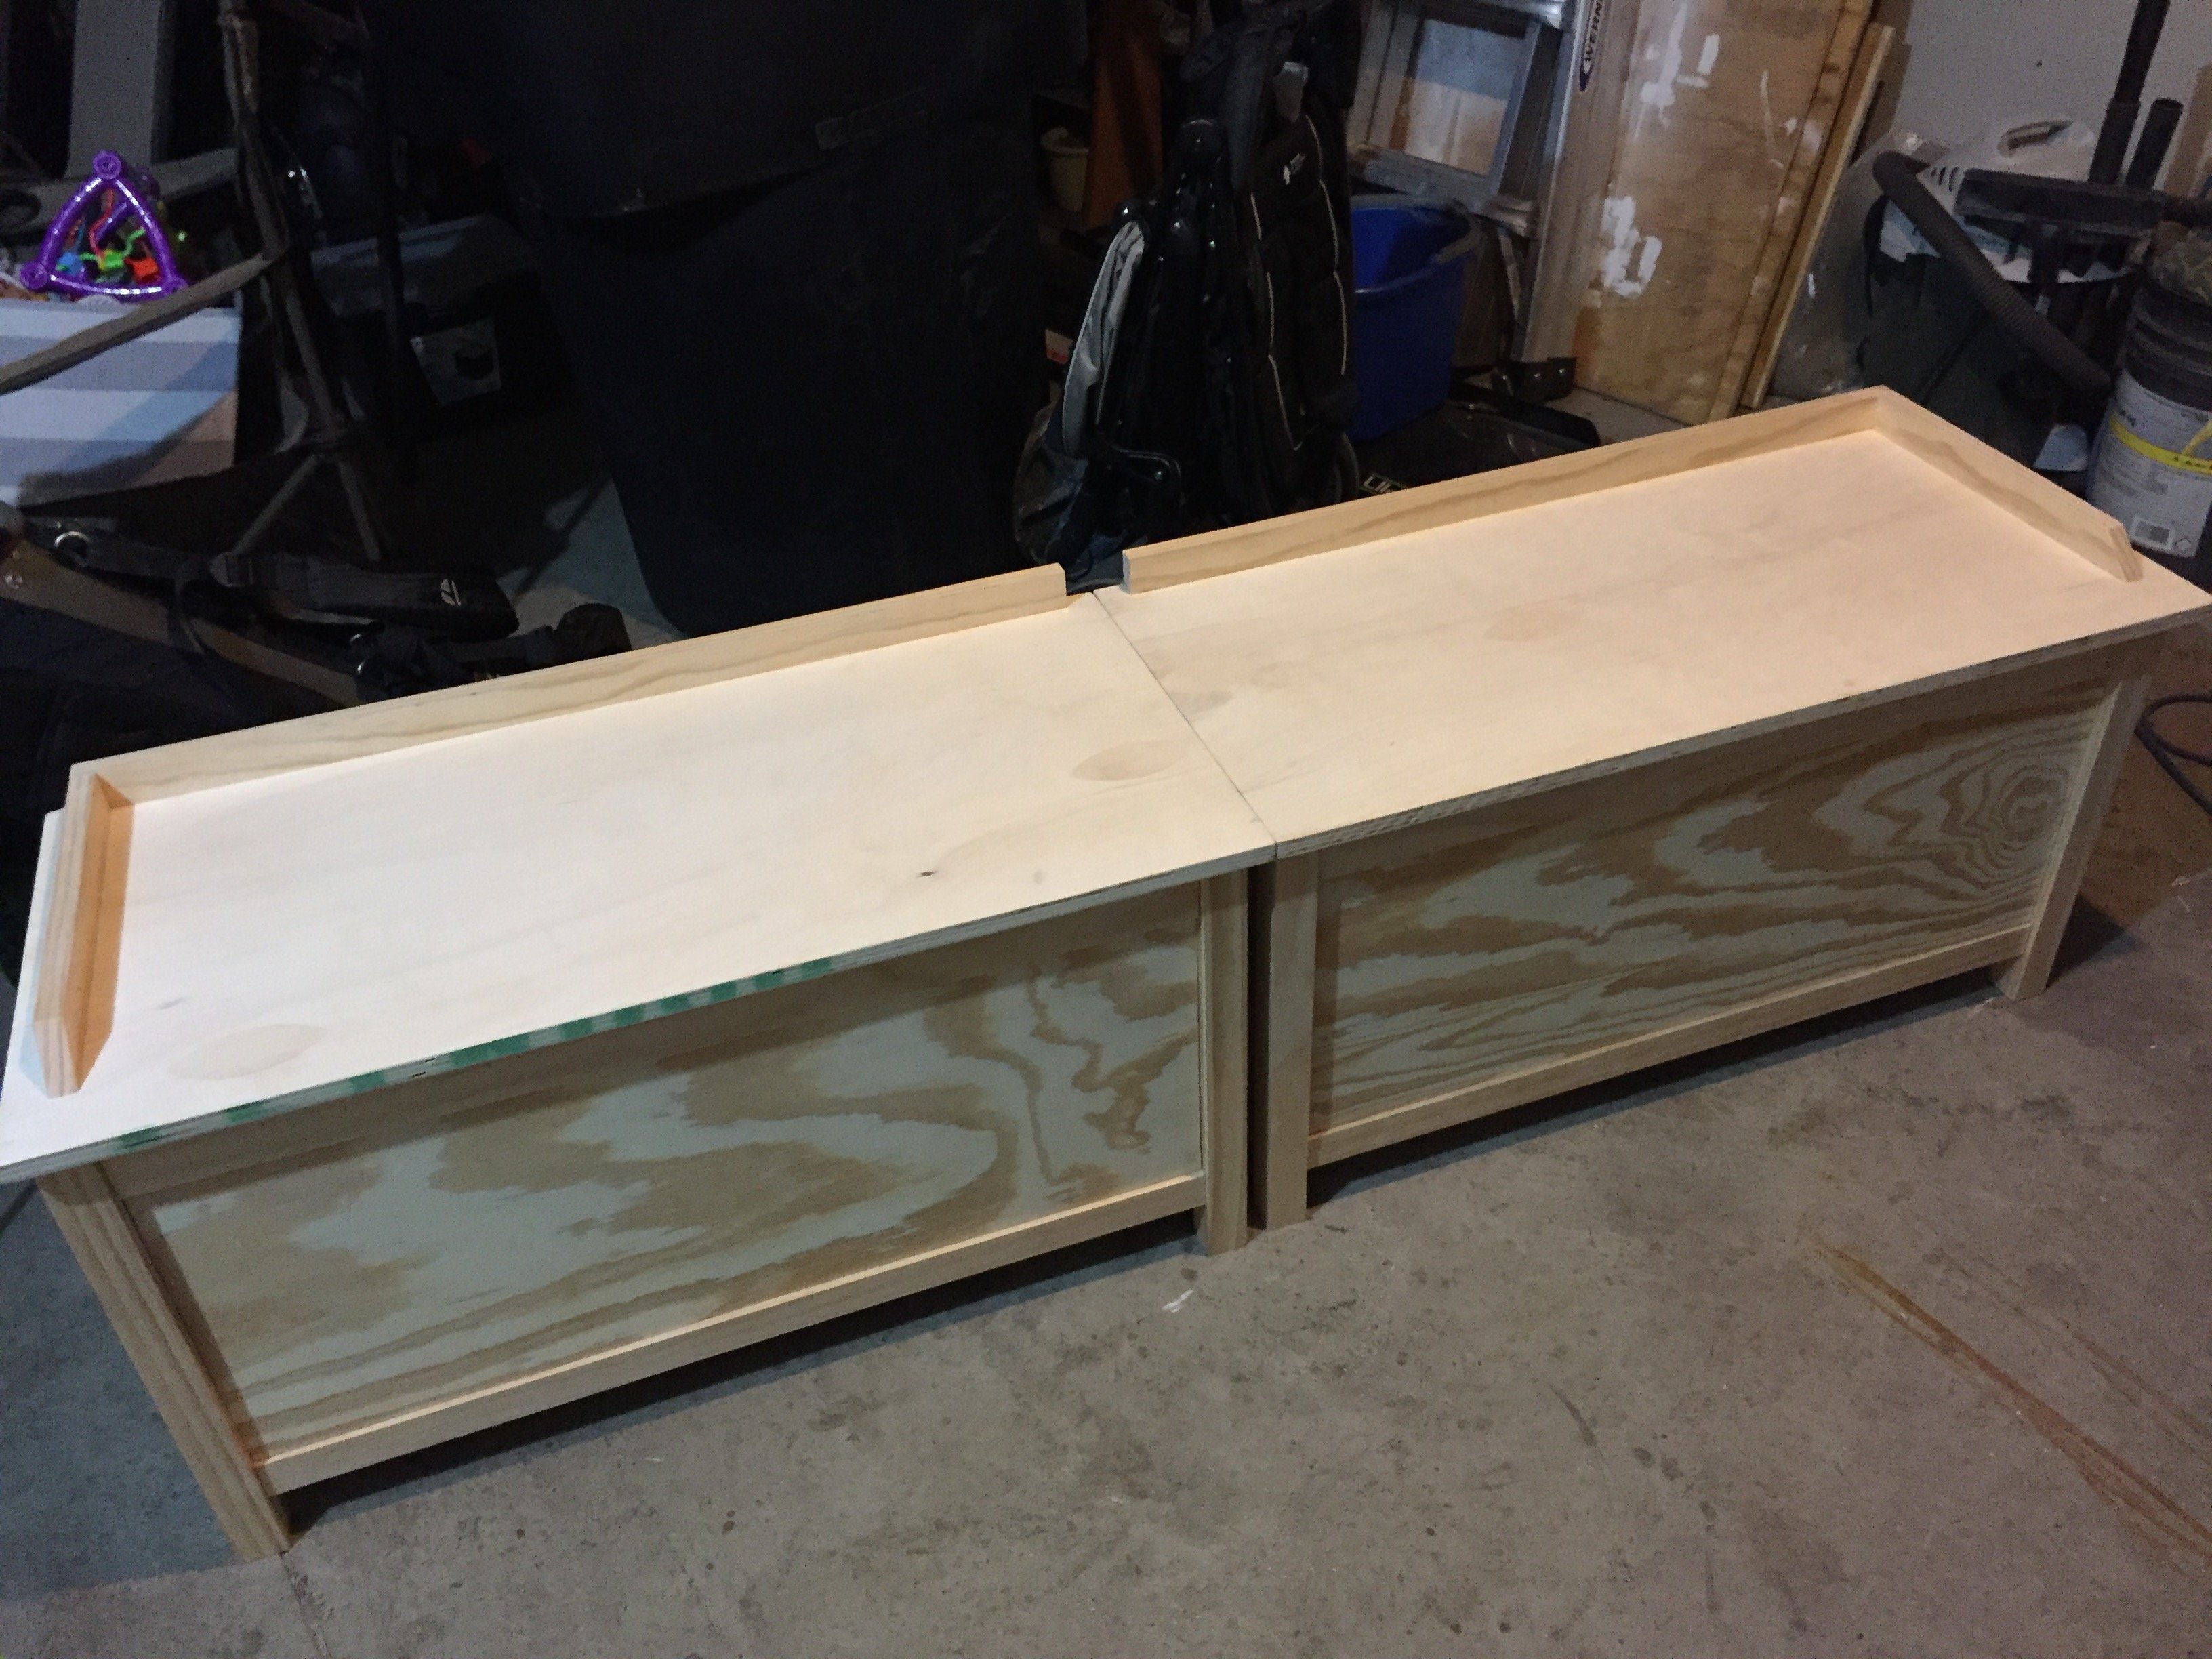
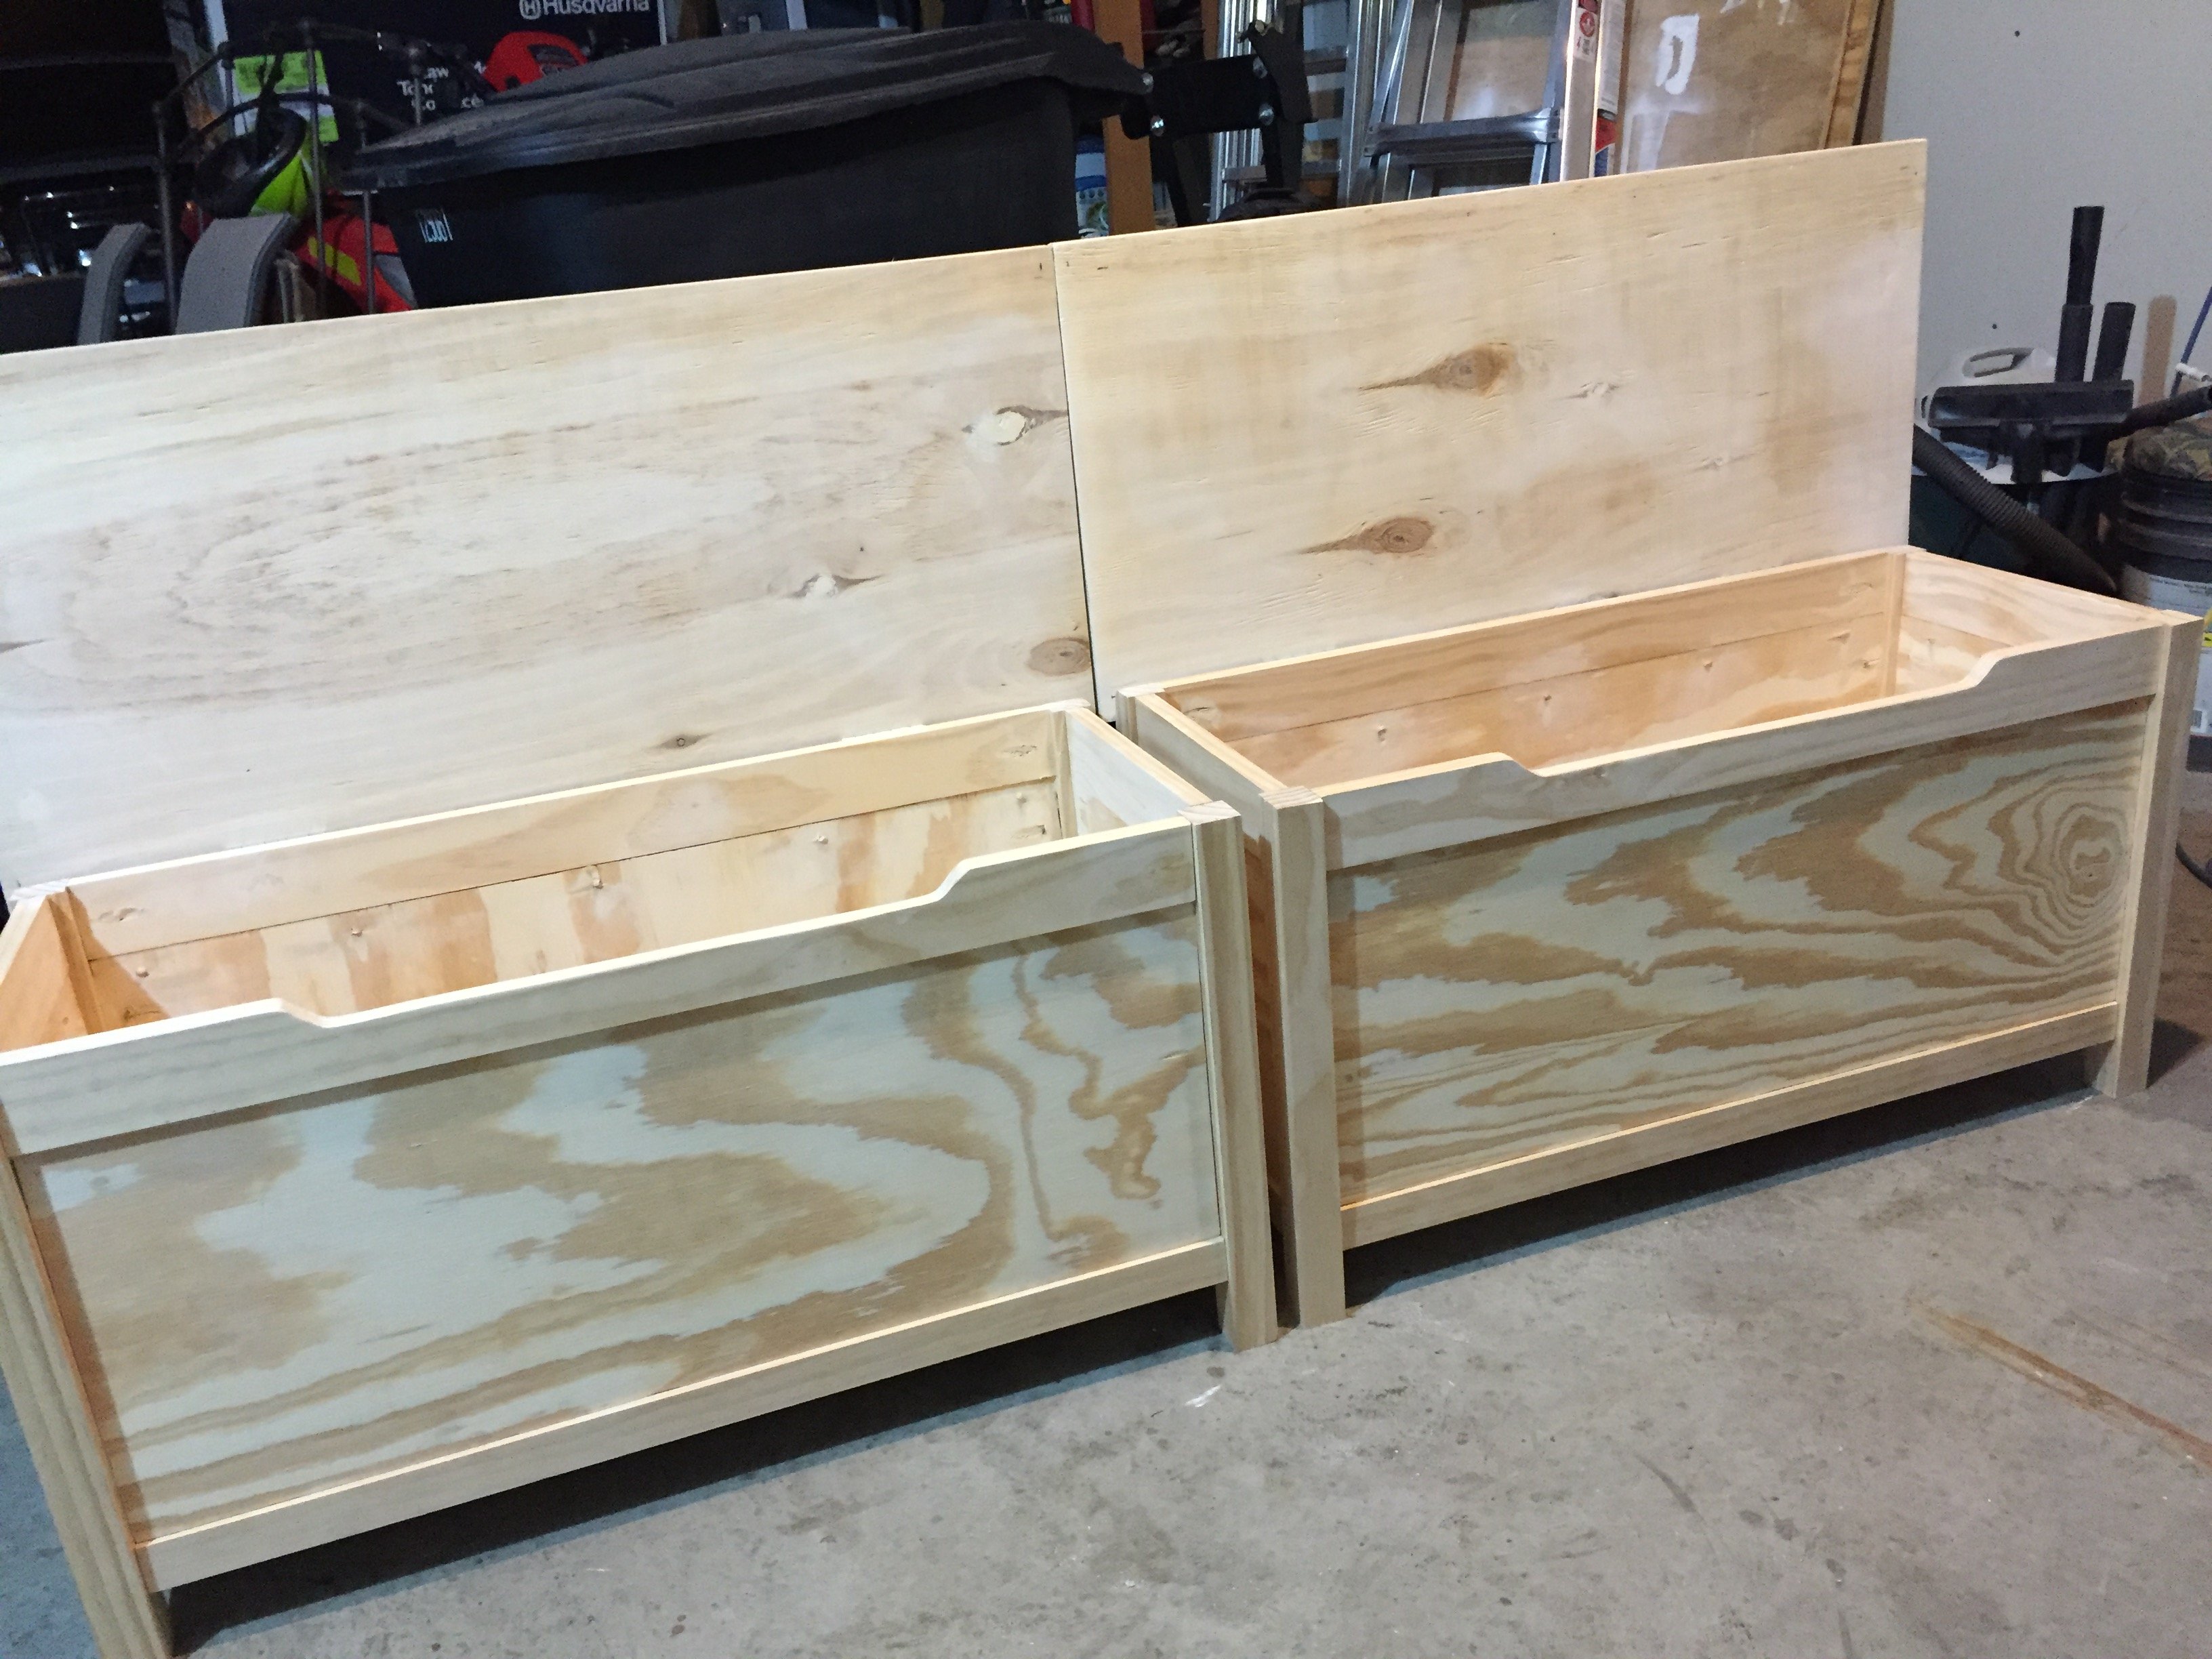
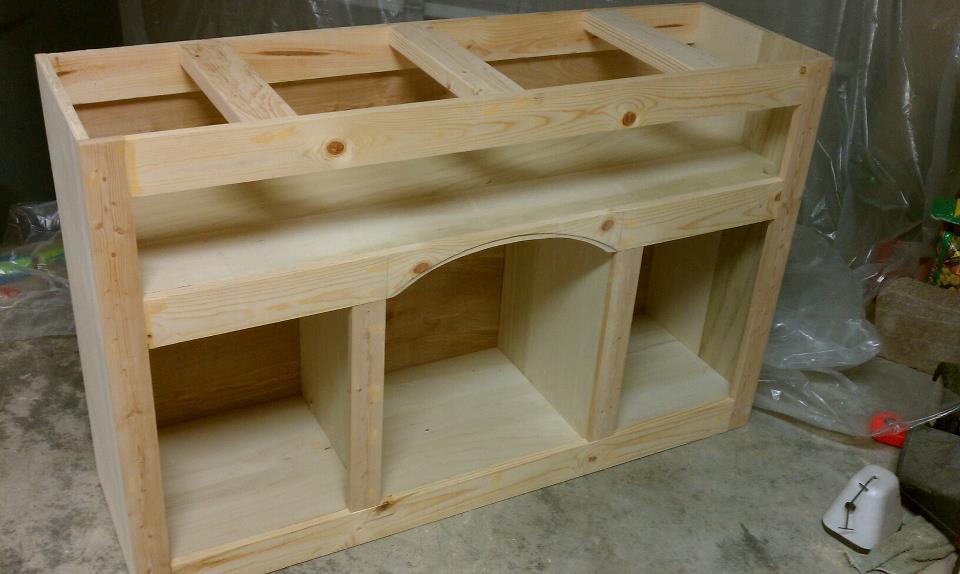
Even though it was all sold as "better that Ikea" furniture, it was all pretty cheaply made with weak quarter turn screw joints and MDF.

The first thing I did was to take each piece apart and glue, pocket screw and nail the heck out of each piece.

I than scuff up the finish (committed now :-) ) with some 220 sandpaper. While my wife and I decided what color we wanted I looked into oil based paint. Even though it usually can't be found at HD or Lowe's a guy who worked in the paint department and was a professional painter for 30 years advised me to find some.

We both agreed that Latex paint never really seems to dry all the way, especially for a surface, which will have glasses and what not placed on them.

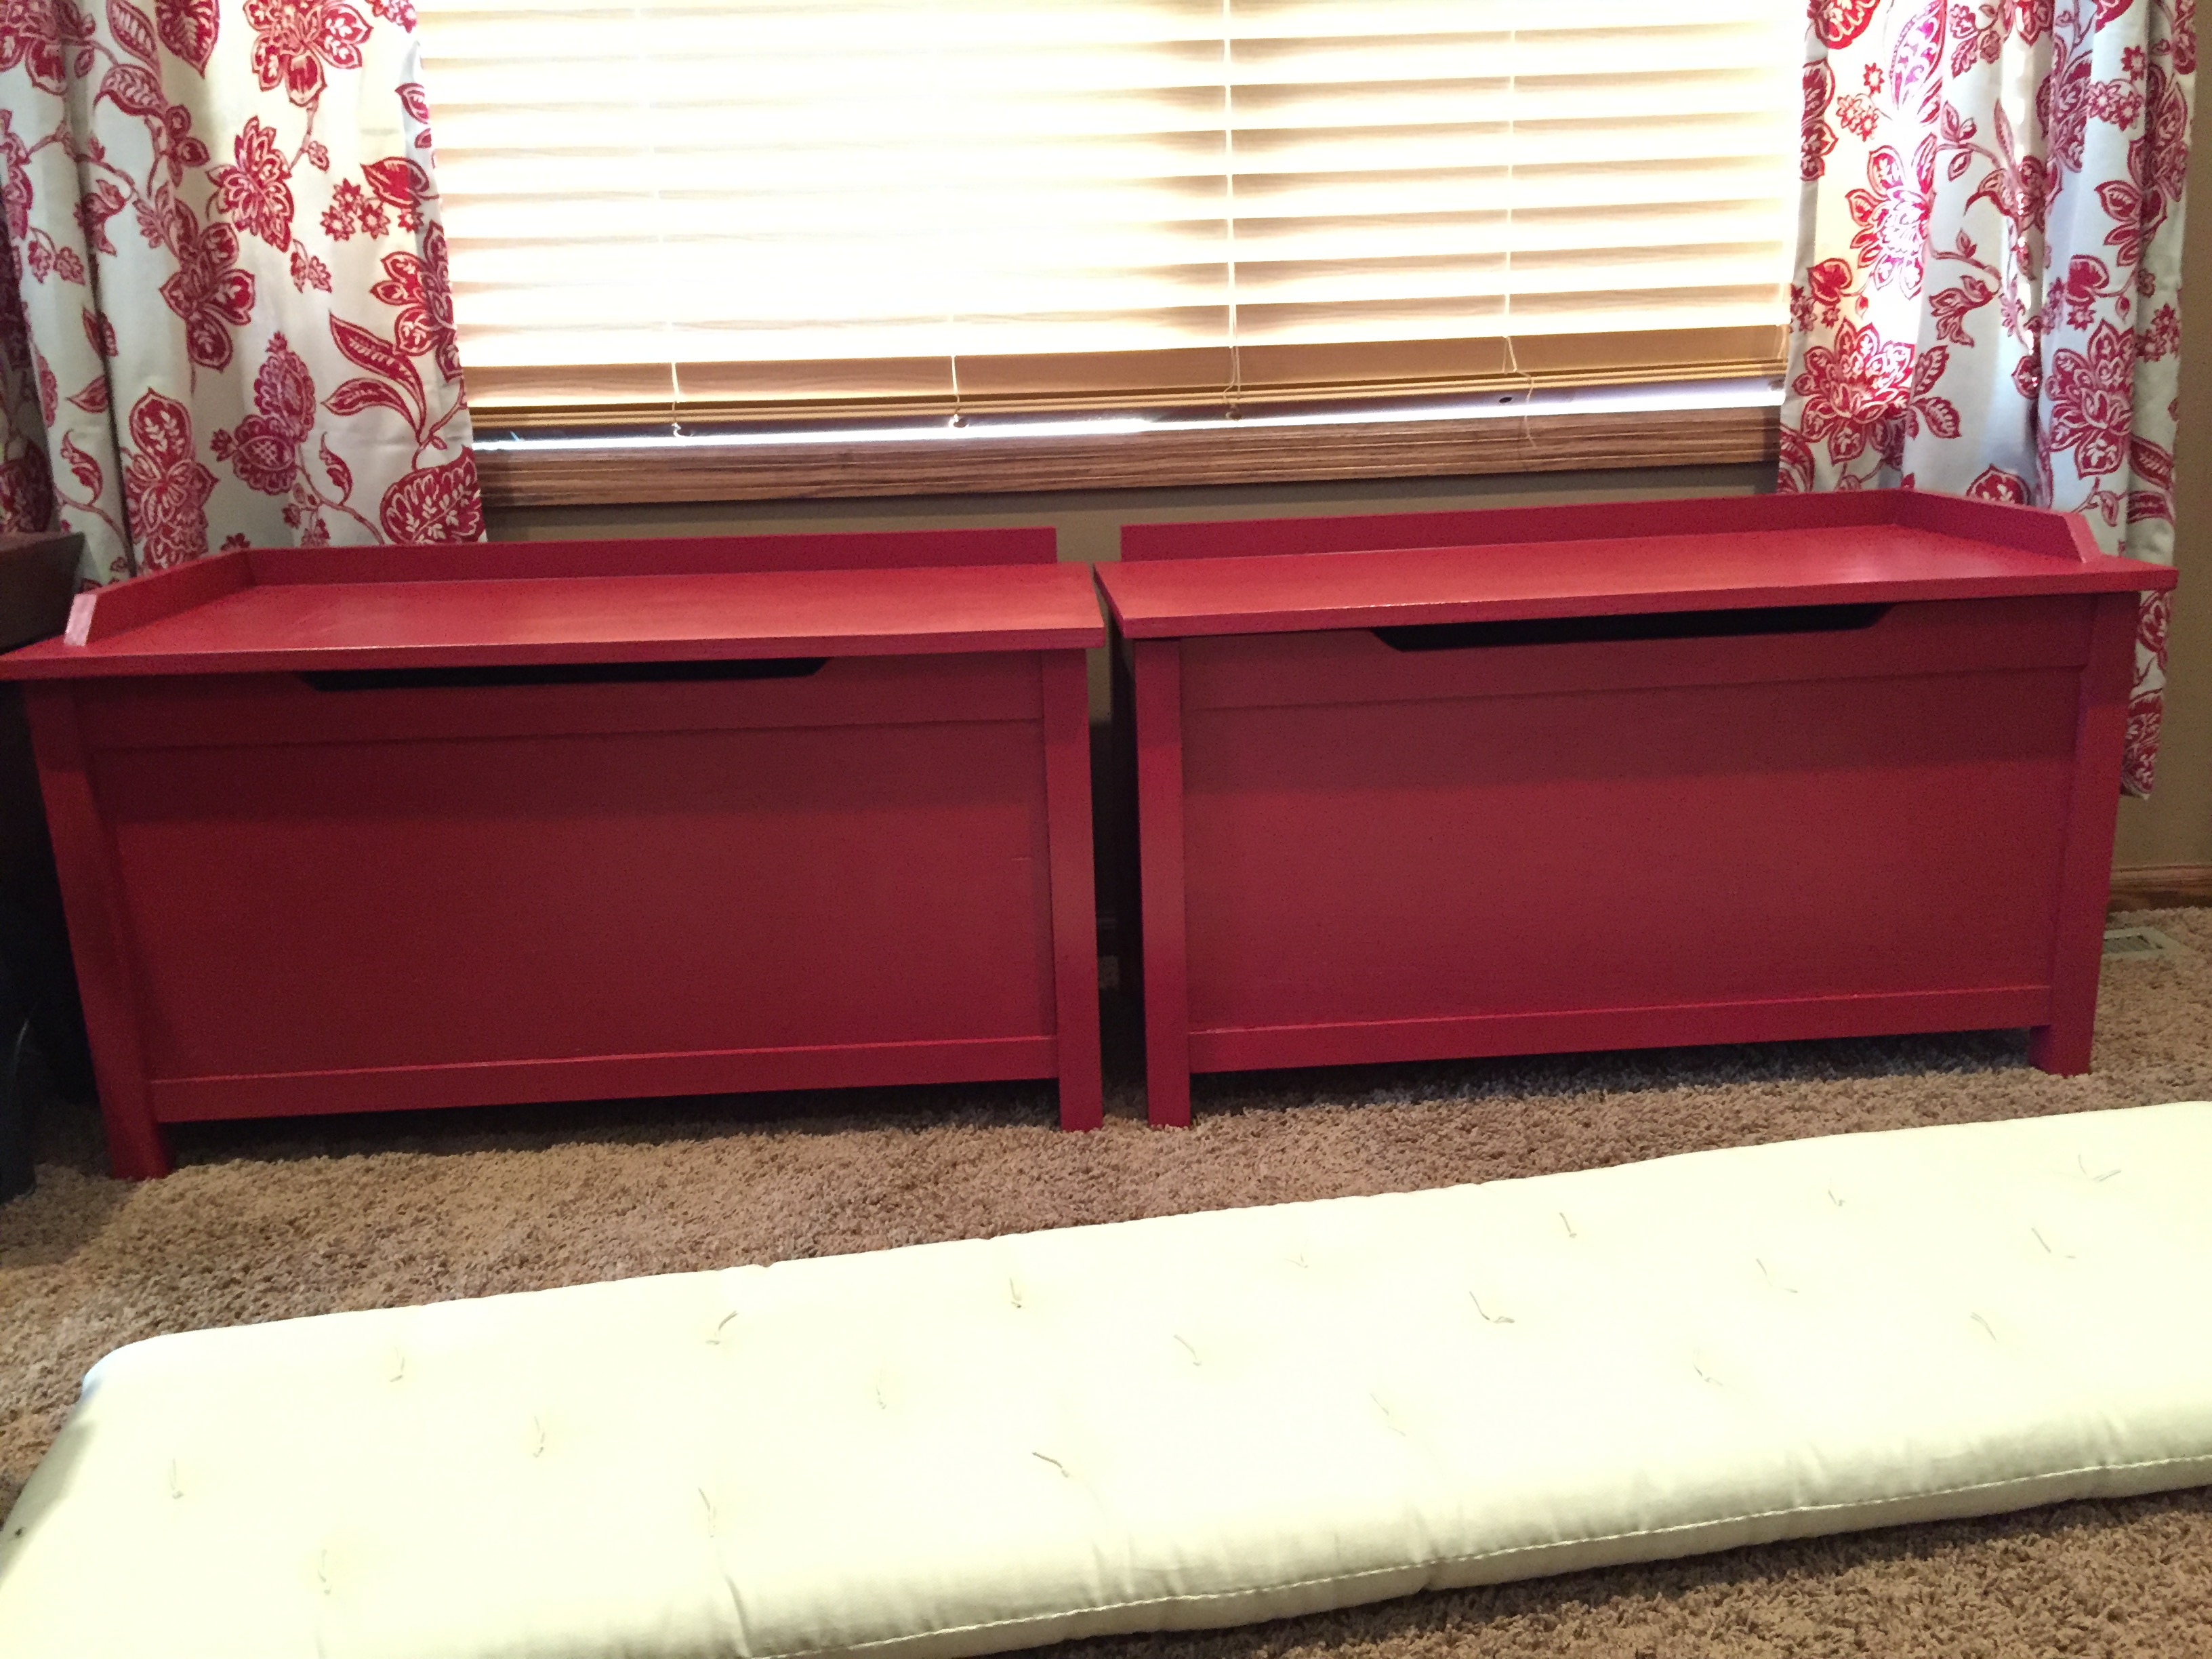
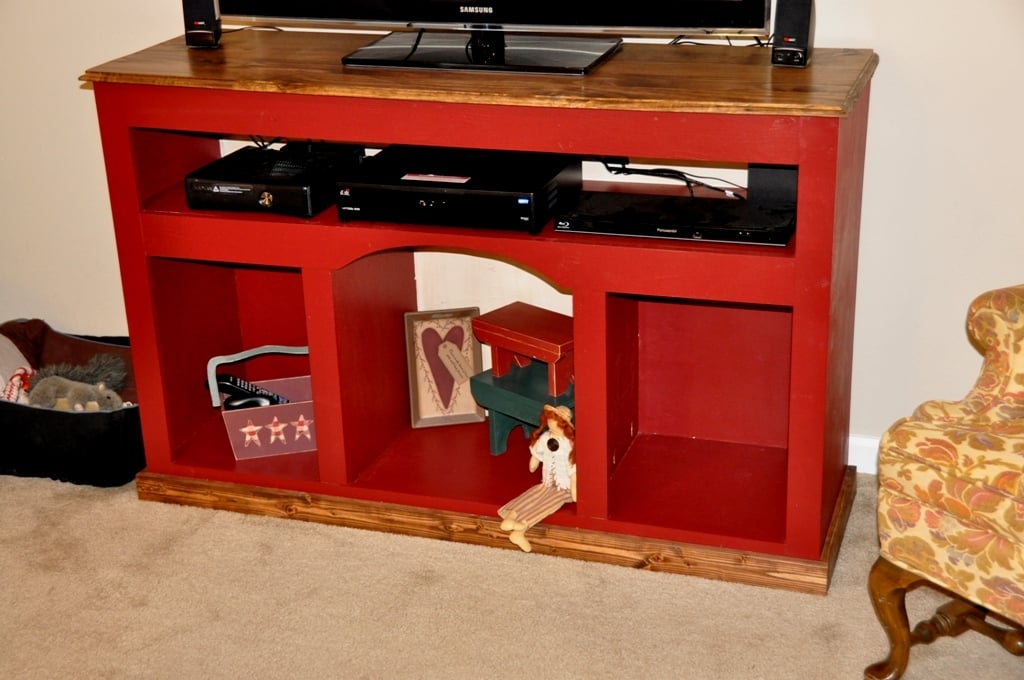
I got some oil based paint from a "paint store" and also bought a product called Penetrol to put in the paint. The Penetrol "watered down" the paint to allow more working time and avoid brush marks. I really tried to avoid usually a brush, and mainly used a very tight , high quality foam roller. It really work great and I just made sure I covered each area all the way from one side to the other. I would start with less Penetrol than they say. My paint was like soup and although it worked great, I figured you can always add more, but you can't take it out!!

The oil paint took about two days to dry in my garage (very cold now) and than I moved it into my house for the rest of the time. Once it was "cured" 3-4 days, it formed a shell like surface, which did not require any poly at all!

I feel it's about as good as you can get without having a sprayer. It was definitely more clean up as I needed paint thinner for the brushes I did use, but I stored them in zip loc bags in my garage refrigerator in between coats, until I was completely done!!

I hope this post helps someone out there!!

Estimated Cost
47.00 for one gallon of oil based paint
Estimated Time Investment
Weekend Project (10-20 Hours)
Finish Used
Oil based paint
Recommended Skill Level
Intermediate

Surfer Shack

My buddy wanted this bed from Pottery Barn Kids but didn't want to spend $1300. It cost him $250 in materials and i built it for $300. So you DIY'ers could do it for $250. We also adjusted the size to fit a full size mattress.

Built from Plan(s)
Estimated Cost
$250
Estimated Time Investment
Weekend Project (10-20 Hours)
Finish Used
Kona wood stain
Recommended Skill Level
Intermediate

Comments

Rachael Cabos (not verified)

Wed, 06/06/2012 - 16:35

What were the dimensions?

Alexis buchanan (not verified)

Sun, 09/23/2012 - 14:42

Both my boys want to sleep up top I have a nice corner window seal that I'd like to put the l shaped loft at mid height double twin any suggestions also would like the entry on both ends so my 9 yr old can descend without waking my middle son would like a detachable slide in the middle

Recycle Console

Submitted by Jennybeth on Fri, 03/07/2014 - 06:47

This is my attempt at Ana's recycle console project from her new book "The Handbuilt Home". I made a couple of small changes to the pattern but for the most part stayed on course with her plans.

This piece of furniture is now being used at our cottage. I used 3/4 inch birch plywood for the cabinet and shelf and i used 1/2 inch MDF for the foldout compartment. I decided to use the MDF as it was a bit lighter than the plywood so not as much weight on the door when tilting it out.

The color is from Martha Stewart and is called Cayman Blue.

Estimated Cost
$75.00
Estimated Time Investment
Weekend Project (10-20 Hours)
Finish Used
latex primer and paint
Recommended Skill Level
Intermediate

Hall Tree Bench with Shiplap Back

I made this for a cousin, but now I think I am going to need to make one for myself too!  I used shiplap for the back instead of plywood. It cost a little more but was less effort than cutting the lines into the plywood. Plus it was already finished. 

Built from Plan(s)

Simple Modern Outdoor Double Lounger

Submitted by Tammy MT on Sat, 05/26/2012 - 09:16

It took about 2 hours to build it. We have a large family, so we put 2 extra legs on each, just in case. We had problems with the hinges. I think we bought 3 or 4 different hinges before we found something that worked for us. But the end result was wonderful!

Estimated Time Investment
An Hour or Two (0-2 Hours)
Finish Used
painted white
Recommended Skill Level
Intermediate

Pastors Kids

Submitted by gesmith5 on Tue, 03/11/2014 - 10:33

I built 2 beds by doubling the purchase list, then cutting 2 of everything. The hardest part was figuring out what to cut from each piece of wood. It would have been nice to have a detailed cut list so it would be easier to not waste any wood. As it turned out, I needed to purchase one extra 2x4 to finish the job. Not too much trouble. To cut cost, I bought 2x4 studs and had to dig through a half of a pallet of them at Lowes to find the straight ones, and even then some still had a bit of a twist. It's hard to find straight 2x4's.

On the landing, I predrilled countersunk screw holes about 3/4" deep, then after attaching them, I cut plugs, glued them in and sanded it down to a smooth finish. After paint, you can't tell how they are attached.

Having a chop saw stand was great because I could set up a cut length and then quickly cut all the boards I needed for that length. I also used a jig for my drill press and set up to drill all the holes at one time for the landing boards.

The KREG pocket hole joint works wonderfully well in this application. Just make sure you get the right length and diameter screws. The first box of screws I bought were too big around to fit the hole drilled.

As you can see, there are two happy kids that never want to get down off of their beds.

Thanks for the plans, it was a great experience.

Andy

Estimated Cost
$300-$350 for two beds.
Estimated Time Investment
Week Long Project (20 Hours or More)
Finish Used
Kilz oil based primer followed up with semi-gloss water based paint. Light mint green for the girl's bed and Superman/Spiderman blue for the boy's. The boys bed took 2 coats due to the dark color over the wite primer.
Recommended Skill Level
Intermediate

Comments

balloongal247

Tue, 03/11/2014 - 12:23

I found this free cut optimizer tool online, it can break down optimal combination of cuts per board. Just make sure you put it some kind of "Width allowance cutting a kerf", so that it includes what you lose at each cut. You also just have to do one type of board at a time (like 1x2s) but you can put in different board lengths so that it'll tell you how to best use scrap. It's a nice tool.

http://www.online-app.eu.pn/optimization1d.php

Sliding Door Console

I modified the plans to have three compartments instead of four. Also, the hardware was a challenge.  Tip: use a wheel that has an internal bearing. 

Built from Plan(s)
Estimated Cost
$200.00
Estimated Time Investment
Weekend Project (10-20 Hours)
Finish Used
pre-stain and golden oak by minwax
Recommended Skill Level
Intermediate
Back