Community Brag Posts

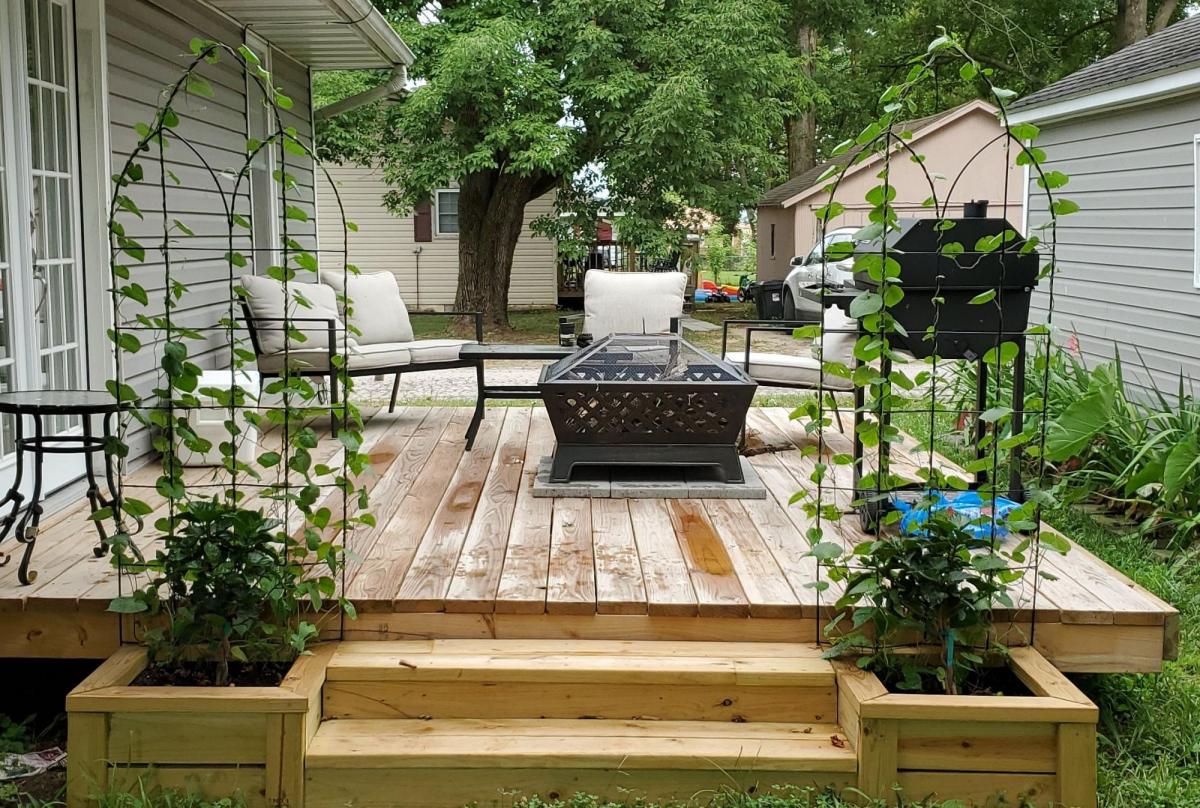
Beautiful steps
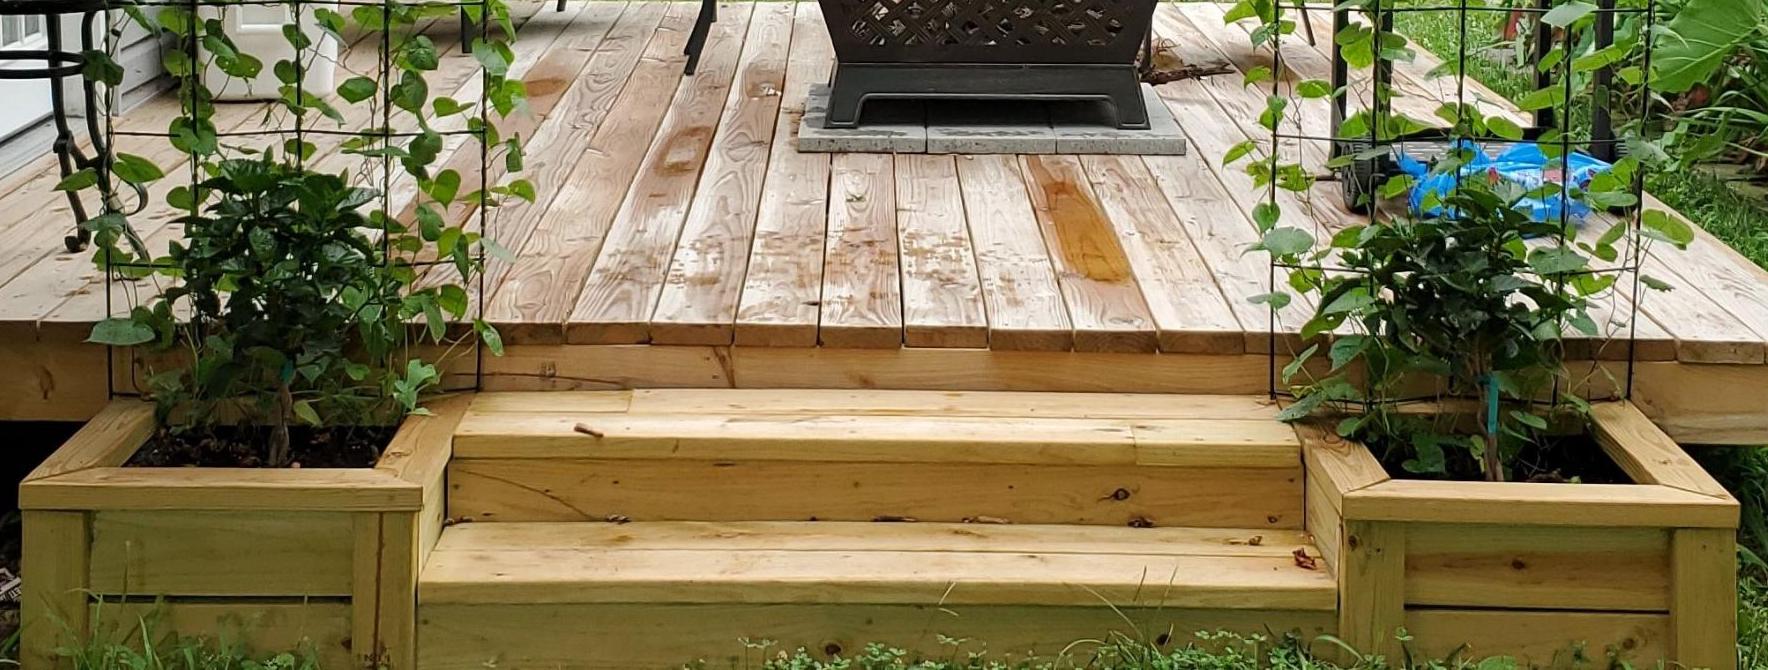
Directions worked like a charm, thank you, Ana for what you do!
Built from Plan(s)
Comments
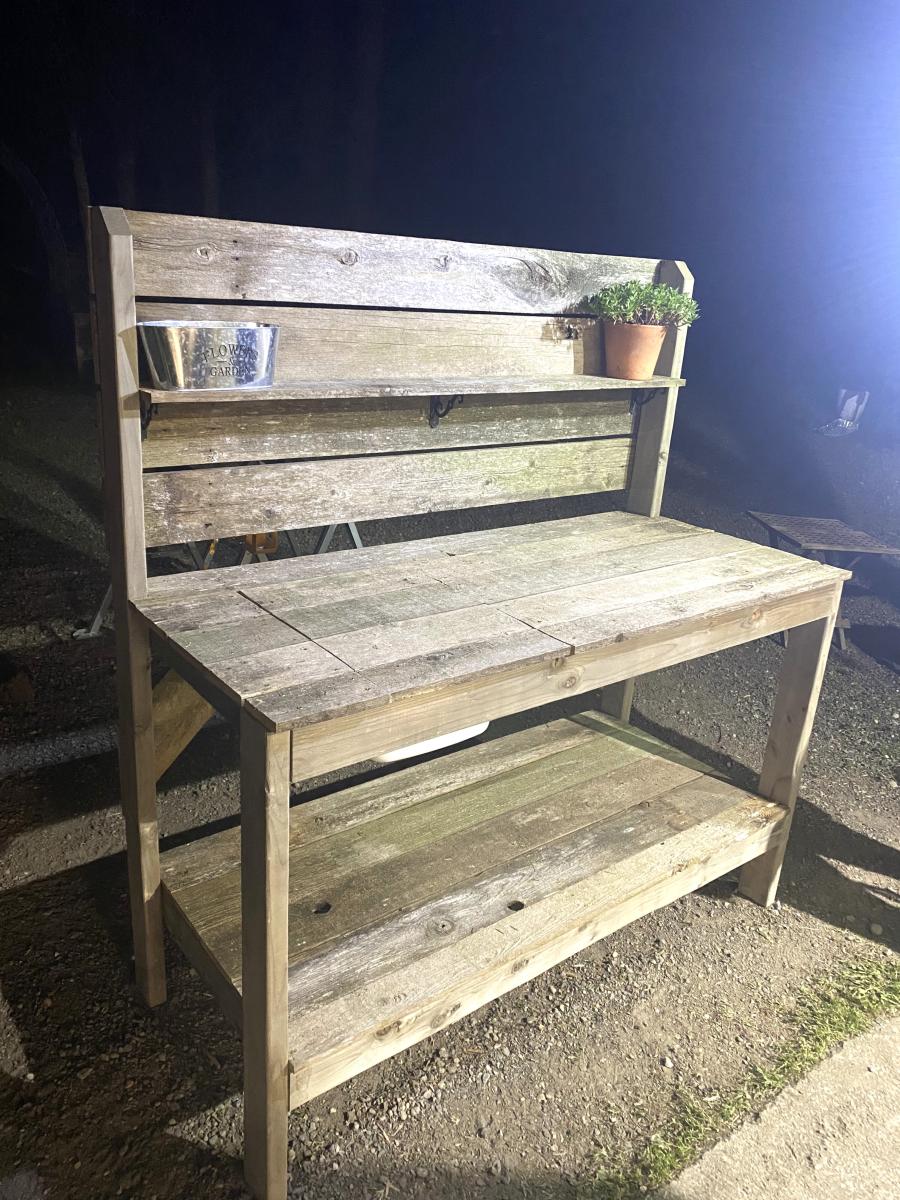
Reclaimed Cedar Potting Bench

Built this potting bench for my sister in law. Added an aging finish to give it a reclaimed patina to match the reclaimed cedar used on the back. Also added a bin for soil and a removable panel to cover it when it isn’t in use.
Built from Plan(s)
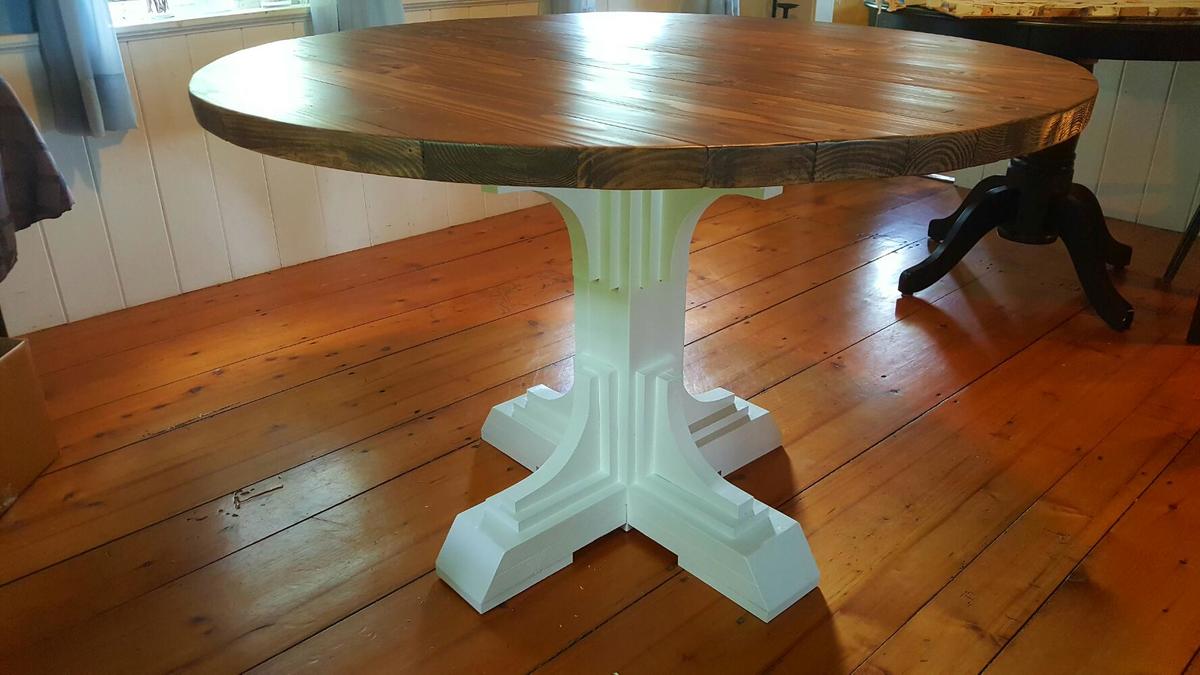
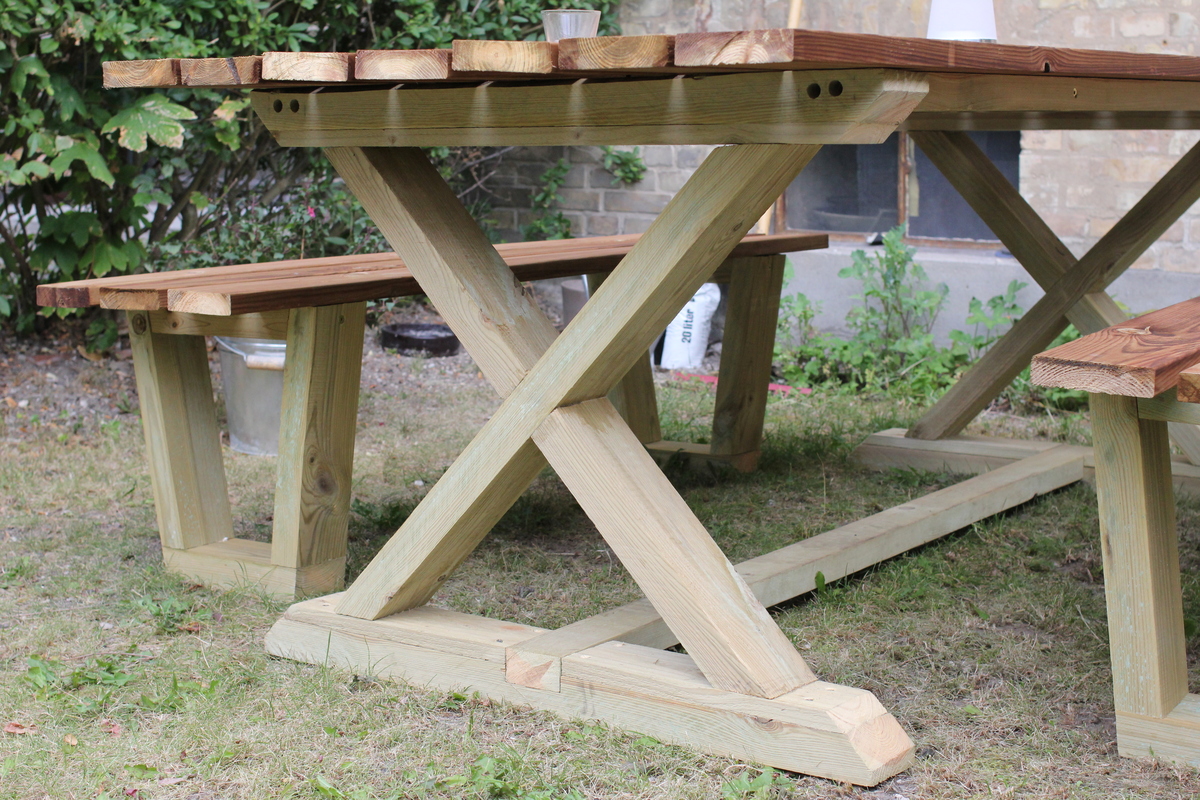
Freestyle X diningtable with fancy benches
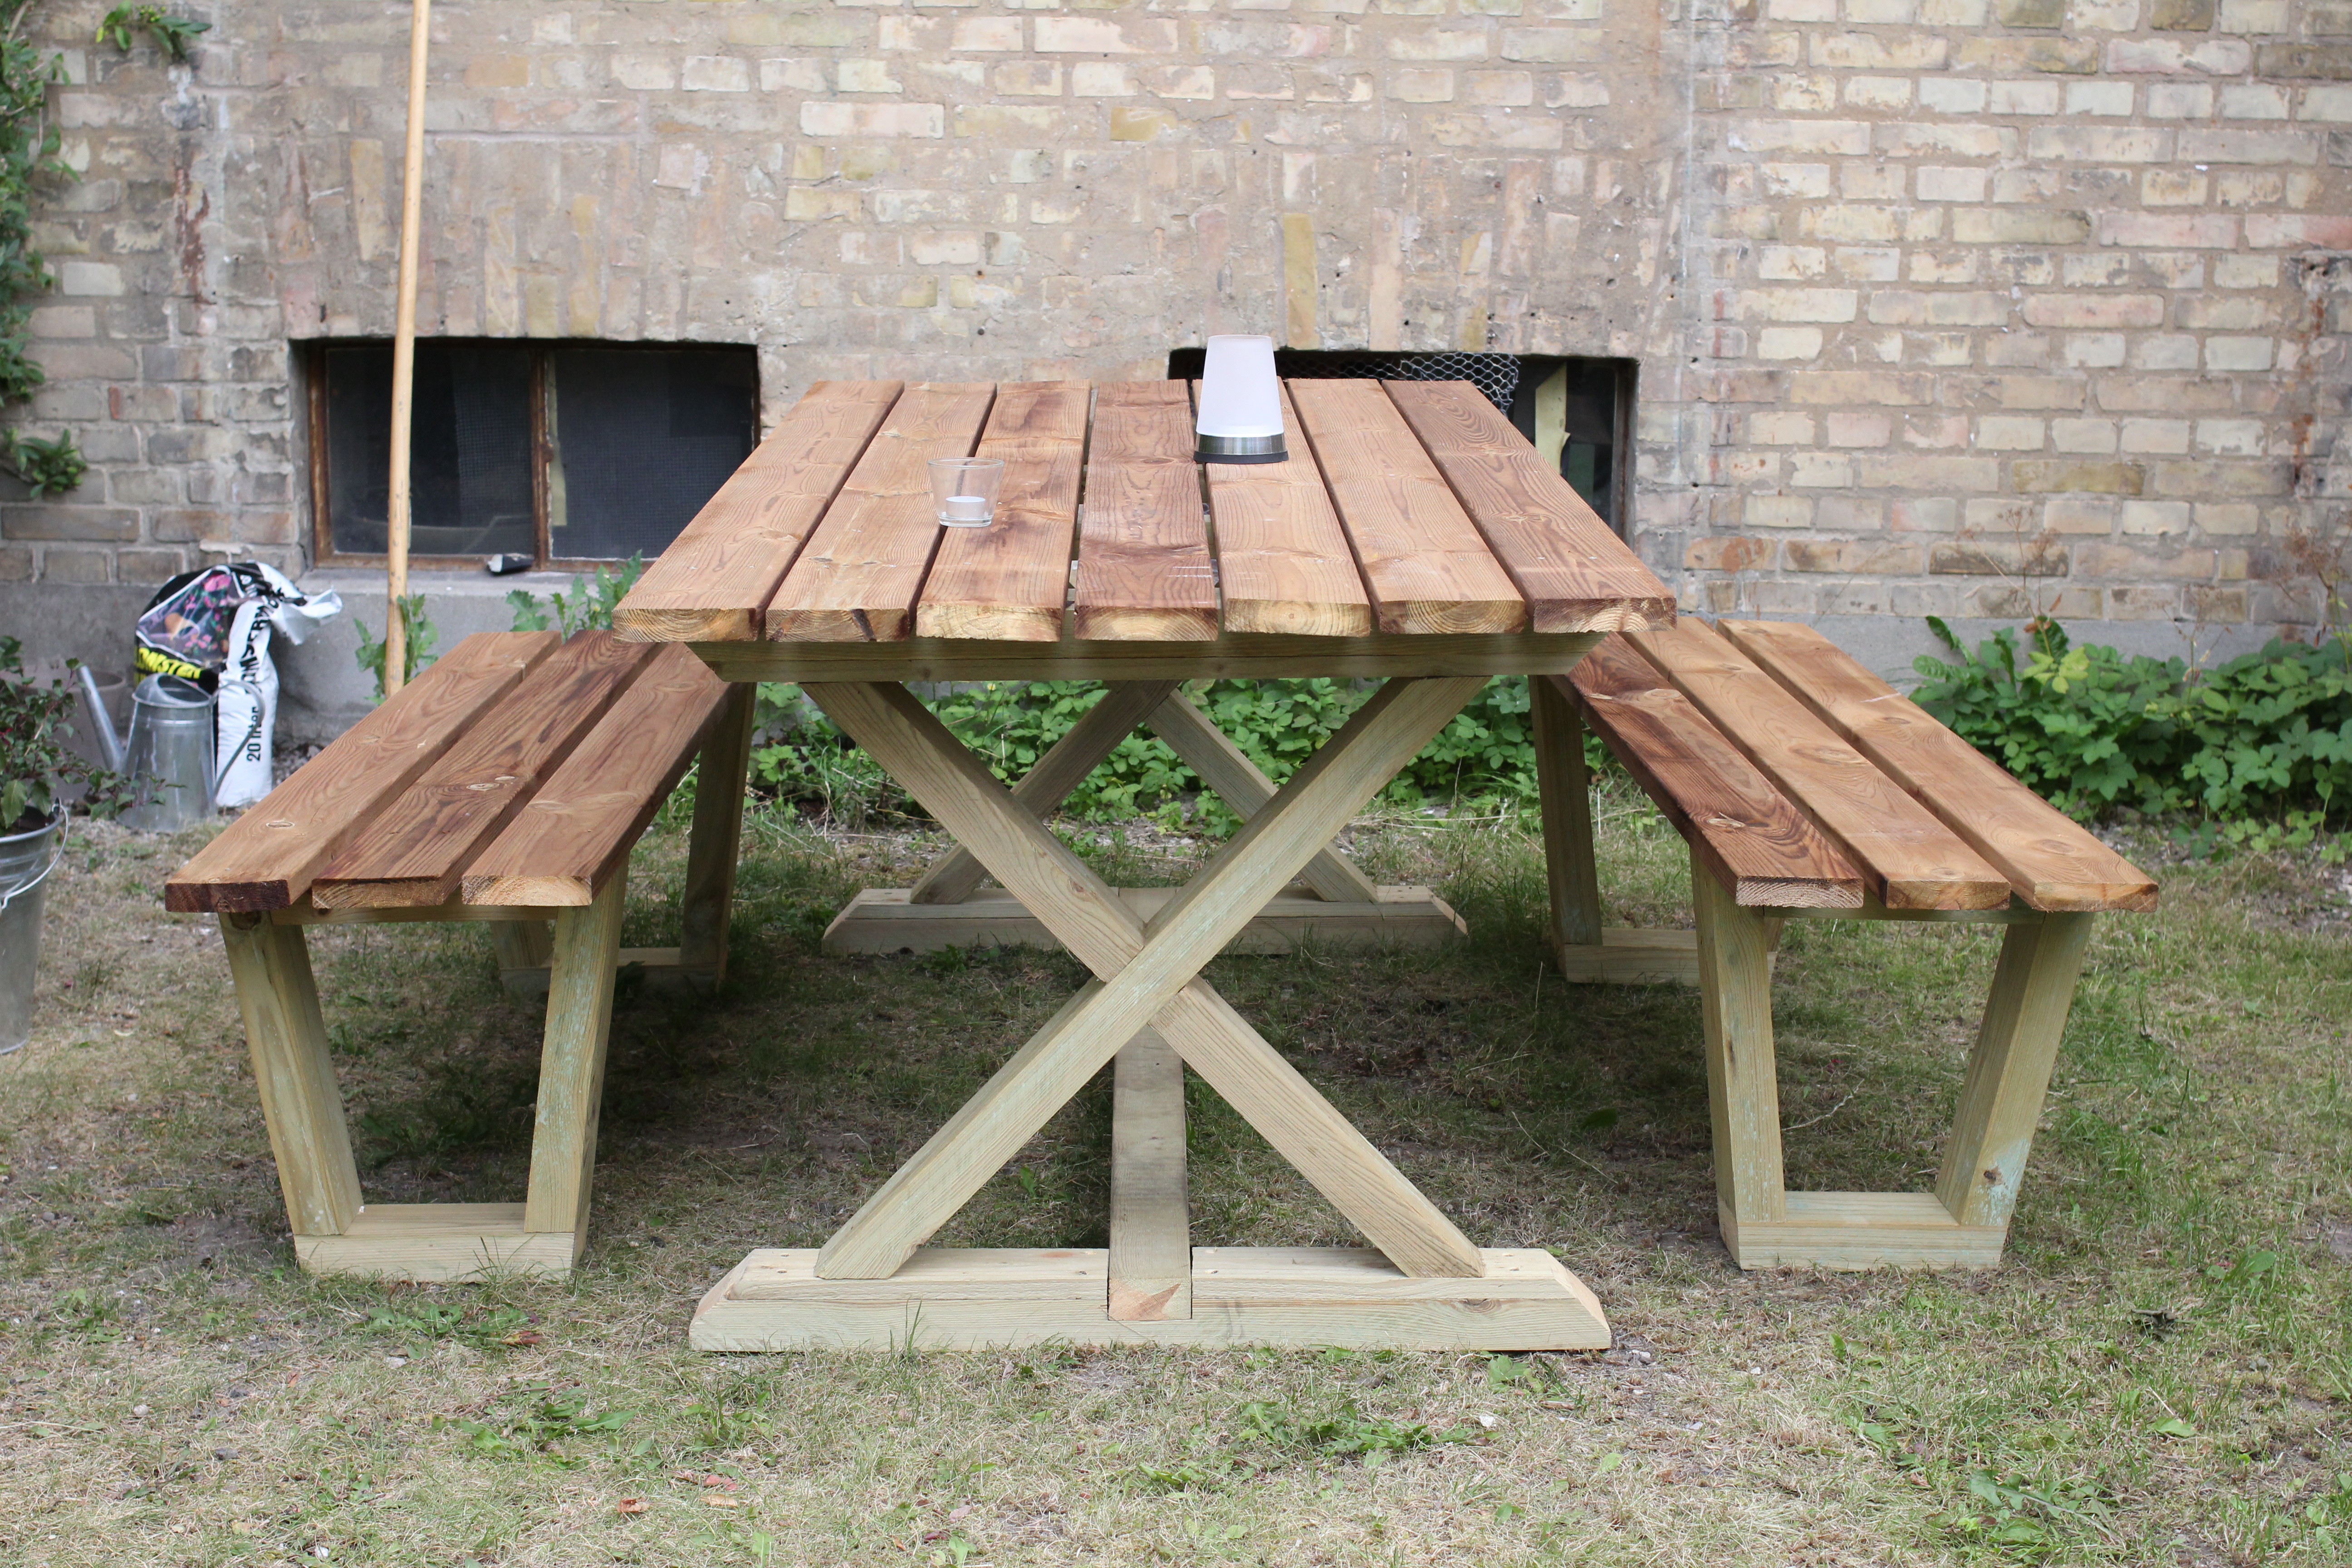
Even though the summer has come to an end, I decided it was time for some new furniture for my small garden in the city. I looked in different stores, but for a student the prices were very much out of range. I then decided that perhaps it would be cheaper to build by myself and an interesting project as I've never worked with wood in a 1:1 scale. I came across the plans for the fancy x, table and farmhouse table and figured that it should be something like that. I made the table and benches in Sketchup, but wasn't really sure about a variety of the aesthetic solutions. I then tweeked it and tried to come up with a new design for the benches that would mach the x shape without just repeating it, and i came up with the final design through a lot of experimentation. The benches can be made by a complete novice, and the table is also quite easy if you have the necessary tools. I'll give it a finish this spring, perhaps just paint it. I've received very good feedback on the project, and even though the benches are quite fancy, you sit very well in them and I think the aesthetics are somewhat accounted for by the easy assembly and comfort. Thanks for the inspiration, and I hope it will inspire you to build even more! The plan is in millimeters, and the planks are standard european sizes, but it should translate ok. PLAN Direct Download: https://dl.dropbox.com/u/2622939/X%20Diningtable%20with%20fancy%20bench…
Built from Plan(s)
Estimated Time Investment
Weekend Project (10-20 Hours)
Finish Used
None atm
Recommended Skill Level
Beginner
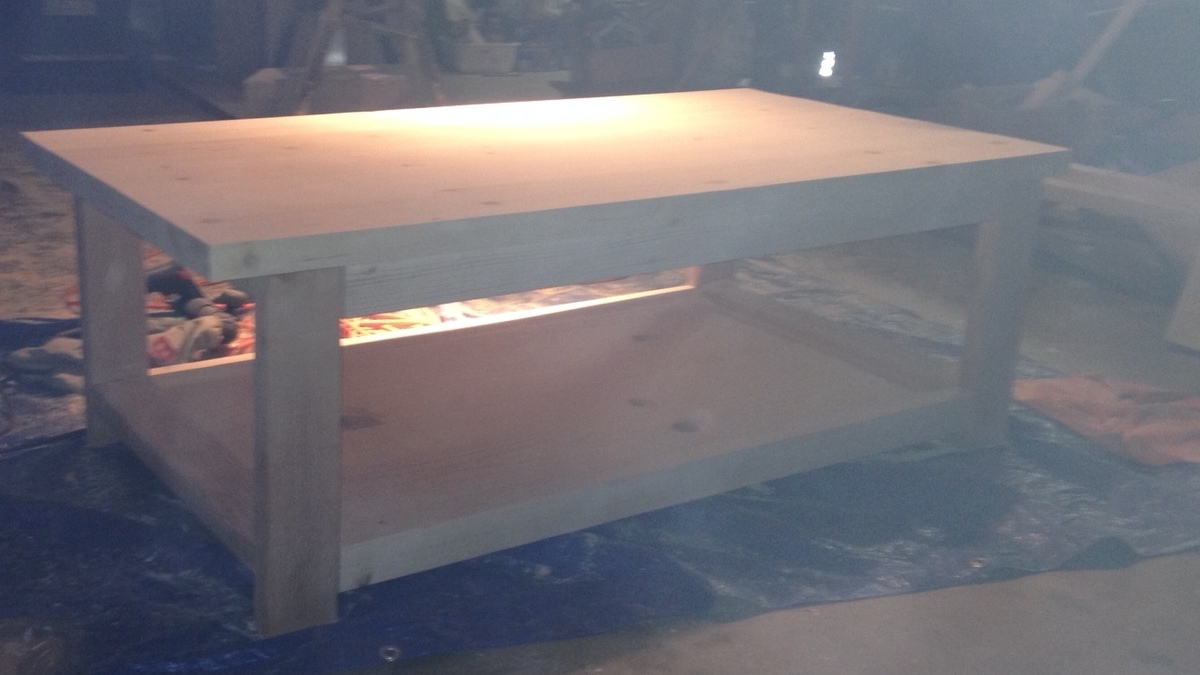
Rustic X Coffee Table
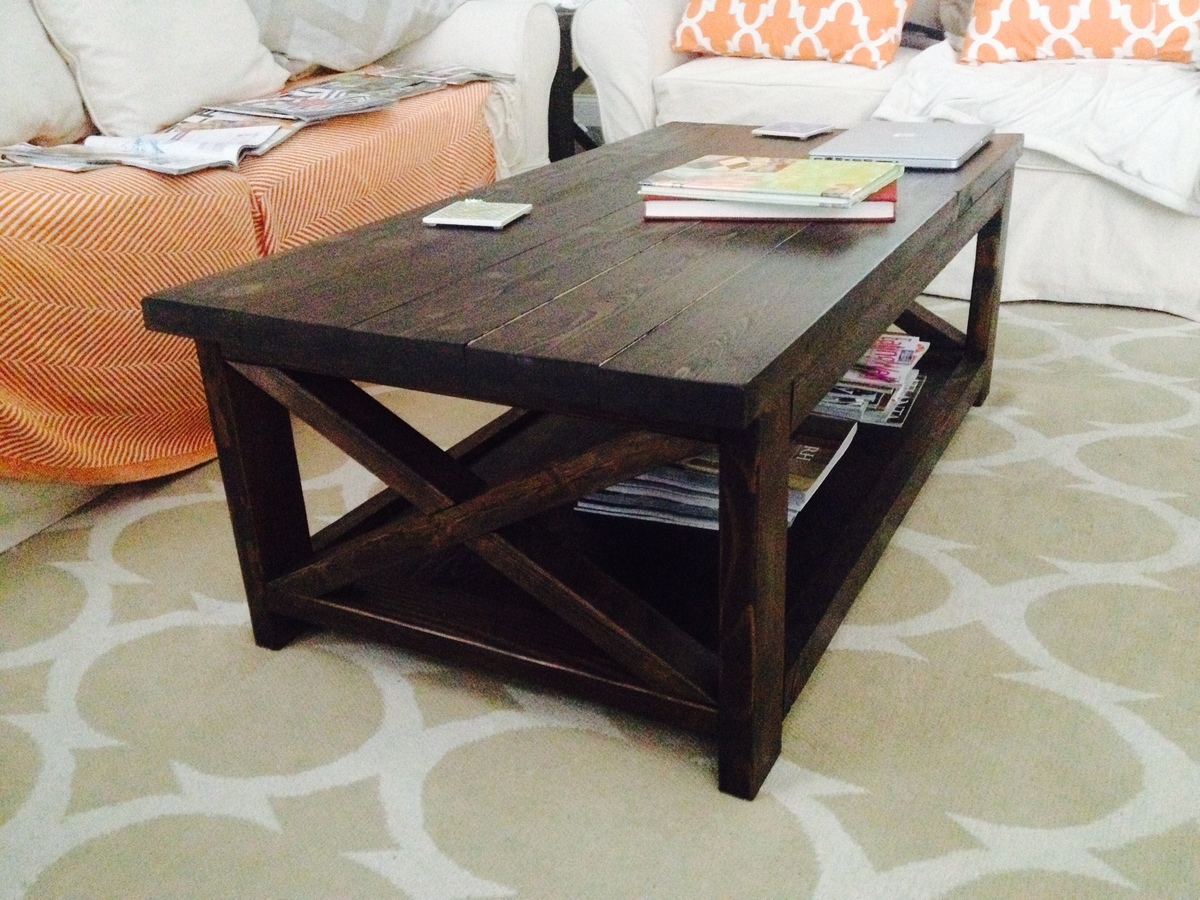
Long weekend project with my dad. First real project for me. Great learning experience can't wait for my next project.
Built from Plan(s)
Estimated Time Investment
Weekend Project (10-20 Hours)
Finish Used
2 coats of Varathane Kona
Recommended Skill Level
Beginner
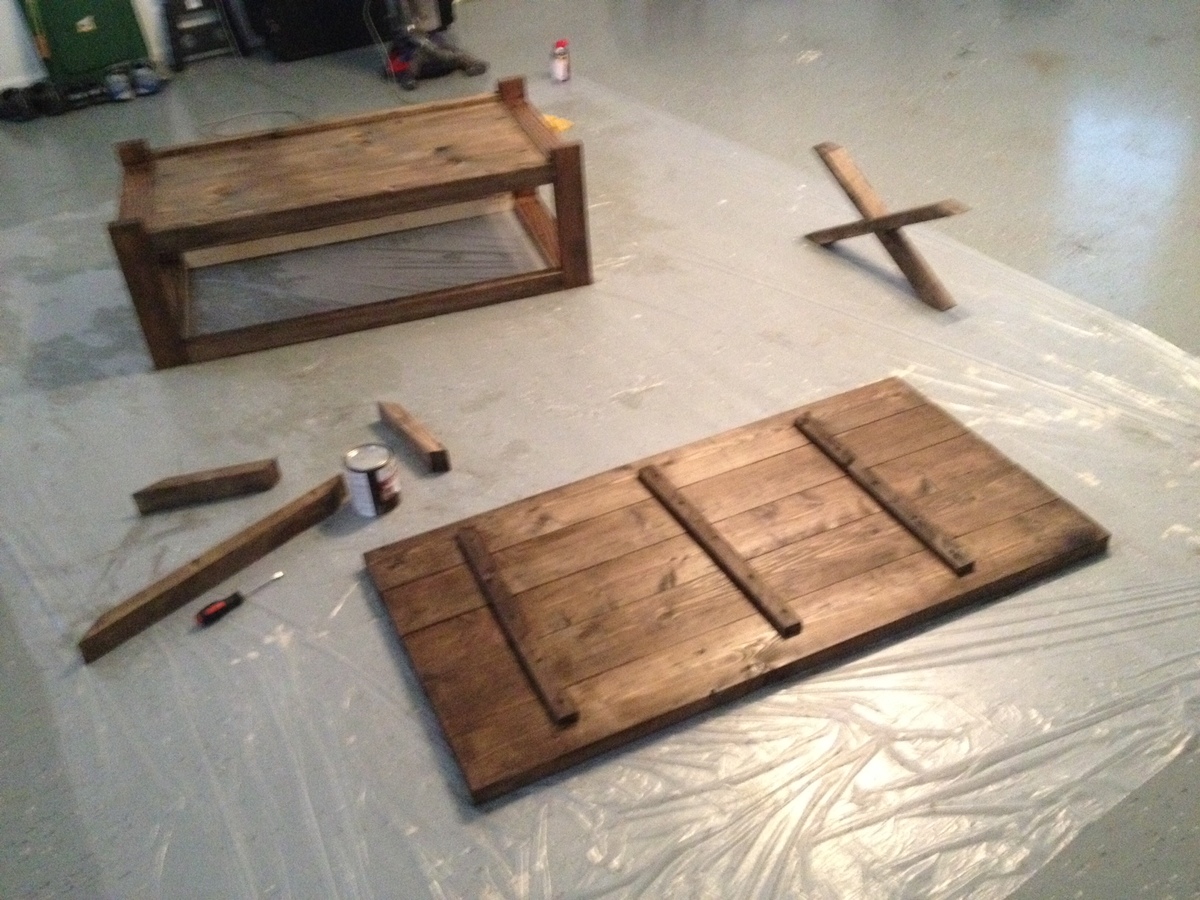
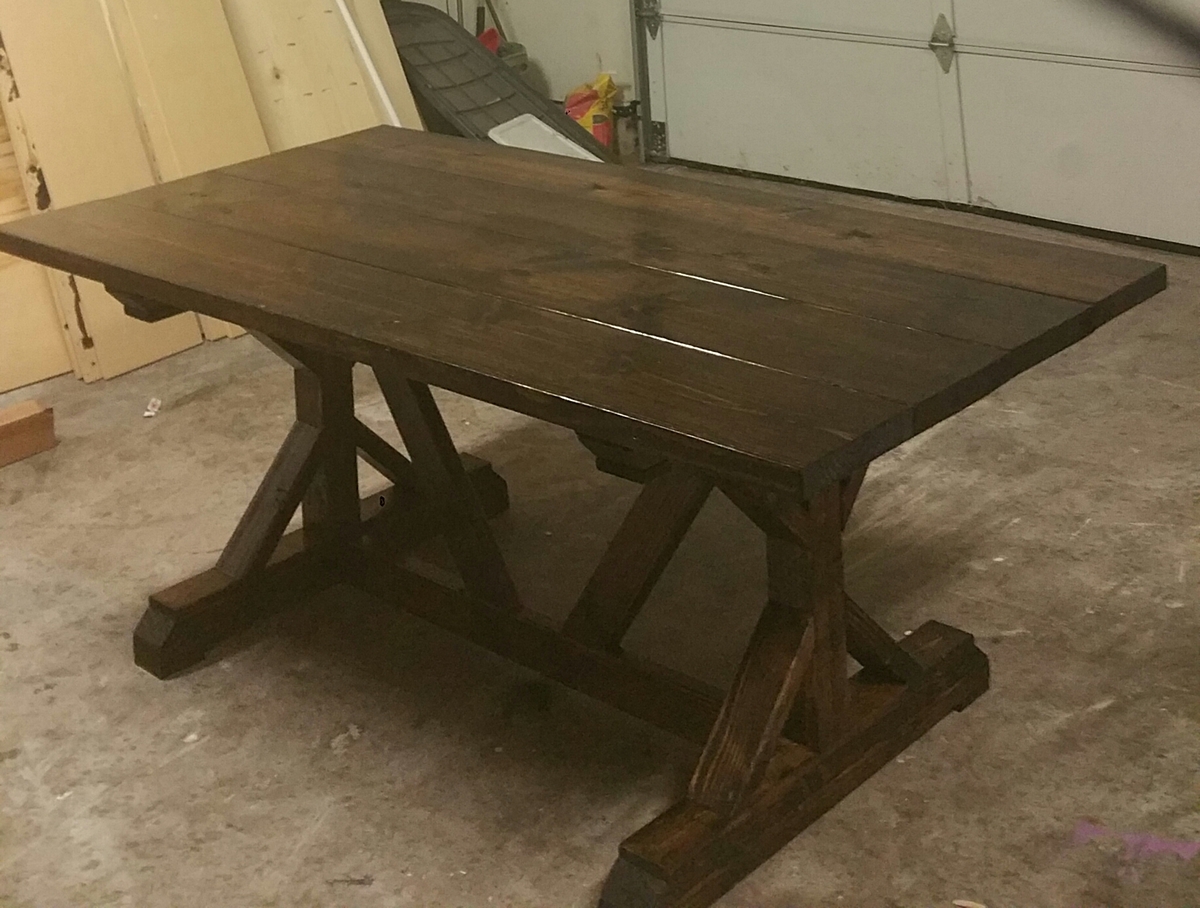
Farmhouse Table
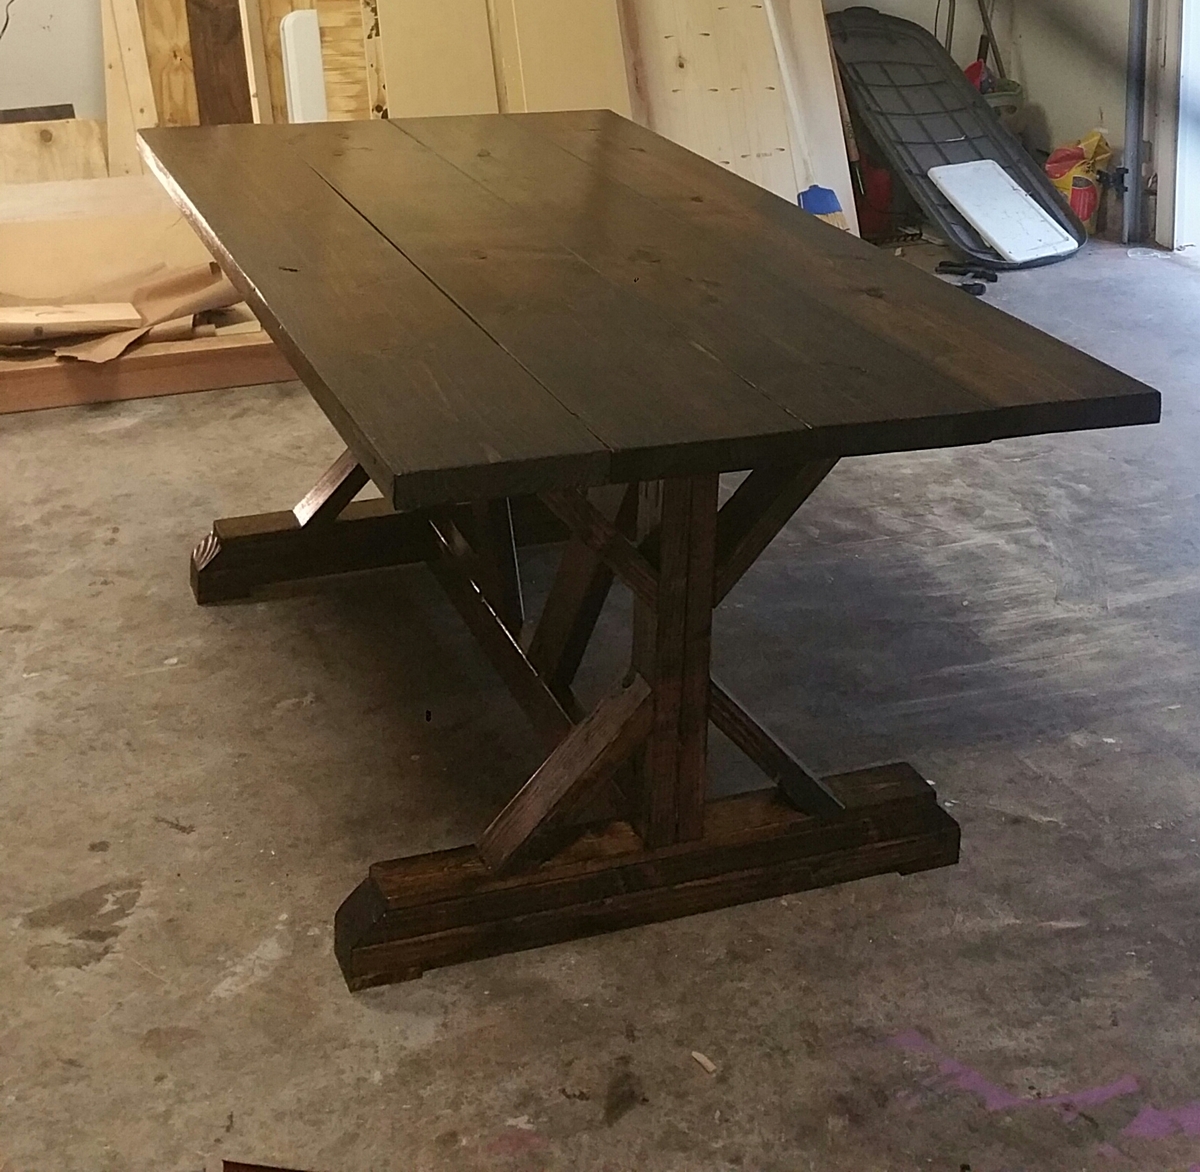
I built this table shorter than the plans. Its 72in long.
Built from Plan(s)
Estimated Time Investment
Day Project (6-9 Hours)
Finish Used
Dark Walnut
Recommended Skill Level
Beginner
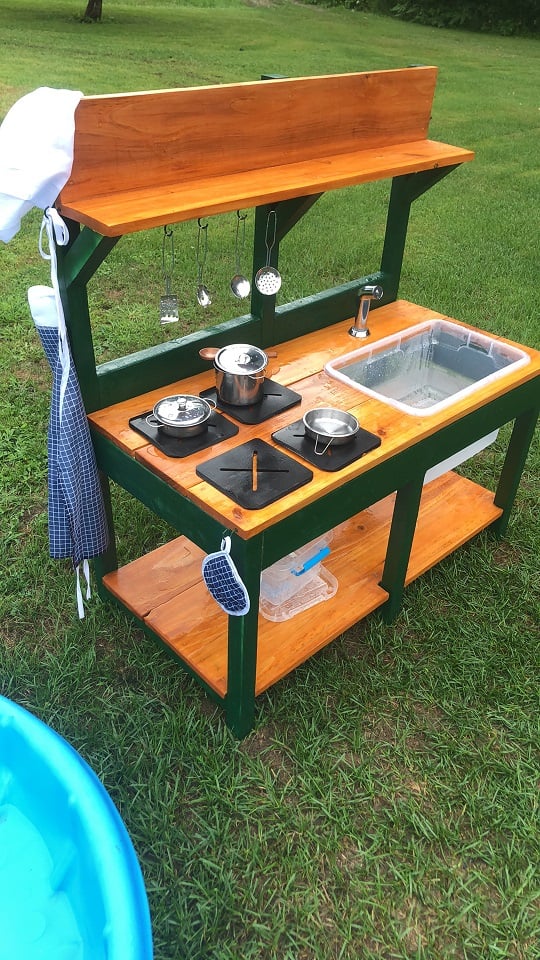
Mud Kitchen
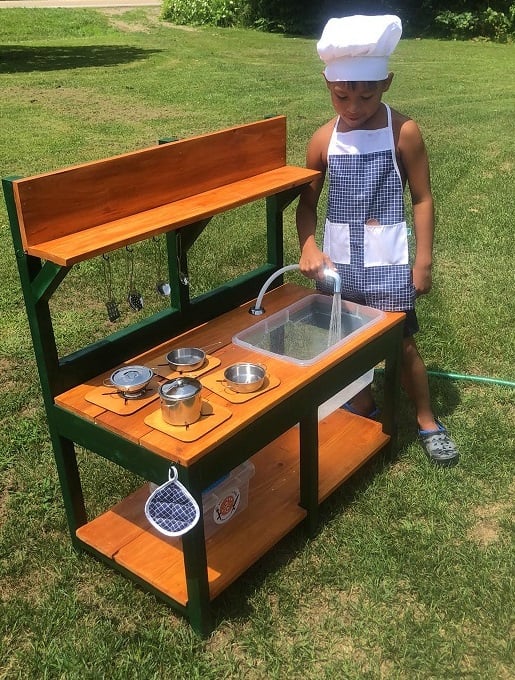
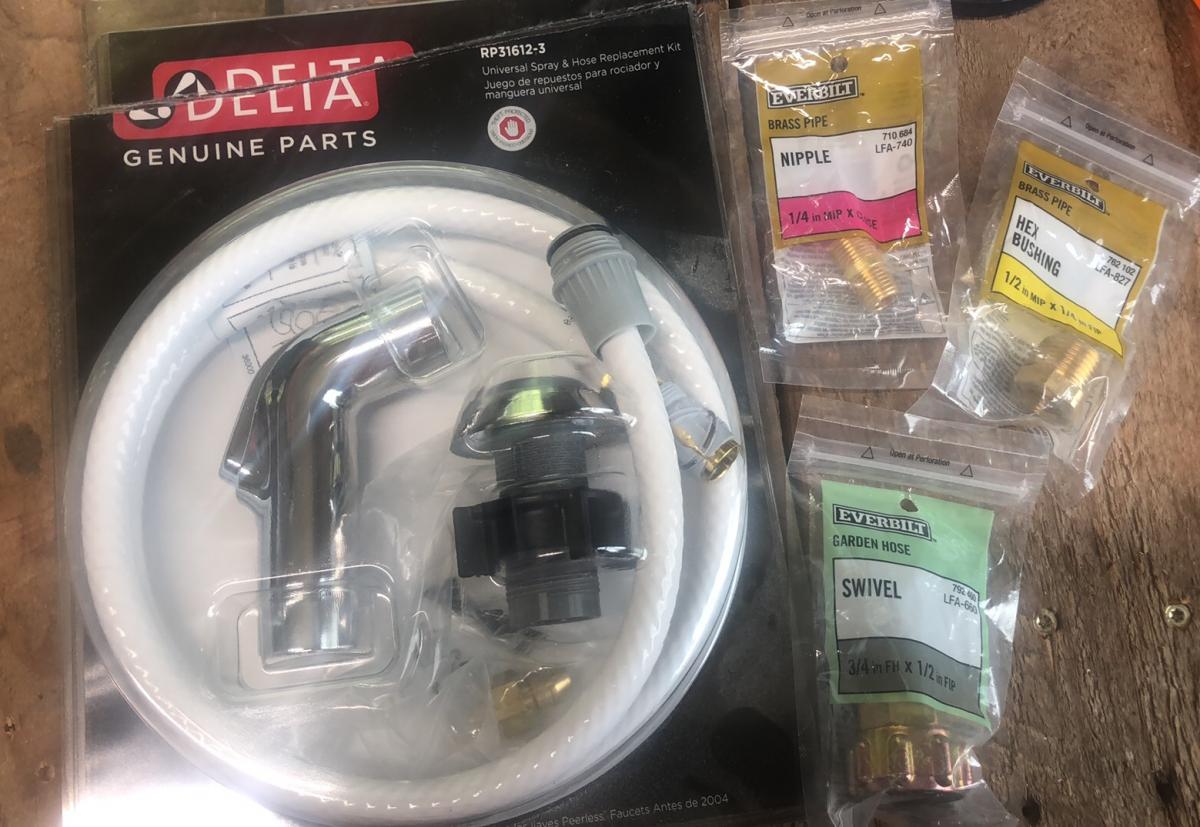
This was my first build, like ever. I am very proud! Props given to my hubby who is a carpenter by trade. I went back and forth on stains and paint colors at home depot. He didn't rush me and was awesome the entire time! He actually picked up the supplies, and is now a fan of the self tap screws! He thought he knew where everything in home depot was, but he had to ask to find those LOL. He wanted to use his new nail gun, but I wanted to follow the plans. The plans are awesome! We decided not to add an oven door just yet. Likely will soon. (Avoiding pinched fingers for now) I also have the knobs for the front, but it was hot and since I had only just stained them, they needed time to dry and second coat yet. (I kind of forgot about them once I finished them with my new dremel) We purchased the hose kit from the kitchen section at home depot. It came with everything, I searched market place and even posted asking if anyone had a used one for sale. No luck. This was $20 and came with everything, the guys at home depot showed me what adapters to get to ensure that it would hook up to our garden hose, and we grabbed those too and they worked perfectly! I messed up cutting one of the angles for the shelf the wrong way, but there was enough scraps for my husband to help me fix it. It was a fun build, and so rewarding to see our kids playing with it! I used my dremel 4300 and it wasn't powerful enough for the thicker wood, so my stove tops are thinner, but he actually enjoys setting them up and spraying them off the table with his hose! I painted the brass hooks green when we were painting the kitchen so they would match. The pots and pans came with the little tote and the apron chef hat and pot holder. It was a perfect finishing touch. *Edit to add photos kitchen hose kit from home depot, reading comments, others had a hard time finding adapters. I suggest taking what you have with you to home depot so they can show you what adapters you need. We needed three because we have a quick attachment on the end of our garden hose, (for our sprayer) now little mans mud kitchen can be connected and disconnected easily!

Built from Plan(s)
Estimated Cost
$75
Estimated Time Investment
Weekend Project (10-20 Hours)
Finish Used
Rust-Oleum Ultra Cover 2X Enamel Spray Paint and Behr Semi-Transparent Waterproofing Exterior Wood Stain and Sealer
Recommended Skill Level
Starter Project
Square Outdoor Table with Built-in Seating
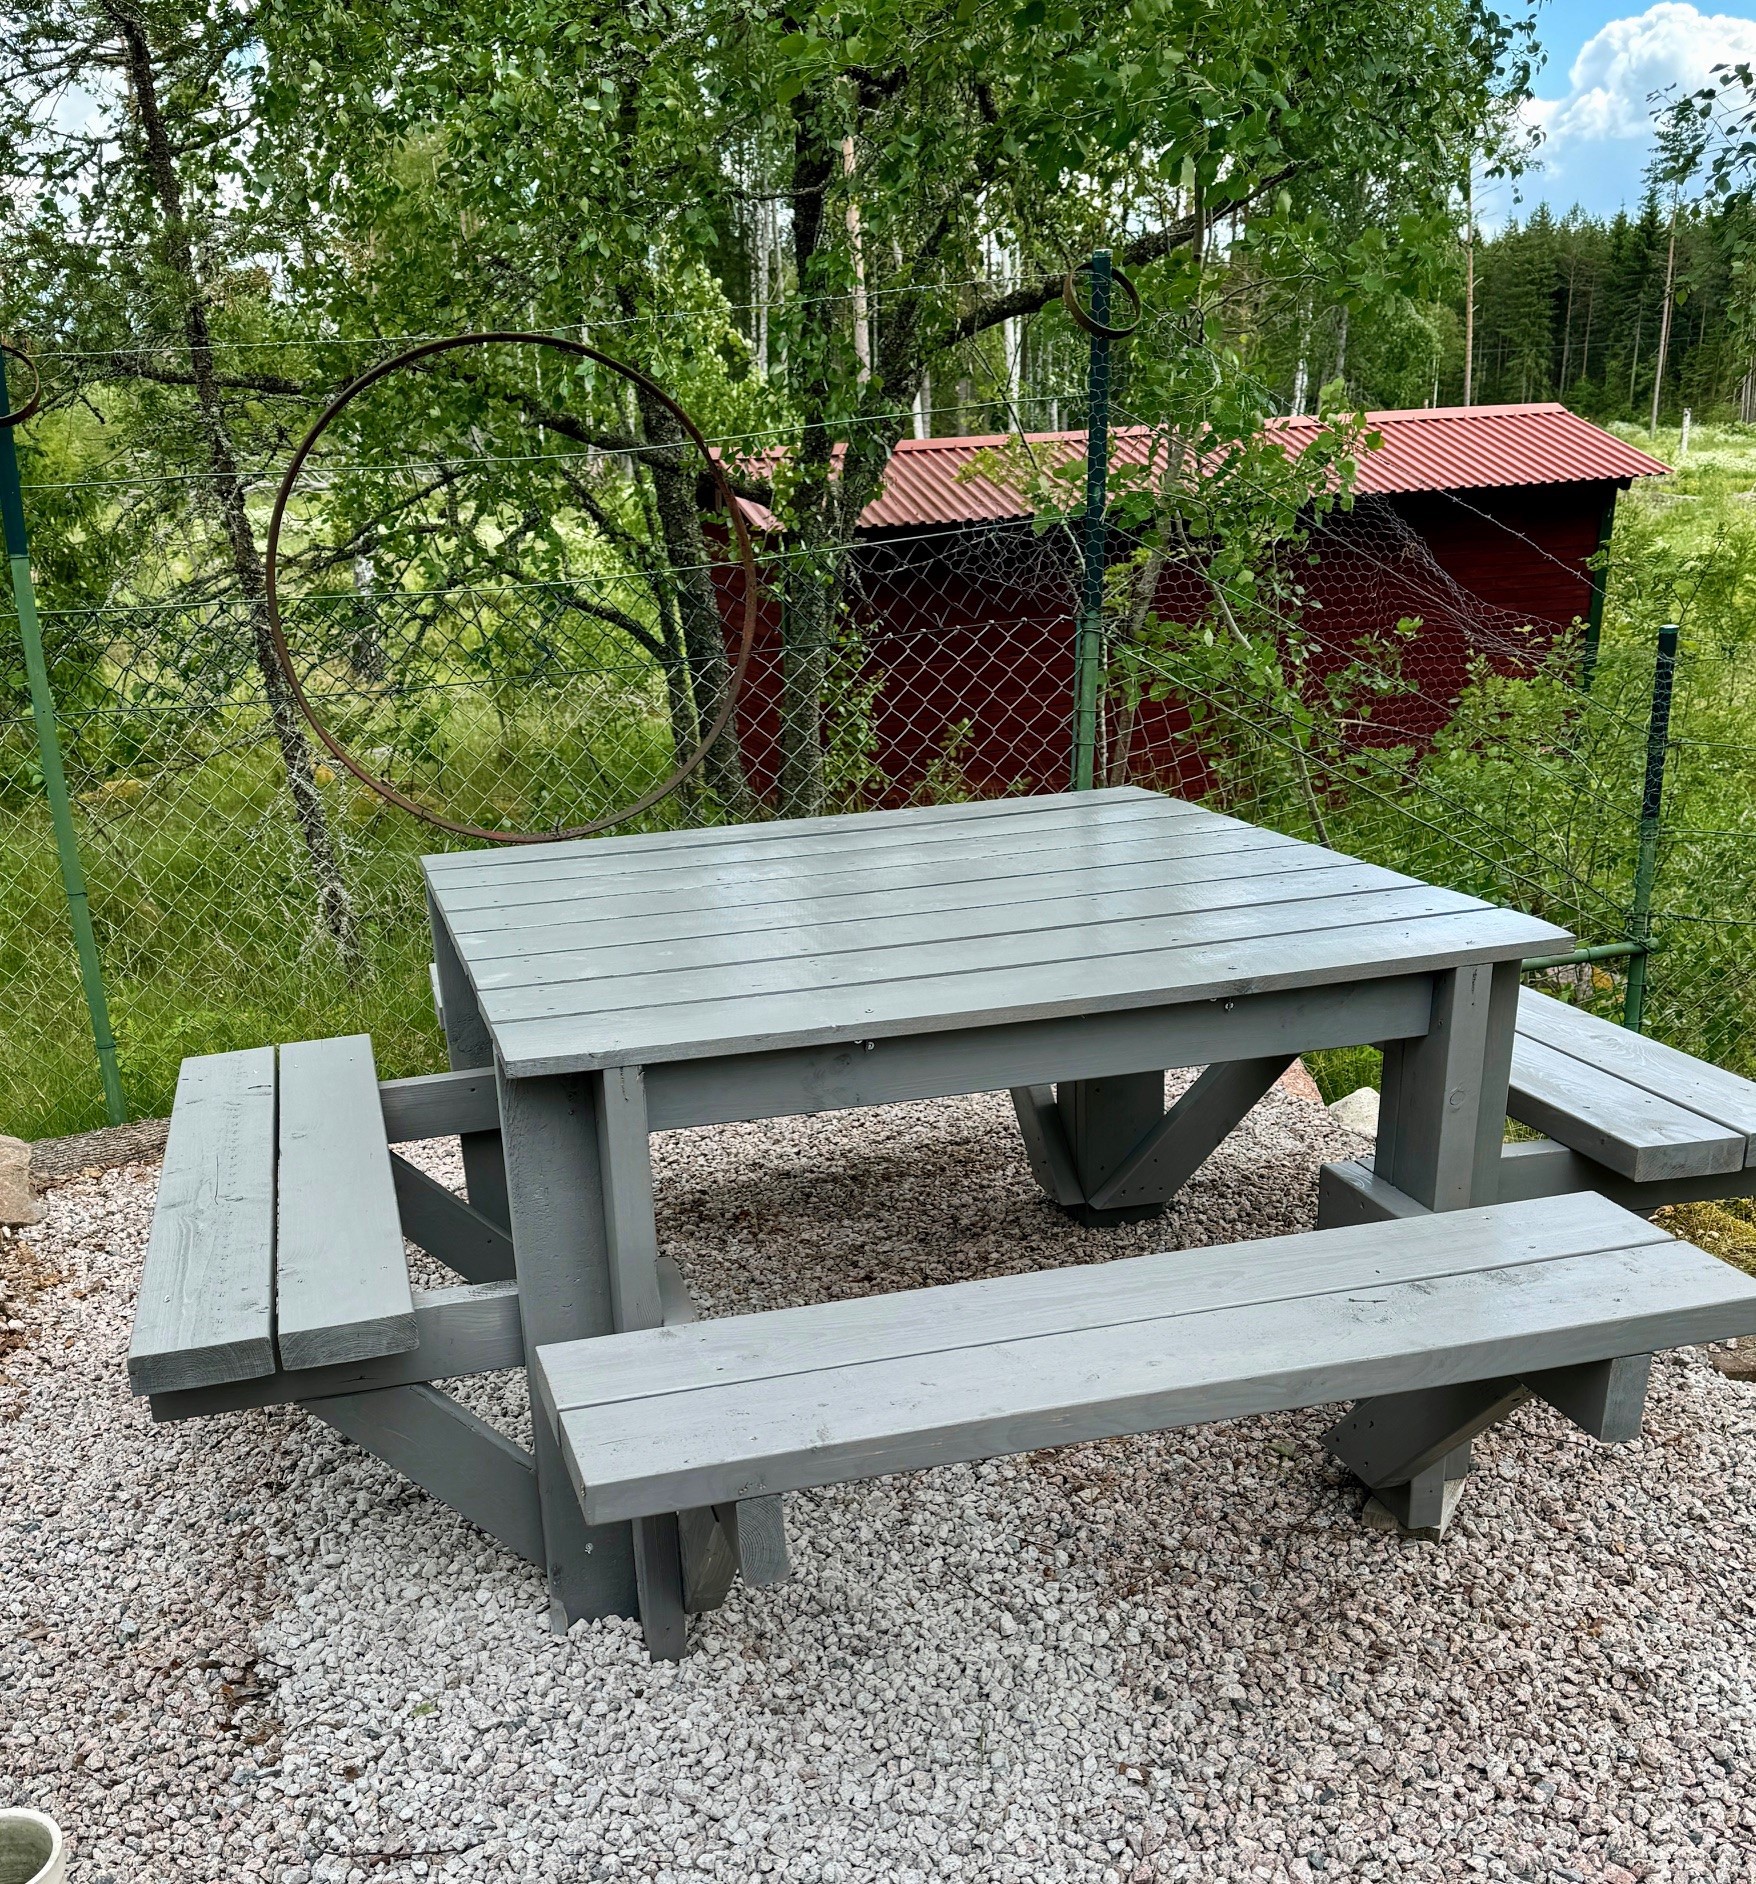
My first Ana White project, so fun to build. Now standing at my summer place in Sweden, ready for a whole summer of picnicking.
Marie Stana
Built from Plan(s)
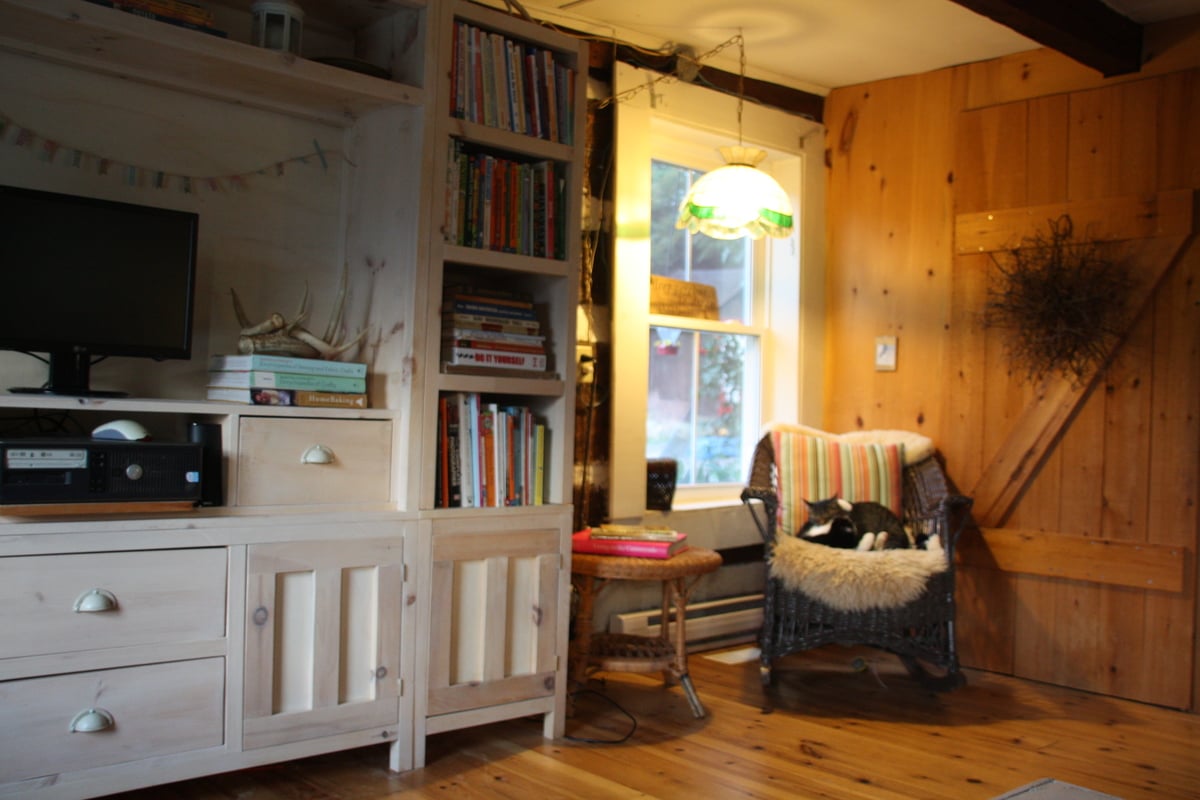
media hutch
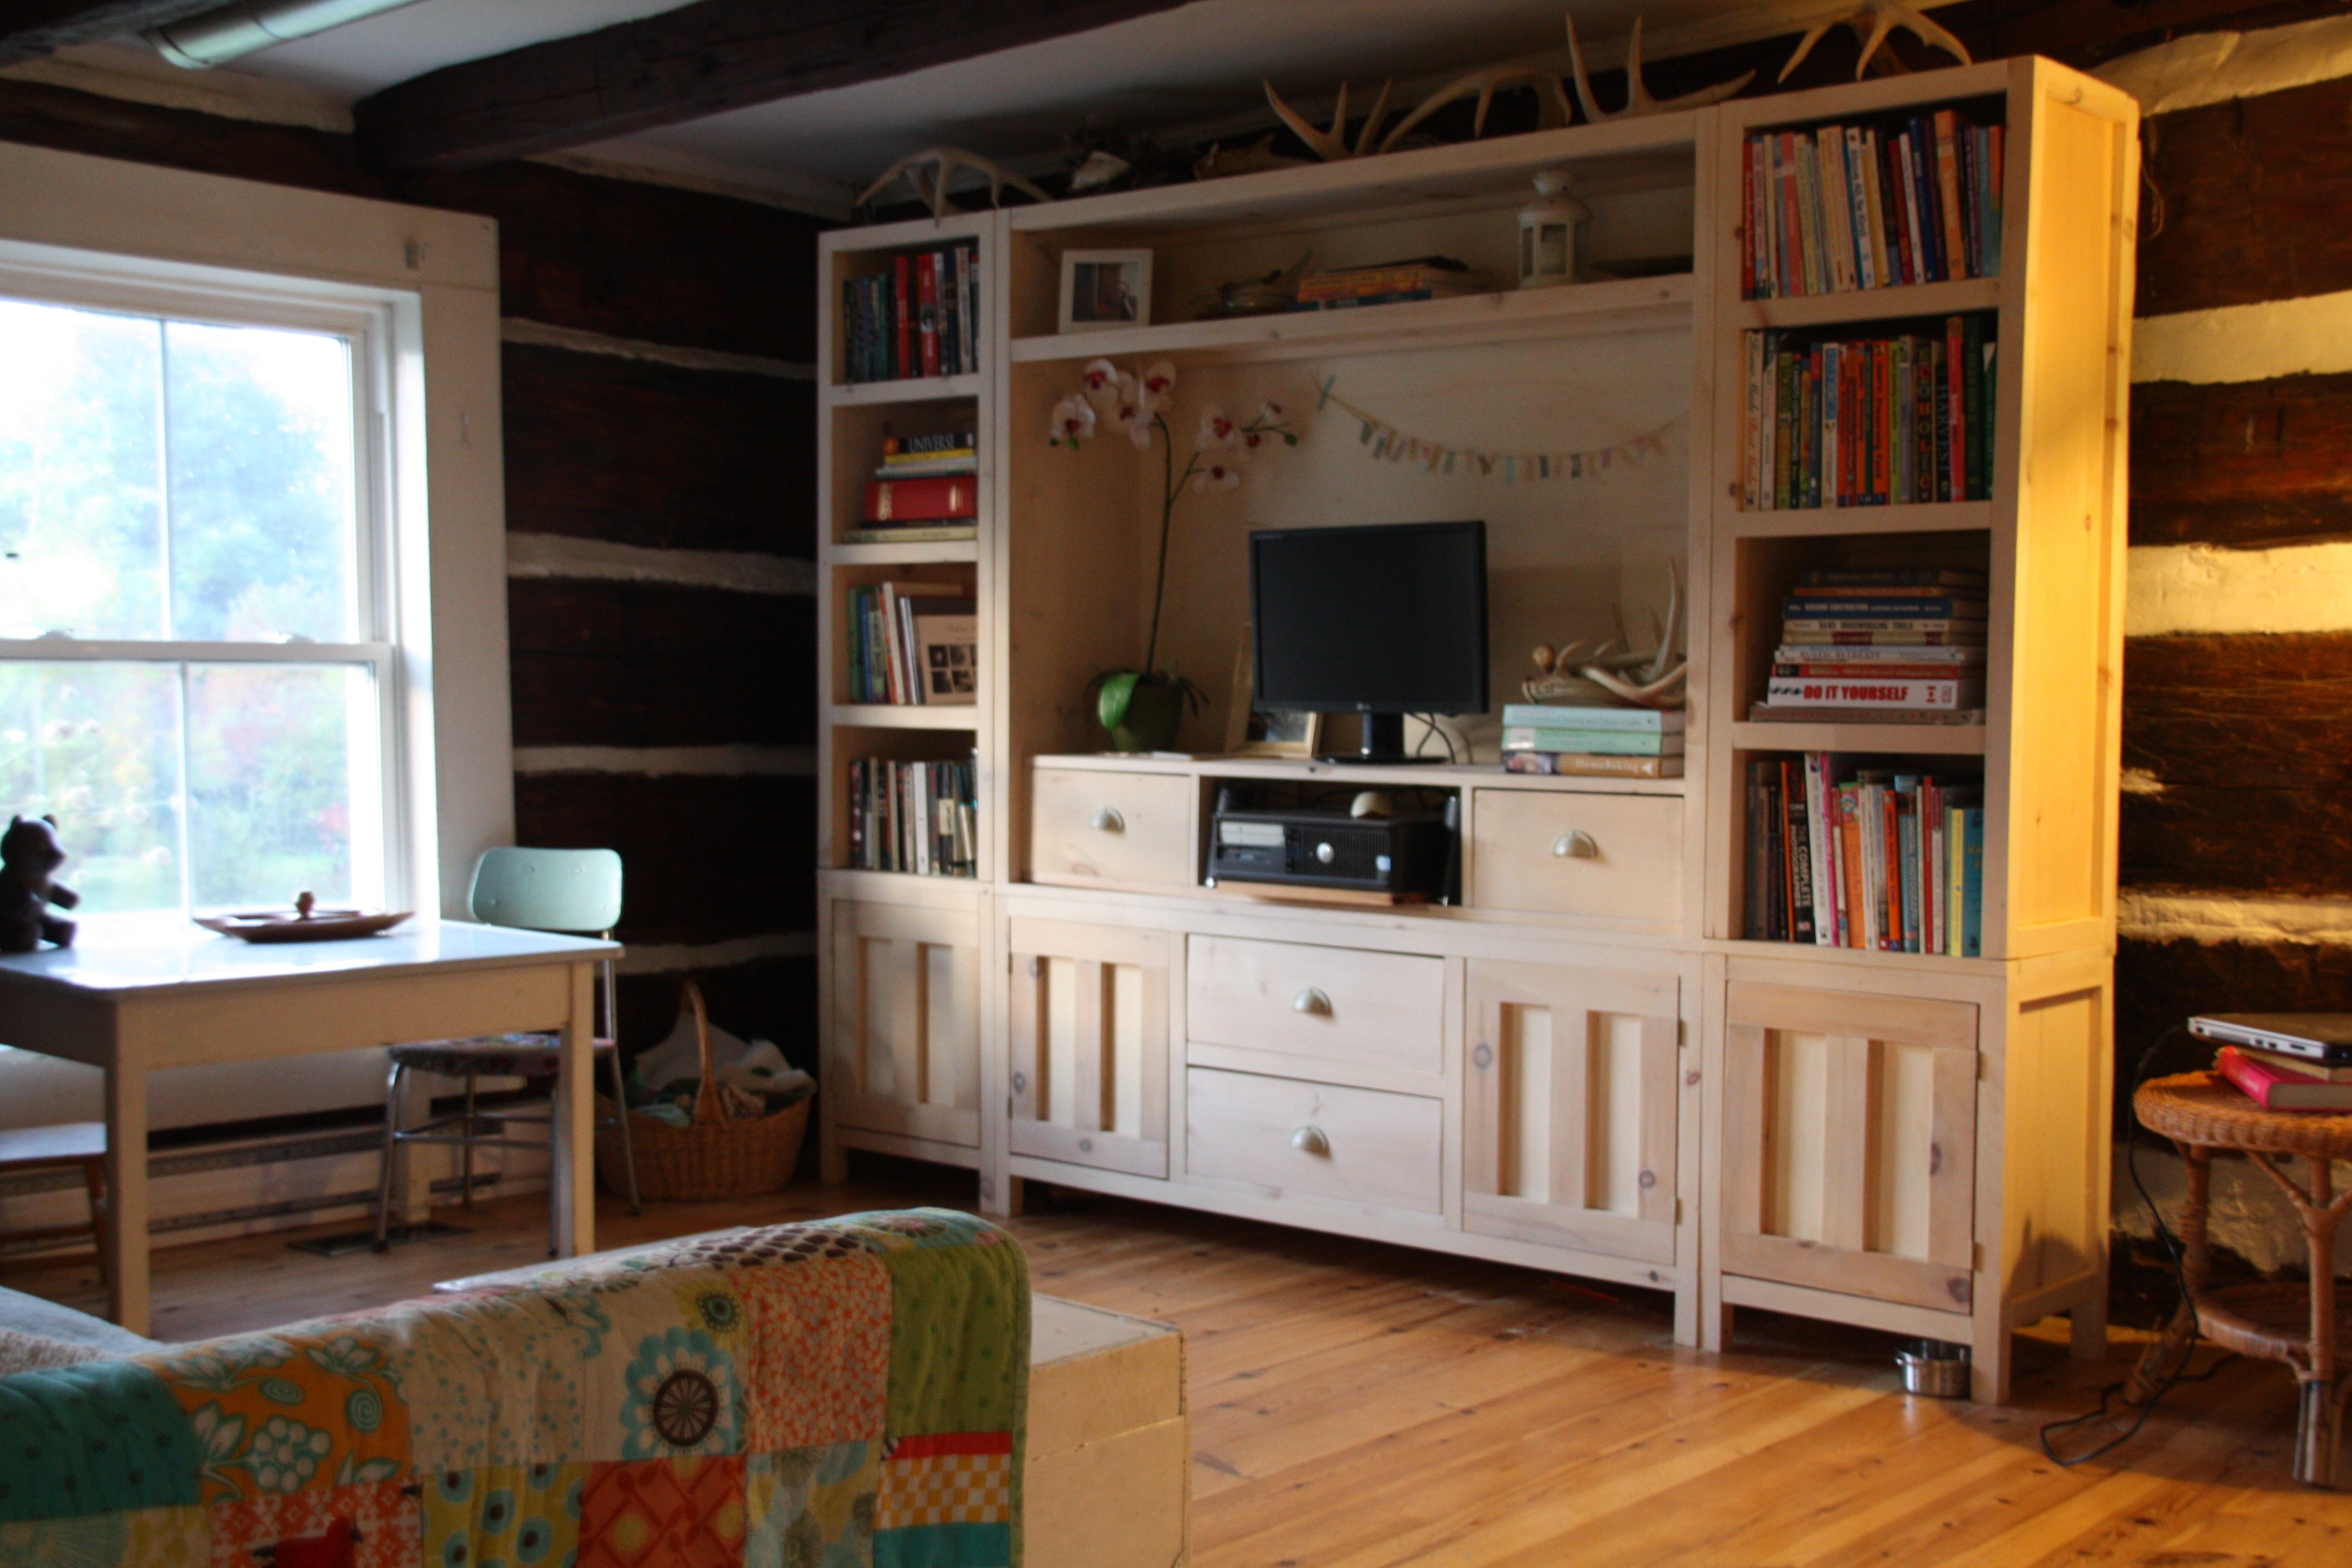
After an entire weekend devoted to work on our entertainment cabinet, it is finally complete.
As many of you may have noticed, we live in a 104 year old cabin so much of the wiring could not be hidden in the walls since they are made of giant logs. One wall contains huge tats of wires, panels and plugs. We did our best to place the biggest pieces of furniture and curtains in front of it to both hide and keep the kids out, but it has been a thorn in my side since day one. We originally thought we would pay someone to build a false wall there, then we thought we would build it ourselves, and then we decided to build a very large cabinet that would nearly perfectly cover most of the wall. These plans fit the bill perfectly and since we had such great luck with Ana White’s plans for our harvest table and Poppy’s bed, we jumped right in.
With the addition of a chop saw (an early birthday present from Mike’s dad) and a Kreg Jig the project, though time consuming, was fairly simple for us newbies. That being said I am glad it is done. It contains a lot of blood, sweat, tears and maybe even a little piece of our marriage.
We used pine and finished it with two coats of “White Oak” stain. We placed four drawer pulls and will be making the remaining door knobs from driftwood or cut antlers. Though we don’t have a big television (actually it is just an old computer with a 20 inch monitor) we decided to leave the large opening since we may one day get a real one again. It cost a bit more than we had anticipated, but when you factor in our learning of new skills, the quality and strength of the piece, and the feeling of pride we feel when looking at it, I would do it all over again.
Last night, the living room was put back together and, while I made supper, Mike chopped wood for the wood box. We sat fireside last night and again early this morning.
Fall is no longer a whisper and I couldn’t be gladder.
Visit www.erinellenbergermarch.com to follow our DIY journey from homeschooling to homesteading to furniture making.
go gently + be wonderful
e.
Built from Plan(s)
Estimated Cost
$400 plus
Estimated Time Investment
Week Long Project (20 Hours or More)
Finish Used
White Oak Minwax Stain
Recommended Skill Level
Intermediate
Comments


Tue, 09/25/2012 - 11:14
Completely awesome!
I love it and the wood looks great in the cabin! And...no wires!!!
We're working on a built in media cabinet for our media room, too! Good times!
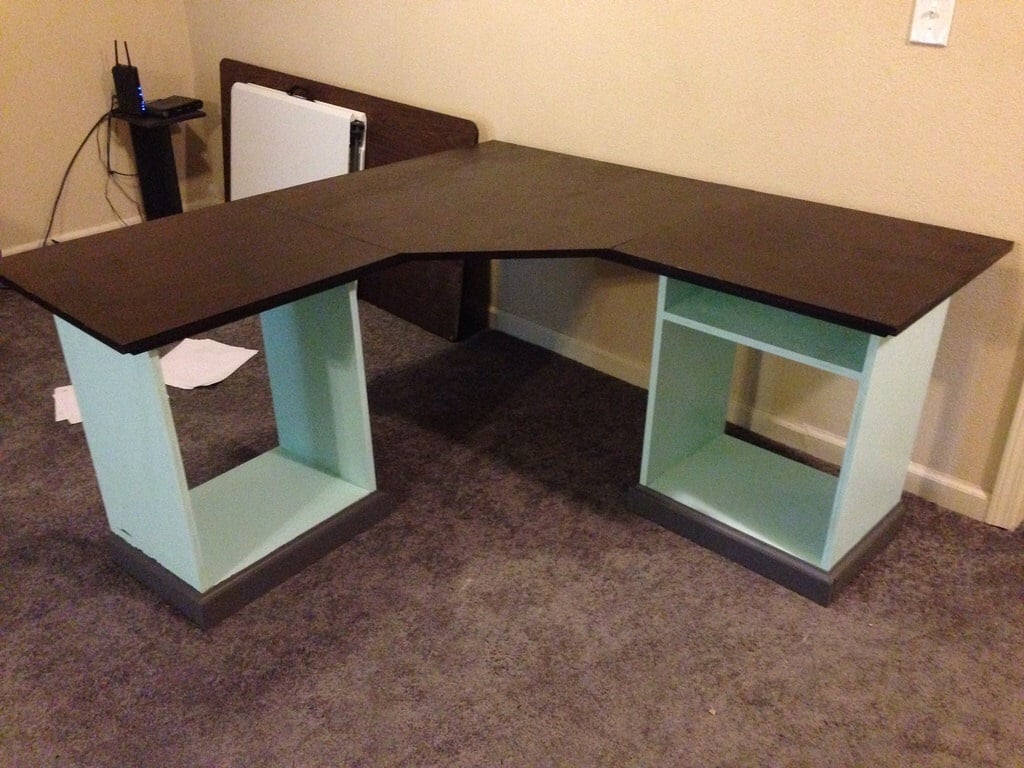
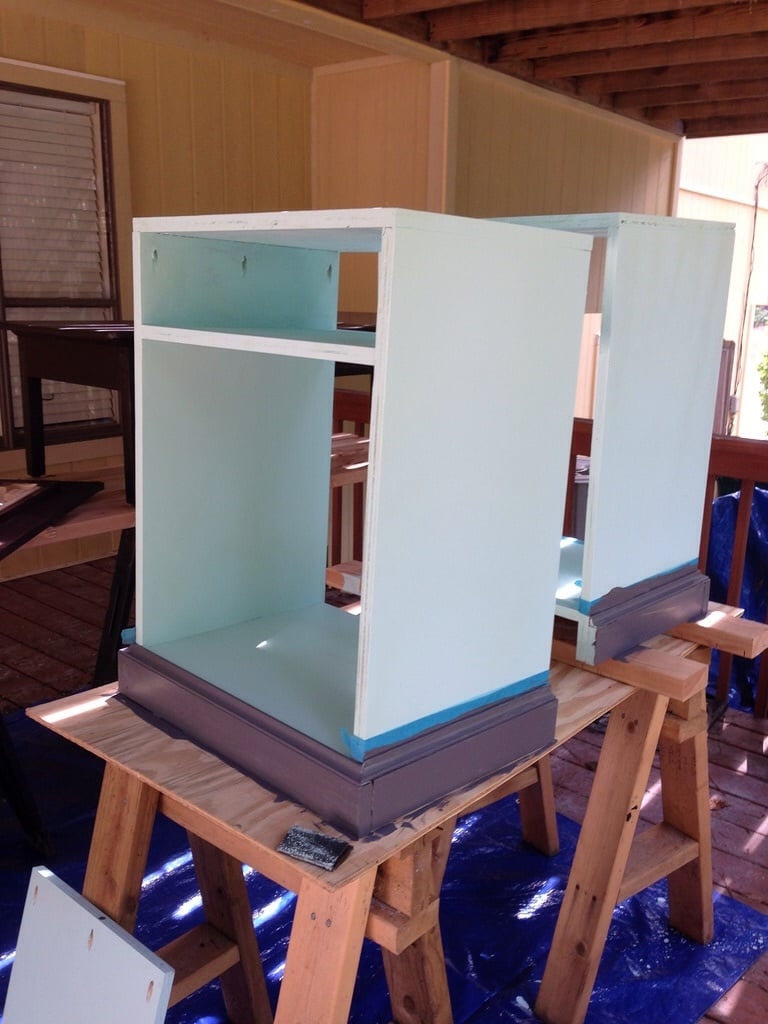
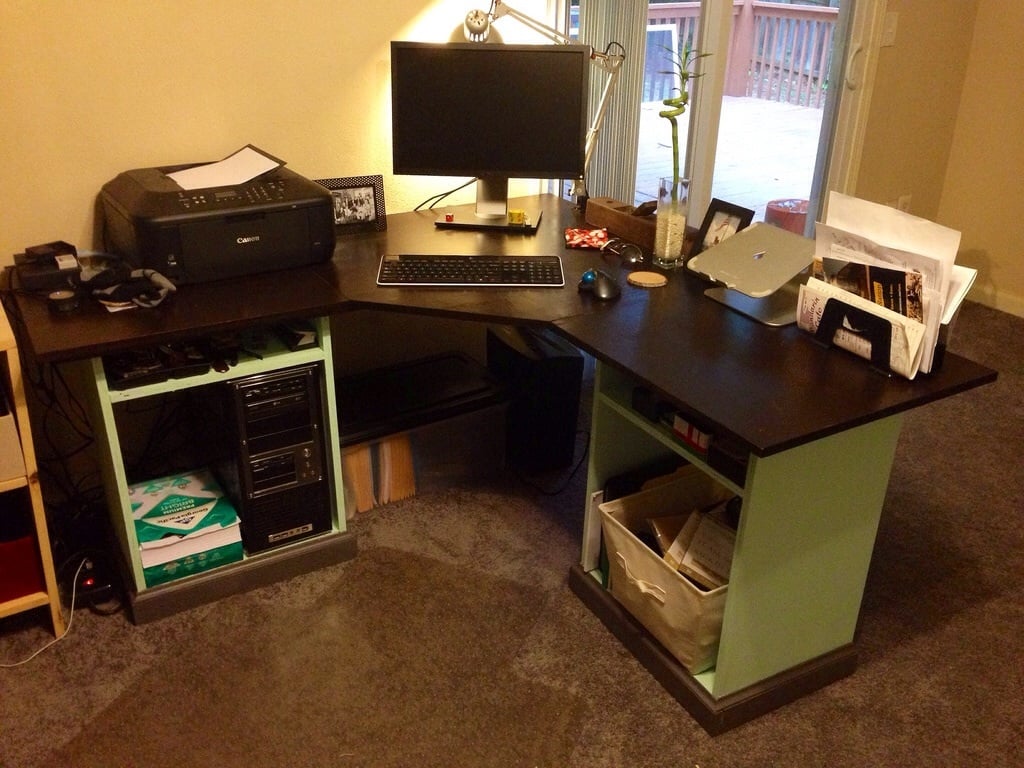
Modular Office L-Shaped Desk
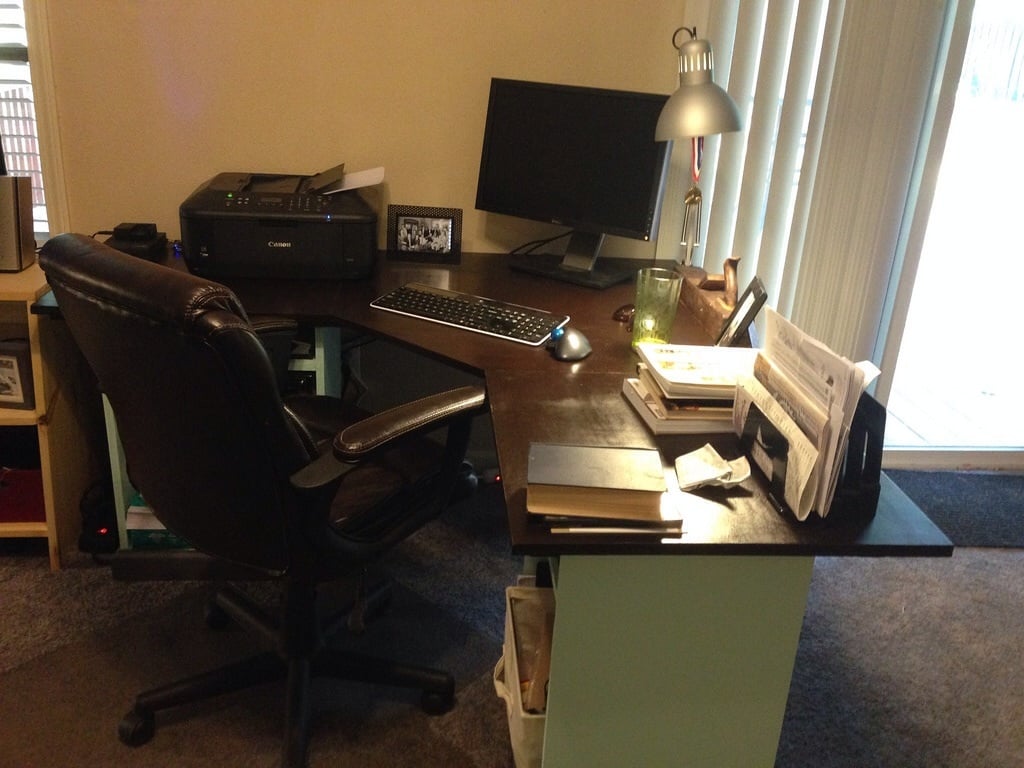
I used baltic birch ply (two sheets) plus some 1x3s and 1x2s. I had to modify the dimensions to suit my space (a wall space between a window and sliding glass door.
The dimensions of the 1x2"s we a little hard to adjust. Mostly my math.
I still need to add drawers, but I like the color contrast between the top, base and trim.
I used General Finishes Java gel stain for the top. General Finishes driftwood for the bottom trim. Basic white paint for the bases. I also used General Finishes High Performance Poly (2 coats).
If I had to do it again, I would paint the bases in the Driftwood color and wax the whole thing. Also, I wouldn't apply the stain in hot sun. It came out really dark and was impossible to wipe off the excess. Also, never leave a ironed on edge banding in the sun. This lost adhesion and I had to re-iron it on.
Fun project. First use of pocket holes.
I love the fact that it's modular and the angle gives you twice as much surface area. I get the feeling this will be with me for years to come in some room or another.
-Dallas
Built from Plan(s)
Estimated Cost
140
Estimated Time Investment
Weekend Project (10-20 Hours)
Finish Used
General Finishes Java Gel Stain
General Finishes Milk Paint - Driftwood
White Paint
General Finishes High Performance Polyurethane
General Finishes Milk Paint - Driftwood
White Paint
General Finishes High Performance Polyurethane
Recommended Skill Level
Beginner
Comments
Wed, 08/27/2014 - 21:01
I want to make this unit! Looks great
So glad to have seen this post. I am thinking of making this desk for my daughter. Have been looking for a corner desk unit with open file bases. I found Ana's site and have made the sandbox w/bench plan, and it was not that hard. Of course I some help from a family member, and I think he would be help out with this plan as well. I am not sure of what a pocket hole is, can you tell me in laywoman's terms what that would be. Just to be sure, these plans consist of Office Corner Desktop Plan and the Modular Office Narrow Open File Base Plan. Also, did you use a Kreg Jig? I have found one at a local woodworking hobby shop, but i am wondering if the expense is worth it, any thoughts?
Thu, 08/28/2014 - 10:38
Hi Jackie,
Hi Jackie,
Ana has provided an informative video about drilling pocket holes with the Kreg jig, for those who are wondering how it's done. You'll find it here: http://ana-white.com/2011/11/drilling-your-first-pocket-hole and then you can decide if you think it will be worth it to spend the money on a jig.
Also, if you're concerned about the price, look around on the internet (like Amazon.com for example) and you'll see that there are different models available at various prices. The junior model is quite inexpensive and you might be able to buy it at a better price than the hardware store sells it for.
Good luck with your project!
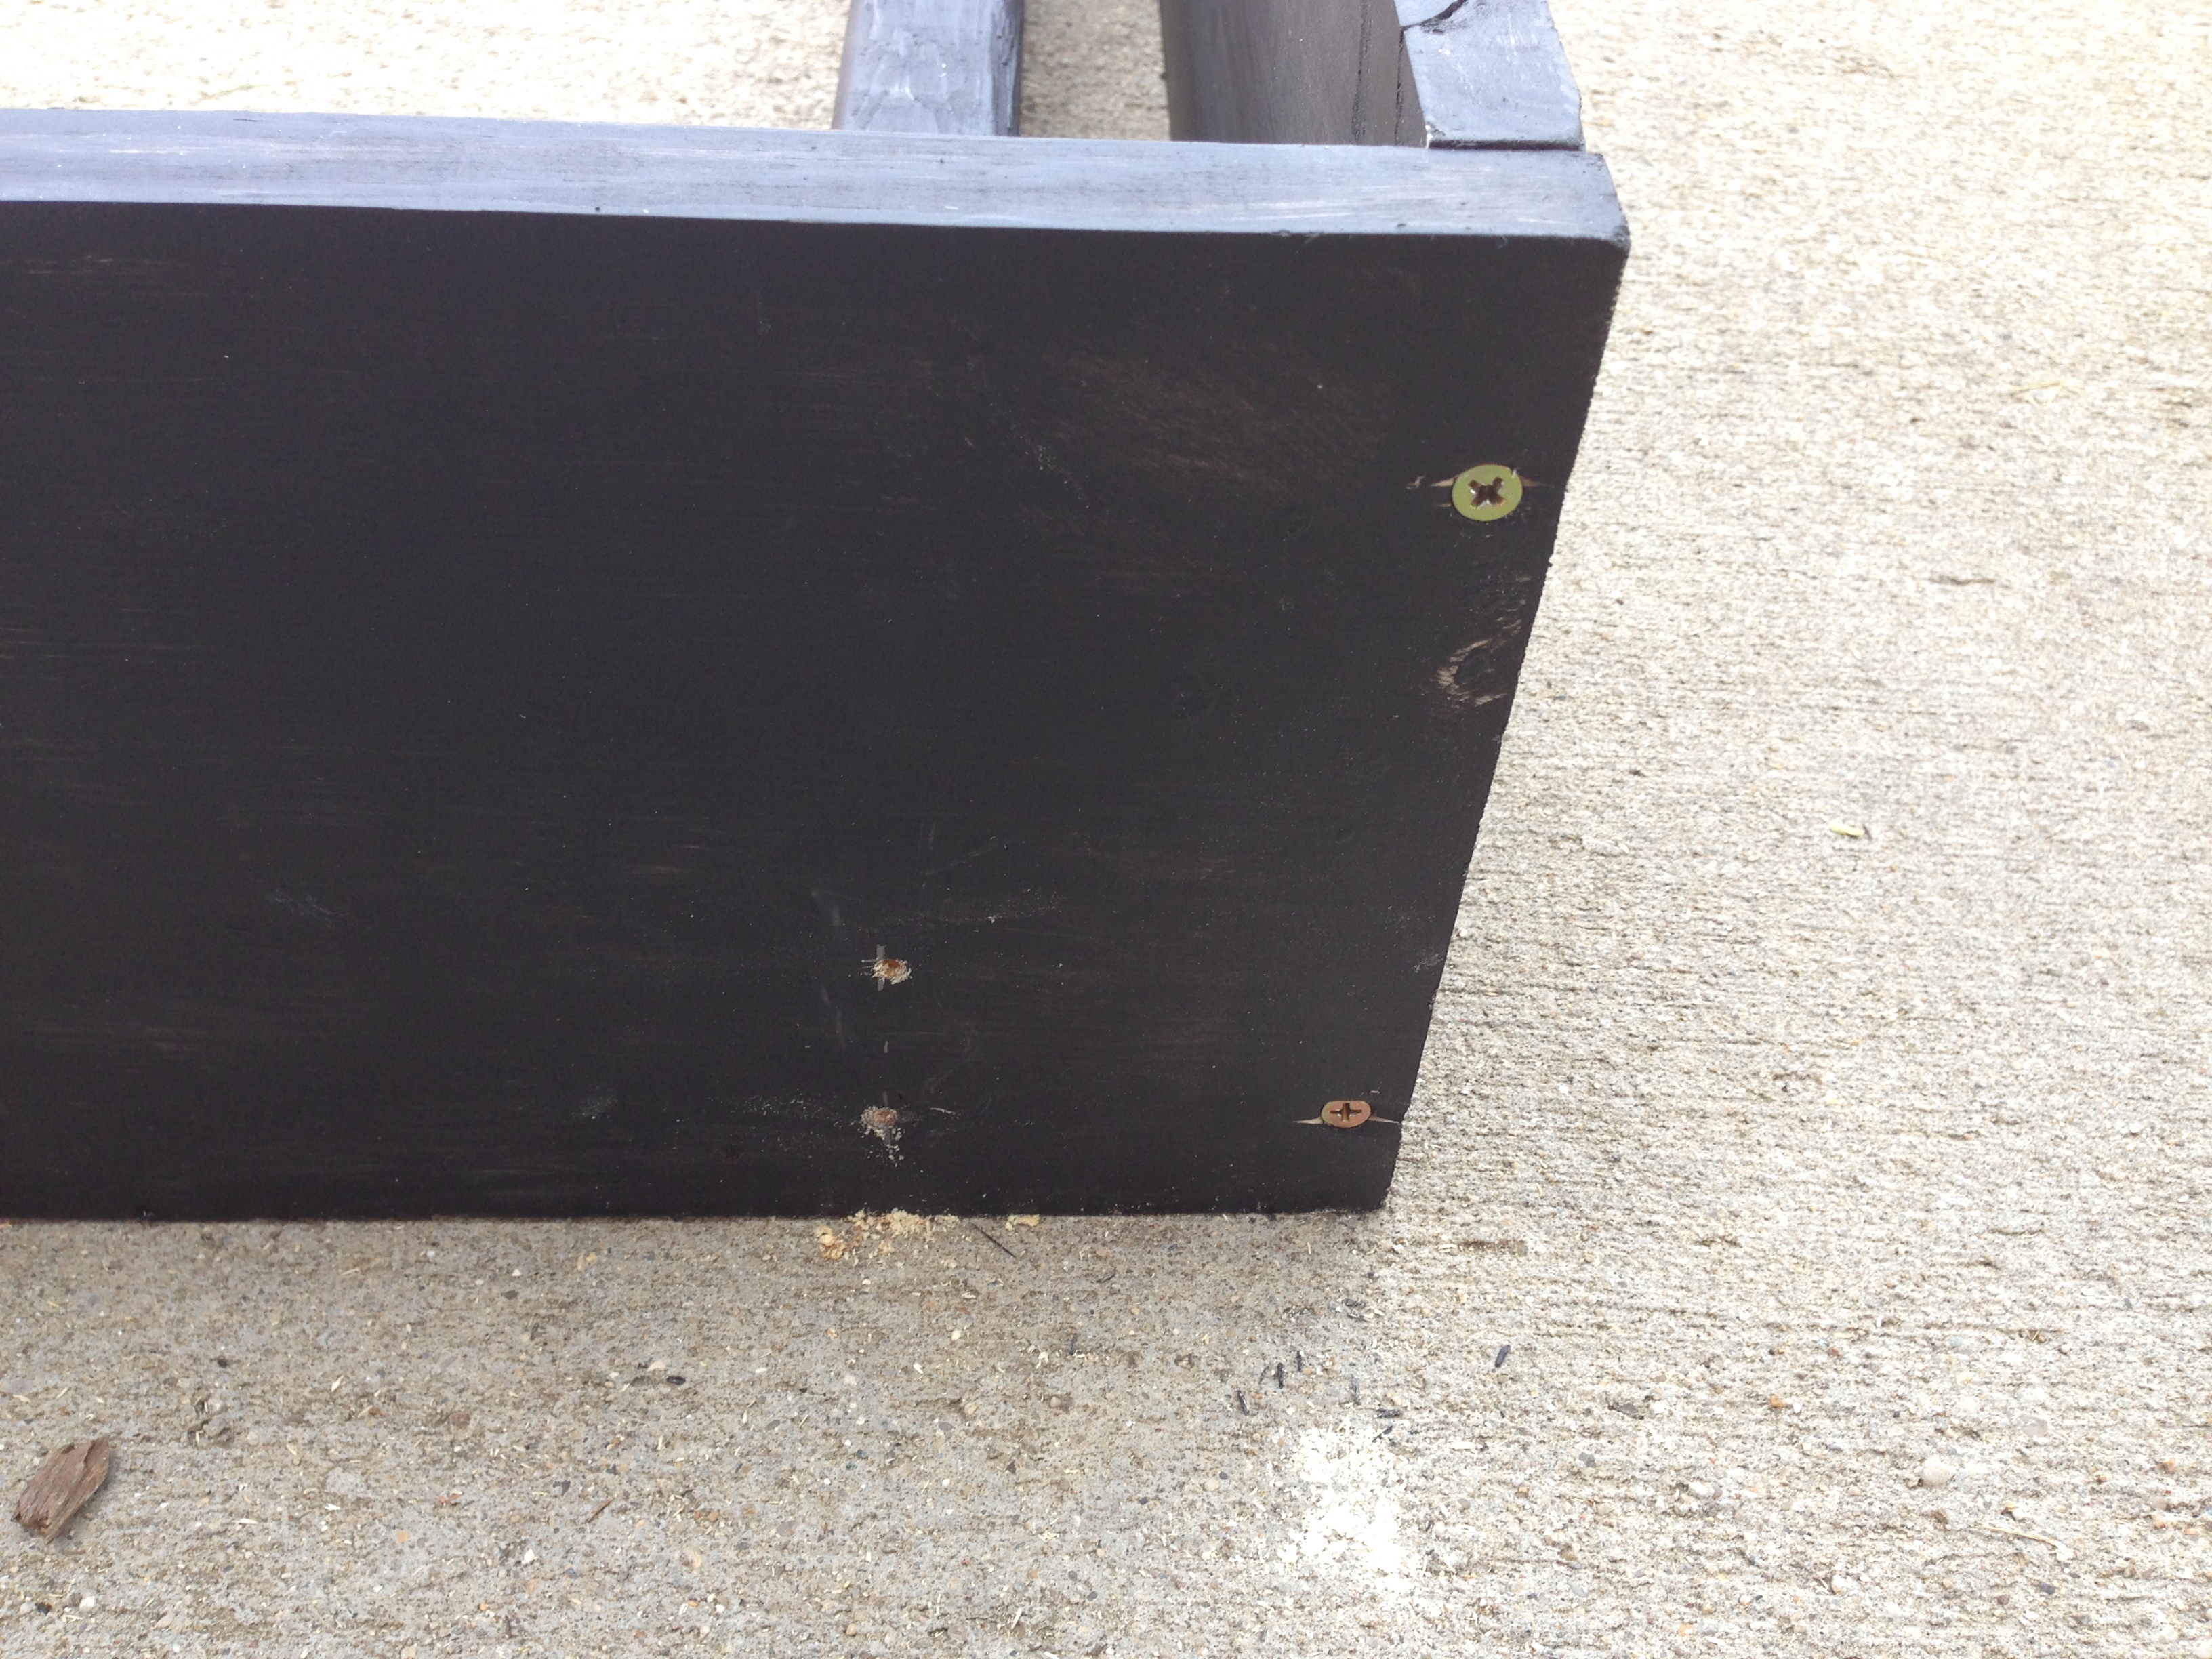
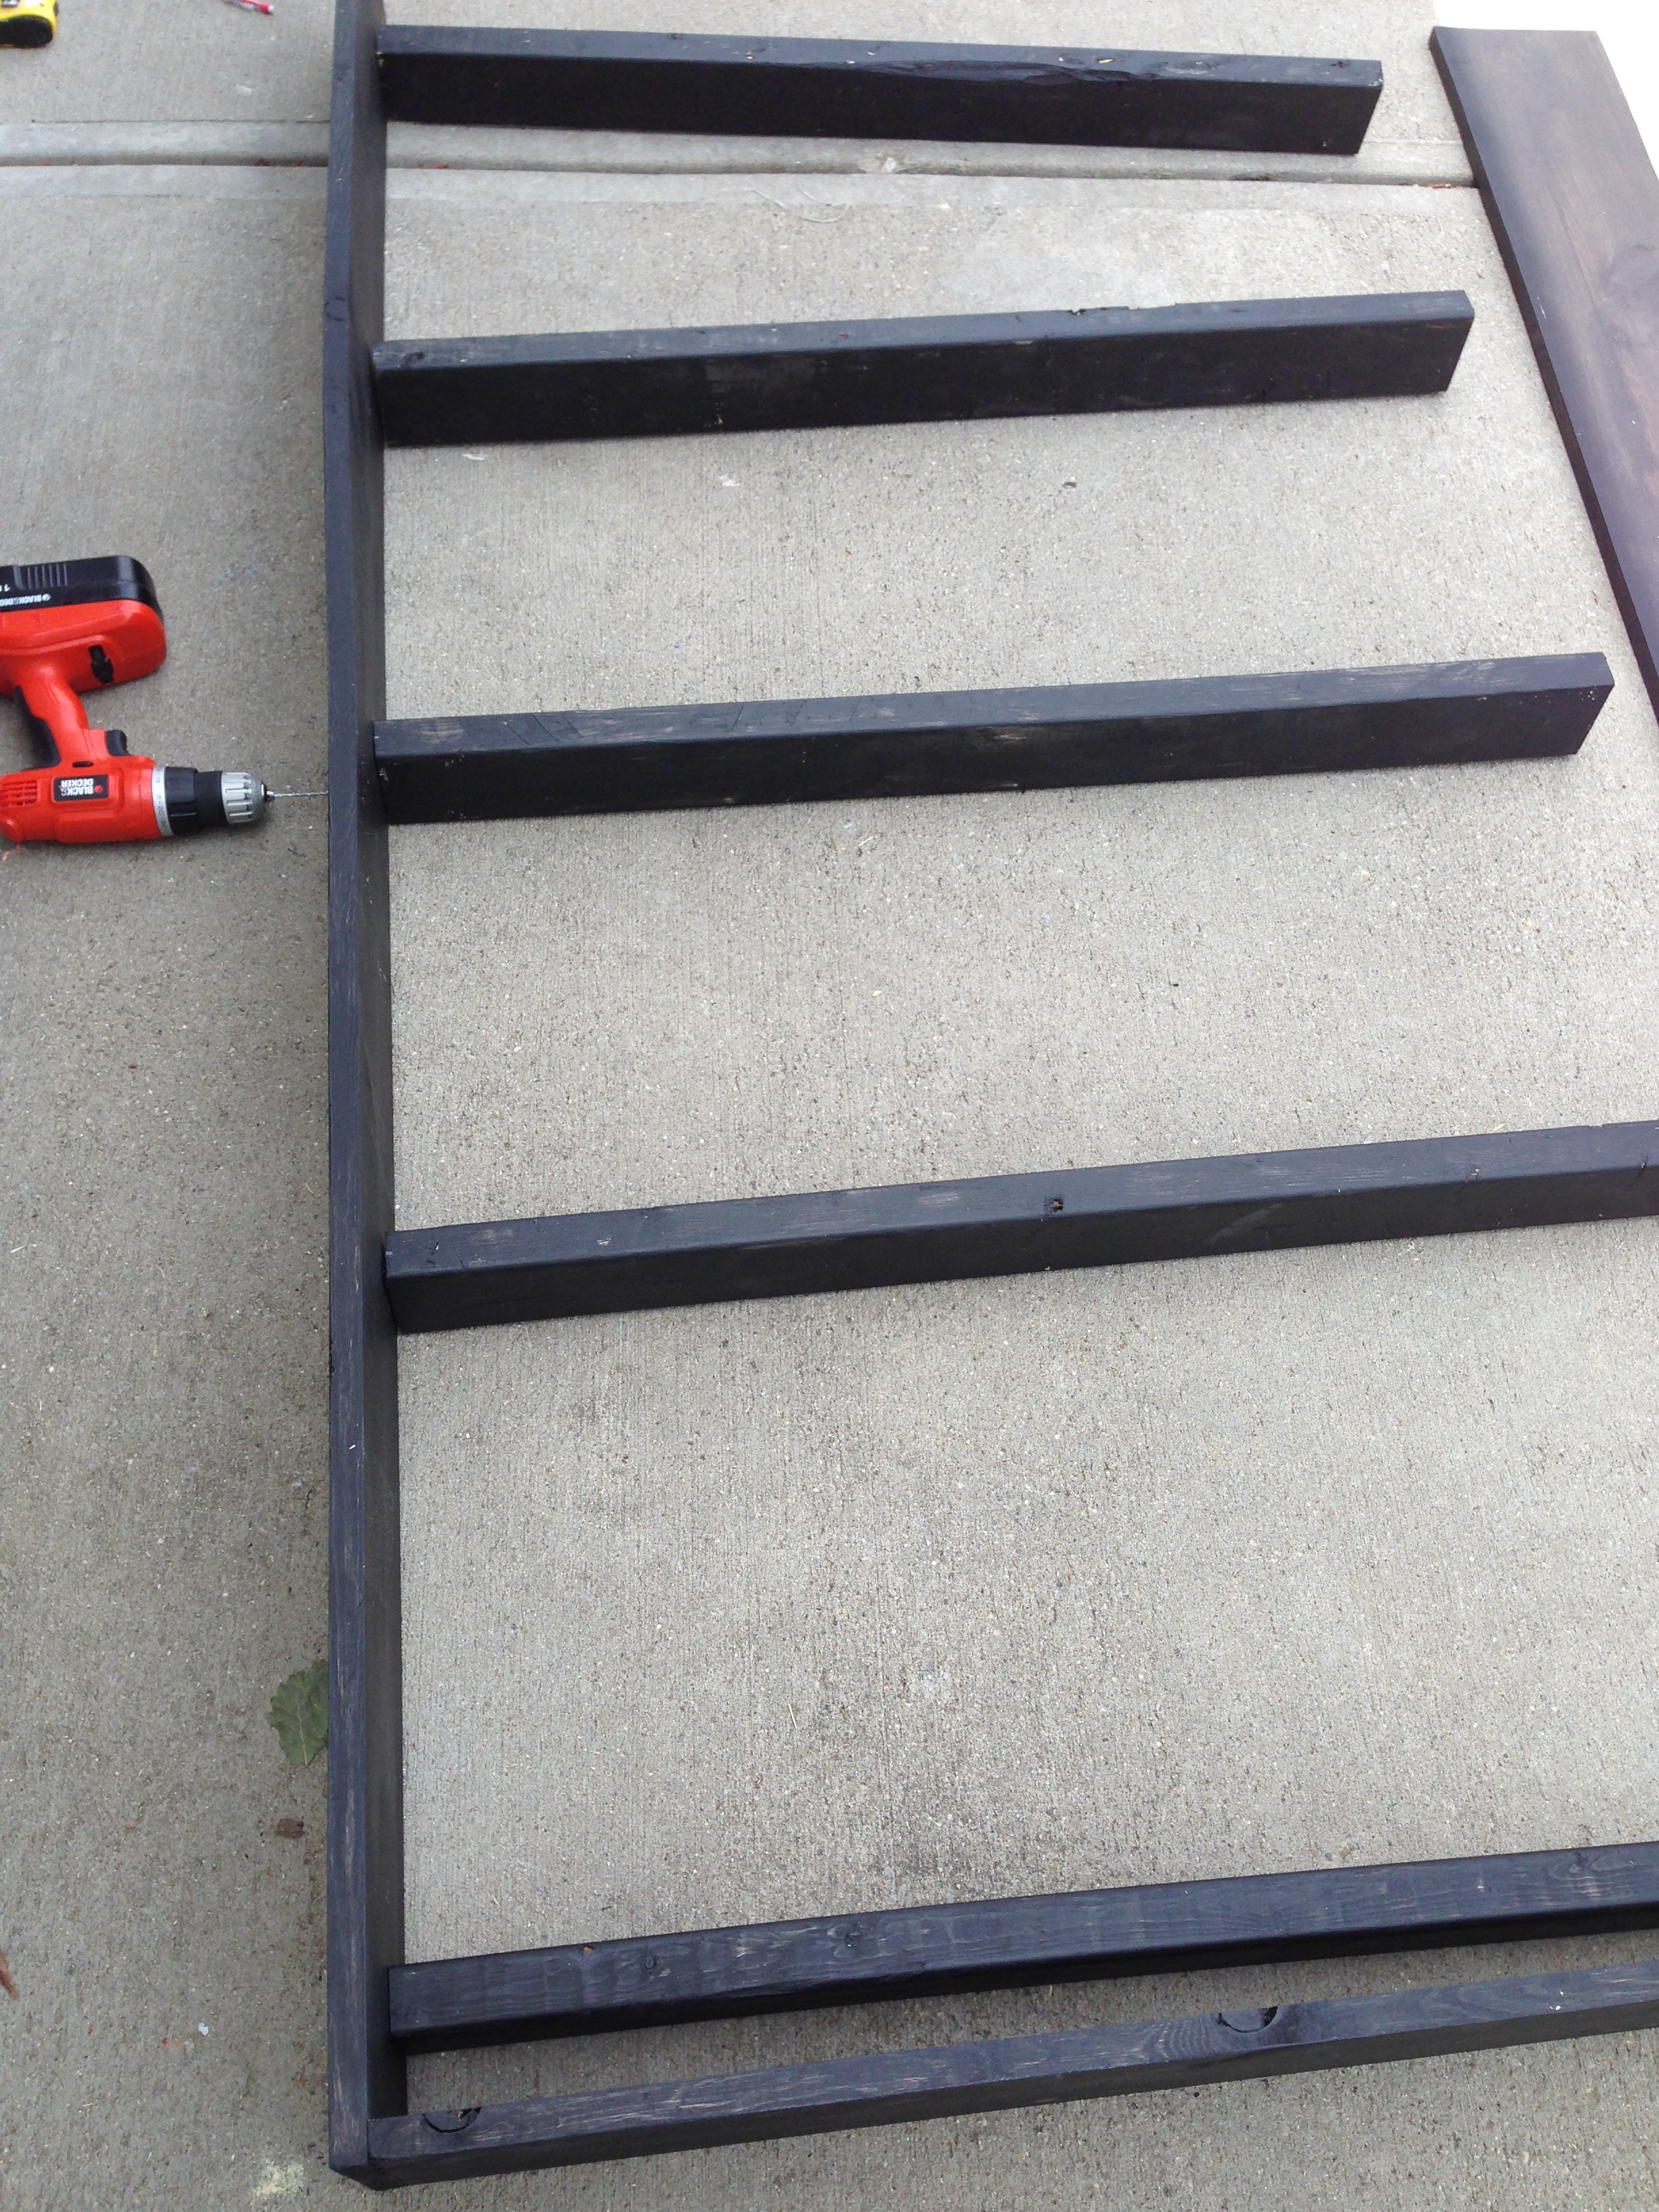
Twin bed frame

We used the plans to create a basic bedframe. I have used the farmhouse bed plans before and really liked the way this frame went together. It is cheap, easy, and nicer than a metal frame.
Built from Plan(s)
Estimated Cost
$20
Estimated Time Investment
Afternoon Project (3-6 Hours)
Recommended Skill Level
Starter Project
Farmhouse coffee table
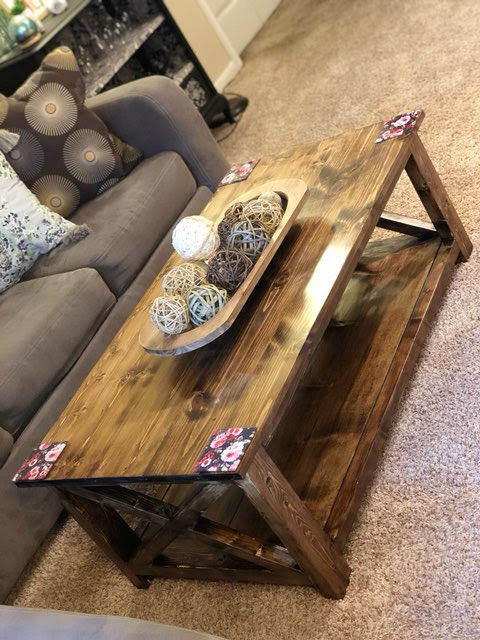
I built this for my daughter. I had to alter the plans just a little, but all of Ana's plans are so well done, that it is easy to change them a little and make them personal. Thank you Ana.
Built from Plan(s)
Window Banquette Bench
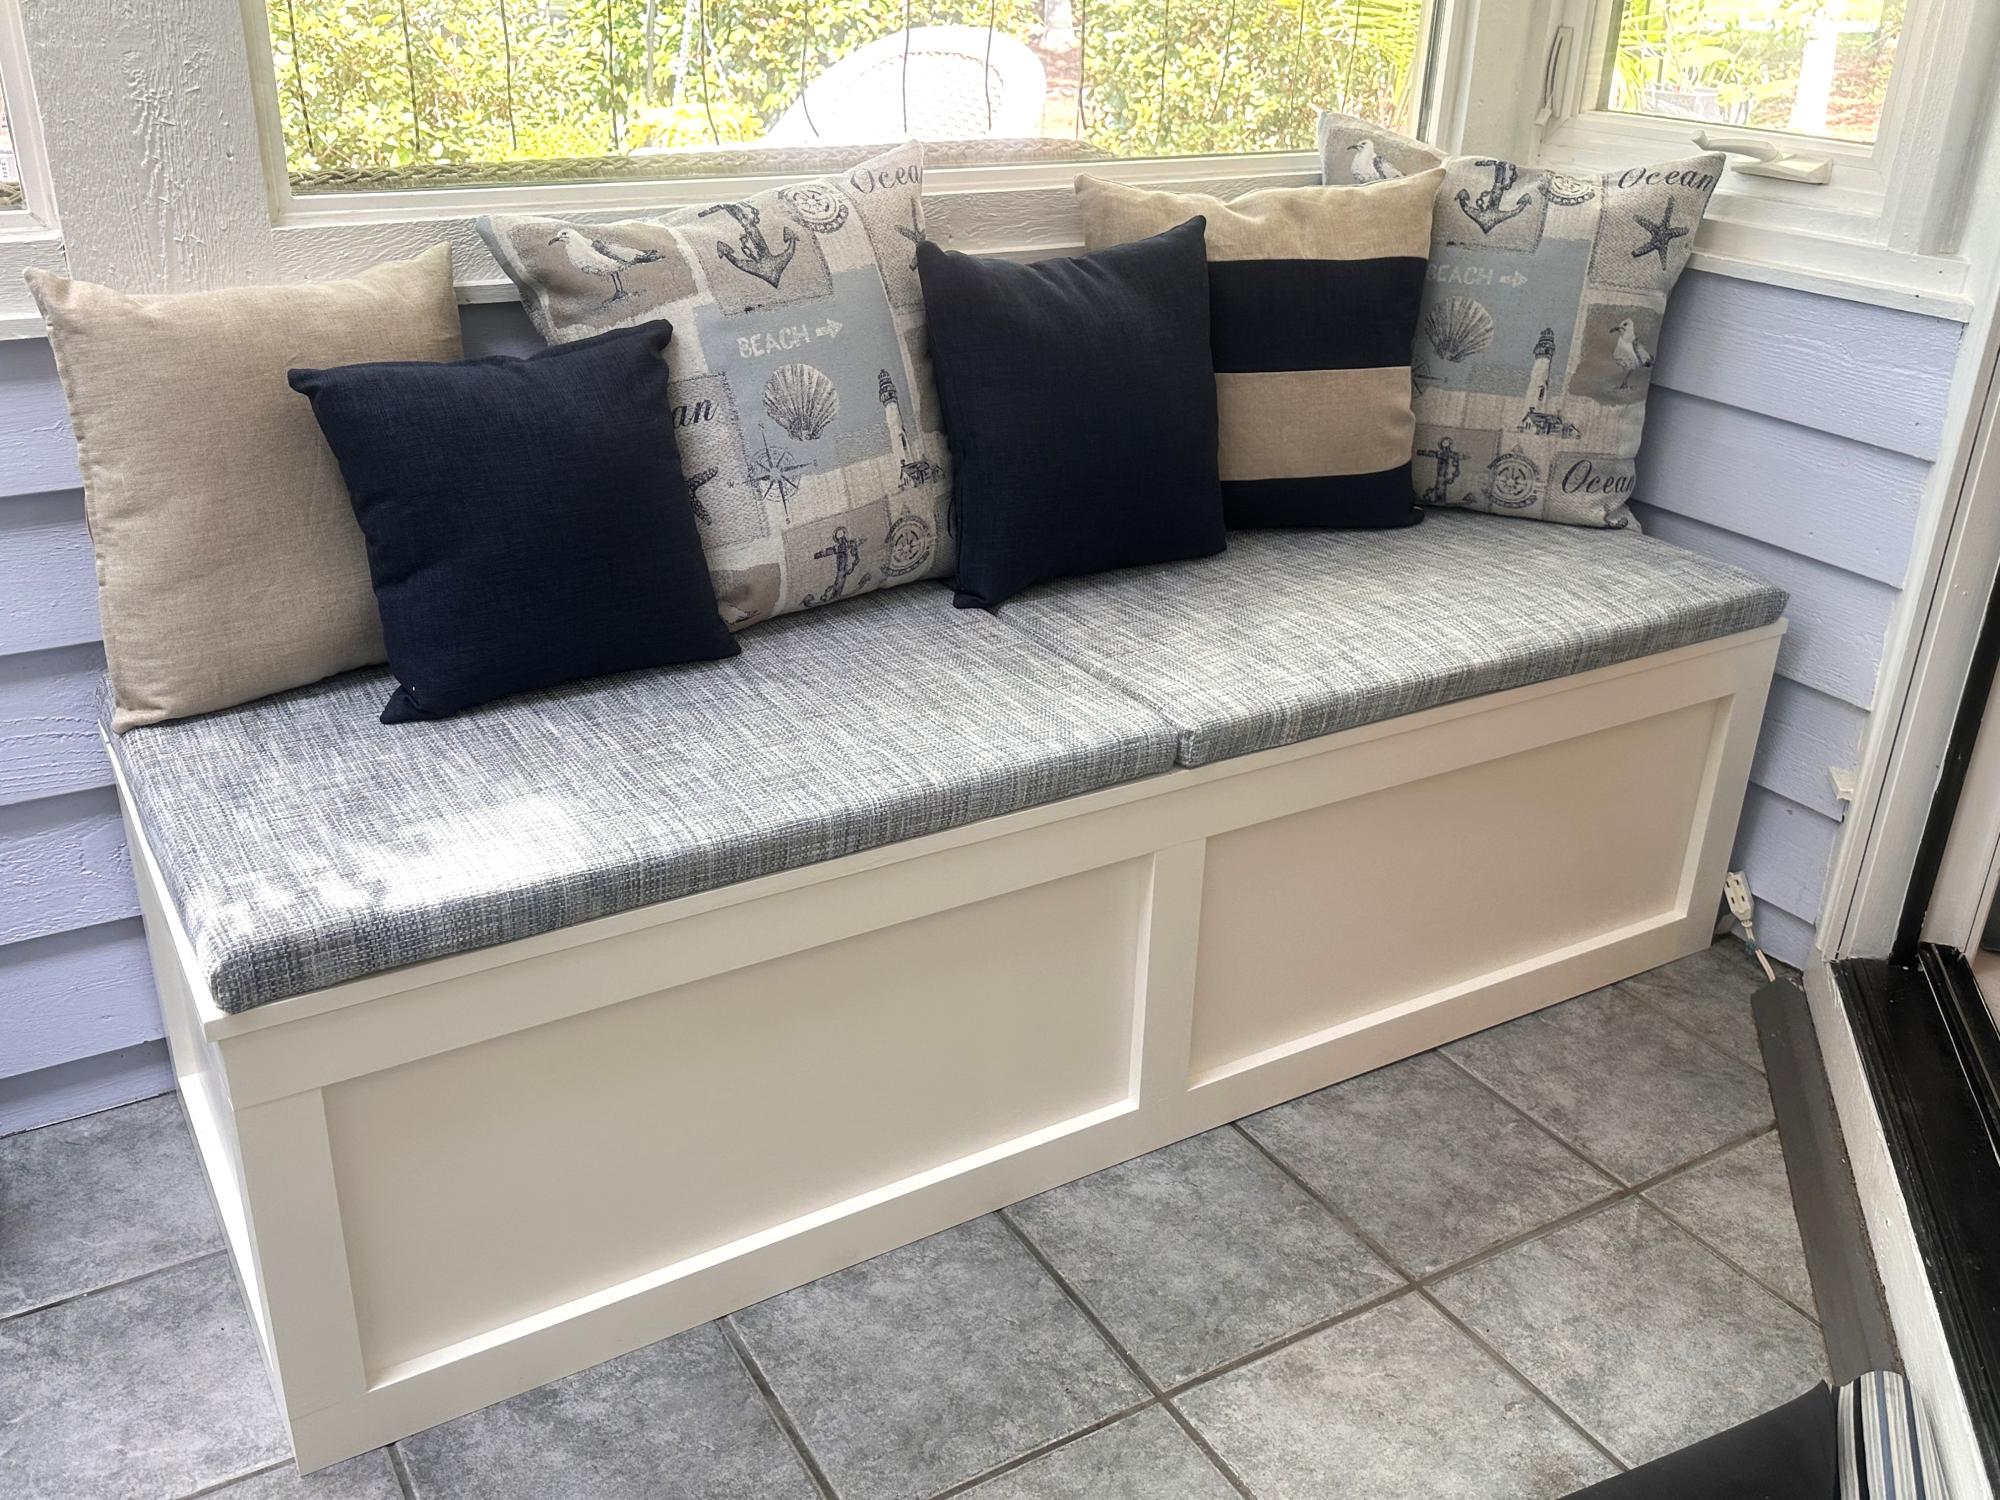
My husband and I used the plans from Ana White’s Banquette bench with a few minor tweaks. We placed our single freestanding(not mounted to the wall)bench in our Carolina room. I also made bench cushions and pillows to make this a comfy place to watch the birds or the golfers out back. It was an easy and fast project to complete.
Built from Plan(s)
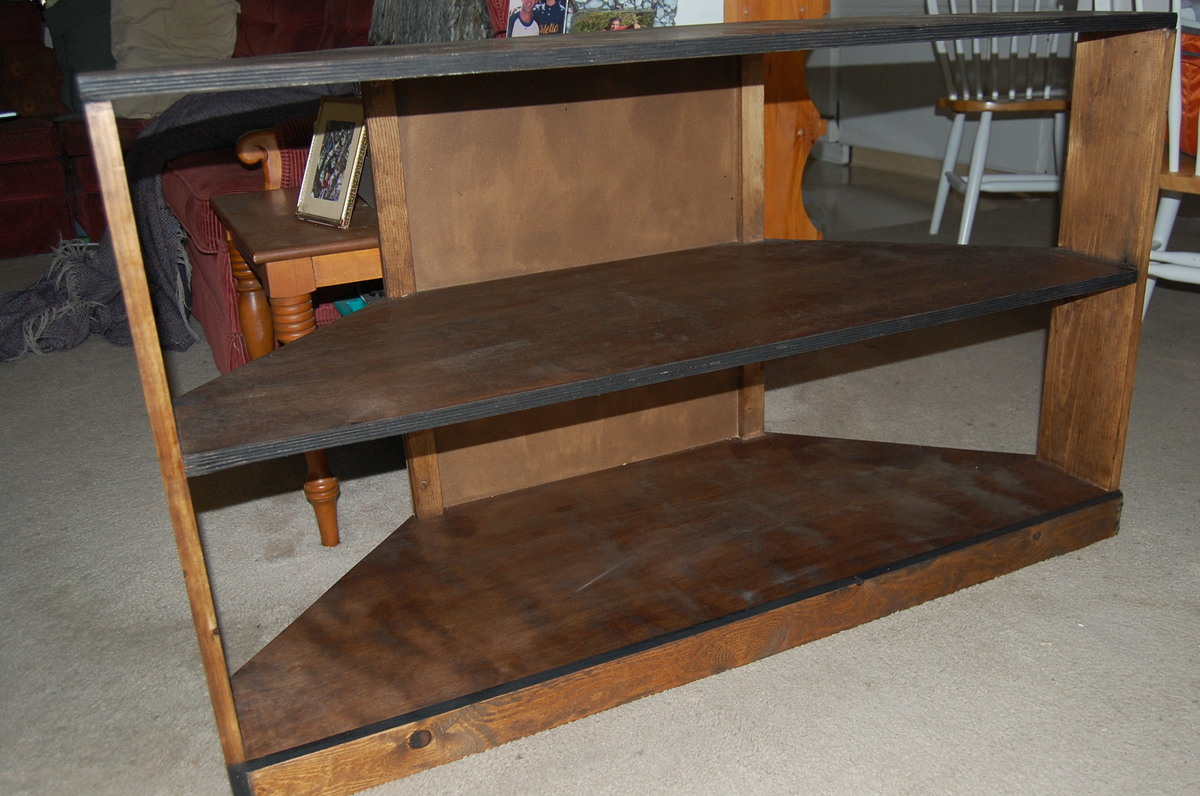
Modified Corner Media Stand
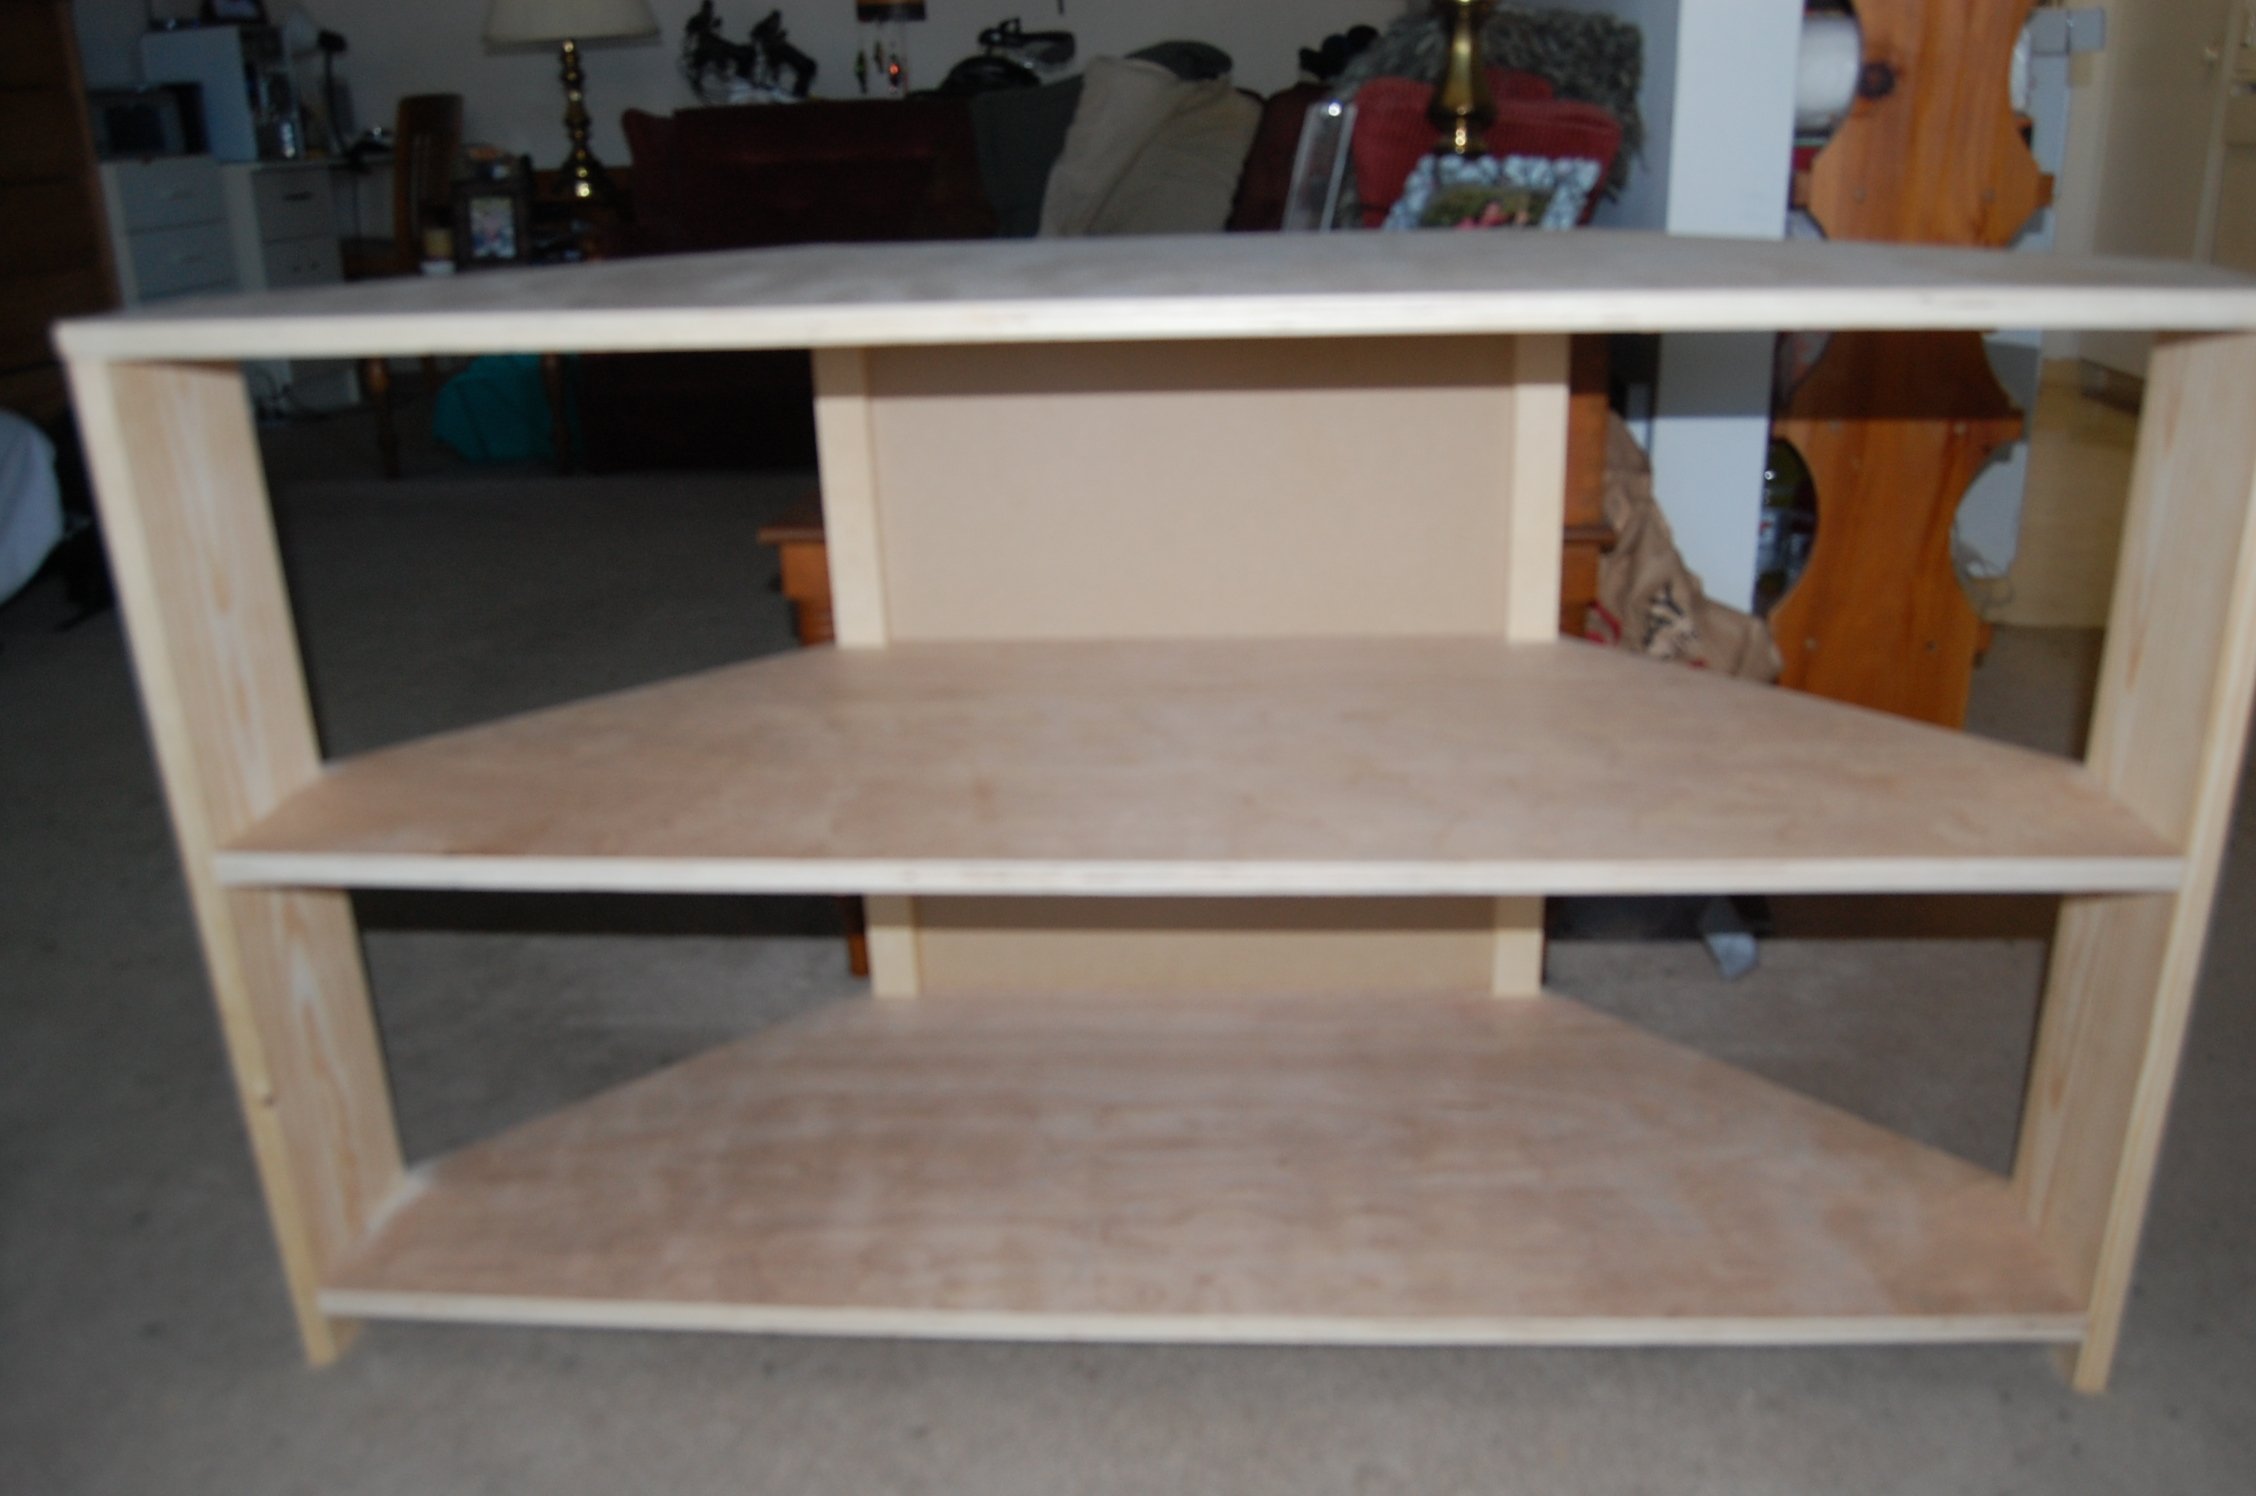
I used the Tall Corner Media Stand plans as inspiration for this, but I didn't actually need it top be very tall, so I took off one of the shelves, and decided not to add the extra section for the cable box and what not.
I also liked the simplicity to it without all the trim, so I decided to leave the sides and top slats off and just stain it and add a 1x3 at the bottom for aesthetic purposes.
Built from Plan(s)
Estimated Cost
$85 (for lumber and stain. Already had screws/glue,etc.)
Estimated Time Investment
Afternoon Project (3-6 Hours)
Finish Used
MinwaX'S full collection: Pre-stain wood conditioner, English Chestnut stain, and clear coat
Recommended Skill Level
Intermediate
Comments

Sat, 04/16/2016 - 23:01
Measurements
Any possibility you could have an option for metric measurements on your projects. I assume that there would be many more metric speaking nationalities besides me that would find this helpful. Your country, and a smattering of others, are among the only countries that still use the old Imperial system.
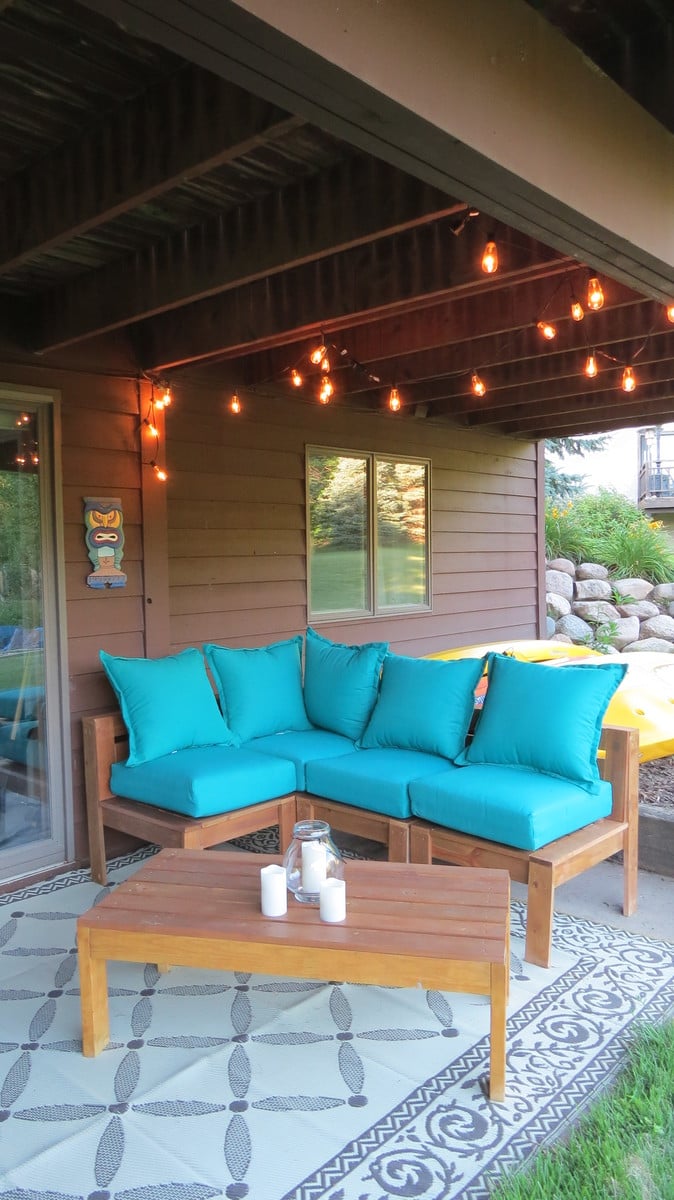
Outdoor sectional
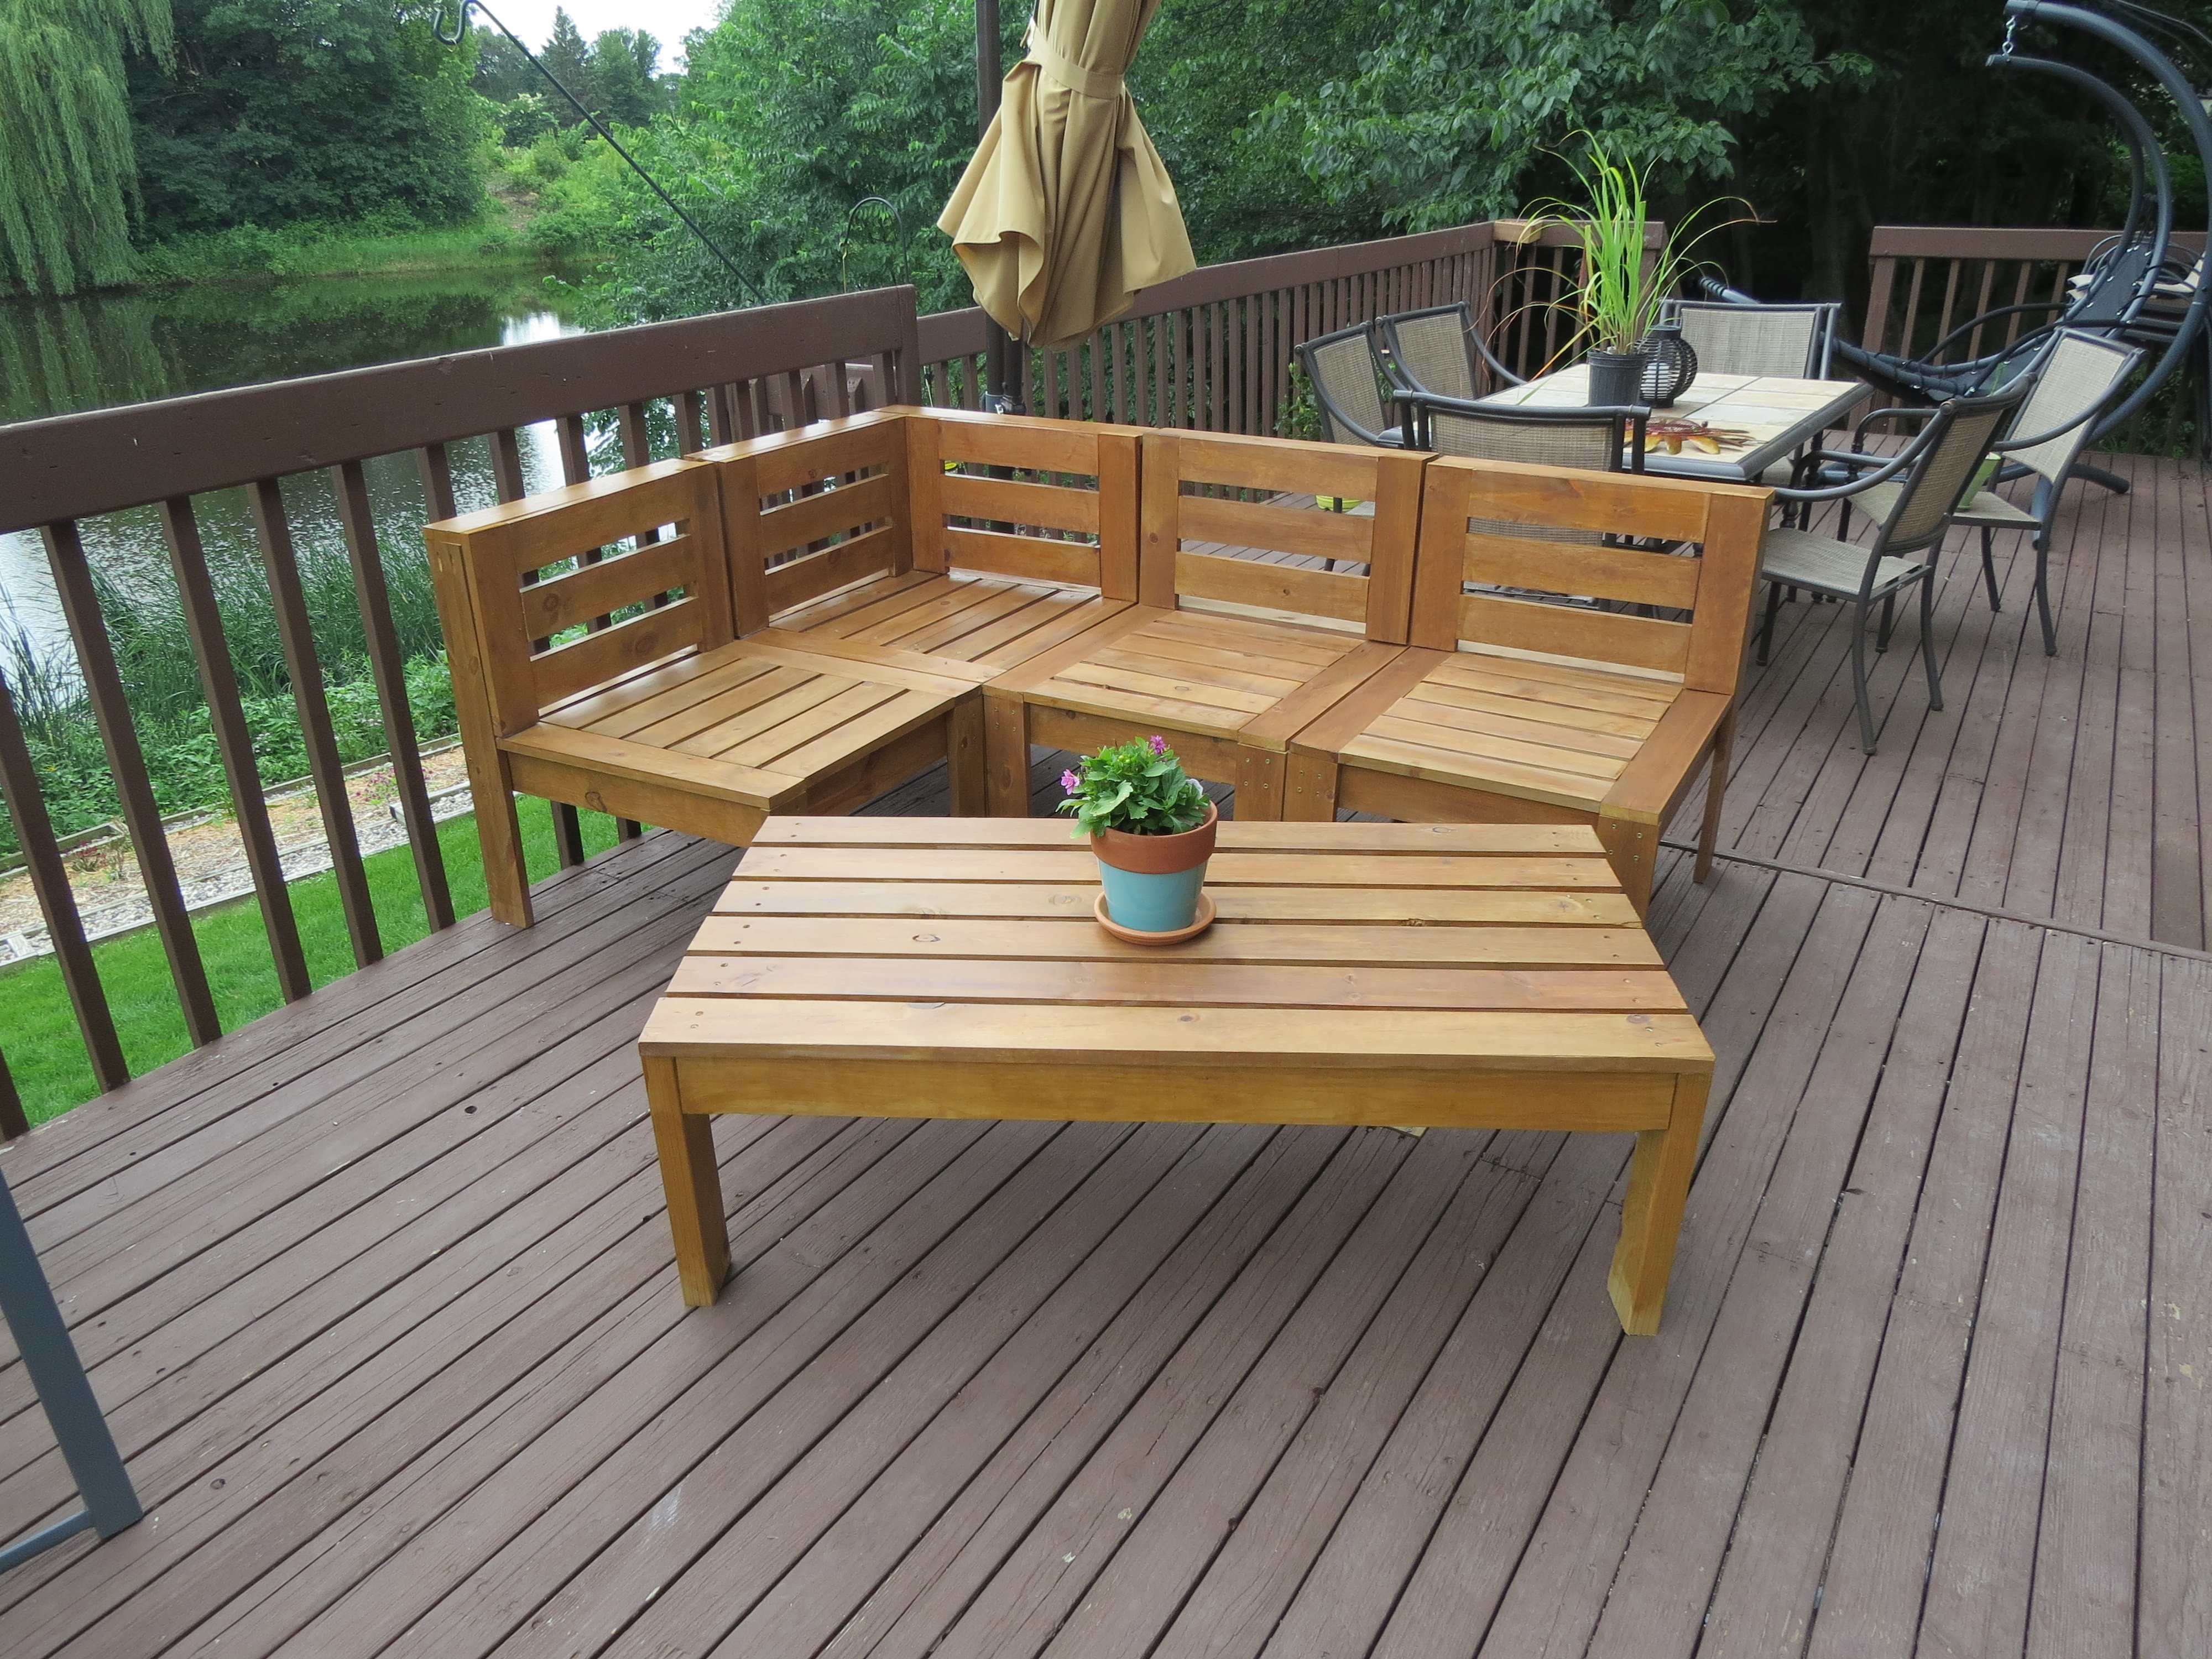
I changed the plans a bit and added backs to the chairs. I've never used a saw or a drill before, but I am thrilled with how easy this was to do. I love the end result!
I found cushions to go with the furniture at Target.
Built from Plan(s)
Estimated Time Investment
Week Long Project (20 Hours or More)
Recommended Skill Level
Beginner
Farmhouse Dining Room Table with Benches!
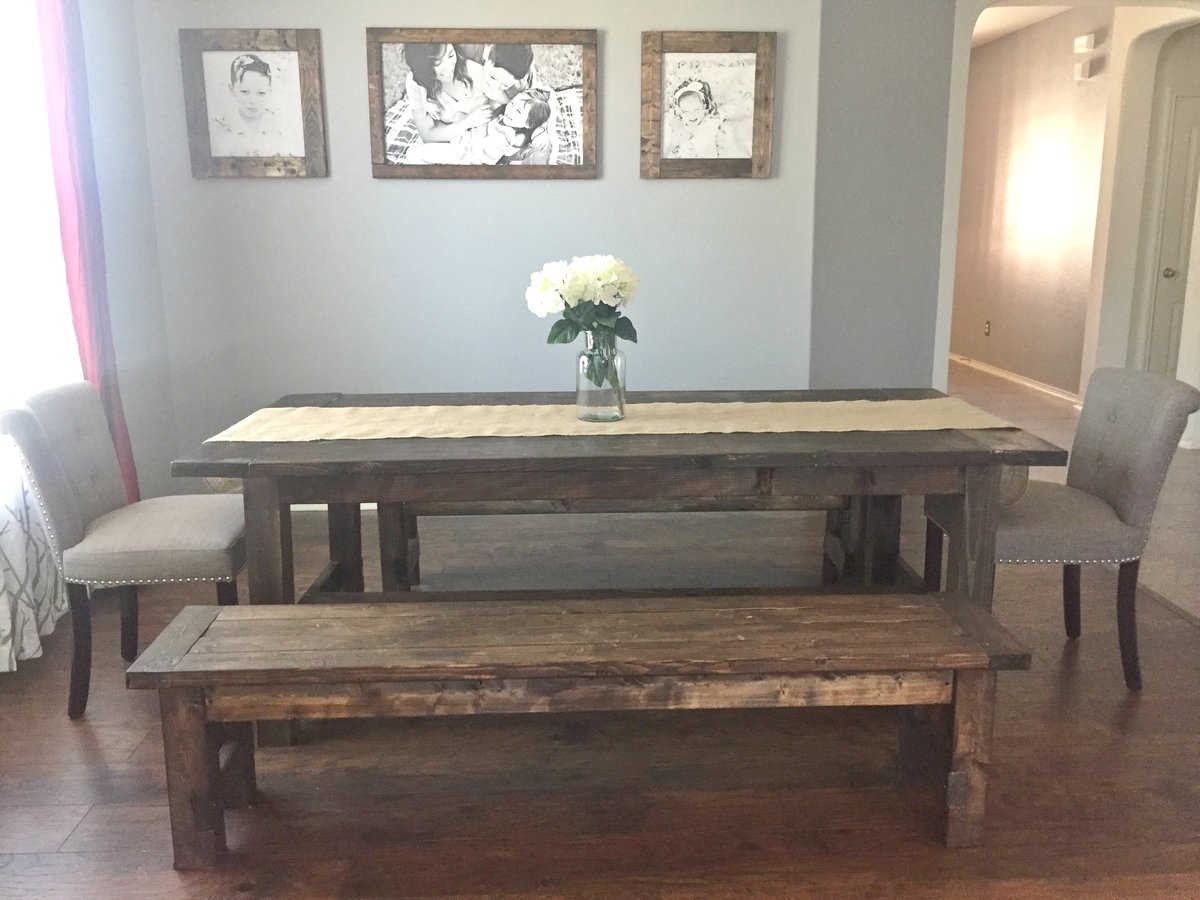
Love Ana White plans!
Dining Room Table: http://www.ana-white.com/2012/11/plans/farmhouse-table-updated-pocket-h…
Benches: http://www.ana-white.com/2011/01/plans/farmhouse-bench


Estimated Time Investment
Day Project (6-9 Hours)
Recommended Skill Level
Intermediate
Comments
Barn Door Pantry
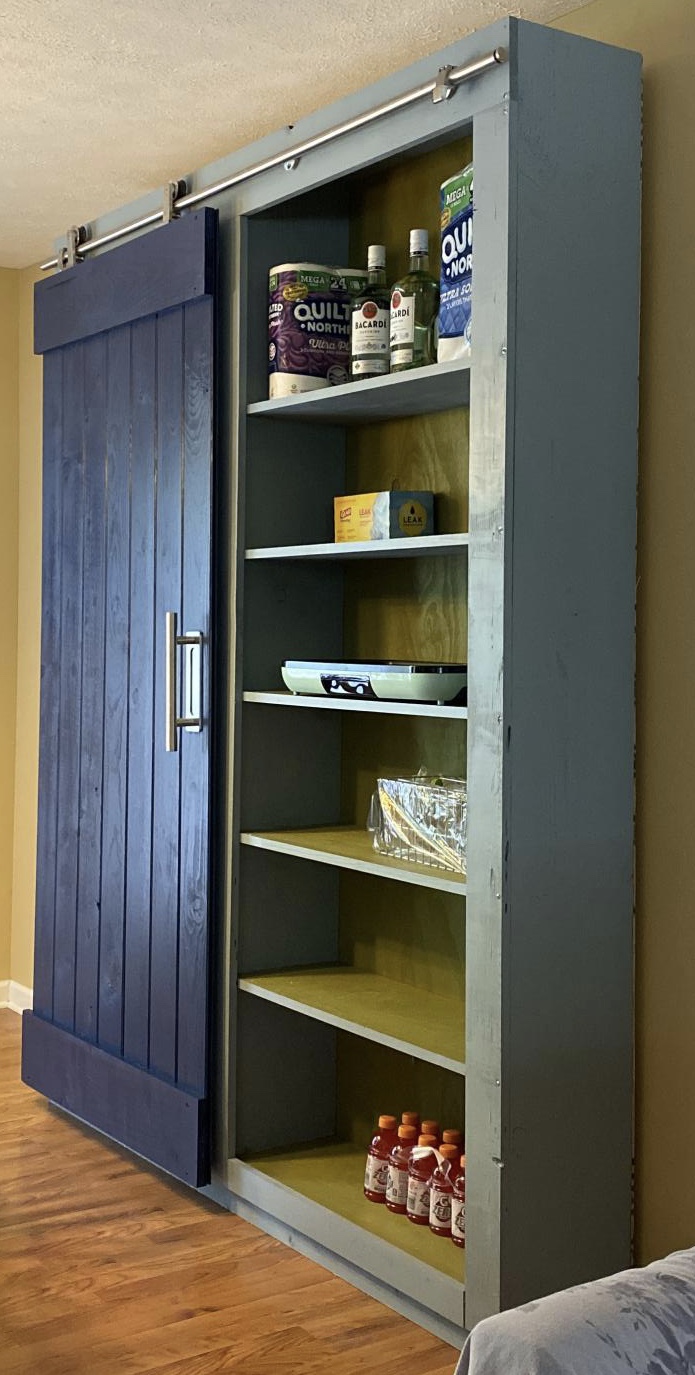
We didn’t have much storage space in our little galley kitchen. Imagine how excited I was to find this plan on my favorite site.
This was my first build using my new circular saw. For previous projects, I’d take both the shopping list and cut list to Lowe’s and have them cut the wood. This time, I made all my cuts. I was nervous but love how it turned out.
I anchored it to the wall because with the barn door and the hardware weight, it felt a little front heavy.
We used the same color as our kitchen cabinets (AH13 Salty Dog) and then selected coordinated colors for the body (AH18 Debonair) and shelves (AH15 Rural Green).
Built from Plan(s)
Estimated Cost
500
Estimated Time Investment
Weekend Project (10-20 Hours)
Finish Used
Sherwin Williams paint:
Barn Door (AH13 Salty Dog)
Cabinet (AH18 Debonair)
Shelves & Back (AH15 Rural Green)
Barn Door (AH13 Salty Dog)
Cabinet (AH18 Debonair)
Shelves & Back (AH15 Rural Green)
Recommended Skill Level
Intermediate
Comments
First Project - Farmhouse Table!
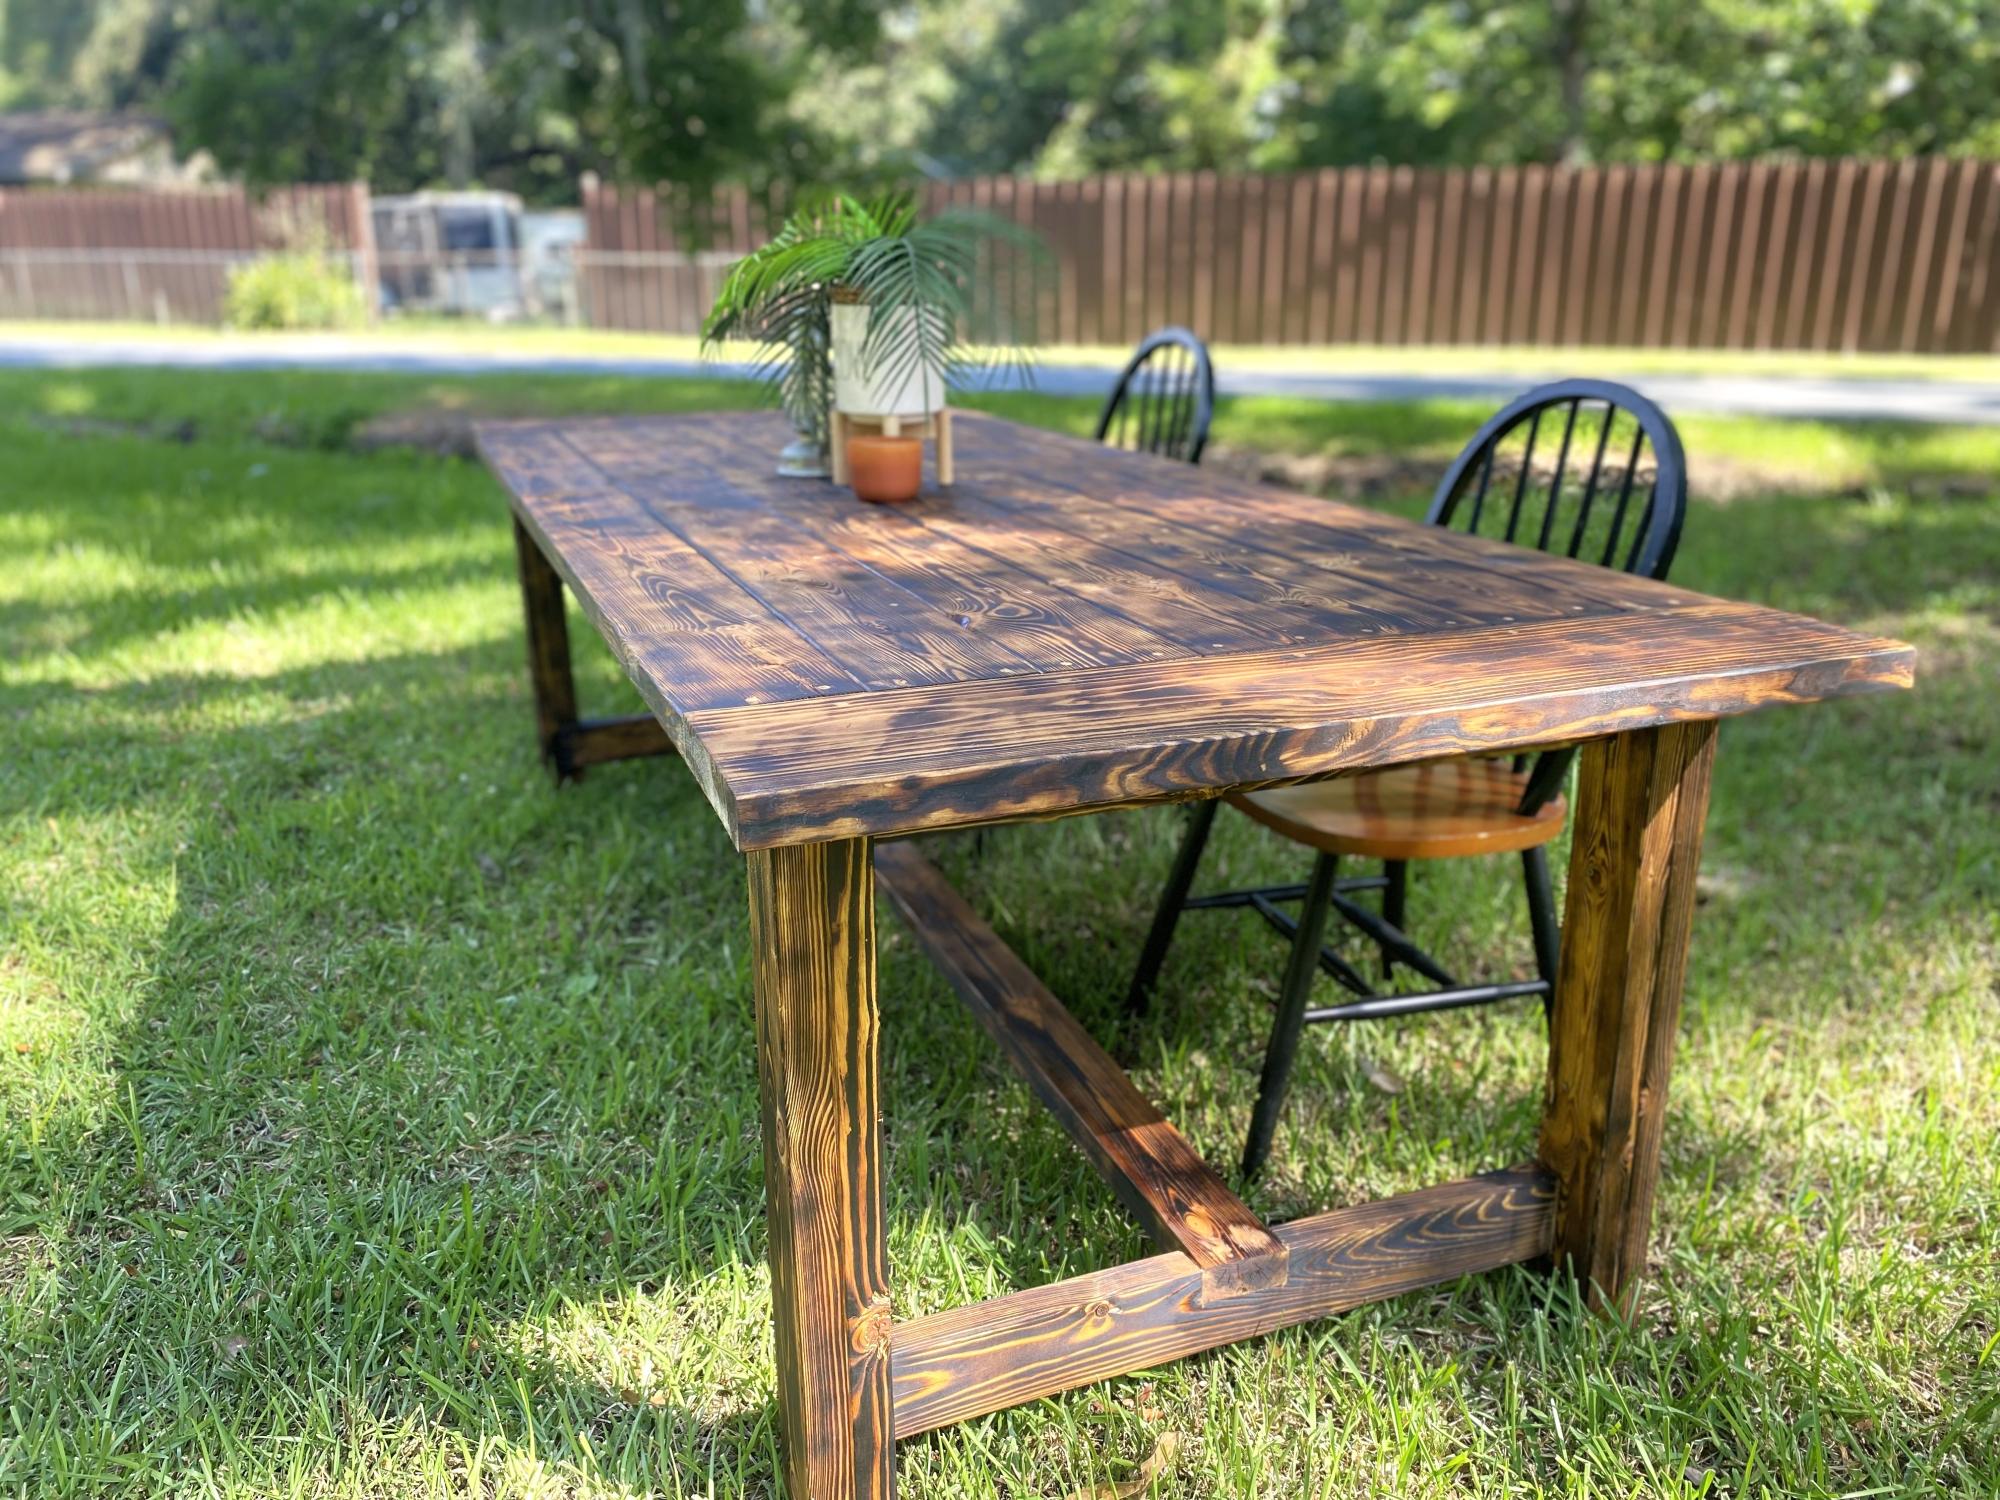
This is the first Woodworking project I’ve ever taken on. I absolutely love the plans for this farmhouse table. I used pine and then used a torch for the finish with oak stain. I love the way it turned out.
Bryan Carrejo @ TheBrosWoodworks.com
Built from Plan(s)
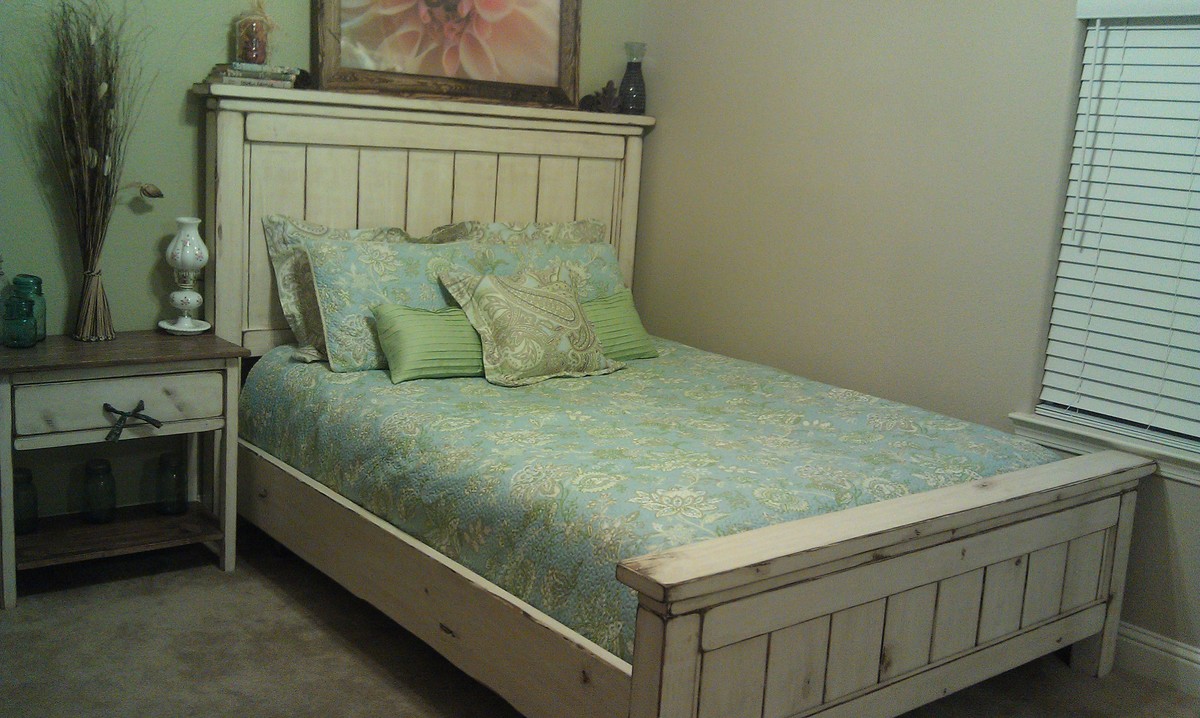
Farmhouse Bed - Queen
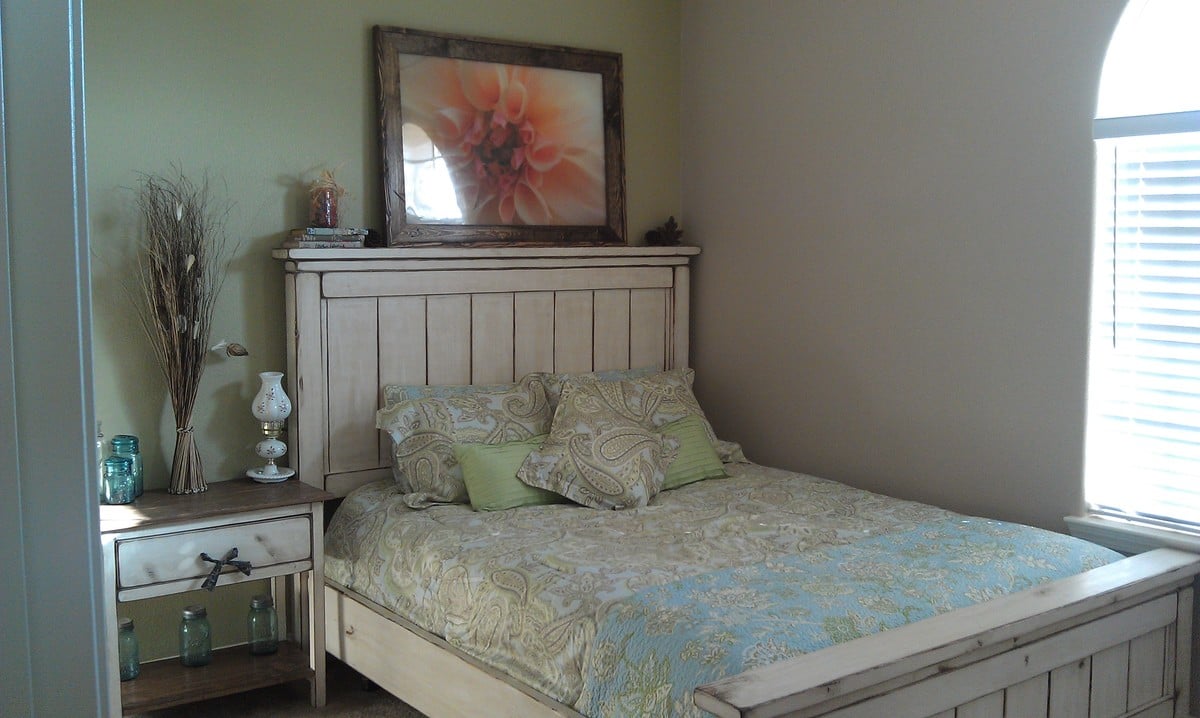
I had a lot if fun building this and am so glad I did!
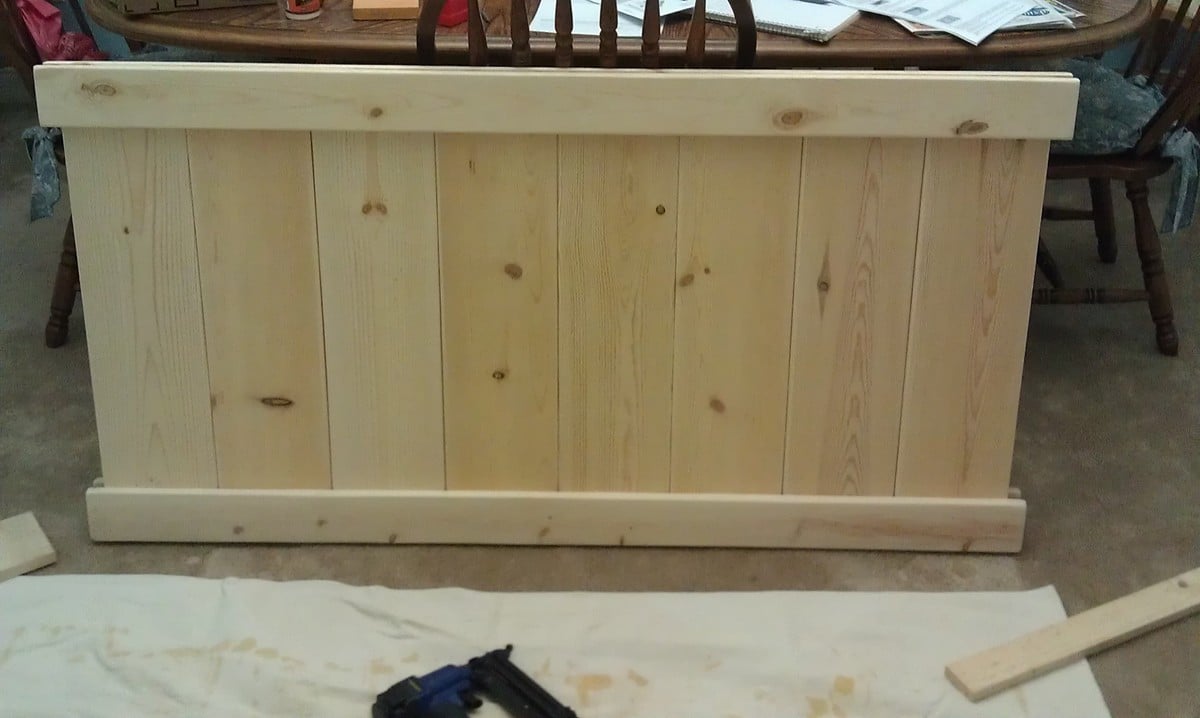
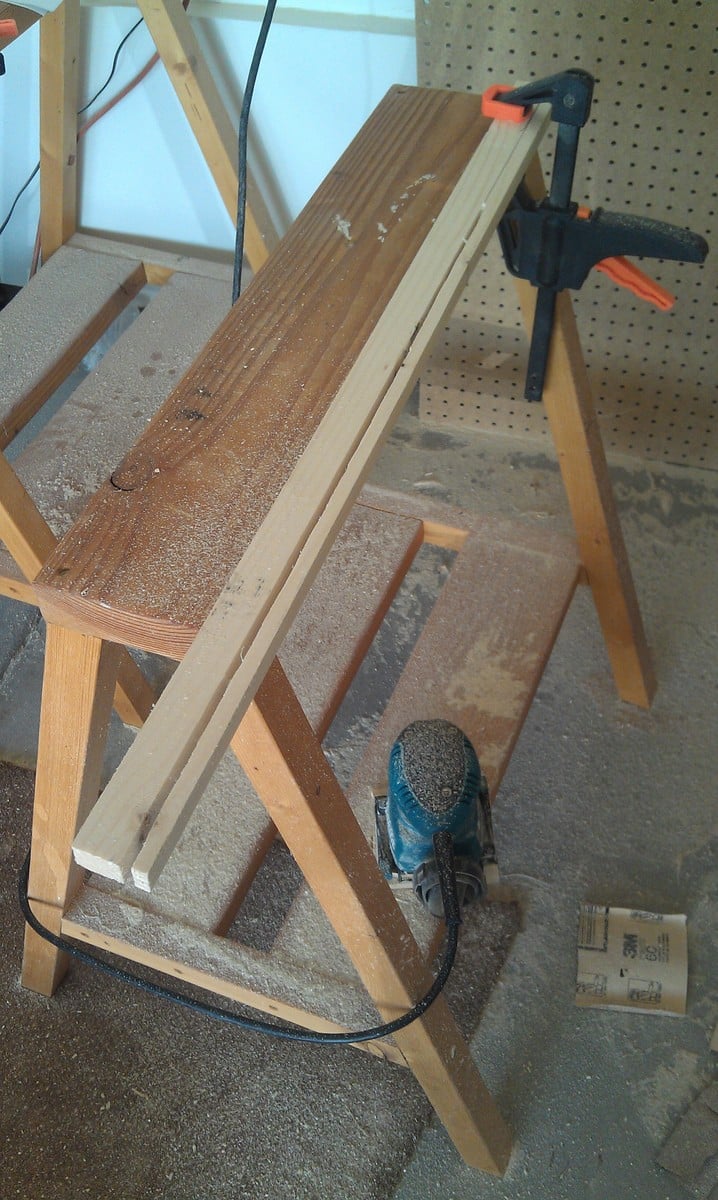
Ana mentioned that she distressed the planks by using a screw driver between them to scrape off some of the paint, I did this on the headboard and, while it did work, it was a pain and added a lot of time. For the foot board I painted and distressed all of the pieces prior to assembly and it worked out a lot better! :-)
My 1x8's were slightly smaller than Ana's so I cut down a 1x2 using my circular saw to fit into the spaces left on both sides.
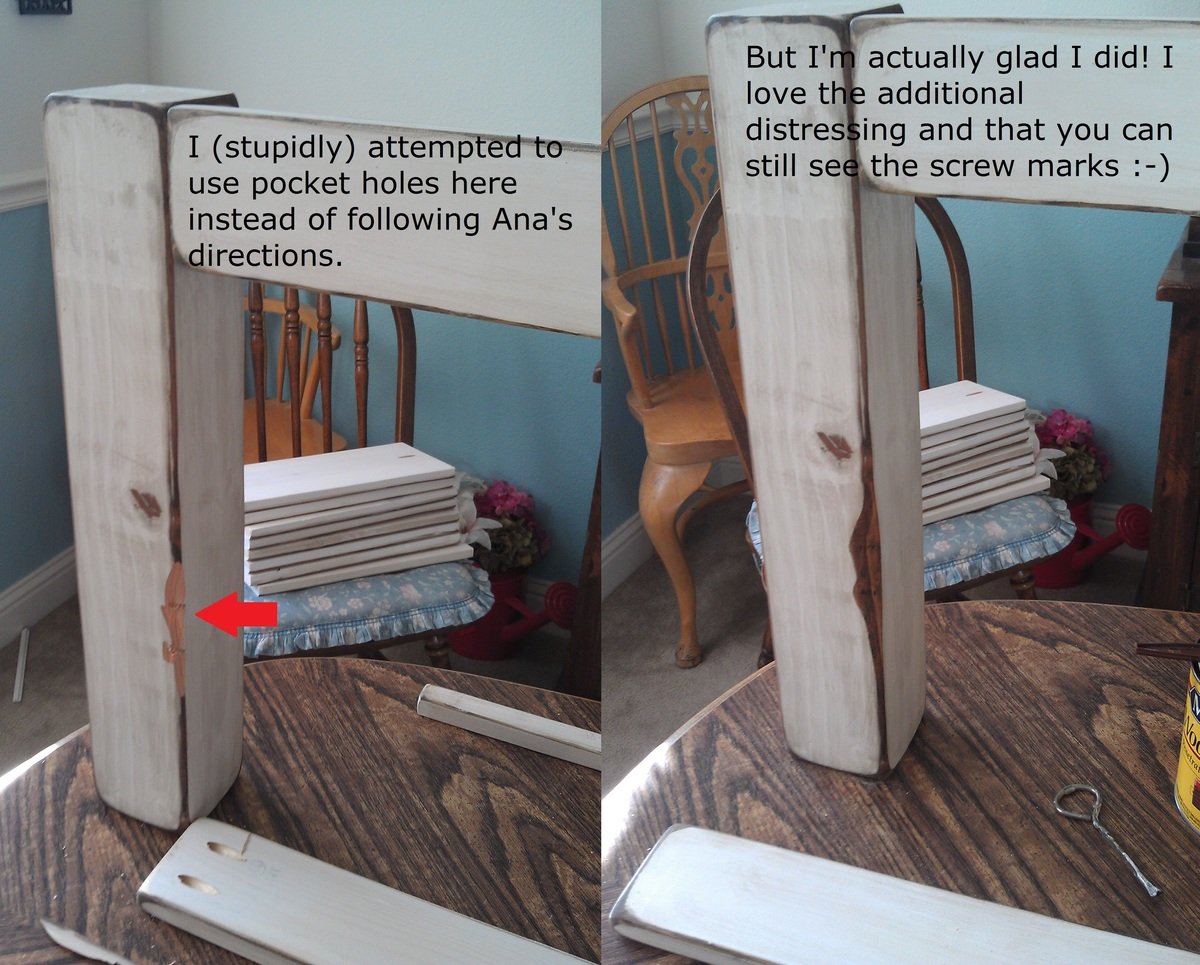
I attempted to use pocket holes to assemble the bed to minimize visible holes, it actually worked great except one side on the foot board :-( I ended up sanding it down and actually ended up really liking it. it always makes me think of it when I see that spot (and not in a bad way)
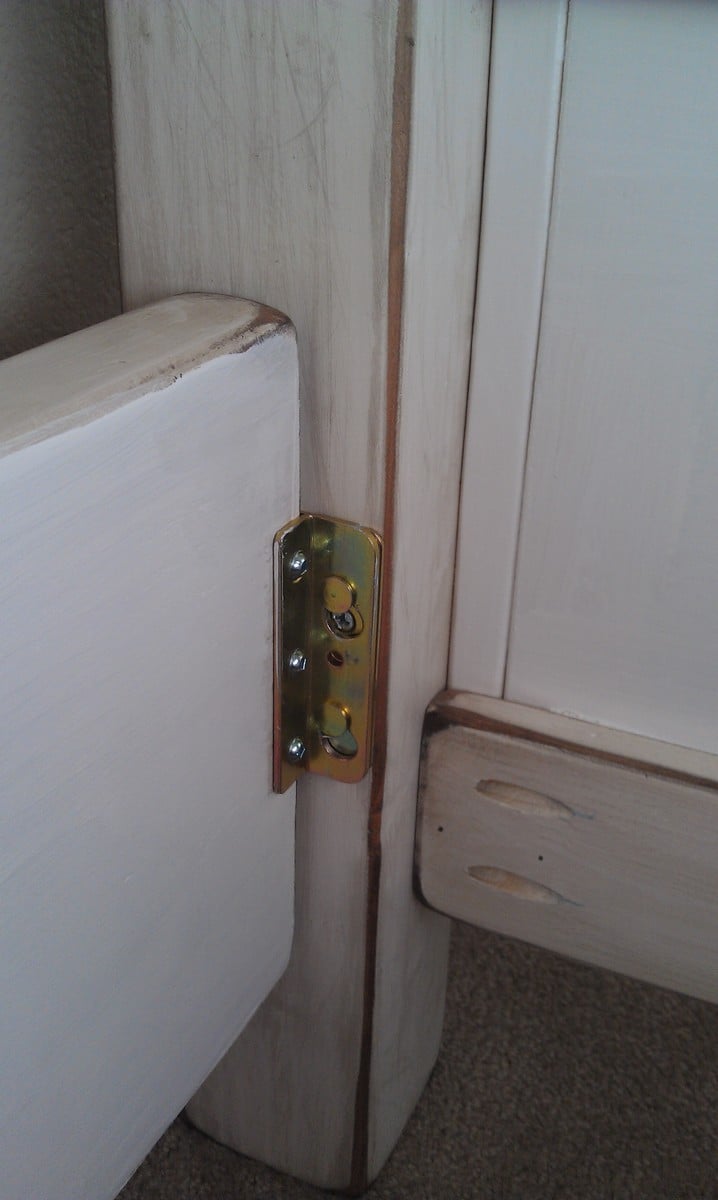
I cheated when putting this together. I decided to keep the mattress and box spring in their original frame. I used brackets from Woodcraft to connect the side rails to the headboard & foot board.
http://www.woodcraft.com/product/2003981/9364/hafele-nomortise-bed-rail…
Built from Plan(s)
Estimated Cost
I spend $109.75 (after tax) for all the wood and the rail brackets
Estimated Time Investment
Week Long Project (20 Hours or More)
Finish Used
I used Kilz 2 Primer then painted with Behr Silk Pillow. I sanded down all the edges then wiped on a coat of Minwax English Chestnut and sprayed with krylon matte clear sealer.
I stole the finish idea from boxermum here http://ana-white.com/2011/04/king-farmhouse-bed-1 but I did a lot more distressing and my stain turned out a lot darker.
I stole the finish idea from boxermum here http://ana-white.com/2011/04/king-farmhouse-bed-1 but I did a lot more distressing and my stain turned out a lot darker.
Recommended Skill Level
Intermediate
Comments
Wed, 10/03/2012 - 14:48
Beautiful finish
Your finish is beautiful! I love it! You did a great job on both the night stand and the bed! Congrats!
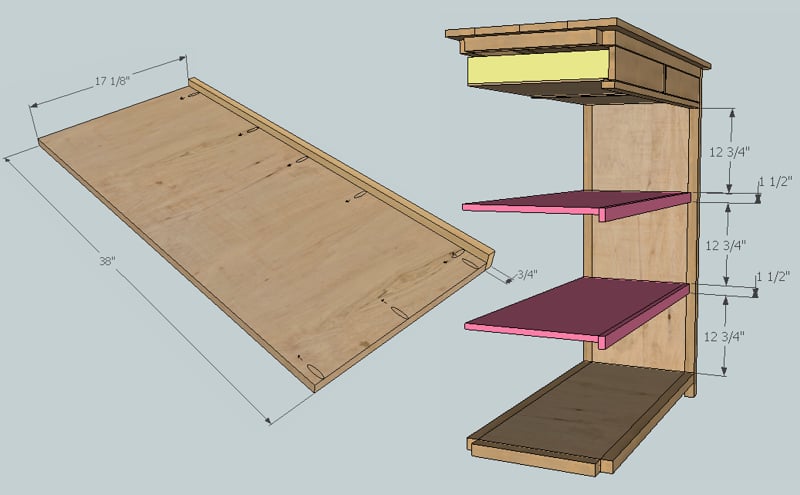
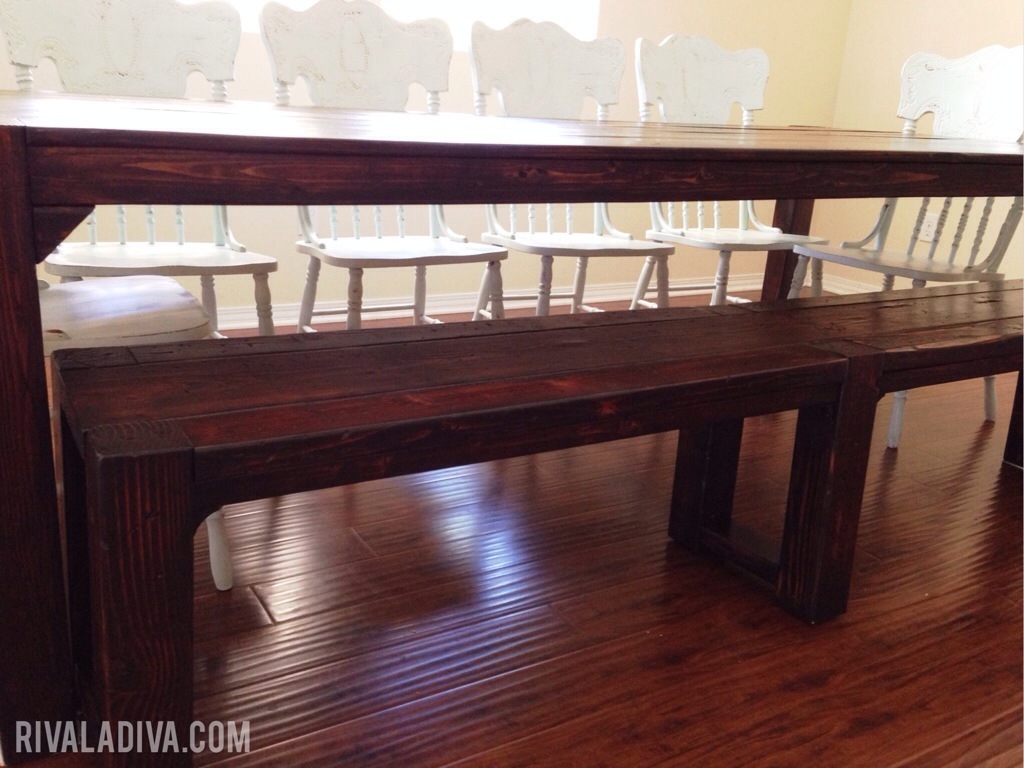
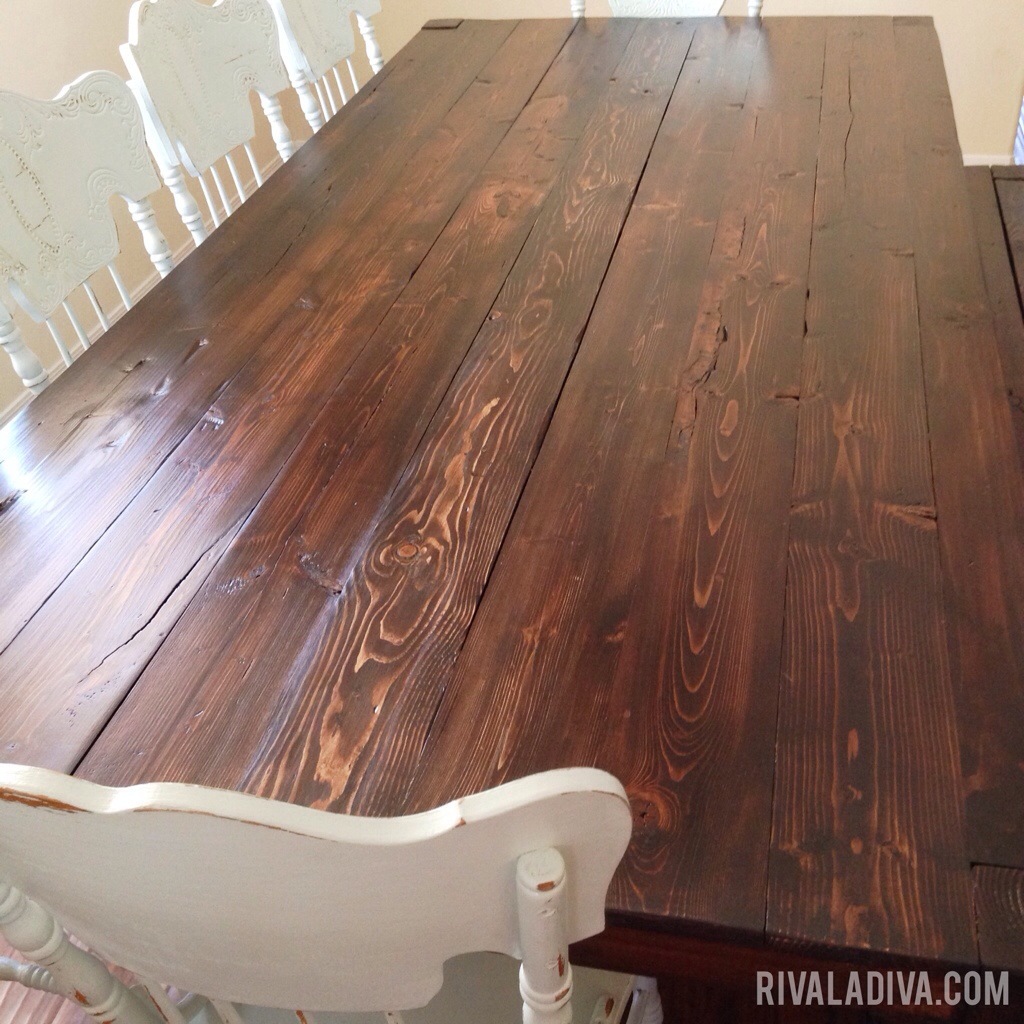
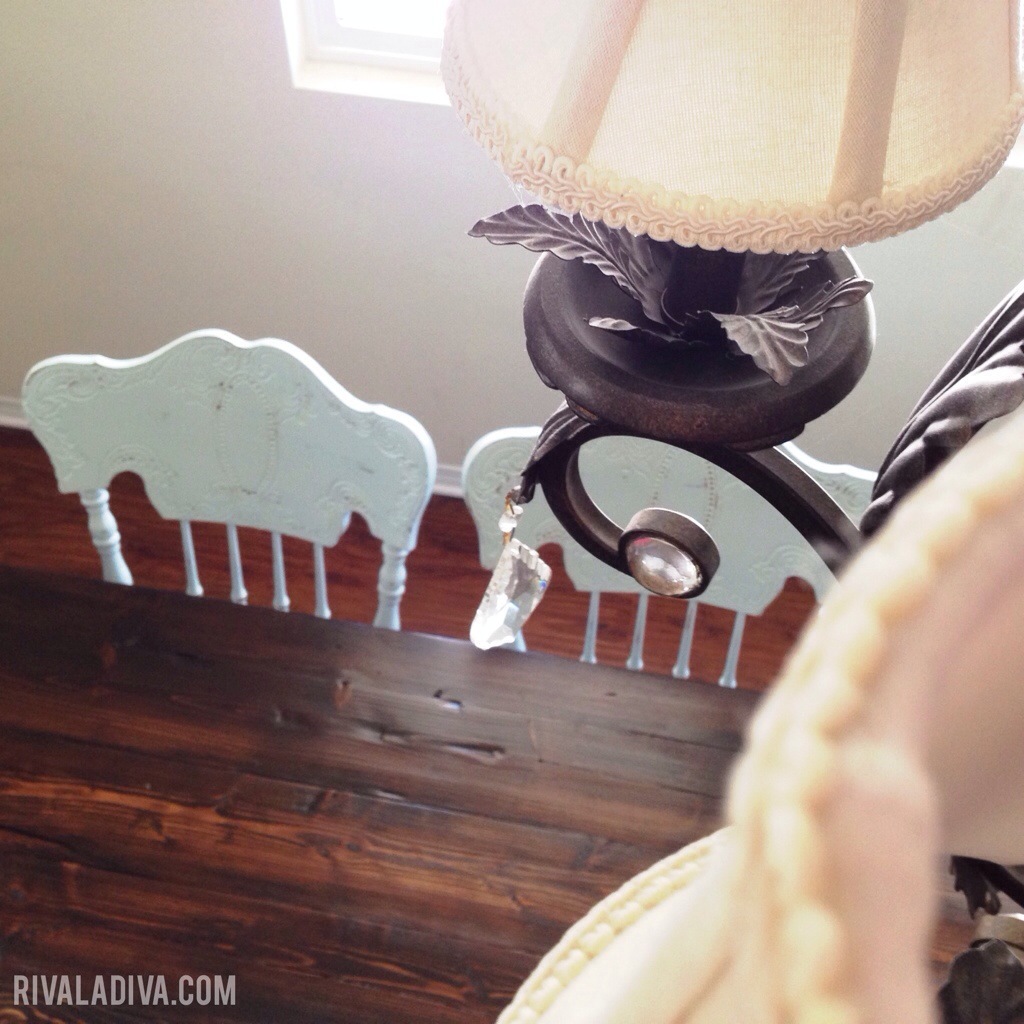
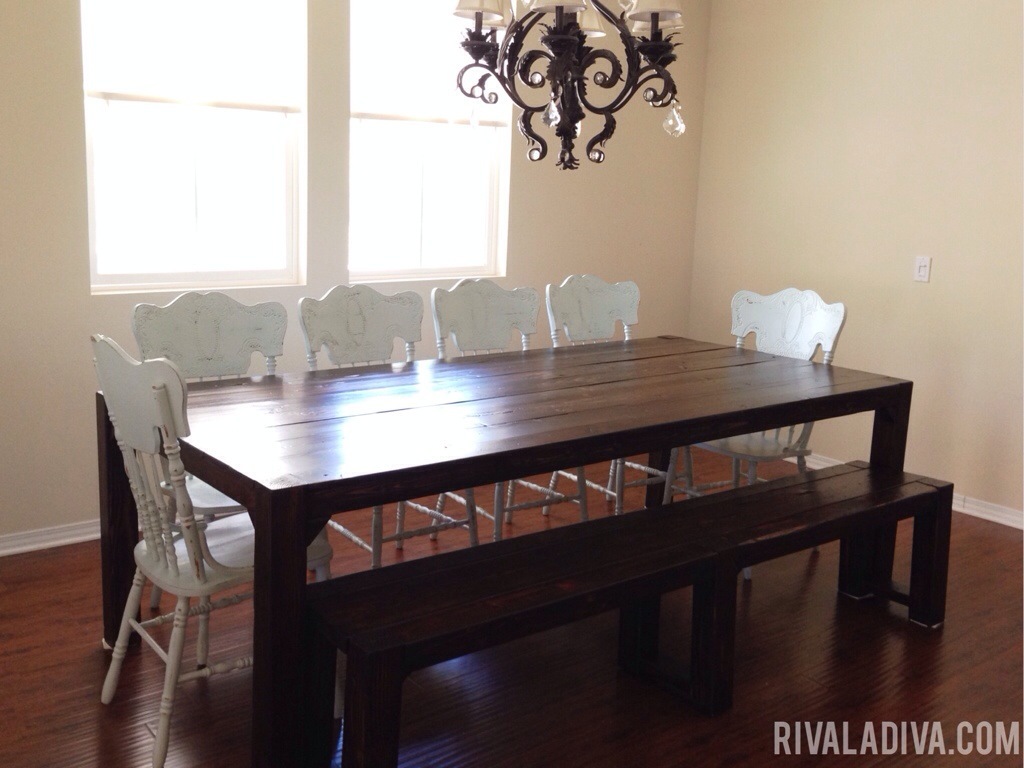
Restoration Hardware Table for LESS
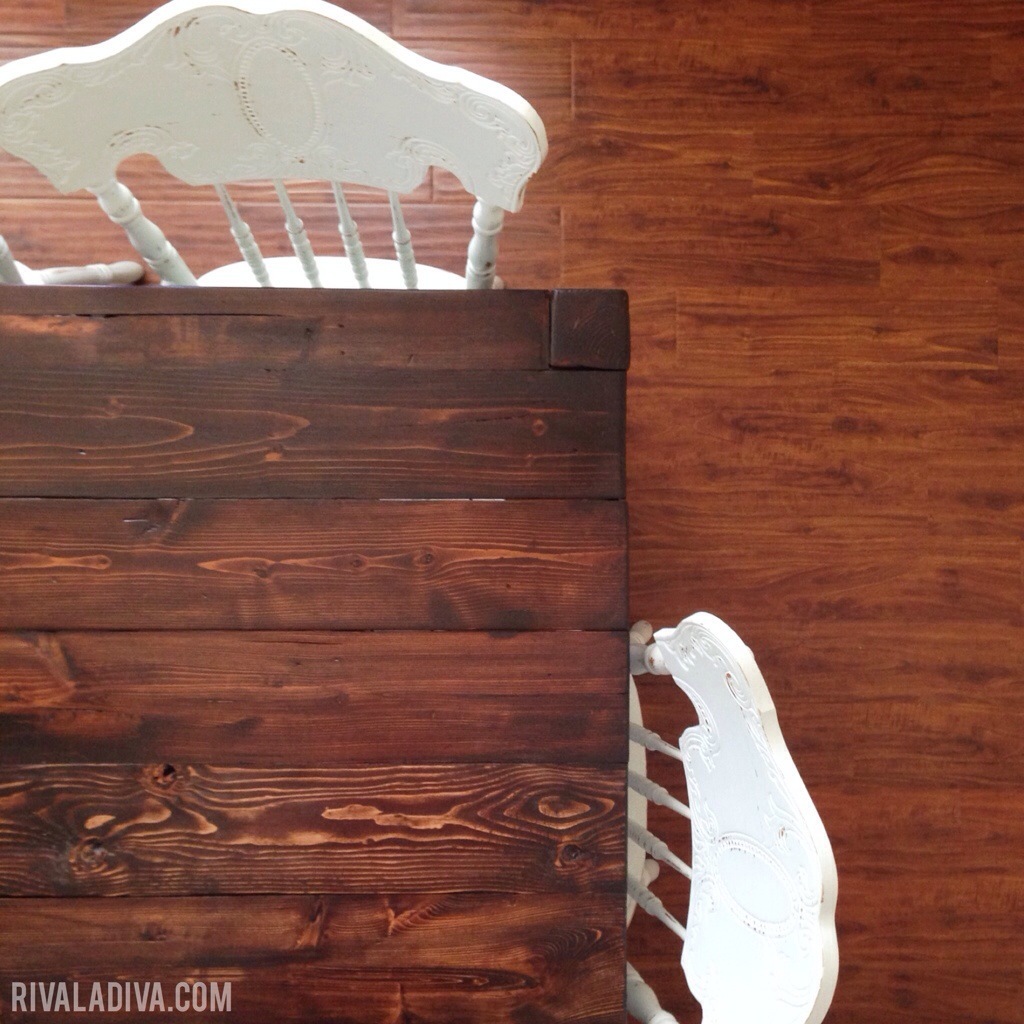
Flashback to last year when I found this way chic table at Restoration Hardware.
But the price tag is a bit steep for moi.
I have, like, a million kids, so… as I am a huge fan of Ana White and her amazing skills – I looked for a similar plan AND found one!
Well, you have to remember I have a million kids and I usually hangout with other families with their millions kids and there is never enough room, a 28″ x 58″ table is crazy small for my type of entertaining. Go big or go home, right?
So I drafted modifications for these plans – I am a seamstress and can draft sewing patterns, TOTALLY the same thing, right?
I am kidding, I really wouldn’t know, but so far so good.
Anyways, I bought the wood and got to work and here's how it turned out!!
I would LOOOOVE to hear how you like it! :)
Built from Plan(s)
Estimated Time Investment
Week Long Project (20 Hours or More)
Finish Used
Rust-oleum stains, Traditional Cherry and Kona.
Recommended Skill Level
Intermediate
Comments
Isaac is 14. This is his version of the child's Adirondack chair
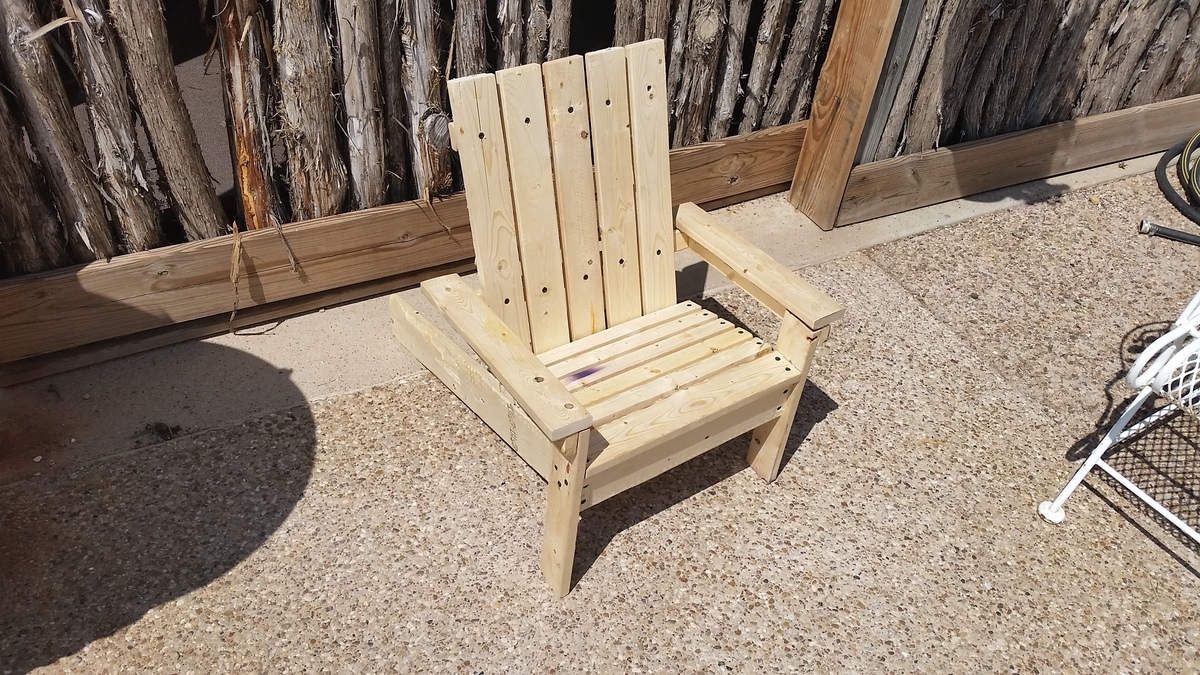
Isaac is 14. He built his baby sister a chair inspired by Ana! He builds things almost daily!

Built from Plan(s)
Recommended Skill Level
Beginner