Community Brag Posts
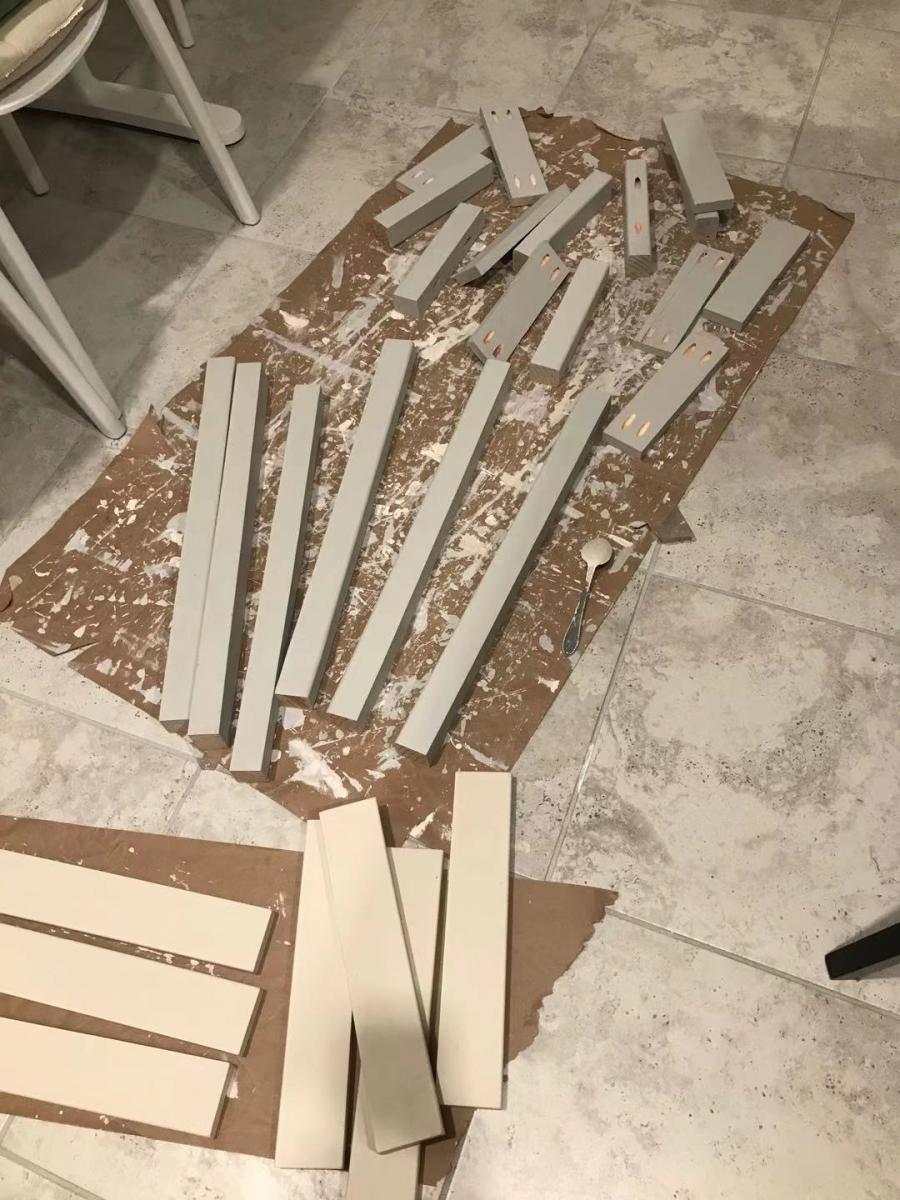
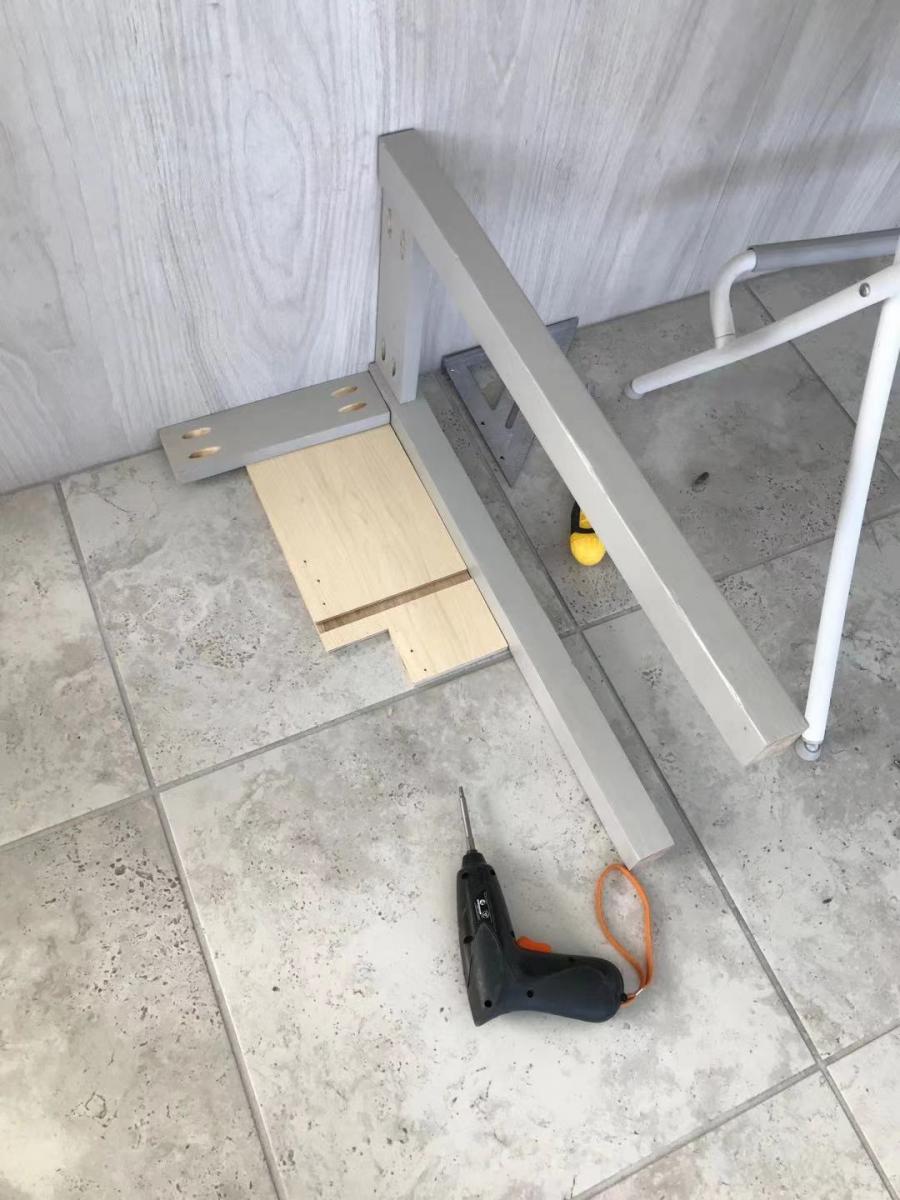
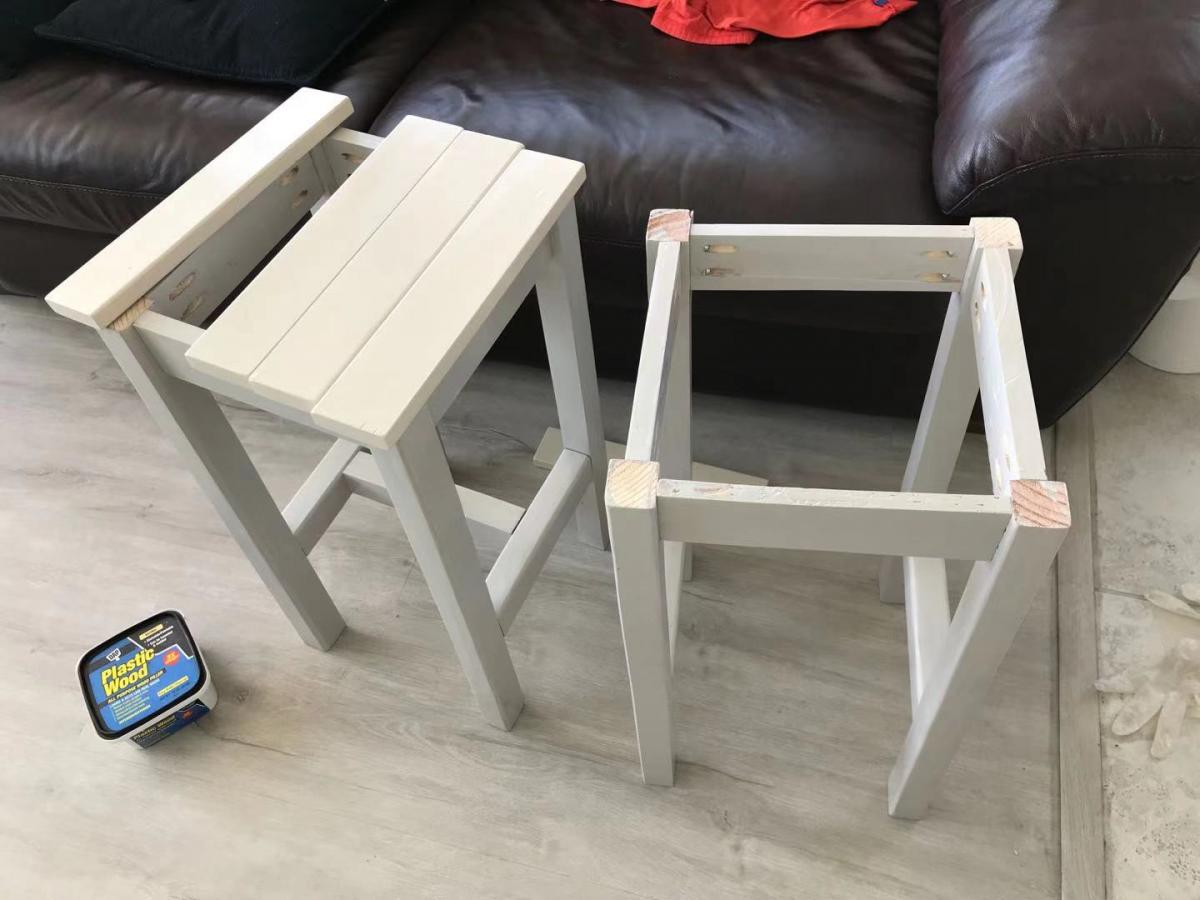
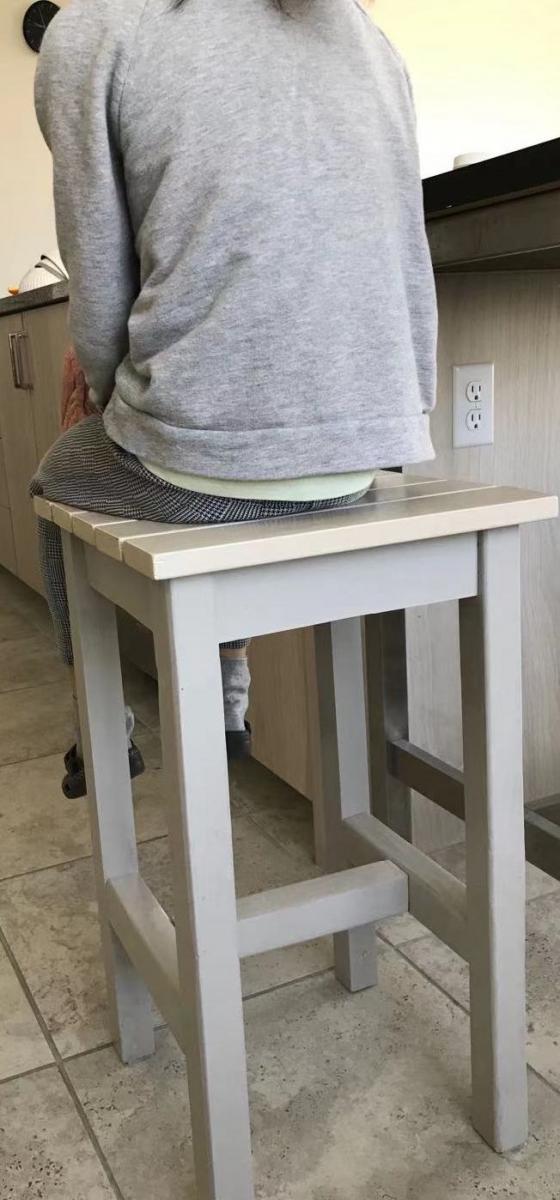
my Adirondack Stool higher version
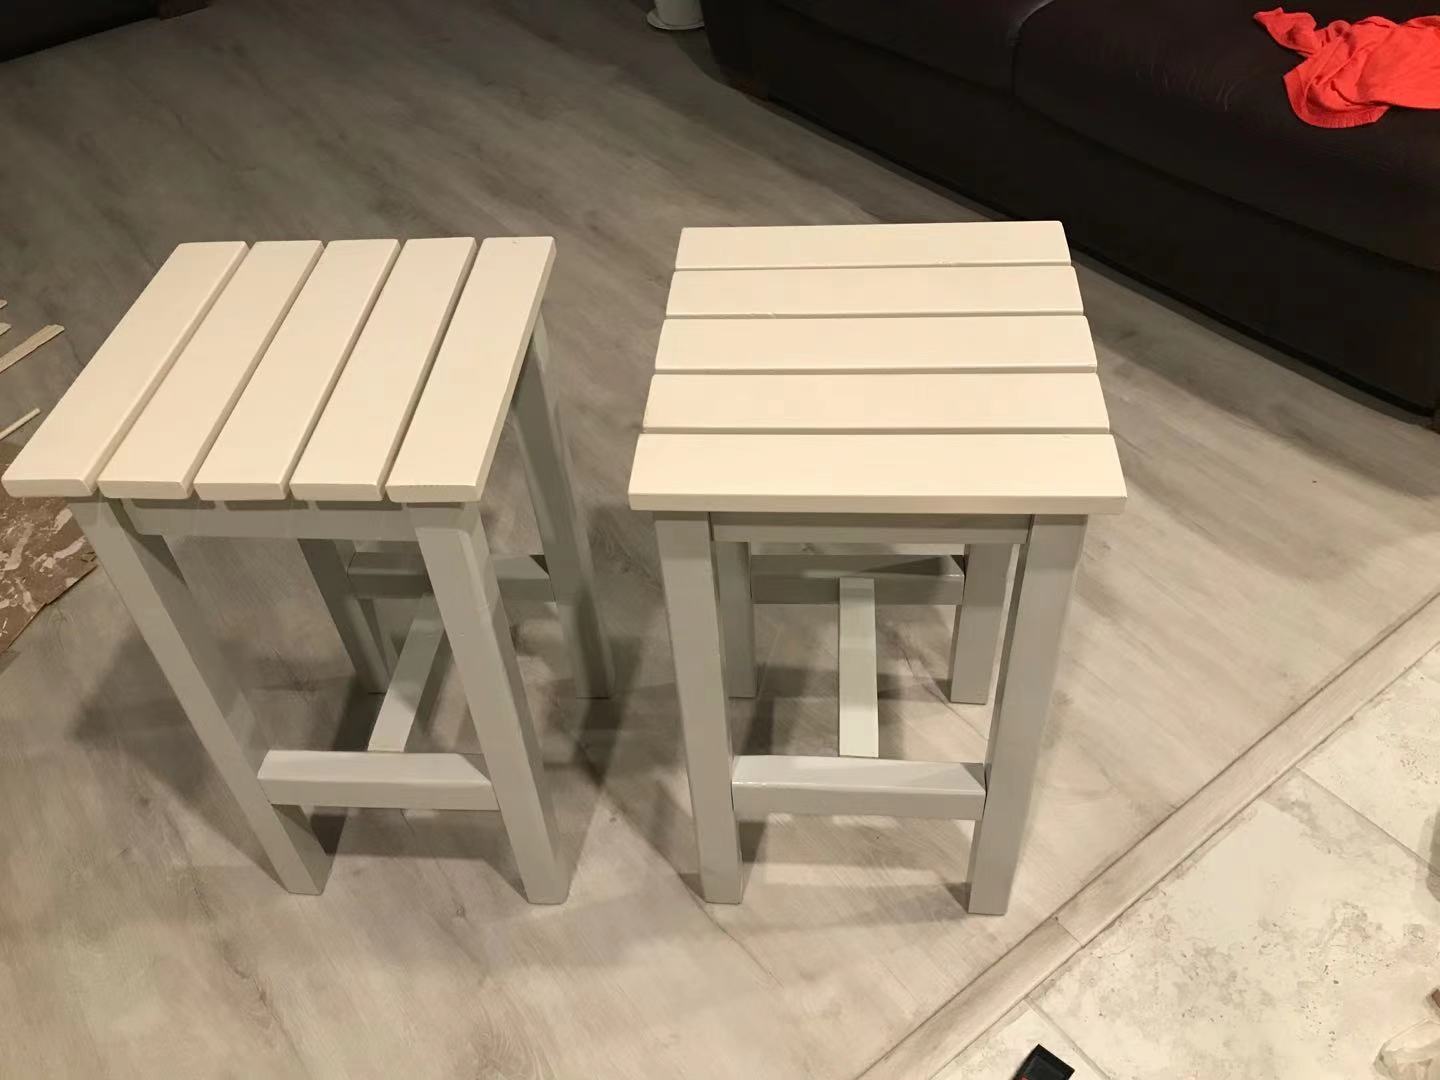
I decided to make two Adirondack stools, they looks simple and easy and I have 2*2 and 1*3 slats on hand.
Cutting and painting didn't take too much time, but I was struggling with assembling. It was hard to square the board. When I finished them, they were great, I love them!They are 24" heigh.
Built from Plan(s)
Estimated Cost
$10
Estimated Time Investment
Day Project (6-9 Hours)
Finish Used
Minwax Polycrylic
Recommended Skill Level
Beginner
Comments
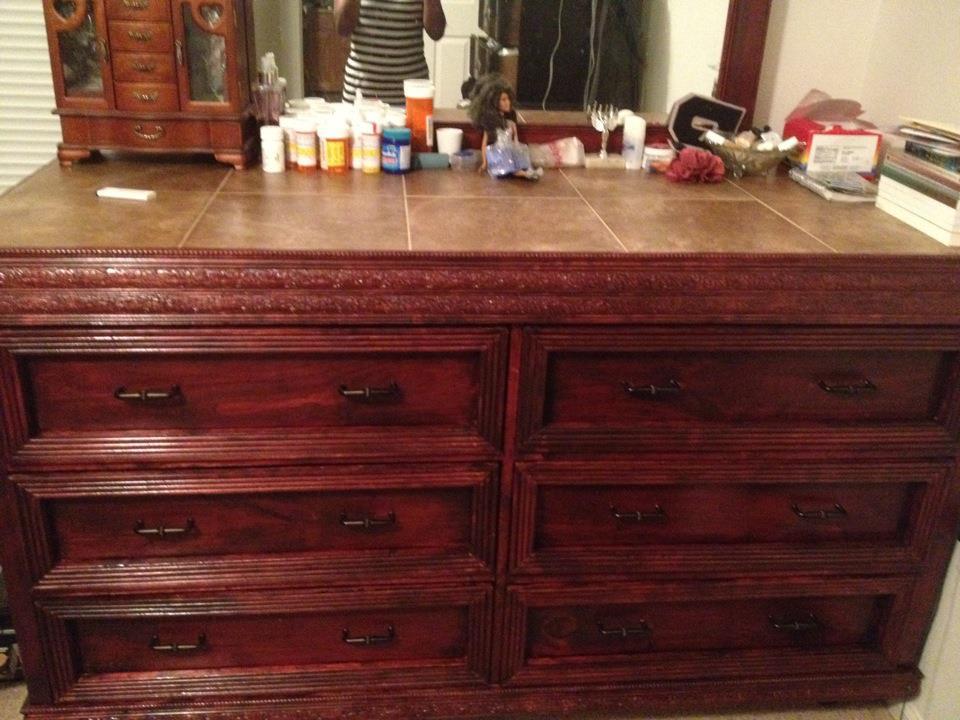
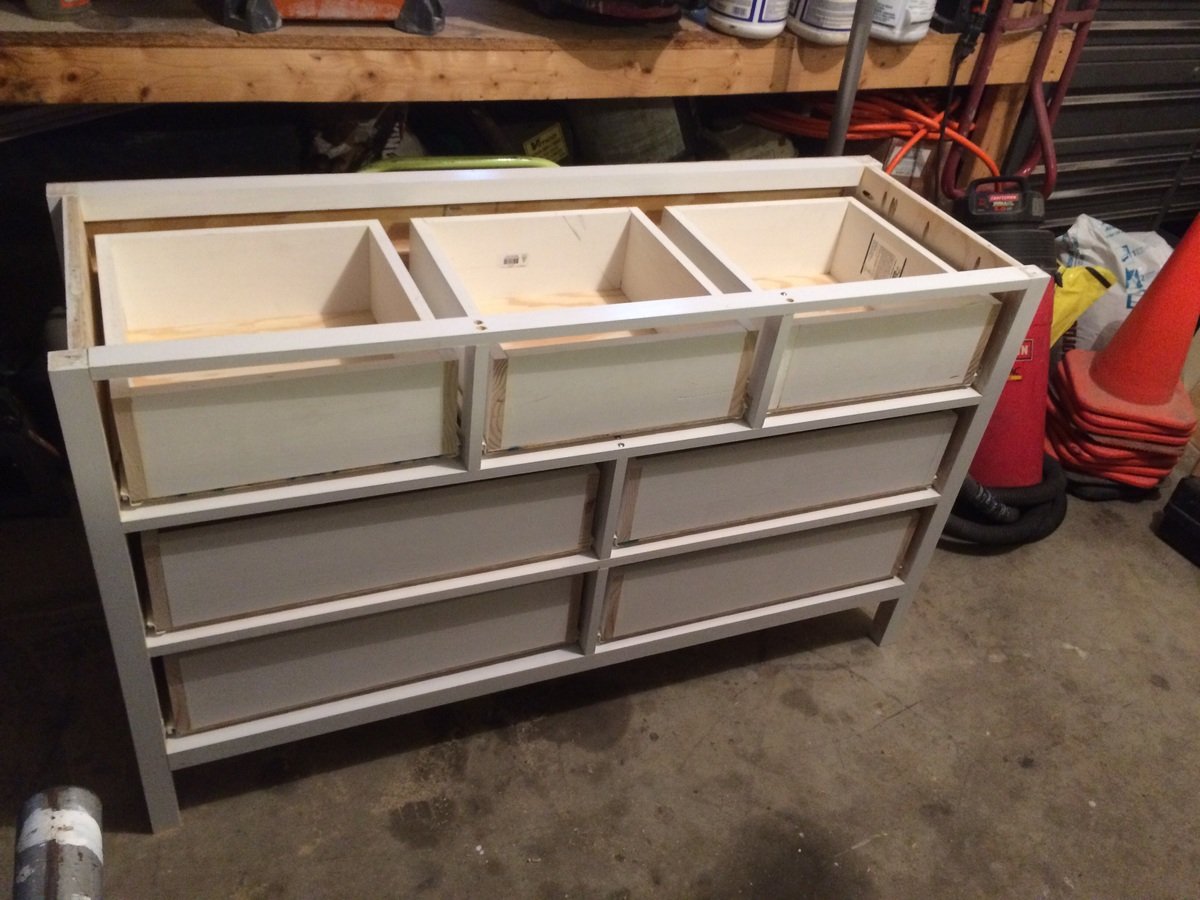
Dresser
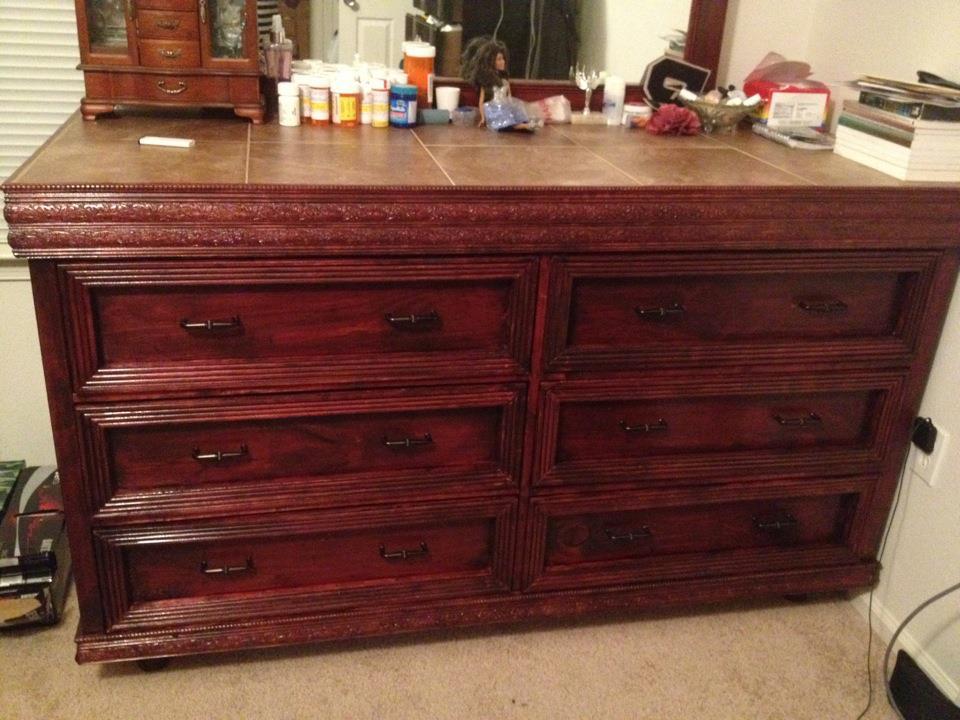
Needed a new bedroom set. Loved the Madison plan, but also loved the idea from another brag post. The Rhyan nightstand had tile on the top. So I added porcelain tile to the top. Wanted something different.
Built from Plan(s)
Estimated Cost
$300
Estimated Time Investment
Week Long Project (20 Hours or More)
Finish Used
Miniwax red oak and polyurethane gloss coat
Recommended Skill Level
Intermediate
Crib Mattress Sectional Sofa
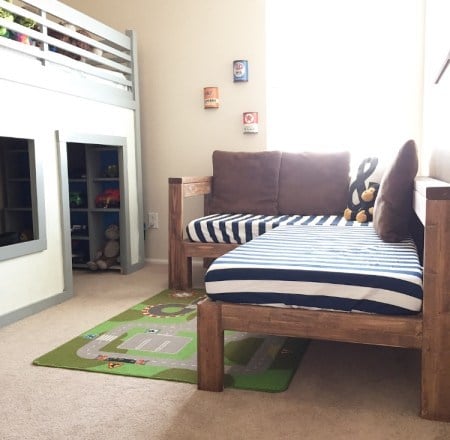
I built this couch to put in my son's bedroom. It came together really easily and I love the finished product!! I have more pictures of the build on my blog.

Built from Plan(s)
Estimated Time Investment
Afternoon Project (3-6 Hours)
Recommended Skill Level
Beginner
Industrial Bookshelves
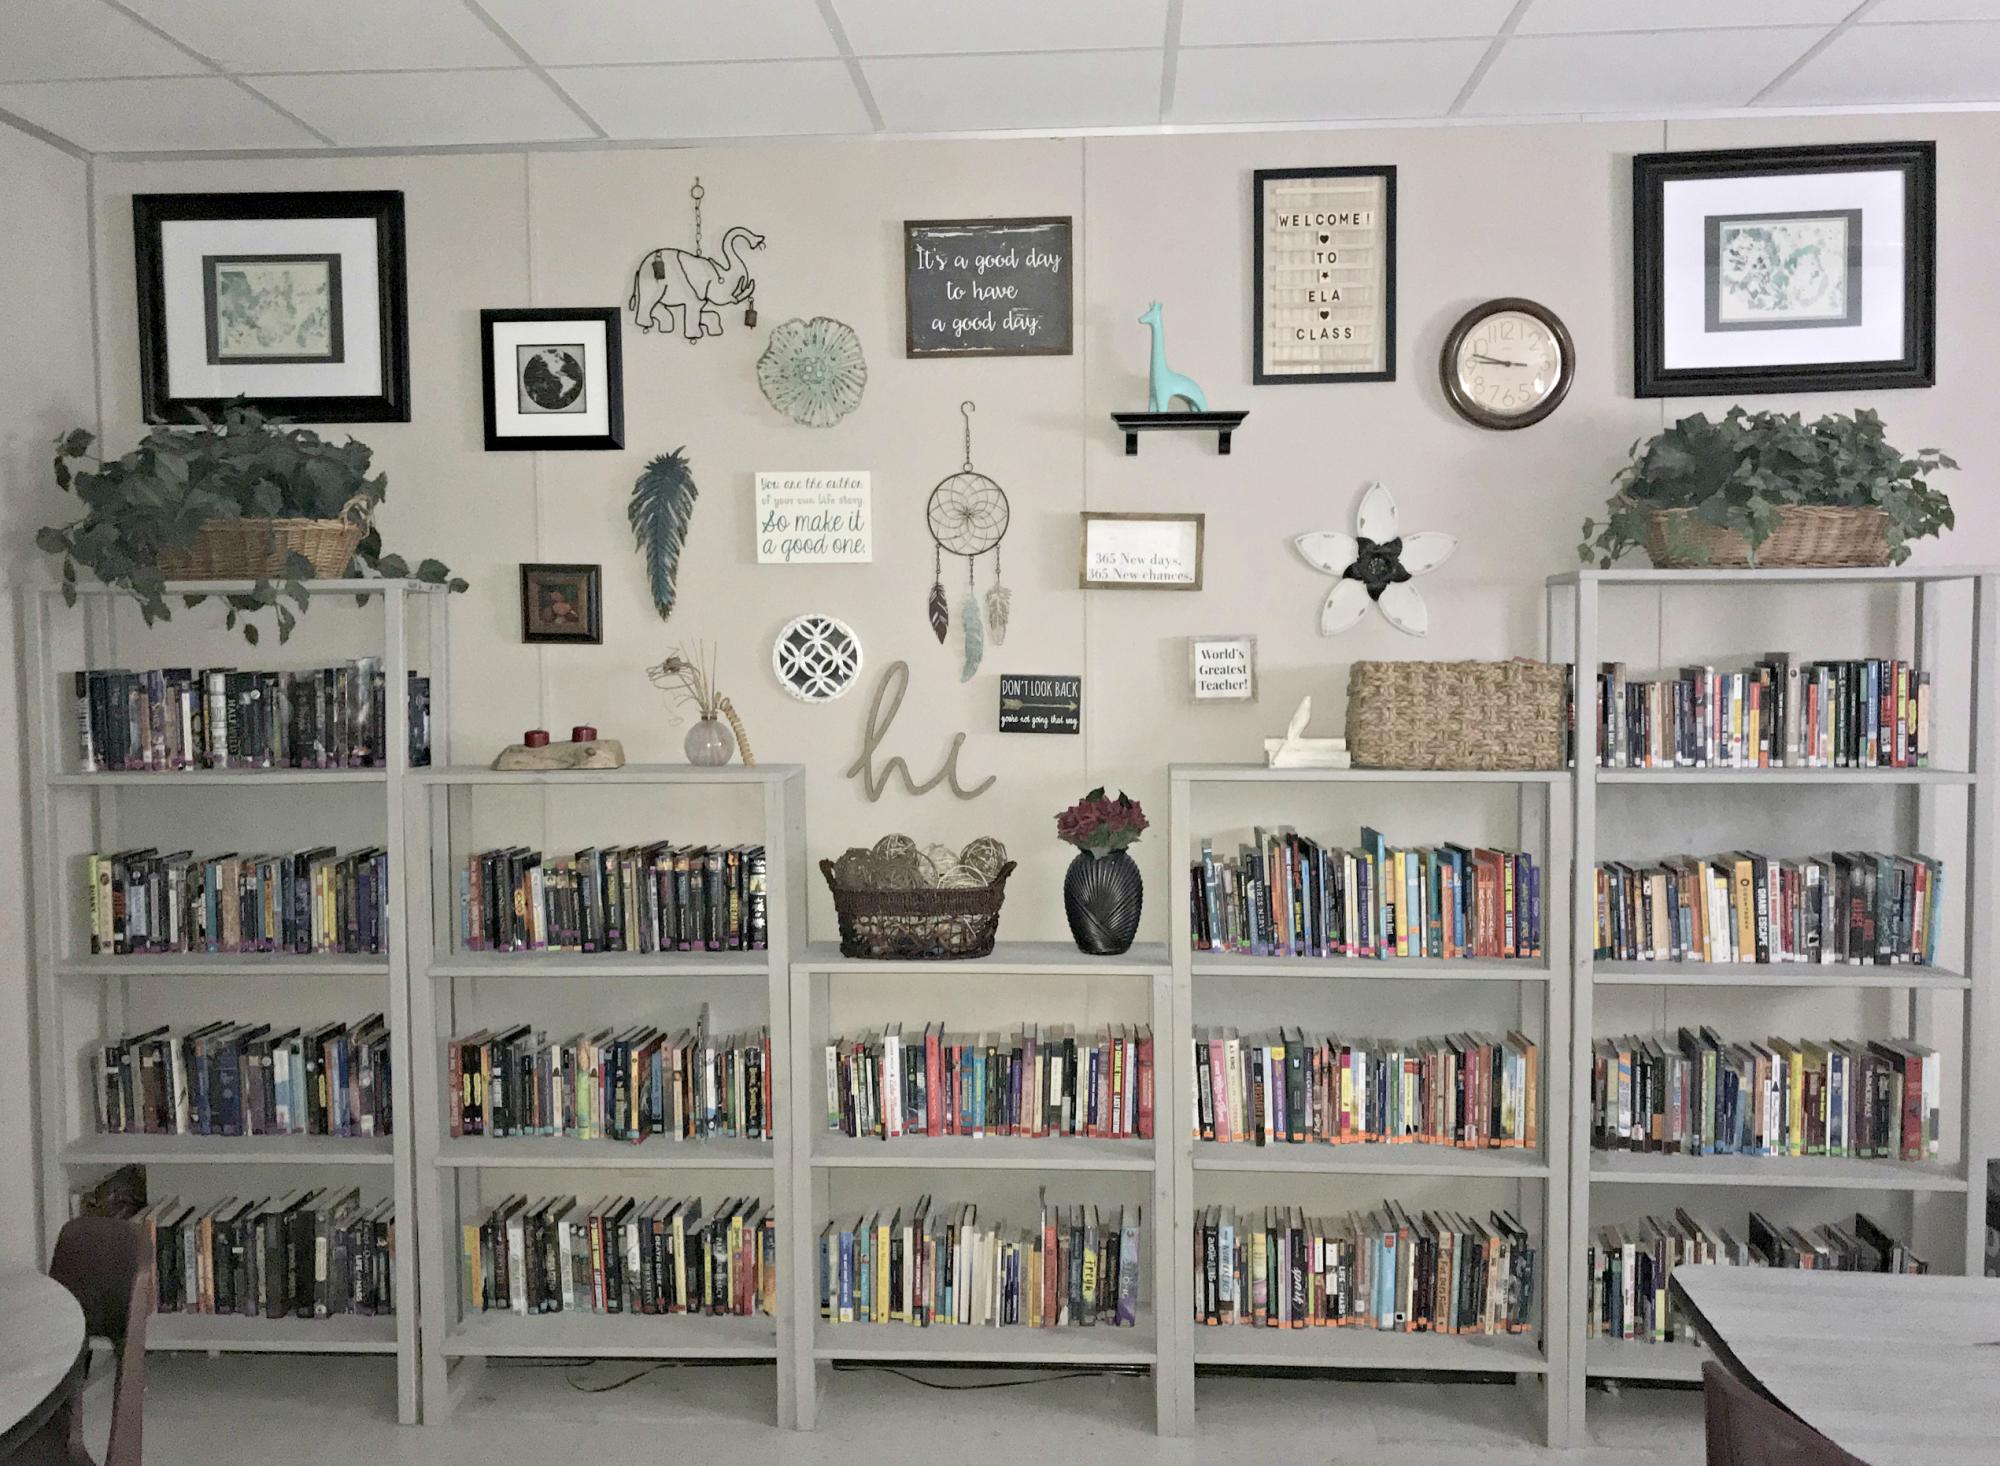
My husband made these gorgeous, inexpensive bookshelves for my classroom. We modified the plans to create a couple of different sizes. I love them, and they work perfectly for the classroom library.
https://www.ana-white.com/woodworking-projects/30-industrial-bookshelf
Built from Plan(s)
Estimated Cost
$75
Estimated Time Investment
Afternoon Project (3-6 Hours)
Finish Used
Varathane Woodstain- Sunbleached
Recommended Skill Level
Beginner
Comments
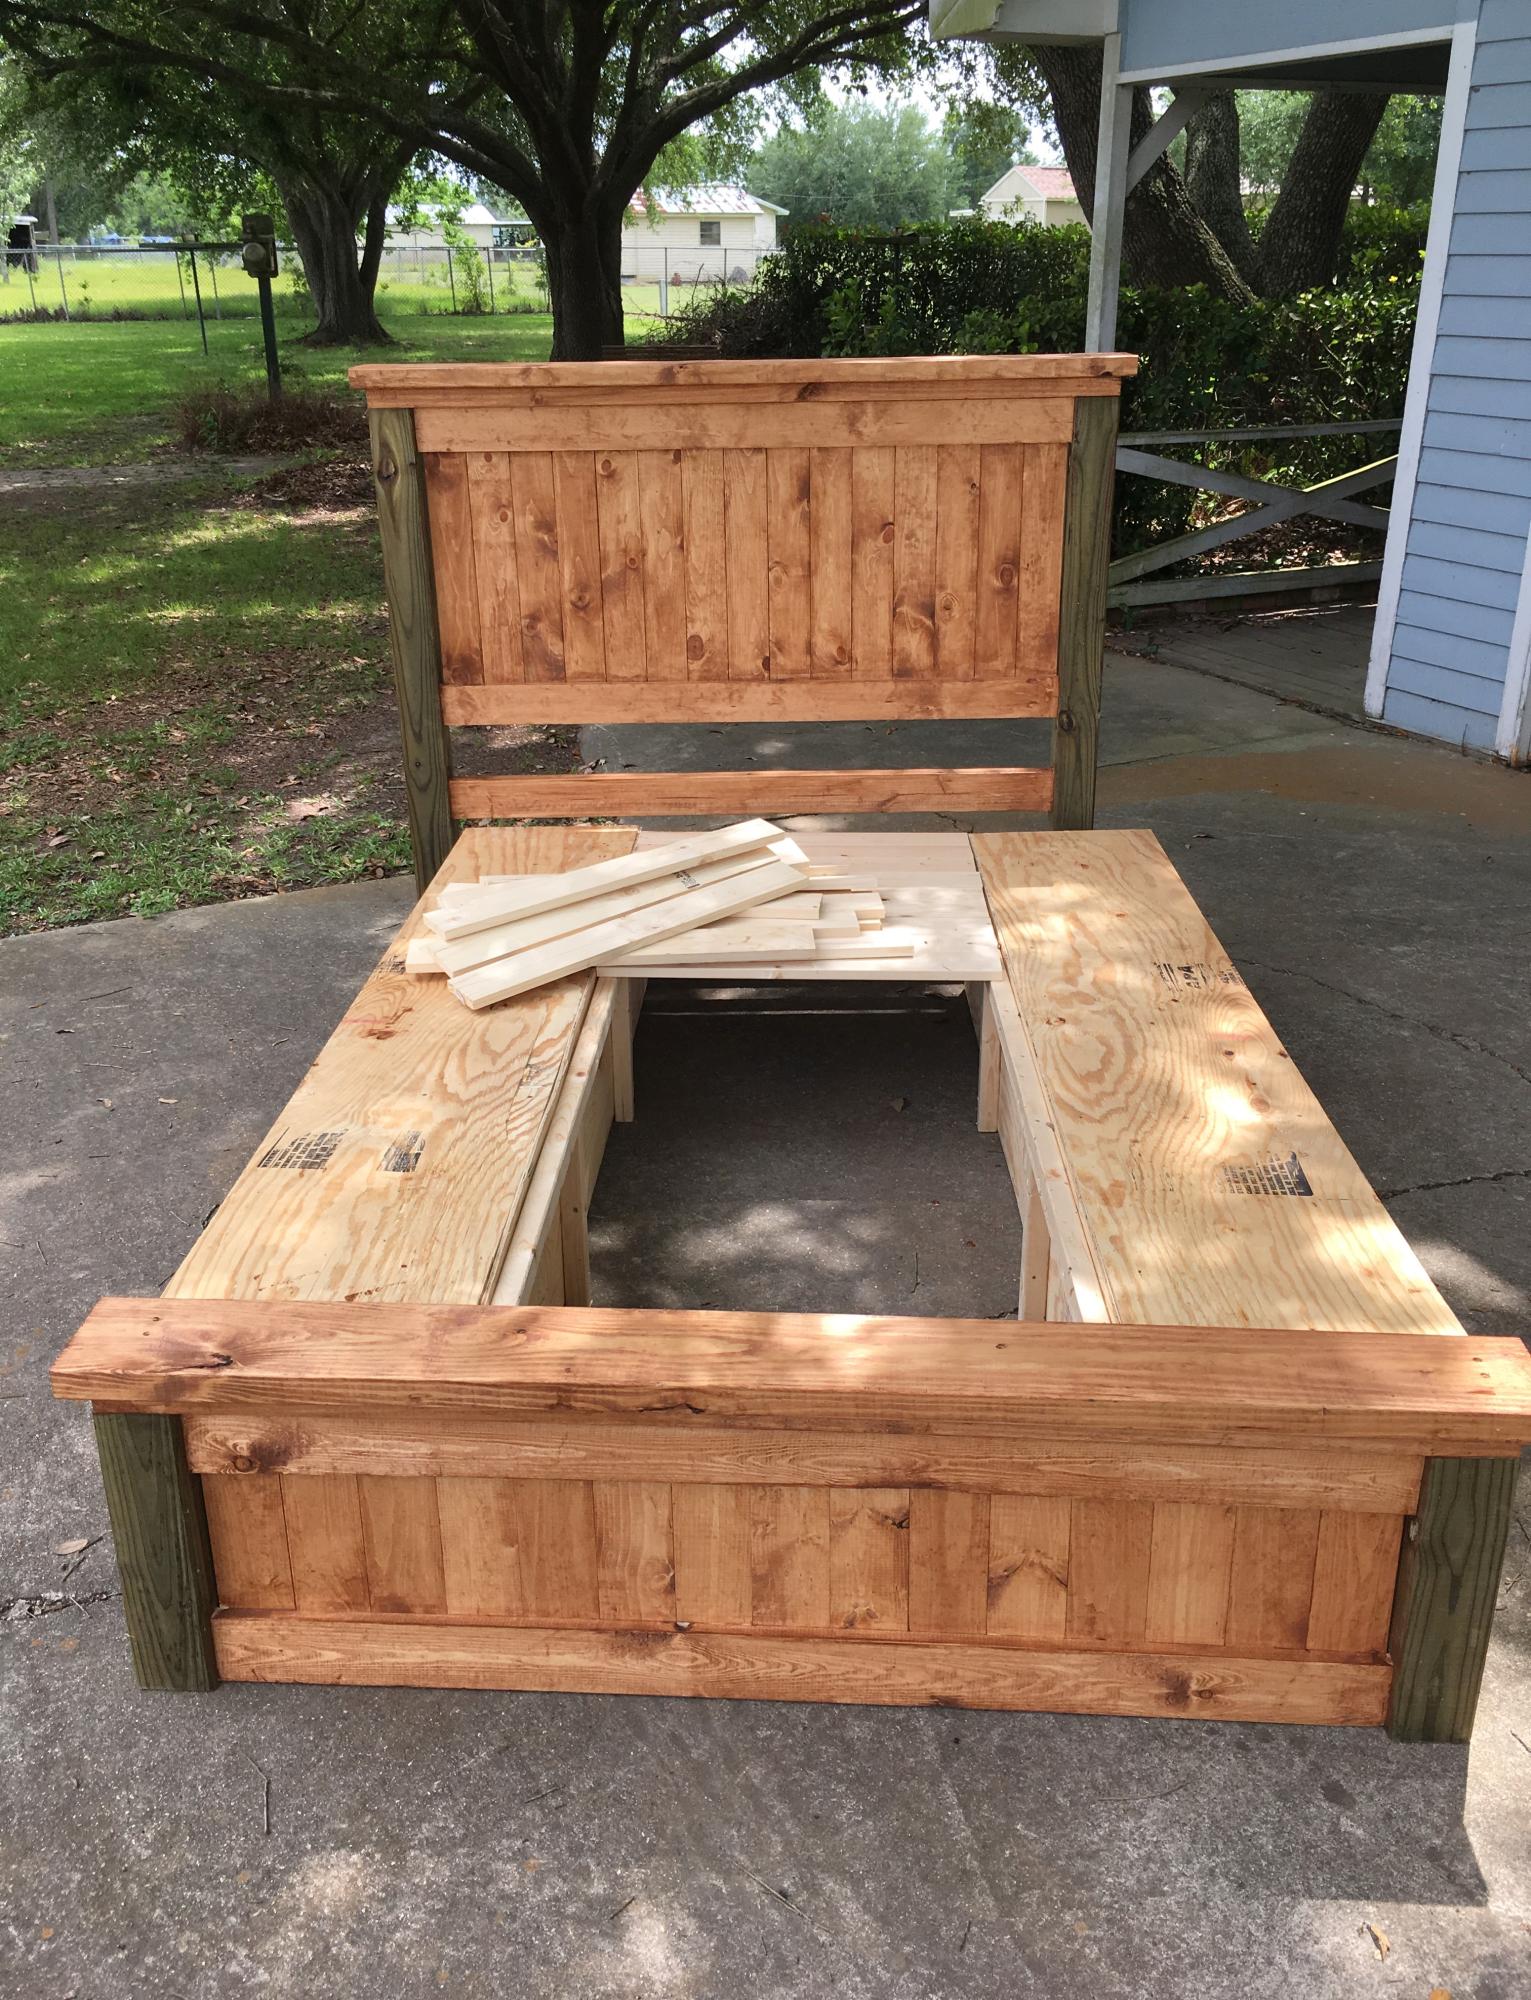
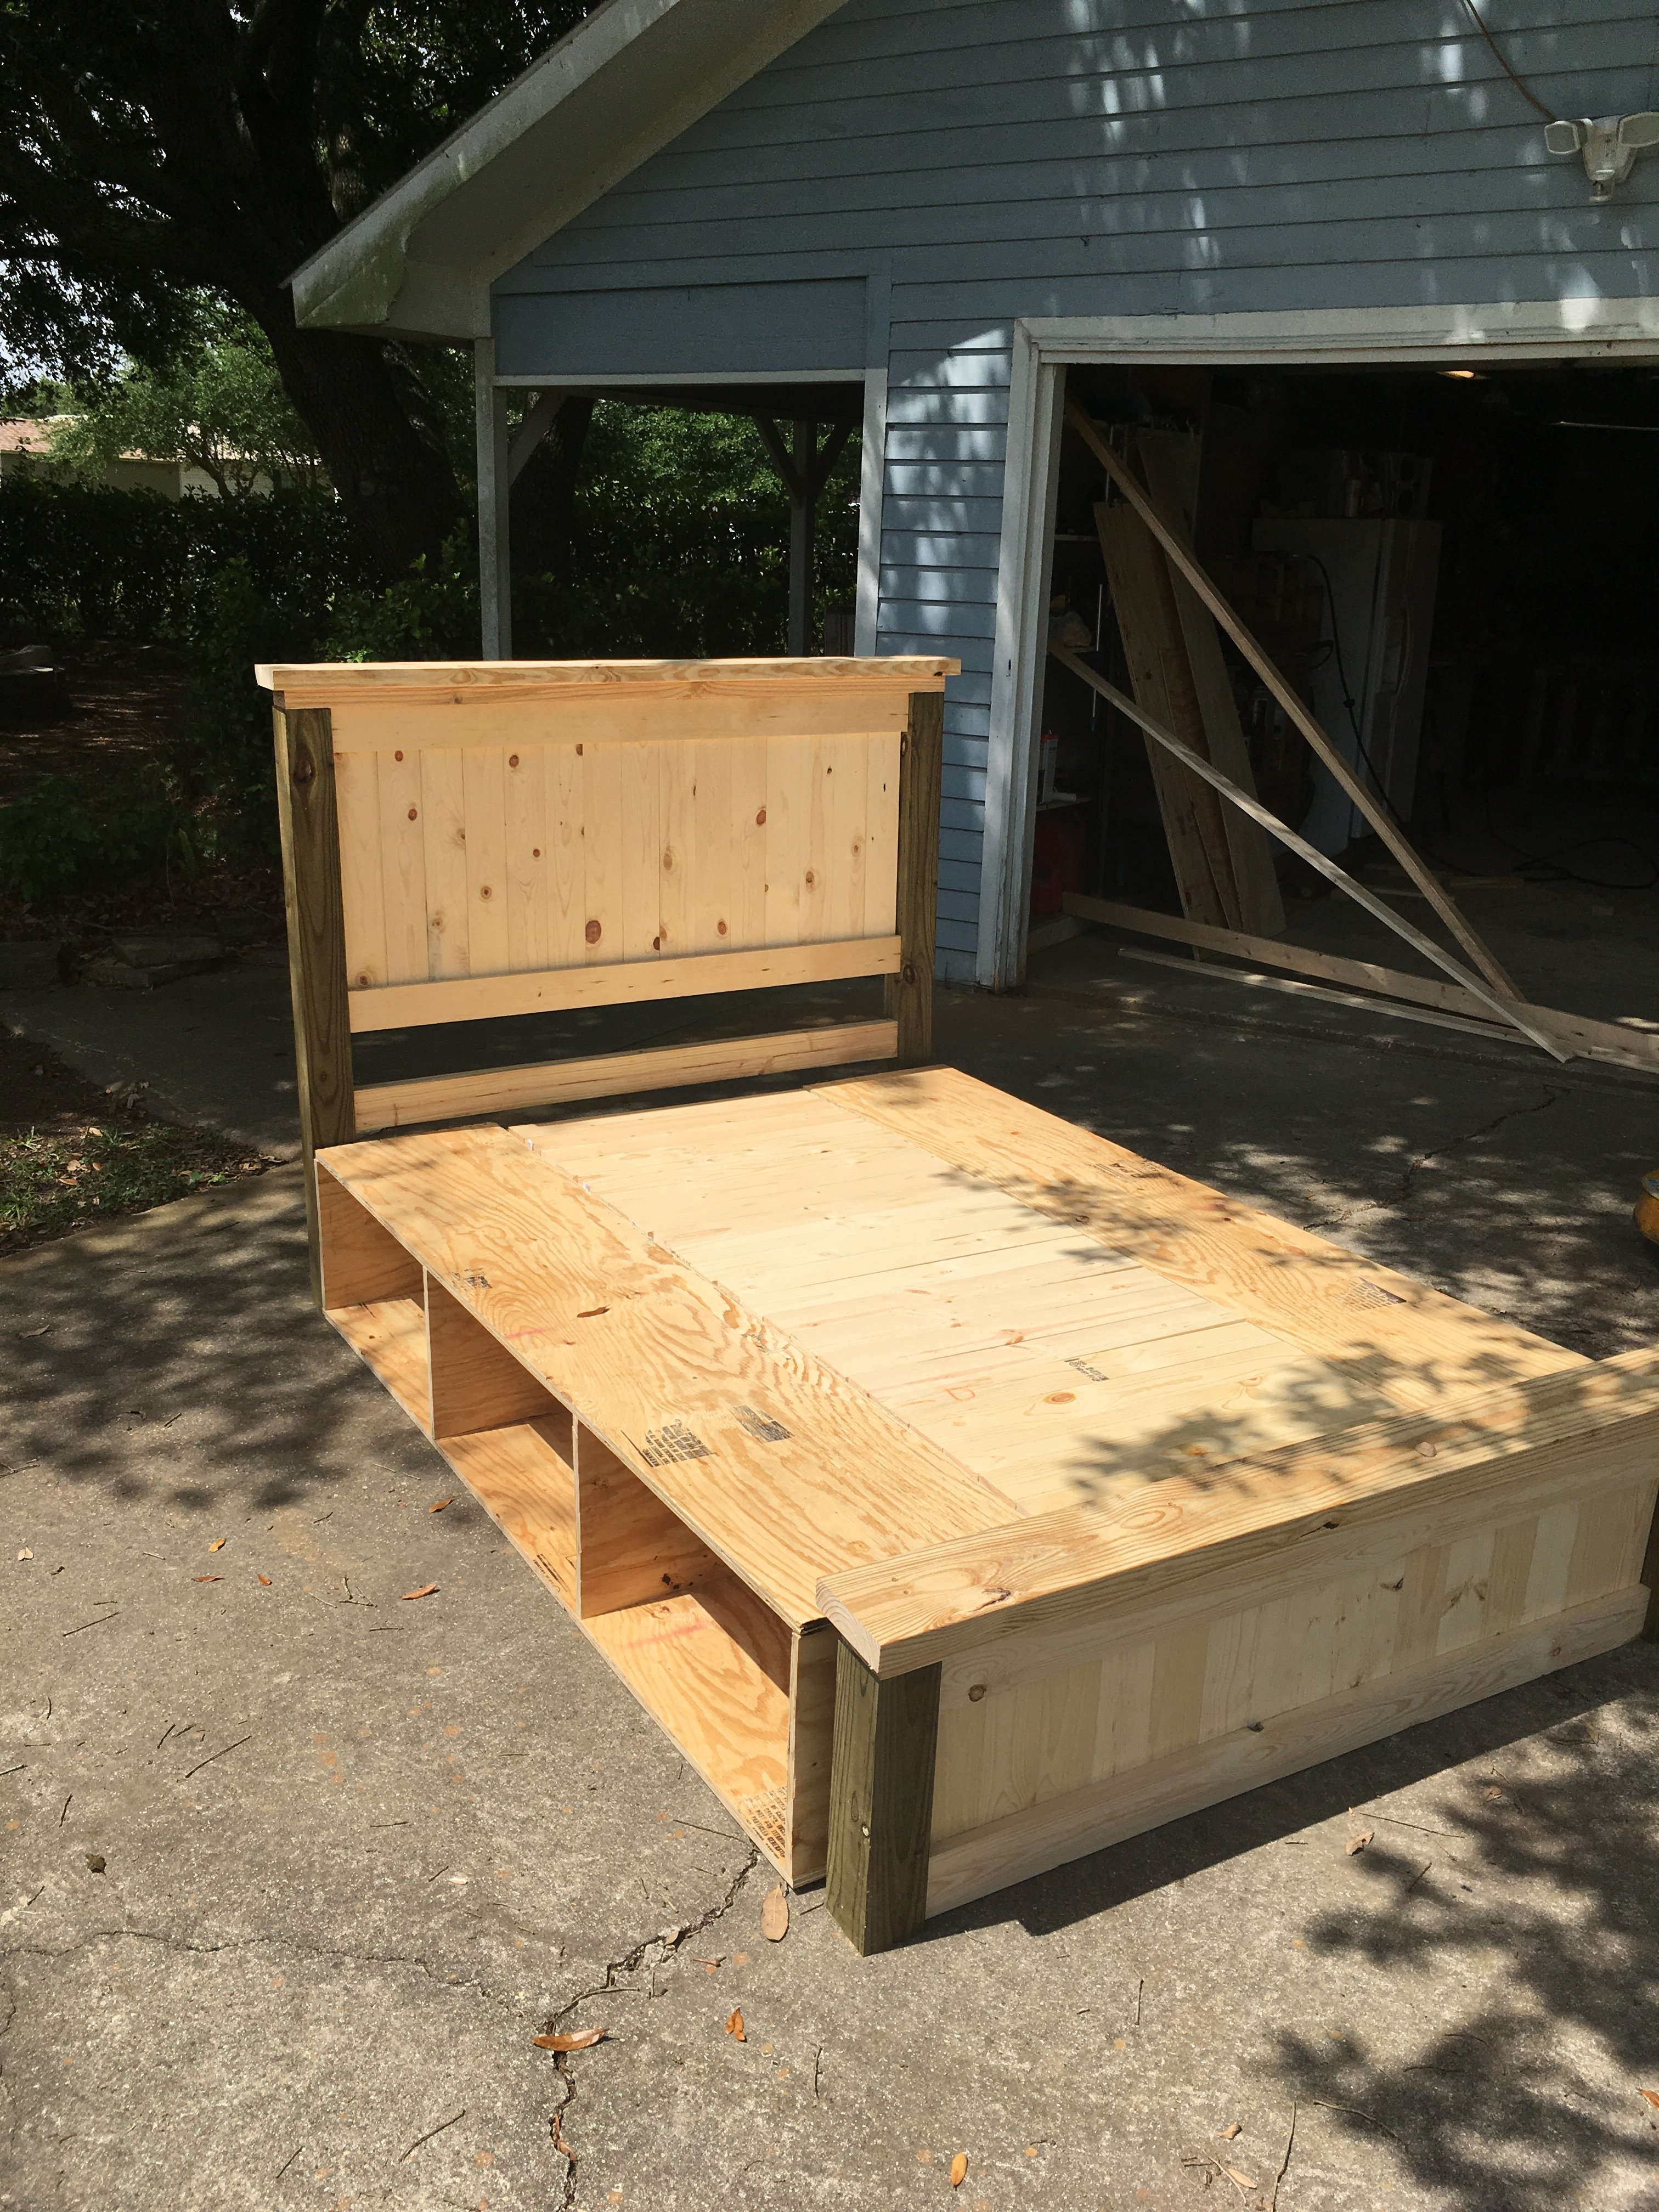
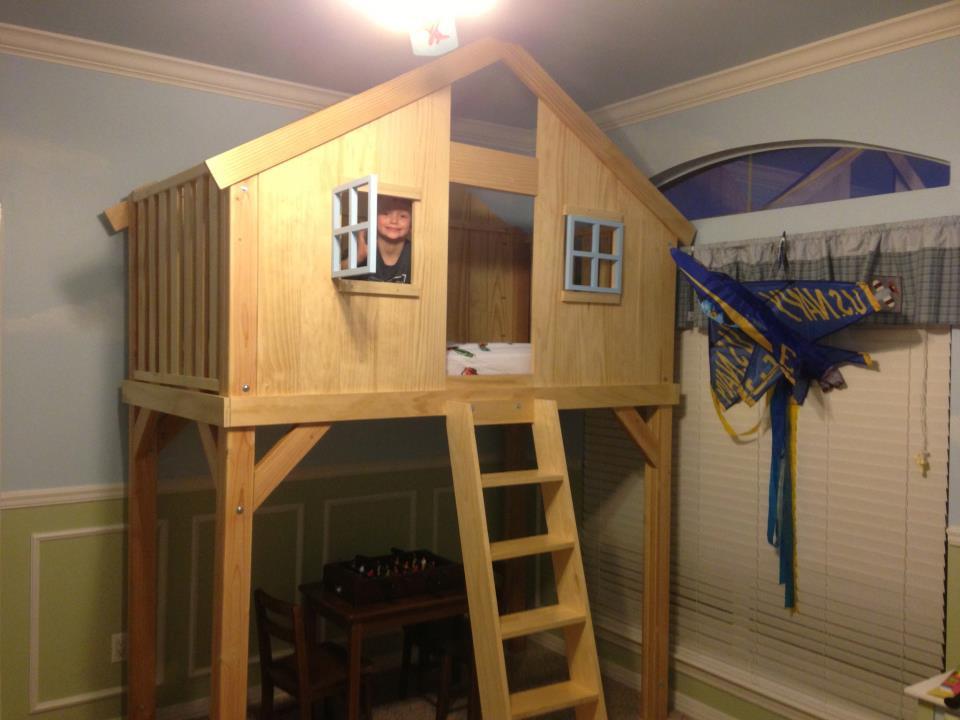
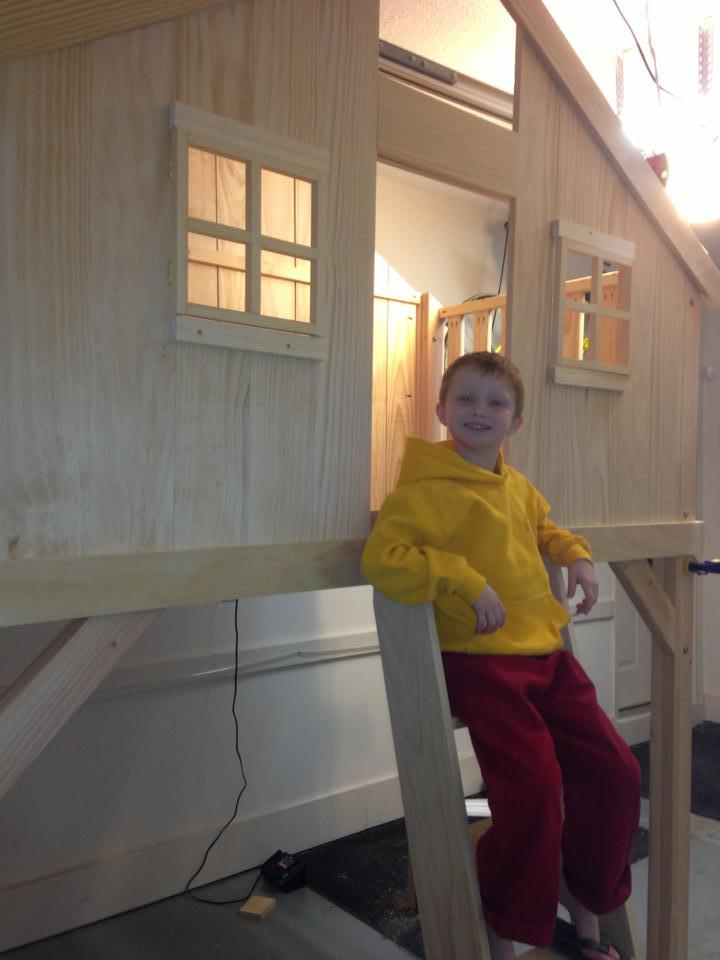
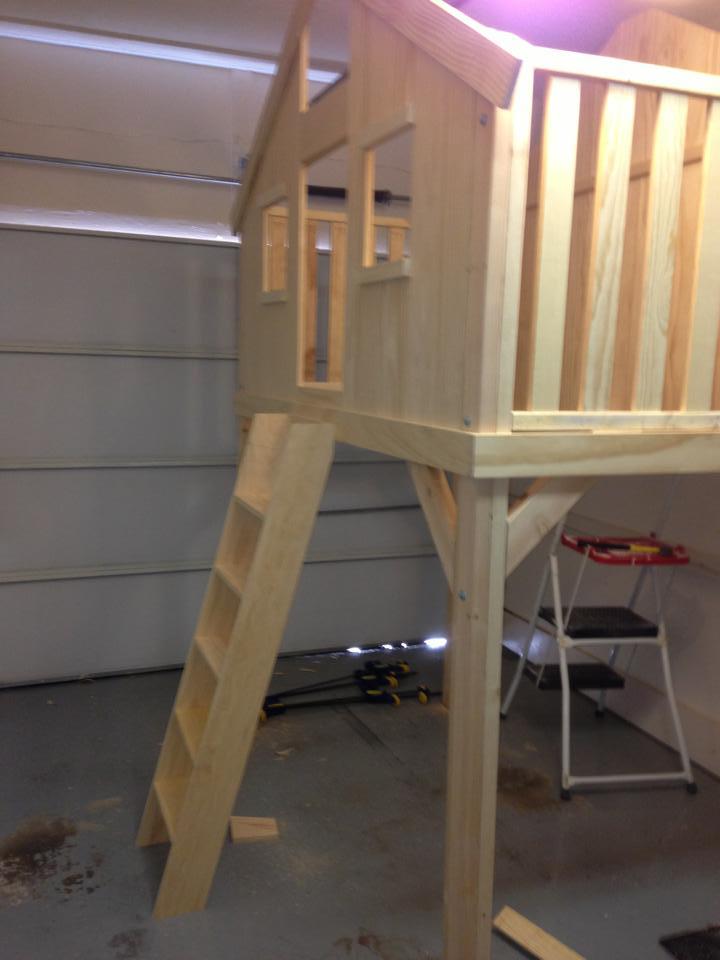
My version of the Clubhouse Bed
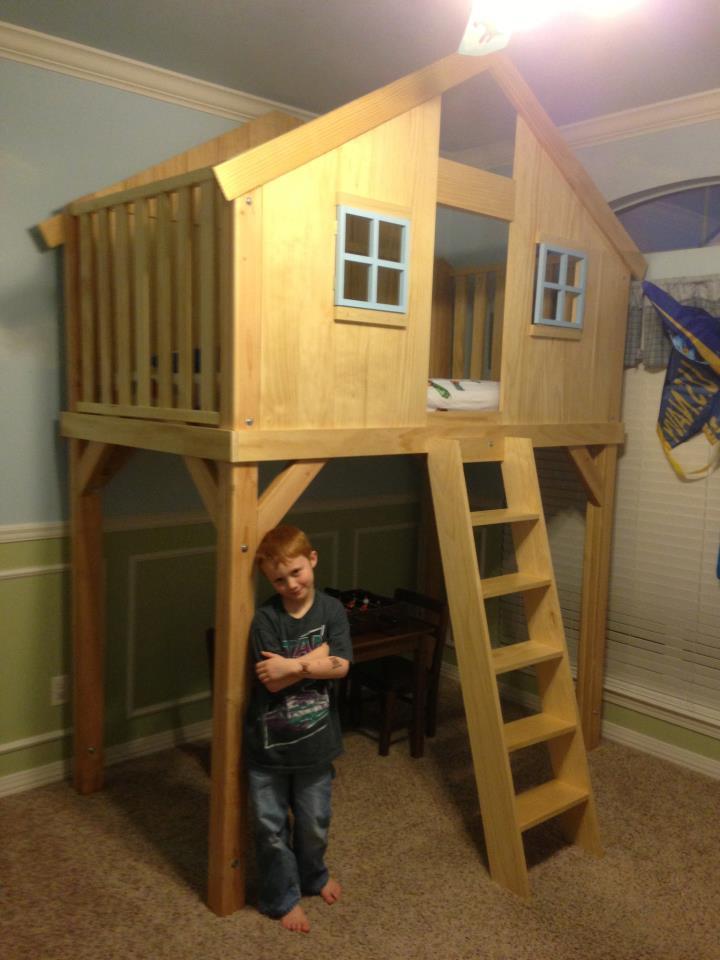
Decided to make this bed as a father-son project. We modified the original plan a bit but used most of the ideas from the site. We decided to make it taller since we had the ceiling height available and wanted real usable space under the bed. I built this one with 58" clearance under the bed. We also made the windows hinge outward to prevent head bangs when playing in the bed. We also added a bit more support on the front and the back panels.
Estimated Cost
$500
Estimated Time Investment
Week Long Project (20 Hours or More)
Finish Used
I sprayed on a clear poly using a HVLP sprayer.
Recommended Skill Level
Beginner
Potting Bench Project
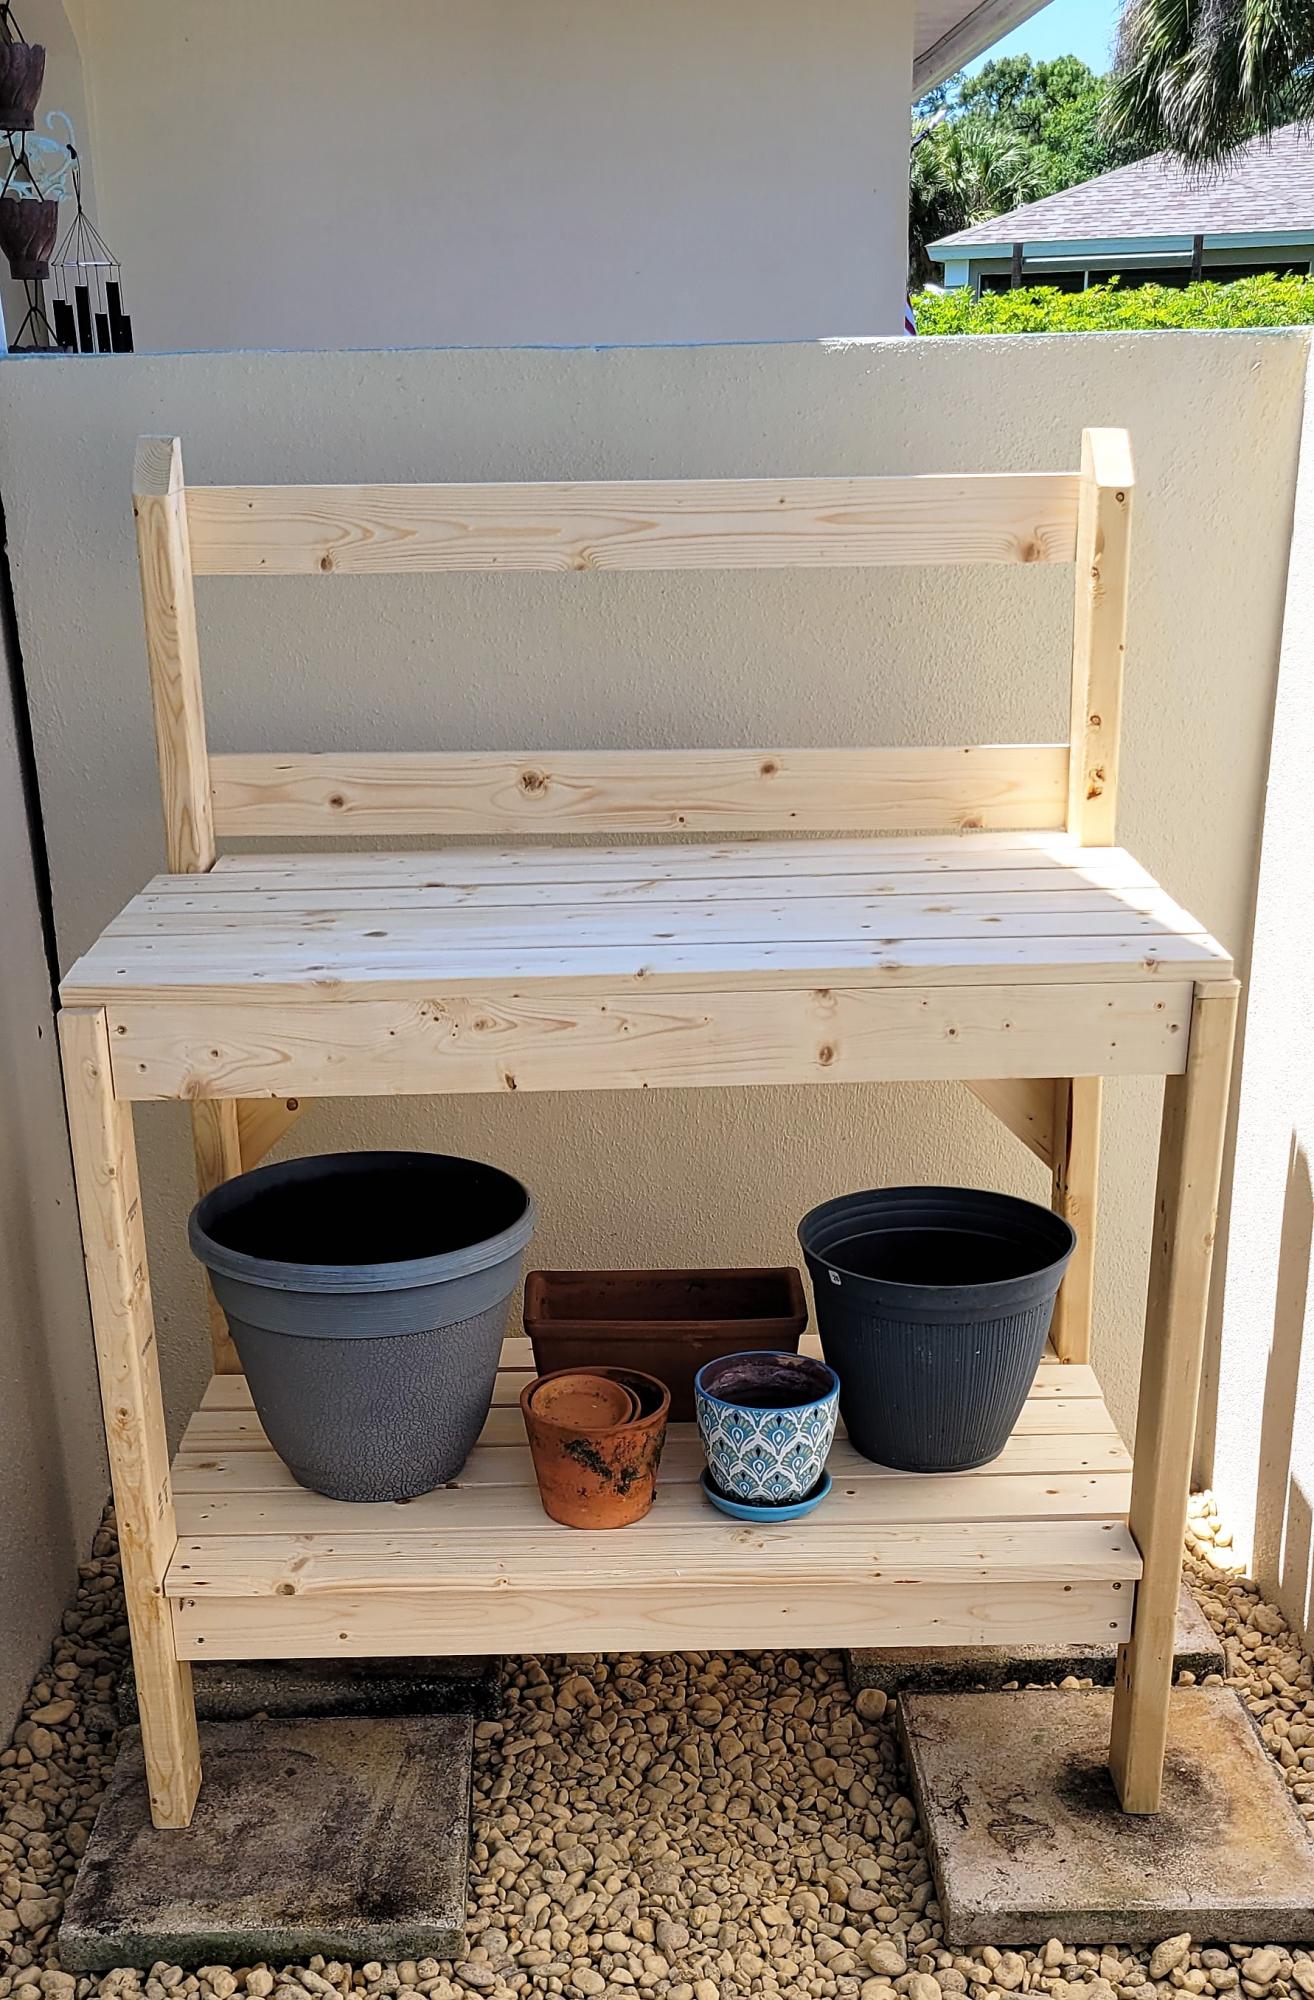
Fun project indeed! Just make sure its all square every step of the way.
Thanks, I look forward to perusing some more projects!!
Built from Plan(s)
Estimated Cost
$50
Estimated Time Investment
Day Project (6-9 Hours)
Finish Used
Thompson's Clear Wood Sealer, two coats
Recommended Skill Level
Beginner
Comments
My son is gonna love it
this was an easy project and so practical. I saw the "other" version of this and wondered where $70 worth of time and materials went. This cost me $7 and about an hour and a half. I love making something that I've seen for a fraction of the cost, and this site makes it so easy.
Built from Plan(s)
Estimated Cost
$7
Estimated Time Investment
An Hour or Two (0-2 Hours)
Finish Used
Minwax English chestnut, 2 coats
Recommended Skill Level
Beginner
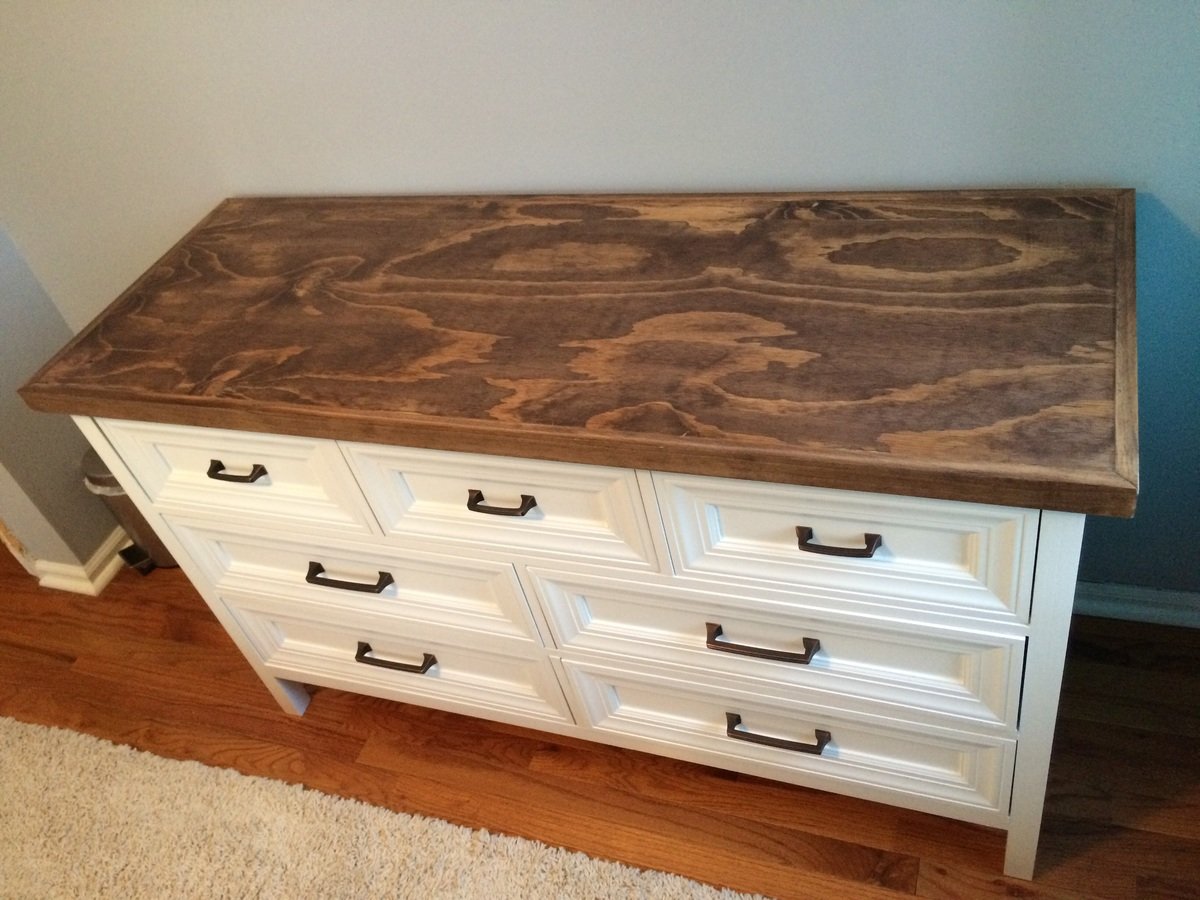
Kendal Dresser - upgraded
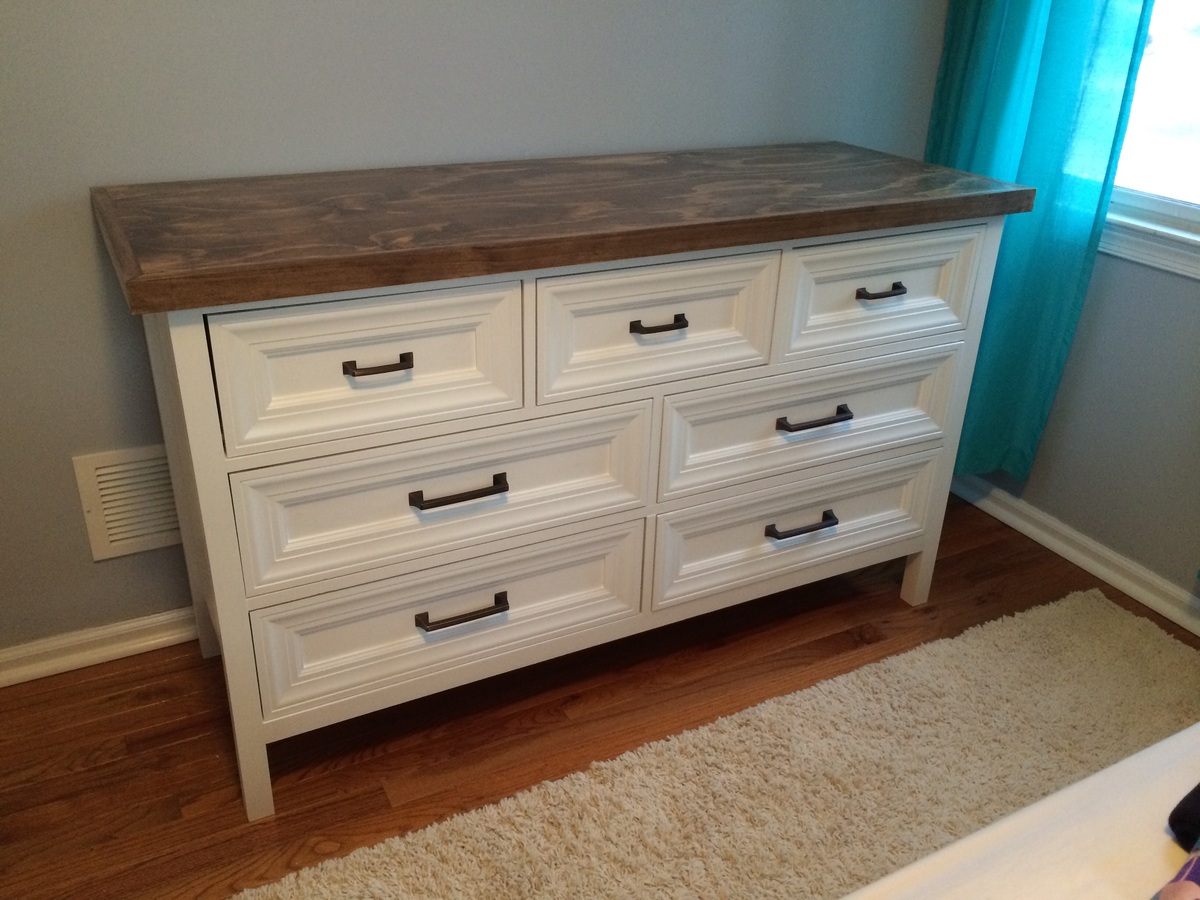
I added front drawer trim & a walnut stained top to this already great design
Built from Plan(s)
Finish Used
Minwax Special Walnut
Varathane clear coat
Sherwin Williams high gloss white
Varathane clear coat
Sherwin Williams high gloss white
Recommended Skill Level
Intermediate
Comments
Cedar Planter Box

Great, simple plans and exactly what we needed for a planter box. A great use for scrap lumber or leftover lumber. The finished size is very practical. This is our second Ana White project. Garage shelving project was as simple and successful.


Estimated Cost
Made from mostly leftover lumber. Minimal costs.
Estimated Time Investment
An Hour or Two (0-2 Hours)
Finish Used
Stain & Paint
Recommended Skill Level
Intermediate
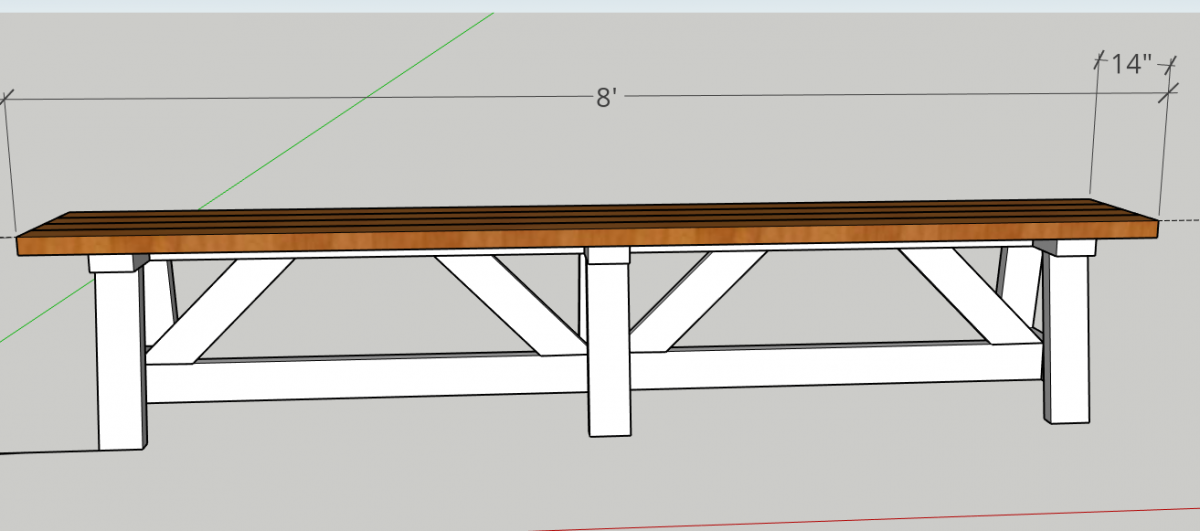
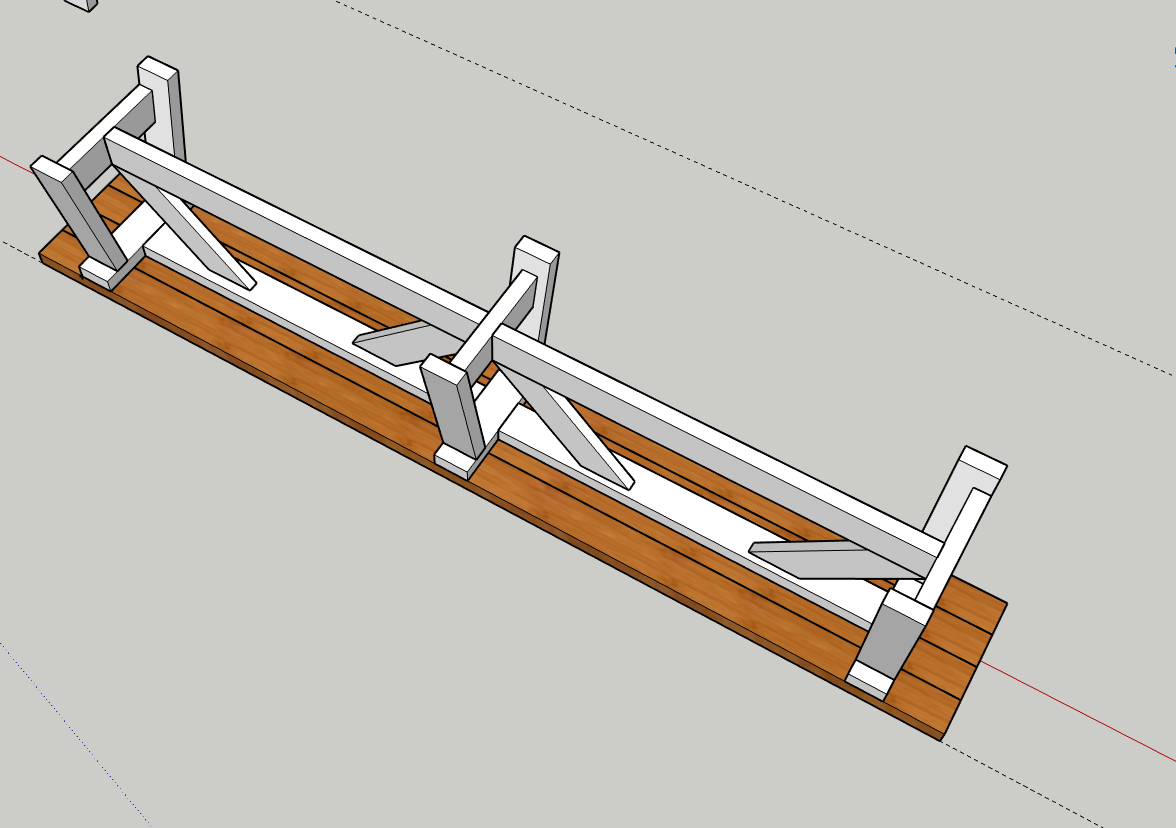
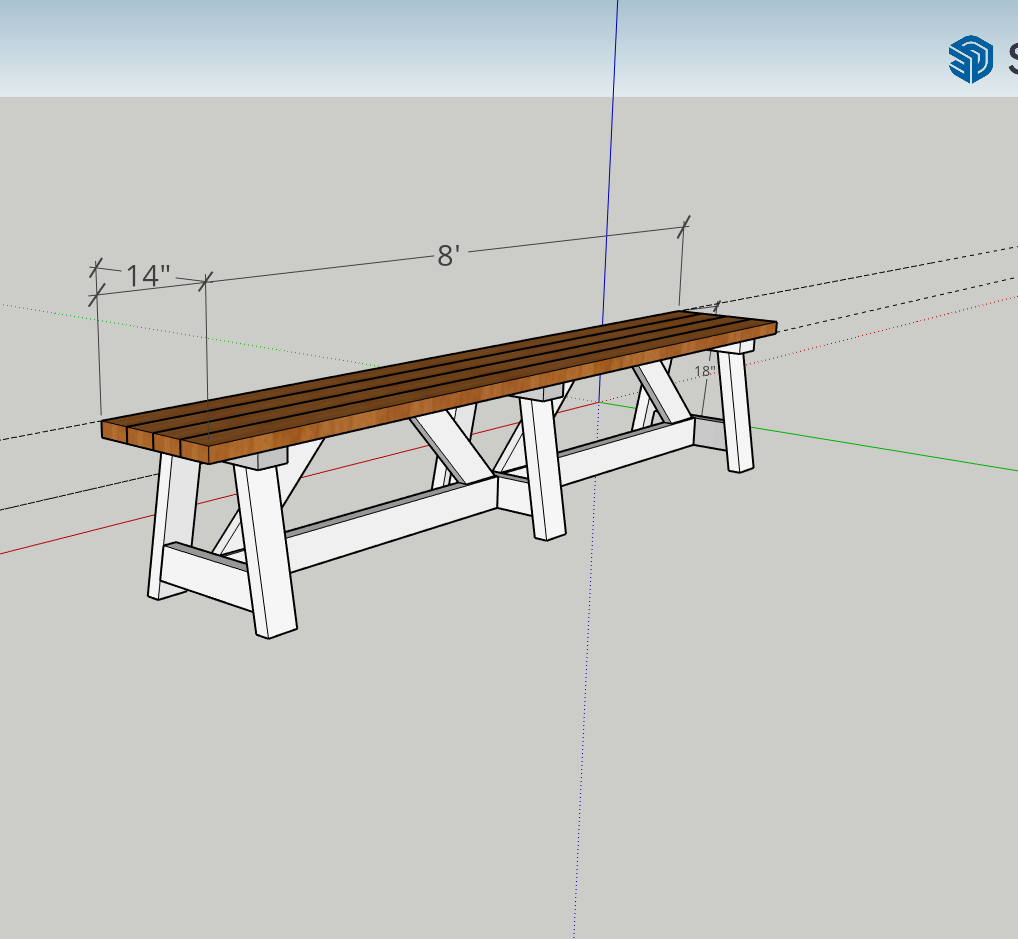
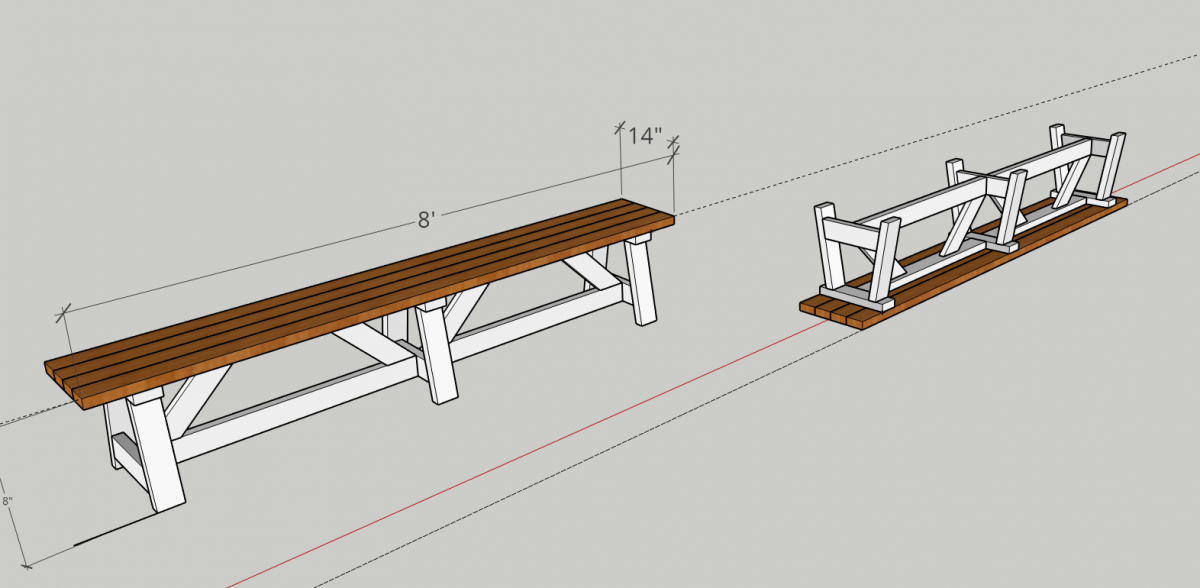
8 foot long truss style farm bench
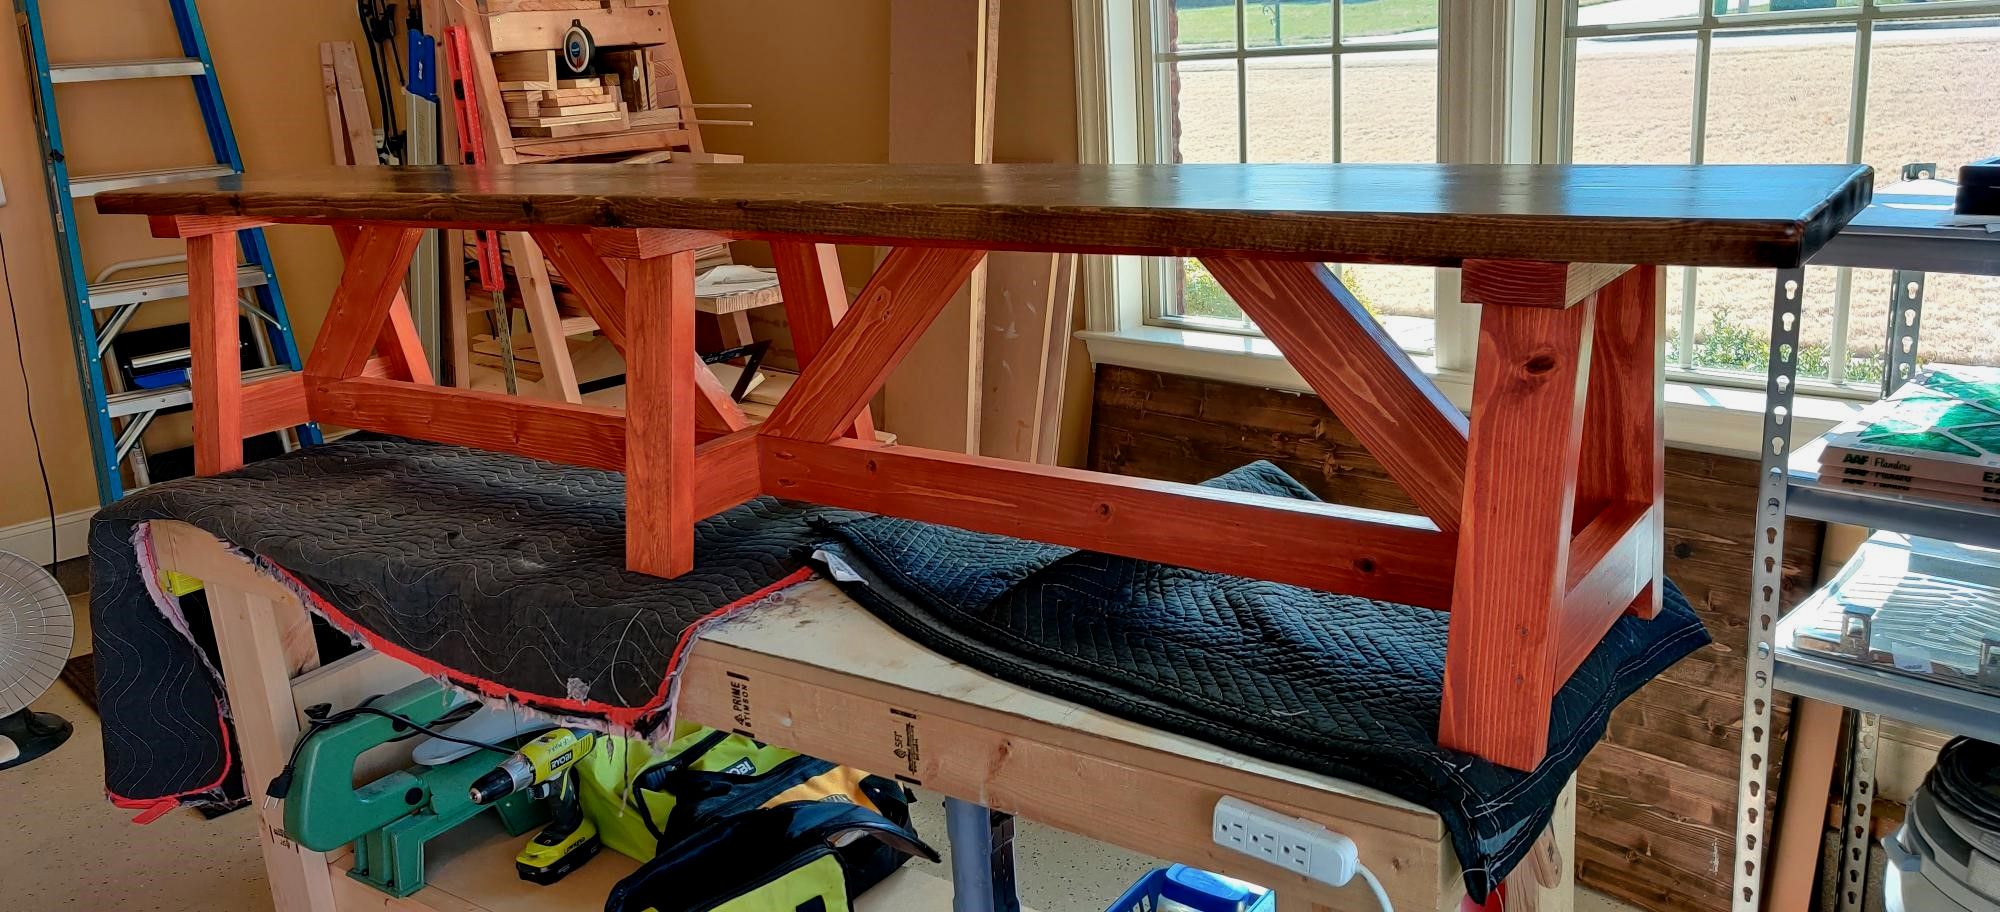
I had a friend that loved the 48" long truss style farm bench. However, she wanted one 8' long. I modified the "2X4 Truss Style Farm Bench" and came up with this design. As you can see, she want a very specific stain color combination.
Built from Plan(s)
Estimated Cost
$80
Estimated Time Investment
Week Long Project (20 Hours or More)
Finish Used
stains and Minwax Polycrylic
Recommended Skill Level
Beginner
Comments
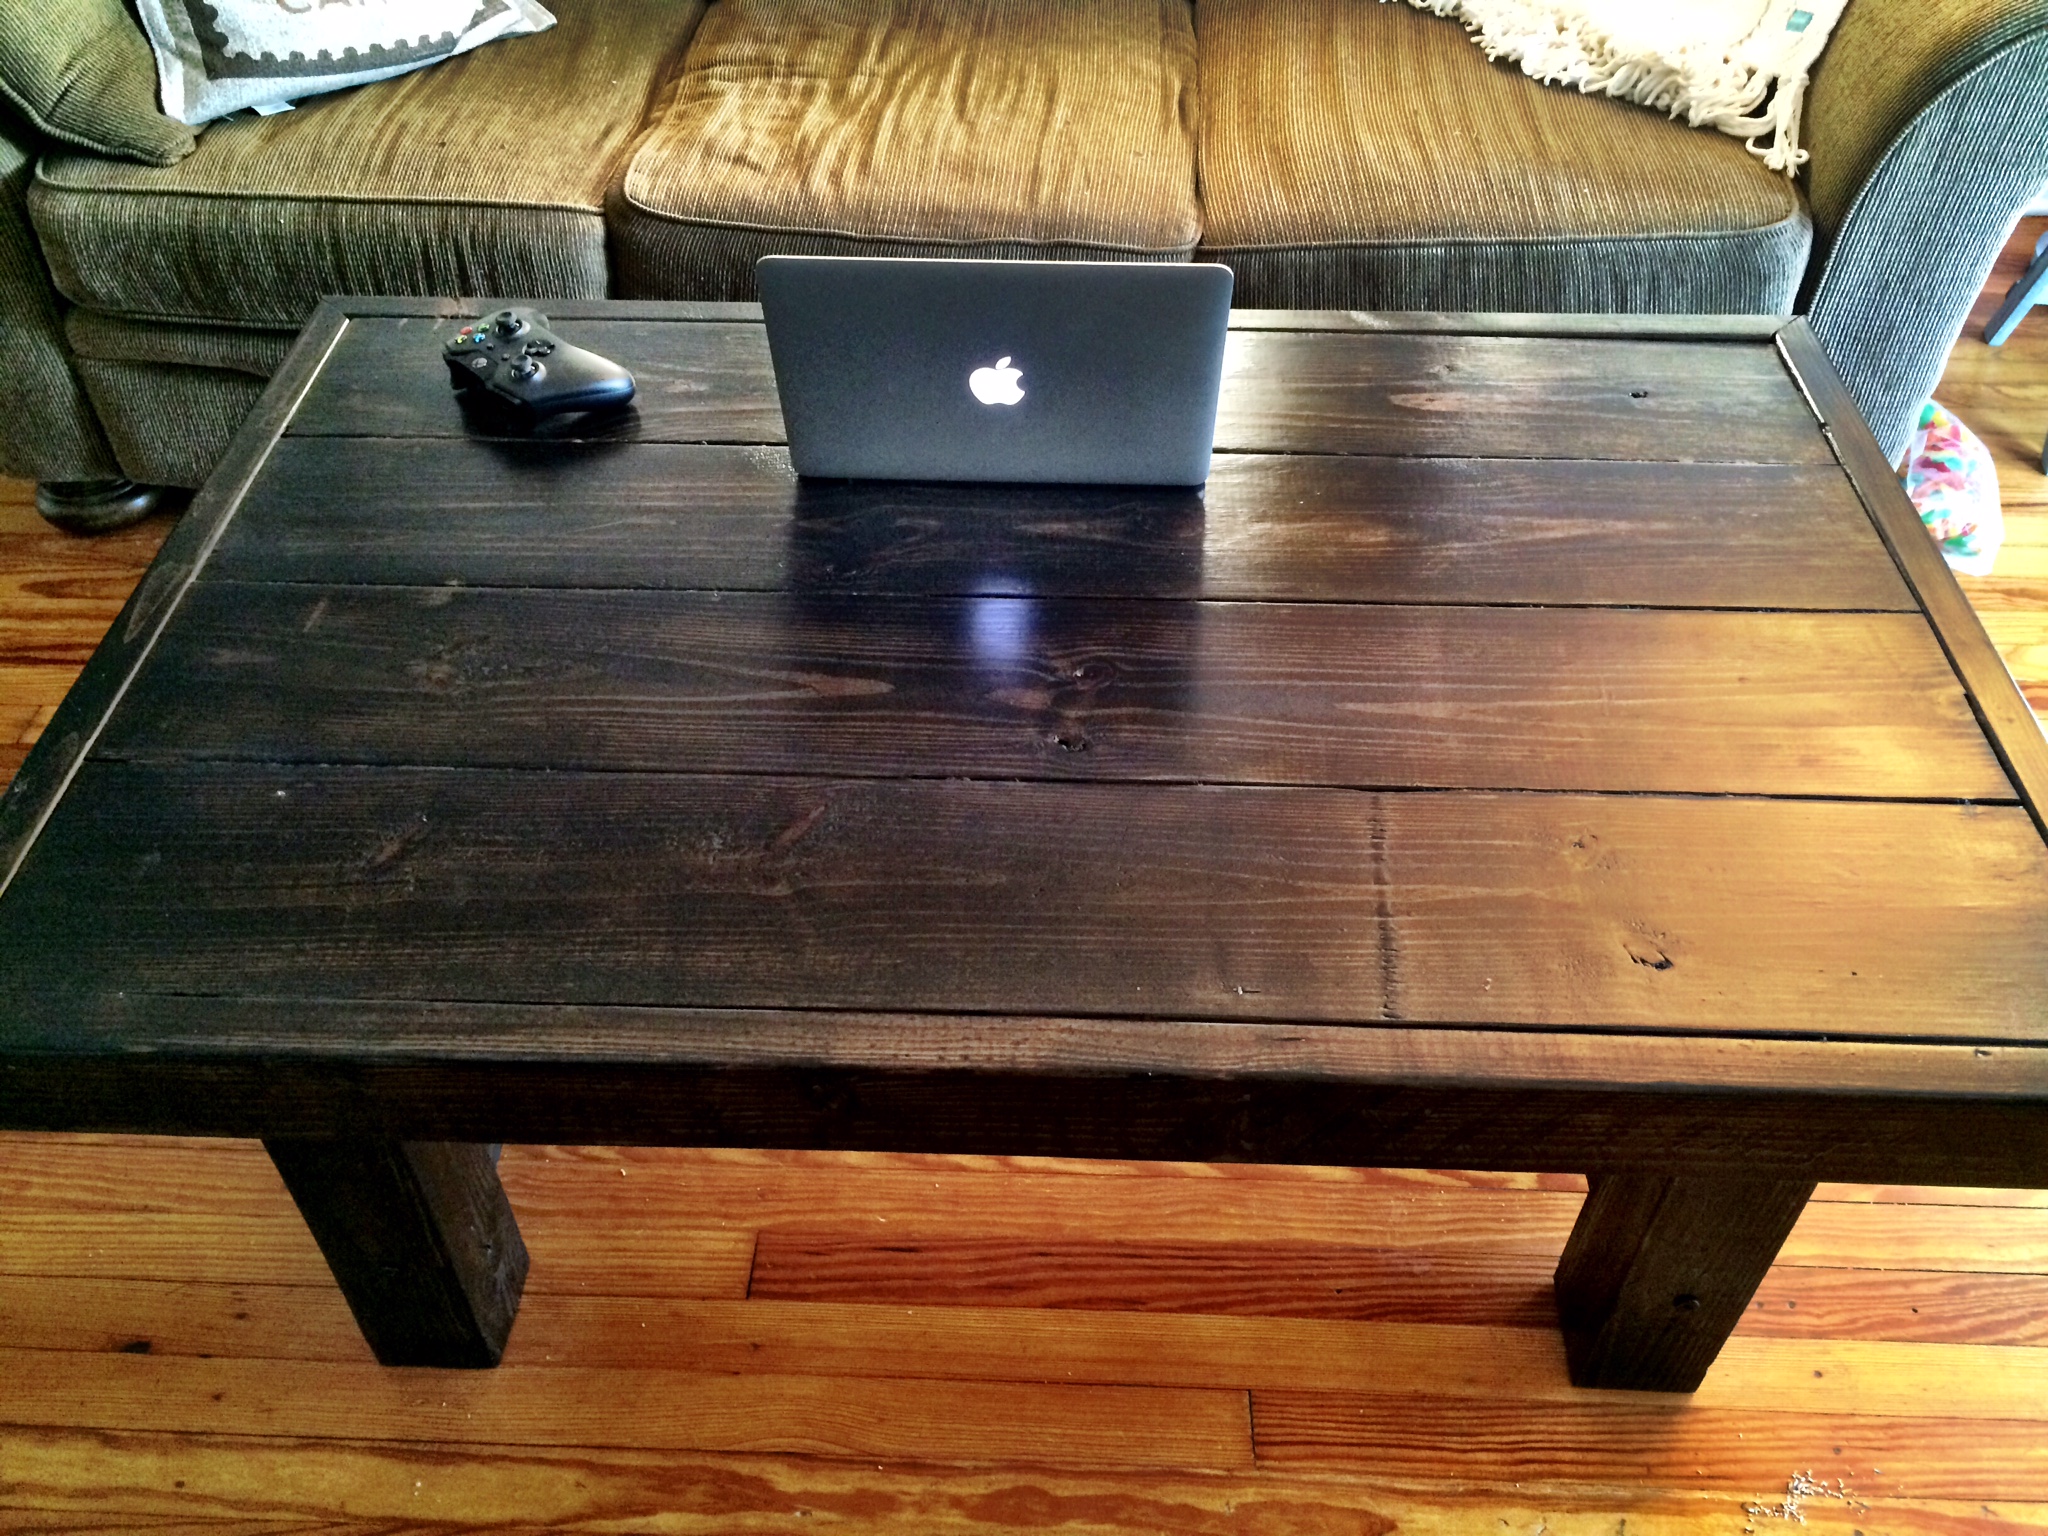
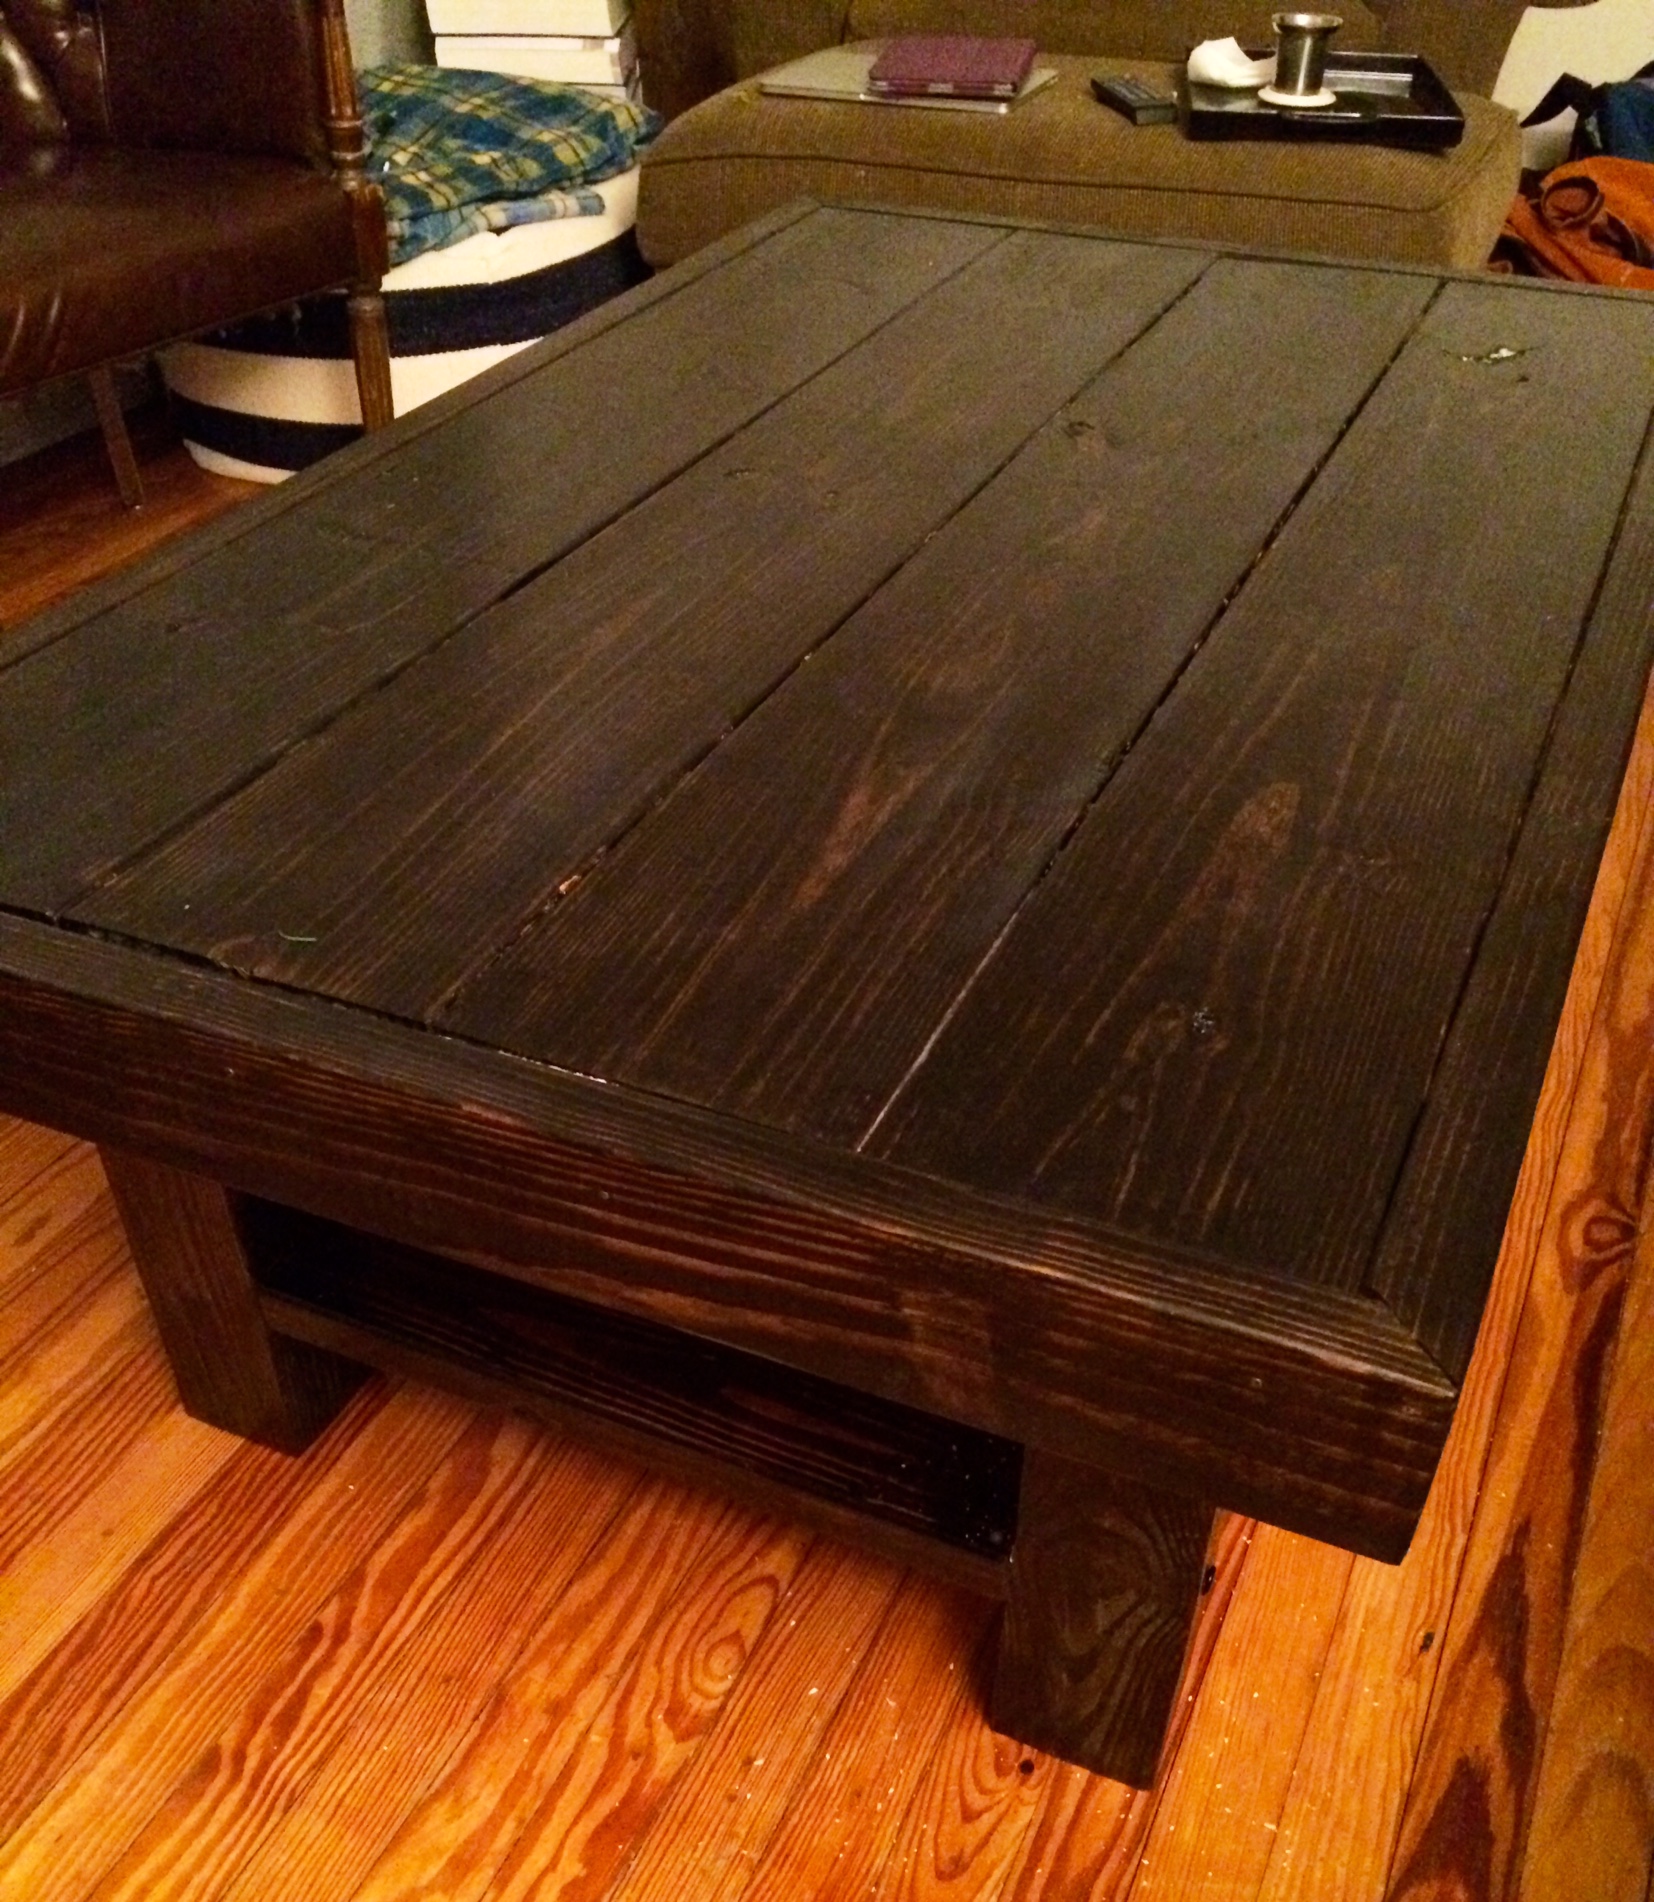
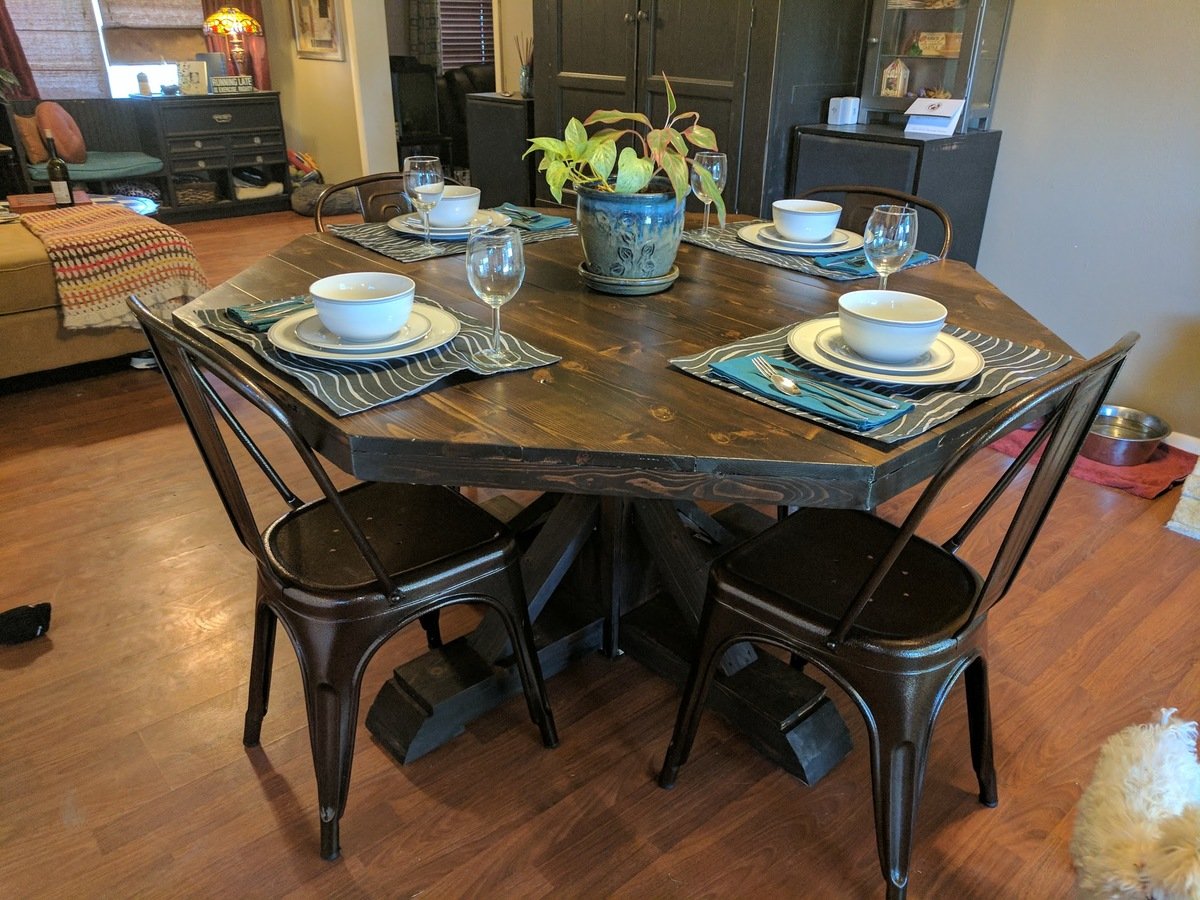
Rustic table first project!

After weeks of being shown every DIY project on Interest by my lovely wife, like most men, I cracked! What seperated me from these other guys??? NOTHING! Haha, so I took a trip to Home Depot, got my supplies and went to work.
The assembly and construction was relatively easy, I have a background in construction so I was taught the motto of "measure twice, cut once." This served me well during this project as I did not need to get additional lumber for careless mistakes.
After the table was put together, I went to work with the sanding/distressing of the table. I wanted it to have a reclaimed barn wood look to it; So out came the nails, screws, chains and blowtorches. This was probably the most fun!
After the distressing was to my liking, I went to work prepping for stain. Two coats of dark walnut Minwax later, we were looking like a real table! Anyhoo, prep for poly, apply two coats, and Bazinga! New kitchen table......that looks really old. Lots of fun to build and will last a long time! Thanks Ana!


Estimated Cost
$150
Estimated Time Investment
Weekend Project (10-20 Hours)
Finish Used
Minwax Dark walnut, Minwax semi-gloss polyurethane.
Recommended Skill Level
Starter Project
Comments
Tue, 03/26/2013 - 14:14
Beautiful! Can't wait to see
Beautiful! Can't wait to see the bench(es) you're going to build to go along with this awesome table - right? :-)
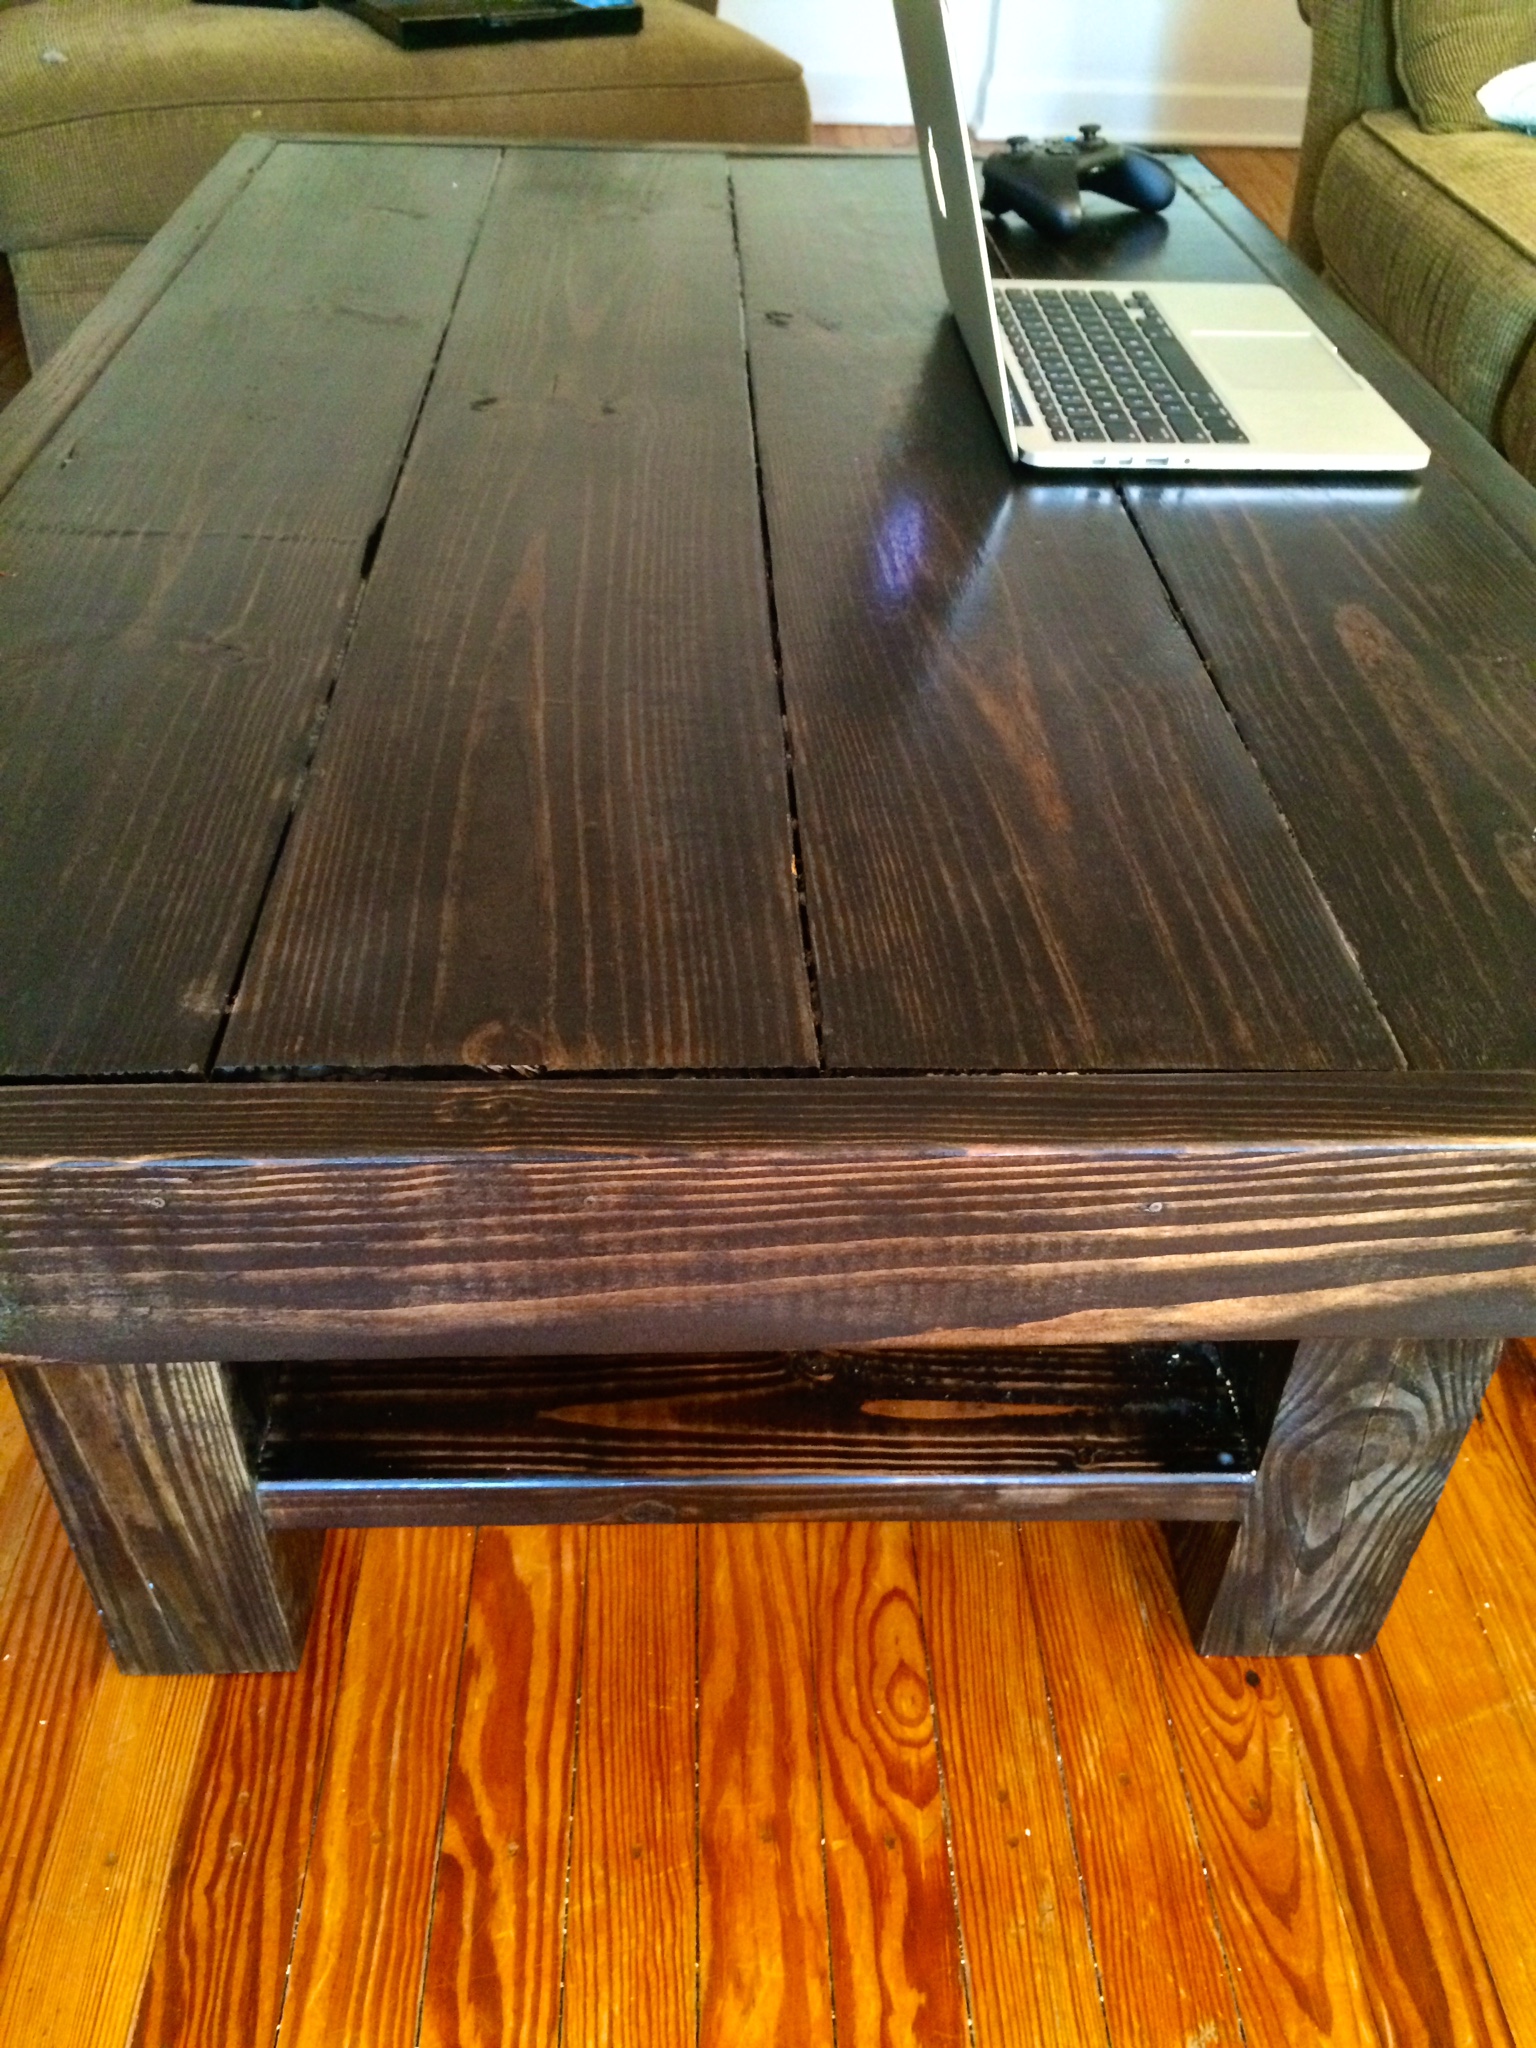
Simple Wood Slab Coffee Table
This was my first solo wood project I have done without my dad, now that I have moved across the country. It was a great intro to woodworking, and I definitely learned a TON. I did this with a generic "tool set" I got for christmas a few years ago, all battery powered.
Note to other beginners:
- Circular saws that are battery powered may not have the juice to cut through those 2x8's, which led me to have some uneven cuts.
- Careful with the wood glue. If it leaks out between the boards it can be a B**** to clean up and will cause some issues with staining down the road.
Long story short: Love this project, super happy with the turnout even with some imperfections! Has me bit by the DIY/Woodworking bug!
Estimated Cost
Wood - $50-60
With extra supplies I needed to get besides drill/circular saw: $120ish
With extra supplies I needed to get besides drill/circular saw: $120ish
Estimated Time Investment
Day Project (6-9 Hours)
Finish Used
Minwax Jacobean - Two coats separated by 24 hours (was cold in the garage ~15 degrees outside) so gave it plenty of drying time.
Recommended Skill Level
Beginner
Beautiful table!
These plans were very easy to follow and the end result is beautiful. Thank you so much!
Built from Plan(s)
Estimated Cost
$200
Estimated Time Investment
Weekend Project (10-20 Hours)
Finish Used
Kona stain with matte poly
Recommended Skill Level
Beginner
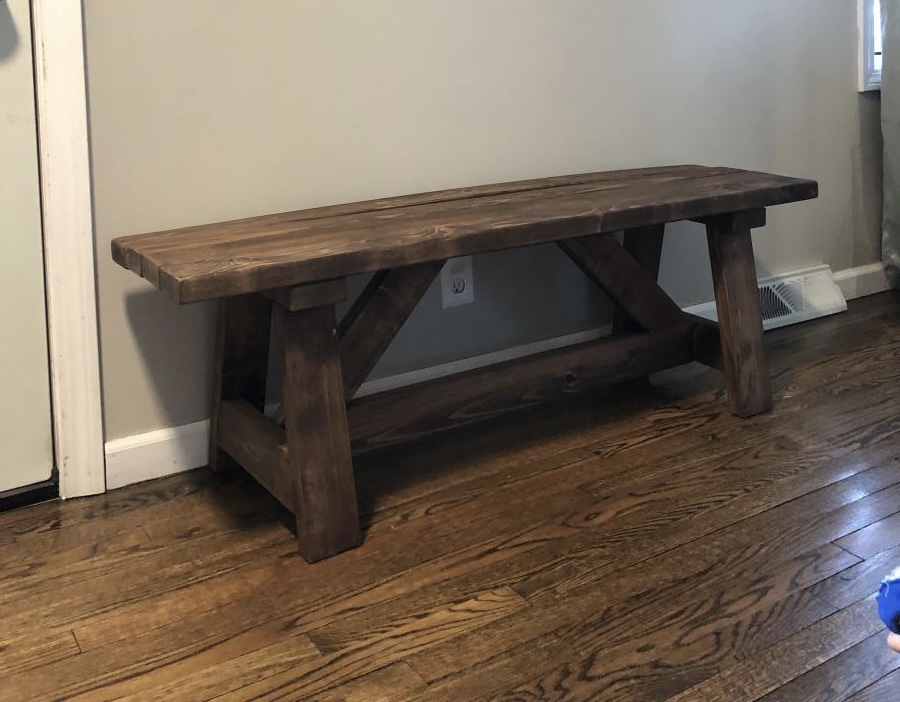
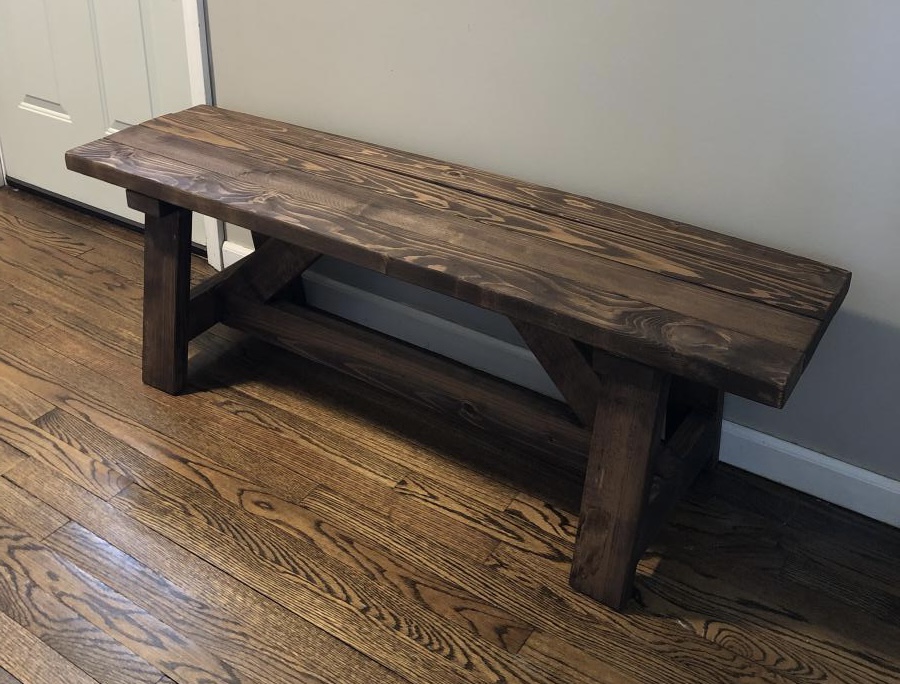
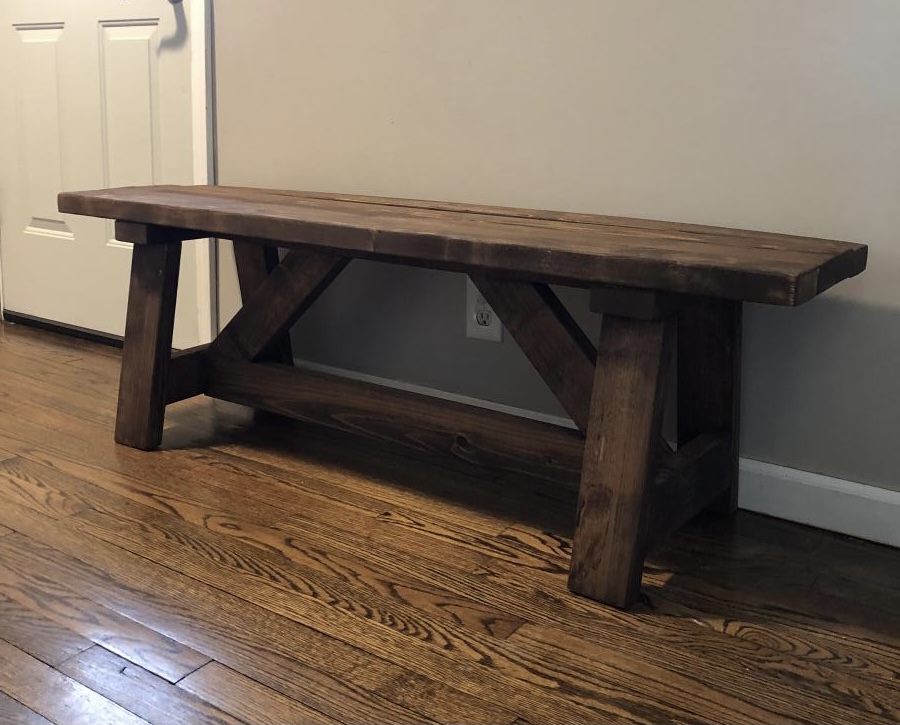
2x4 Truss Bench

I loved making this bench - only 5 2x4s. I used premium studs, sanded before building, wood glue/countersunk screws and filled them in. Used English Chestnut stain and I’ll add polyurethane to ensure longevity. My first build - the trusses/supports weren’t the right size, somehow we’re short? So I cut those out twice. It’s OK because I had excess anyways! Nice snug fit now.

Built from Plan(s)
Estimated Cost
$60
Estimated Time Investment
Afternoon Project (3-6 Hours)
Finish Used
English chestnut varathane stain, polyurethane finish
Recommended Skill Level
Beginner
Comments
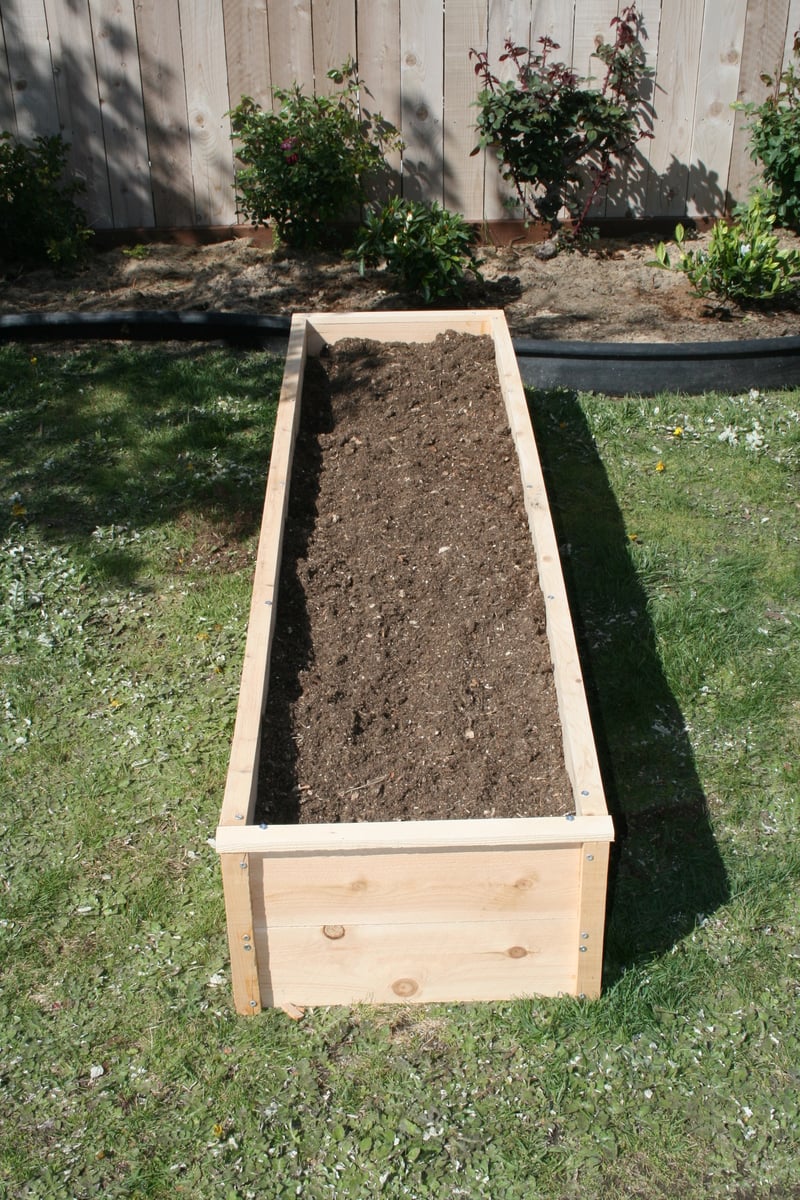
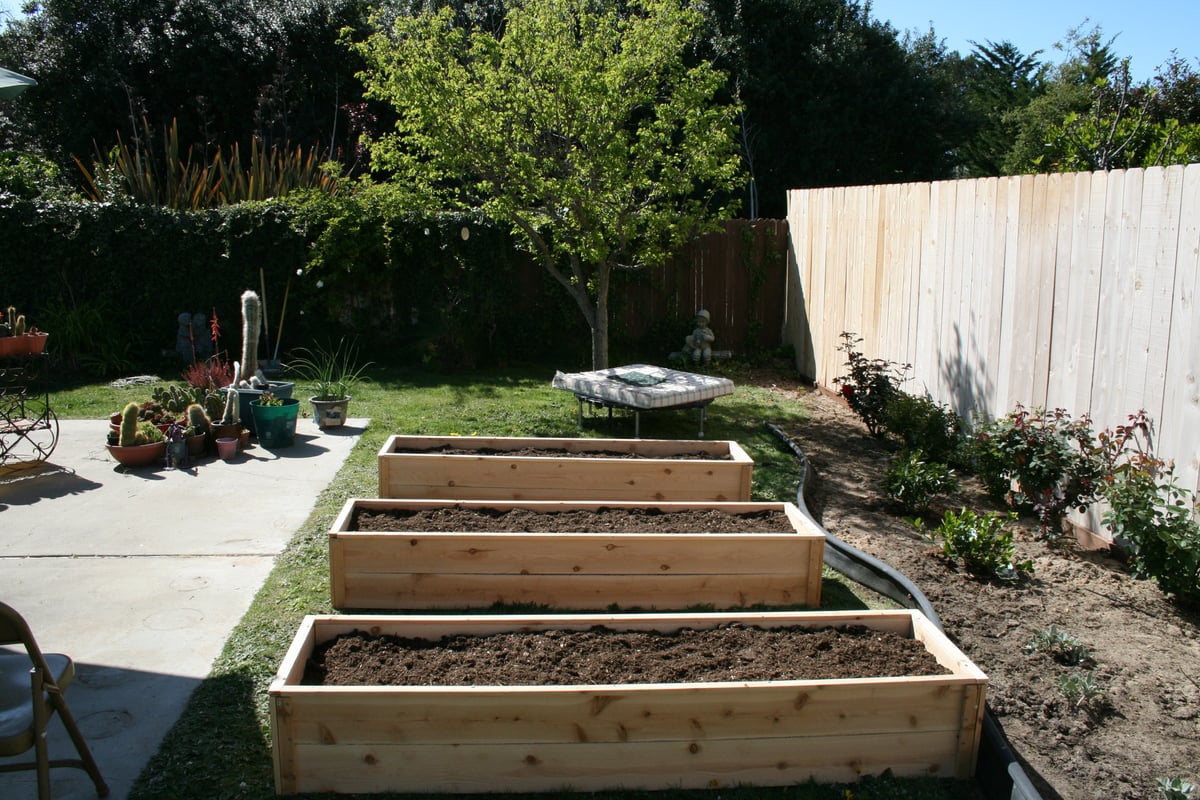
Cedar Fence Picket Raised Garden Beds
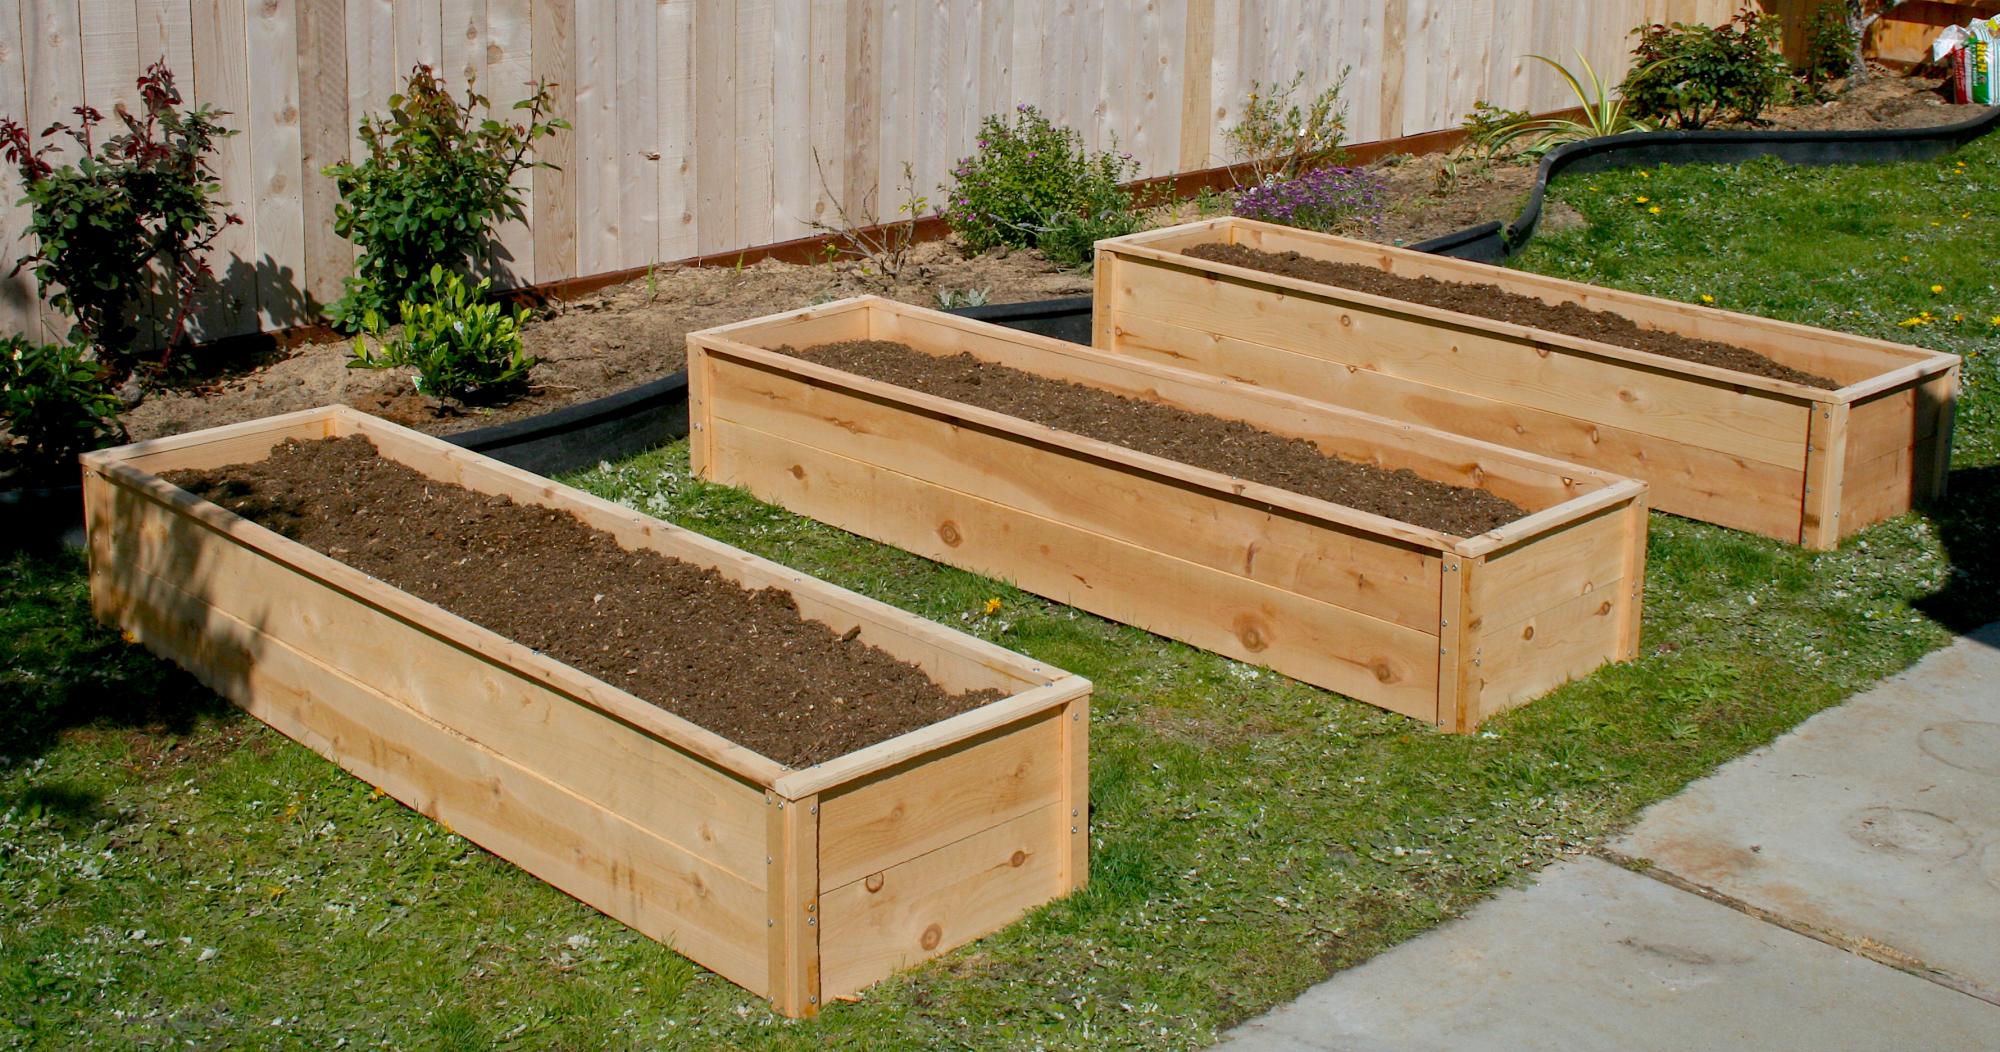
I made these for my 81 year-old Grandma, and I will be making some for my own front yard soon. I followed the plans and ripped the fence boards instead of buying the optional 1x2s. My awesome dad showed me how to use the table saw, but the rest I did all by myself! We decided to leave them unfinished for a natural look. It took me about 7 hours total broken up to make all three, but this is my first project and I was slow. Thanks Ana, for inspiring this working Mom to pick up a hammer and get stuff done!
Built from Plan(s)
Estimated Cost
$13 per bed in fence boards
Estimated Time Investment
Afternoon Project (3-6 Hours)
Finish Used
Left unfinished
Recommended Skill Level
Beginner


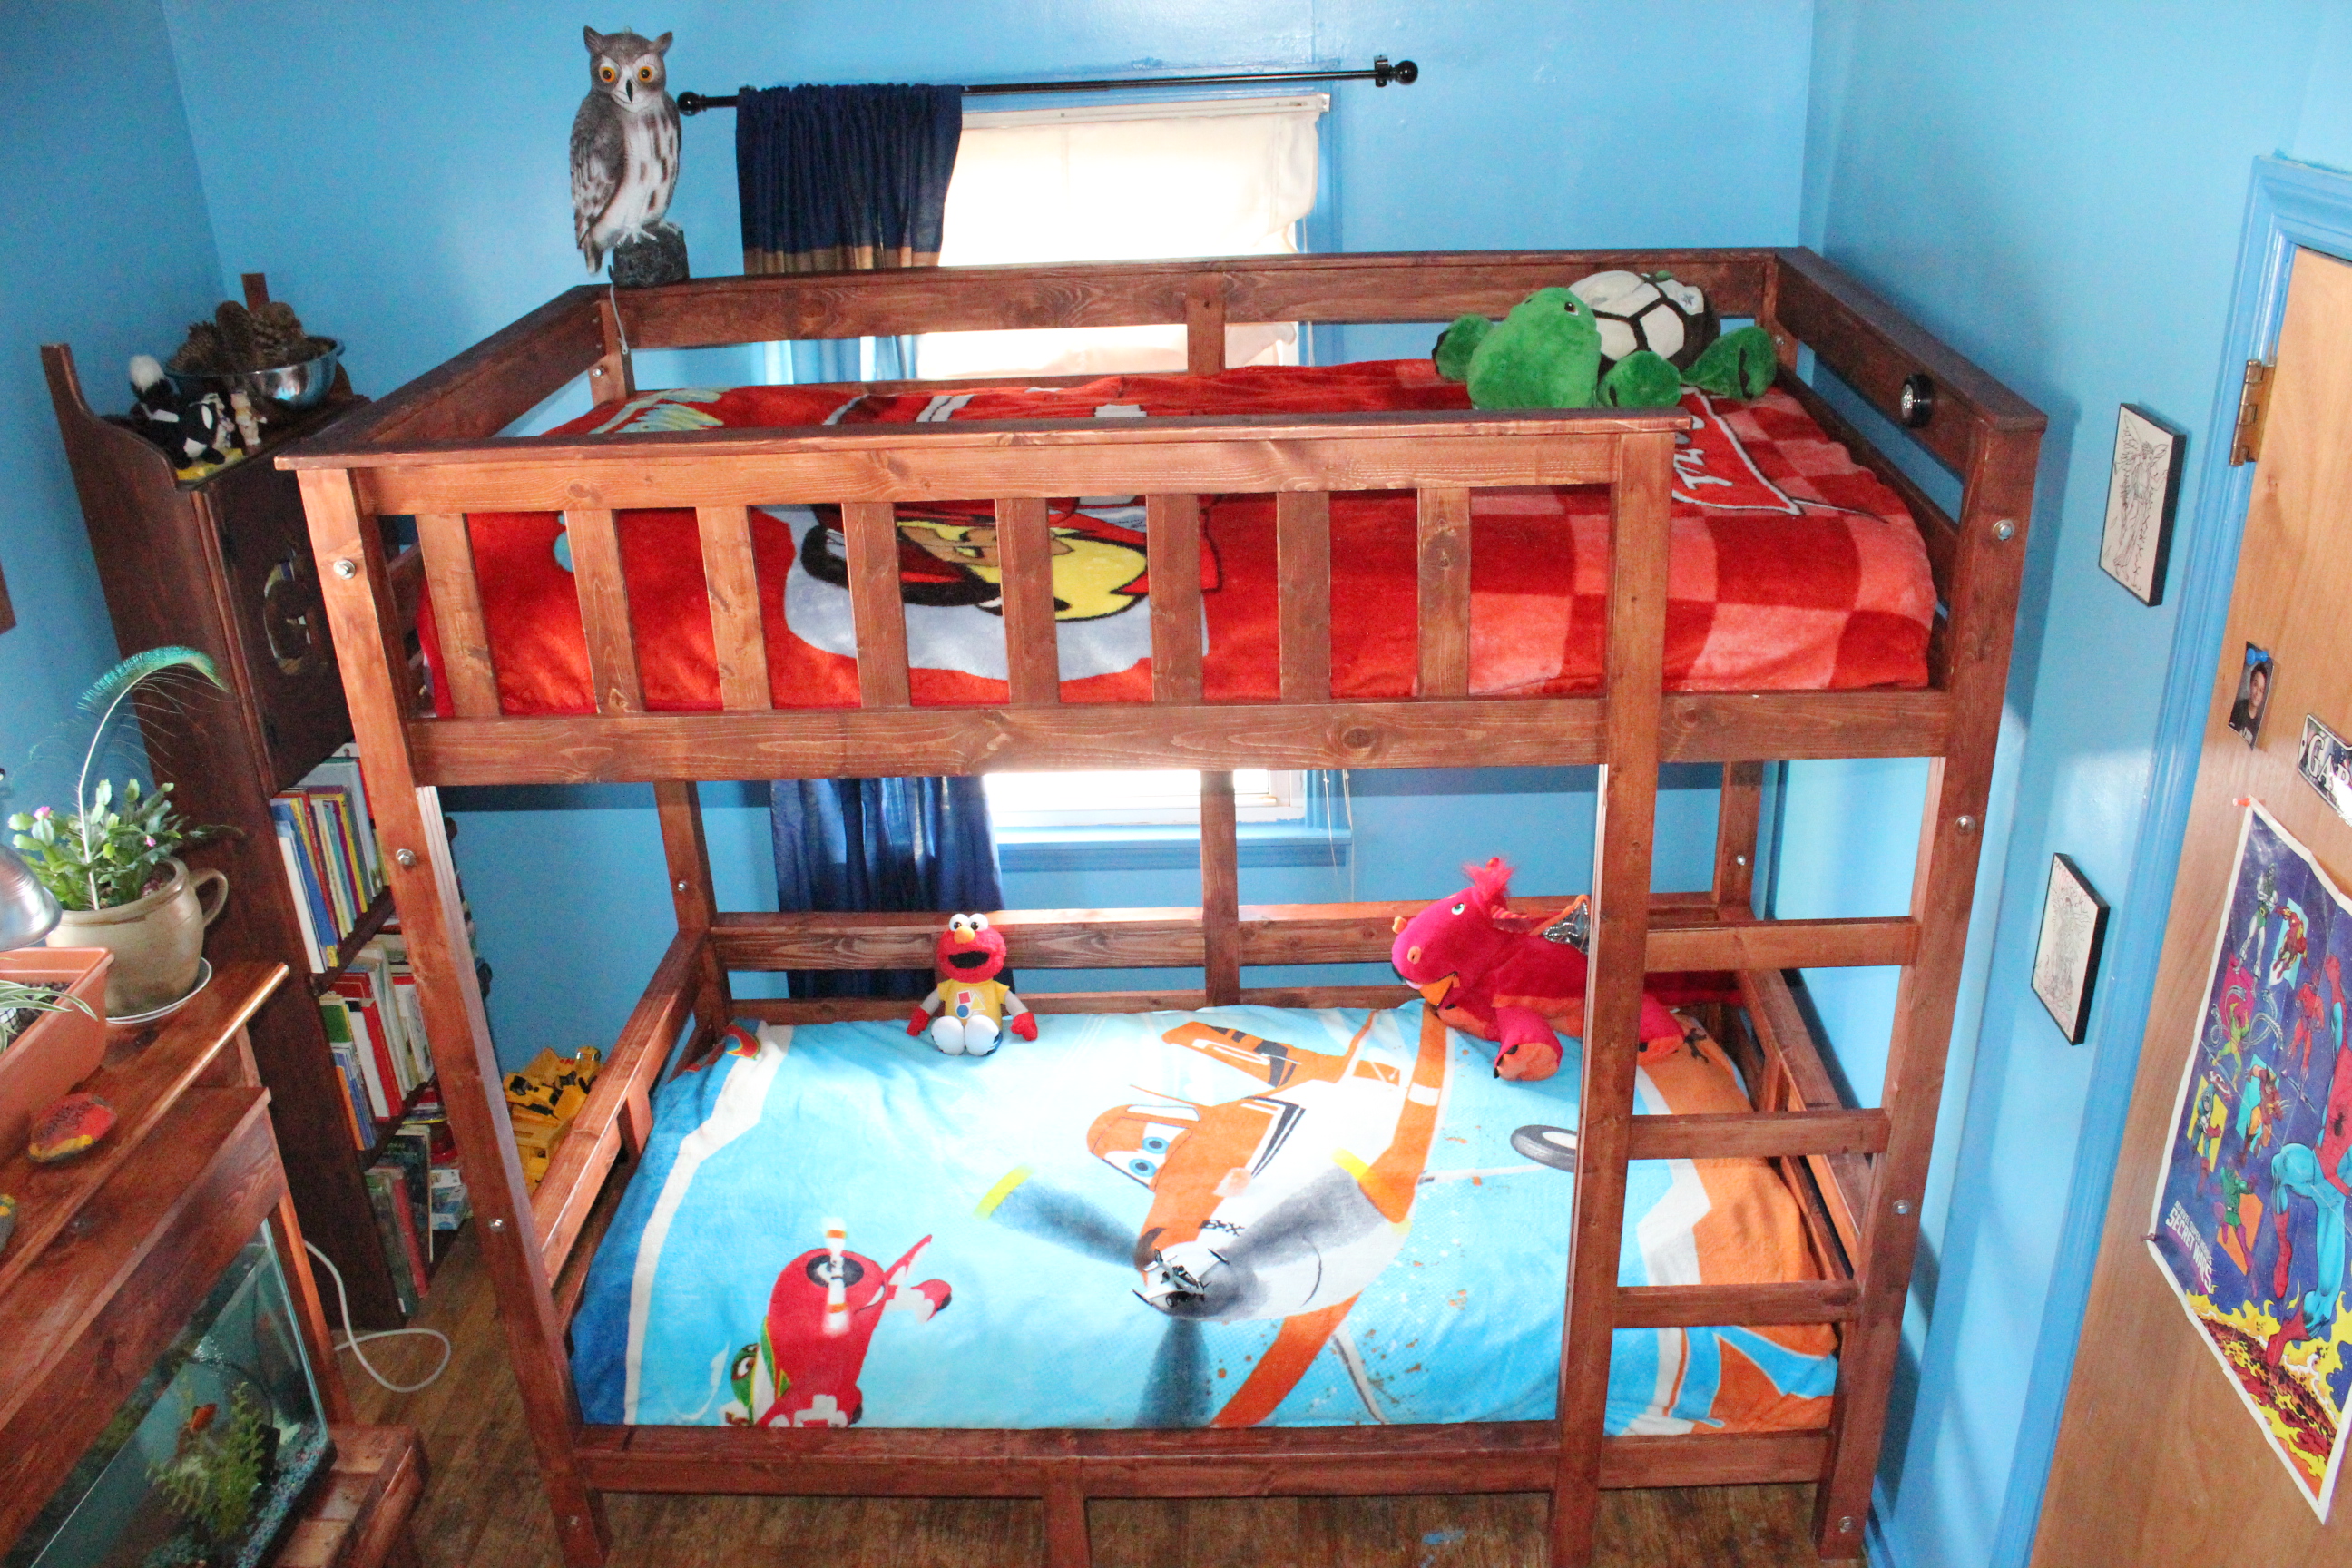
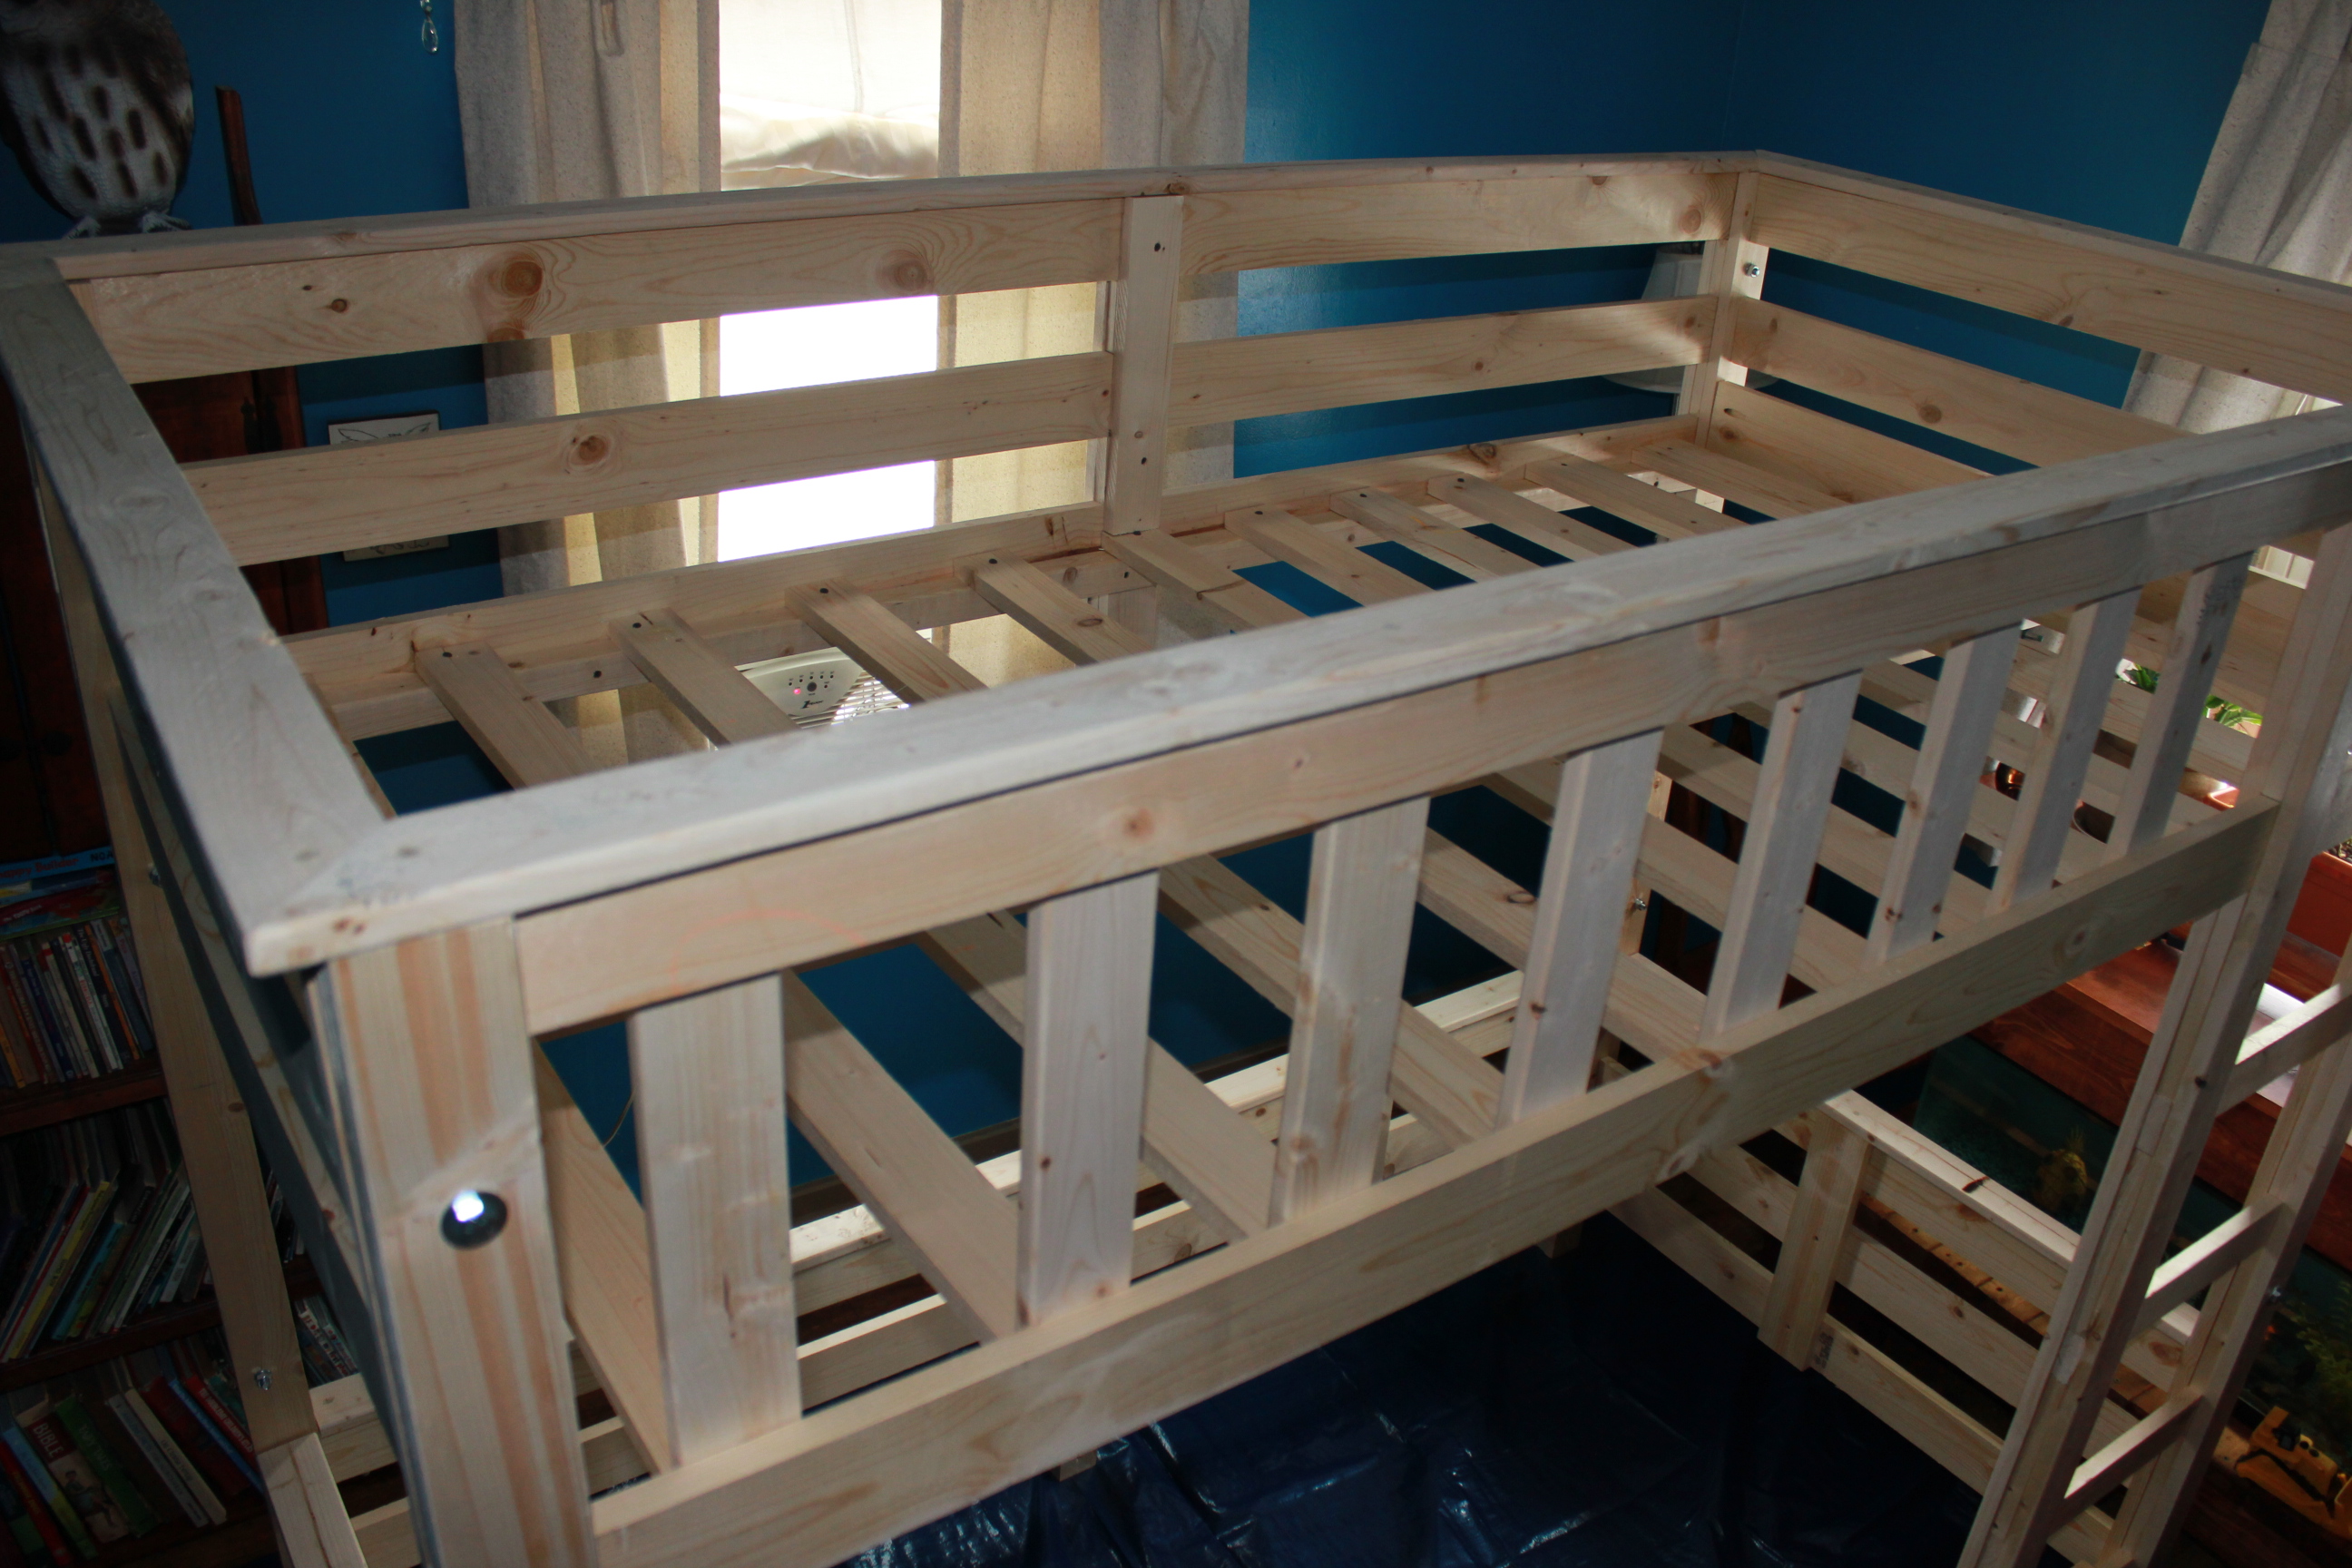
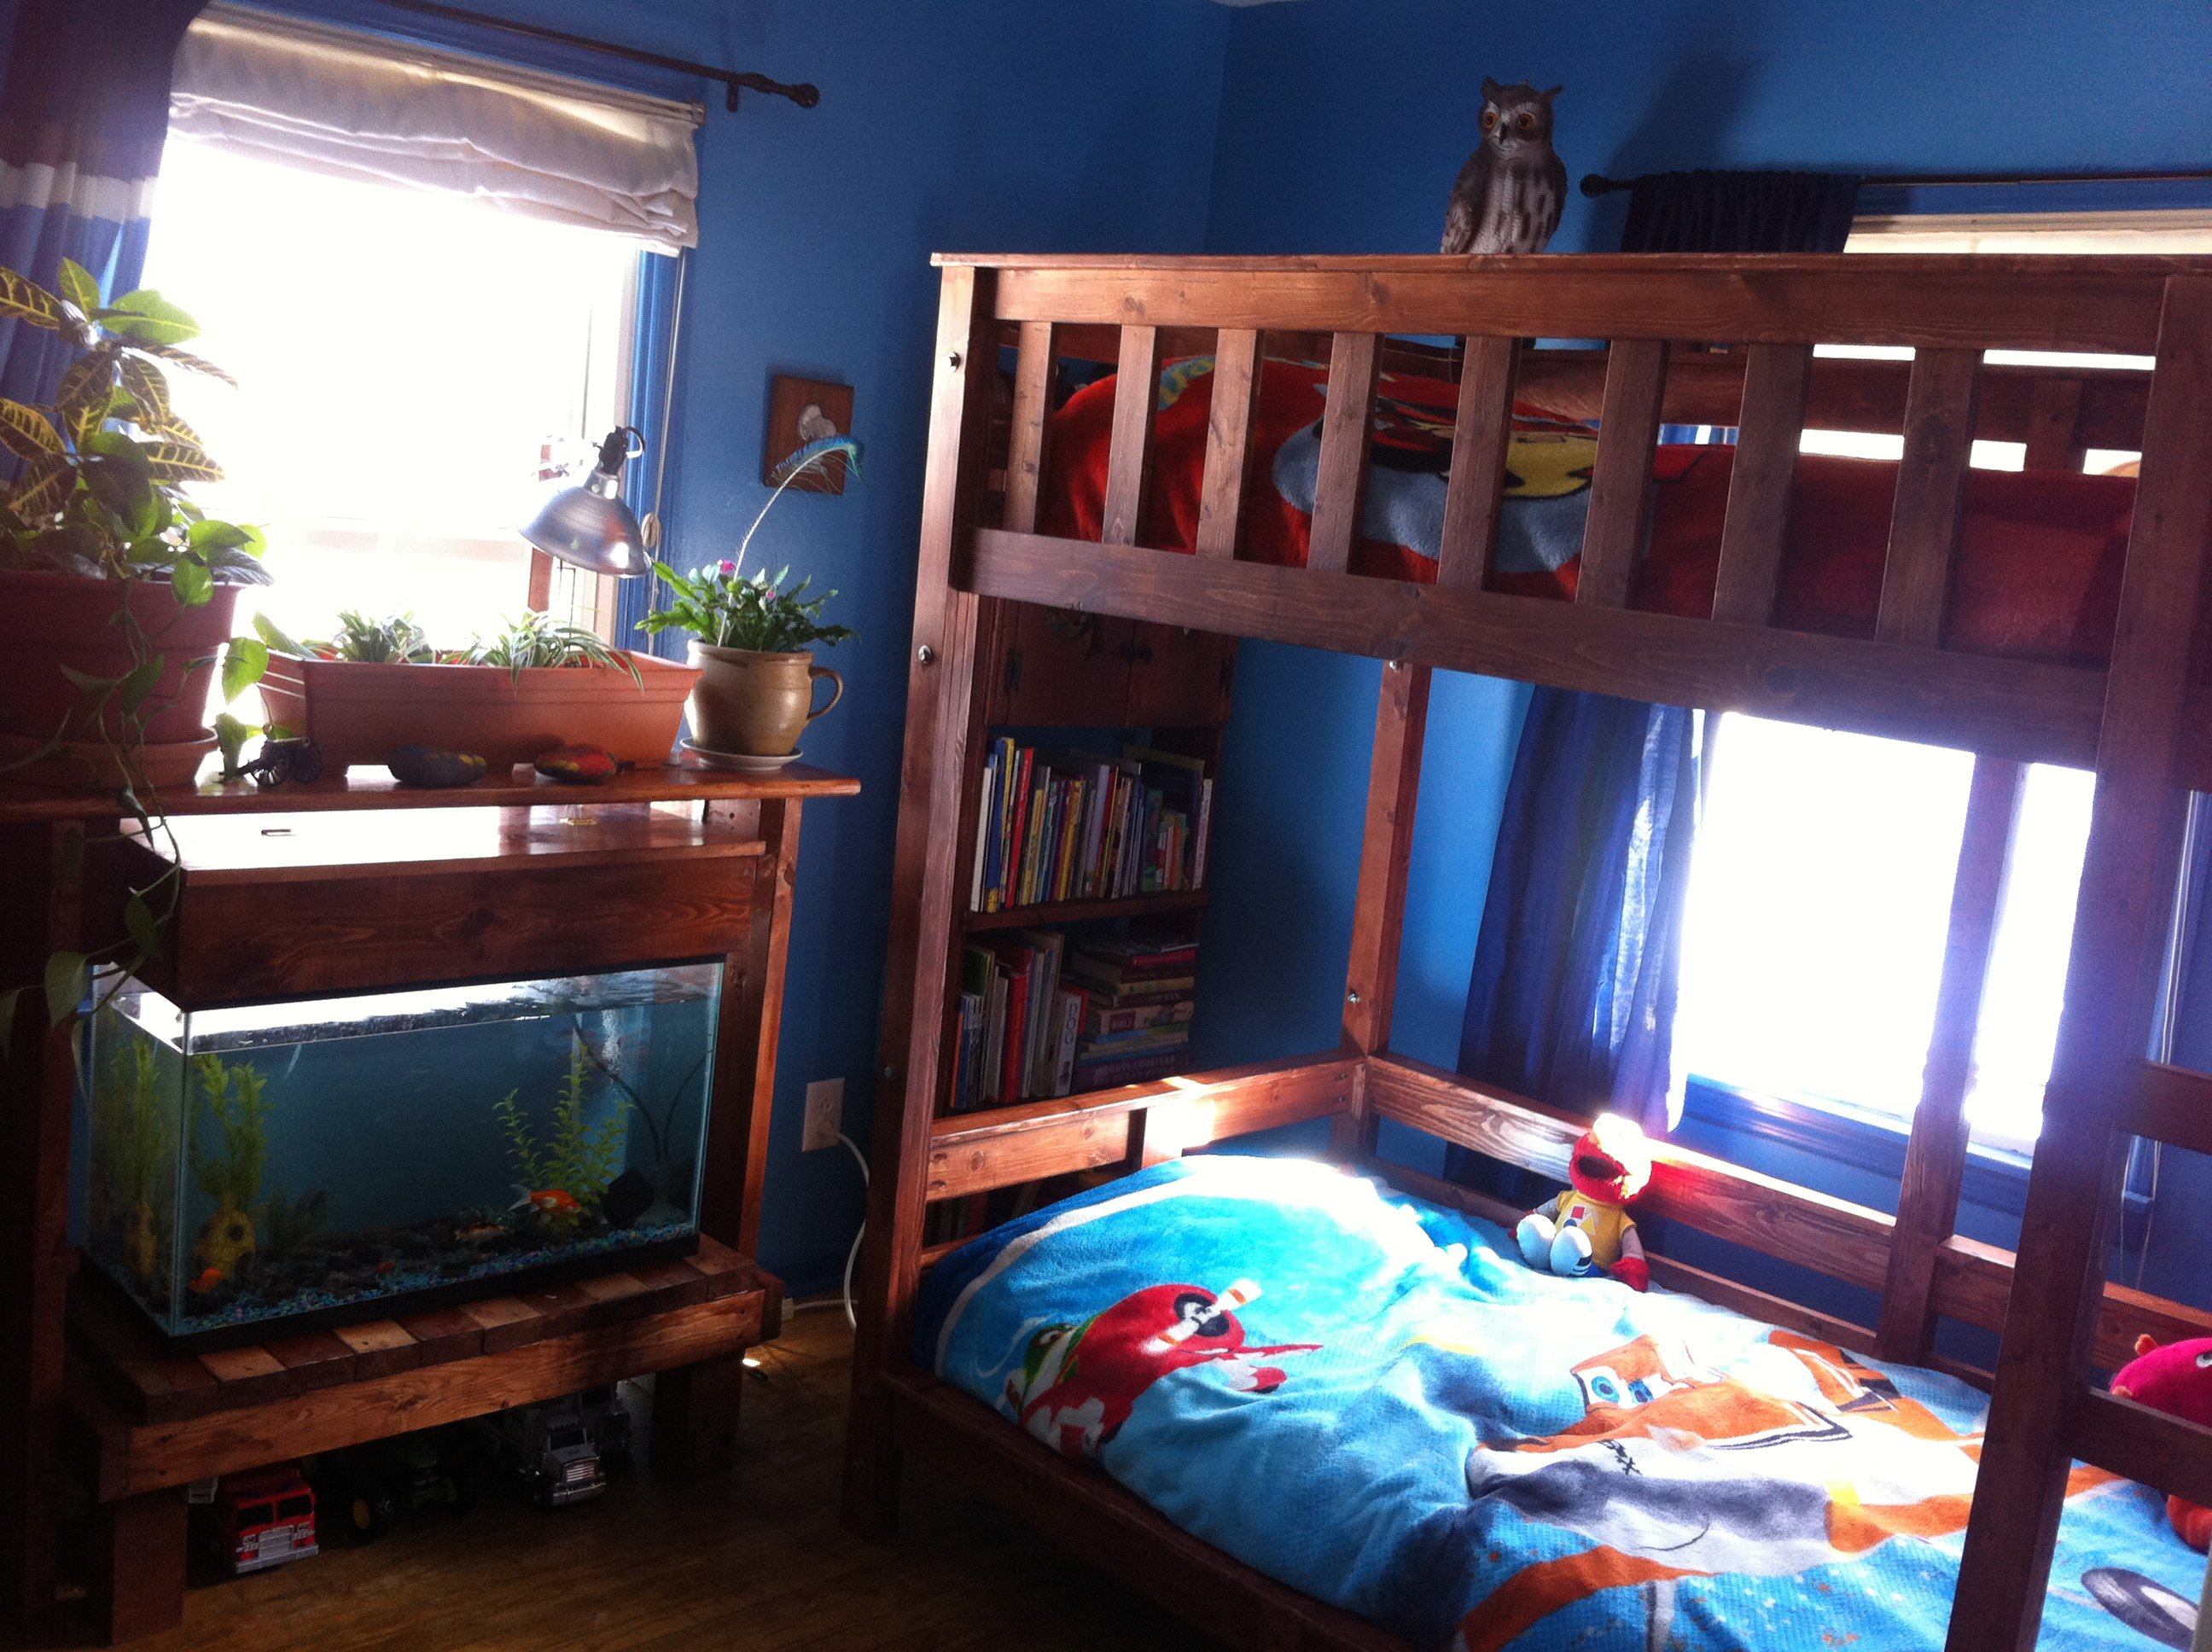
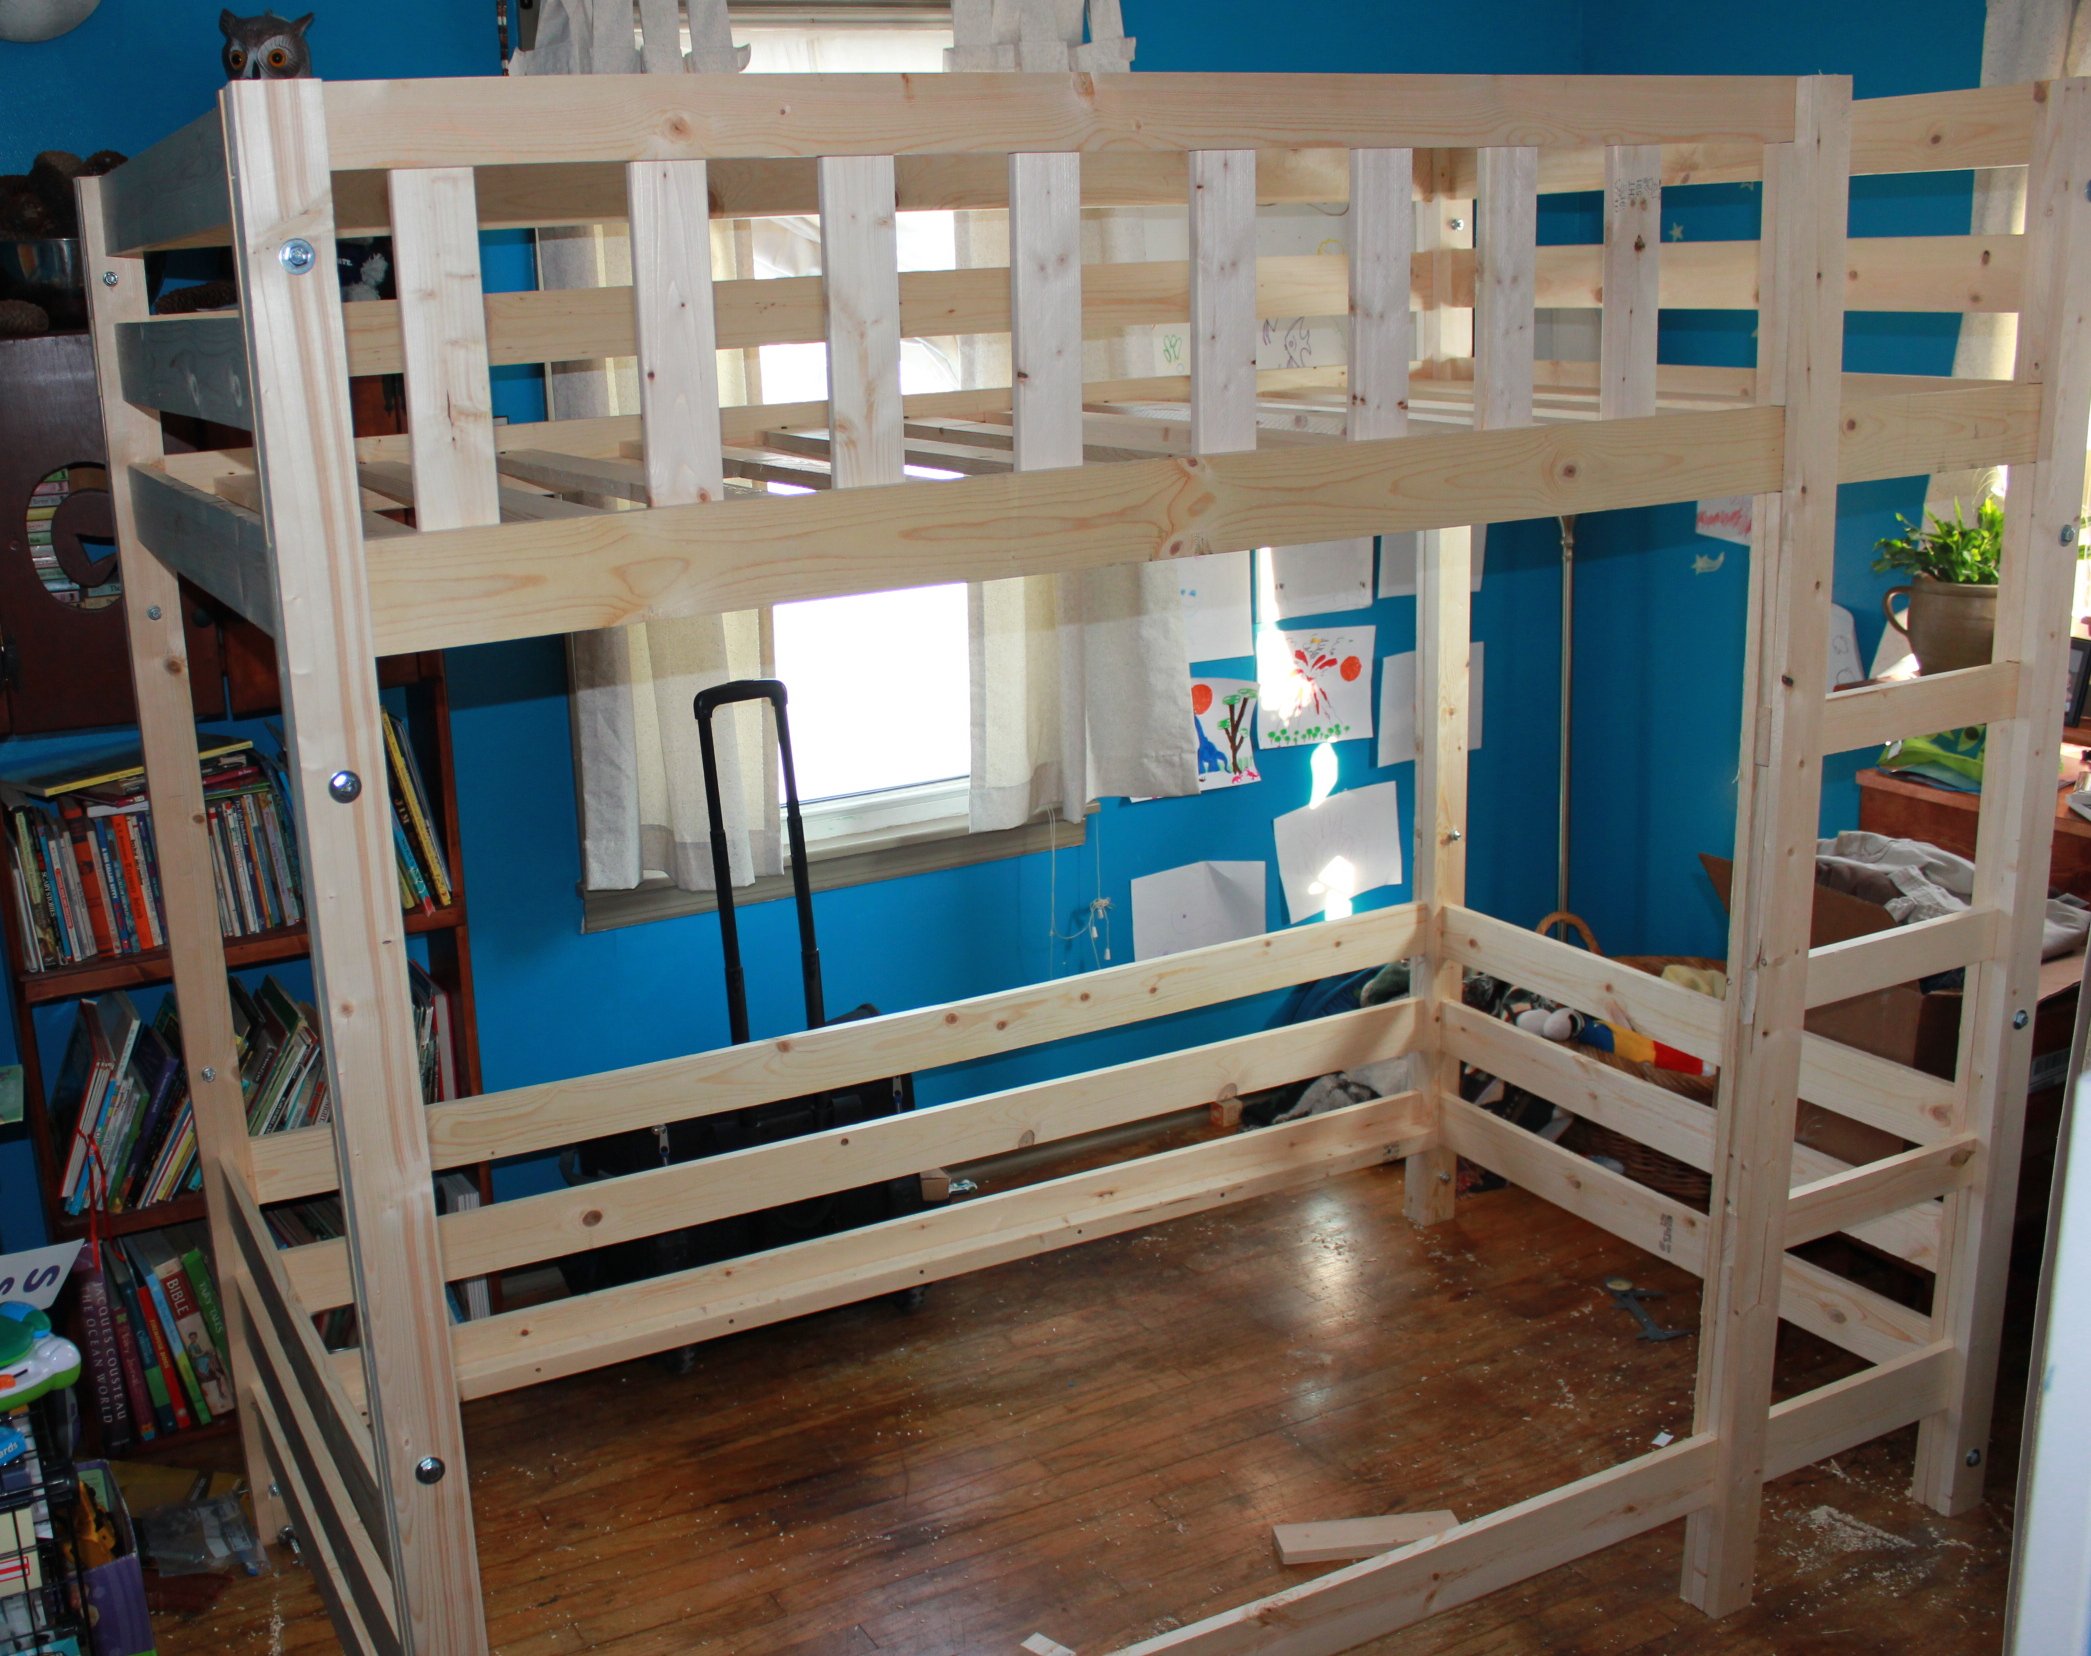
Children's Bunk Bed
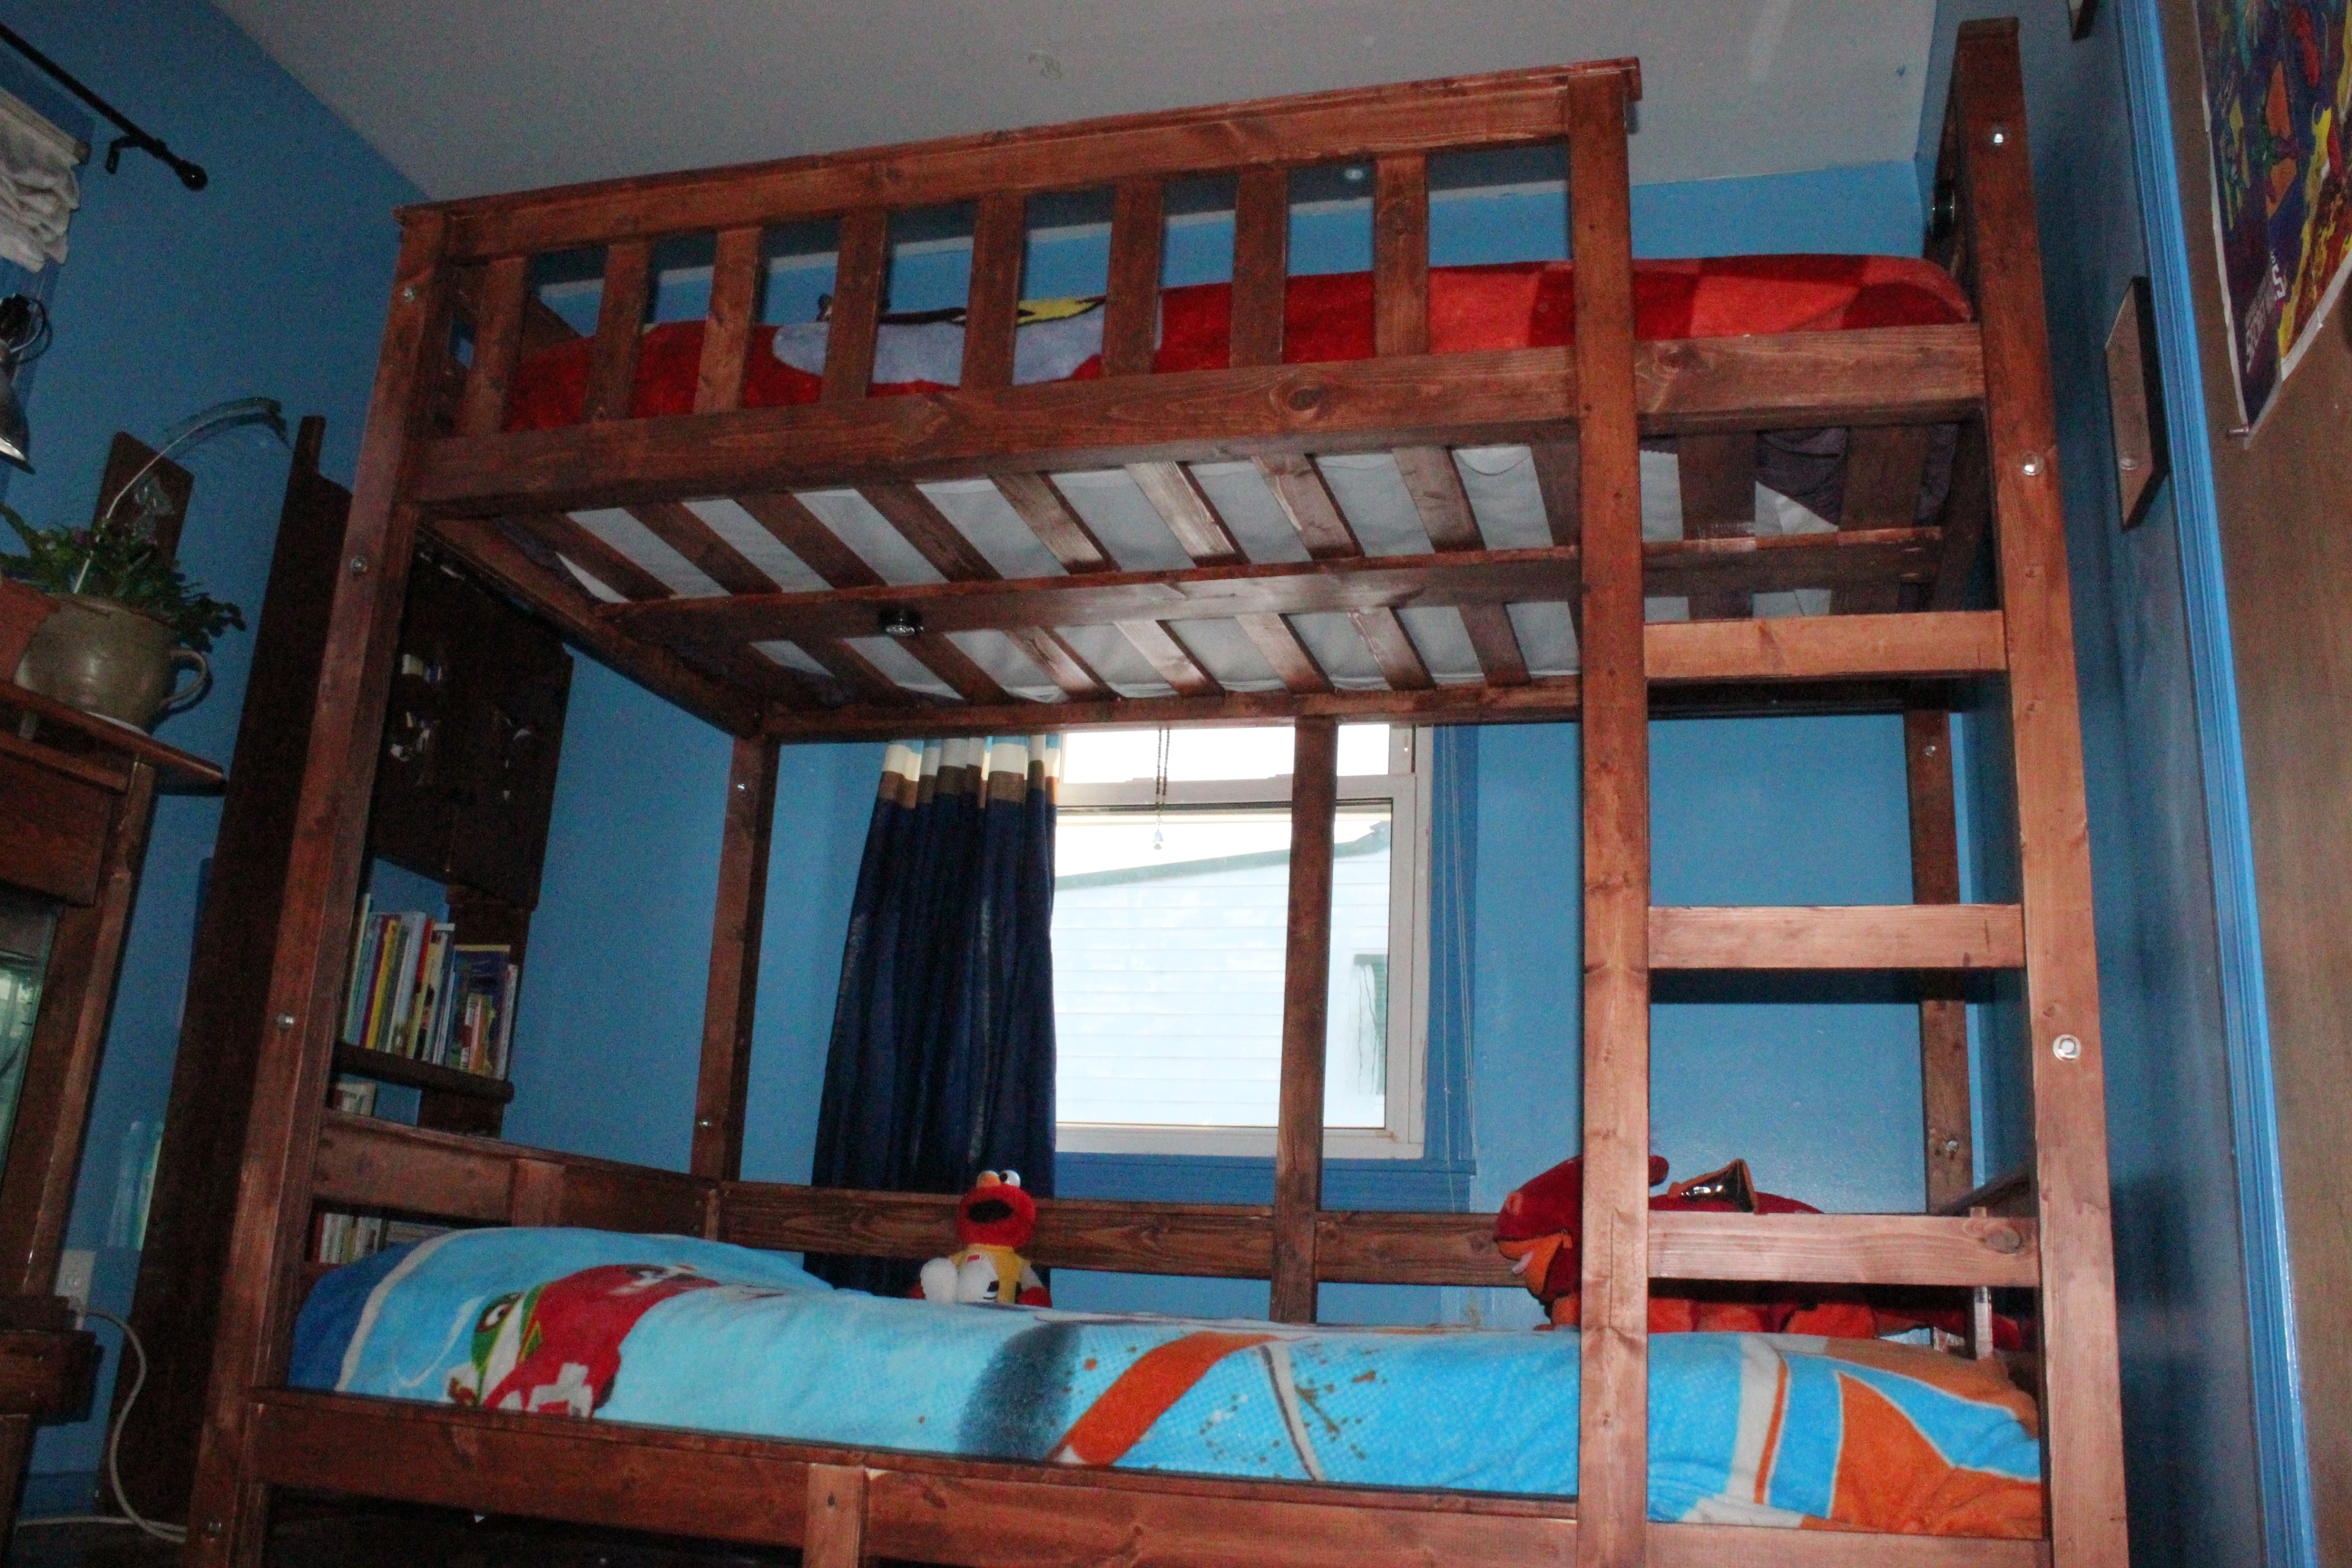
Over a year ago my wife Rebecca and I decided that our two oldest children would love to have bunk beds. They are close in age and already share many toys, so sharing a room made sense. Plus we had to make room for our third child that was on his way!
We searched for bunk beds and found that those within our budget were made of low quality plywood. We were concerned about the safety of potential bunk beds and whether they could withstand our boys’ roughness. Quality bunk beds, on the other hand, were easily above a thousand dollars which was way beyond our budget. We were pretty bummed that we could not find our kids a suitable bunk bed within our expectations.
Then Rebecca suggested: “You could build them one.”
Hmmmmmm. It was an interesting statement from my wife, perhaps even a challenge. A challenge that I immediately immersed myself into. Mission accepted!
What I did differently:
- Added extra posts for a sturdier bunk bed.
- Bunk bed is longer to fit twin mattresses, height increased.
- Added rail slats and trim.
- Added LED lights.

Built from Plan(s)
Estimated Cost
Approx $500
Estimated Time Investment
Weekend Project (10-20 Hours)
Finish Used
Rust-oleum Light Walnut = 3 coats, Polyurethane Satin Interior = 3 coats
Recommended Skill Level
Beginner
Comments
Farmhouse table
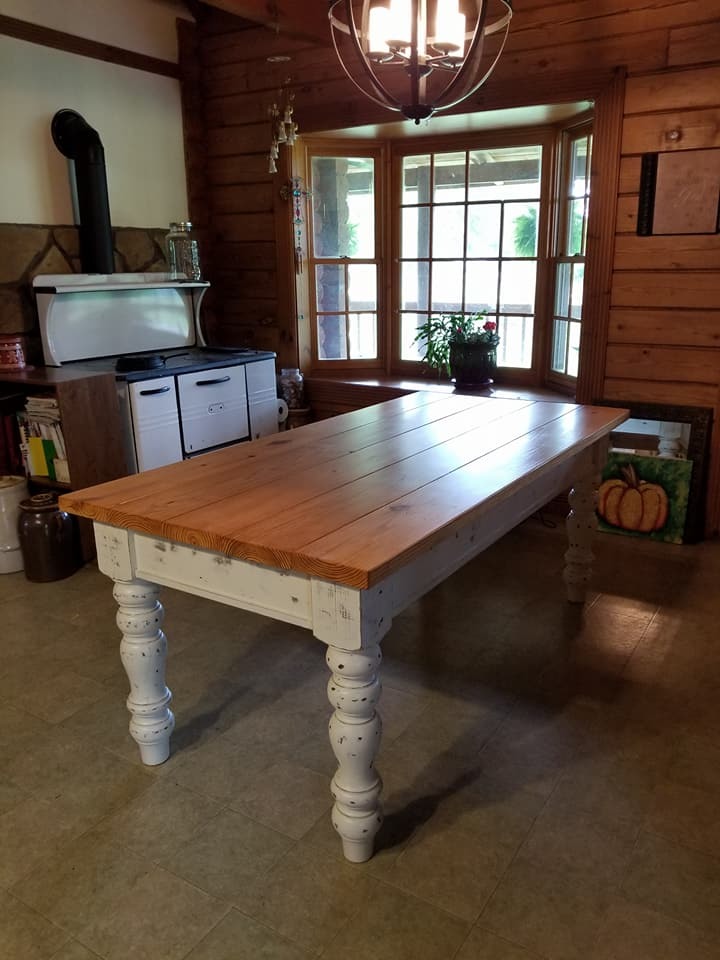
6'x3' Farmhouse table. Top is made of 2x8's, stained with MinWax natural oak. Legs are 5"x5" "husky" legs found on Etsy.com. Side aprons are 1x6 pine. The base has a basecoat of mahogany stain, covered my antique white milk paint and distressed with an orbital sander.
I was hoping to get the same "old world chipped paint" finish that Ana did on one of her tables, but I couldn't get it to replicate. But I'm still happy with the results.
Estimated Cost
$350
Estimated Time Investment
Week Long Project (20 Hours or More)
Finish Used
Natural Oak stain on top, Mahogany stain covered by antique white milk paint on base.
Recommended Skill Level
Intermediate
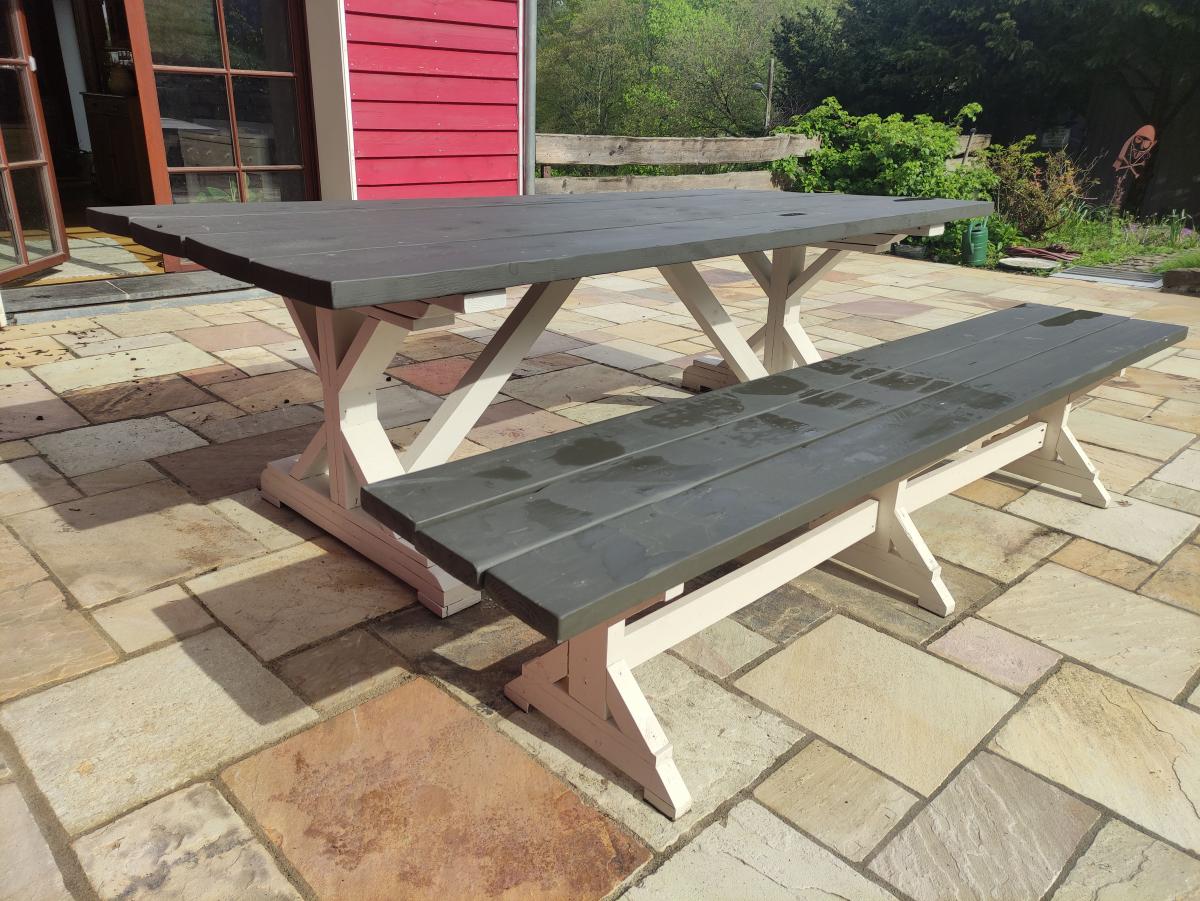
Fancy X Farmhouse Table & Bench
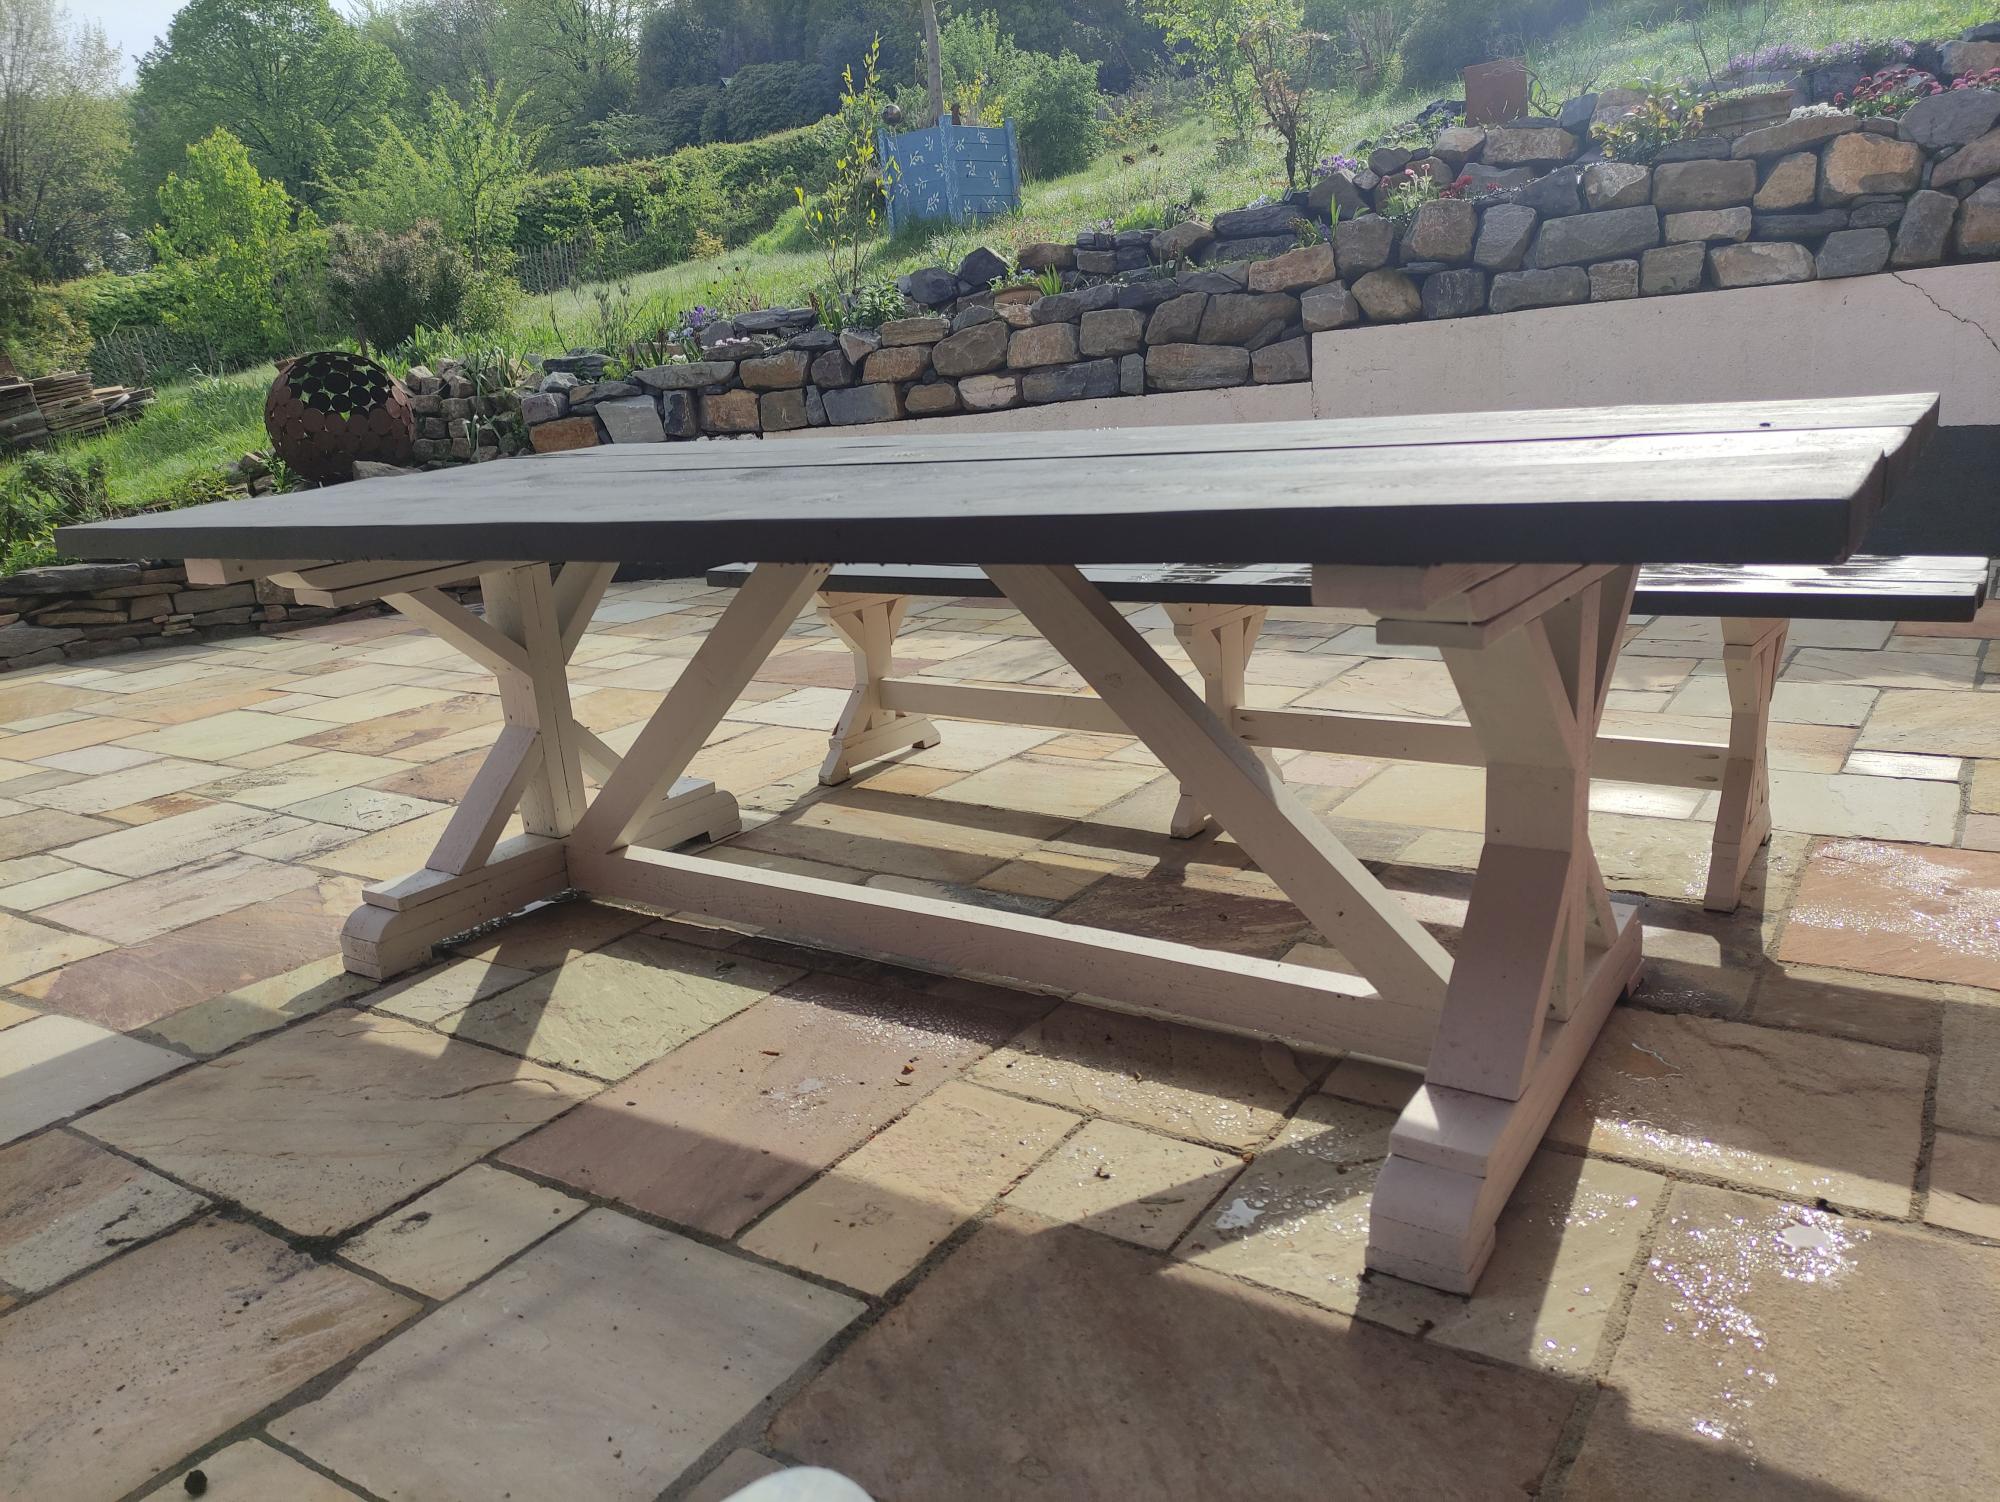
Last summer we got a new terrace and definitely need new outdoor dining furniture.
Built from Plan(s)
Estimated Cost
200 €
Estimated Time Investment
Weekend Project (10-20 Hours)
Finish Used
Mylands Artillery Ground No. 164 Wood & Metal Eggshell & Mylands Cadogan Stone No. 59 Wood & Metal Eggshell