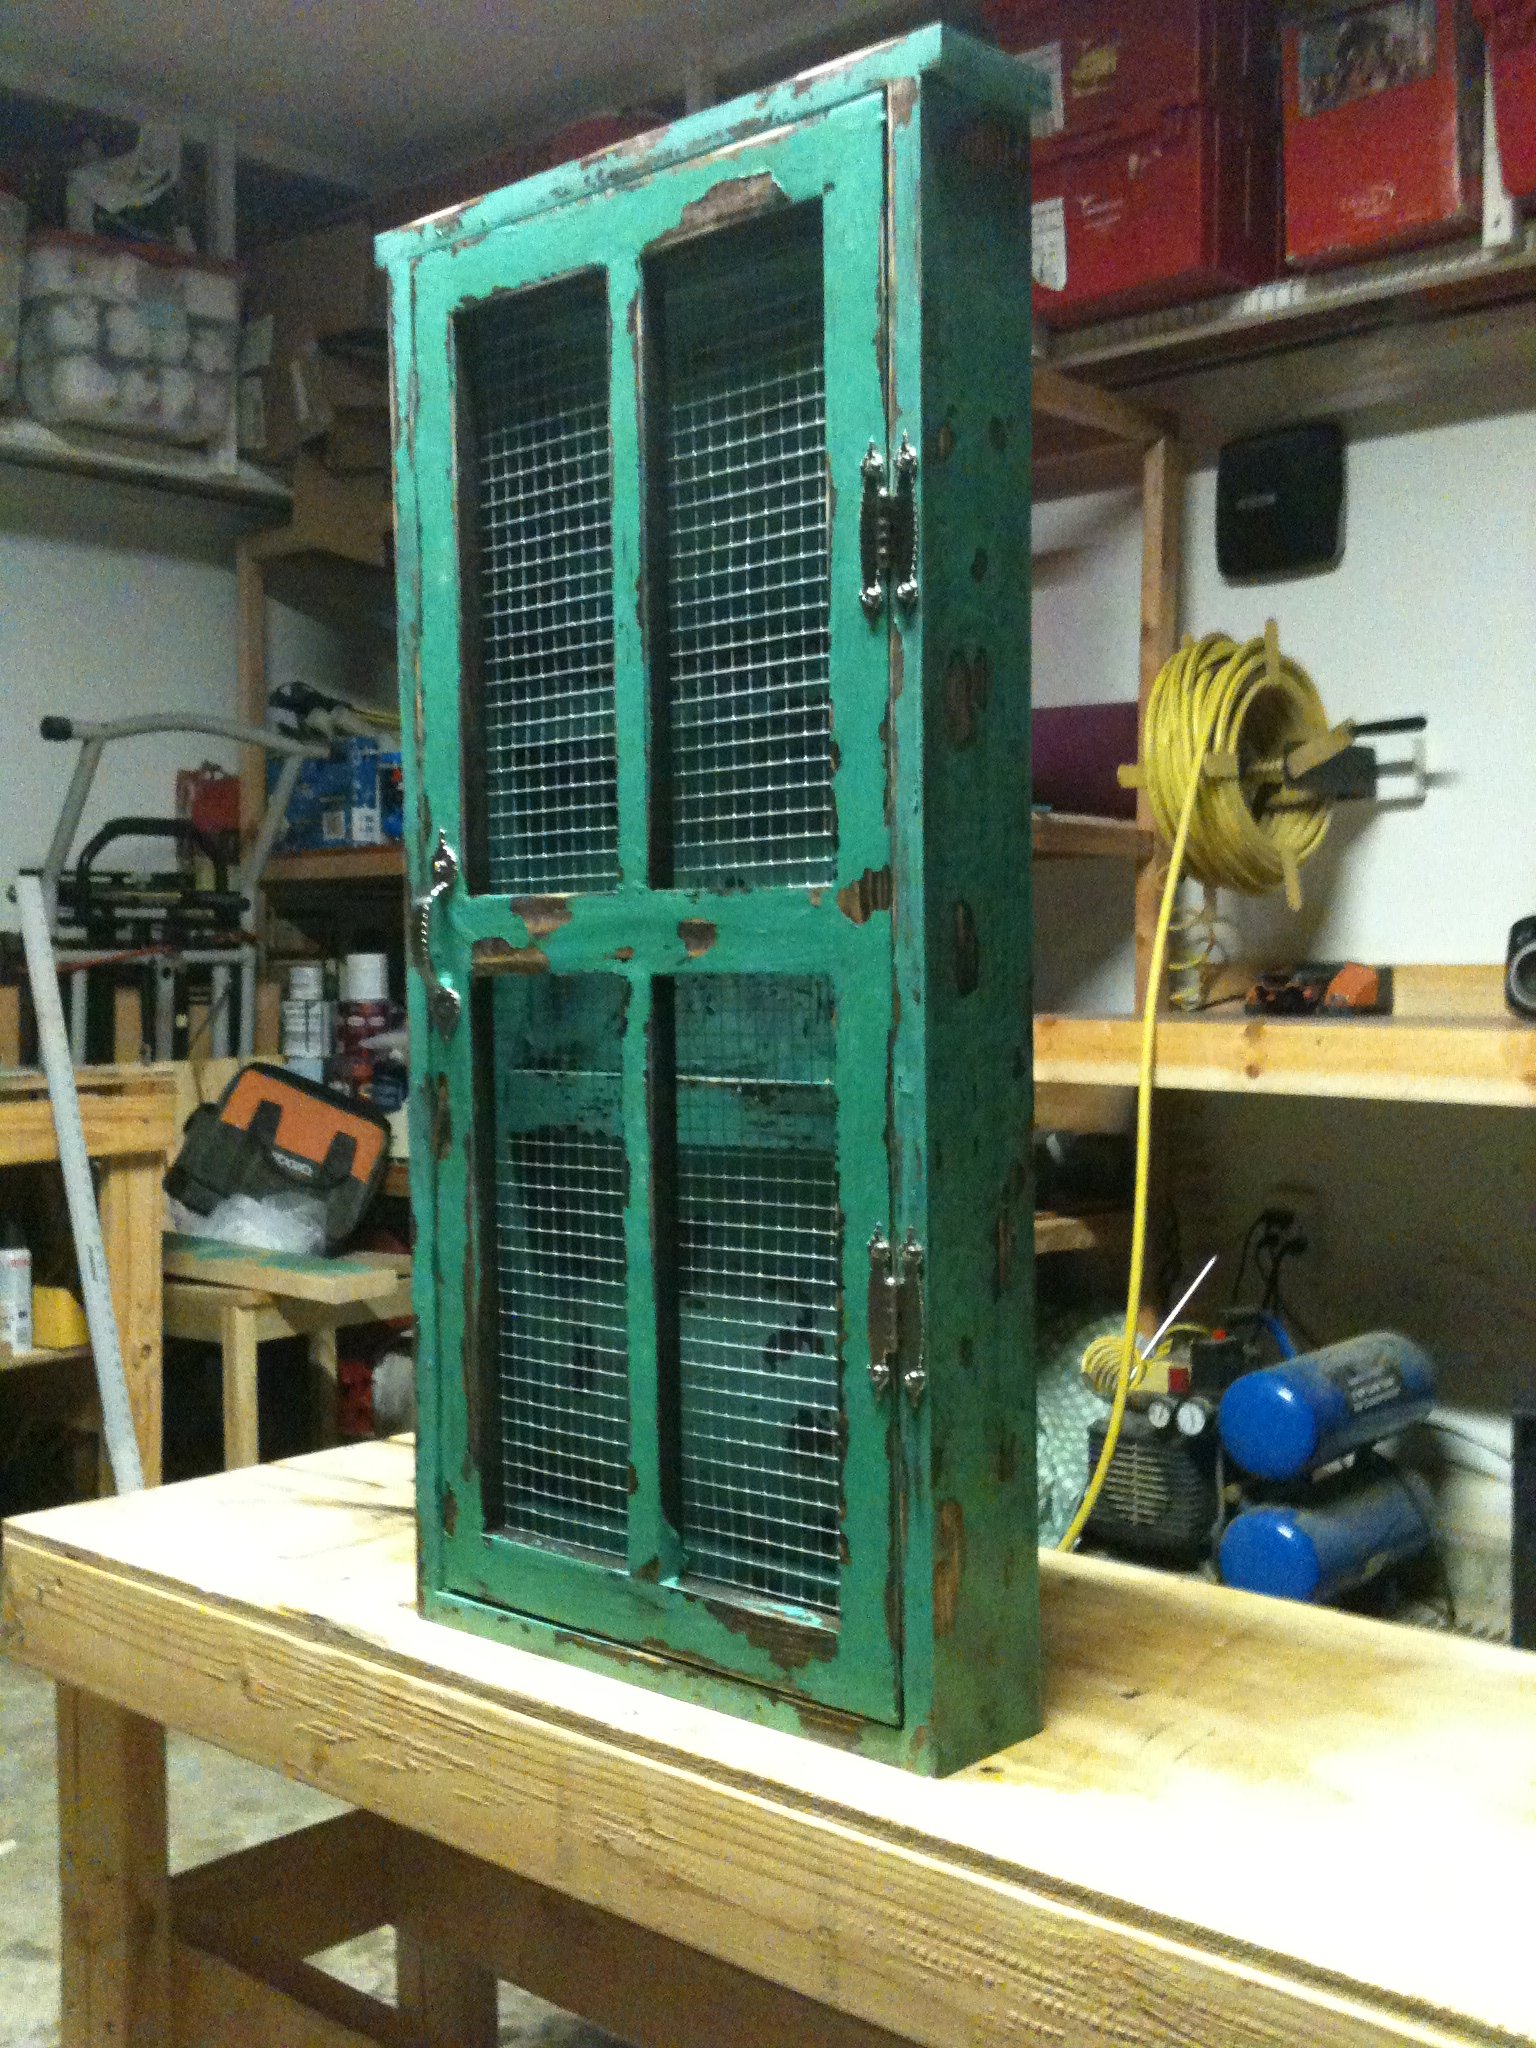
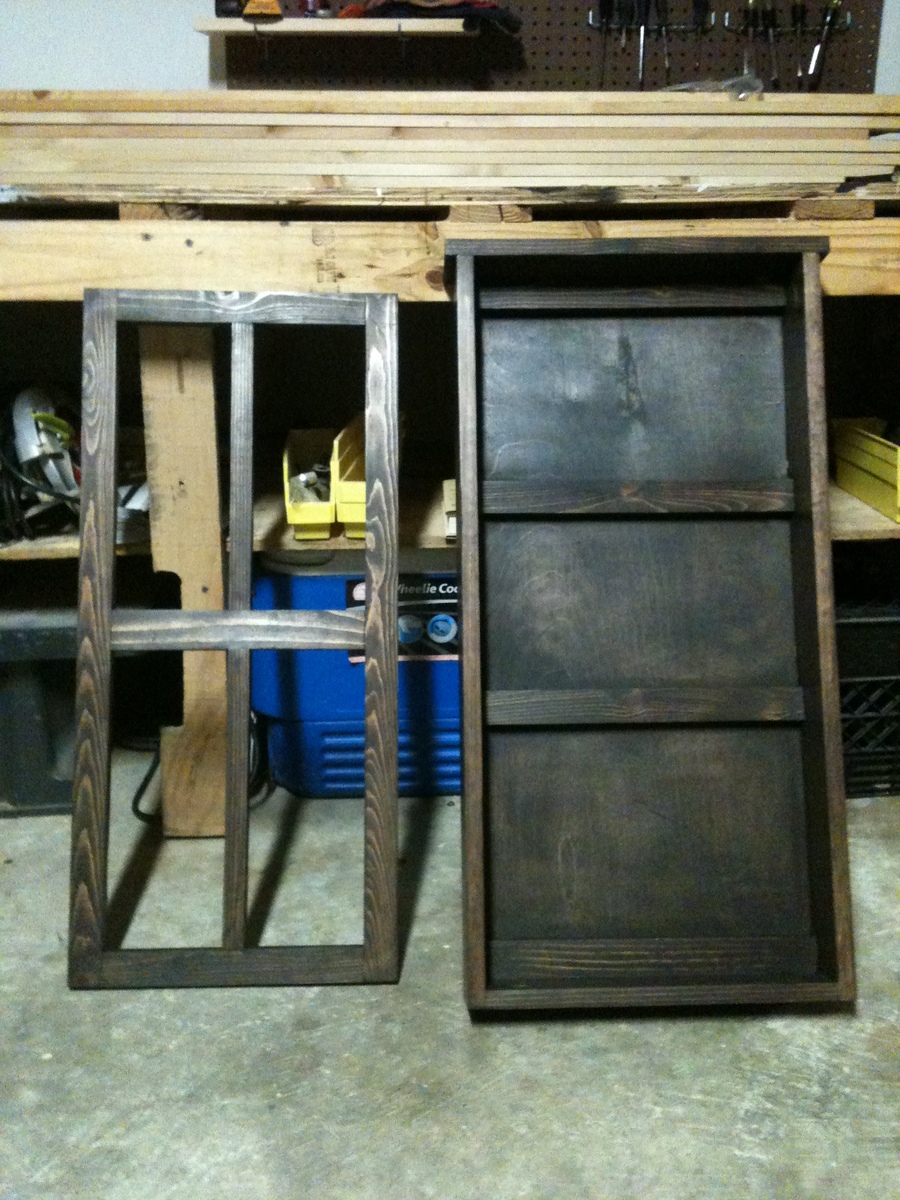
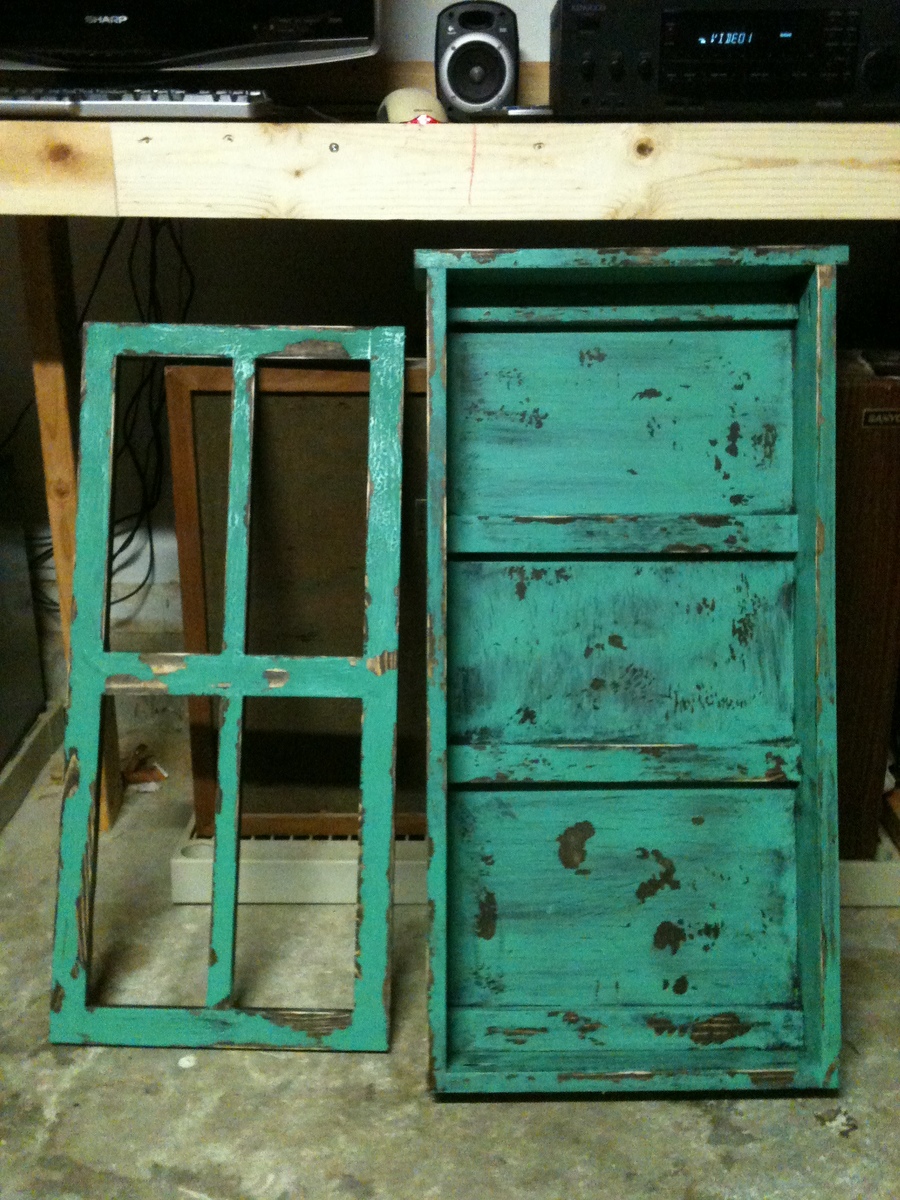
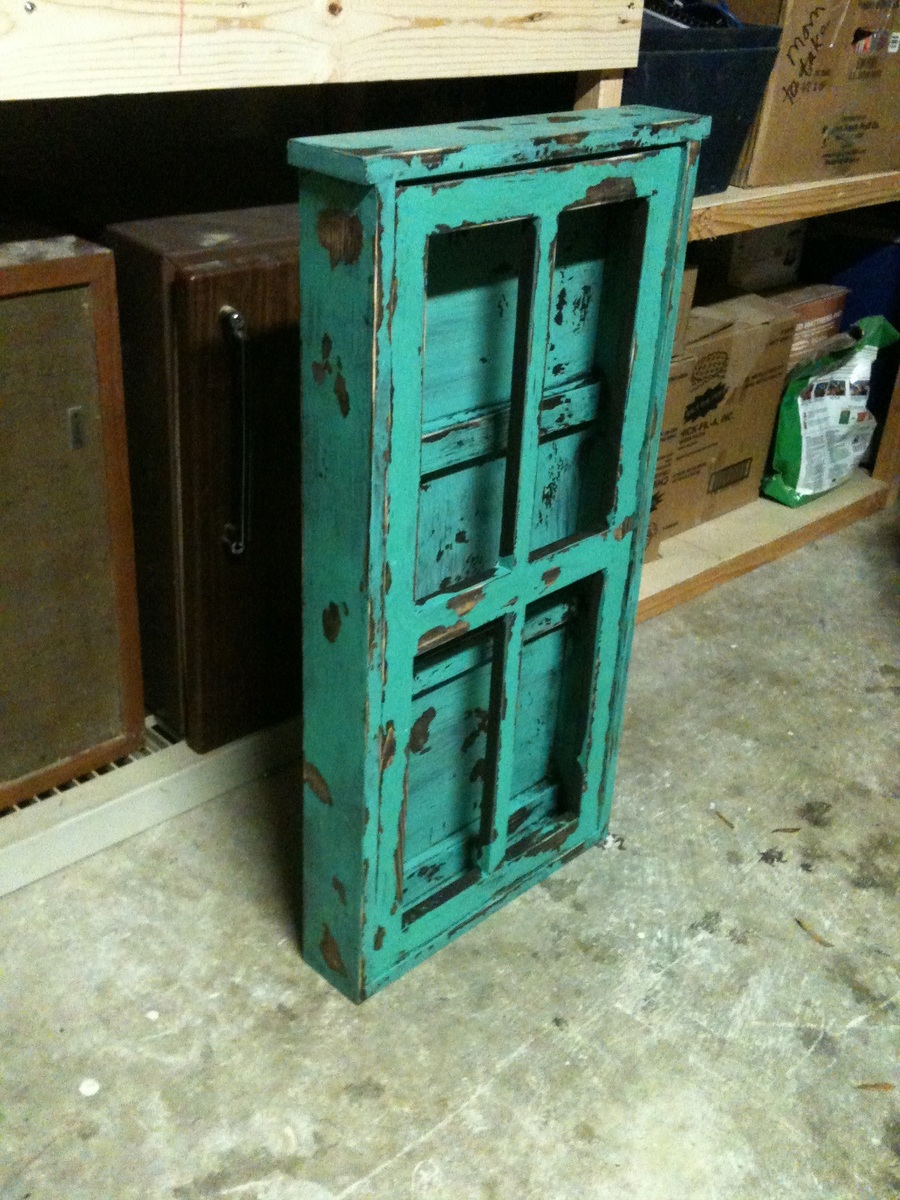
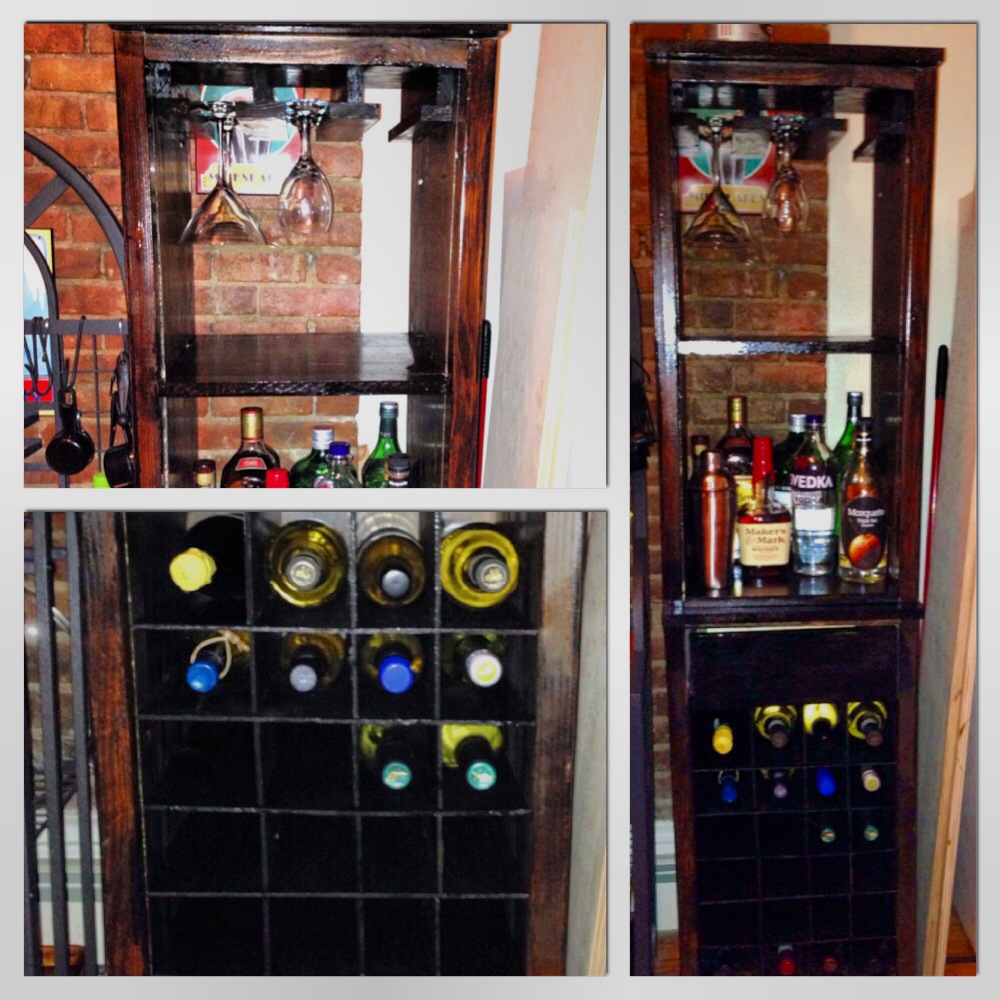
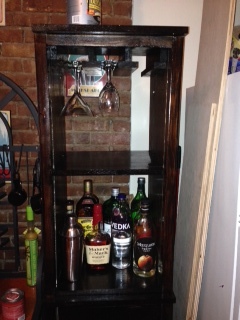
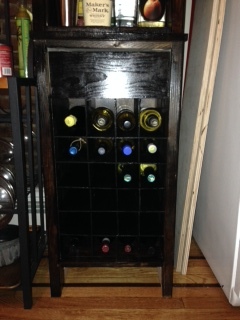
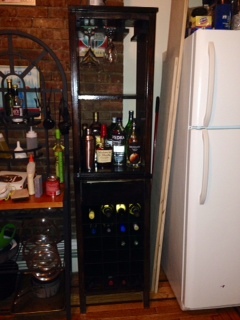
wall jewelry cabinet
I wanted to get my wife something nice for are wedding anniversary and couldn't find anything i thought she would like. so browsing this site I seen this and new she would love it. I hope you guys love it to.
![](/sites/default/files/3154836903_1383875418.jpg)
![](/sites/default/files/3154836904_1383875418.jpg)
![](/sites/default/files/3154836905_1383875418.jpg)
I wanted to get my wife something nice for are wedding anniversary and couldn't find anything i thought she would like. so browsing this site I seen this and new she would love it. I hope you guys love it to.
I made this table entirely from oak. It was somewhat more expensive than other projects I've done but my wife wanted a new coffee table so I thought why not go for it. I found hard wood to be much easier to work with than other wood. I like how it turned out. I used "Mom's Train Table" plan but added two 22 inch deep draws. A little extra storage is always a good thing!
This was so fun to build!! We finished in two days and then I took many more days to stain and varnish🤪 The plans were easy to follow and the finished furniture was just what we’d hoped for. We bought our cushions from Ikea and they fit perfectly to Ana’s dimensions - we didn’t make any modifications.
Canadian DIYers - Hockey pucks under the legs of the furniture to keep all the rain we’ve had from soaking up into the wood 🇨🇦 🏒🇨🇦
Mon, 06/07/2021 - 21:39
Are these the 24 3/8 x 24 3/8 cushions at Ikea? I am just starting this project and was going to extend the length to 74" instead of 72". But yours seems to fit just fine as is.
Cheers!
I was shocked at how easy this all came together! Hubby built the bunks, I made the bedding. Both mattresses, quilts and pillows came together in under 2 hours!!! I kept right on sewing and made a matching pillow for my daughter's bed, and a tote bag for myself!
Fun project! Started with rough western red cedar which I ran through a jointer and planer to get good lumber.
I made a few changes to the design. I used thinner seat boards and cut a leaning tilt in the backrests. I also added 2 boards on the back rests.
I used all pocket holes to hide the screws. Once they dry out I will seal the sectionals.
Got a full set of cushions on Amazon for $300. Total for this project was around $700. Not too bad!
Finished up right before christmas! I built this for my girlfriends 5 year old daughter. Used the plans and modified slightly and added working lights!
The mod wine bar is a great project. I made a mistake cutting the inserts forcing me to use extra 1/4" plywood, so I decided against putting a back on the hutch or a cover to the bottom of the base. I actually like the way those both turned out.
After reviewing the Pottery Barn collection, I decided to put a bottom on the hutch. I think it is more stable this way and allows greater flexibility in the future (since it is not attached to the base).
The one modification I would like to make (and potentially will make in the future) is the stemware holders are just slightly too small. I would modify using a 1x4 rather than a 1x3 for the two middle pieces.
I am extremely pleased with how it turned out and look forward to building two more in the future.
Sun, 02/02/2014 - 22:22
That particular blog post is written artistically and it includes many practical knowledge for everybody. I guess you've carried out a great job of handling this delicate
I built this coffee table in an afternoon, following the plans exactly. Super fun and easy build. I sanded the heck out of the coffee table and stained the base and top with Varathane Kona Stain. I then painted the coffee table with dilute Annie Sloan Chalk Paint in French Linen and dry brushed with ASCP in Old White. When dry, I sanded here and there to enhance the rustic look. I then finished with Minwax Polycrylic and assembled the top to the base in my living room...it's heavy! Love it:-)
Built this modern bench to put in my prarie.
my first project!
Sat, 04/22/2023 - 09:53
Thank you for sharing, you did an amazing job! Can't wait to see your next project.:)
Frames I made for my Mother and my wife for Christmas. Painted with Chalkboard paint so they can change them however they want
I have two girls and my youngest was getting out of a crib. I could build another bed or include both girls and build a bunk bed. I chose the bunk bed route with the approval of my wife and got started. I loved the plans from ana-white.com and decided to pull the trigger.
Total cost for bed not including the new full mattress was around $300. A huge savings from the estimated $1,500 from comparable beds on the market. This took me about 2 weeks total but that was a couple hours here and there. I would describe most of the work as beginner skill level but a couple of the steps had challenges but you could figure it out. My girls were out there helping me build and paint so it was also very memorable. Thank you again for all you do Ana.
Bobby
Wed, 12/18/2013 - 09:34
I'm new to the site & love this for a potential kids room. Where can I fin the plans w/ specs & materials? Thanks.
In reply to Plans for this by Lindsayayer
Wed, 12/18/2013 - 12:09
I used the twin simple bed plans, full simple bed plans and the twin over full plans for the ladder. It was easier to just print them all off. Hope that helps
Modified the design a bit to be lift up lids instead of tilt out.
Fri, 02/16/2018 - 17:18
Can you post the specific plans for the lift up trash and recycle bin??
Sun, 05/26/2019 - 18:28
If you could post the plans for this, It would be nice. Great job!
Fri, 01/10/2020 - 05:16
I just love this and would love to have the specific plans for this project!!!
Fri, 01/17/2020 - 20:23
Thank you for the great idea. I’m going to add a third bin and use it for laundry in my bedroom.
Sat, 03/07/2020 - 02:29
I’d be grateful for details, plans, measurements for this project. This is an amazing build, nicely done.With green top looks fantastic and complements the white very well.
Thu, 01/11/2024 - 20:31
To everyone asking for the plans, it's a modified tilt out. It states right there under the pics that it was modified and the original plans are there in red, under "Built from plans"
This bed is amazing. Great design, very sturdy and another Ana White project in the books!
This was my seventh outdoor couch but my first sectional. My very first couches were all inspired by Ana White's plans and I have gotten so much better with my skills that I building other things as well. Thanks Ana for all your inspiration!
We made two toy boxes for the Make Two Challenge. A single mom with two small children needed a little boost for christmas this year. I used the stacking toy box plans but dressed it up a bit with trim and added casters. The plan was very easy to follow.
Modified the plan to have no legs and added caster to the bottom so that it can be rolled easily around. Easy to build. I am in love with Ana's plans! Only cost $40 in wood!
Comments
joshuaaslocum15
Thu, 11/07/2013 - 17:52
let me know what you think!
Val Manchuk
Thu, 11/07/2013 - 19:07
Beautiful and Rustic!
This project looks great. I love how the finish turned out!
Val
artsybuildinglady.blogspot.ca
JoanneS
Thu, 11/07/2013 - 19:21
Beautiful!
What a great project! You did a beautiful job, and the finish is fab!
spagirlval
Fri, 11/08/2013 - 15:06
Great job.
Great job.
rickthered
Sat, 11/09/2013 - 17:53
Superb finish
The finish on this looks excellent. How did you manage such an authentic worn look? Also, how did you attach and finish the mesh inserts? We have no use for this piece right now, but it looks so good that I just want to go start making one straight away.....!
joshuaaslocum15
Sat, 11/09/2013 - 19:23
Finish
After construction
step 1 - stain the whole cabinet and wait for it to dry
step 2 - brush on Elmers school glue all over the project and wait for it to get tacky ( look on youtube for crackle paint effect)
step 3 - Lightly paint on color
Step 4 - dry the project with a blow dryer and watch it crackle
step 5 - I used a orbital sander and just went crazy hitting it all over ripping and peeling the top coat of paint.
I attached the mesh with a staple gun I think on the next one I am going to use stained glass instead of the mess though.
Mriddle
Sun, 07/06/2014 - 11:45
Love the finish
Thanks for putting the Elmer glue idea up here.