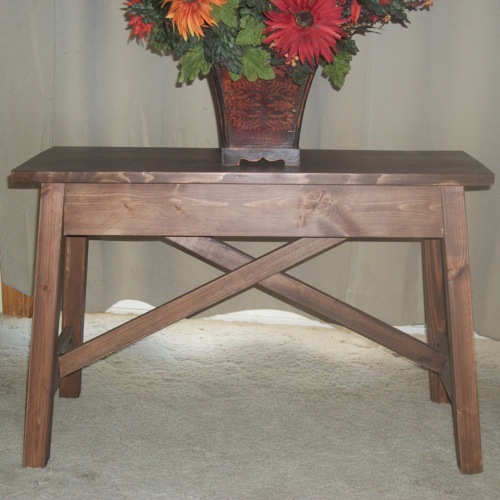
See Saw By: Ray

The grandchildren love the see saw. it is very sturdy. Great plans Ana.
Thanks
Ray
Built from Plan(s)
The grandchildren love the see saw. it is very sturdy. Great plans Ana.
Thanks
Ray
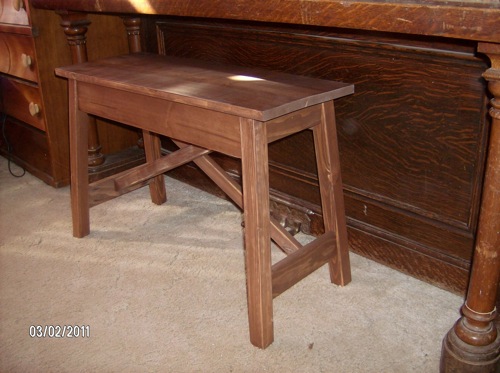
This was a really cute bench that I thought would look nice paired up with my grandmother’s piano we’d inherited after she passed. My 13 year old daughter has been taking lessons and needed something better than a folding chair to sit on when she practiced (at least I thought so).
We did modify it a bit. We made it a bit taller for her to be able to sit comfortably at the piano. We also ran into a little bit of trouble when putting this together because the shopping list isn’t exactly right on the plans. Other than that, this was a great plan, easy to do and very inexpensive. Even if you had to buy the stain (which we didn’t as we had some left over from another project) it should still only cost about $27 or so. So for under $30 you’ve got this great bench that is super cute and very functional. Can’t beat that!!!!
Thanks Ana for posting the plans and allowing us to all live in your world! This is a great website and a wonderful online community. I check out the site everyday to see what’s new!
Thanks again!!!!!!
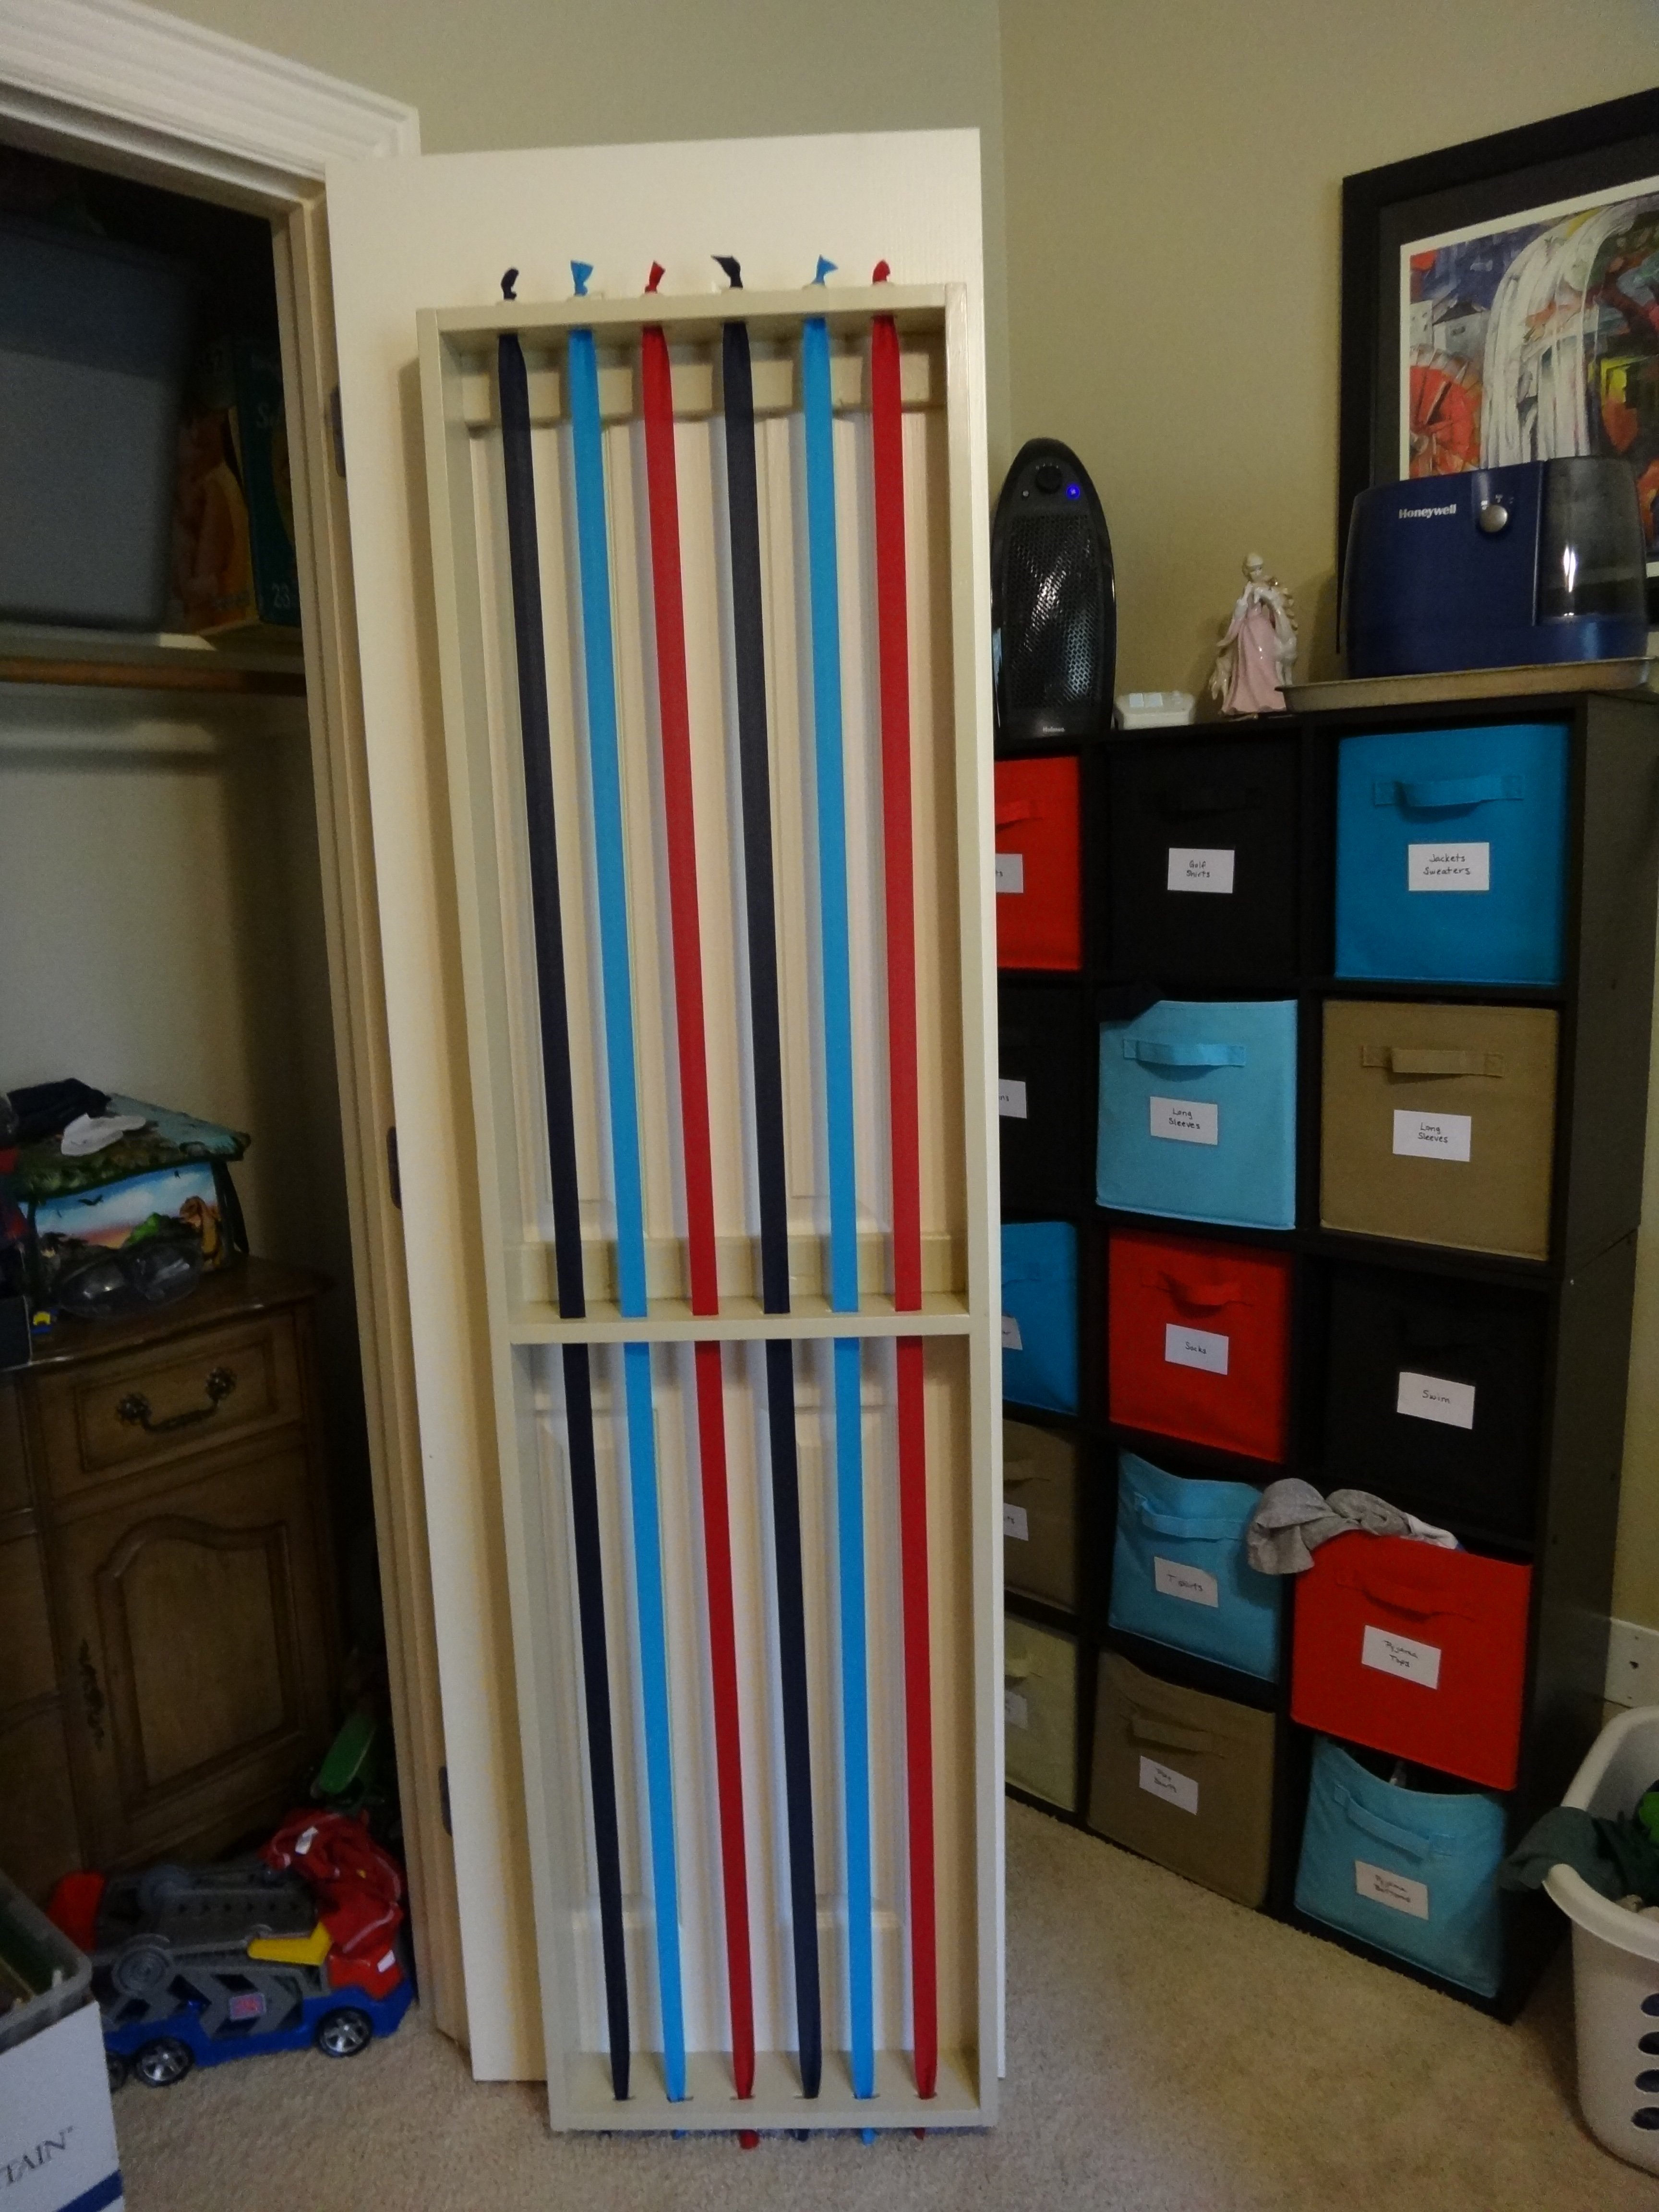
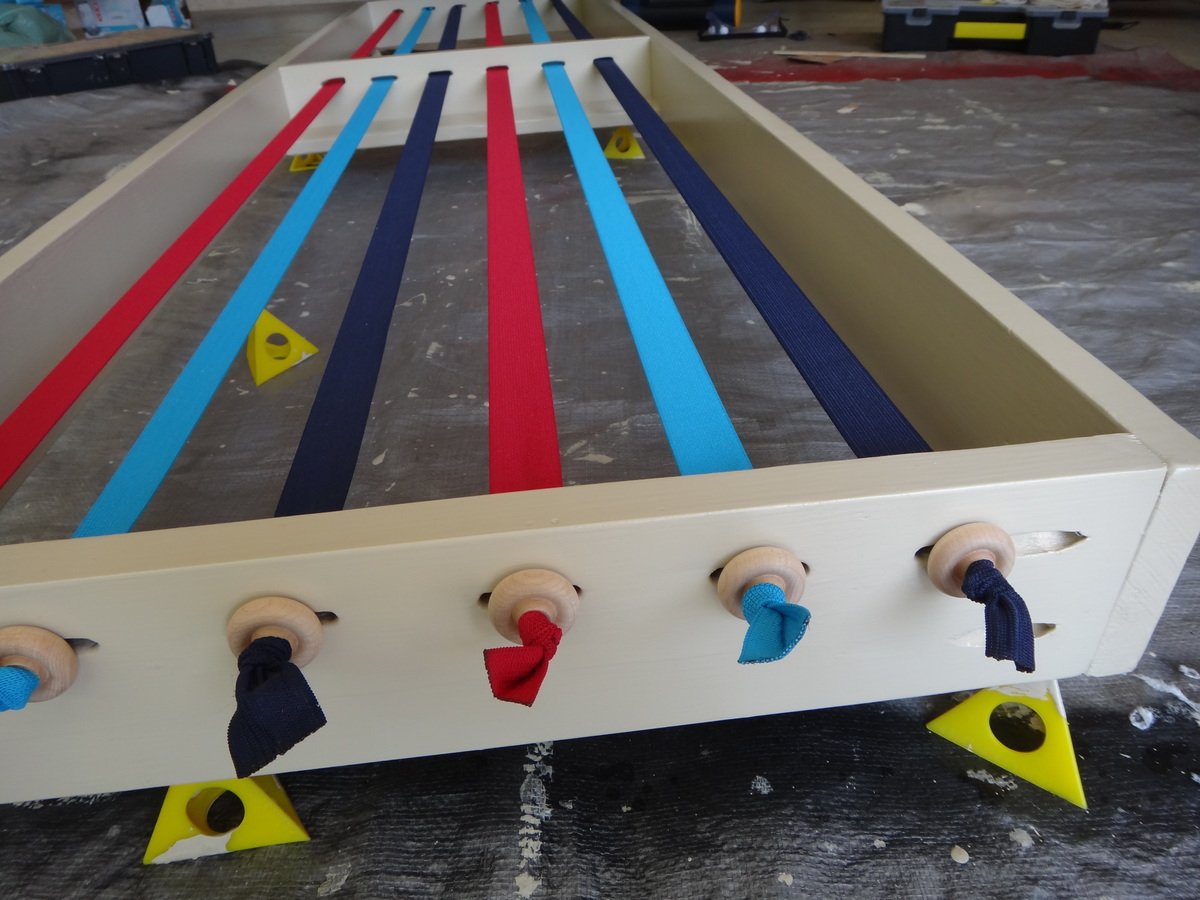
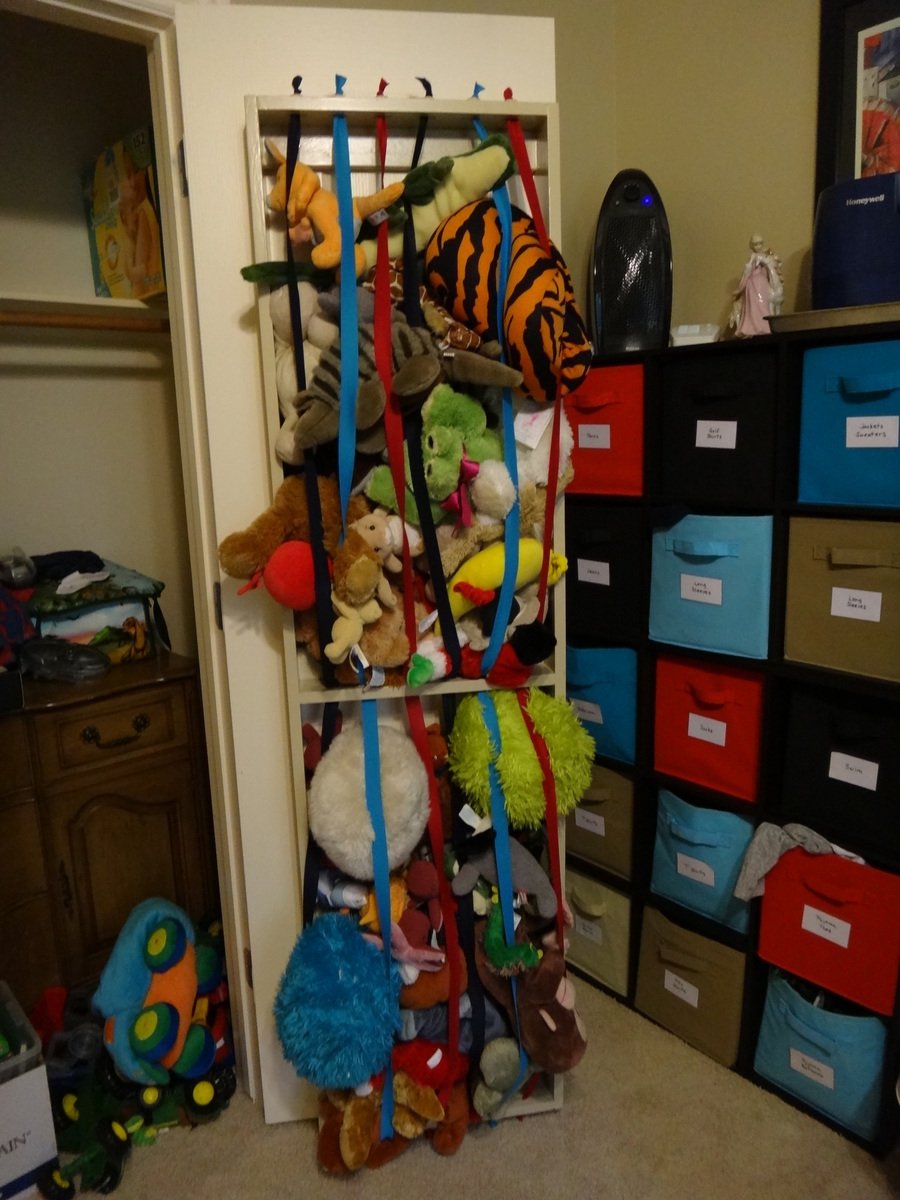
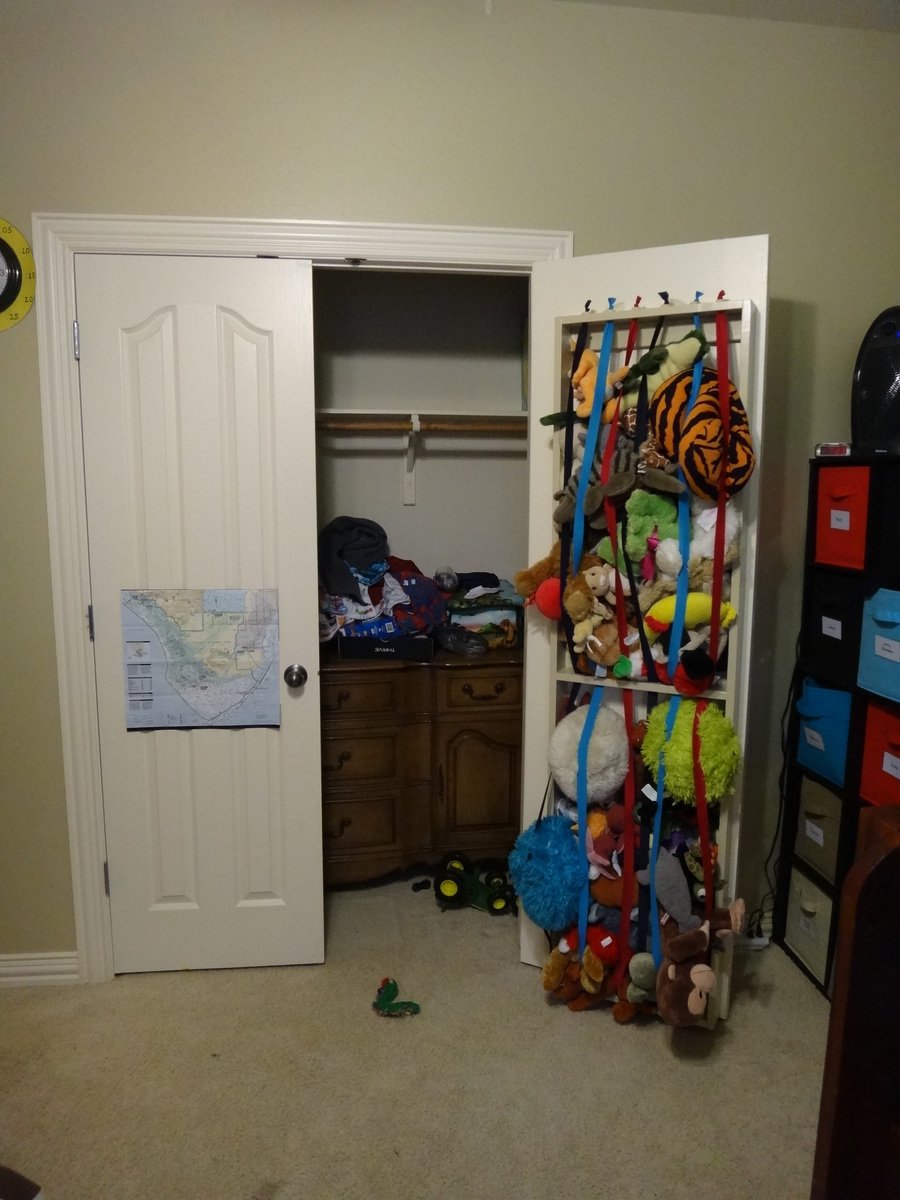
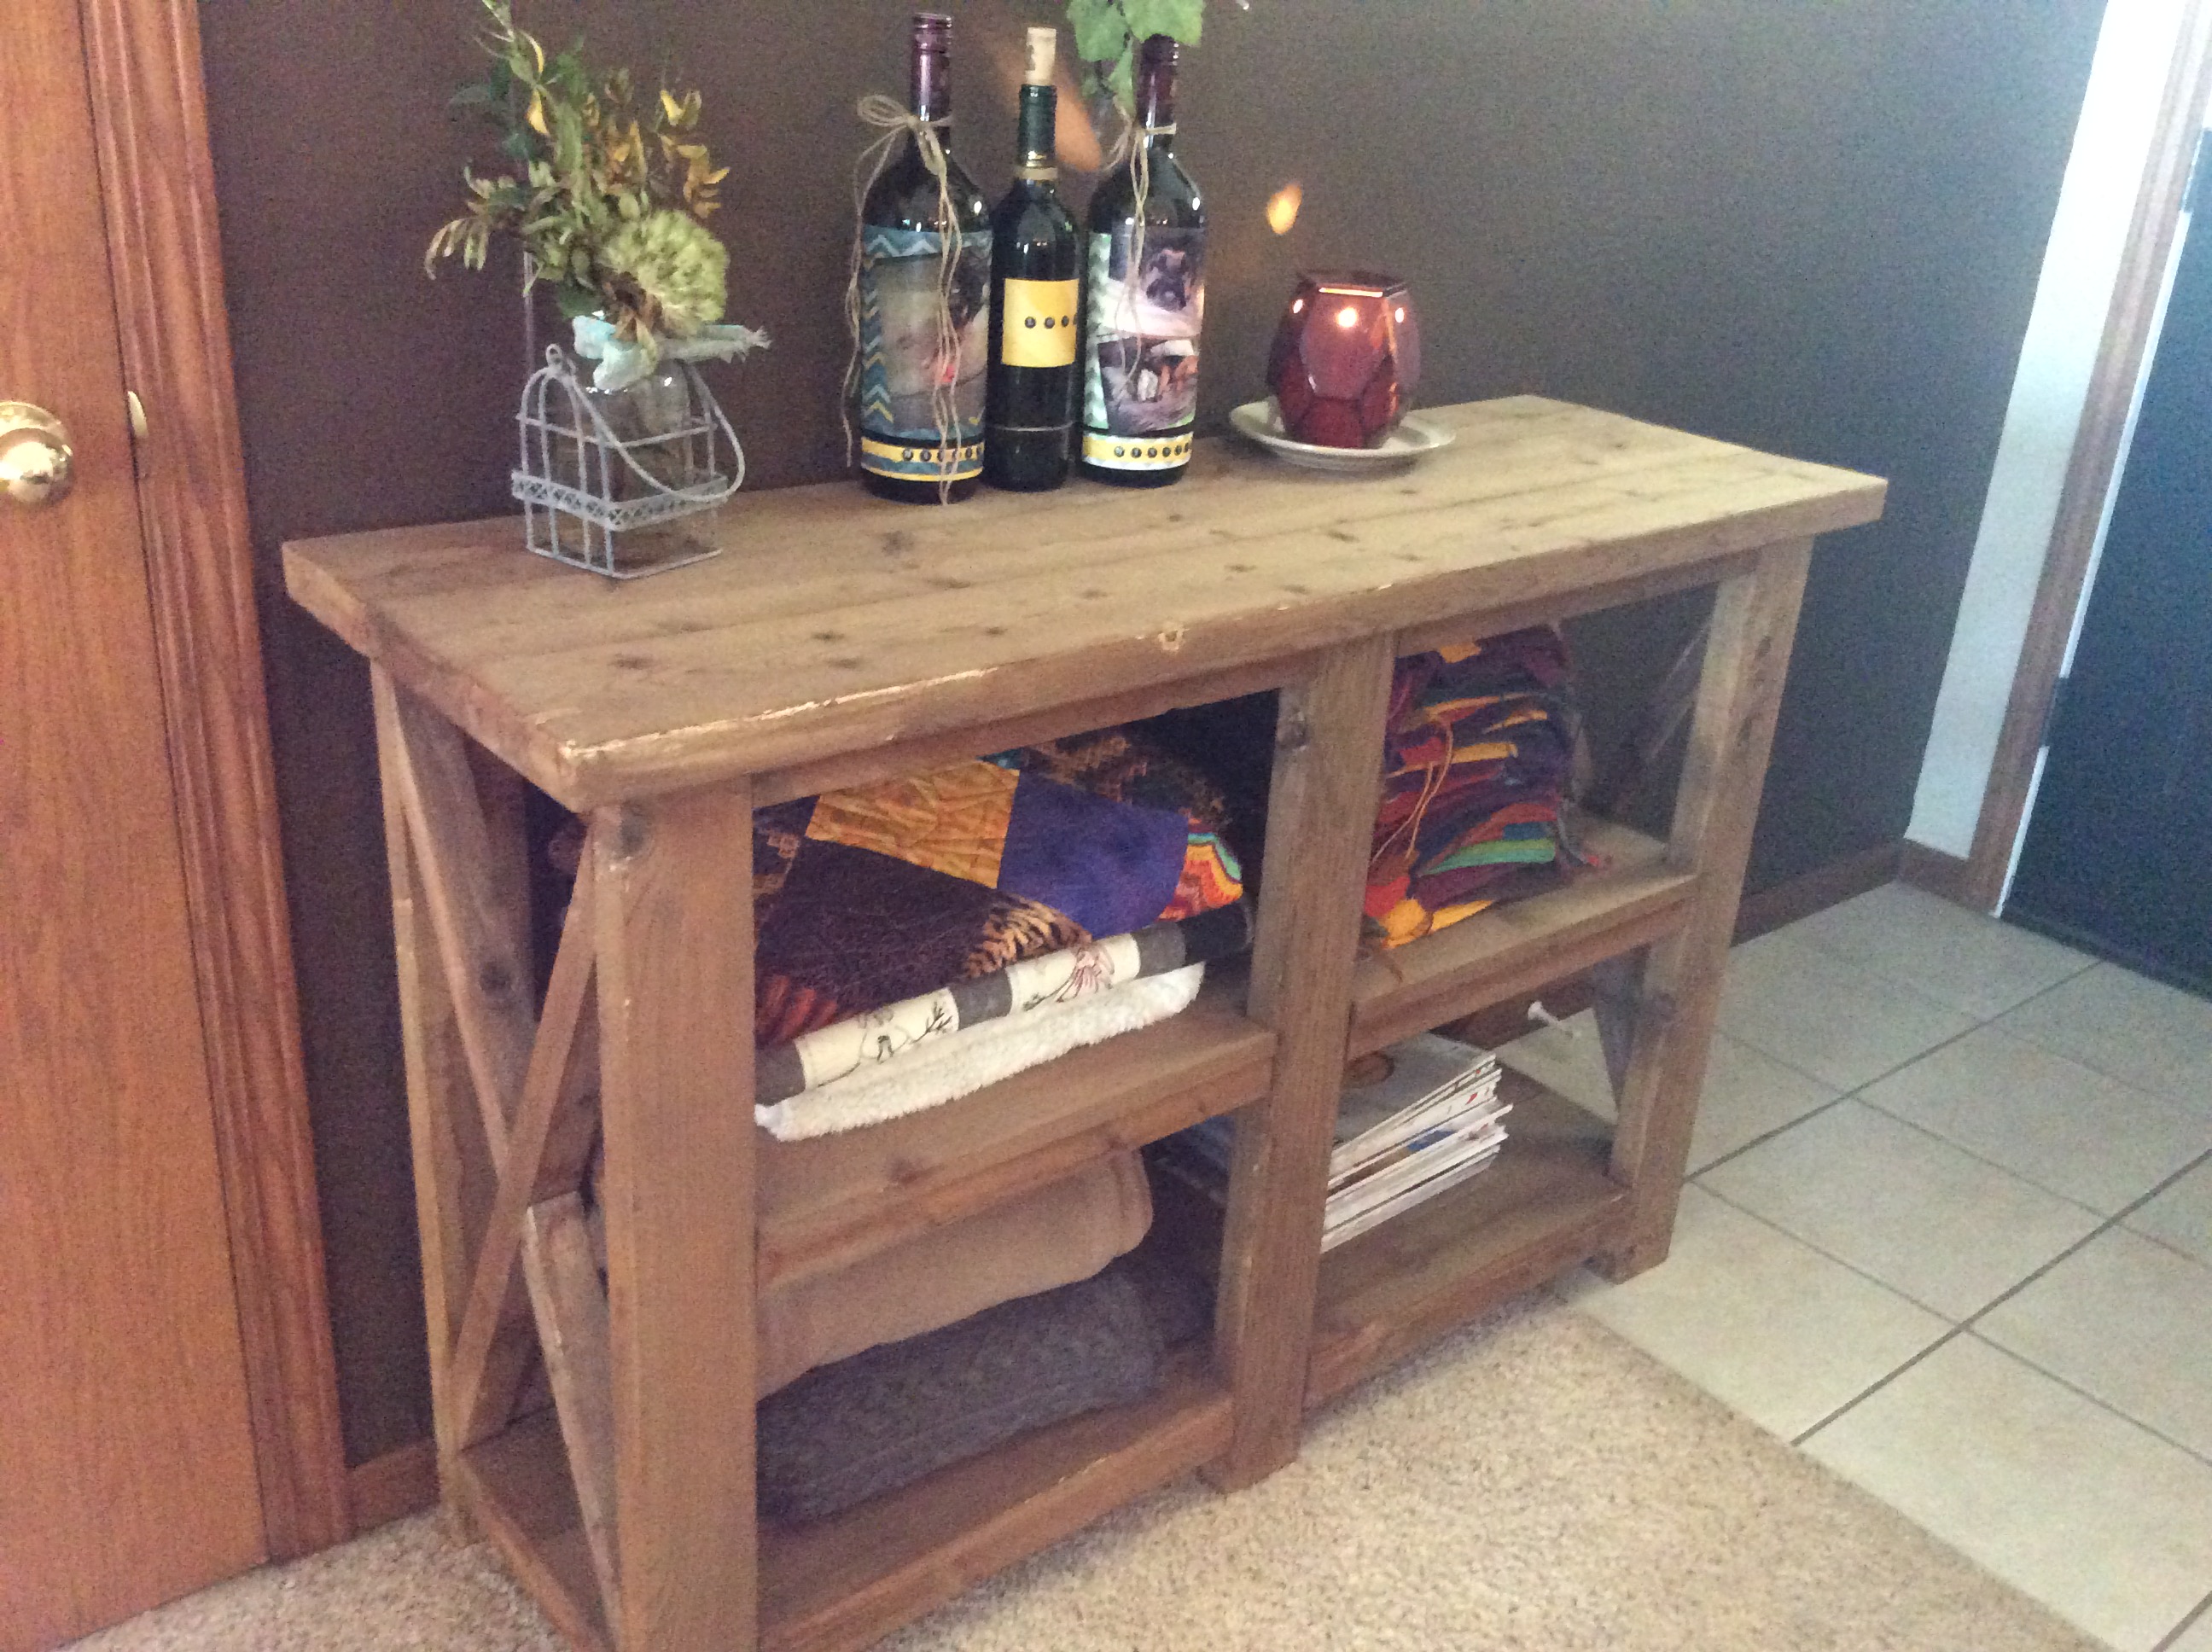
No more free range stuffed animals! We needed stuffed animal storage because they are bulky and keeping them in bins meant the one the kids wanted was always on the bottom. But none of us (my husband and I included) could manage to cull them.
I was inspired by the way Walmart contains their giant beach balls -- bungee cord verticals on a fixed frame. I was going to make it free standing til I saw the behind closet door storage plans. Perfect!
I made the frame and shelf from 1x4s because that was the depth of my doorframe -- 3.5 inches. It took (3) 1x4s @6' - One for each side and one cut for the top, bottom, and shelf/support.
I couldn't find bungee cord by the roll (should have checked Amazon first!), so I bought colored 1 inch wide elastic from JoAnns. Each 3 yard pkg cost $4. I needed 3, so that drove the price up. I cut them in half, and the 4.5' lengths have plenty of give on the 6' frame, so you could probably use standard 4' bungee cords from the box store.
I used my router to make the holes for the elastic. I used wooden toy wheels to keep the knotted elastic from being pulled through the holes. You could just drill holes, but my router was new and I wanted to practice with it.
The kids love putting their stuffed toys away now, and they can see all of them so they can pick the ones they want to play with rather than dumping them all out of a bin. I love it.
I've already decided to do the other door with the bottom half of the frame in elastic like this for costume storage, and the top half shelves. Thank you, Ana!
Fun project that the kids were able to help with.
I started with the Fancy Hall tree plan, but decided to add cubbies to the top. This is the first "real" thing I have ever made. I could only work on it every other week, so it took longer than expected. Thanks for the plans!!
I used untreated 2” x 6” boards, mitered the corners and stained with Minwax Early American.
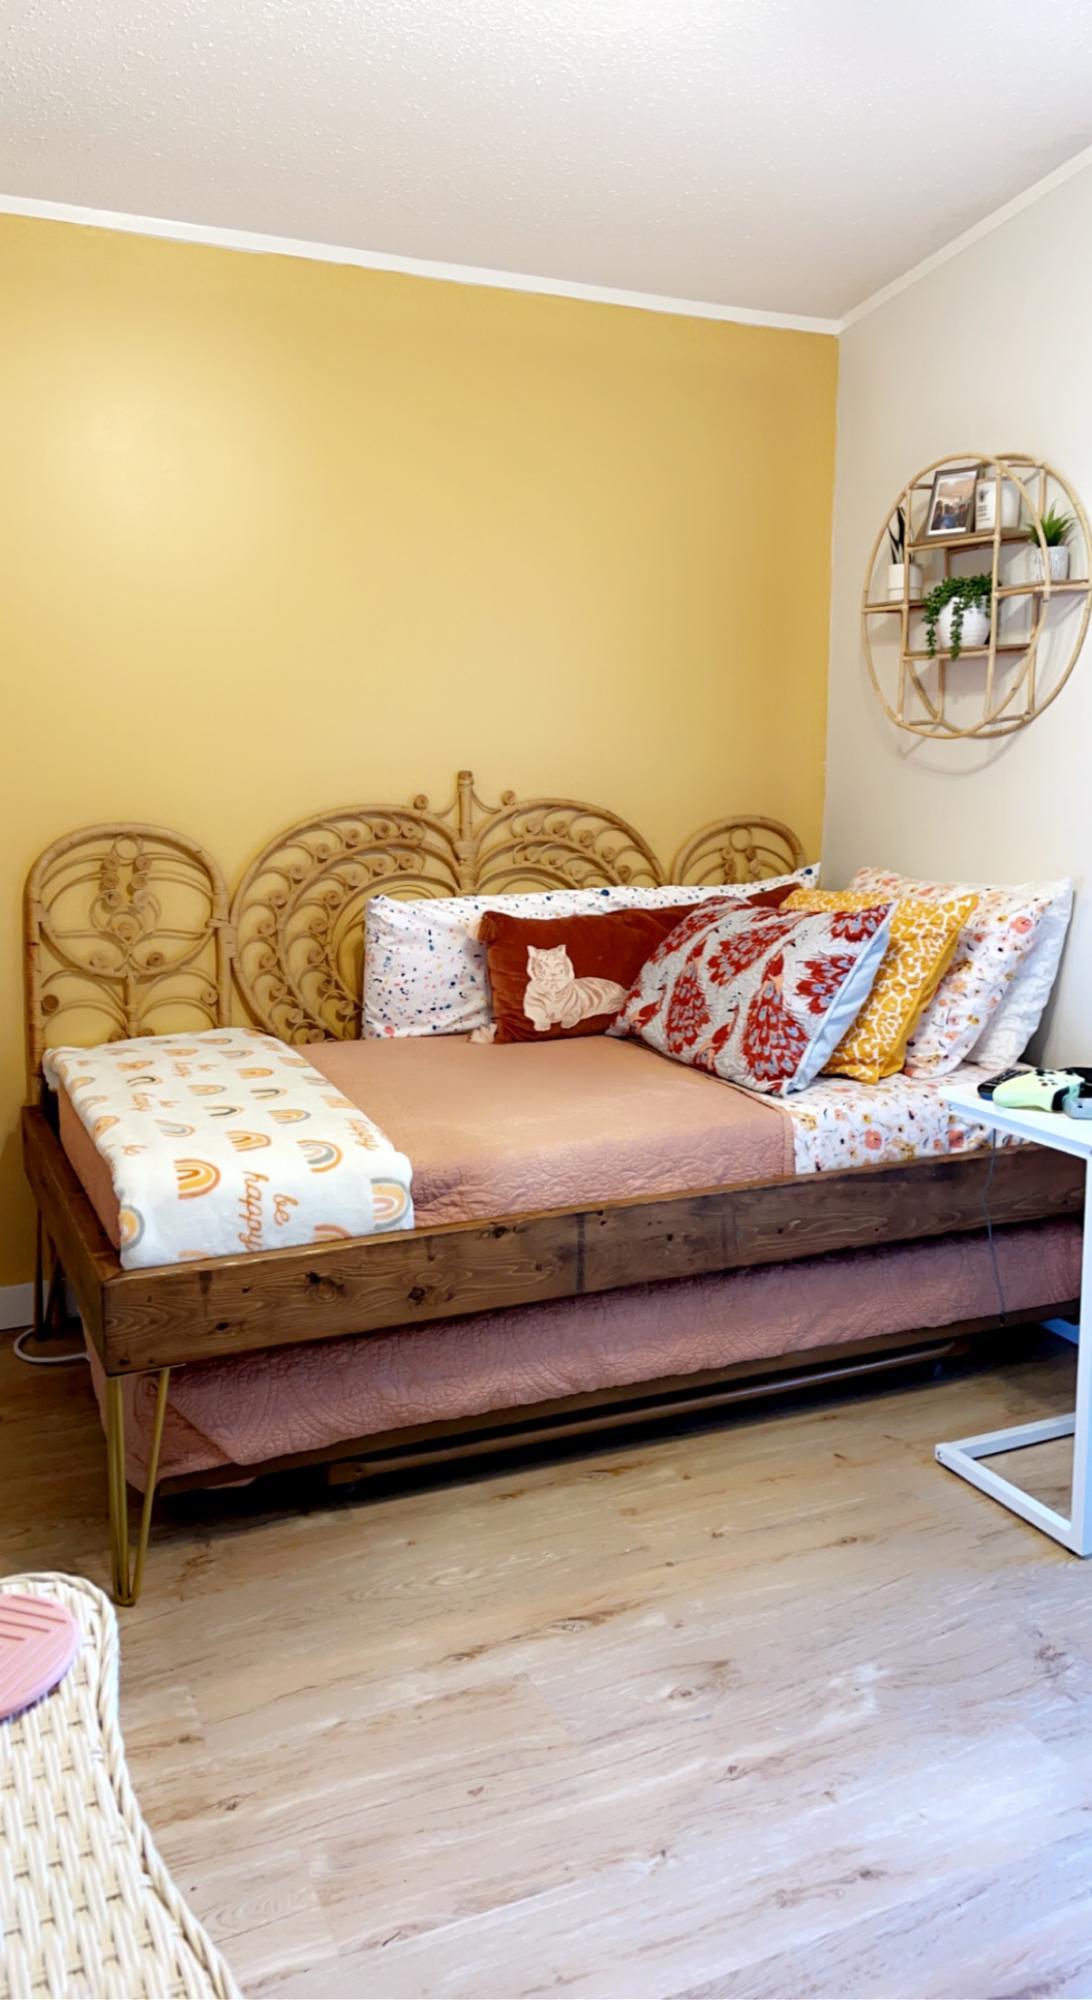
The 14” golden hairpin legs are from Amazon however, after I built the bed, I realized the mattress on the trundle was getting caught on the angles of the legs so I’ve ordered straight legs as replacements. It should take care of the issue. Lesson learned! 🤣 Overall, I built it myself, it’s very sturdy and she loves it! Thanks Anna for the plans!!!
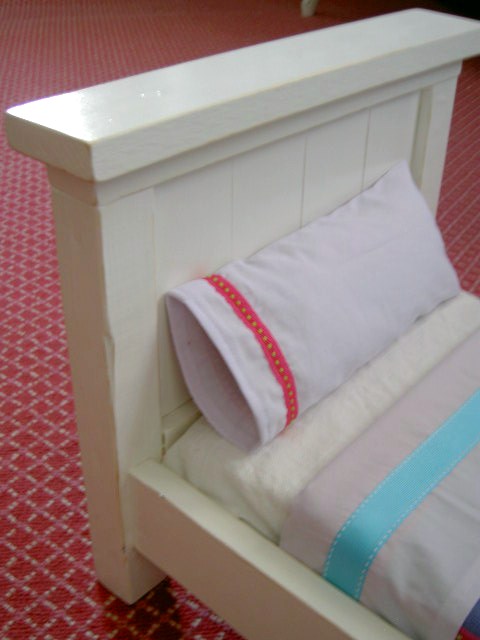
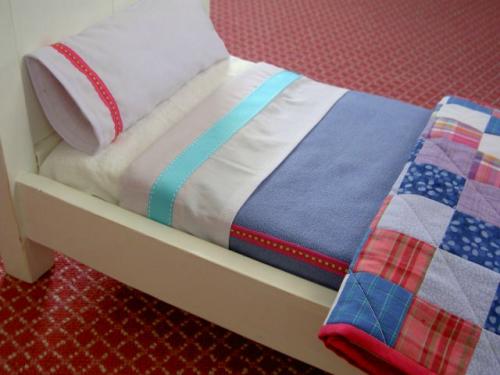
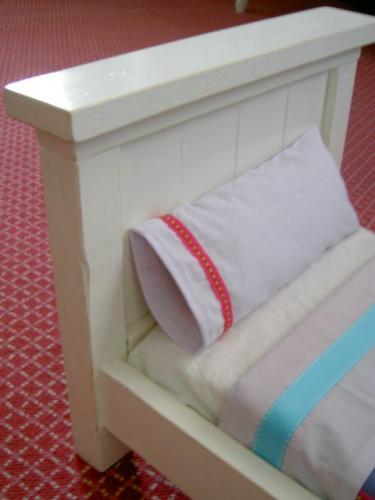
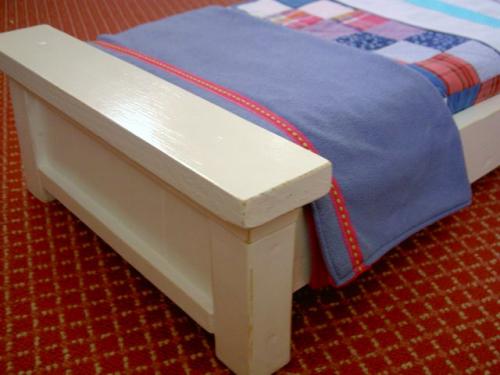
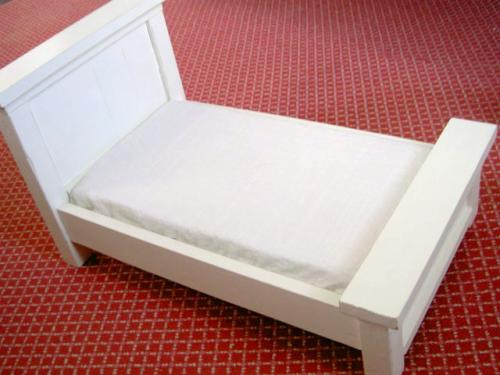
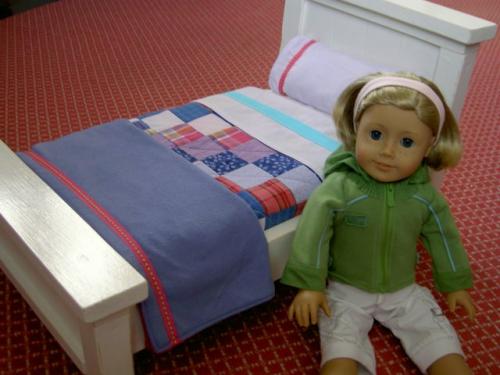
Farmhouse doll bed modified - one slat less in width.
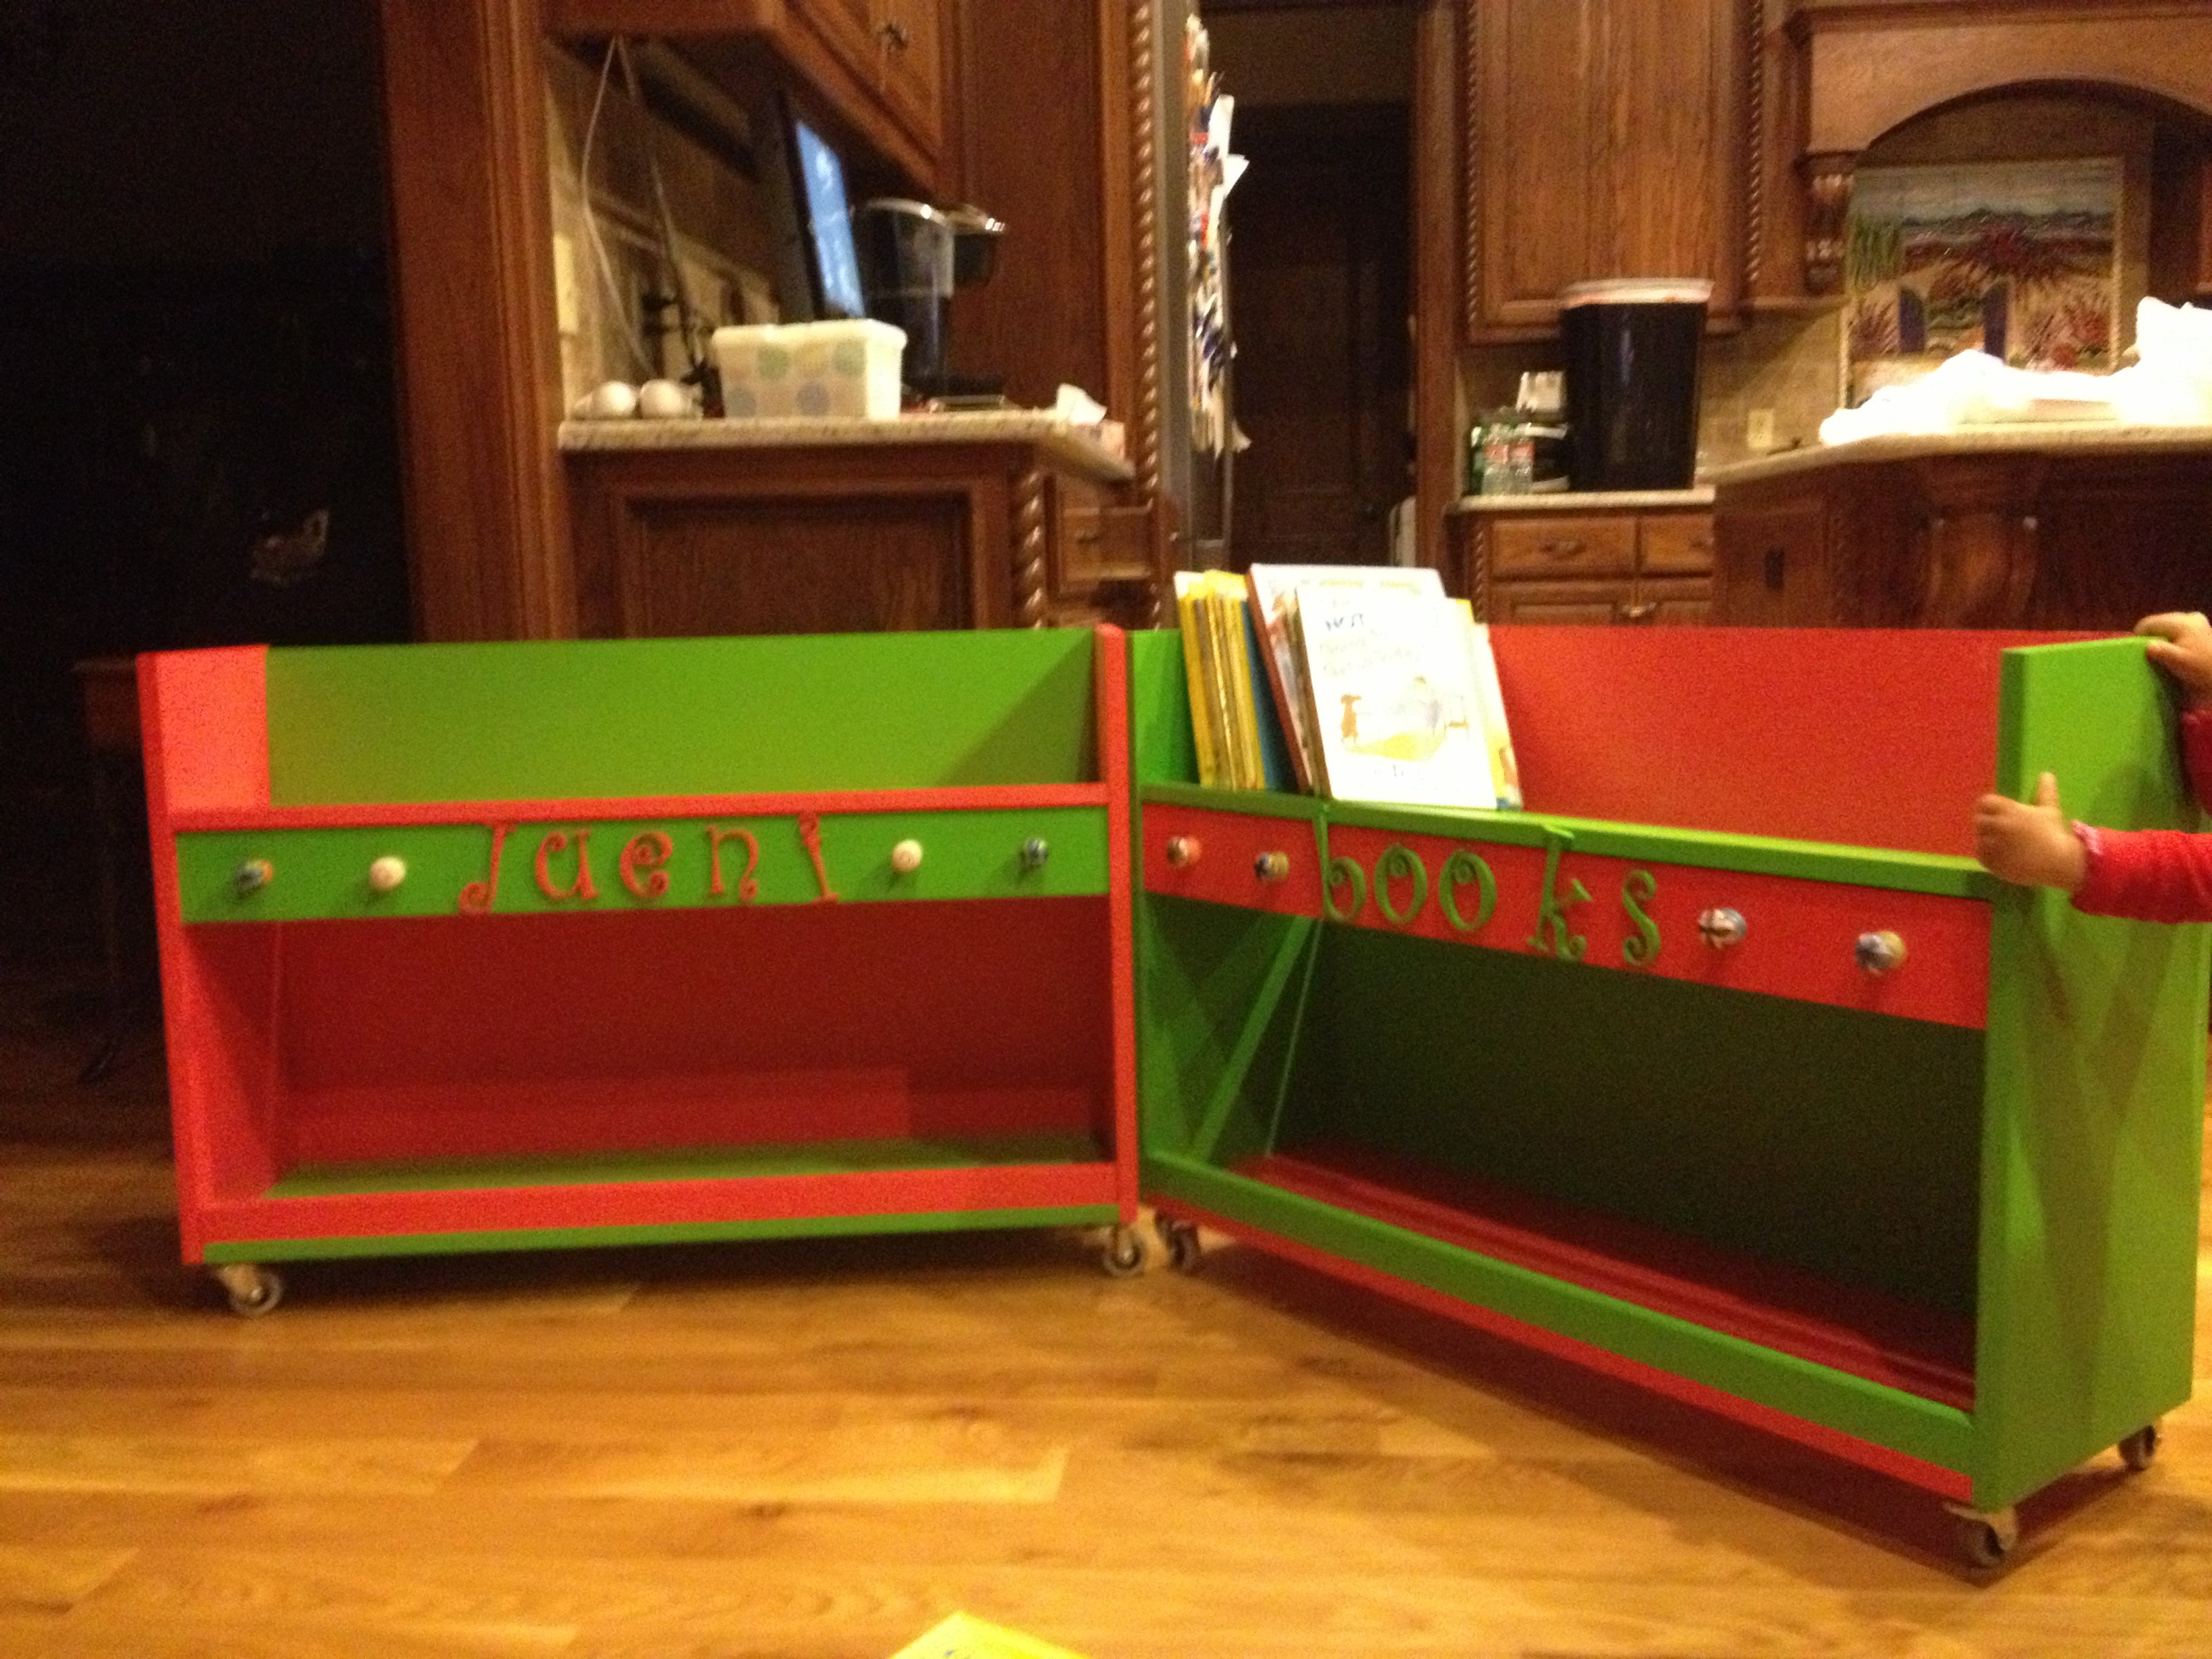
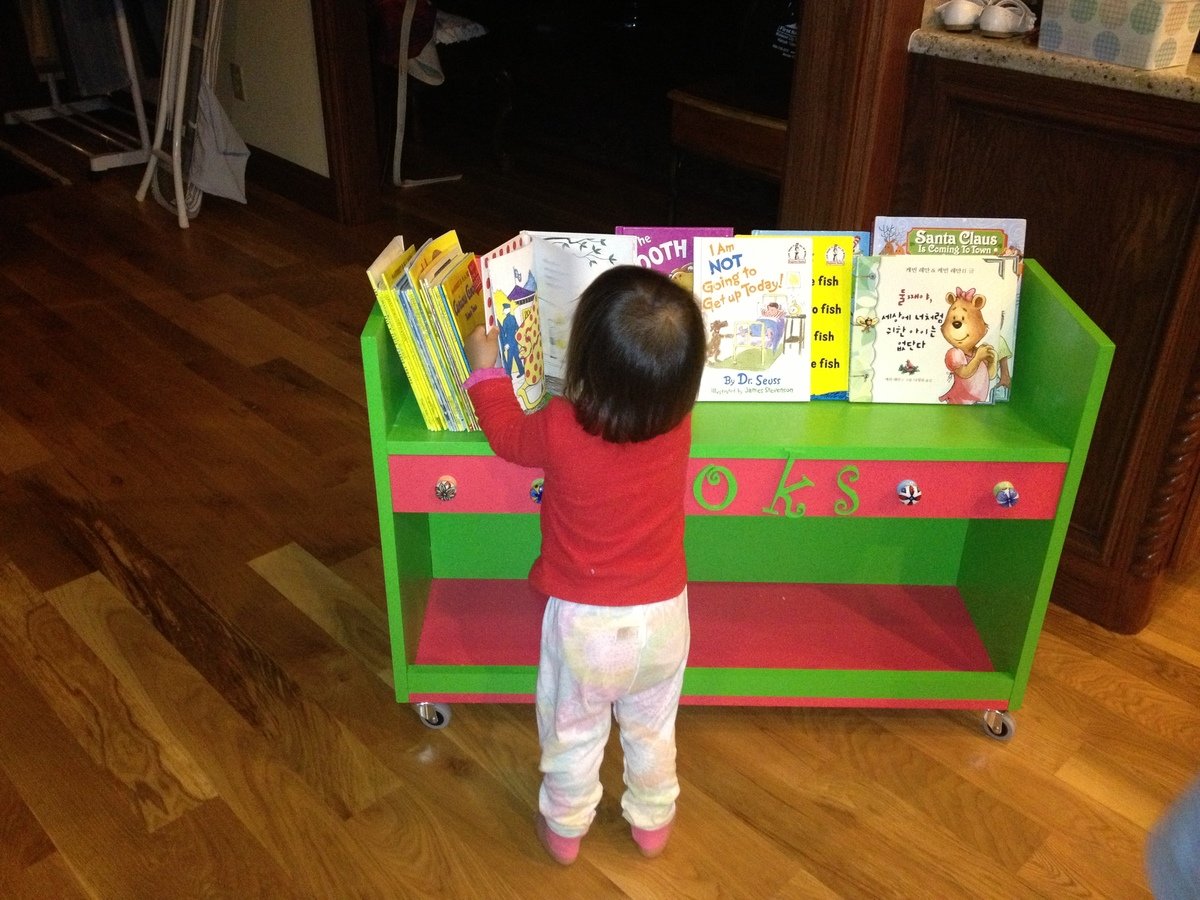
We followed Ana's plans for the basics but went on our own for simplicity. We found the letters at Hobby Lobby. I also added some ceramic knobs to hang things on.
To make it easier we eliminated the handle holes and did not round the top edges. Just used some kreg jig screws for the bottom and second shelf and screws for the rest. That's about it! Pretty easy. The hardest part was the painting.


My wife and went through a phase, in which we saved as much money as we could to buy quality furniture. "No more cheap stuff from the department store!" we said. Well several thousand dollars later, we had a gorgeous espresso colored bed, a beautiful rustic dresser, and empty pockets. About a year ago I decided to take up woodworking, and since then we have discovered what you can build on your won, from the plans at ana-white.com look just as good (if not better) than the thousand dollar pieces we own!
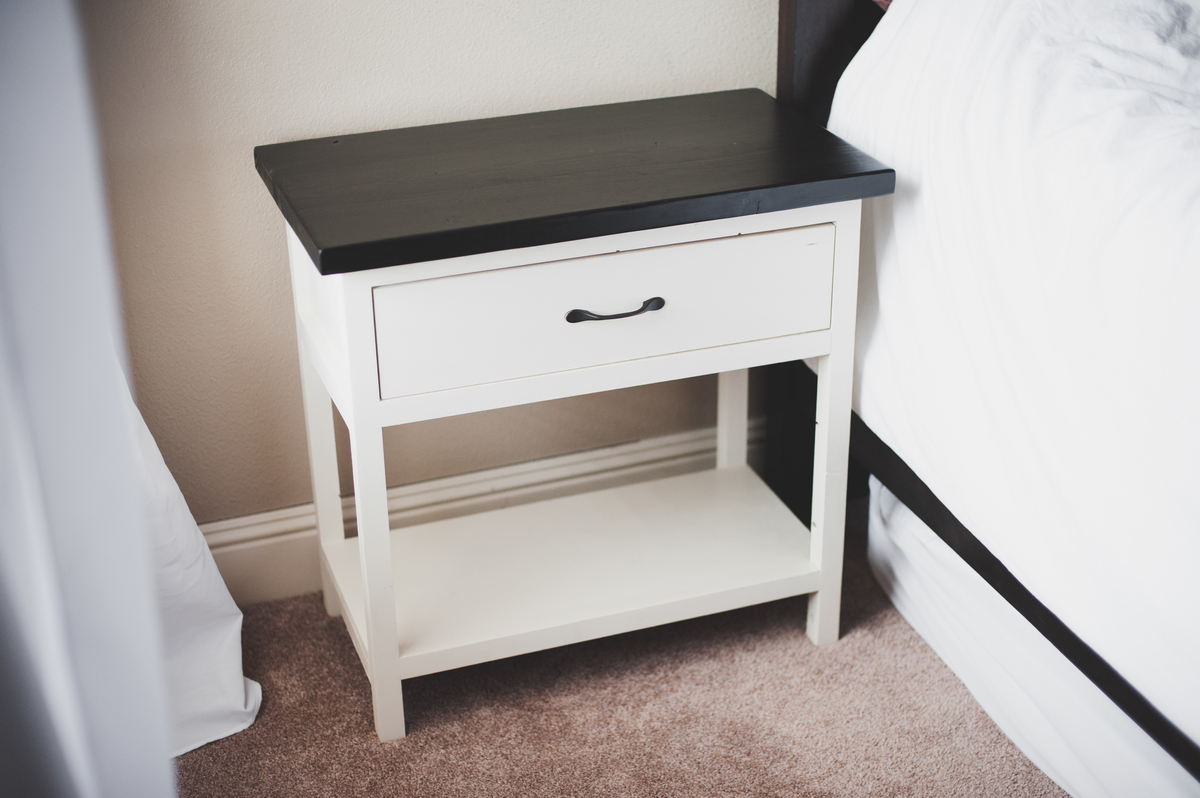
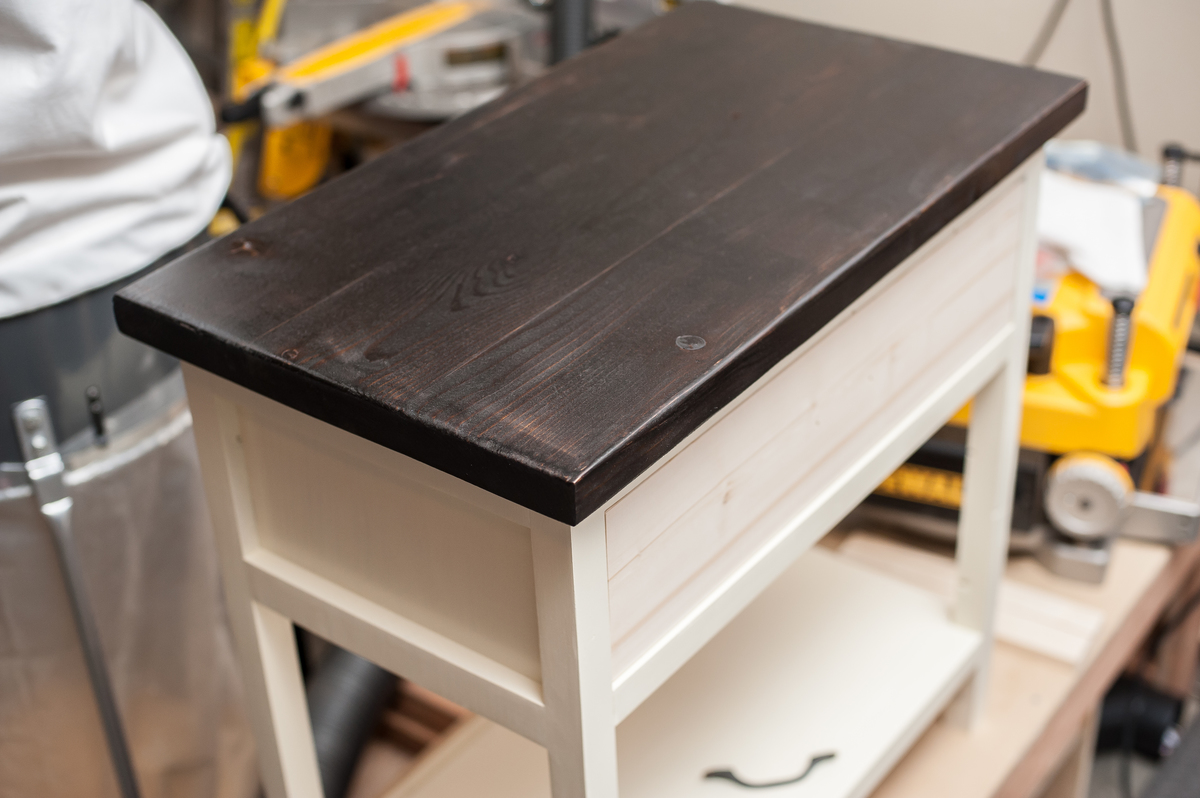
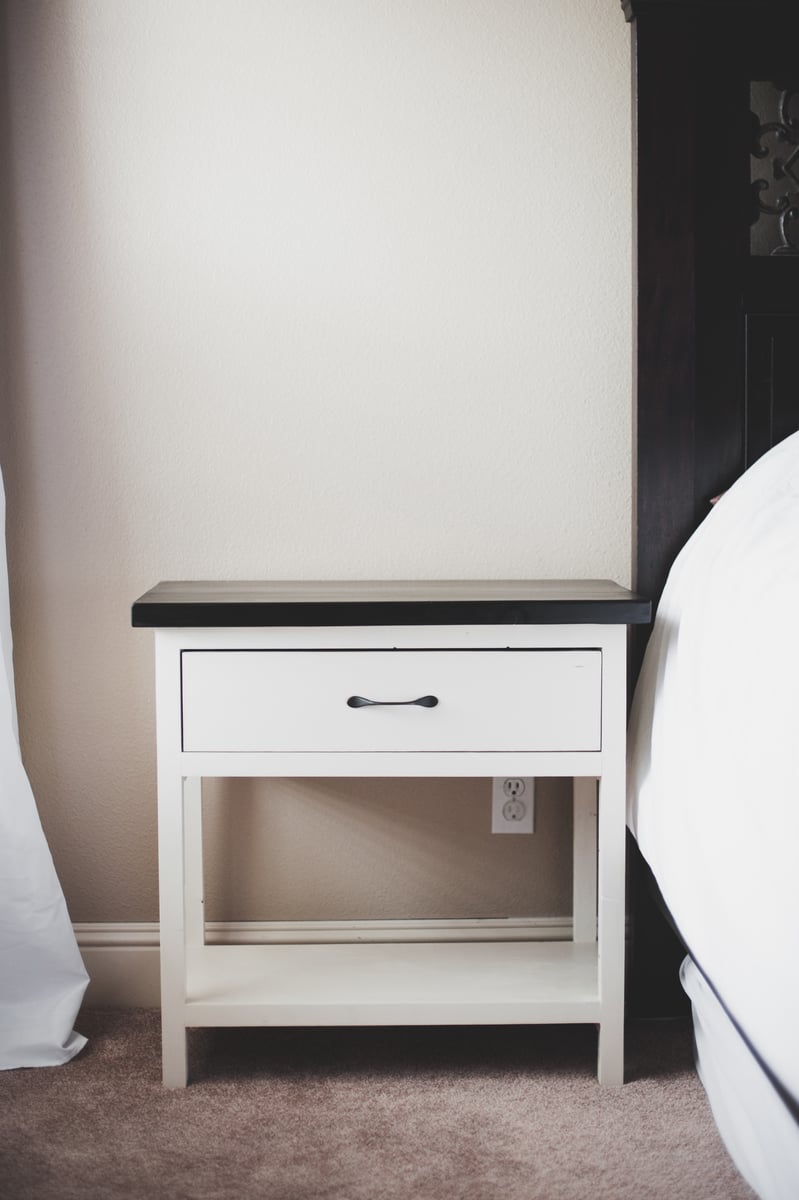
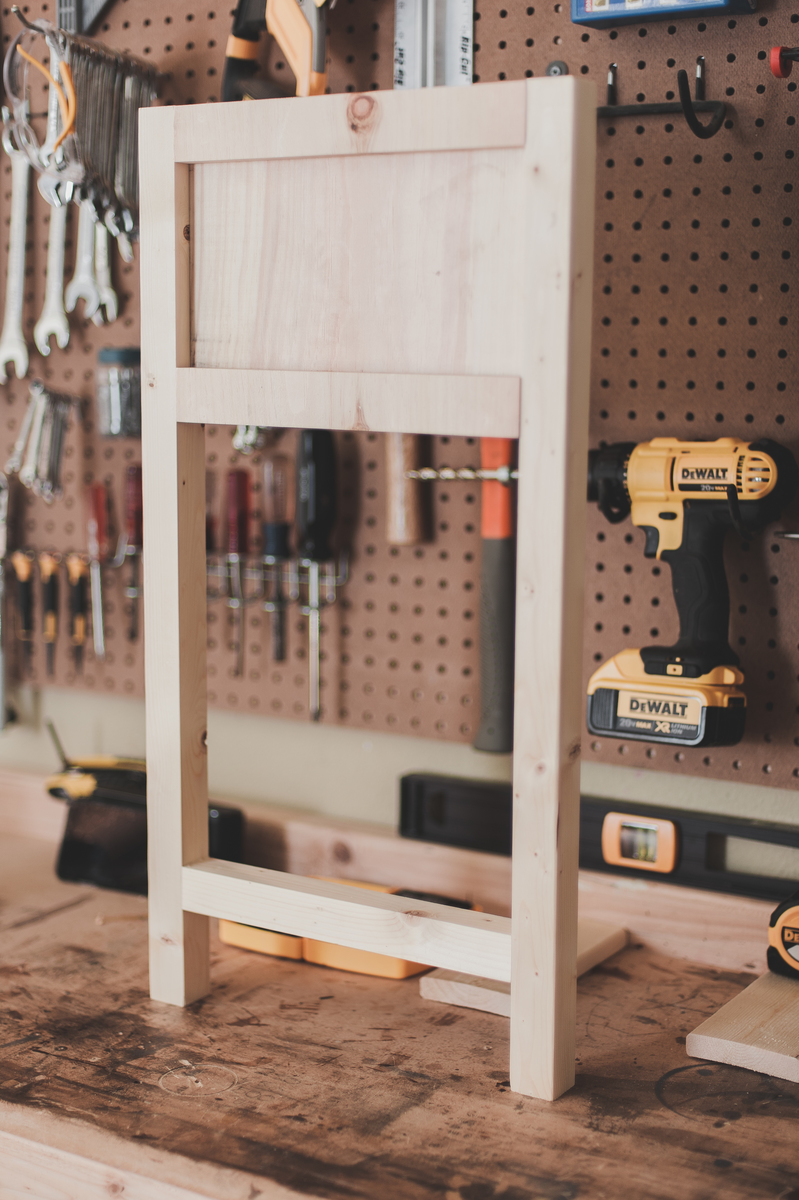
When I saw this plan, I knew that we would soon have the bedside tables my bride had been wanting for more than 6 years. With a few modifications, I was able to build the set for about $40.
I modified the plan as needed, buying the cheap $1.50 2x2s and 1x2s from Lowe's, which I planed at home, and a single 12ft pine 1"x12" at the lumber yard for just $14. I also used 2x6's (planed down to 1" for the drawer) rather than 1x6's (8') which I bought from Home Depot for about $5. I used my Kreg Jig for all the pocket holes, and took. my. time. About 8 hours of building, I stained the top with Minwax Espresso Satin Stain, laying on 1 thin, quick-drying coat, followed by a second thick coat (let dry 6 hours) after which I hand-sanded with 220 grit paper, then applied a final thin coat, which dried in about an hour. The frame was painted an off white we chose to match our baseboards.
Super happy with this build. I think it's the nicest project I have had so far. Thanks so much for the plan!
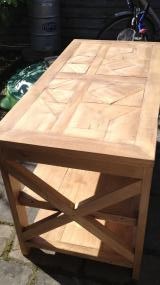
I'm not a plan follower and just wing it. Saw a Pottery Barn Table I fell in love with and started building with 2x4s for the frame, 2x2s for the Xs and 2x6s for the shelves and tops. Finished with steel wool soaked in white vinegar.
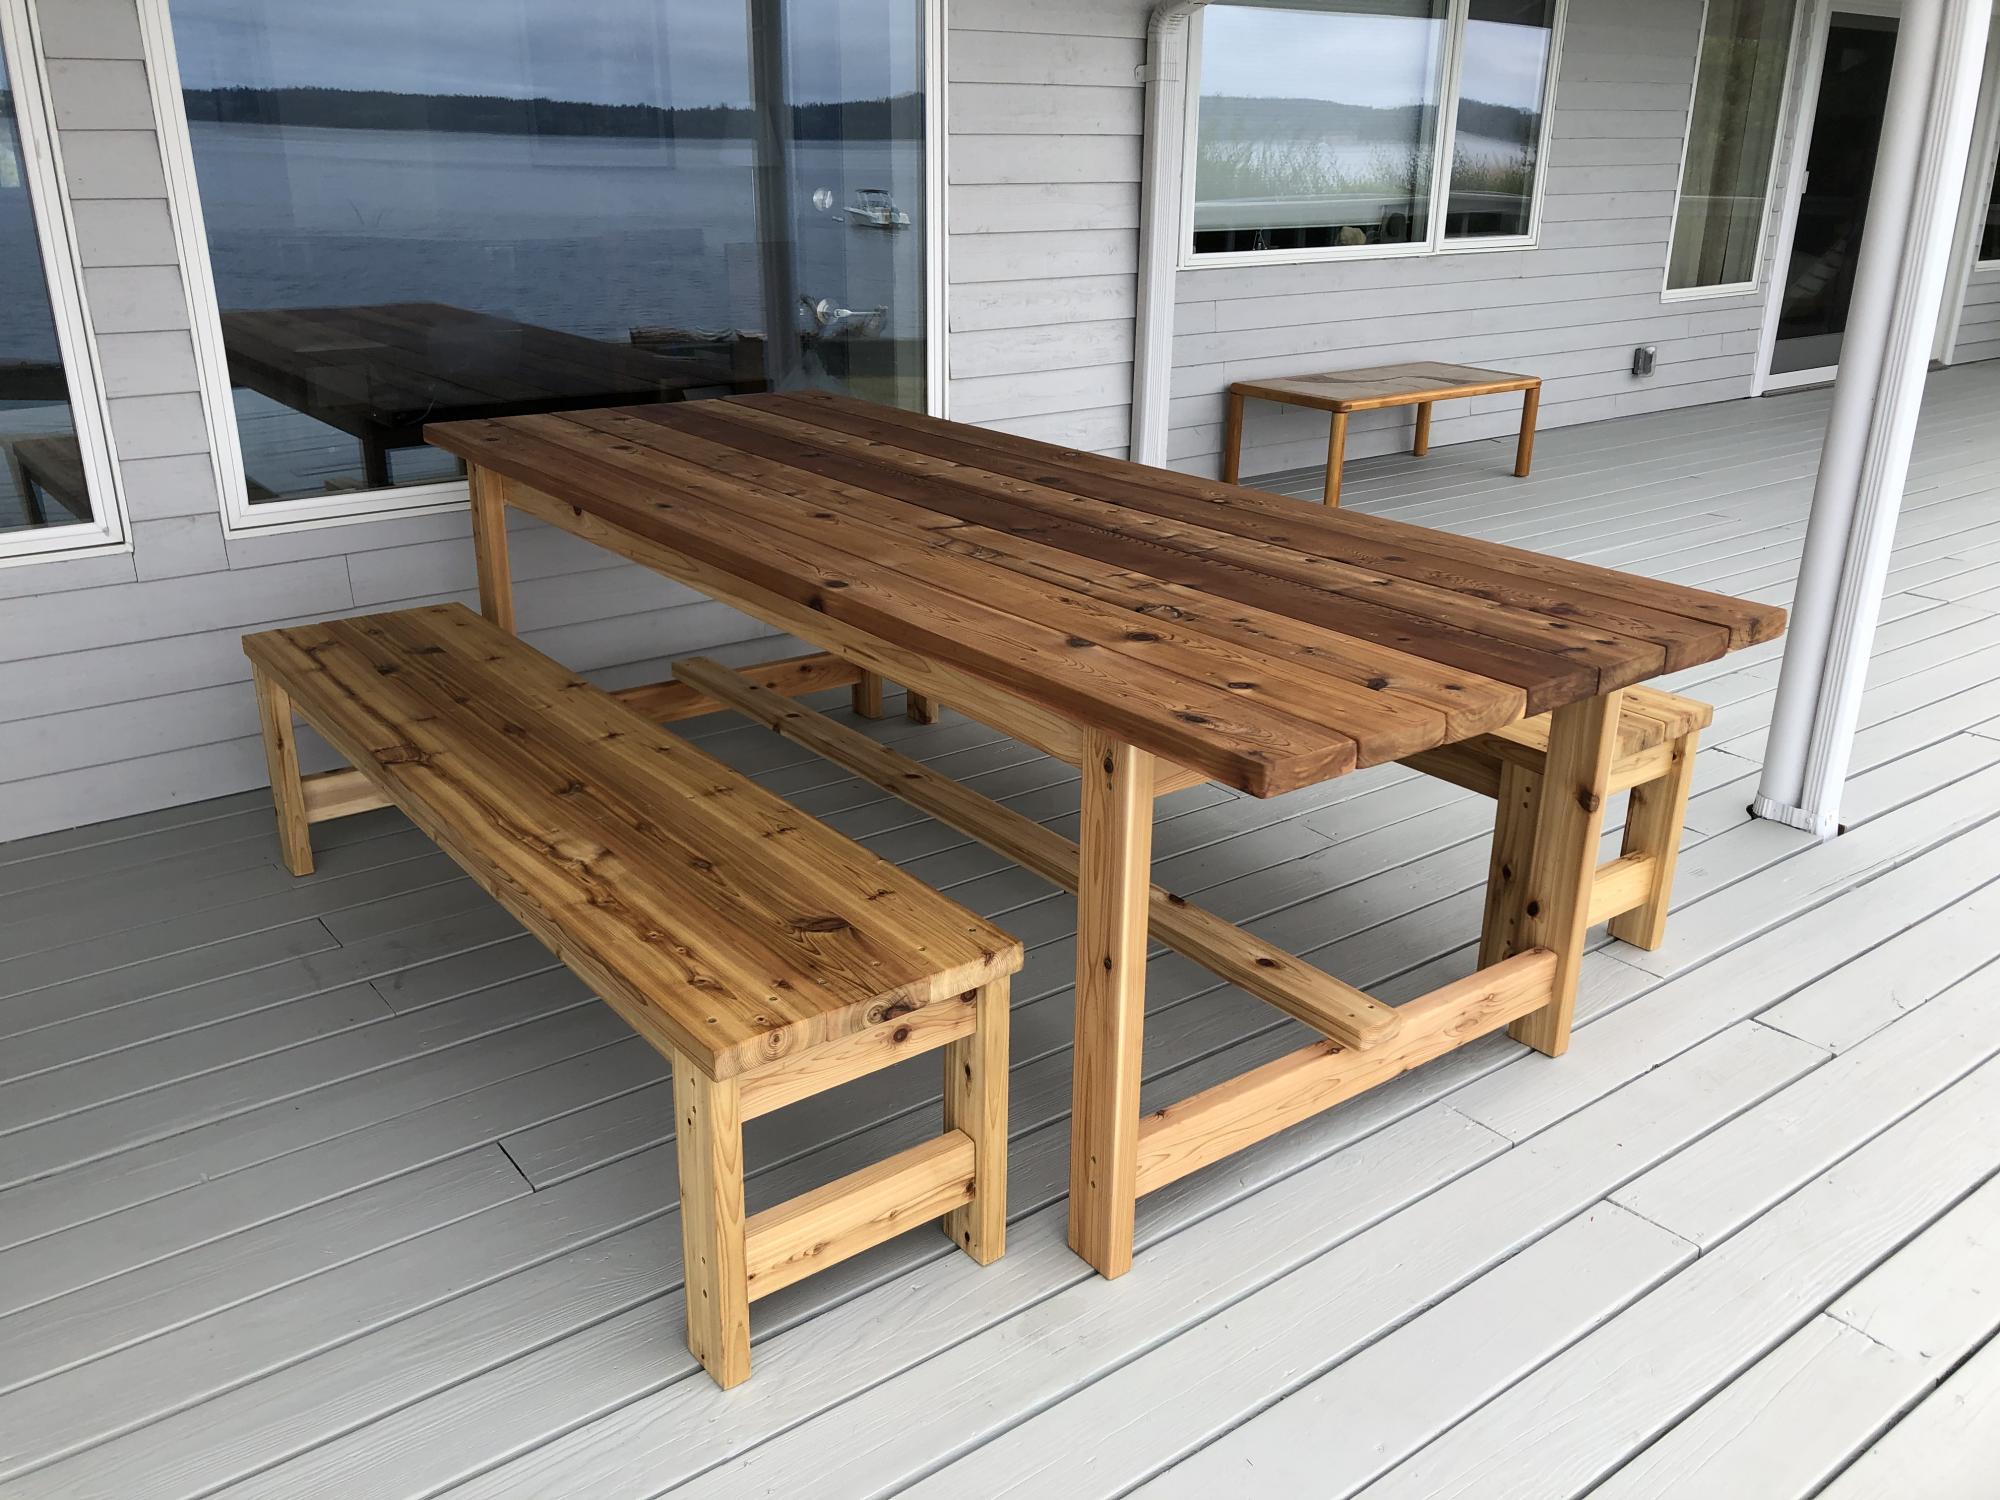
Built this deck dining table and benches from Lowes cedar, and the results way exceeded my expectations! The plans were so well written, it was easy to slightly modify (made both table and benches wider and longer) and the build was very simple. The clear directions helped give me the confidence to do this and we have got so many nice compliments. There was nothing this sturdy and simple even available to buy. I even built a coffee table and bar table after modifying the plans a bit. Thank you Ana!

Made this adorable step stool for my two year old nephew... BUT... I liked it too much and decided to keep it for myself. Is that selfish of me? I use it almost every day to get to the top shelf in my closet. Maybe next year Miles!
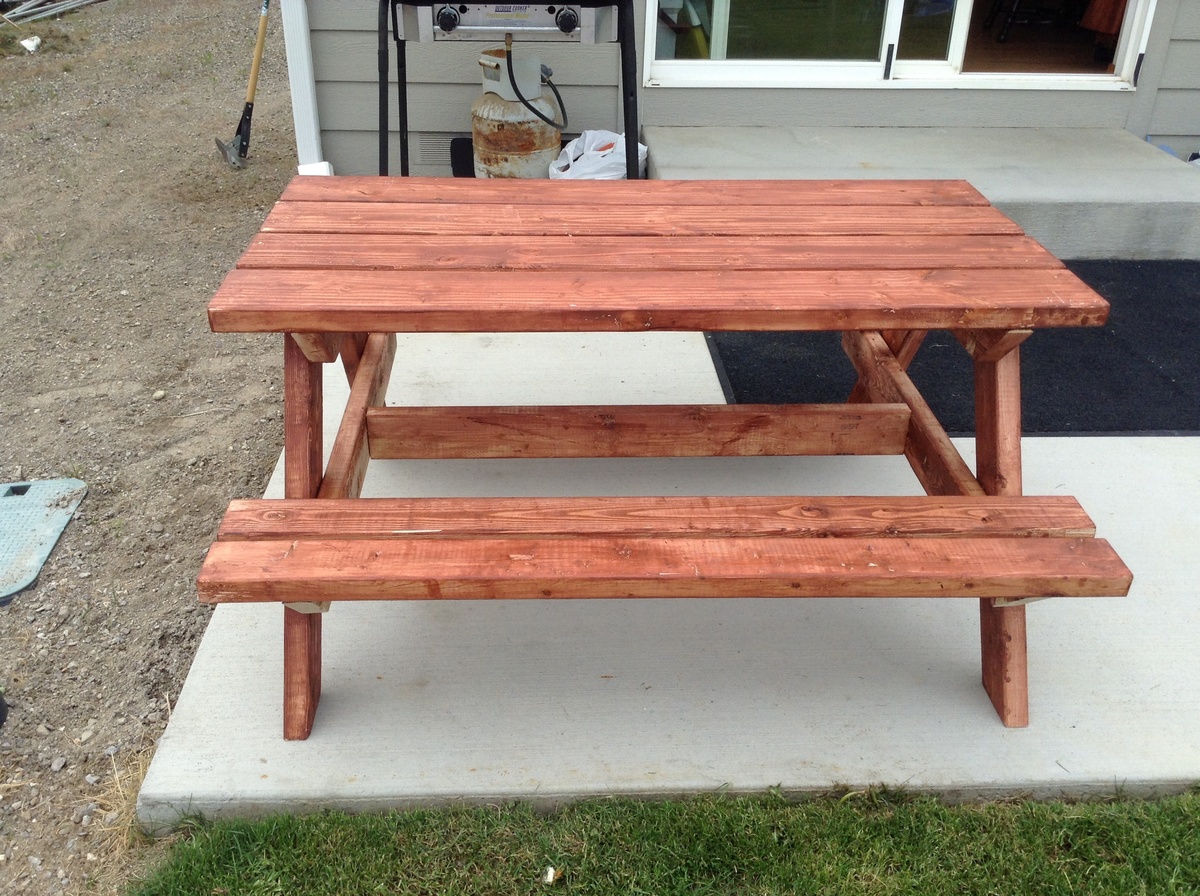
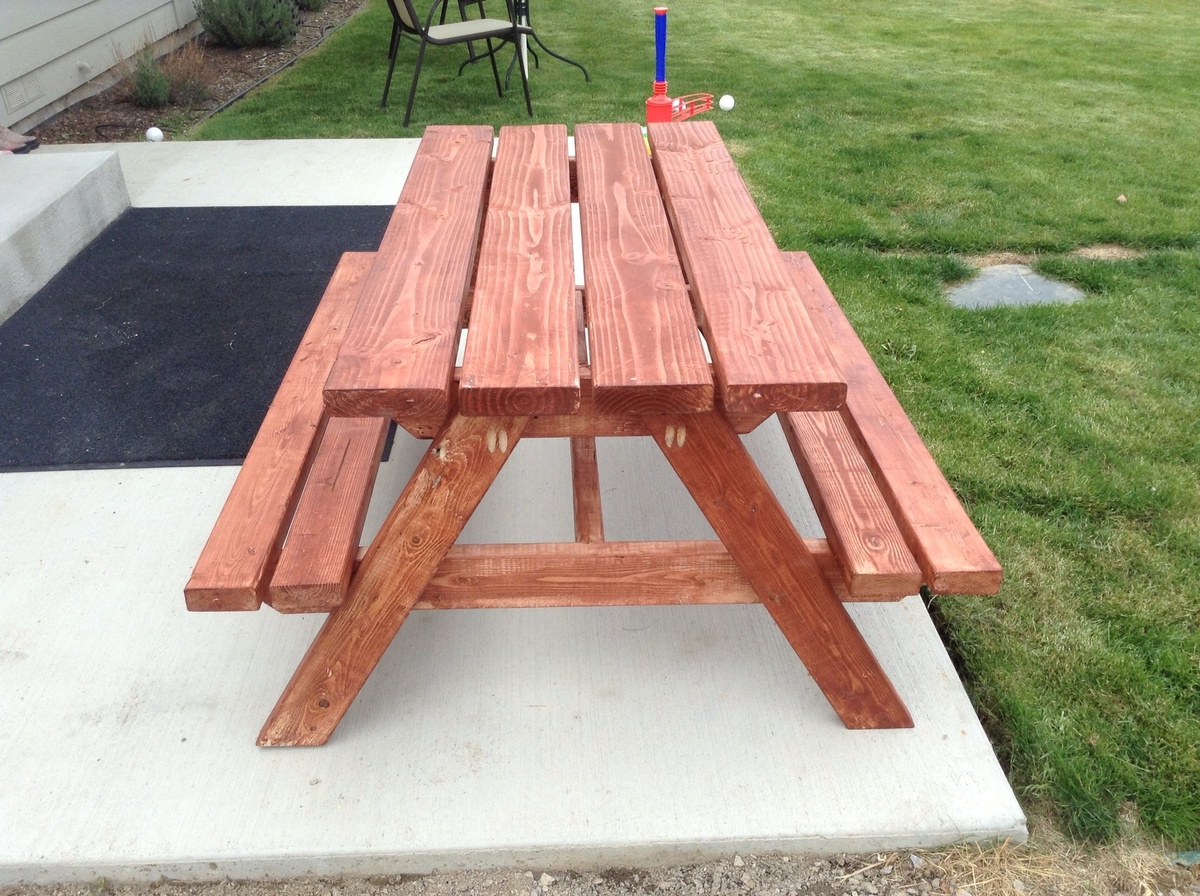
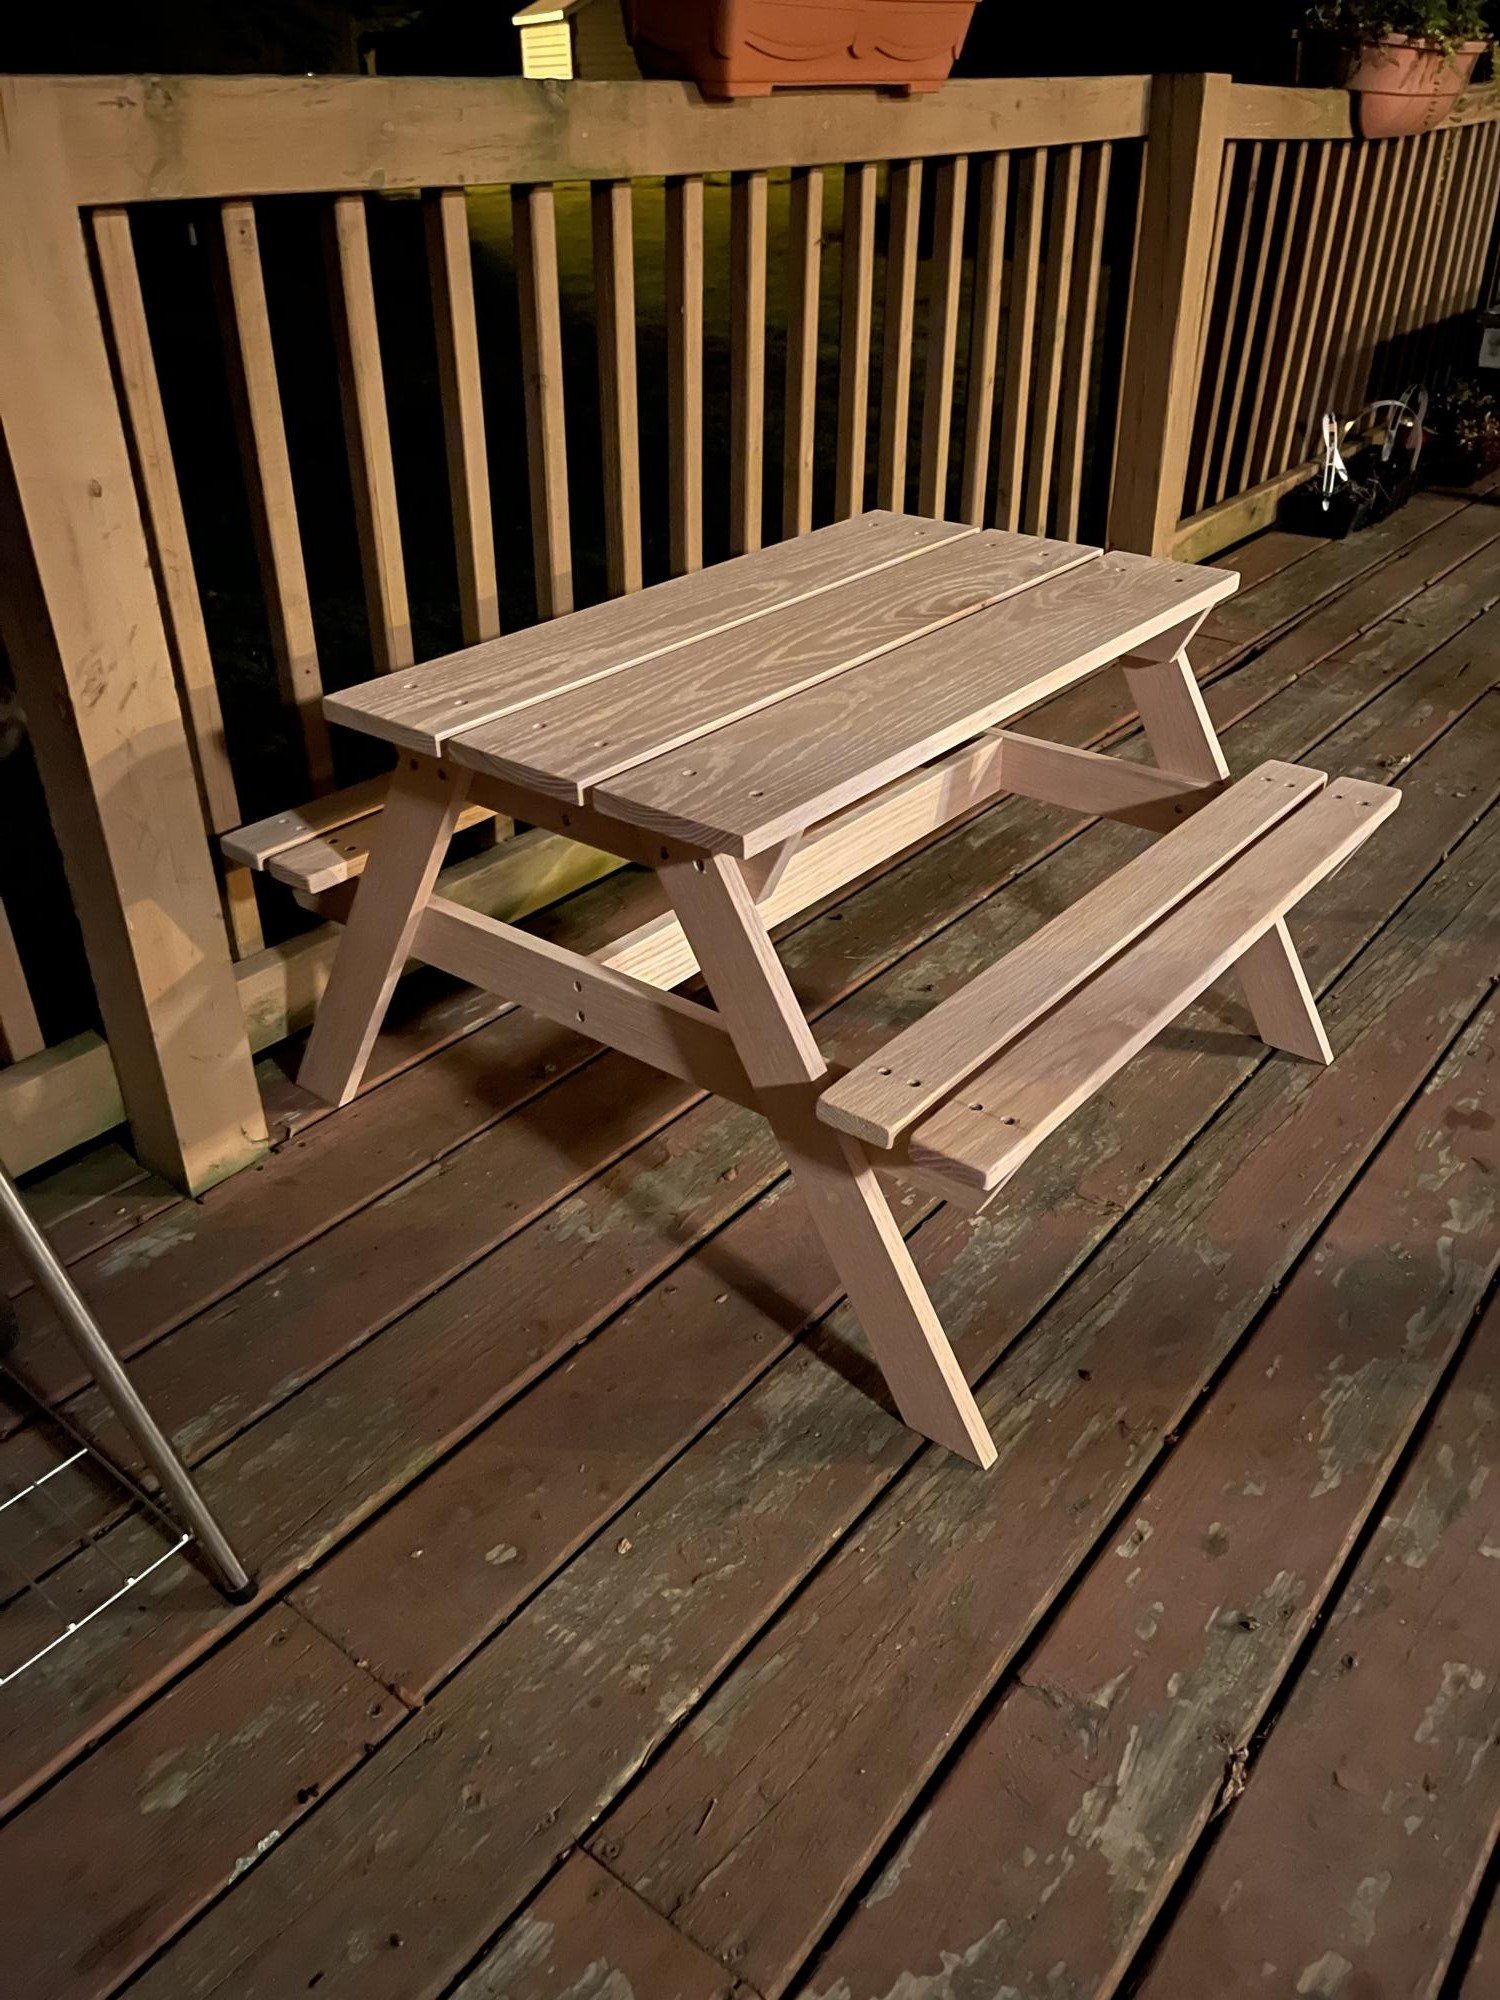
We finally got our grass green and back yard clean, after all that work the lop sided blue little tykes picnic table stood out like a sore thumb. This was the perfect table to fit our back yard make over.
When Ana says read all comments she means it. Cherie posted "if you plan carefully you really only need 5-2x4's instead of 6. Cut 2-2x4's in half for the seats. Cut 2 legs and one seat support from the third 2x4. Repeat for the fourth 2x4 and finally cut the bottom suppport and the 2 table supports from the 5th 2x4. Just plan carefully." I still bought 6 2x4's but only used 5.
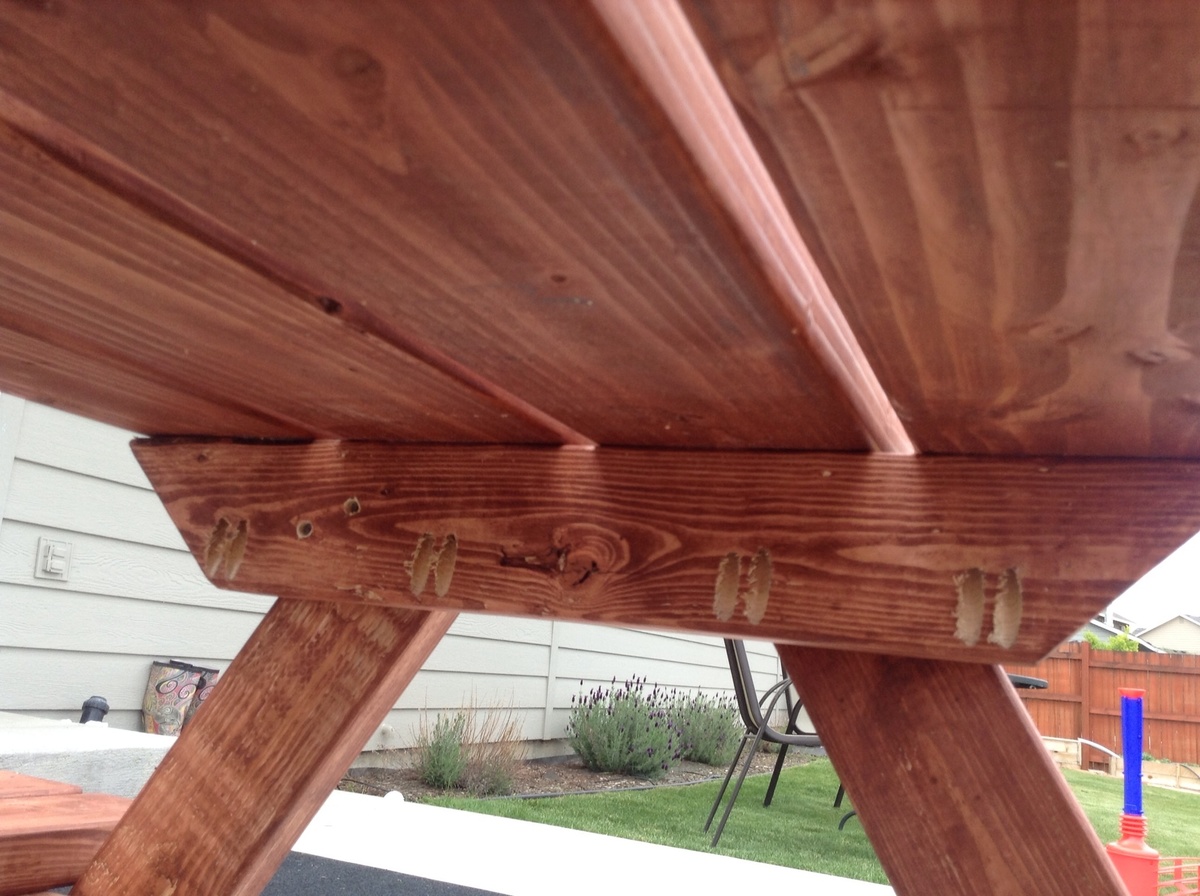
I did pocket holes on almost all the joints. I put the table on risers and was even able to use a pocket hole to add the seat boards. I did have a bit of a problem with the table top supports, I am not sure what others did but I cut mine at 45 degrees and they still wasn't enough to get the measurements the plans had. I just left it and marked where it would have been. I had some scraps from a fence pickets I ripped for my $10 raided garden bed left,over that I used as a spacer for my table top and seat boards, made it so easy and they are perfectly spaced. They are just over 1/2 an inch but It worked great.
http://ana-white.com/2010/04/plans-bigger-kids-picnic-table.html
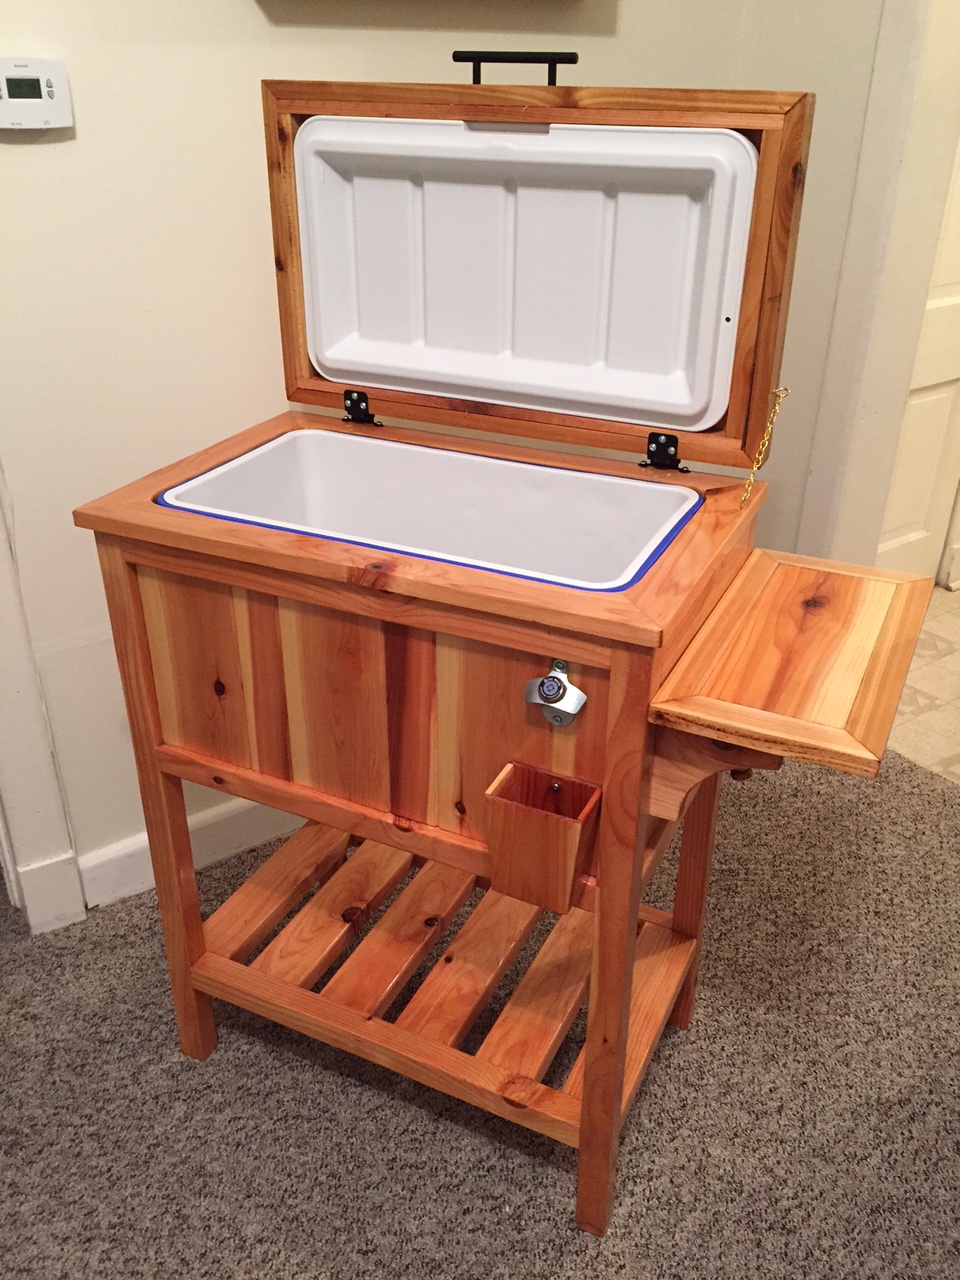
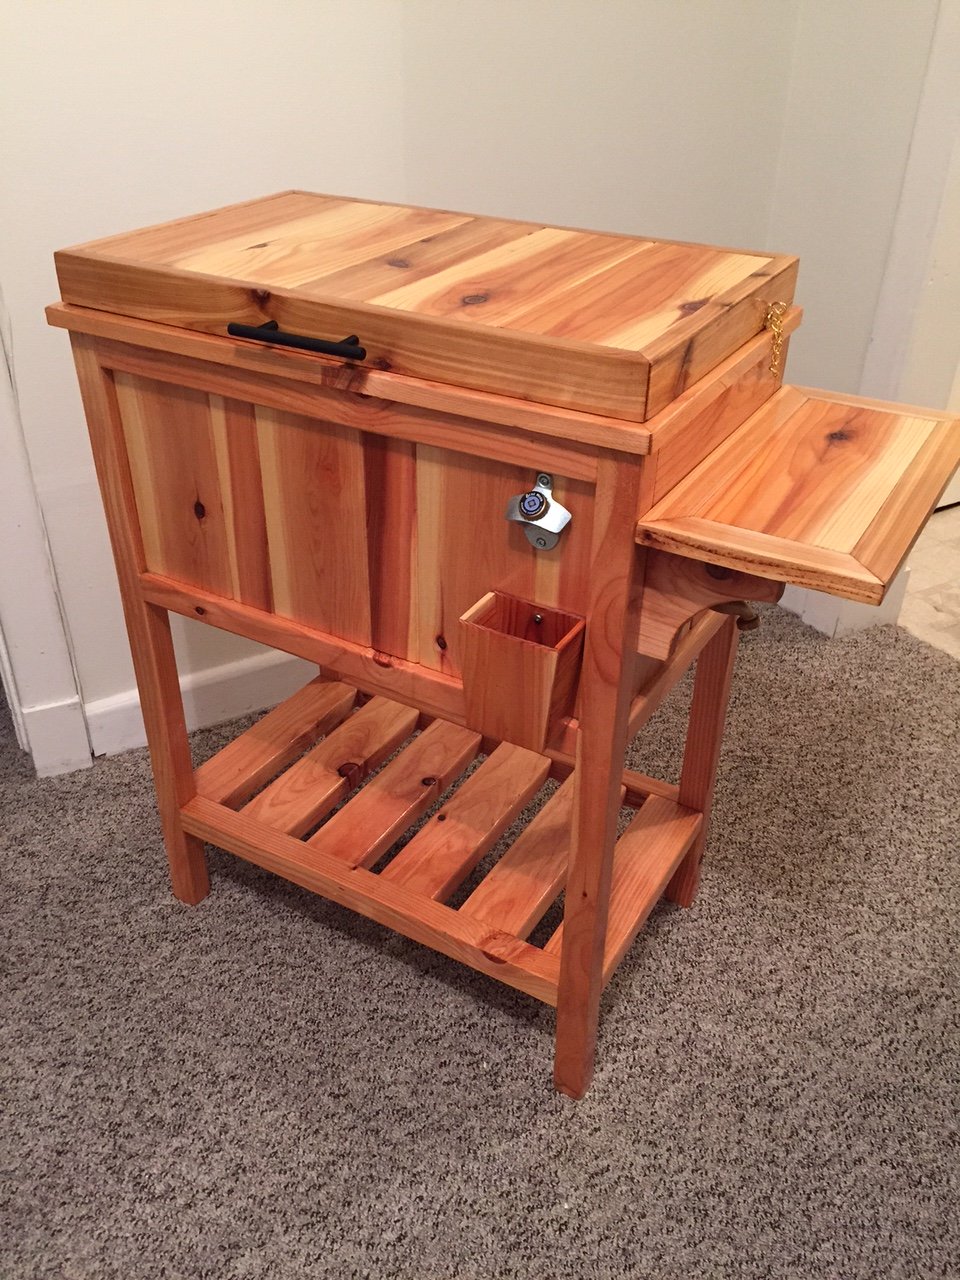
This is the cooler stand presented by Jenny from Birdsandsaoap. Very easy to build and always ends up with someone asking to buy it or have you make them one.
Wed, 06/10/2015 - 11:34
The plans for this can be found at the following web adress: http://ana-white.com/2013/06/plans/wood-cooler-birds-and-soap
Hope this helps
Wed, 09/21/2016 - 08:07
New to this site. How do I get the plans for the Wooden Cooler Stand?
Thank you!
This little table was built for our grandson who loves it so much, it was taken inside. About 6 hours, and he took possession of it. Amazing piece!
Tue, 10/05/2021 - 07:02
I love this so much, such a great table and what an adorable grandson! Thank you for sharing~
90% of this bed is built with scrap wood and re-used wood. I built this bed in 5 hours. (Not counting priming, painting, and filling).
The panels on the headboard and footboard instead of being all the same size are what I had leftover from other projects and lucked out with it balancing as the following:
HEADBOARD PANELS: from left to right --> 1x8, 1x3, 1x8, 1x8, 1x12, 1x8, 1x8, 1x3, 1x8.
FOOTBOARD PANELS: from left to right --> 1x8, 1x8, 1x12, 1x3, 1x4, 1x3, 1x12, 1x8, 1x8.
I only had to cut all of these boards to length, not width, and it all worked out PERFECT to make the panels.
Instead of the 4x4 posts, I used 2 2x4's that I had saved from when I ripped a closet and soffit out of our master bathroom. Those 2x4s are also used for the construction of the headboard and footboard, and the trim on top of both.
The only pieces of wood I had to buy were the 2x6 tops of head/footboard and the 2x10s for the side rails. T
The whole bed has dings and holes and dents and stuff all over it because of it being re-used/scrap wood, but I love the look of it. I painted it a gloss white to balance all of that. I found bedding that is green and white on one side and gray and white on the other side to match the color scheme of the room - and now it's done and I couldn't be more proud!!

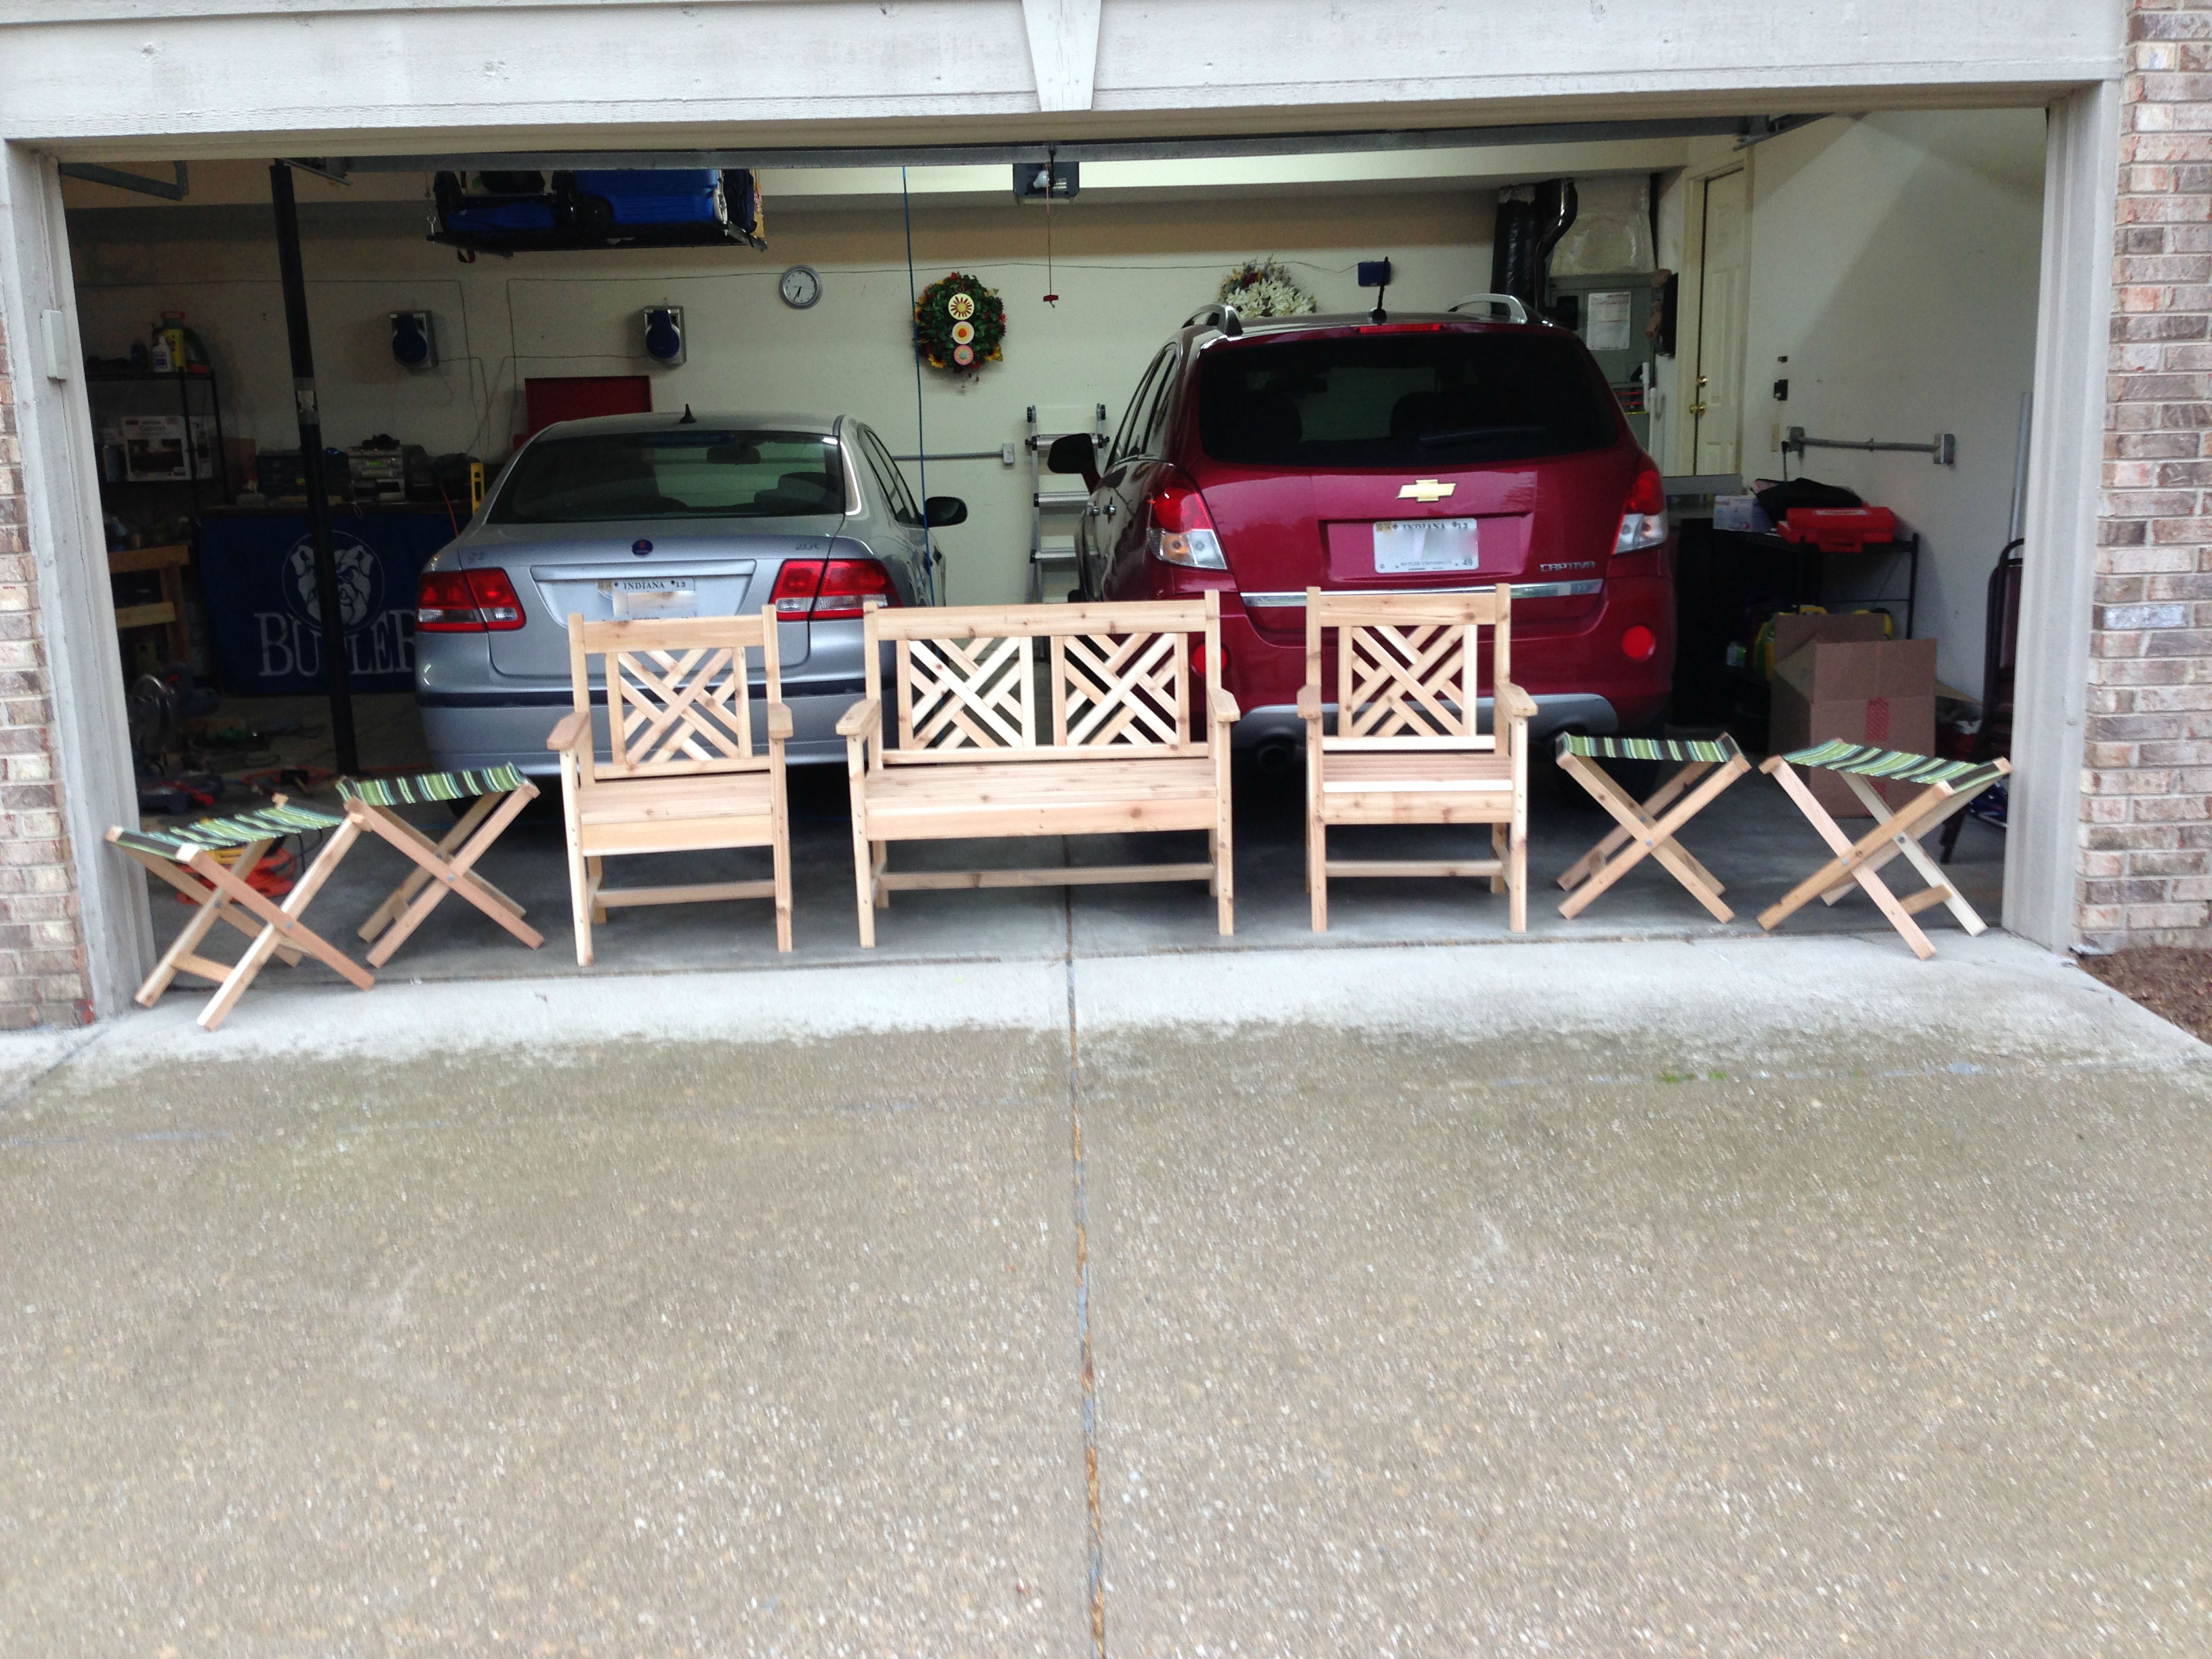
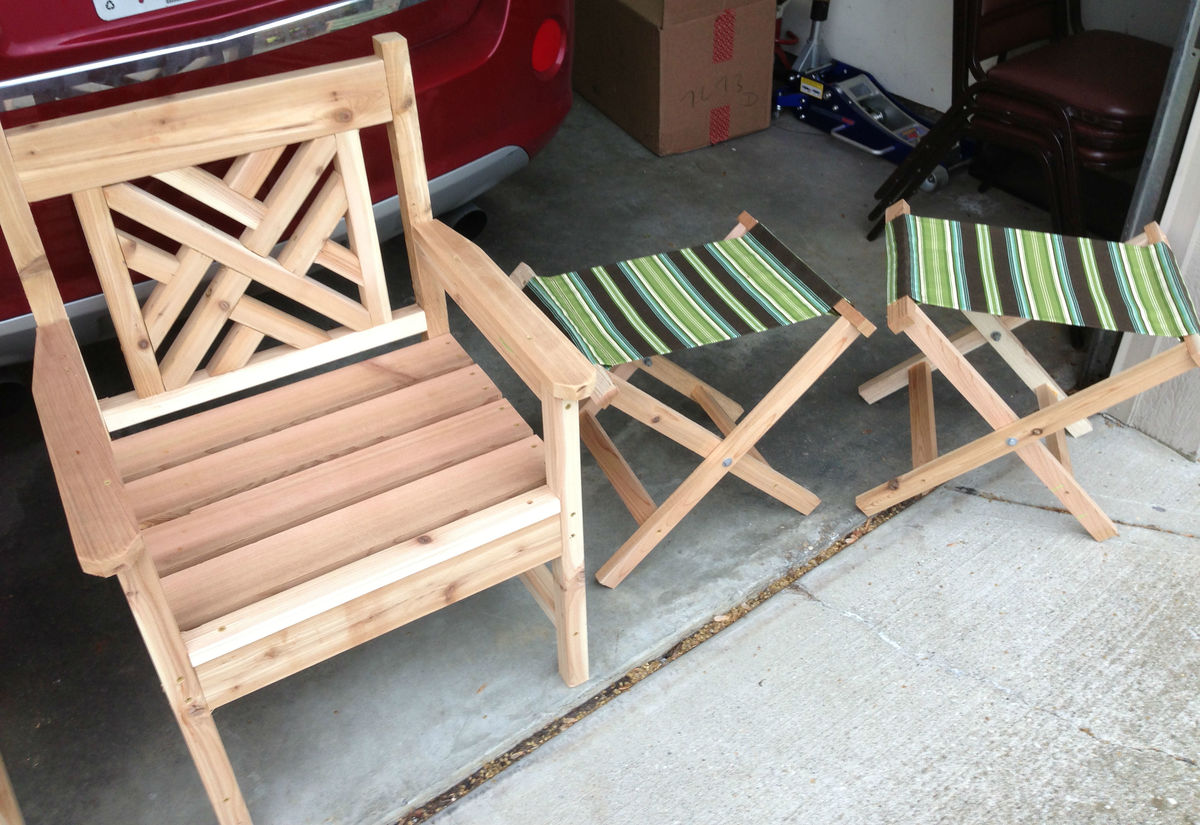
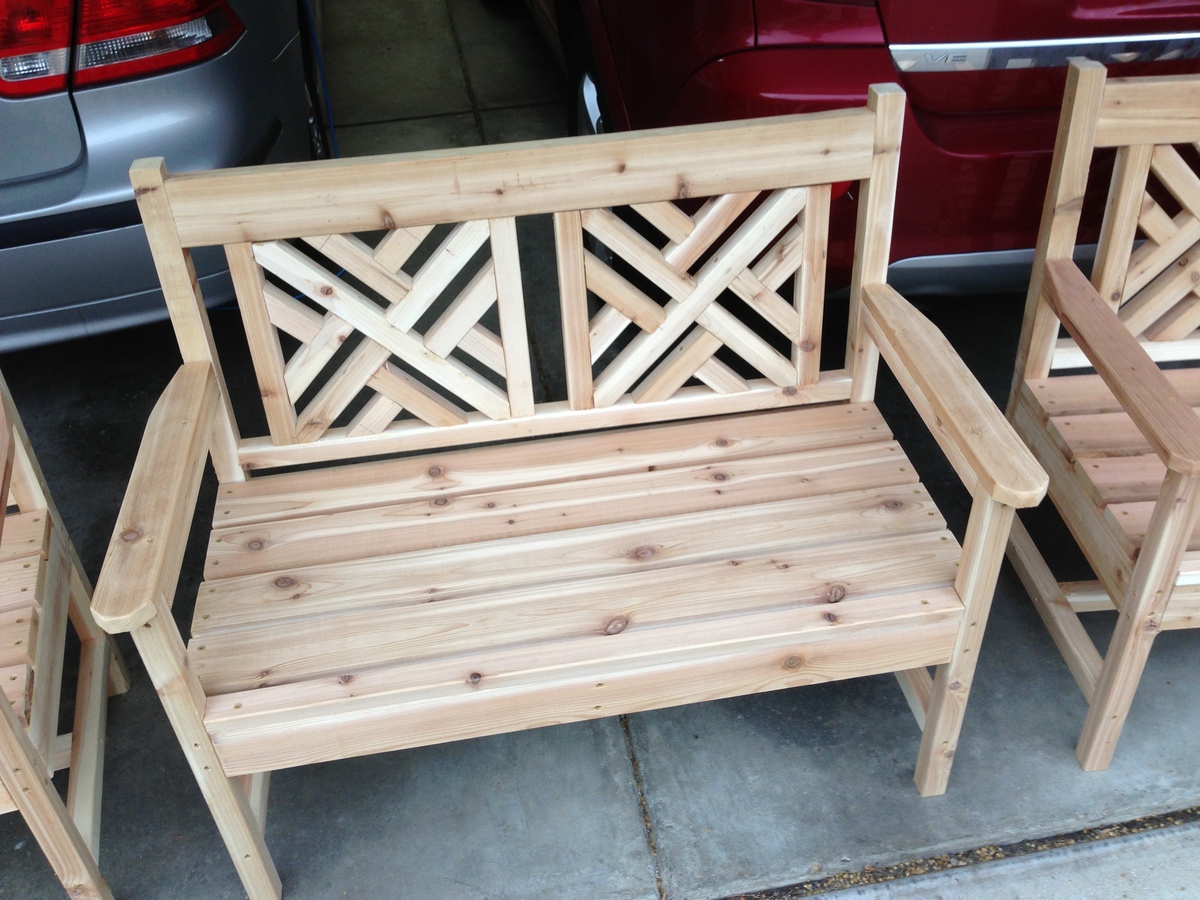
Memorial Day weekend project for my wife and I. These will go around our firepit out back, but it was raining so we just took pics in the garage where they were assembled. I built the woven back bench and used the plan (and SketchUp) to modify the plan for 2 chairs as well. I mirrored the weave on the bench and the 2 chairs for a bit of visual contrast.
I also used the plan for the folding camp chairs but simplified it a bit by removing the upper strechers and dowels and just making the fabric on there permanently. These will only be pulled out if we have more than 4 around the fire.
Sun, 08/18/2013 - 18:04
I've been thinking of making the bench, but I really like the chairs as well. Your set looks fantastic!
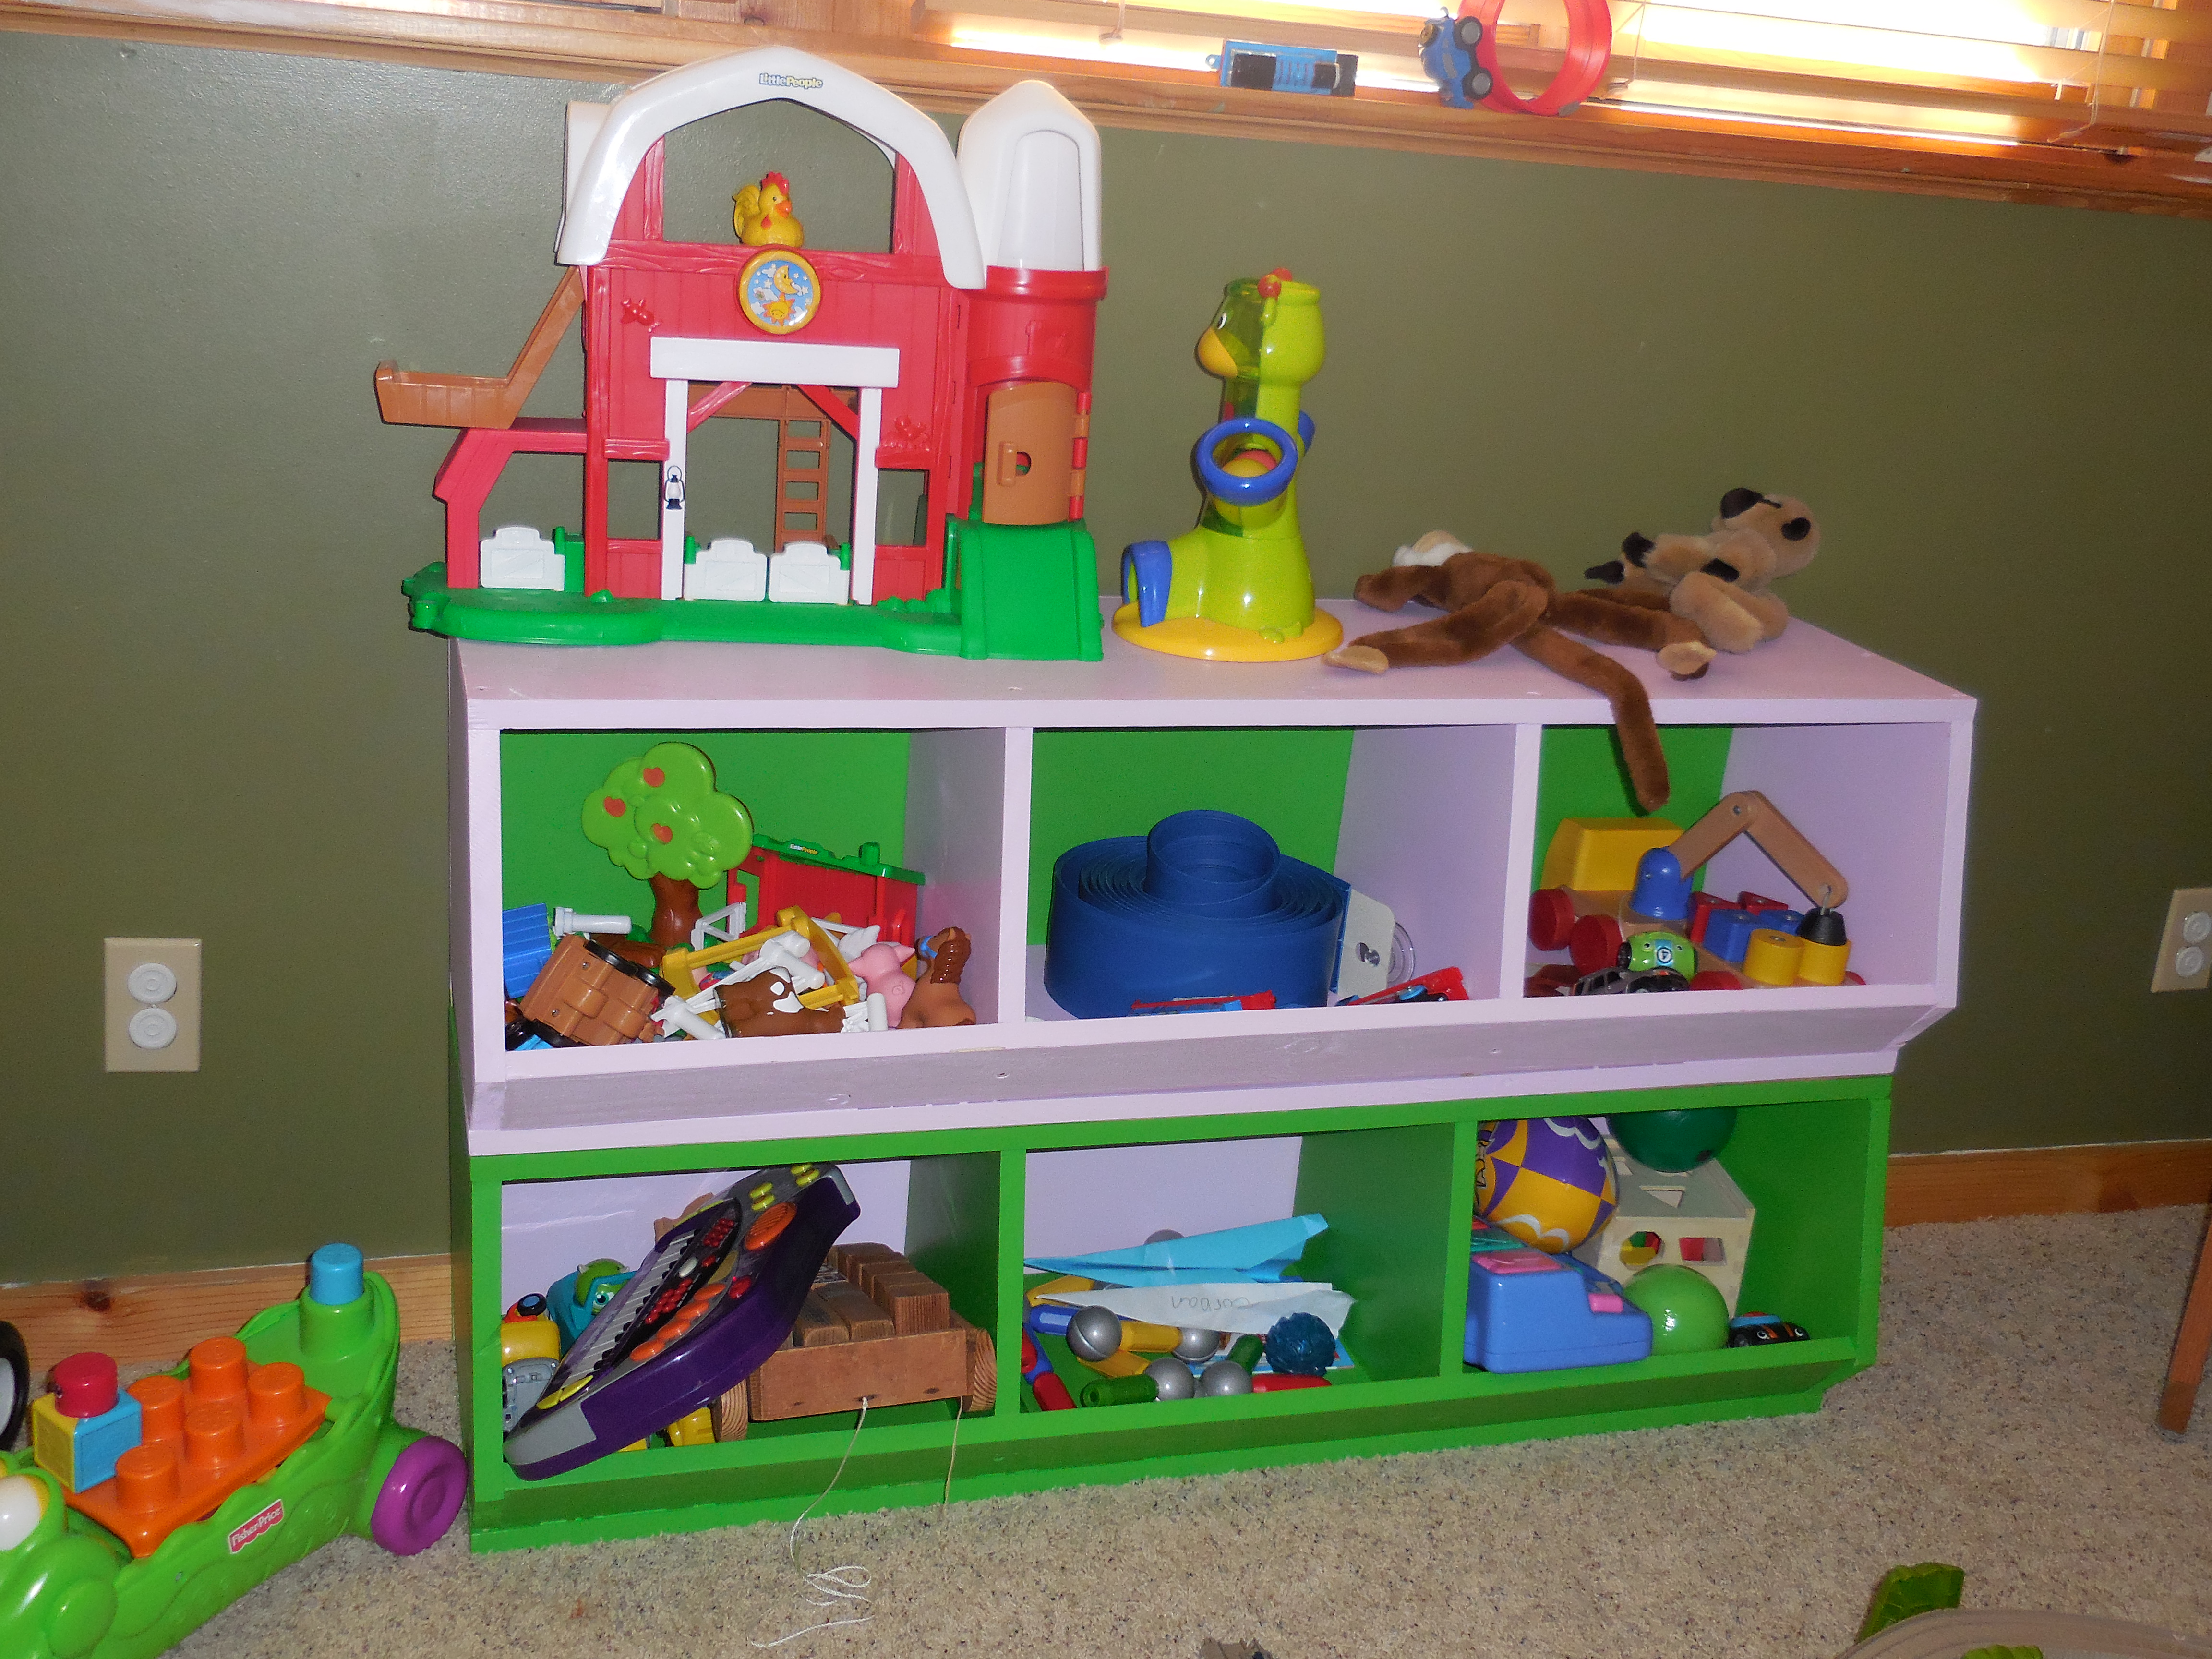
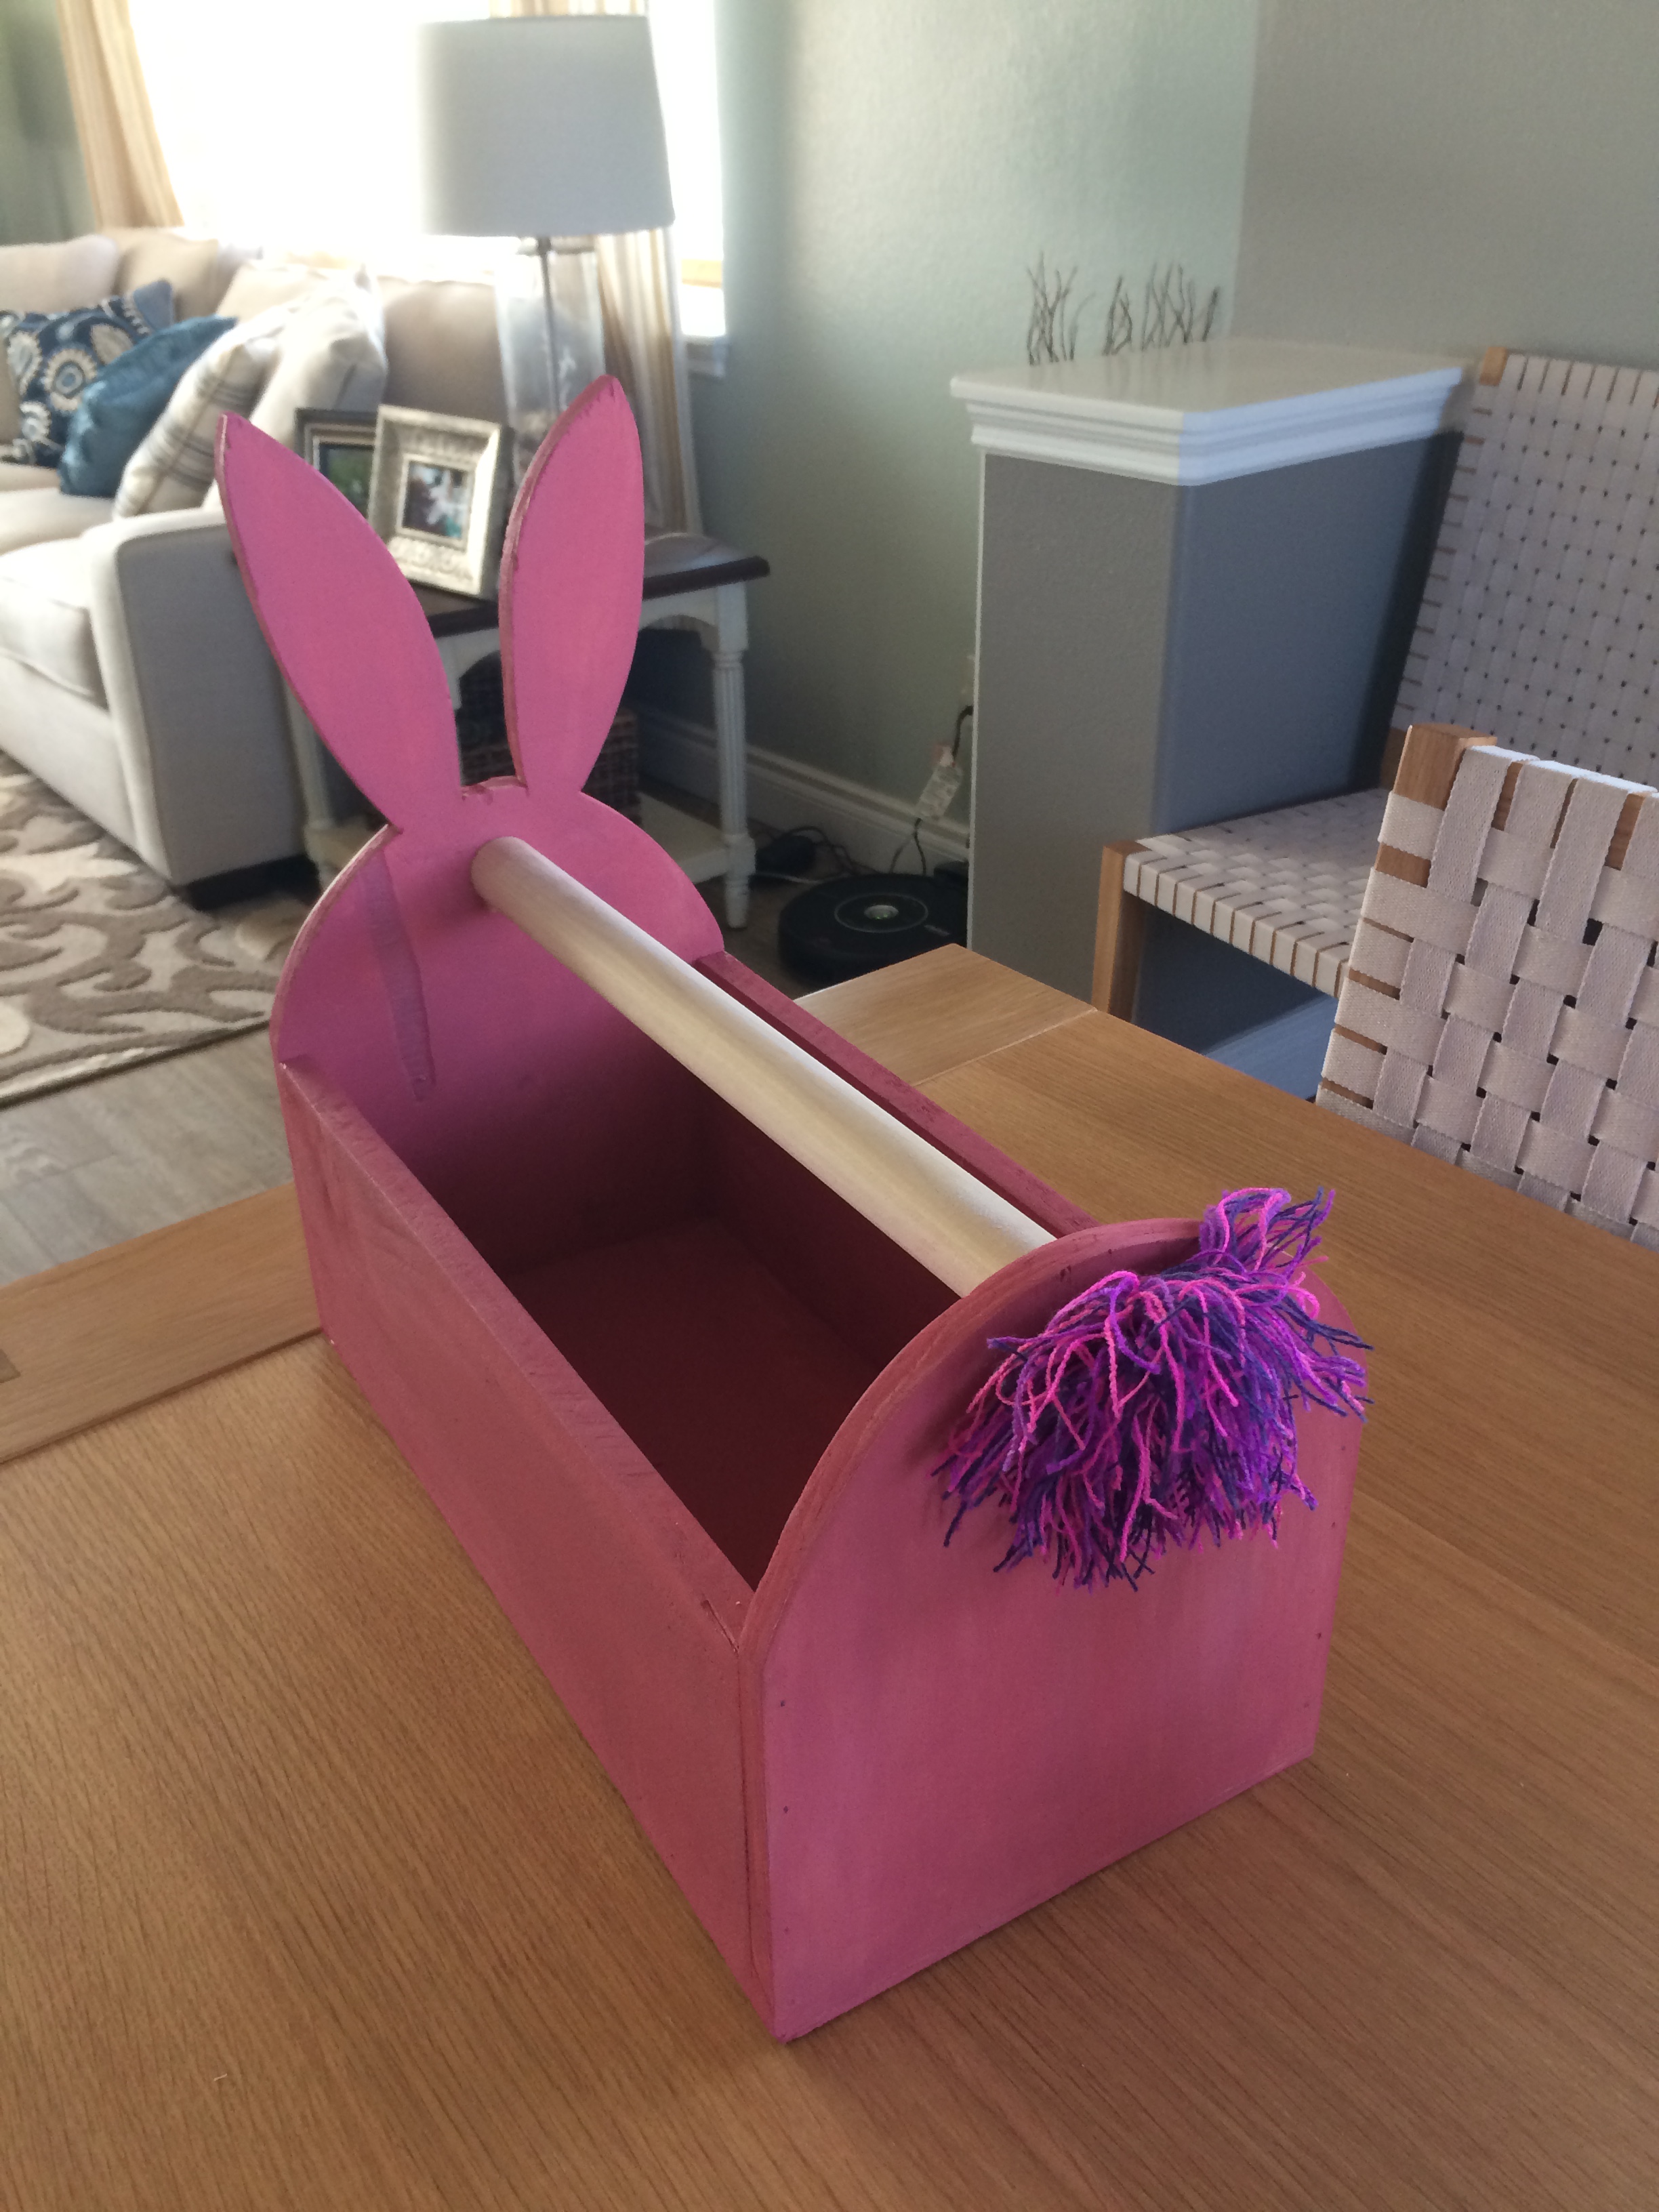
I am a beginner, so I took it slow. Working during nap time mainly (too dark / cold after bedtime!), this took me a couple weeks. I learned a lot and should have asked my husband for more help/advice; don't look too close! I loved Ana's stain color, and fully intended to copy it, but decided to let my boys have some input since it is for them and their toys. They picked out the colors (I limited my point and pick 1 1/2 year old to colors that wouldn't clash!) and my 4 year old helped me paint the color he picked out. It was a fun project and a good one to learn on.
I started this project with your plans, but as you can see things did not go exactly as planned. The people I made this for wanted a mosaic countertop, so I invented this myself. I've never done this before. The whole thing had to be smaller than the plan suggested (calculate inches into centimeters is kind of hard to do), but it turned out quite good. Thanks for your plan, I will use more from this site!
I bought nice wood, so it's not a cheap project.
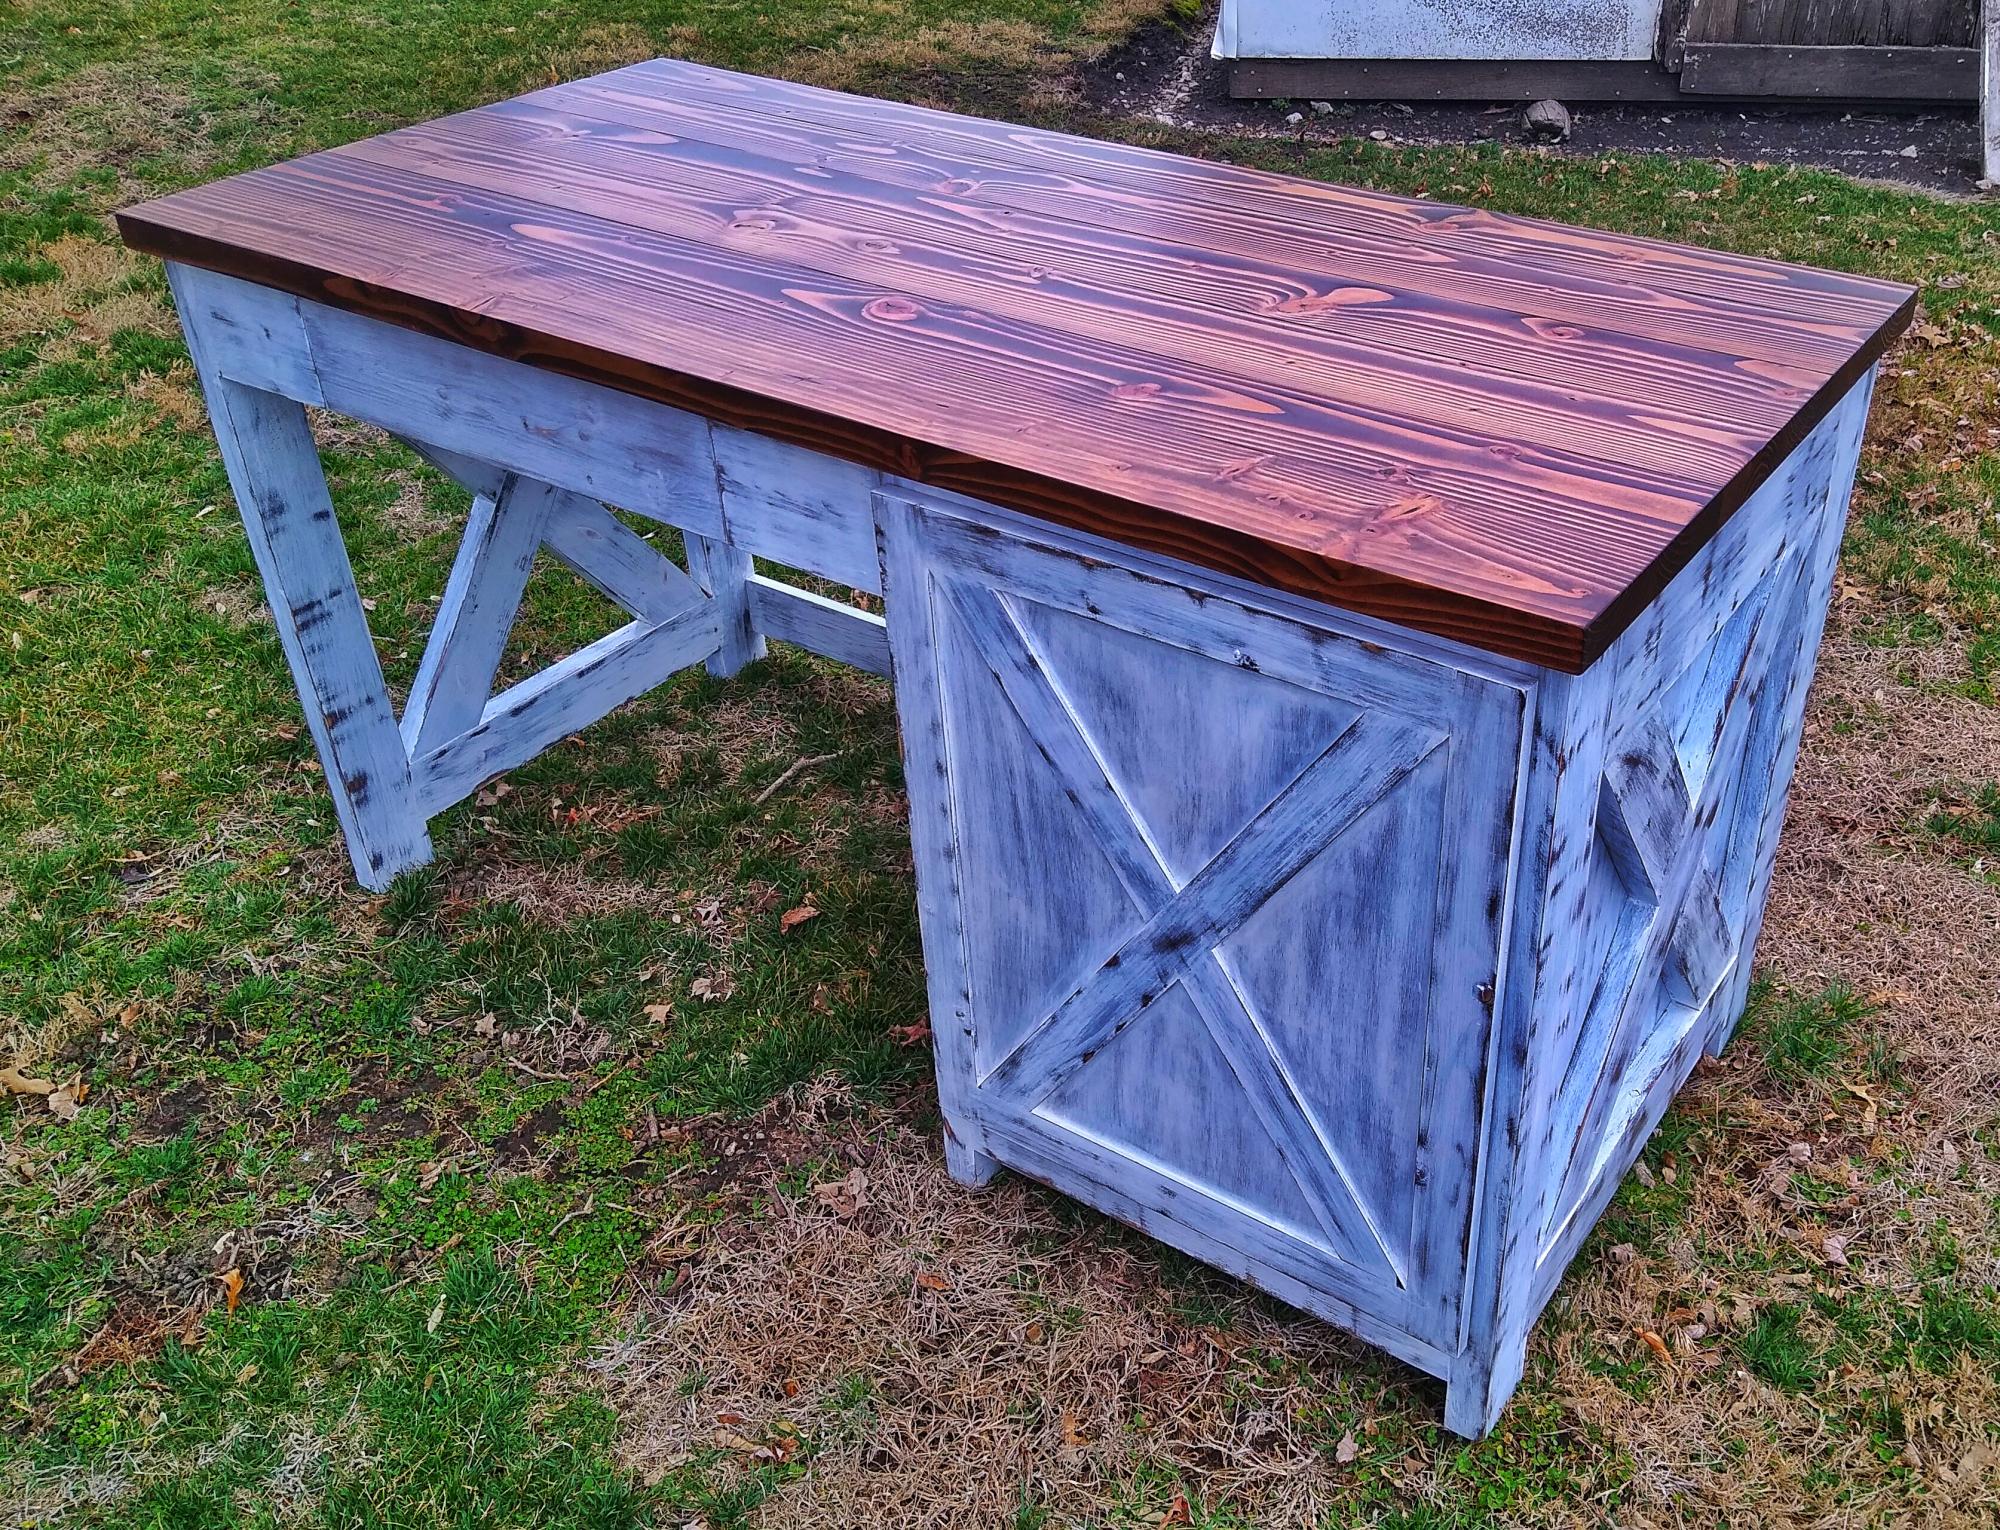
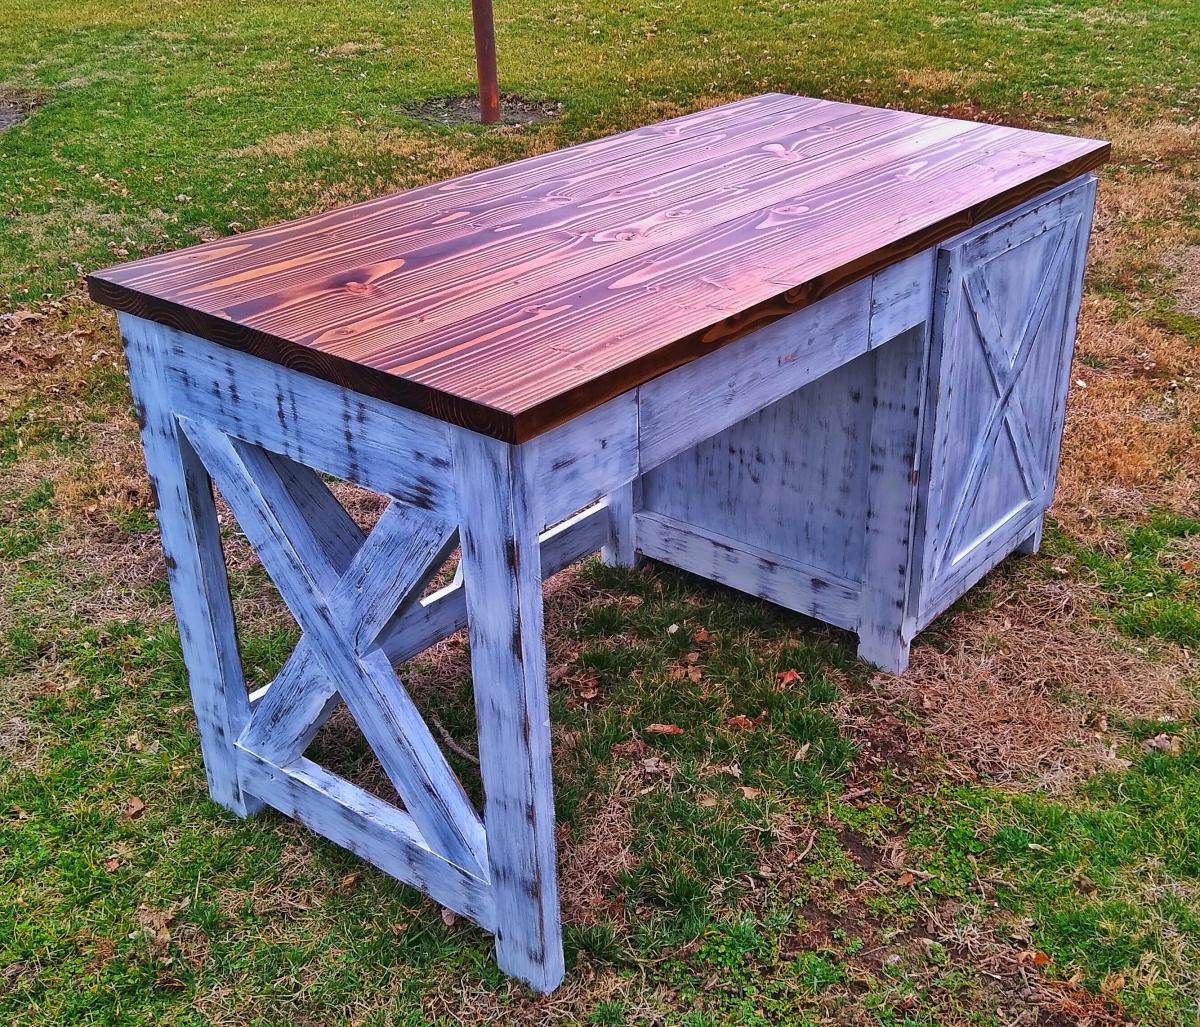
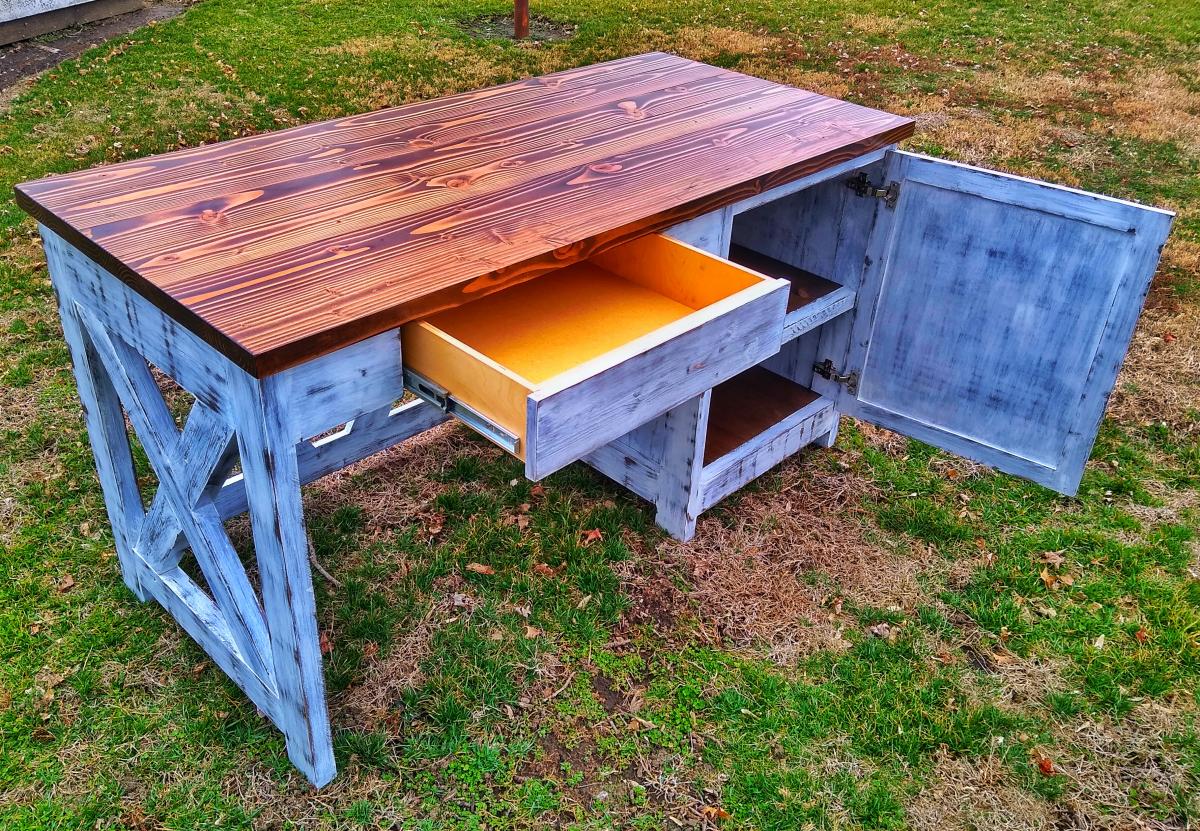
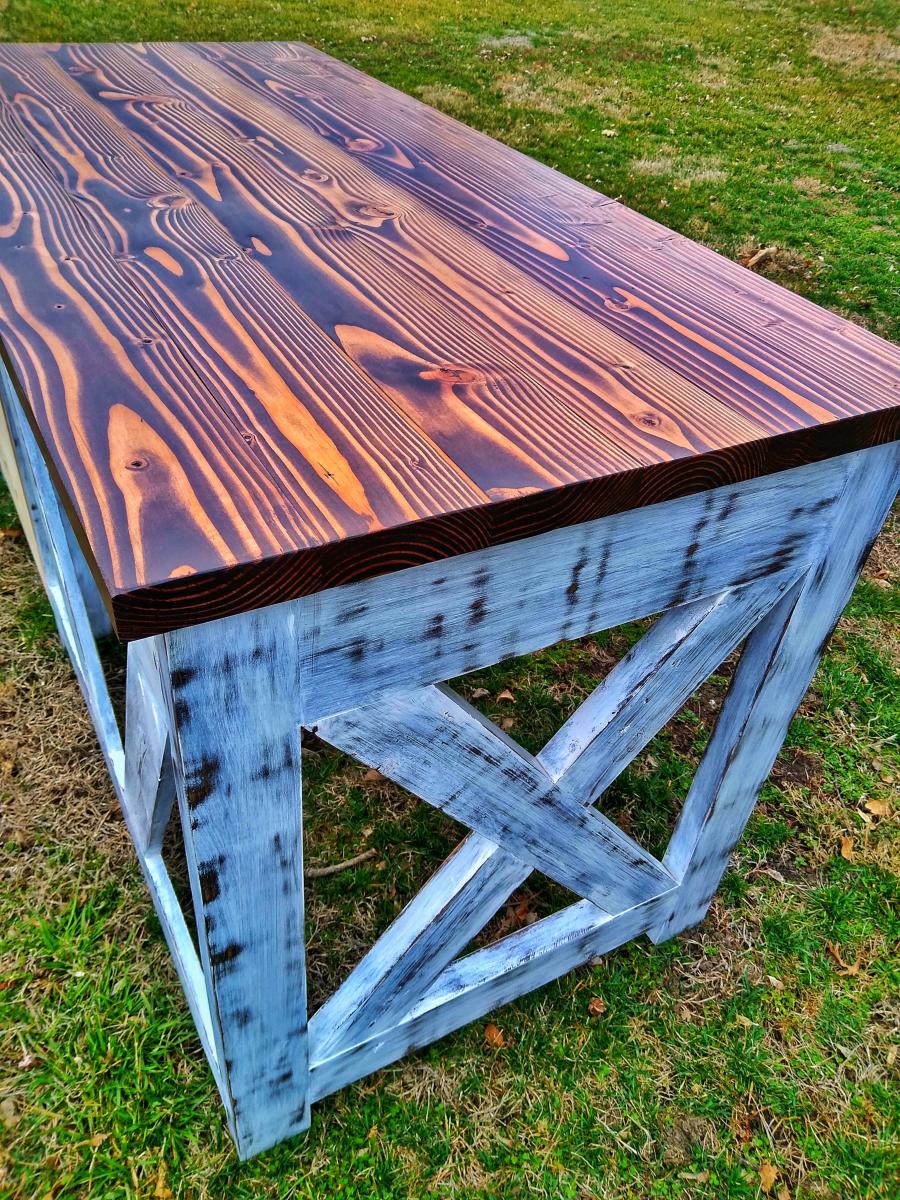
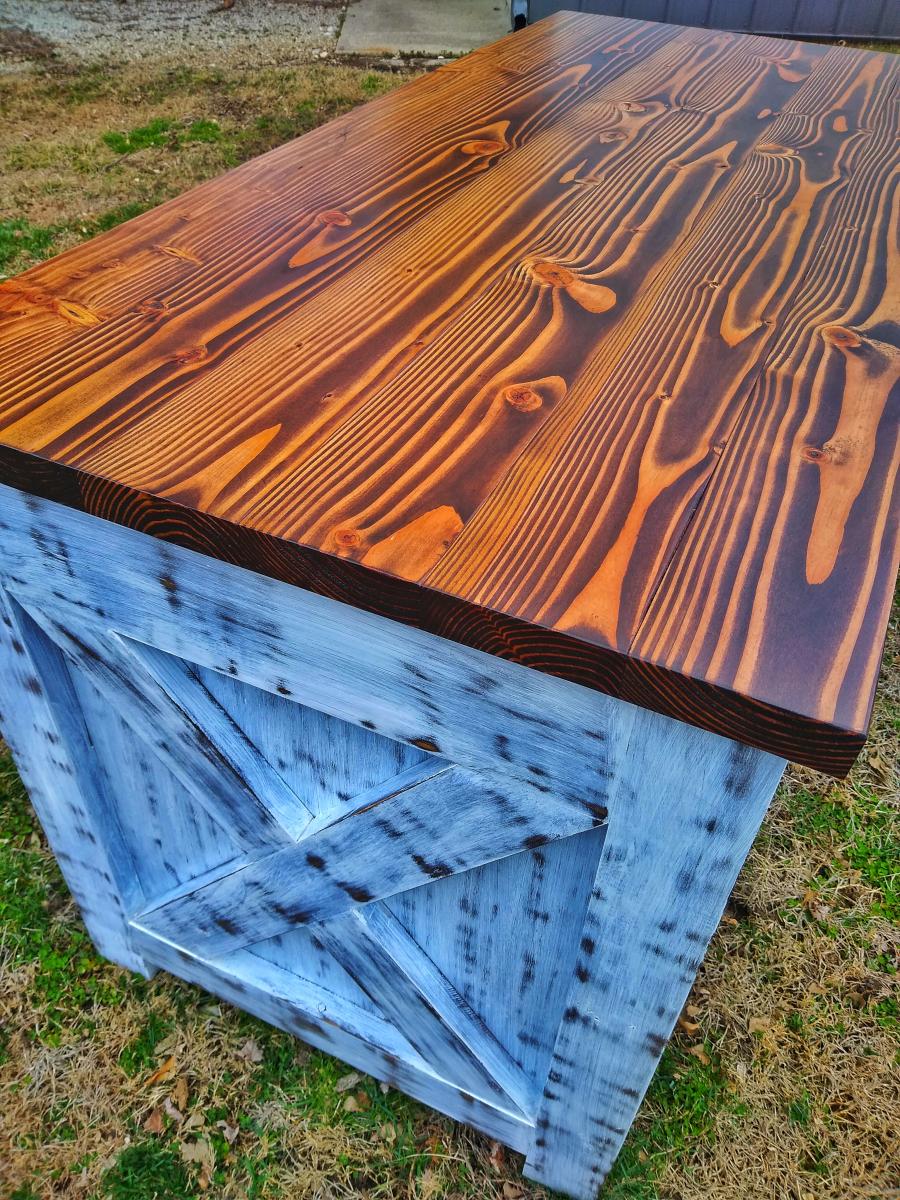
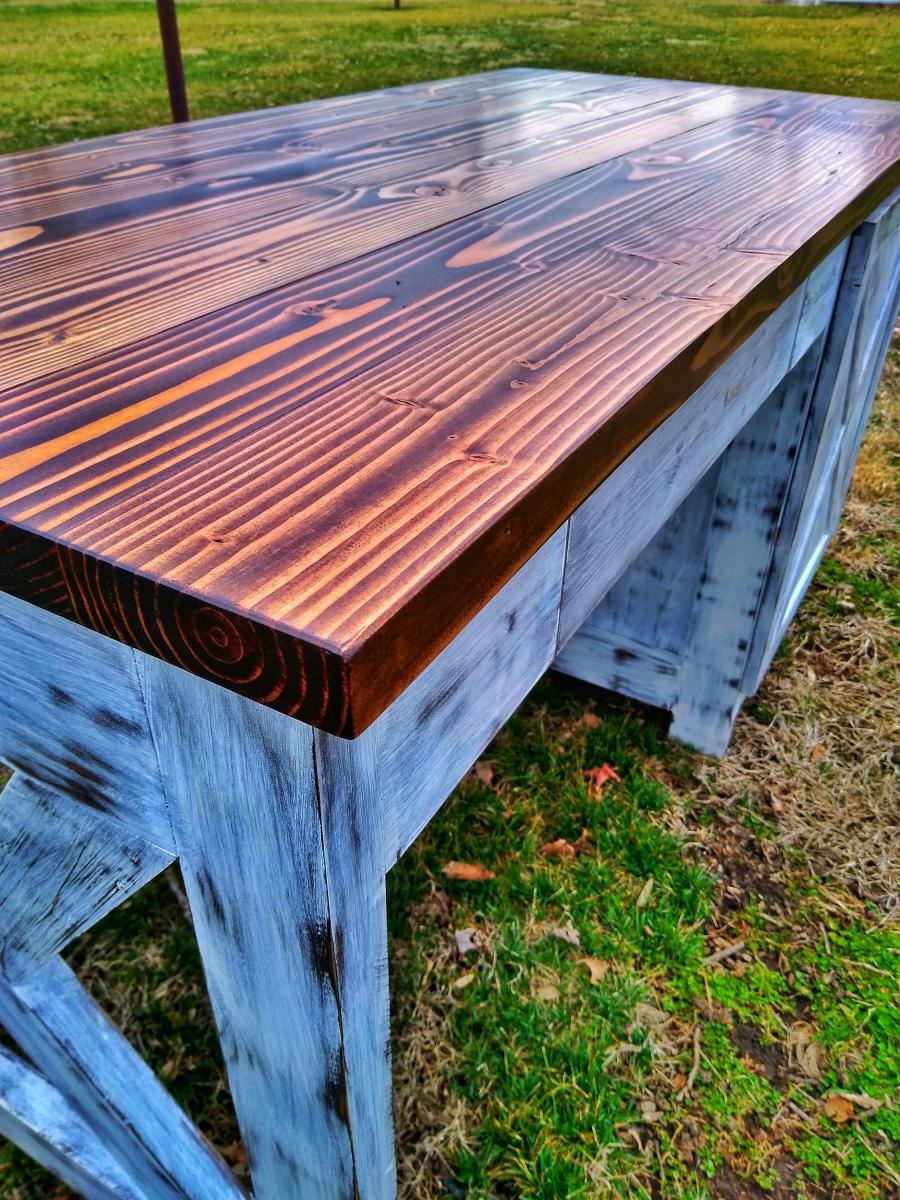
I was commissioned to build this Rustic X desk with a drawer and door incorporated into it. The finish is distressed white and a combination of Special Walnut and Espresso stain.


Comments
Ana White Admin
Mon, 10/04/2021 - 16:44
Wonderful!
Such lucky grandchildren! Thank you for sharing, it looks fantastic.