Community Brag Posts

Modern Platform Bedframe: Teenage Perfection
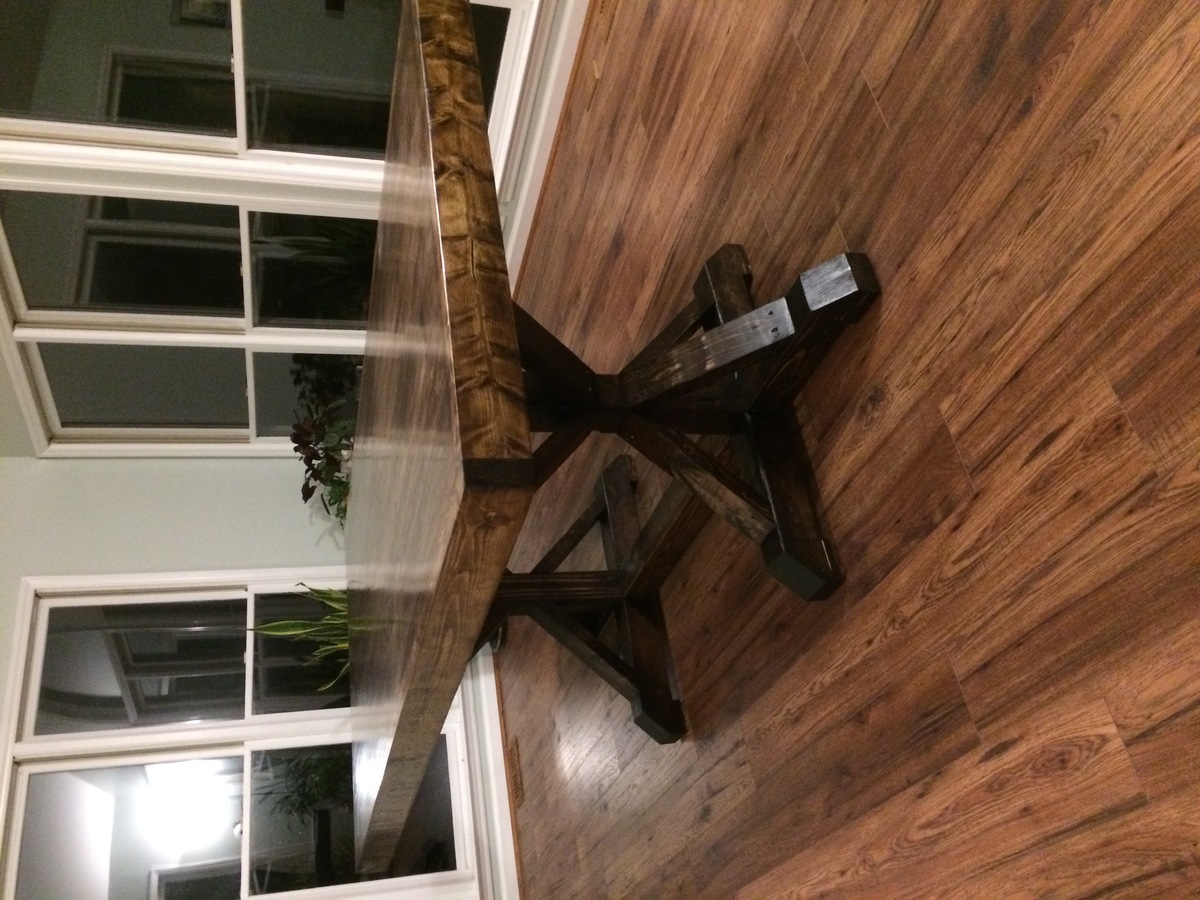
The second furniture building project I've ever made. It was super fun to make, though I probably spent half my time making sure ever corner was square!
I used 2 x 8's for a bit of extra depth (my daughter has a deep mattress) but other than that I followed the plan, even down to the 6" hairpin legs.
My daughter wanted a really simple headboard so I added a Chevron-style headboard from https://vintagerevivals.com/70-diy-slatted-headboard. As an upcycle, I used the wooden slats from a bedframe we were getting rid of and it worked perfectly.
Fantastic project and happy teen!!
Estimated Cost
$150.00
Estimated Time Investment
Weekend Project (10-20 Hours)
Finish Used
Rustoleum Chalked Ultra Mat in Aged Grey
I rubbed it on with a wet rag and used a bit of water to thin it out to create a beachy look.
I rubbed it on with a wet rag and used a bit of water to thin it out to create a beachy look.
Recommended Skill Level
Beginner
Used picture ledge directions to build spice shelves

Used the instructions for building a picture ledge and instead used the shelves for spices. Only cost $10, already had the stain and polyurethane at home. Didn't do pocket holes, as I don't have a jig, just drilled/screwed directly into the pieces. Would have been done in less than an hour, but the coats of stain and polyurethane took over 24 hours to dry/reapply.
Built from Plan(s)
Estimated Cost
$10
Estimated Time Investment
Weekend Project (10-20 Hours)
Finish Used
English Cottage stain
Recommended Skill Level
Starter Project
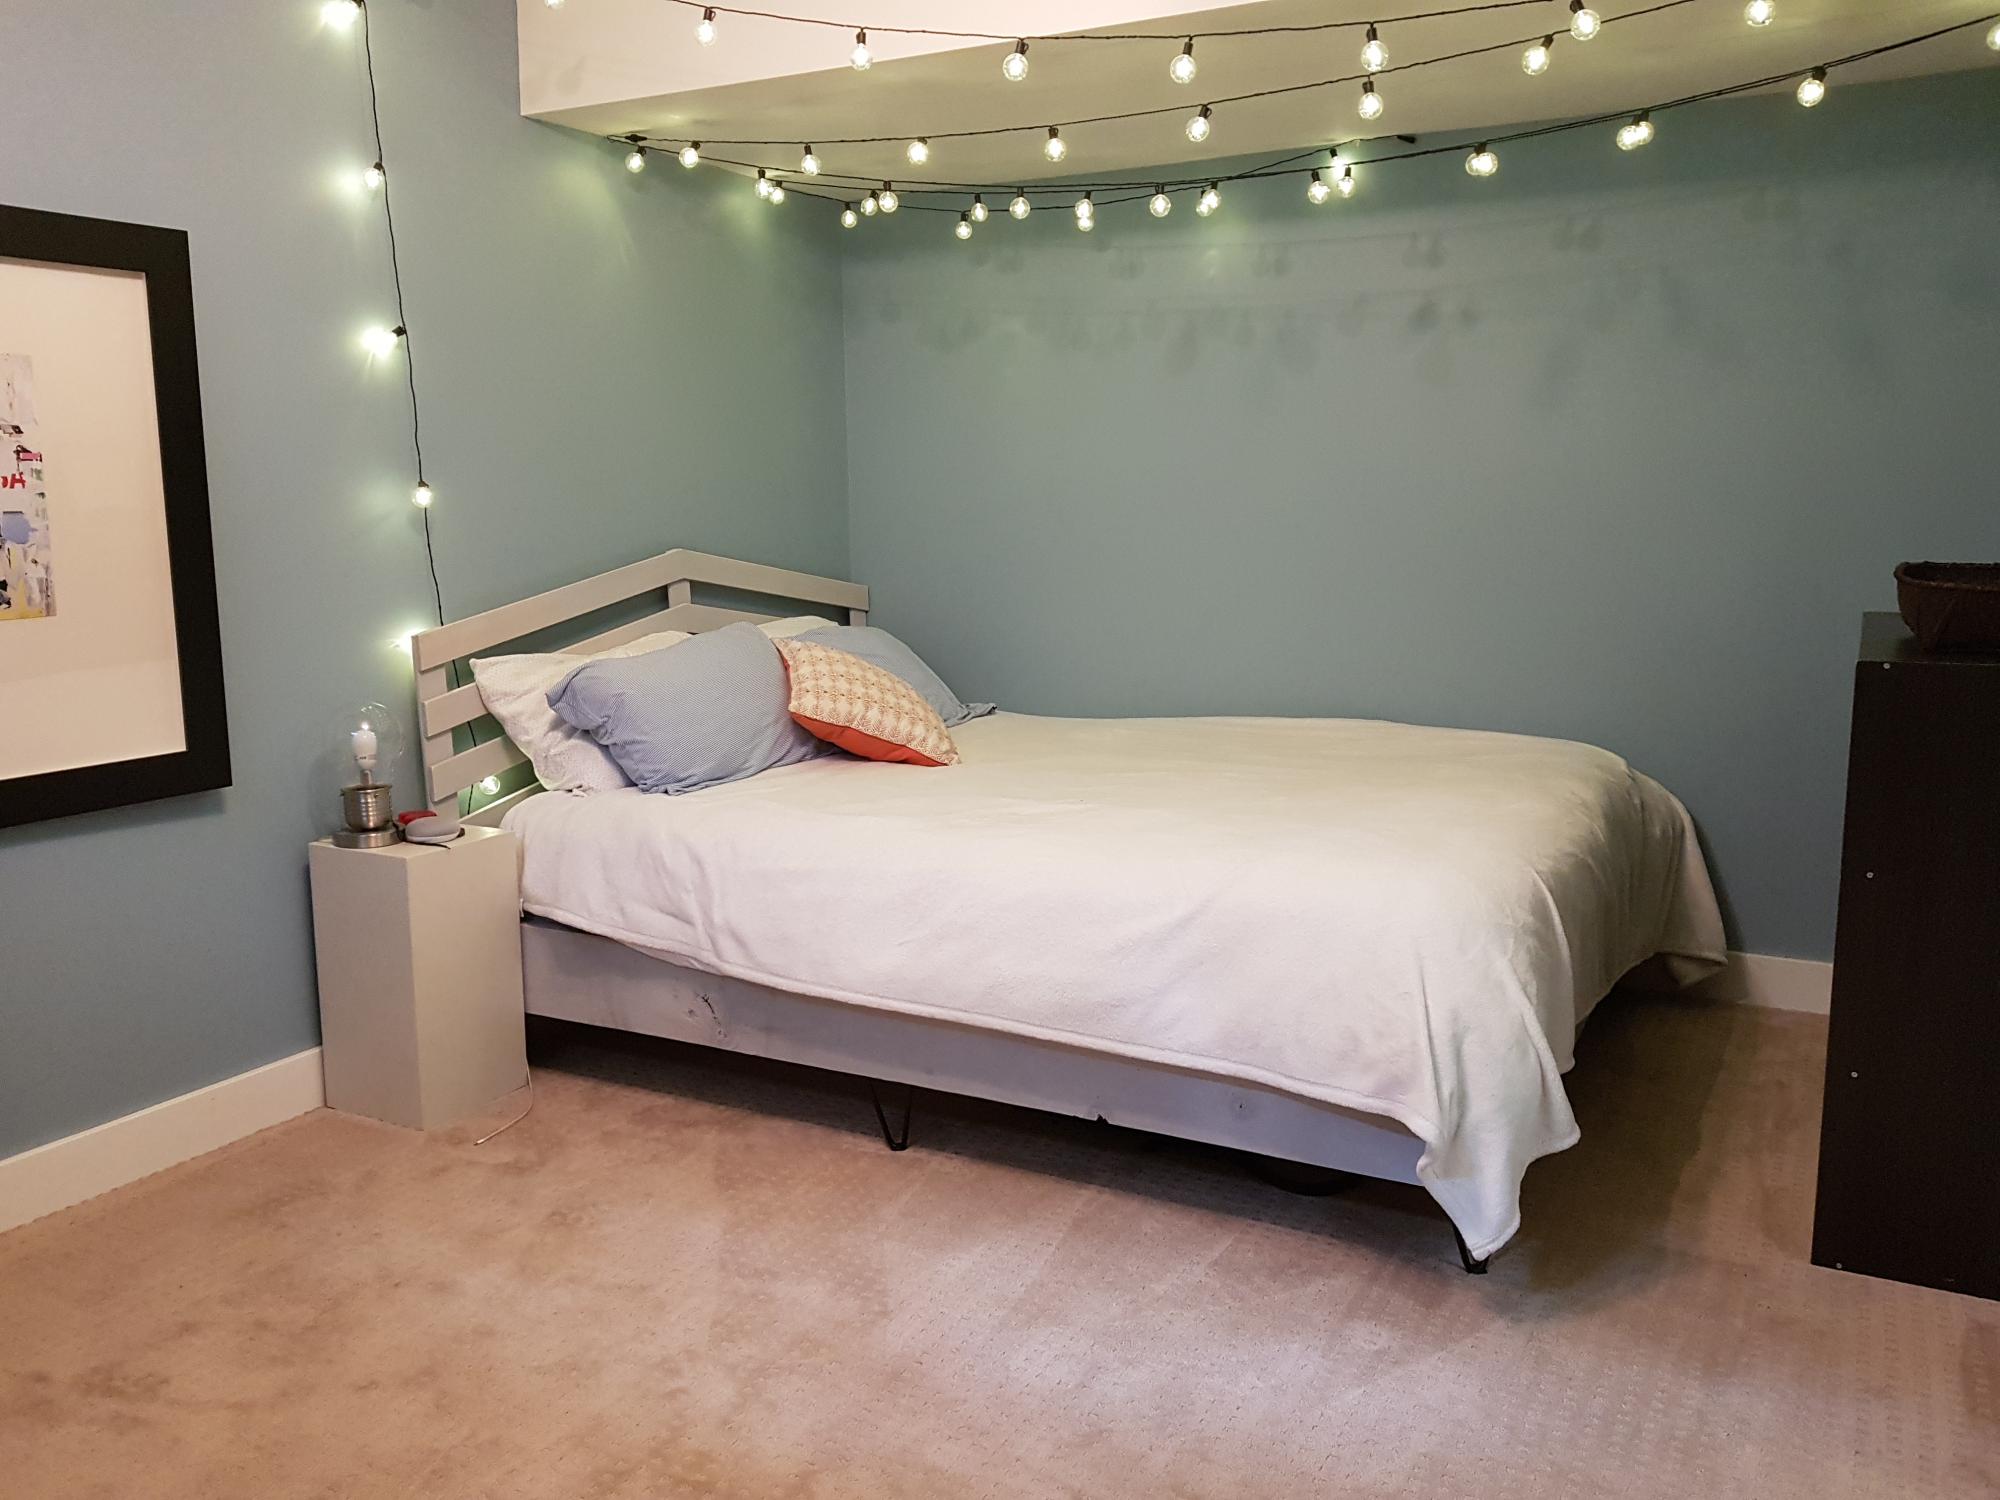
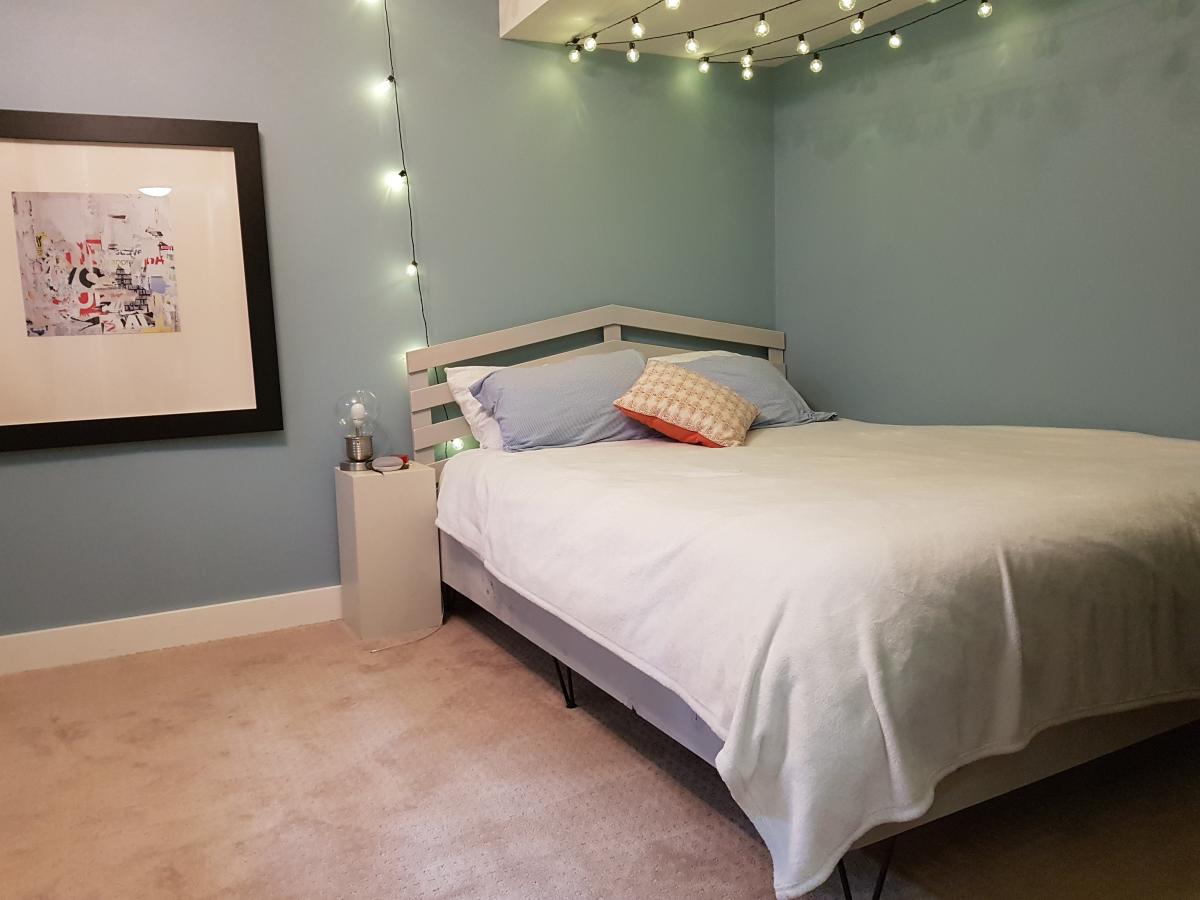
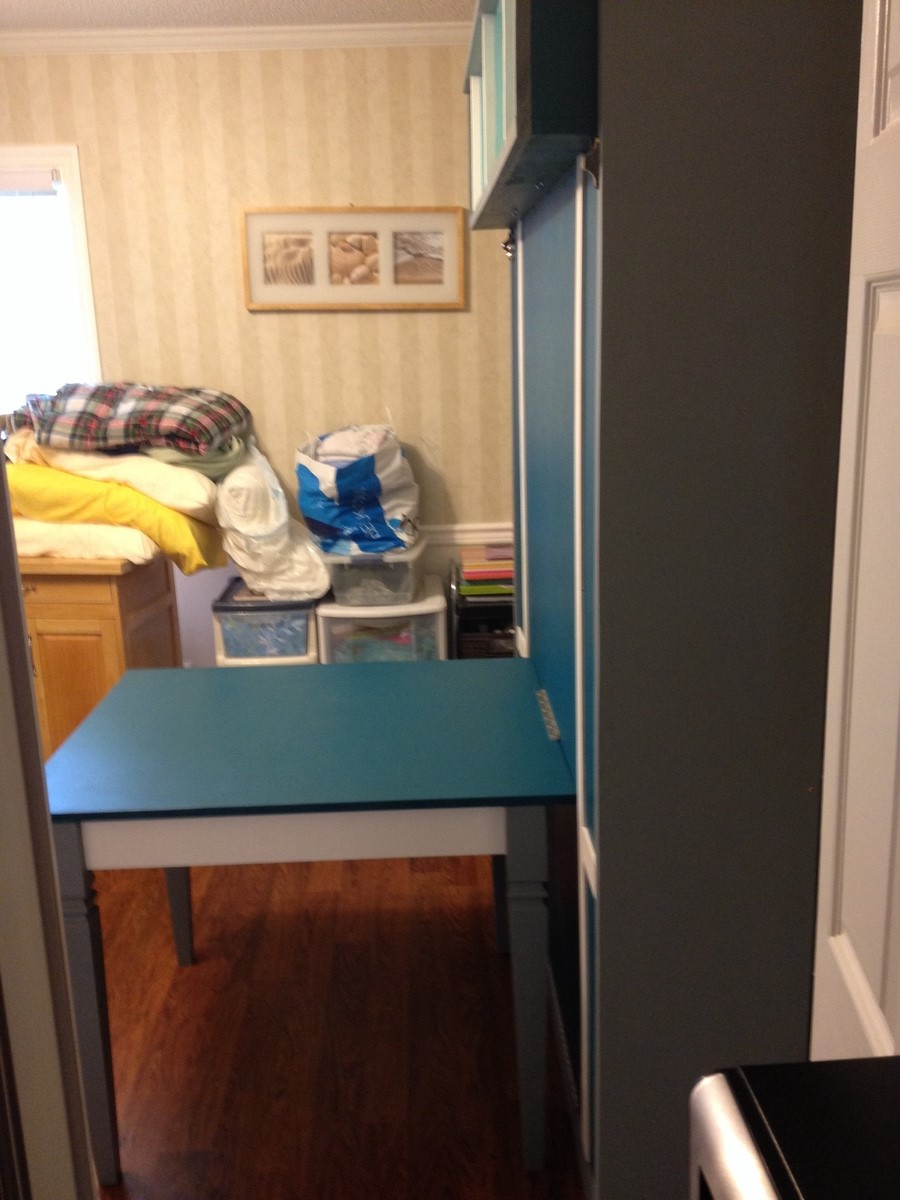
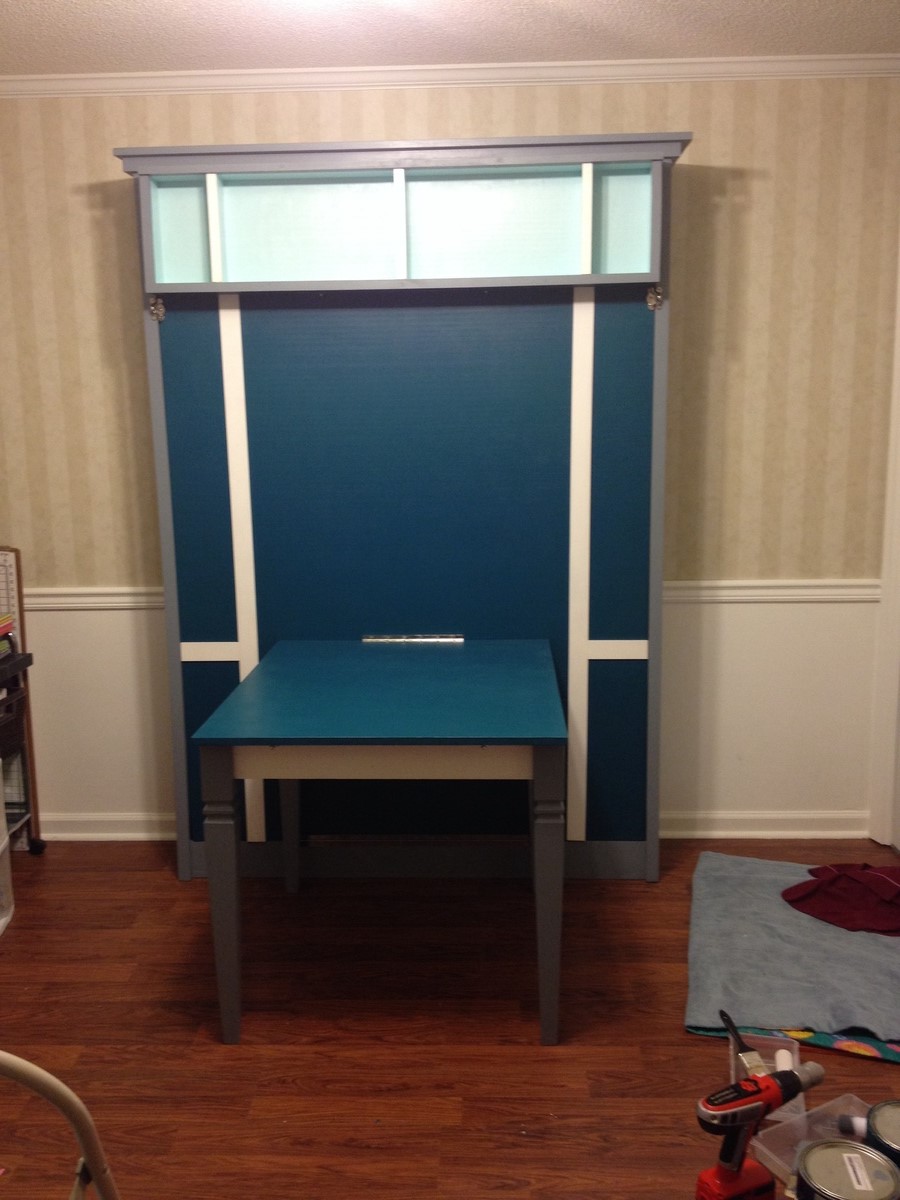
Full sized and off the ground
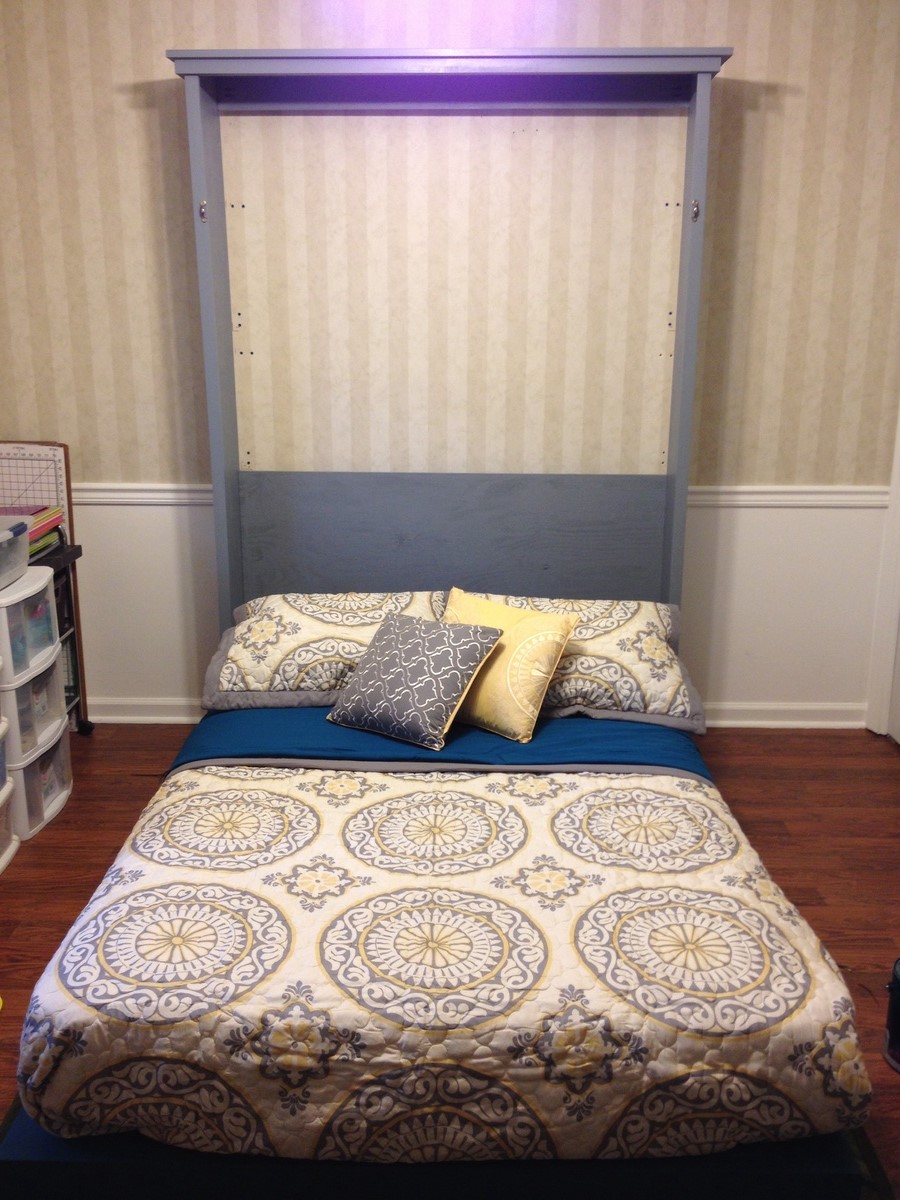
I followed most of the measurements with the Murphy bed with added dimensions for a full sized bed. I also added a shelf to provide support while the bed is down since I brought the platform off the floor. The table is also hinged to the bed platform so that it folds up and locks in place for a center support for the bed.
Built from Plan(s)
Estimated Cost
300
Estimated Time Investment
Week Long Project (20 Hours or More)
Finish Used
Cal spar gypsy teal, shark fin grey, and oyster all in satin finish.
Recommended Skill Level
Beginner
Comments
Fri, 07/25/2014 - 16:06
This is awesome! This is
This is awesome! This is just what I need. I can't see how the table provides center support. Do the table legs come off?

Fri, 07/25/2014 - 16:52
Marvelous build!
What an awesome project! Love how the added shelf at the top creates the "legs" at the end of the bed when it is lowered (looks like it keeps the bed about 4" off the floor?). Are those window sash locks for closure? Those will keep it in place nice and tight when it's closed. The fold down desk is brilliant also, and love the legs and the colors!
Fri, 01/23/2015 - 14:13
Customization plans
Super job! Can you provide plan details for the table and feet for the off floor design?
Ana White Farmhouse Potters Bench
My hubby made it for me after seeing yours!! I LOVE IT THANK YOU SO MUCH!
The buy list is correct the cut list is wrong the bottom 2*4's listed should both be 2*6's
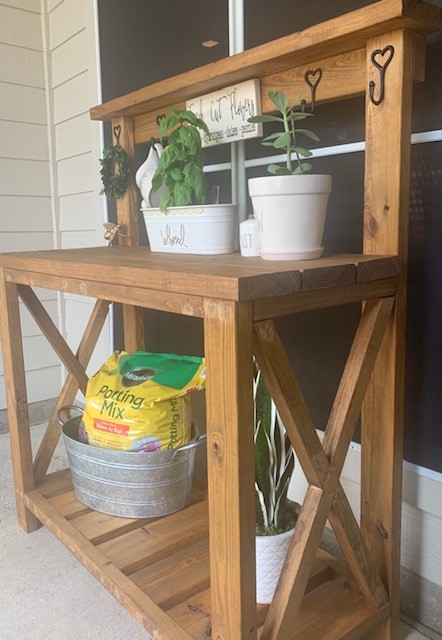
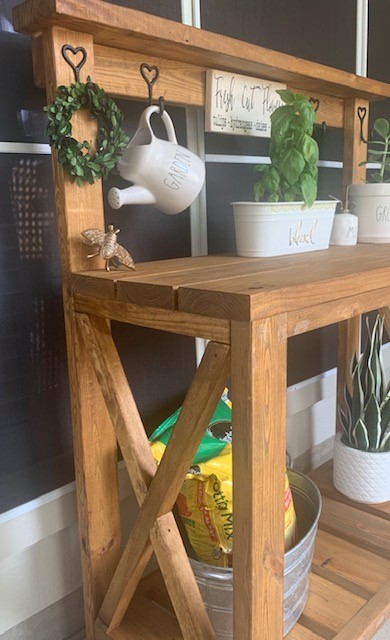
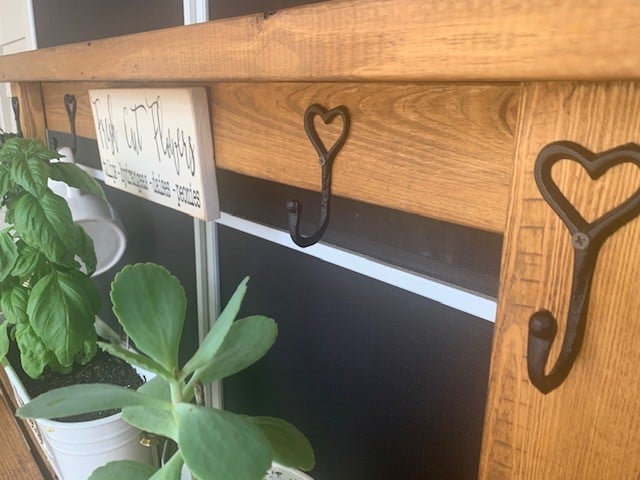
Built from Plan(s)
Estimated Cost
$56
Estimated Time Investment
Day Project (6-9 Hours)
Finish Used
Golden Oak
Recommended Skill Level
Beginner
Rustic Mountain Style Bed Frame

Here is a bed I recently made. My inspiration was a bed we saw at a local high end furniture store in the mountains that has price of $4,800. I bought my wood at a local saw mill for $125. I used a wood planer, table saw and miter saw to build the bed. It turned out great.
G Russell
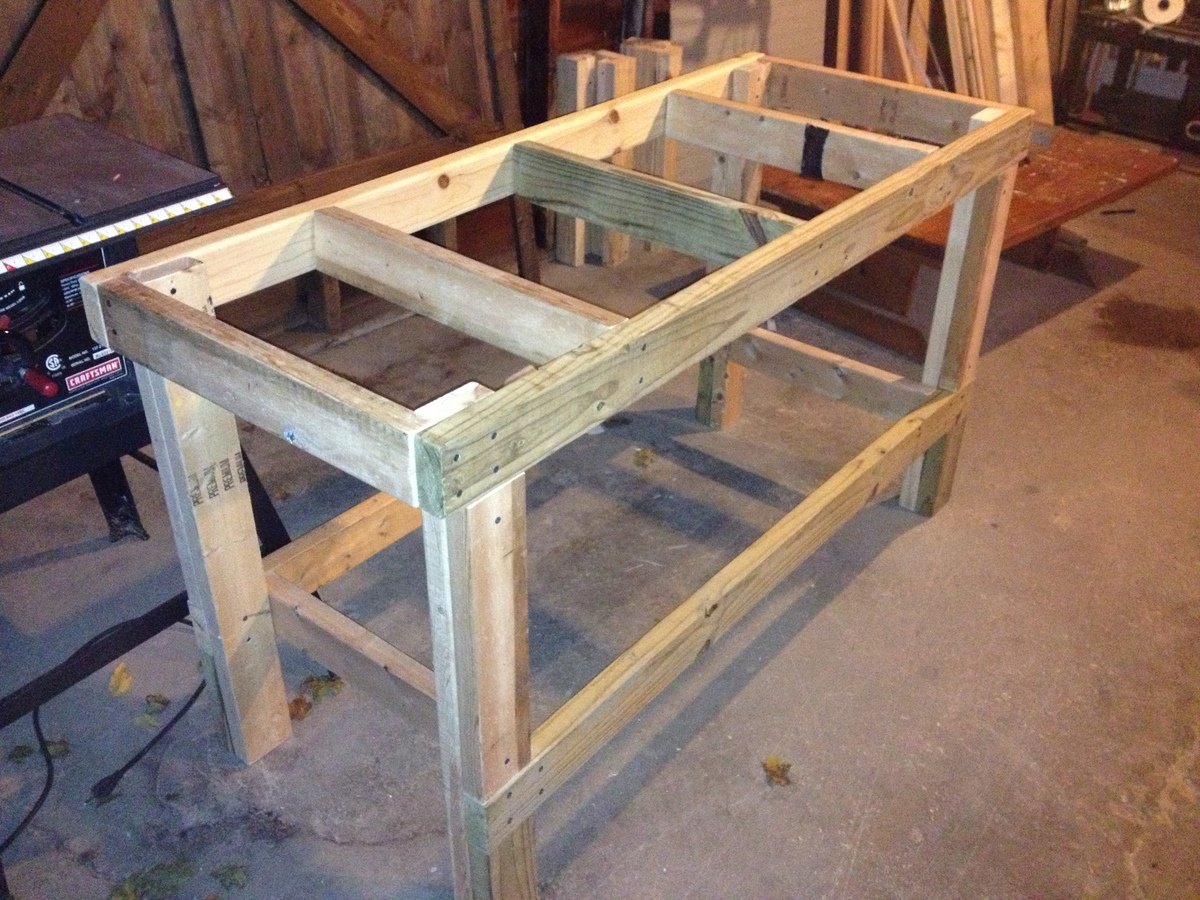
Quick & Easy Workbench
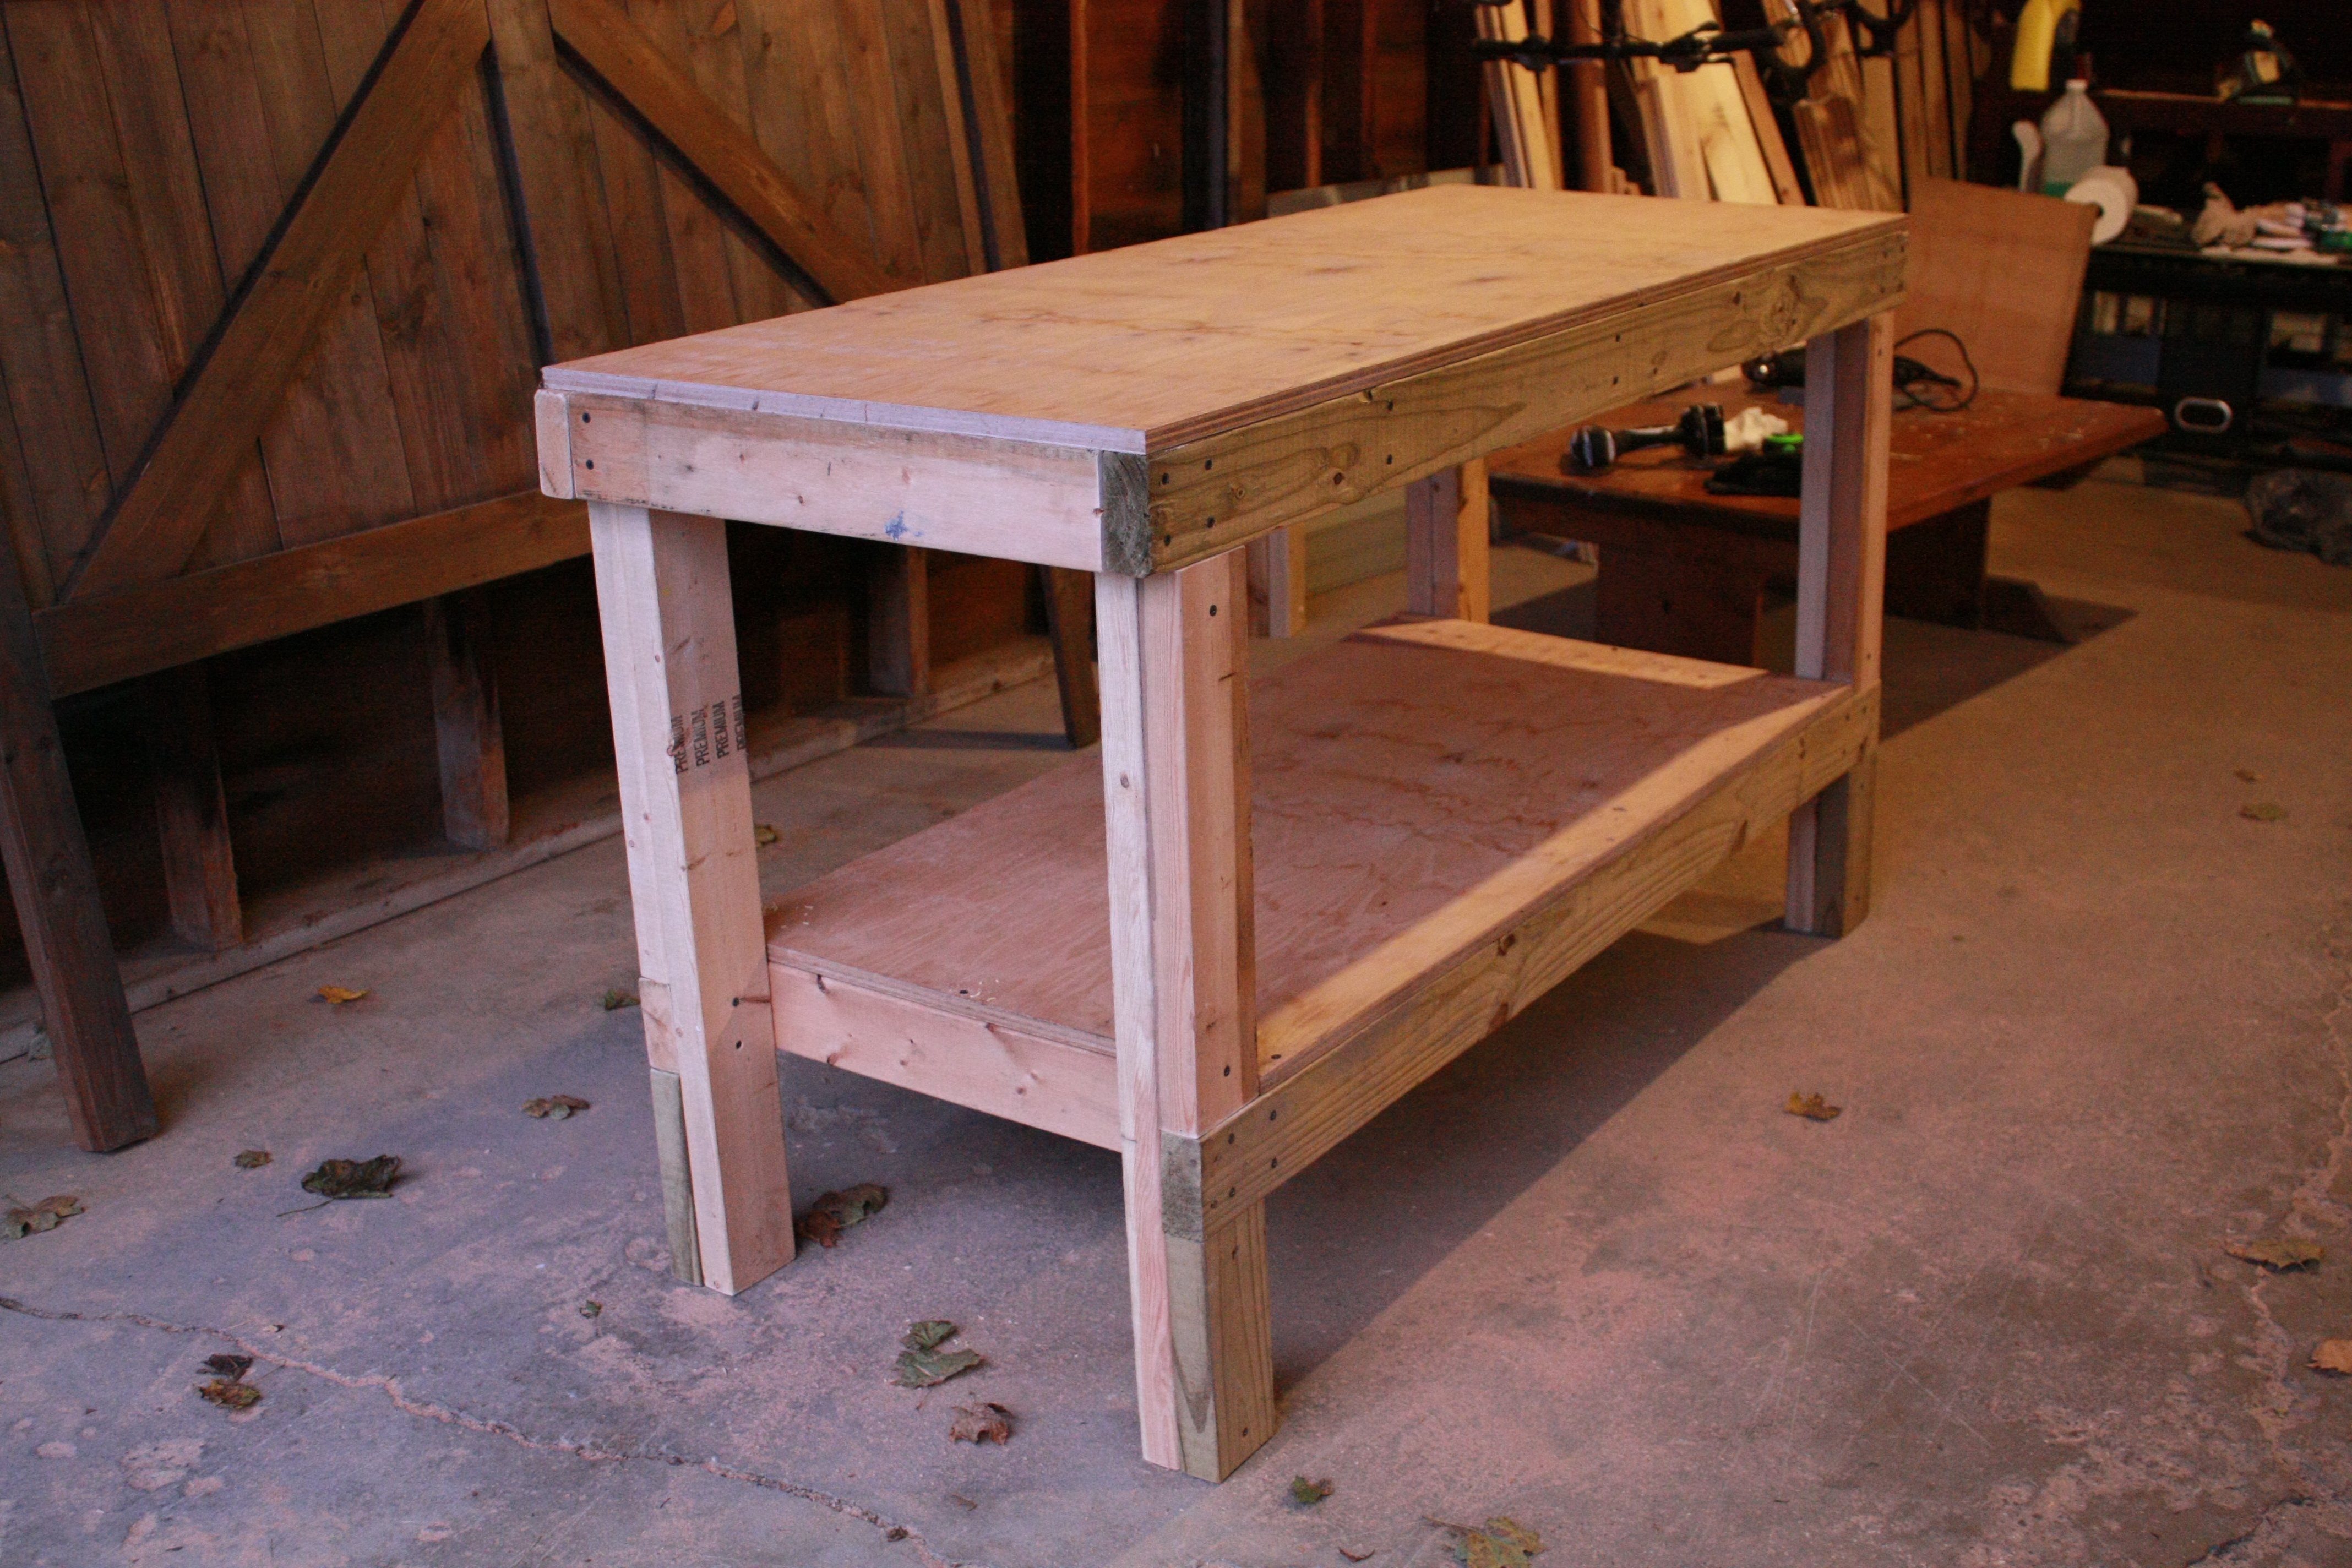
After diving head-first into this website and too many projects to mention, I decided it was about time to have a workbench. I received some free scrap wood from my neighbor so I spent a quick couple of hours putting this together. The plans were great and it went together very quickly. Looking forward to using this for more projects!
Built from Plan(s)
Estimated Cost
$0 (used free scrap lumber)
Estimated Time Investment
Afternoon Project (3-6 Hours)
Finish Used
None since it's just a workbench. =)
Recommended Skill Level
Starter Project
Comments
Sat, 11/24/2012 - 06:04
Help...
Hi Ana .. I`m lookin into building a single bed frame and head and foot board . Do you have any input that would help me along the way here.. Any info would be great . Love your work . and you look great as alway`s . Thanks in advance , and hope to hear back from you soon. Bye for now , and be safe .. Claude . G :-)
The Little Helper Tower

I made this for my friend's daughter. I can't believe how easy this was to make. It is sturdy and really light weight. I put it together in one afternoon and painted it the next day.


Built from Plan(s)
Estimated Cost
$60
Estimated Time Investment
Afternoon Project (3-6 Hours)
Finish Used
Glidden Very Berry Semi-Gloss paint and primer in one. Three coats.
Recommended Skill Level
Beginner
My New Farmhouse Bed!
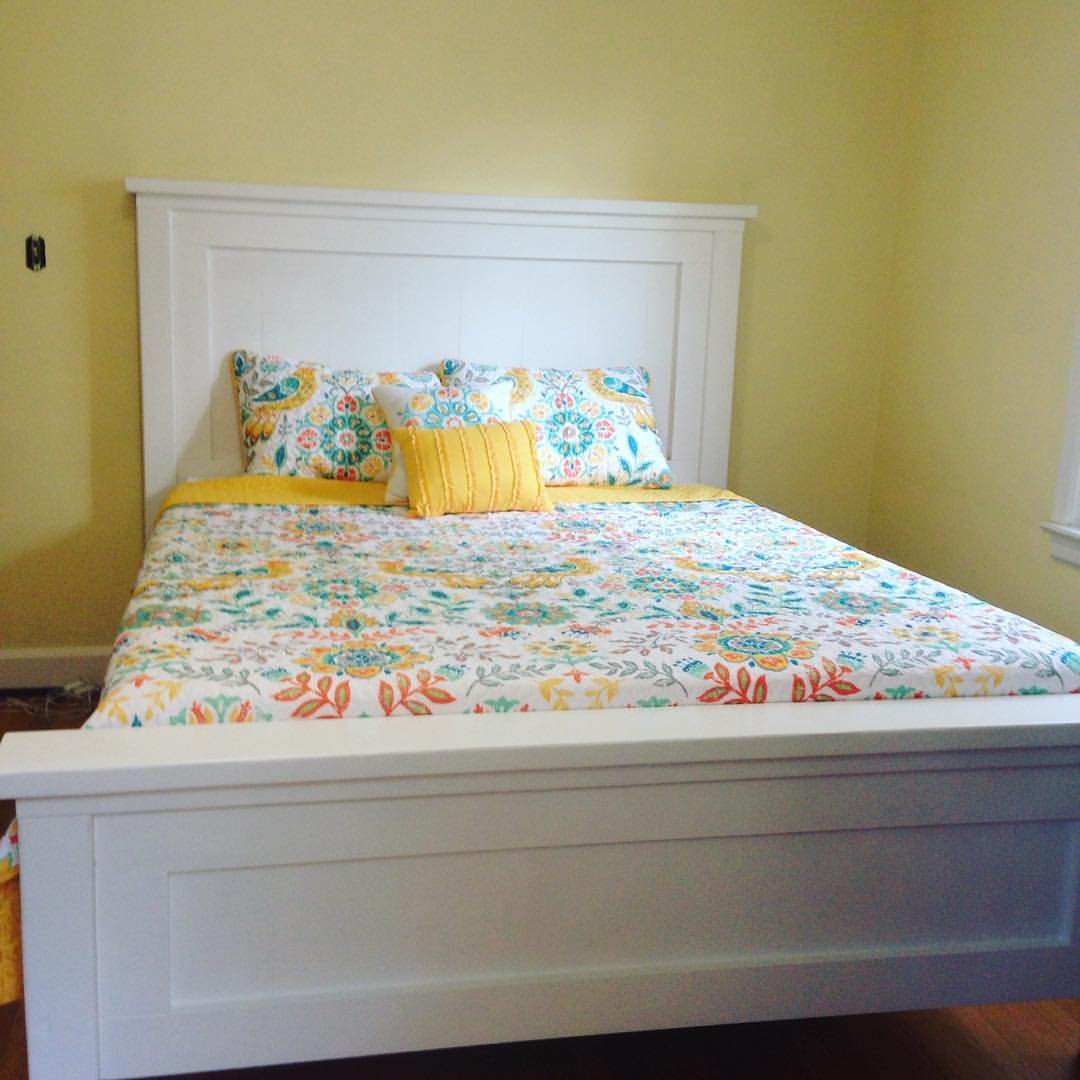
This was my first project and I am hooked. This was an easy build. I only ran into challenges attaching the headboard and footboard to the frame because I really wanted to be able to disassemble it and reassemble just in case.. fortunately I located a website selling threaded metal inserts and I ended up just bolting it on with hex bolts.
I was just surprised by how fast I could build it and how long it took to finish it. Sand, wood filler, sand, caulk, prime, sand, paint, sand, paint. Get interrupted by my kids 100 times.
Already plotting my next 3 builds..
Built from Plan(s)
Estimated Cost
$200 using leftover paint and primer
Estimated Time Investment
Weekend Project (10-20 Hours)
Finish Used
Sherwin Williams Trim Paint base white
Recommended Skill Level
Beginner
modern farmhouse bed frame with matching end tables
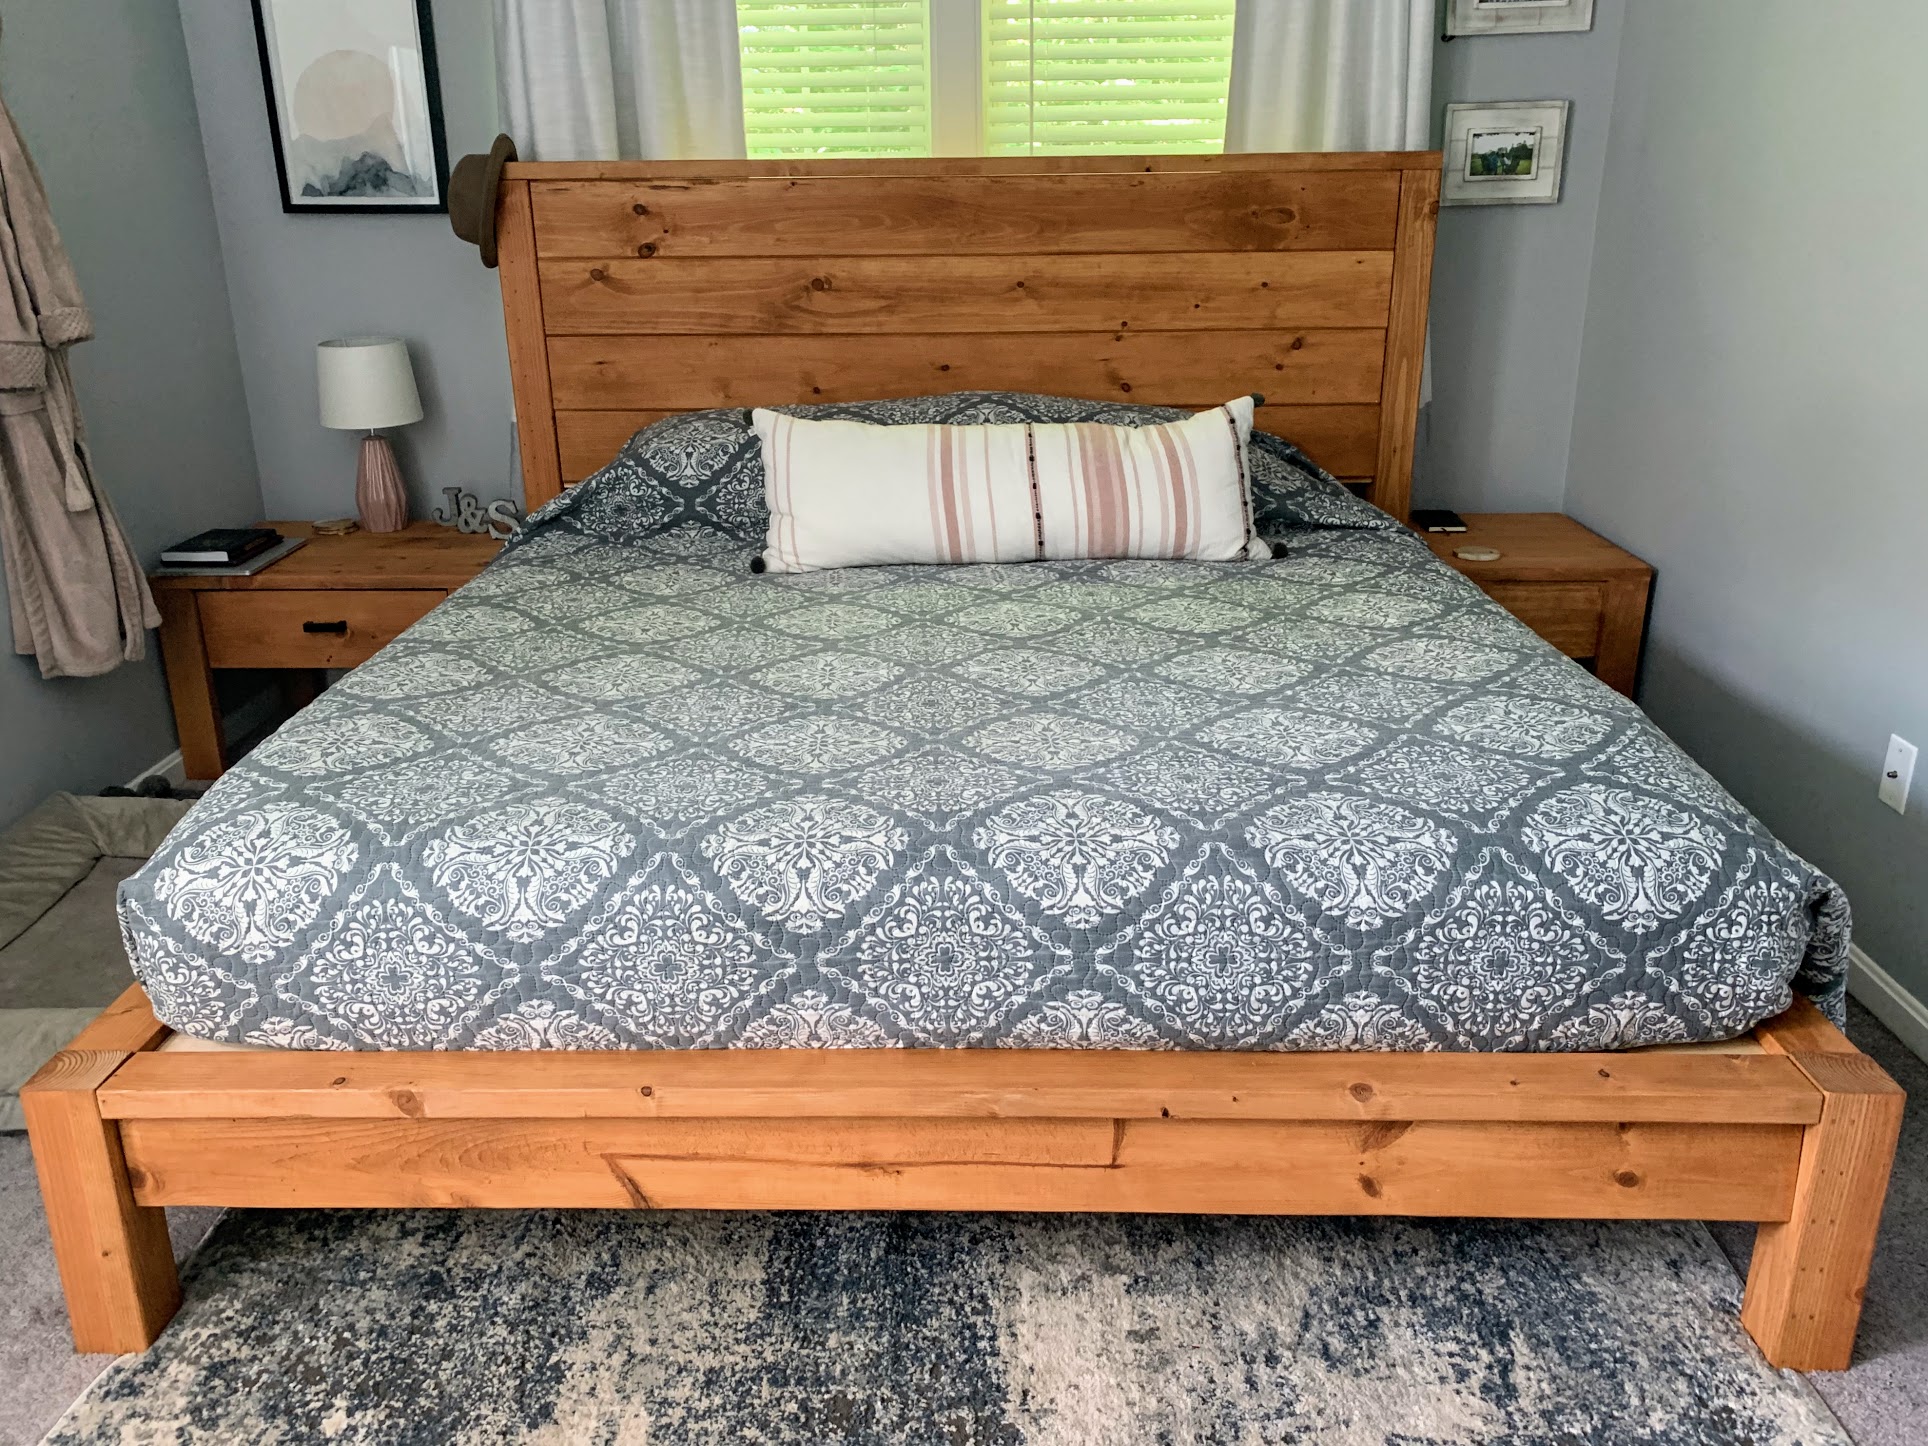
Bed frame - Husband and I built and assembled over a weekend. We love it!
Only variation from the plans were that we used 1x8 shiplap boards for the headboard (because the options were nicer at Home Depot).
Nightstand 1 - This I built myself, it took about 5 hours.
Followed the directions and the drawer worked the first time!
Nightstand 2 - This I also built myself, took about 4 hours.
This one I had about 17" to work with. The only measurement that changed was the front and back cut to 10".
Built from Plan(s)
Estimated Cost
Not sure about the bed frame. We purchased some tools for this project.
about $70 per nightstand
about $70 per nightstand
Estimated Time Investment
Weekend Project (10-20 Hours)
Finish Used
Minwax Wood Finish
Semi-transparent
Ipswich Pine - 221
Semi-transparent
Ipswich Pine - 221
Recommended Skill Level
Beginner
Comments
Farmhouse Table

I used a combination of the farmhouse table and the tryde coffee table (but on a larger scale). I don't have a Kreg drill or any of that and so I just screwed from the top side down. Since I knew the screws would show, I decided to take a platinum/shiny silver Sharpie to color over the screw heads to make them stand out.
The legs were a 2x4s glued and screwed together. Can't find any untreated 4x4 at the local Lowes or Home Depot, so this was my next best option.
I used a few coats of Rustoleum Dark Walnut and then Rustoleum Semi-Gloss poly.
I have since made a new bench with the same main design, but just to a small scale. Also, I did it opposite of the top. The table is 2x4 with 2x6 breadboard ends. The bench is 2x6 with 2x4 breadboard ends.


Built from Plan(s)
Estimated Cost
About $60
Estimated Time Investment
Afternoon Project (3-6 Hours)
Finish Used
Rustoleum Dark Walnut
Recommended Skill Level
Beginner
Comments
Mon, 10/22/2012 - 09:12
It is just regular whitewood
It is just regular whitewood 2x4s glued and screwed together. Then I just used wood filler to make it look llike a 4x4.


First woodworking project - Coffee table

This coffee table was my first woodworking project ever. I followed the plans exactly but left the X off each end. They seemed a little daunting for the first time around, plus I like it without them better. Great plans and great result!
Built from Plan(s)
Estimated Cost
$60
Estimated Time Investment
Day Project (6-9 Hours)
Recommended Skill Level
Starter Project
Thanks Ana
This was a great build, awesome project for my girlfriend. Very fun and super satisfying especially at paint and stain stage! Everyone loves it. Grateful for the plans.
Took me about a week. Edge banded my face and spackled the sides. My drawers were installed with a dado. Everything else was pocket screwed and glued.
Definitely recommend.
Follow my journey @alexthenailbanger

Built from Plan(s)
Estimated Cost
400
Estimated Time Investment
Week Long Project (20 Hours or More)
Recommended Skill Level
Intermediate
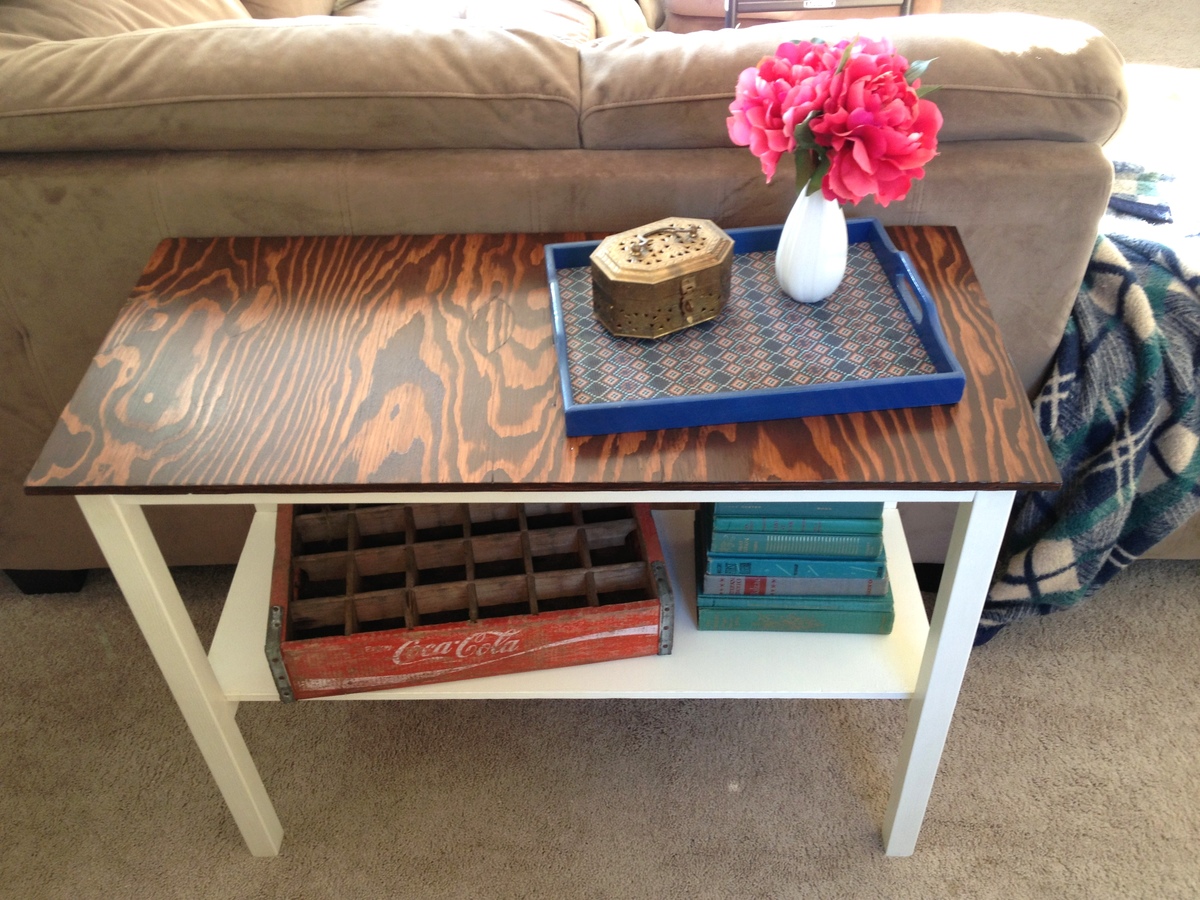
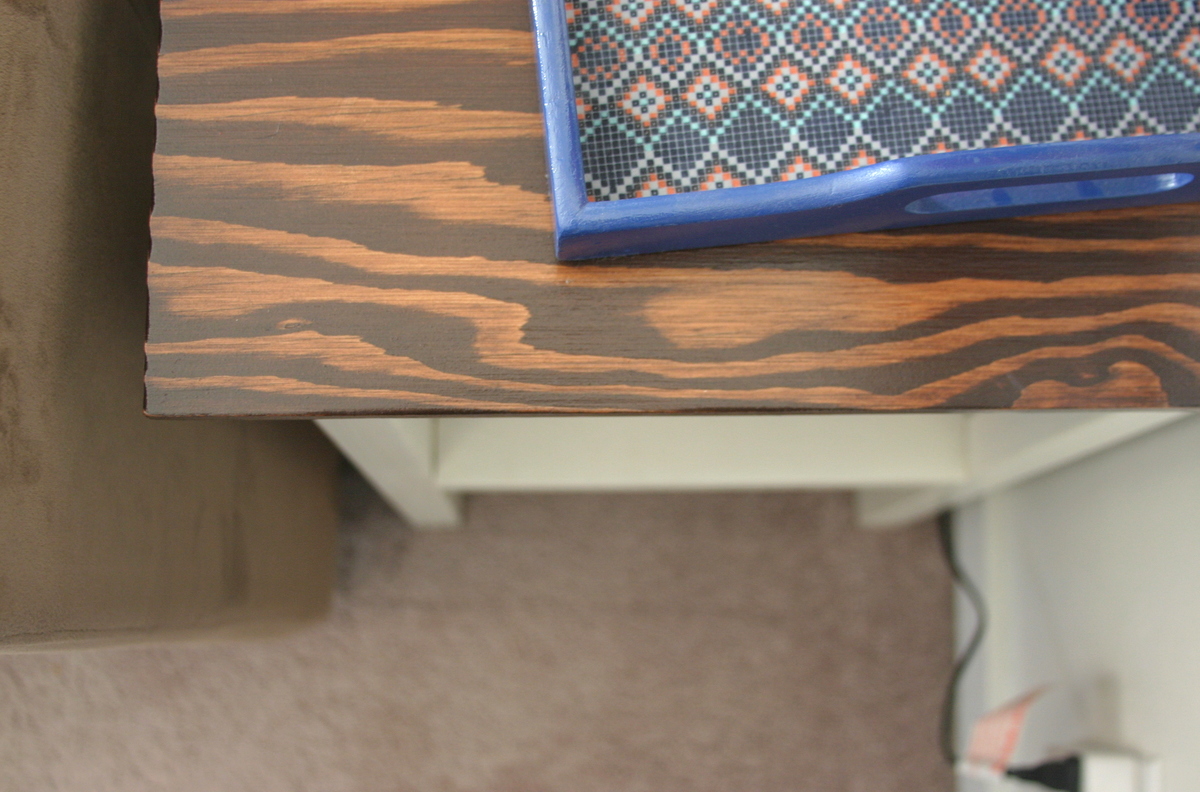
Perfect End Table
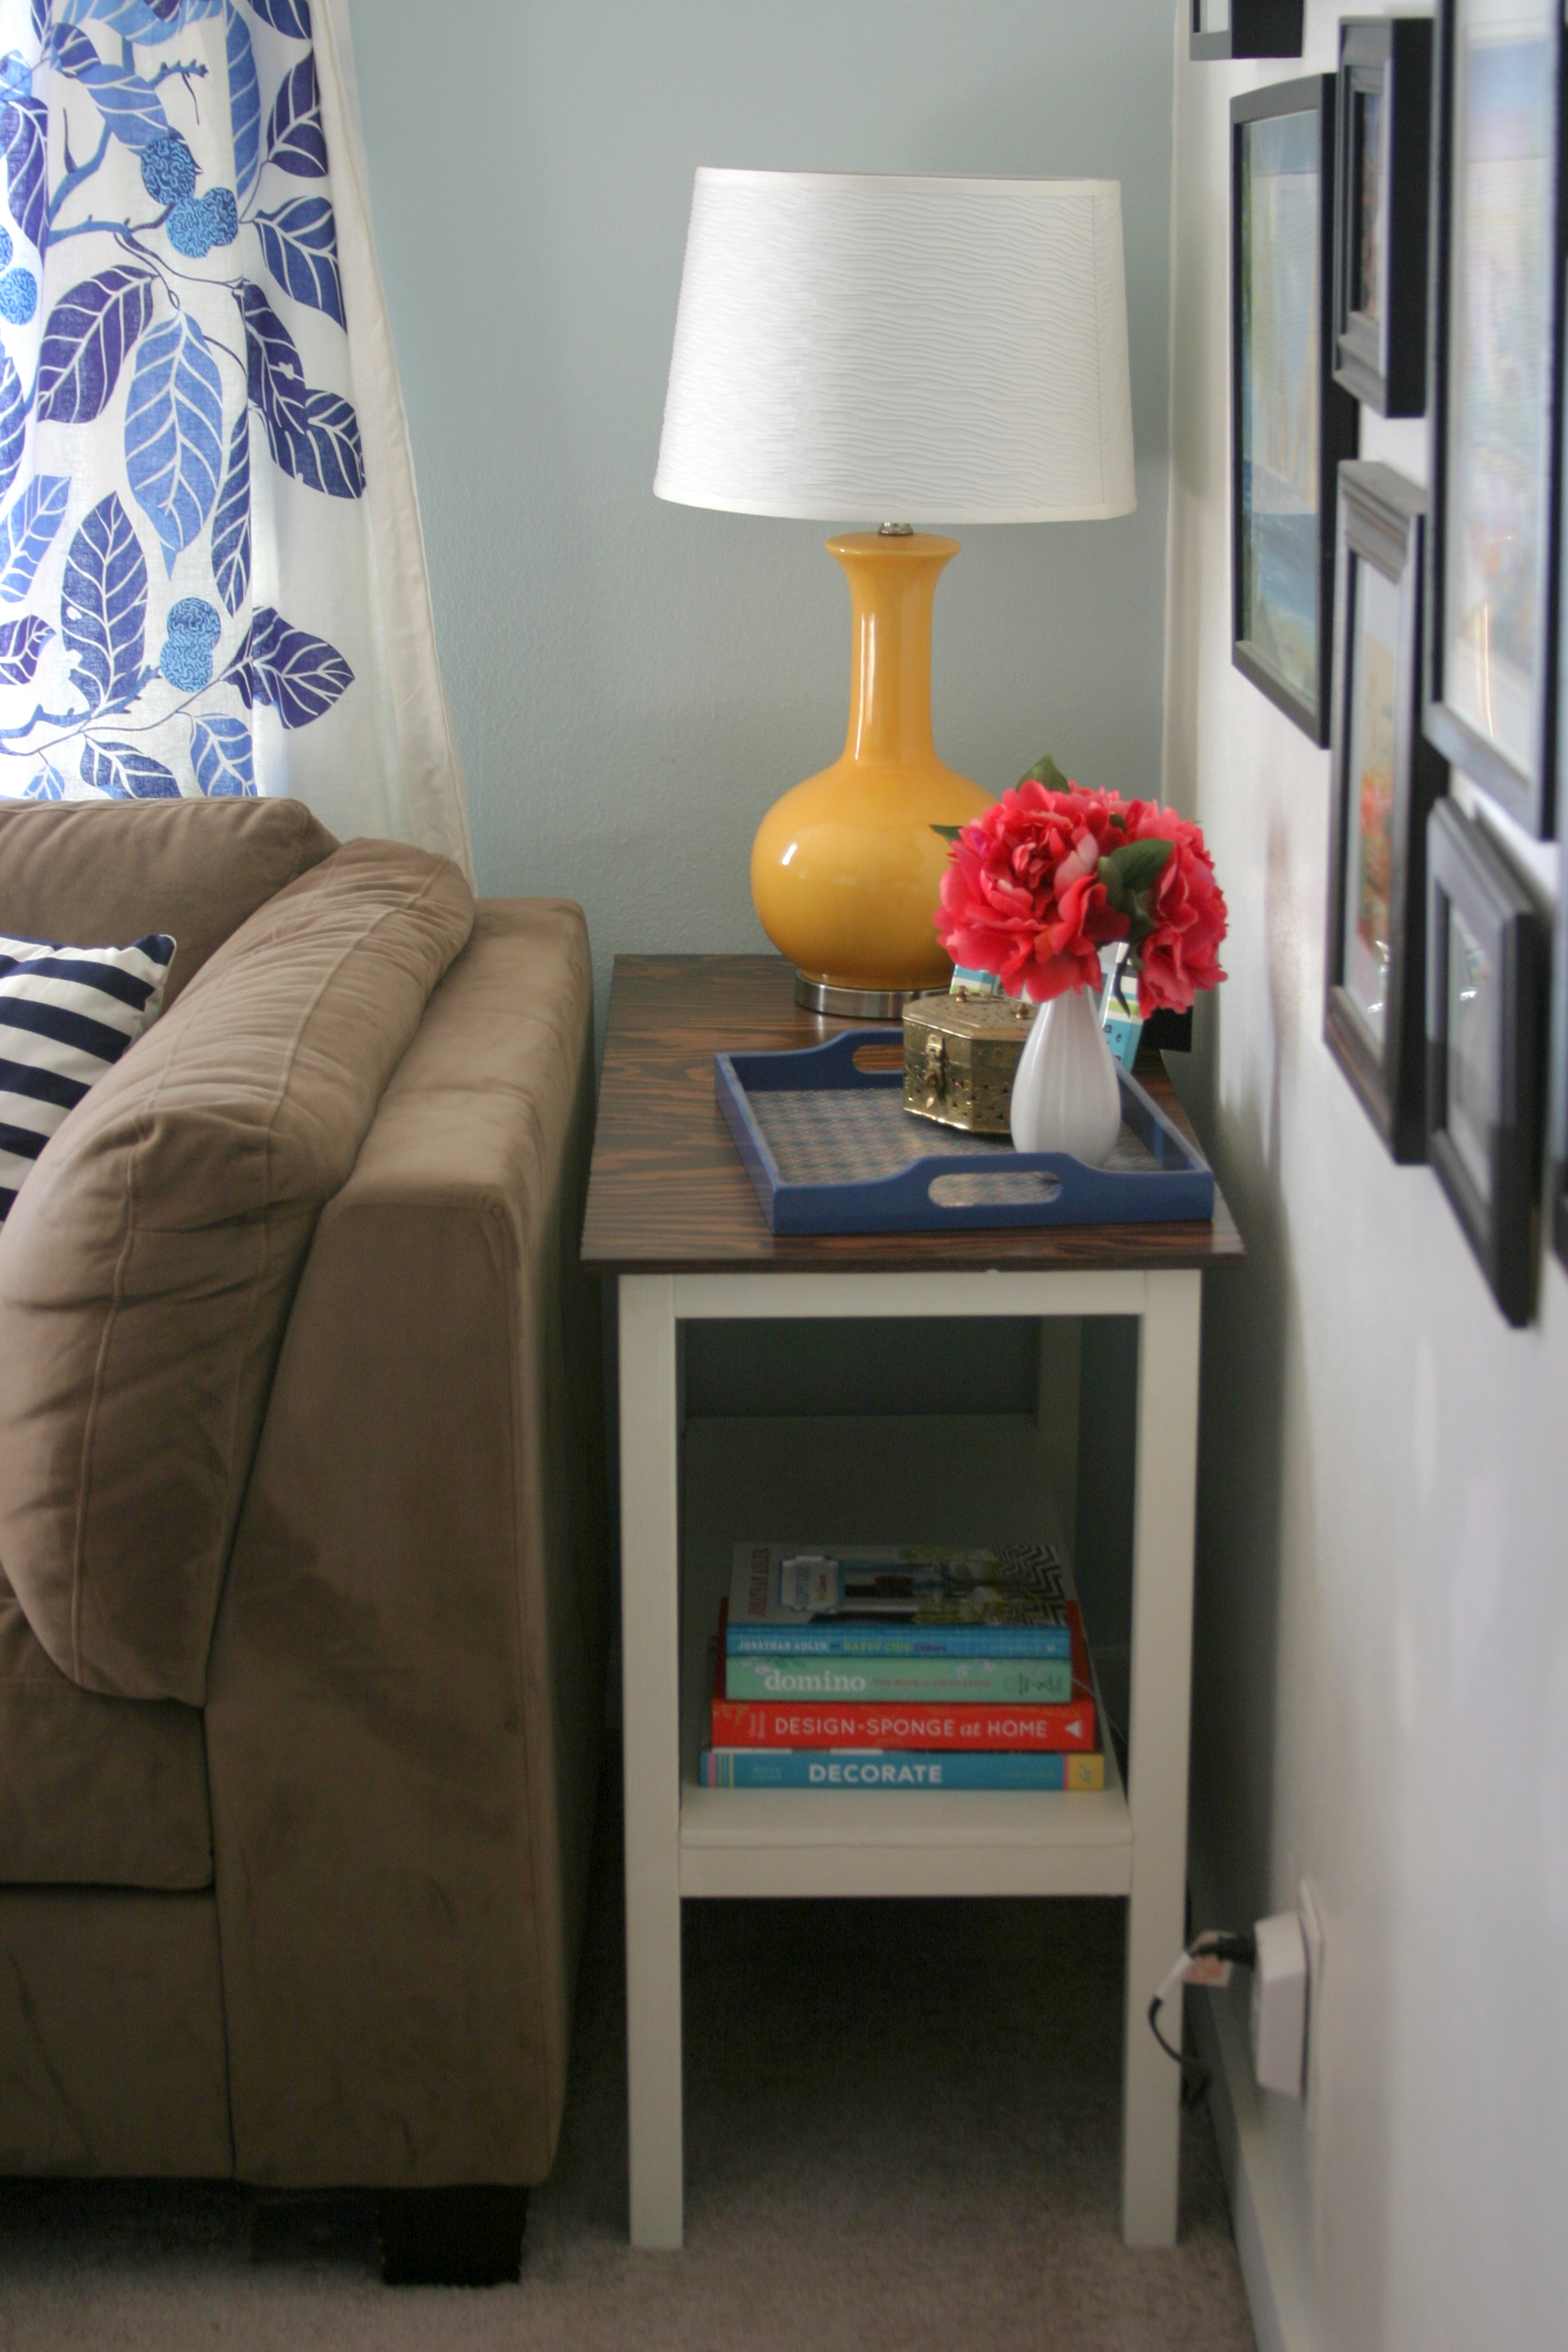
This was the first furniture building project for my husband and me. We changed the table height to 28 inches instead of 24 and used plywood for the top, like Jenn did in her post. It took us a little longer than we thought since we are not experts (yet!), but we made it work and love how it turned out! This is such a classic and stylish table. Perfect for a beginning project!

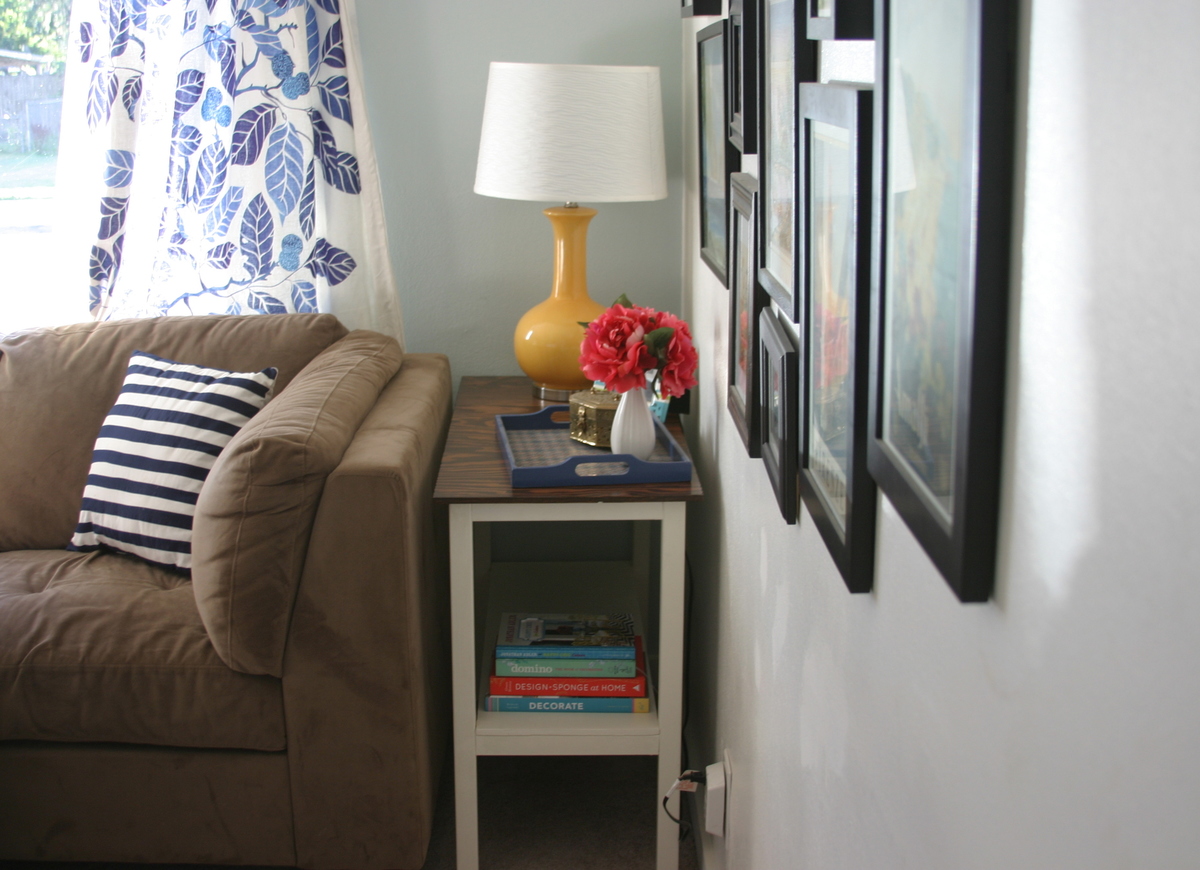
Built from Plan(s)
Estimated Cost
$70
Estimated Time Investment
Day Project (6-9 Hours)
Finish Used
Olympic Latex Flat in Heirloom Lace for the base (primer first, then at least two coats). Varathane Wood Stain in American Walnut for the top. Three coats of polyurethane on the top and then one more coat over the whole thing.
Recommended Skill Level
Beginner
Revised Dog Crate
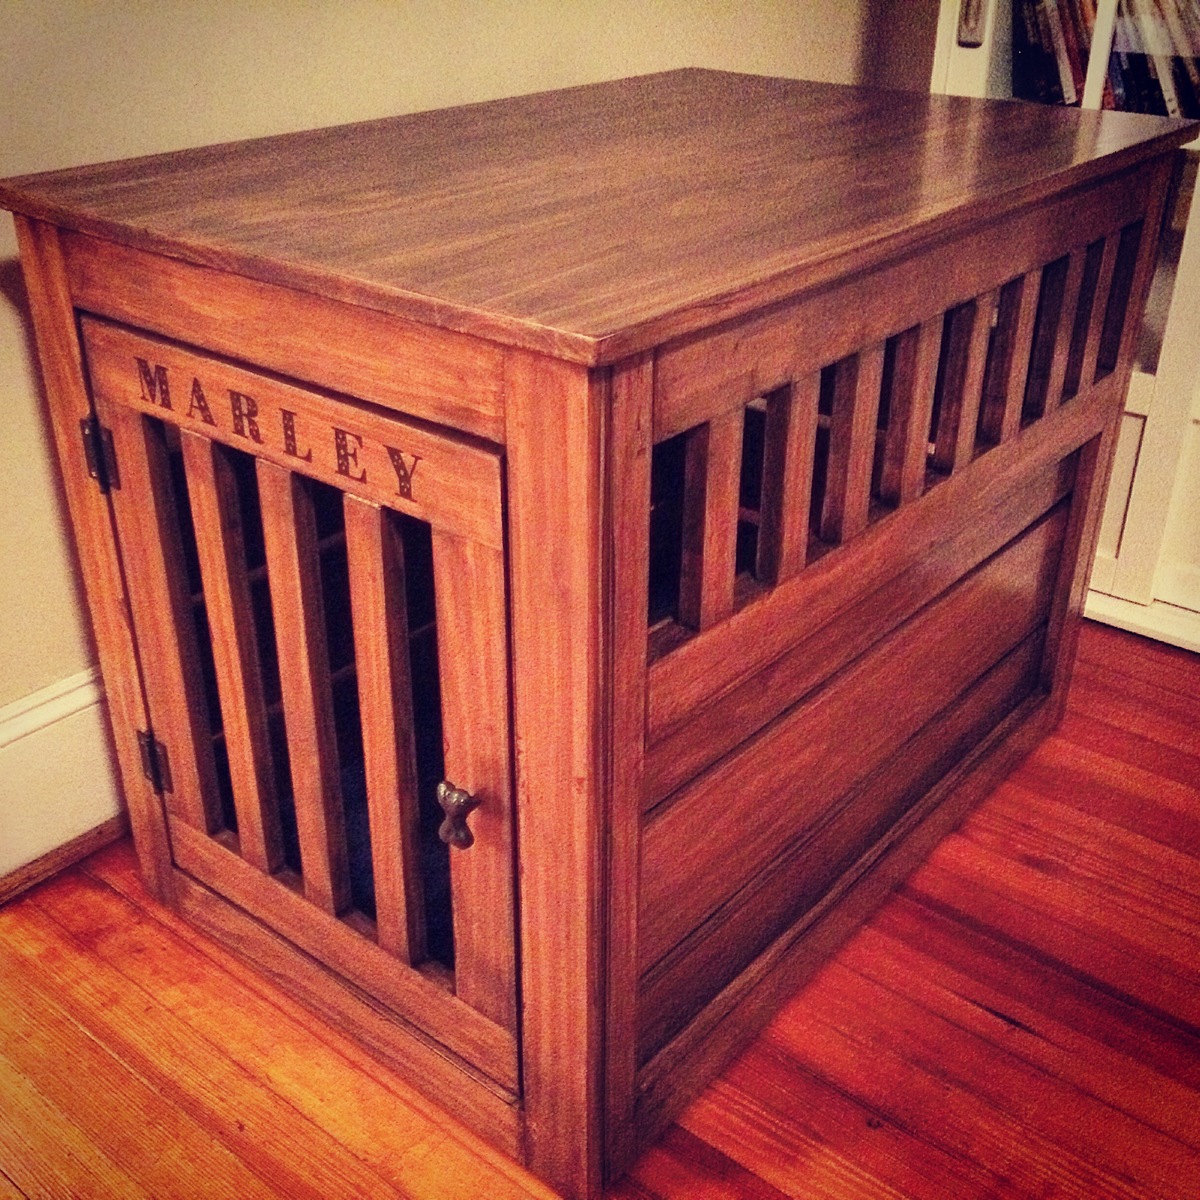
First project made from scratch....took me a while but glad it is finished! Will try to do one more of a larger size for my other dog.
Estimated Time Investment
Week Long Project (20 Hours or More)
Finish Used
SafeCoat Durostain (birch and walnut)
Vermont Natural Coatings for the topcoat
Vermont Natural Coatings for the topcoat
Recommended Skill Level
Starter Project
Comments
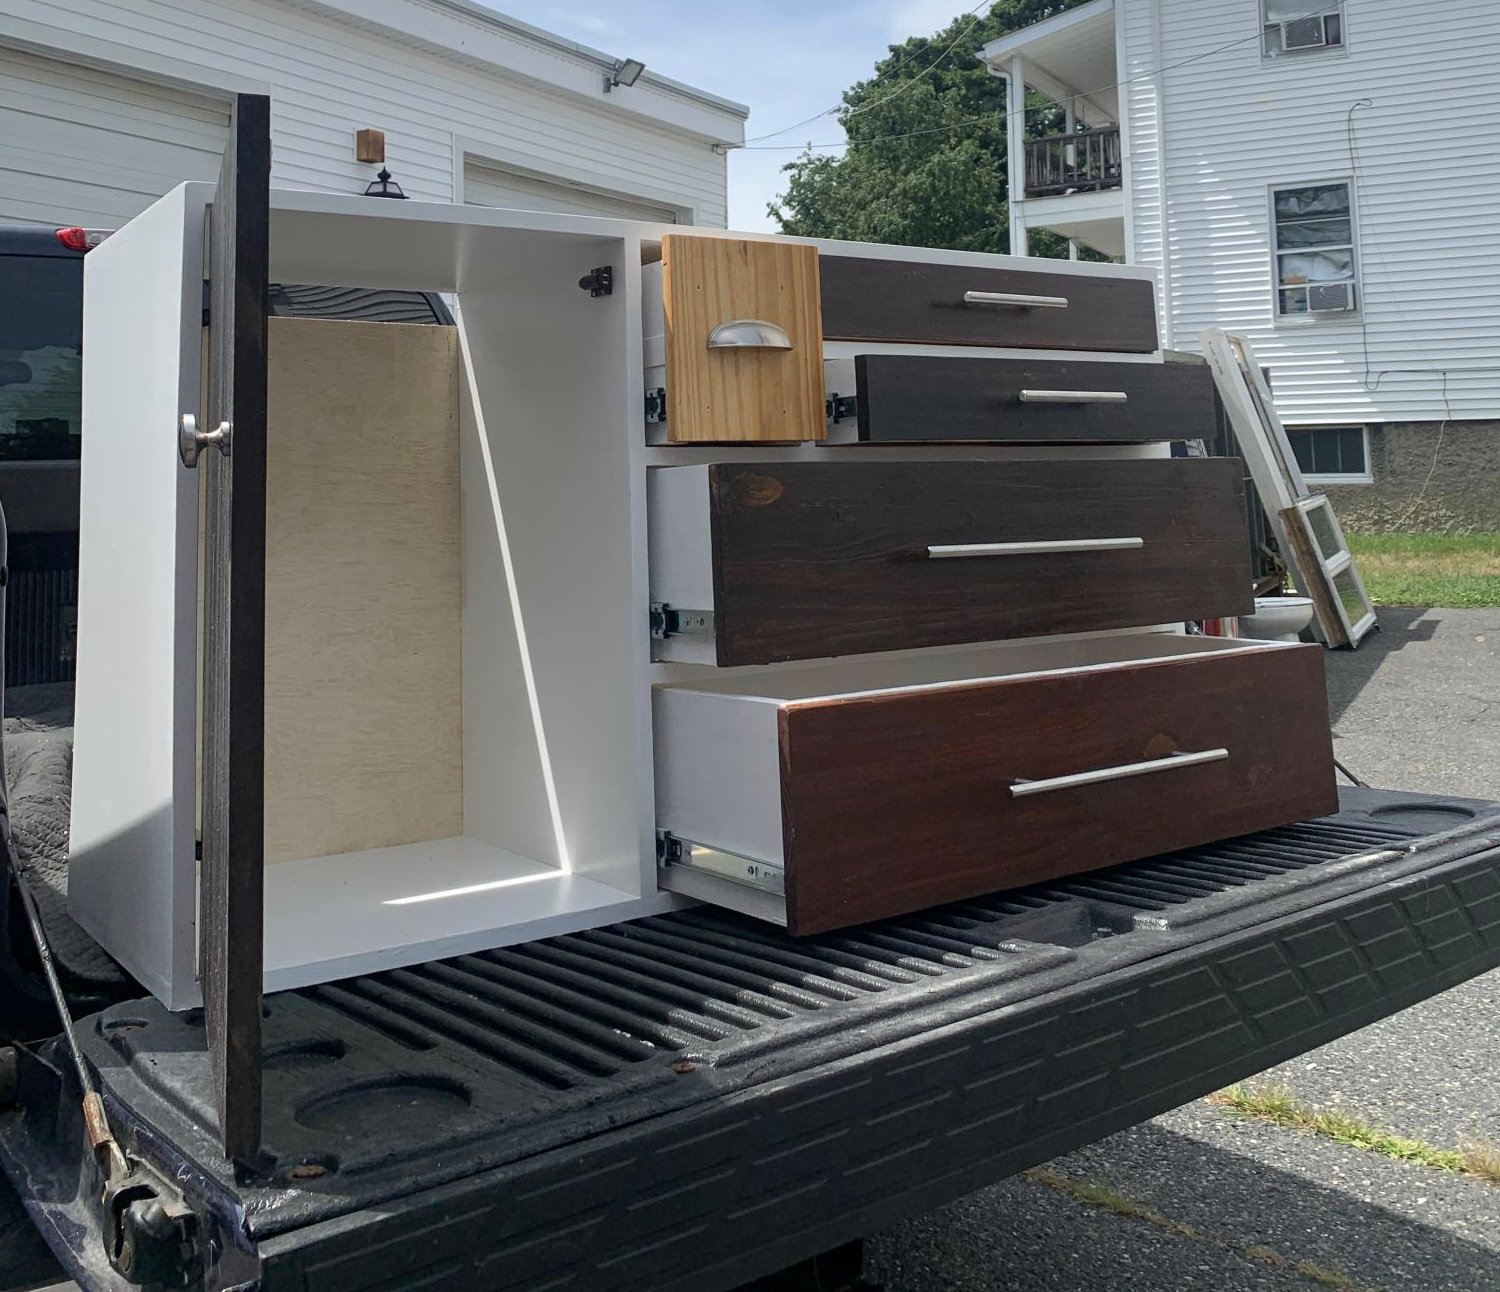
Modern White Dresser with Wood Drawers
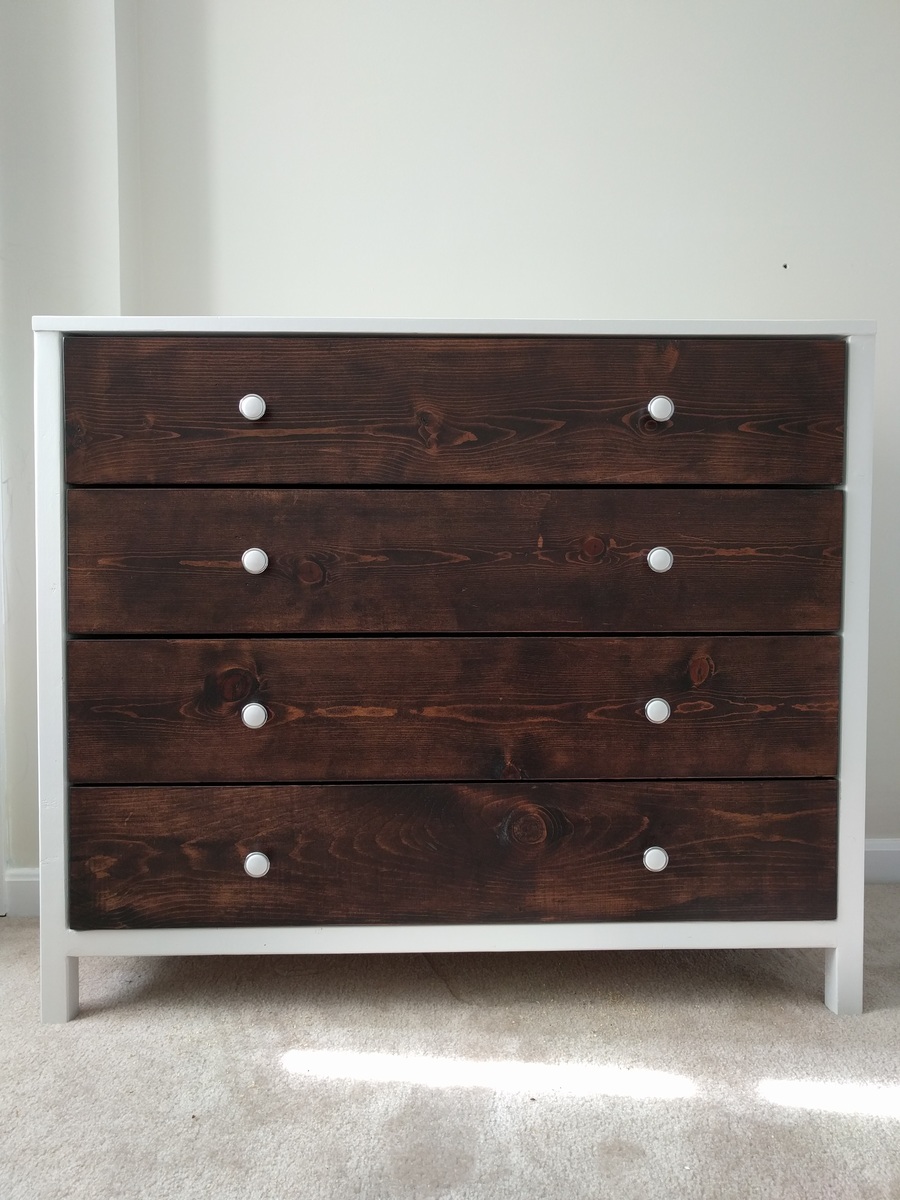
Seen here is my first personal wood working project. I loved the two tone look of this piece as the white really complements and makes the antique walnut stained drawer fronts pop! While the dresser turned out really well considering it being my first build, I learned a lot of lessons. I had a lot of challenges because like every new wood worker, you likely wont have all the right tools for the task at hand. I built this dresser with a circular saw, Kreg jig tool, a miter saw and Wagner spray gun. With these limitation, most task took 2x-3x longer than it normally would. In the end, I was pleased with the outcome.
Built from Plan(s)
Estimated Cost
$200-$300
Estimated Time Investment
Weekend Project (10-20 Hours)
Finish Used
Sherwin Williams ProClassic Alkyd Interior Enamel White Paint/
General Finishes Java Gel Stain/
General Finishes Water Based Poly
General Finishes Java Gel Stain/
General Finishes Water Based Poly
Recommended Skill Level
Intermediate
Wood Outdoor DIY Furniture Set
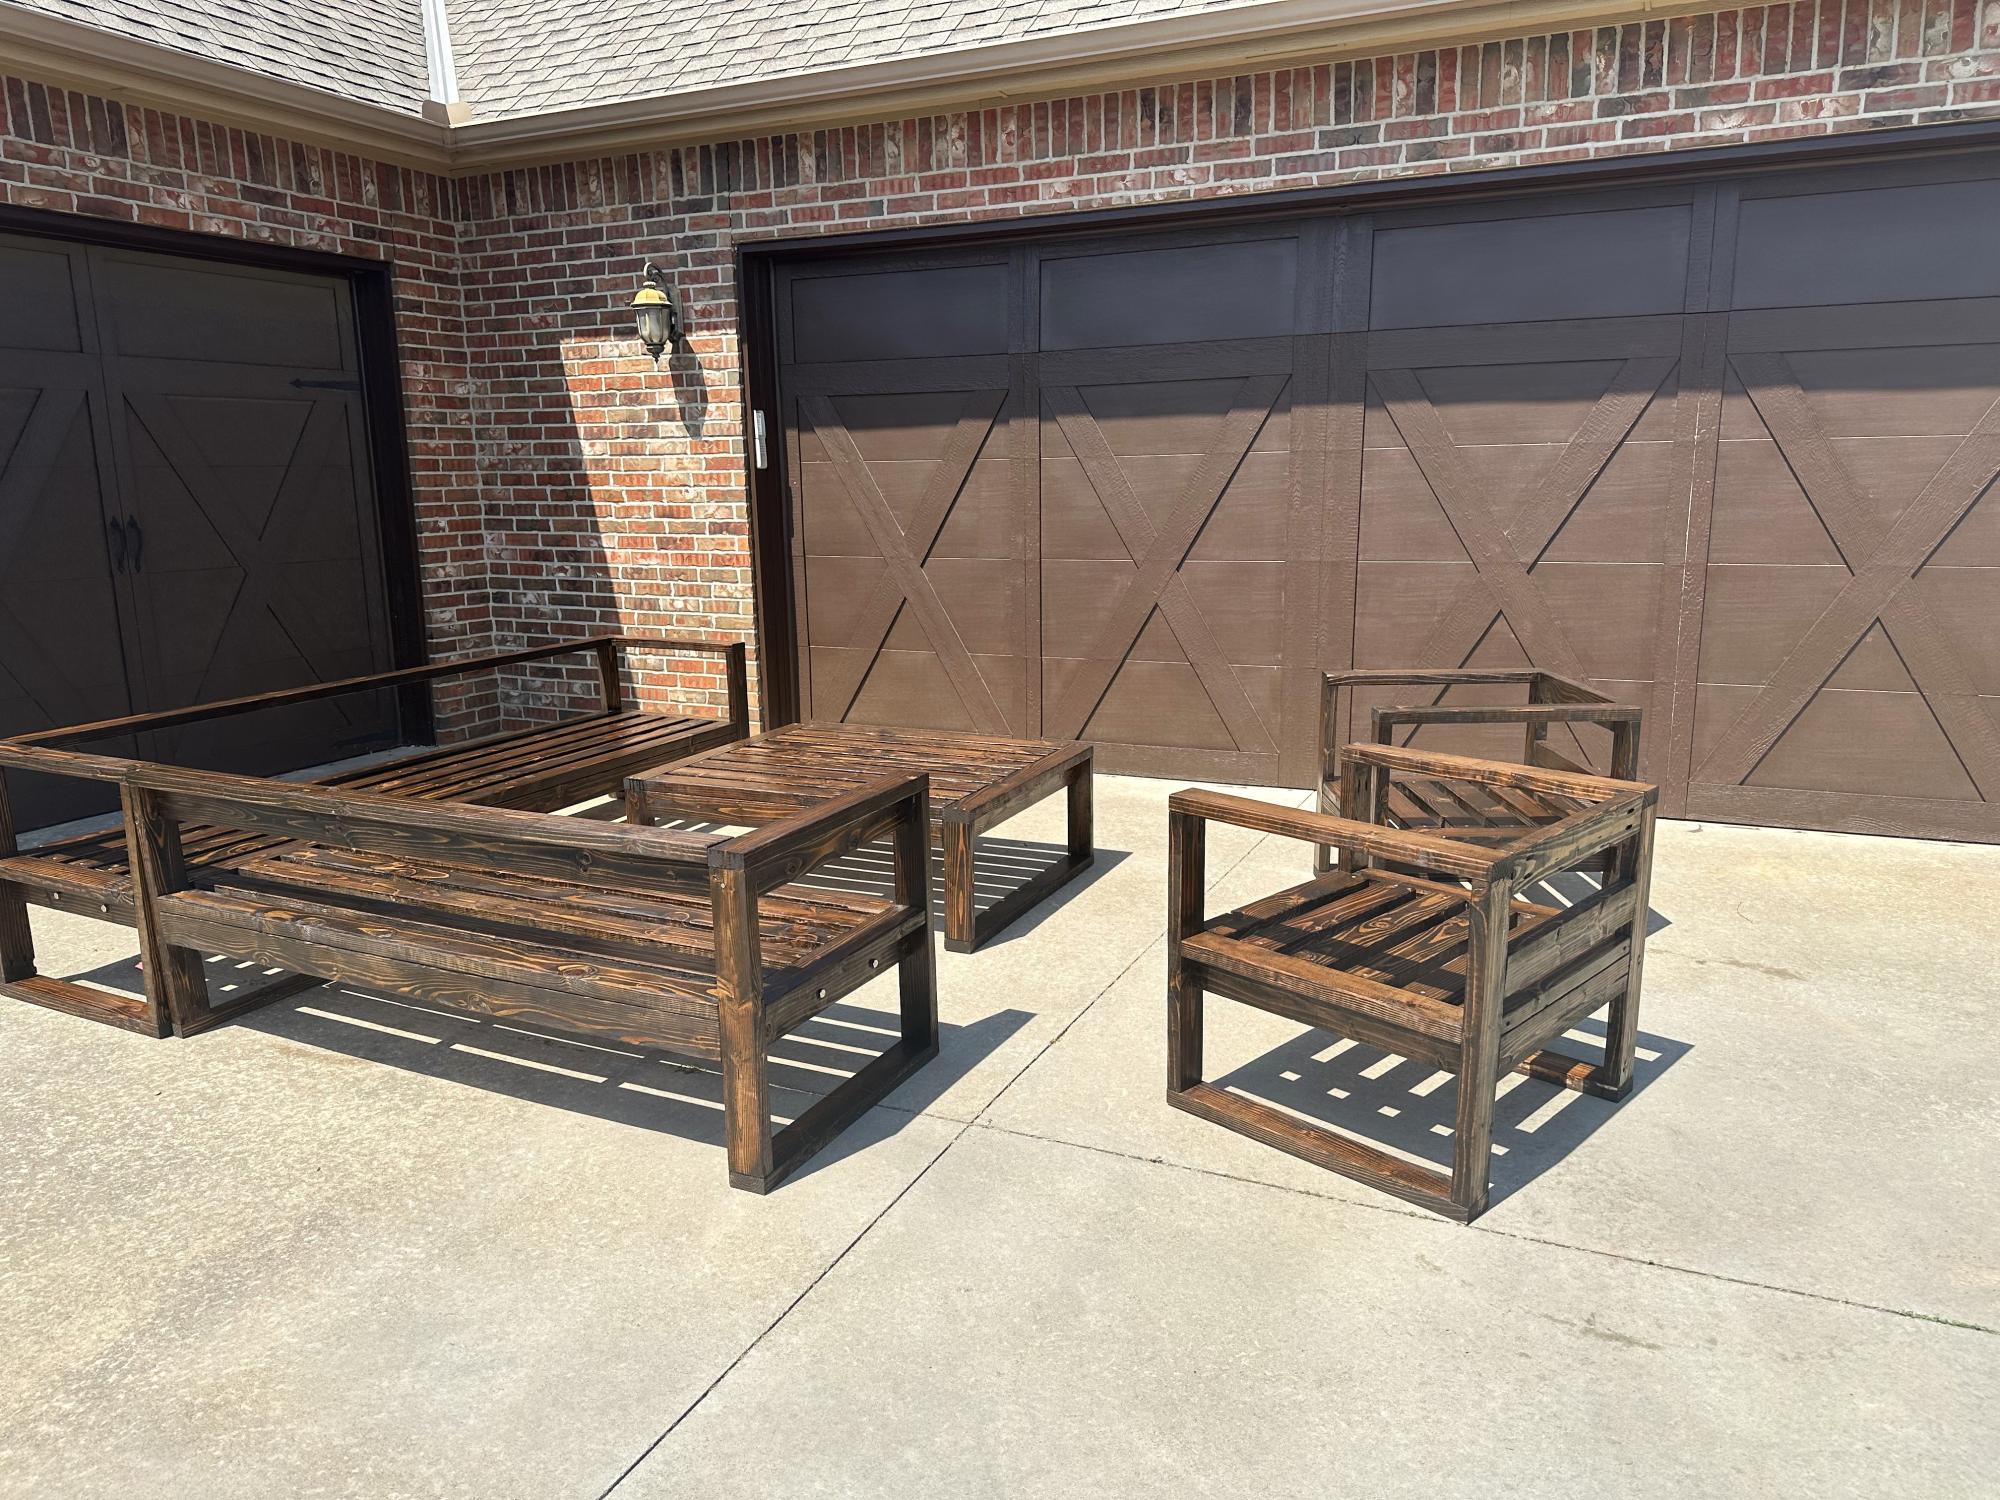
Built this 2x4 deck furniture set. Stained in espresso color.
Kelly Kesler
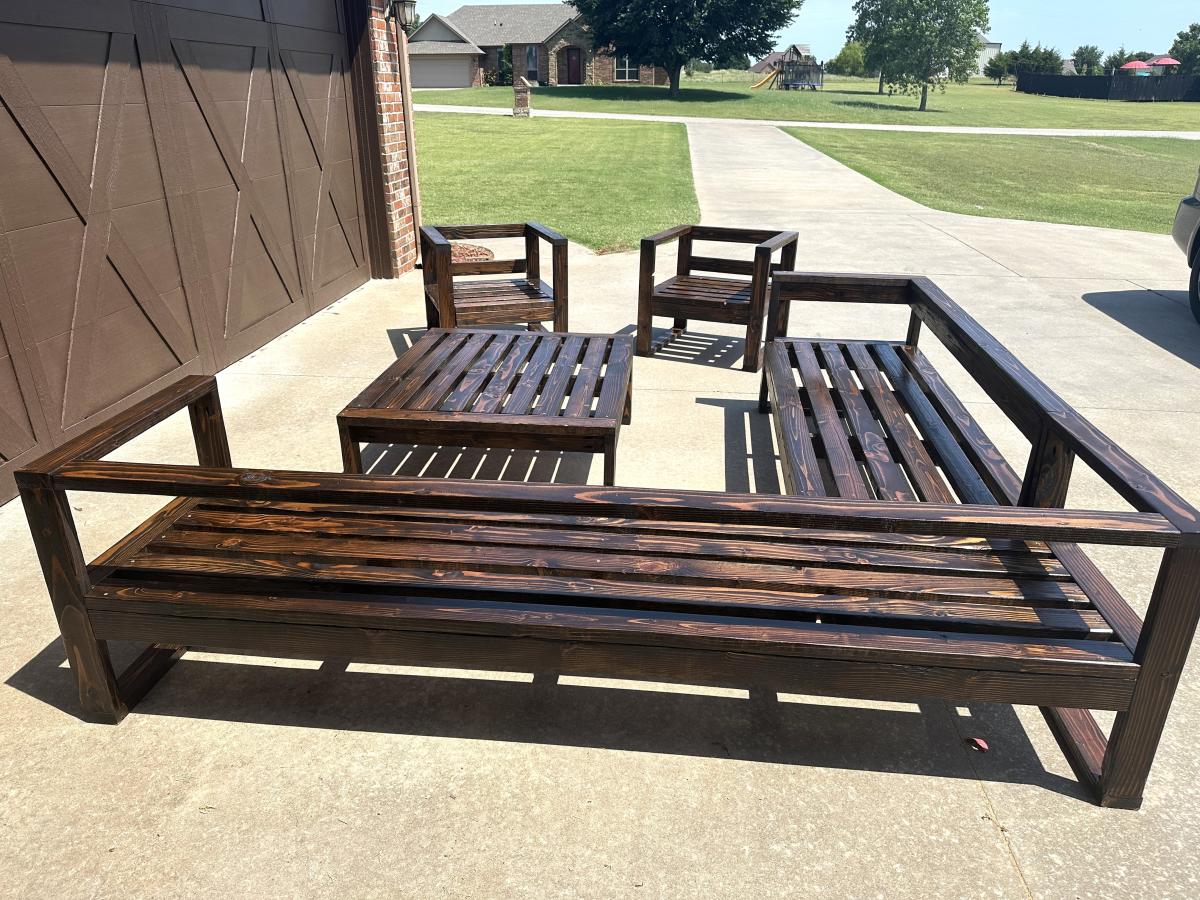
Built from Plan(s)
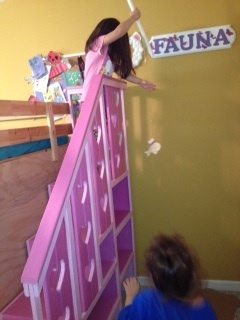
Sweet Pea Garden Bunk Bed Storage Stairs
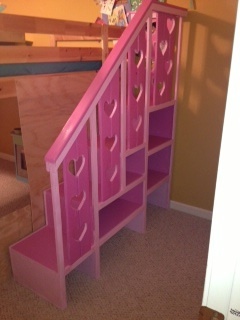
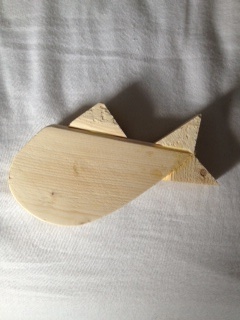
Jenny from www.birdsandsoap.com became my hero when I saw her sweet pea garden bunk bed plans on here! I love these storage stairs and everything else about the bed. I decided to build the whole works. Here are the storage stairs. I added the last couple photos to show what my girls and I did with the scraps from the cut out hearts. We made a fishing game out of it... used screws in the "fish" to make them magnetic and we just used fridge magnets for the end of the fishing pole. Pretty fun! We'll get to making more fish and painting them later... right now I gotta finish this awesome bed house! (I just wanted to share that to let everyone know how creative I can be... normally I'm just a big style biter off ana white and Jenny from birds and soap and Pinterest lol... I bet if you went in my house right after Jennys house they would look pretty identical. I also made her version of the farmhouse storage bed, what can I say? She's got good taste!) YEAH!
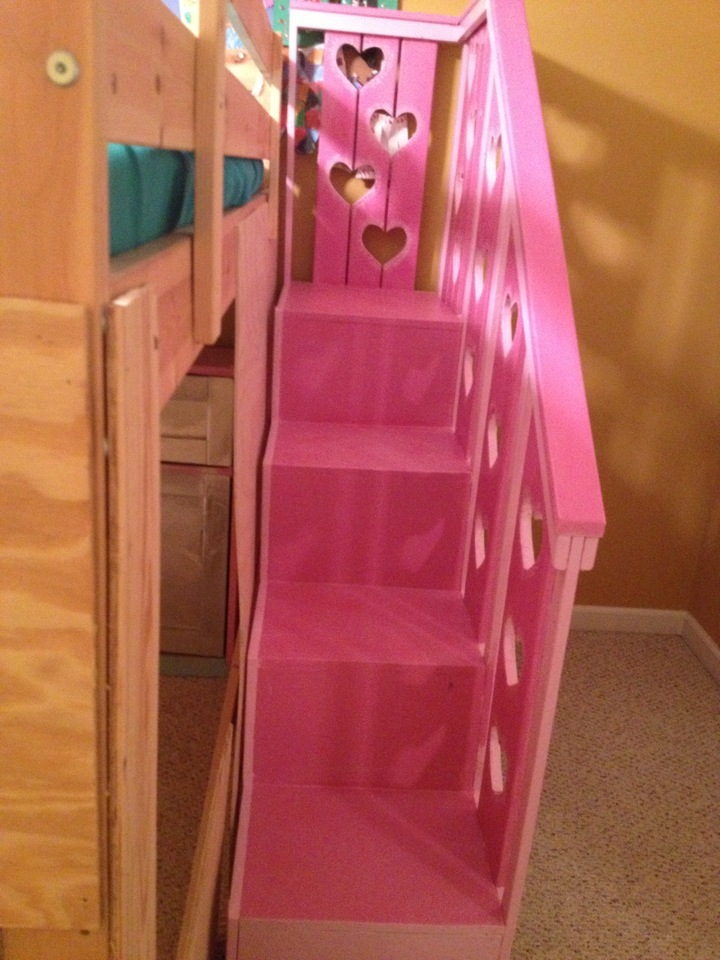
Built from Plan(s)
Estimated Cost
$50
Estimated Time Investment
Weekend Project (10-20 Hours)
Finish Used
Paint and Polycrylic
Recommended Skill Level
Beginner
Comments

Mon, 12/31/2012 - 08:50
Stair Plans
Where did you find the plans for the stairs? I can't find them on this website or the Birds and Soap website.
Mon, 12/31/2012 - 08:51
Where did you find the plans
Where did you find the plans for the storage stairs? I can't find them on Ana White's site or the Birds and Soap site.

In reply to Where did you find the plans by HollykmB (not verified)
Mon, 12/31/2012 - 22:28
Plans
This link should take you there... http://ana-white.com/2012/09/plans/sweet-pea-garden-bunk-bed-storage-st…
Hope that helps. Good Luck!