Community Brag Posts


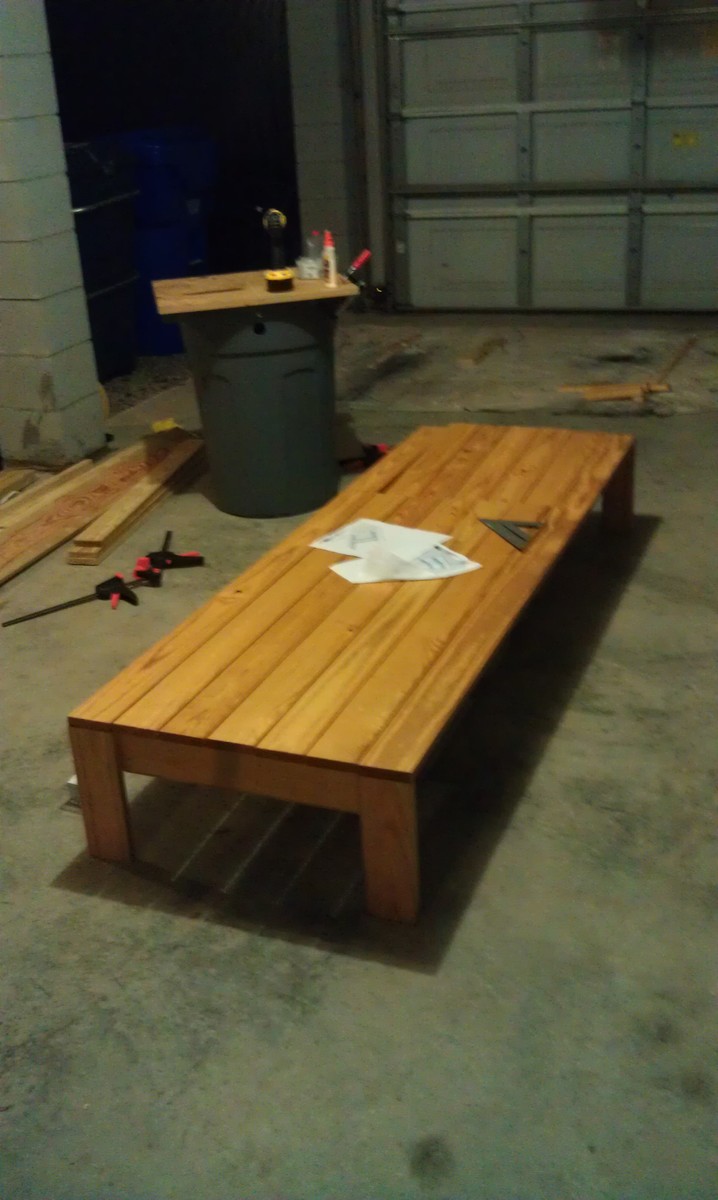
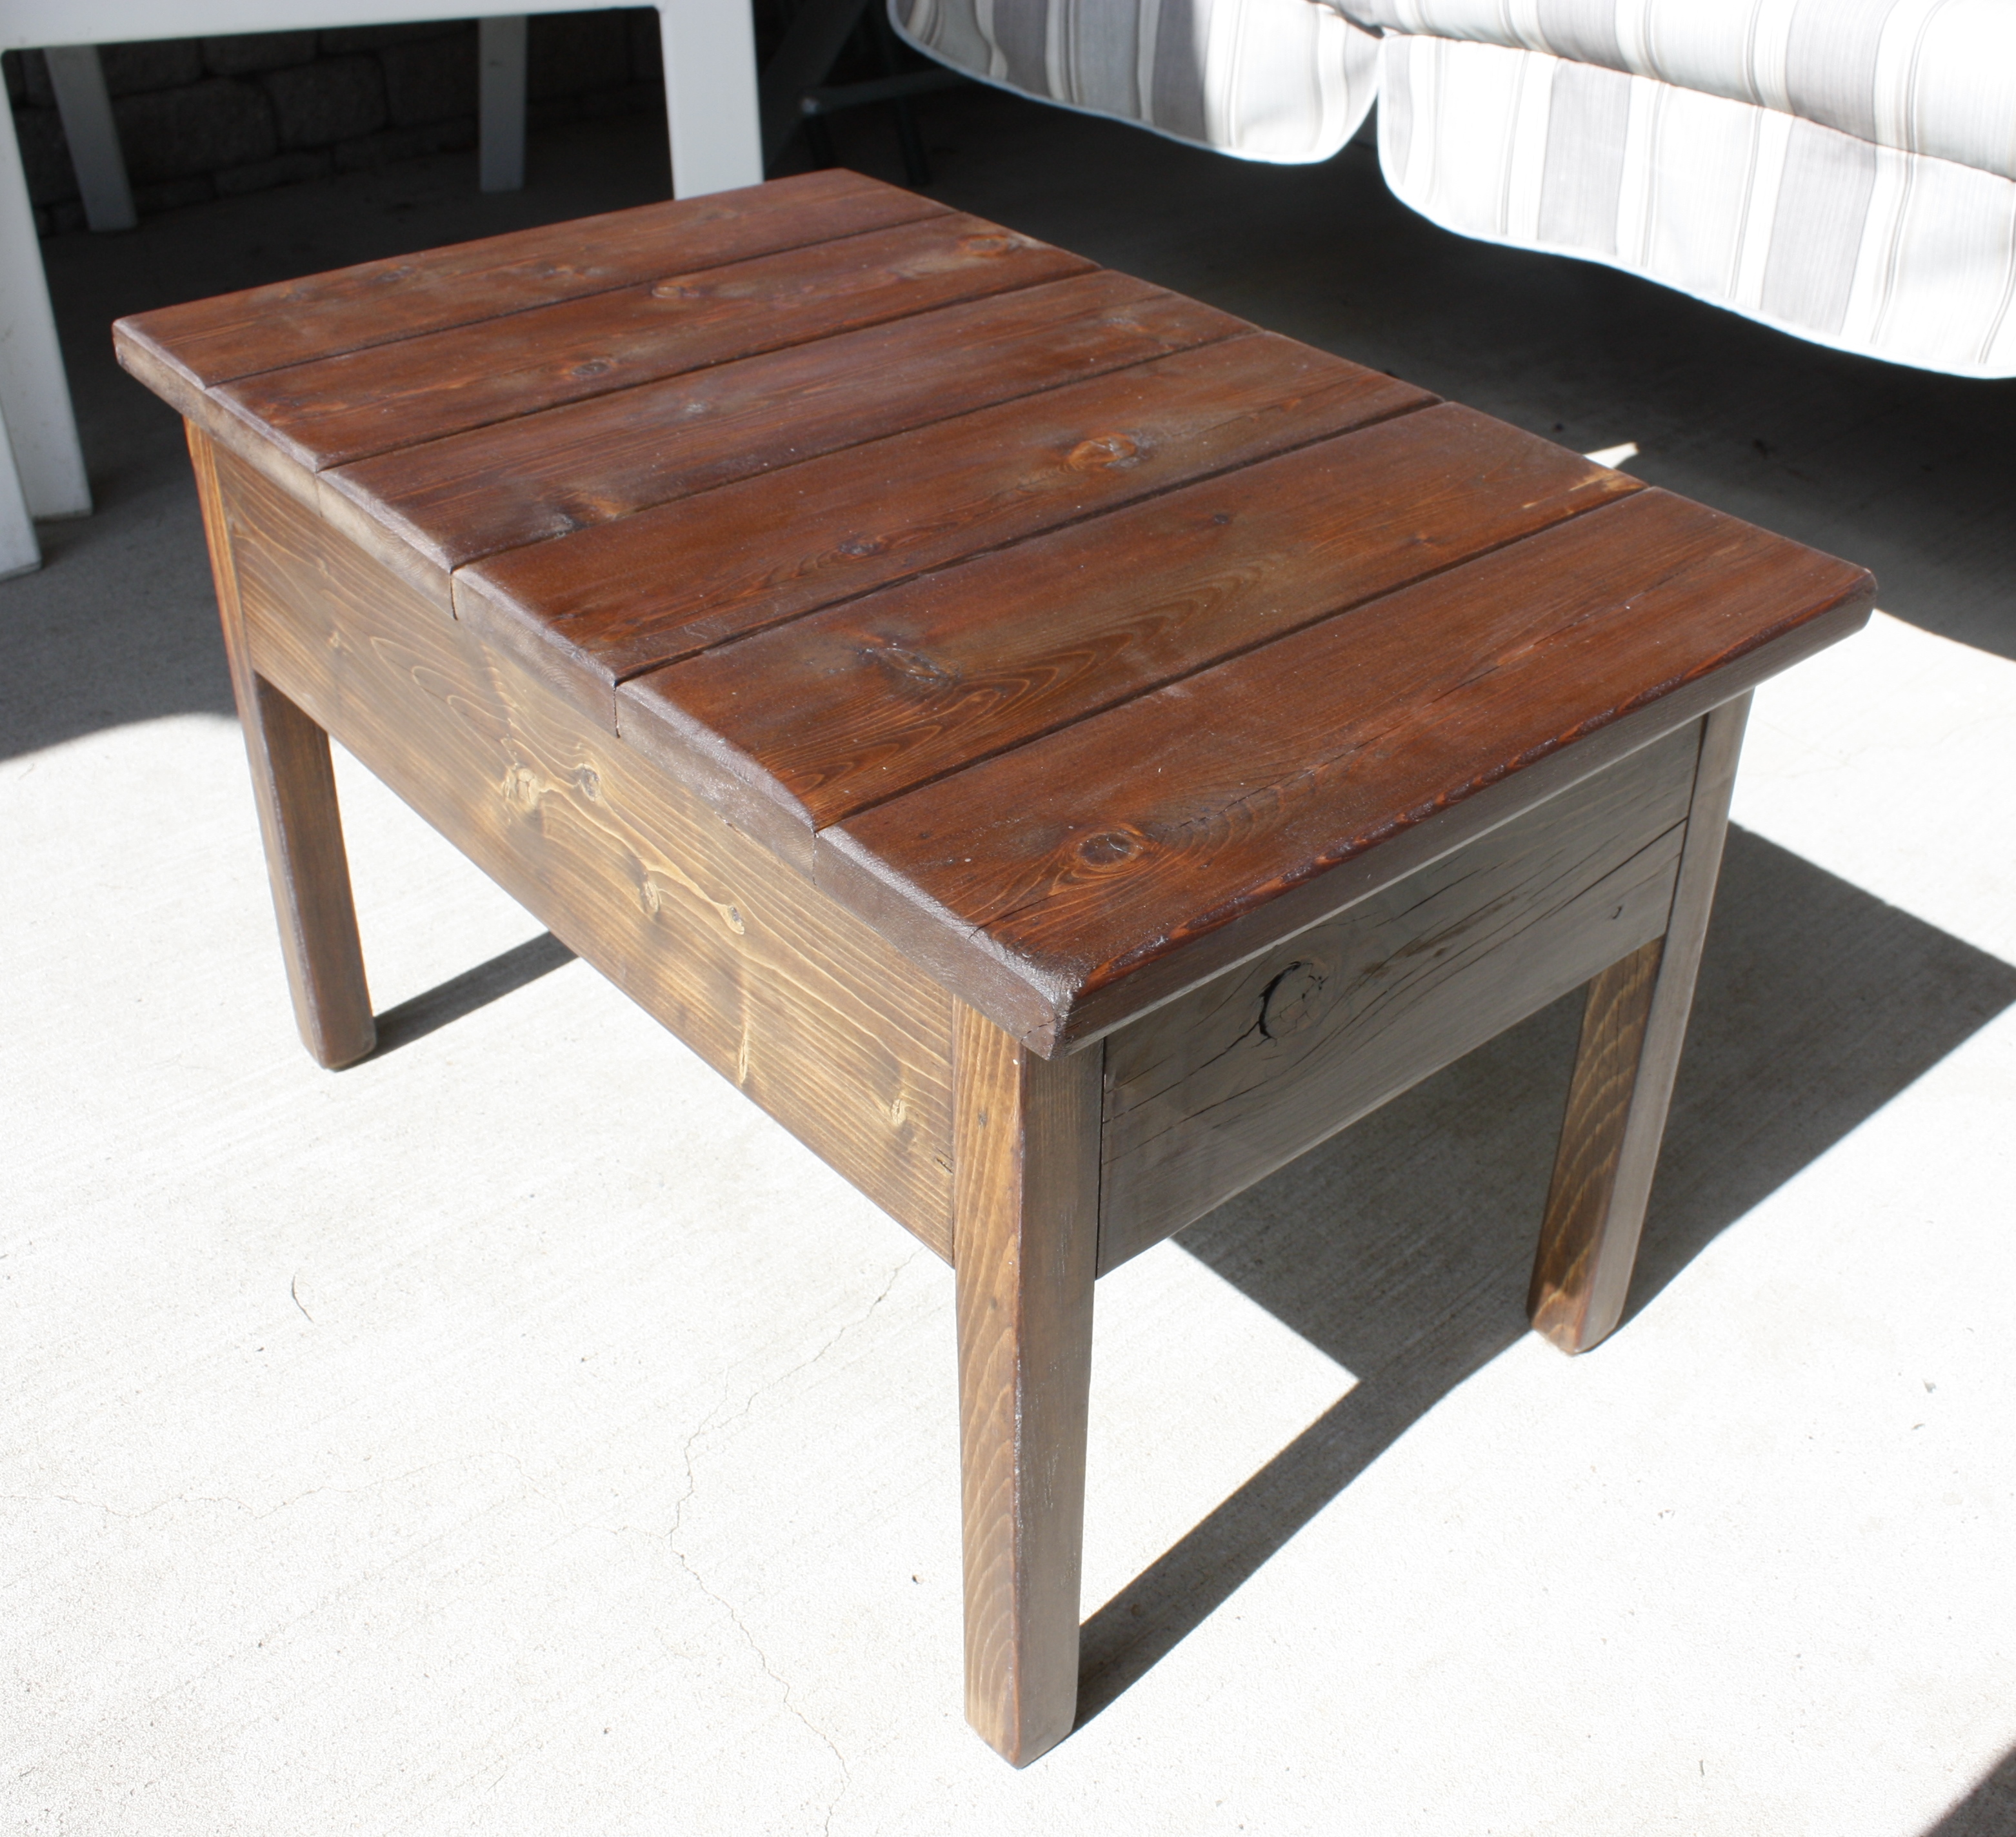
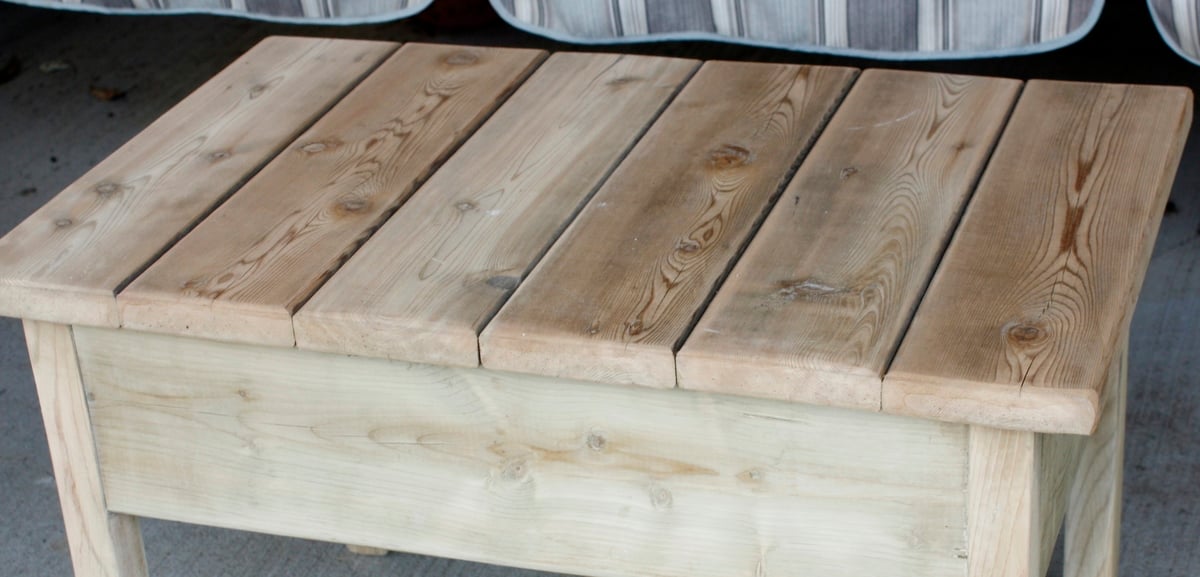
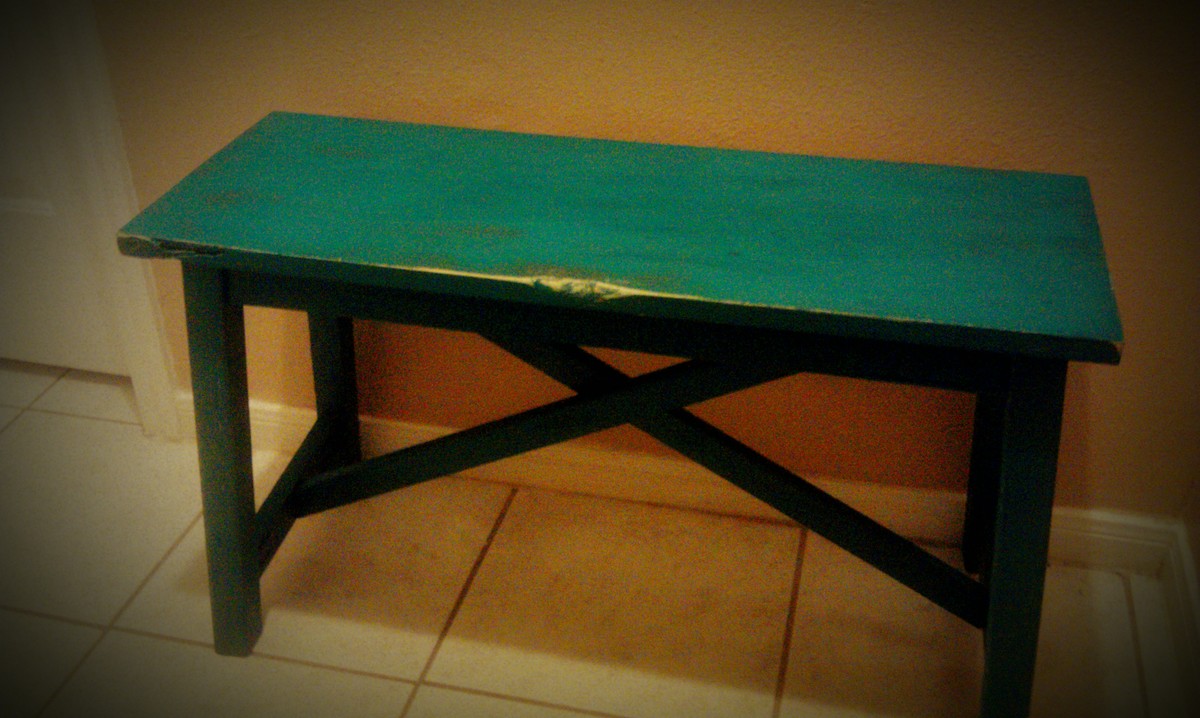
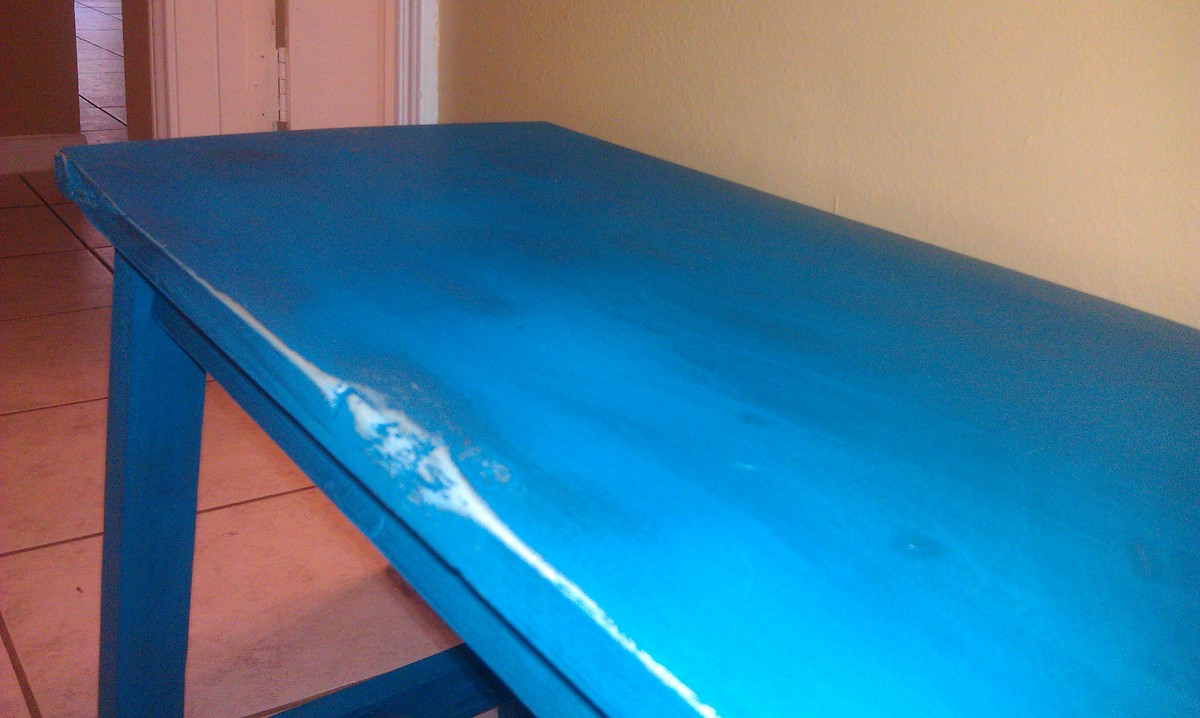
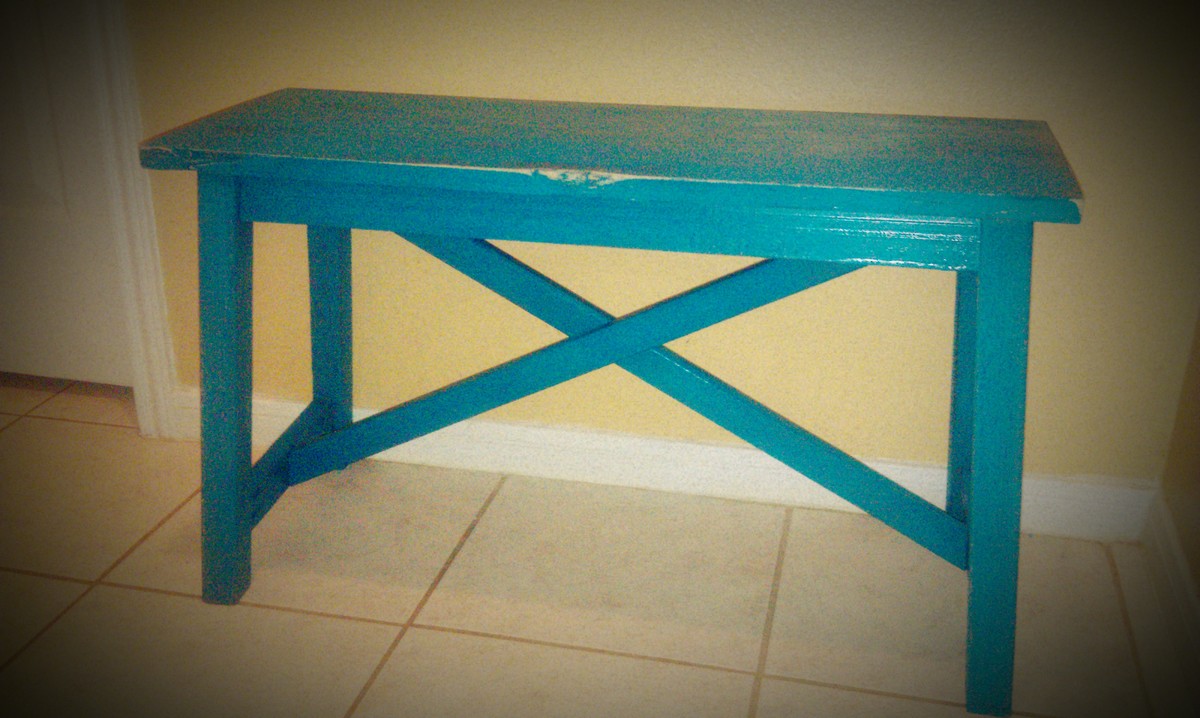
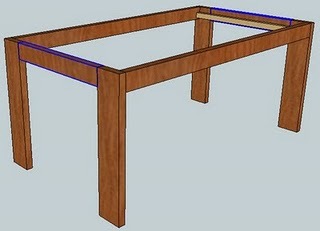
Another Rustic X Coffee Table
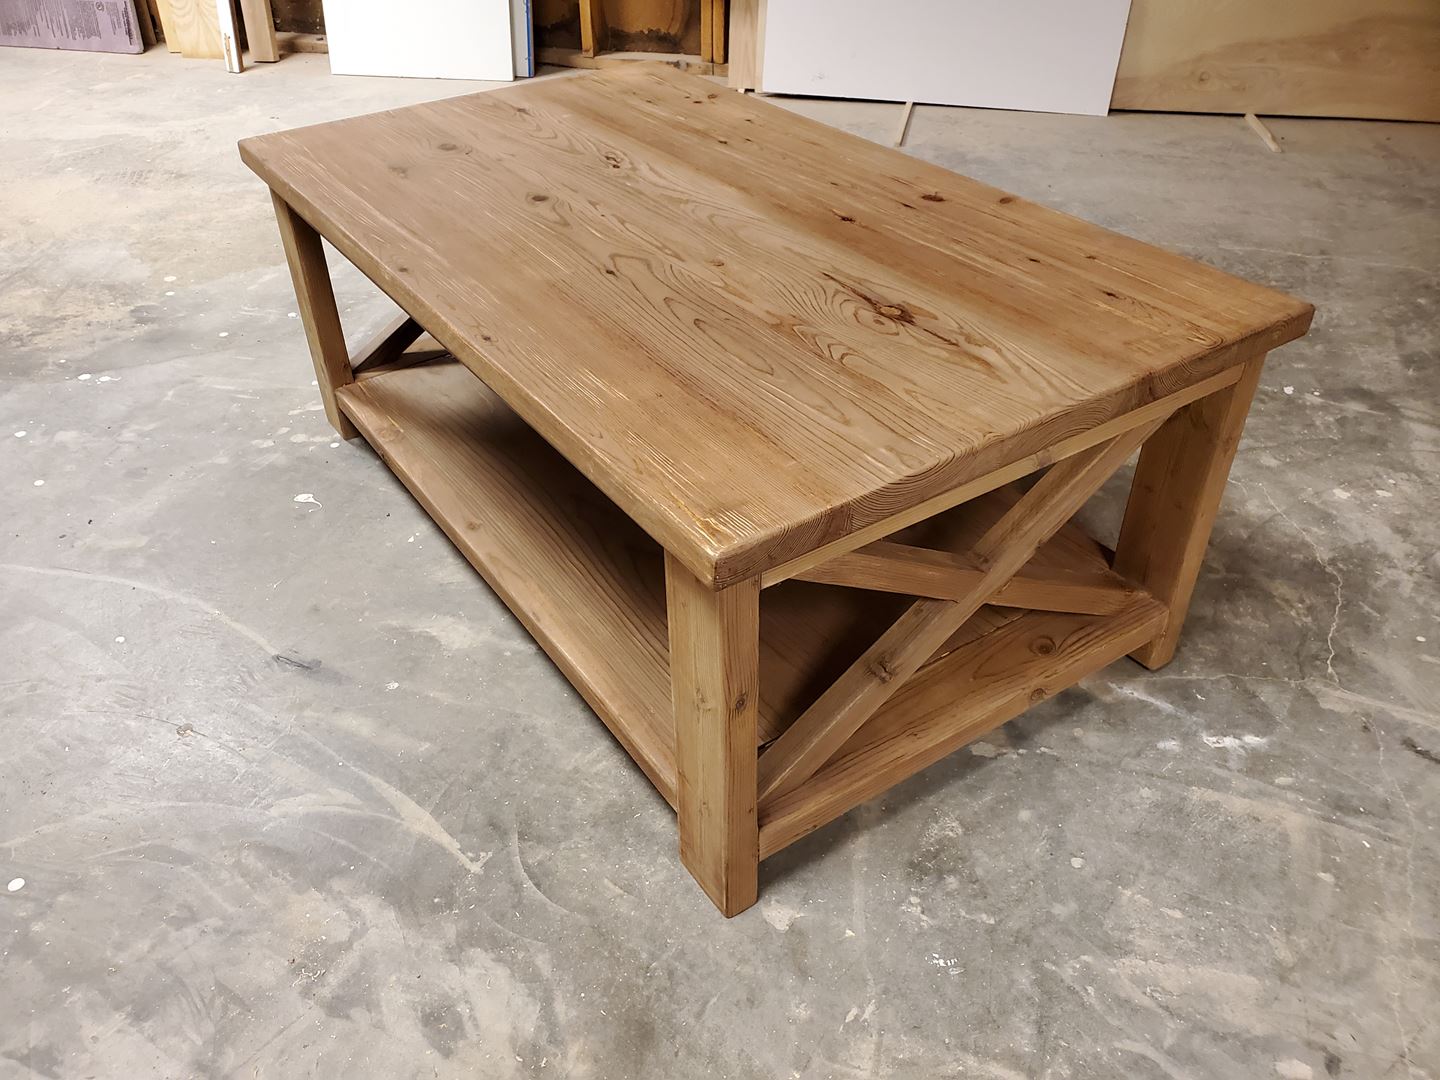
My first coffee table and I'm happy with the results. I certainly learned alot about woodworking which was part of the goal. More details on my blog: http://jdfinley.com/a-table-with-coffee/ Thanks for the neat designs Ana!
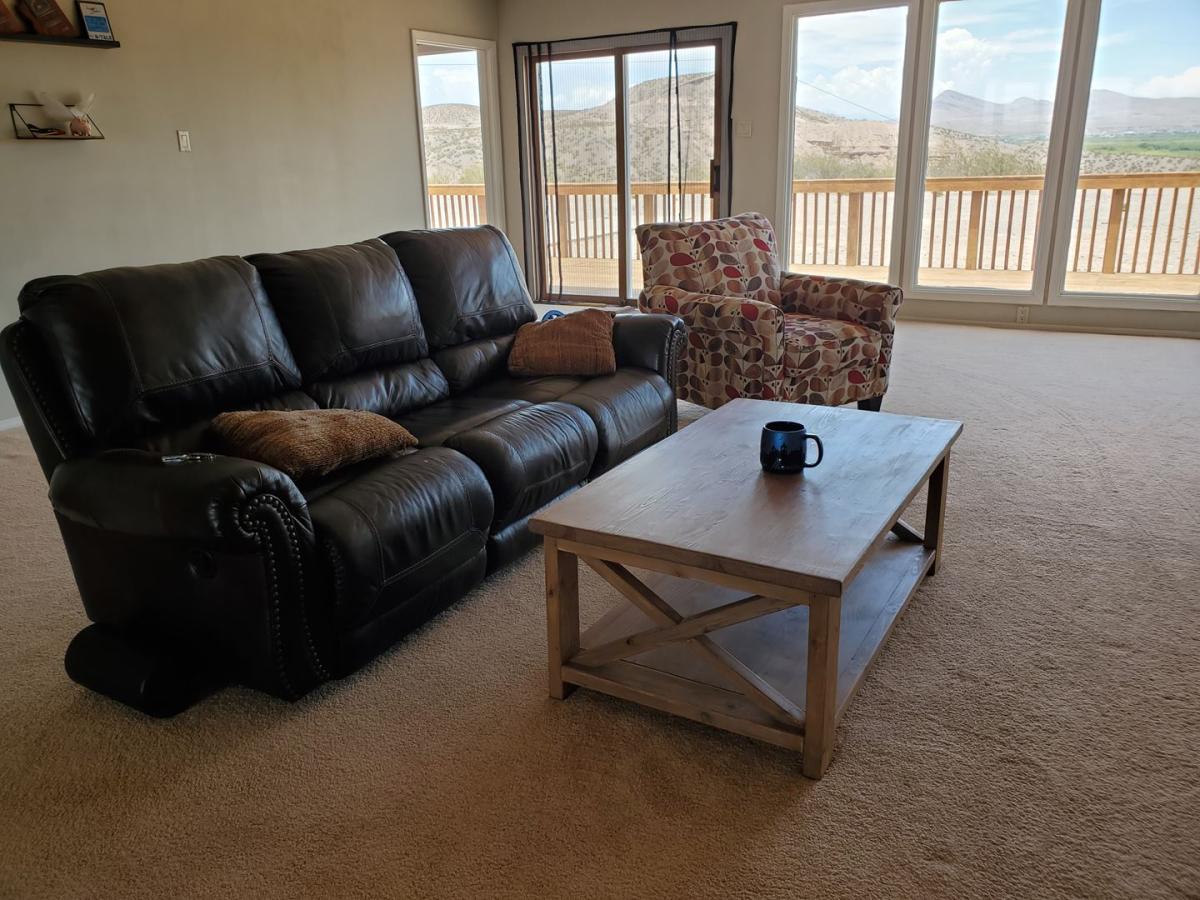
Built from Plan(s)
Comments
Sun, 06/26/2022 - 19:25
Amazing first project!
Way to go, this looks fantastic, can't wait to see your next project!
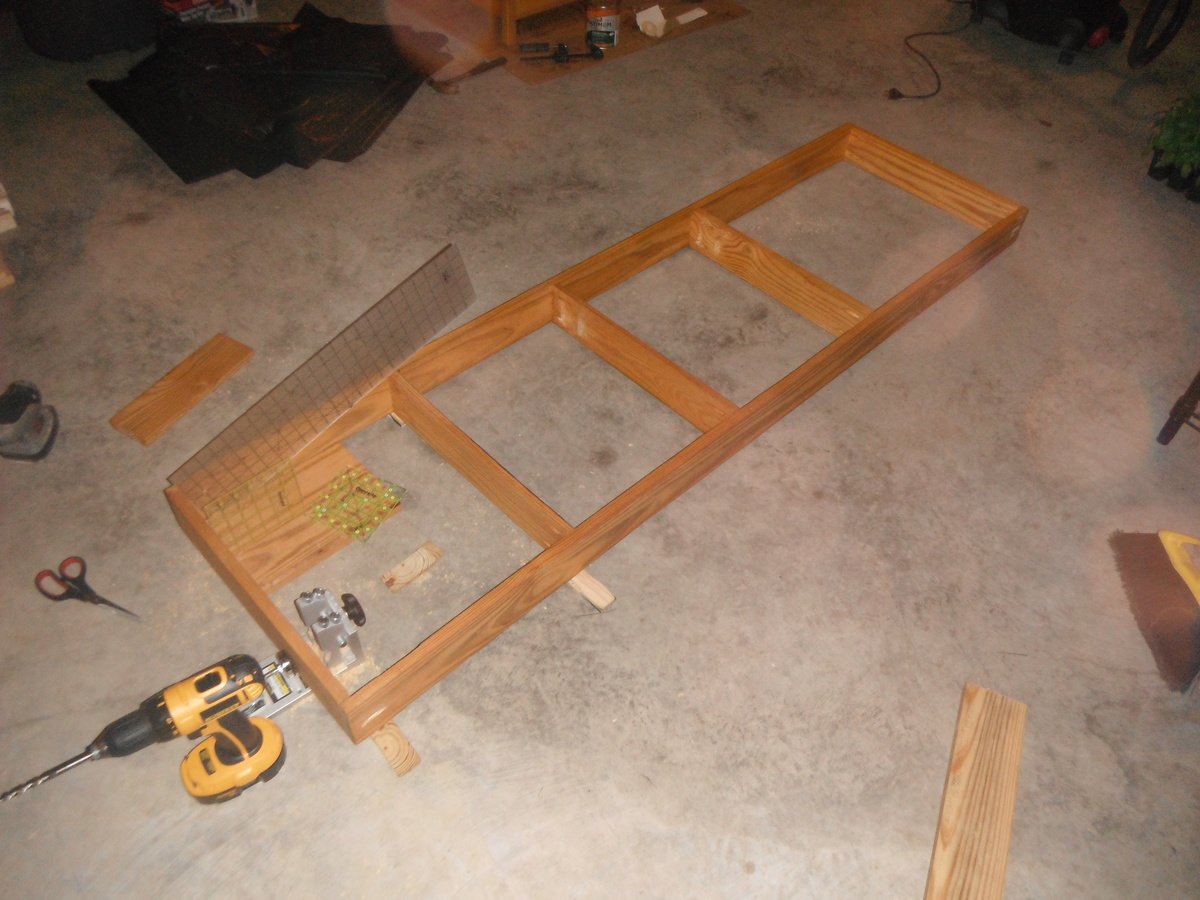
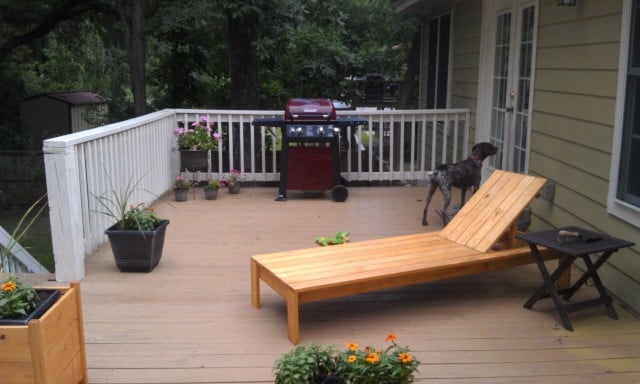
Lounger
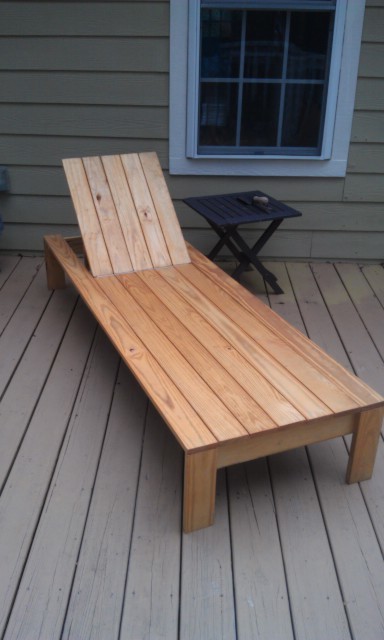
This was my 2nd wood working project. I found it was nice to have a 2nd set of hands to line up the top boards and put on the hinges. I did use a piano hinge for the back like another poster mentioned. It is smaller (not as thick) and helps keep the boards all even on the end when the back is lowered.
I really like the look of this lounger. I was worried that the boards on the edges would need more support, but they seem sturdy enough. If I notice them sagging later or starting to move, I will put some braces underneath.
Built from Plan(s)
Estimated Cost
$60.00
Estimated Time Investment
Weekend Project (10-20 Hours)
Finish Used
Olympic Maximum Stain + Sealant - Cedar Natural Tone
Recommended Skill Level
Intermediate
Outdoor deck furniture
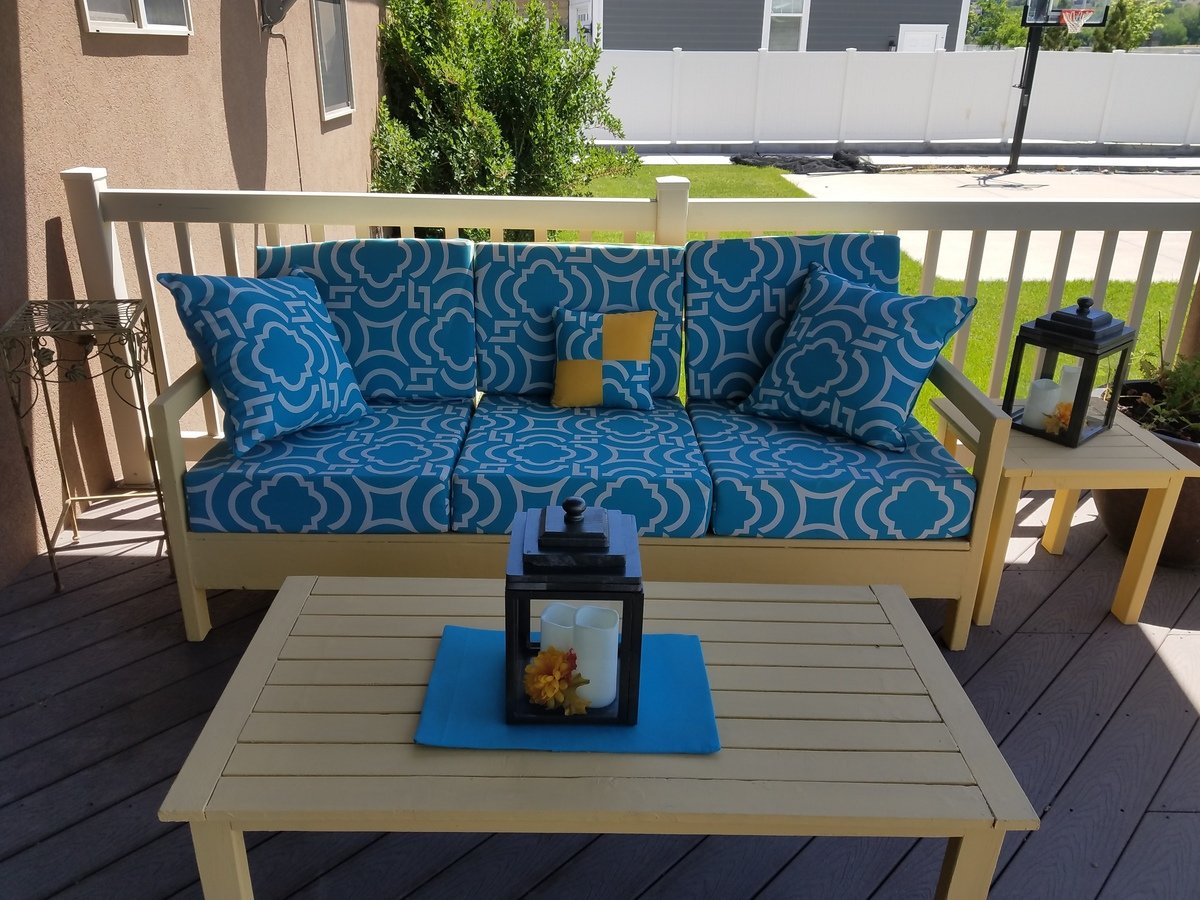
Thanks Ana for the great, easy plans!
Note: I used an exterior deck paint to paint this furniture. Although it has a rough texture, it doesn't bother us because of the cushions. Very easy to spray off, and has been through two seasons with no chipping or discoloration. Yay for less refinishing time and effort!
Built from Plan(s)
Estimated Time Investment
Weekend Project (10-20 Hours)
Finish Used
Outdoor deck paint from Home Depot
Recommended Skill Level
Beginner
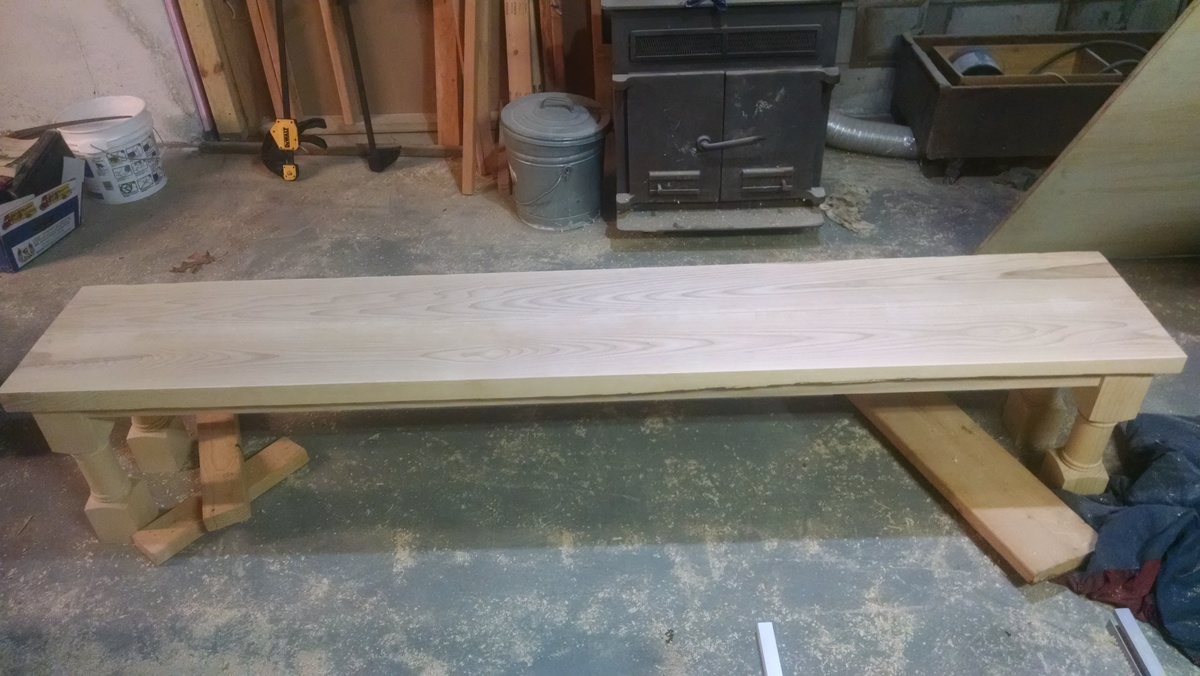
rustic bench
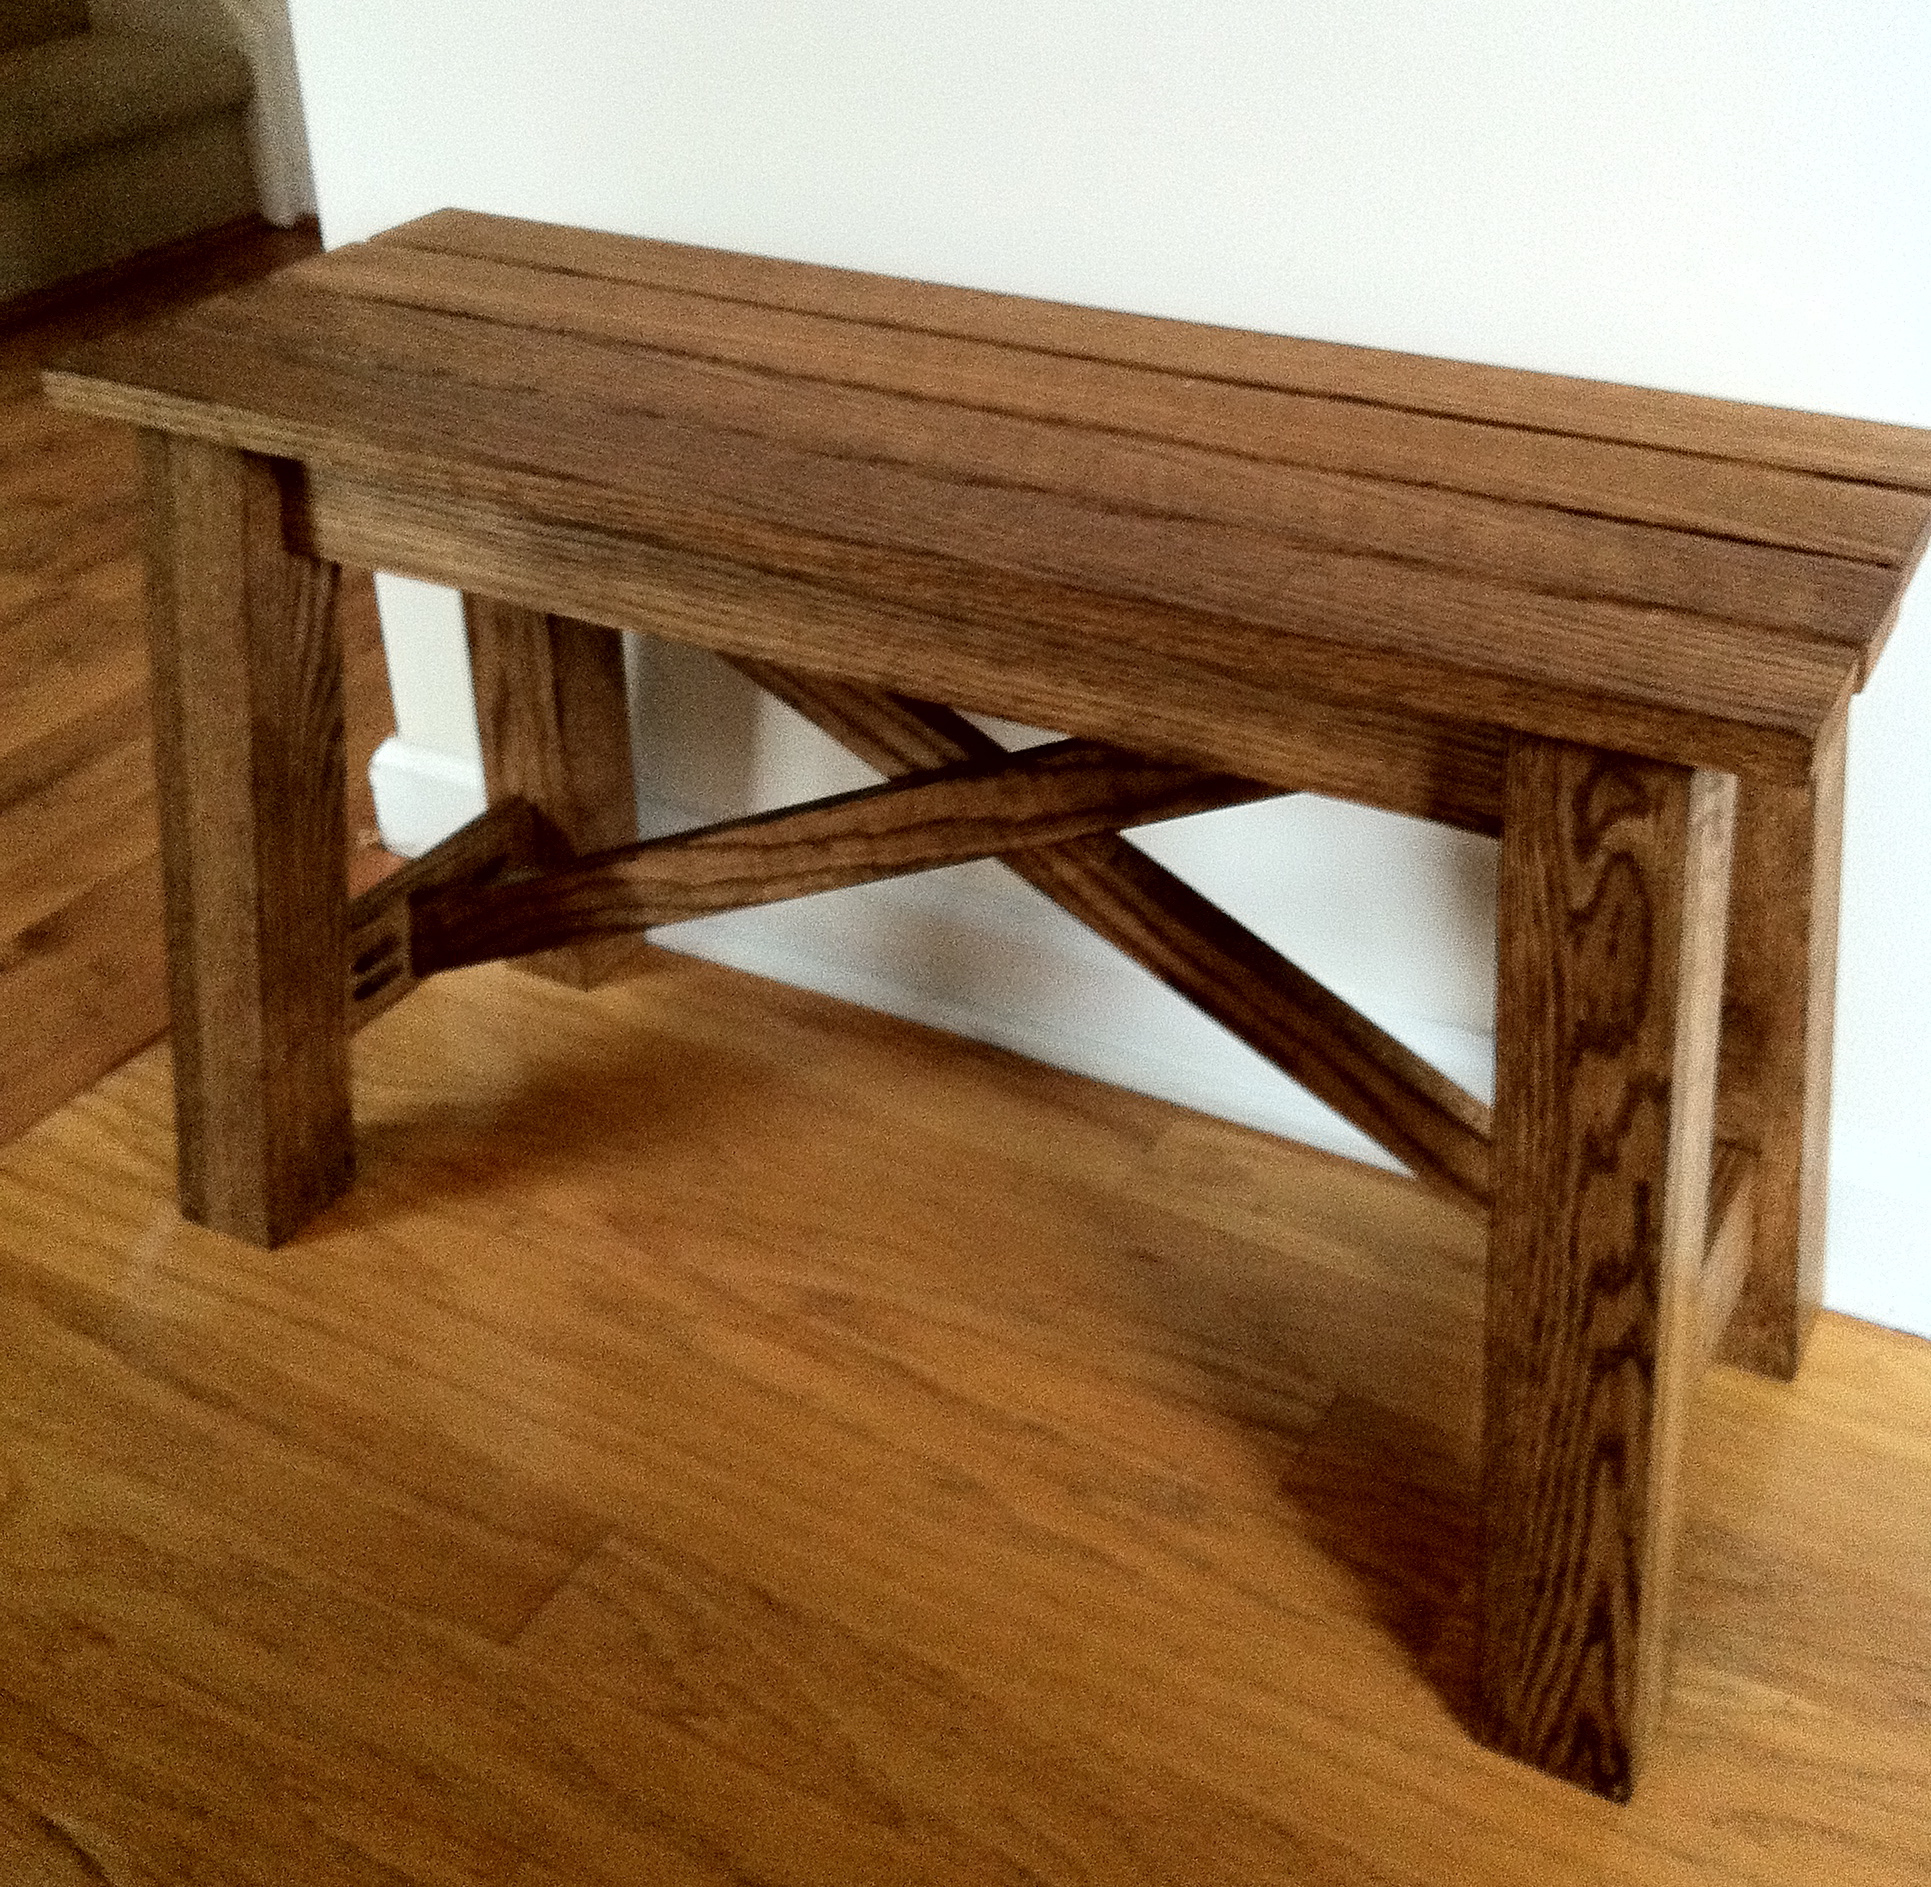
I made a few small changes to the plans. used 3x3's for the legs, and 1x3 slats for the top (instead of solid 1x12). used 1x3 for the aprons and the base and made them 2 inches shorter to account for the 3x3 legs. I used pocket hole screws for everything.
Built from Plan(s)
Estimated Cost
about 45 dollars. the oak was expensive (especially the 3x3's).
Estimated Time Investment
Afternoon Project (3-6 Hours)
Finish Used
dark walnut
Recommended Skill Level
Beginner
Mini Coffee Table
This little table is built entirely from scraps! My husband and I needed a table near the porch swing to set our coffee on and put our feet up at the end of the day, and it had to be small because we don't have a lot of space on the patio. It didn't cost a penny to build, and it's just the right size!
More details about how I built it can be found on the link.
Estimated Cost
$0
Estimated Time Investment
Afternoon Project (3-6 Hours)
Finish Used
Two coats of Minwax stain in Early American followed by two coats of Varathane Diamond Coat clear finish in Satin.
Recommended Skill Level
Beginner
Comments

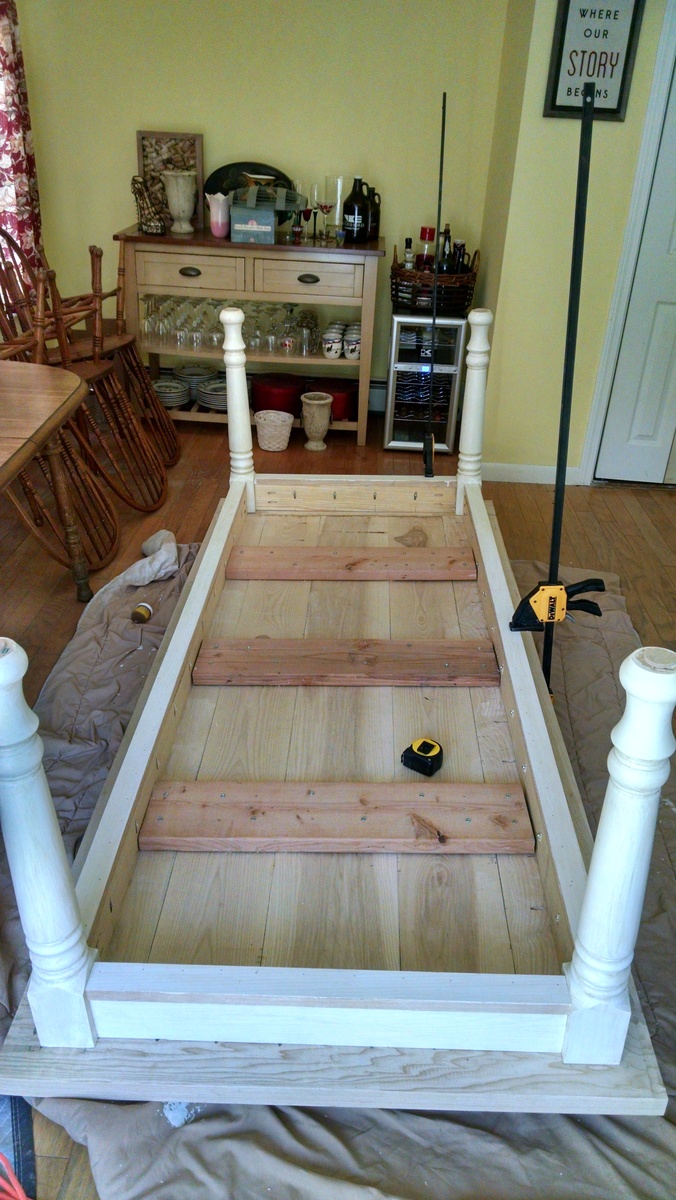
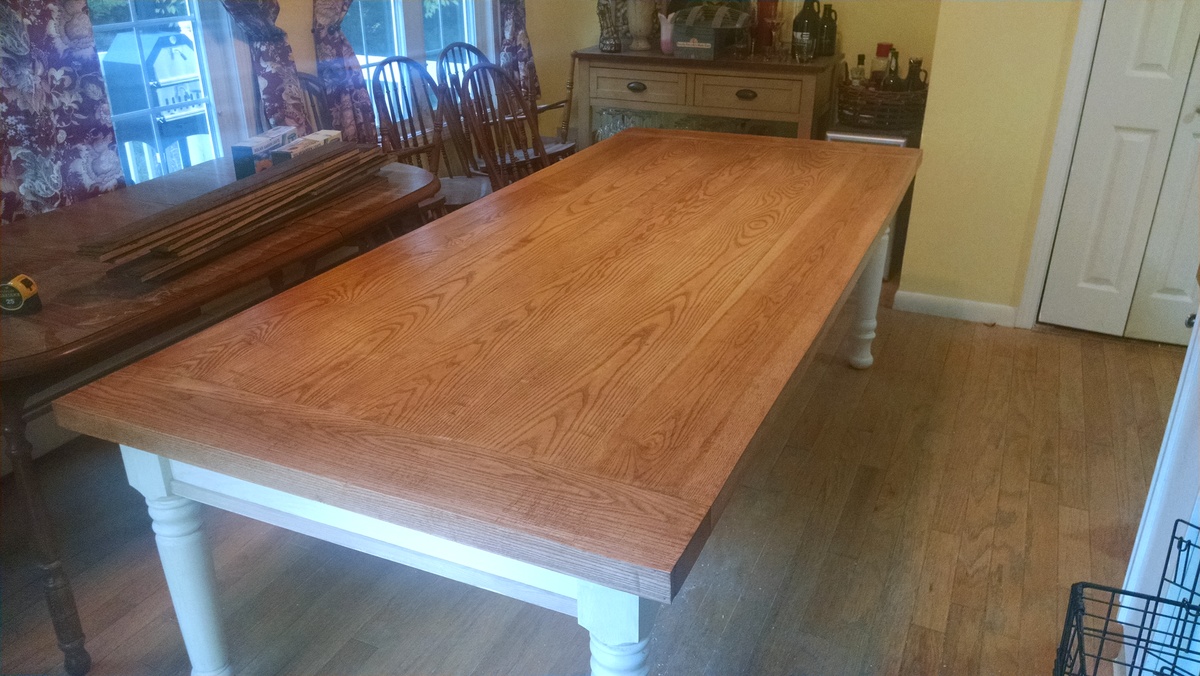
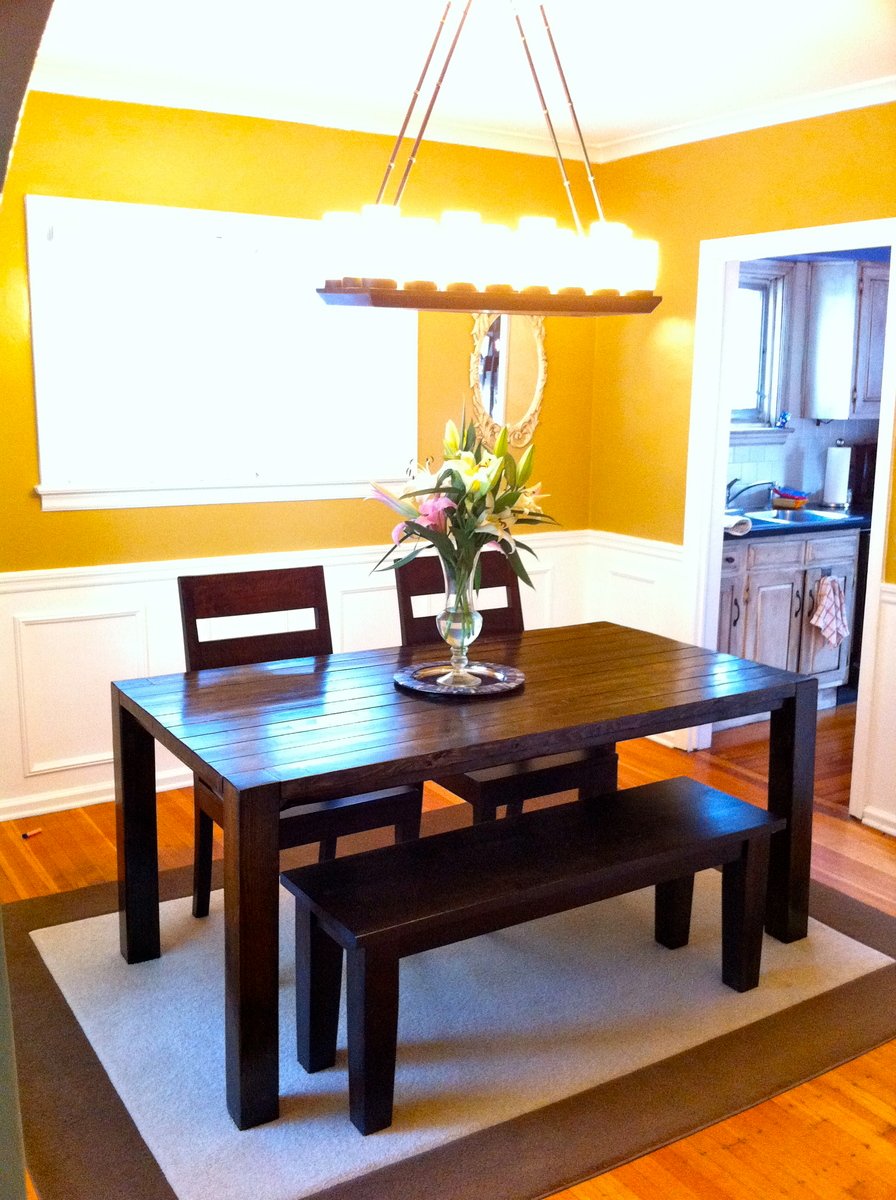
Farmhouse Dining Room Table and Bench
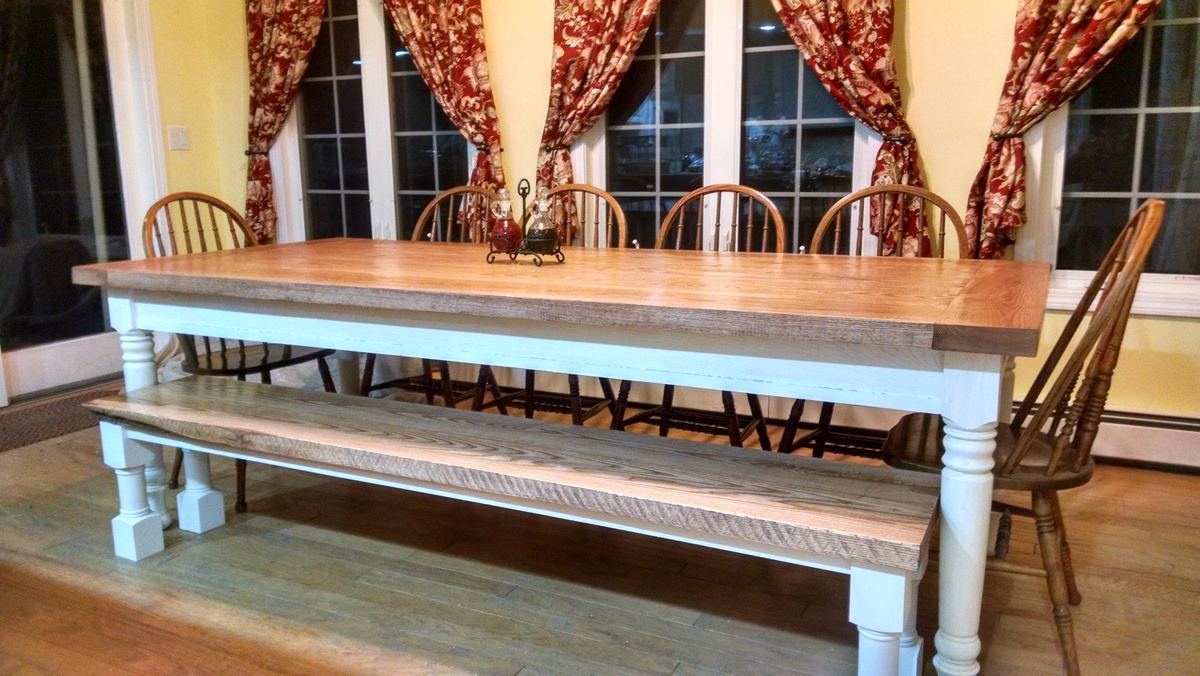
This table is massive with the top being 96" x 42" and 2" thick and sitting 31" high. The table can be done in a weekend and the bench was assembled the same way as the table out of scraps and was finished in about 4 hrs.
Built from Plan(s)
Estimated Cost
$700
Estimated Time Investment
Weekend Project (10-20 Hours)
Finish Used
Miniwax Cherry for the tops and white paint with faux glaze for the distressed aprons and legs.
Recommended Skill Level
Intermediate
Comments
Sun, 10/11/2015 - 11:17
Absolutely stunning!
That is one beautiful set up you have there, thanks for sharing!
High chair

Thanks so much for the plans. Built it for my visiting nephew. Had a hard time with wood splitting, definitely predrill once you have the pocket holes lined up. I finished with food grade mineral oil, may go over it with beeswax.
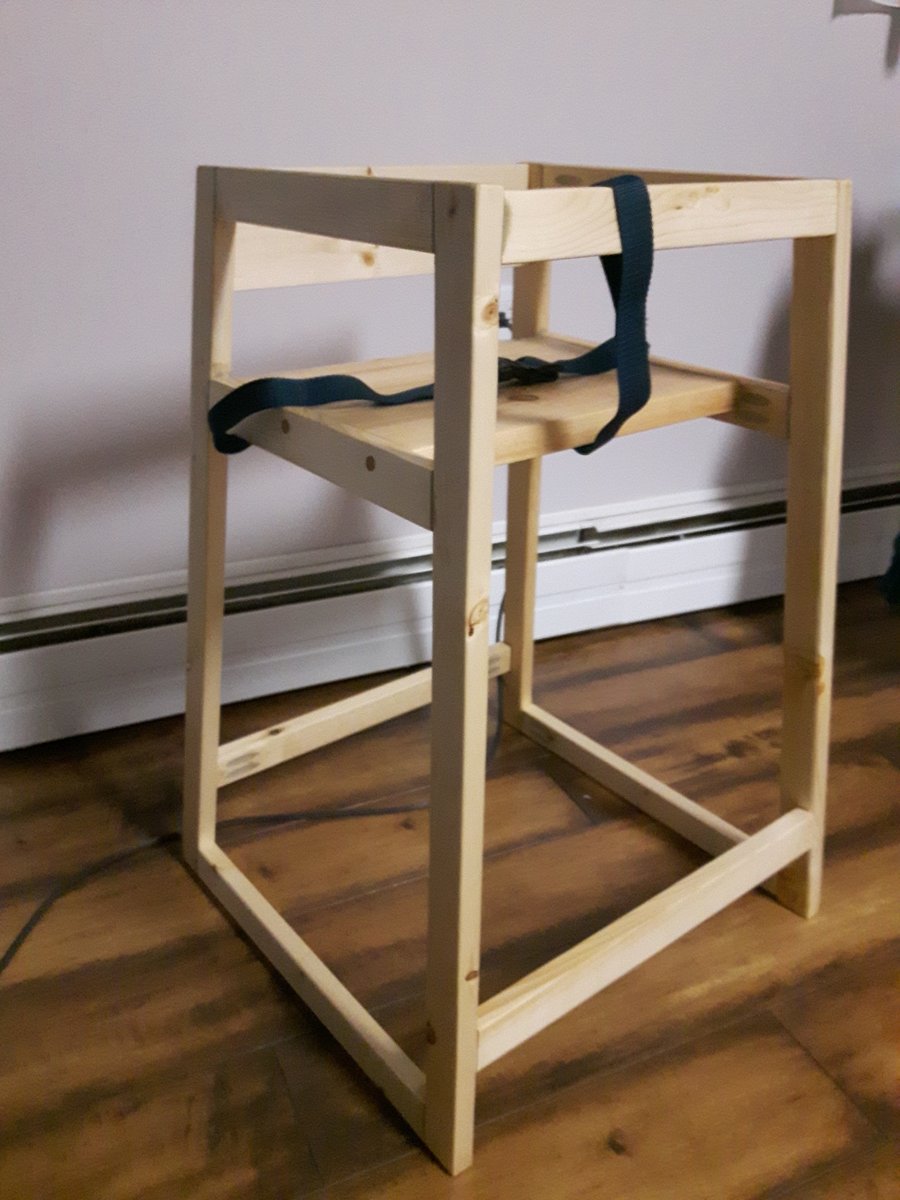
Built from Plan(s)
Estimated Cost
$15
Estimated Time Investment
Afternoon Project (3-6 Hours)
Finish Used
Mineral oil
Recommended Skill Level
Beginner
Fire Wood Shed
This is smaller version of Ana’s Firewood shed. We just need to load it with wood! It’s about 4 feet long, 2ft wide, and 5.5ft high. I so appreciate all the great plans available to the public! Thanks.
Built from Plan(s)
Comments
The Waiting Bench
My first shot at the "easy" rustic X bench...not so easy that X.
Built from Plan(s)
Estimated Cost
again....free. I have a cousin that brings me the remains of HUGE shipping crates and pallets :)
Estimated Time Investment
An Hour or Two (0-2 Hours)
Recommended Skill Level
Beginner
Comments
Turned leg farmhouse table by Craig Martinson

Turned leg farmhouse table from Ana White's plans. The legs are from Osborne Wood and lumber is from a big box store.
It took 2.5 hours to build, including cuts and drilling pocket holes with a friend's help. It took about 30 minutes to stain plus time to wait for the stain to set before wiping it down. I list this as a weekend project because of the time it takes to cure the stain (1 coat) and for each coat (3, total) of the acrylic to dry.
Built from Plan(s)
Estimated Cost
$400
Estimated Time Investment
Weekend Project (10-20 Hours)
Finish Used
I finished the table with Minwax Dark Walnut stain (it photographed redder than it is in actuality--it's a nice warm brown) and 3 coats of Minwax Polycrylic.
Recommended Skill Level
Beginner
Comments
Sawhorse Desk Bases
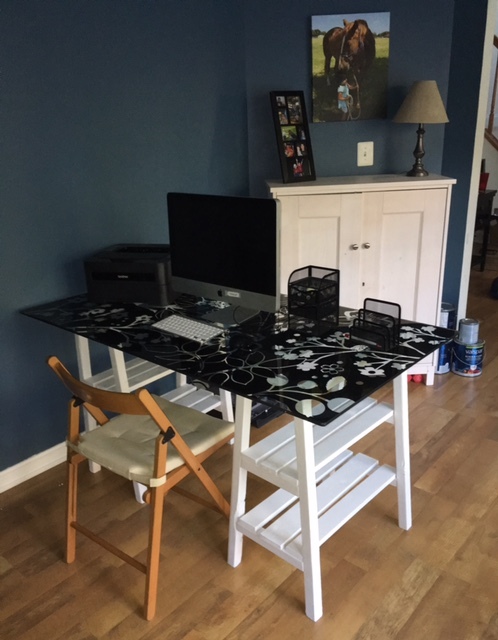
I needed new bases for my glasstop desk. I found the Sawhorse Leg Storage Desk and thought it would be perfect! I am a beginner and this was my first time cutting an angle like 5 degrees parallel and not paralell. The pictures in the instructions really helped me out with that. The units came together pretty easy and I decided to plank the shelves instead of using plywood (because I had scraps on hand and wanted to use those rather than cut plywood). I am a beginner and am still a little weary of using my circular saw too much, so planking the shelves was a better fit for my skill level. I think it turned out really good. I used white satin spray paint and got small clear plastic "bumpers" to pad the top where the glass sits on the bases.
Built from Plan(s)
Estimated Cost
$20-$25
Estimated Time Investment
Afternoon Project (3-6 Hours)
Finish Used
Rust-o-leum White Satin Spray Paint
Recommended Skill Level
Beginner
Farmhouse Bedside Table 11.04.18
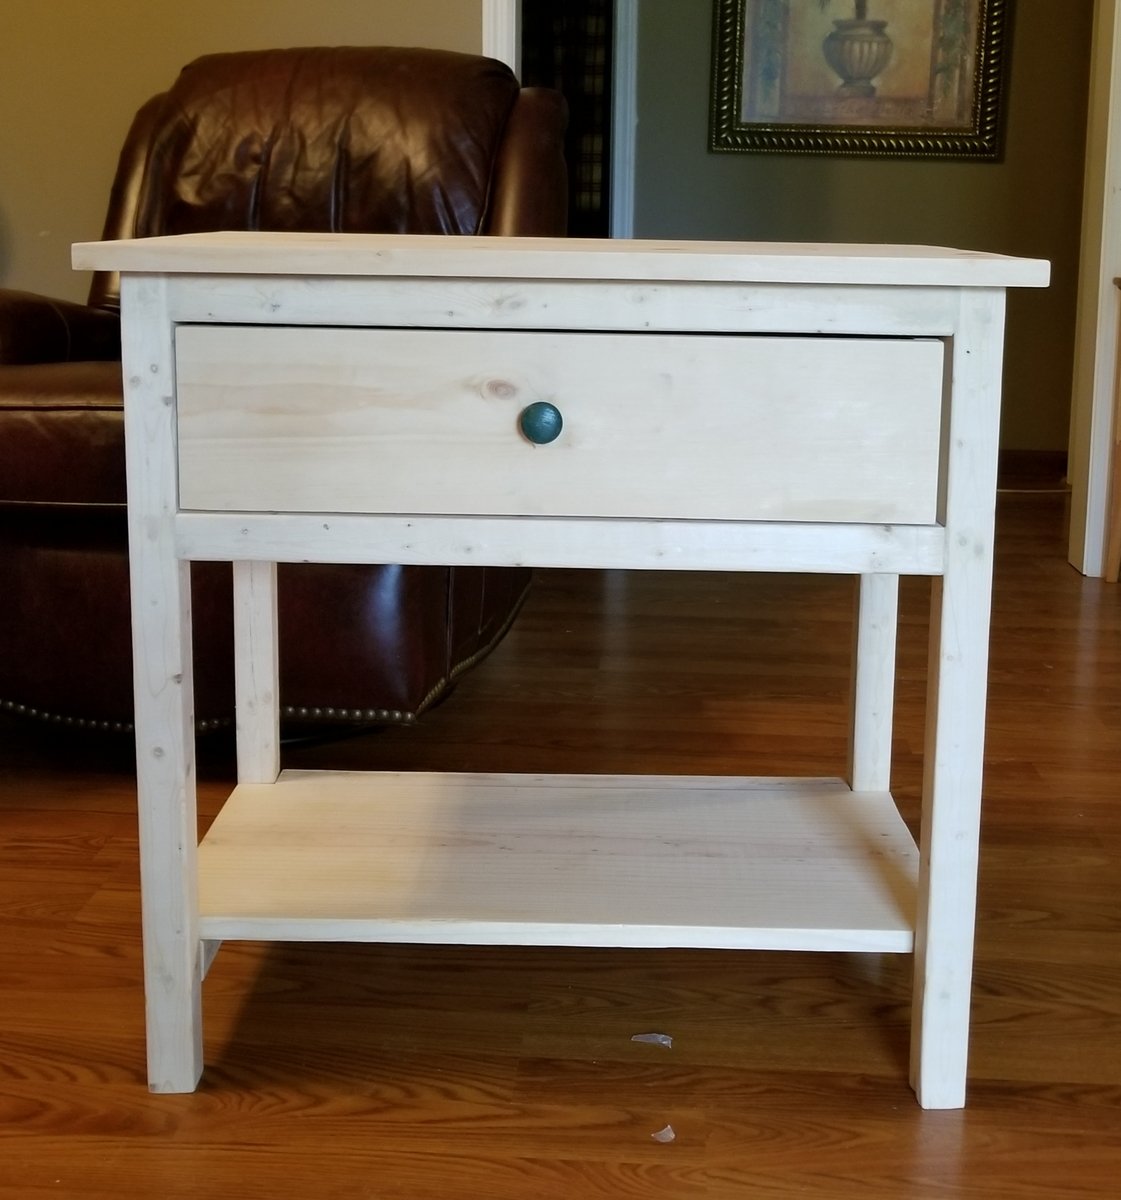
I built this for my son and his fiance. I am leaving the staining up to my son. It is only the 3rd or 4th piece of furniture I have built. I still have to build the match for it. I'm sure it will be much better, since I have learned from my mistakes with the first one.
Comments
Board and Batten
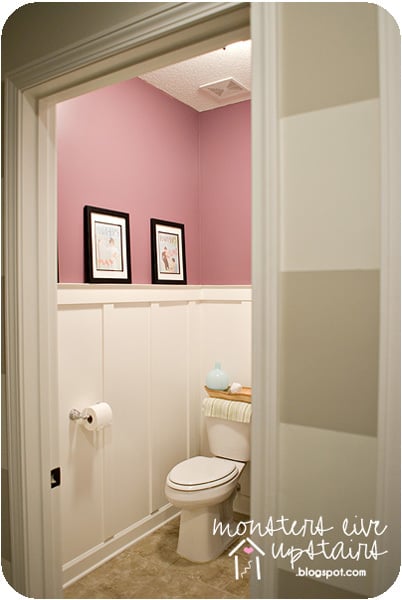
Board and batten makes such a huge difference in any room for very little money and I knew this is just what we needed for our very small but very tall half bathroom. We did have to modify our boards at the bottom and cut them at an angle to meet our baseboards but it is still perfect. Such an easy way to dramatically change a room.
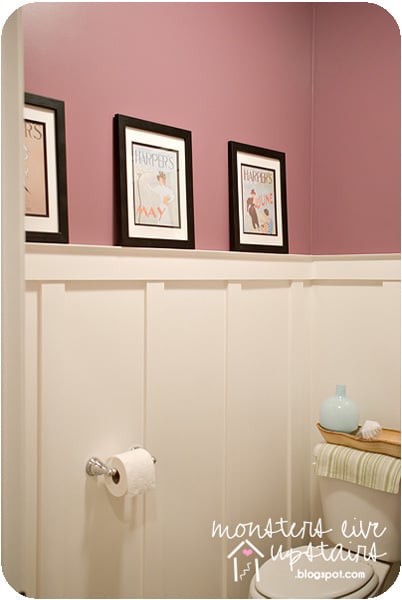
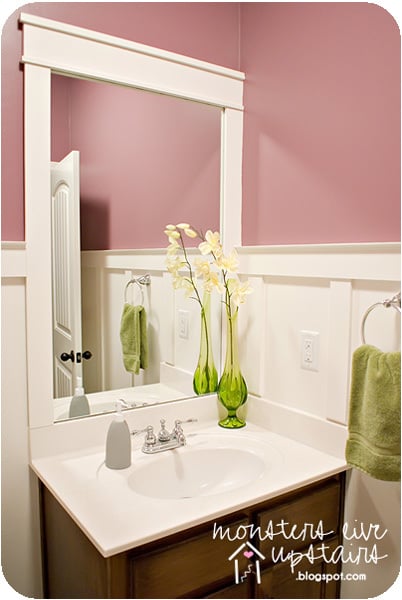
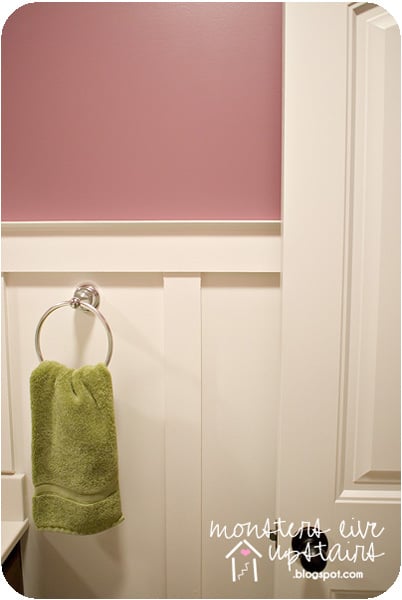
Built from Plan(s)
Estimated Cost
$60
Estimated Time Investment
Afternoon Project (3-6 Hours)
Finish Used
Just a semi-gloss white to match the rest of our trim and doors in the house. The walls are Sherwin Williams Plum Dandy
Recommended Skill Level
Starter Project
Comments

Sat, 08/06/2011 - 13:41
What a beautiful
What a beautiful transformation! I went to your blog and loved how you've put aside a little money each month to improve your home. Beautiful photos too!
Sat, 08/06/2011 - 13:57
Thank you, Ana! We wouldn't
Thank you, Ana! We wouldn't be able to stay on that budget if it wasn't for you and all of your ideas! You've really changed how things are done at our house. We no longer "have to buy it right now"...but take our time to see if we can do it on our own and make it ours. That is a very powerful thing!

Fri, 08/12/2011 - 04:41
Love the look
My husband and I just had to build a few walls to cover in a new furnace and duct work. Neither of us wanted to deal with the mud, tape, and sanding that would surely follow. So I suggested that we do a paneling like yours. I used furring strips vs. typical pine or moulding. It looks great!
Thu, 08/18/2011 - 13:47
Thank you so much!
I loved the bathroom so I checked out your blog, We have a mudroom followed by a small bathroom and then a small laundry room. I love your mud room area and the stripes, we are totally going to use your ideas to spruce our place up!
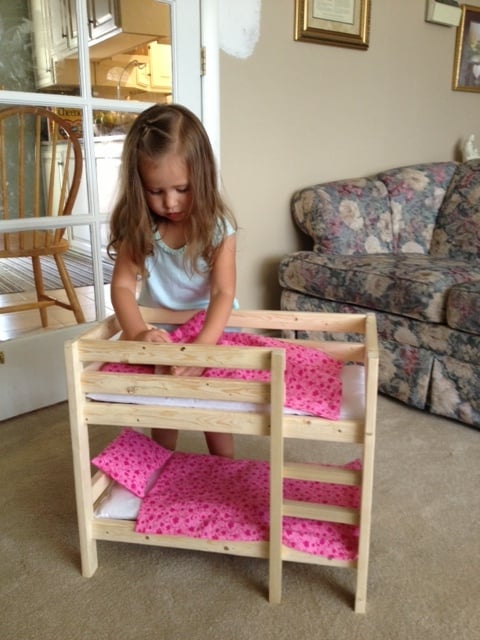
Doll Bunk Bed
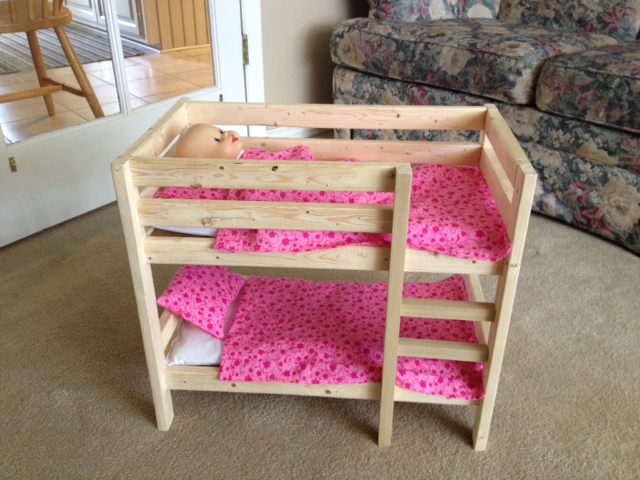
This is my second project. (My first was the canopy doll bed.) It just took a couple of days to get it all cut, put together and sanded. This was my first time with the Kreg Jig and I loved using it. So awesome.
Built from Plan(s)
Estimated Cost
$5 for lumber
Estimated Time Investment
Afternoon Project (3-6 Hours)
Finish Used
Haven't put a finish on it yet...
Recommended Skill Level
Beginner
Mug tree
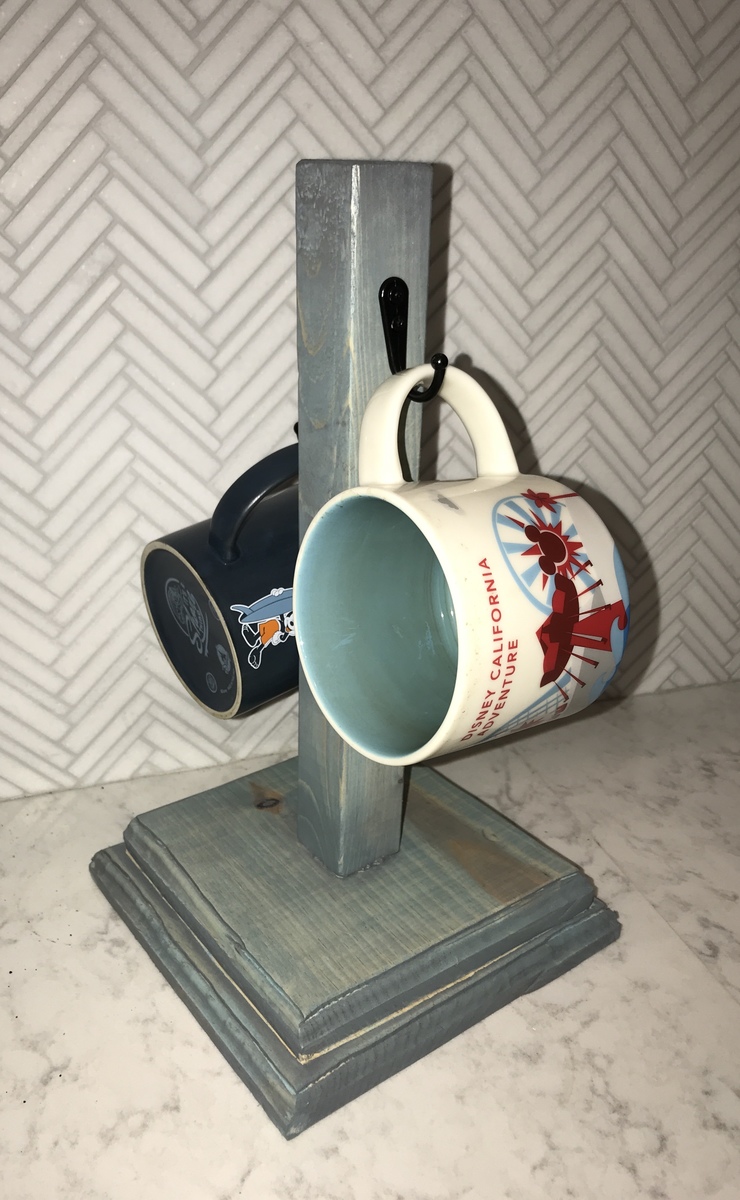
Fun and easy build to use up some scraps and try out some finish techniques and router edging. Not perfect because I was getting the hang of a new router, but perfect low commitment project to practice on. I only did 2 hooks for my needs and preferred not having to knob on top.
Built from Plan(s)
Estimated Cost
$2 for hooks maybe? Everything else I already had on hand.
Estimated Time Investment
An Hour or Two (0-2 Hours)
Finish Used
Vintage aqua stain followed by weathered grey stain and a coat of poly. F
Recommended Skill Level
Starter Project
My very first woodworking project!
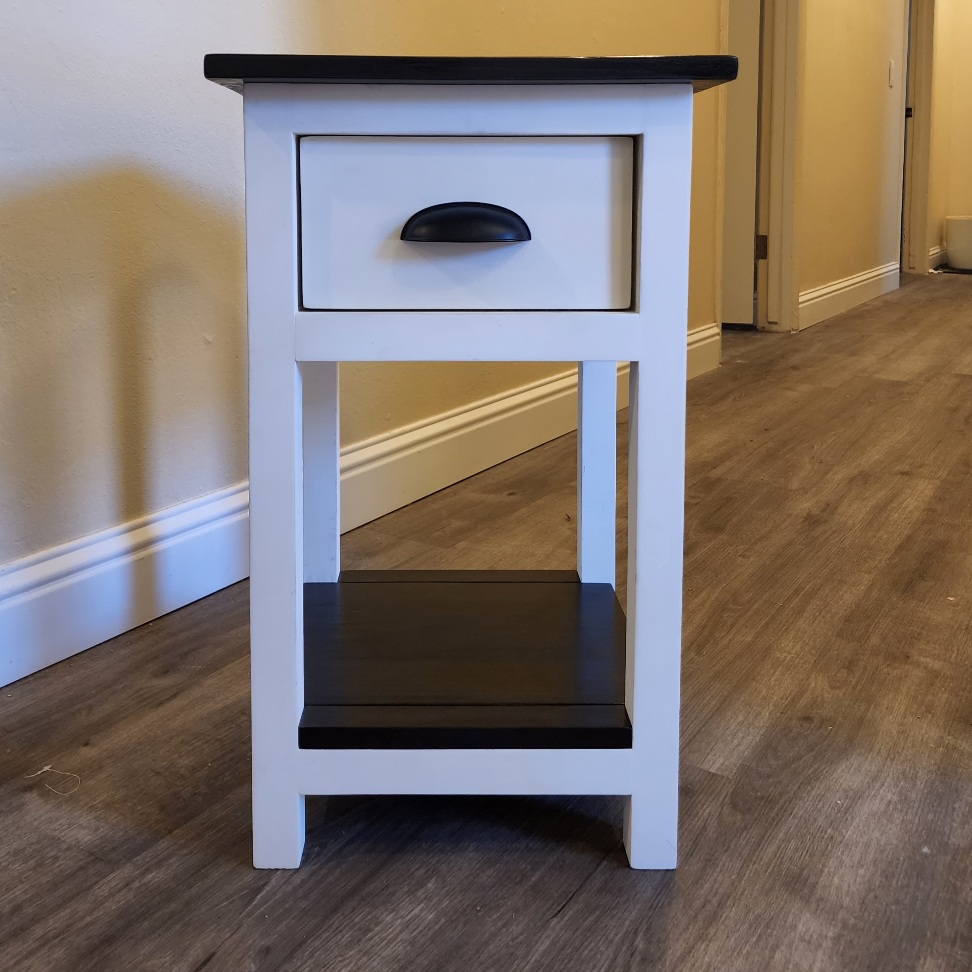
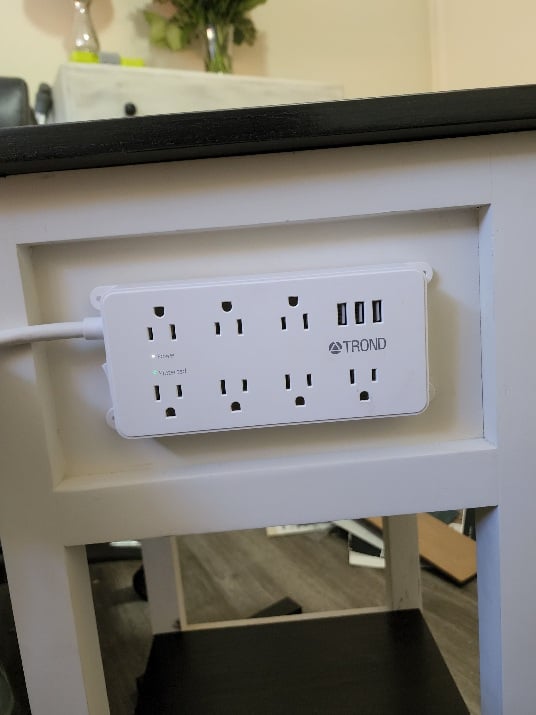
Just bought myself a miter saw and this was my first ever woodworking project... had a lot of fun putting it together. I opted to build the back the same as the sides rather than just putting the piece of plywood as suggested in the plans (and shortened the length of the drawer accordingly), so I could add a surge protector/usb port with extension cord in between the trim boards since the outlet placement in my bed is horrible and requires pulling out the bed from the wall anytime we need to plug something in. Took a bit longer than anticipated, with never having built anything before, but now that I know what I'm doing I expect the 2nd one to go much quicker!
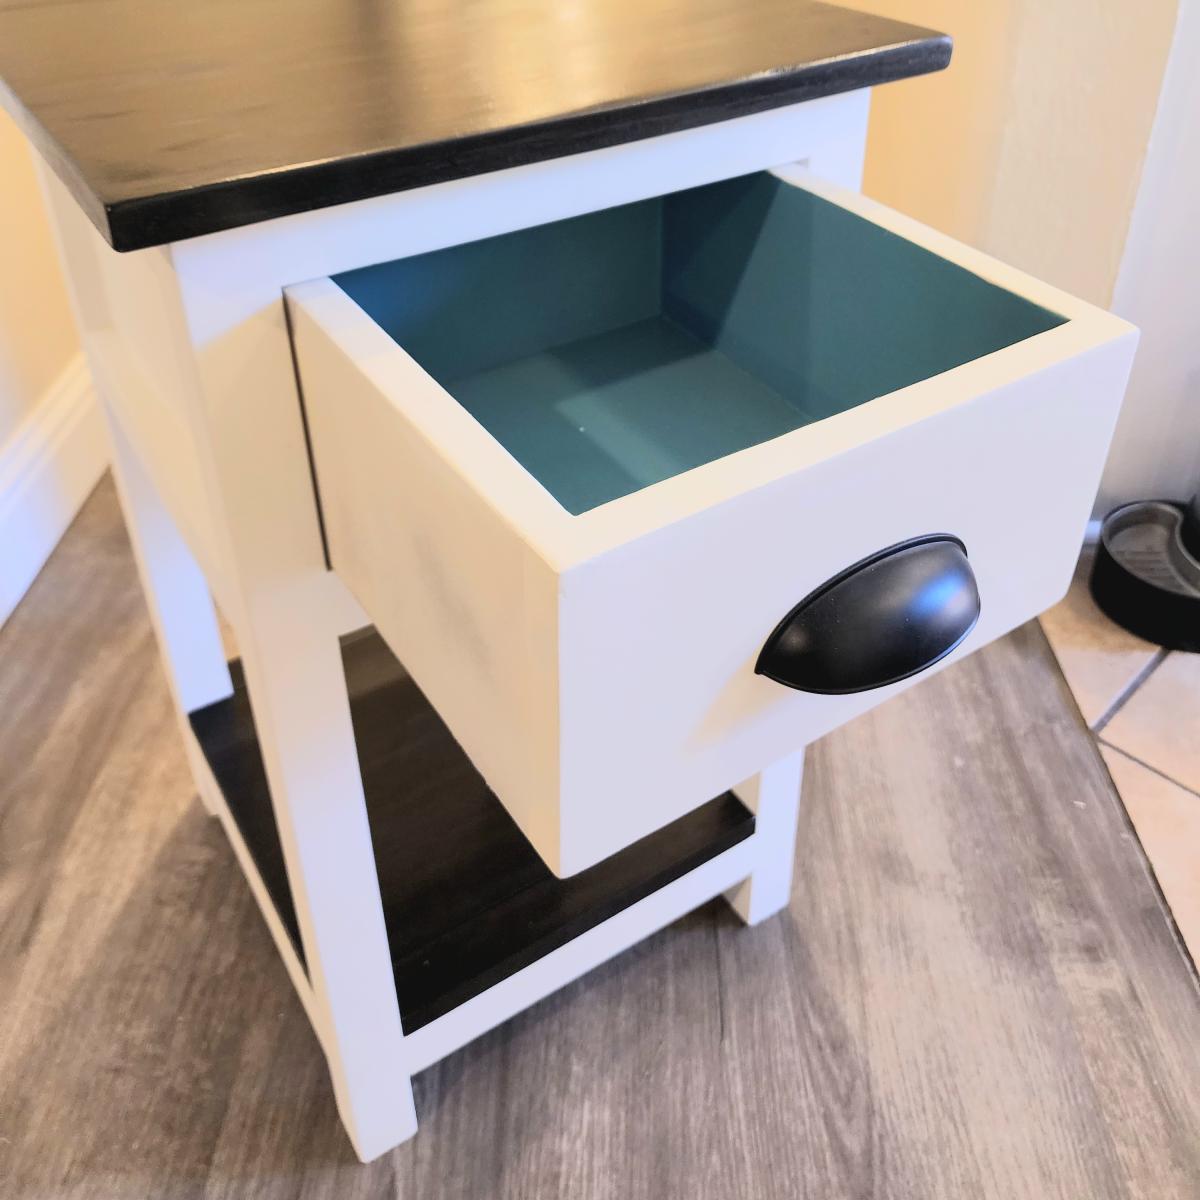
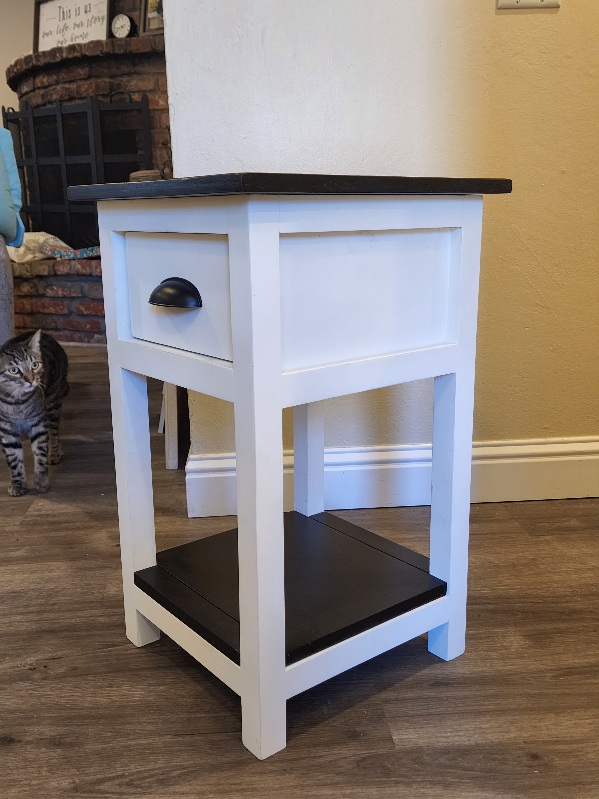
Built from Plan(s)
Comments
Fri, 08/12/2022 - 11:45
Amazing first project!
Love the addition, way to go, can't wait to see your next project!
"Big Ur" Table
Our first Ana build - the "Big Ur" table to match our existing Crate and Barrel "Basque" chairs and bench. We LOVE IT!! More info on our blog strawbridgestuff.com - check it out!
Estimated Cost
$75
Estimated Time Investment
Weekend Project (10-20 Hours)
Finish Used
Minwax stain in "ebony"
Recommended Skill Level
Starter Project
Comments
In reply to Stunning table! Just by Ana White
Thu, 08/11/2011 - 05:50
AHHHH THANKS!
Thanks Ana! You're a mini-celebrity in our household, so your comment made our day! :) You're the reason we got into building and we LOVE it, so thanks!
Wed, 08/10/2011 - 07:38
Love it!
I've been waiting for someone to post a brag post for this table! Yours looks great. I'm thinking of making one for my first project as well. Couple of questions: What did you use to cut the 4x4s? And is the plank tabletop smooth enough to, say, write a letter on, or are the grooves too deep for that?
Thank you!
In reply to Love it! by Keri Beth (not verified)
Thu, 08/11/2011 - 05:58
Hi Keri Beth! Thanks for
Hi Keri Beth! Thanks for your comment! To answer your question, we had to cut the 4x4s at home since the saw at our Lowes couldn't handle it. We used our mitre saw, and were able to get all the way through the 4x4 in one cut by going nice and slow, making sure to hold the entire piece as steady as possible while cutting.
After reading your comment I took a piece of paper and a pen over to the table and tried to write a little note. The tabletop is definitely smooth to the touch, but the fine-point pen I was using did poke through the paper over the grooves. However, I can roll the pen across the tabletop and it does not get caught up in the spaces between the boards, if that makes sense :) The grooves are hardly noticeable, and I think if I was writing on anything thicker than a single sheet of paper it would have been fine.
Hope that helps, and feel free to ask more questions if you decide to build the table. We love it, and I'm sure you will too!
Thu, 08/11/2011 - 06:46
Wonderful! Thanks for your
Wonderful! Thanks for your reply. Is your miter saw a 10" or 12"? I plan to buy one soon. Thank you!
In reply to Wonderful! Thanks for your by Keri Beth (not verified)
Thu, 08/11/2011 - 06:53
Ours is a 10", and also has a
Ours is a 10", and also has a laser which is a great feature for making sure your cuts are straight. Best of luck!
Thu, 12/29/2011 - 17:25
Chair Ideas?
I just made this table and plan on making a matching bench. Would LOVE to have wonderful chairs to match. Suggestions on what to build? I am on a budget but would like something substantial.
Where did you get your chairs, or did you build them??
Fri, 12/30/2011 - 20:12
Chairs
Hi! Glad you built the table...we've been so happy with it so far! The inspiration behind us building this table was actually me finding those two dining chairs and the bench at Crate and Barrel as floor samples on clearance...I think I spent $150 for all three pieces? This was before we even moved into our house/had the slightest inclination to start building furniture :) That being said, the chairs are from the "Basque" line of dining chairs at Crate & Barrel in "Java"...we stained our table with Minwax Ebony stain and it's a verrrry close match, as you can see in the pictures. We got another 2 chairs as wedding gifts, so we were lucky!
Right now, the chairs are on sale for $179/each (they also come in a lighter honey color if you don't want to go quite as dark as we did). They are very sturdy and compliment the rustic style of this farmhouse table. We've never built chairs, so I can't speak to that as an option - might be worth a shot though! Or, you could build two benches and buy fun chairs (upholstered parsons chairs maybe?) for the ends? Totally depends on the look you're going for, but I hope it works out! Let us know :)
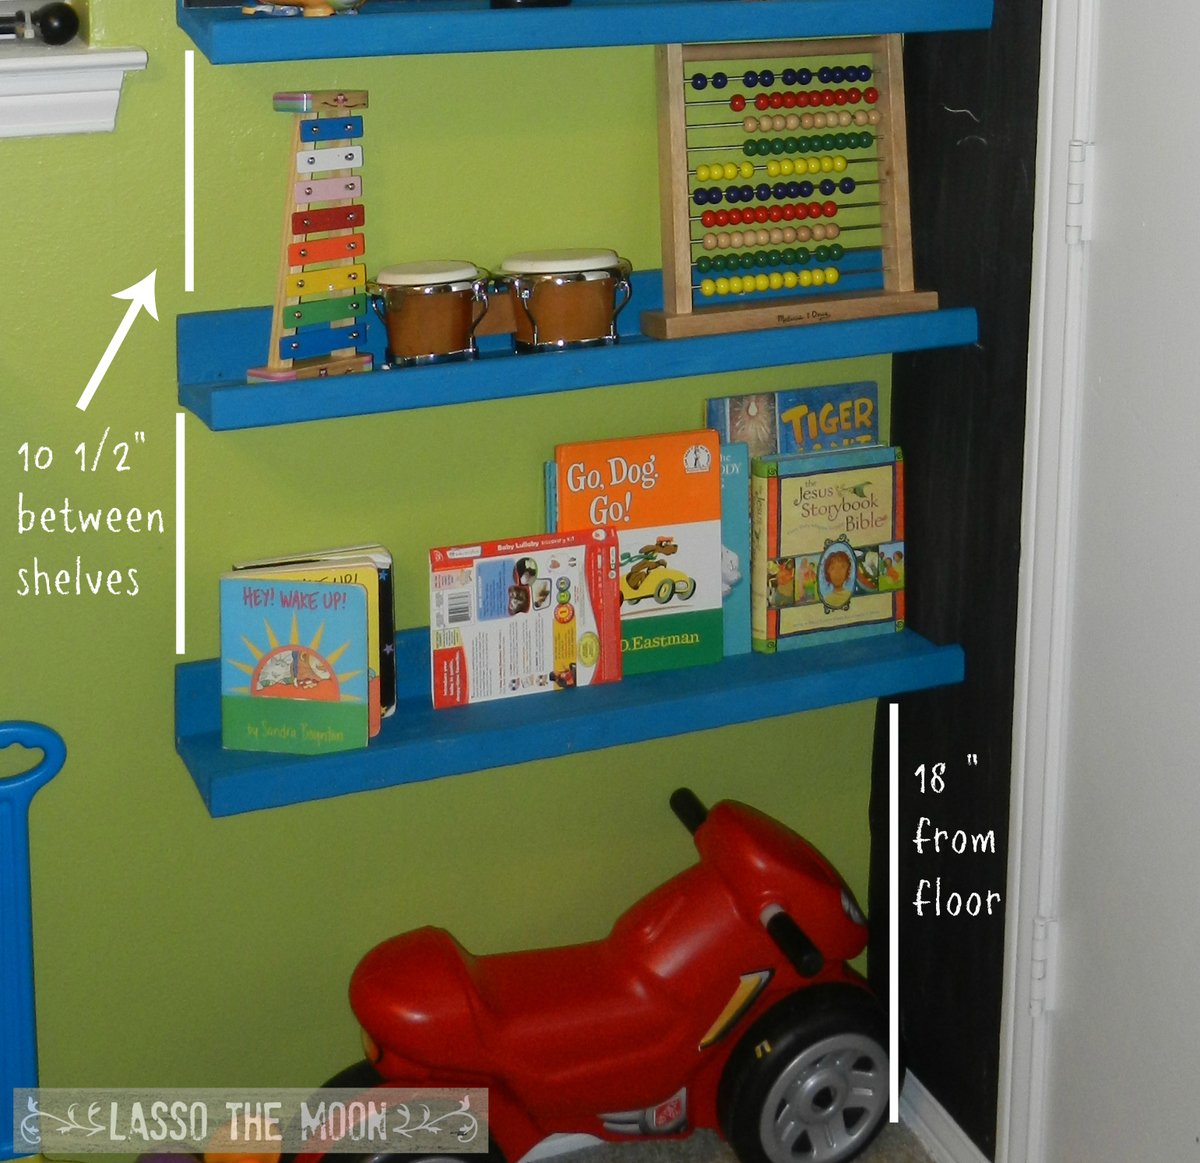
Boys Room Display Shelves
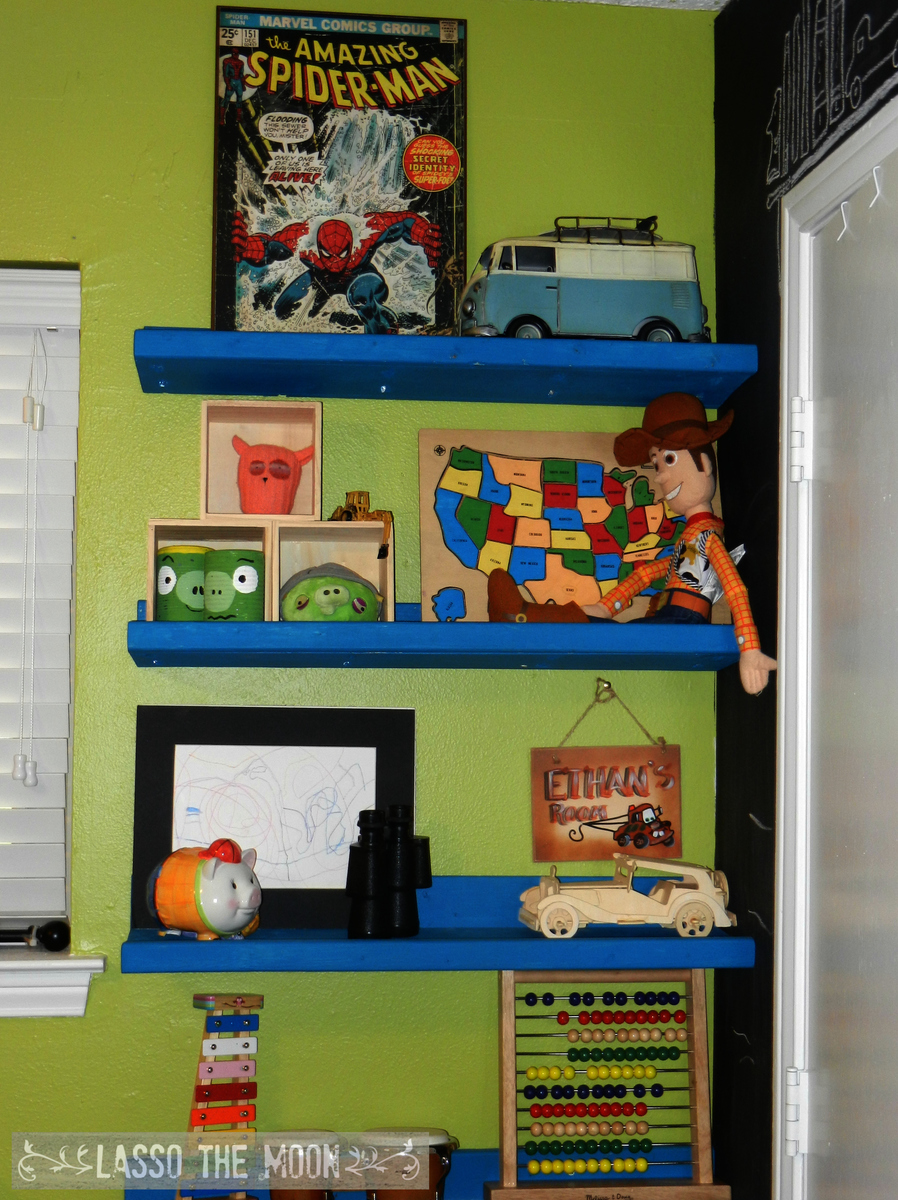
My new thing is hiding a stack of shelves behind an open door. There are so many rooms in my house that have this little piece of wasted space!
For my son Ethan's shelves, I made the 10-dollar ledges, but only 30 inches long. Also, because I used pocket holes to put them together, I made the "shelf" part from a 1x6, so they would have a little extra depth for showing off his treasures and lego projects.
These changed the entire look of the room. I love how they are out of the way, and are adding design to his room as well.
These were so easy to build!
Learn more on the blog post:
http://lassothemoon.typepad.com/lasso_the_moon/2013/08/boys-room-behind…
--Anna
Built from Plan(s)
Estimated Cost
$20
Estimated Time Investment
An Hour or Two (0-2 Hours)
Finish Used
behr havasu blue paint
I didn't need it to be smooth or shiny, so I used a $3 pot of test paint for all five shelves. A great way to save some cash!
I didn't need it to be smooth or shiny, so I used a $3 pot of test paint for all five shelves. A great way to save some cash!
Recommended Skill Level
Starter Project
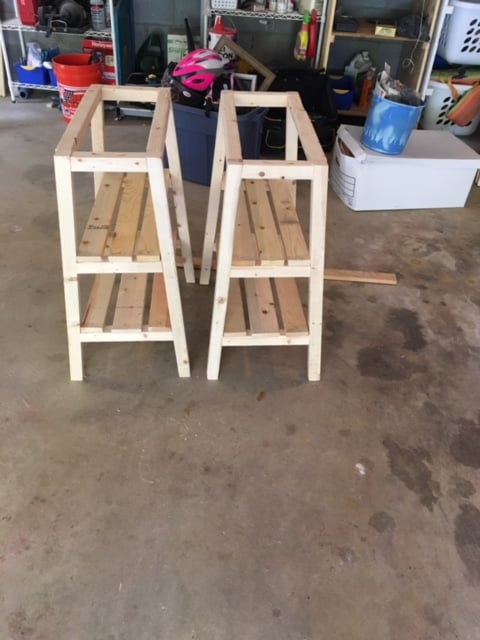
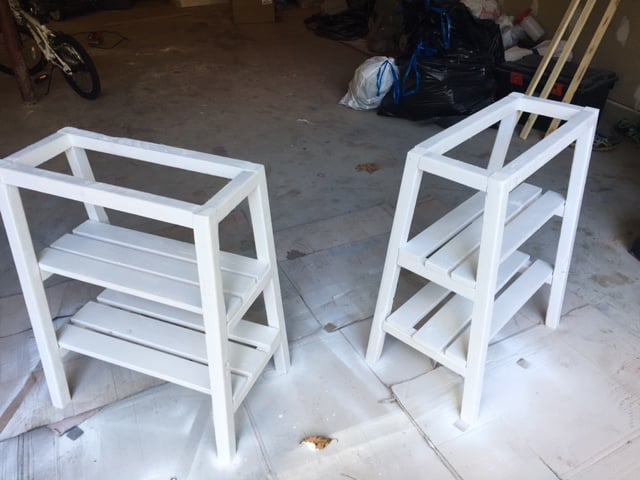
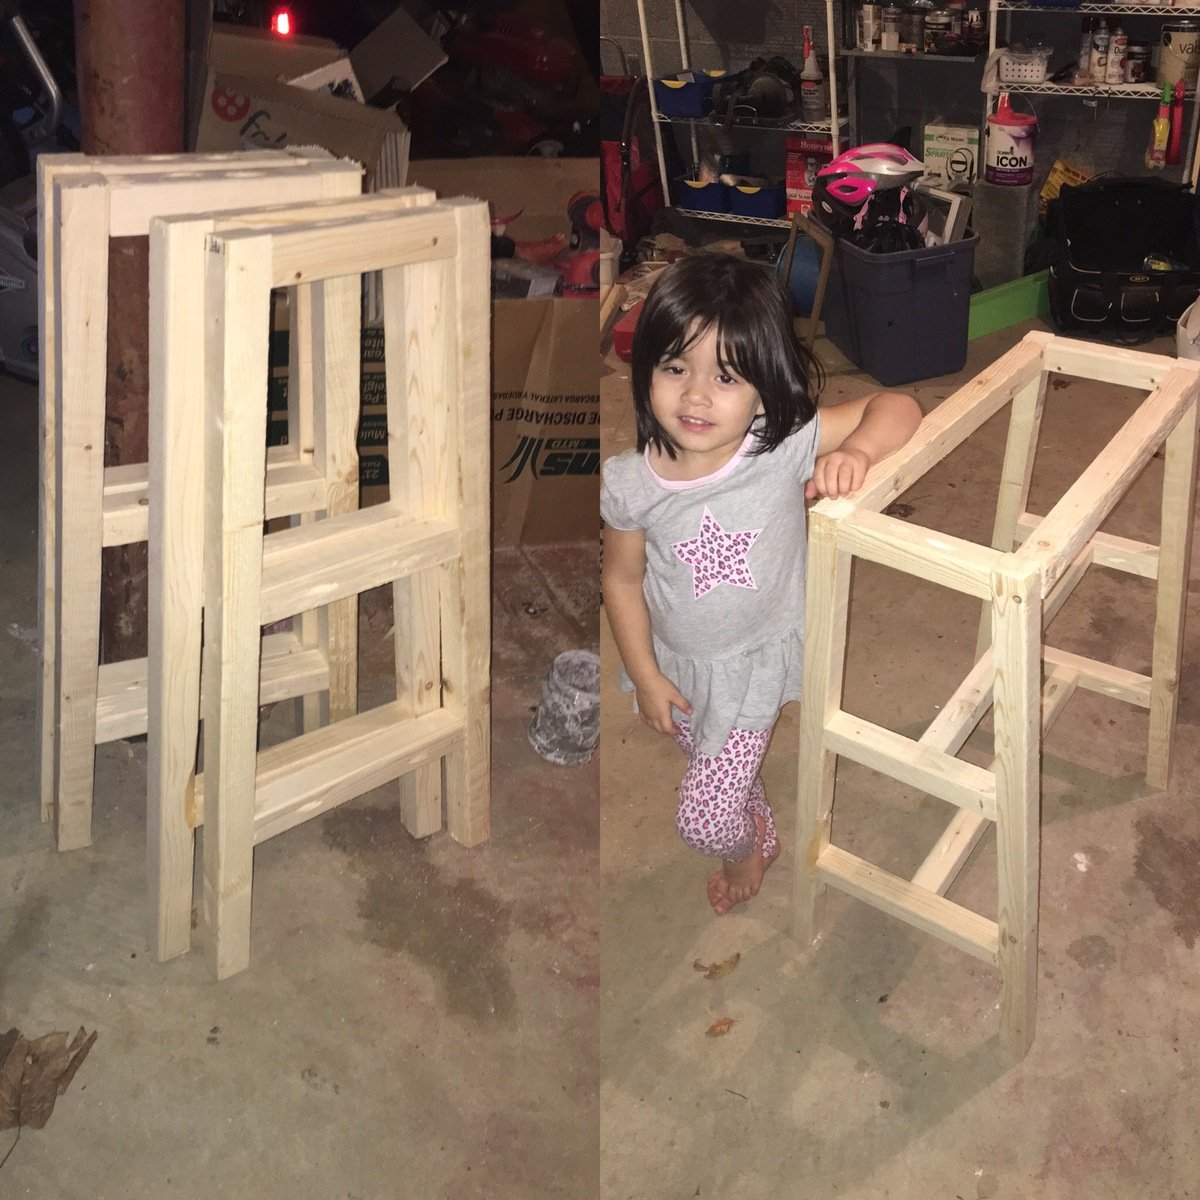
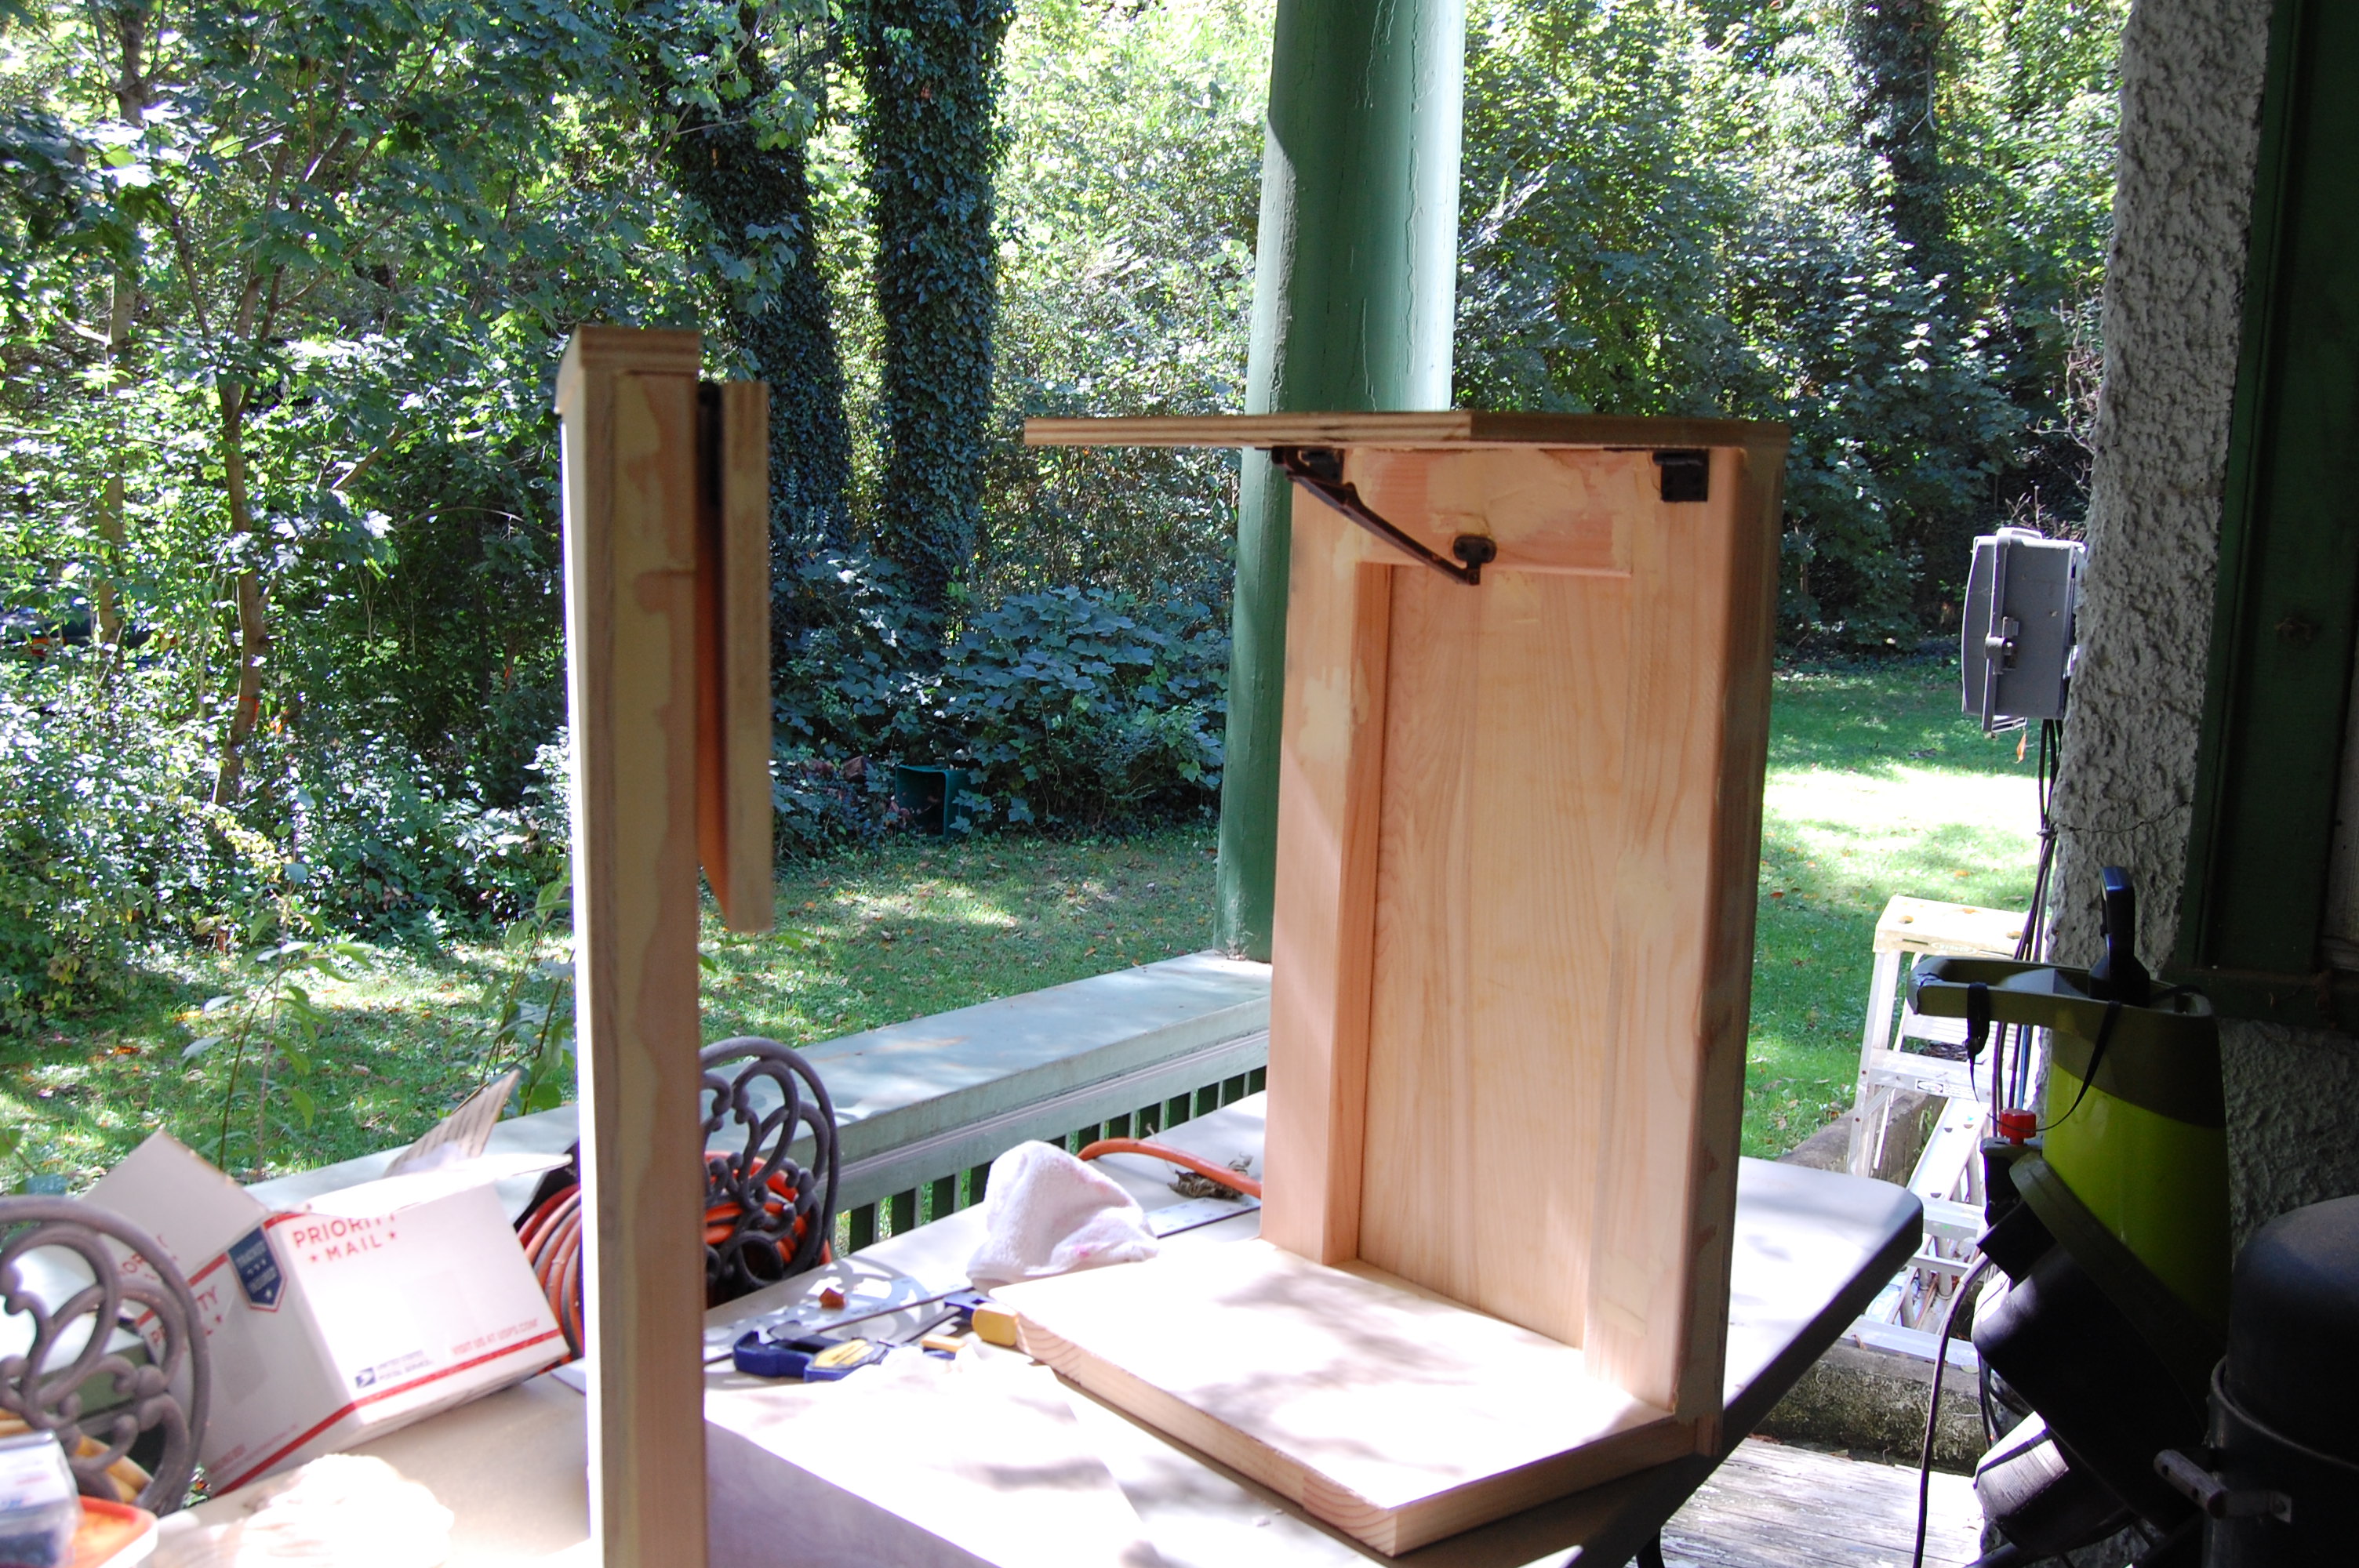
drop leaf sofa table

When we rearranged the living room to create better sight lines for the football games, we lost table space near the sofa. My daughter helped me design these: she asked for the drop-leaf, even though they currently reside over the arms of the sofa.
My sofa is so low-to-the-ground that I couldn't put casters on these. Otherwise, they are Seriously Over-engineered: heavily framed with 2x4s!
Built from Plan(s)
Estimated Cost
about $40 for the pair, including the drop-leaf hardware?
Estimated Time Investment
Afternoon Project (3-6 Hours)
Finish Used
diy chalk paint, made from Mythic paint "Sunny at Heart," finished with 2-3 coats of beeswax/mineral oil rubbed on
Recommended Skill Level
Beginner
Bookshelf

Currently redesigning our living room and needed a bookshelf to put next to our prop picture. Found this rolling bookshelf and decided to give it a go. We already made a few pieces of furniture so we already had the kreg Jig (my favorite tool ever!) and assorted screws. I found the directions to be fairly easy to follow, but then again, I had already built some furniture so maybe for a beginner it'd be harder to follow. I spent about 20 hours, and $66 on this - $40 for wood and metal emt pipe, and $26 for the 3"caster wheels (work brakes) found on Amazon. I already had all the screws and stain around from other projects I used Walnut Minwax stain with 2 costs of polycrylic. Really loving this bookshelf!
Estimated Cost
70
Estimated Time Investment
Weekend Project (10-20 Hours)
Finish Used
Minwax Walnut
Recommended Skill Level
Beginner