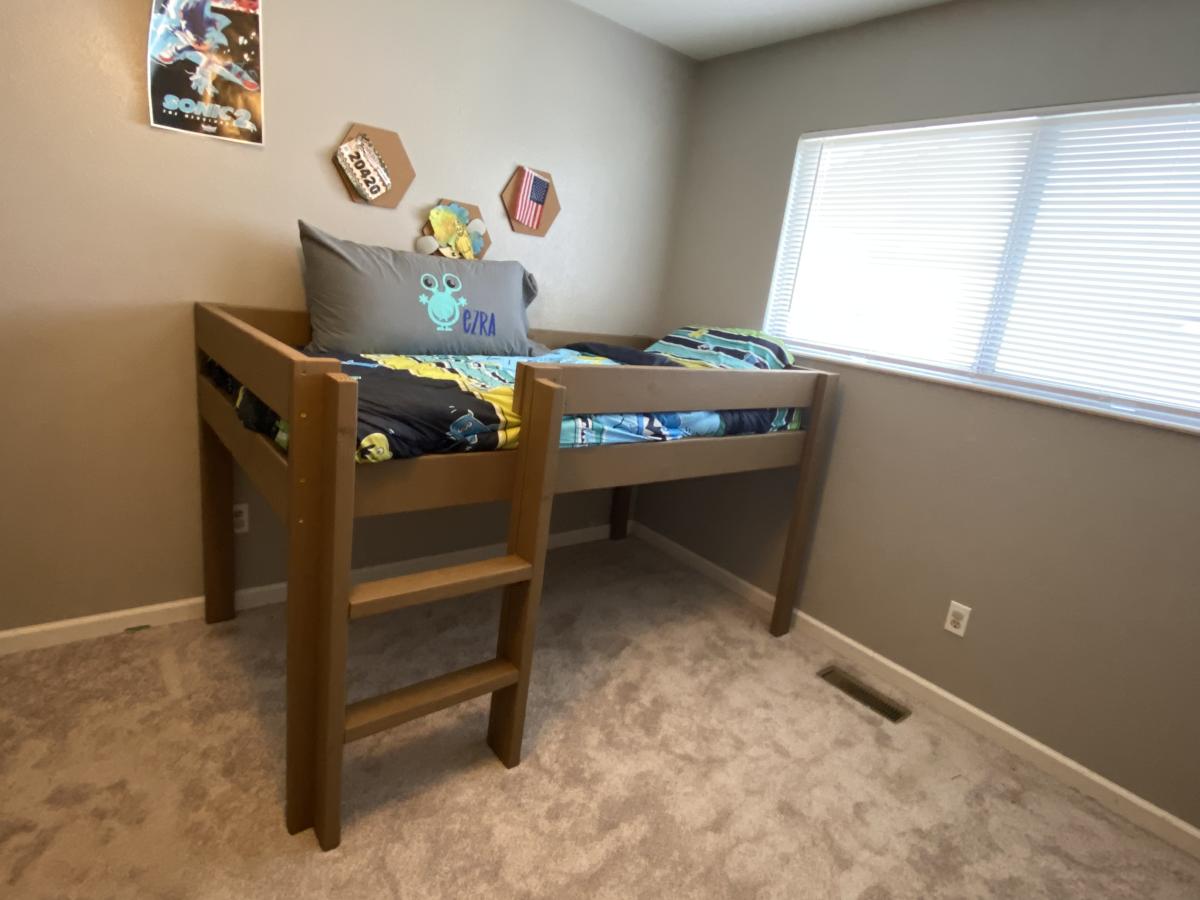
Gammie’s Sleeping Angels
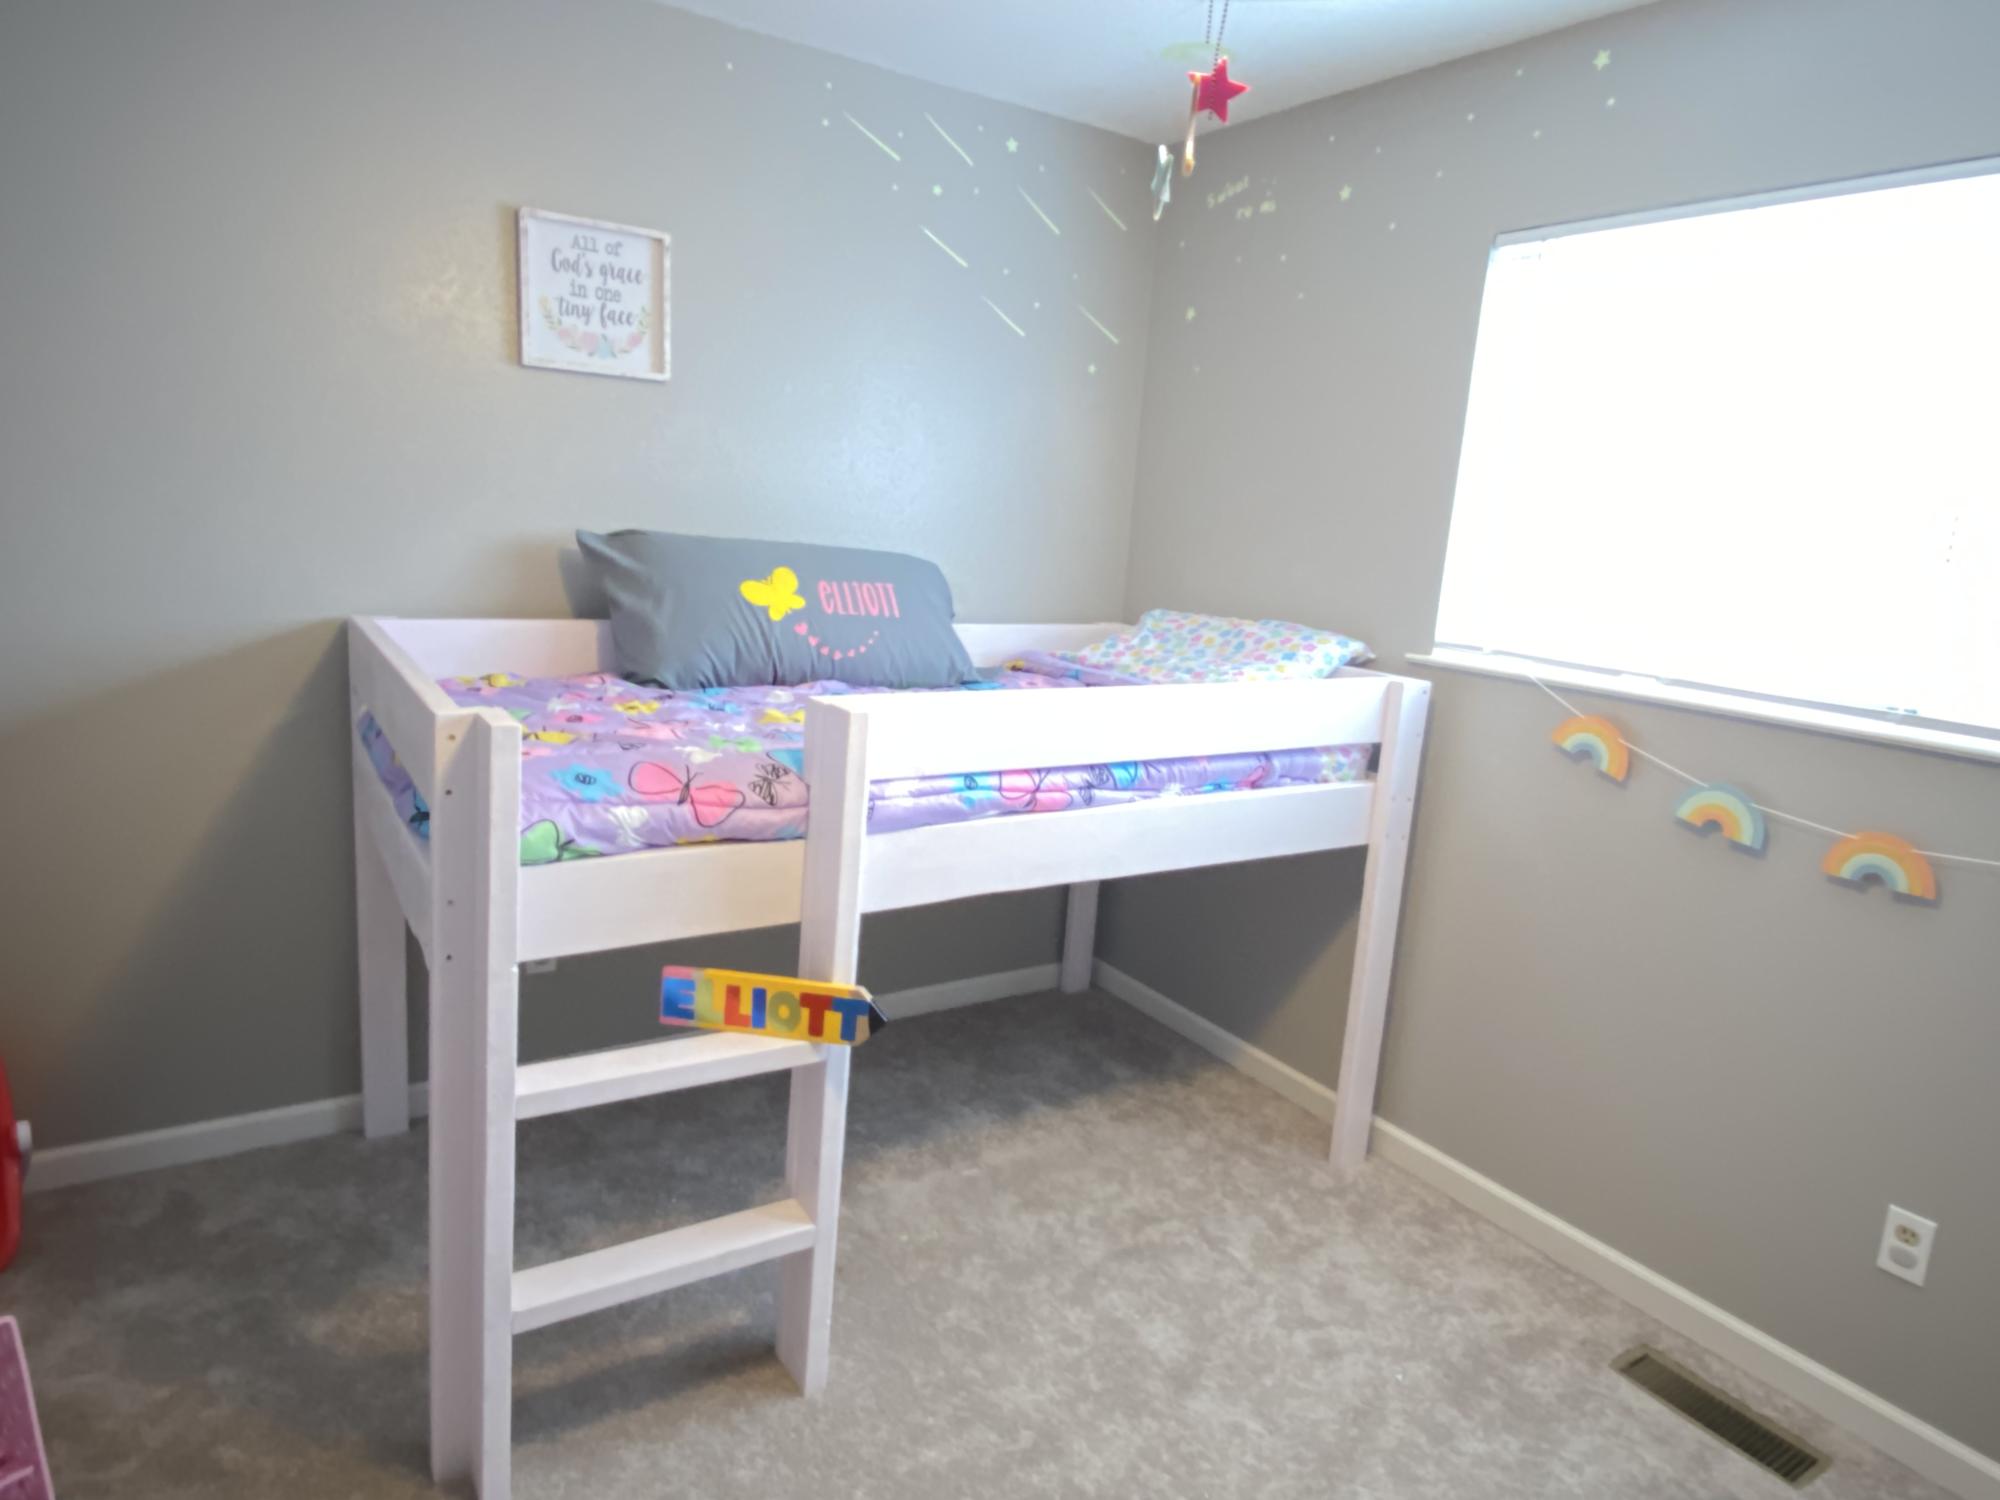
These loft beds were made for Christmas for my grand daughter and grand son !! They now sleep in their own beds!! It was fun to build!
Built from Plan(s)
These loft beds were made for Christmas for my grand daughter and grand son !! They now sleep in their own beds!! It was fun to build!

The plans for this table were easy to follow (thanks Ana!!!) We used pine for our project and it turned out so pretty. We have not built the benches yet but I will update when we do. The project took about us about 6 hrs. to assemble...however you should keep in mid that applying the stain and polyurethane might be the most time consuming part of the project. We used 4 coats of stain and 6 of the poly. We let the final coat cure for about 48 hrs. I added drawer handles to the ends and sides for decoration and functionality (to move the table). The hubby insisted on using extra bolts on the legs for reinforcement...so I indulged him. He is still getting used to my love of anything rustic or distressed.

Fri, 10/07/2011 - 10:39
Great Job Cookie and Carl! Looks like it belongs in Country Magazine!

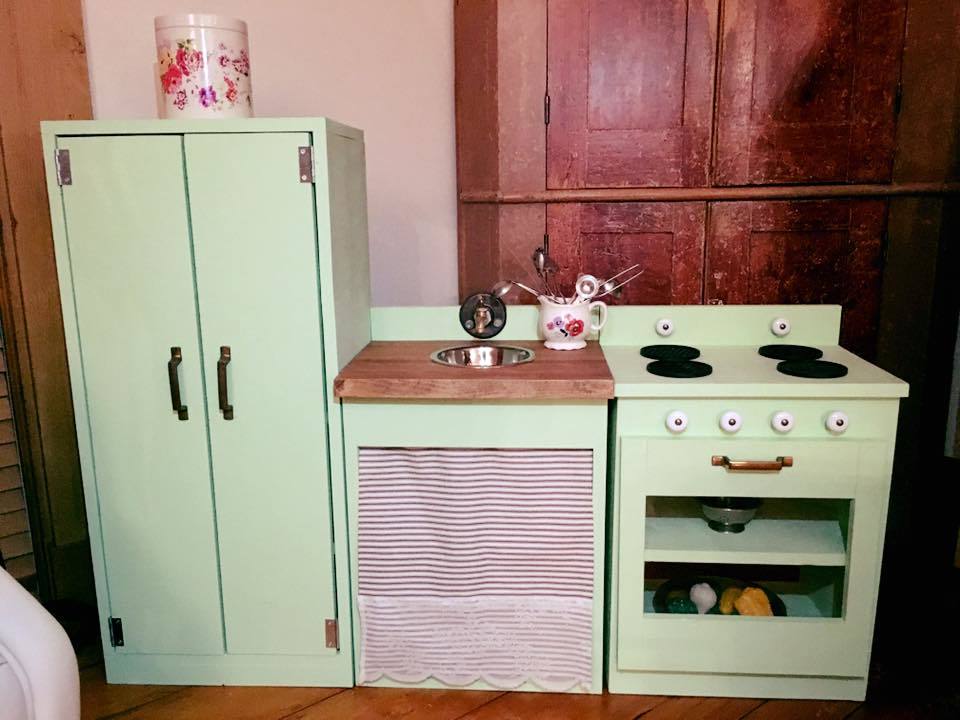
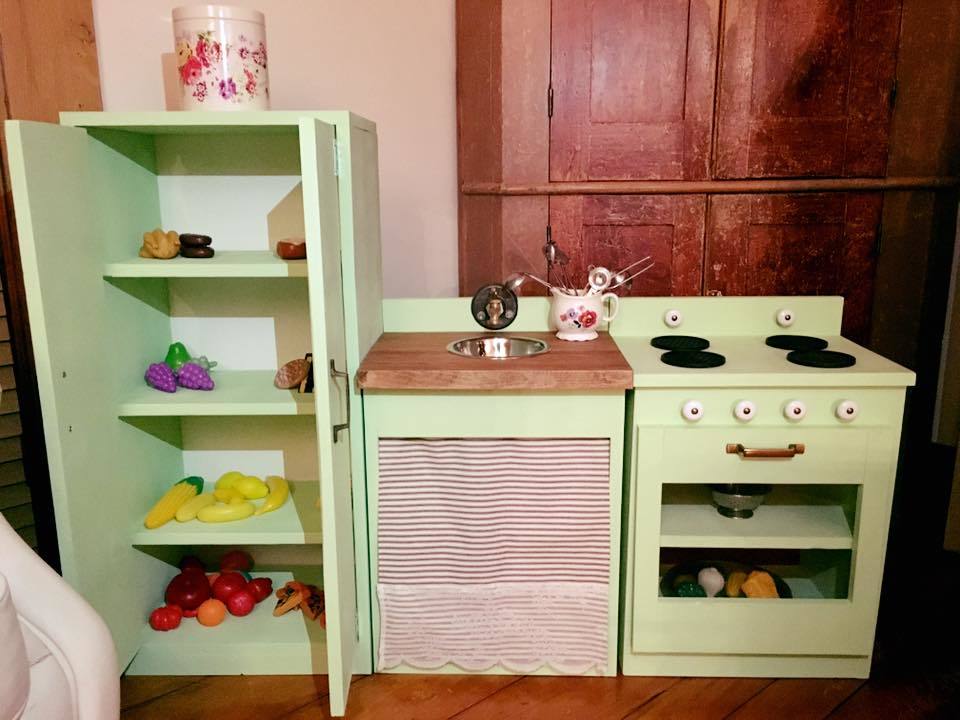
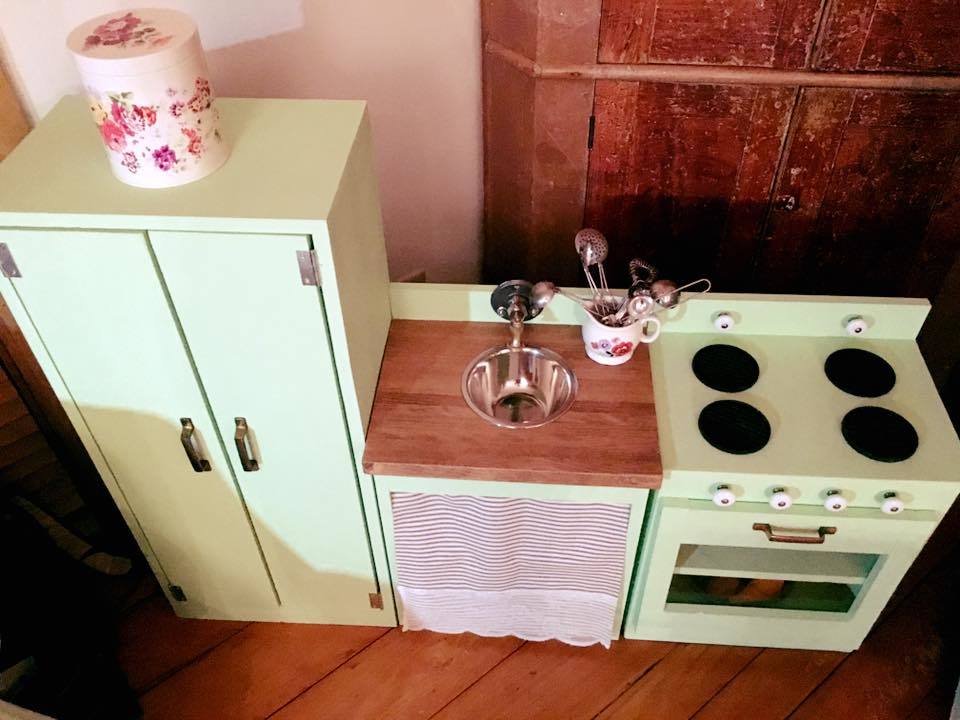
I purchased these nightstands at a garage sale for $15 each. They were in dreadful shape needing repair and too many hours of sanding to count! I was inspired by this project and decided to try the finishing techniques out myself. I made the hardware myself out of angle aluminum and used the aluminum posts used to bind corporate booklets. Since I wanted to use the existing holes for the original hardware, the shorter nightstand has 2" pulls/handles and the taller has 4.5" pulls/handles. I really like how they turned out!

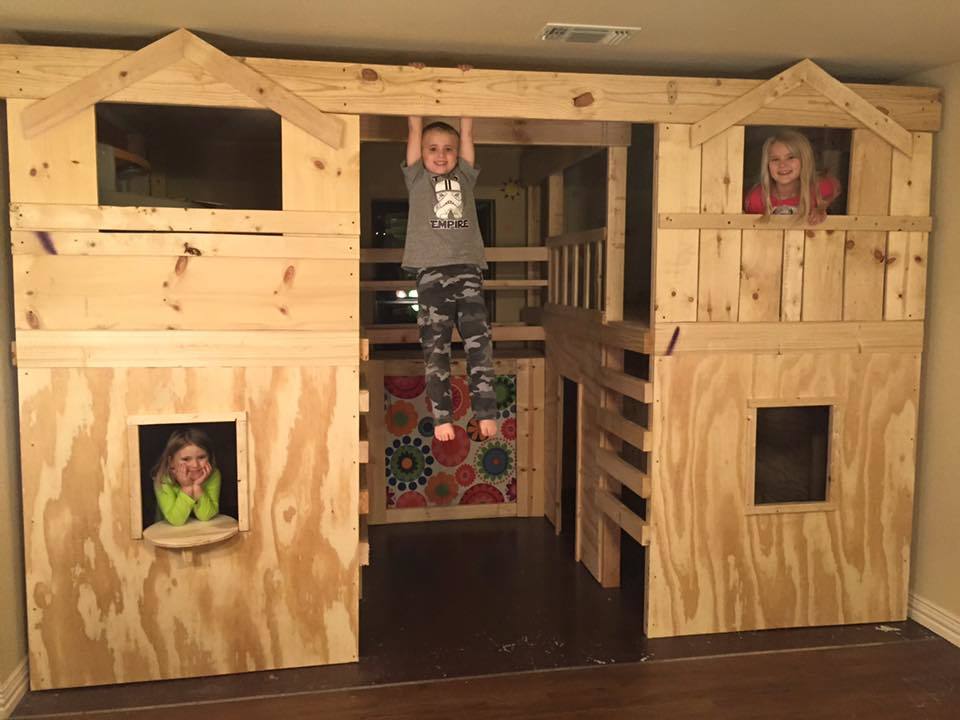
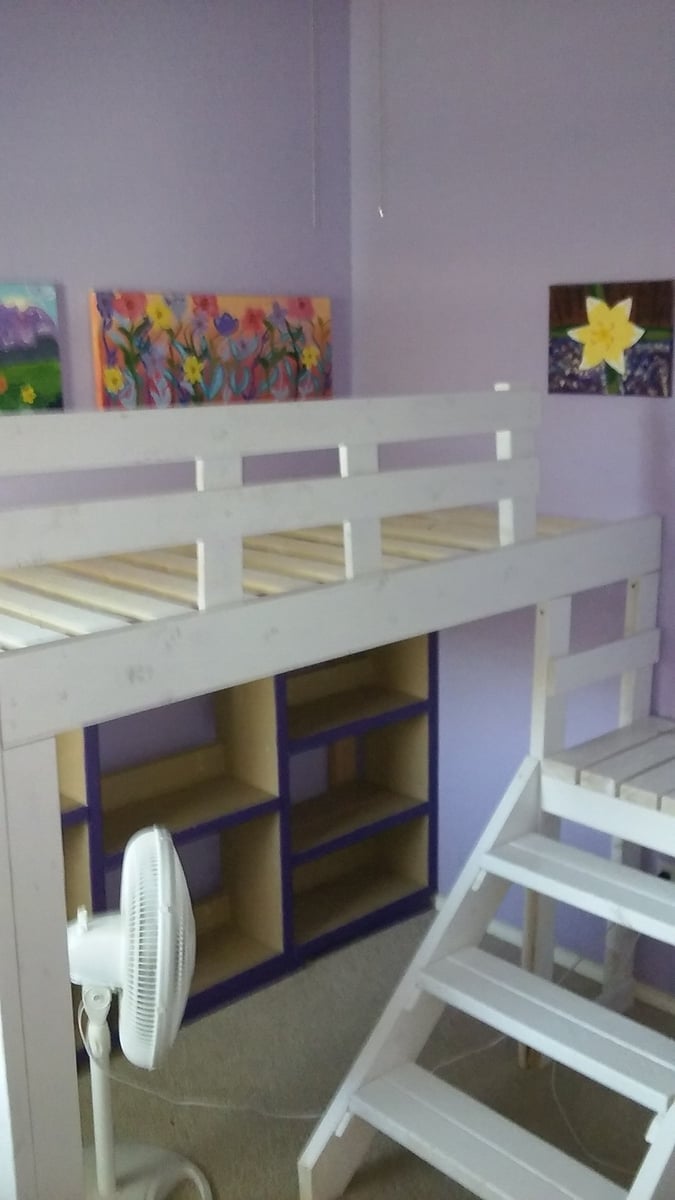
Modified to fit a smaller space by Tracy Brannum. Took 2-1/2 days to build, the kids love it! Shared on Facebook. https://www.facebook.com/photo.php?fbid=10207847978933419&set=o.1921239…
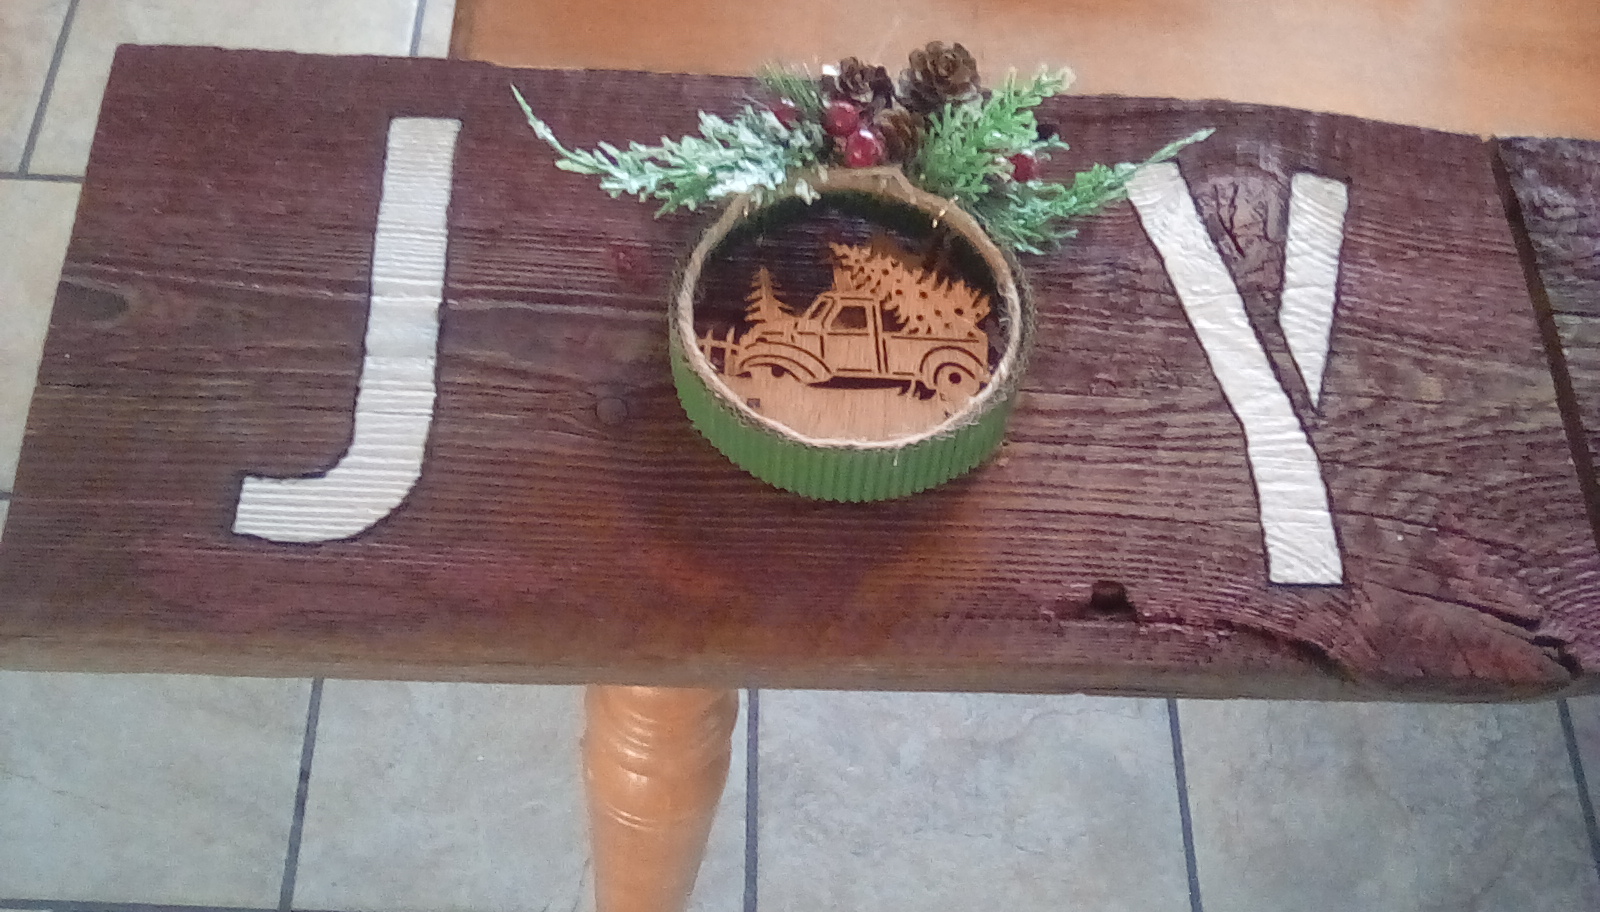
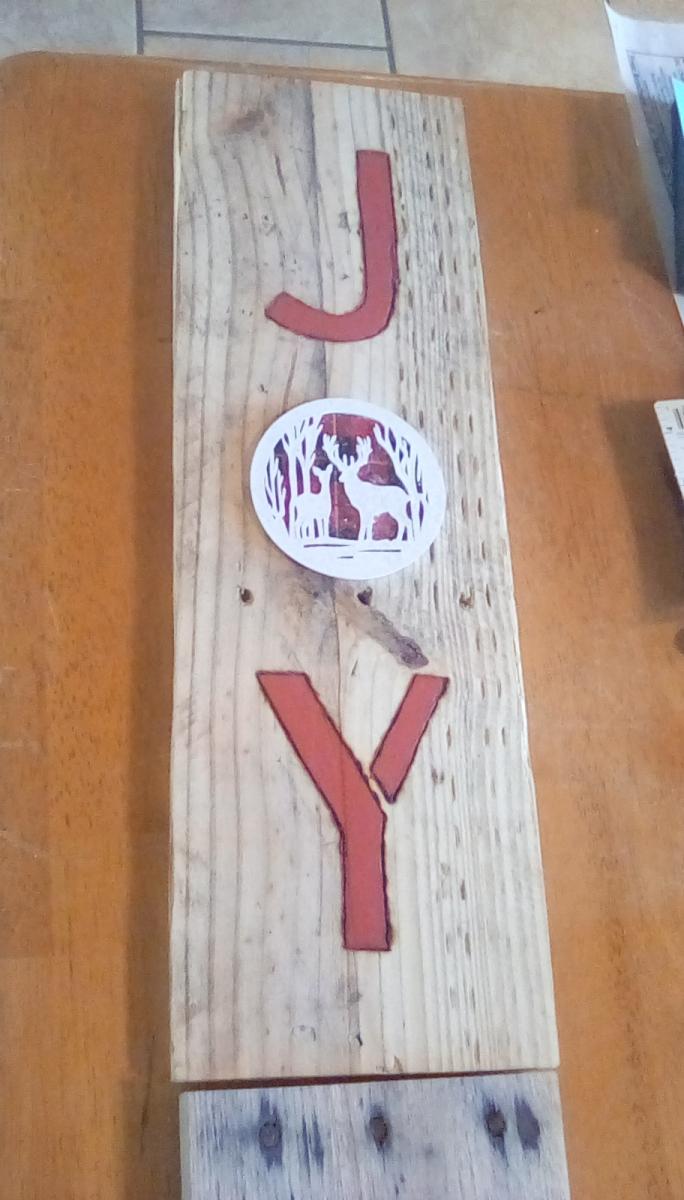
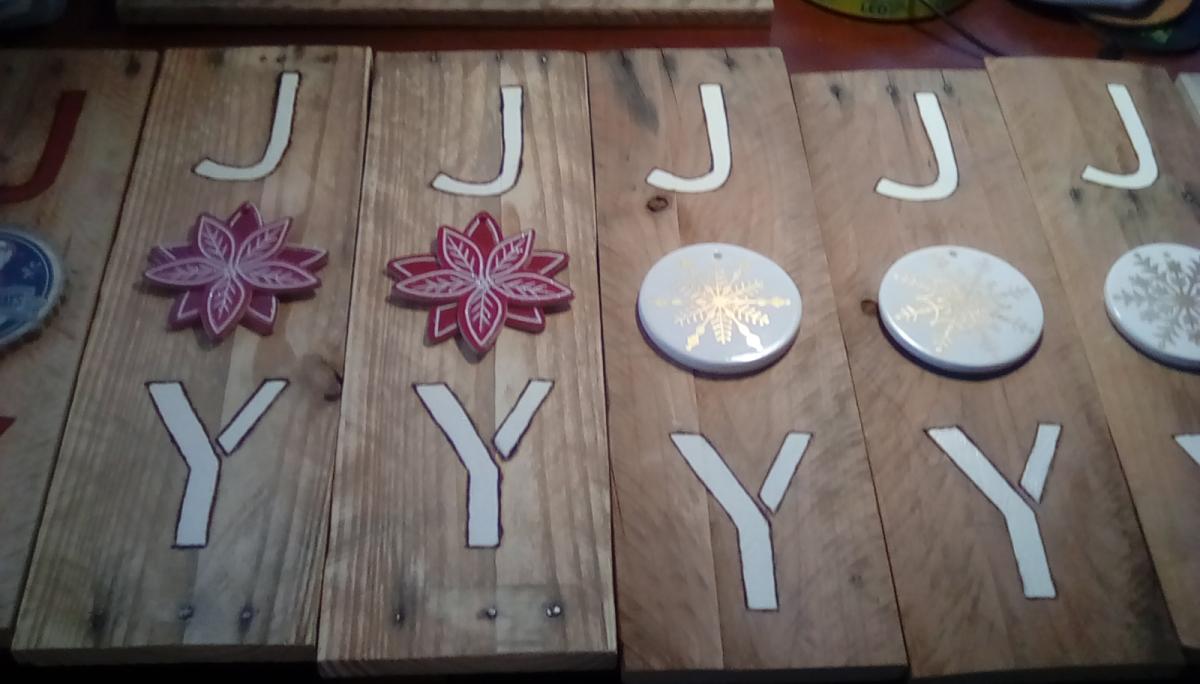
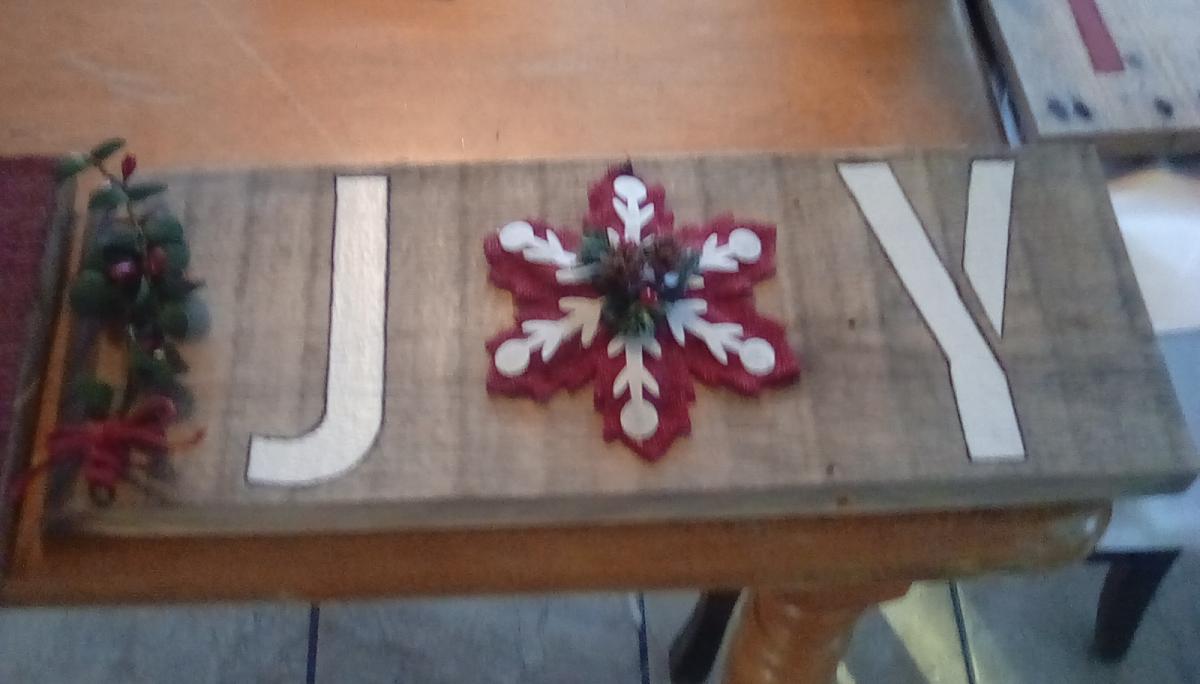
Loved your "JOY" wall art, but after I built the prototype, realized it was way too large for my idea of gifts for the family. Since I had already cut and sanded pallet boards to size, I downsized the idea and used individual boards and 4" and 6" stencils to paint the letters. I wanted a darker border around the letters, so I woodburned around them. Some of that turned out uneven since the wood wasn't smooth but it adds to the rustic look. I used roundish tree ornaments to use for the "O" letter. Popped on sawtooth hangers on the back and left them unfinished. I did finish off the larger red barn boards and the grey one with spray Clear Coat, since I thought the wood looked dried out.
Thanks for all your great ideas and look forward to your new ones!

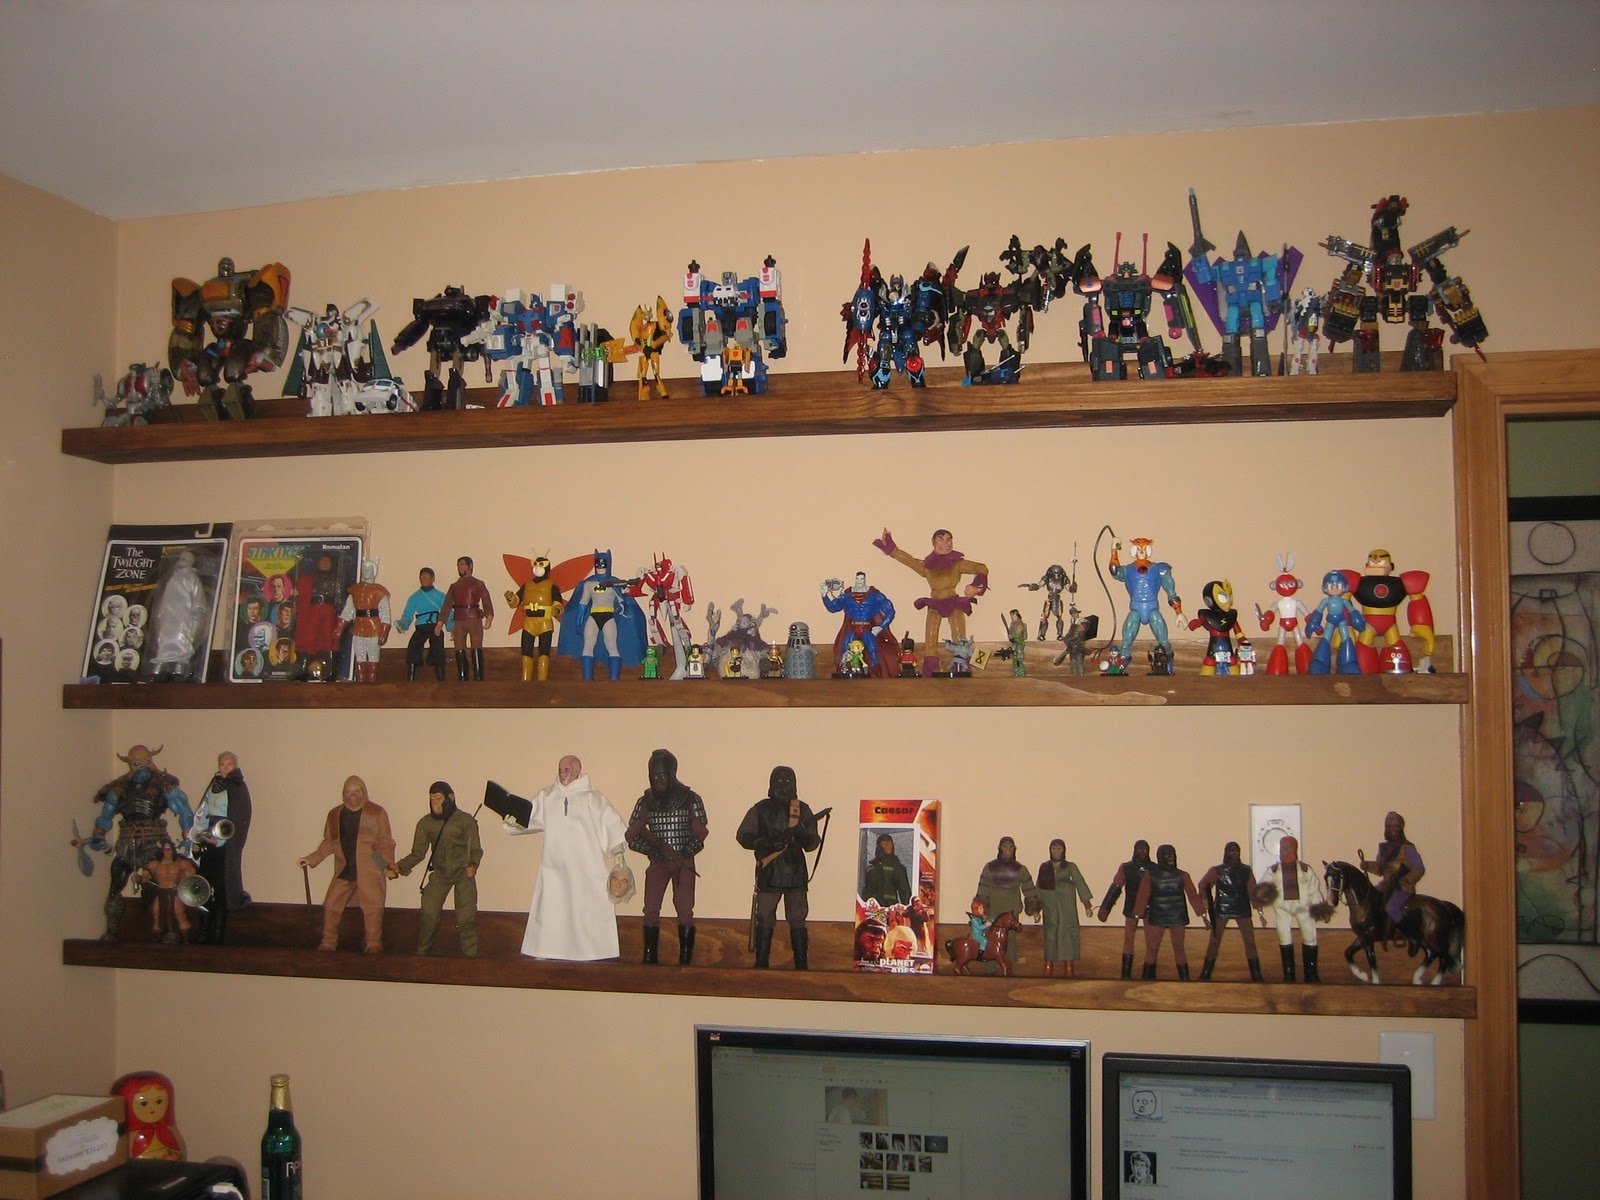
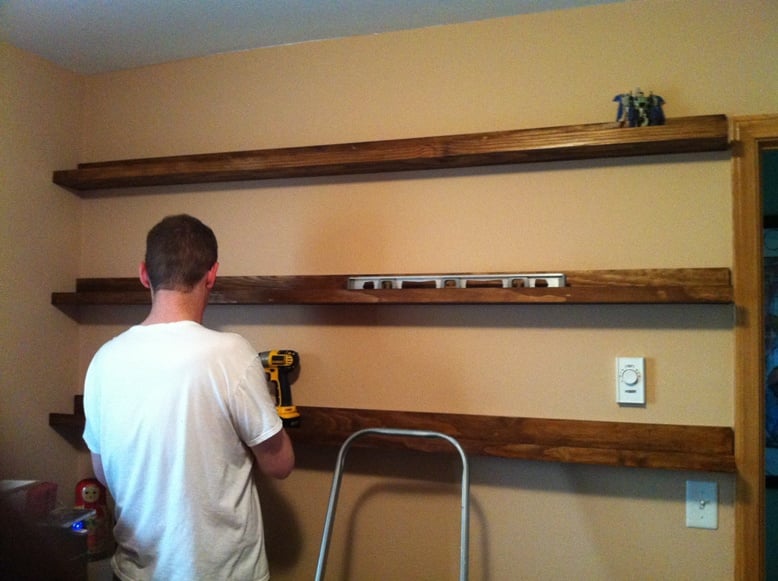
As we begin to convert a small room to an office, first priority is creating display shelves for my husbands toy collection. These shelves do a great job! They are easy to create plus very sturdy. No toys will be falling on their own.
This was a pretty easy project and I woul recommend it to any beginner. My only tip is to make sure that everything is clamped before you nail or screw. You don't want to see light through the seams.
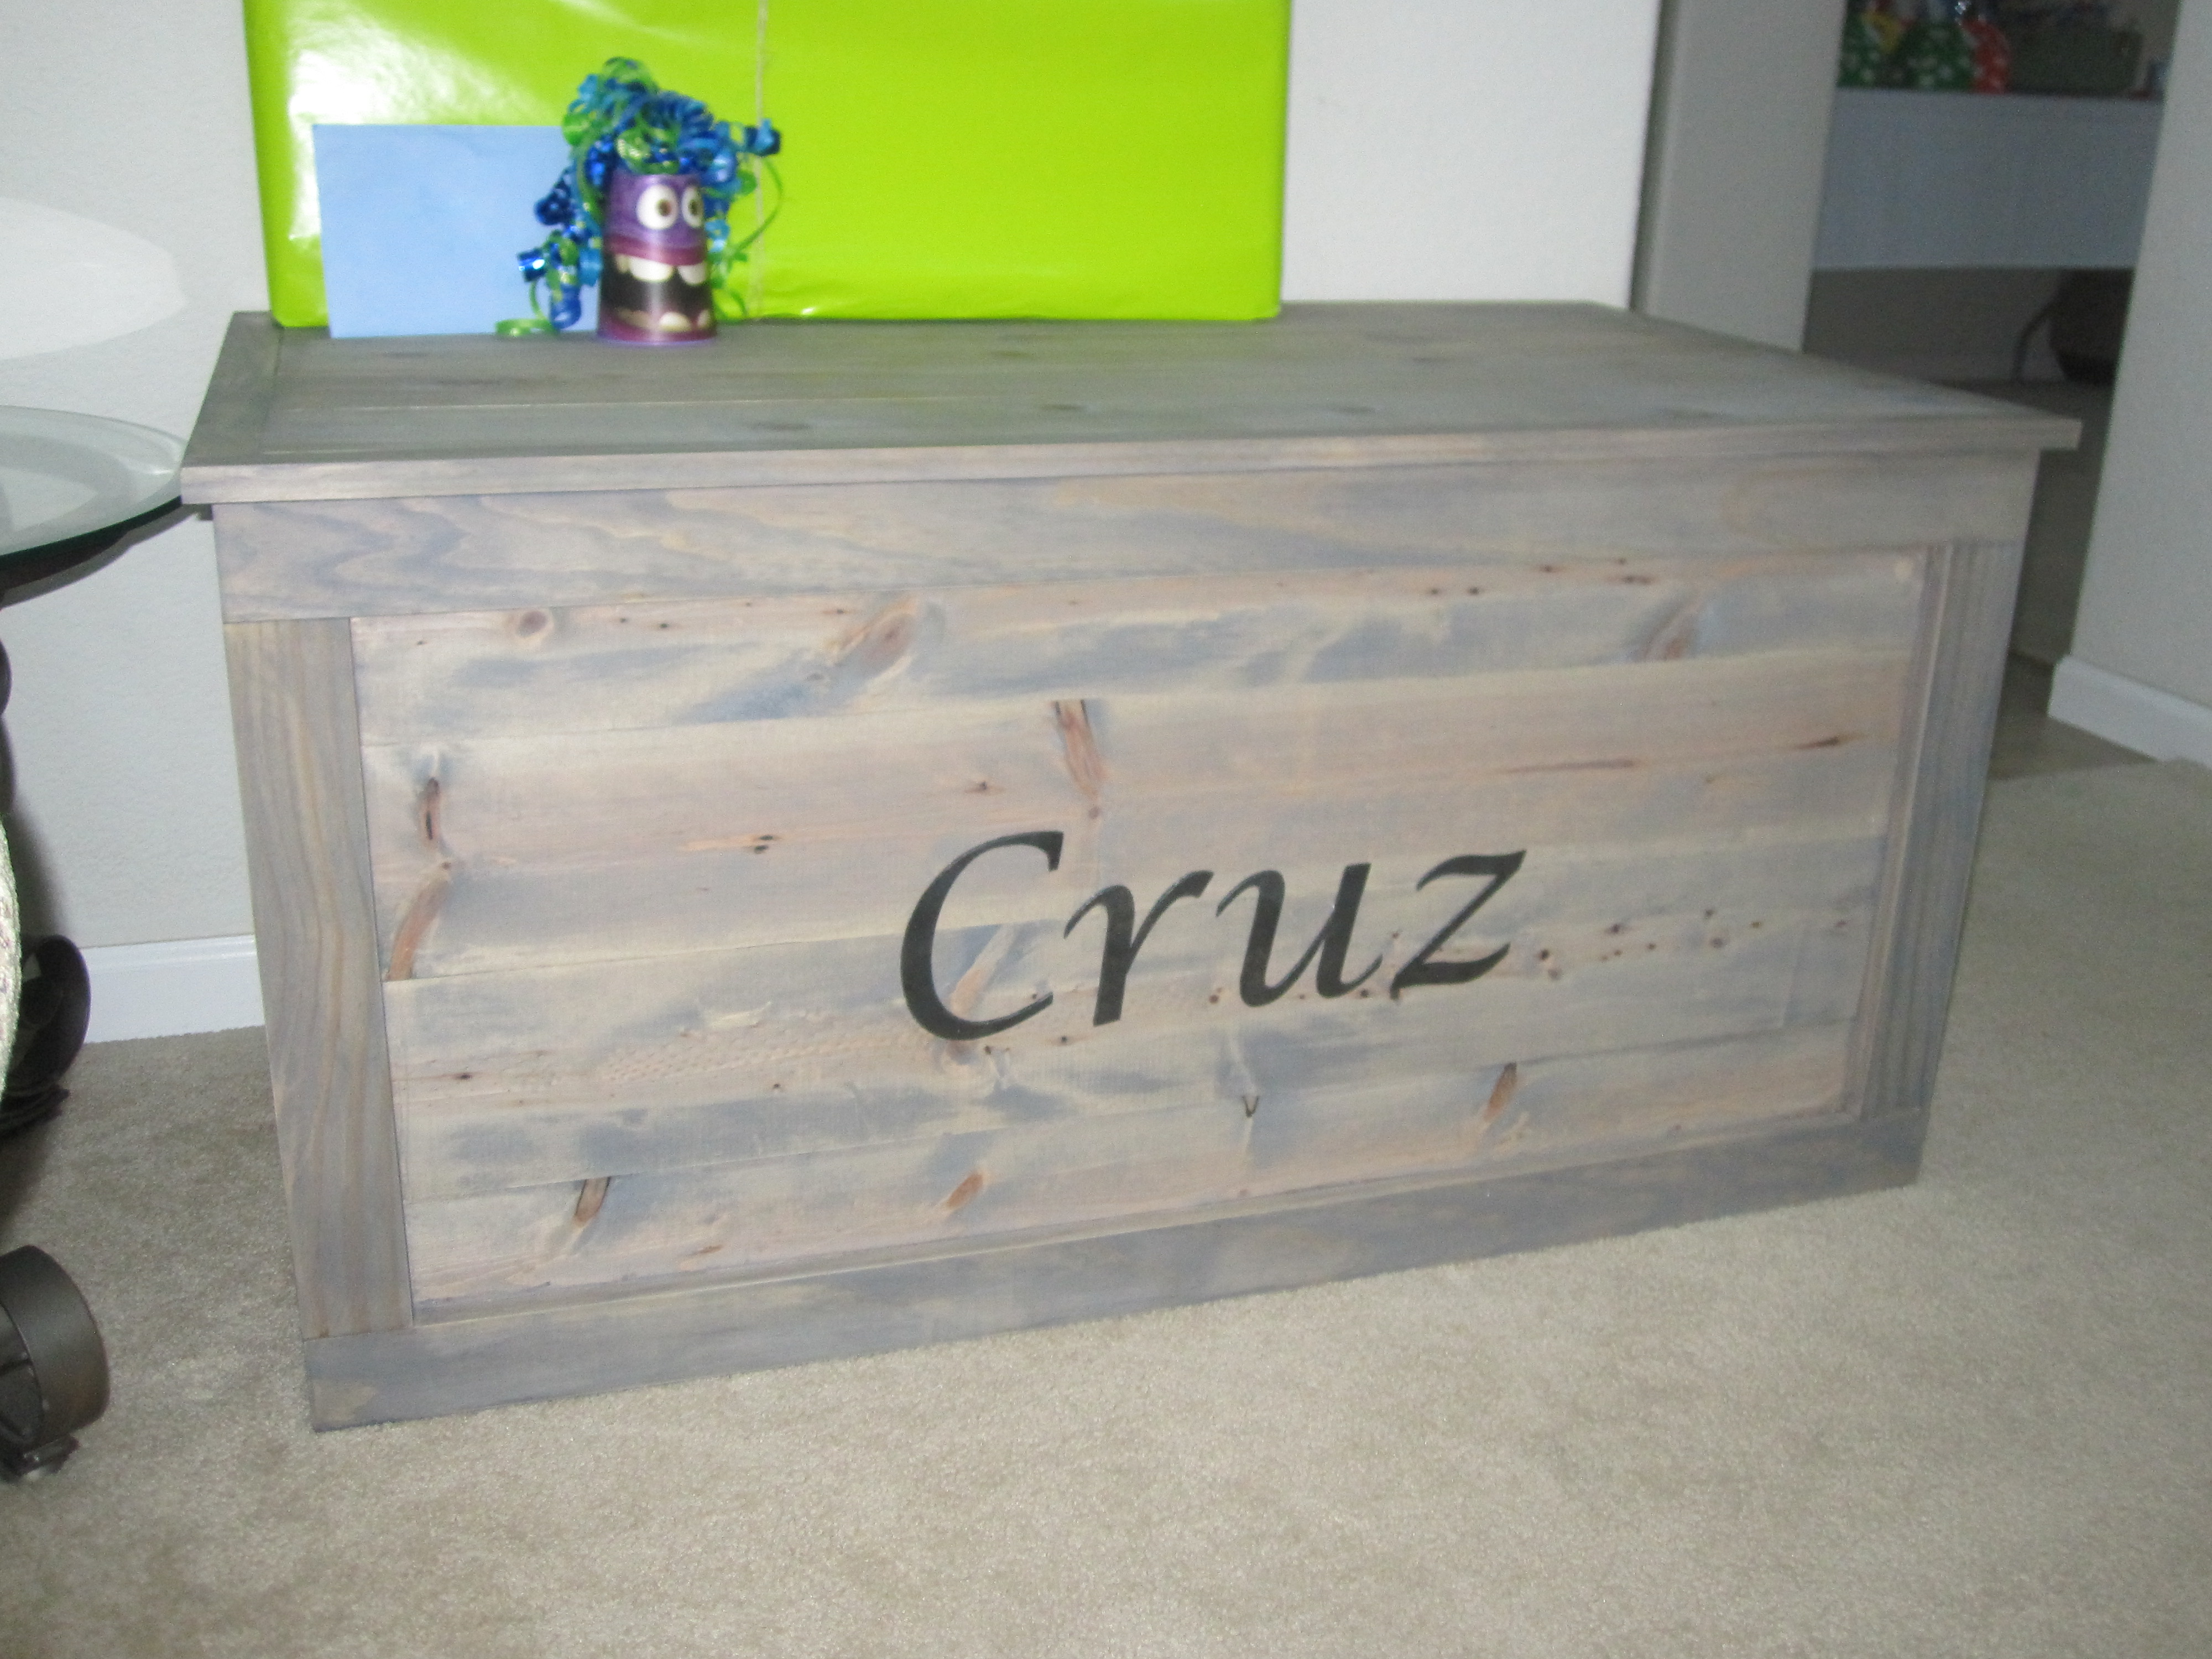
I made this toy box for my nephew for his first birthday.


Sun, 06/29/2014 - 08:57
I'm a new member and I would like the plans to this toy box but they are not here and I don't know how to go about getting them?
Plans were fantastic for this build and our kids love it! Thanks!

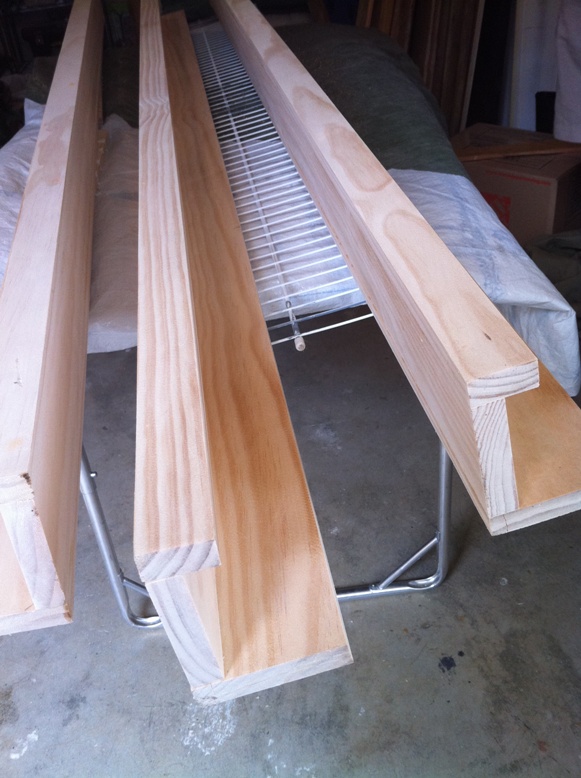
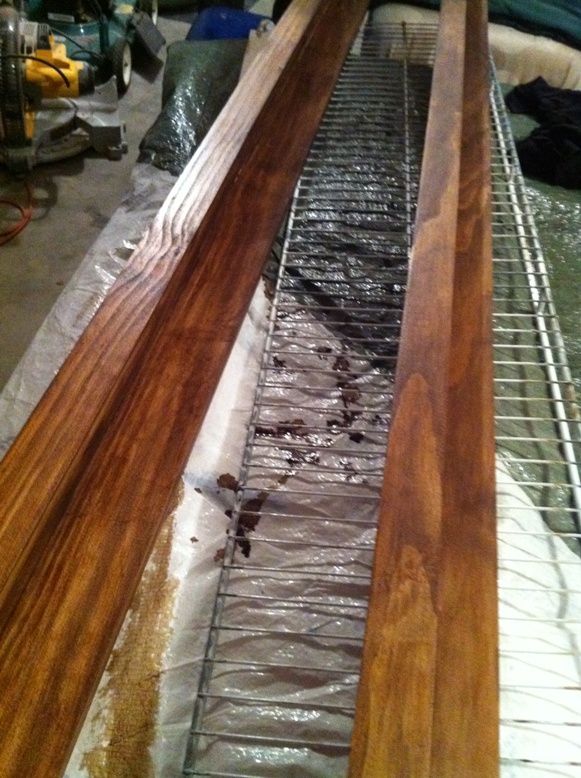
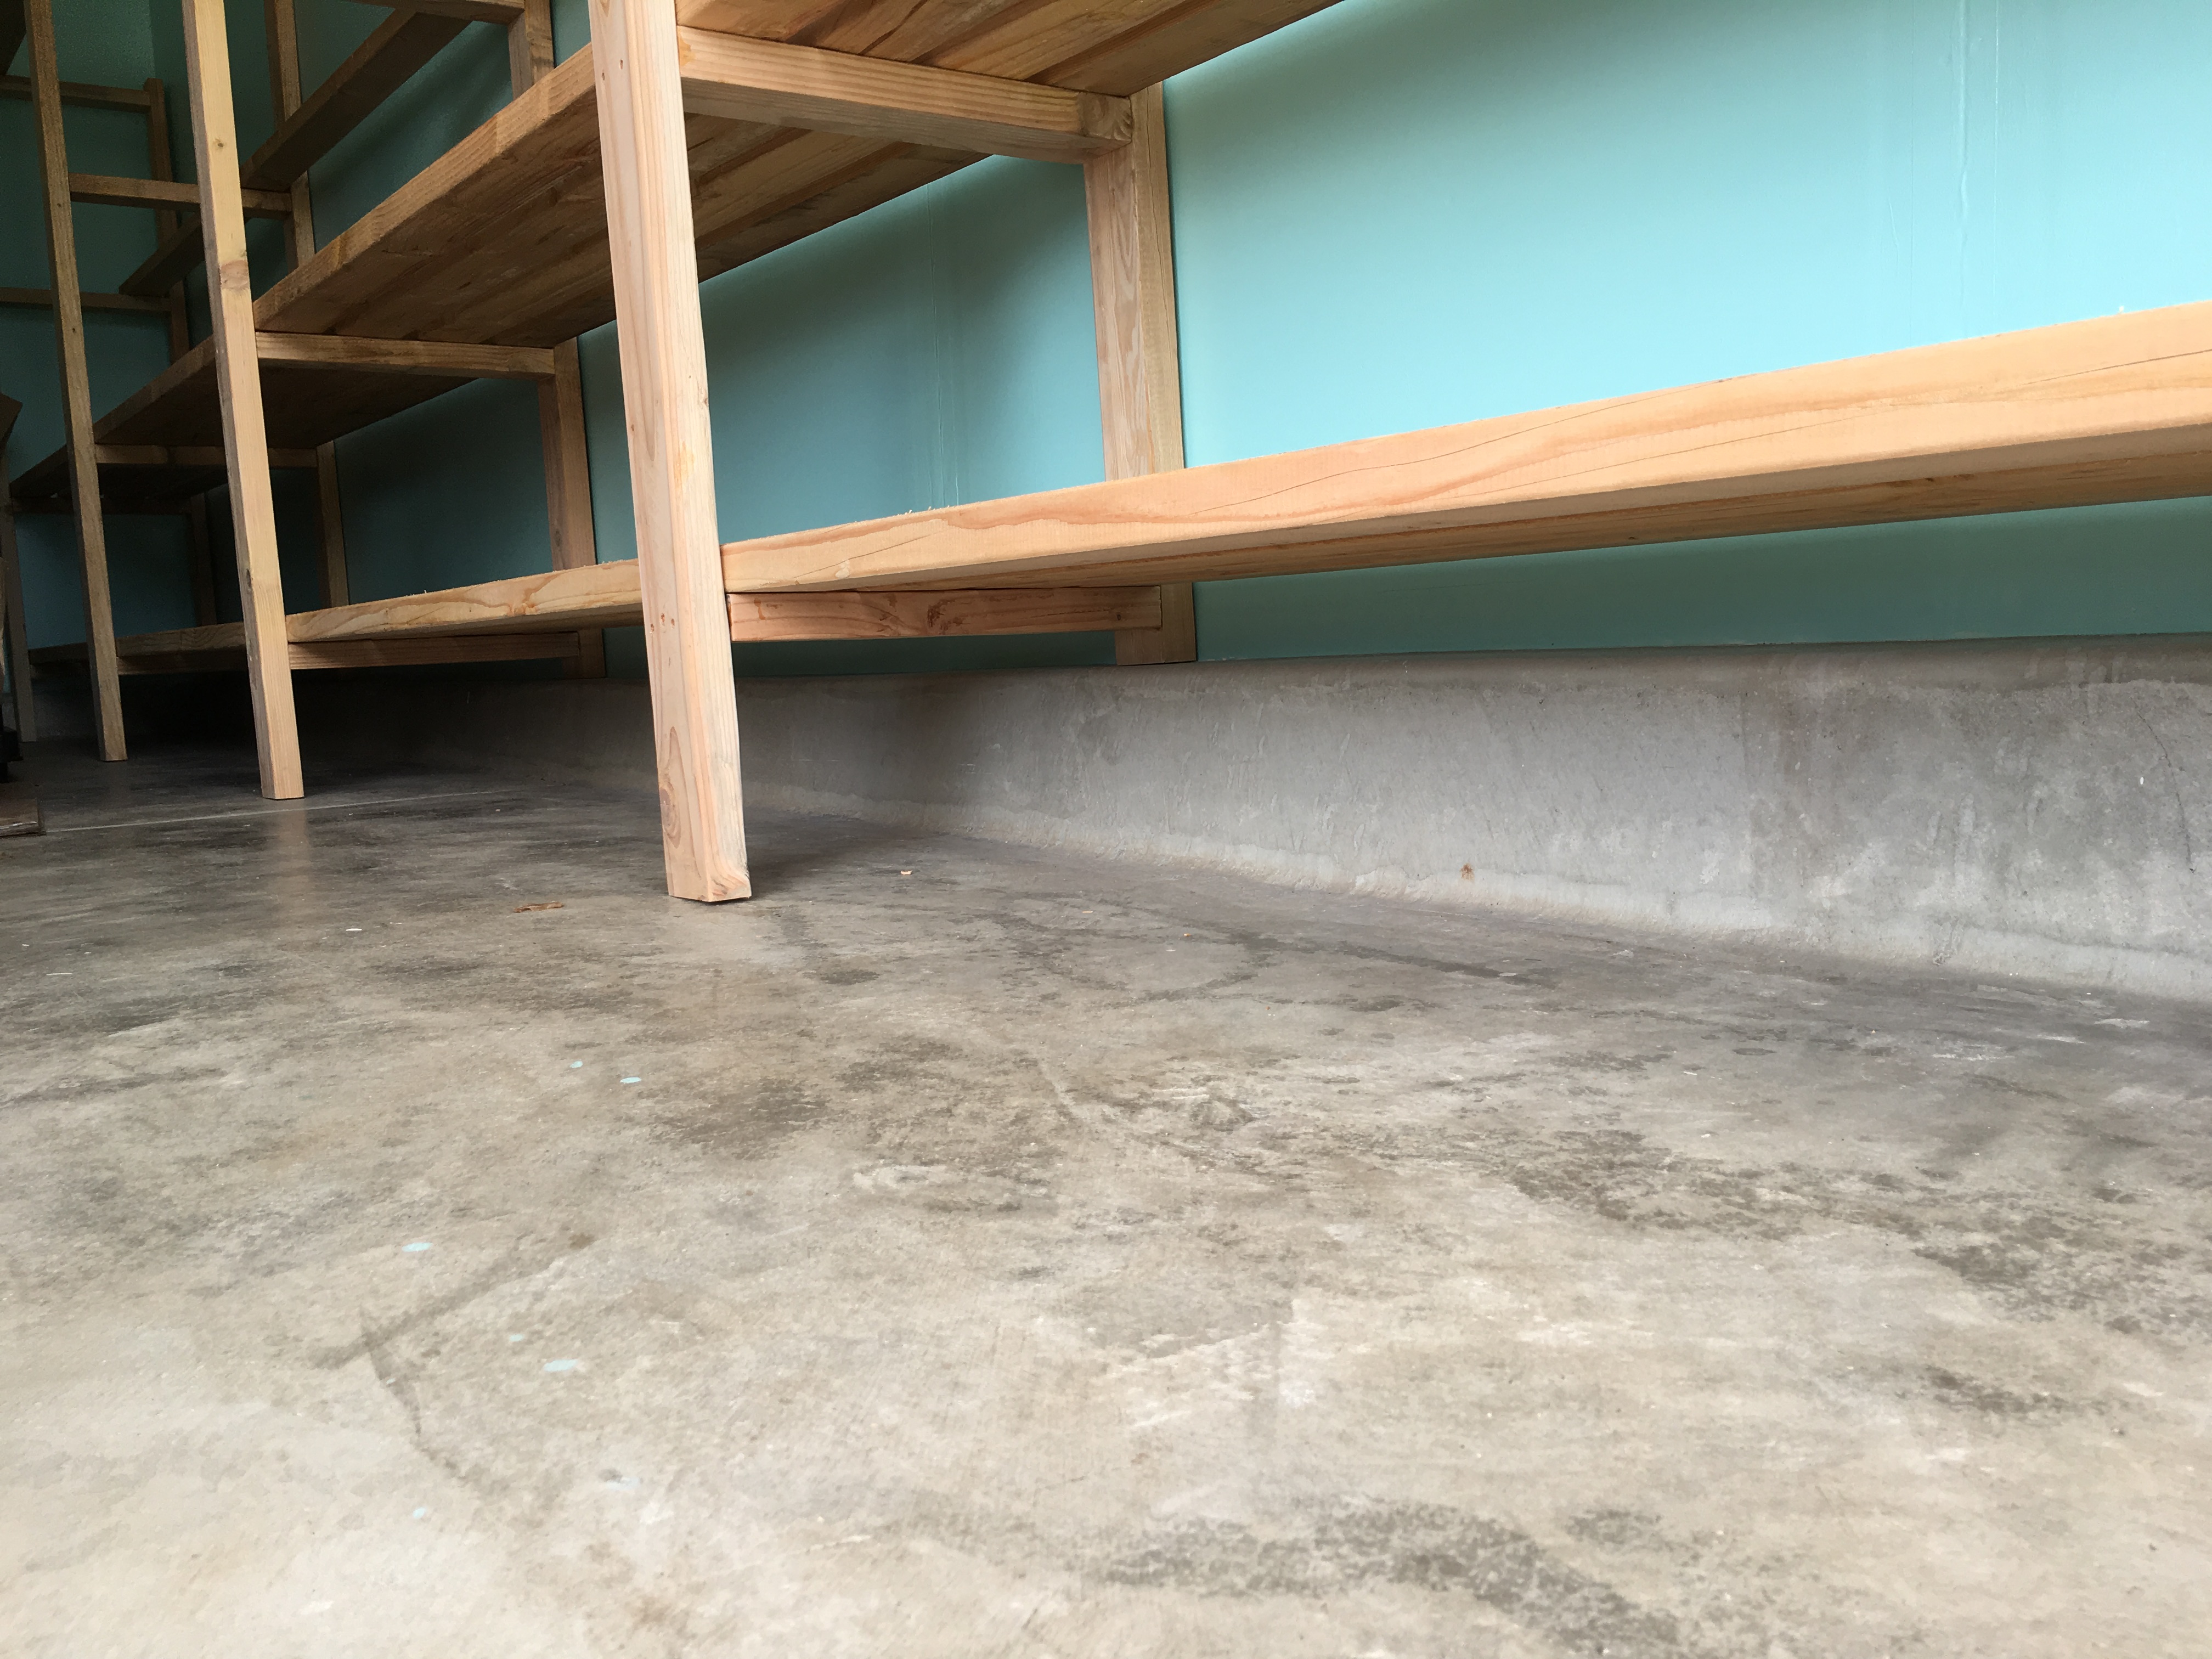
My garage has the concret lip so I chopped the legs running along the wall to sit on top of the lip. Additionally, the garage floor is at a slight incline so I took more time to cut each leg to ensure the shelf was level and didn't slant with the floor incline.
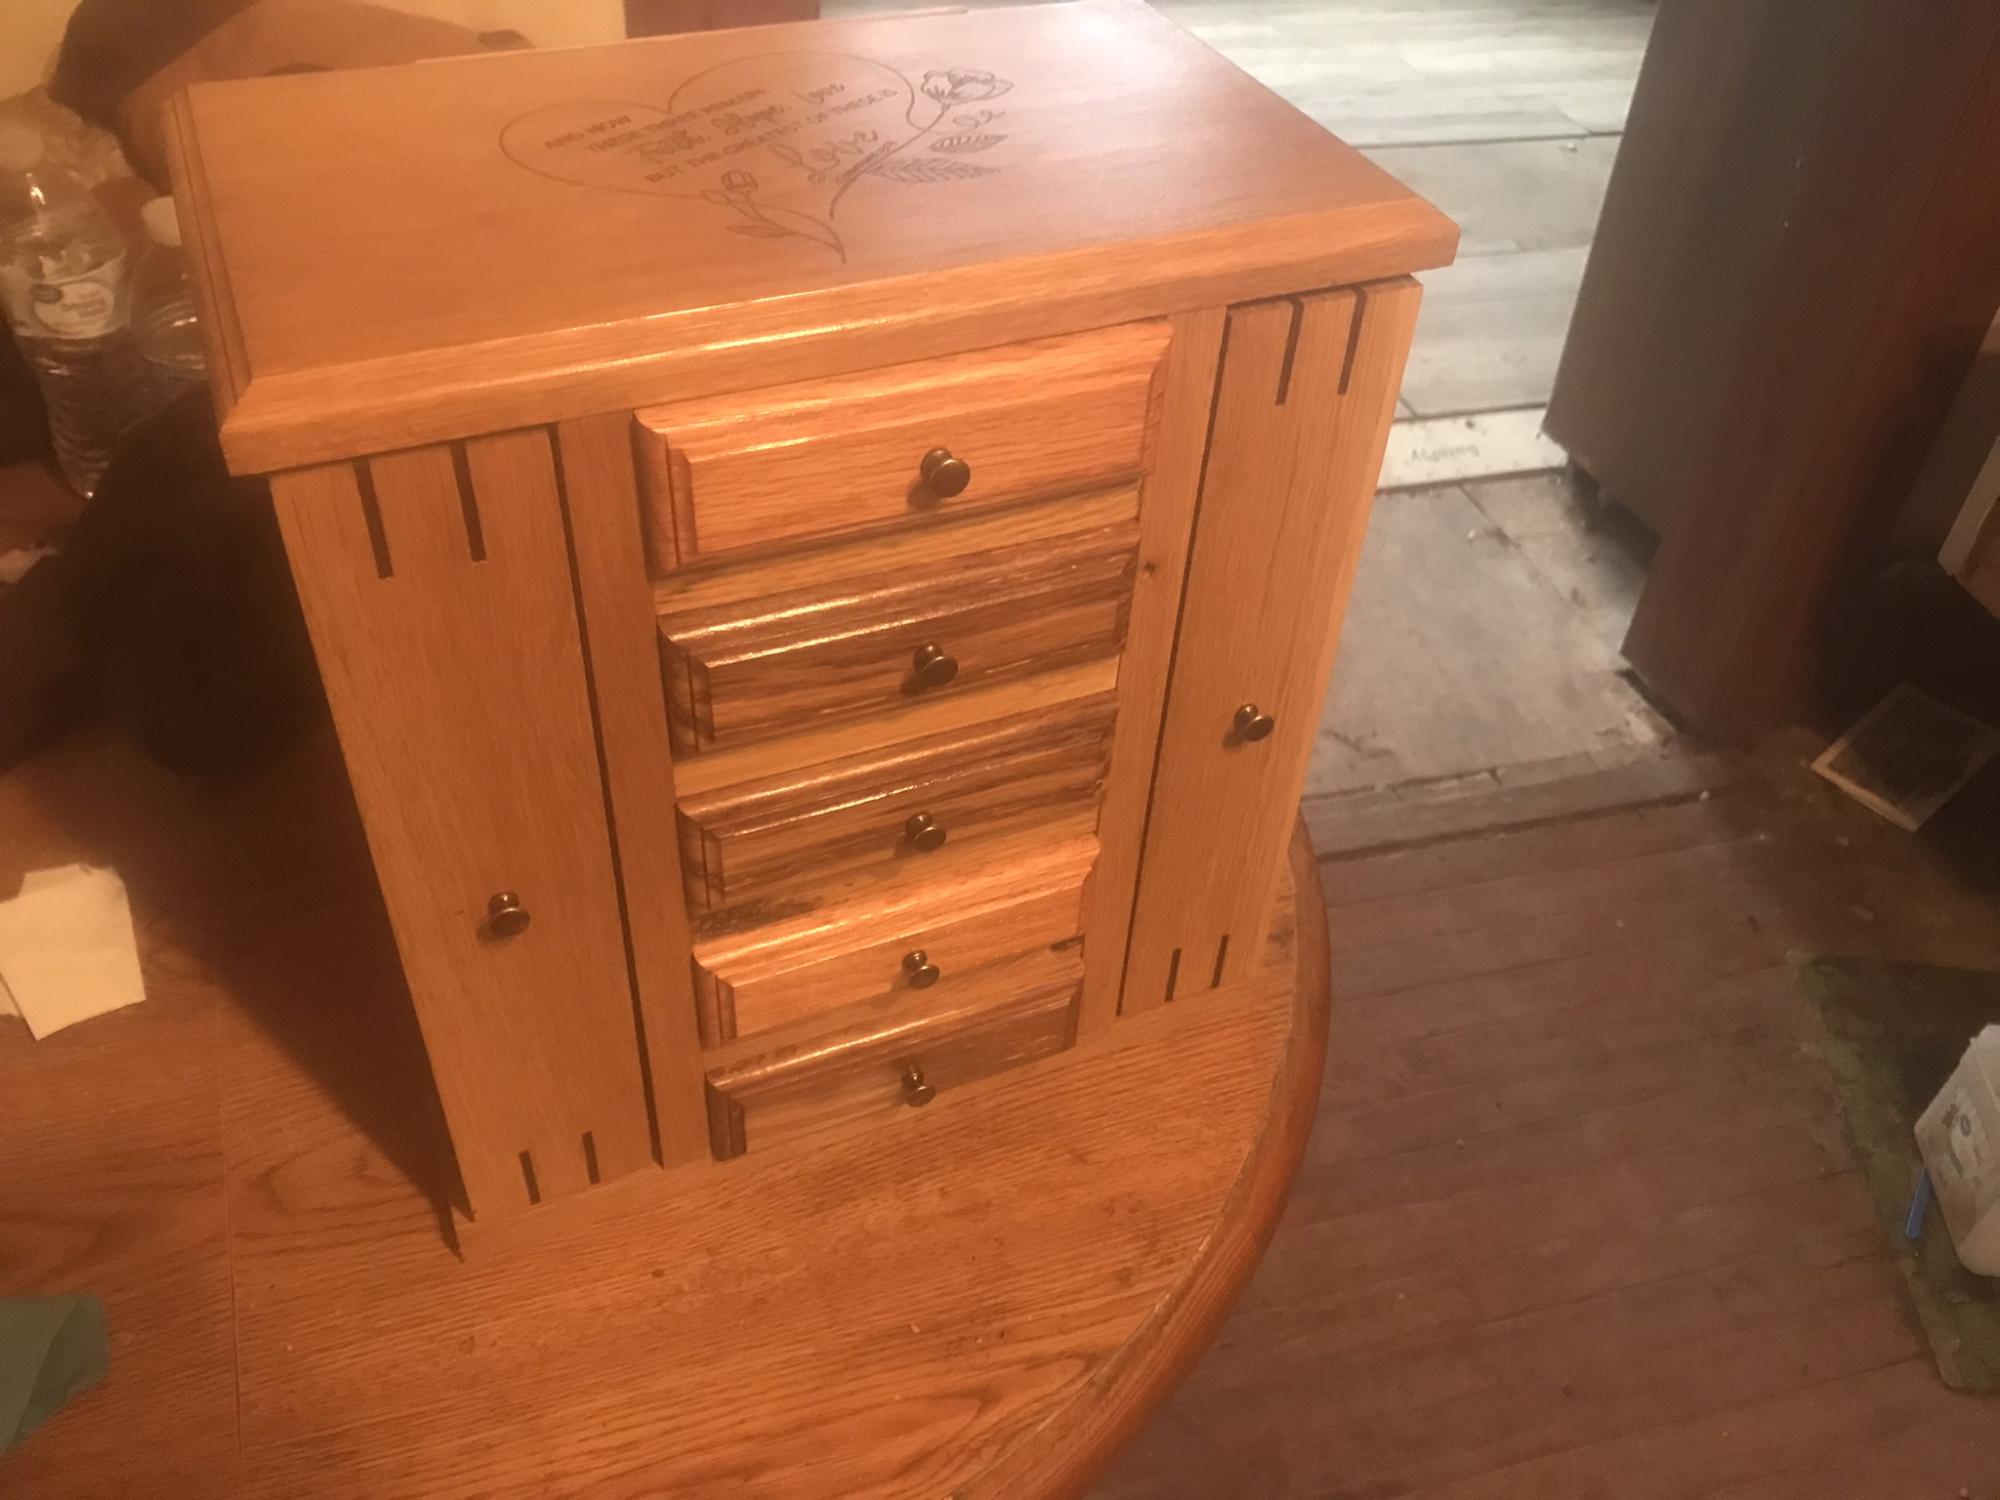
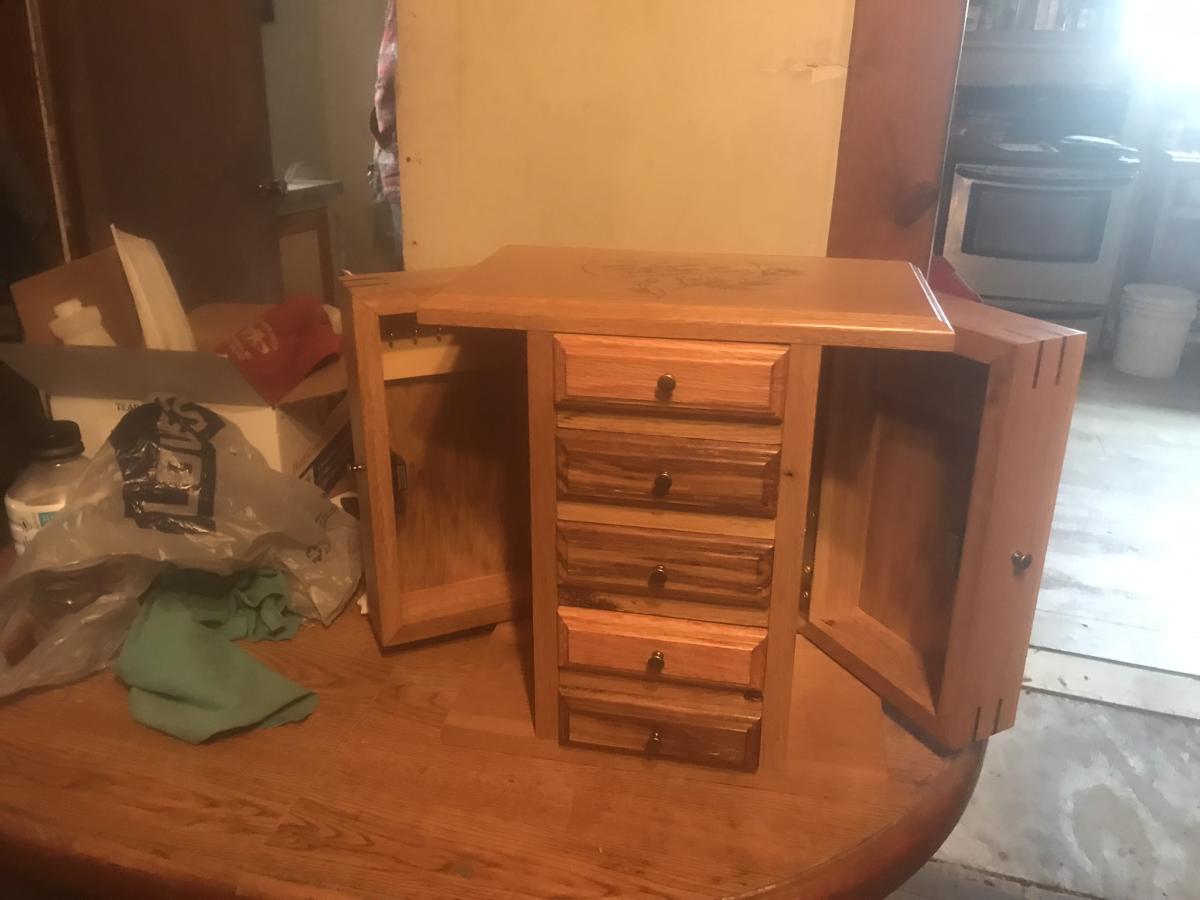
Made from white and red oak with laser engraved top
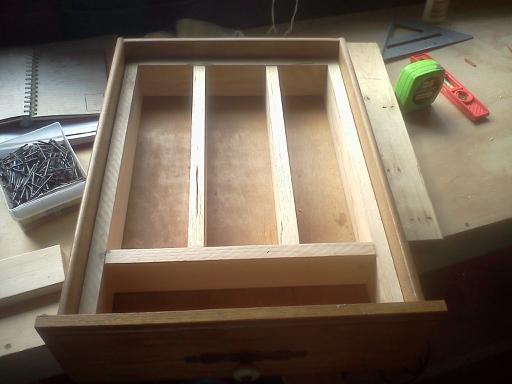
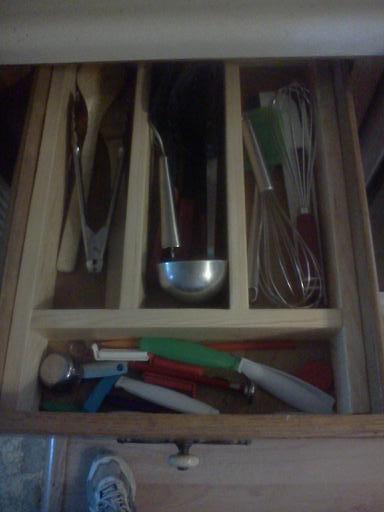
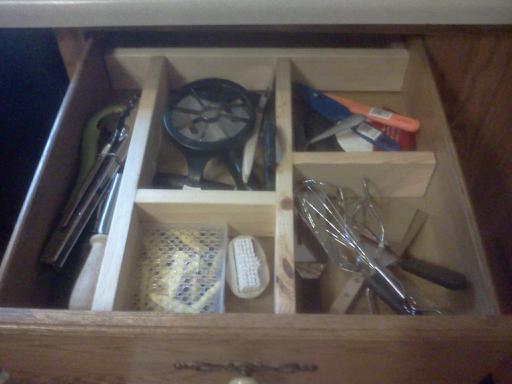
I got this idea from another poster. I already have a custom built silverware drawer divider, but decided that this would be a very nice thing to have for my two messy utensil drawers. I built for both drawers yesterday. Love them! I made one for my brother's tiny silverware drawer this morning and now my mom has requested them for 3 of her drawers. :-) It is so nice to be able to do something like this for them.


I hated wall mounts sold at stores and have been looking at a way to kind of make my TV look like it was in a picture frame. So with some help from my head designer (wife) I came up with this. I wanted some little shelves on the sides so my wife could put little knickknacks or pictures in. Hope ya'll like it. I will take better pictures soon.


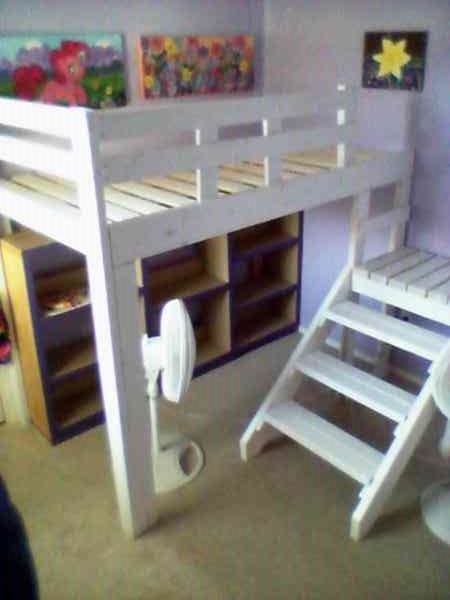
This took about 10 hours total. I actually built 2 versions. Both in about 20 hours total. One taller with stairs going away from the bed and this one shorter with stairs beside the bed. Had to make a lot of modifications durle to the dimensions of the room being so small and square. Overall though the plans really helped. Thanks Ana for having these plans available to use.

This week we made a farmhouse entryway table out of only 5 2x4's for about $15! It was super easy and only took half a day. We used plans we found on this site. We love the look of the new rustic console table. It adds a lot of pop to the foyer and a great place to drop your keys and mail.


Ana is Awesome! I built these from her plans. It was super easy, lots of fun, and the compliments are non-stop.
Thank you Ana.
Wed, 02/01/2023 - 08:57
These look fabulous, the two tone finish is super fresh! Thanks for sharing.
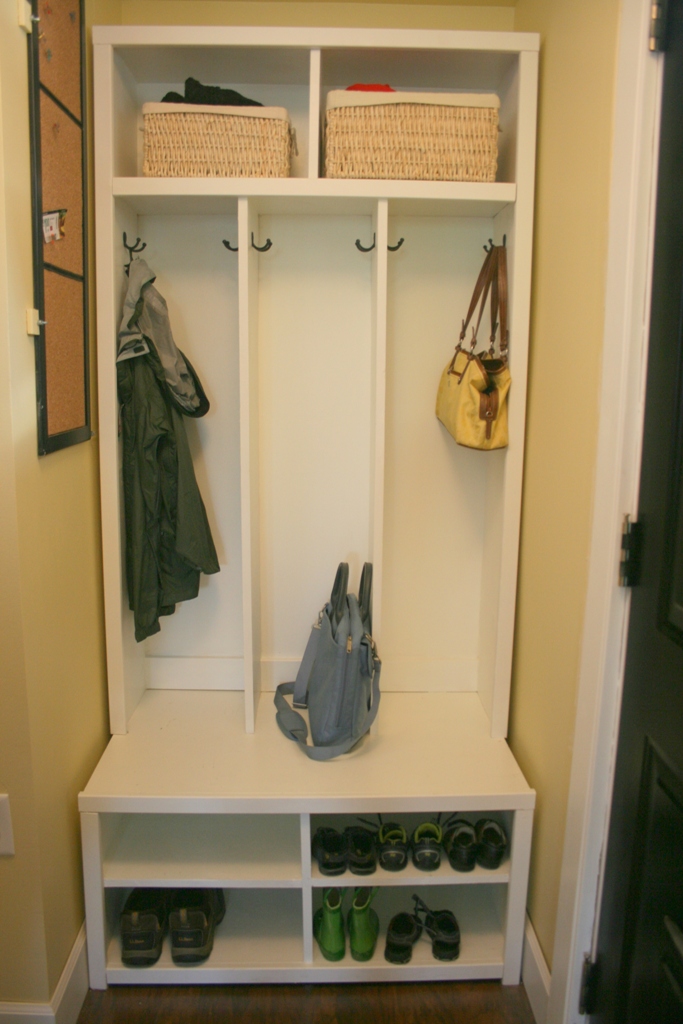
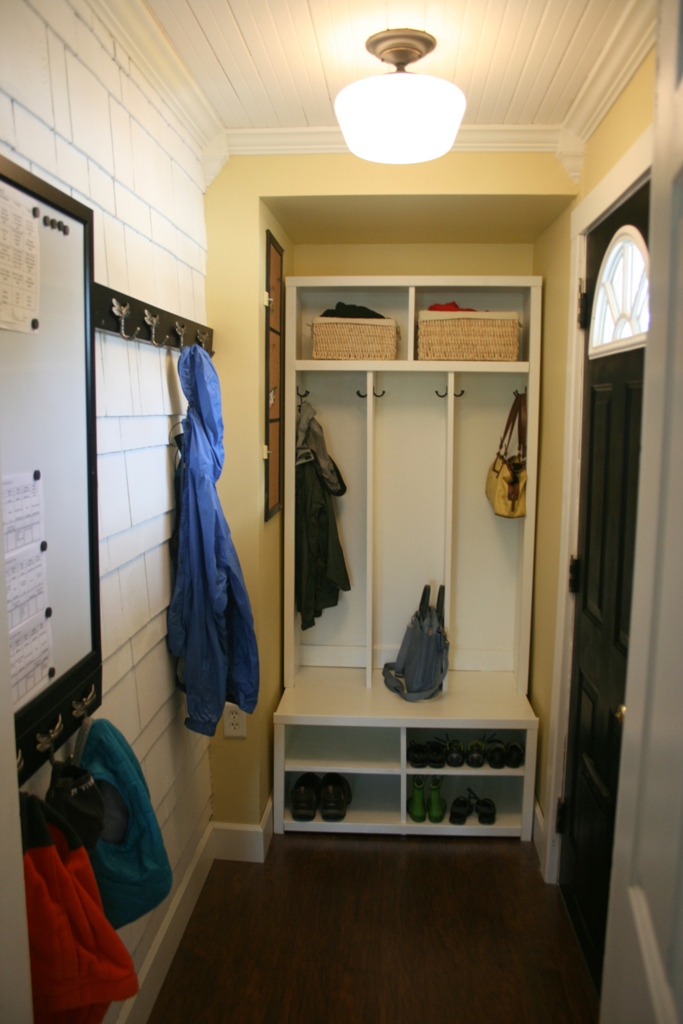
We had a small mud room off our back door that was in need of serious help! We started from scratch in this room - framing, drywall, floor, molding, etc. To complete the room, we modified the Braden Entryway Hutch and shoe bench plans to fit the dimensions of our space, and add a third cubby. It has worked wonderfully!
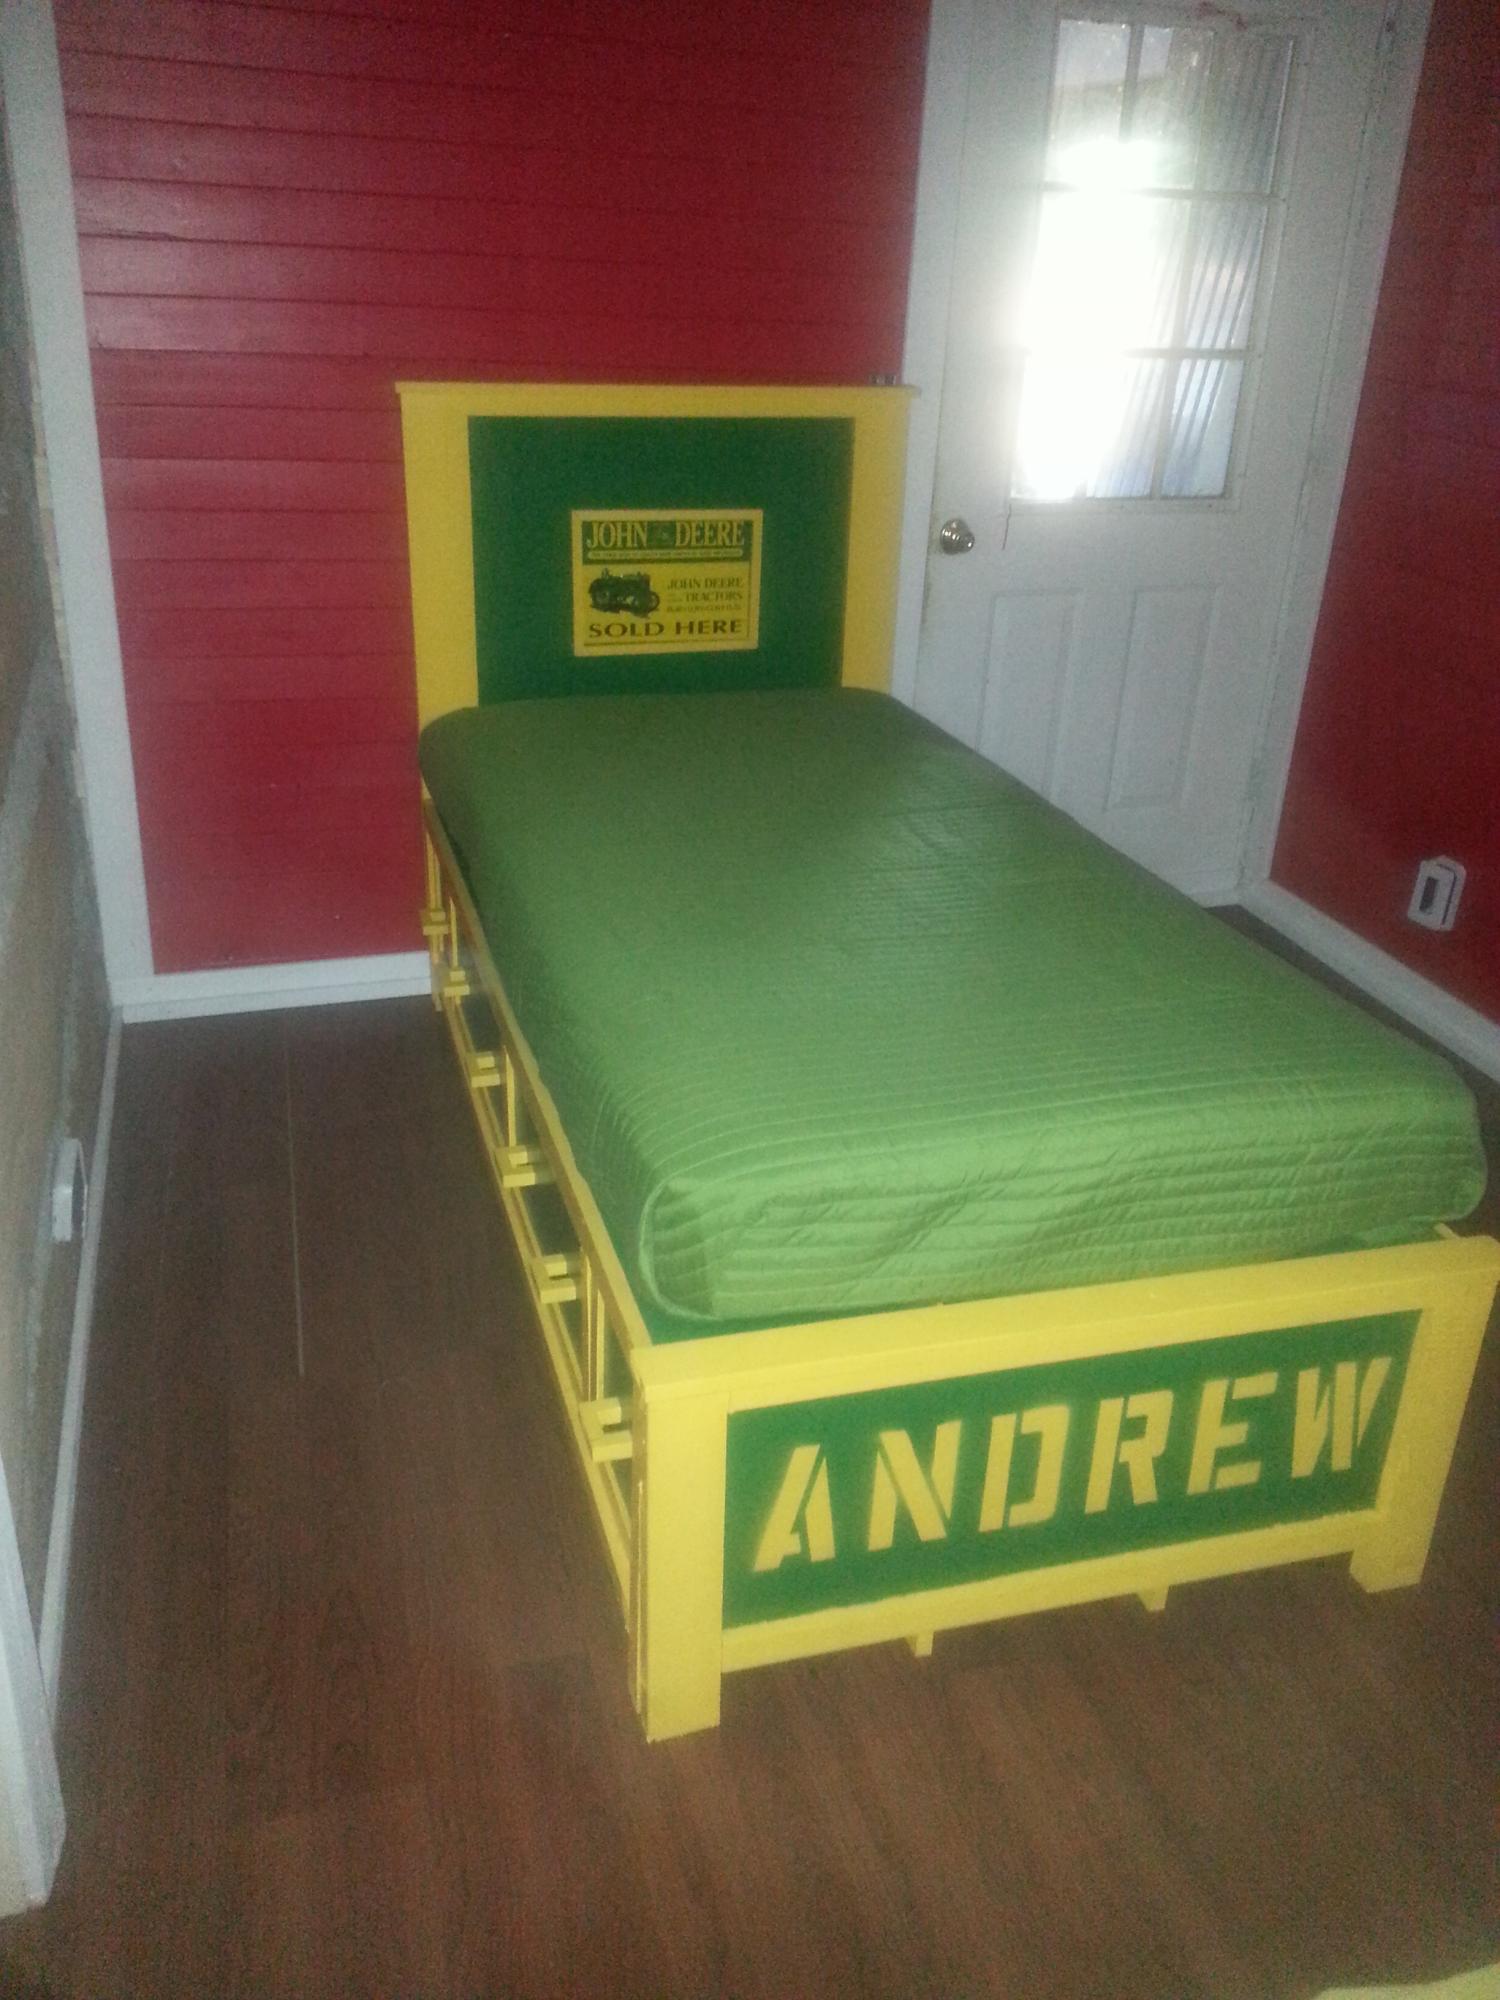
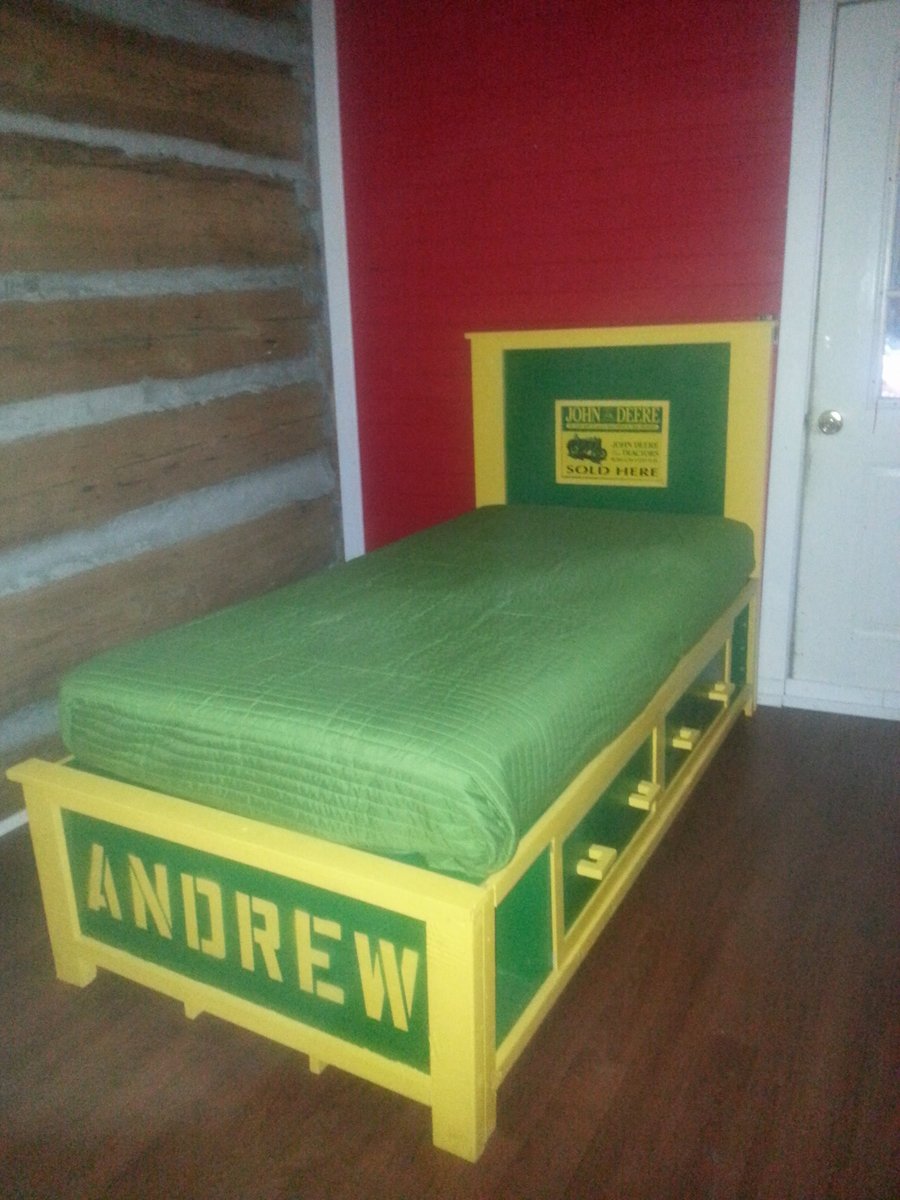
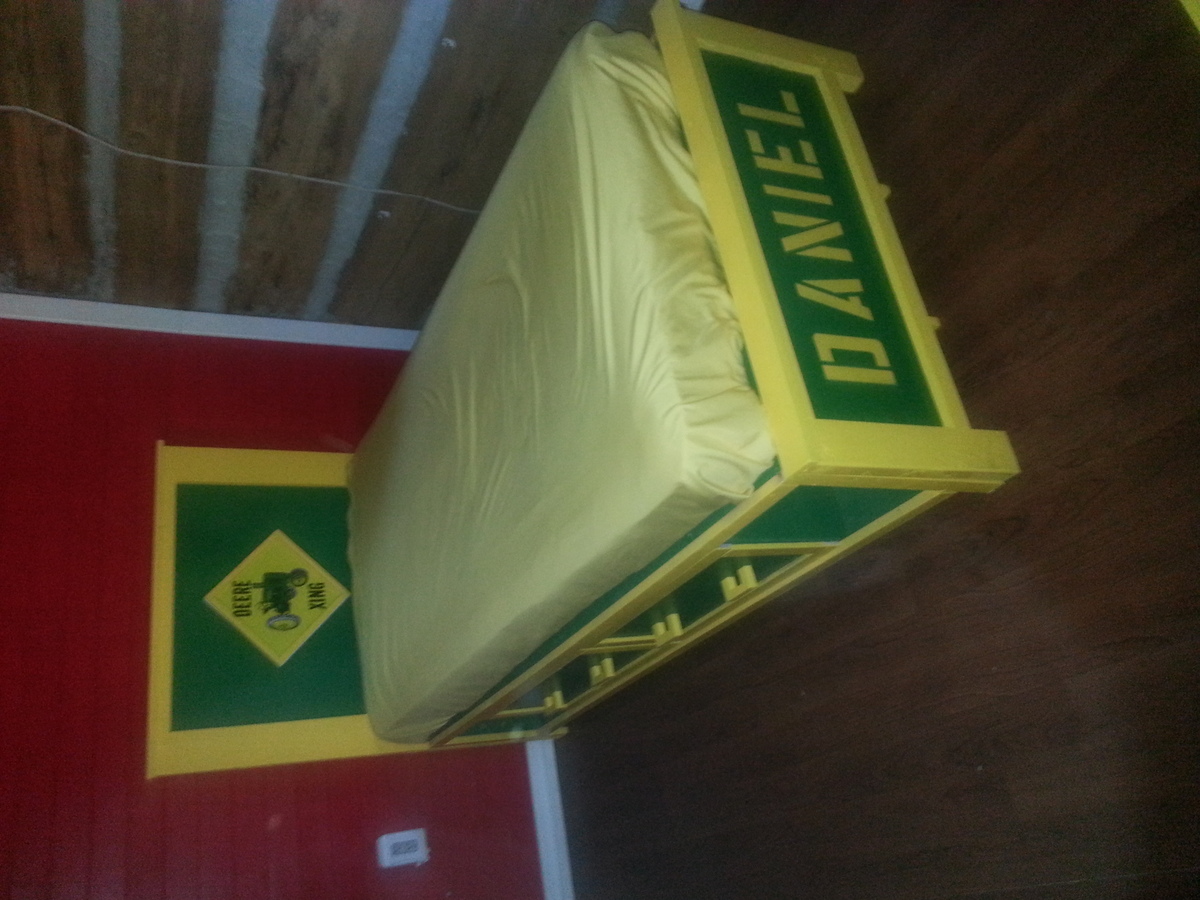
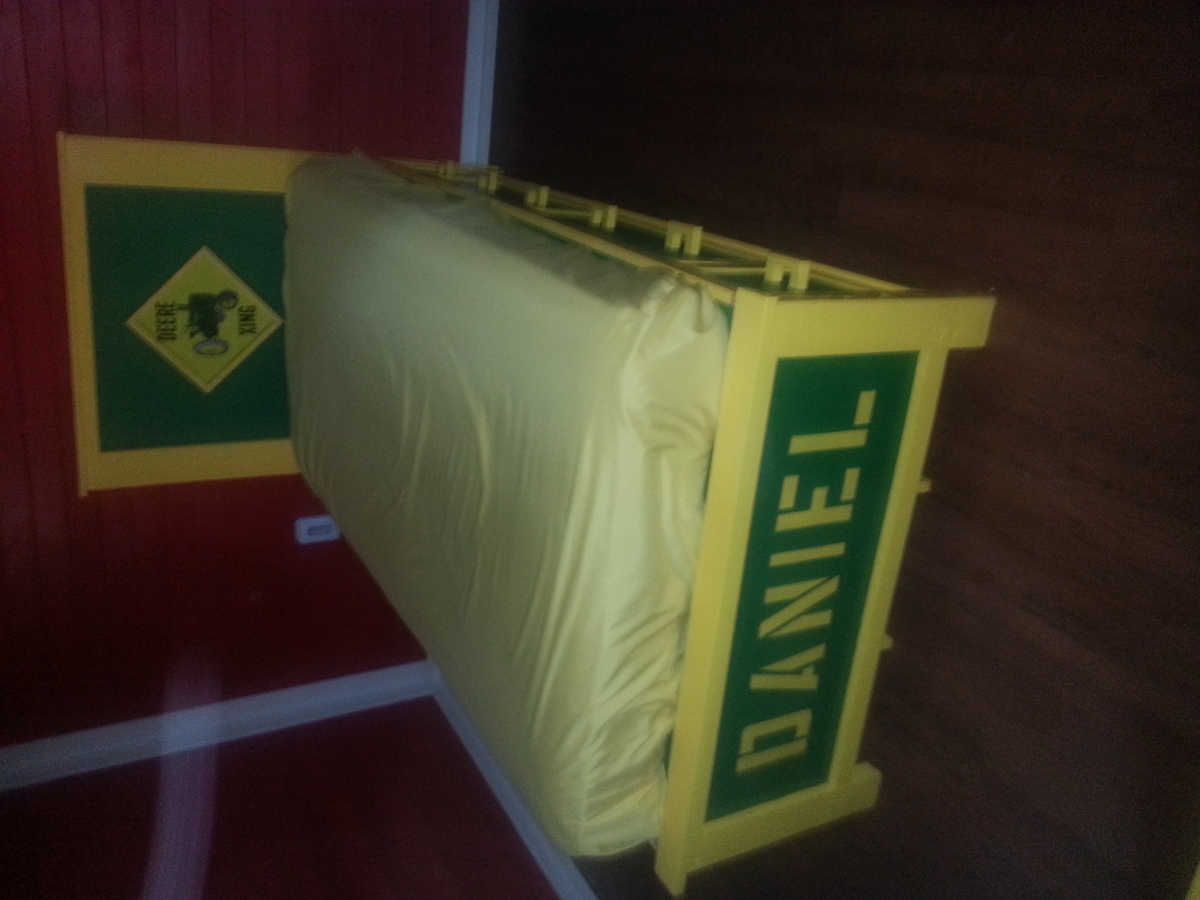
My wife and I have twin 2 1/2 year olds. We needed to get them out of their cribs and into a real bed. At the same time we needed a larger area to store their clothes, shoes, etc. I reviewed and followed Hailey Storage Bed Plan. The only alterations that I made to the plan is that I changed the color, added some decorative touches, and added 6 draws. The bed has a John Deere theme. I attached a John Deere sign on the headboard and then added trim around the sign.
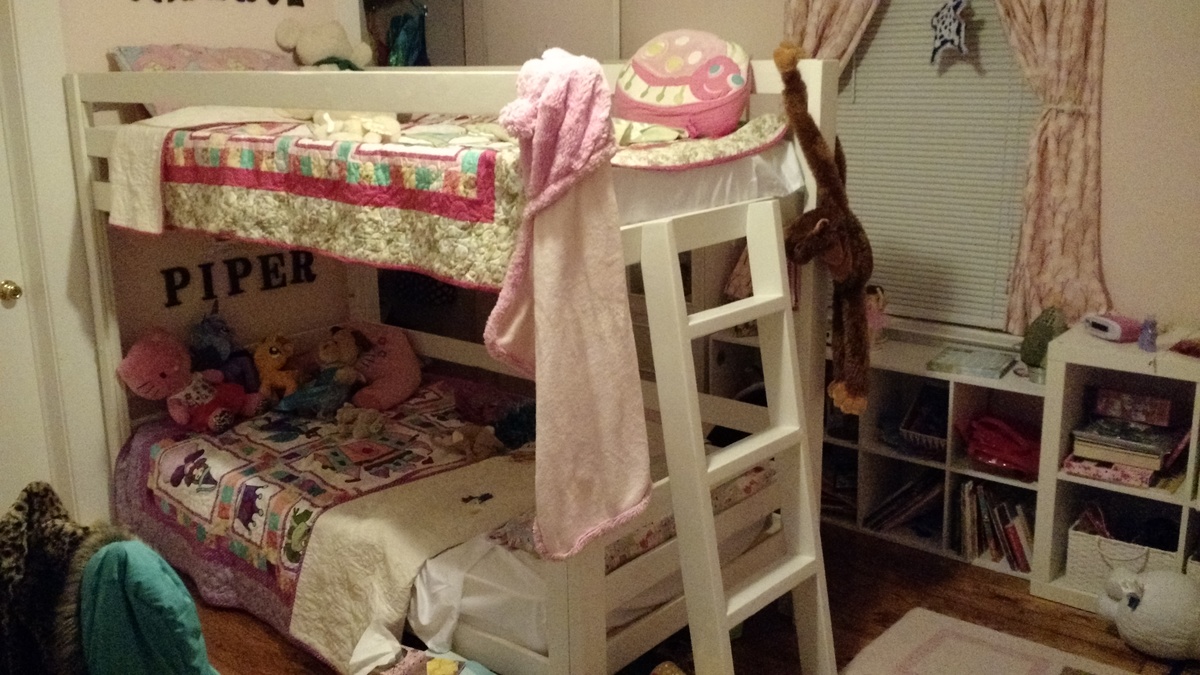
I reworked the Camp loft bed and the classic bunk bed plans to work better in this narrow room. Our kids love it!
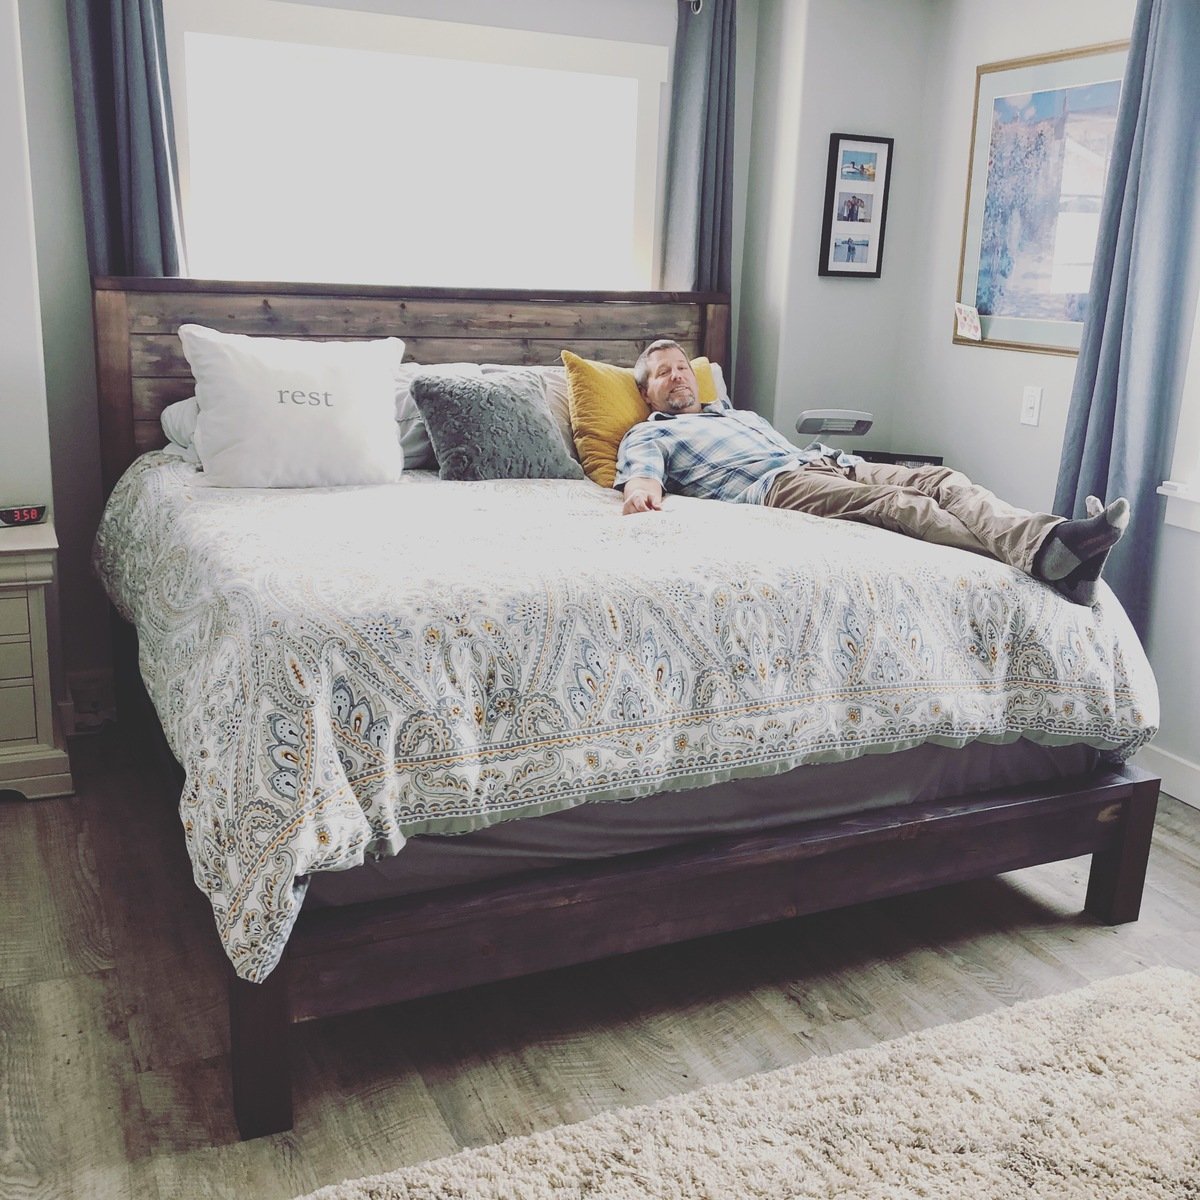
farm house bed frame. Easy fun project

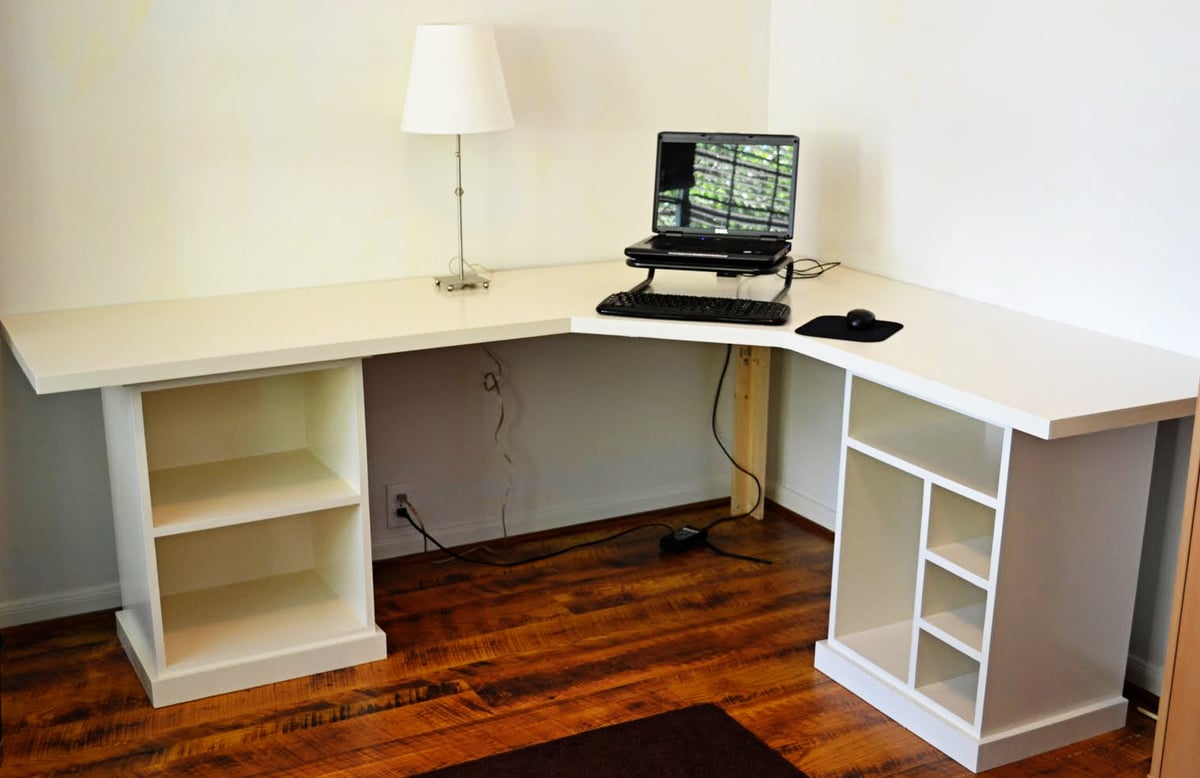
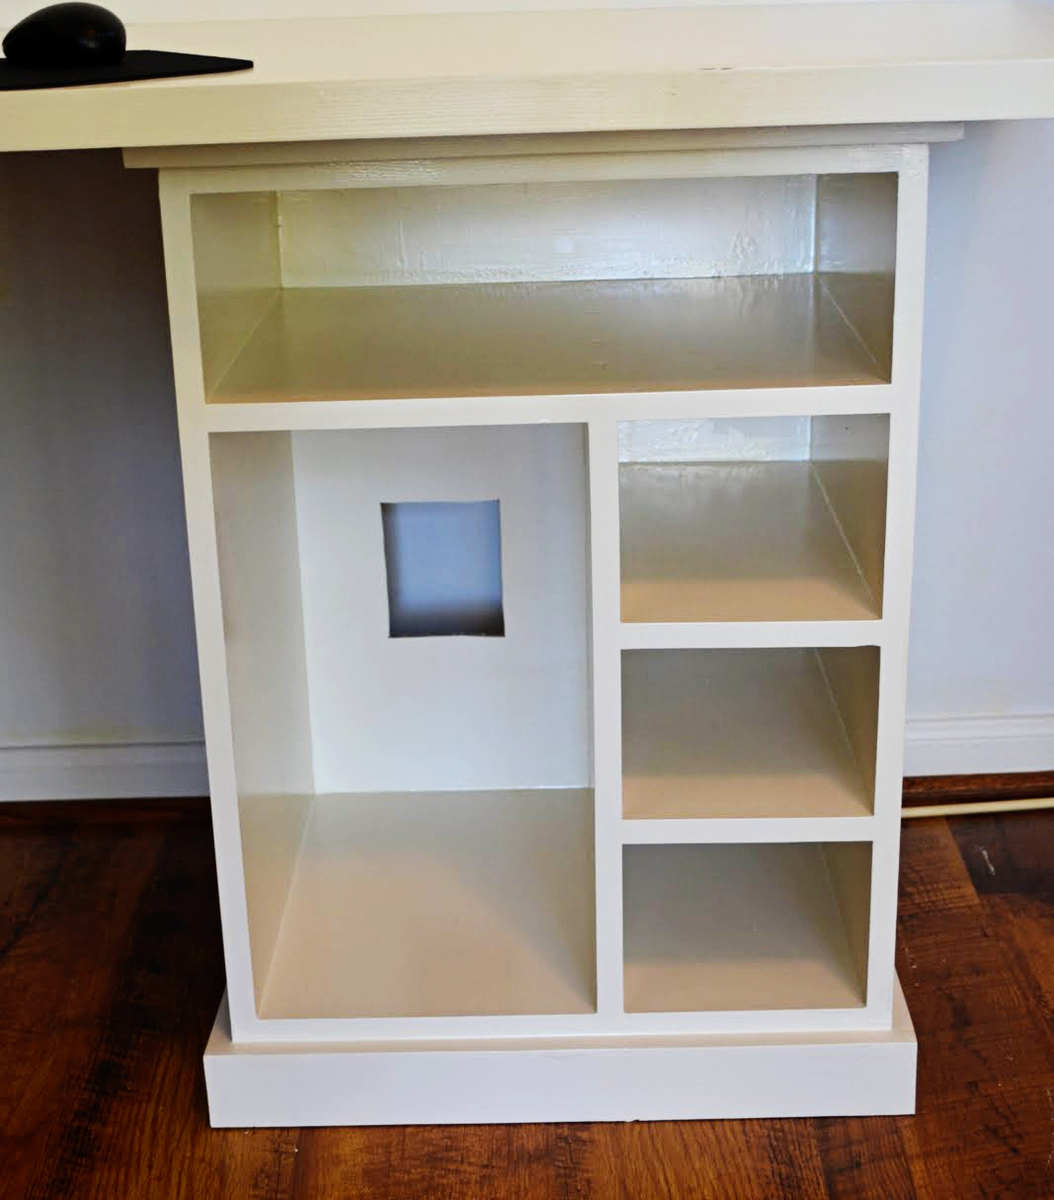
This was all my husband - he did a great job using the modular desk plans to customize (its a bit larger) this desk for our office. He finished it this past weekend so not much on it yet!


Mon, 02/06/2023 - 12:21
WOW, this is so awesome, well done! Thank you for sharing.

Comments
Ana White Admin
Fri, 01/13/2023 - 11:43
Cute Beds!
These look so great! Thank you for sharing.