Community Brag Posts

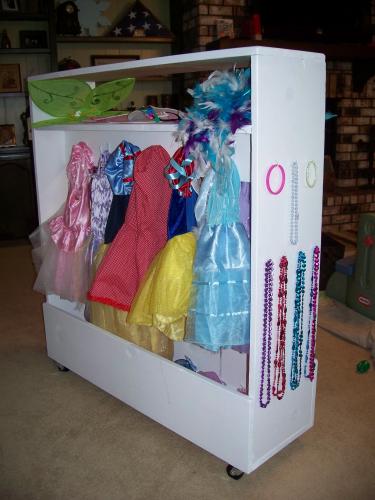
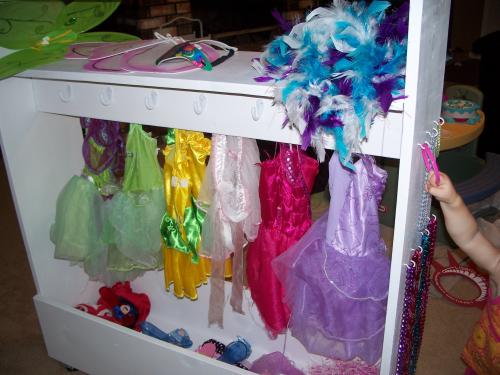
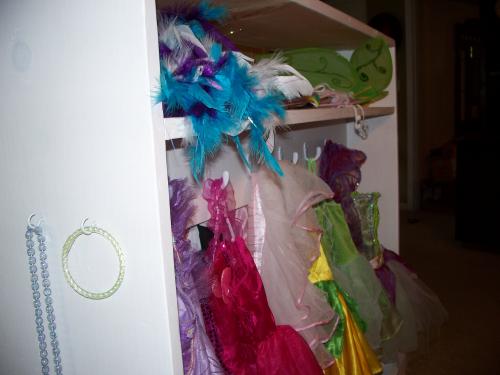
Dress Up Cart
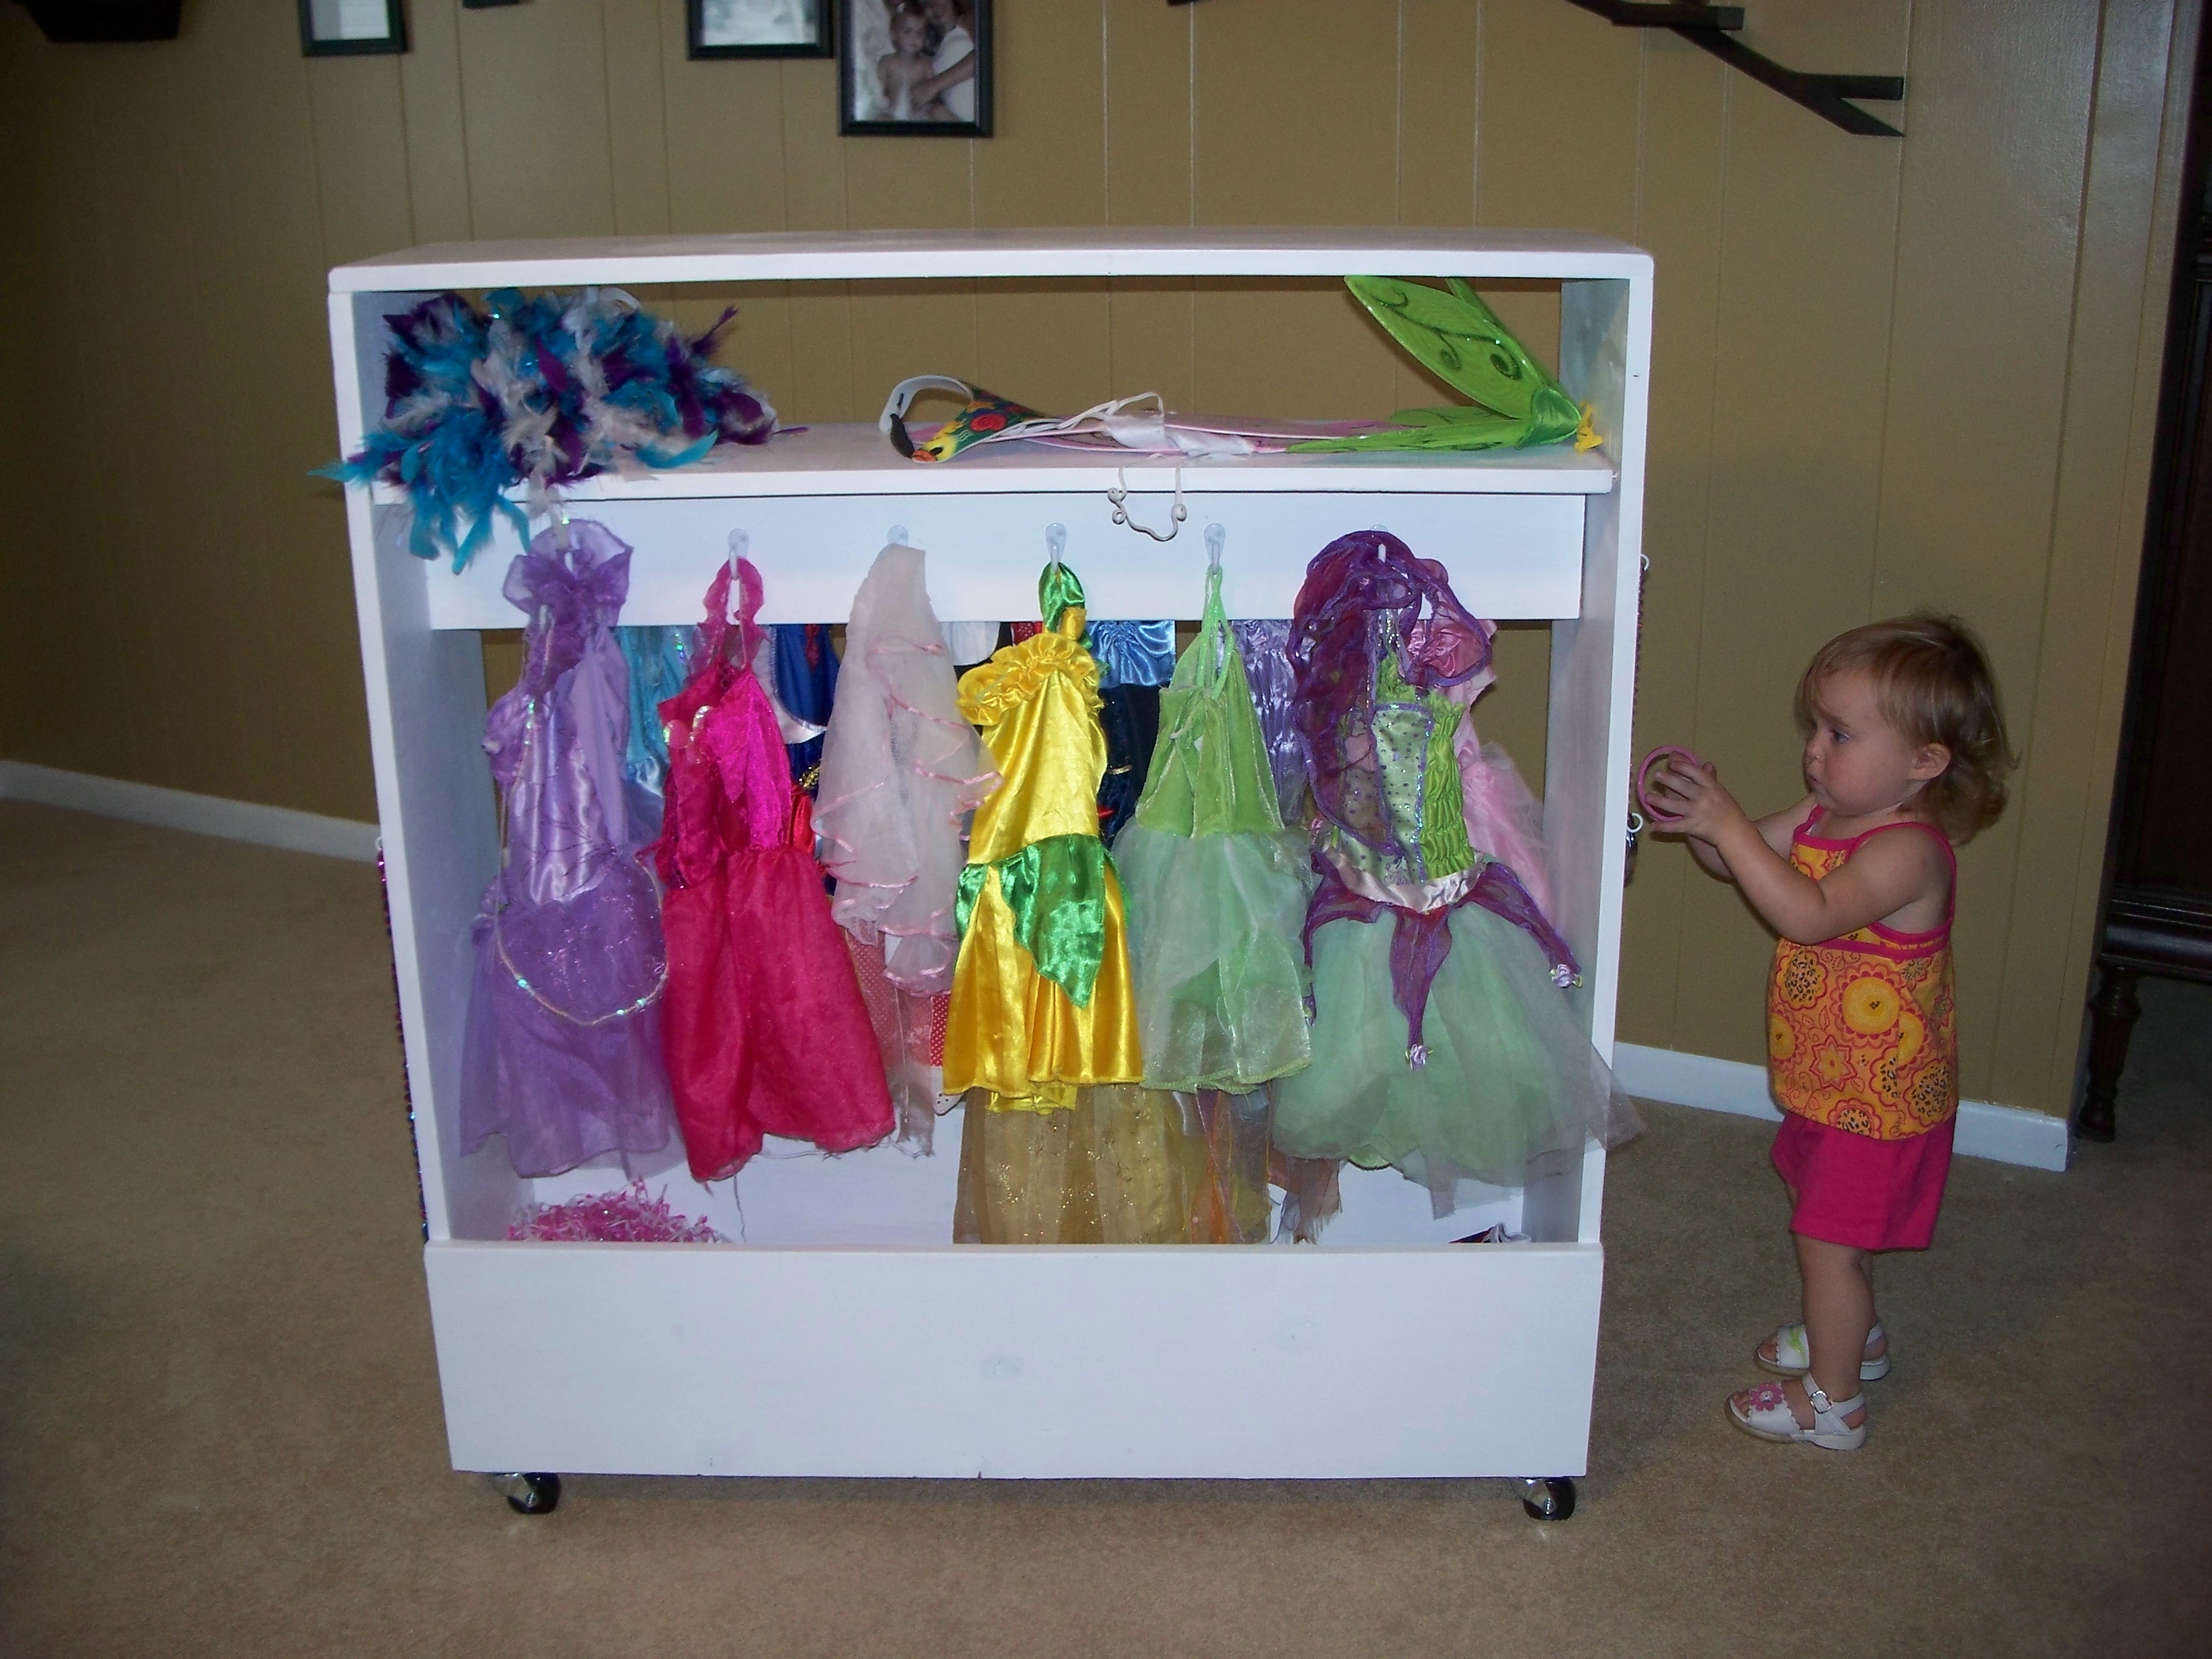
When I saw these plans I knew I had to make it! I have 2 little girls (3yrs & 18months). I modified mine because I knew they wouldnt be able to hang their dresses back up on the hangers. And I wanted just a little extra storage for other things.
Estimated Time Investment
An Hour or Two (0-2 Hours)
Finish Used
White Paint
Recommended Skill Level
Starter Project
Farmhouse Vanity - pretty easy
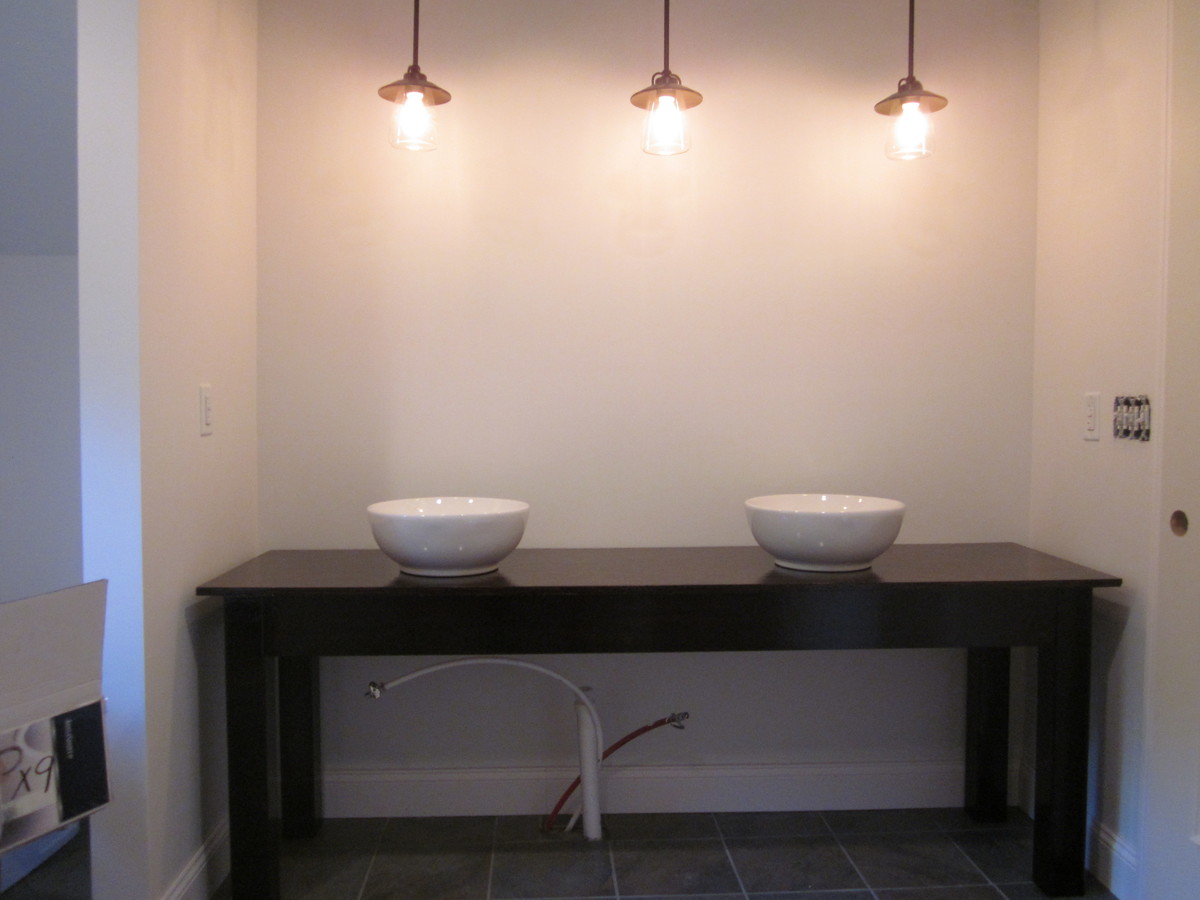
This was a pretty easy project! It took my husband about 2 hours to cut and assemble and really required very little wood and materials. The long part was sanding, staining, and sealing it as we wanted to make sure it can withstand being in use in the bathroom. Looks great and we're really happy with how it turned out! We'll probably add the slats on the bottom sometime later.
Built from Plan(s)
Estimated Cost
$150
Estimated Time Investment
Afternoon Project (3-6 Hours)
Finish Used
Minwax Red Mahogany
Recommended Skill Level
Beginner
First Project
This was my first project and I loved it!! Can't wait to do more!!
Built from Plan(s)
Estimated Cost
$50
Estimated Time Investment
Weekend Project (10-20 Hours)
Finish Used
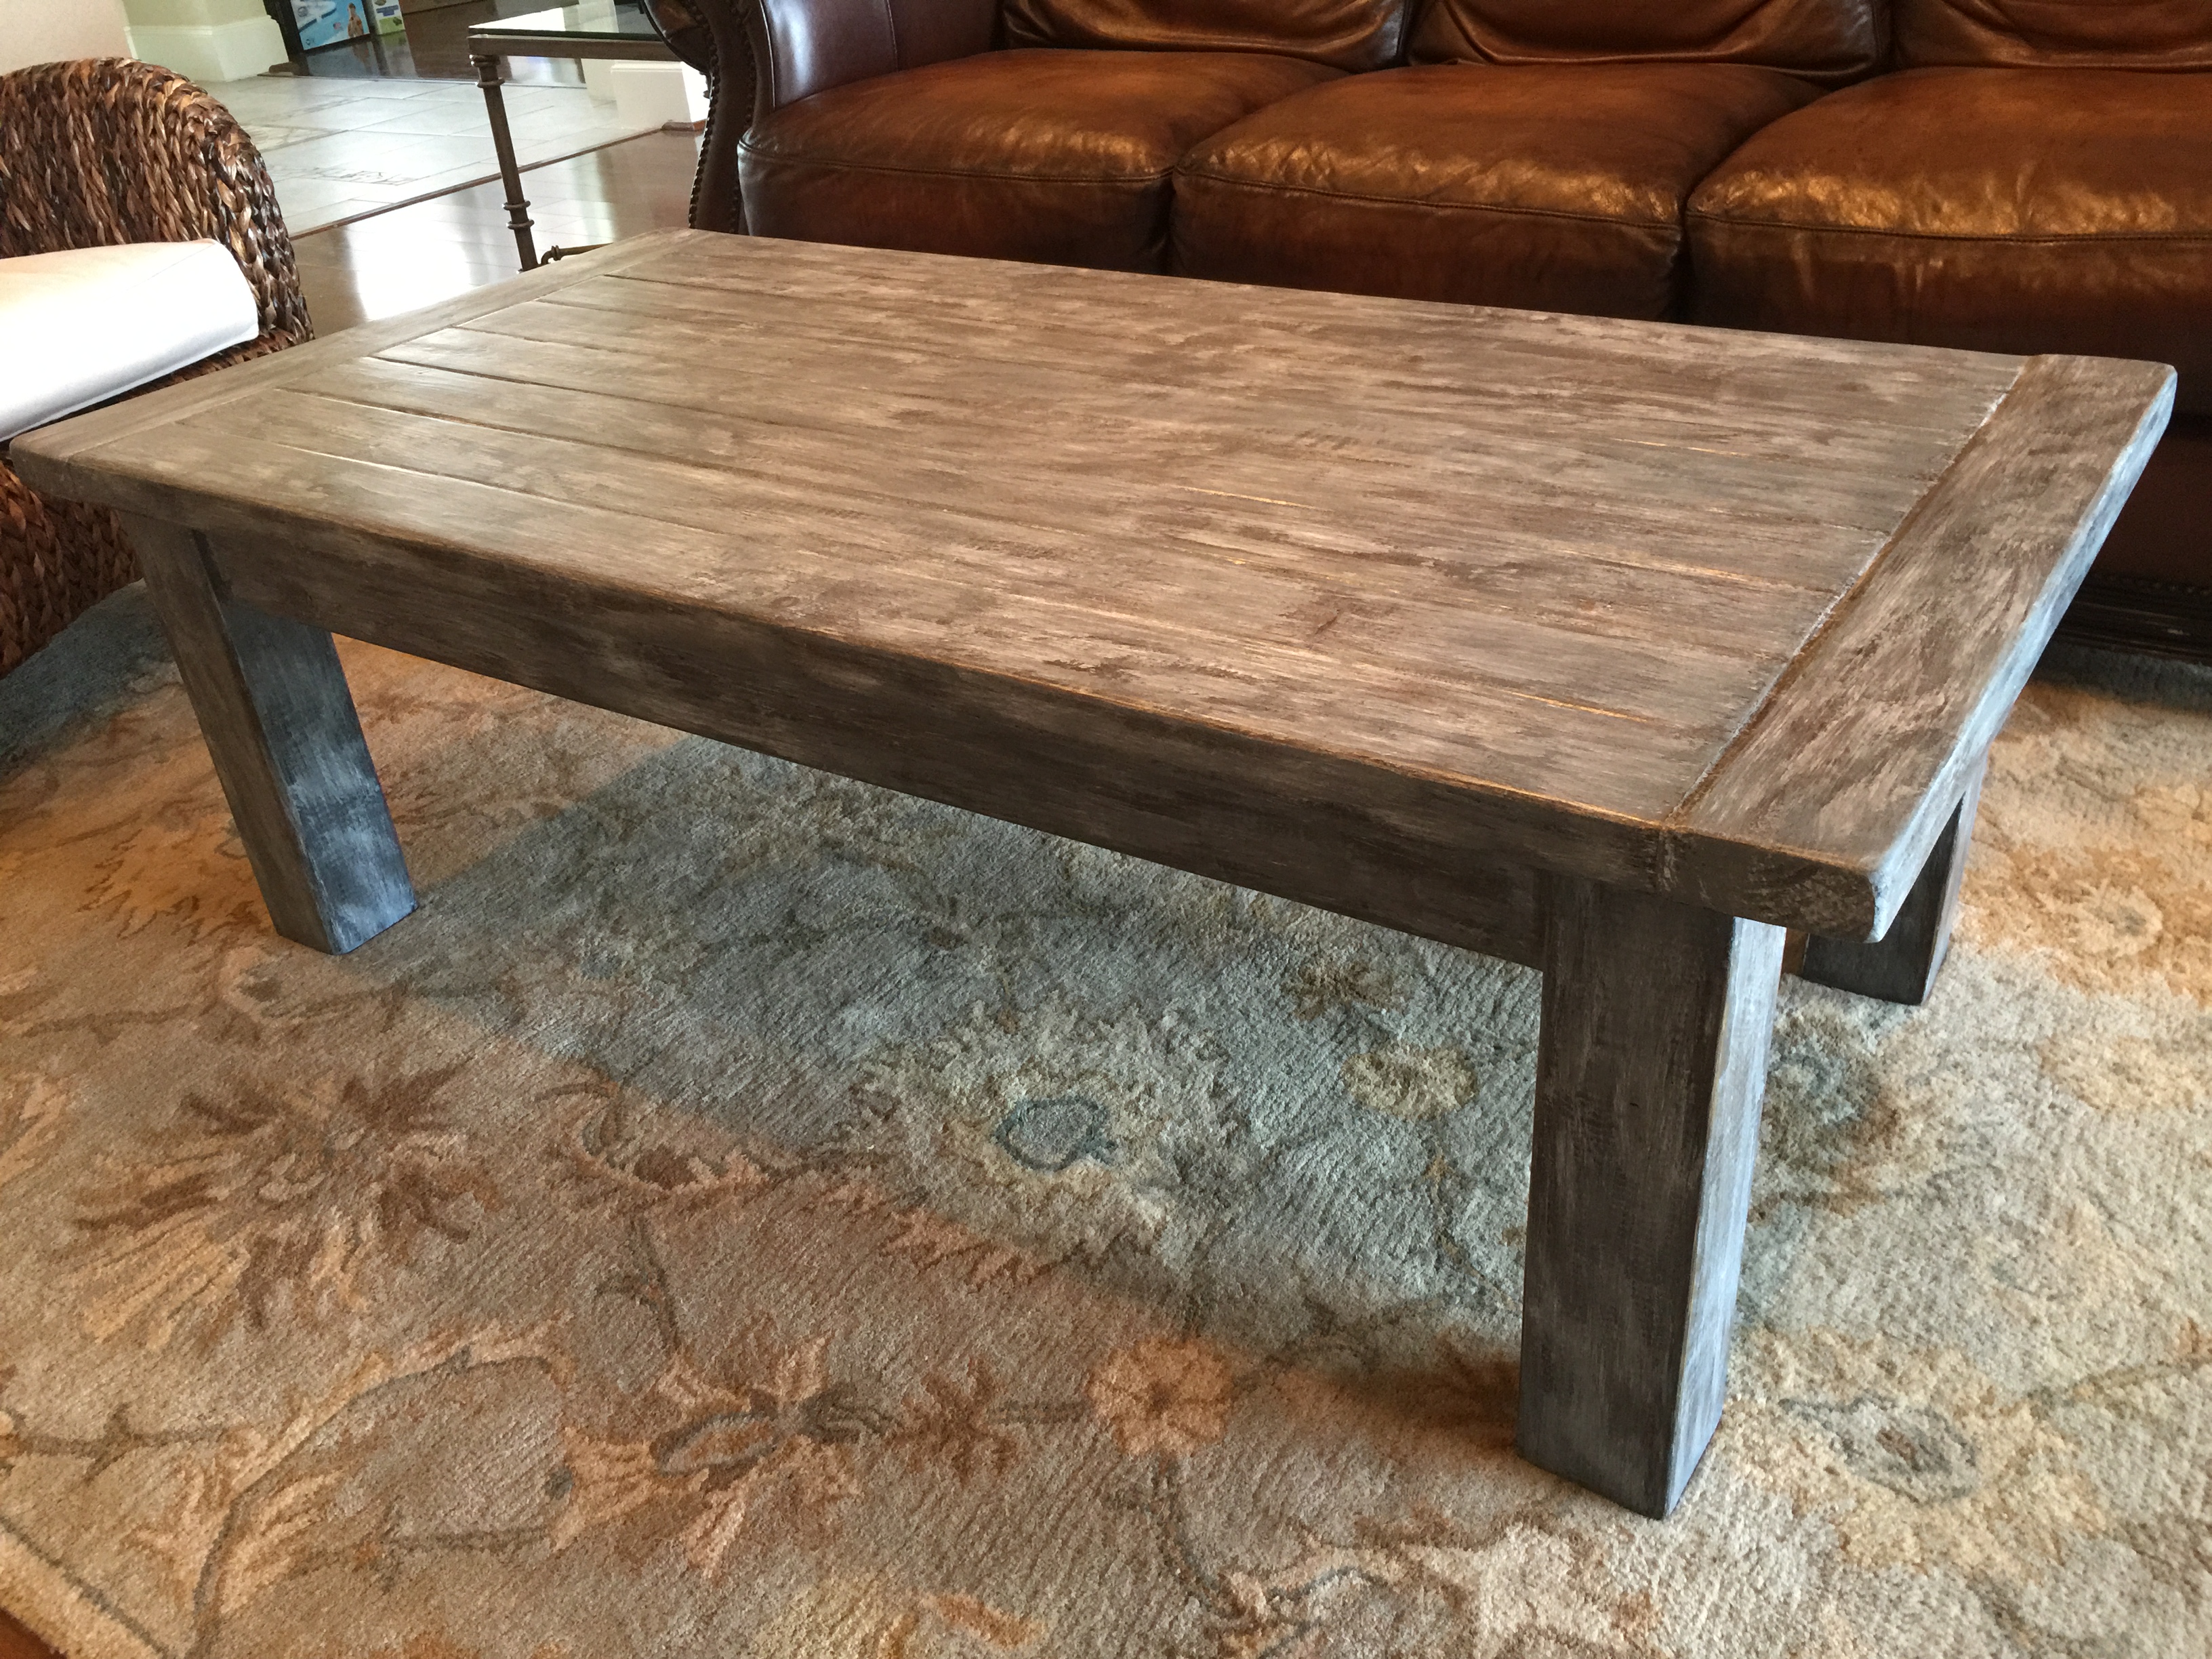
Started with Kona stain, then lightly added white acrylic paint. Used steel wool to get an older look. Then I went over that lightly with Weathered Gray, and scratched that up with steel wool again. Three coats of satin poly later...and here we are.
Recommended Skill Level
Beginner
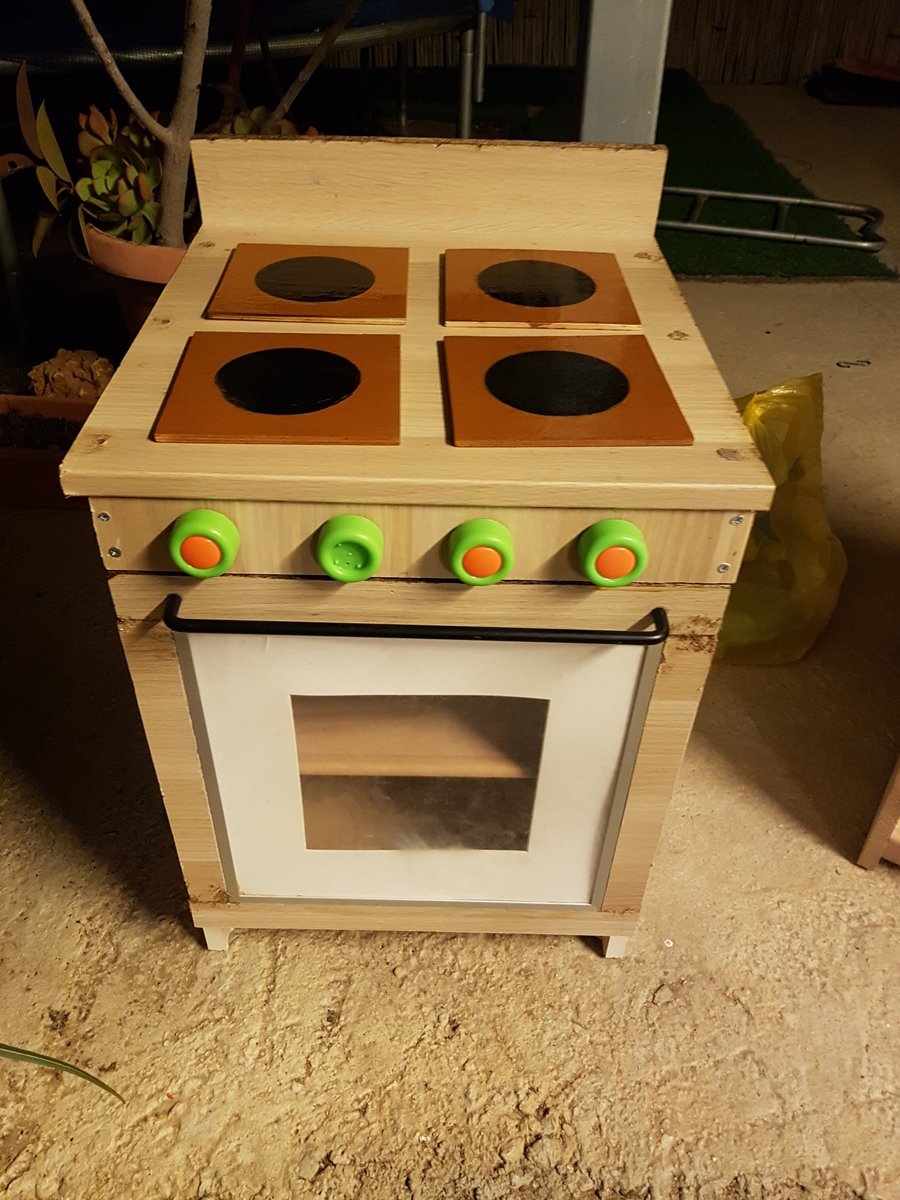
Ana White play sink and stove by Droritos
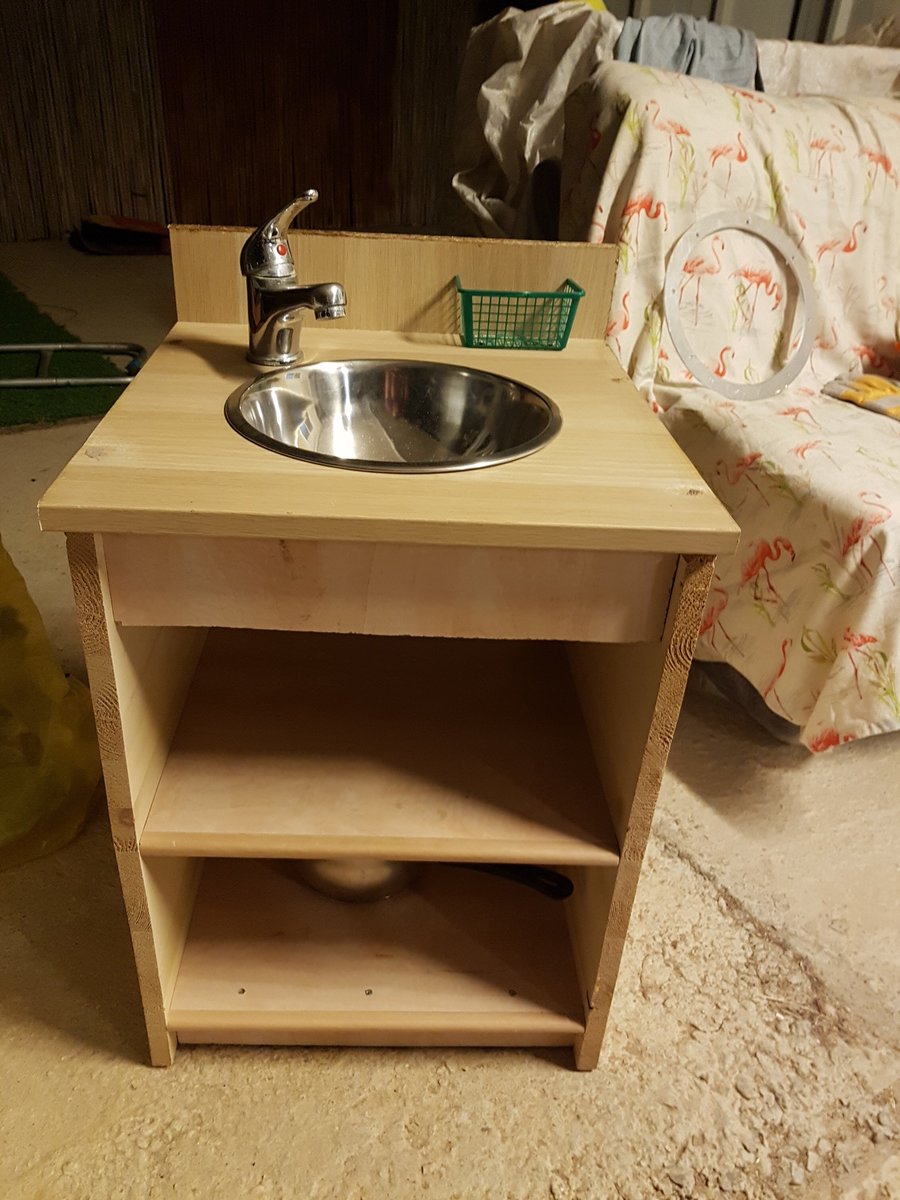
From Ana White kids kitchen plans
Thank you!
My kids loves their mini kitchen!!
Built from Plan(s)
Estimated Cost
Less than 20$
Estimated Time Investment
Day Project (6-9 Hours)
Finish Used
None yet
Recommended Skill Level
Beginner
Dog kennel coffee table
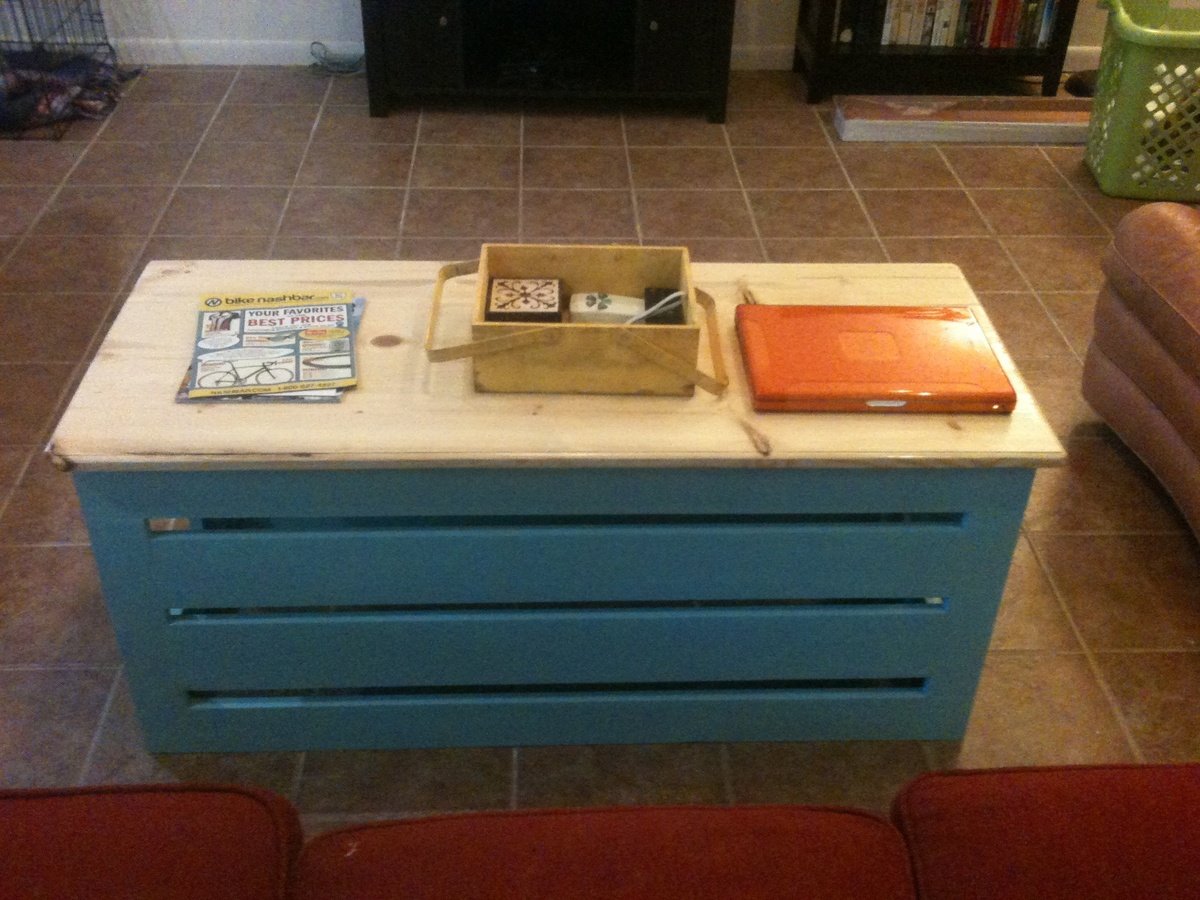
I borrowed the idea from the dog kennel plans, made obvious modification, and this is what it became. Enjoy!
Built from Plan(s)
Estimated Time Investment
Weekend Project (10-20 Hours)
Recommended Skill Level
Intermediate
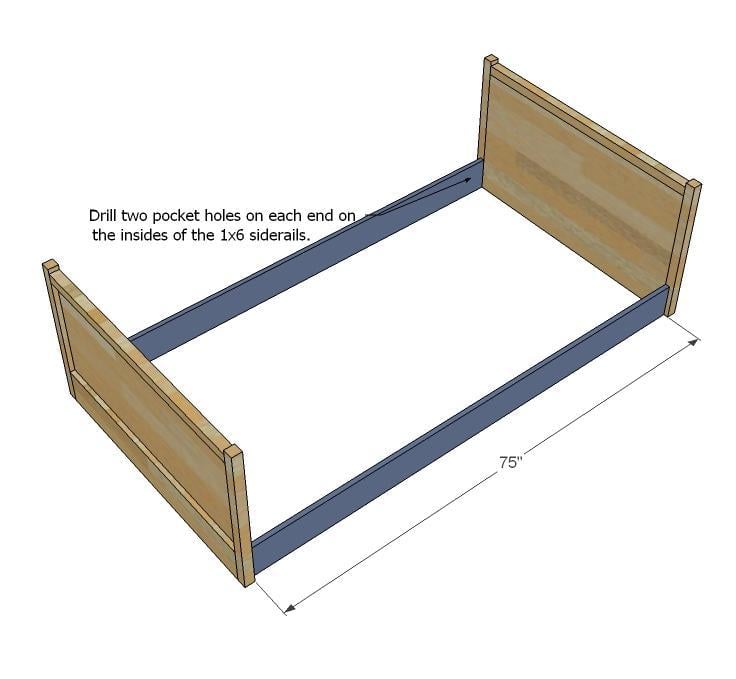
Twin Emme Bed in "magical Merlin"
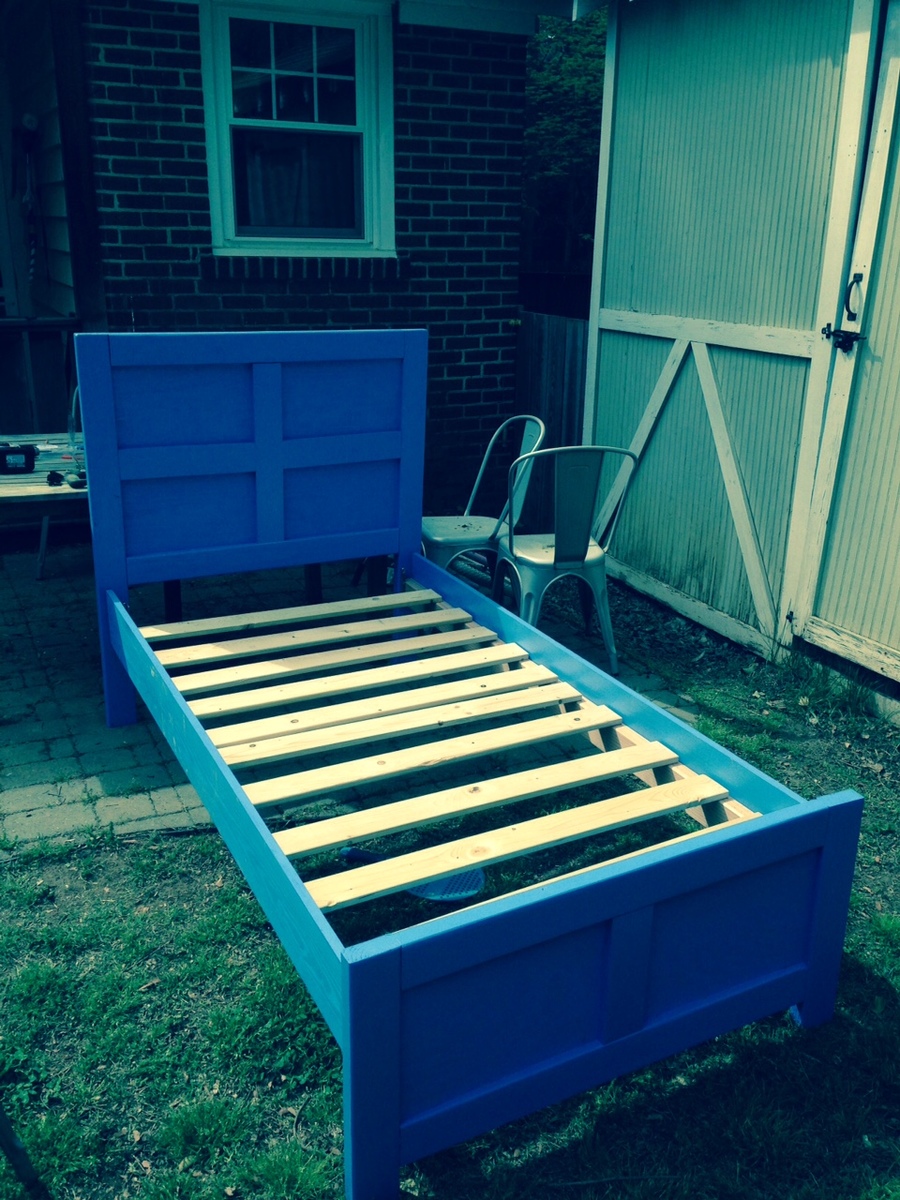
Lots of kreg jig work, but remarkably easy to do when following the plan. This was my first "big" carpentry job and it went very well. I asked my 3-year-old which color he wanted, so "Magical Merlin" blue it is!
Estimated Cost
c. $200 including paint
Estimated Time Investment
Week Long Project (20 Hours or More)
Finish Used
Painted
Recommended Skill Level
Beginner
Comments
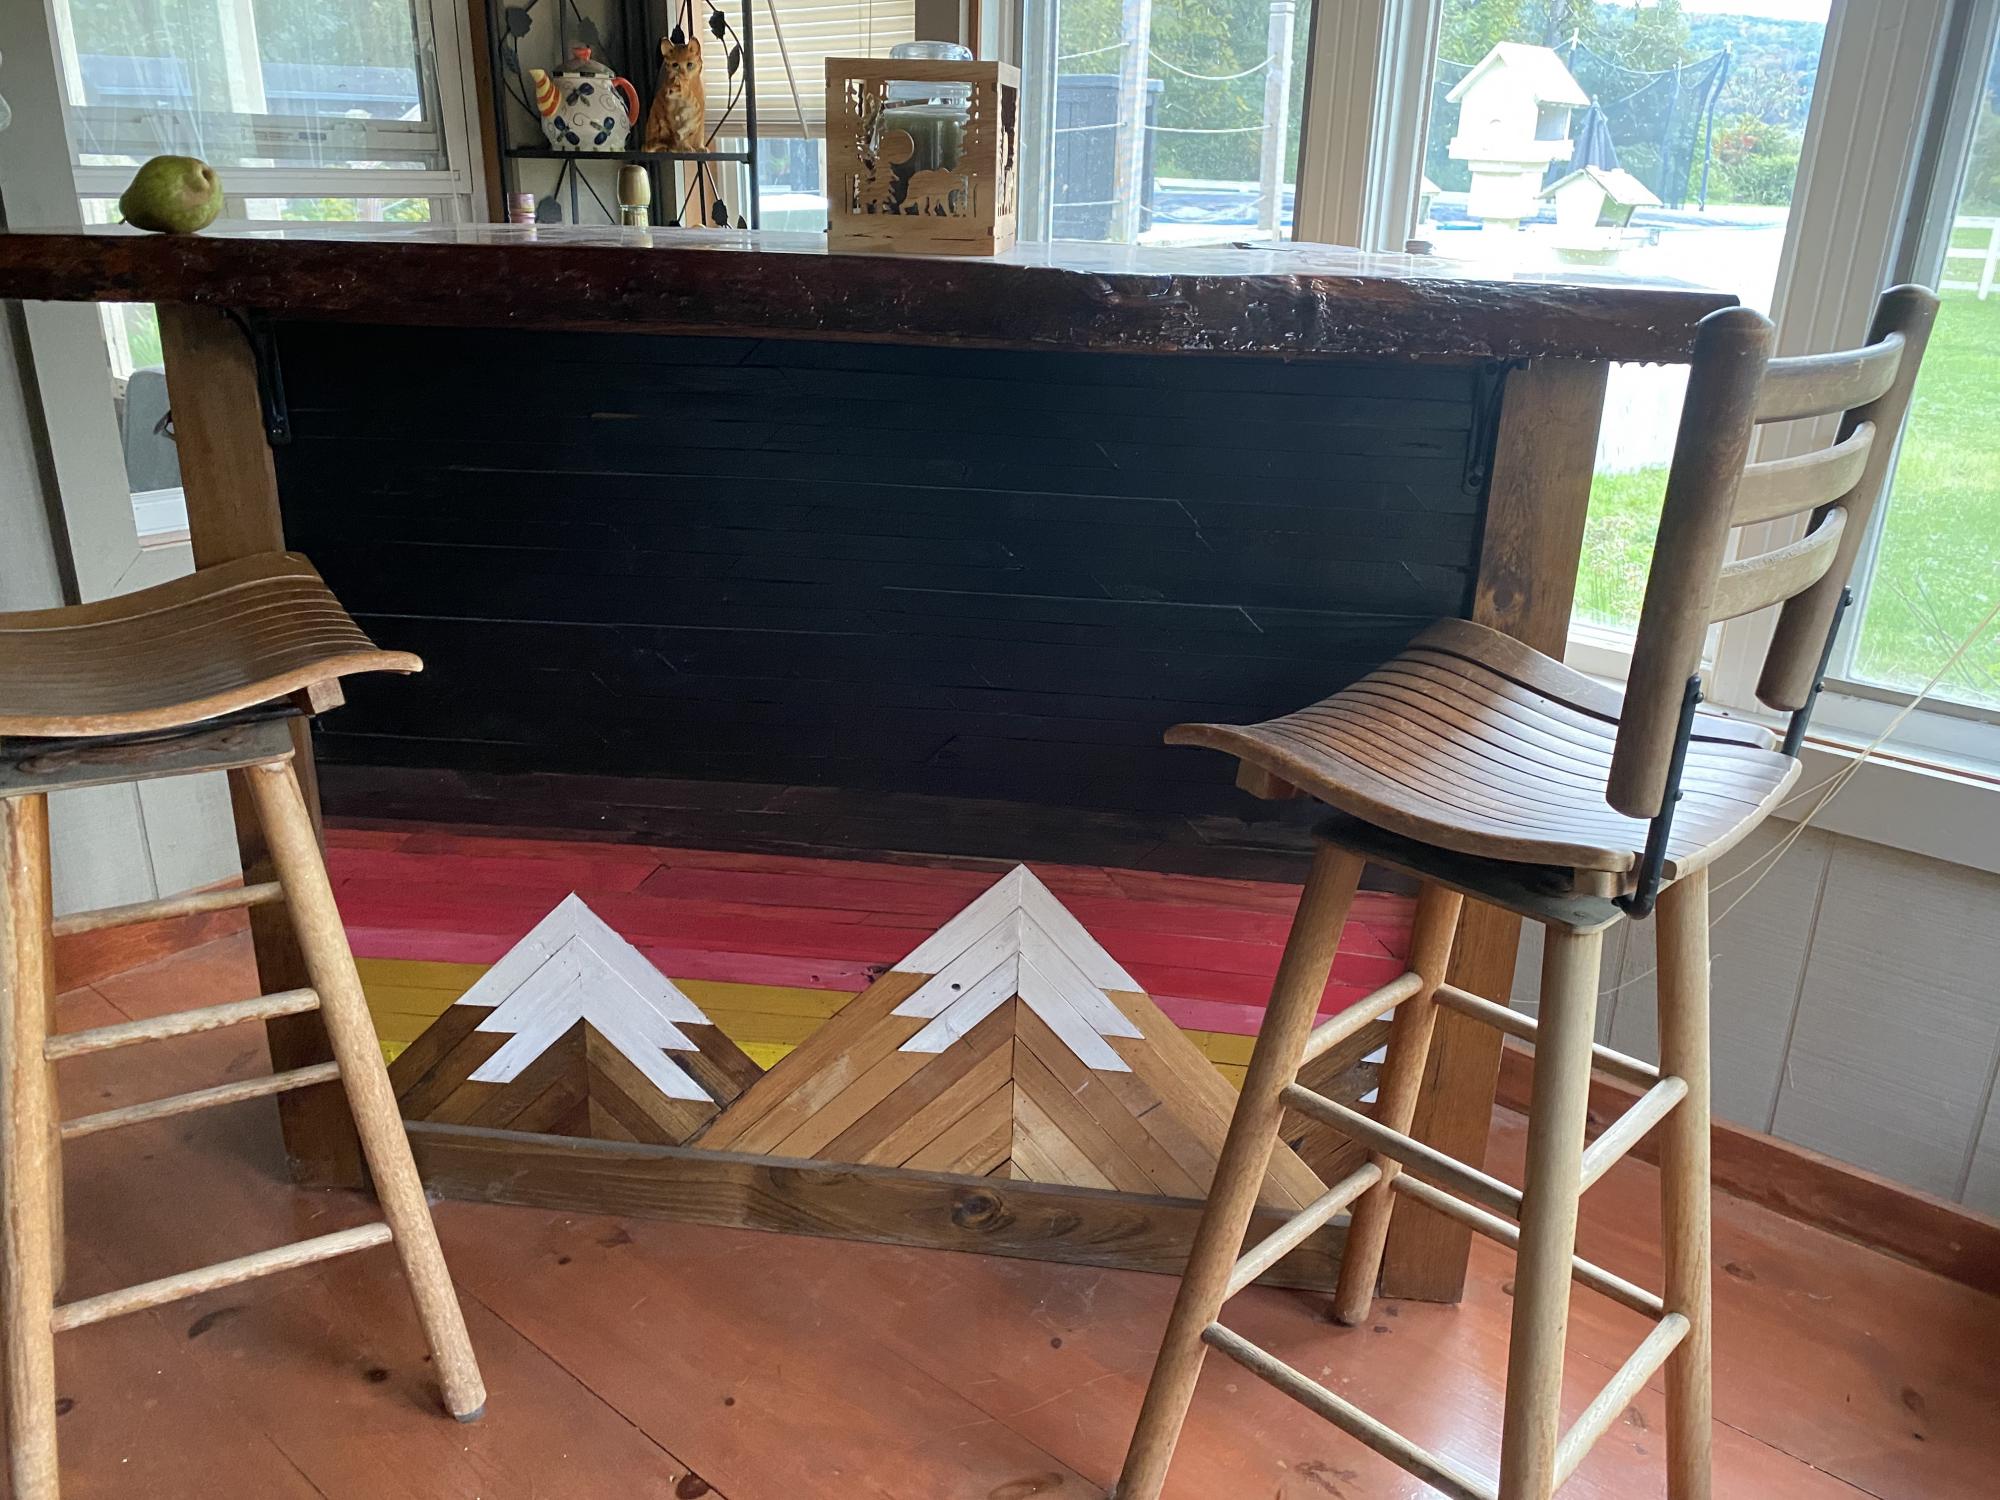
Farm House Table
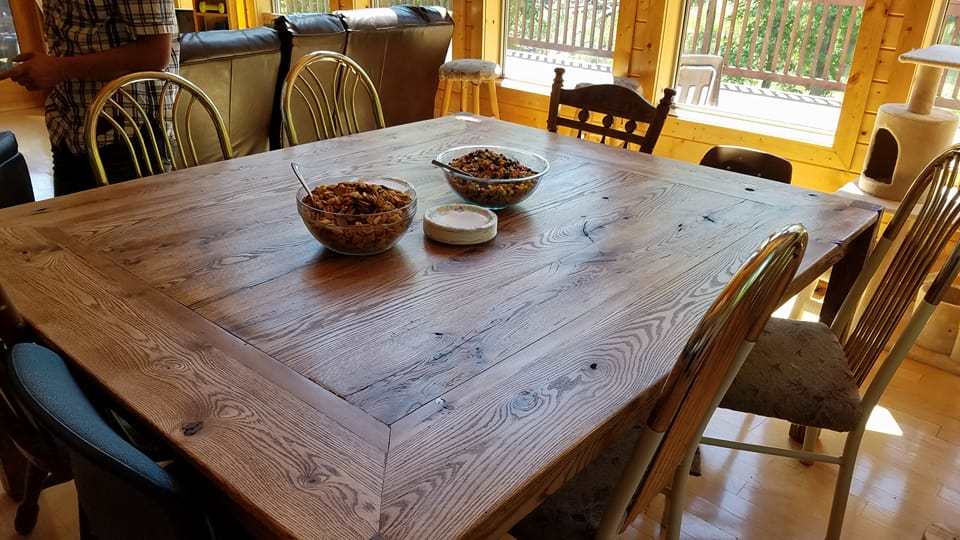
This was a fun and unique project. I've always wanted a farm house table. But to make this project so special my Father gave me Oak wood from the land that I grew up on. There is a small "accent" trim of Iron wood. I remember that tree before it was cut down. Being that all the boards were rough cut; I had to plain them all to equal thickness. But not one board was exactly equal width. So we made the outside "bread board" ends all the same, then let the inner boards remain slightly uneven in width. So the table ended up being 71" x 61" Iwas going for a very large square table and came close. But it fits our space perfectly! The other unique element of this table is that we designed it so the top of the legs show as part of the table top. The legs are 4 x 4 oak posts that came from the white fence in the front yard of my childhood home. We had to take them down to 3 x 3 and they even have some nails still in them. So much characher in this table. It is rock solid and doesn't move! And my daughter has already claimed it when it gets passed down. It will out live me for sure! :)
Chairs are next ;)
Estimated Cost
Almost free!
Estimated Time Investment
Week Long Project (20 Hours or More)
Finish Used
Pre-stain, Early American and Poly
Recommended Skill Level
Intermediate
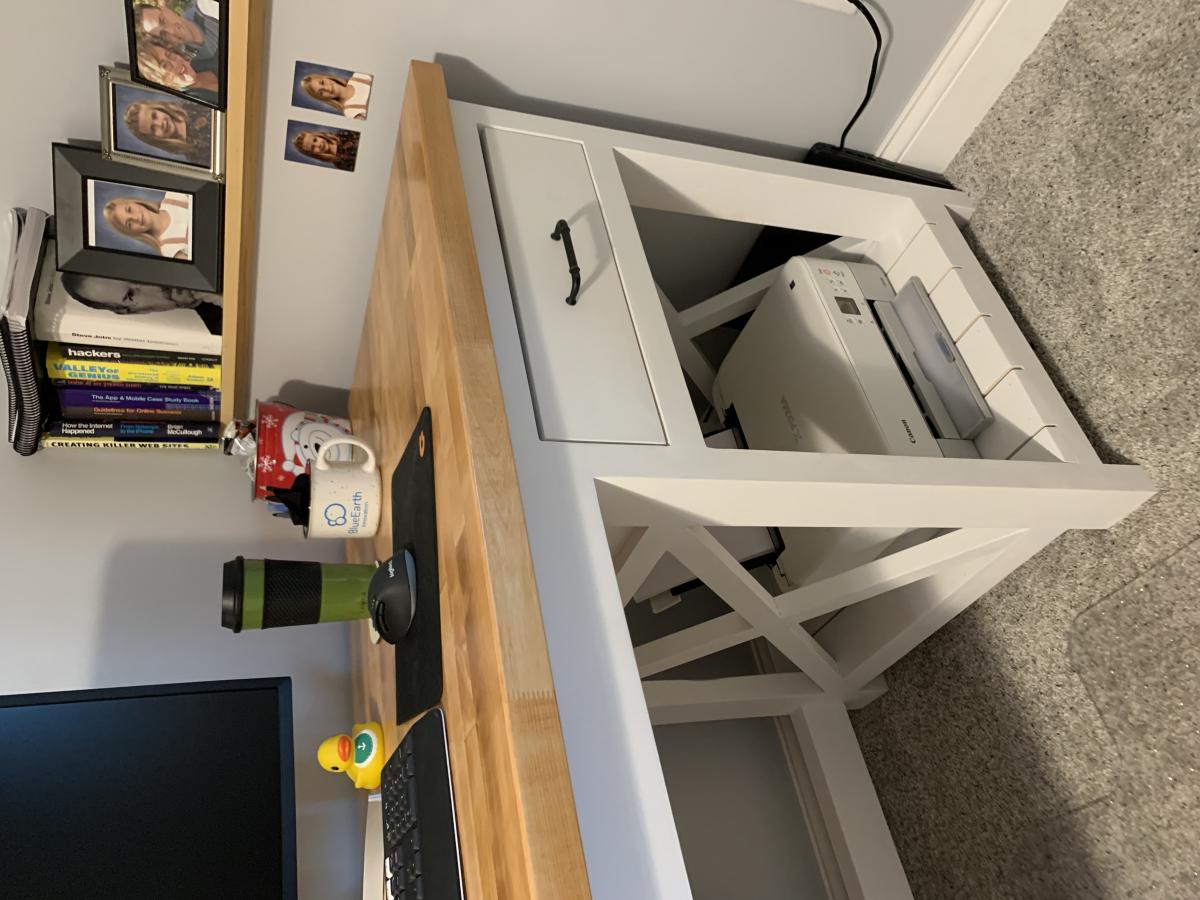
Desk / nightstand combo
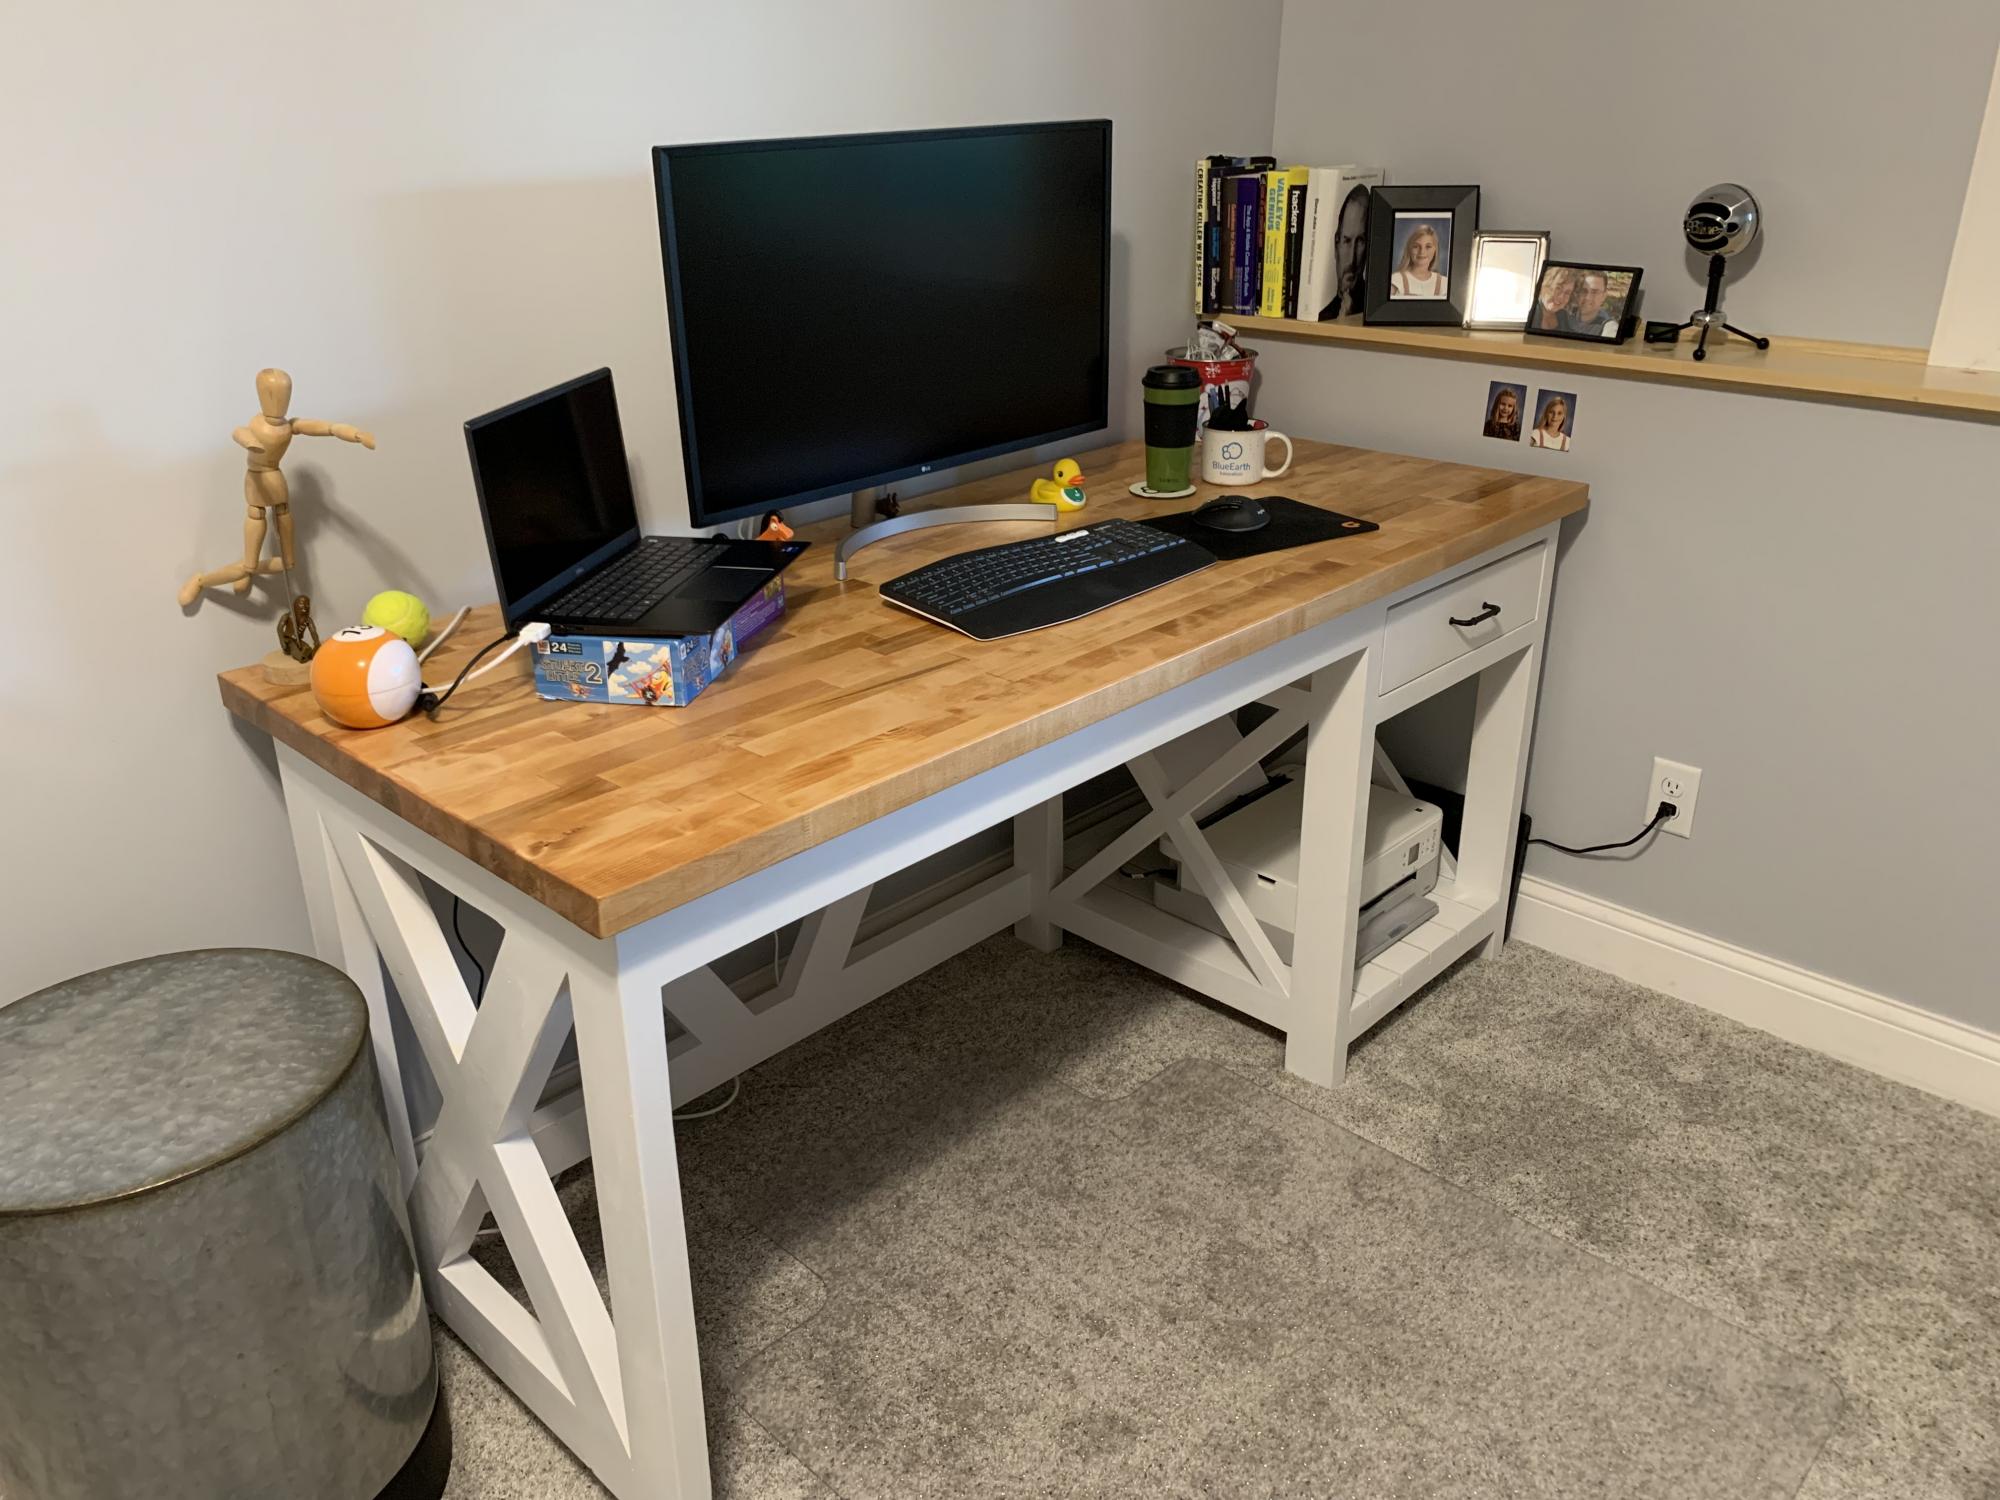
I took the plans for the Farmhouse X Desk and combined it with a (slightly) modified nightstand since I liked the 1x4’s better than the plywood base and also wanted a drawer instead of 2 shelves.
Also, I milled the side and took about 1/8” off the rounded 2x4 edges so that the squared sides fit together MUCH tighter. The joints were a lot easier to sand putty and sand seamlessly flat/smooth.
Very happy with the results and my brother and wife both want me to build them one now!
Built from Plan(s)
Comments
Tue, 10/19/2021 - 07:24
Great build!
YES! That is gorgeous, love the added drawer option. Thanks for sharing!
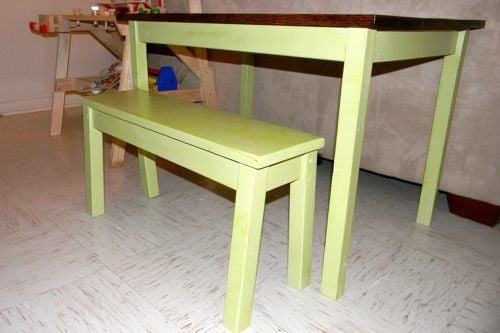
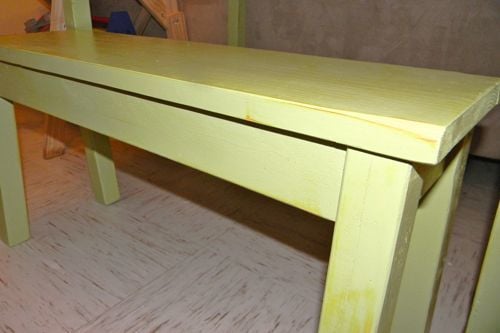
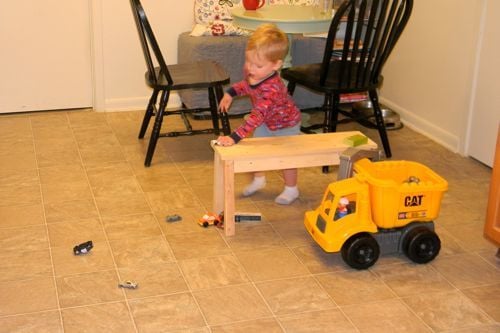
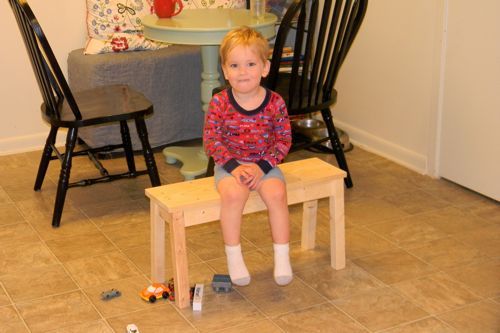
Bitty Bench modified for Clara's Table

This was an easy and satisfying project! It took about 2 hours to make 2 benches. Our son LOVES his benches. He has employed for sitting in all manner of places as well as a handy bridge for vehicles to crash off of:).

Estimated Cost
$6+scrap wood
Estimated Time Investment
An Hour or Two (0-2 Hours)
Finish Used
Leftover Behr Ultra paint, Minwax Wipe On Gloss Poly. Imperfections were filled with wood fill and sanded with 120. After the table was painted and before it was clear coated I sanded again with 120 and knocked off some finish on the edges and lifted some color. I really liked the bright green color that showed up in spots.
Recommended Skill Level
Starter Project
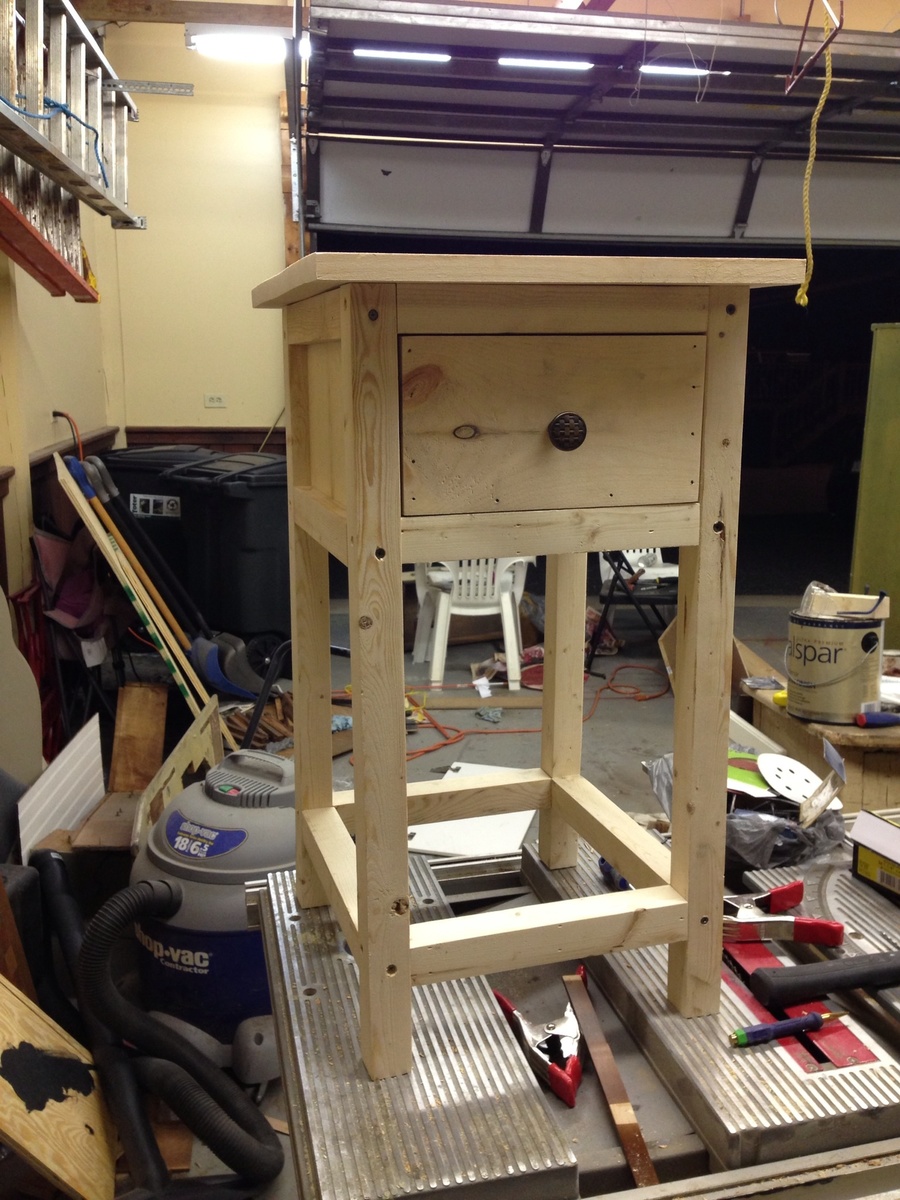
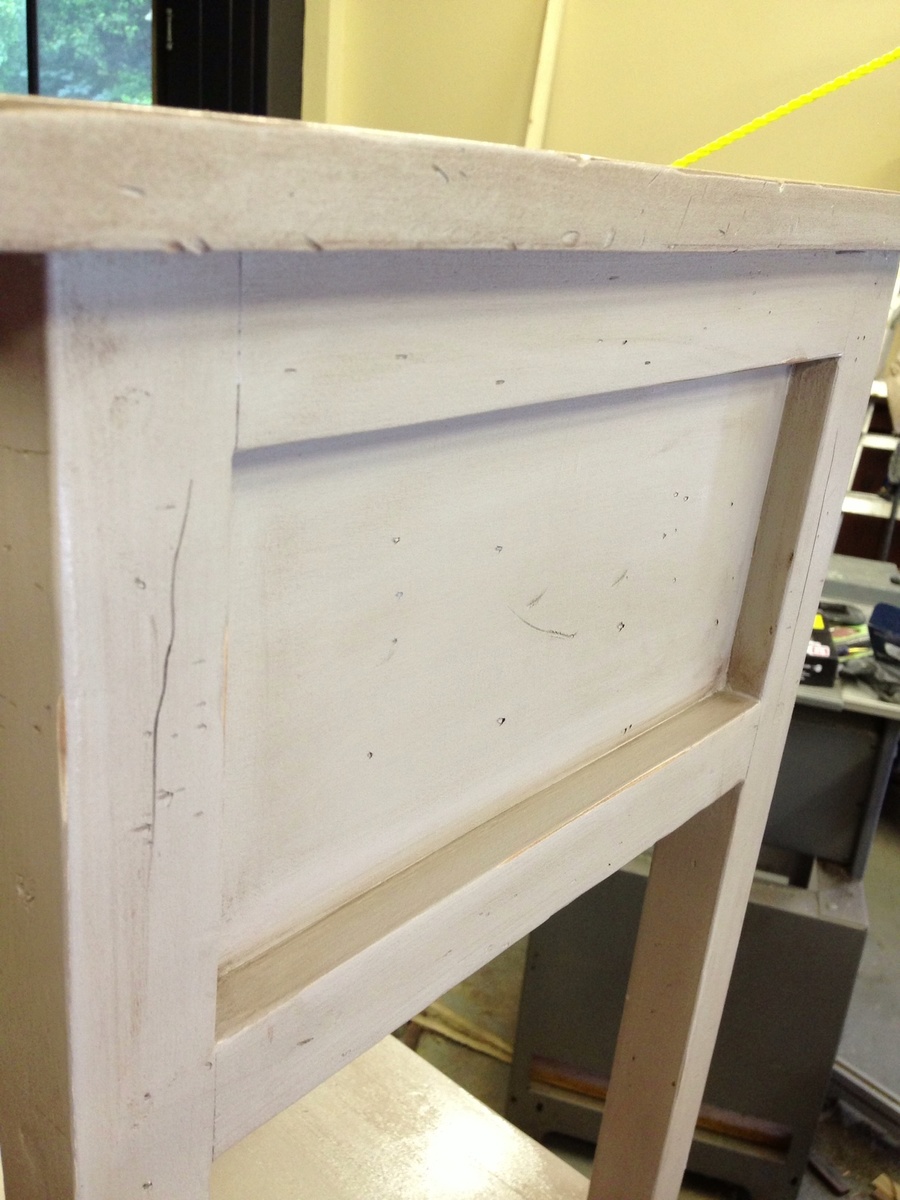
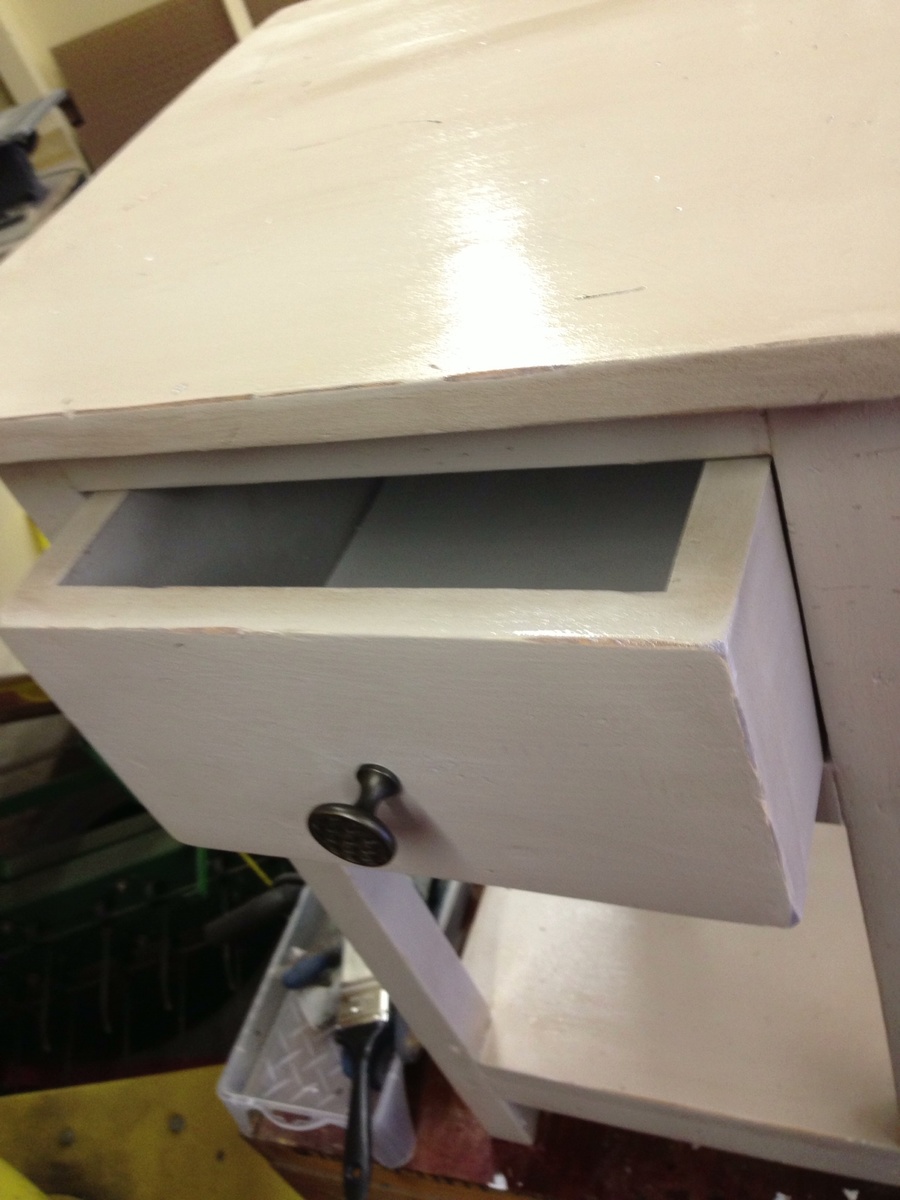
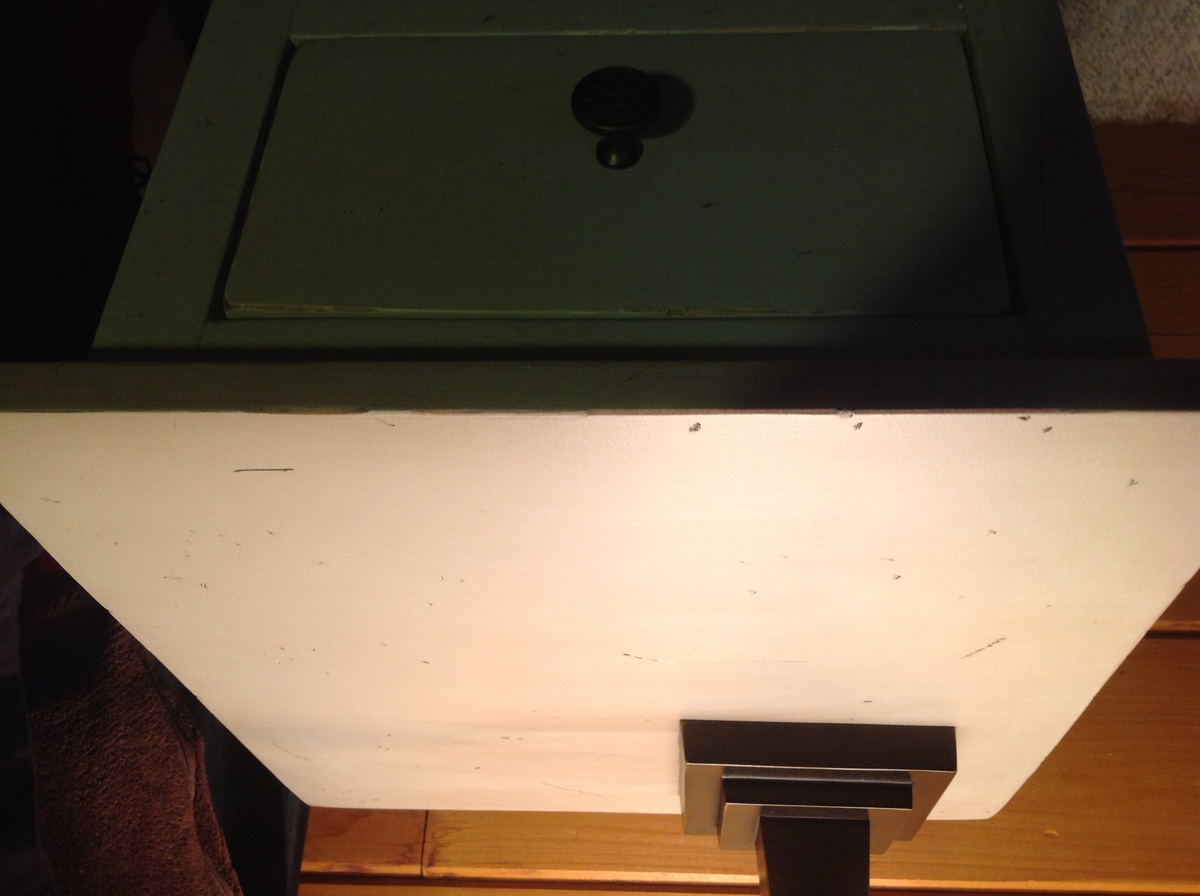
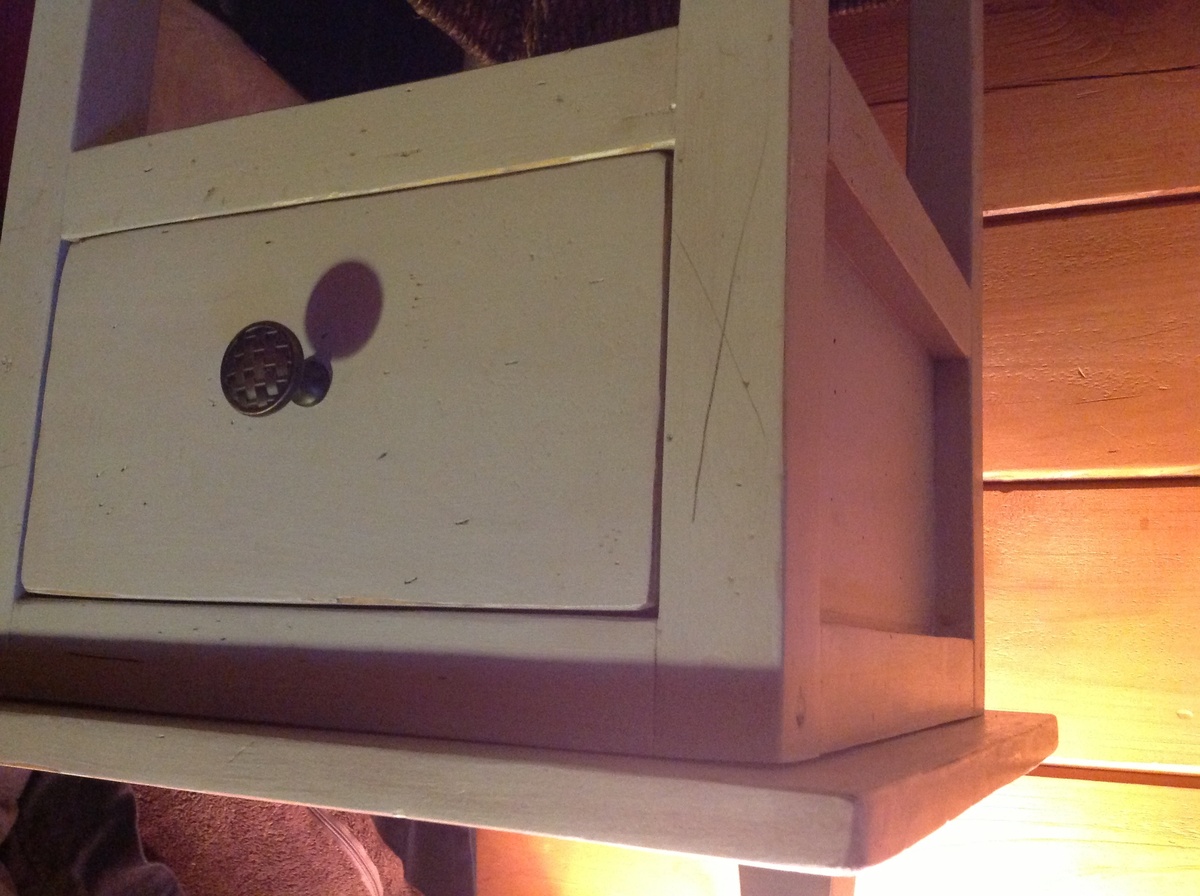
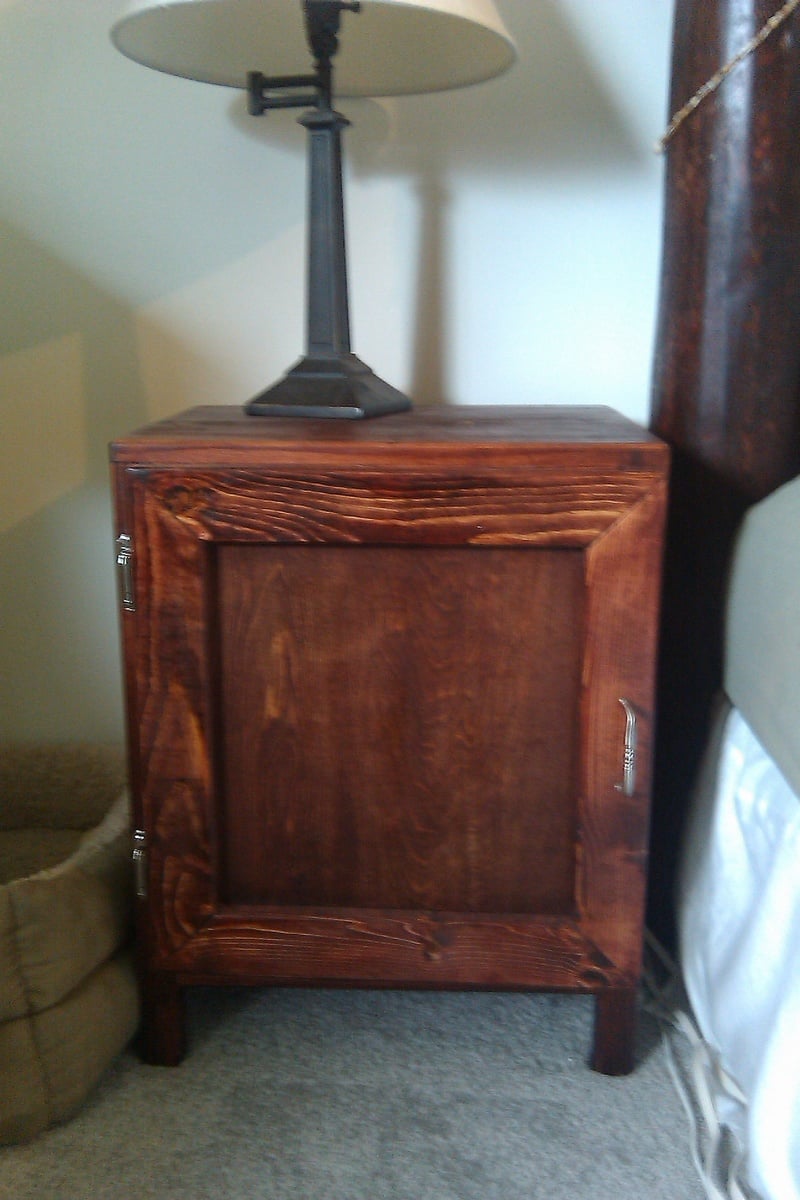
Mini farmhouse bedside table
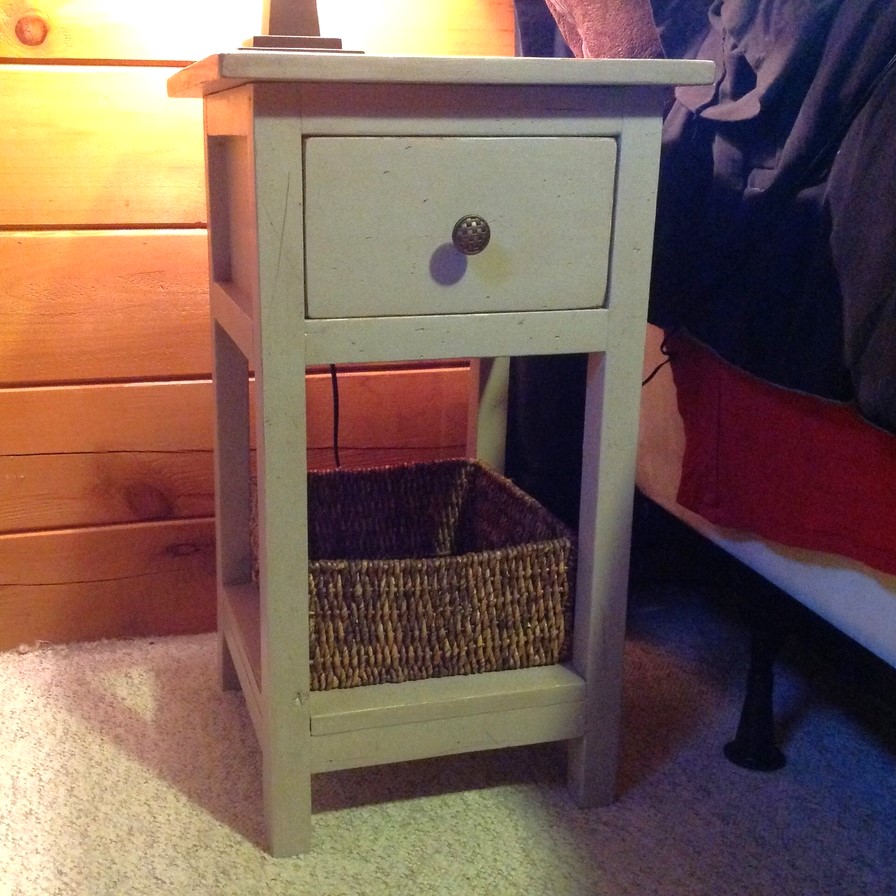
My very first furniture piece from scratch! It isn't exactly square or level, but my 19-yo loves it and he says I am the best "cooker, sewer, and can do anything!" I think that's reward enough. I made this with 2.5" screws, but after completing this I immediately went out to buy a kreg jig. I made it out of pine because I knew I would be painting it. I look forward to many more projects in the future. My husband said to me the other day "can I ask you a question?" And I said "yes, I will build our kitchen cabinets one day." All he could do is laugh.
Built from Plan(s)
Estimated Cost
$30
Estimated Time Investment
Day Project (6-9 Hours)
Finish Used
Distressed painted finish. I primed it, which I would not do again because a sample I made without priming gave a more translucent look to the paint that I like better. I gave it two coats of gray paint. I used a sample that you get in a plastic cup with a lid at Lowes and that was enough to paint this easily. I used a color called linen coach I believe and it was on clearance; $2!
I distressed it with a flat-head screw driver and my orbital sander as well as a couple hits with a hammer. Rubbed dark walnut rustoleum stain and wiped off a couple minutes later. Finished it off with two coats of rustoleum poly in as matte finish, which I absolutely love.
I distressed it with a flat-head screw driver and my orbital sander as well as a couple hits with a hammer. Rubbed dark walnut rustoleum stain and wiped off a couple minutes later. Finished it off with two coats of rustoleum poly in as matte finish, which I absolutely love.
Recommended Skill Level
Beginner
Comments
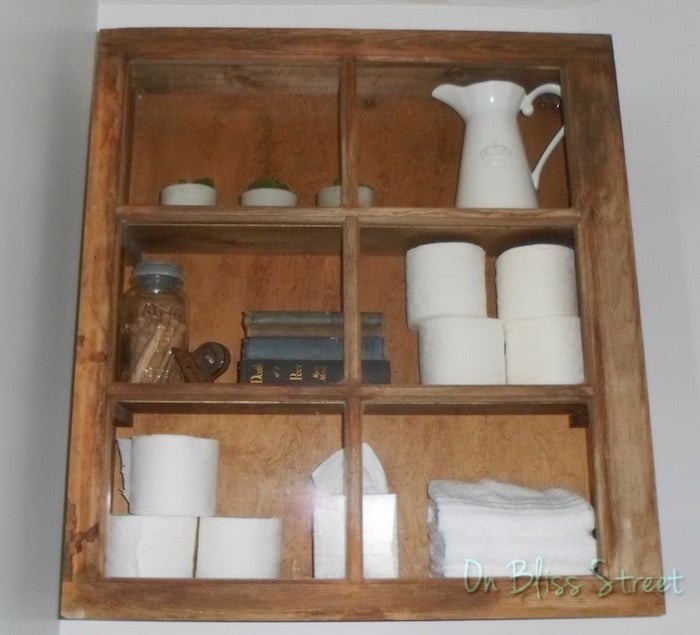
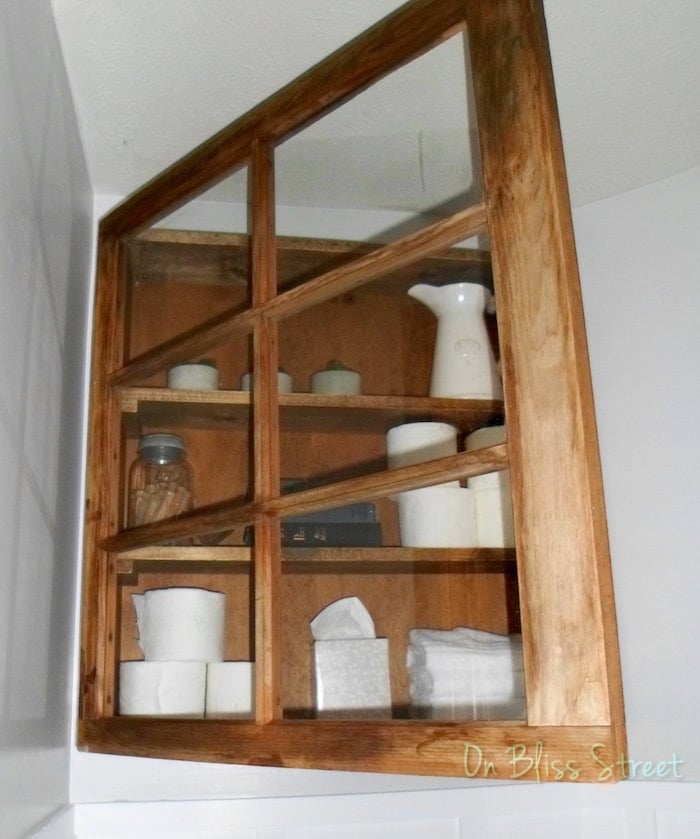
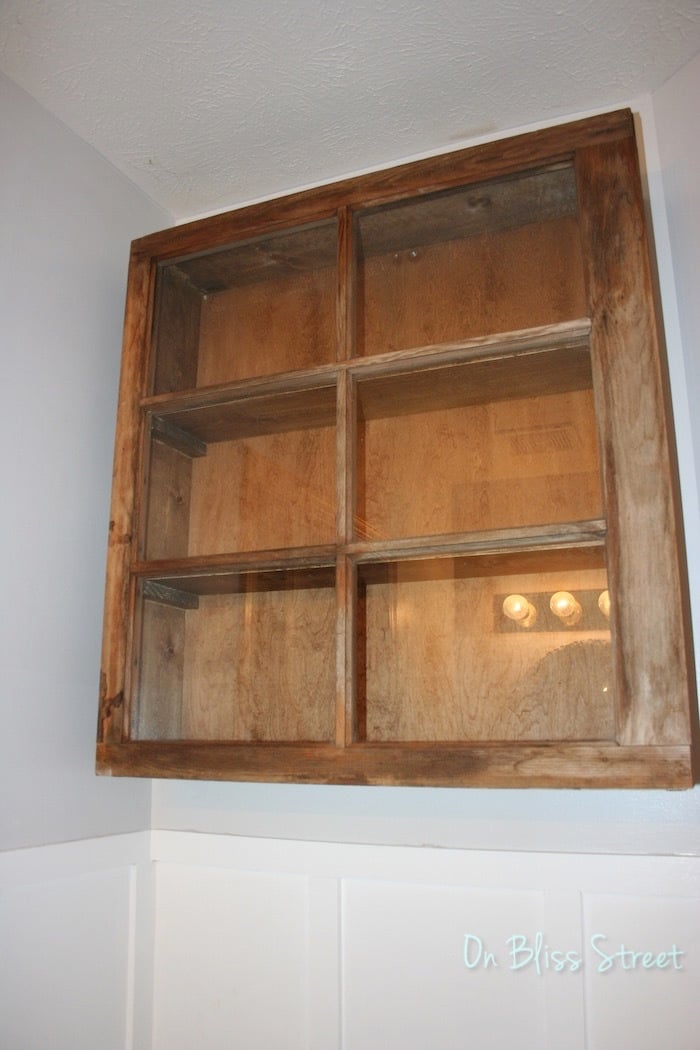
Cabinet Made From an Old Window
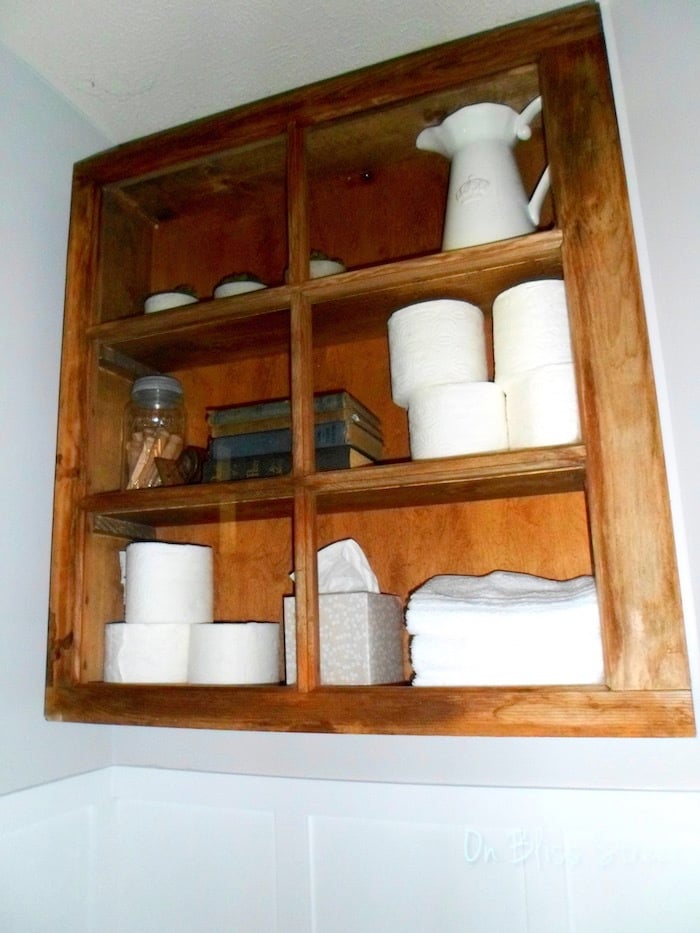
I needed a cabinet for my $300 bathroom remodel that fit in with the rustic, handmade vibe. I sort of hoard old windows so this was a perfect opportunity to use one. The full details and tutorial are on my blog- http://OnBlissStreet.com
Estimated Cost
$15
Estimated Time Investment
Afternoon Project (3-6 Hours)
Finish Used
Minwax Provincial and light sanding
Recommended Skill Level
Starter Project
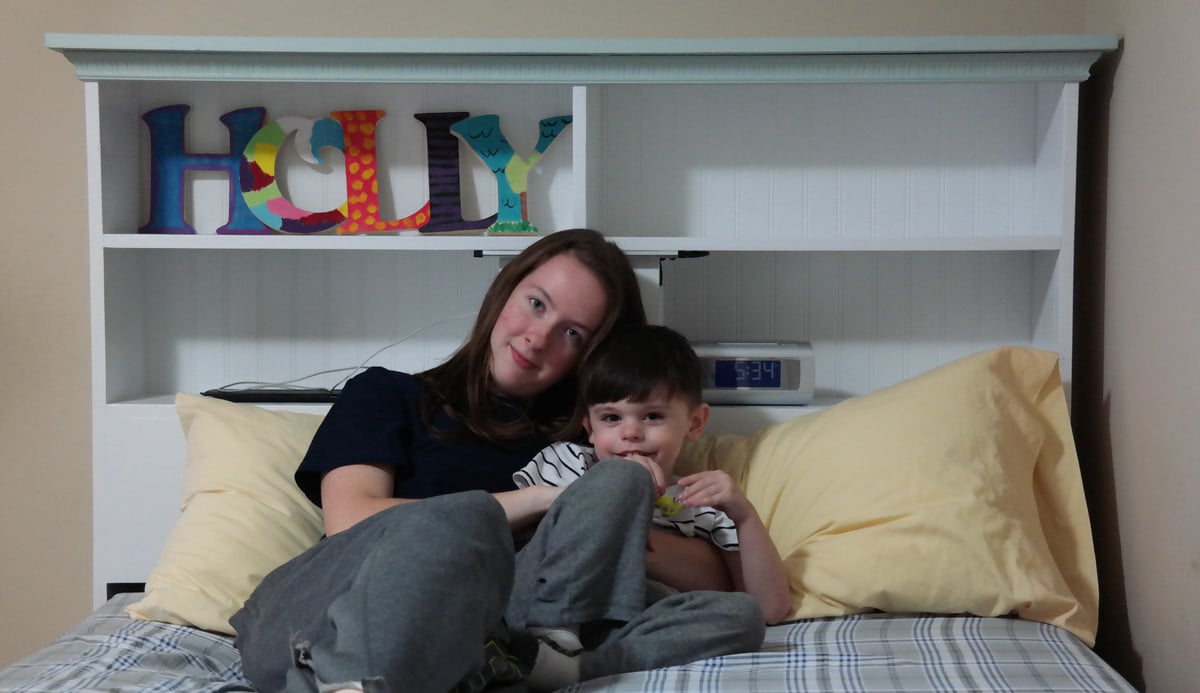
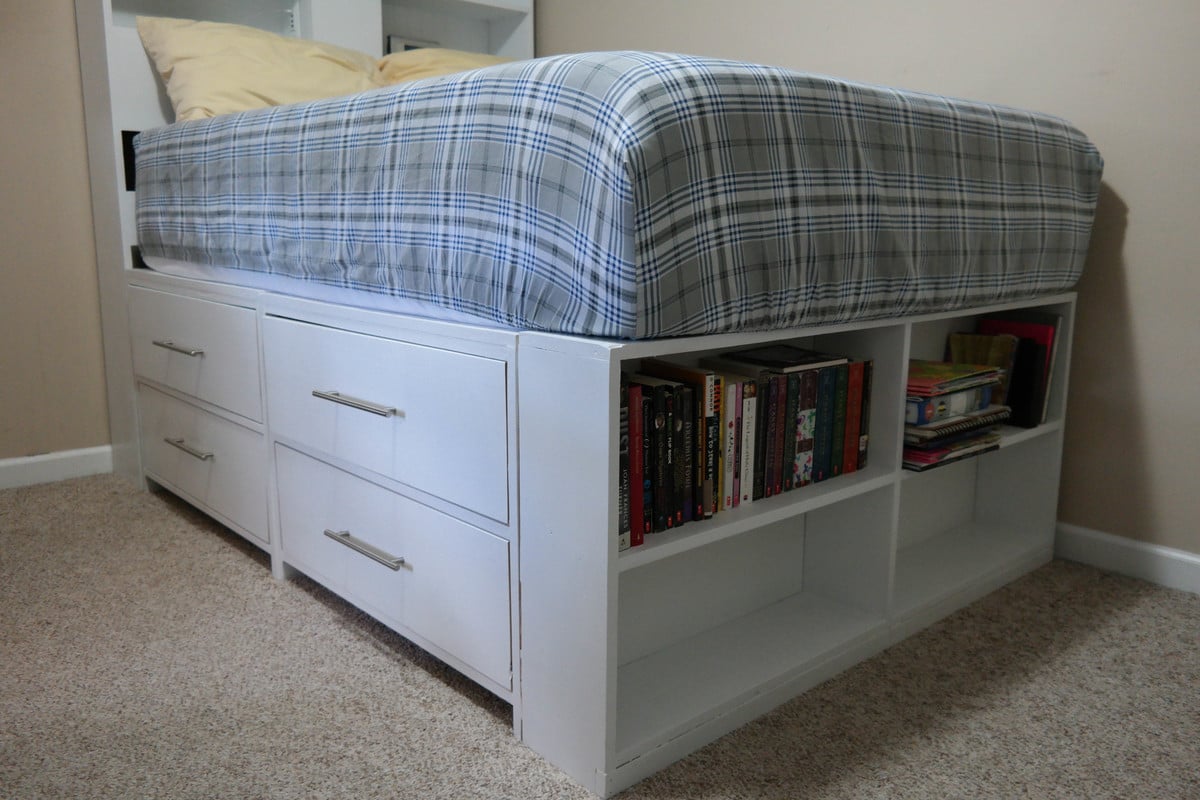
Holly's DIY Storage Bed
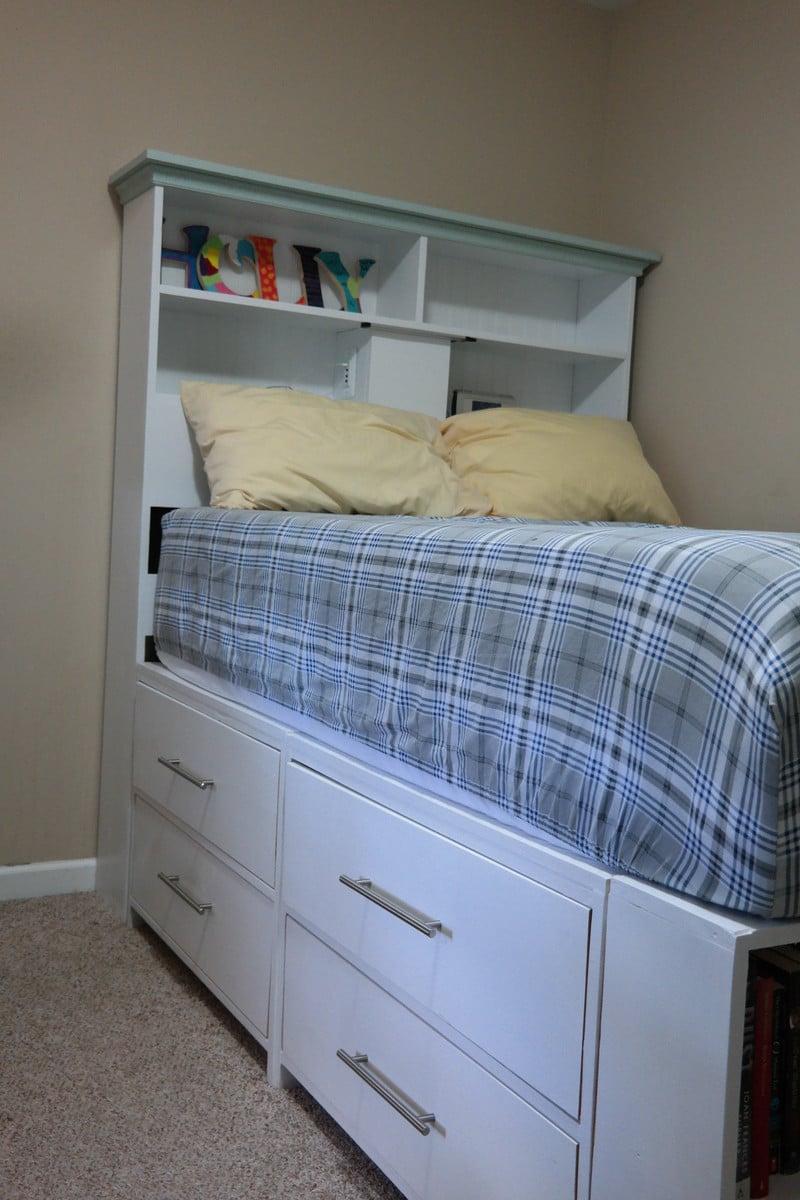
Teenager designed - mother approved DIY storage bed.

Built from Plan(s)
Estimated Cost
300-400
Estimated Time Investment
Week Long Project (20 Hours or More)
Finish Used
White paint
Recommended Skill Level
Intermediate
Fancy X table

We had a good time building this table. We made it smaller (6 feet) than the original plans, and also changed up the breadboard a little bit. We are a military family so made it so it assembles/disassembles with carriage bolts instead of screws. Hopefully that helps it hold up over time with frequent moves.
Varythane golden oak stain on the top and rustoleum charcoal chalk paint for the base. Sanded lightly and a light touch of the paint on the tabletop to create a distressed look.


Built from Plan(s)
Comments
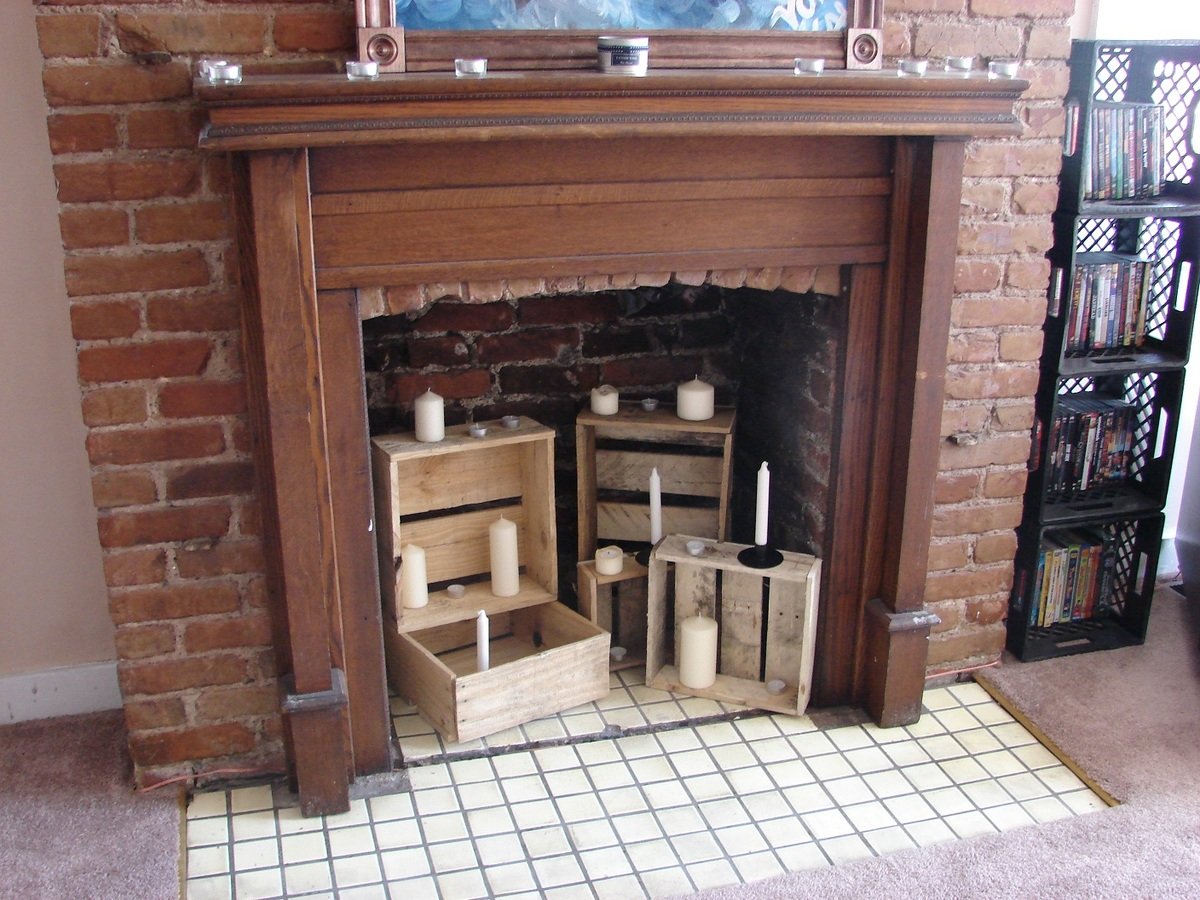
Little Crate Fireplace Decor
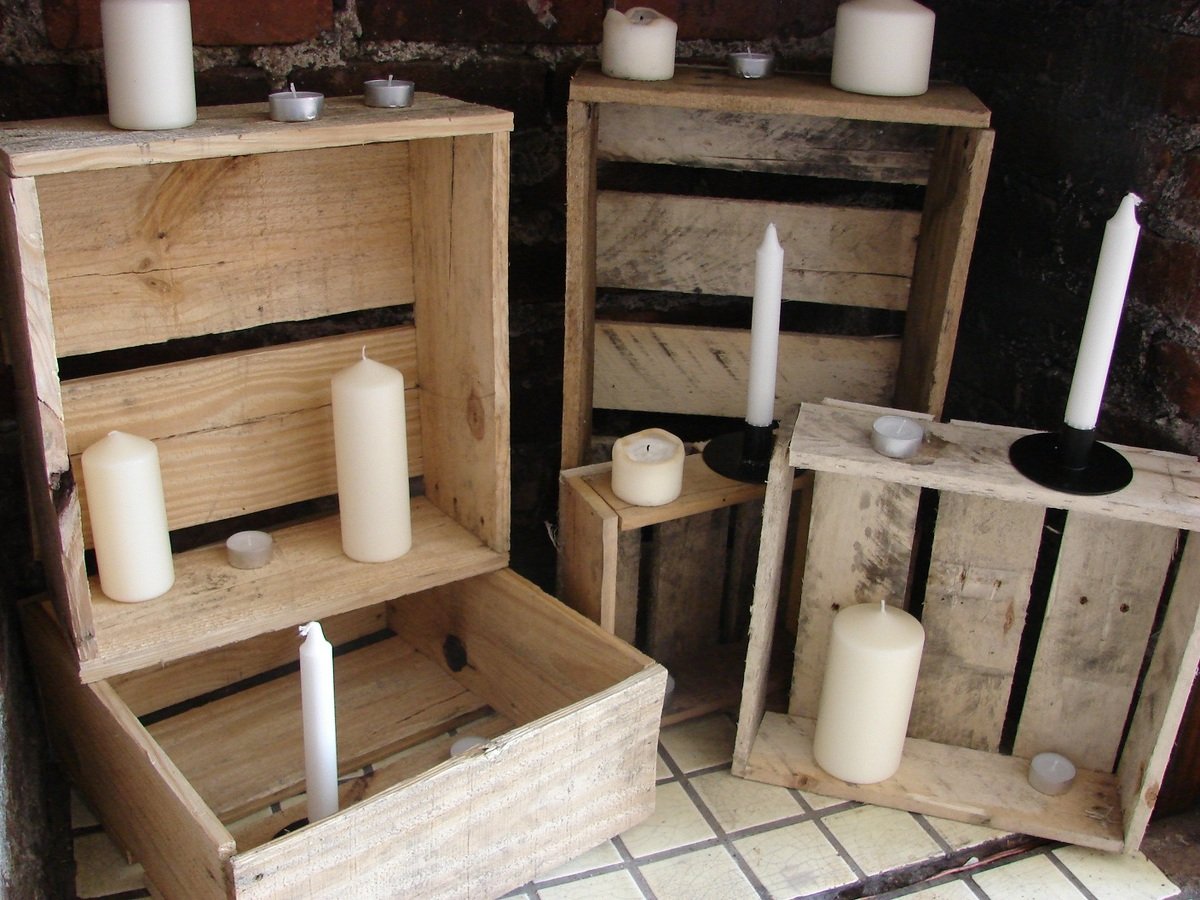
The apartment we're in has a non working fireplace so we needed something to stack candles on in there. I just went to my free pallet wood pile and started cutting and nailing. They roughly follow the planes of the Little Crates, or maybe the free floating nightstand. I'm still debating whether or not to put any sort of finish on it, for now here they are without any sanding or anything.
Built from Plan(s)
Estimated Cost
Free
Estimated Time Investment
An Hour or Two (0-2 Hours)
Finish Used
None
Recommended Skill Level
Starter Project
Red Oak Slab. coffee/end table

I knew a guy taking down a big red oak tree and figured it was my opportunity to make an awesome red oak slab table. I ended up using my buddies giant band saw to cut them, and it took what felt like forever for the moisture to soak out of the slabs. After that I spent hours and hours sanding, and I now know red oak is super hard hahaha. However the staining and coat of poly took no time at all. But I did blow about $300 on 1" thick steel pipe. Then coated that in black spray paint that gives it a hammered look. But I am thrilled on how it turned out, it is very unique. And very very heavy.

Estimated Time Investment
Week Long Project (20 Hours or More)
Finish Used
English chestnut stain- poly semi gloss
Recommended Skill Level
Intermediate
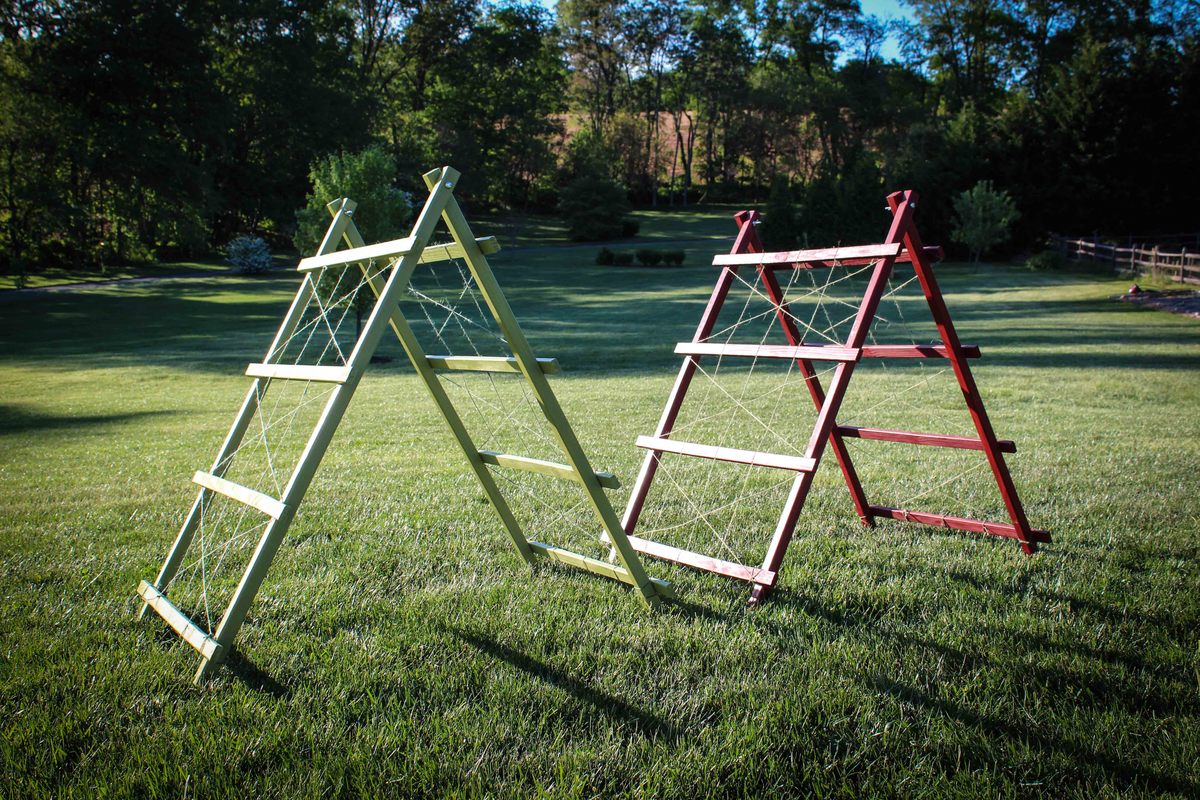
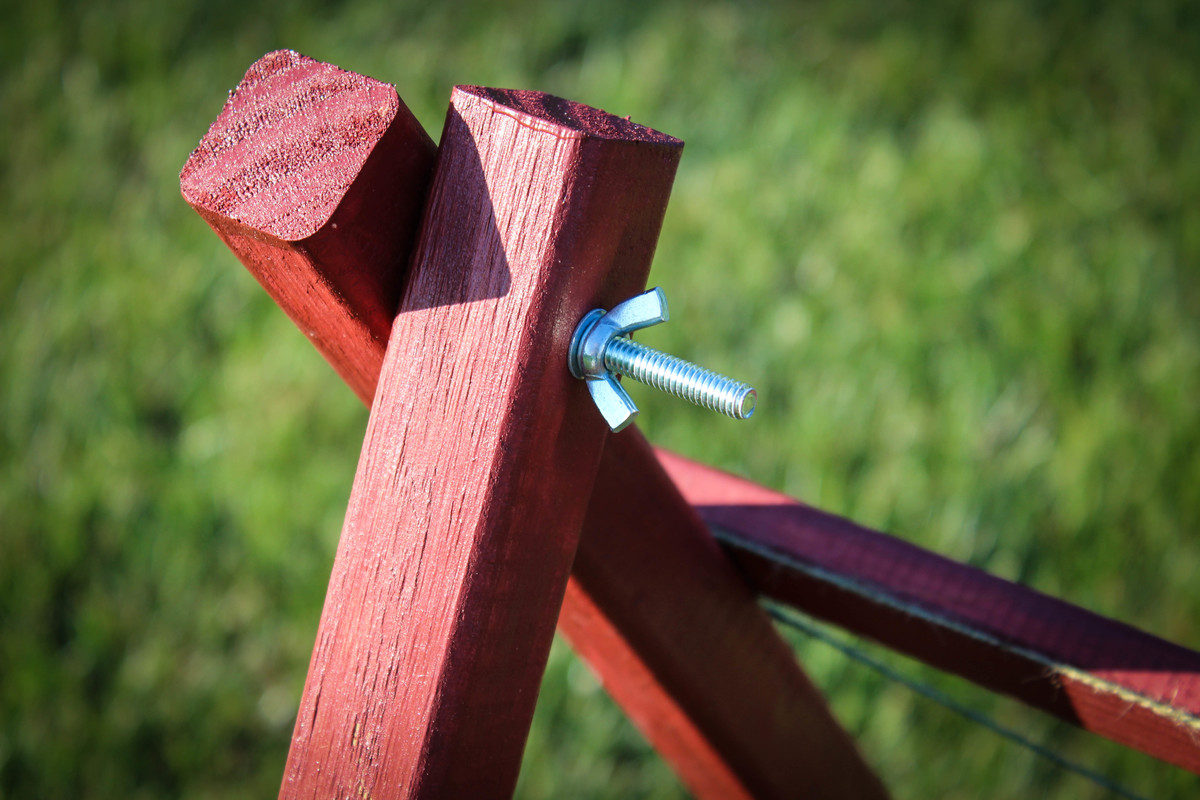
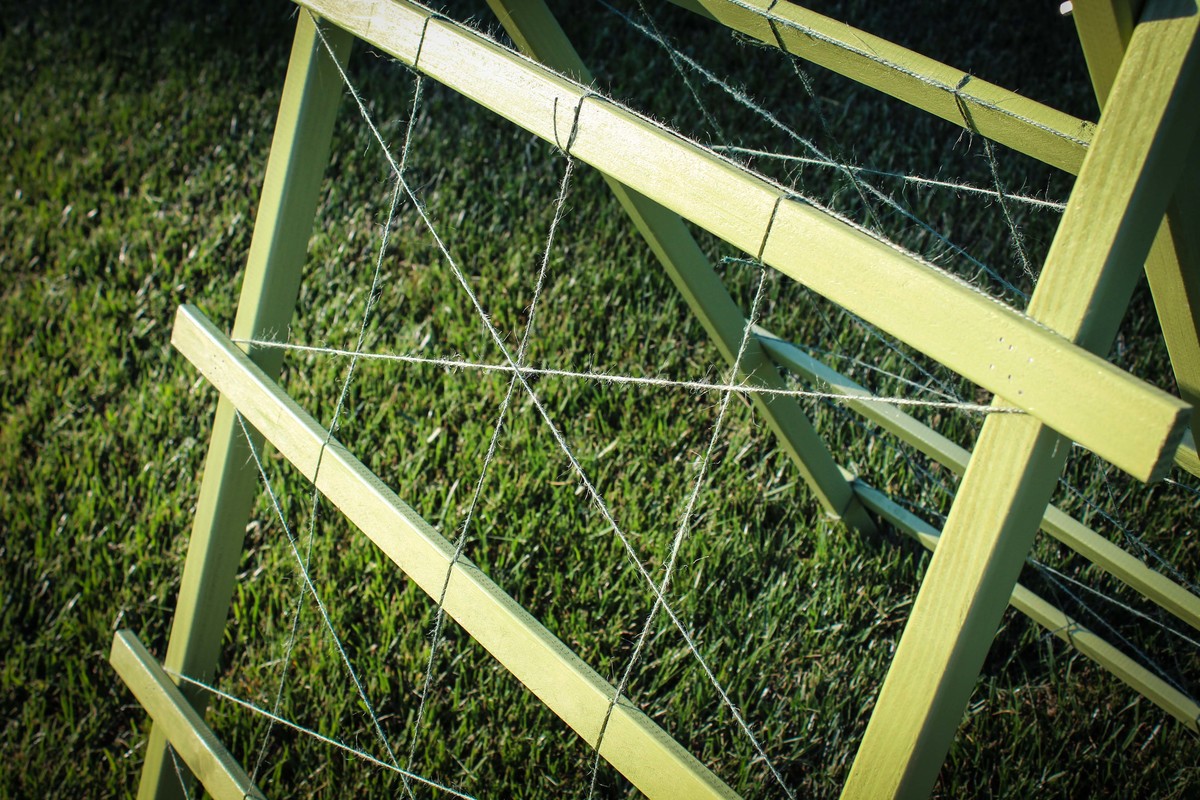
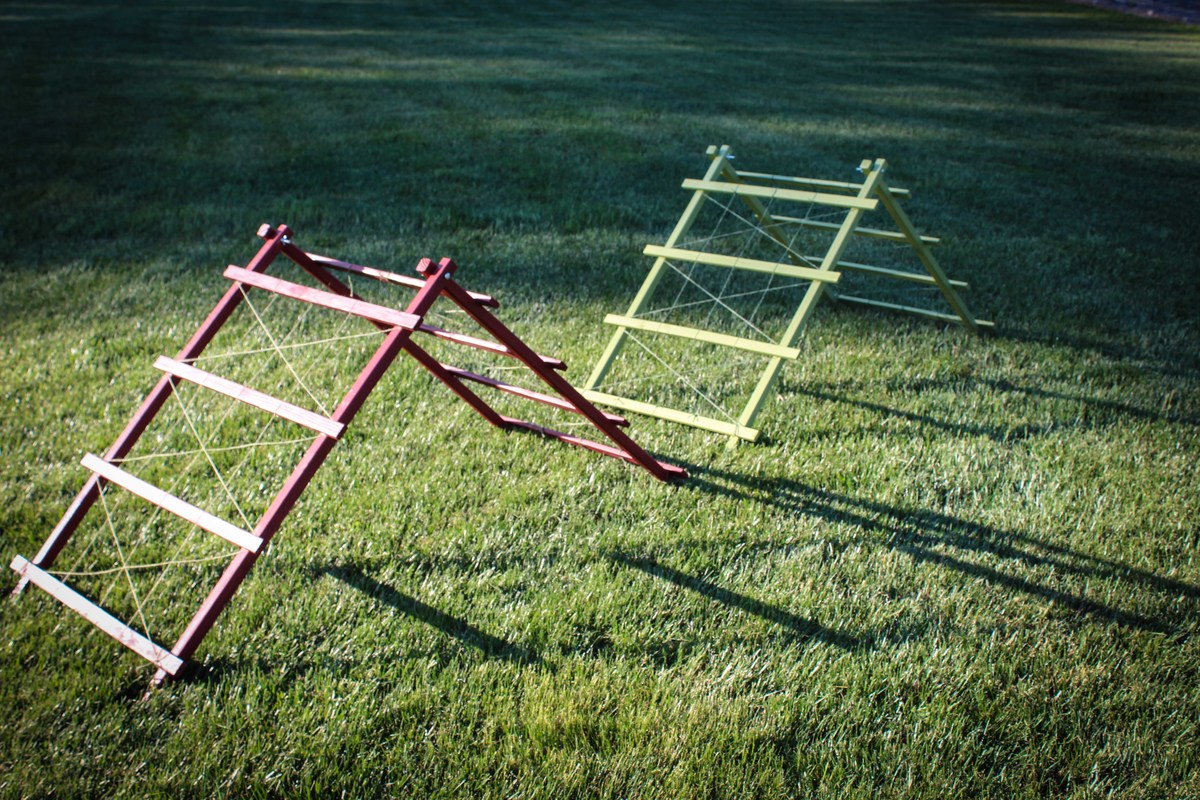
Garden Trellis
Video of the Build:
https://www.youtube.com/watch?v=xH3ABM3X3uE
Build Instructions:
http://www.instructables.com/id/Garden-Trellis/
This adjustable garden trellis for cucumber/pea/bean vines is a quick project for the vegetable garden. The trellis gets the vines off the ground and is more productive in less space. No giant rotting cucumbers to find three weeks after the rest have matured. It is made from small lumber and twine. Paint is optional but gives a nice pop of color. Just in time for the rapid growth of summer!
Estimated Cost
$10
Estimated Time Investment
Afternoon Project (3-6 Hours)
Finish Used
Paint
Recommended Skill Level
Starter Project
Corner Desk for Craft Room Sewing - DIY
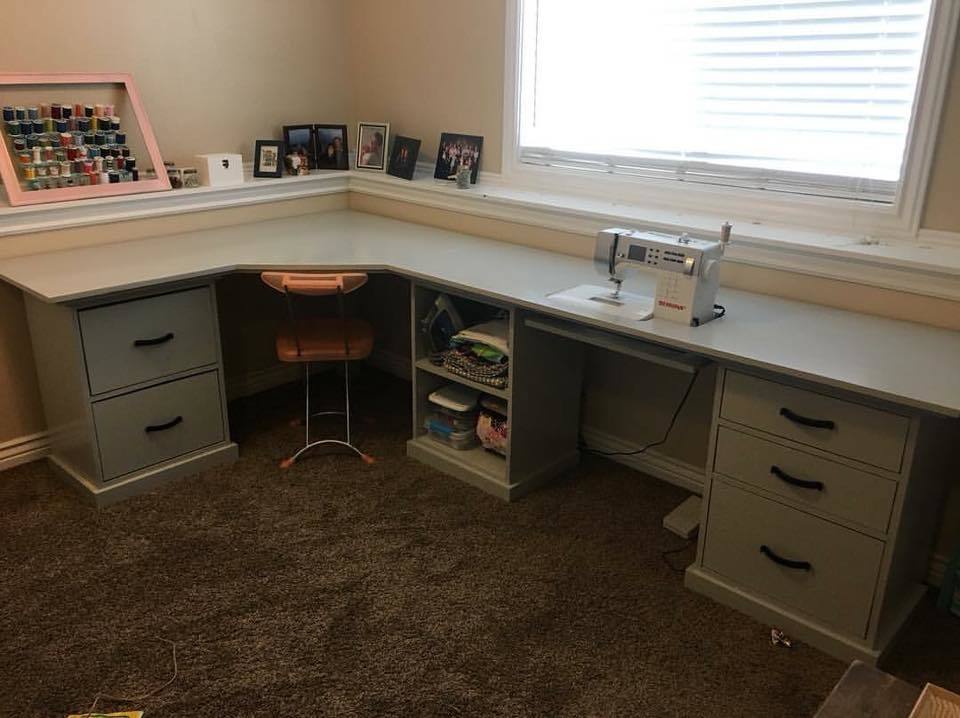
We made this sewing/craft table by combining plans from the modular office. It was a big job but SO worth it! We love your plans and use them all the time!
Submitted by Candace Ann Williams
Built from Plan(s)
Recommended Skill Level
Advanced
Comments
Modified Nightstand
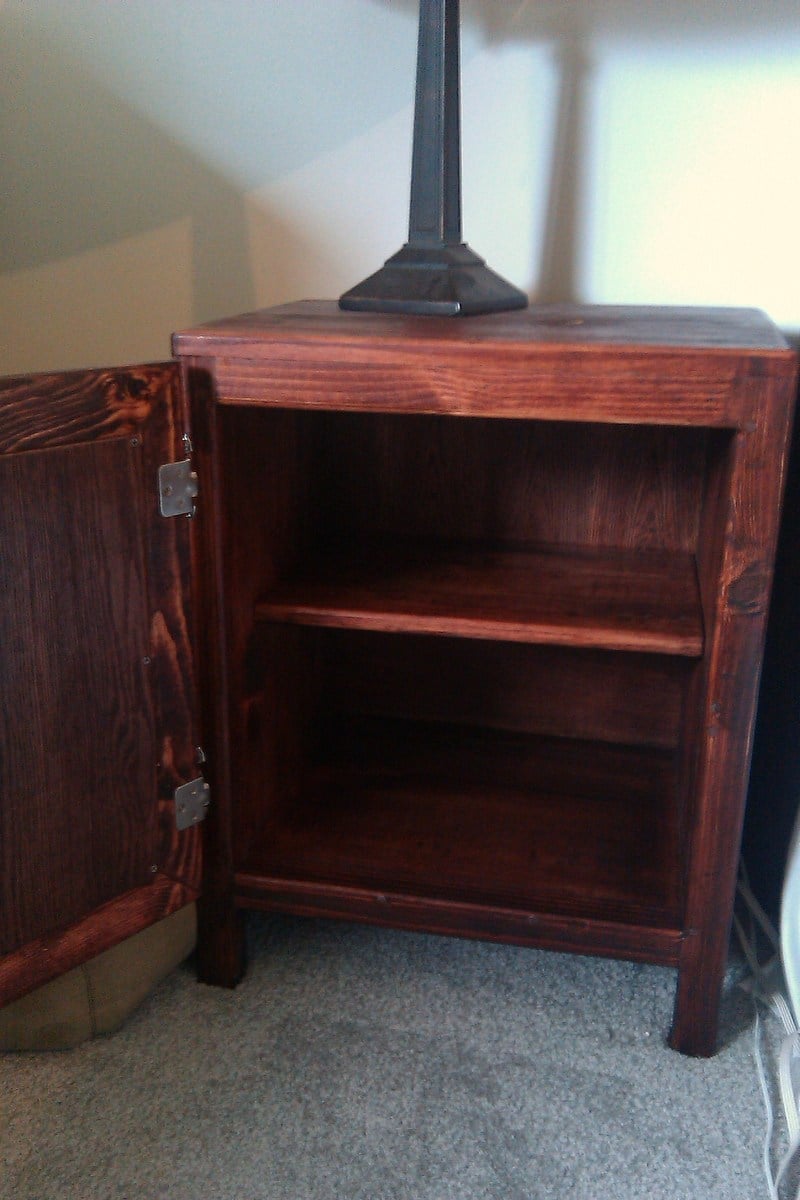
This is my first Ana
White project. I learned a lot of woodworking do's and don'ts and I am now addicted to the smell of freshly cut wood.
Built from Plan(s)
Estimated Time Investment
Day Project (6-9 Hours)
Finish Used
Wood conditioner, mohogany wood stain.
Recommended Skill Level
Intermediate
SIMPLE, CHEAP AND EASY CONSOLE TABLE

very quick to make
Built from Plan(s)
Estimated Time Investment
An Hour or Two (0-2 Hours)
Recommended Skill Level
Starter Project
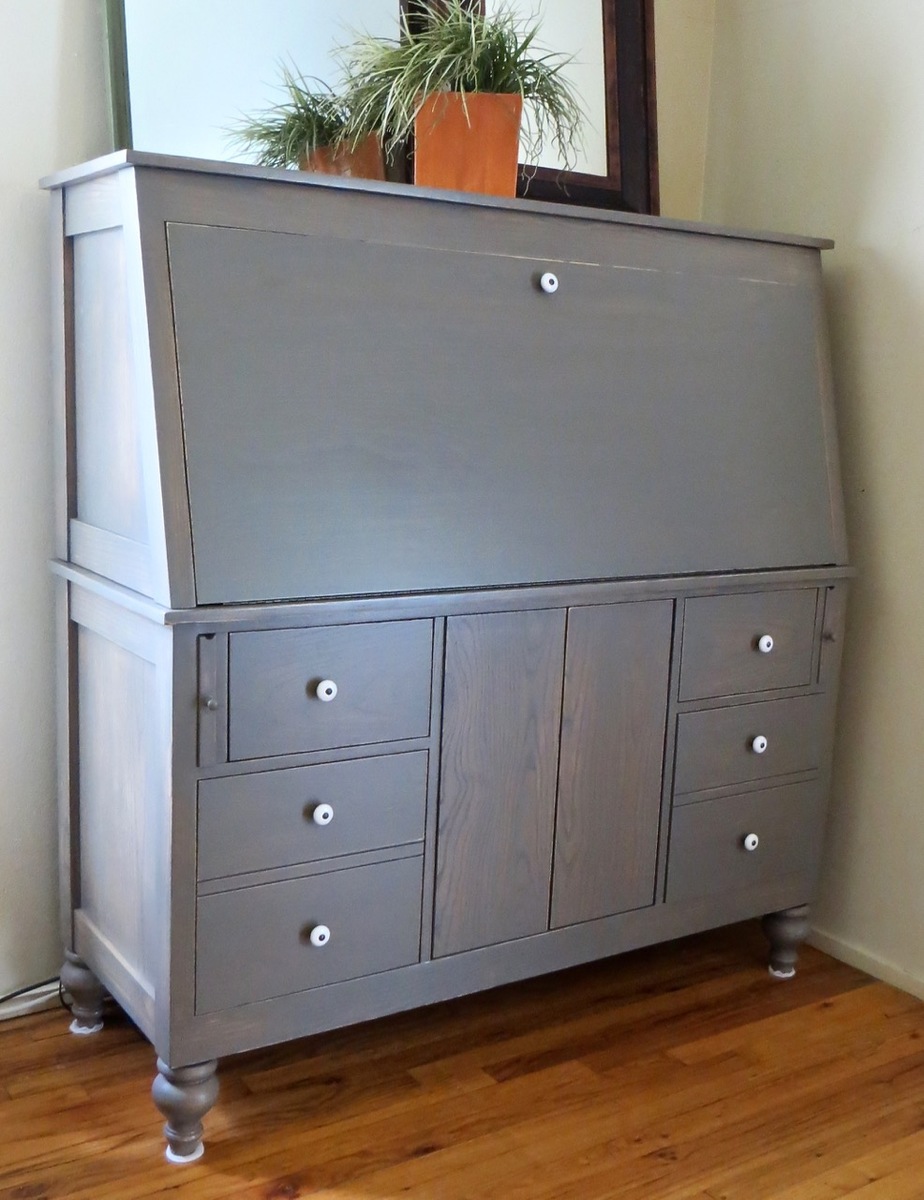
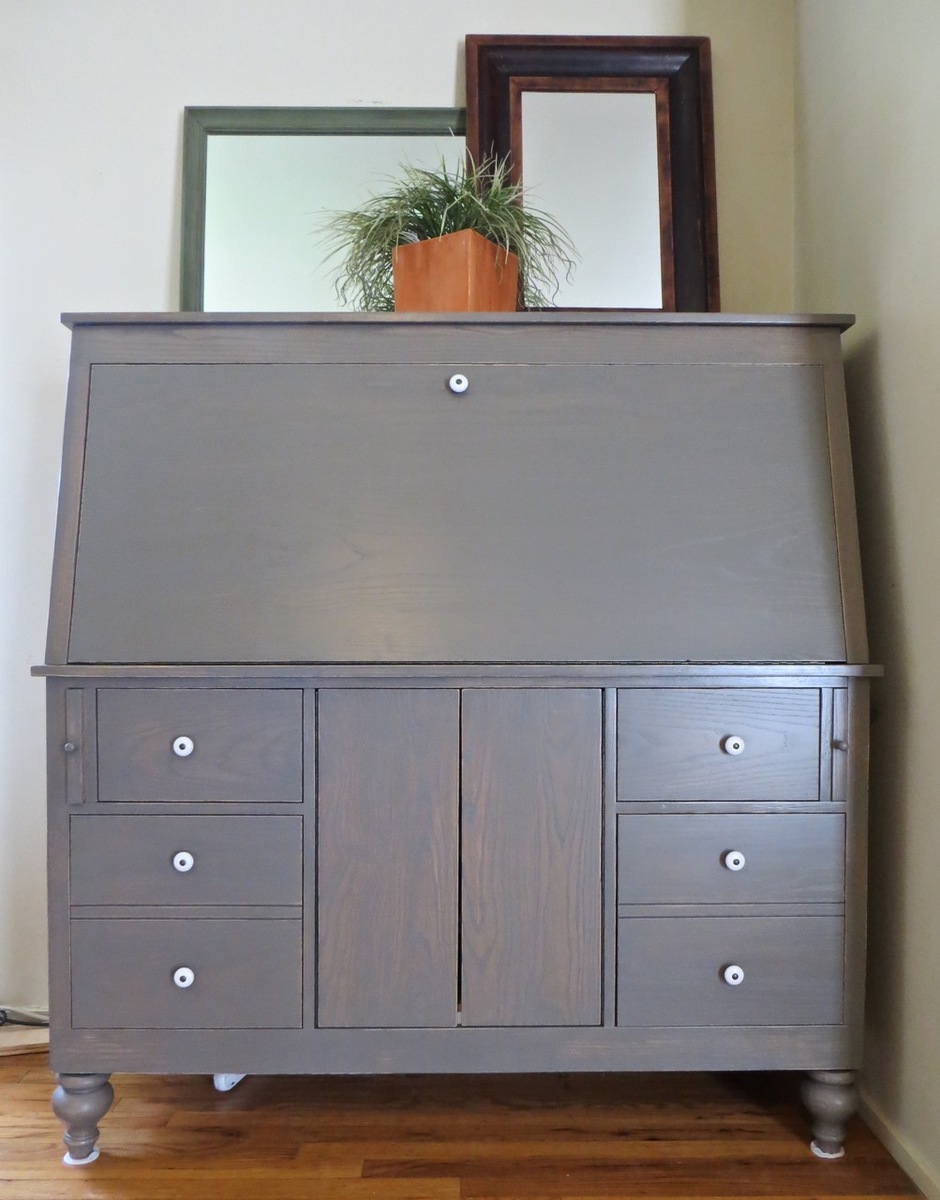
Drop-Down Door Hutch Desk
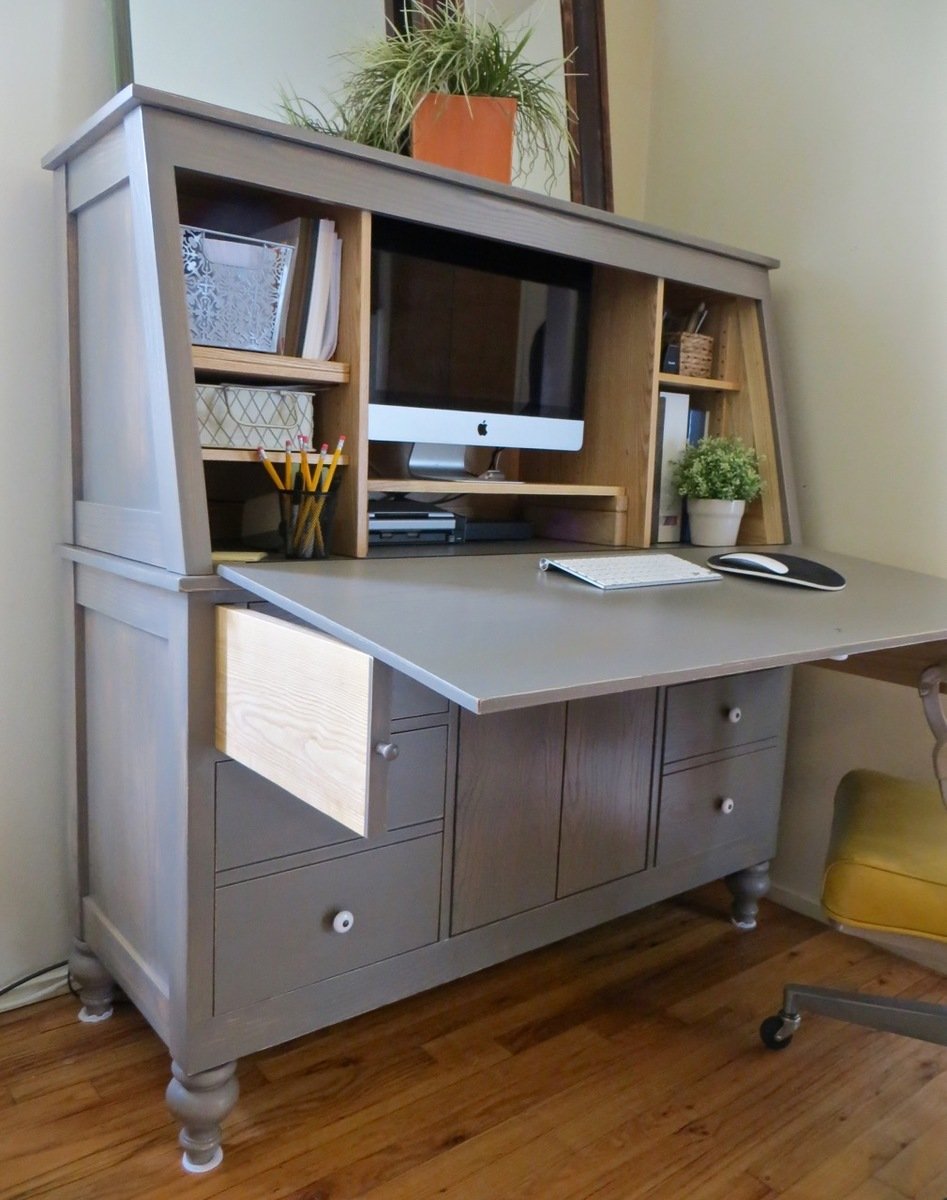
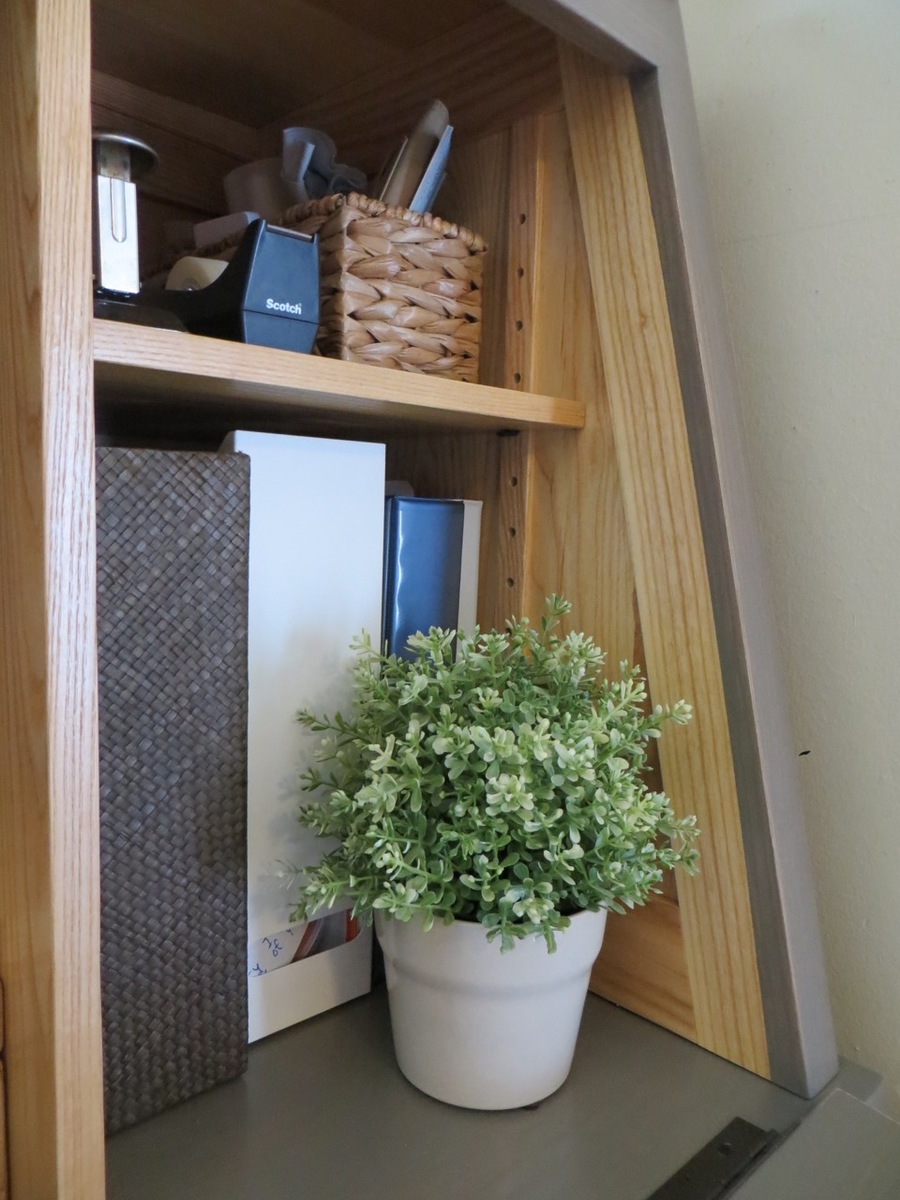
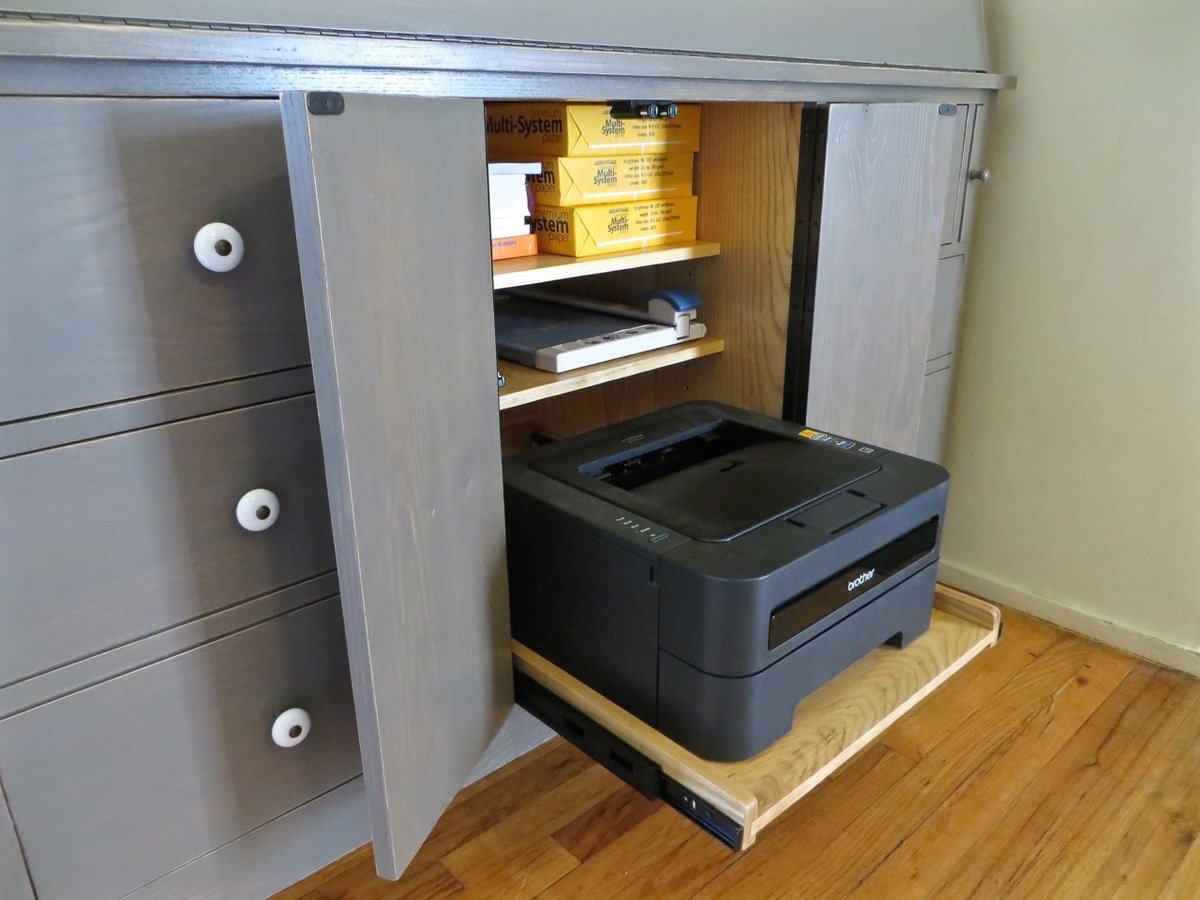
I designed this desk from another desk I built. With this one, I wanted the overall foot-print smaller but still something that was able to organize all our office stuff and be able to close everything to keep it clutter-free. We have a small apartment, and although this desk is about the size of an up-right piano, it works perfectly into our living space!
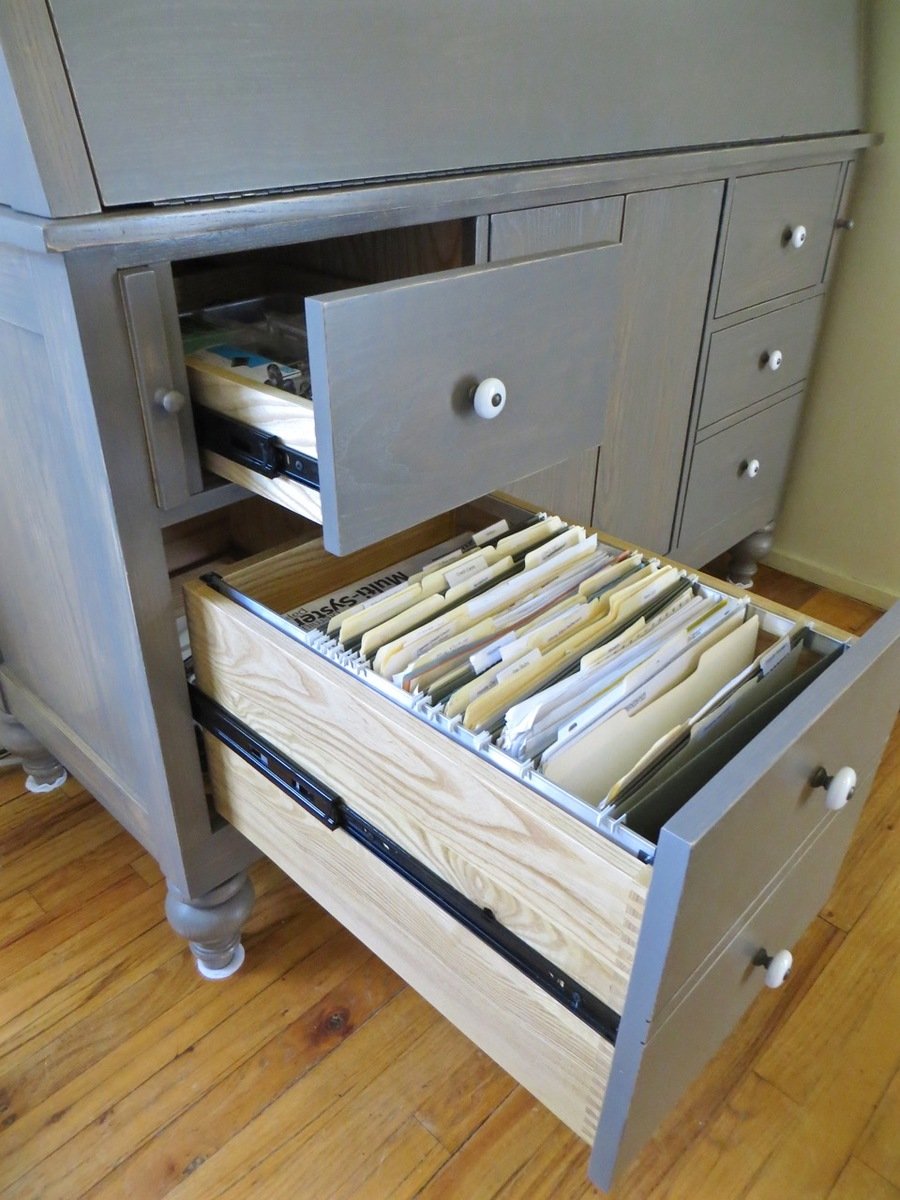
I made it out of raw hardwood (Ash) and because I knew just the wood alone would make this desk heavy/bulky to move I made the top hutch removable. It's held in place by wood pegs (dominos). All the shelves are adjustable and the drawers are full-extension (something I've never had - wahoo)! The drop-down door is help up by 2 pull-out boards on each side (my first desk had chains). I spend a lot of money on this desk because I knew it was a chance in a lifetime to make and wanted it to be perfect and something that would last generations.
I built the main carcass off of plans/measurements I designed, but then all the insides, drawers, shelves, doors, etc where made as I built (because just a millimeter difference in building changes everything)!
If you want more pictures/descriptions of the building process I wrote about it in a 4-part series on my blog.
Estimated Cost
$1,000 for all wood & supplies
Estimated Time Investment
Week Long Project (20 Hours or More)
Finish Used
To achieve the ash gray color I used "General Finishes" brand water-based stains (equal mixtures of Walnut, Antique Oak & Whitewash) with 1/2 ratio of Pre-Stain Conditioner (bought from Woodcraft). I did 2-3 coats stain, lightly sanded and sprayed 2 coats of Ceramithane clearcoat using HVLP sprayer (sanding with 550 grit paper in between).
Recommended Skill Level
Intermediate
Comments
Wed, 09/23/2015 - 11:22
is there plans available for this project?
is there plans available for this project?

In reply to is there plans available for this project? by Nsmjc
Tue, 09/27/2016 - 12:20
No plans :(
Hi there! I'm sorry but I don't have plans put together on it! I designed it in Google Sketchup and have some 'screen shots' I could send you for basic measurements if interested. You can e-mail me at [email protected]
Mon, 06/15/2020 - 09:08
drop-down door hutch desk plans or dimensions?
Hi. Do you happen to still have those 'screen shots' or any other info/dimensions from this build? LOVE LOVE LOVE it!!