Community Brag Posts


DIY Entertainment Center
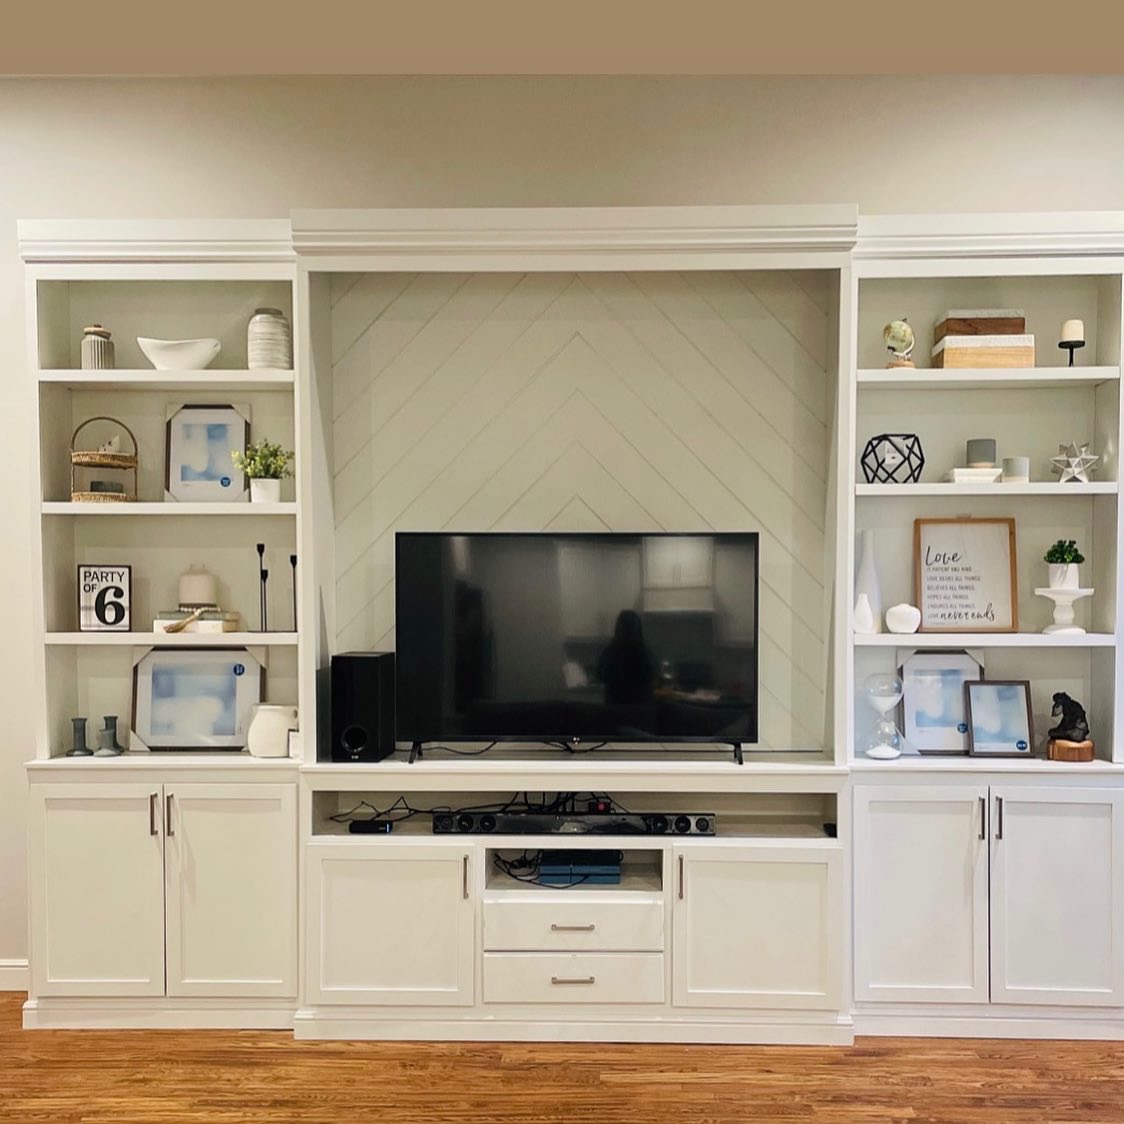
Largest Build I have done up to date. It took a bit longer but it was so worth it. Wanted something different than all the entertainment centers I saw so I created a herringbone back. I love how it turned out.
-@theorthhome/instagram
Estimated Cost
$800
Estimated Time Investment
Week Long Project (20 Hours or More)
Finish Used
Pure White from Sherwin Williams
Recommended Skill Level
Intermediate
Comments
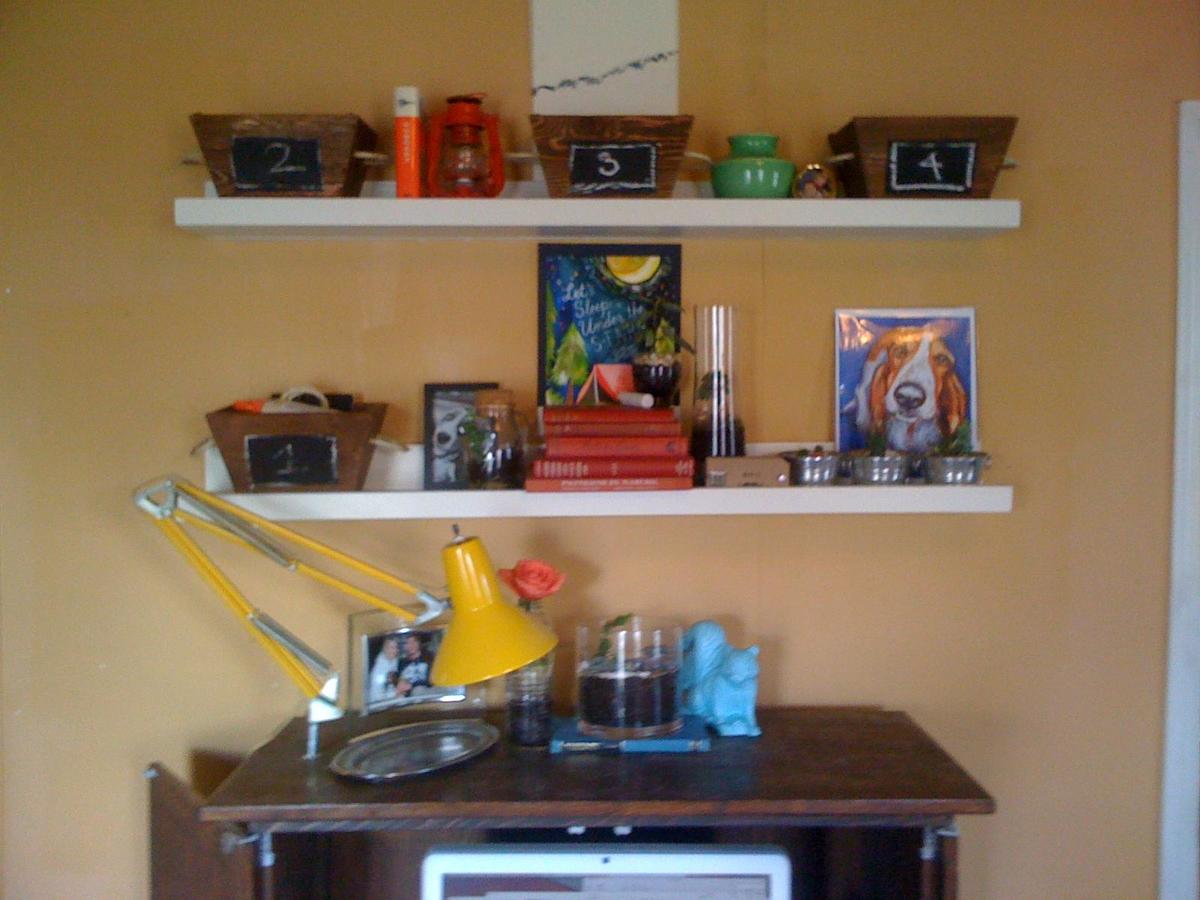
$1 Small cedar planters & $10 ledges

We have been stalking ana-white.com for awhile and making a few projects here and there. we made the $10 ledges to fit over our entertainment center. When we found the plan for the cedar planters we thought they would be a great little storage area for all of the little junk around the house. We made 6 of these planters out of 3 cedar planks and modified them to fit on the $10 ledges (which are actually made with a 1x6 to allow for more things to be able to fit) so they wound up more rectangular than square.
Sorry for the crappy I-phone pics!
Built from Plan(s)
Estimated Cost
$15 for ledges $6 dollars for 6 crates
Estimated Time Investment
An Hour or Two (0-2 Hours)
Finish Used
Miniwax in early american + chalkboard paint for crates
Antique white paint for ledges
Antique white paint for ledges
Recommended Skill Level
Starter Project
Corner Cupboard
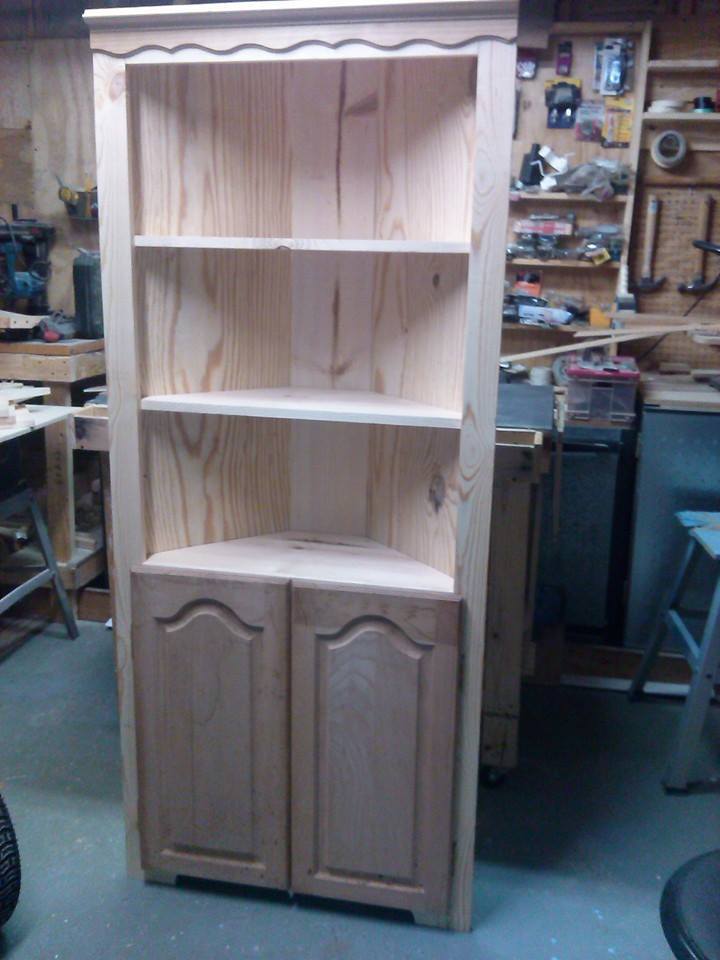
Built from your corner cupboard plans. Added a few of my touch and ready for staining. Thank you Ana.
Built from Plan(s)
Estimated Cost
Total cost was about $90
Estimated Time Investment
Afternoon Project (3-6 Hours)
Recommended Skill Level
Intermediate
Comments
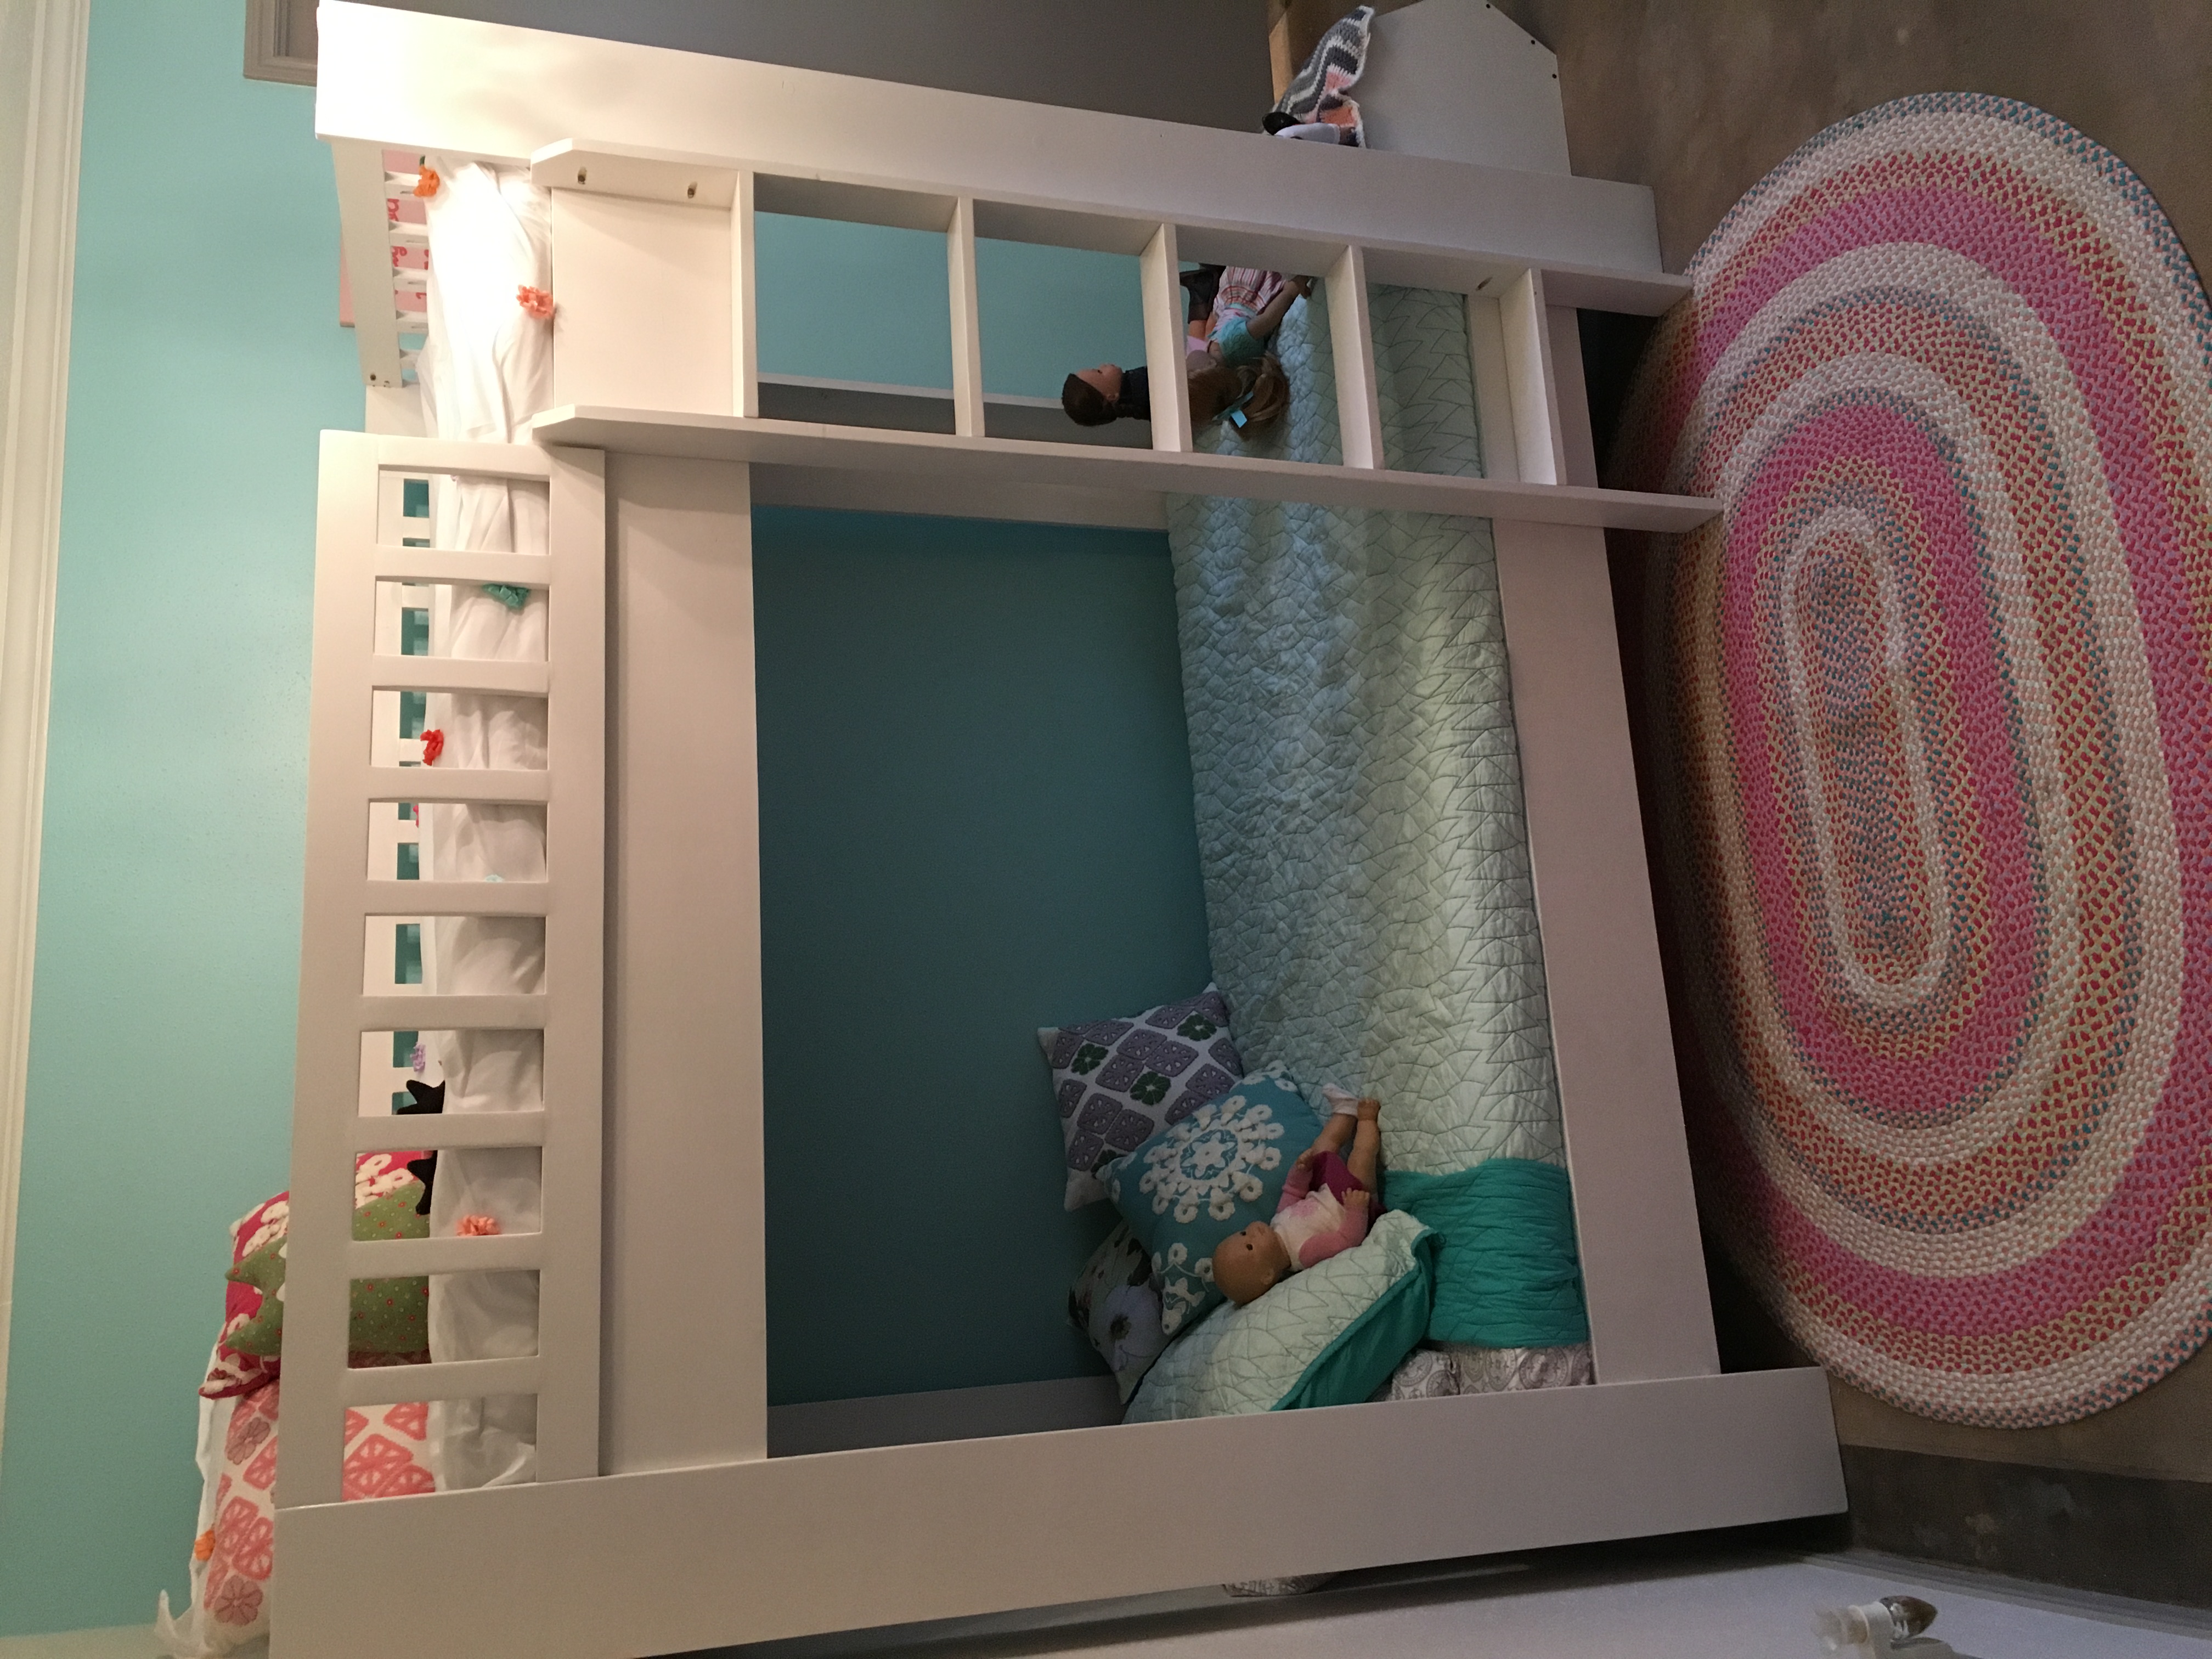
Rustic modern bunkbed
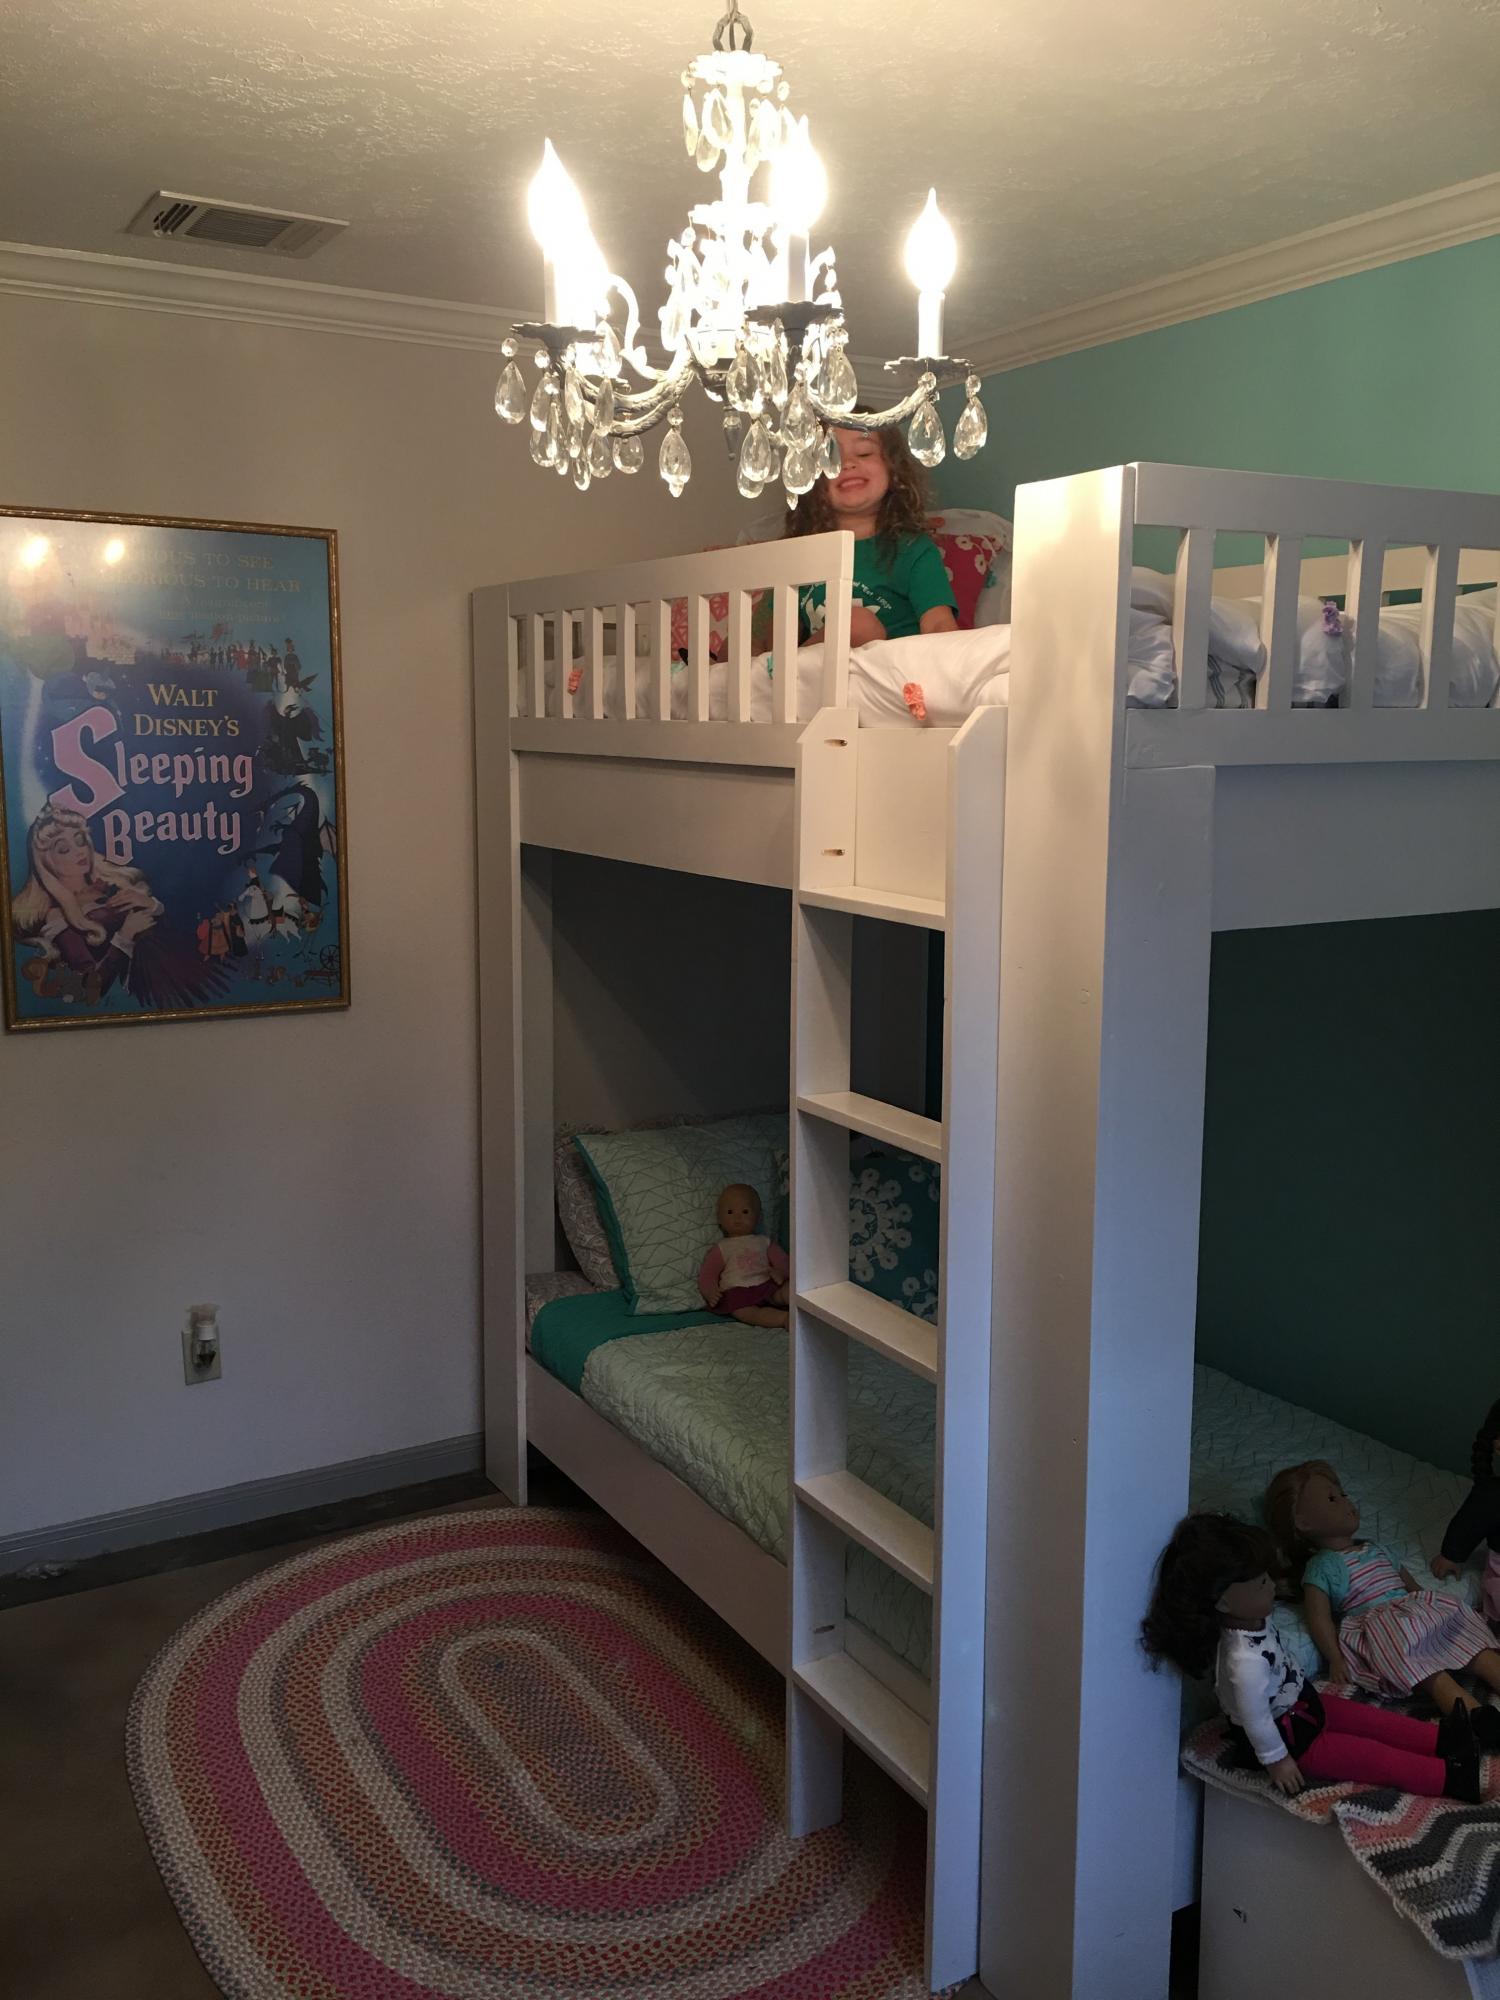
Restoration hardware Callum bunk plan. Stylish and sturdy bunk for our daughter.
Built from Plan(s)
Estimated Cost
350
Estimated Time Investment
Weekend Project (10-20 Hours)
Finish Used
Amy Howard paint in Bauhaus Buff and gloss sealer
Recommended Skill Level
Intermediate
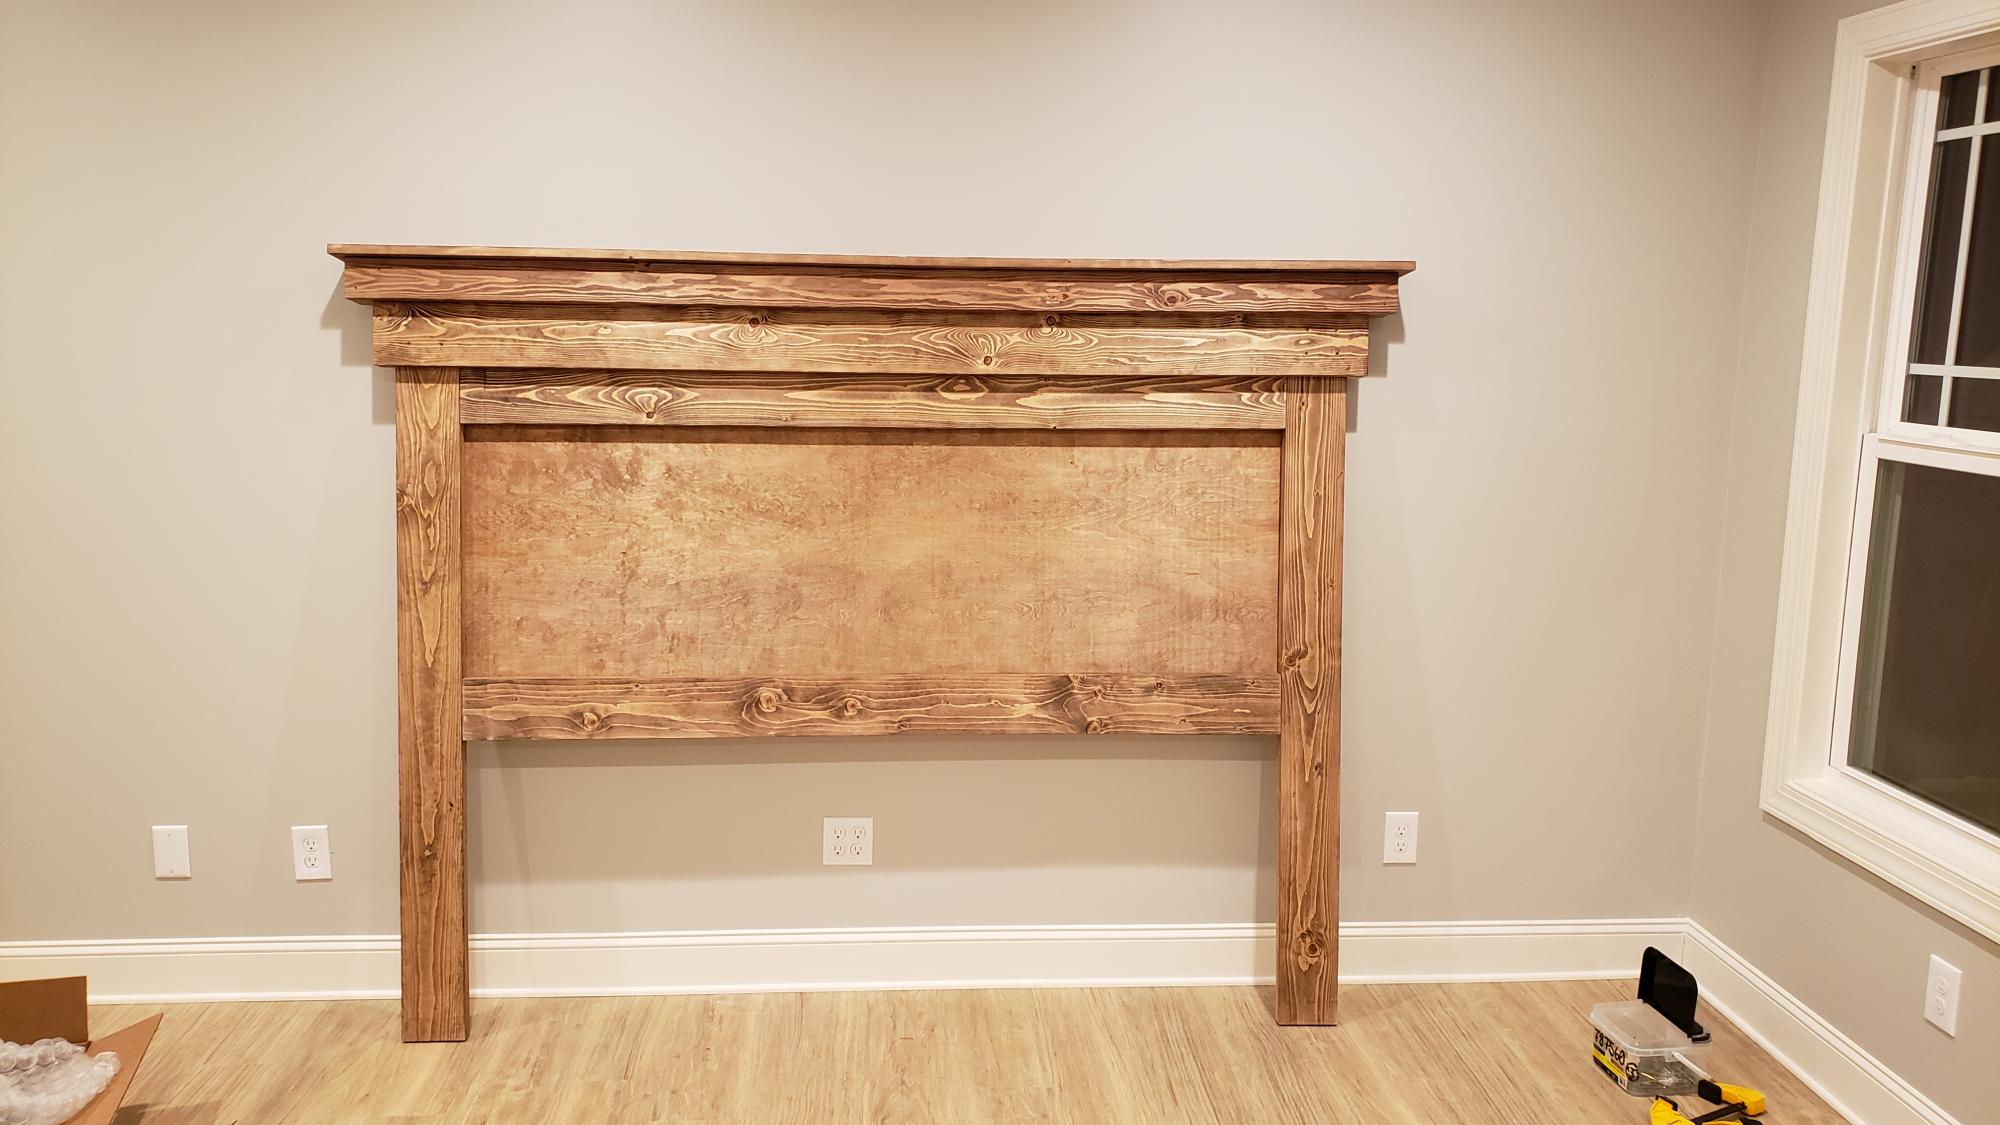
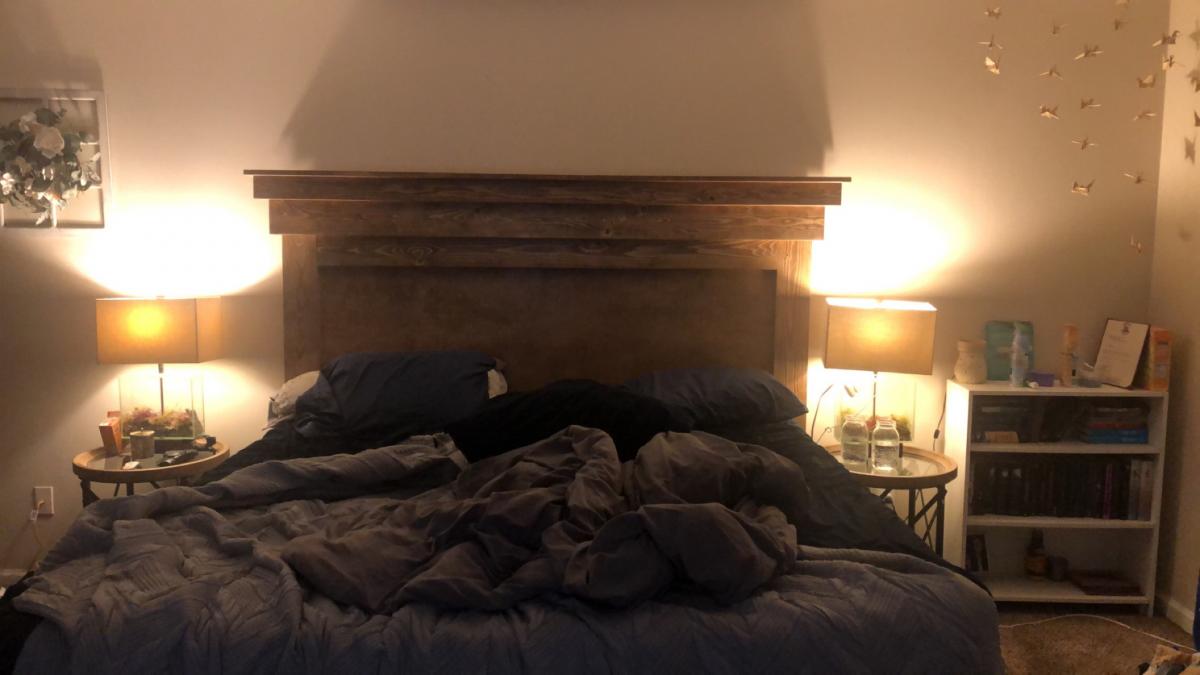
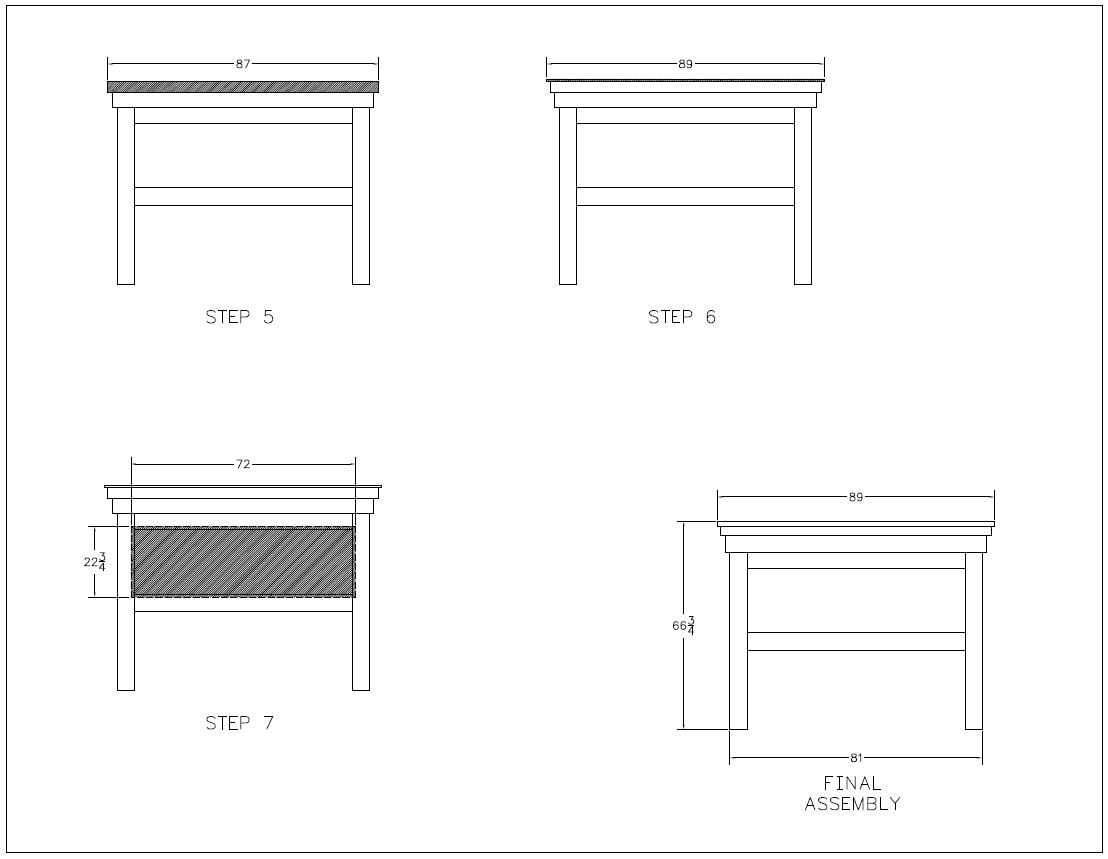
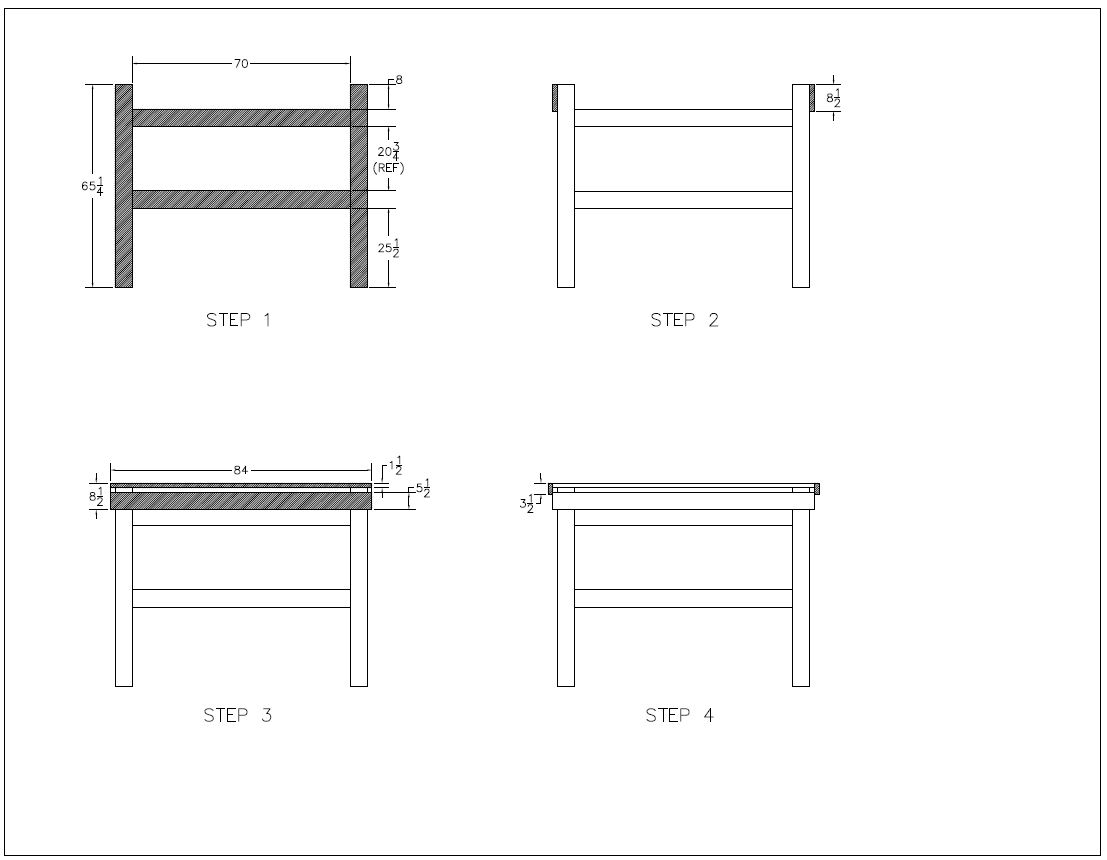
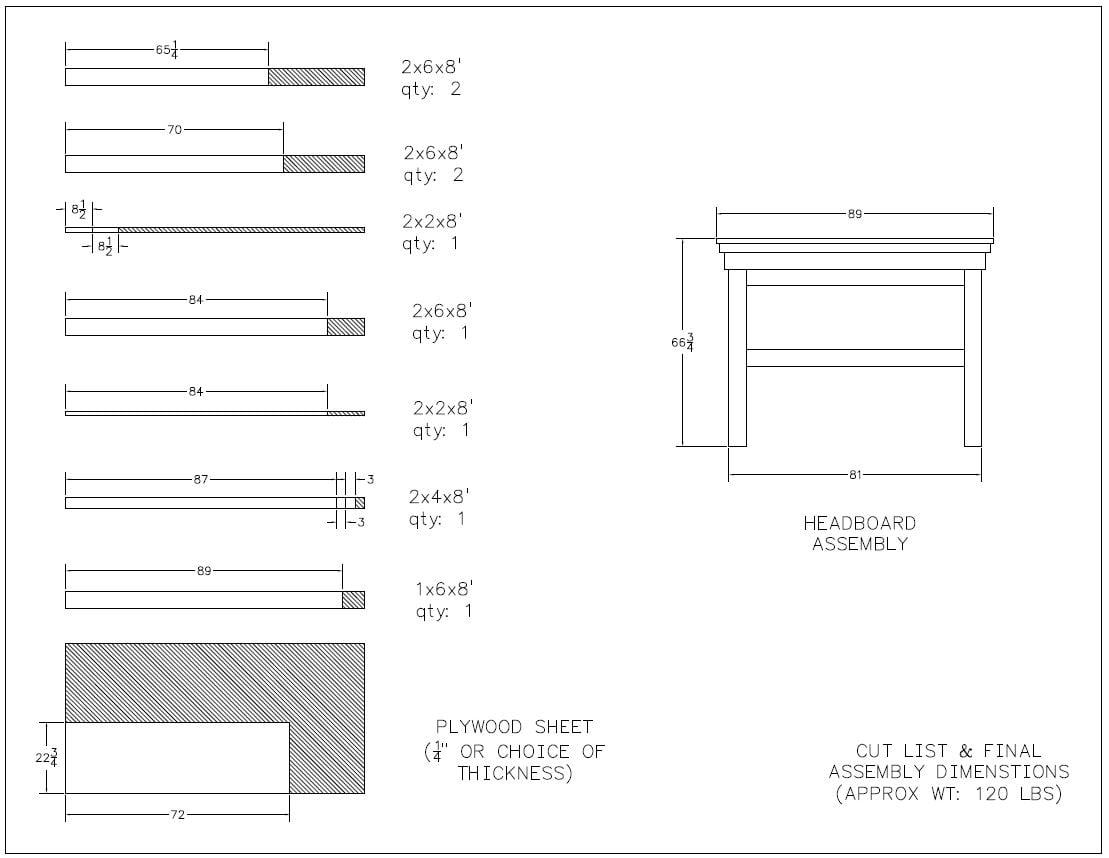
Mantel Moulding Headboard - King Size Here!
Hello,
I have a PDF with material, cut list, and assembly steps for anyone interested. I also used Type 2 wood glue and all screws with this build, substituting for nails in the original plan!
Please email me at [email protected] with any questions!
Thanks
Matt
Built from Plan(s)
Estimated Time Investment
Afternoon Project (3-6 Hours)
Finish Used
I have painted this Extra White, and stained with Special Walnut from Minwax.
Recommended Skill Level
Beginner
Comments
My corner console

Needed a less massive entertainment center for my itsy bitsy living room.This plan was perfect we shrunk it down a bit width wise. Easy to build only took us a day to build and me a couple of weekends to paint! LOVE
Estimated Time Investment
Day Project (6-9 Hours)
Finish Used
White paint with brown glaze
Recommended Skill Level
Beginner
American girl stable

Followed instructions and became a fun day project using primarily 1x2's, Kregs jig and glue. Hardest part of this project was keeping our daughter out of Santa's workshop. Thanks to a previous brag post, I used wood shims as an idea for a roof and added the raffia to give Santa hero powers on Christmas morning. Wood/shims were purchaed at HD; stain, hinges and clasps from a Re-store; raffia from a craft store. All in probably cost around $40 total with wood and shims being $30 of that. Note: if you decide to shingle using glue, plan for a LOT of shims and a full bottle of glue if not more. I cut the shims in half to give me double the amount for use.
Stain/finish and shingles added 2 extra days to this project.


Built from Plan(s)
Estimated Cost
$40
Estimated Time Investment
Weekend Project (10-20 Hours)
Finish Used
Walnut on frame, honey maple on roof.
Recommended Skill Level
Beginner
Comments

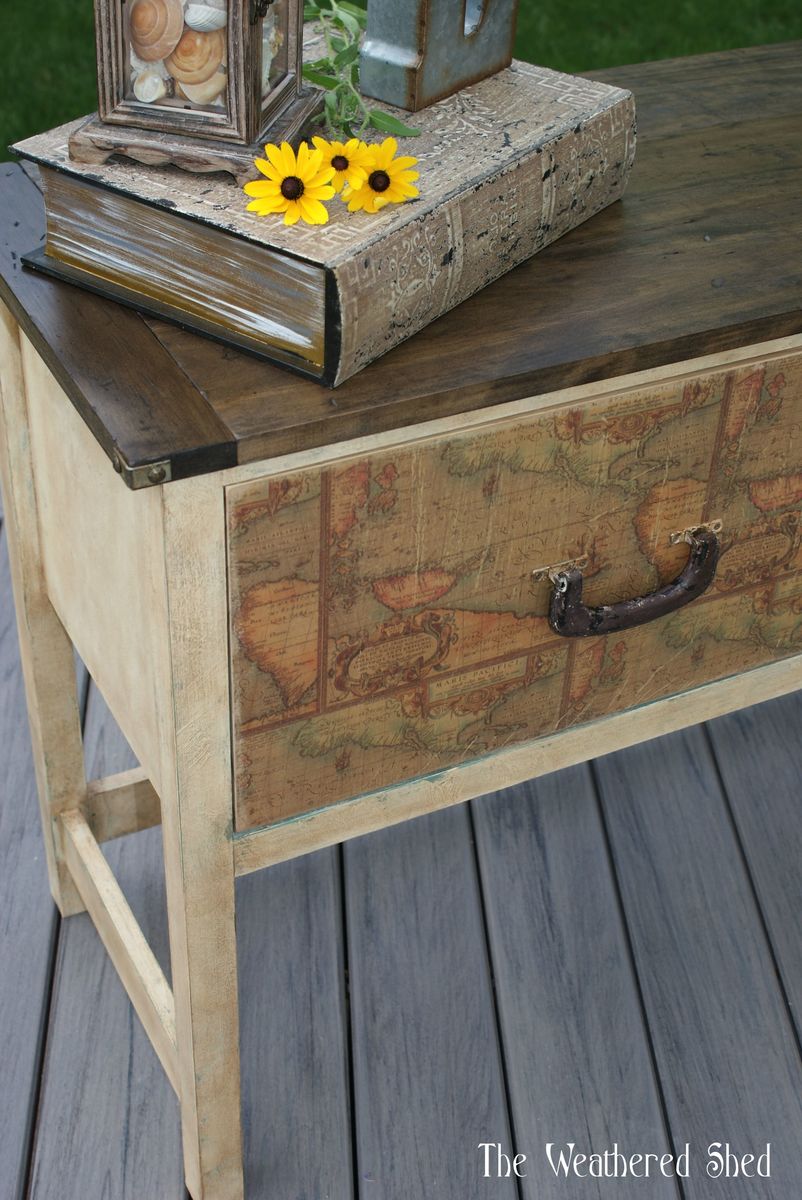
Vintage Travel Themed Console Table
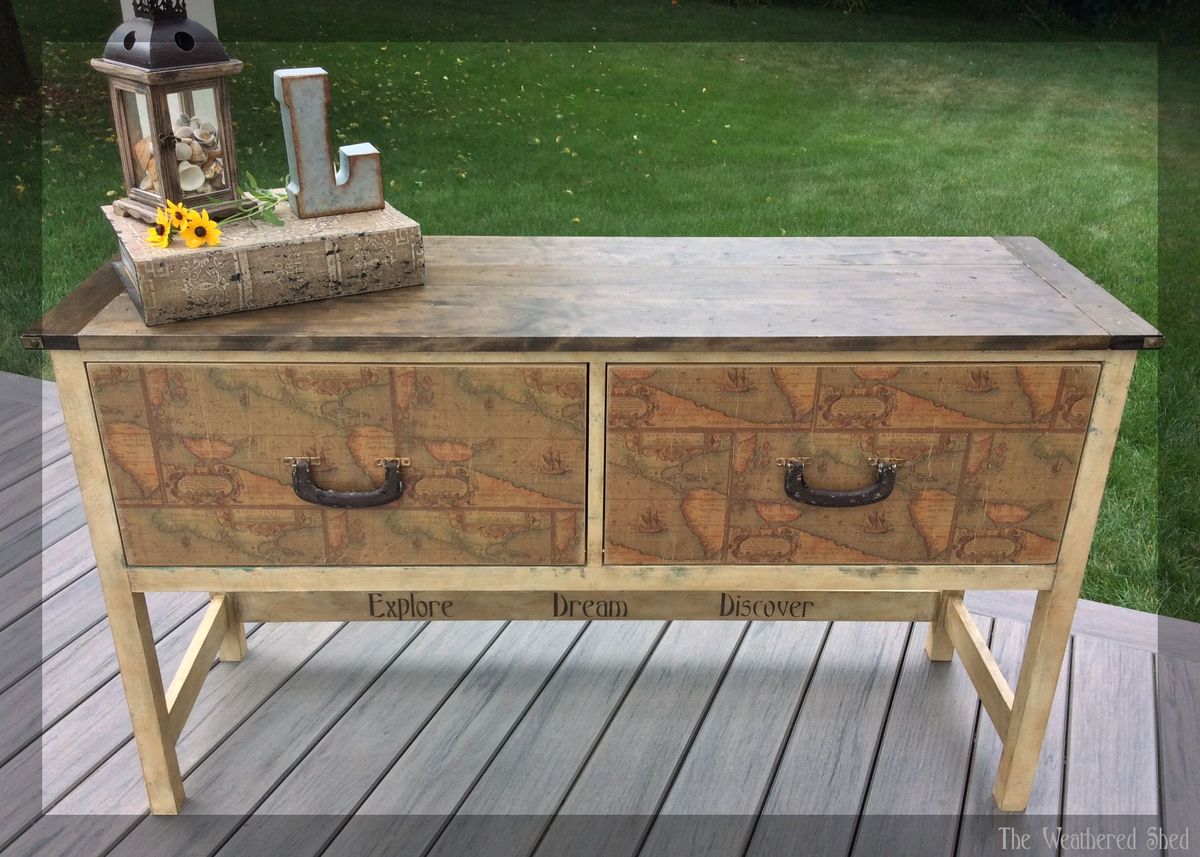
My IG Builders Challenge 2016 Piece
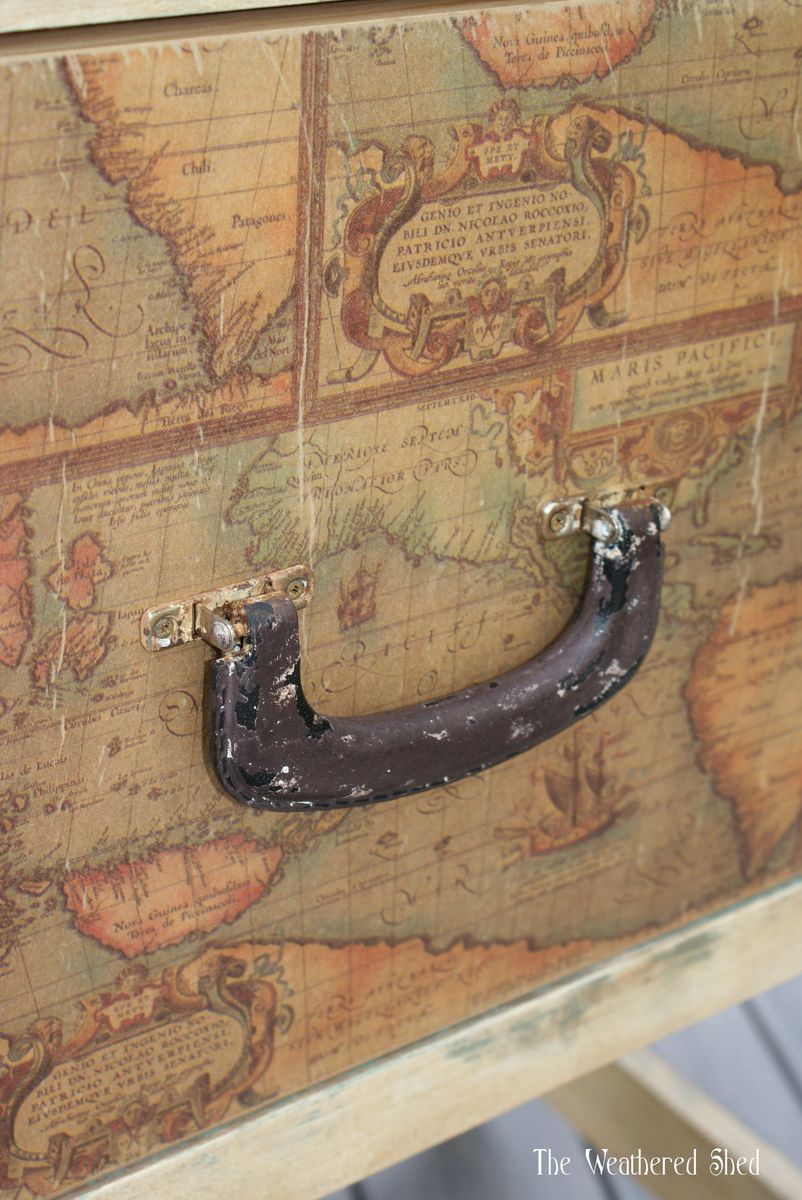
First piece I have ever build by myself. I decided to go with a vintage travel theme. Drawers were decoupaged with old map look wrapping paper and then distressed a bit. Suitcase handles painted and distressed serve as the drawer pulls. I even rusted up the metal on them...including the tiny screws! For the top, I decided to beat up the wood with hammer, chains, etc. and then stain in dark walnut. On each corner of the top I placed metal brackets which I also soaked in a vinegar rust solution to age them and then attached using some decorative upholstery tacks. For the body, I decided to go with American Paint Company paint. It's thick and easy to create lots of texture. I layered two colors...Beach Glass as the base coat and Home Plate on top. In order to achieve an aged, parchment paper type look, I used dark wax. The dark wax sinks into all the yummy texture creating the look I wanted to get. Additionally, I stenciled the words: Explore Dream Discover across the bottom.
Built from Plan(s)
Finish Used
American Paint Company Paint - Beach Glass & Homeplate
Minwax - Dark Walnut
Minwax - Dark Walnut
Recommended Skill Level
Beginner
Fancy farmhouse headboard only
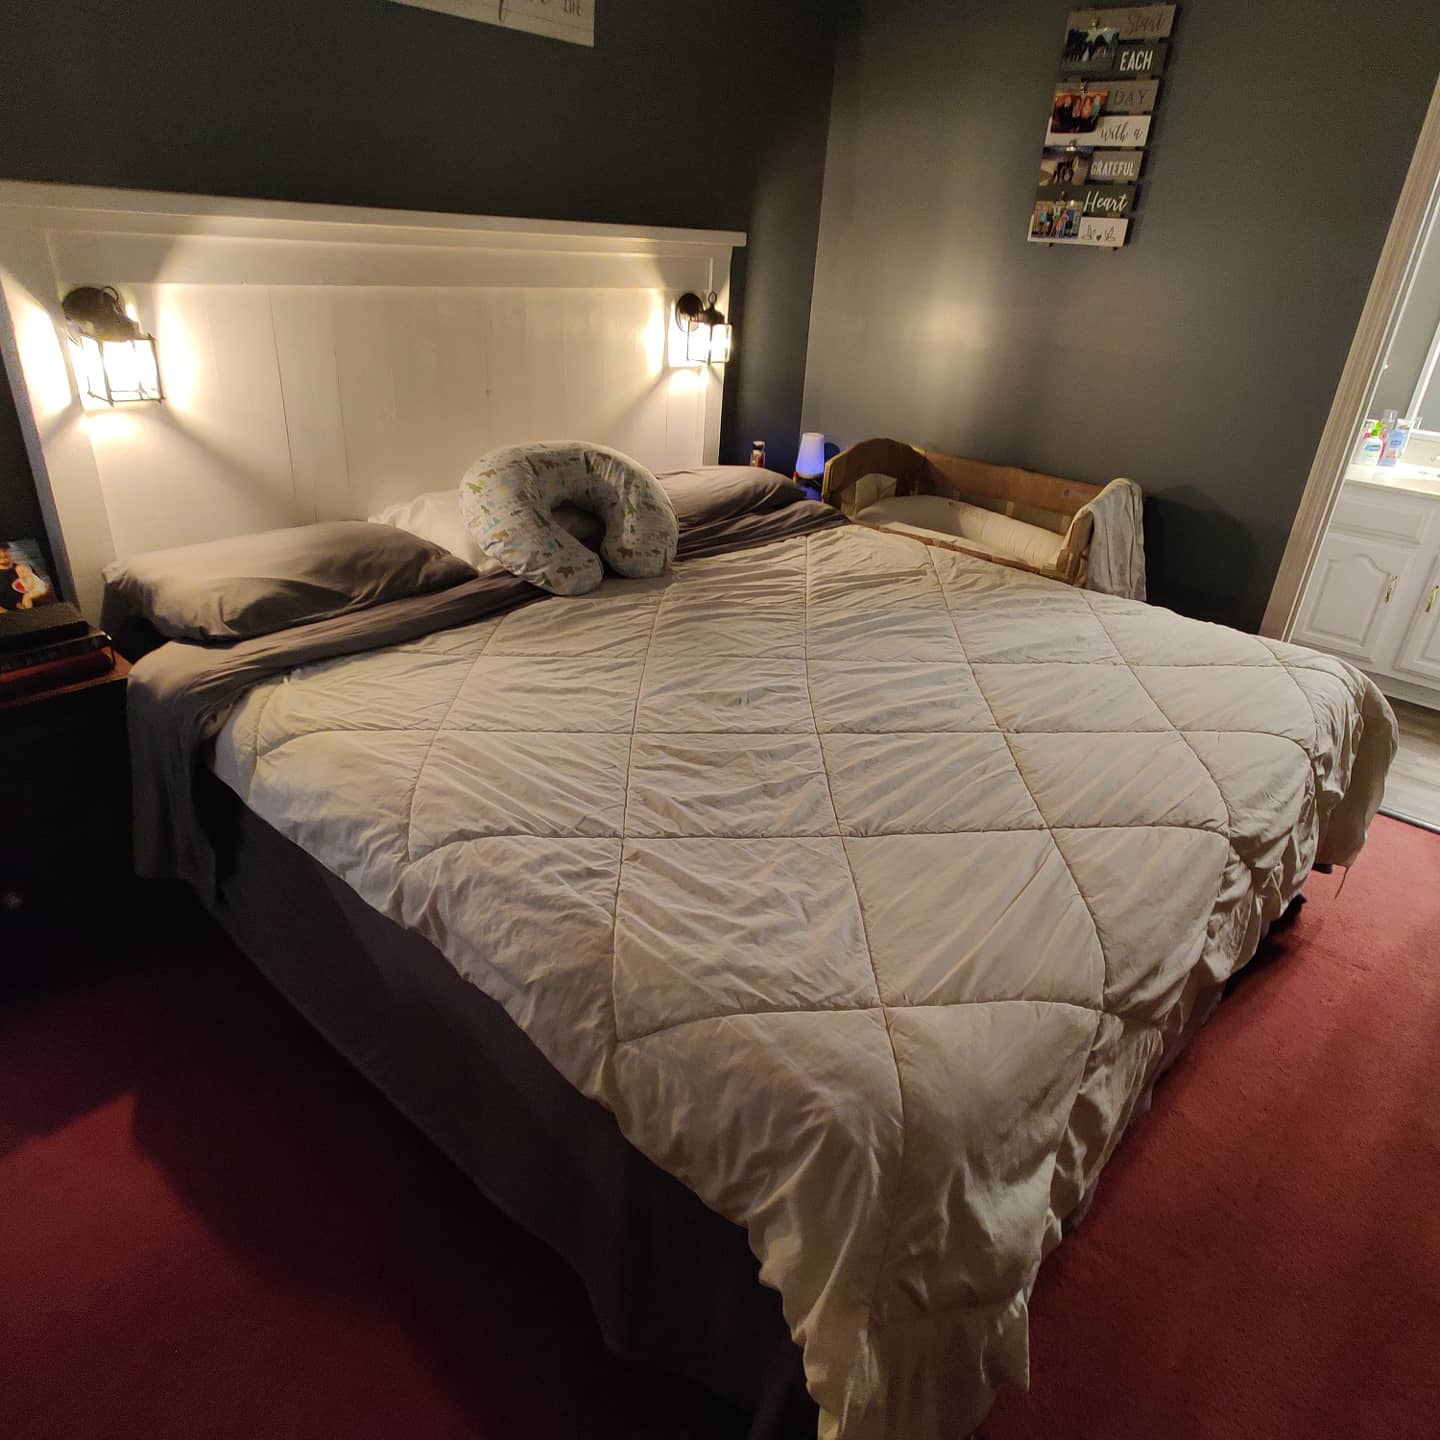
My first real woodworking project, made possible by Ana! Didn't really change much from the original fancy farmhouse bed design, just made it one plank narrower, added some lights and only utilized the headboard as my bed came with its own frame. Thanks so much for sharing your plans and I am getting ready to tackle the night stands to match.

Estimated Time Investment
Day Project (6-9 Hours)
Finish Used
Looking for a more rustic finish I just decided to use a whitewash and let a lot of the defects of the wood and the grain show through.
Recommended Skill Level
Intermediate
Comments
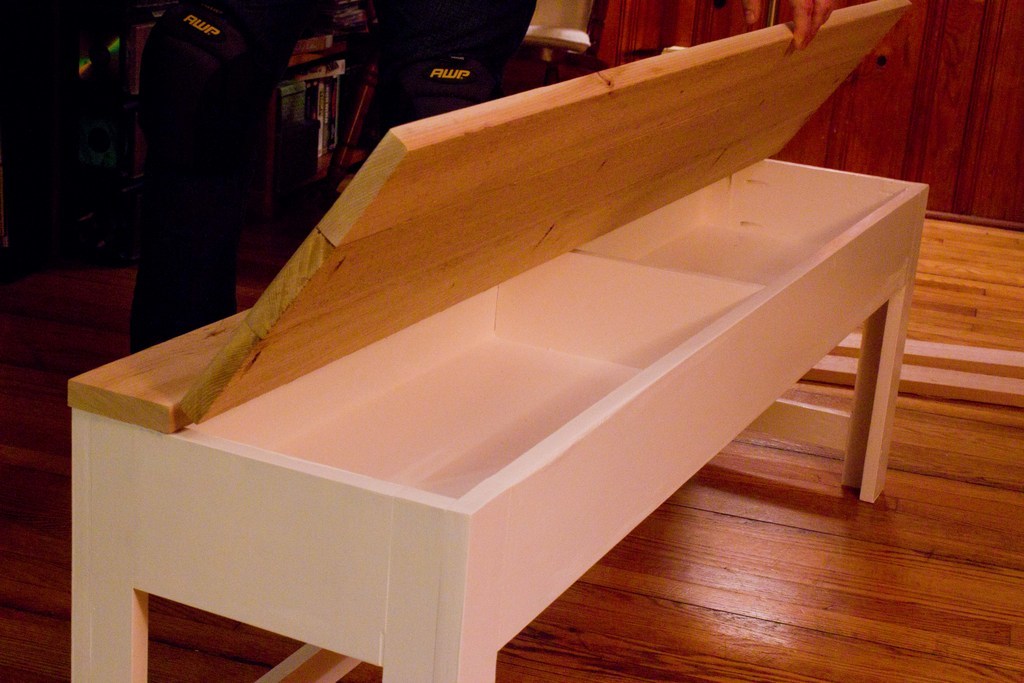
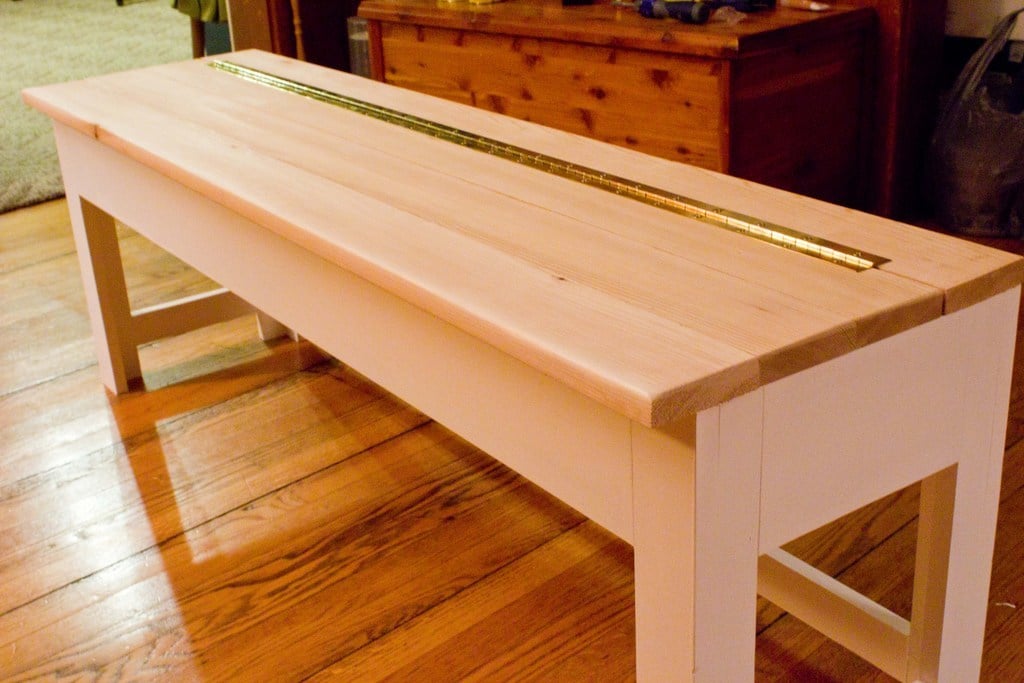
Storage Bench For the Mudroom

This was for our mudroom, obviously. I wanted to use up some ply that I had ill-advisedly had the store cut into quarters, so each of my storage compartments are 48" long, supported in the center by that divider piece you see in the second pic.
The beauty of DIY of course, is that you can modify everything. But if you do, you spend a week on a 4-hour project (but you do use up a lot of scraps). I cut nearly every piece out of plywood with the exception of the 1x3 front legs. It was time-consuming, but I think it was worth it as it allowed me to impulsively deepen the storage from 3.5" to 5". It also meant I only had to purchase the cedar, one pine 1x3, and a hinge.
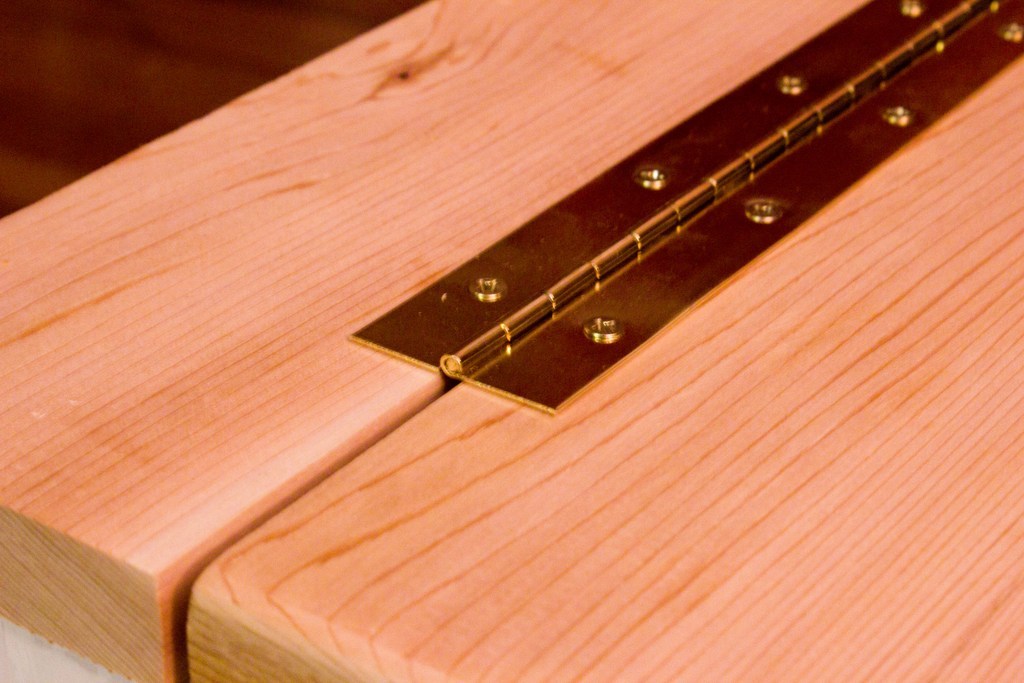
The top is bare cedar boards which we'll allow to weather naturally. The hinge is the longest piano hinge they had at the blue store at about $7. The white is just a base Behr ultra with no tint because it's classic and we already had it.
Built from Plan(s)
Estimated Cost
$30
Estimated Time Investment
Weekend Project (10-20 Hours)
Recommended Skill Level
Starter Project
Comments

Mon, 03/18/2013 - 10:41
Love your bench
Now I may have to copy you on this one, some day in the distant future when I finally get to our garage entry renovation. :) Looks great!
TV Stand

This TV stand was built from the plans of the Planked wood sideboard. I made it a bit shorter only 6ft and made shelving in the middle instead of another storage space. Each side has a shelf in the middle and we store DVDs in them along with some of our childrens puzzels and games. I stained it Walnut and love the look of the rough wood. All of our guest cant believe that its homemade and not purchased from a store.
Built from Plan(s)
Estimated Cost
80-150
Estimated Time Investment
Weekend Project (10-20 Hours)
Finish Used
walnut stain with added finish coat already included.
Recommended Skill Level
Beginner
Comments

Kennel side table
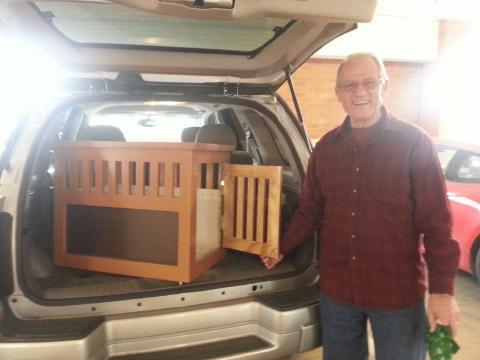
My dad wanted to make something for my husband and my first dog. When I saw this crate I shared it with my dad. He was on board and did a great job!

Built from Plan(s)
Recommended Skill Level
Intermediate
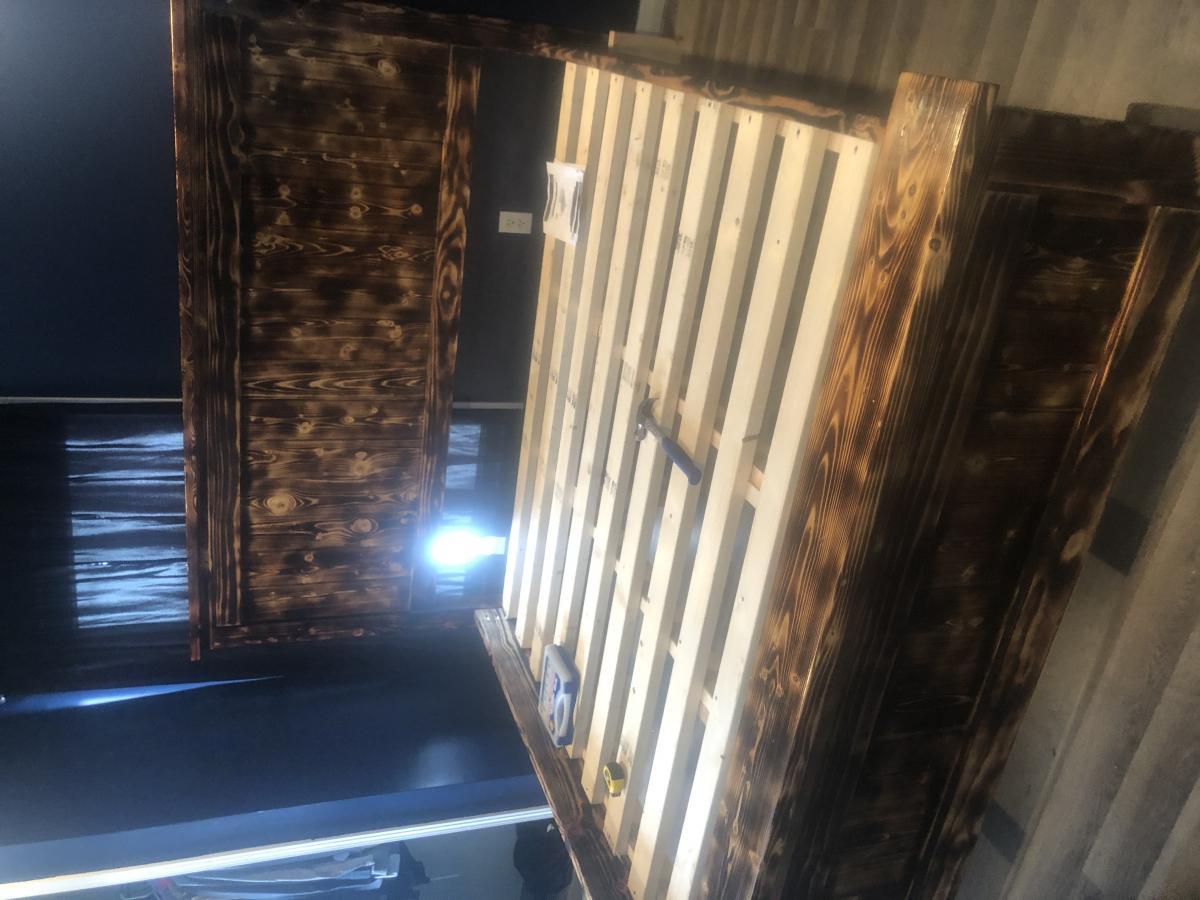
King farmhouse bed
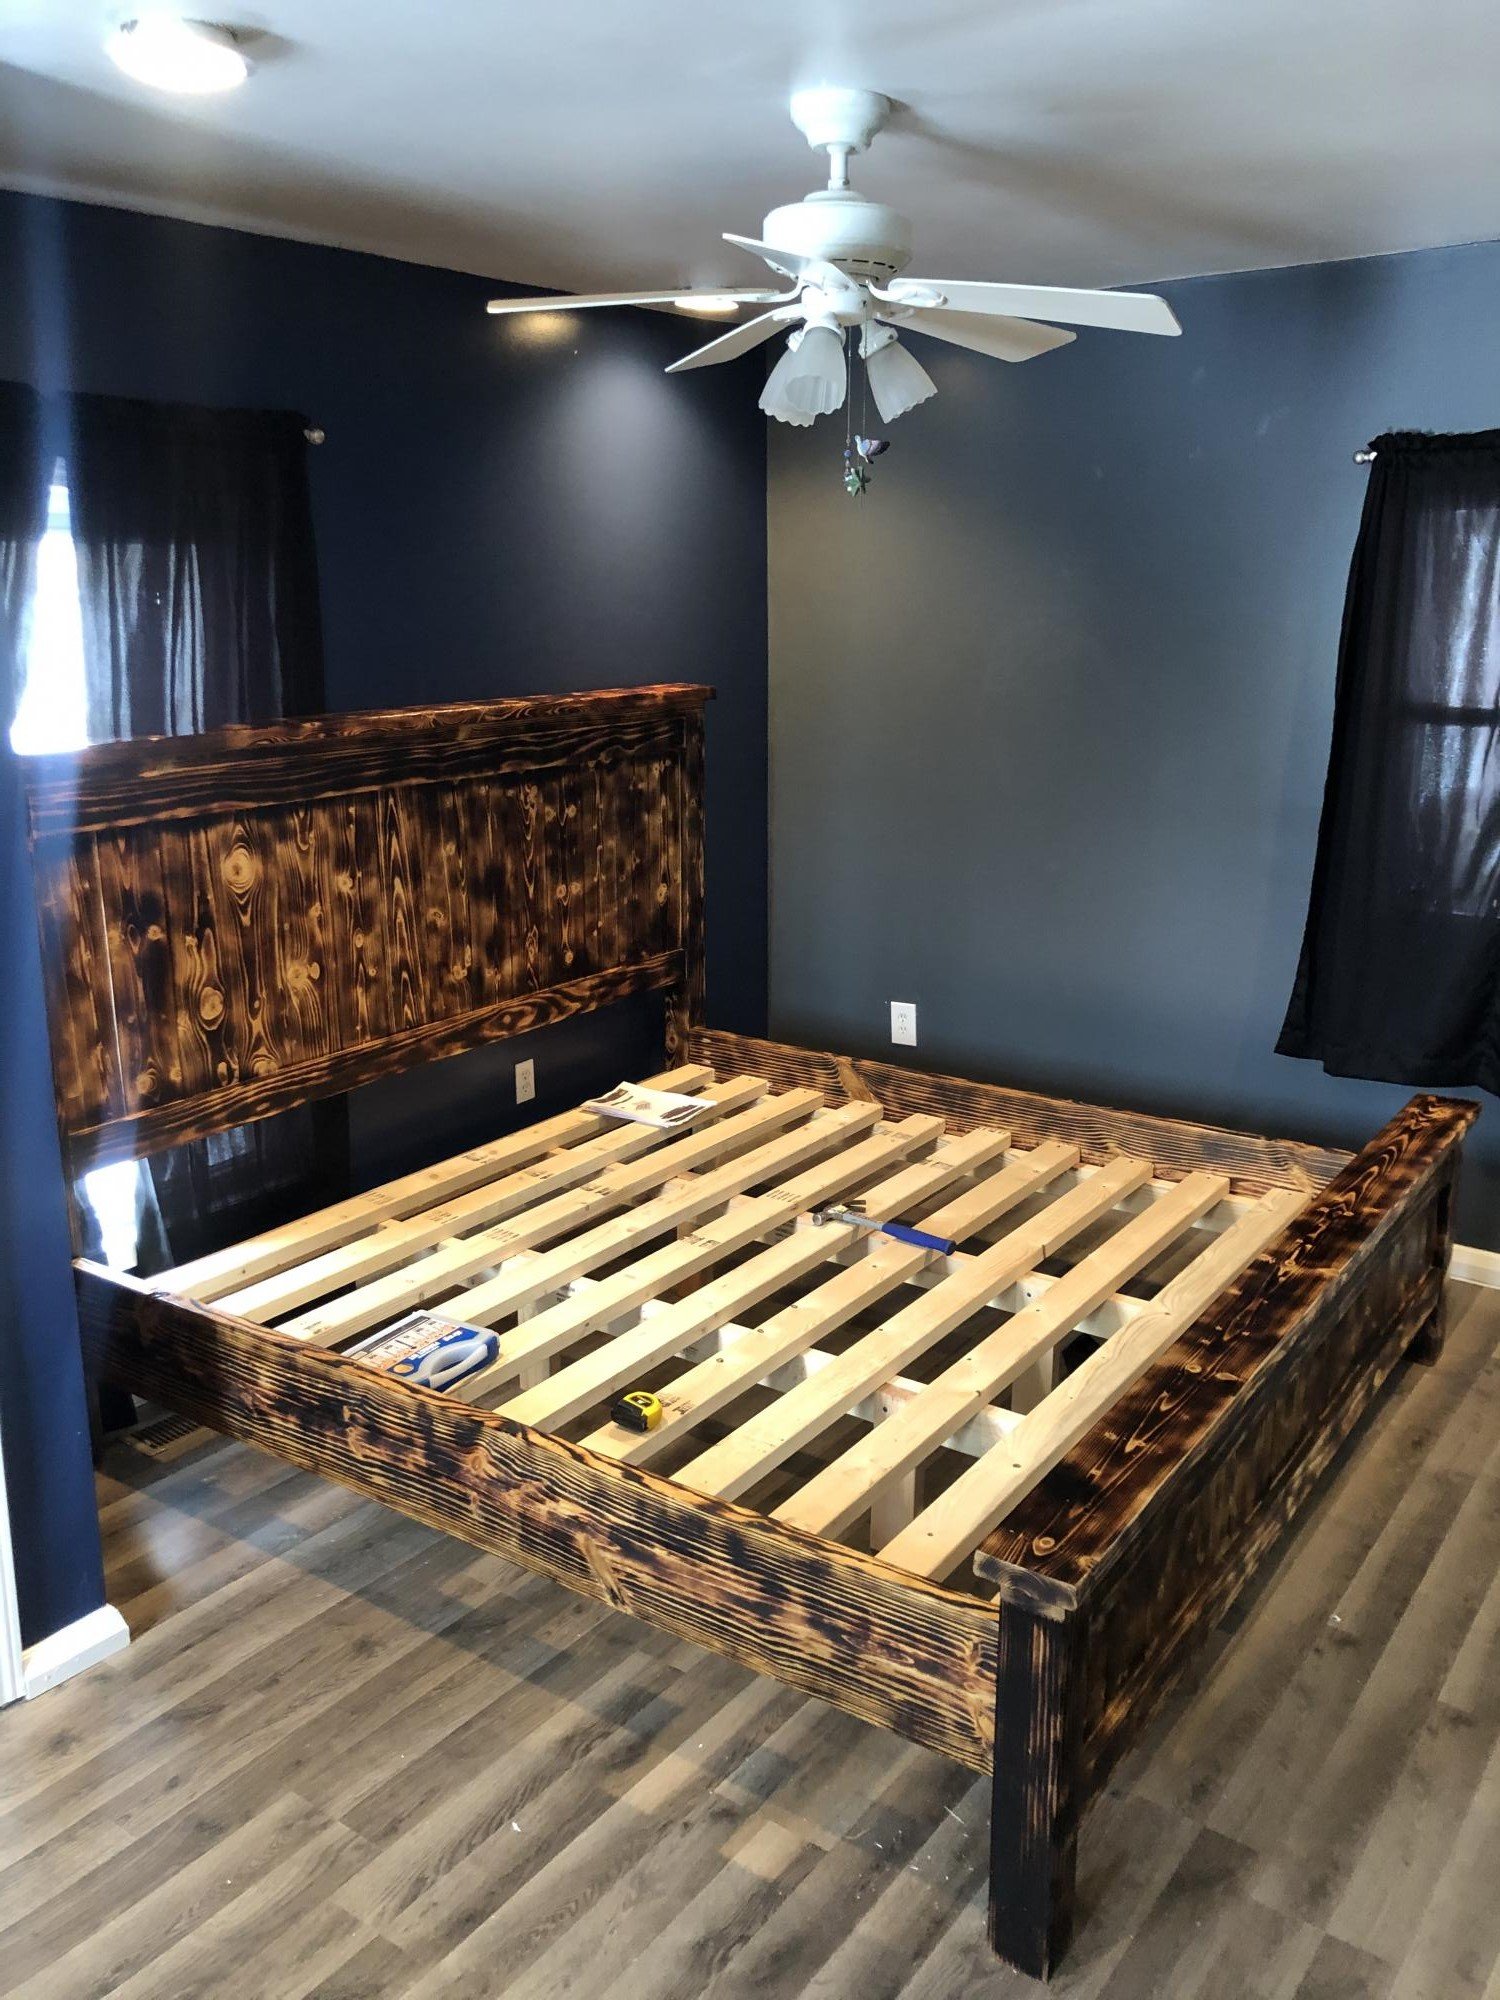
My husband built the bed and we were going to stain it but we burned the wood and clear coated it
Built from Plan(s)
Comments
Sun, 02/07/2021 - 11:00
Nice finish and great build!
It looks great in your room, beautiful! Thanks for sharing:)
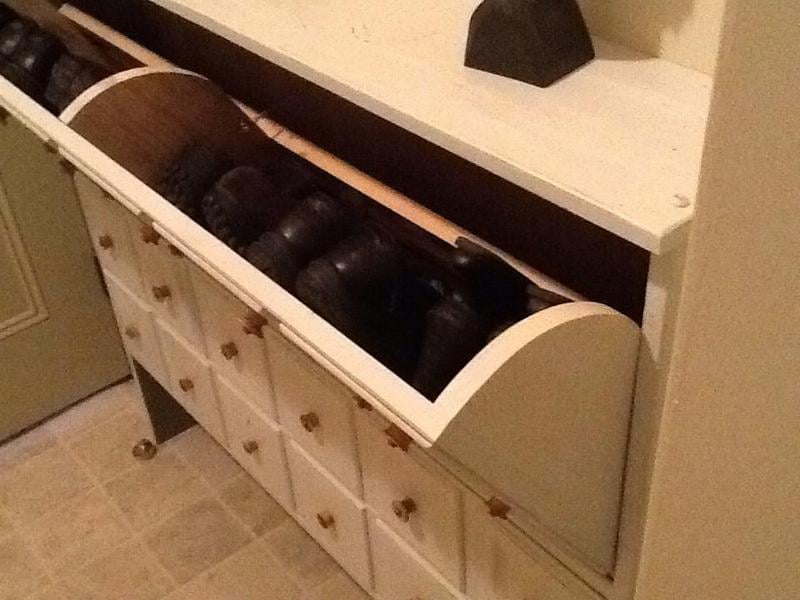
apothecary shoe cabinet

Absolutely love my new shoe cabinet! Saw the original plan on Pinterest in distressed black. Downloaded and asked hubby if he would build this for me and he did! I finished it with Colonial White oil base paint and distressed it with sand paper, hammer, steel wool and paint spatters.
One of the coolest features .... the knobs which are wooden thread spools cut in half.
The cabinet holds 11 pair of shoes and 3 pair of short boots.
Estimated Time Investment
Weekend Project (10-20 Hours)
Finish Used
Oil based Colonial White.
Recommended Skill Level
Beginner
Comments
Sun, 02/24/2013 - 18:01
This looks amazing! Love the
This looks amazing! Love the style! Great work. :)
Julie
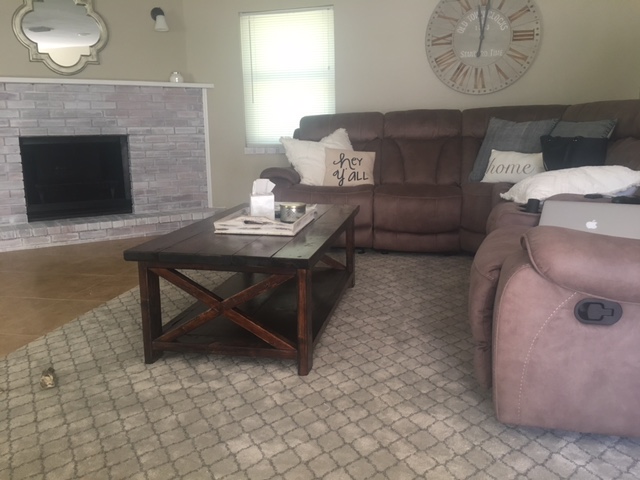
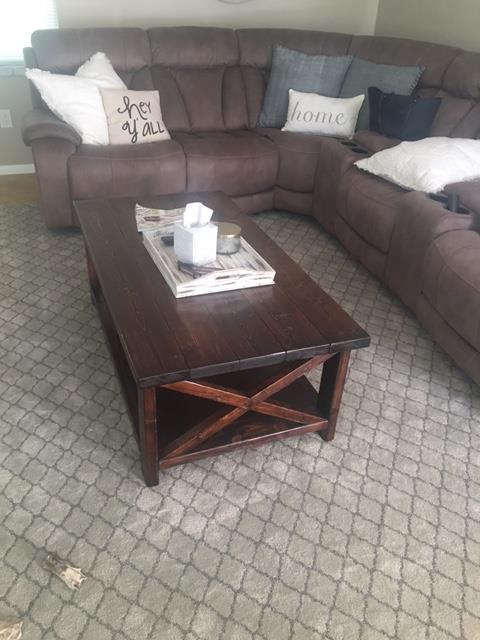
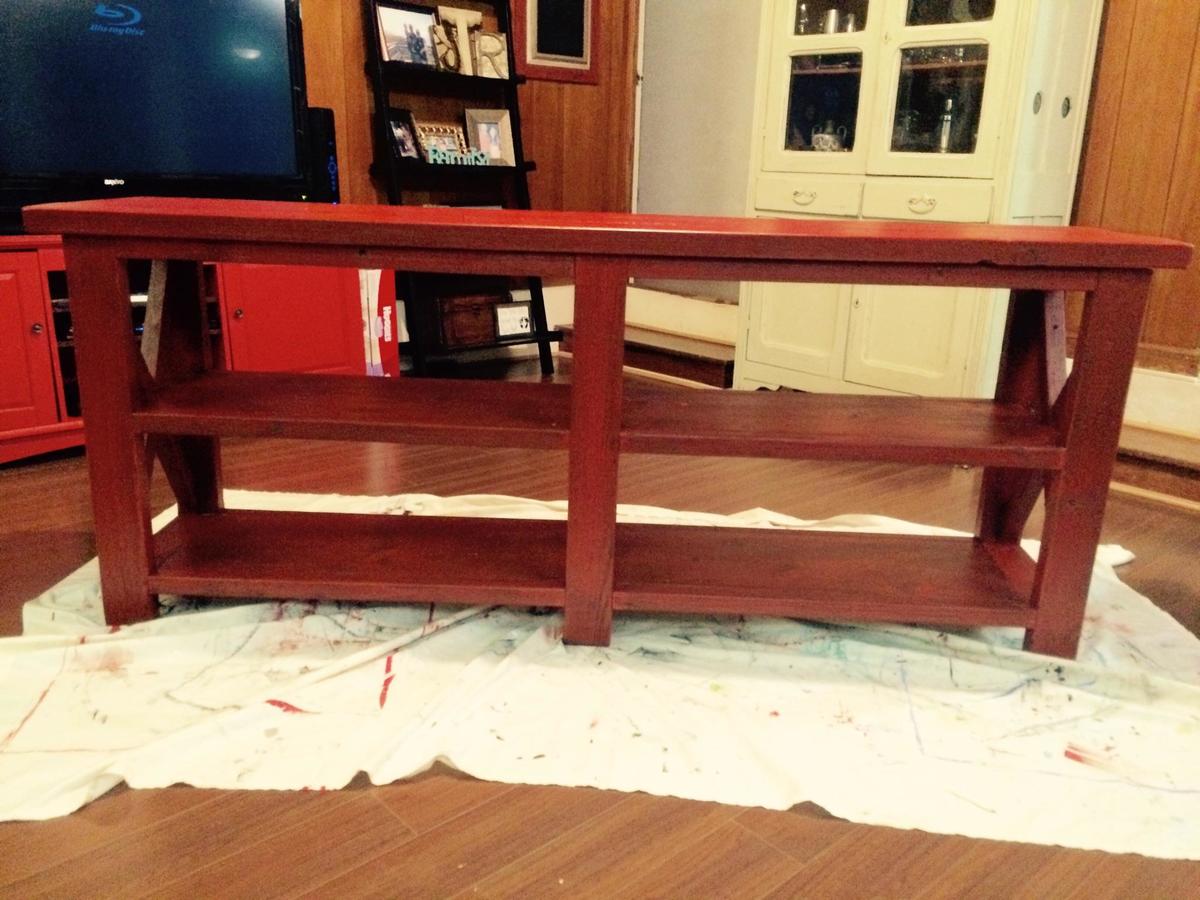
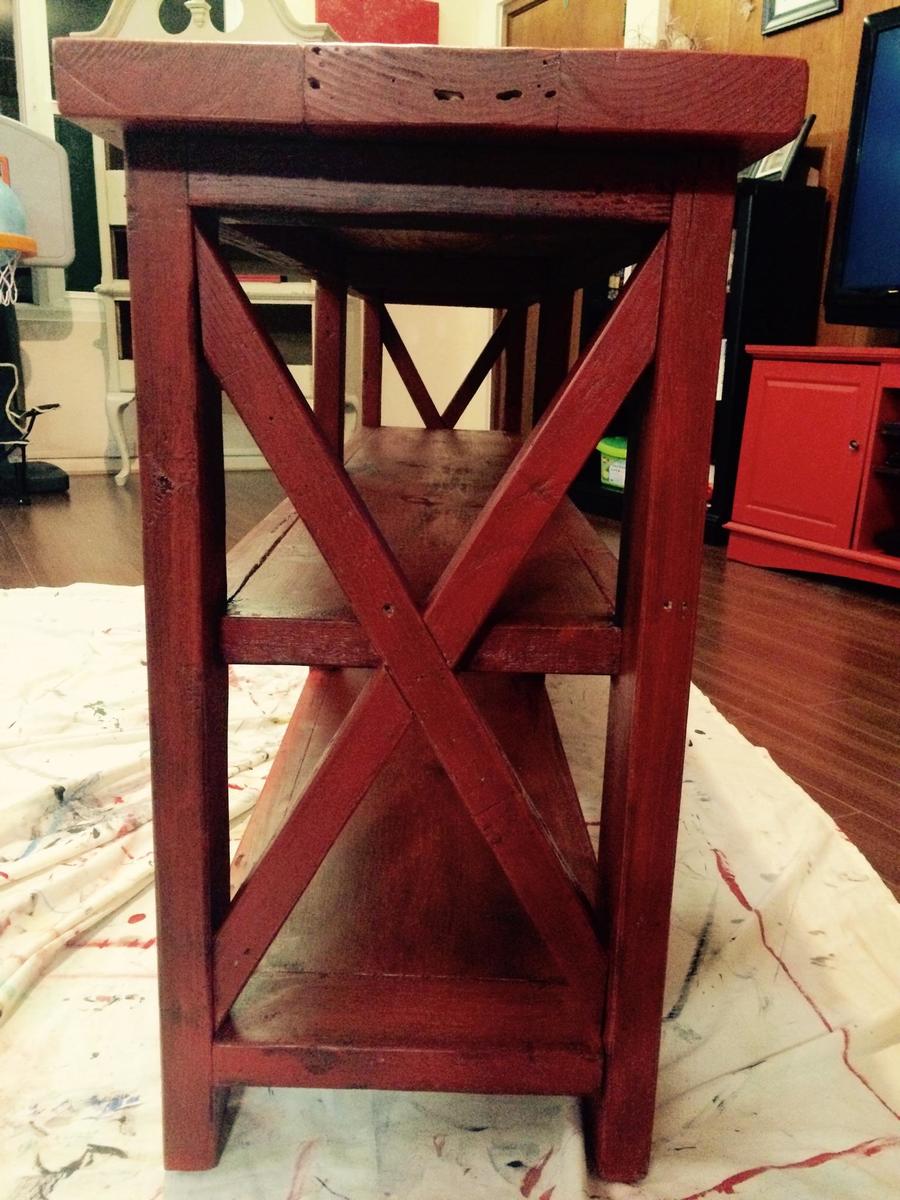
Rustic X

Finished with walnut stain and Million Dollar Red. Wood is all reclaimed from local deconstruction company.
Built from Plan(s)
Estimated Time Investment
Day Project (6-9 Hours)
Recommended Skill Level
Beginner
Comments

Fri, 01/02/2015 - 11:11
Very nice job on the console.
Very nice job on the console. It turned out great! What did you use for the finish?
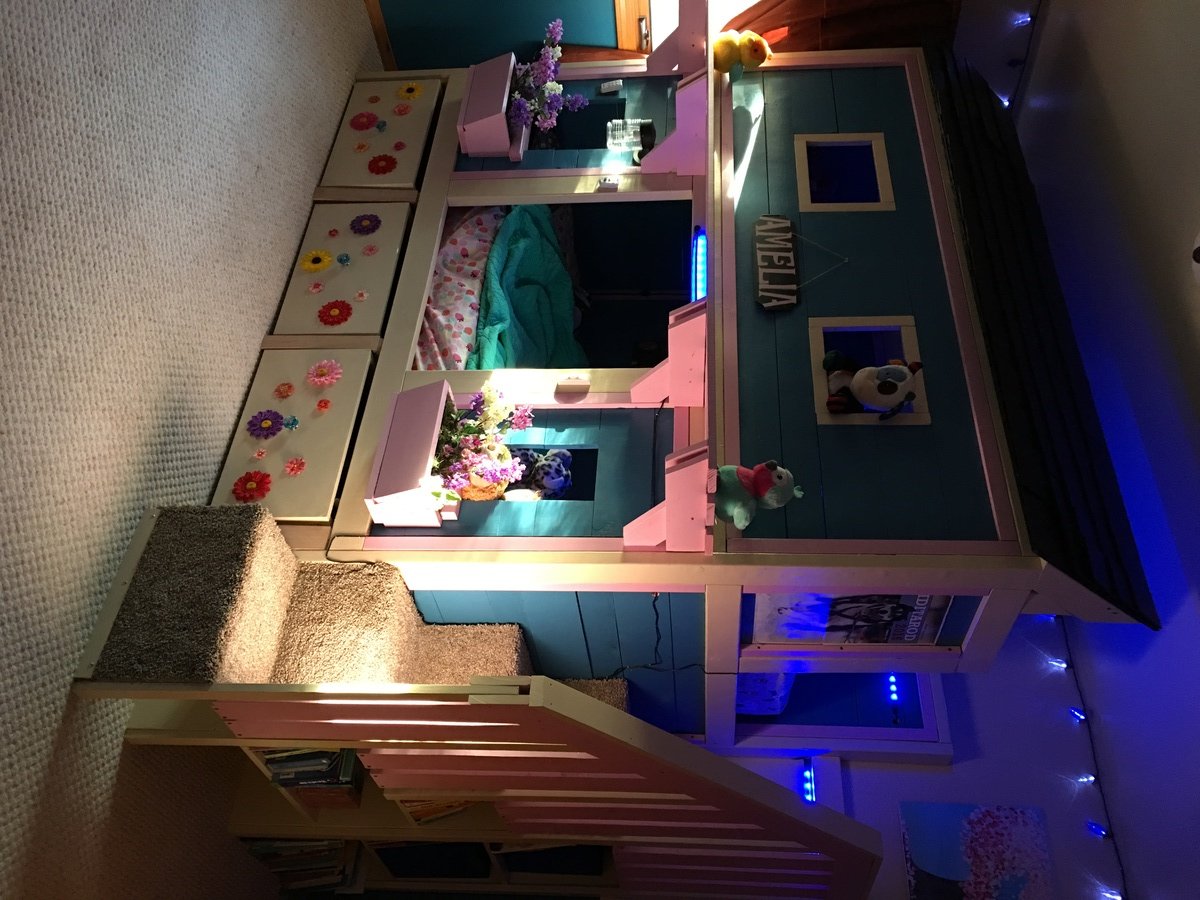
Amelia's dream bed
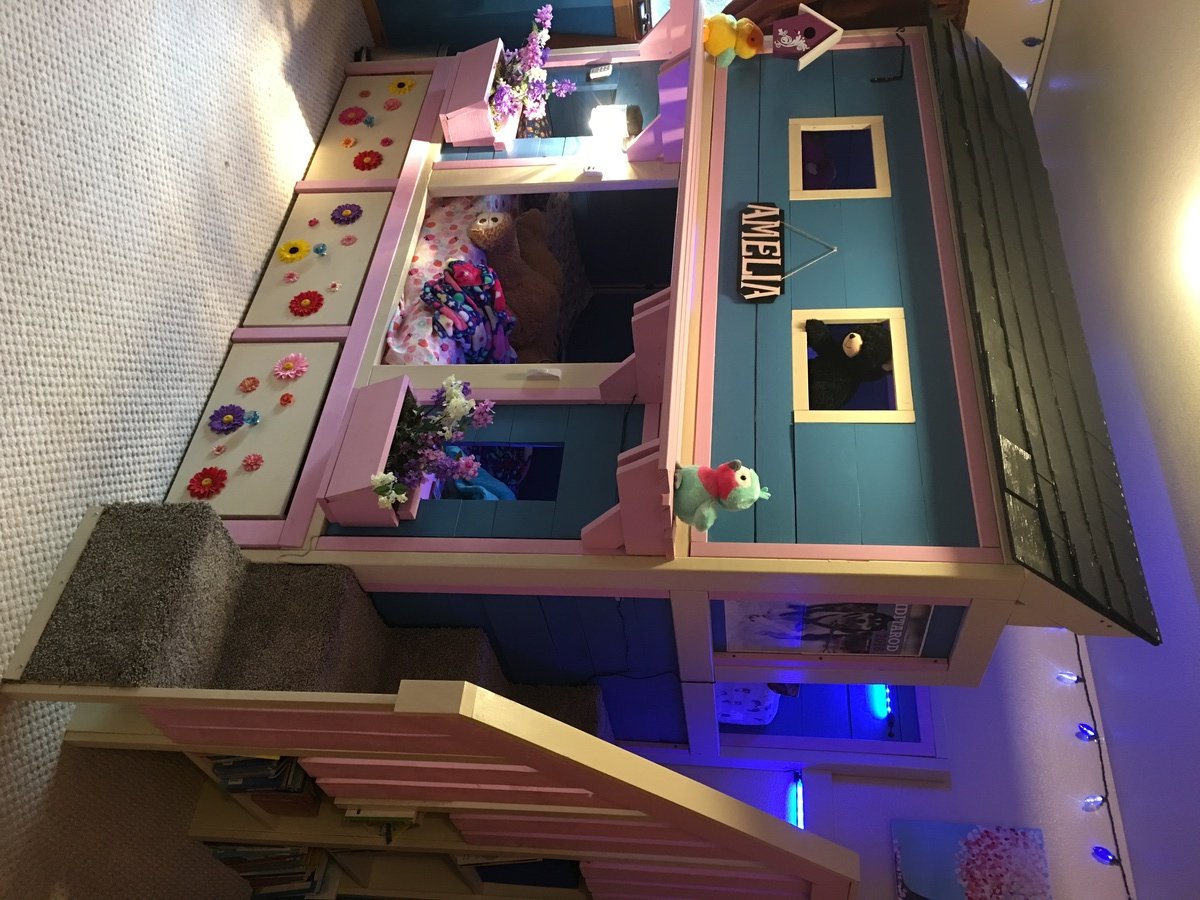
I built this bed in about a week. It was a big project but very rewarding. The plans I had from Ana White were easy to follow and detailed, and having the shopping list and cut list was very helpful. It was pretty straightforward with mostly right angles. It may be a bit much for a beginner, but someone with some basic woodworking and building skills should have no trouble. It’s very heavy and needs to be assembled in pieces. The roof shingles were made by using 1/4 plywood cut into rectangular squares and painted black and stapled on. It was a nice touch. The pergola was also a nice addition, as was the staircase with bookcase. I bought a remnant from a carpet store for 10 and tacked it in the stairs and it’s very comfortable. The drawers were a lot of work but again worth it. Our now 4 year old is in love with her bed!
Built from Plan(s)
Estimated Cost
About 1500 due to premium paint and LED lighting
Estimated Time Investment
Week Long Project (20 Hours or More)
Finish Used
Paint
Recommended Skill Level
Intermediate
Comments
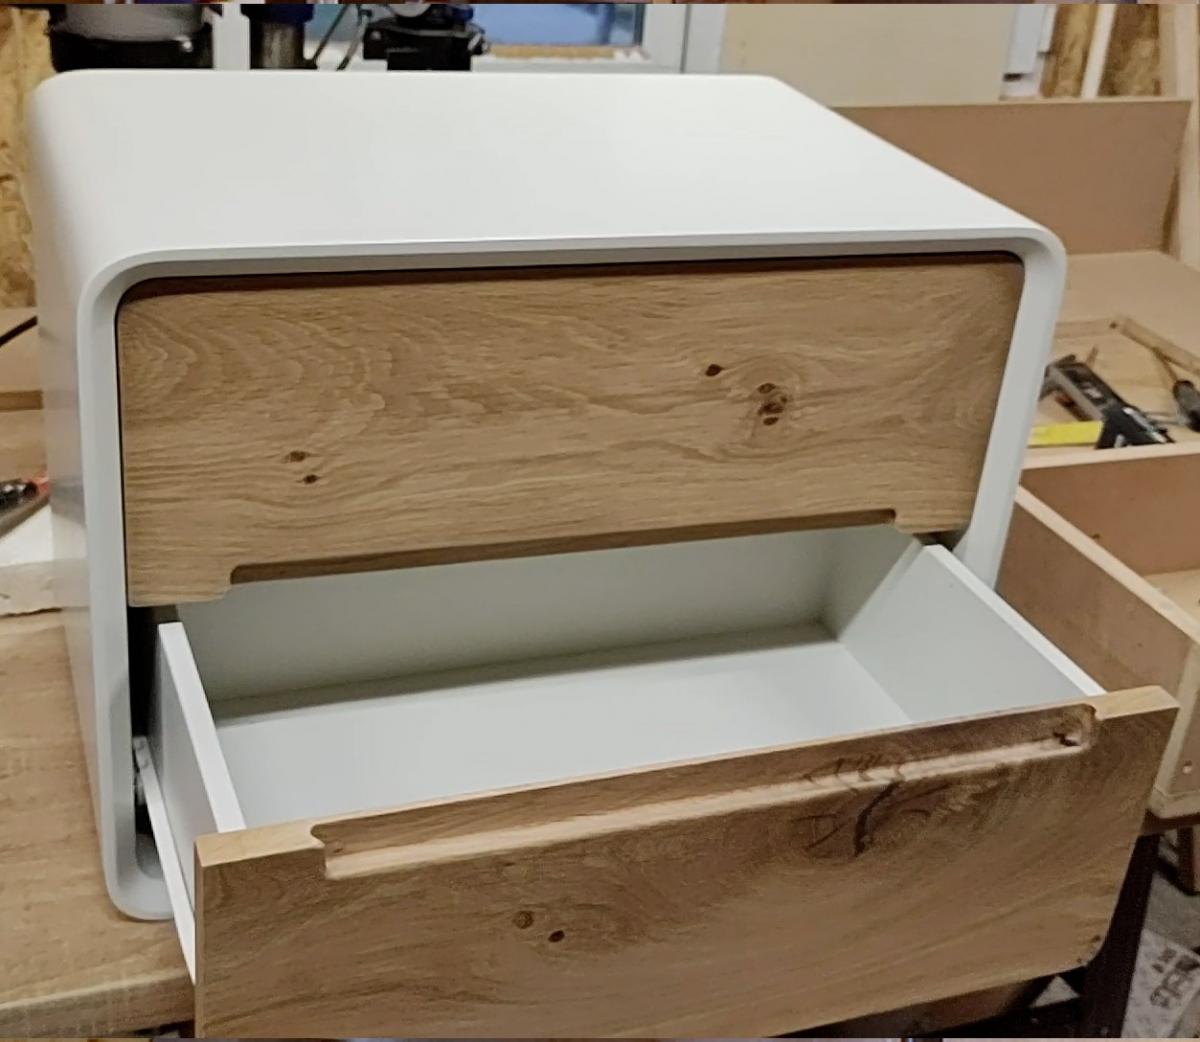
Mid century modern floating Nightstand
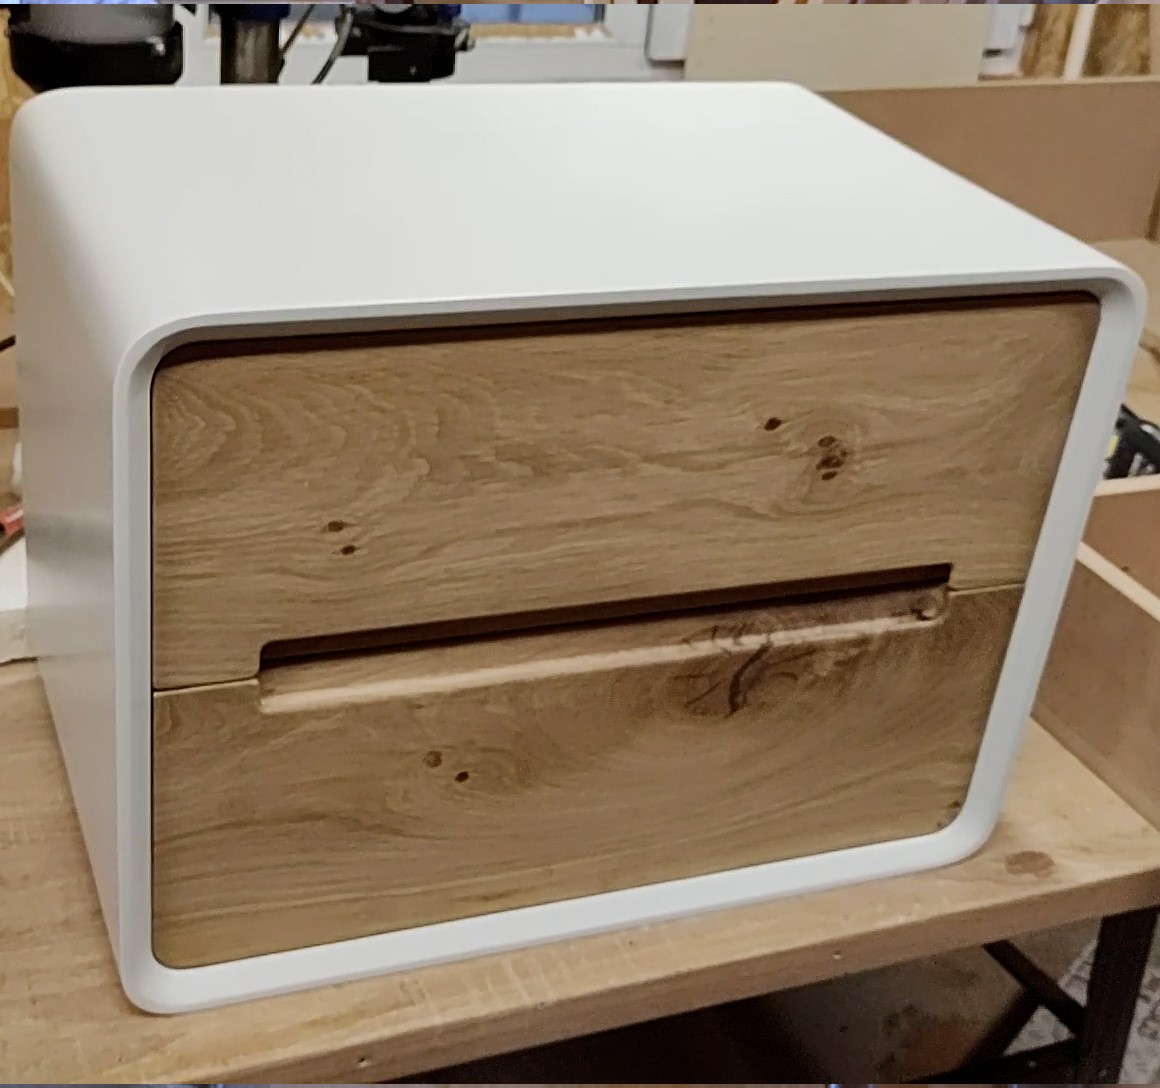
I made a set of these floating midcentury nightstands for my kids. The most difficult part was to make the large radius rounded corners and to make it look seamless
This is the project I'm most proud of, yet. It included a lot of work and took my patience to the limit.
If you like it, you should read more and view the full build video on my blog.

Estimated Cost
100
Estimated Time Investment
Week Long Project (20 Hours or More)
Finish Used
Water based paint and varnish
Recommended Skill Level
Advanced
AT & T Park Bed
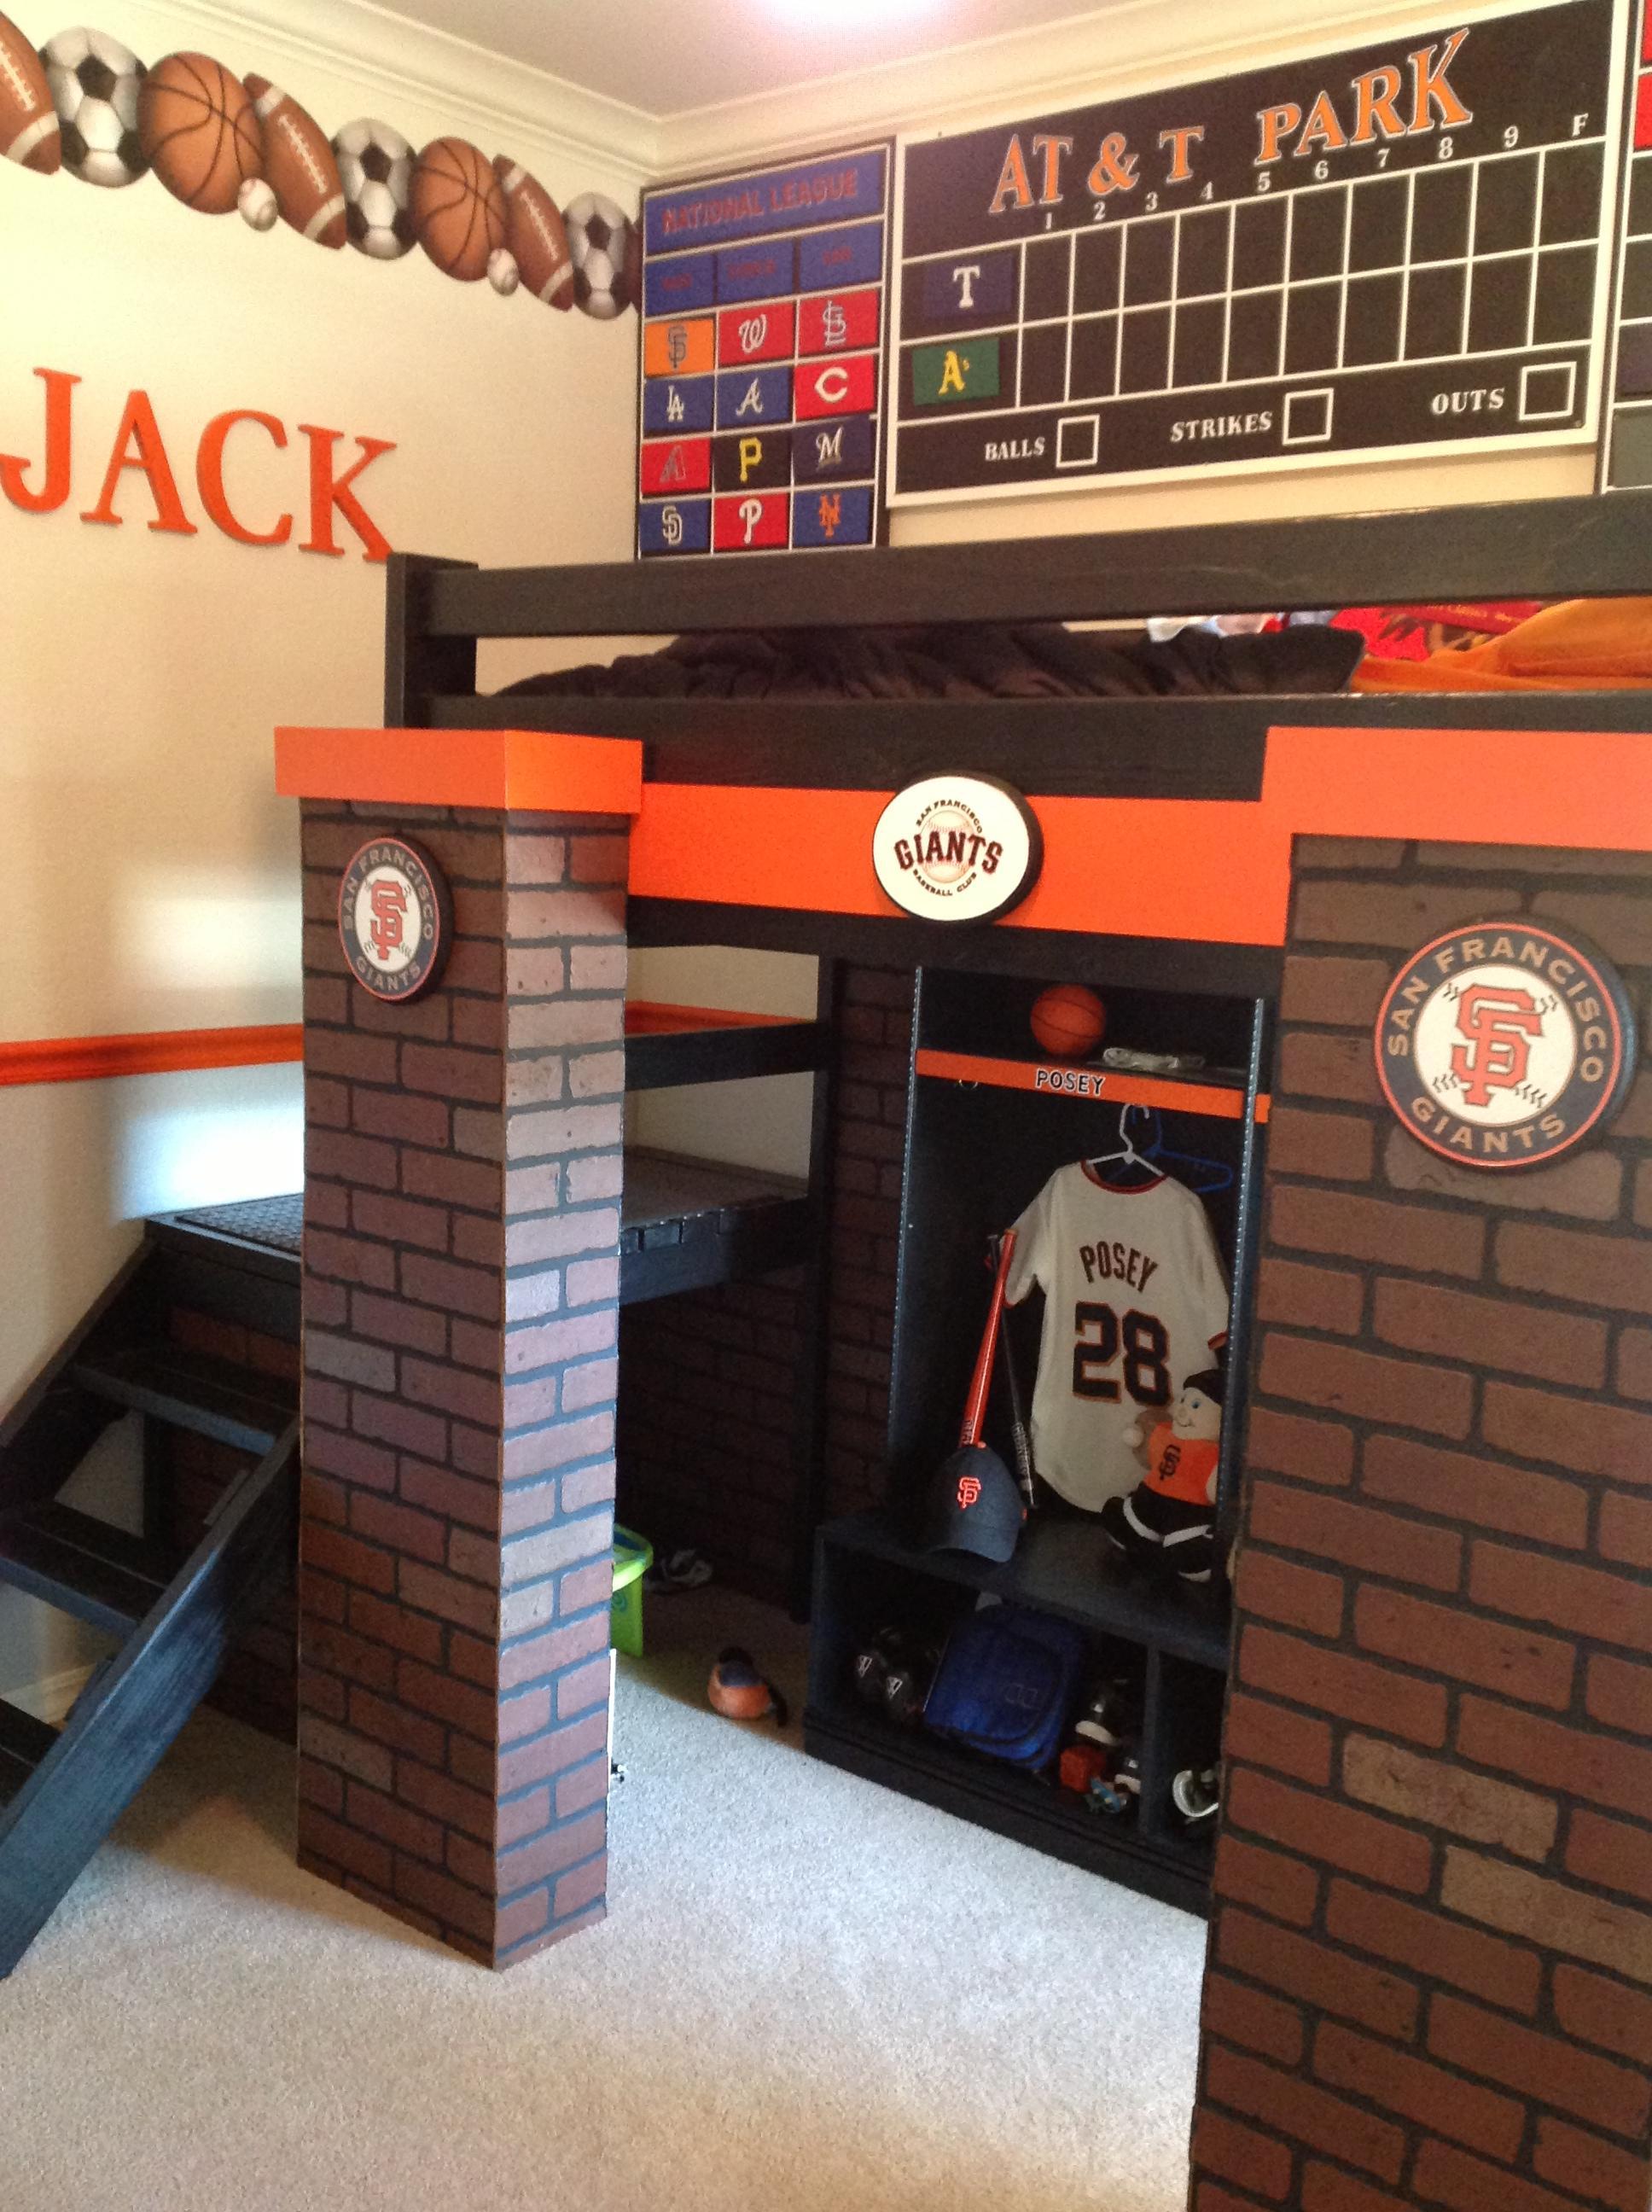
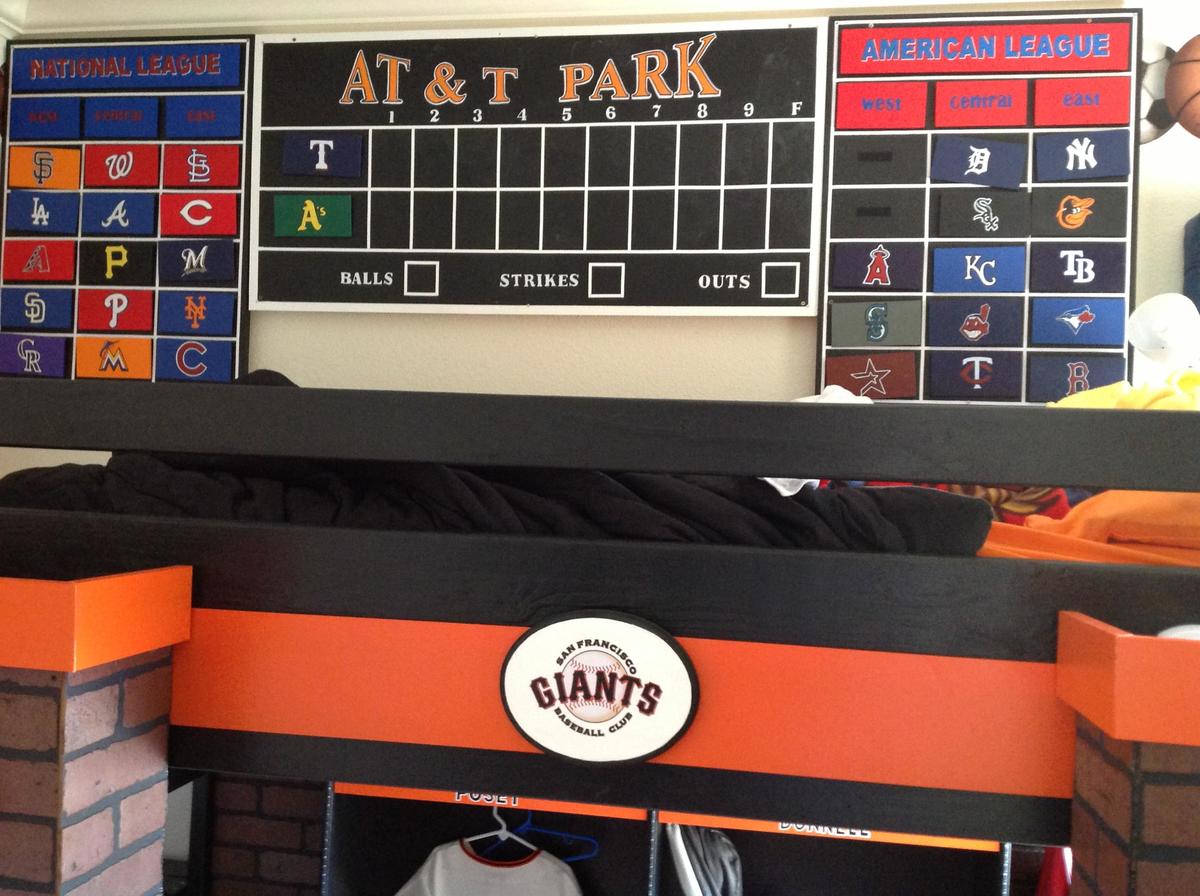
My 7 year old nephew, Jack loves the San Francisco Giants, so my brother and I decided to create an AT & T Park bed using Ana's Camp Loft Bed plans as a guide. I started with the scoreboard to hang above the bed. The teams are all hand painted and hung with Velcro so Jack can arrange the teams according to their current league standings. He can also decide who he wants to play and change the teams on the actual scoreboard, which is painted with chalkboard paint.
The bed was created using Ana's plans. We added brick facade columns to make it look more like AT & T Park. The columns have shelves in the back built in for storage. I found some great Giants stickers and added them as well.
Under the bed, I built a locker using Ana's Small Locker Cabinet plans for Jack to hang and store all of his athletic gear.
Built from Plan(s)
Estimated Time Investment
Week Long Project (20 Hours or More)
Recommended Skill Level
Intermediate
Comments


Thu, 02/28/2013 - 18:17
This is AMAZING!!!! I totally
This is AMAZING!!!! I totally want to make this for my son when he's a little older! Great job!!!
Sun, 01/26/2014 - 12:04
Amazing bed!
Wow, this bed is fantastic. My 4 year old son saw this picture and asked if I could make him one.
I was wondering if you would share your plans with the modifications making it with the bookshelves.
Thanks,
Heather
Sun, 01/26/2014 - 12:40
This belongs in a magazine!!
I am very impressed with all the details and thought you put into this. You should be extremely proud of this bed!
Wed, 11/19/2014 - 20:15
scoreboard
Can you tell me what the scoreboard is made out of? I know chalkboard paint is used but what did you paint on? Wood, corkboard?
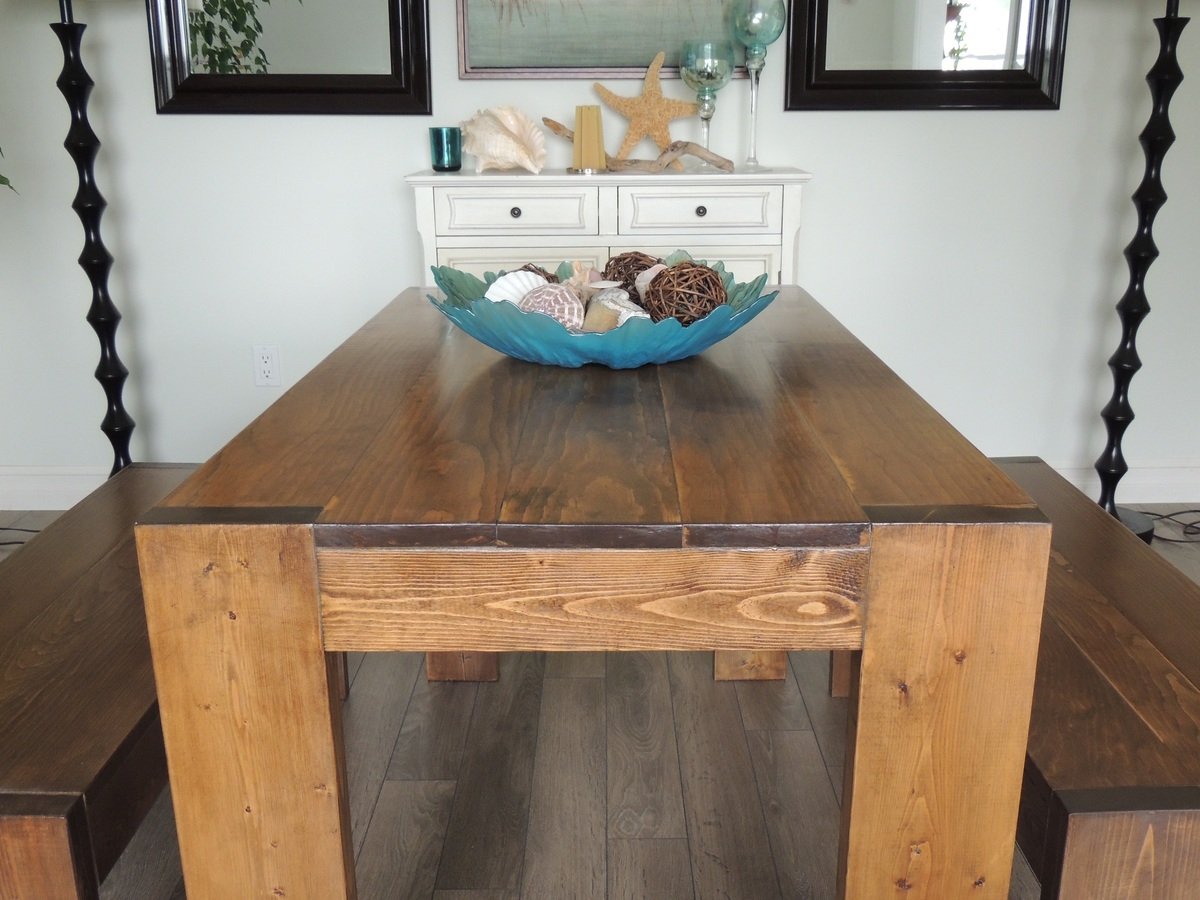
Modern Farm Table
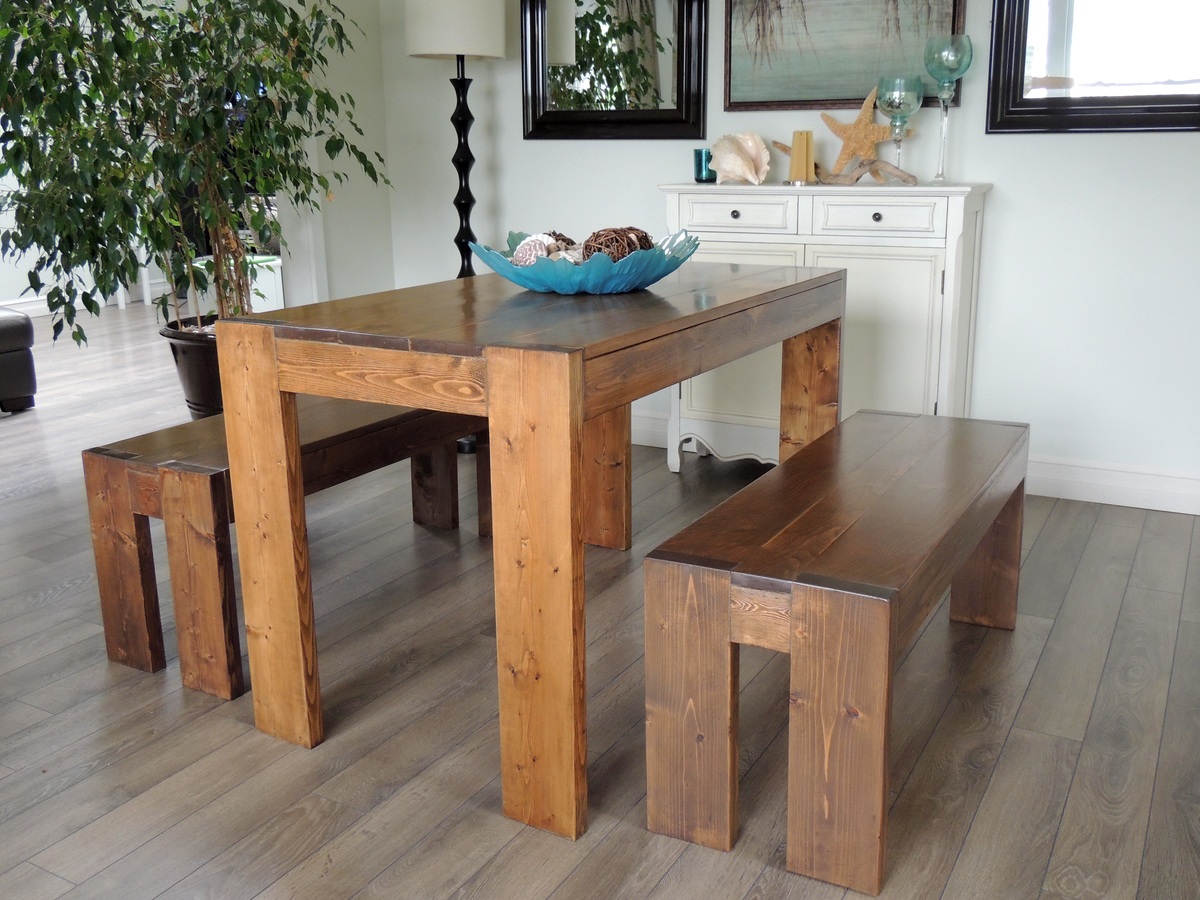
This was my third project. The building is now getting very easy, it's the finishing that's the hard part. For some reason the wood wasn't taking in the stain very well even though I followed the right steps. Condition, sand, and then stain. In the end after many applications I was or I should say my sister who I was making it for was happy. I had to modify the size to make it fit in her space.

Built from Plan(s)
Estimated Cost
I really have to start keeping track, I didn't. Maybe between 150 and 200 with all the stains.
Estimated Time Investment
Weekend Project (10-20 Hours)
Finish Used
I used minwax conditioner before sanding and minwax stains. Special walnut,weathered oak, and pickled oak. I started with the special walnut followed by a coat of weathered oak then the pickled oak. I wasn't happy with it at that point so I put another coat of sw and honestly I lost track. When I was finally happy with it I put a top coat of minwax spar urethane.
Recommended Skill Level
Beginner
Modified Pipe Bed

This was a collective project that involved my Husband, son and I. We built two of these and modified the bed by going away with the footboards being that these beds were for our teenage sons. We also had to cut the wood for the headboards to 37 1/2" in order to make them fit with the split ring hangers. They LOVE their new beds! And so do we! They are so cool!

Estimated Time Investment
Week Long Project (20 Hours or More)
Finish Used
Varathane Stain and Polyurethane - Early American.
Recommended Skill Level
Beginner