Community Brag Posts
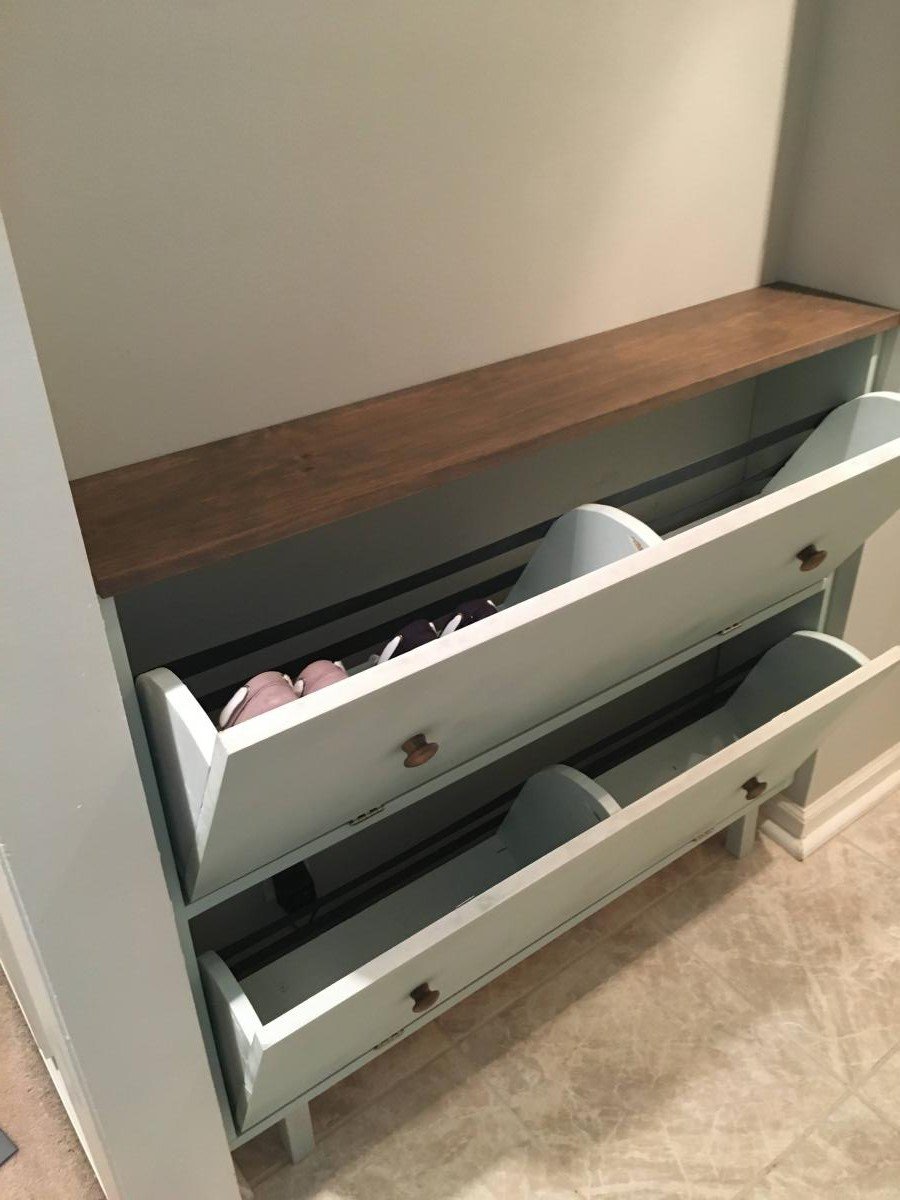
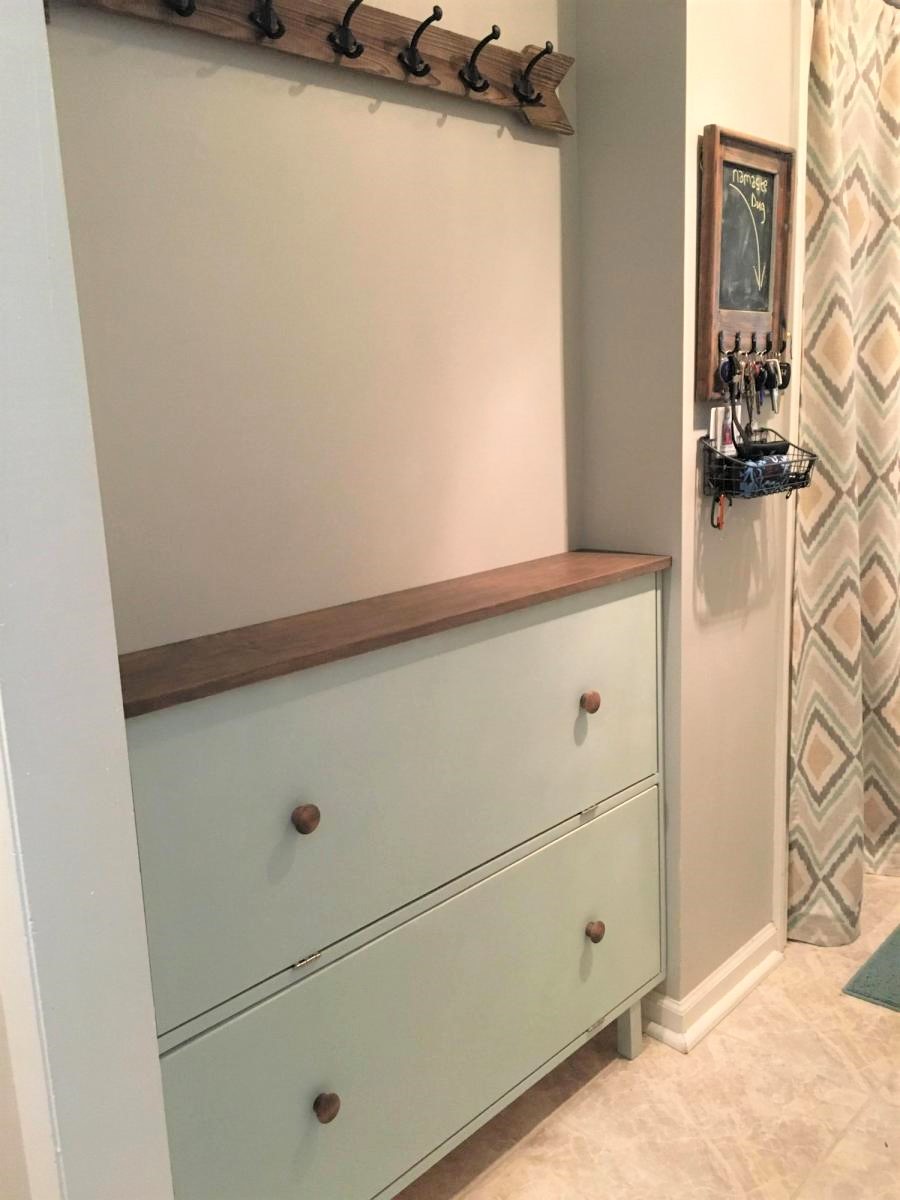
Shoe Dresser
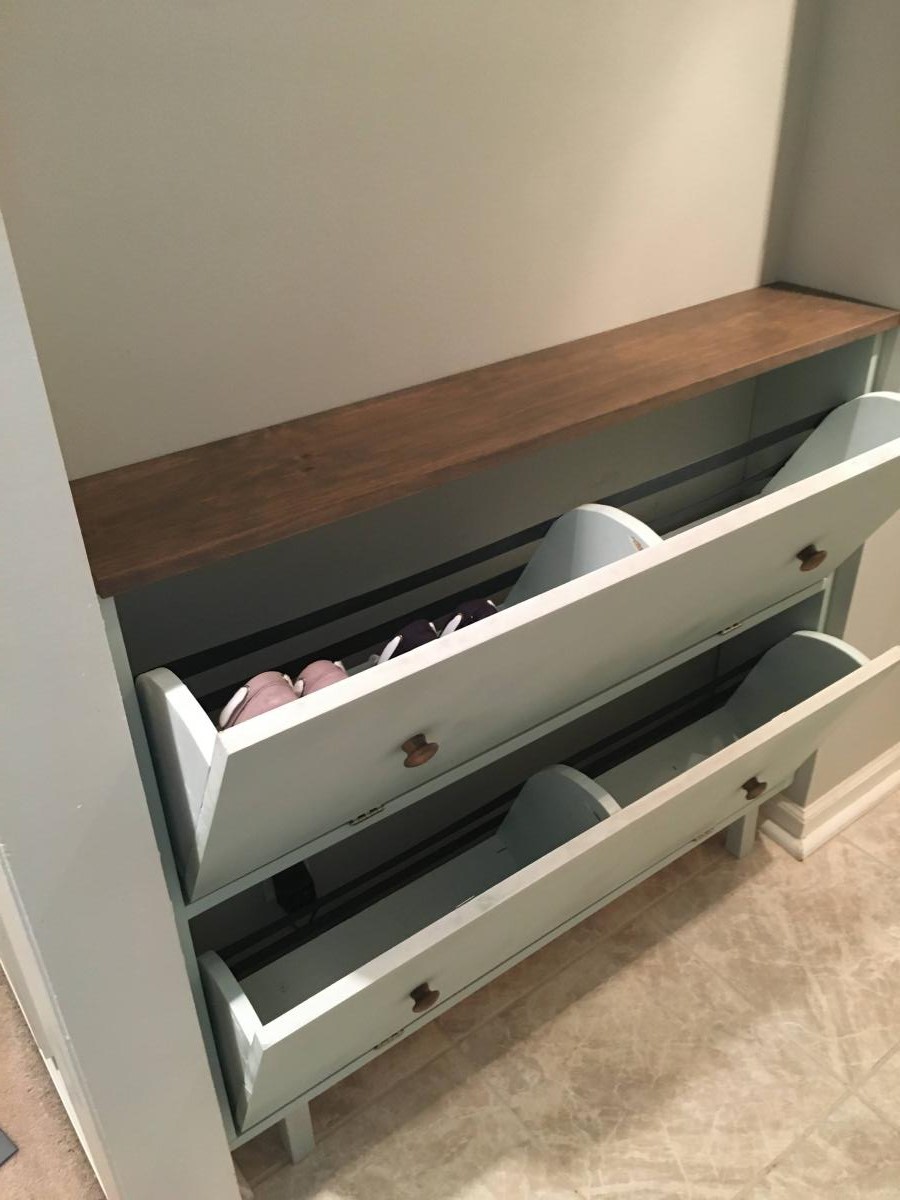
I had this space in my mudroom that was a perfect spot to make a custom shoe dresser. I adjusted the plans I found on this website to custom make storage for shoes. Now this weird little space is functional.
Built from Plan(s)
Estimated Cost
80
Estimated Time Investment
Day Project (6-9 Hours)
Finish Used
Rustoleum chalk paint Serenity Blue, classic grey and special walnut Minwax
Recommended Skill Level
Intermediate
Comments
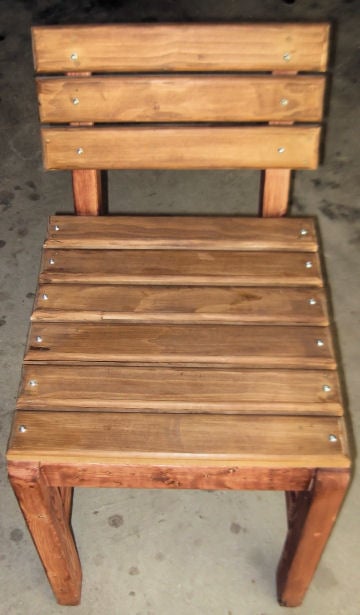
Harriet Outdoor Dining Chair
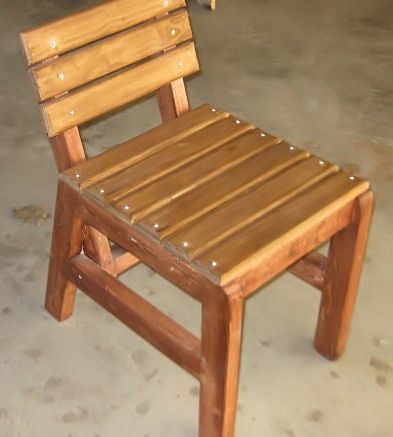
I saw this chair and was looking for something for back yard BBQ's I just beefed it up by using 2X3's instead of 2X2's left the measurements the same. I was playing around with Minwax Express Color to see how well it does and I like it helps control Blotching very easy to use except be careful when squeezing the tube or you like me will have a permanent shirt for staining

Built from Plan(s)
Estimated Time Investment
An Hour or Two (0-2 Hours)
Finish Used
Pine
Recommended Skill Level
Beginner
Harriet table and chairs
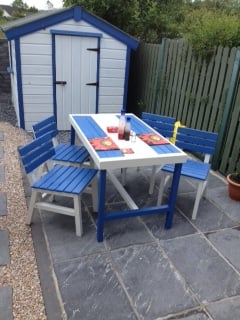
I am so happy with my work.. It has turned out perfect. I love them.
Built from Plan(s)
Estimated Time Investment
Week Long Project (20 Hours or More)
Recommended Skill Level
Beginner
Comments


In reply to Cute paint job by CSaintD
Wed, 12/30/2015 - 04:25
Thank you
Thank you for your kind words and I am so excited that you took time to leave me a reply.
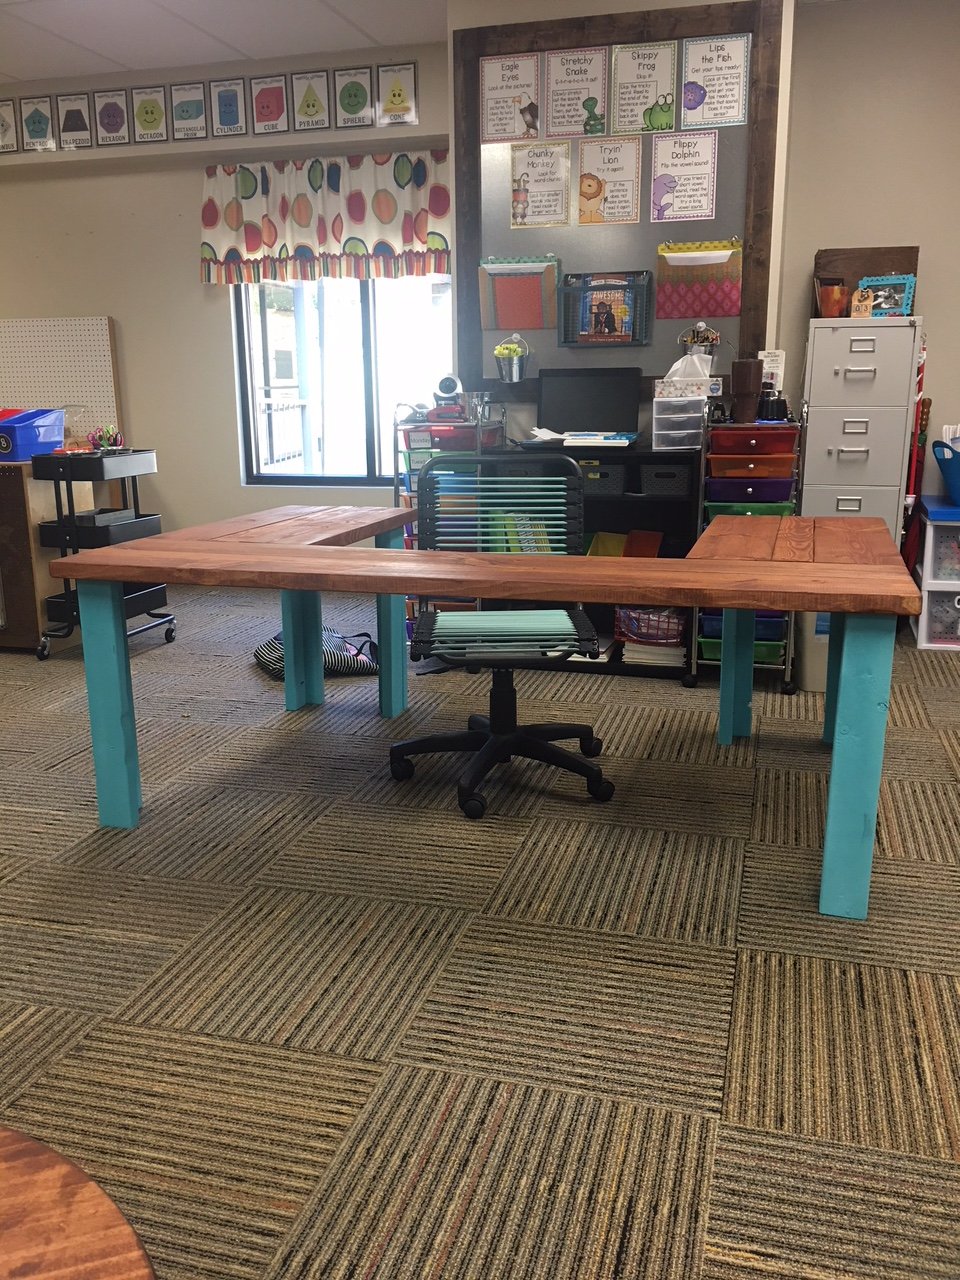
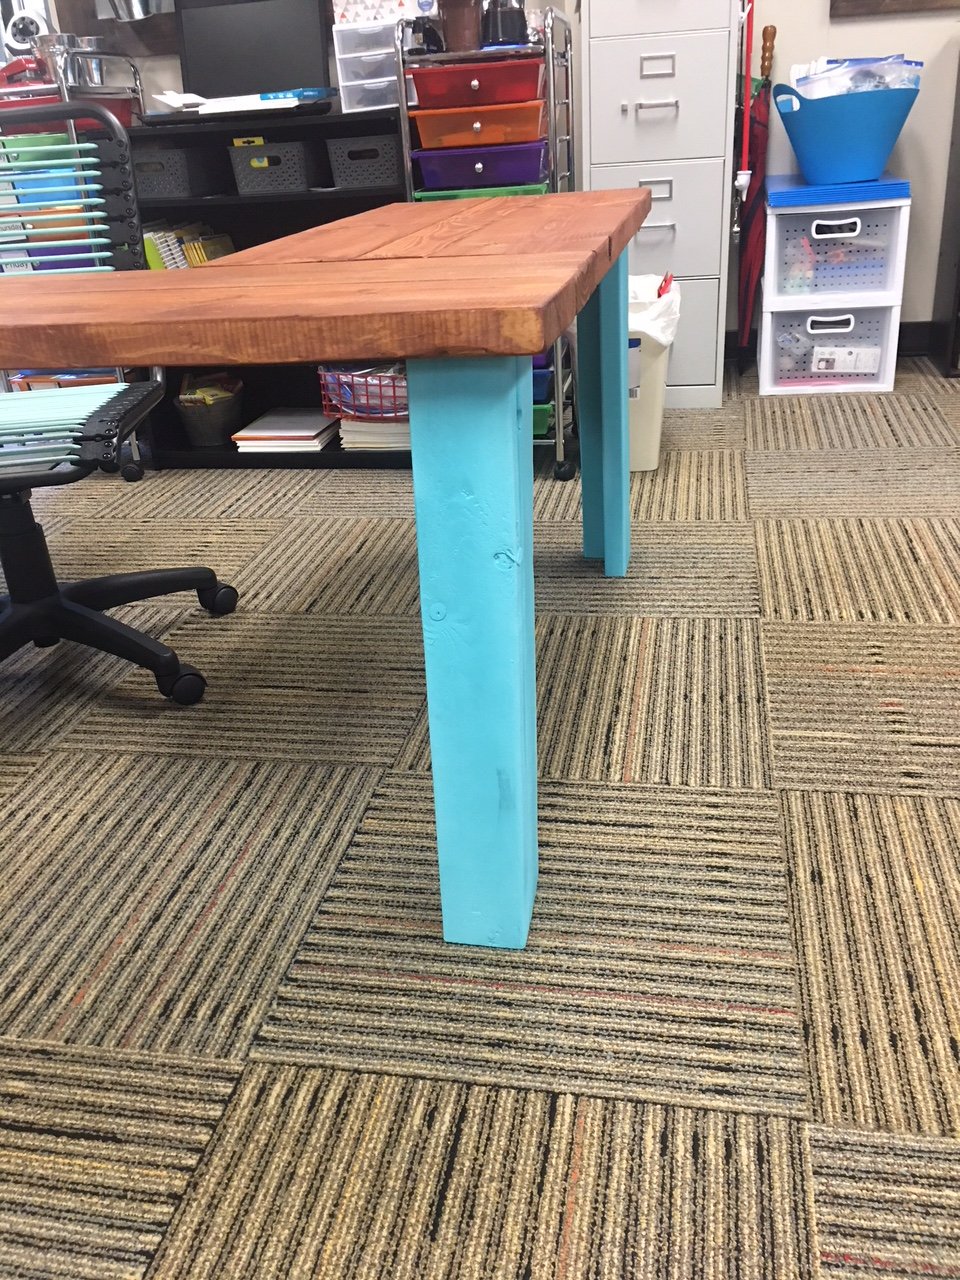
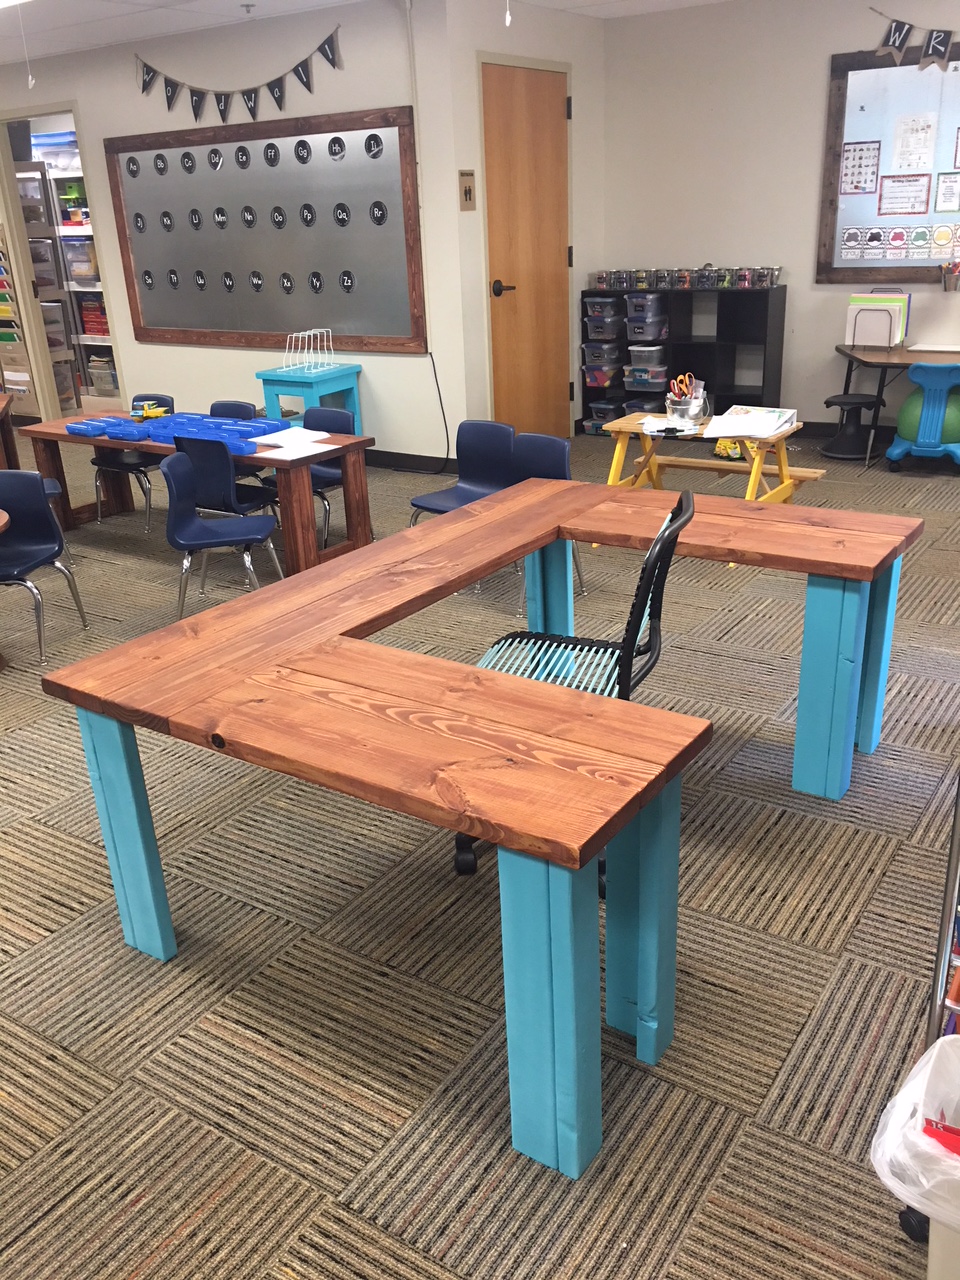
Wife's Kindergarten Classroom

Been a while since I had time to actually build anything worth posting about! My wife wanted some items for her Kindergarten classroom this year, so built several items, most inspired by the Farmhouse family.

Built from Plan(s)
Estimated Time Investment
Day Project (6-9 Hours)
Recommended Skill Level
Beginner
Comments
Sat, 06/29/2019 - 05:47
U-shaped table
I love this! Can you give me the plans and list of materials for constructing it?
Sun, 06/30/2019 - 12:33
I am also a teacher and…
I am also a teacher and would love to build this desk for my reading class. Do you have plans?
Mon, 07/01/2019 - 18:05
Classroom Table ❤️
I love this table for my classroom. Can you share the plans or the dimensions?
-Stephanie
Sun, 07/07/2019 - 09:46
Classroom Reading Table
I would love plans/dimensions for this! I was thinking I could also paint the top with wipe off board paint.
Sun, 07/07/2019 - 14:59
I would love to make one for…
I would love to make one for my classroom. Can you share the plans and materials list for this table?? Thanks!!
Mon, 07/08/2019 - 19:11
Dimensions? Love the table
I am looking to make this for my fourth grade classroom - can you provide the dimensions you used? Thank you so much.
Wed, 07/10/2019 - 11:59
Love this! I would love…
Love this!
I would love this for my classroom! Can you share the plans and materials.
Thank You!
Mon, 07/22/2019 - 18:25
Anyone have any luck with…
Anyone have any luck with figuring out the dimensions??
Thu, 07/25/2019 - 17:20
Has anyone gotten the plans…
Has anyone gotten the plans for this table? I have contacted Ana White and tried other ways also. I would love for someone to share.
Thank you
Teri
Mon, 08/19/2019 - 12:09
kindergarten classroom desk
I am guessing the corner posts are 2 x 4s, the top is 2 x 10s. It looks like the width is 6’ (looking at the floor carpet tiles being 24” square). So 2 - 2 x 10s side by side for the main part of the desk top and 2 - 2 x10s perpendicular on each side of the chair. I guess the height is subject to choice and the length of each side would also be subject to choice or to the length of the 2 x 10s to be economical.
an educated guess would be 4 - 8’ 2x10s for the top and 6 - 6’ 2 x 4s for the legs?
Anyone else have any input here? Open to suggestions.....
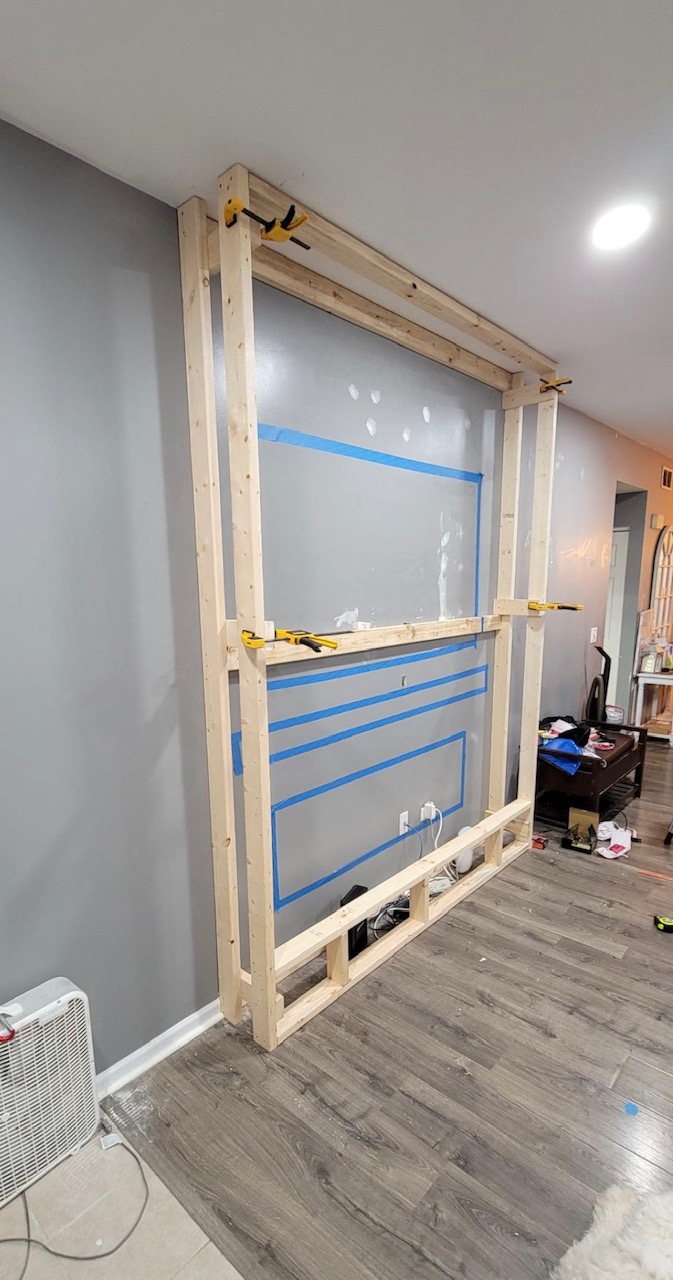
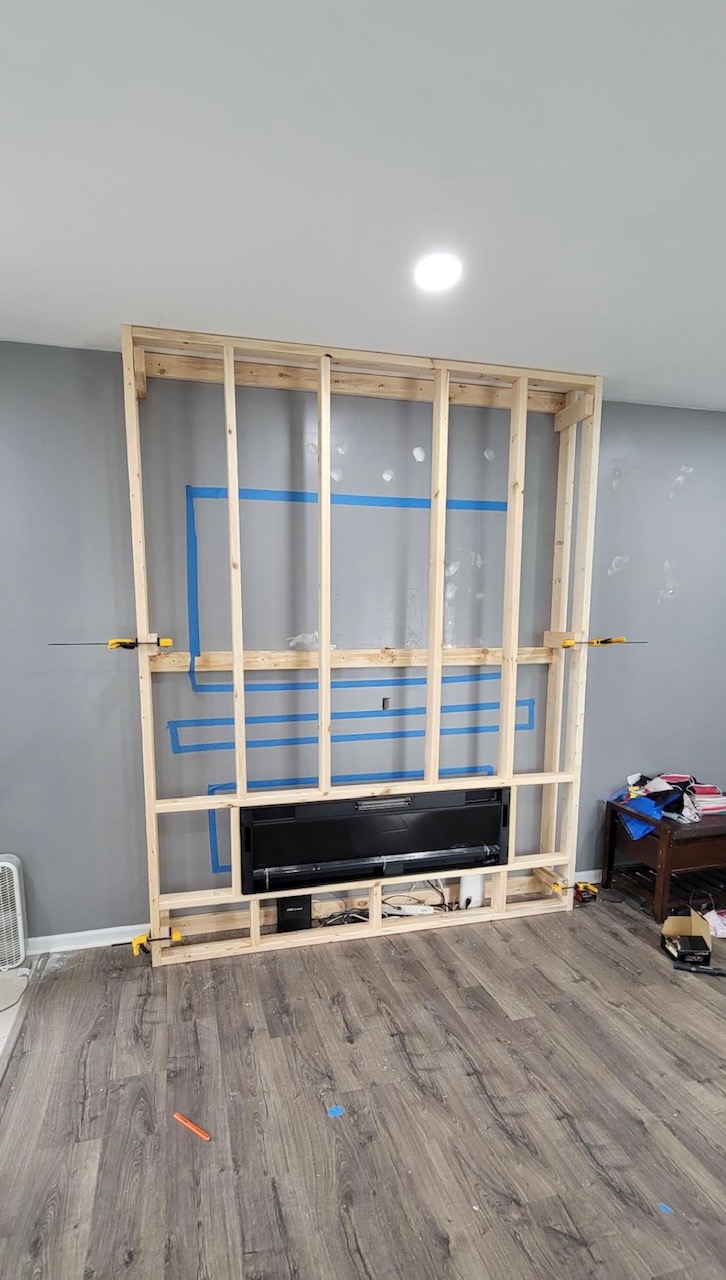
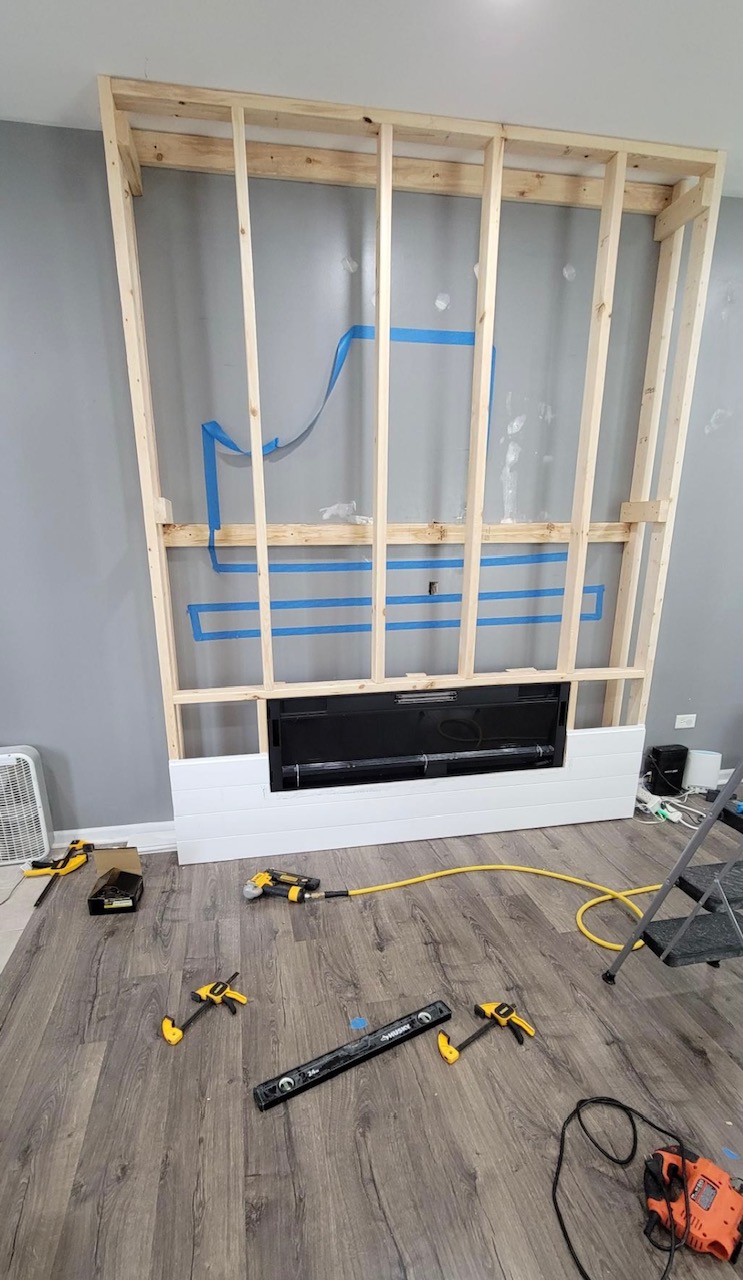
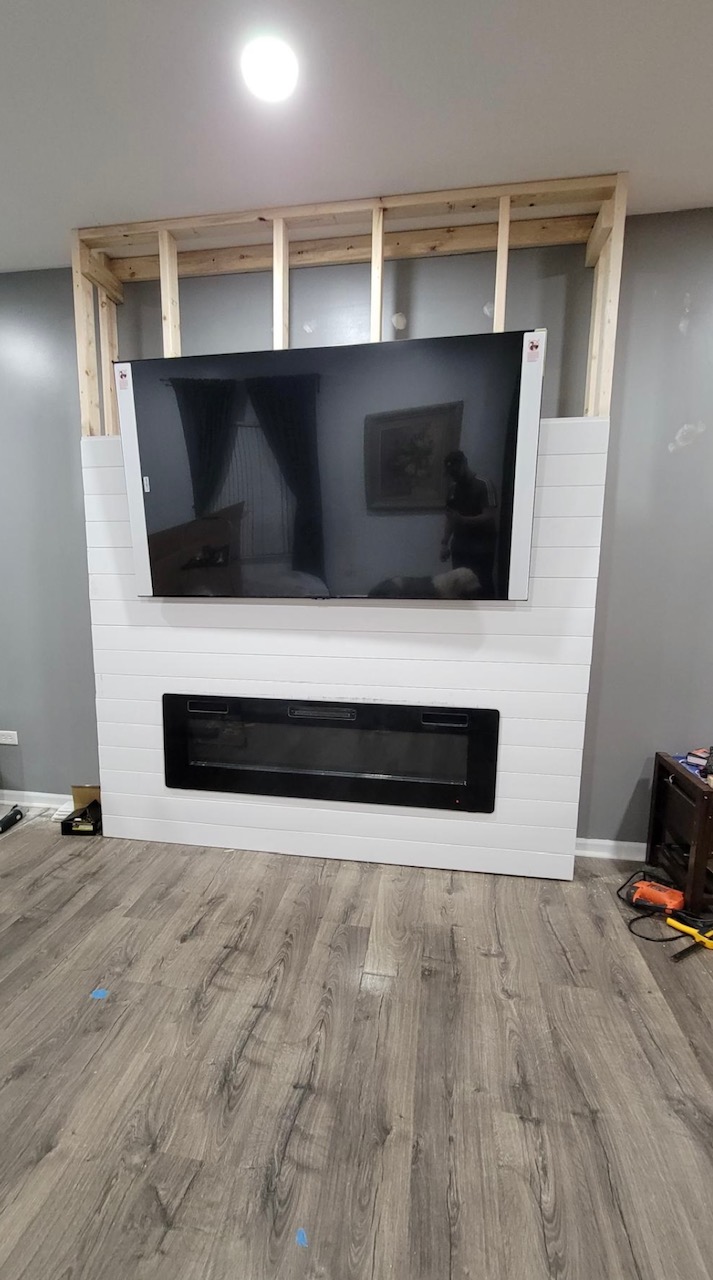
Shiplap Fireplace Surround with Low Mantle
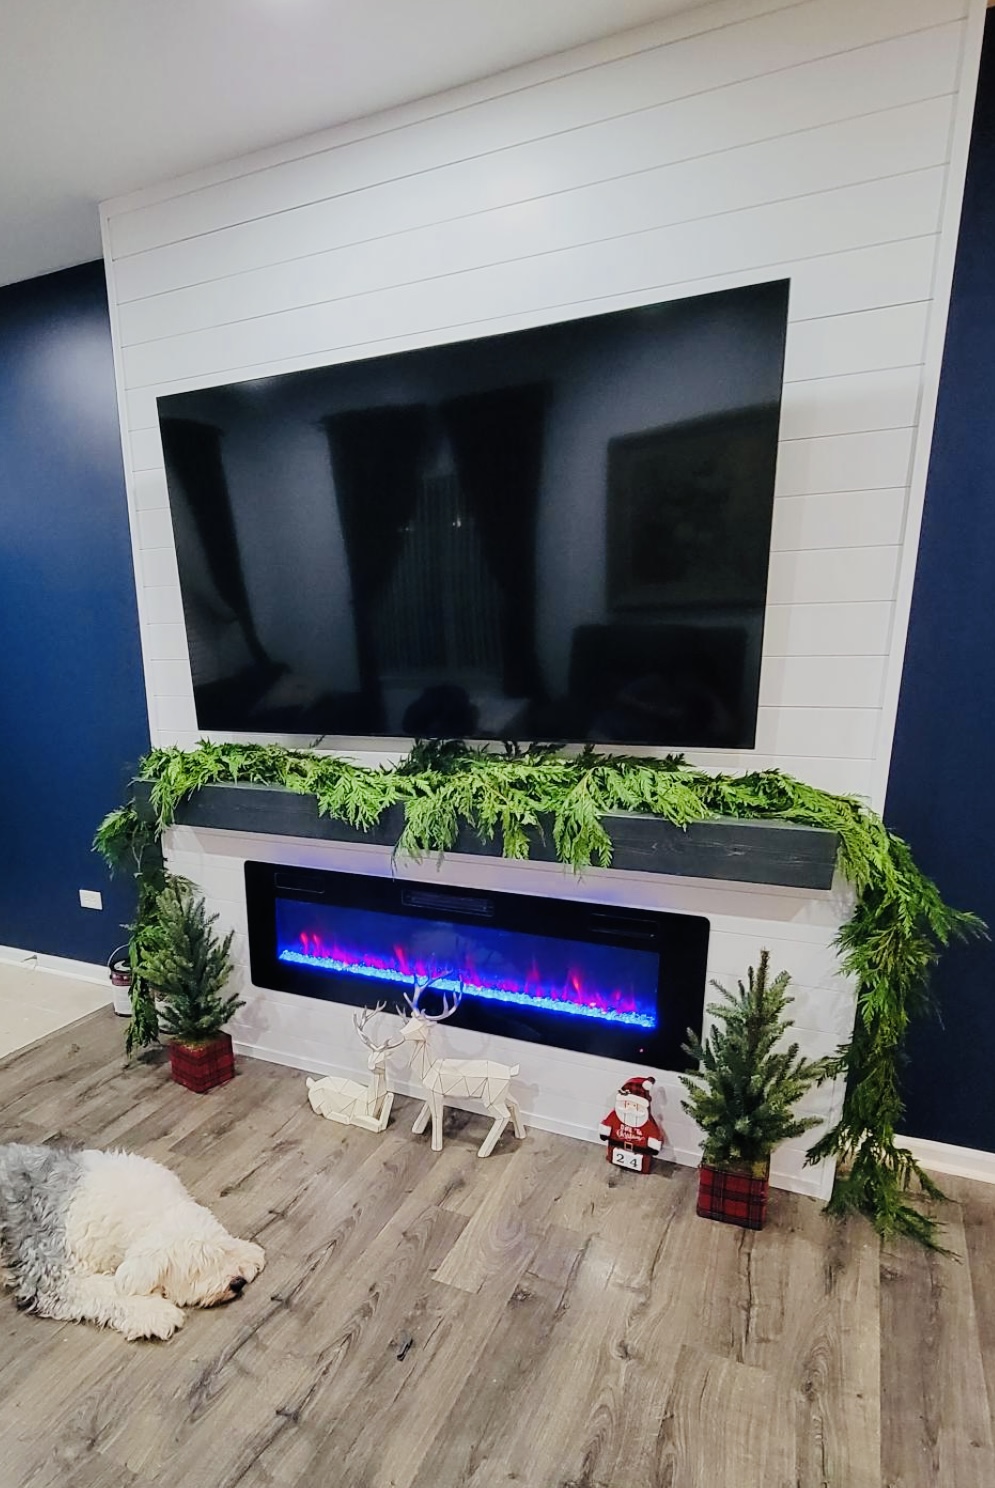
Outstanding Shiplap Fireplace surround with low mantle by Cruz on IG
Including more photos of the build process
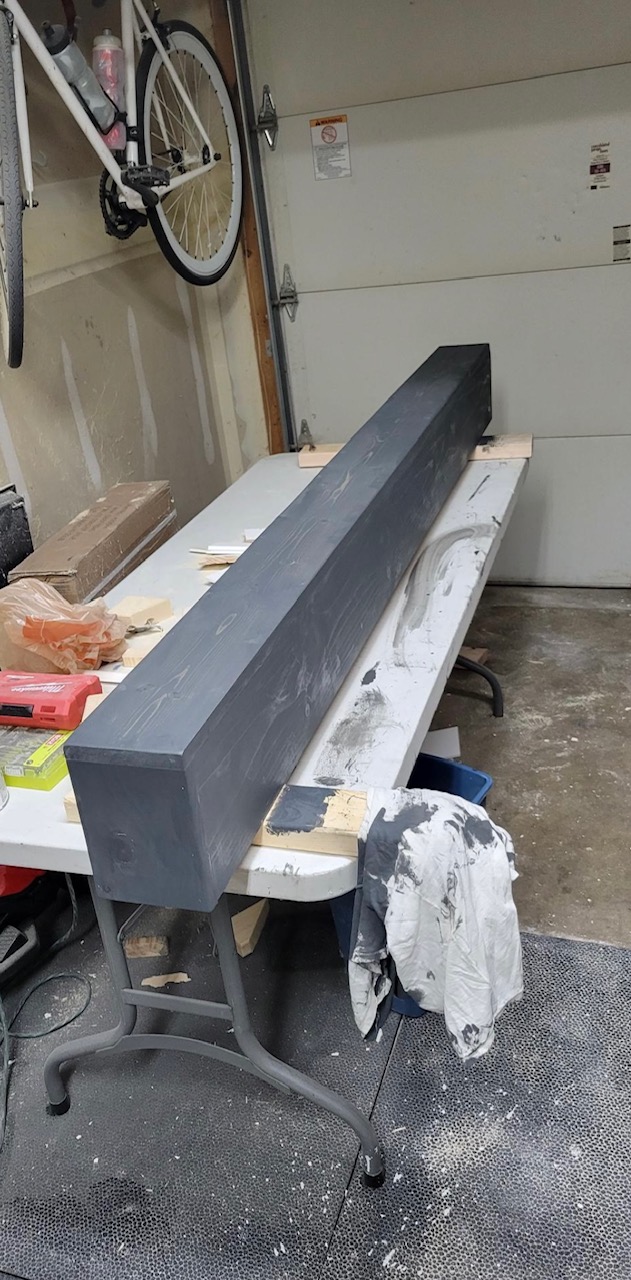
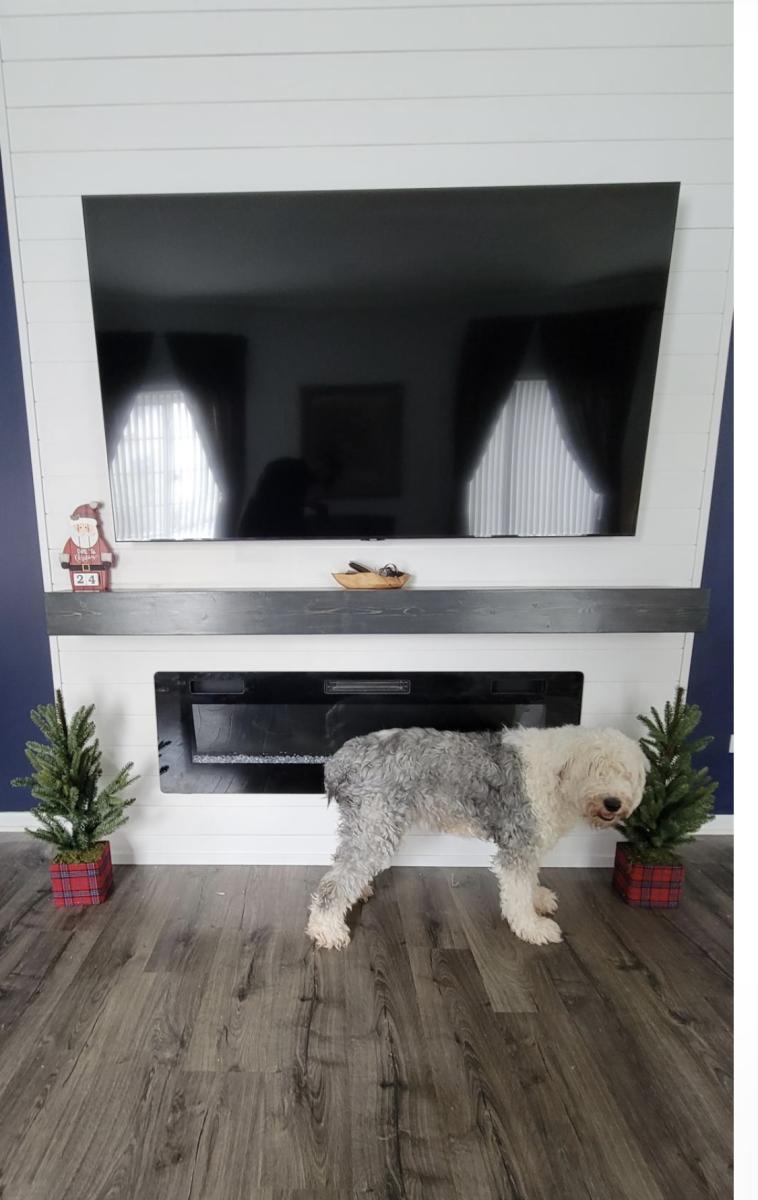
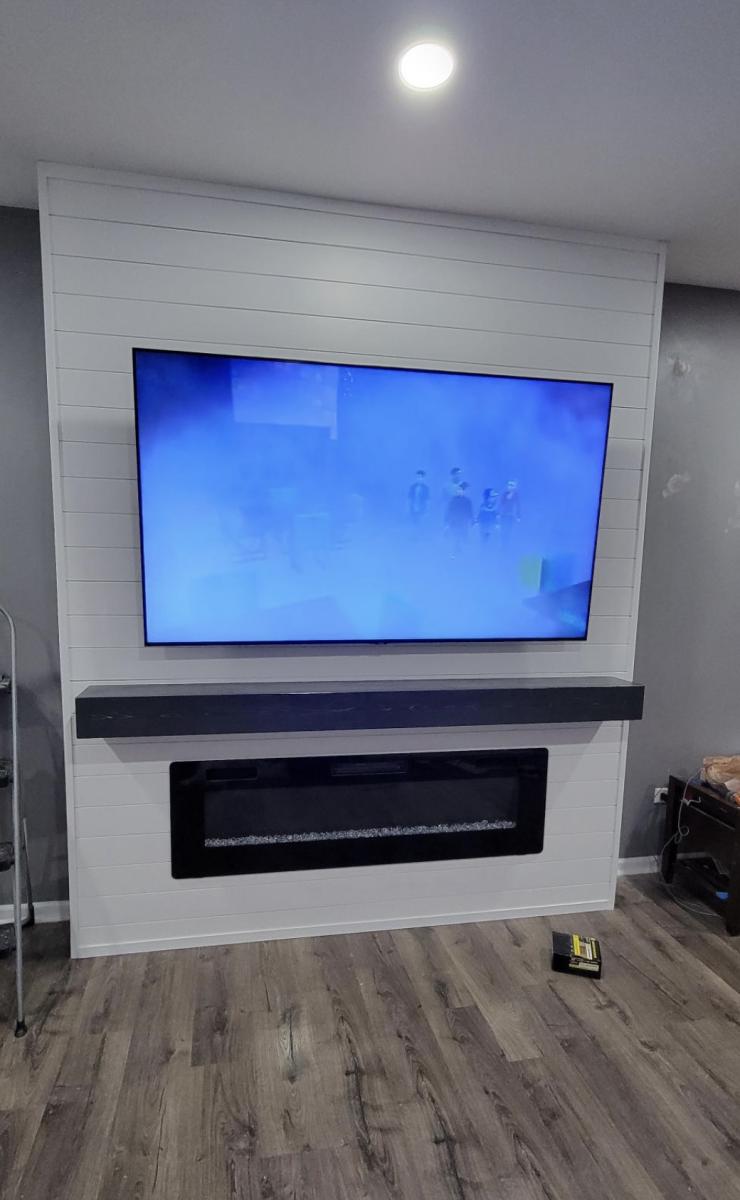
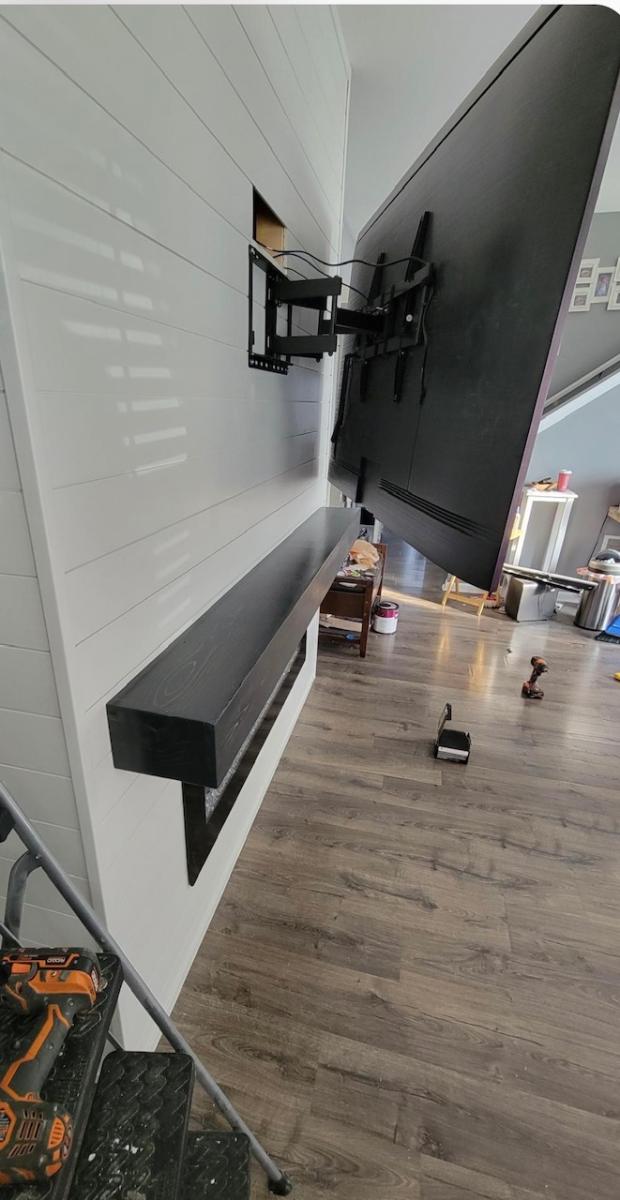
Built from Plan(s)
Stenciled Santorini blue farm table
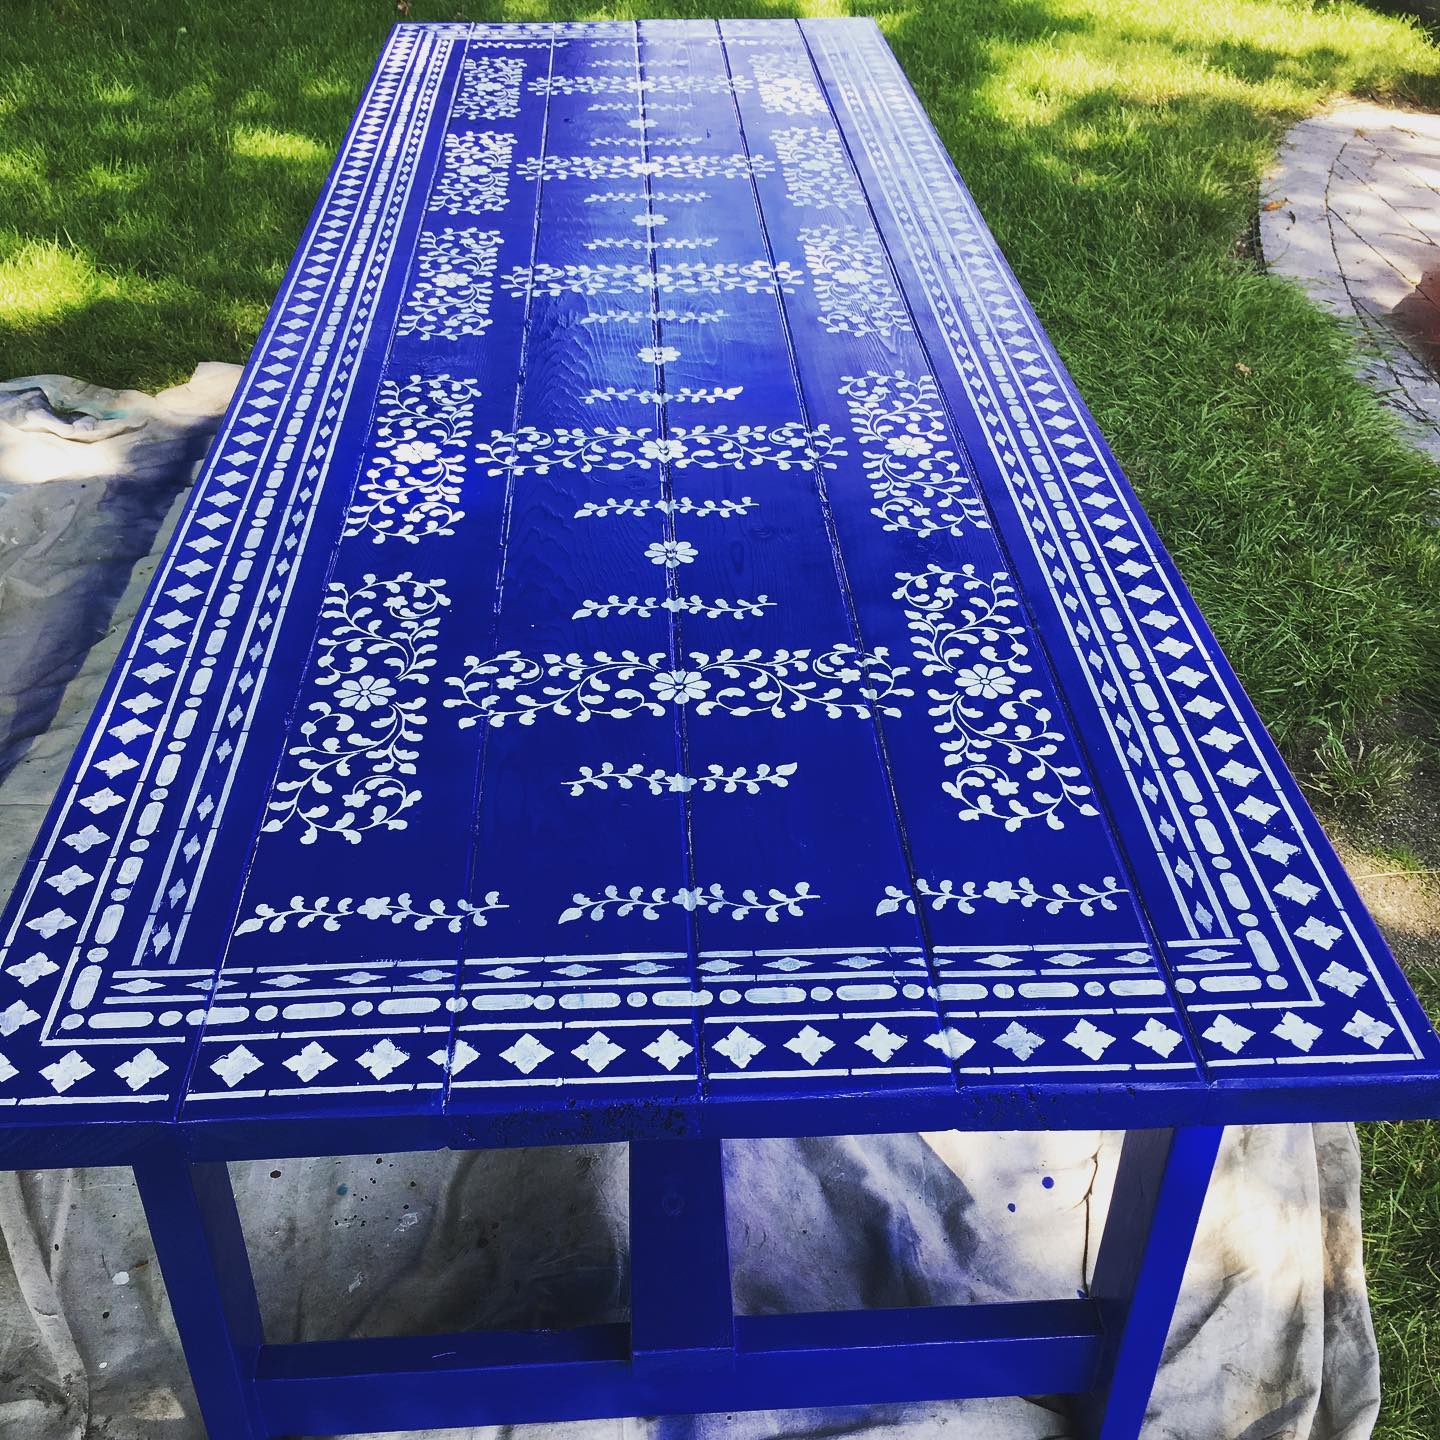
We used Ana White's plans beginner farm table plans to build this table and can't recommend these plans more! Thank you Ana! The build took my husband and I two hours to build. The sanding, sealing, painting, stenciling, and finishing took several days, but the actually build was VERY easy and straightforward. We're total beginners, so we were very happy. The stencils are from Cutting Edge Stencils and are called "Indian Inlay Furniture Stencil Kit by Kim Myles."
Built from Plan(s)
Estimated Cost
$300
Estimated Time Investment
Week Long Project (20 Hours or More)
Finish Used
Rustoleum Painter's Touch 2X (Ink Blue, Satin) spray paint. DAP Silicone sealant. Latex paint (Simply white, for stenciling). Waterproof clear coat.
Recommended Skill Level
Beginner
Comments
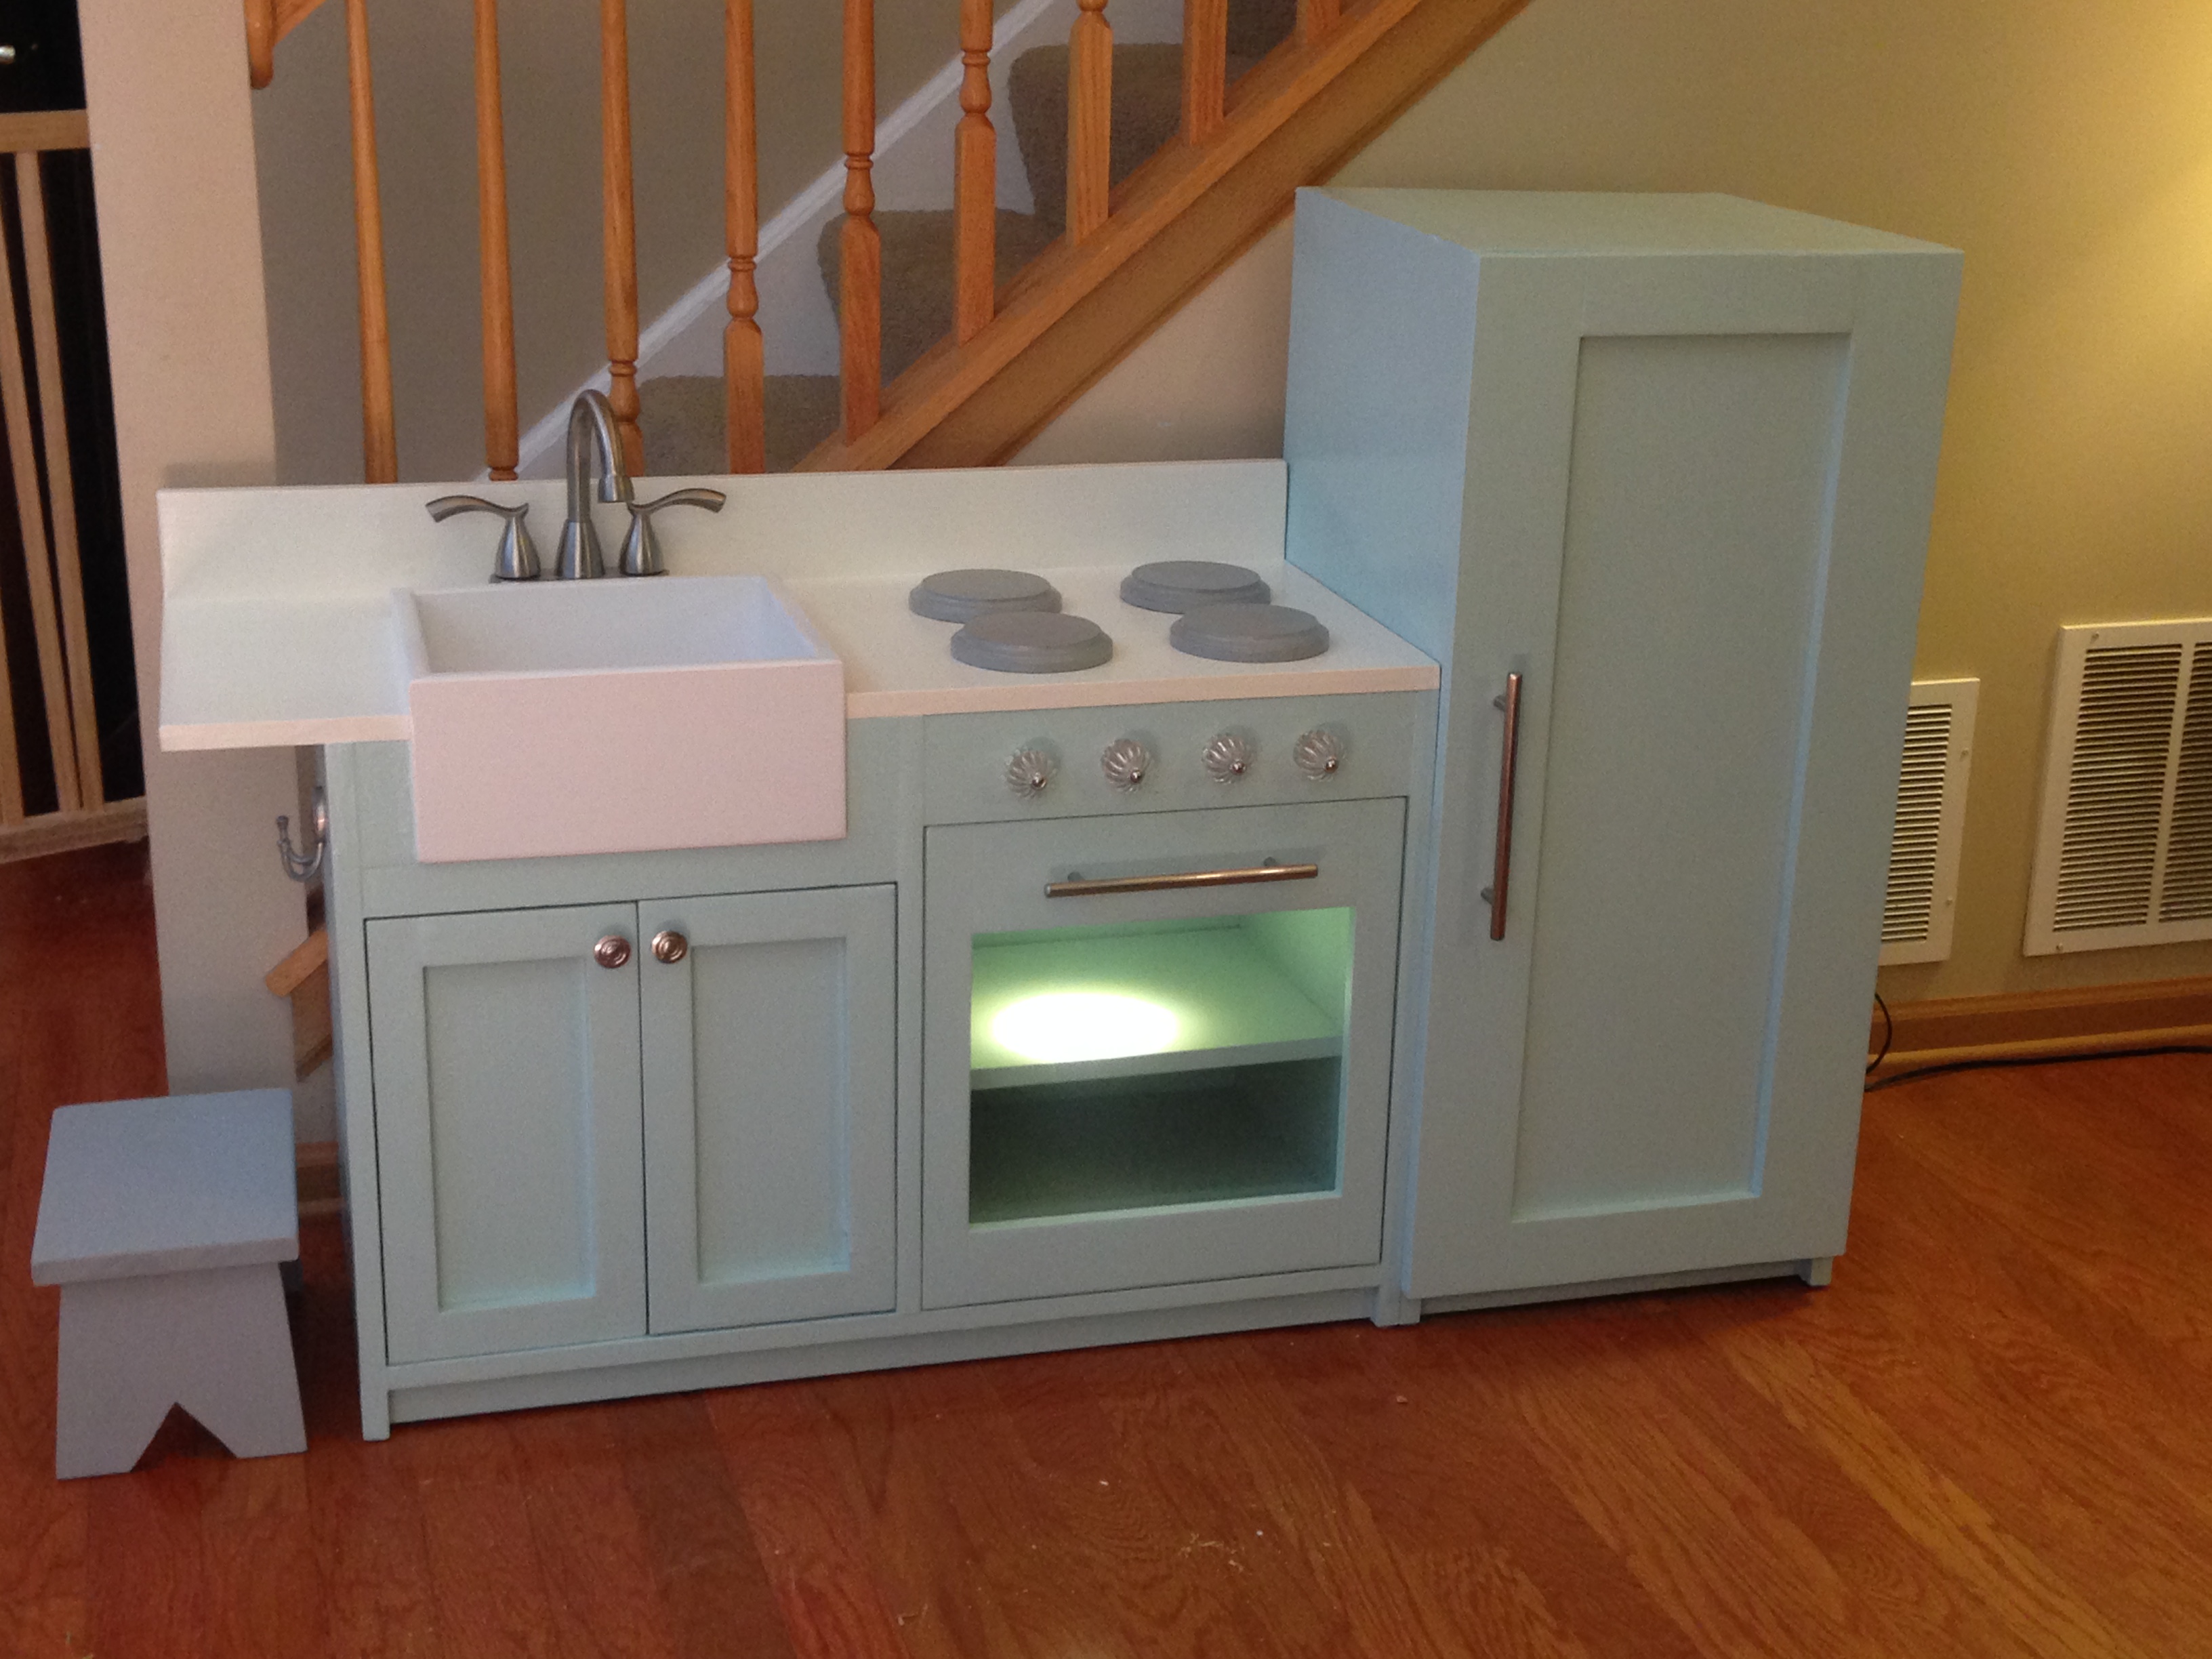
Kate's Play Kitchen
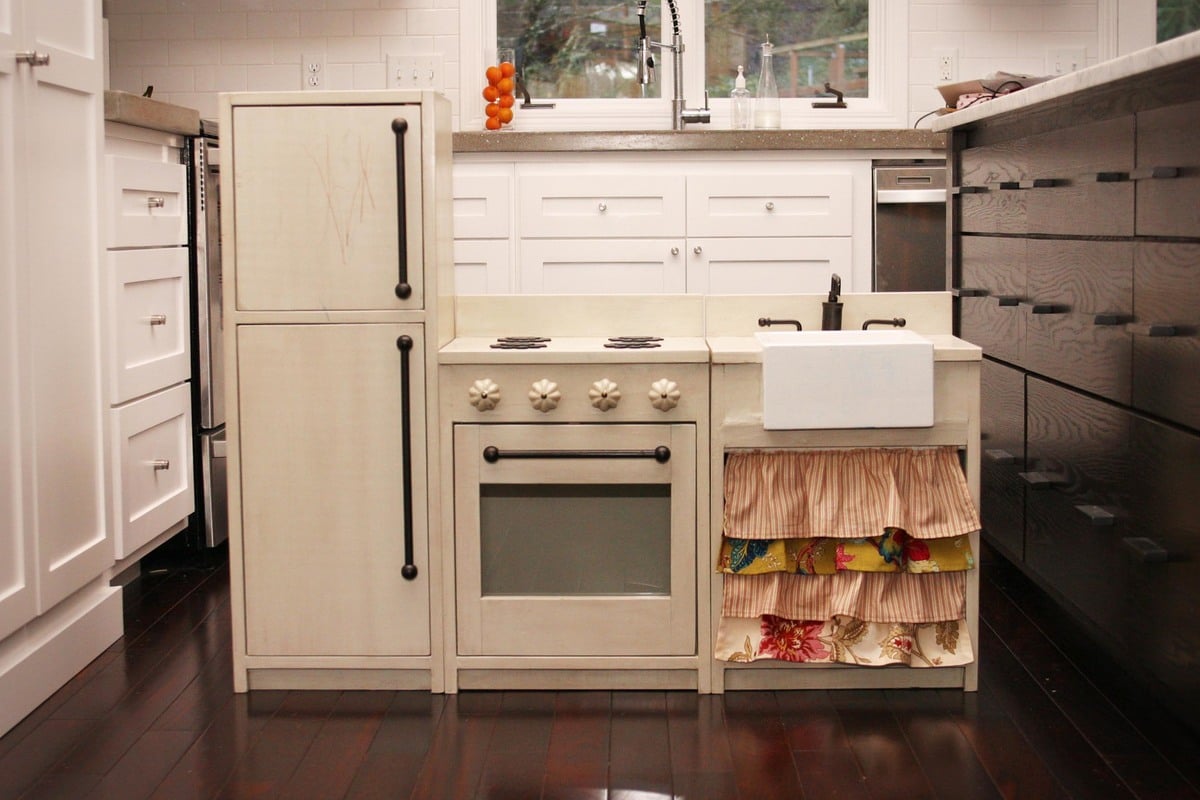
I made this play kitchen for my daughter's second bithday. It was my first project!
Built from Plan(s)
Estimated Cost
$120
Estimated Time Investment
Weekend Project (10-20 Hours)
Finish Used
Behr Ocean Pearl (that I already had) with antique glaze and furniture wax.
Recommended Skill Level
Beginner
Comments


Tue, 01/03/2012 - 14:04
So beautiful! I love the
So beautiful! I love the colors and farmhouse apron sink!
Tue, 01/03/2012 - 15:23
Love the sink!
Looks awesome. Love seeing everybody's kitchen. Do you have more pics of the sink?
Sun, 01/08/2012 - 16:12
Thanks! I'll try to post more
Thanks! I'll try to post more pics of the sink soon.
Tue, 01/10/2012 - 15:36
More photos
More photos of the sink on flickr:
http://www.flickr.com/photos/65952314@N04/?saved=1
Thu, 12/27/2012 - 20:00
This is so cute! What did you
This is so cute! What did you use for the burners?
Thu, 07/14/2016 - 15:41
Beautiful!
Question what did you use for your handles? This is beautiful. I'm hoping to make once close to it for my son's 2nd Bday
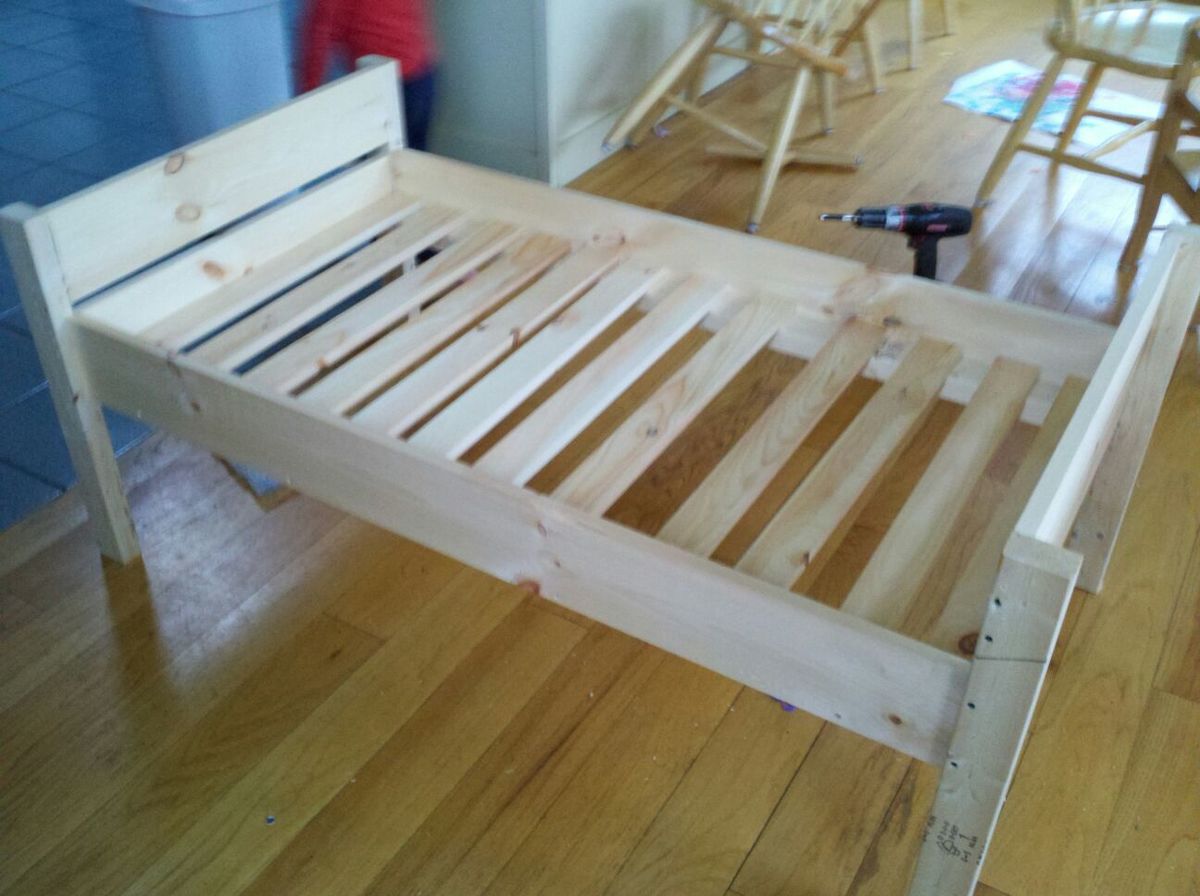
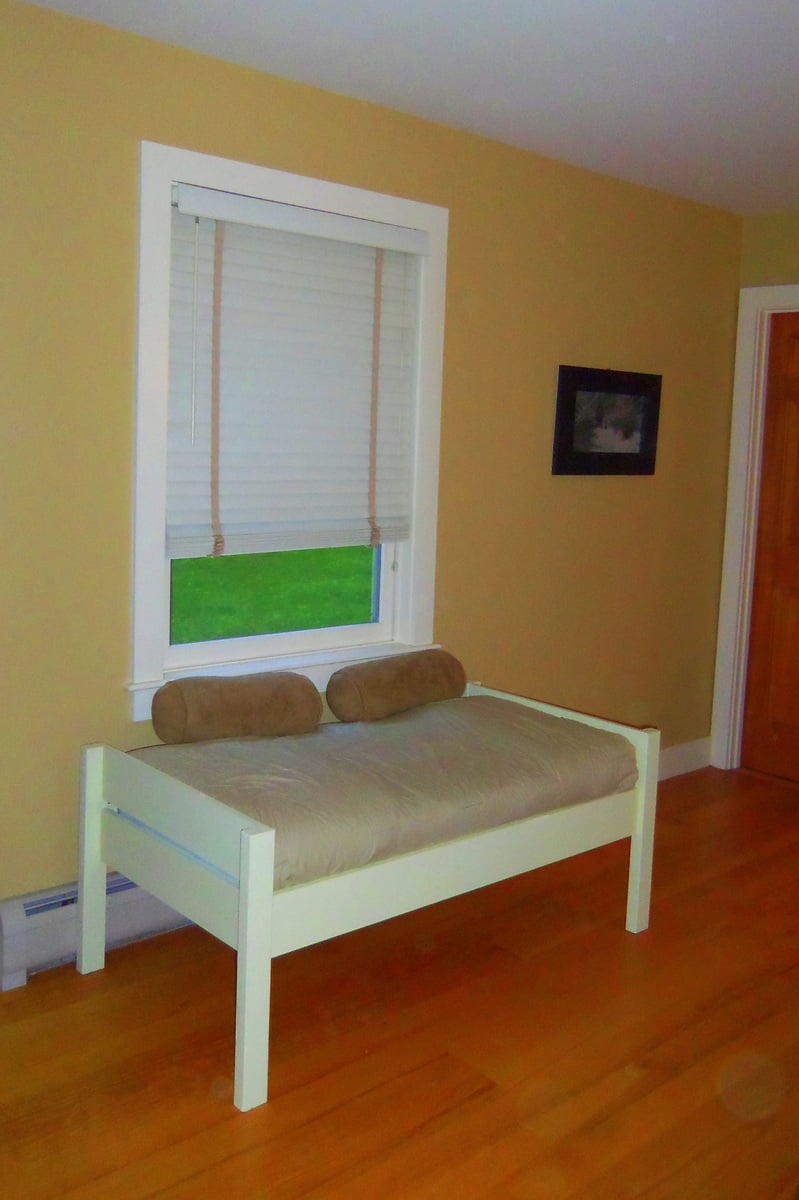
Doggie Daybed

I've thought for a while about building a bed for our dogs, but wasn't sure where to start. We had an extra crib mattress so I set out to find a toddler bed that would work. I decided the Lydia Toddler Bed plan would work best. It doesn't look anything like it, but it was a great starting point.
First, I got rid of the canopy and the decorative side pannels. I also raised the bed 12 inches. (The hope is to add a rug on the floor underneath as sort of a "bottom bunk") The lumber store didn't have 2x2s so I used 2x3s for the legs. I also only used two 1x6s at the head and foot of the bed. They are seperated by 1" because when I got home, I realized they were actually 1x5 (RUDE).
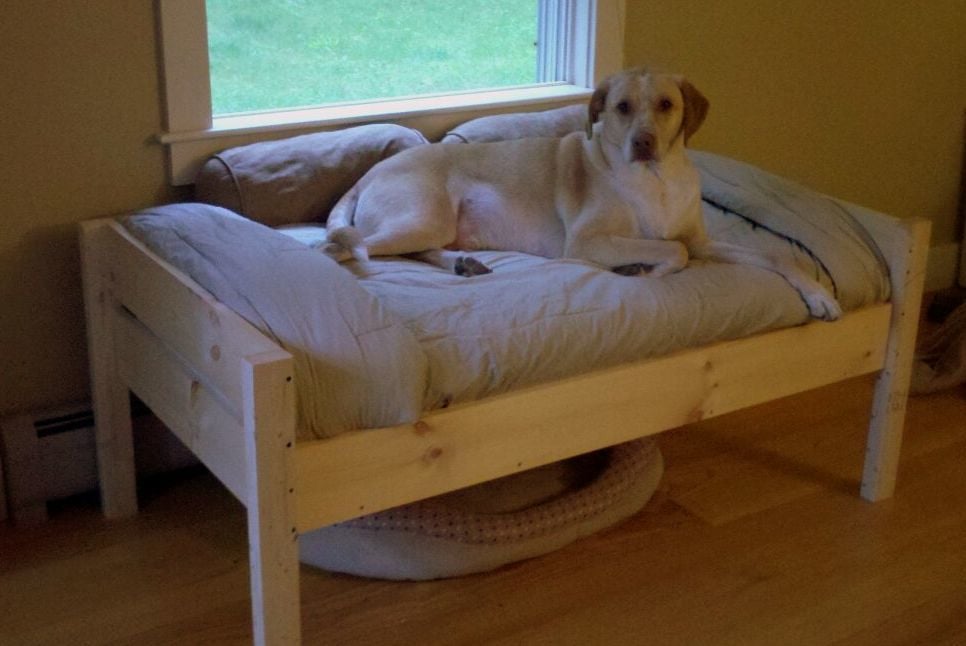
All in all, it turned out exactly as I had hoped and the dogs love it! GOODBYE stinky dogbeds!
**Photo 1: Just finished building--the slats weren't screwed down yet.
**Photo 2: Deacon is testing out his new digs! See the stinky dogbed underneath?YUK!
**Photo 3: Dog Bed Completed! Mac & Deacon love it!
Built from Plan(s)
Estimated Cost
$38
Estimated Time Investment
Day Project (6-9 Hours)
Recommended Skill Level
Beginner
Comments
Thu, 10/16/2014 - 18:49
Luci's New bed
Thanks for sharing the great plans. We built this end in a few hours and she loves it!
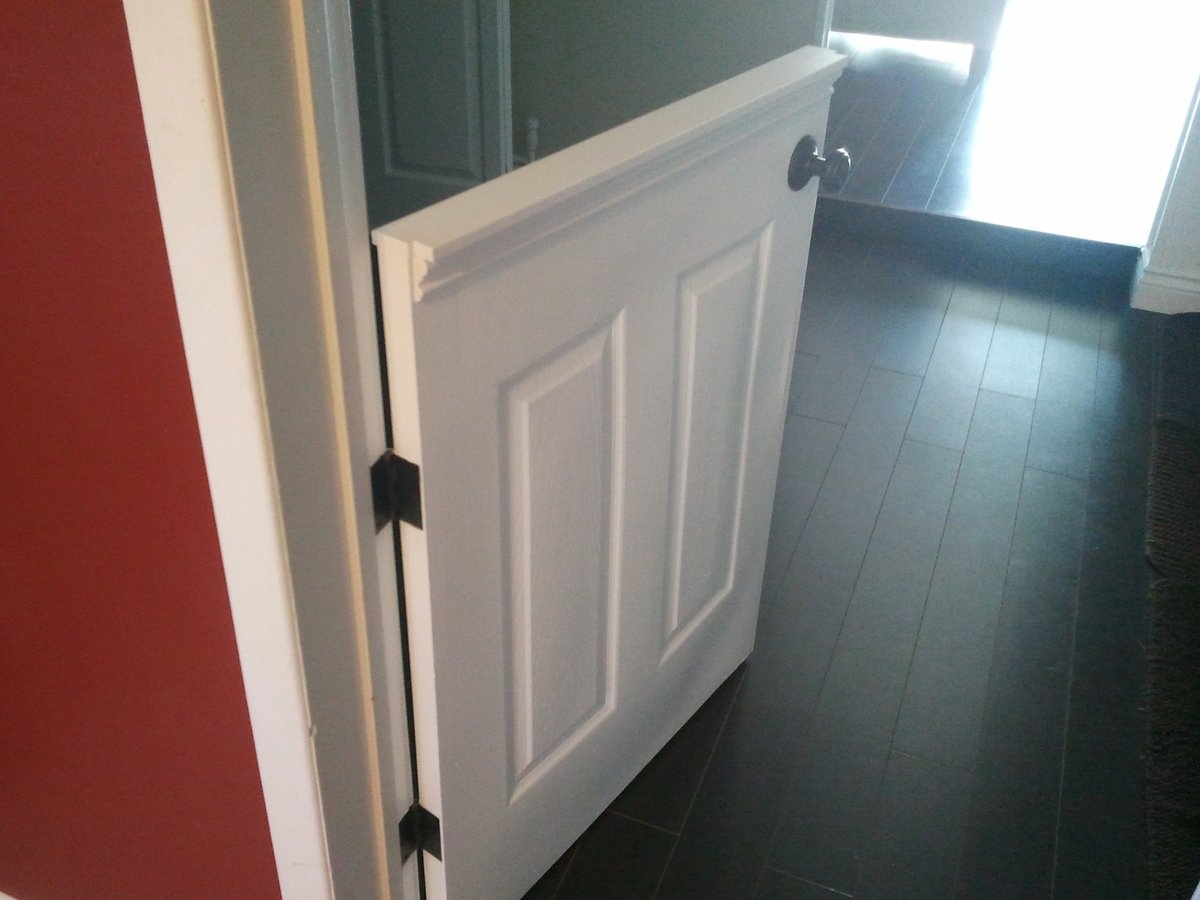
Doggy Door or Baby Gate
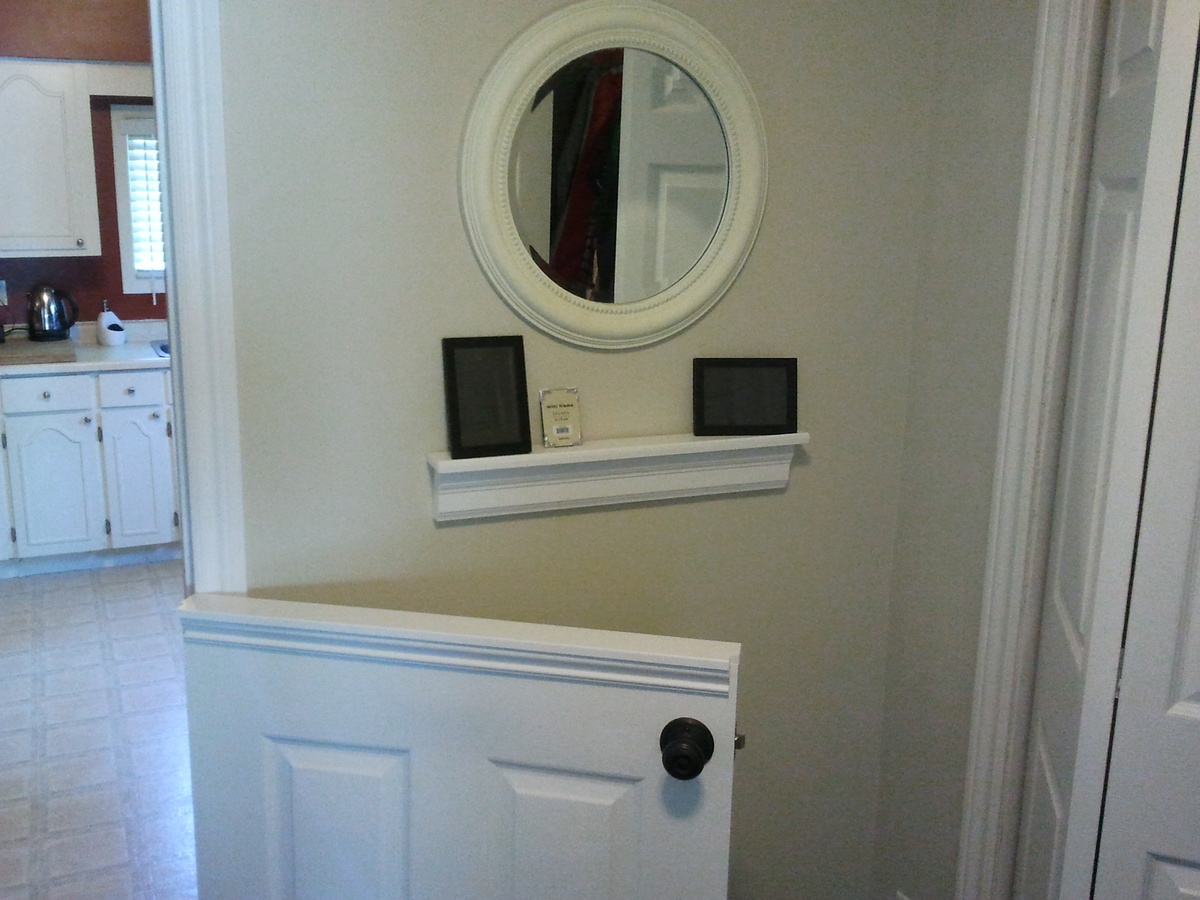
I installed a half door to isolate our dog from the laminate flooring when he sleeps at night.
It was only $25 for the hollow core 6 panel door from HD, which got cut in half.
$25 for the passage knob.
$10 for top plate and trim
Less than $5 for the hinges.
Not having to replace the laminate flooring priceless!
Some Tips:
The $25 door is not prehung. Buy the $14 dollar irwin door jig to install the door "http://www.homedepot.ca/product/door-lock-installation-kit-carbon/904157" It will come in handy if you are remodeling and installing new doors to replace those old flat panel doors. You will also have to chisel out the hinges.
When installing and marking the hinge locations in the door frame shim the door a 1/4" off the floor.
Estimated Cost
$65 materials + $15 jig = $80
Estimated Time Investment
Day Project (6-9 Hours)
Finish Used
White paint
Recommended Skill Level
Intermediate
Comments

DIY Wooden Farmhouse Bed
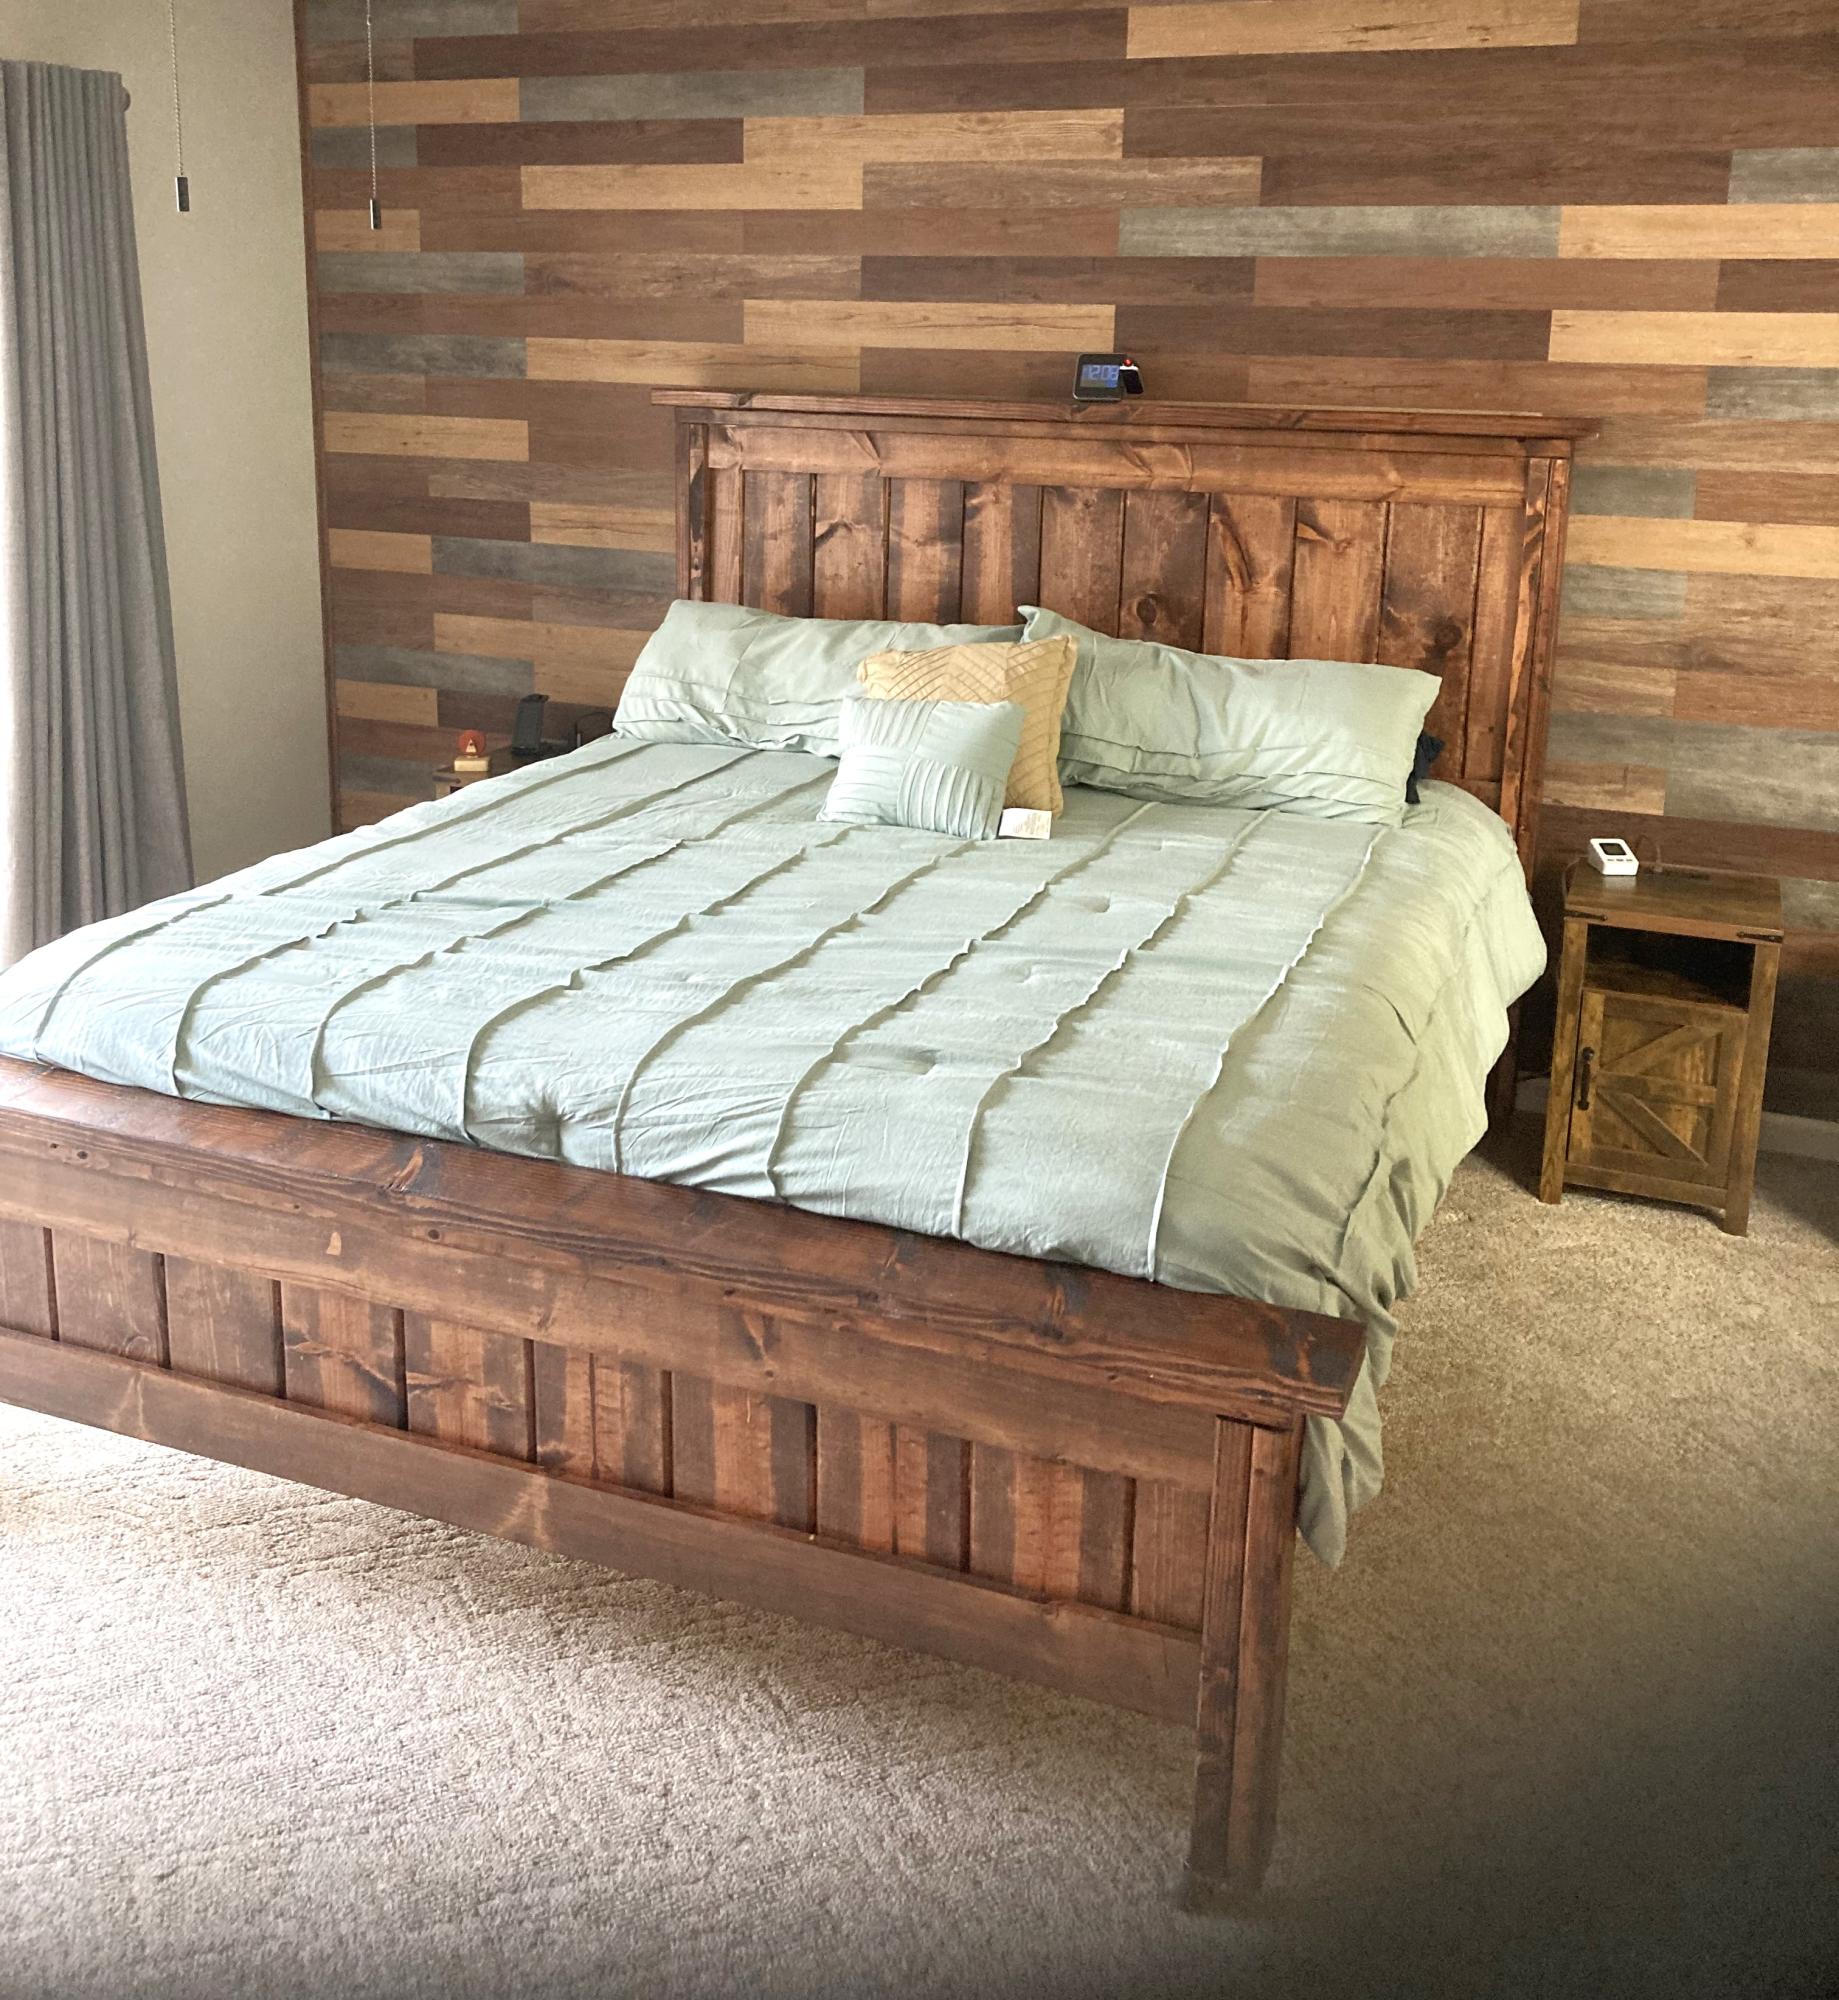
Used your plans for a California King! Had to lengthen the bed by 4” to accommodate the comforter.
David Turton
Built from Plan(s)
Outdoor Farm Table

Farmhouse Table with pocket holes.
Duffsdesignsnc
Built from Plan(s)
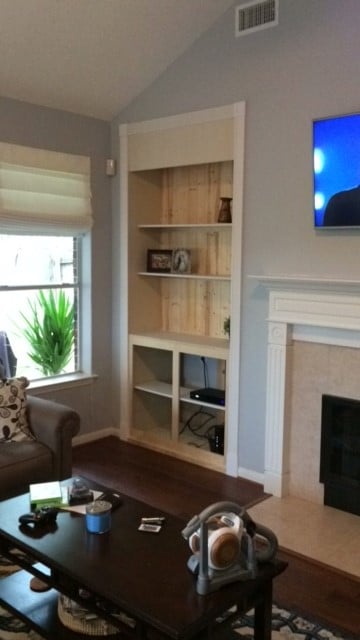
Converted TV wall niche
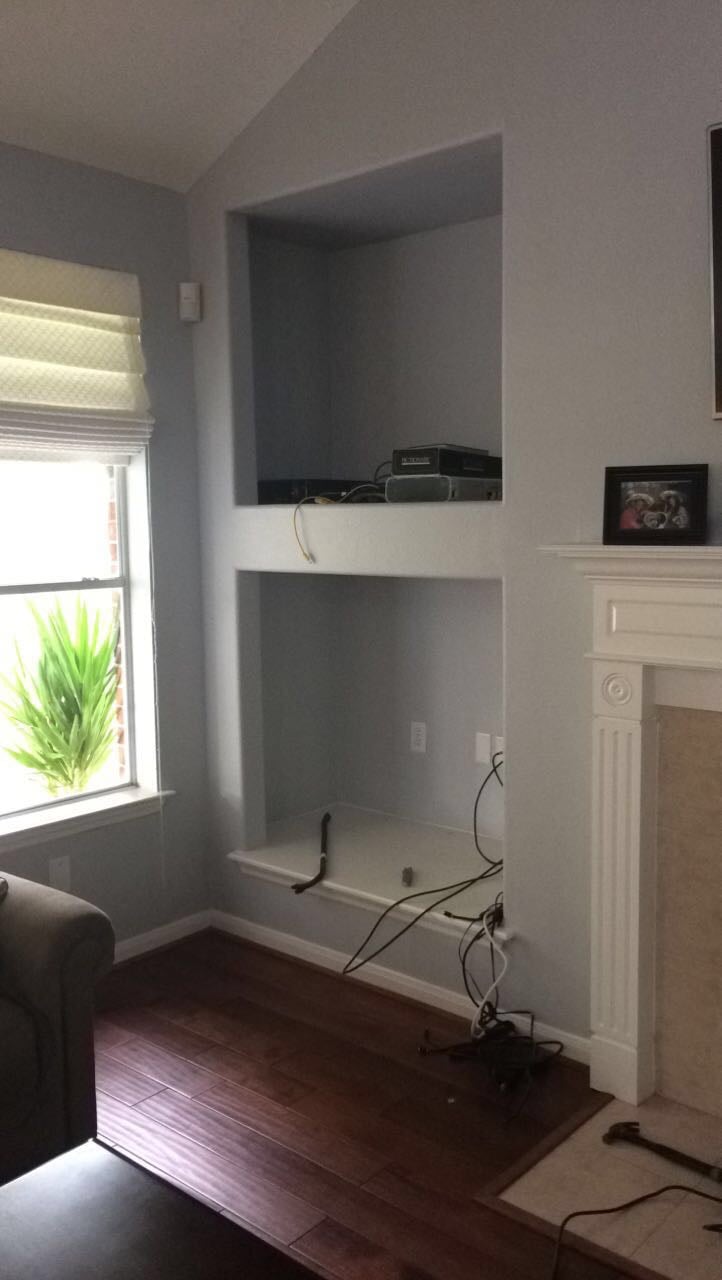
We bought this house about a year ago and we finally got around to removing this pointless niche! The center divider and bottom were removed. The cabinet and hutch were assembled seperately.
This is still a work of progress. I am looking for a nice decorative molding face for the top. If anyone has any suggestions please let me know! We will most likely paint it white to match the fireplace mantle.
Estimated Cost
300
Estimated Time Investment
Week Long Project (20 Hours or More)
Finish Used
Paint
Recommended Skill Level
Intermediate
Closet storage
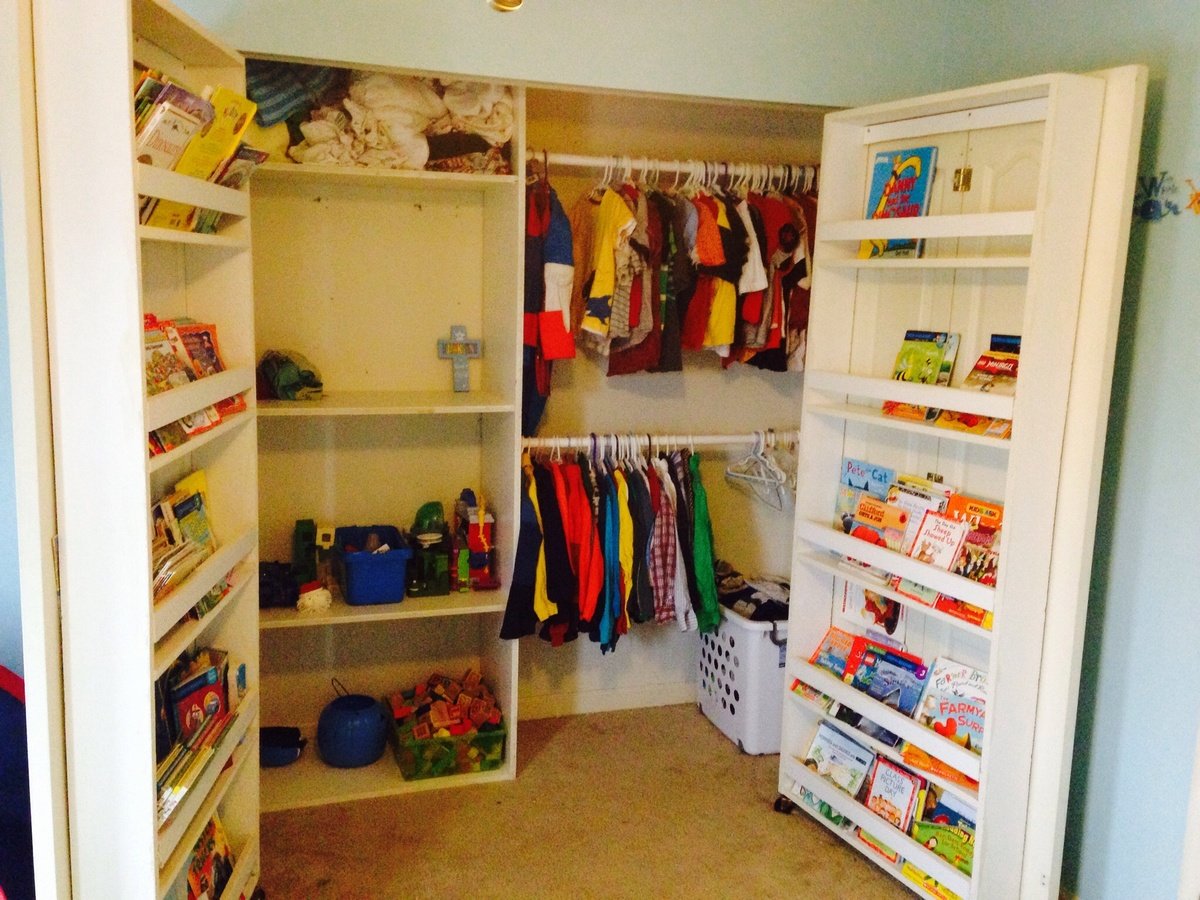
Great storage idea which makes things easy to see and get to
Built from Plan(s)
Estimated Cost
$150
Estimated Time Investment
Day Project (6-9 Hours)
Finish Used
Sherwin Williams paint
Recommended Skill Level
Intermediate
Comments
Wed, 01/28/2015 - 18:50
Thank you very much, Ana you
Thank you very much, Ana you have inspired myself and my wife to undertake woodworking projects that I thought were unattainable. You have made these projects easy, fun and affordable
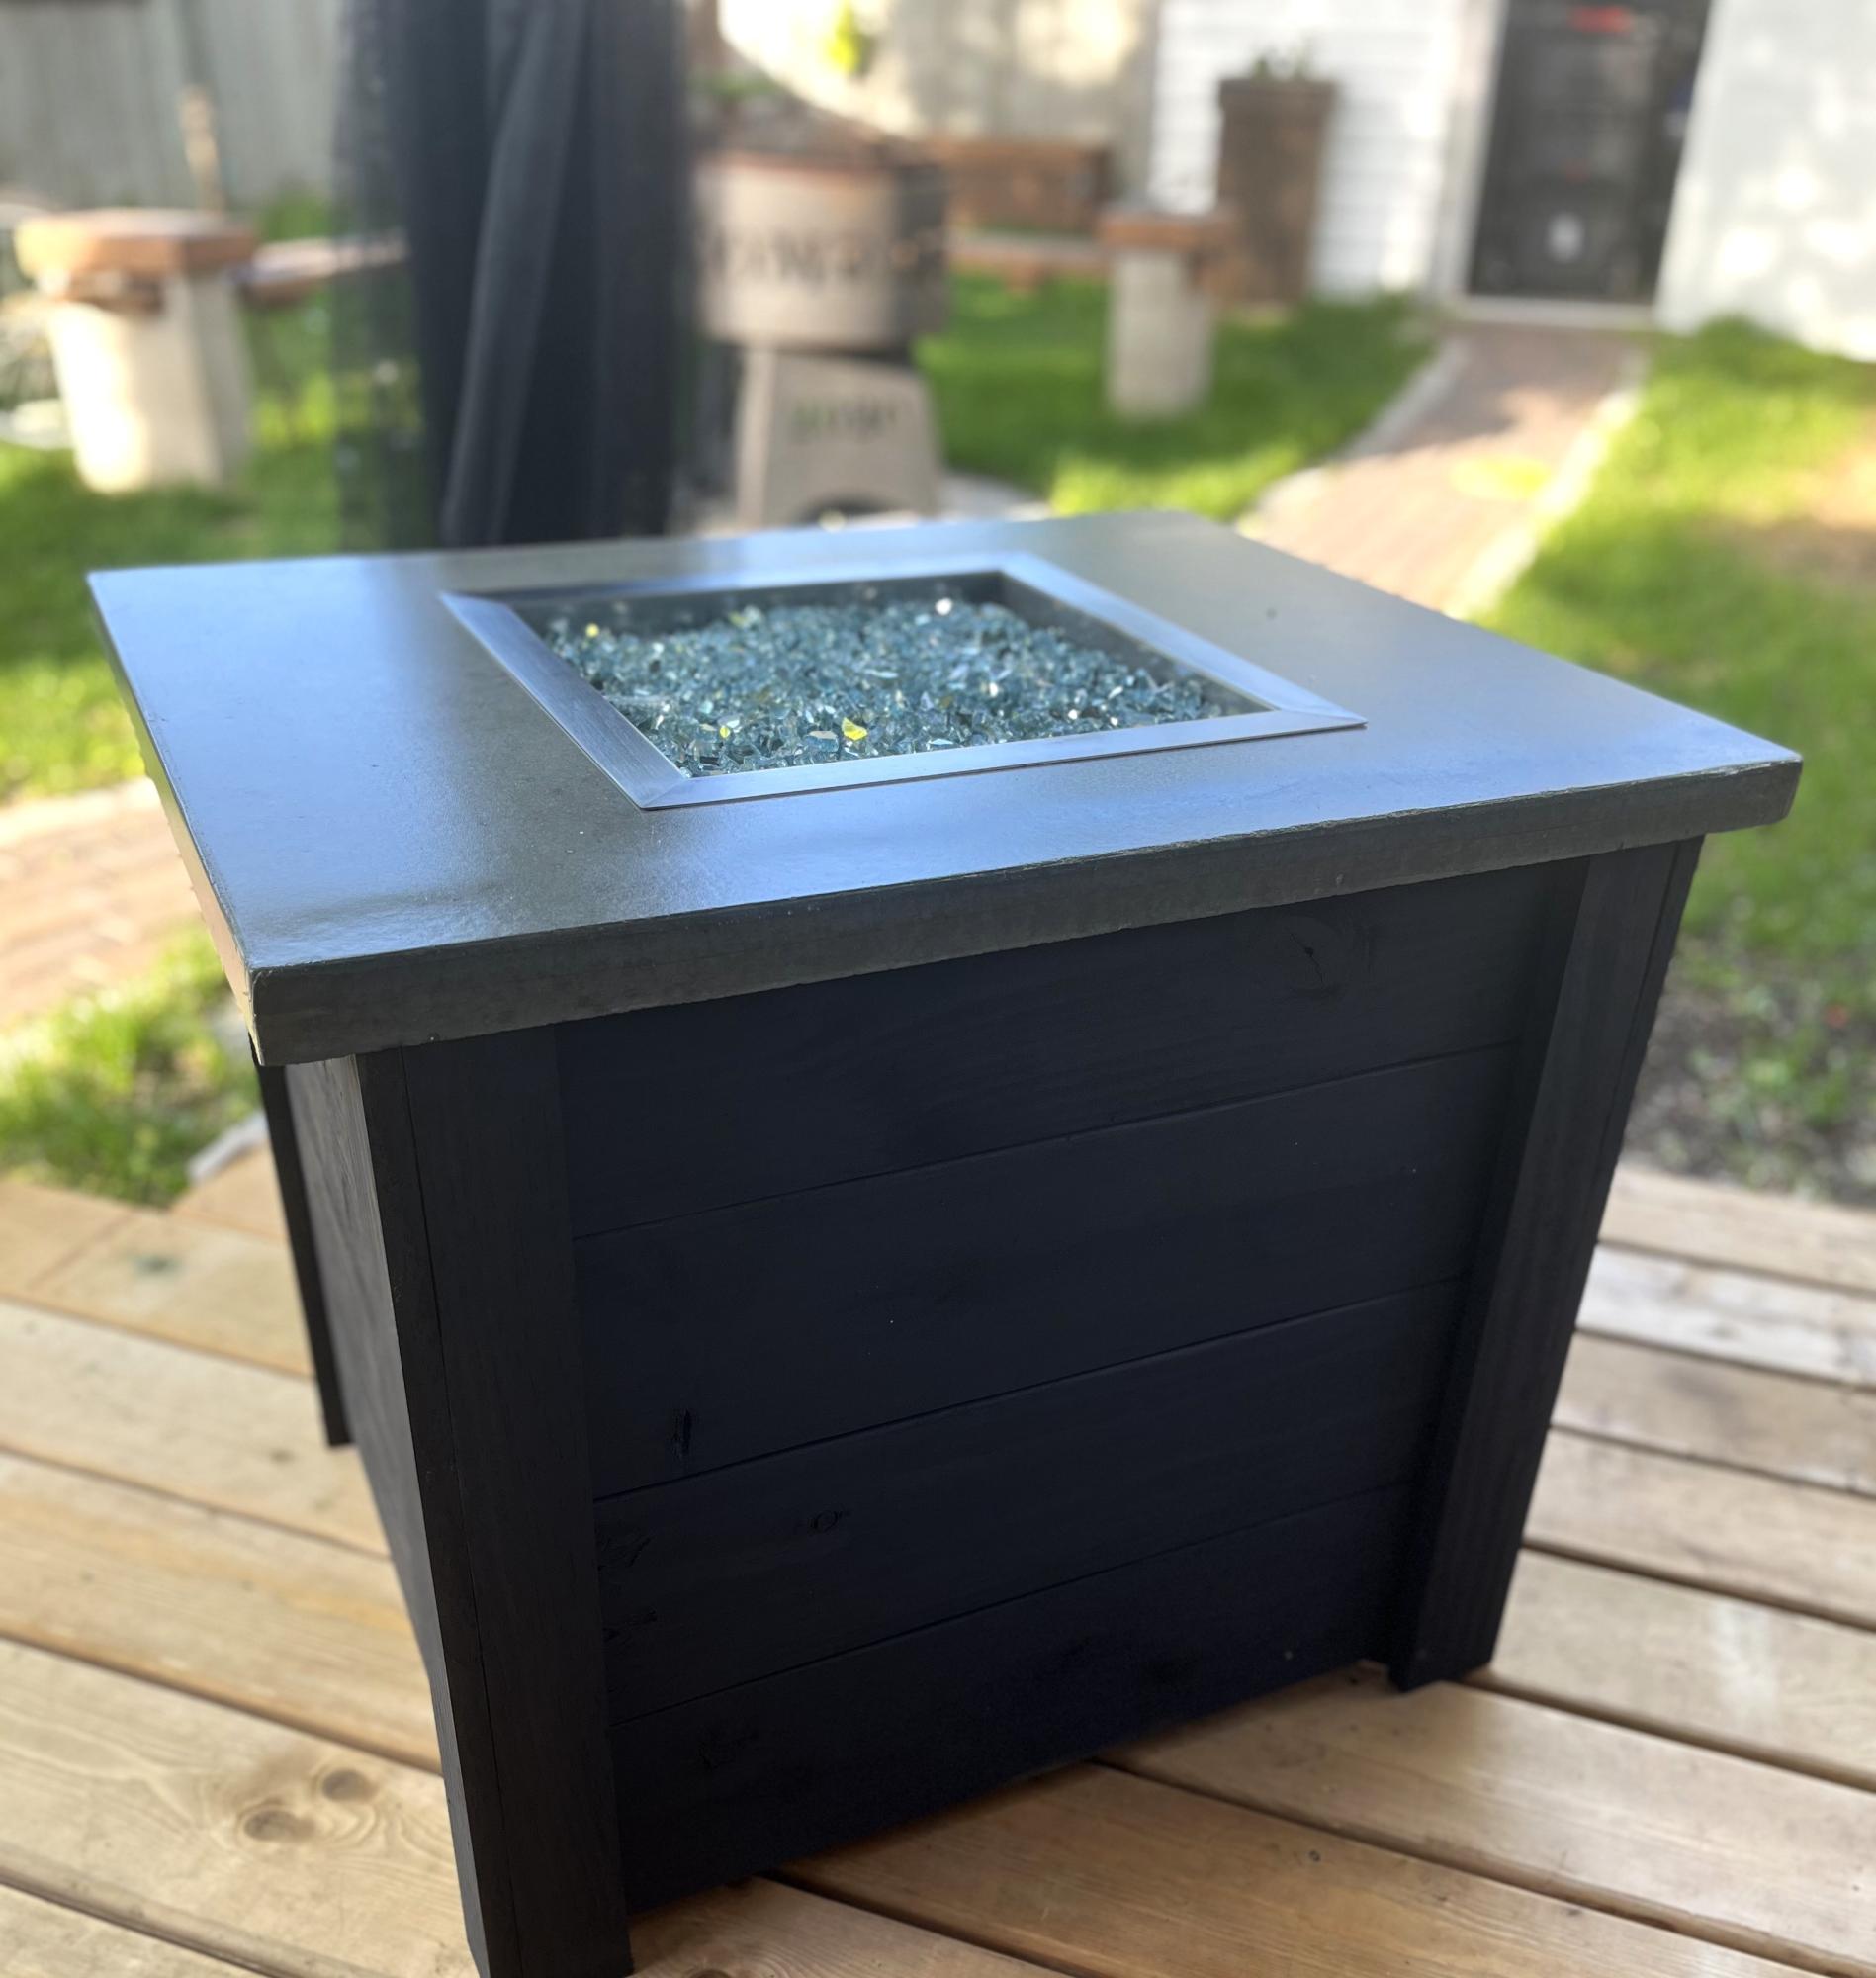
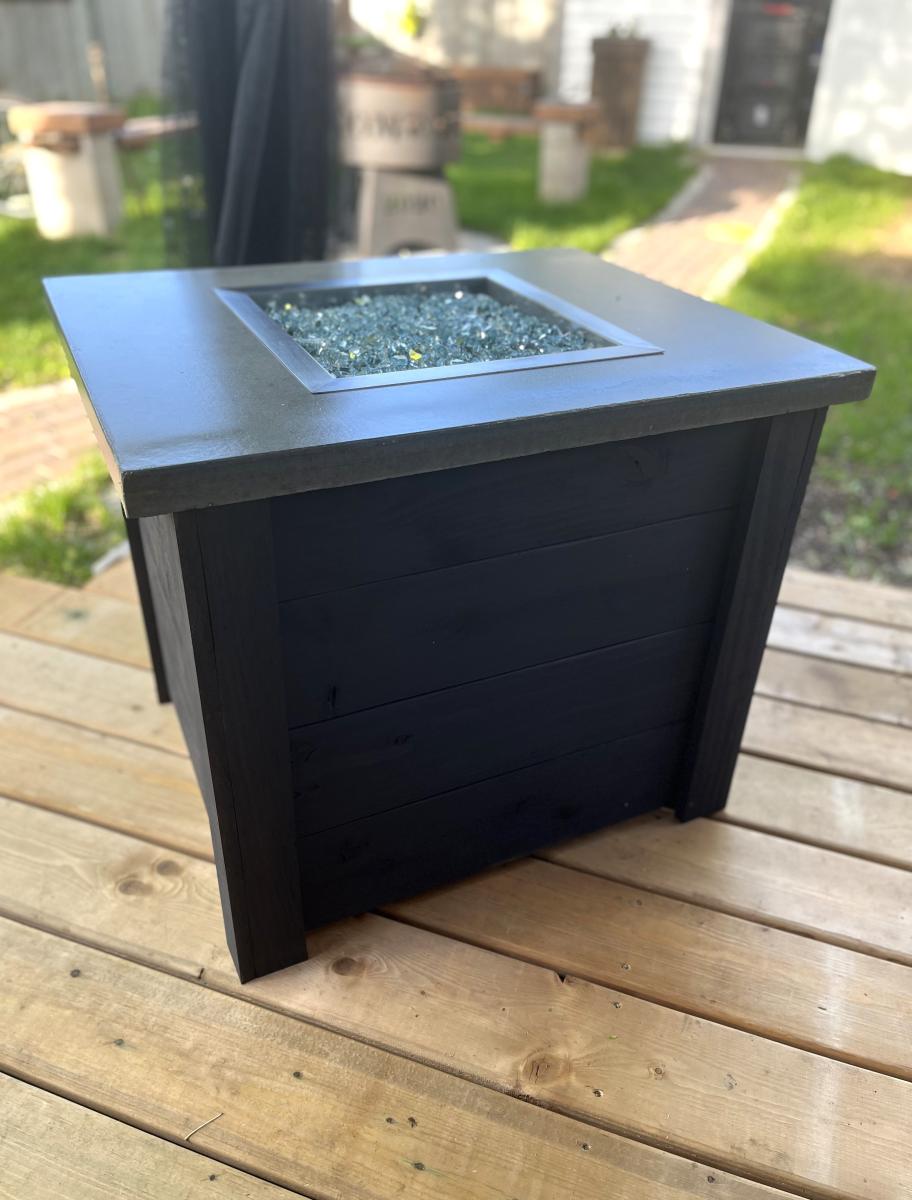
Kitty Outhouse

My first Ana White project. Built Ana’s awesome small cedar shed as an outhouse for our many cats. The have access to it from inside the house. Great way to keep litter boxes and the mess out of the house. It is stand alone, and attached to the house, in front of a bedroom window. There are two ‘entrances’ as well as two, one-way, escape hatches, if a cat in the outhouse is interrupted by another cat (I.e. a male cat comes in and the female feels trapped) they can exit to the outside (one way so no critters can come inside!). Ana has easy to build plans, great site! I plan on making the square table just posted today for my newly refurbished deck. Keep in mind, my estimated costs and time reflect a LOT of additional features on the inside. The shed itself, very easy, simple, inexpensive. Very little waste with Ana’s projects as well.

Built from Plan(s)
Estimated Cost
$500
Estimated Time Investment
Week Long Project (20 Hours or More)
Finish Used
No finish, at least not yet.
Recommended Skill Level
Intermediate
Comments
Thu, 04/29/2021 - 09:06
Wonderful solution for your cats!
Thank you for sharing, what a cool project!
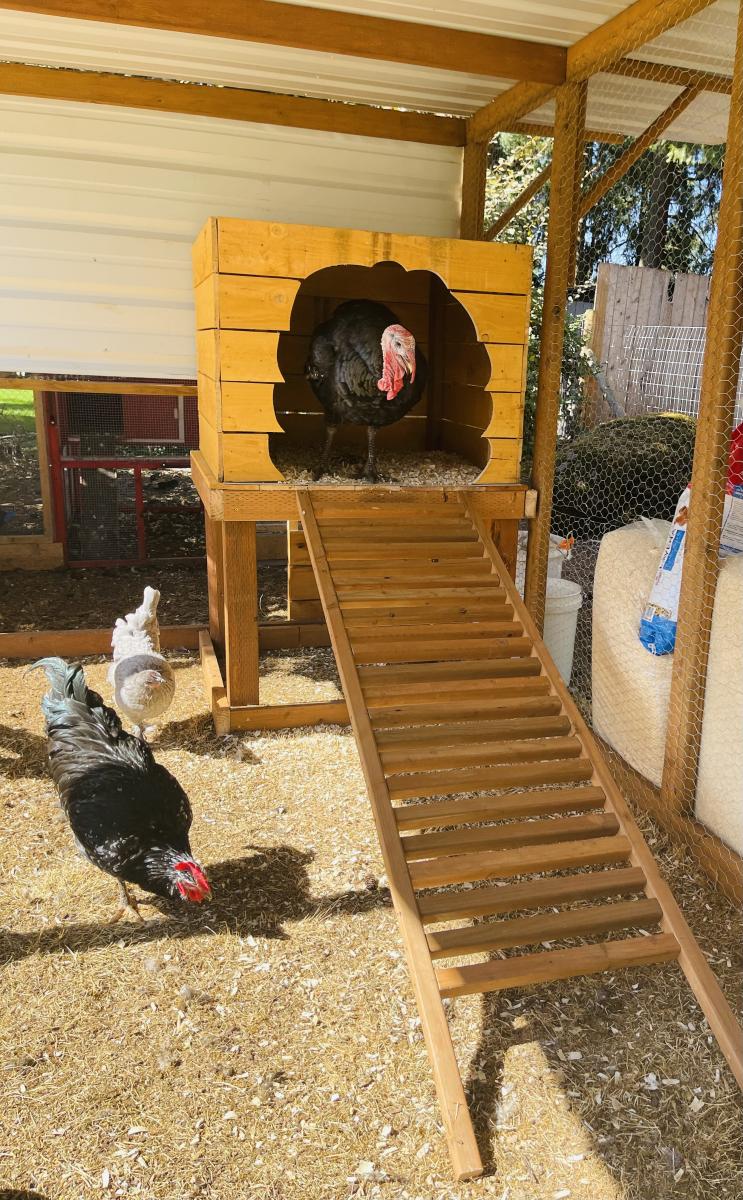
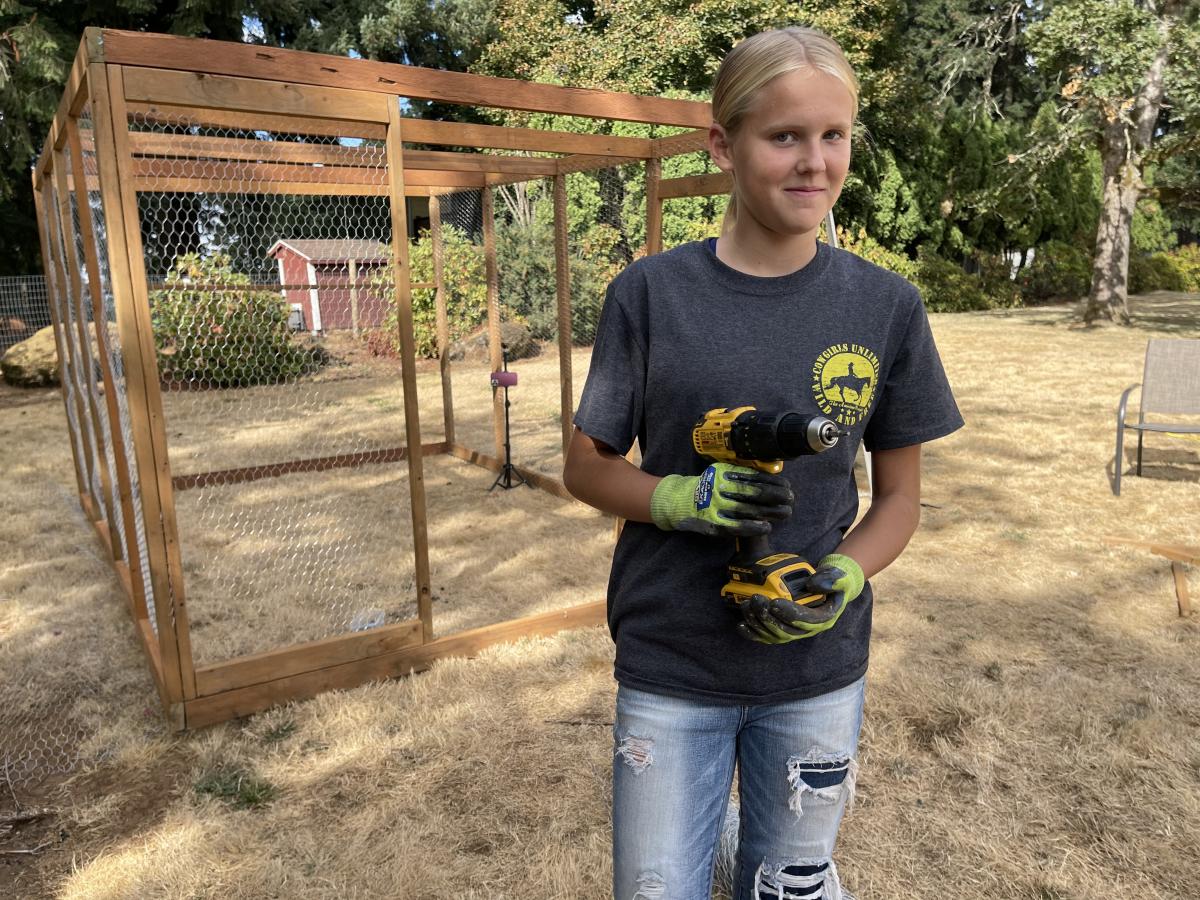
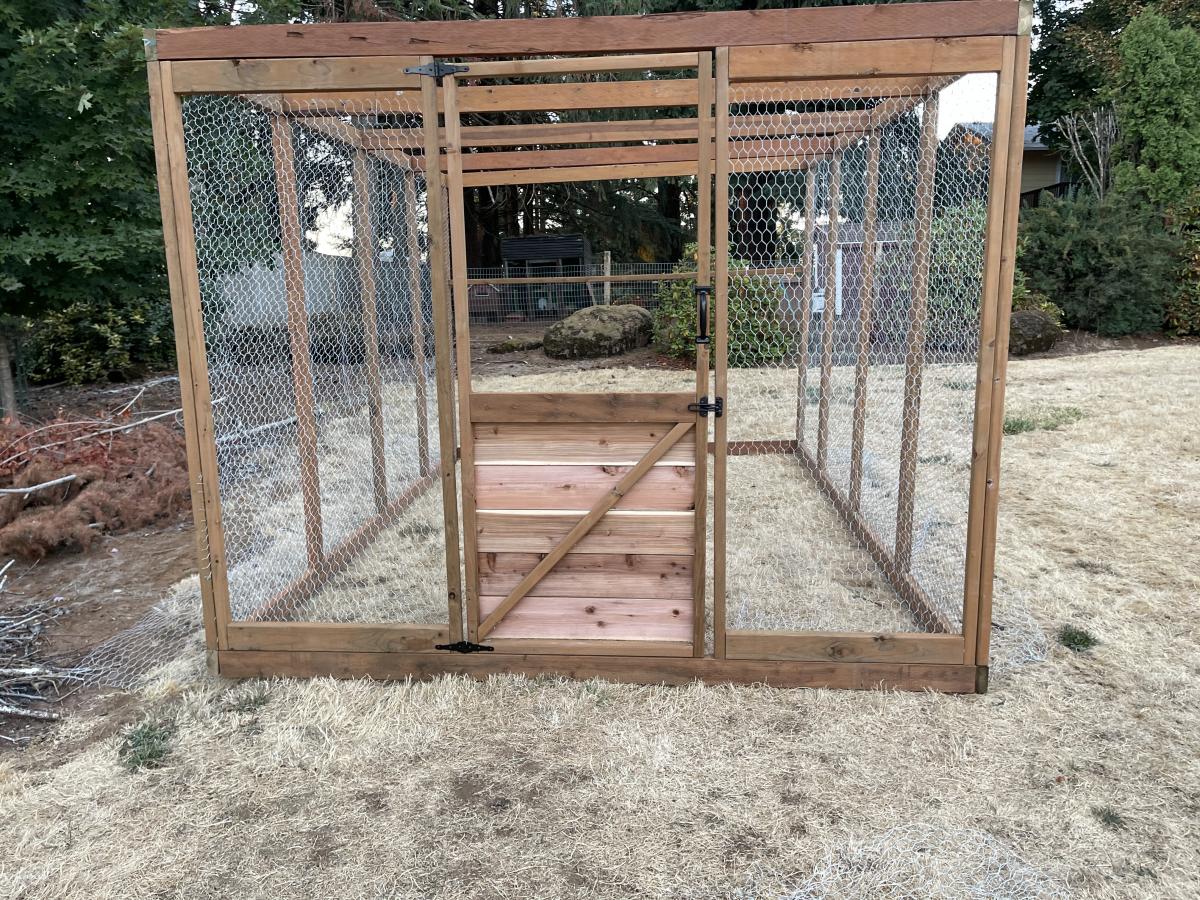
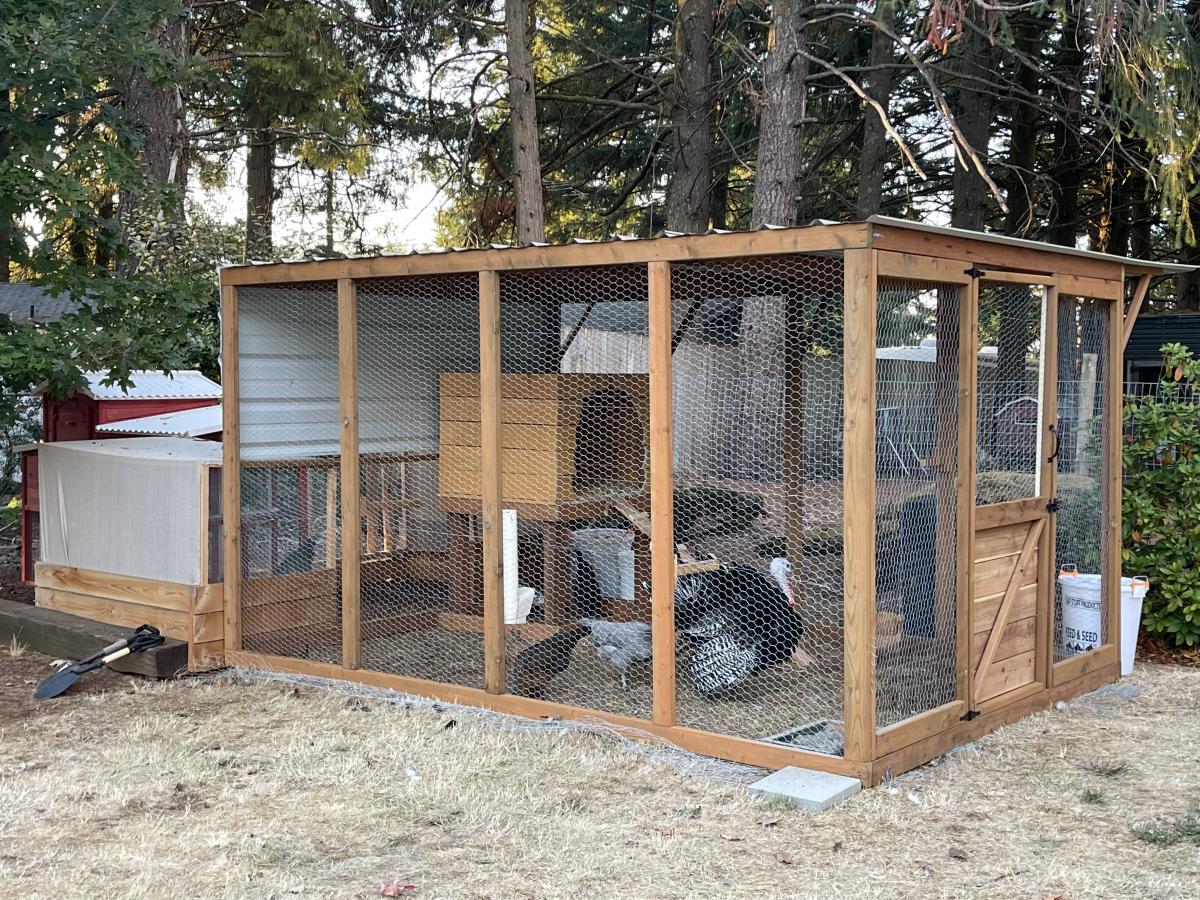
Chicken Run with Turkey House
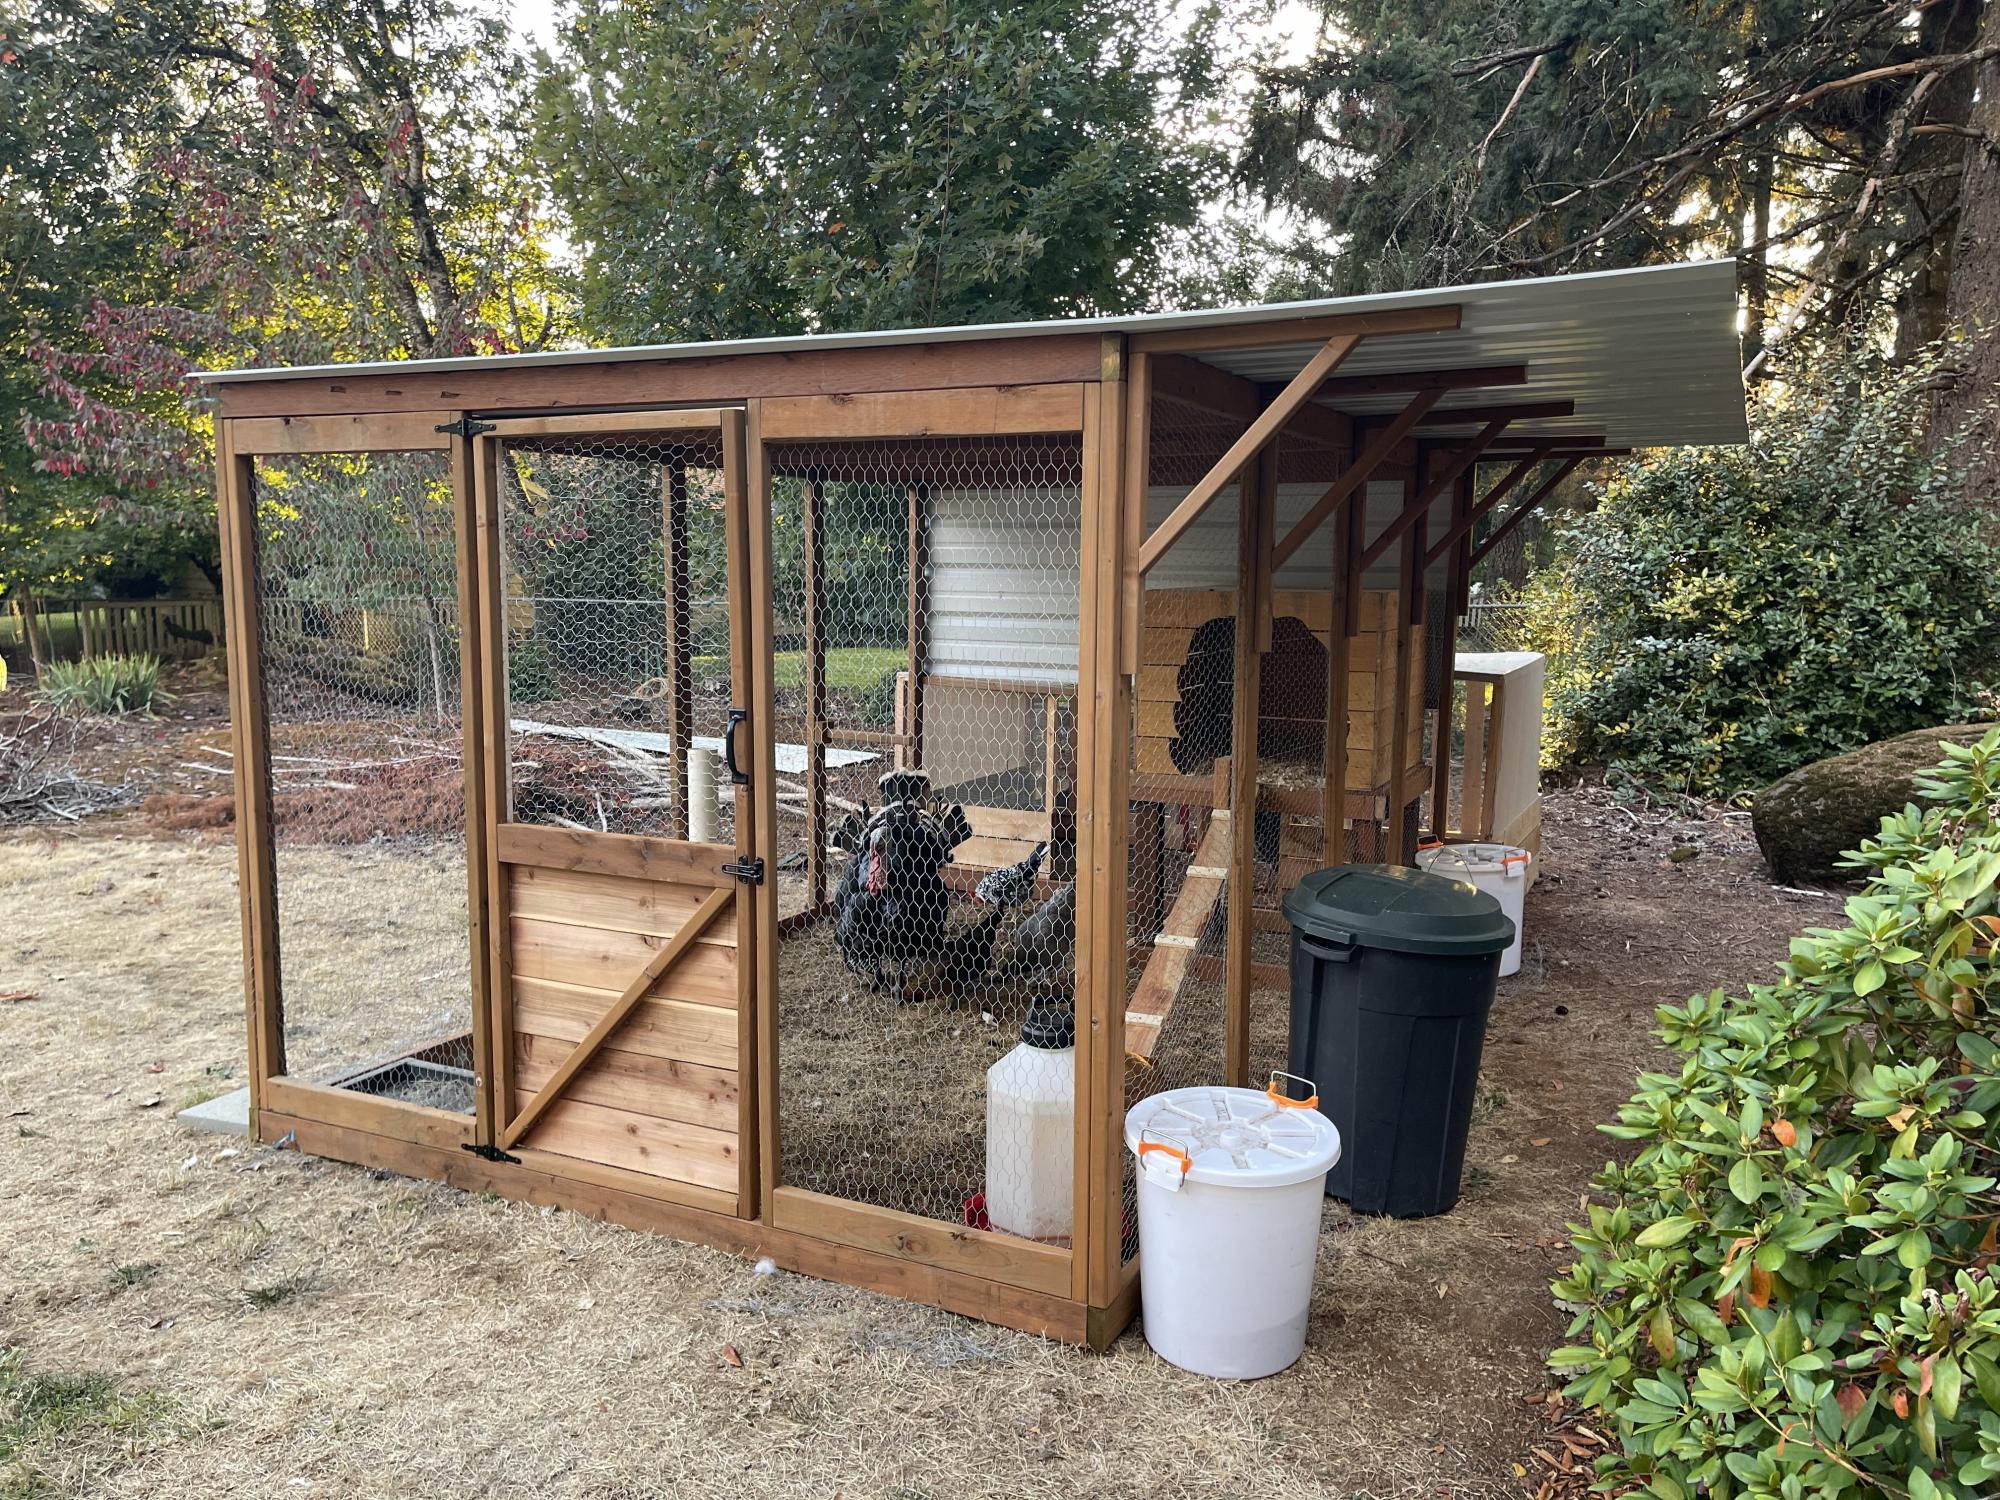
My daughter helped me build this enclosure. We used Ana's chicken run plan, but just made it taller so we could walk in easily. We added an overhang to store food and pellets under, for the supports we used Ana's easy shelves angle support plan, and finally we used the playhouse base plan for the base of turkeys house. All plans used are linked below. We ran the chicken wire out under the structure and still need to bring in some large rocks or pavers, but so far no issues with predators. Turkey was getting too big to fit in the smaller coop, so we decided to have fun with his house and used cedar fence pickets and some treated 2x4's, built a box and jig sawed the shape of a turkey. As you can see in the first photo the ladder for turkey wasn't big enough, all the other chickens were in his house, lol. So I beefed up the ladder and he happily can put himself up at night now:) Overall a super successful project, I wasn't sure what to do with the top and just at that point, the neighbor walked over and offered the metal, talk about a huge win and the perfect solution! We attached the run to the previous smaller structure and now they have so much more room and are laying like crazy:) Finally, I think this would make a great dog kennel as well...
Fireman's Dog Bed
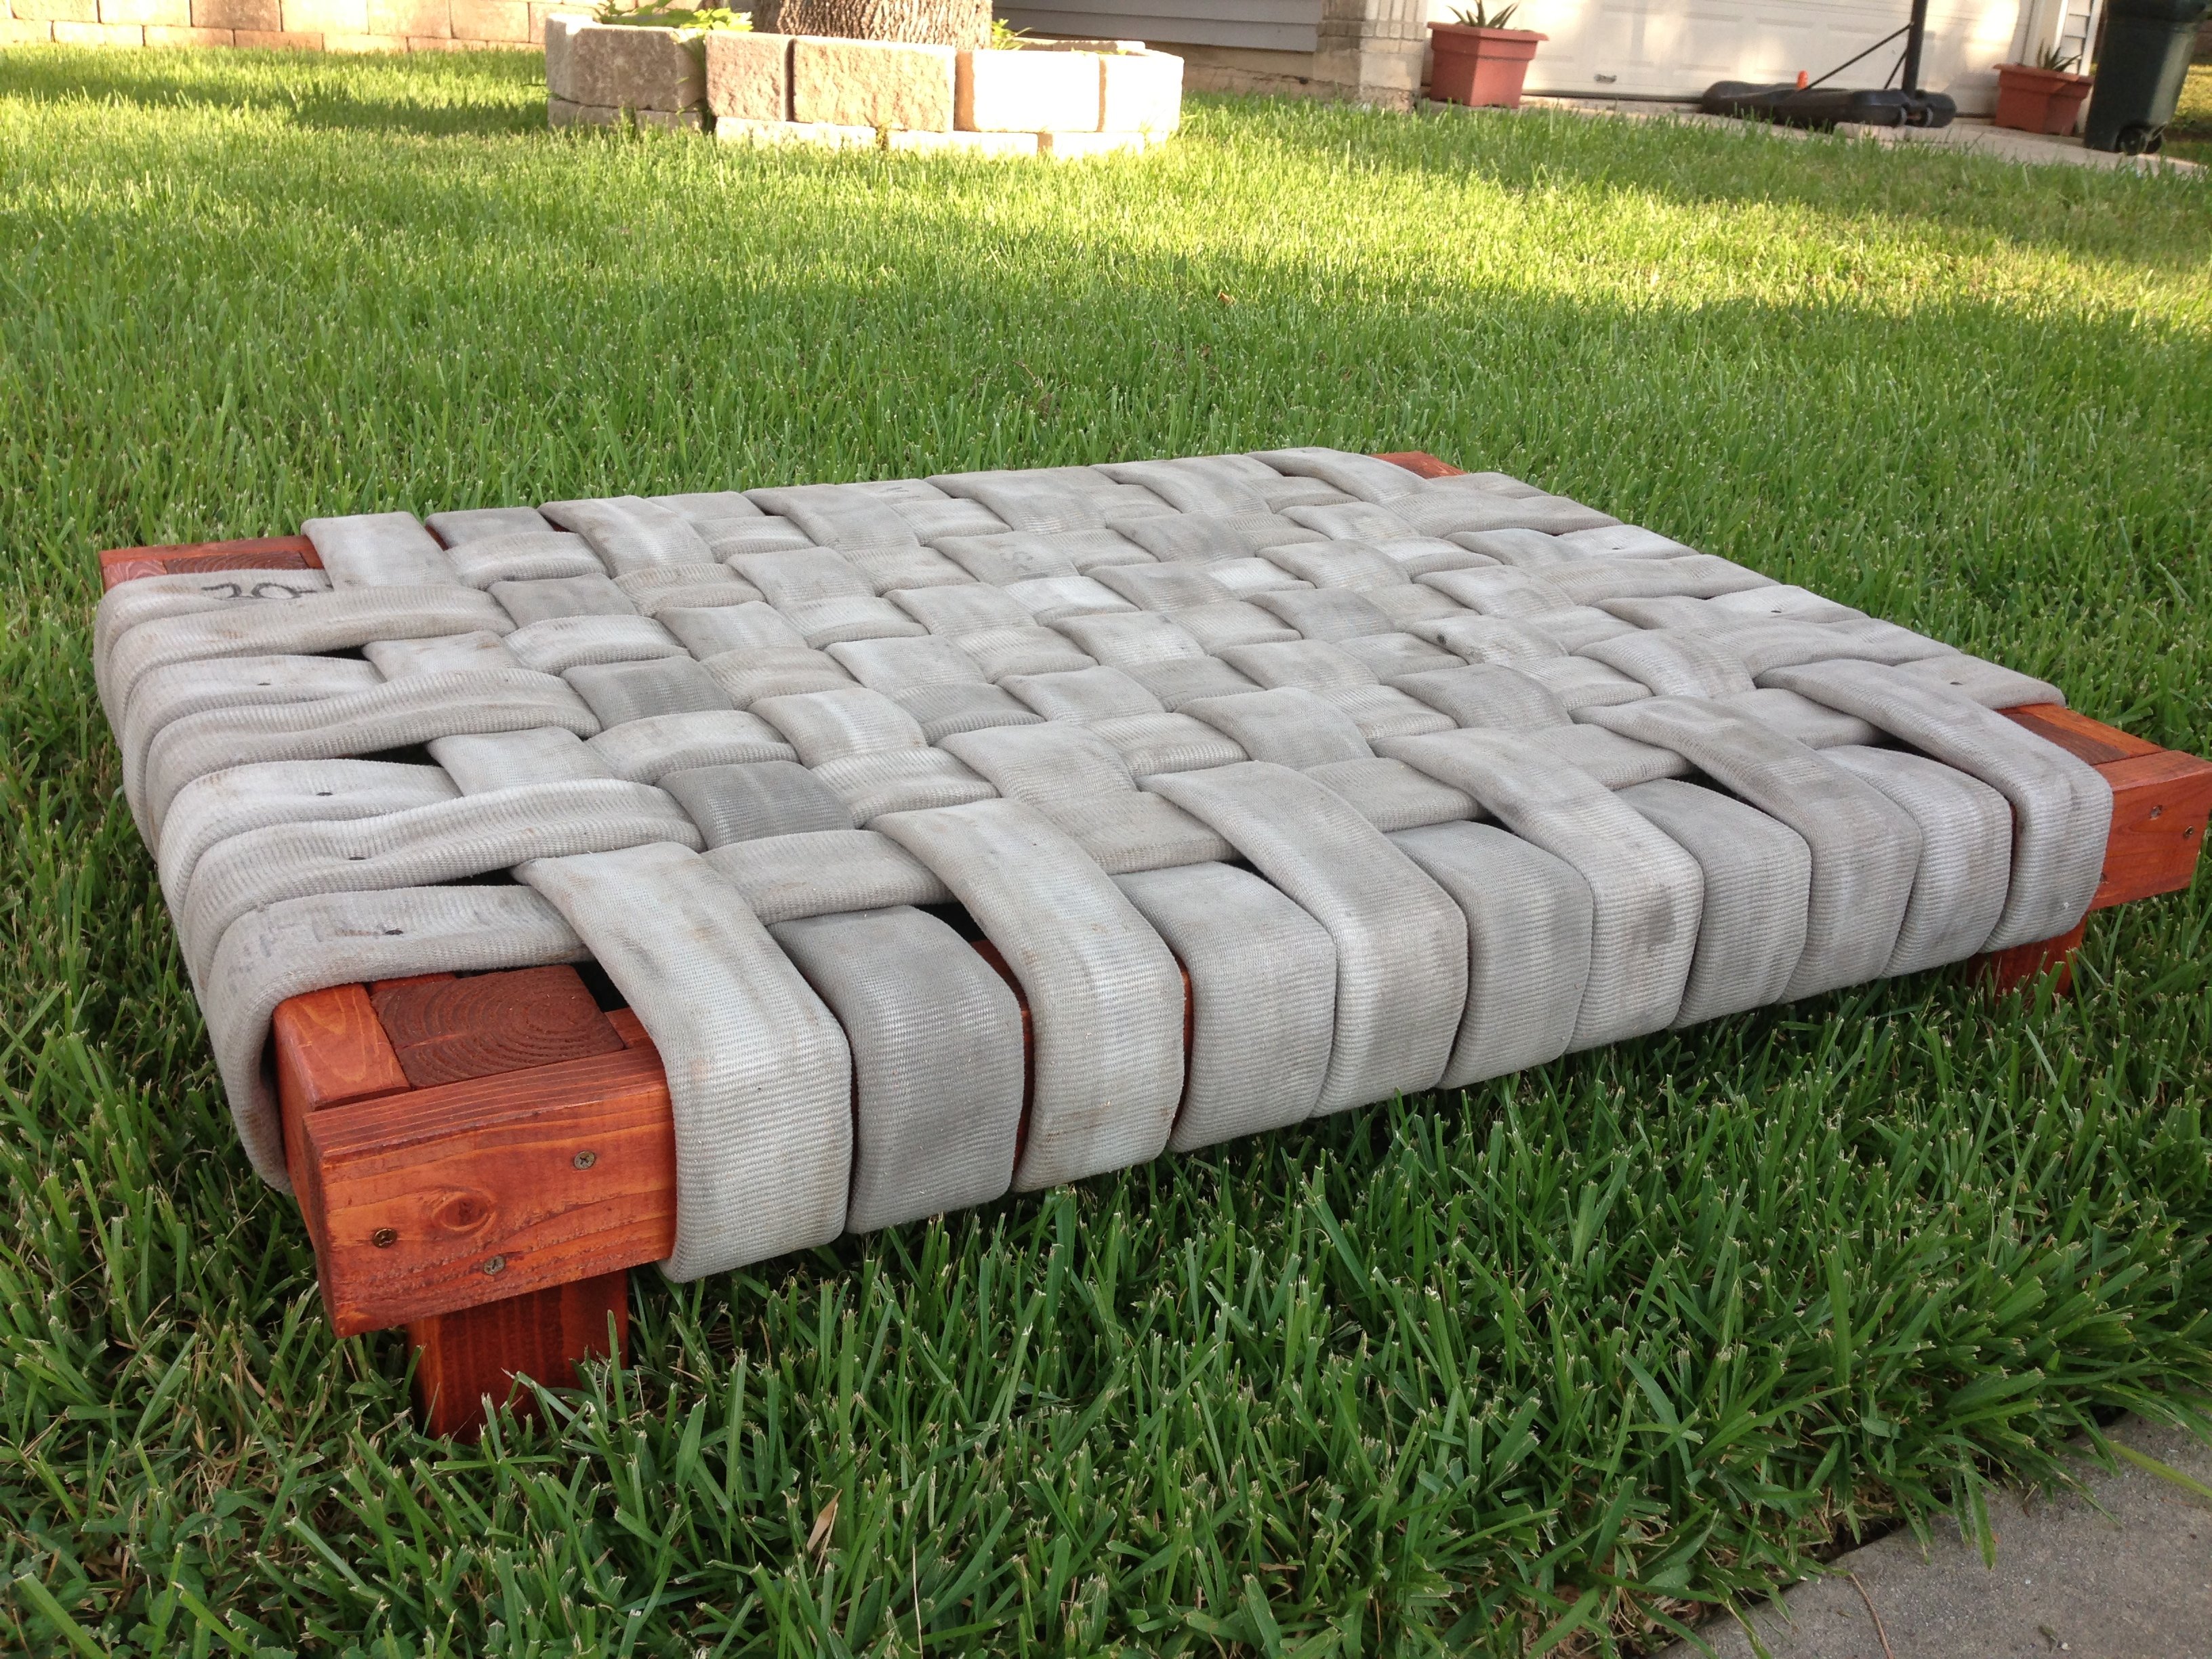
I needed a heavy duty dog bed for my puppy after he destroyed two regular dog beds. I used 4x4s, 2x4s and fire hose. He has not been able to destroy this one and he loves it.
Recommended Skill Level
Beginner
Comments
Mon, 07/08/2013 - 15:48
Cool
I have a pit bull. Shes the sweetest thing but loves to chew up her own beds. She wont chew the shihtzus bed or the cats beds just her own. I'd like to see her try this one out.
;) Now if I could figure out a way to get my dad to give up one of his fire hoses. hehe
Great job, great idea
~Melody
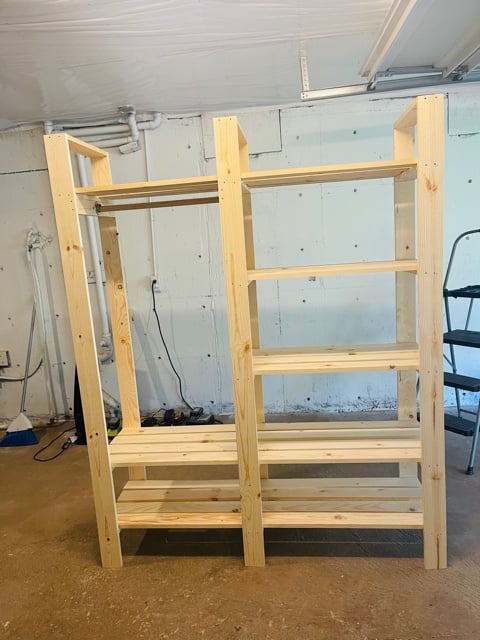
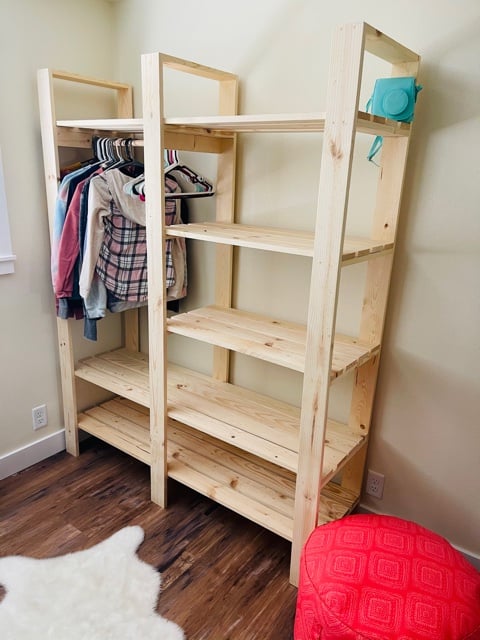
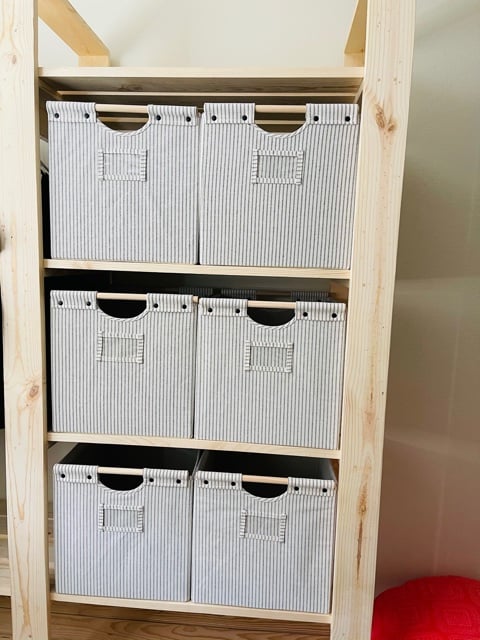
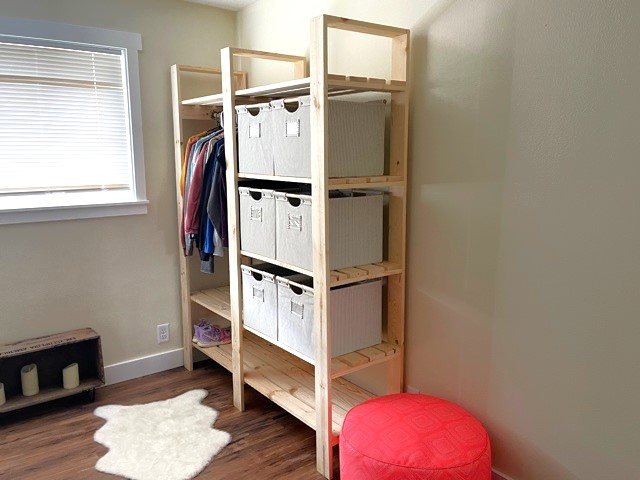
Freestanding Closet
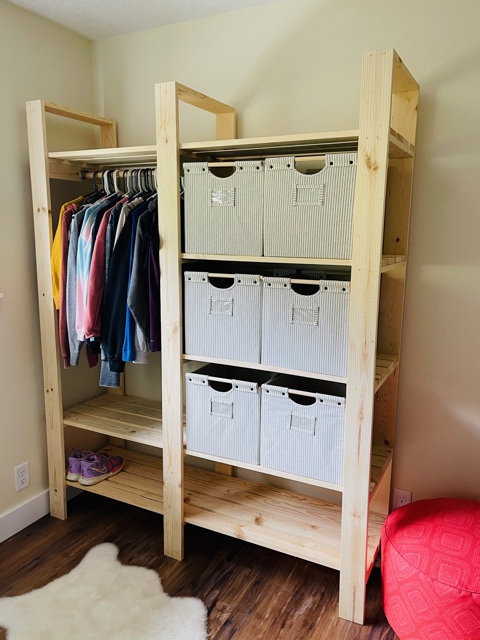
My daughter's room didn't have a closet, so I built one. This only took a couple of hours to build. I found the bins on Amazon and built to fit. It's 60" wide 18" D and 75" tall. I love this plan, it's super easy to modify the size and configuration!
Built from Plan(s)
Nightstands
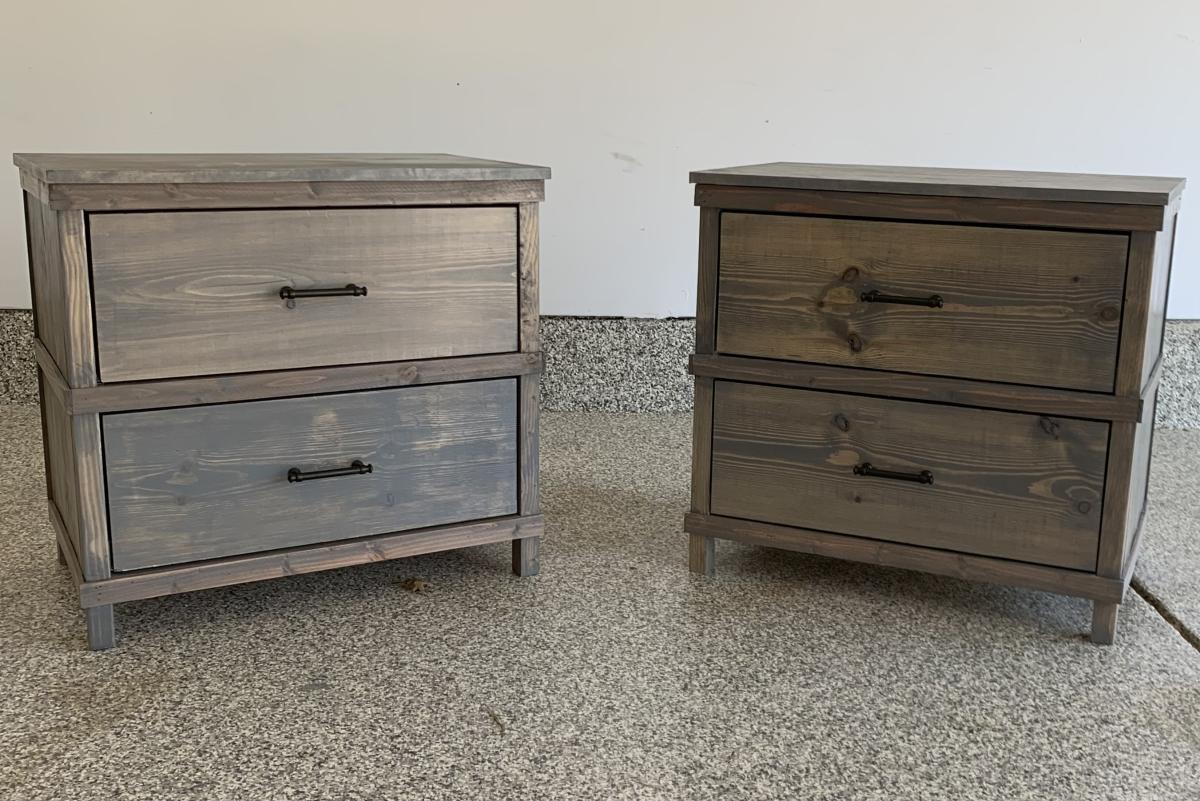
Fun and rewarding projects to finish. Took me way too long to finish, but 2 sever TBIs will do that to a person. Made a few modifications to the original King and nightstand plans but worked out fine. Thanks for these plans Ana!
Built from Plan(s)
Comments
Christmas Kitchen
Made a few mods. Super fun...
Built from Plan(s)
Estimated Cost
150
Estimated Time Investment
Weekend Project (10-20 Hours)
Recommended Skill Level
Beginner
Comments
Outdoor Sectional
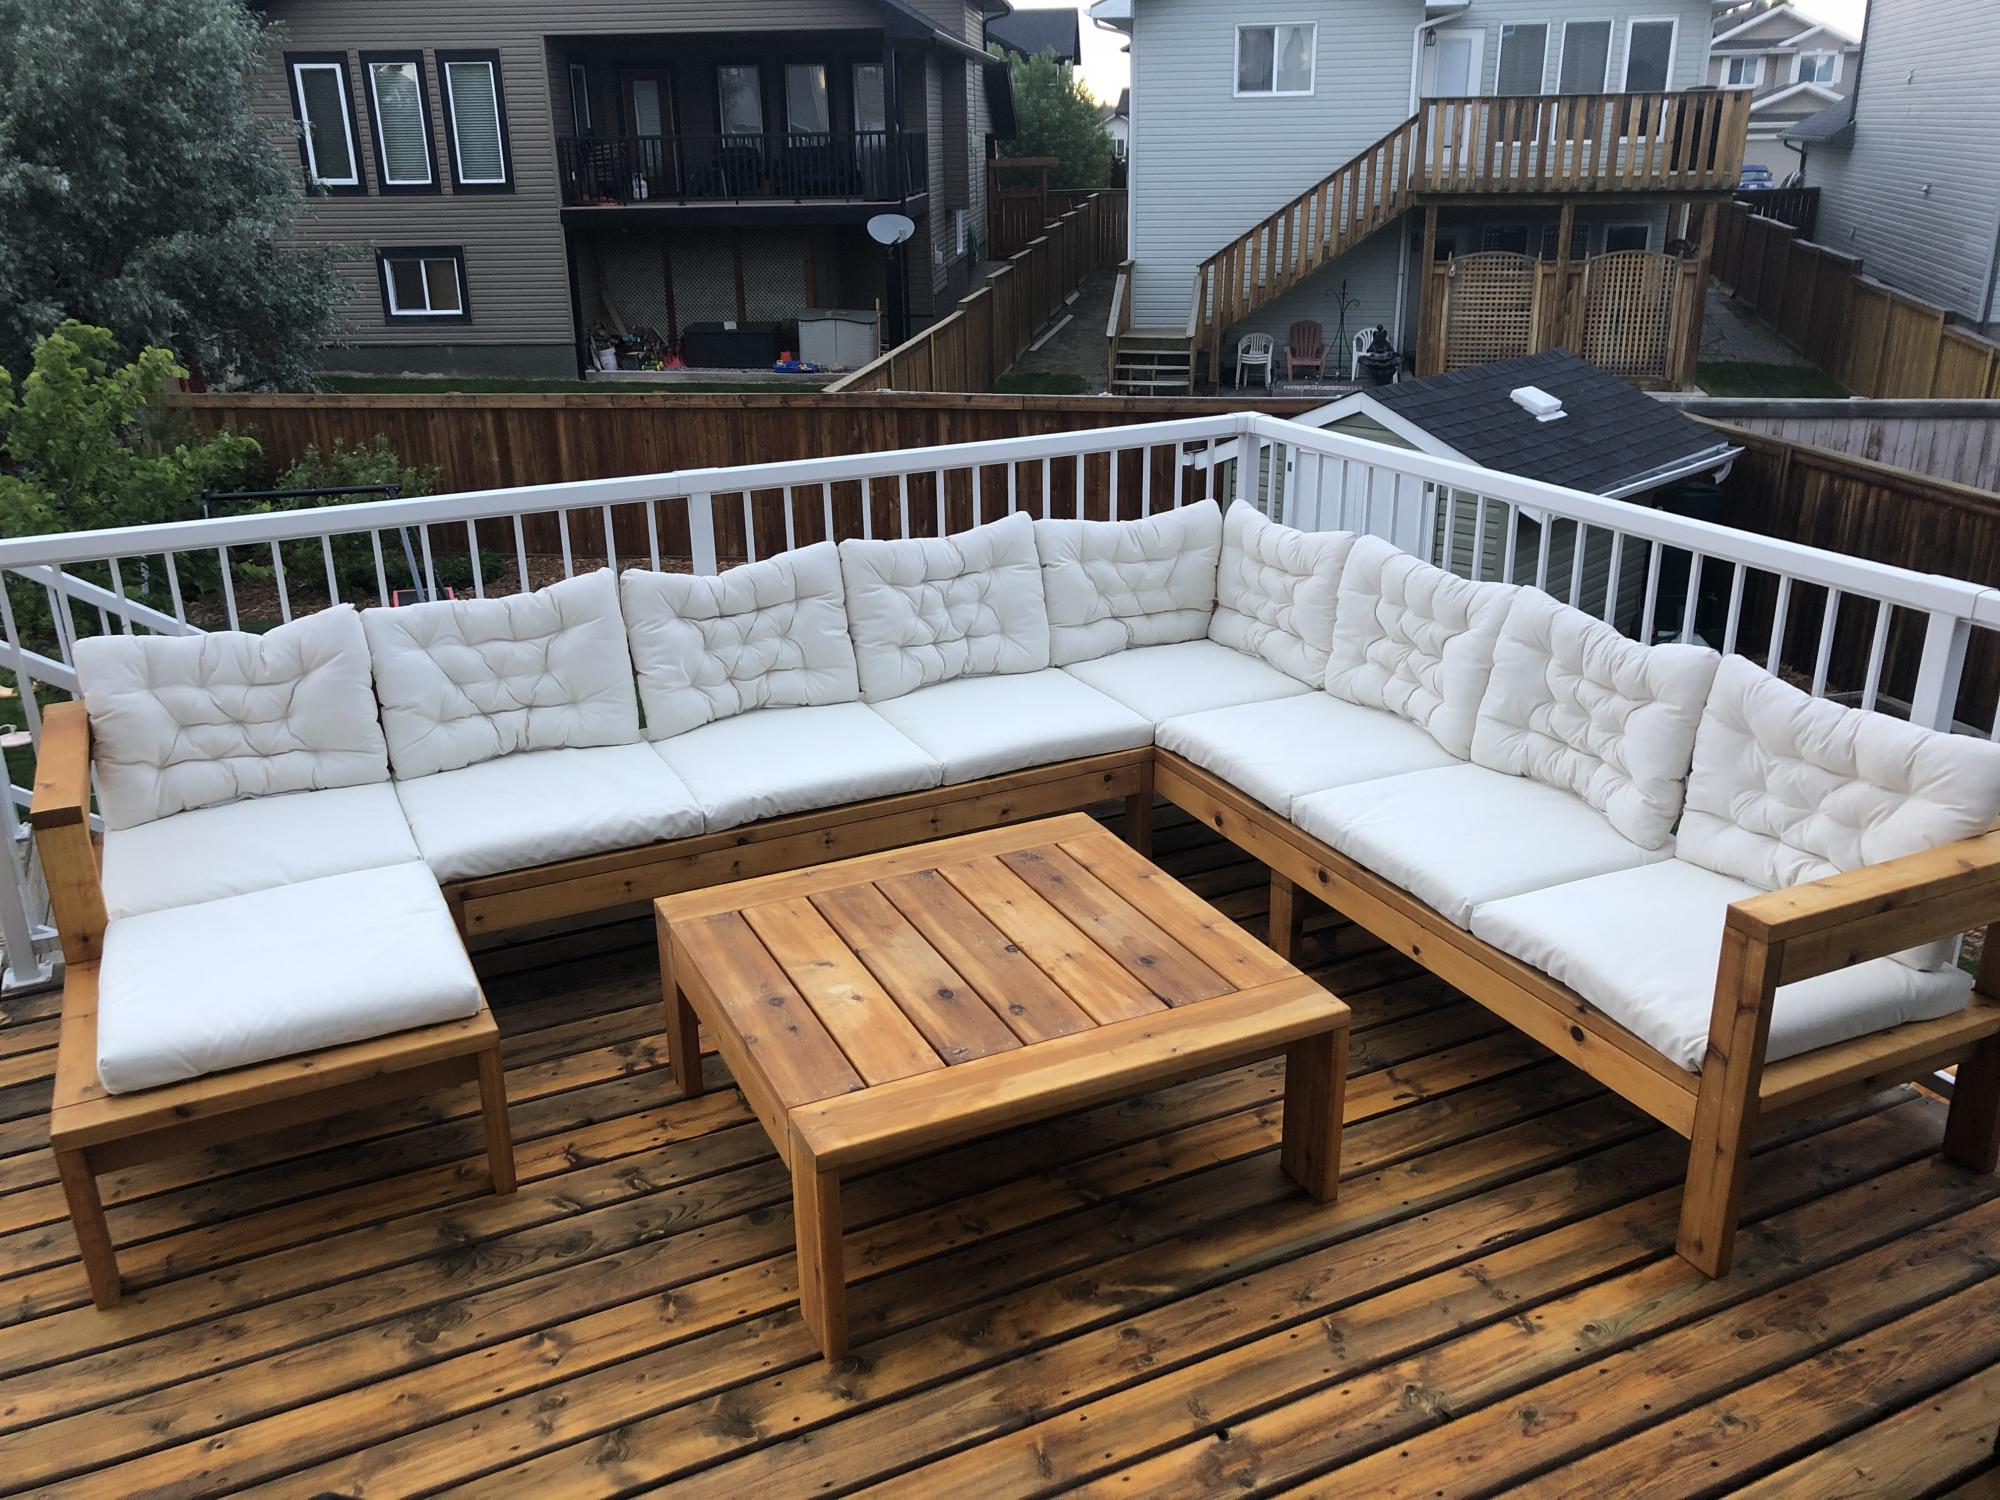
Modified the plans of the outdoor sofa and sectional piece to create this set, then added cushions from IKEA.
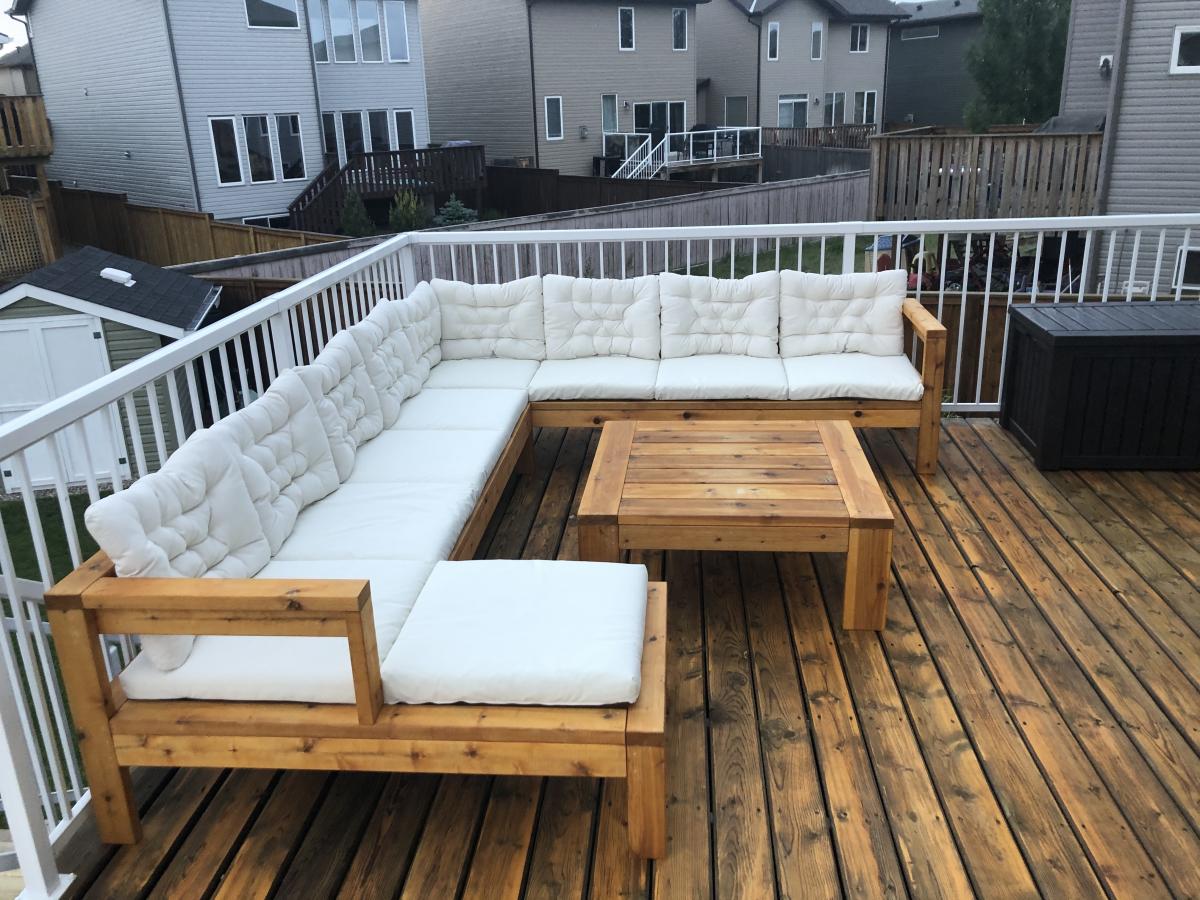
Built from Plan(s)
Finish Used
SuperDeck Cedar Tone Natural
Comments
Wed, 02/21/2024 - 10:27
I'm building the sectional…
I'm building the sectional this weekend, and saw your addition to the end piece and am going to steal your idea. Very nice.