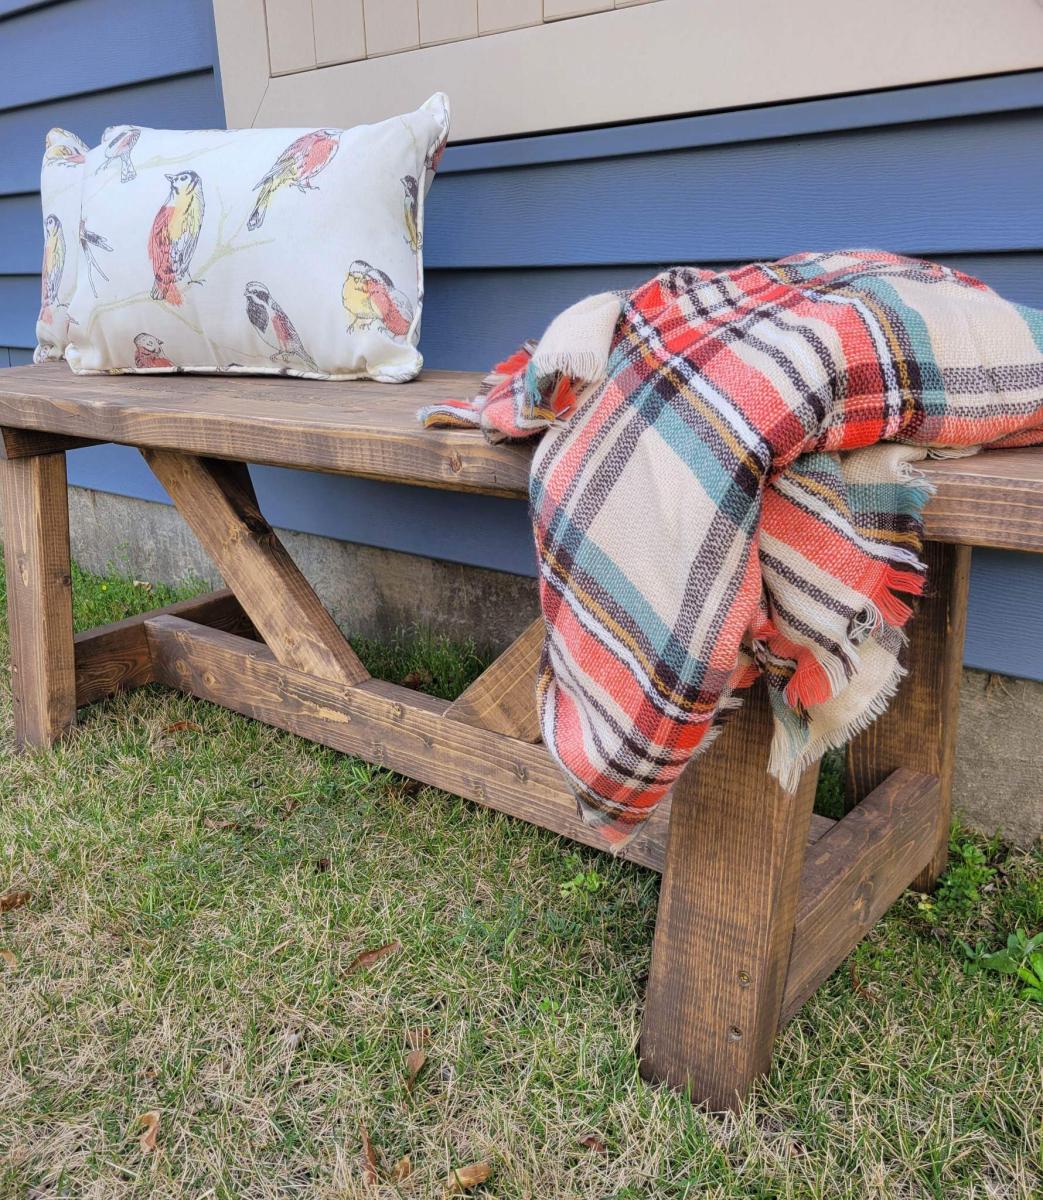
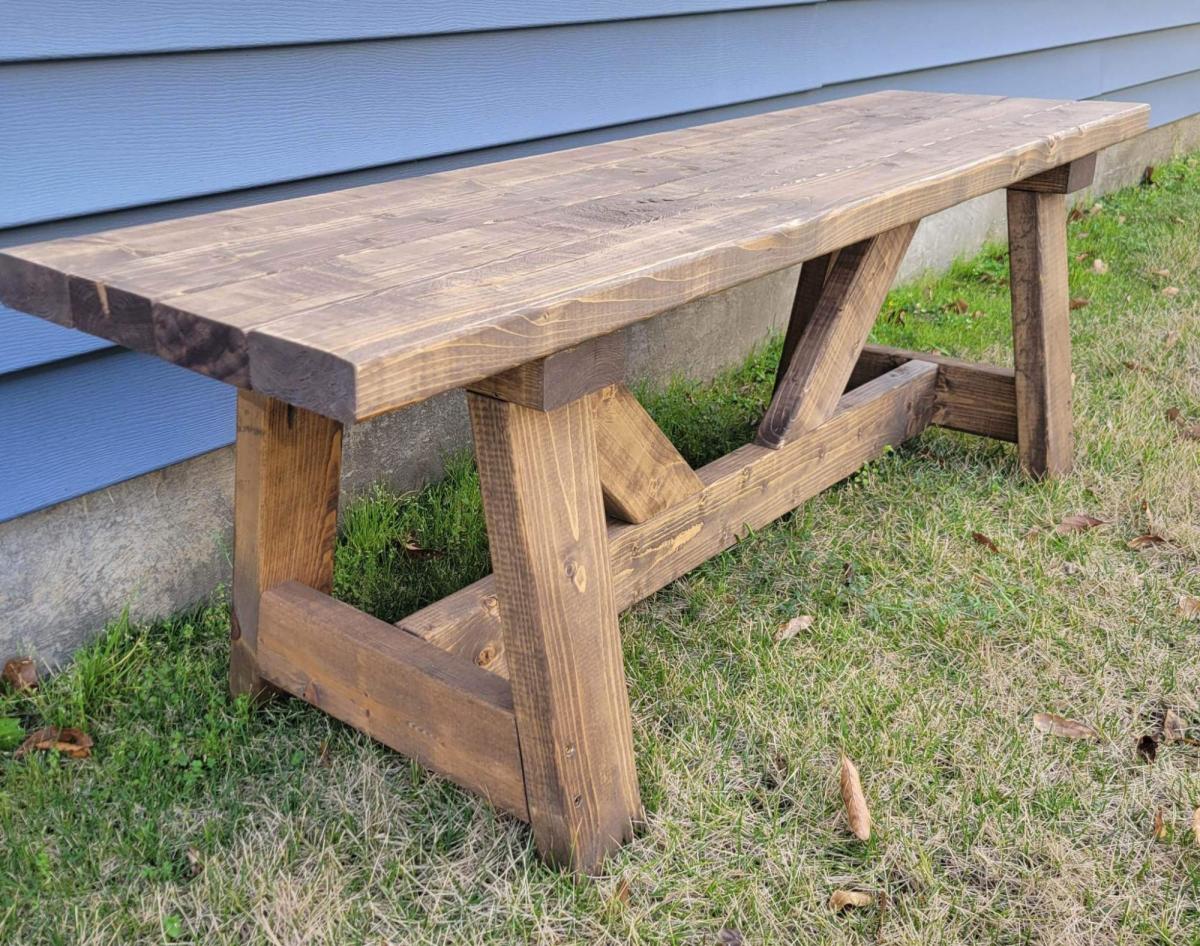
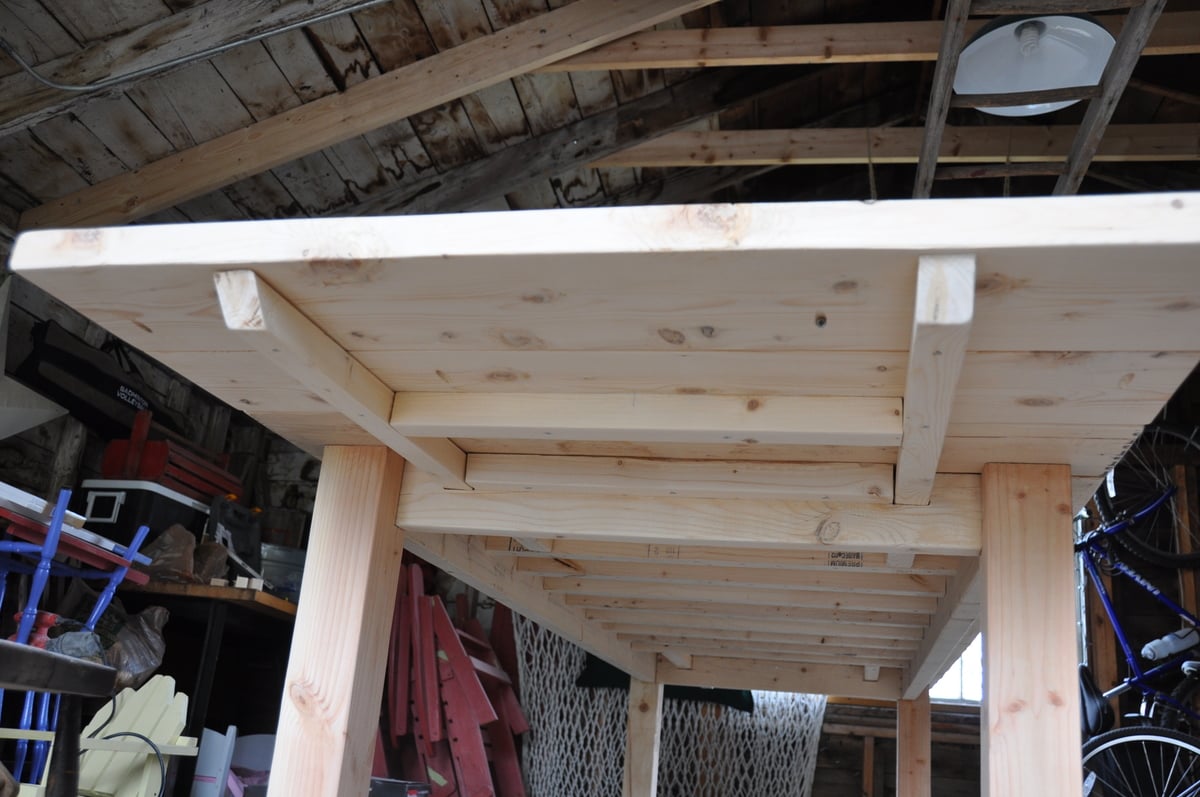
2x4 Truss bench
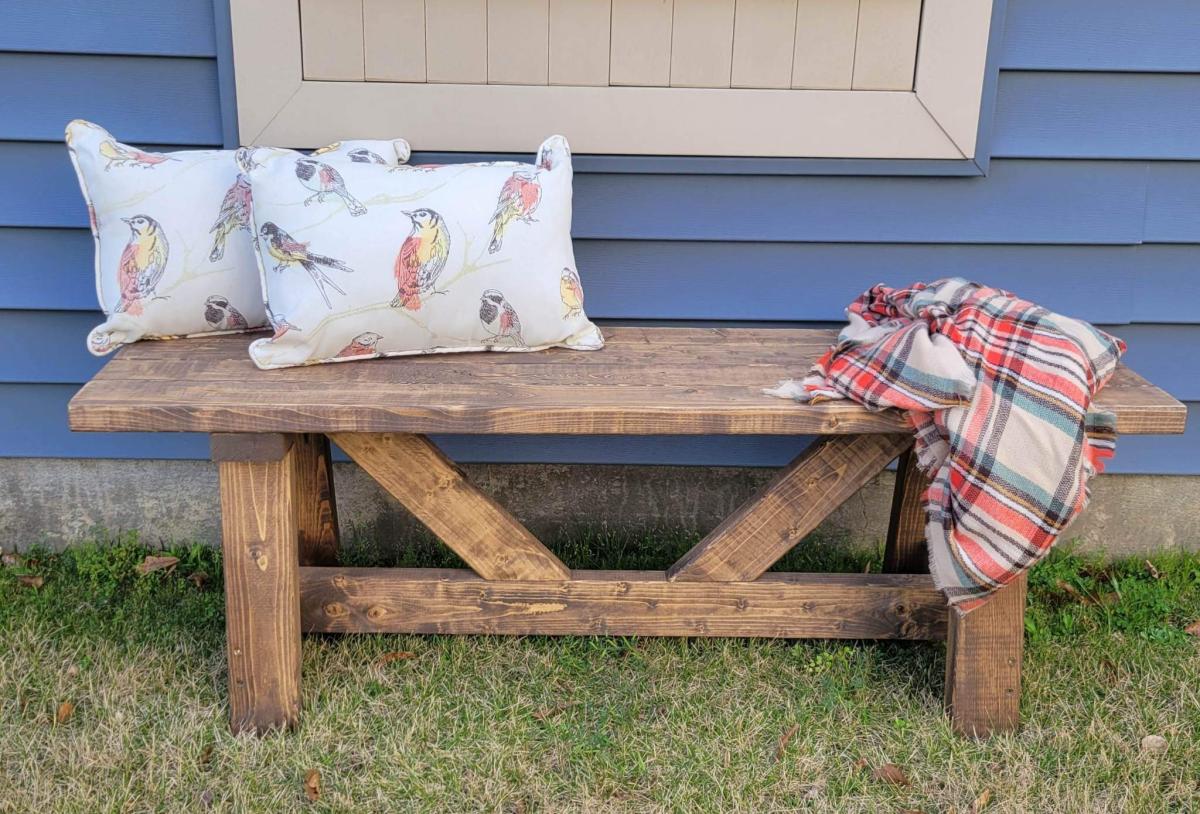
We've been eyeballing this plan since it was first posted. We tend to accumulate extra 2x4s from other projects. Great easy build, was able to knock it out in a morning. The finish is a custom blend.

Built from Plan(s)
We've been eyeballing this plan since it was first posted. We tend to accumulate extra 2x4s from other projects. Great easy build, was able to knock it out in a morning. The finish is a custom blend.
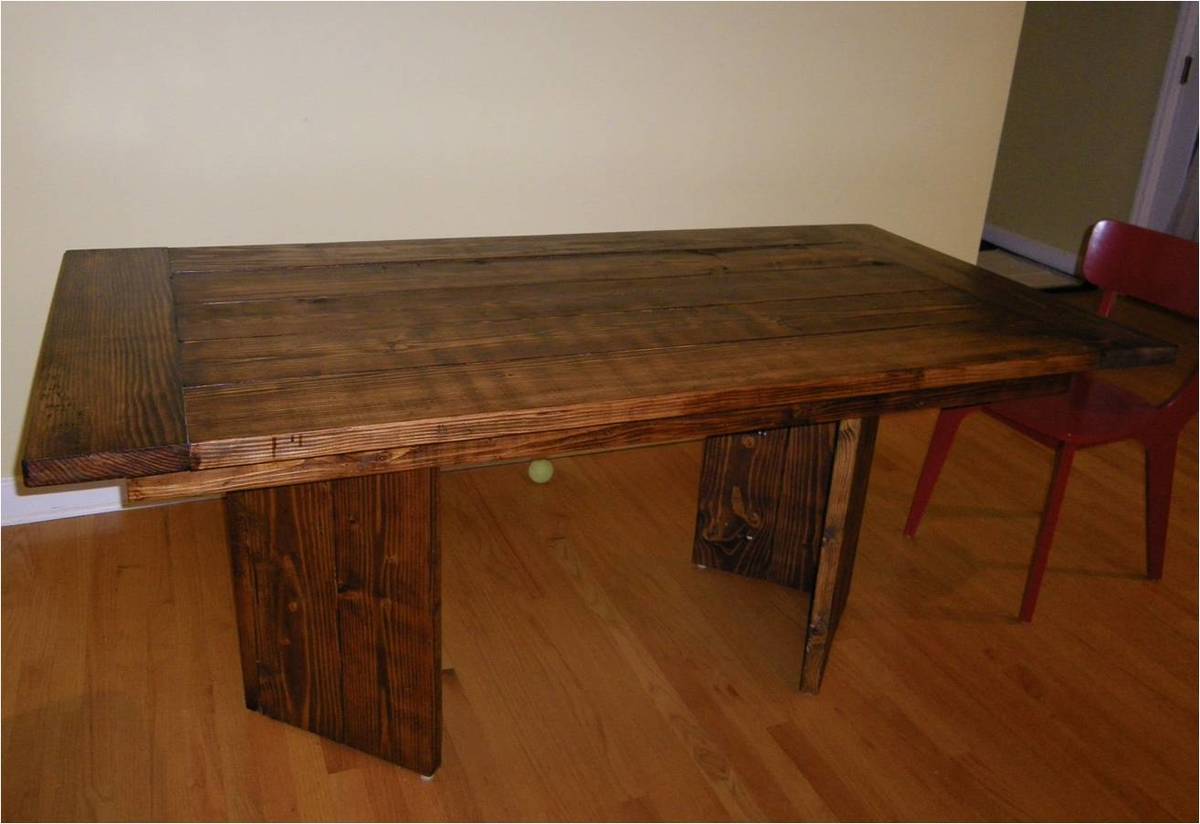
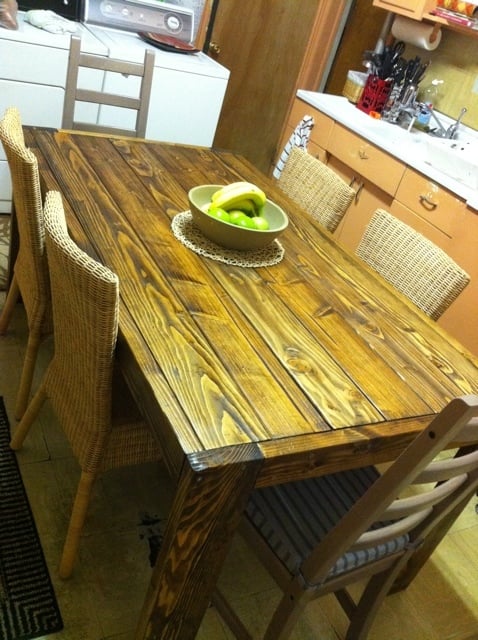
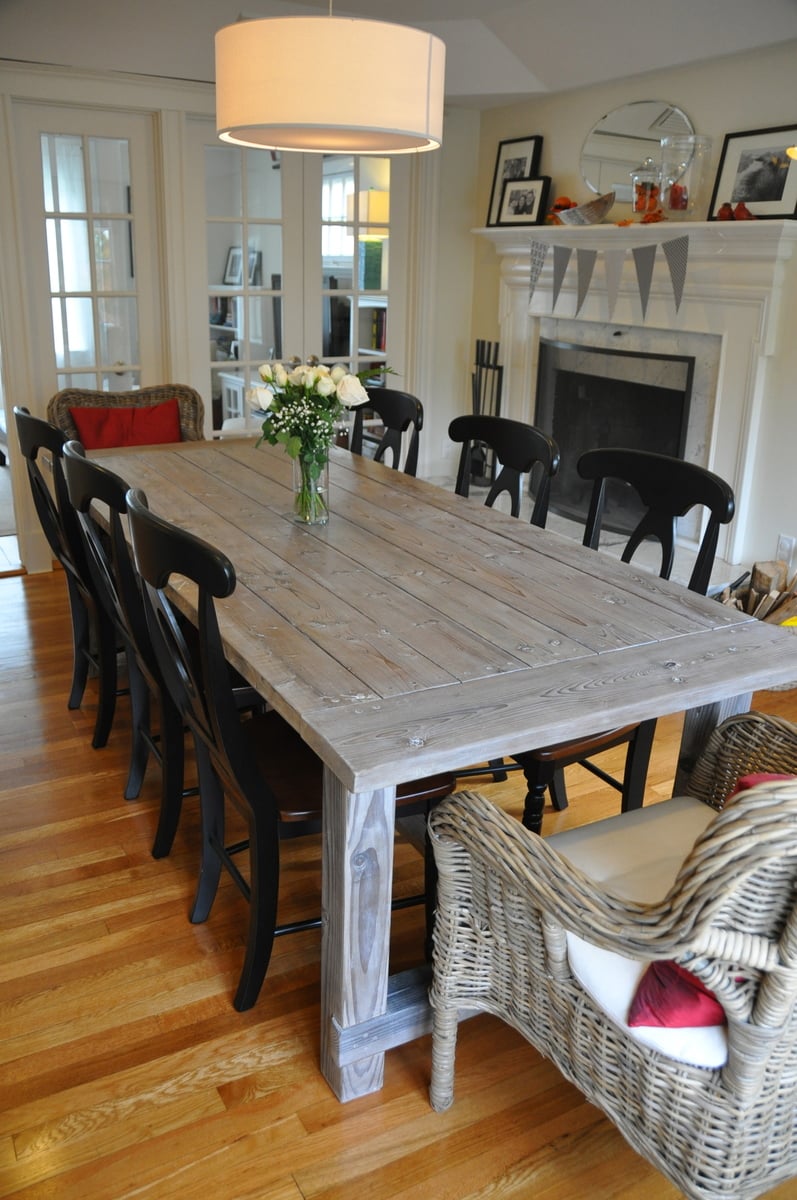
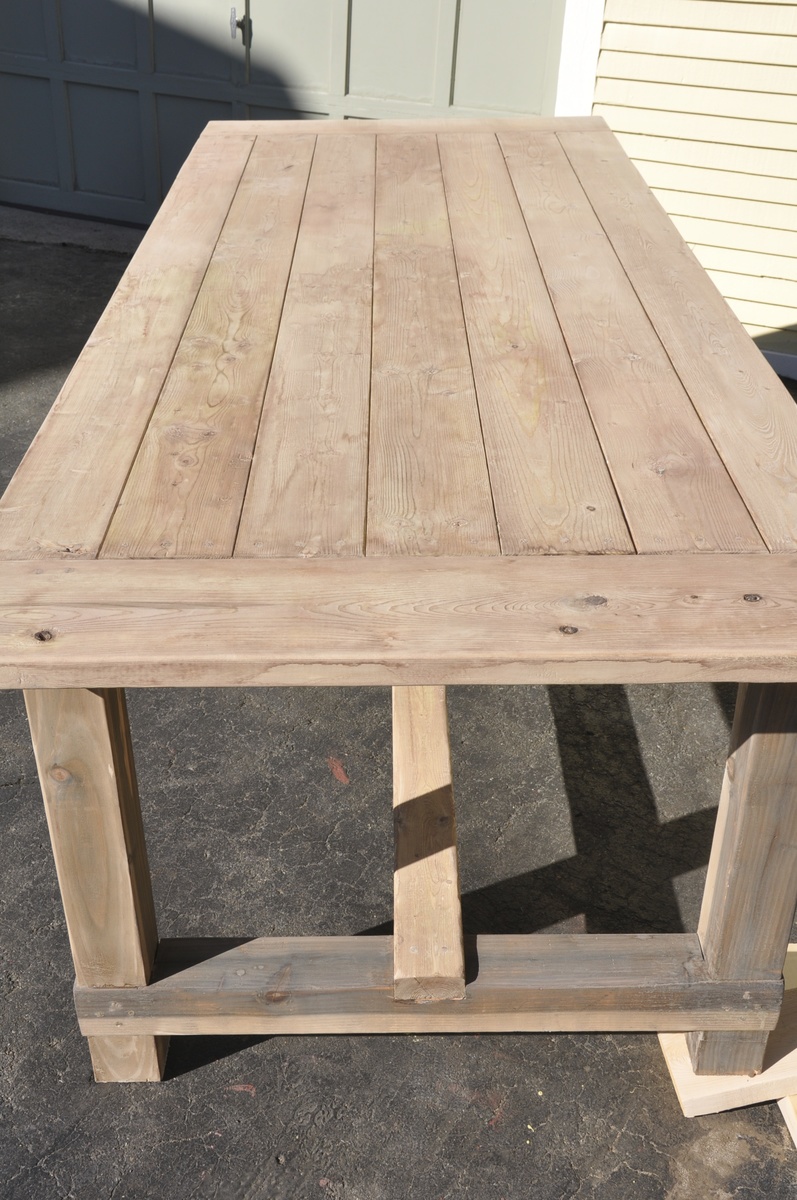
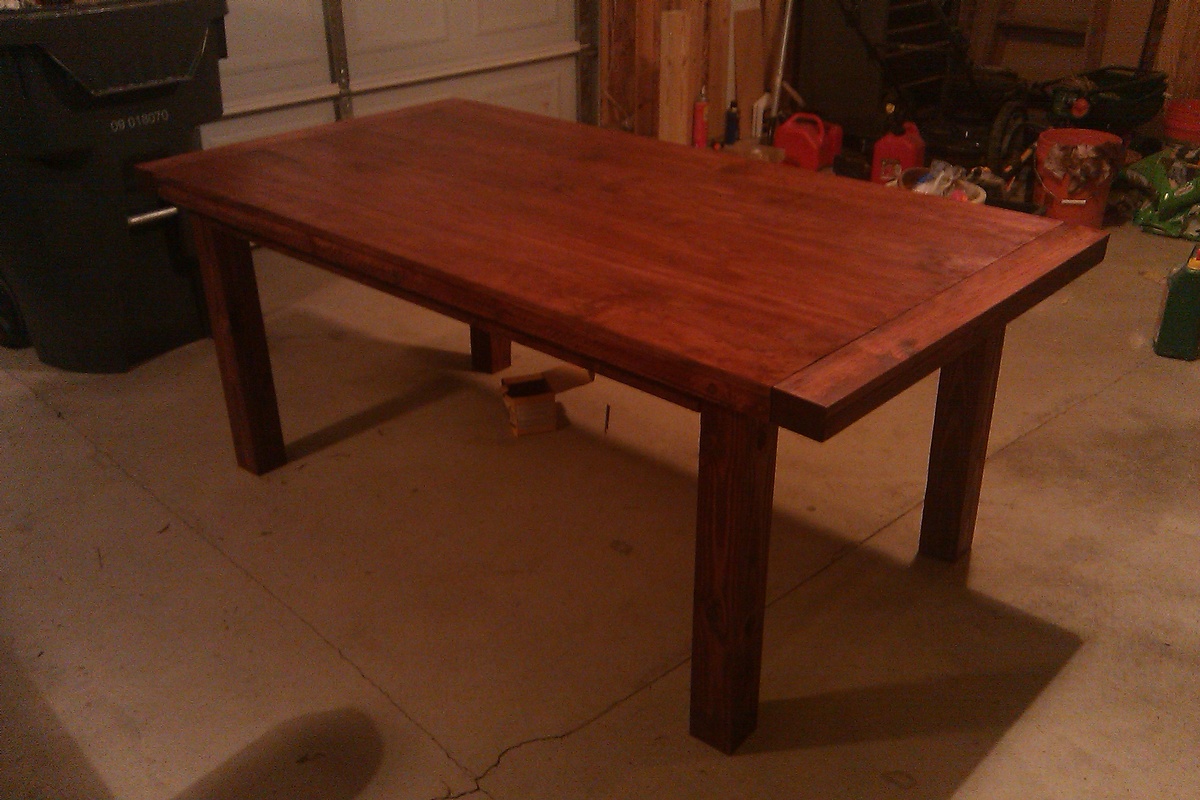
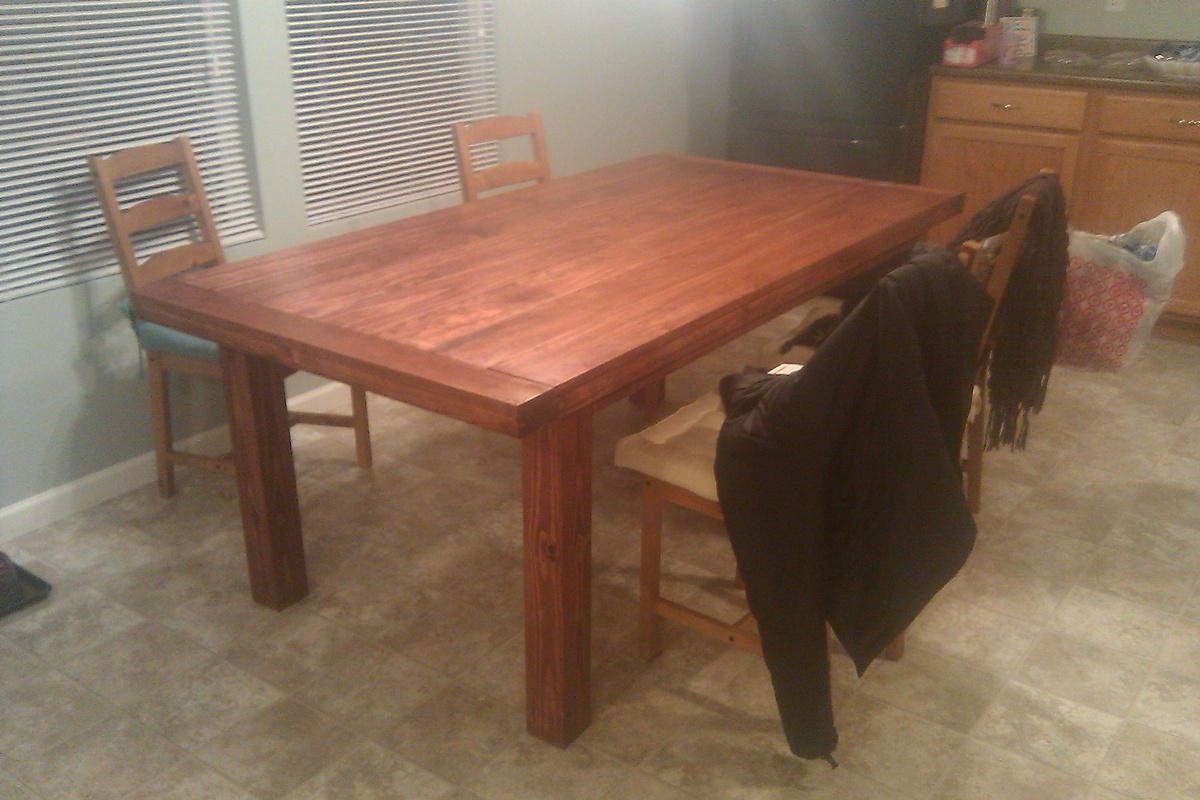
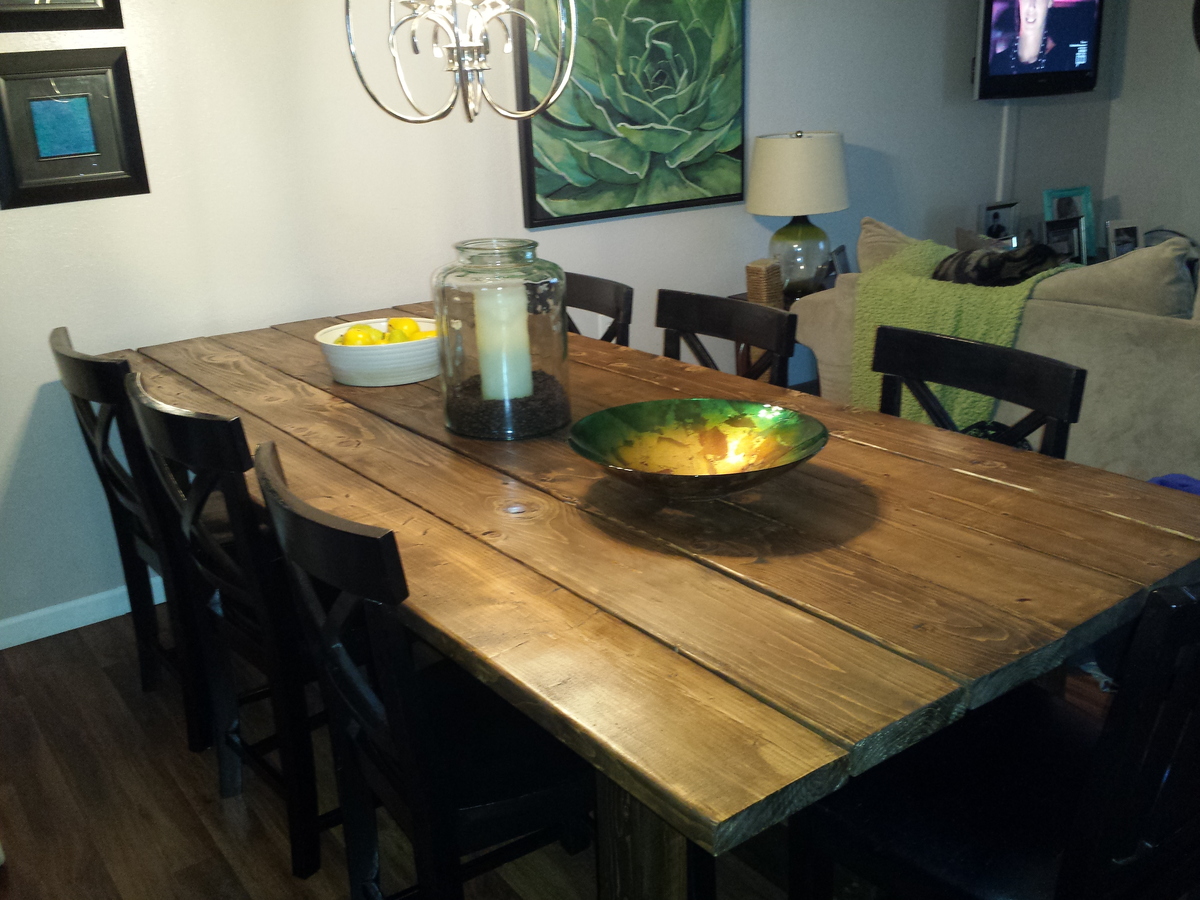
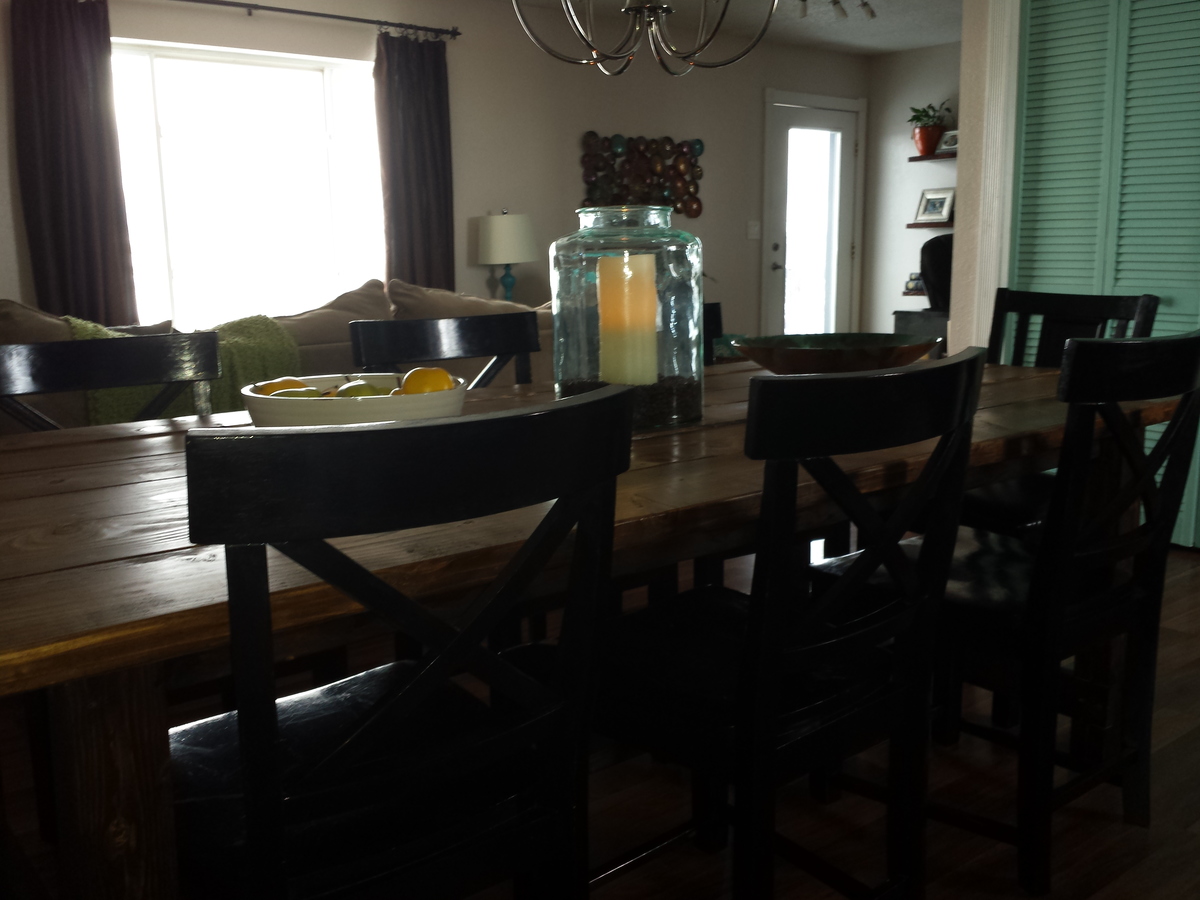
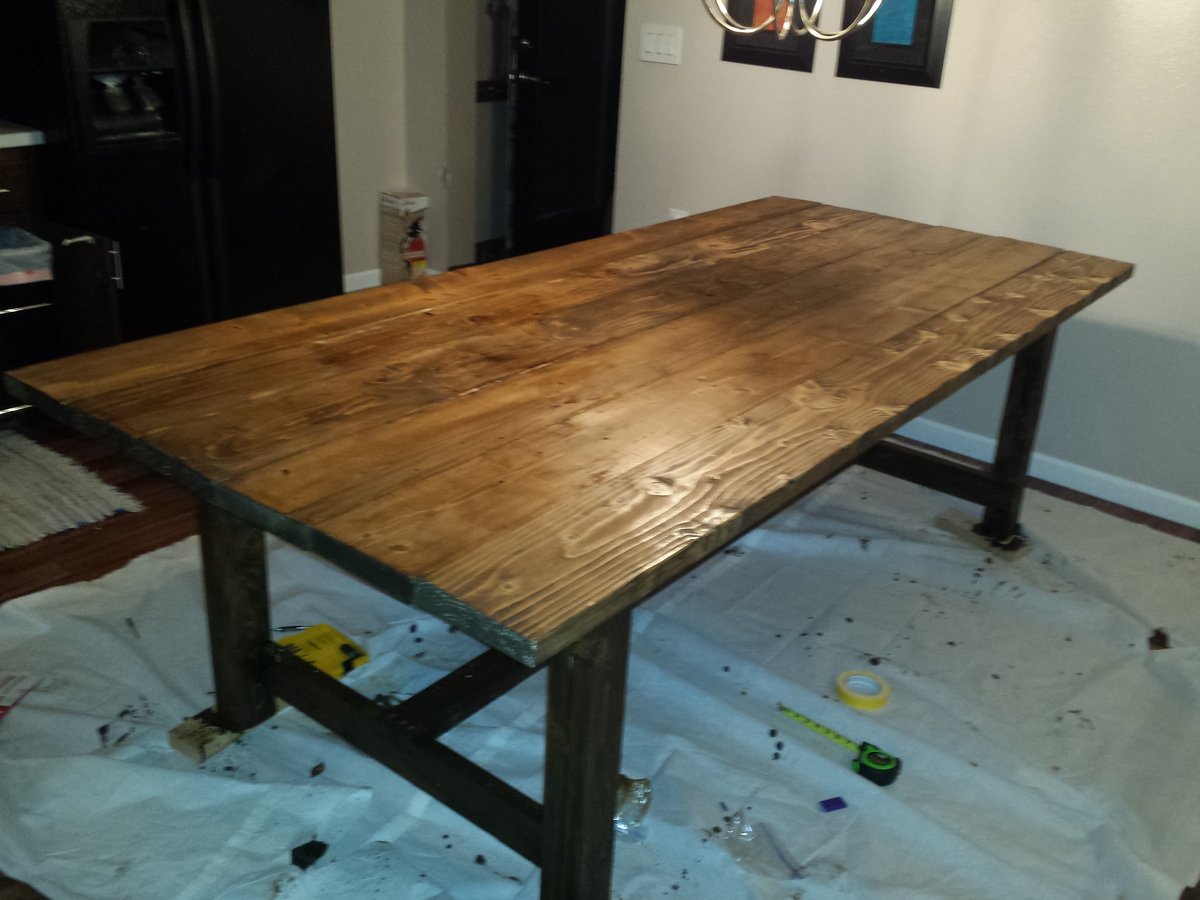
I looked at the Tryde coffee table and some of the brag posts and used that as my inspiration for my dining table. Other than that, it isn't too similar to any specific project plan, but borrowed aspects from several.
I spent about $70 on wood - douglas fir - and completed the entire project for under $150.
The legs are four 2x8 boards. I wanted to do something a bit different, a bit modern, and I think this achieved the goal.
This was my first staining project. Next I am going to build some matching chairs.
Full rundown: http://our-big-house.blogspot.com/2011/11/project-dining-table.html
Wed, 11/23/2011 - 08:19
I really like the way you did the legs. I may use that idea myself. You did a great job!
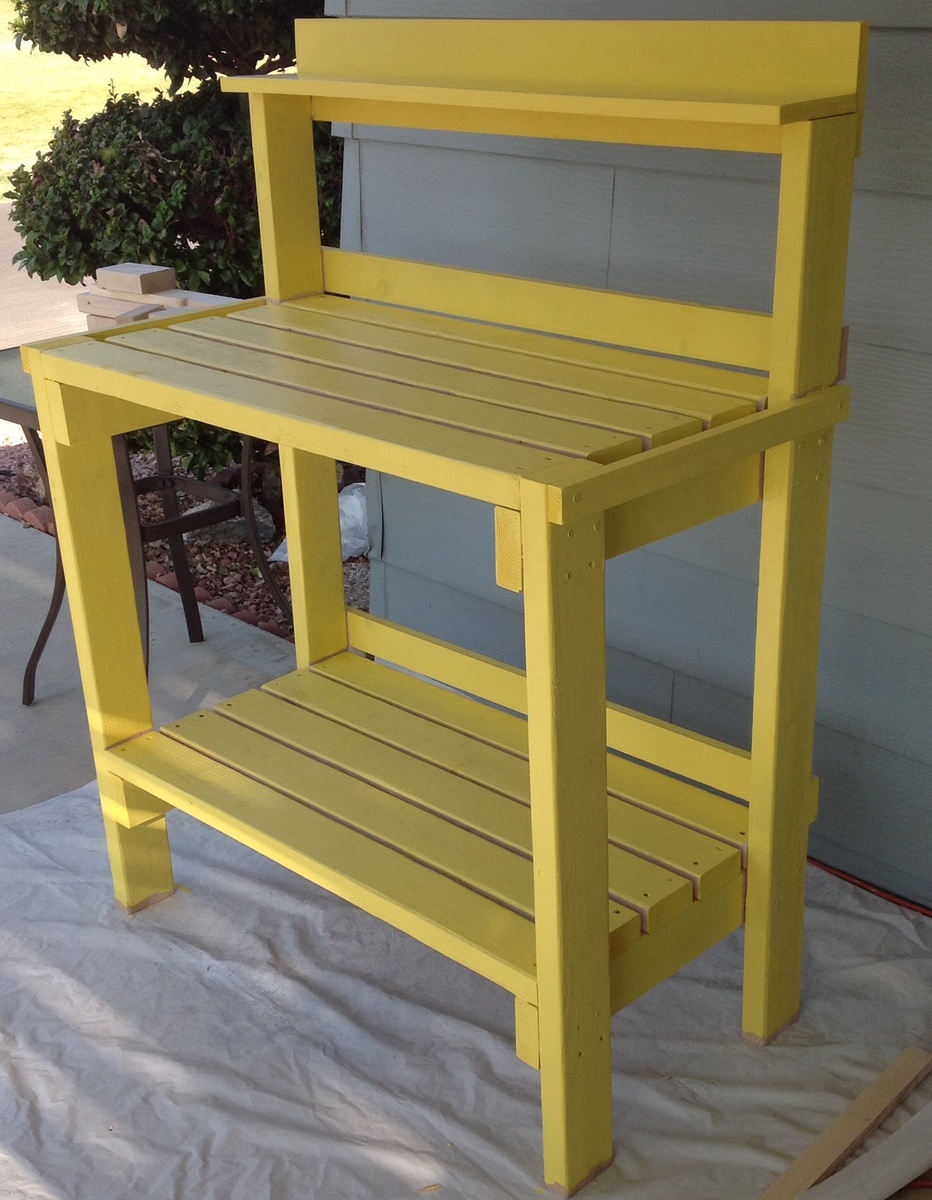
I'm so happy to have found your site! I've been wanting a potting bench for a while. Today the Hubs and I built this one in Daffodil Yellow! It is only partially painted, but I already love it! The hubs wants to build a modified one for his heavy electronics equipment. Thanks a Bunch!
My first big build and I love it! I followed the plans in concept but changed the materials. My frame is still 2x3, but all the trim and siding is cedar fence pickets. I love these! They need a lot of finish work (sanding for days!), but the look is so rustic and real.
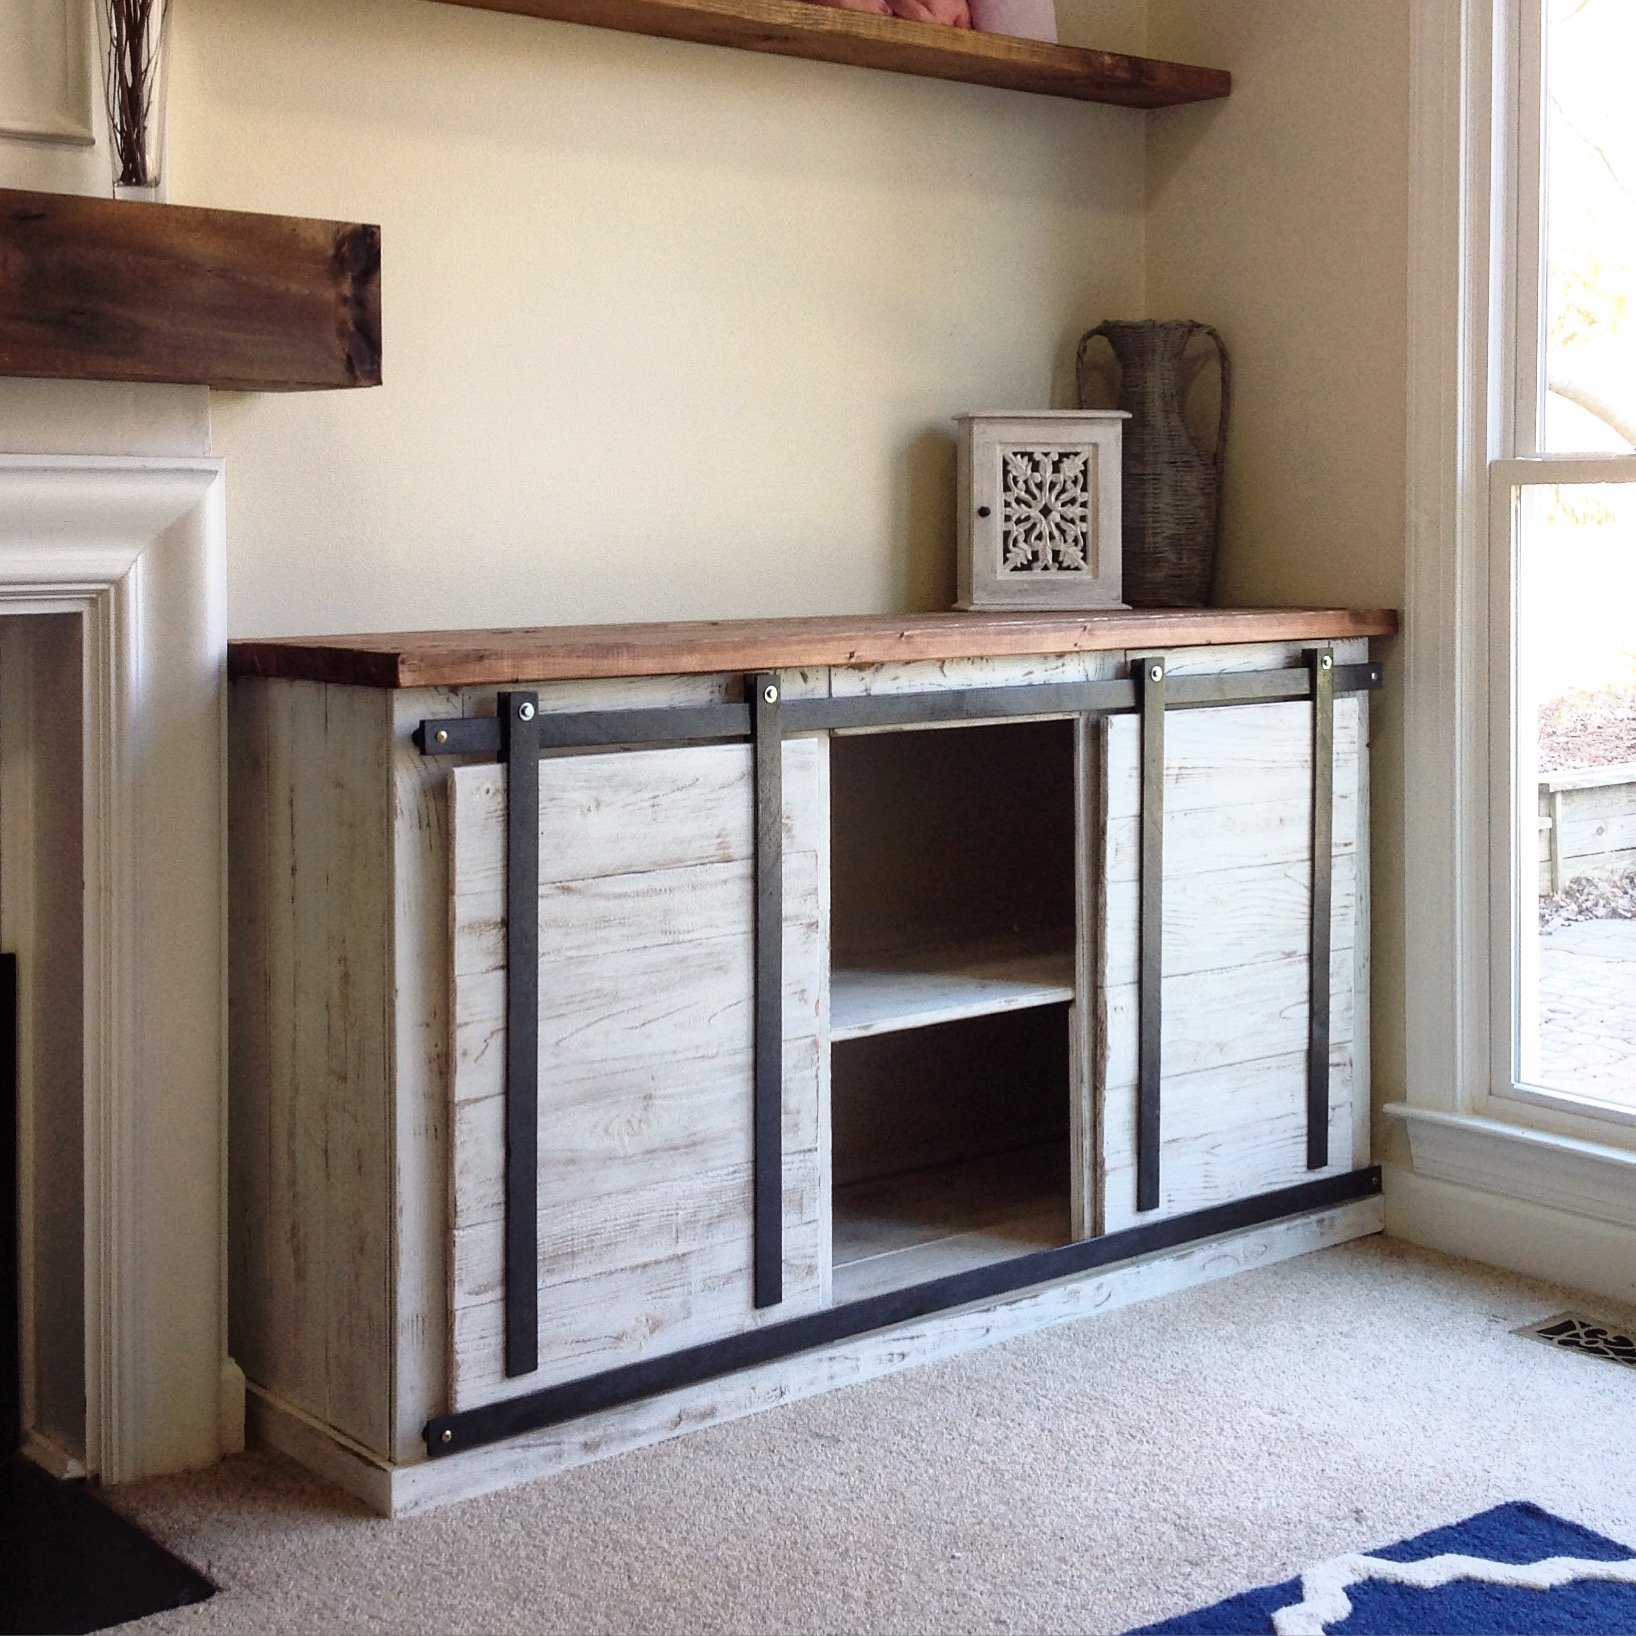
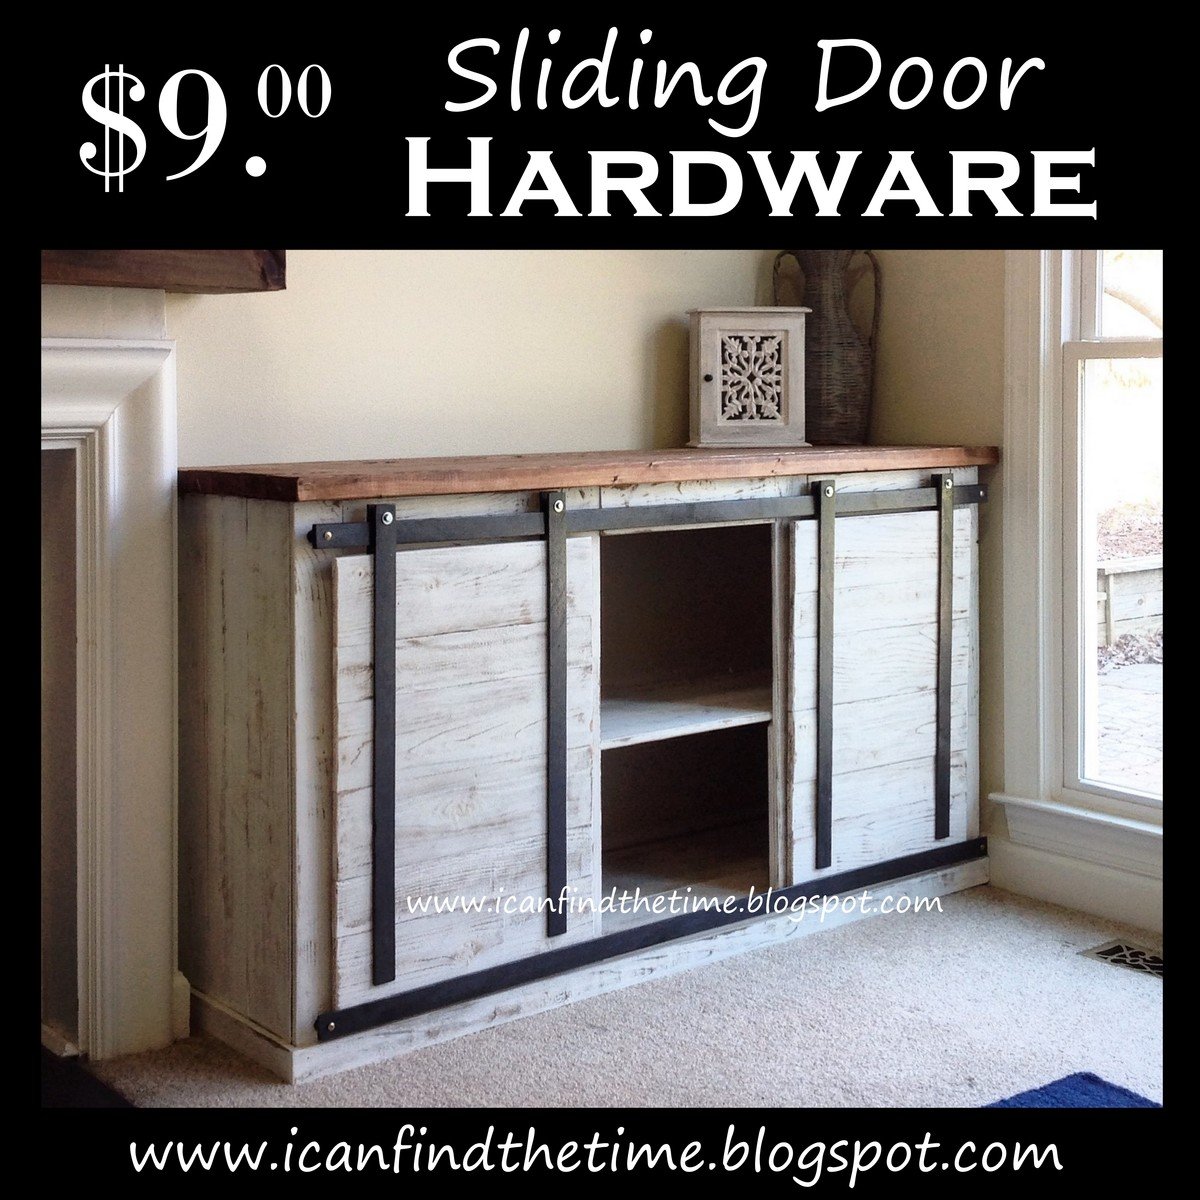
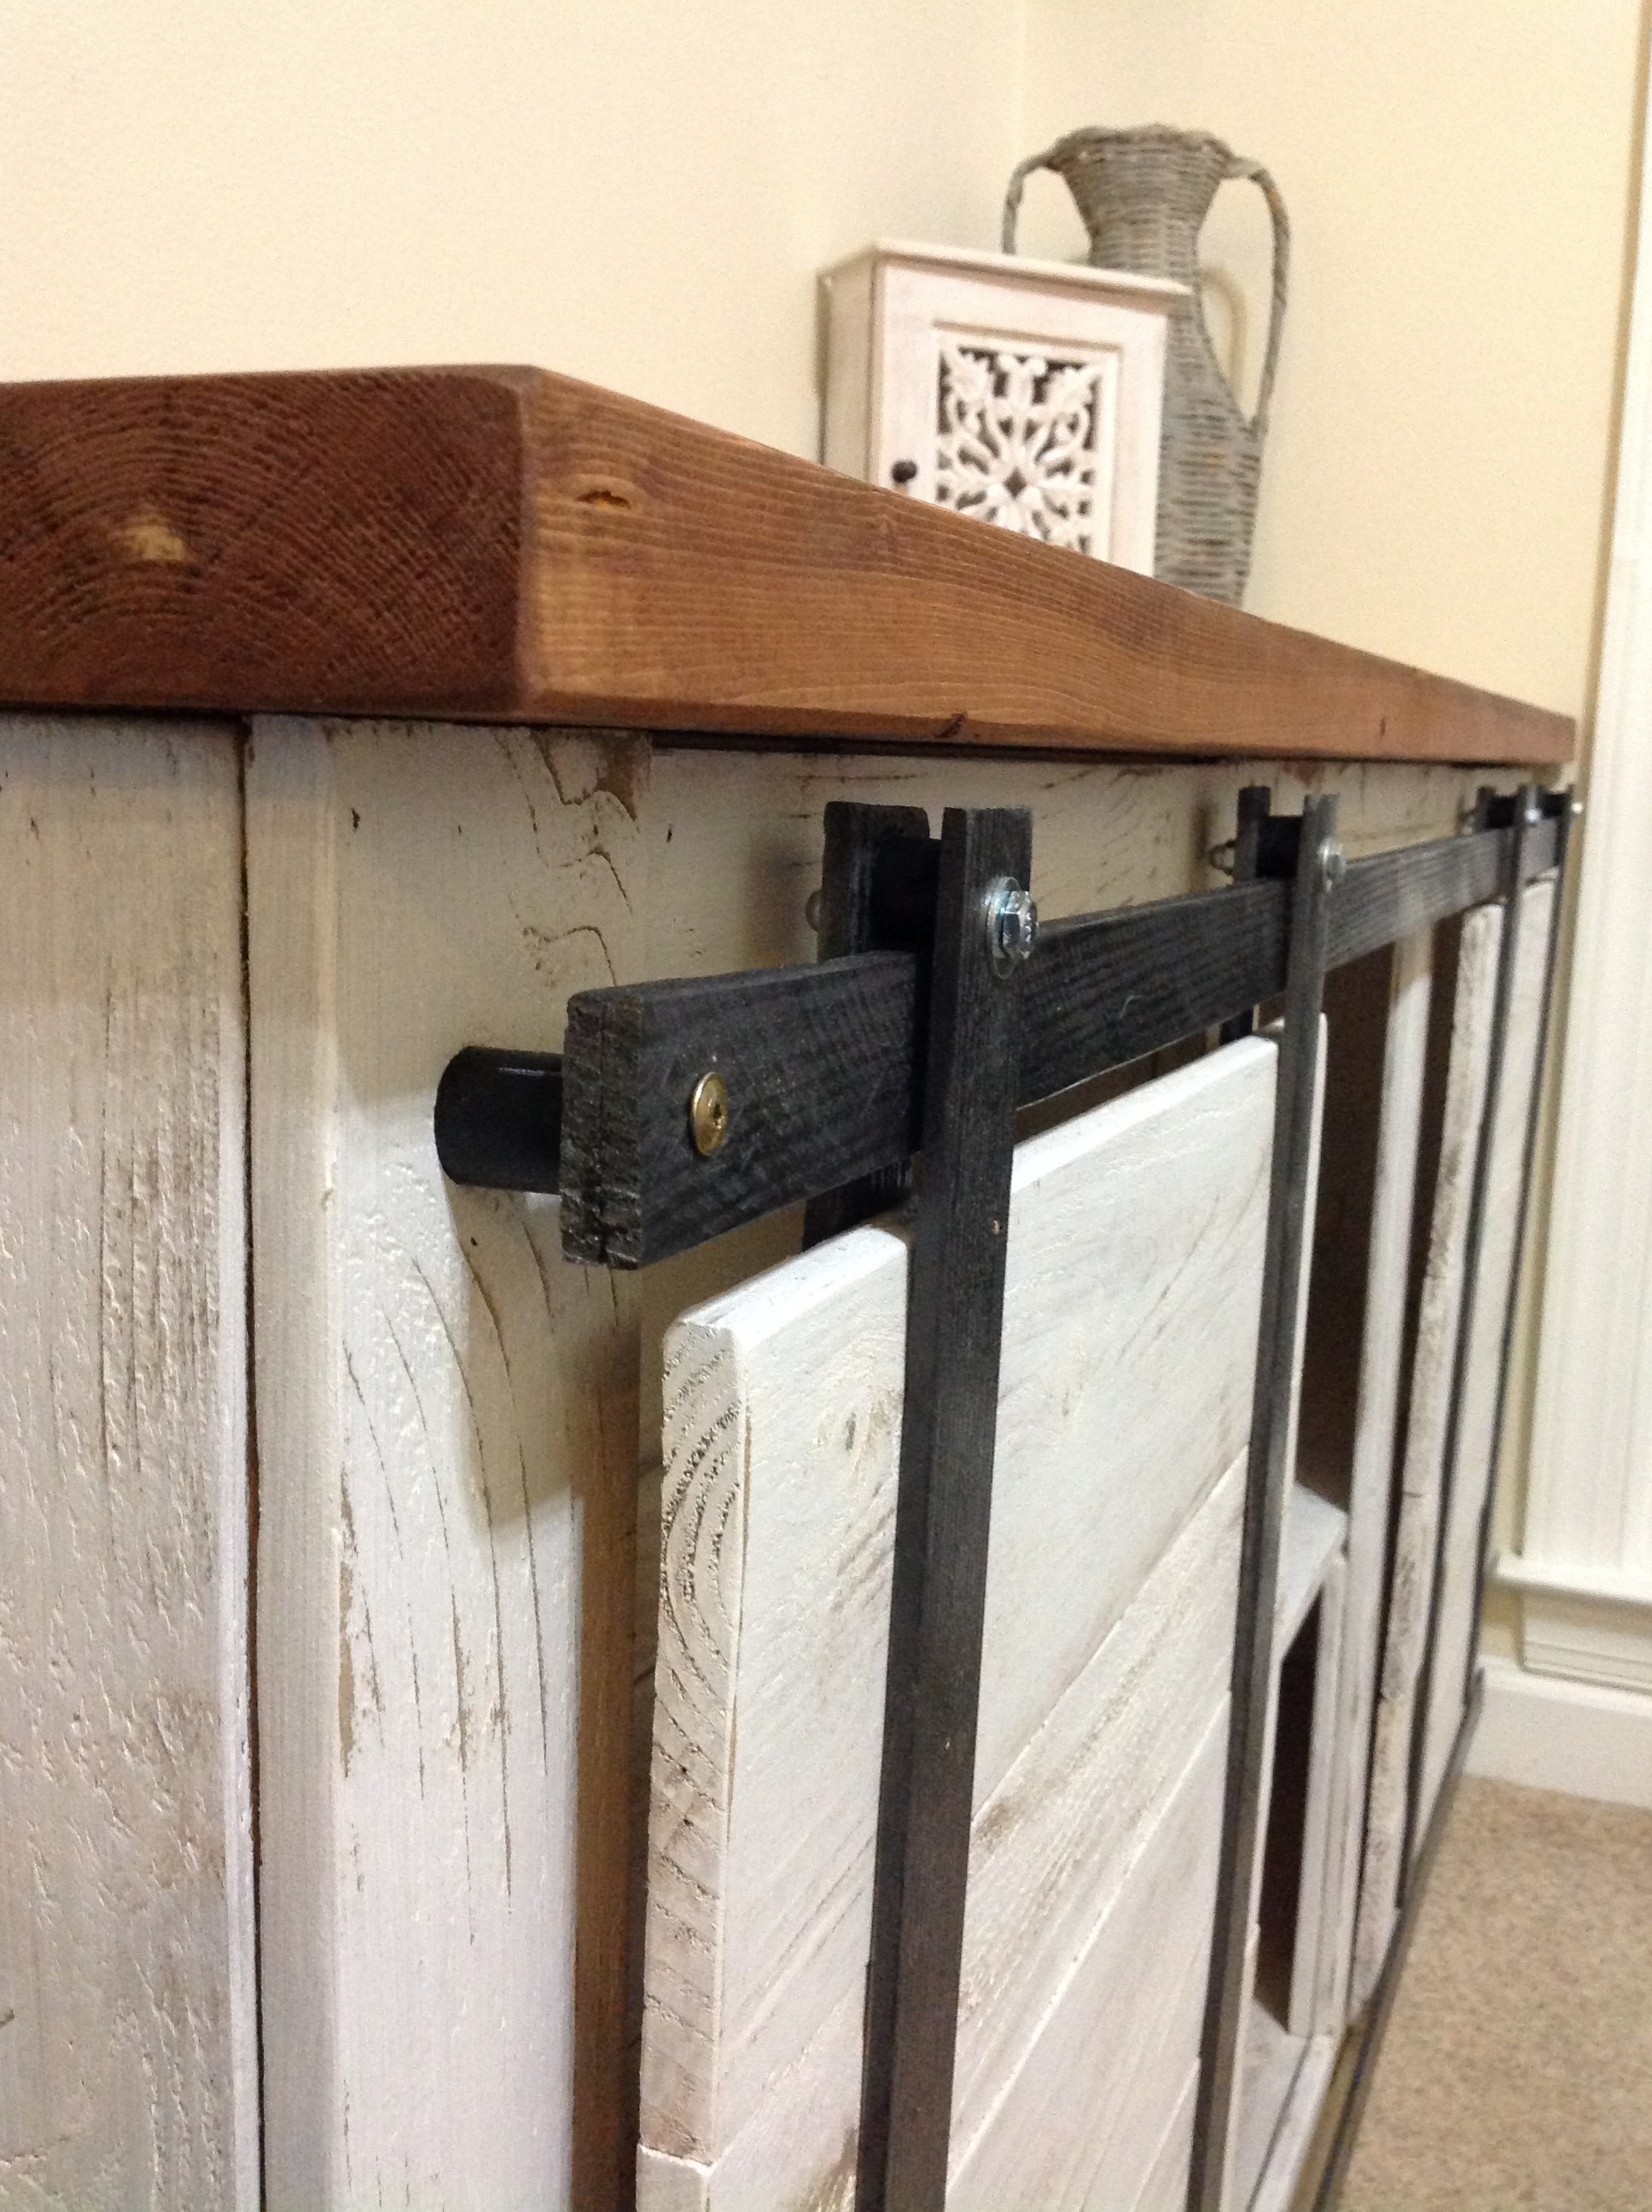
I also came up with a great way to get the sliding door look for only $9 in materials. The other tutorials I found online would have been $60+ and I just didn't want to spend that much. Make sure to check out my tutorial for the sliding door hardware.
My friend asked if I could build a closet for her daughters narrow room, this worked perfect. I have used this plan many times now and each outcome is different and customized for the space.
Started on Saturday Afternoon around 5pm and finished building on Sunday, sanding on Monday, stain and poly on Tuesday and we ate Thanksgiving Dinner on it on Thursday. All that is left is the wood putty! Not perfect but VERY happy with it :)
This was my first build and I learned A LOT and watched A LOT of youtube diy videos. The main take-away from this project is not to build in the freezing cold if the finished project is for inside. I finished this project in below freezing temperatures and I noticed that the wood expanded (increasing slightly the gap between the finished boards on the top) when it was brought inside.
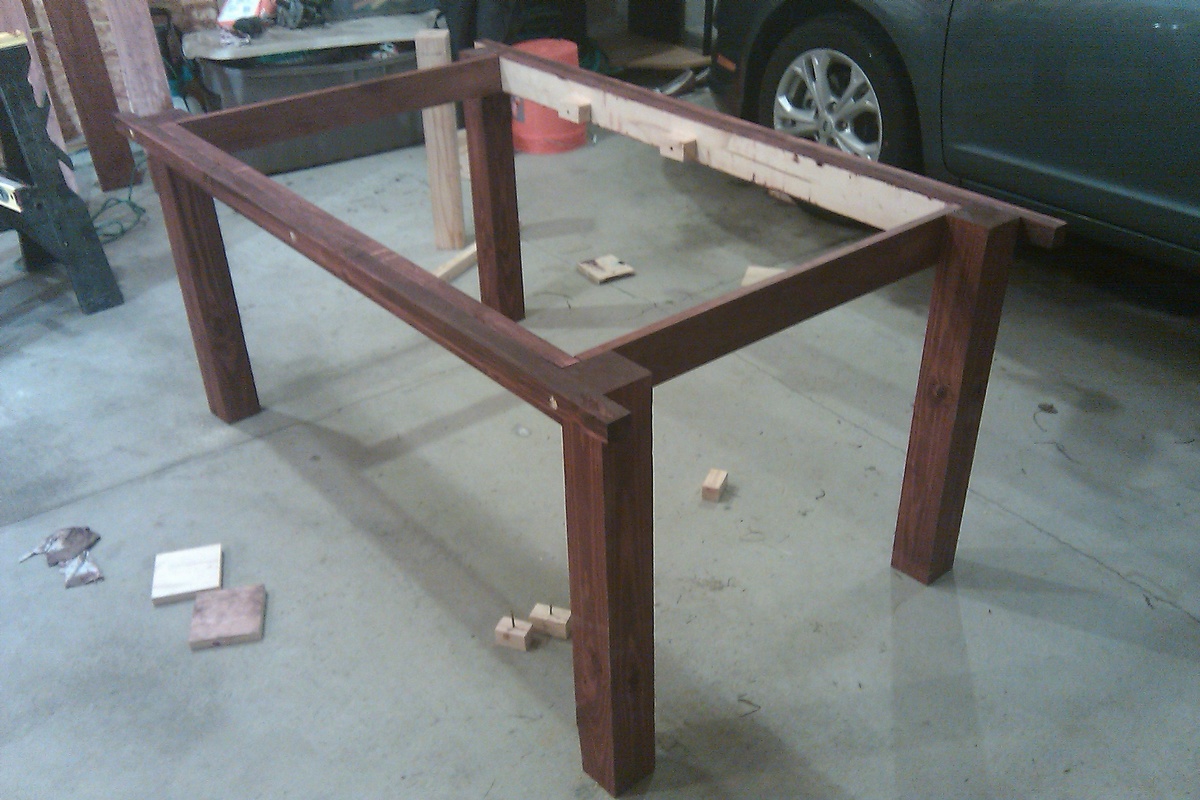
I built this from the original farmhouse table plans with no kreg jig although I did buy and use a pocket kreg jig to make the extensions. The main modifications were using 4x4s such as were used in the Country Living magazine spread that inspired this build and also making modifications to allow the addition of 15" extensions at each end of the table's bread boards.
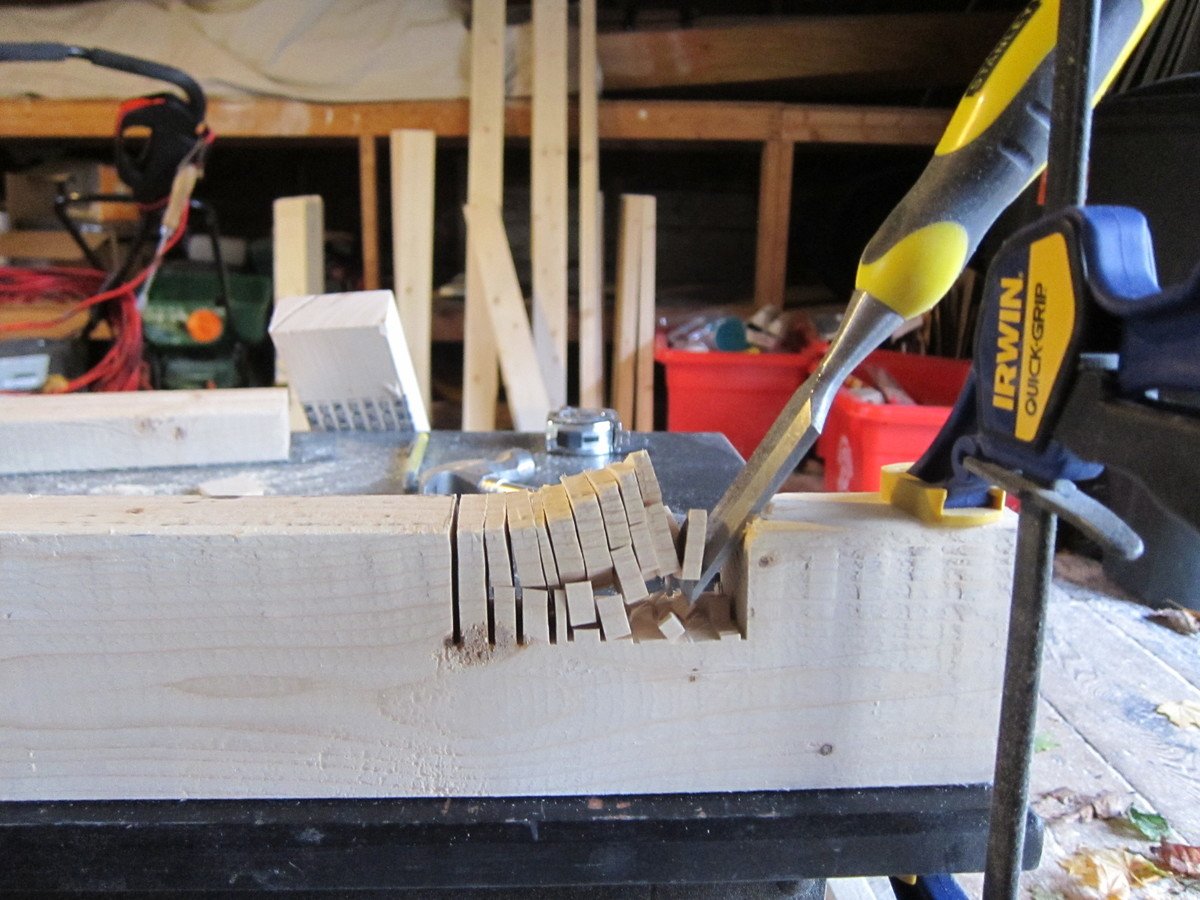
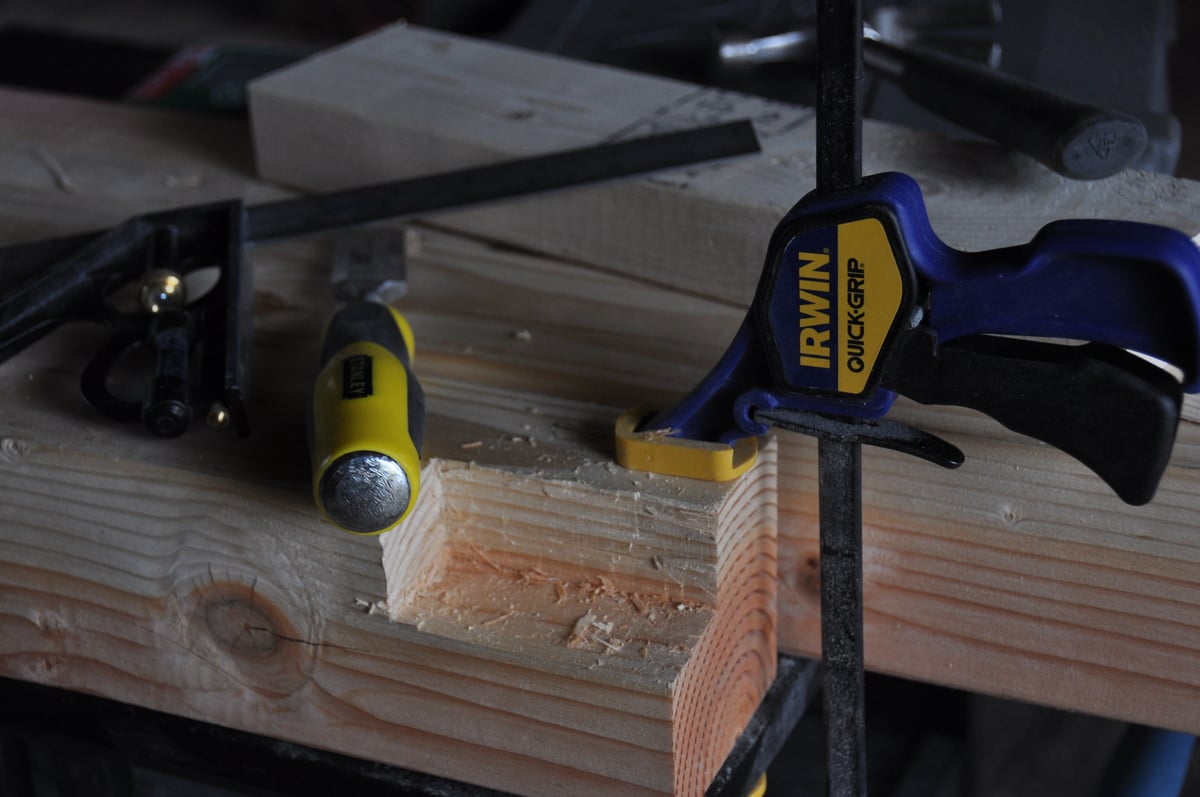
My first challenge was figuring out how to build with the 4x4 legs instead of the 2 2x4s screwed together. In order to accomplish this i had to use a chisel to create the corner lip that the table top frame would sit on. I added photos of this so I hope it will help someone. Chiseling these 4 corners (one on each post) only took an hour or two and was so worth it for the look of the 4x4s. Just measure carefully and work carefully with a sharp chisel. I actually removed half the wood by sawing off the corner at a 45 degree angle. Remember when cutting your boards for the table ends that a 4x4 has different dimensions than 2 2x4s screwed together. Compensate for this in your cuts.
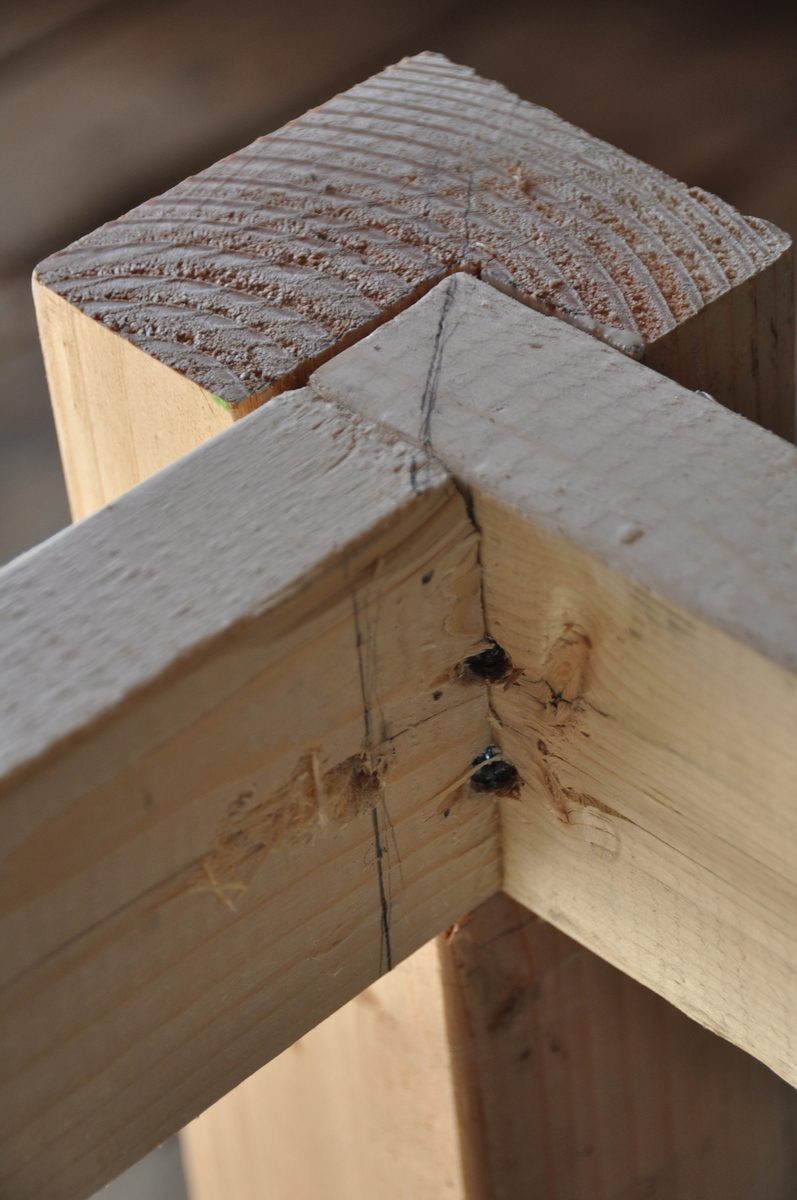
Another challenge was hiding the screws on the table legs and table top. I was leaving the finish natural so didn't want to use wood fill. I accomplished this by getting a countersink bit and then buying wooden dowels the same diameter. For these screw holes, after finishing screwing, I put a dab of wood glue in the countersink hole, inserted the dowel as far as it would go, used a fine hand saw to cut off the dowel flush with the table and then used a hammer to make sure the dowel was in tight and flush.
I had trouble figuring out how to attach the table top frame to the table legs with the long screws from the plans so I included a picture of this step. Its really easy but I was not able to use three screws as the plan calls for. I used two instead and it has been very solid. I used the long screws as proscribed.
Finally, I wanted to build extensions (2 2x8 boards kreg jigged together) so I could increase seating up to a max. of 12 persons, so I needed to cut out 2x2 gaps on the table ends. I also included a picture of these in place. To make room for the 2 2x2s that extend under the bread boards and table top to brace the extensions, I left out one of the 2x2 cross beams at each end of the underside of the table (the boards that the table top boards screw into).
I hope this is helpful to you!

Mon, 02/10/2014 - 11:55
Great job on the table! I love...I had visions of this table before I saw it. I wanted to use the 4x4's for the legs as well, the same finish. I am concerned now about the 4x4's because I am an amateur and I think that may throw too many wrenches into my plan. I started with the bench, finished in 3 hours I have patted myself on the back. Plotting on a Kreg jig right now.

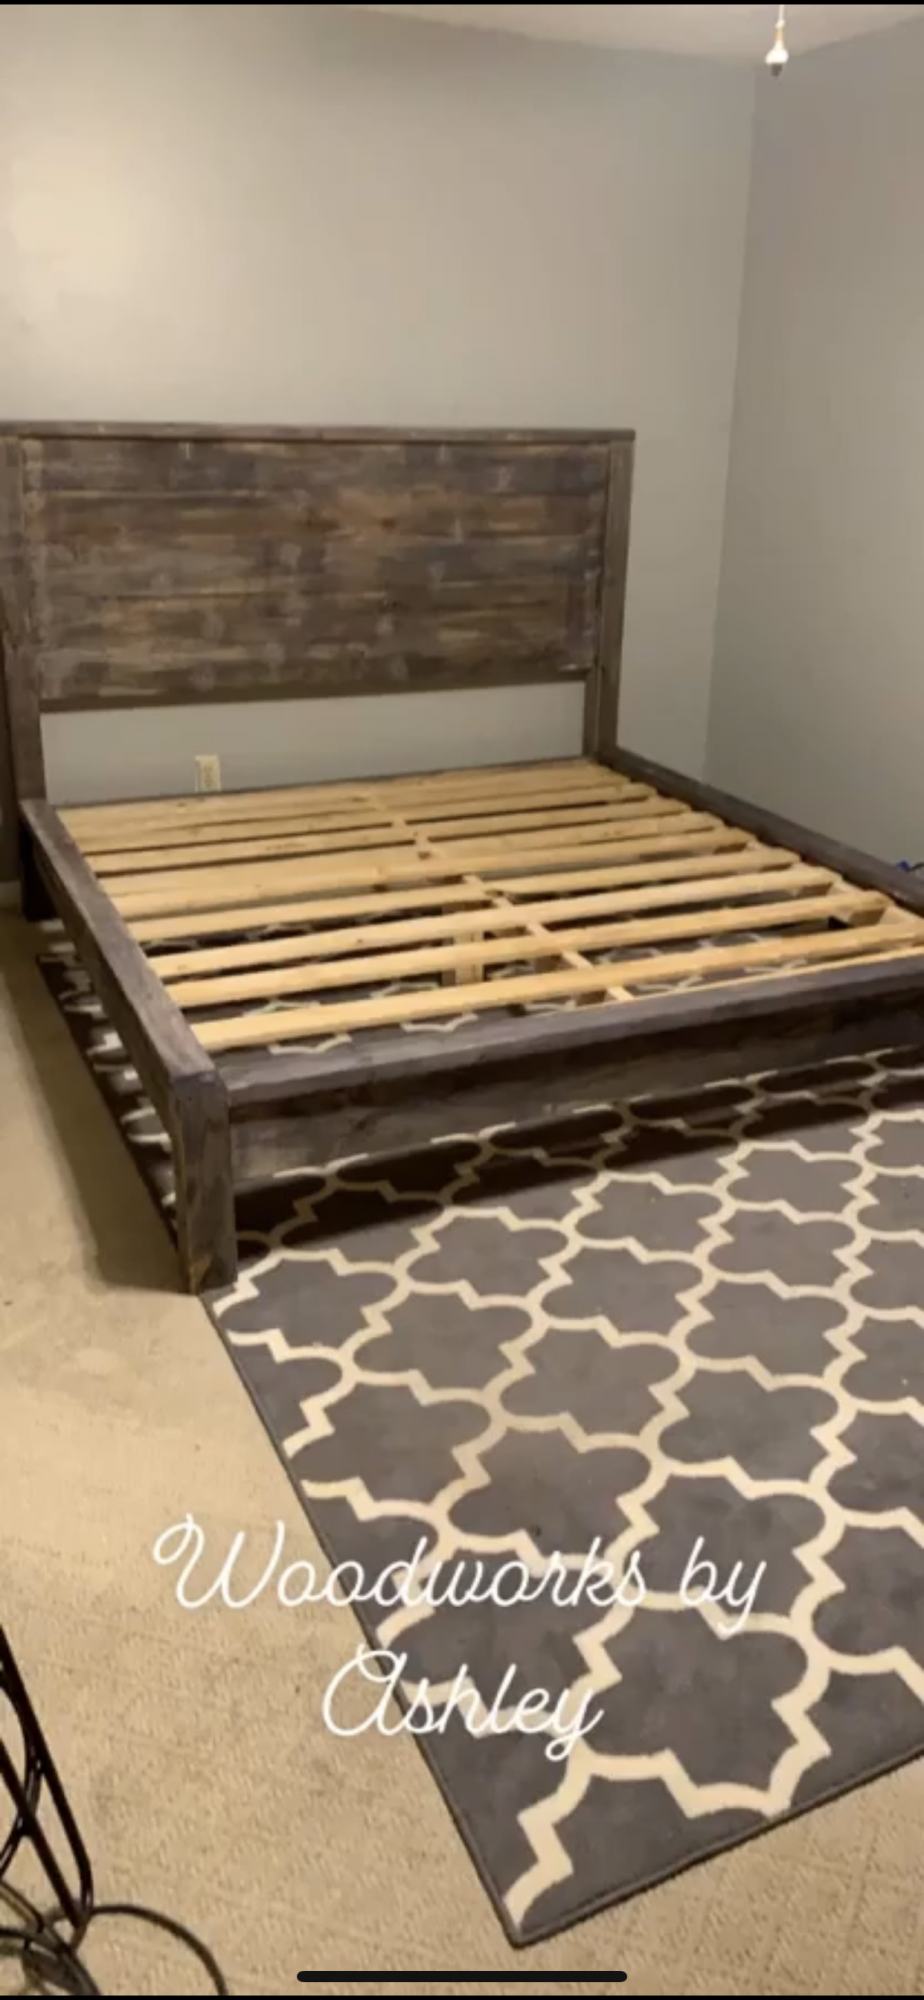
This bed was built based on the Kentwood bed plans. The are a few adjustments to the size, and slats were used instead of the vertical trim pieces. The 54 slats were cut from 2- 50 count bundles of 48" lath boards. The side rails were re-purposed from an old King size waterbed.


Ana sent us the plans for this bench and it worked out great!

Mon, 06/03/2019 - 11:34
This looks awesome! Thank you so much for sharing, great job! I love the table in the middle
Thu, 09/16/2021 - 06:32
How can I get plans for this? I love the idea and want to build these for my fire station.
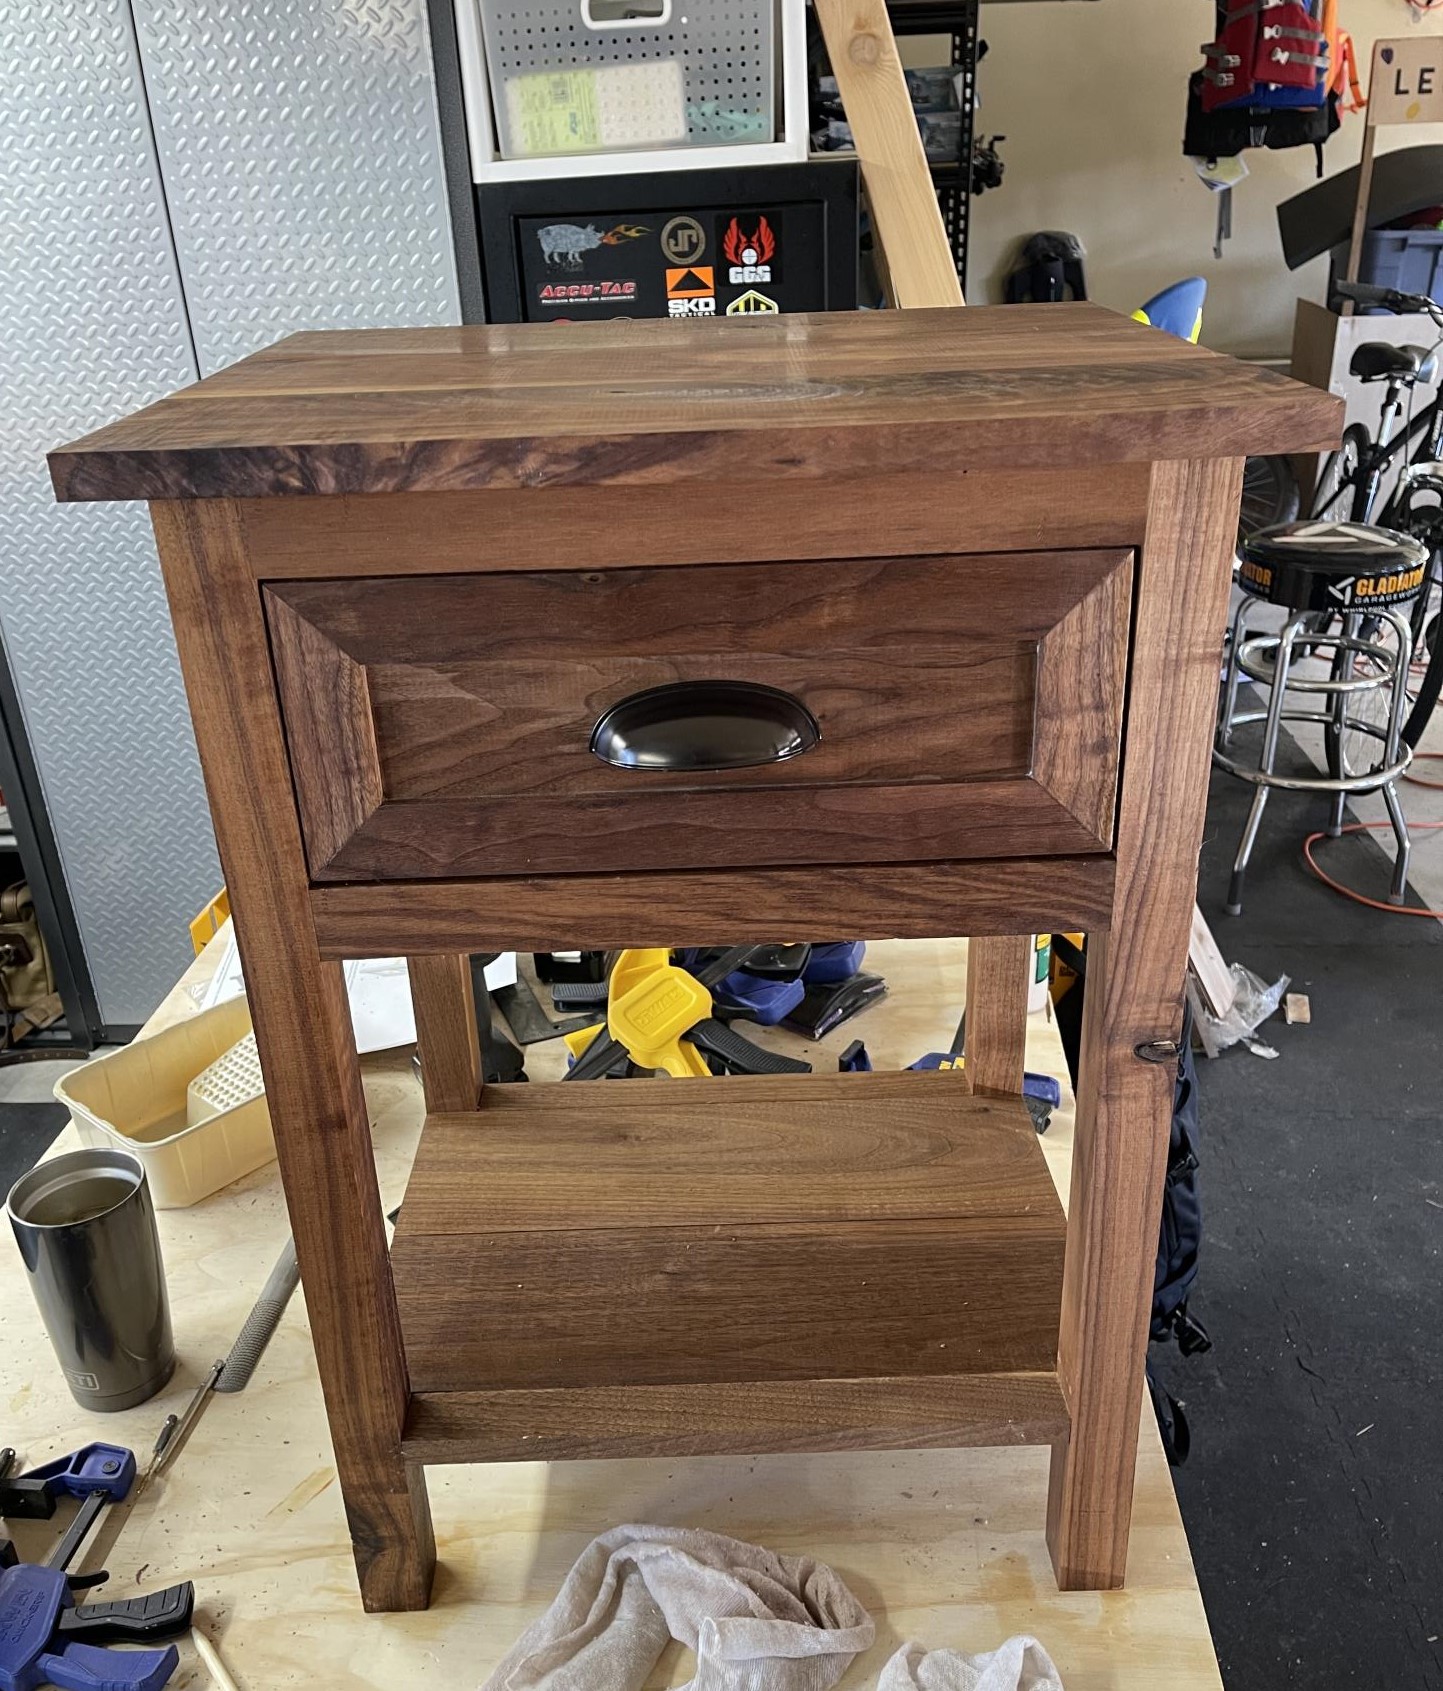
The sublime beauty of the natural wood grain upstages my (considerably) modest skill but we are very happy with our nightstands. Thanks so much for the plans! Rendered in Walnut with Tung Oil finish. Slight modification in dimensions and drawer facing.
Well, this is my second project and was built to replace the first one I did about 2 years ago.
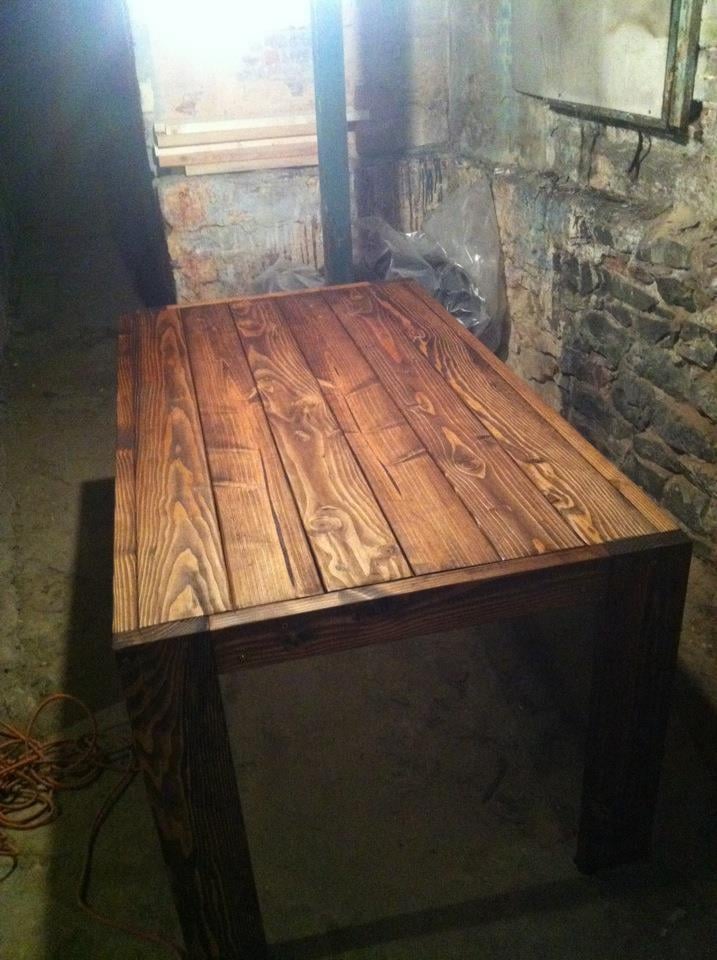
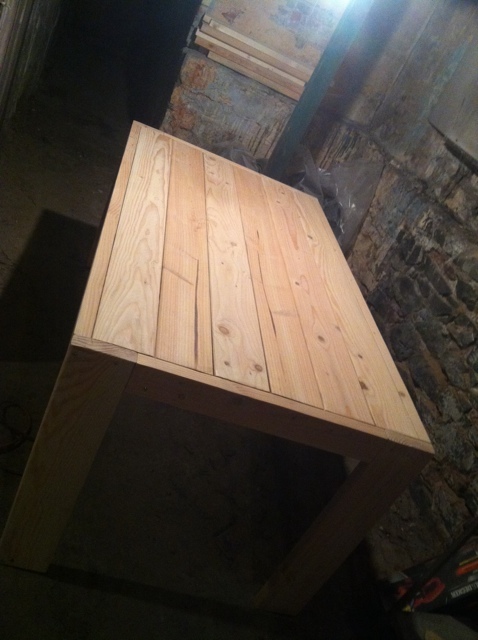
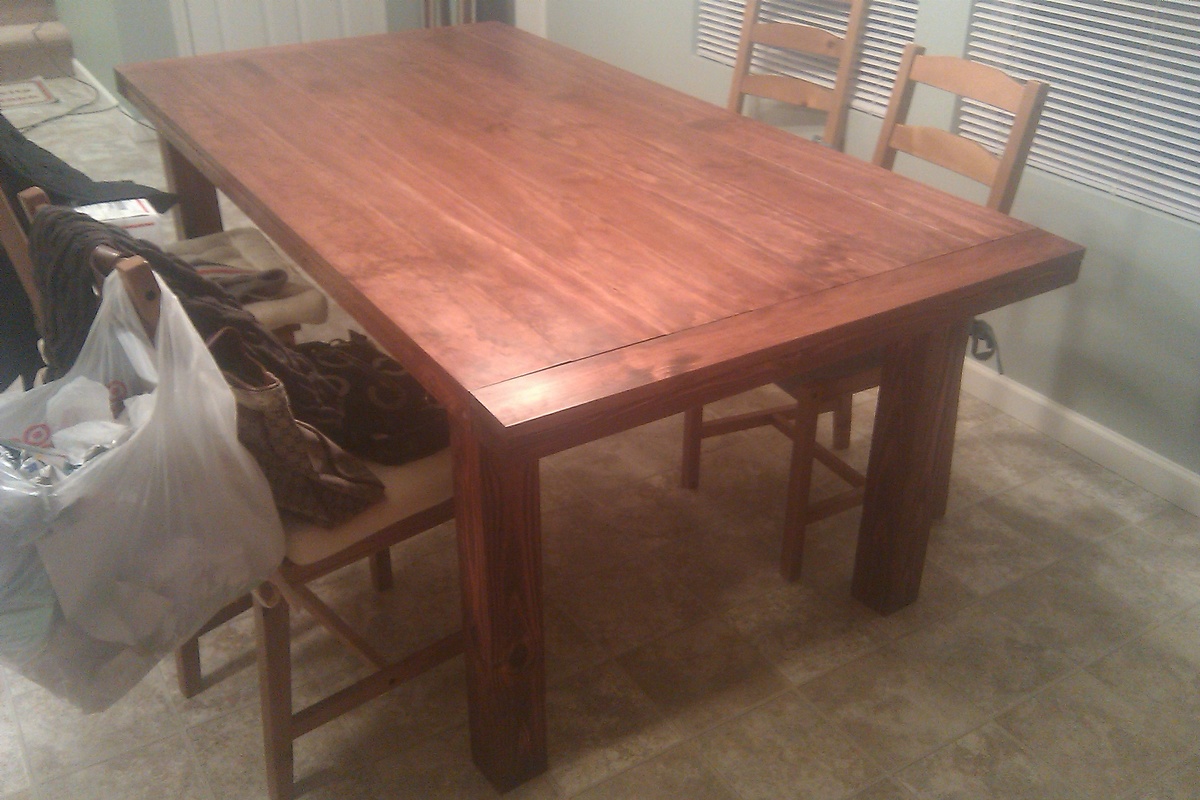
Two summers ago I built the Modern Farm Table and, quite frankly, screwed it up. I rushed that job, not taking the time to be selective about my lumber and forgetting to heed the old axiom of "measure twice, cut once". In short, the table turned out 27" wide and the the table-top surface was as uneven as a highway's rumble strips. Yeah. I know. A sad showing on my part.
This project was a different story. I took my time; and by time I mean it took about 10 hours total, including 3 trips to Home Depot to buy things that I didn't take into consideration (like mineral spirits for brush clean up after polyurethane).
Anyway, this table is a mix between a regular Tryde Table and the Benchwright Table. I liked the thick, heavy look of the Benchwright Table's top, but did not want to sacrifice the ends' leg space by including the trestle.
So, this is pretty much a Tryde Table, with the faux-thick top of the Benchwright and 4" x 4" legs. I used Select Appearance Pine for the top boards. I did this more to ensure I got straight edges than for the surface finish quality. But I like the end result.
Dimensions: 74 1/4"L X 38.5"W X 30"H
Lumber: 4" X 4" legs, S4S 1" pine boards top, 2" X 4" aprons.
Finish: Red Mahogany
Cost: $160
Total time: 10 hours.

Mon, 12/05/2011 - 17:28
You should be proud of yourself for not only doing a wonderful job on this table but for trying again! I love Ana's site because it allows each of us to begin small and build (no pun intended) bigger and more complicated as we learn!
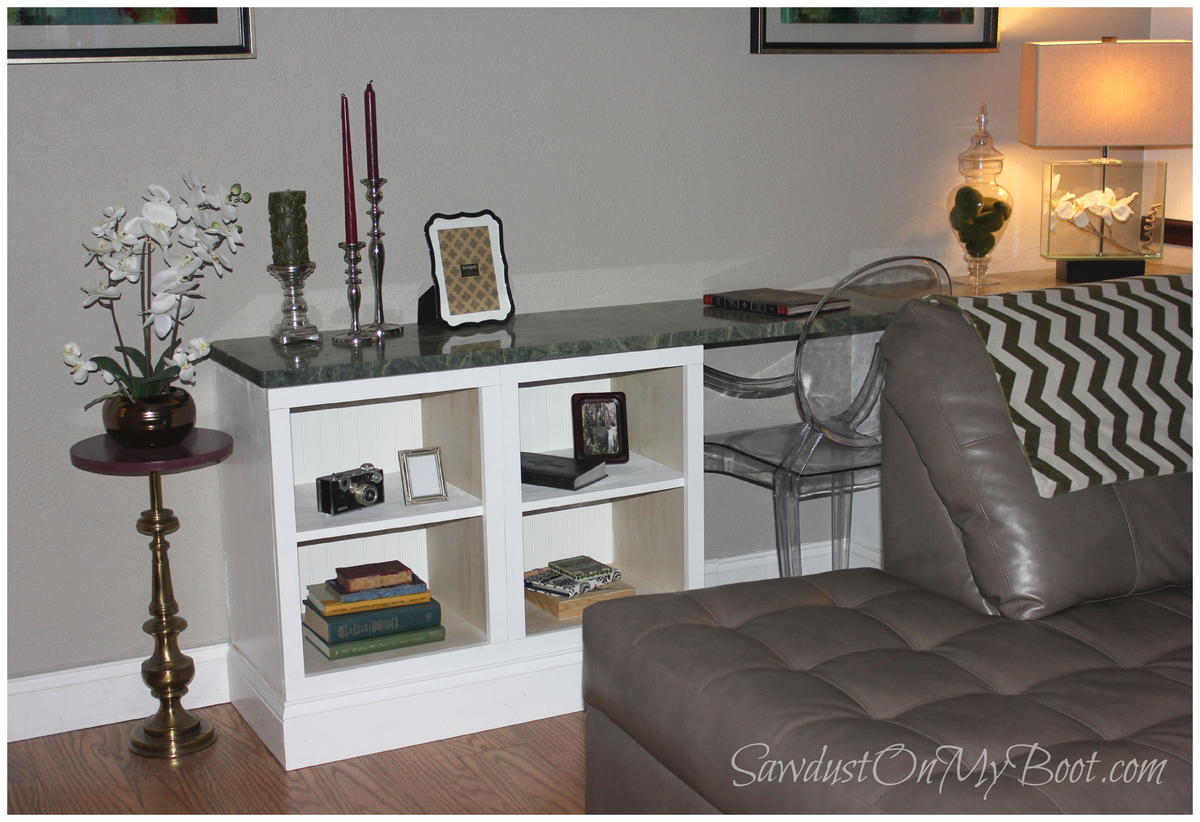
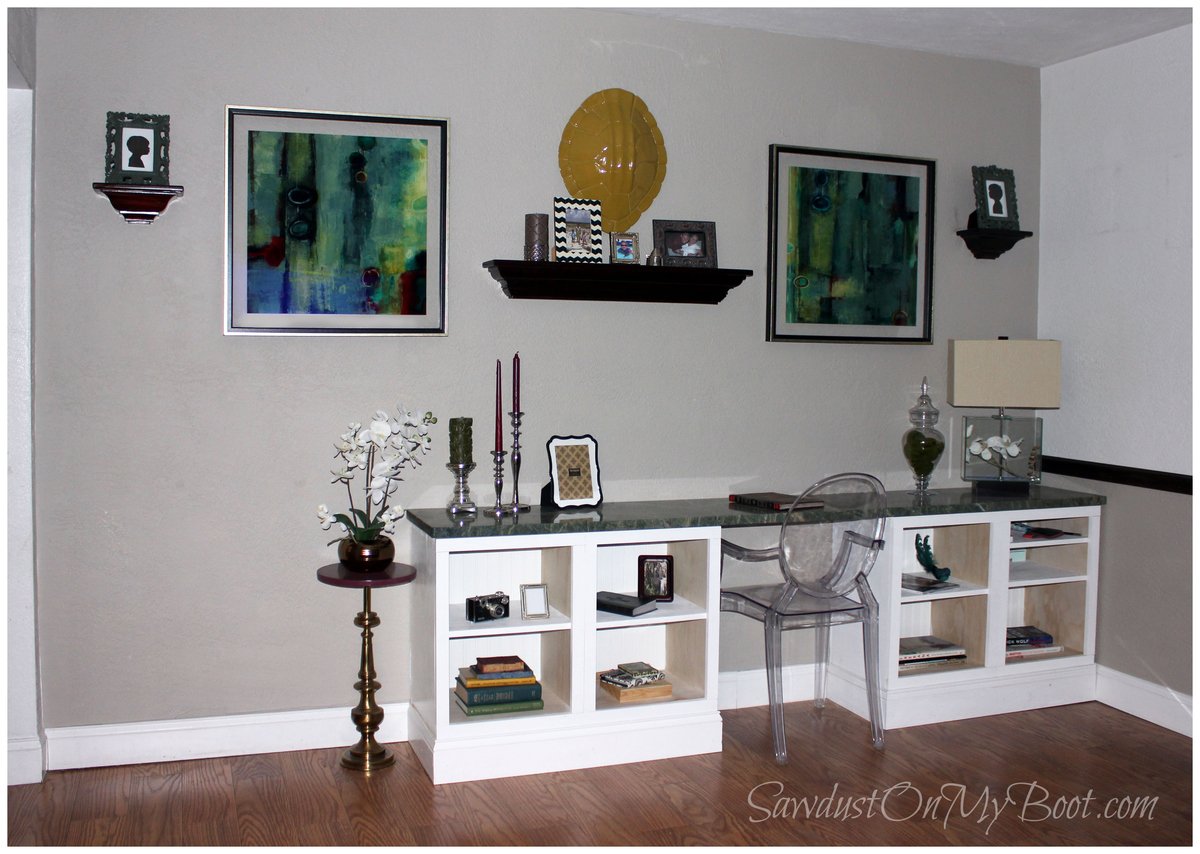
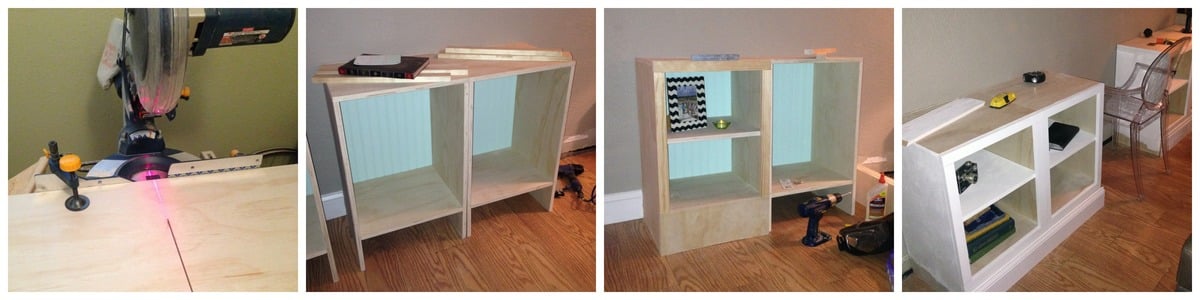
Hi there! I made a built-in desk for our long rectangular living room using a granite top on 4 cabinets... modified from a simple base cabinet plan. It was a blast to build & my family really enjoys it! :D
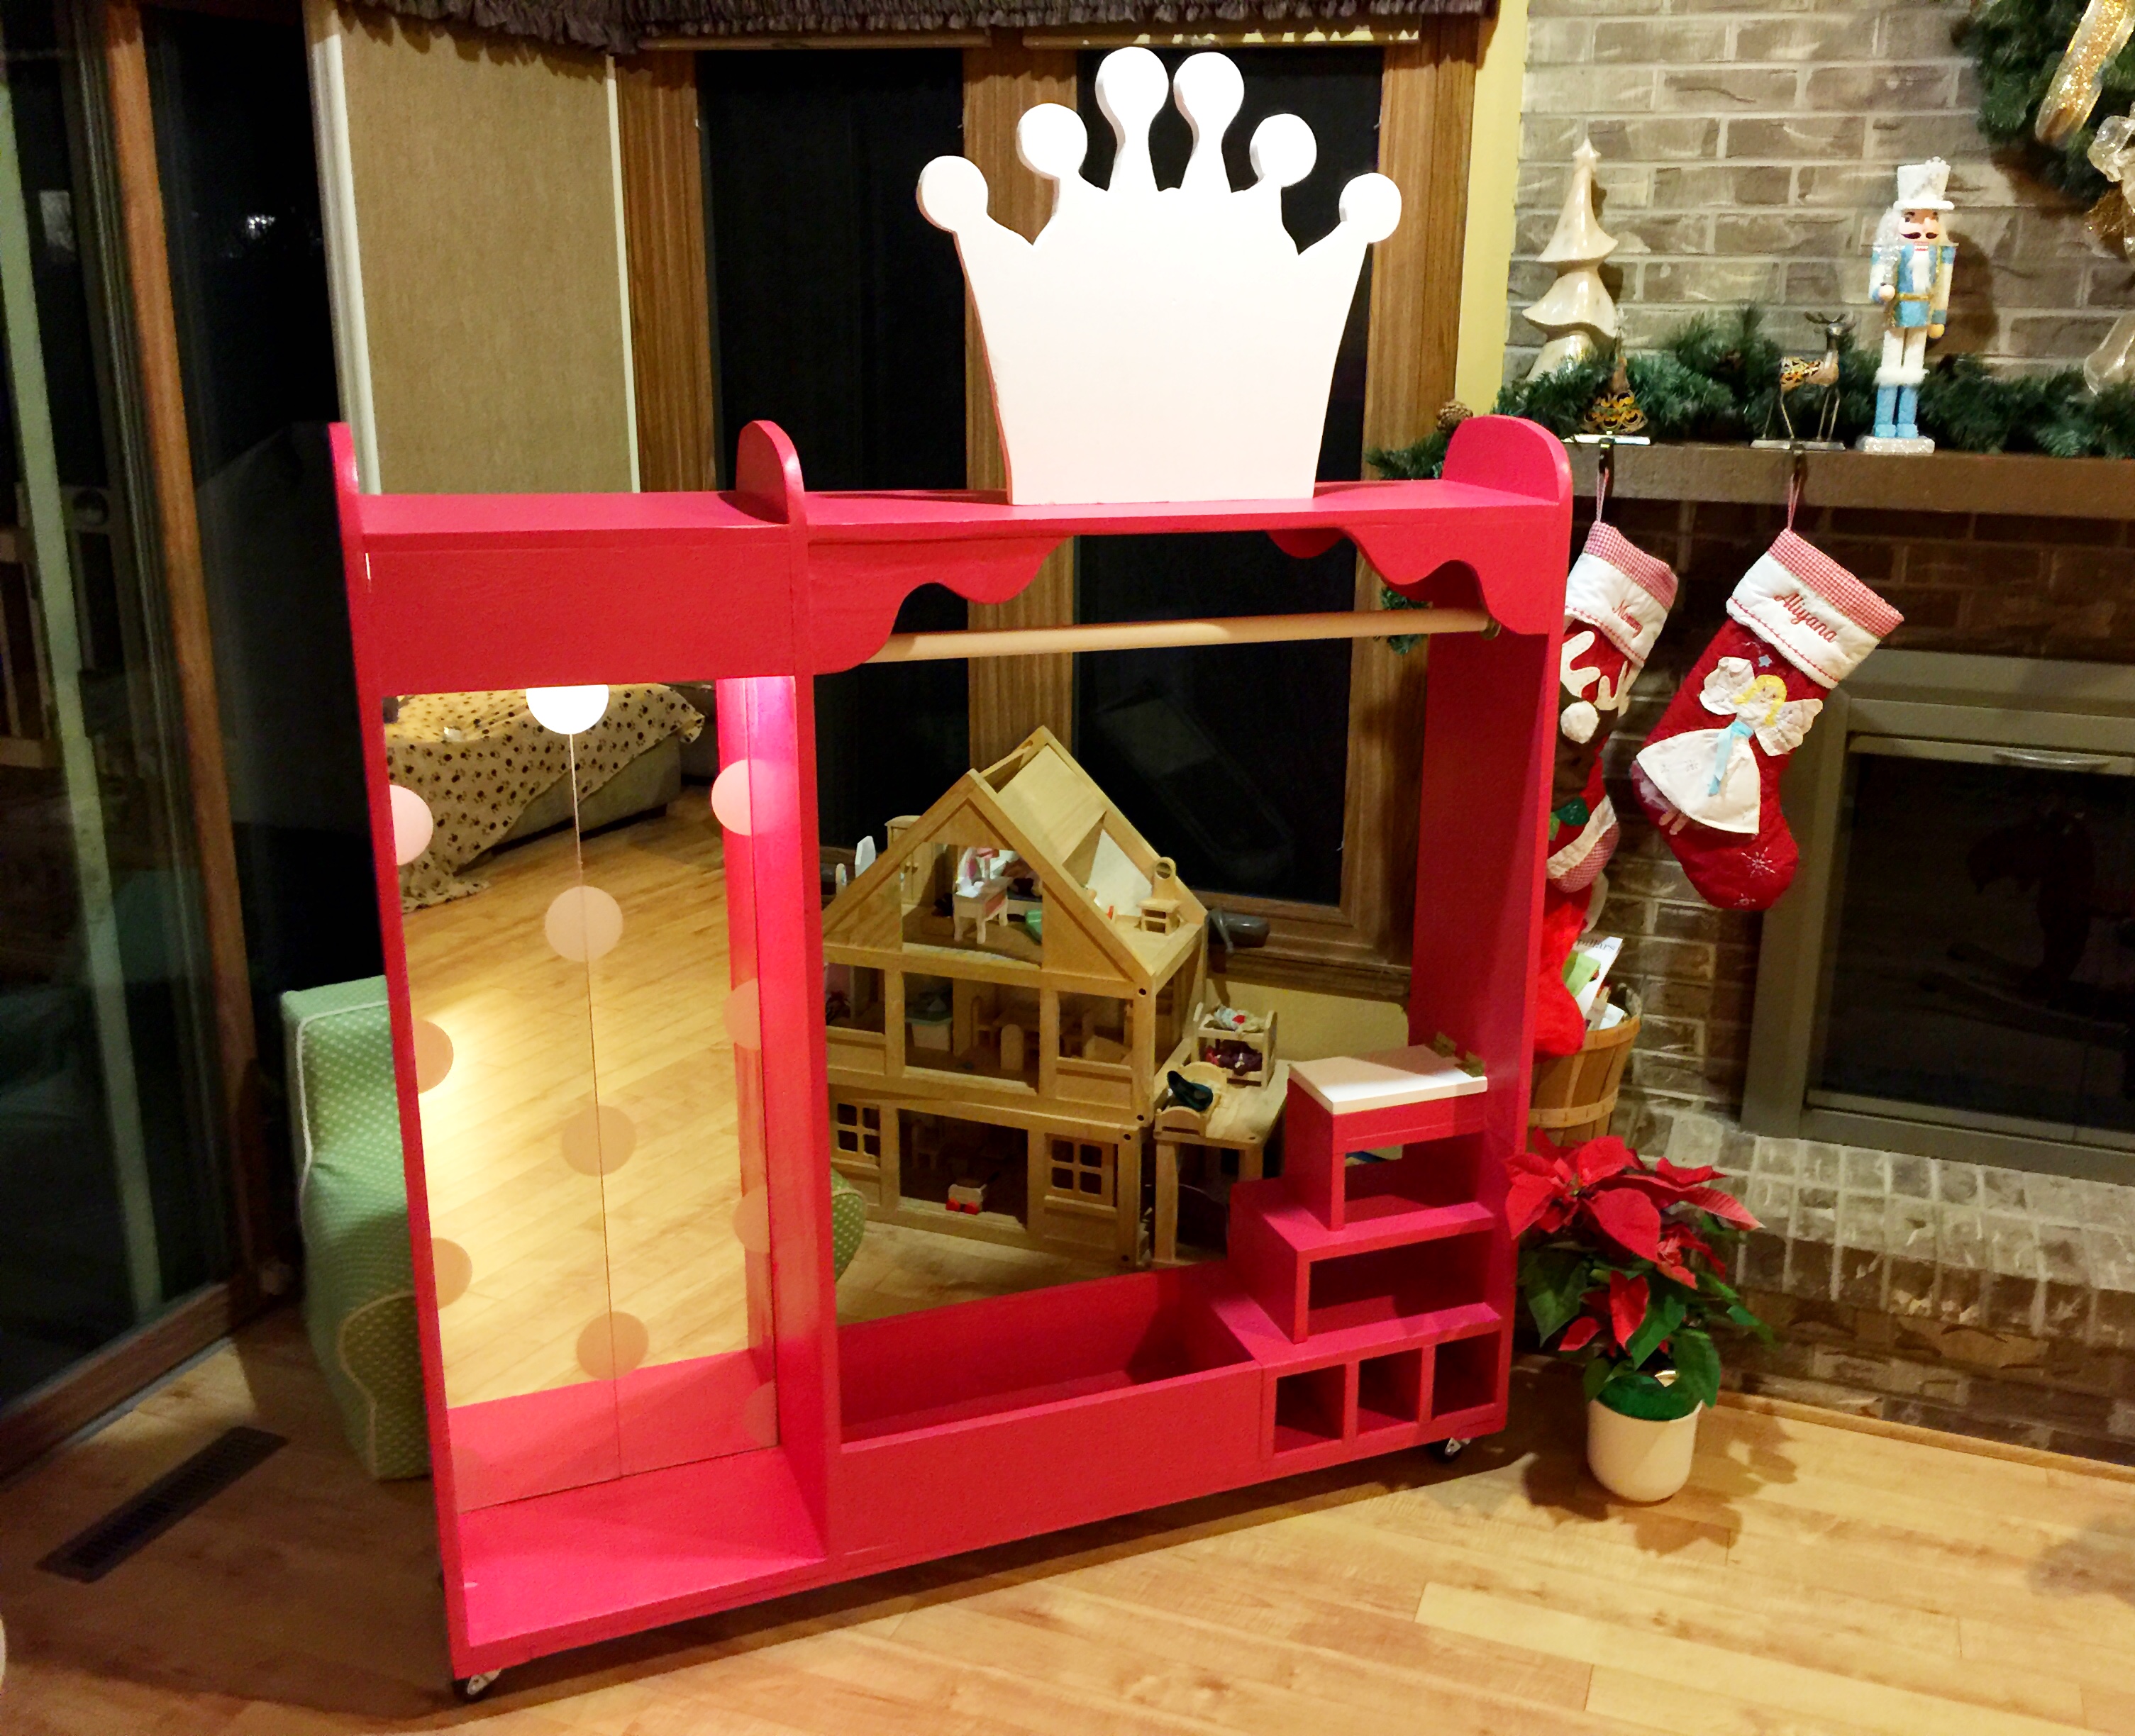
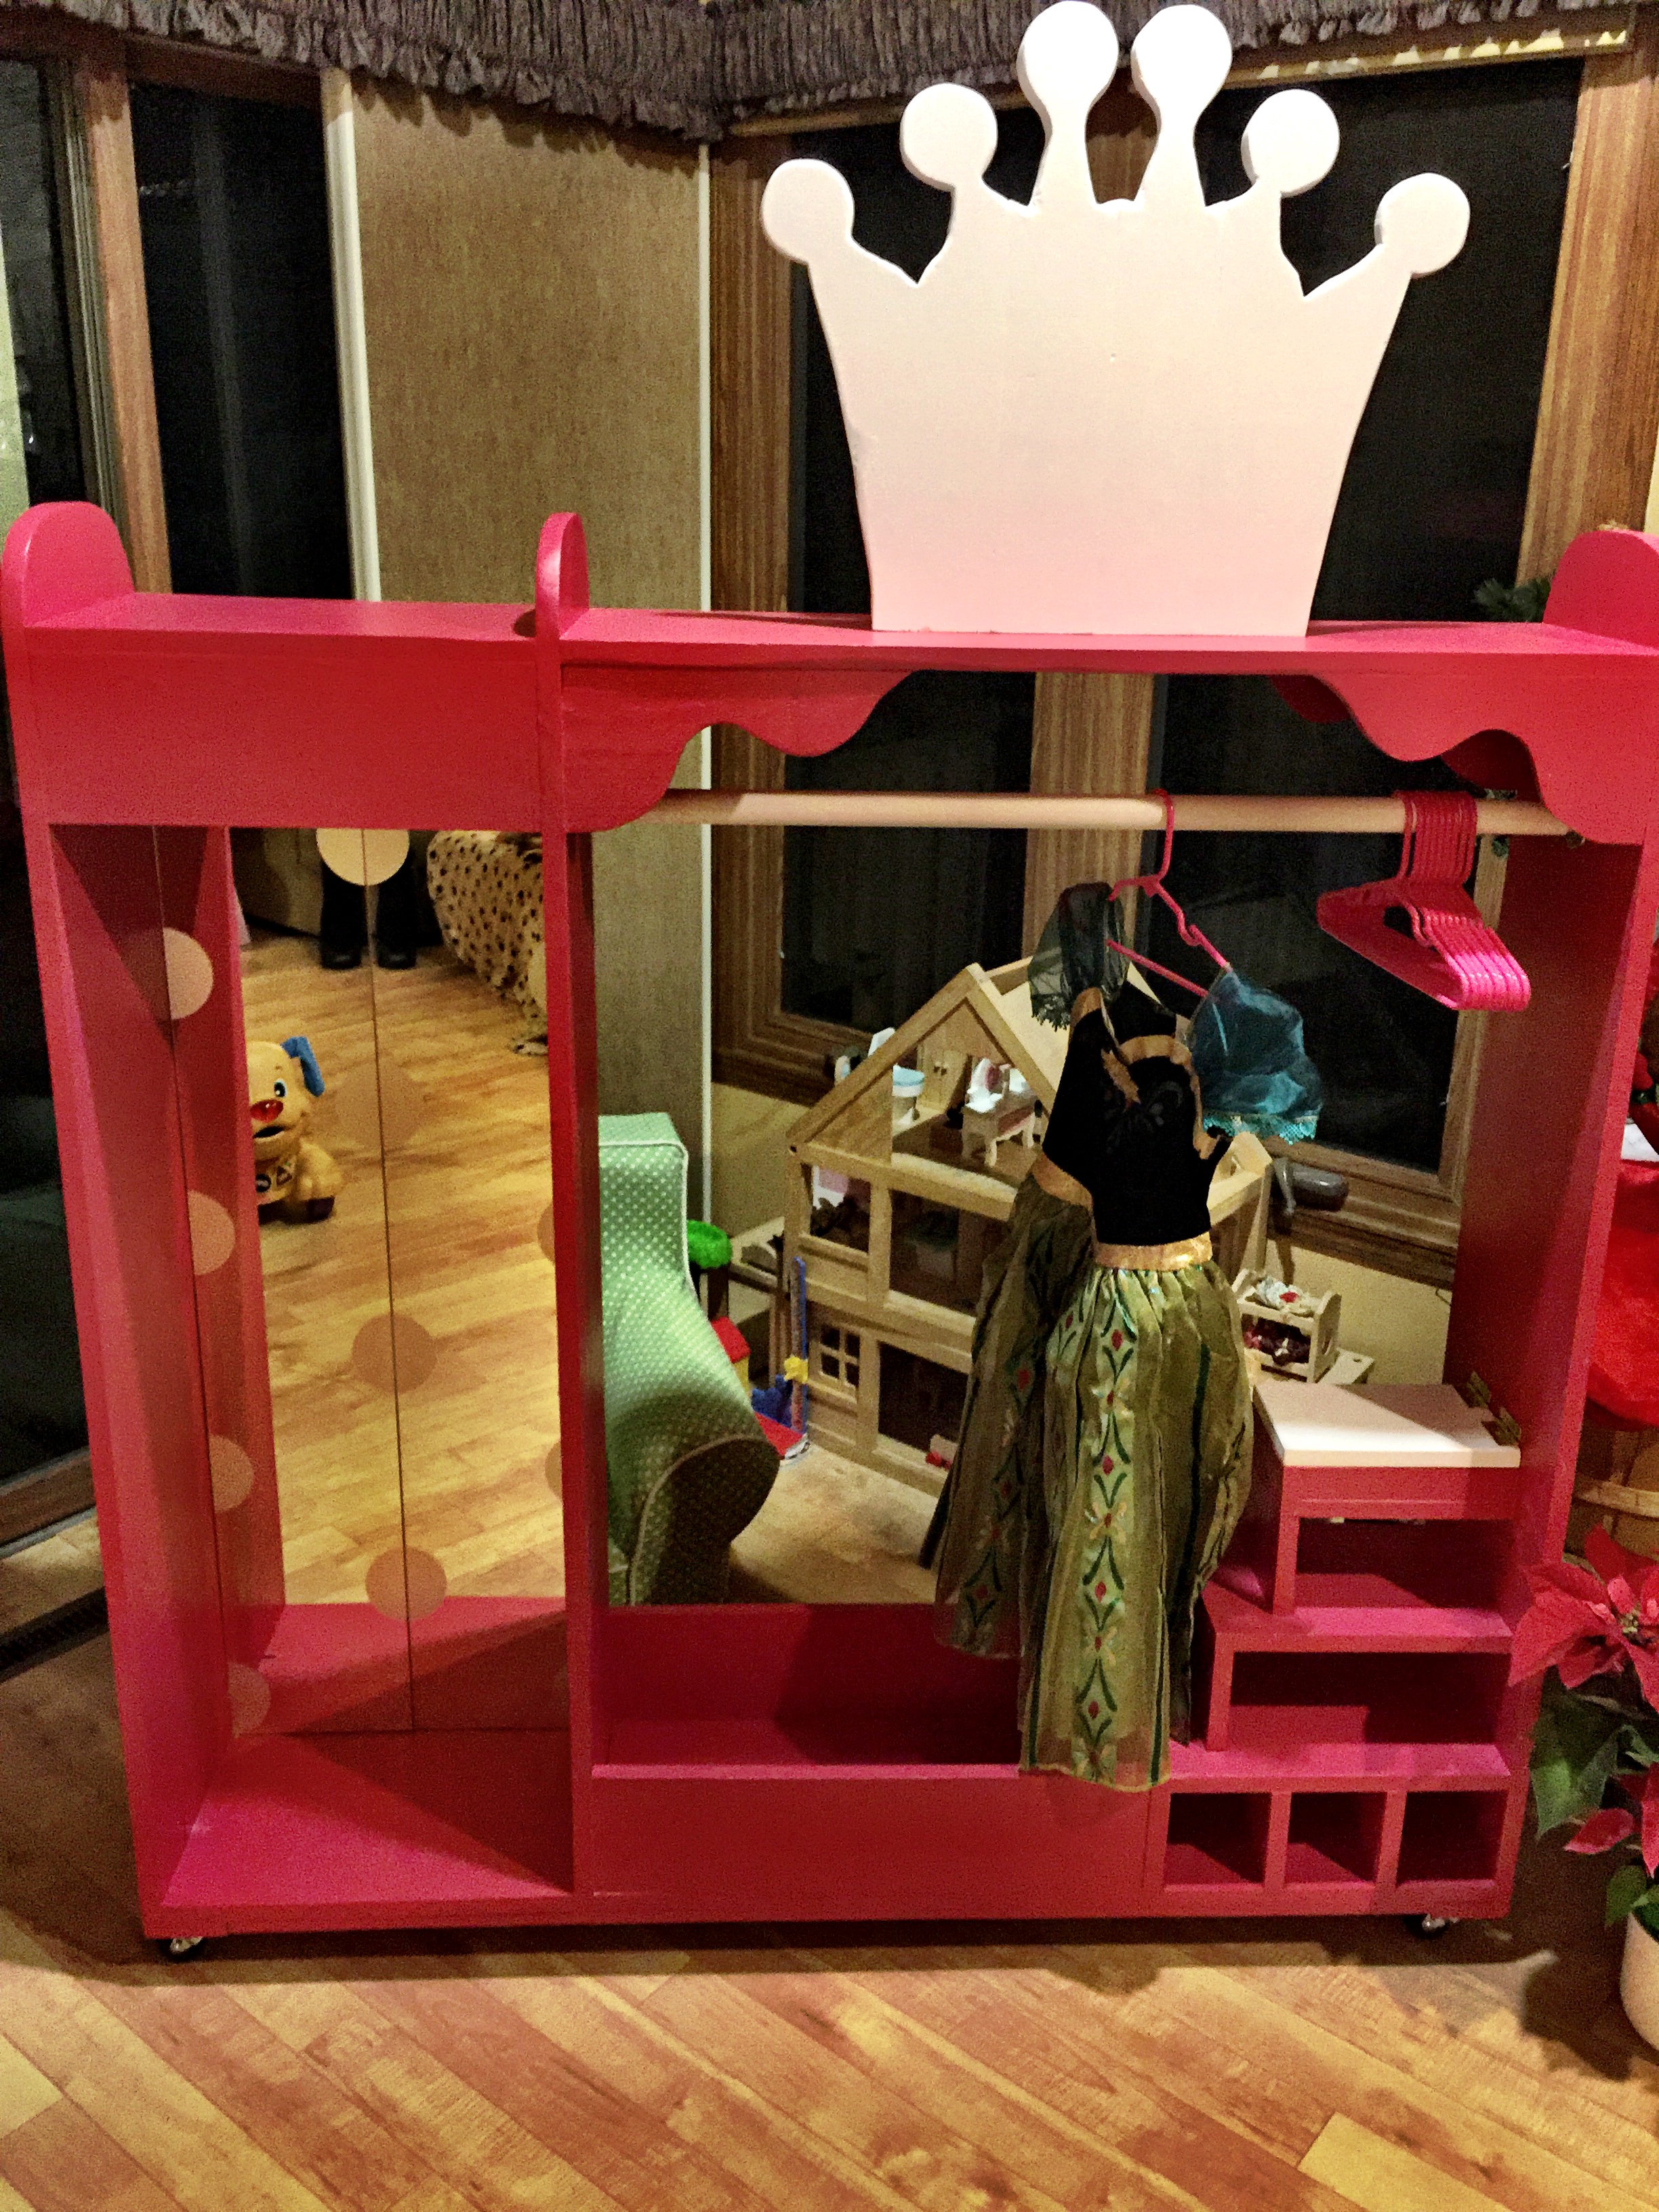
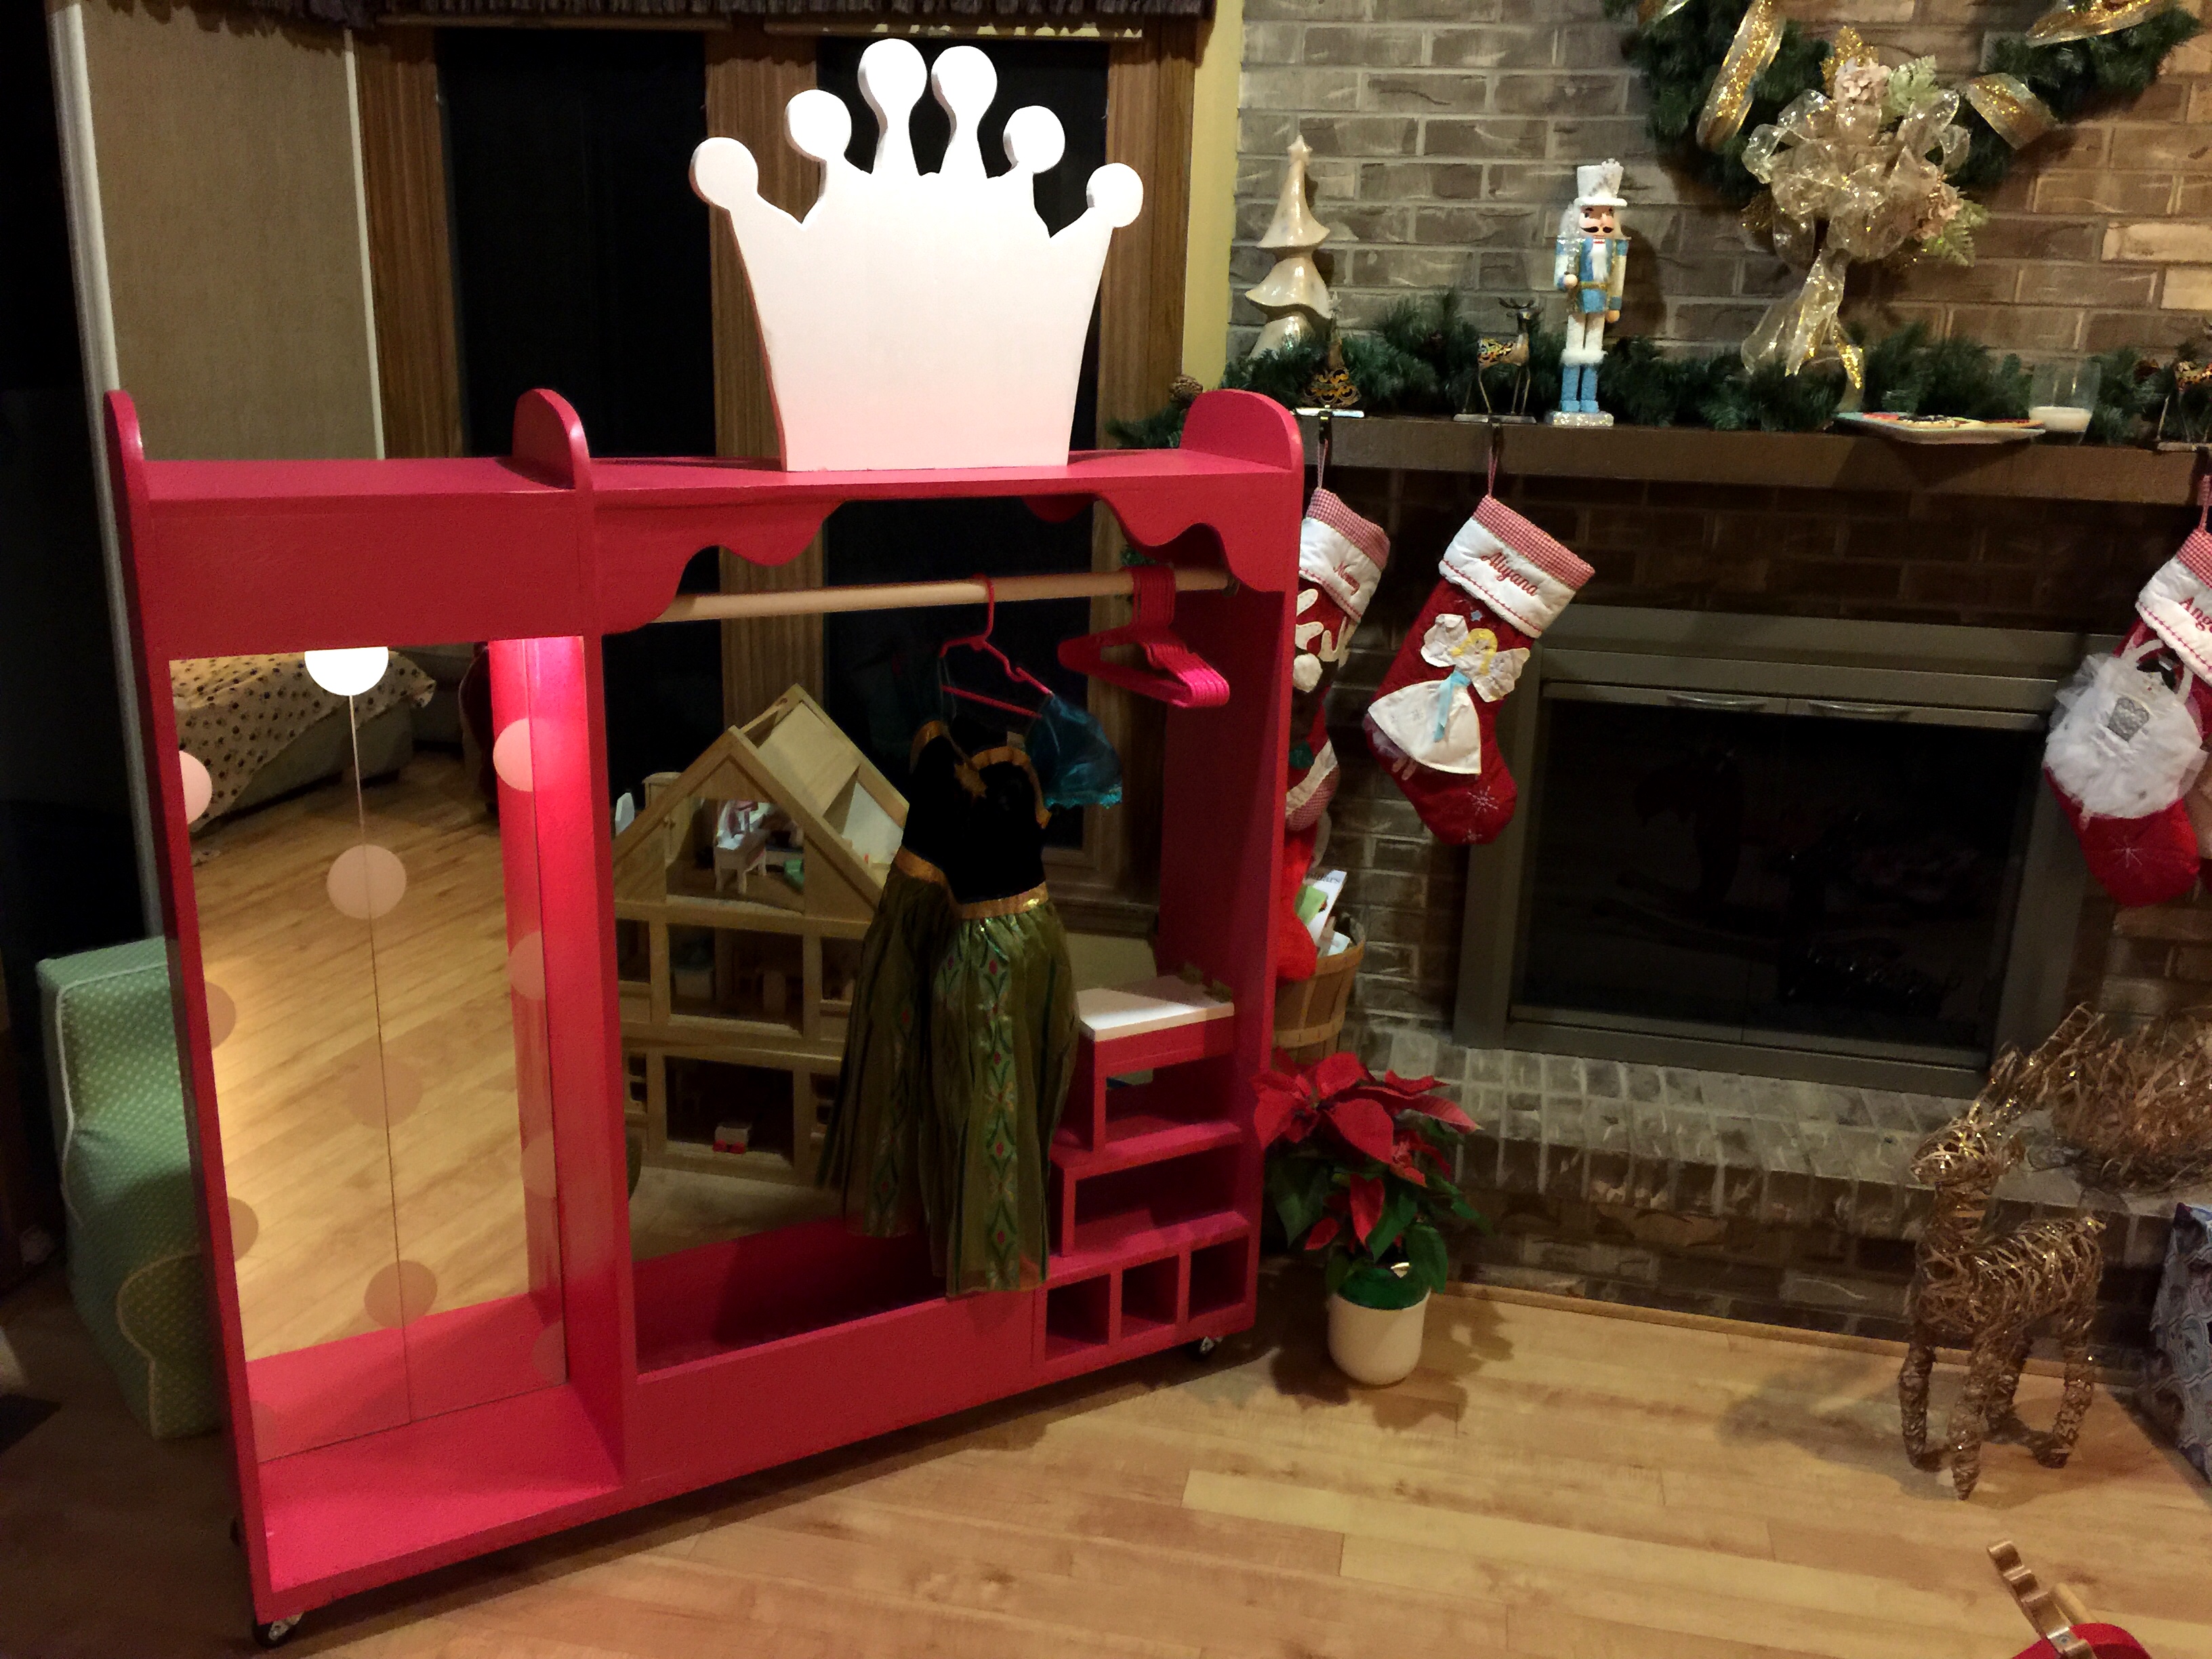
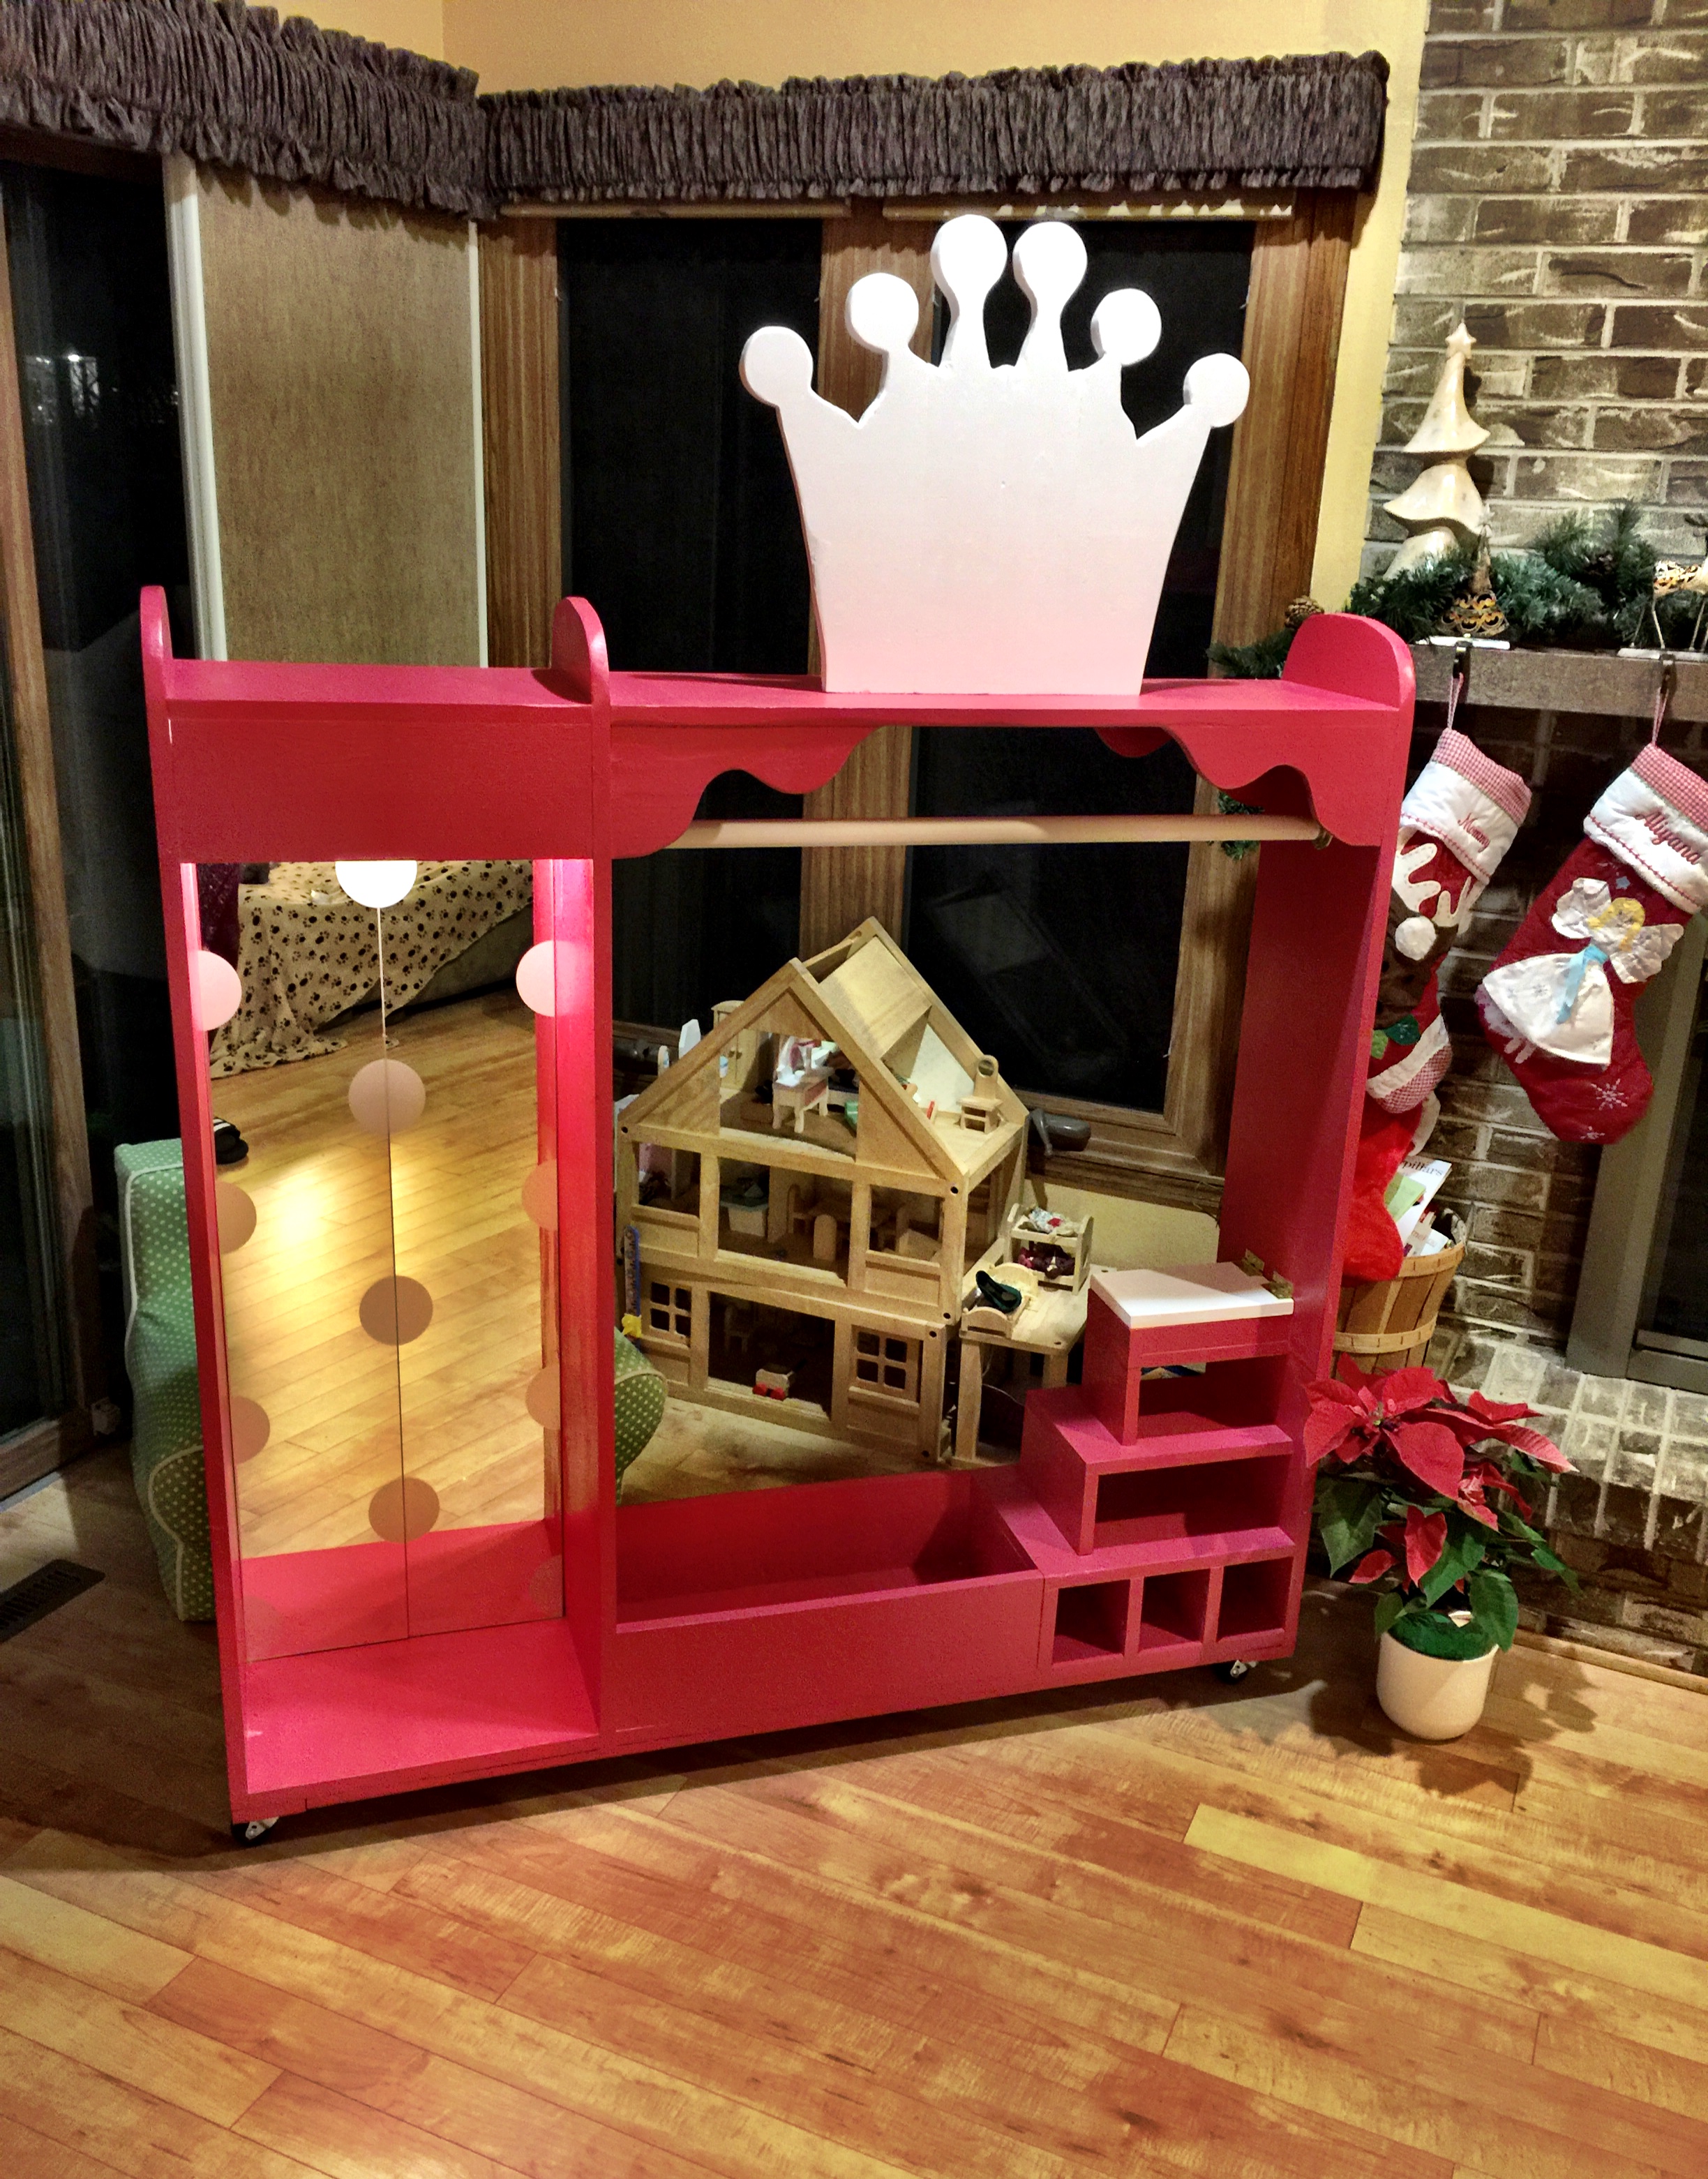
With my 3 1/2 year old girl who is really in a princess dress-up phase (and a 1 year old girl who likes to tag/crawl along), my Christmas present to them was a big hit. I first bought the two mirrors at IKEA and then modified the design around them, with added cubbies and shelves for princess shoes and tiaras, as well as a secret jewelry compartment. I built the decorative crown with different pieces of scrap wood. In all honesty, the modifications made it a little back-heavy and wobbly, so I ended up attaching it to the wall in the basement (which was probably a good idea anyway).

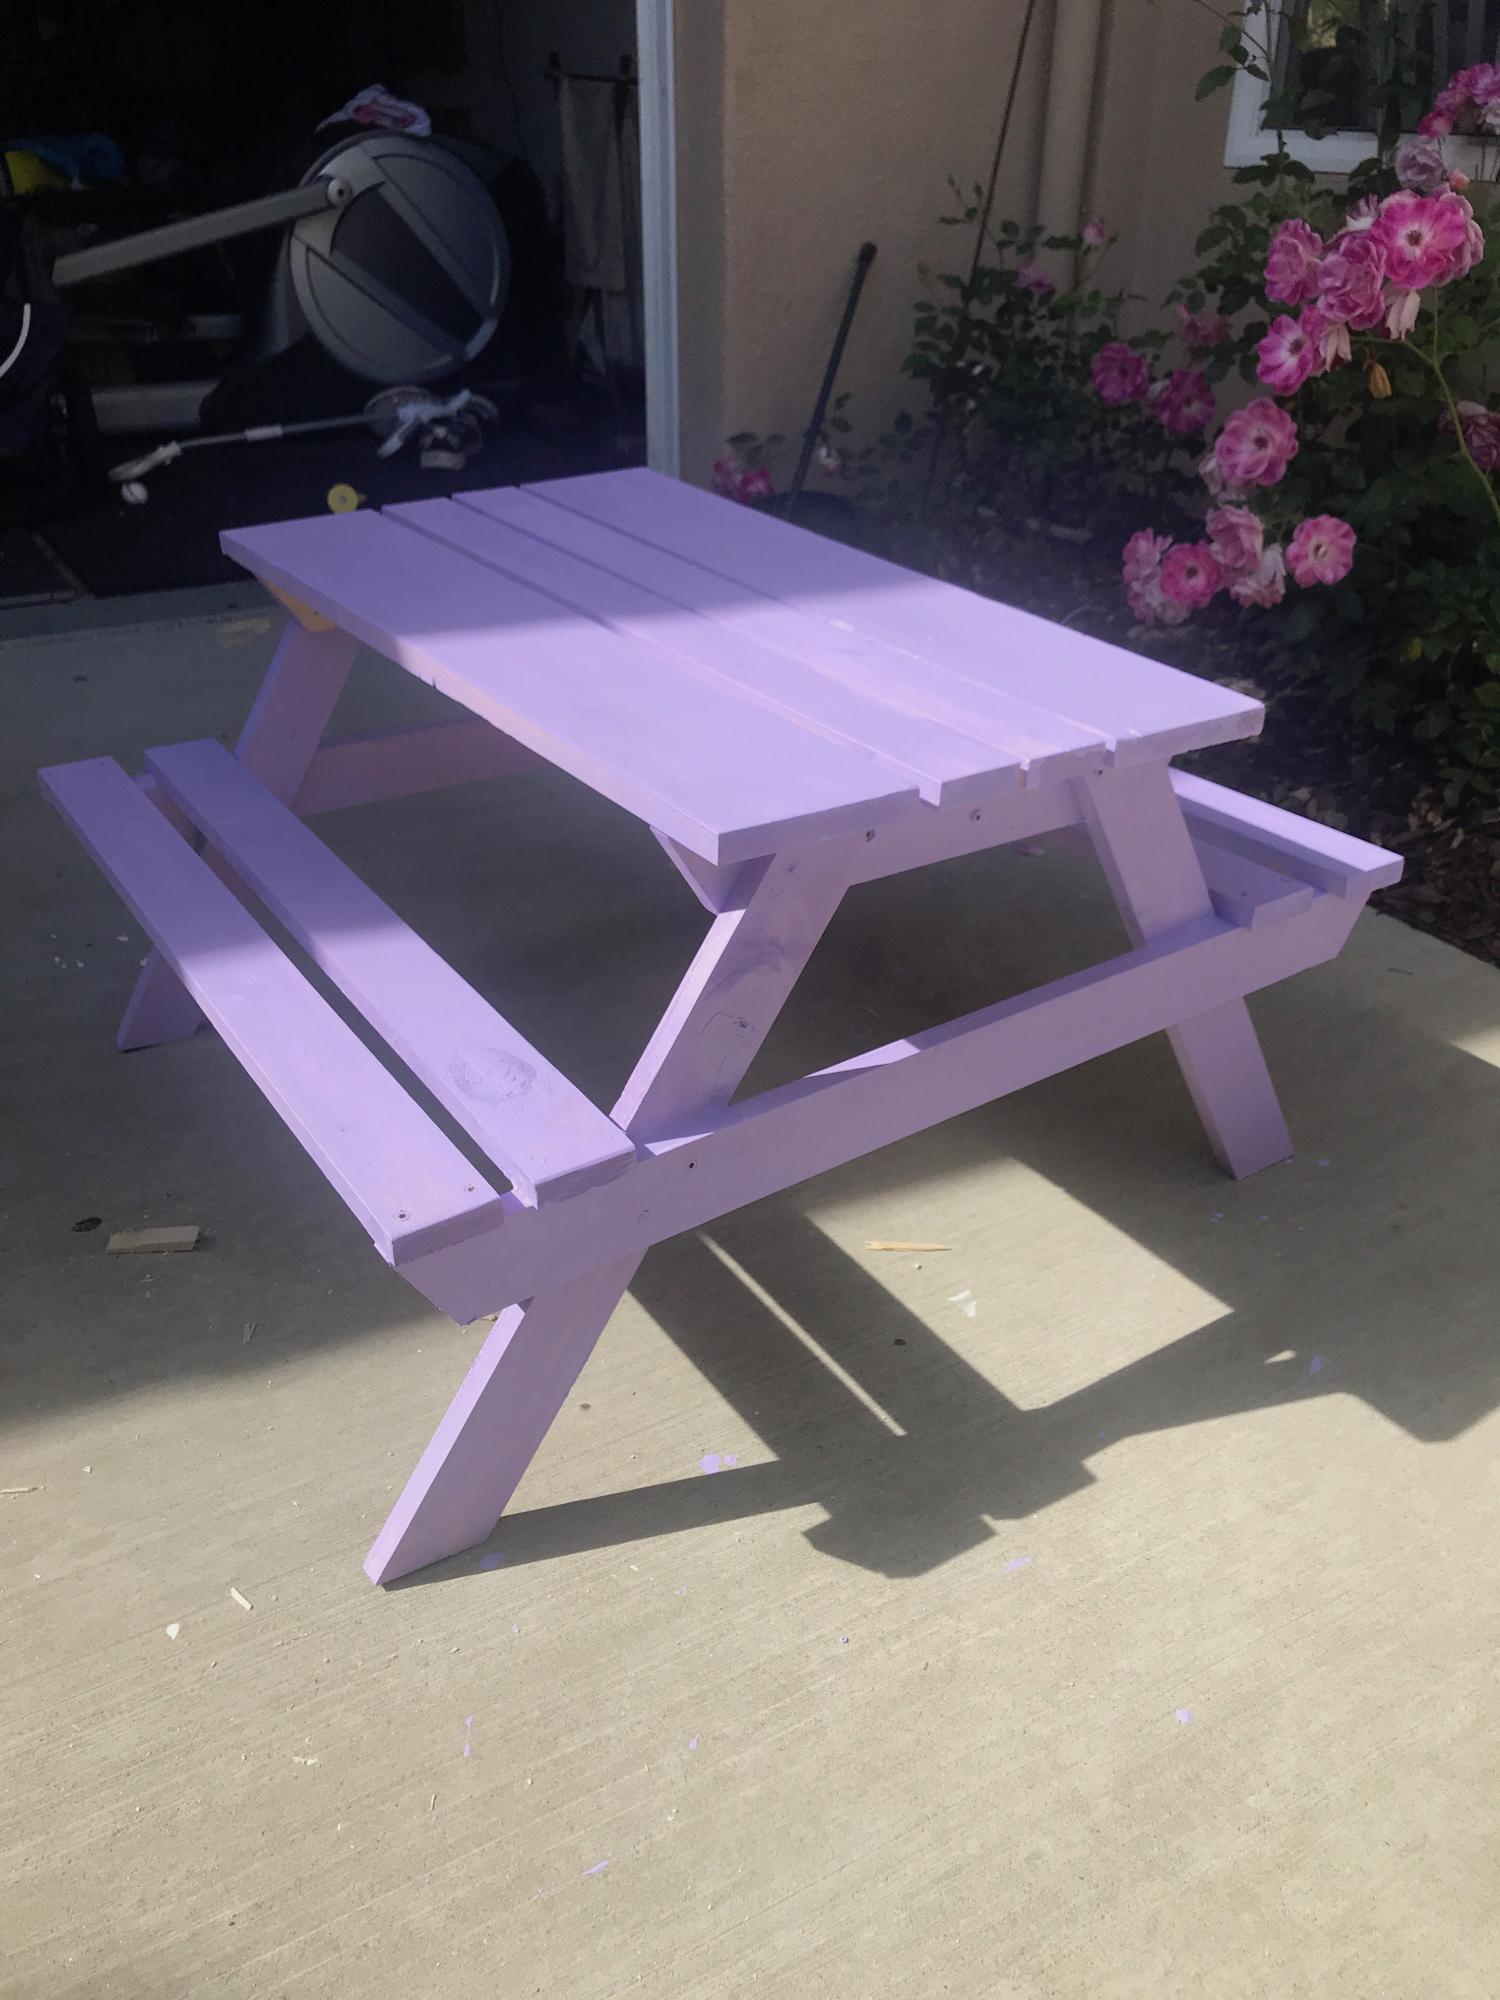
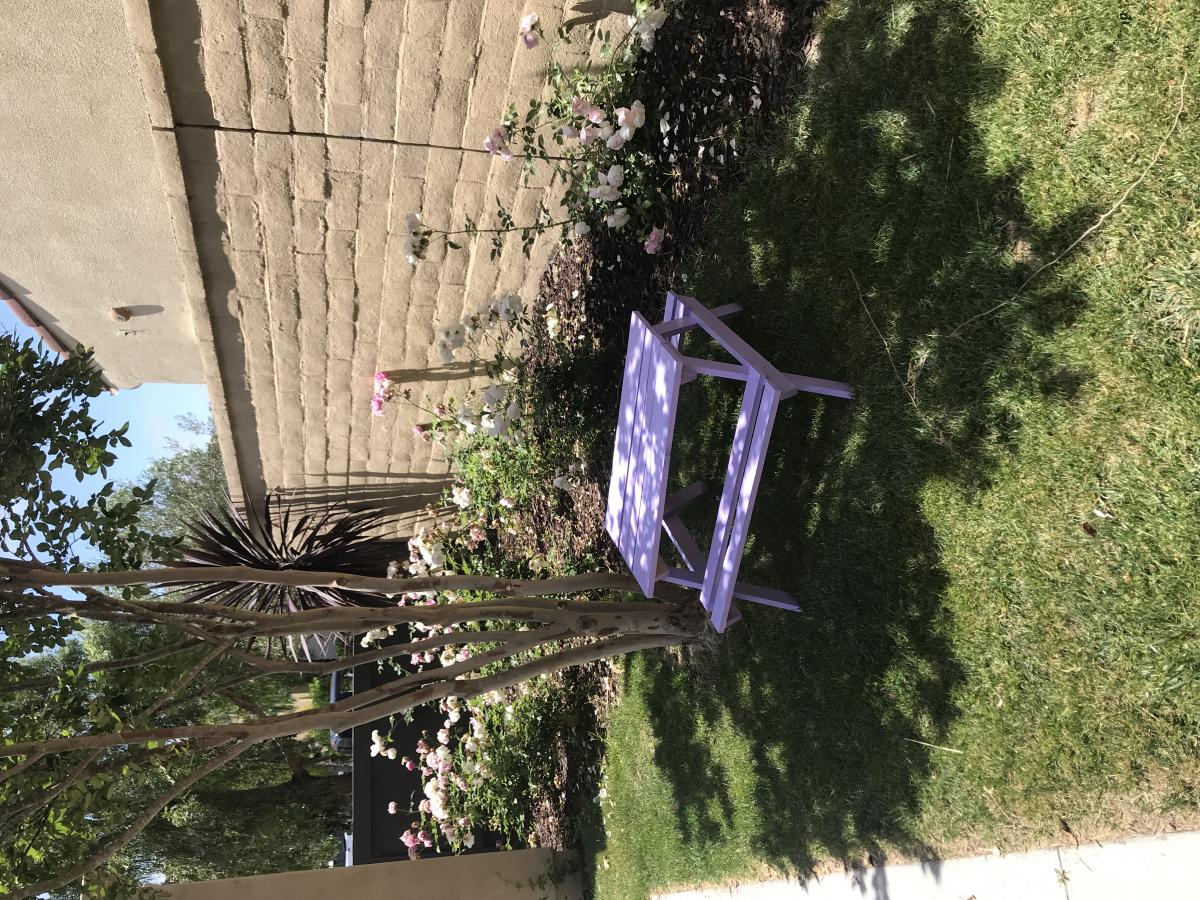
Built this in a few hours. Was a fun build and was all from wood I had sitting around. My daughter requested purple and I happened to have some oops purple I picked up at Home Depot for 50 cents so it was a very affordable project that the girls love!
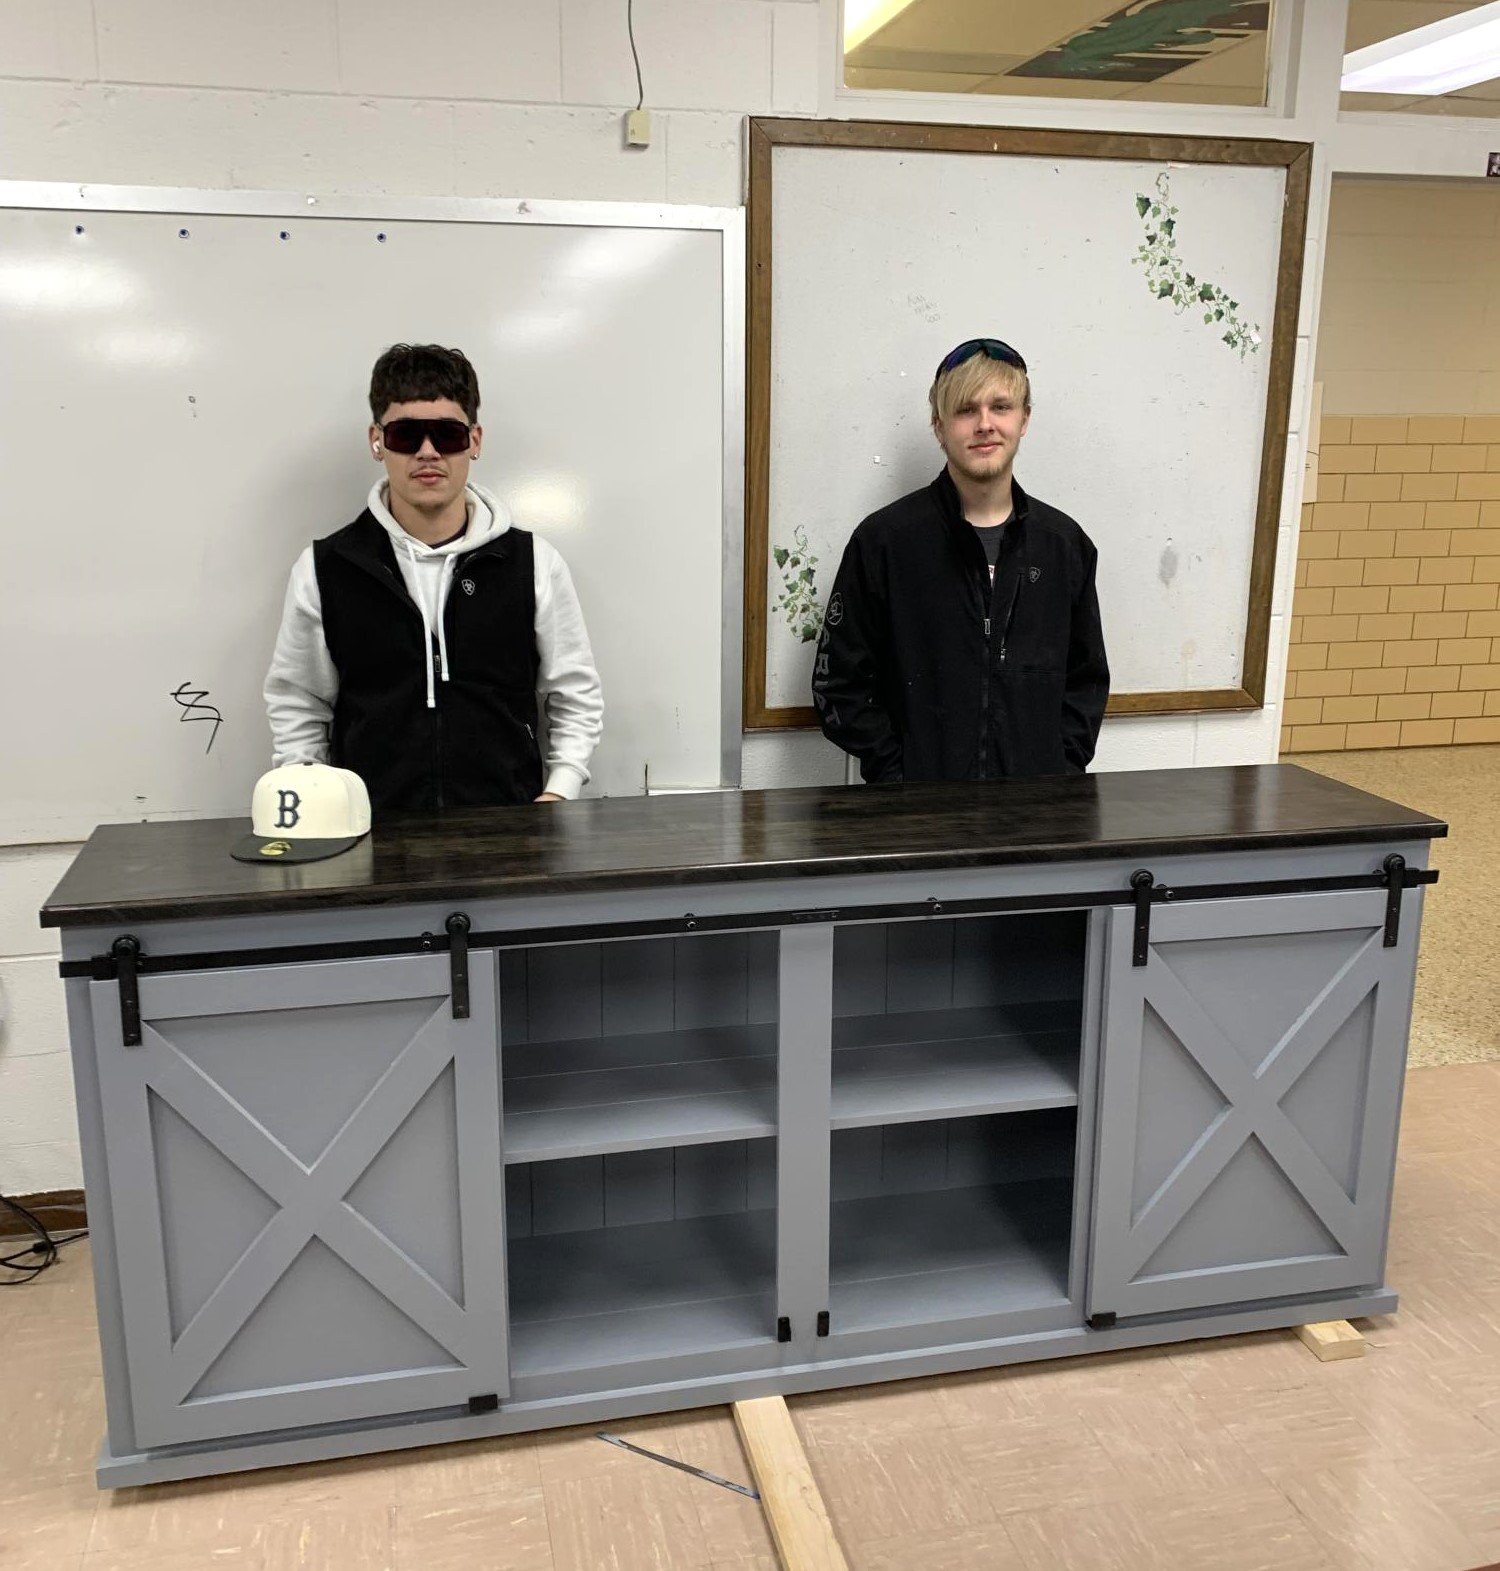
Another project my high school shop class is building from an Ana White plan. The top is maple that has been stained black and then poly.
Mon, 03/27/2023 - 15:32
Thanks for sharing these, please email us at [email protected] so we can give credit when sharing!
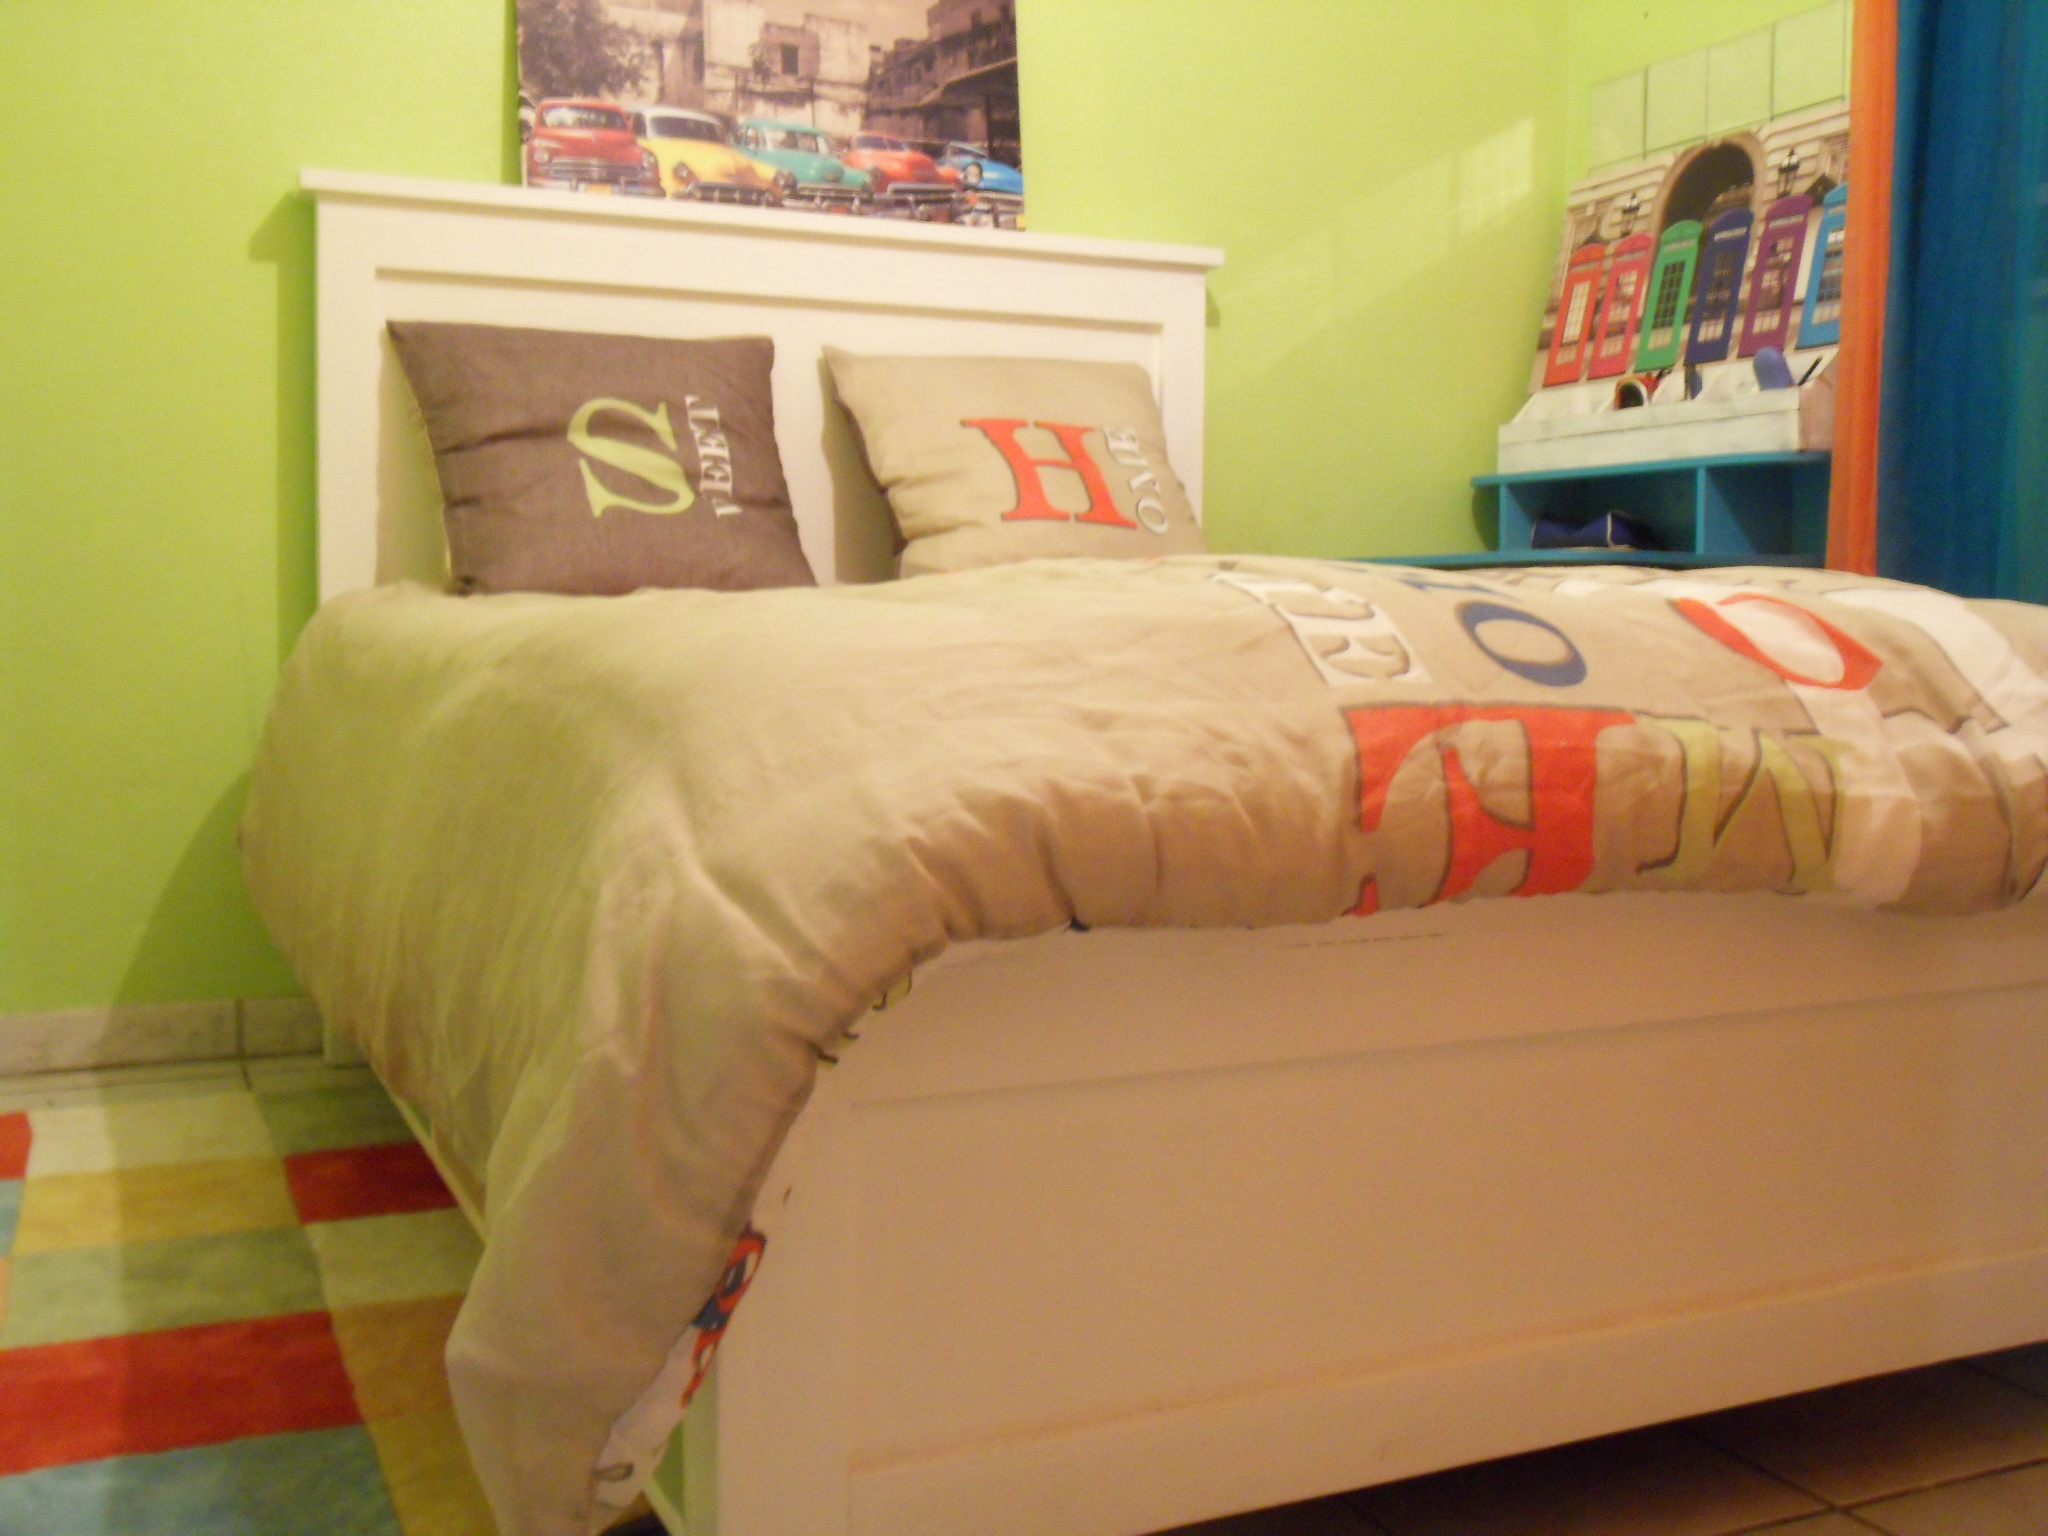
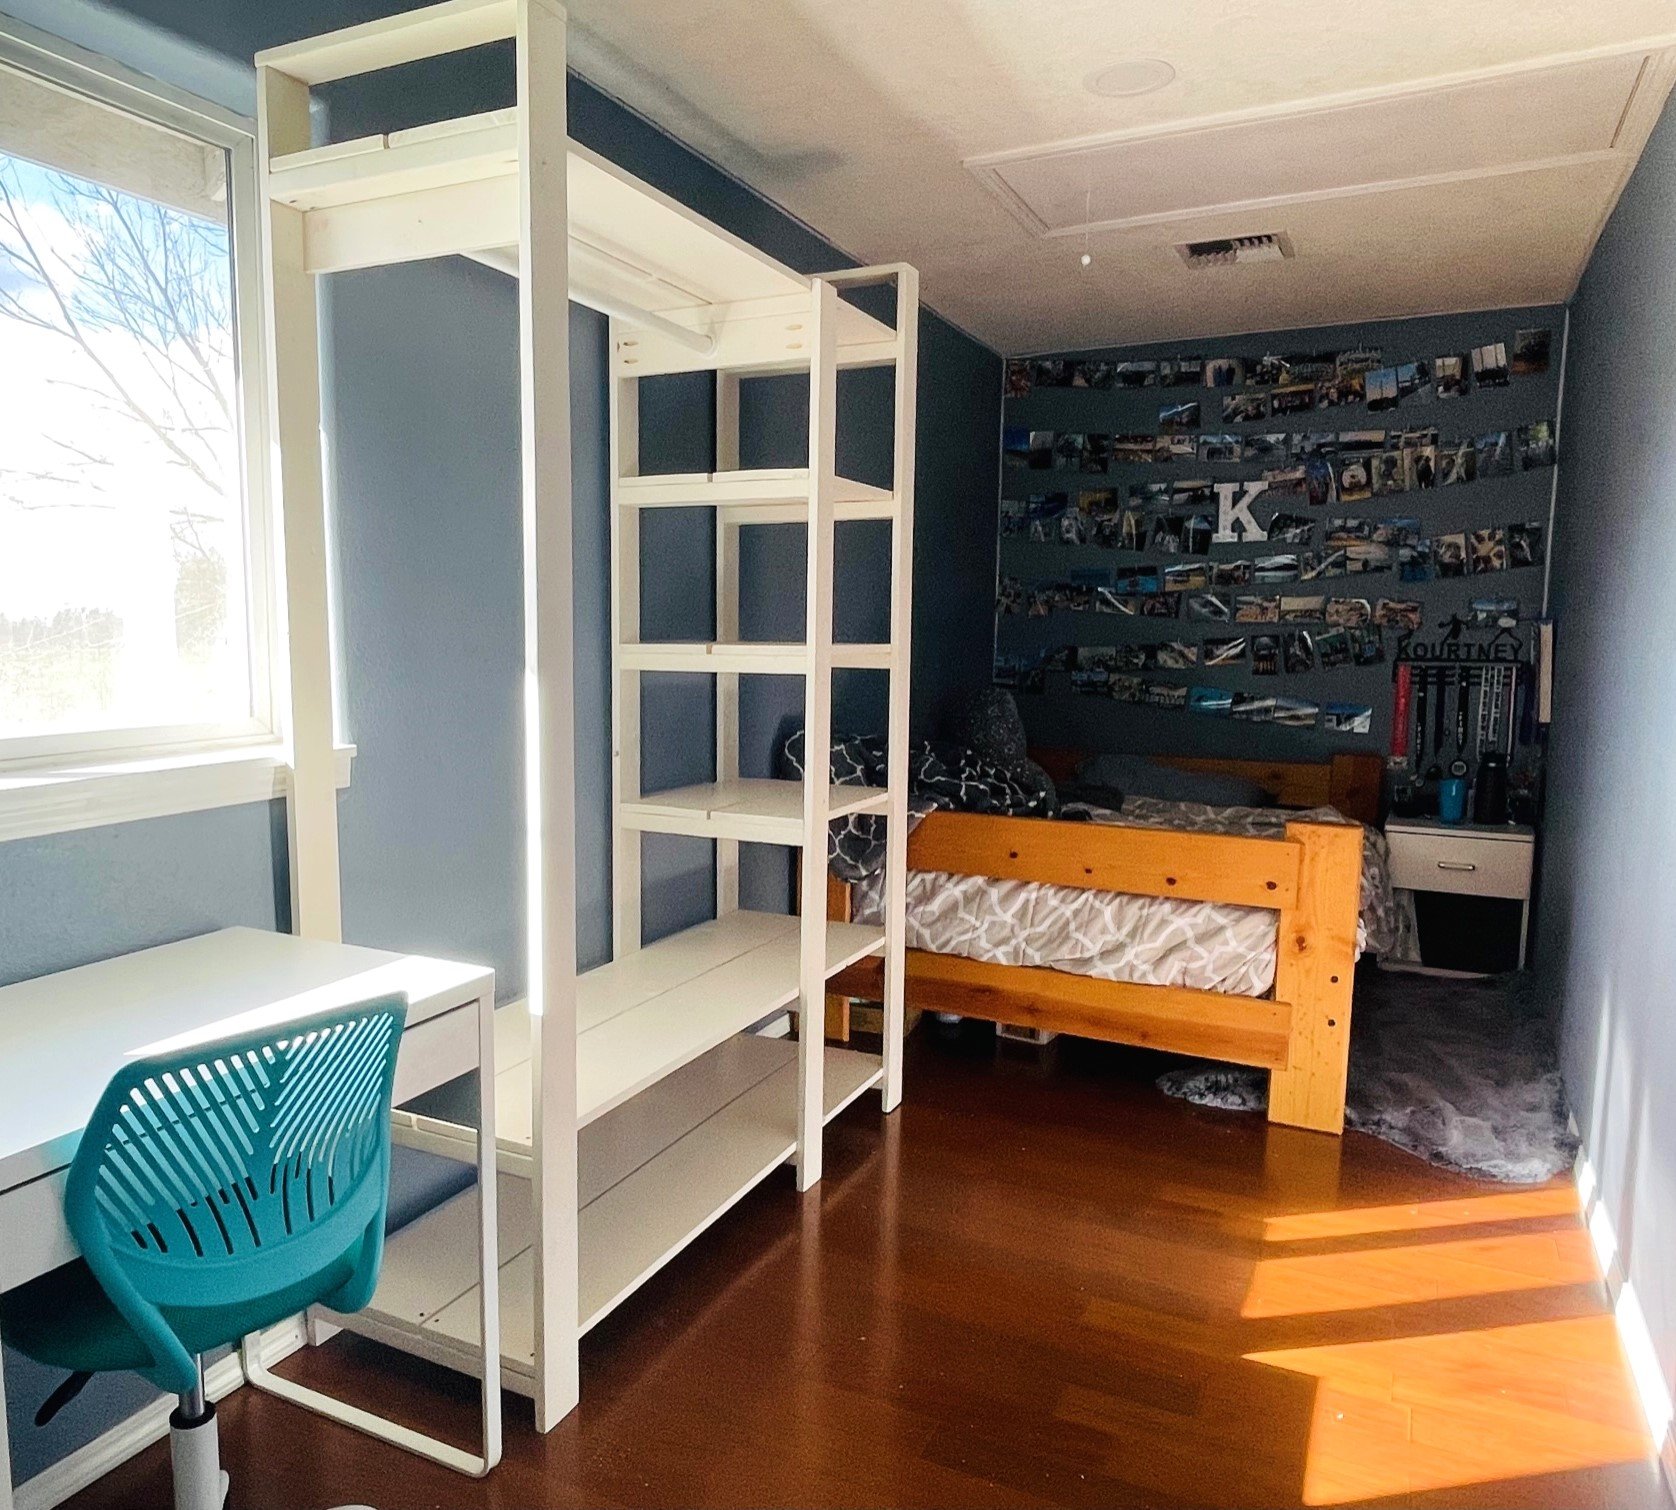
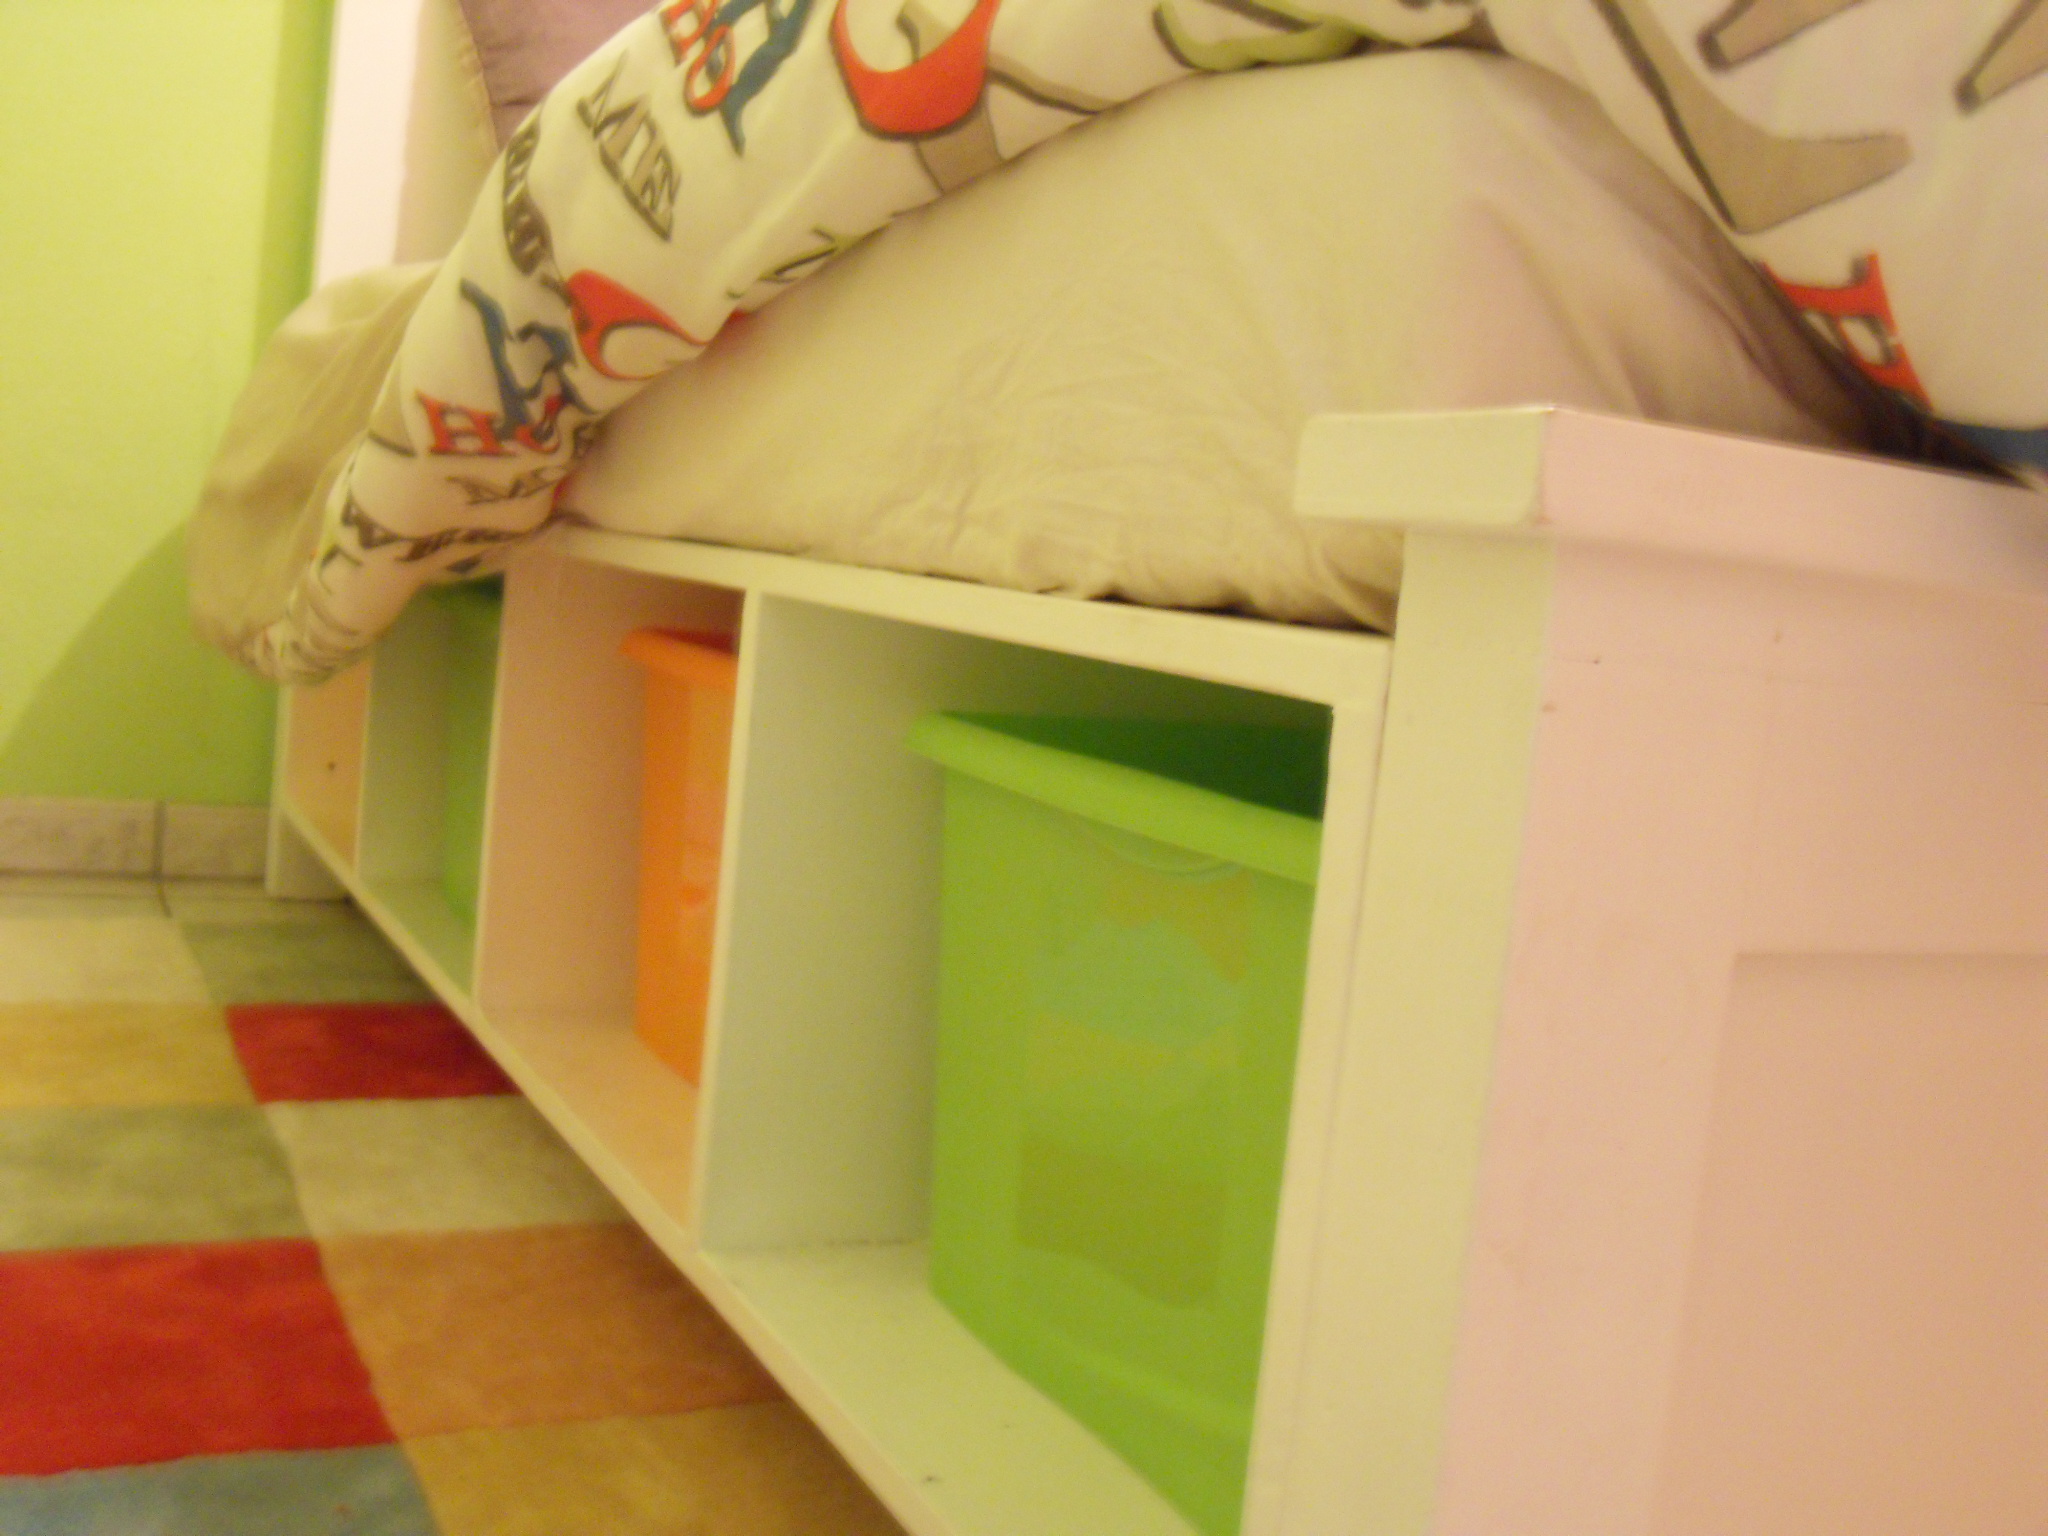
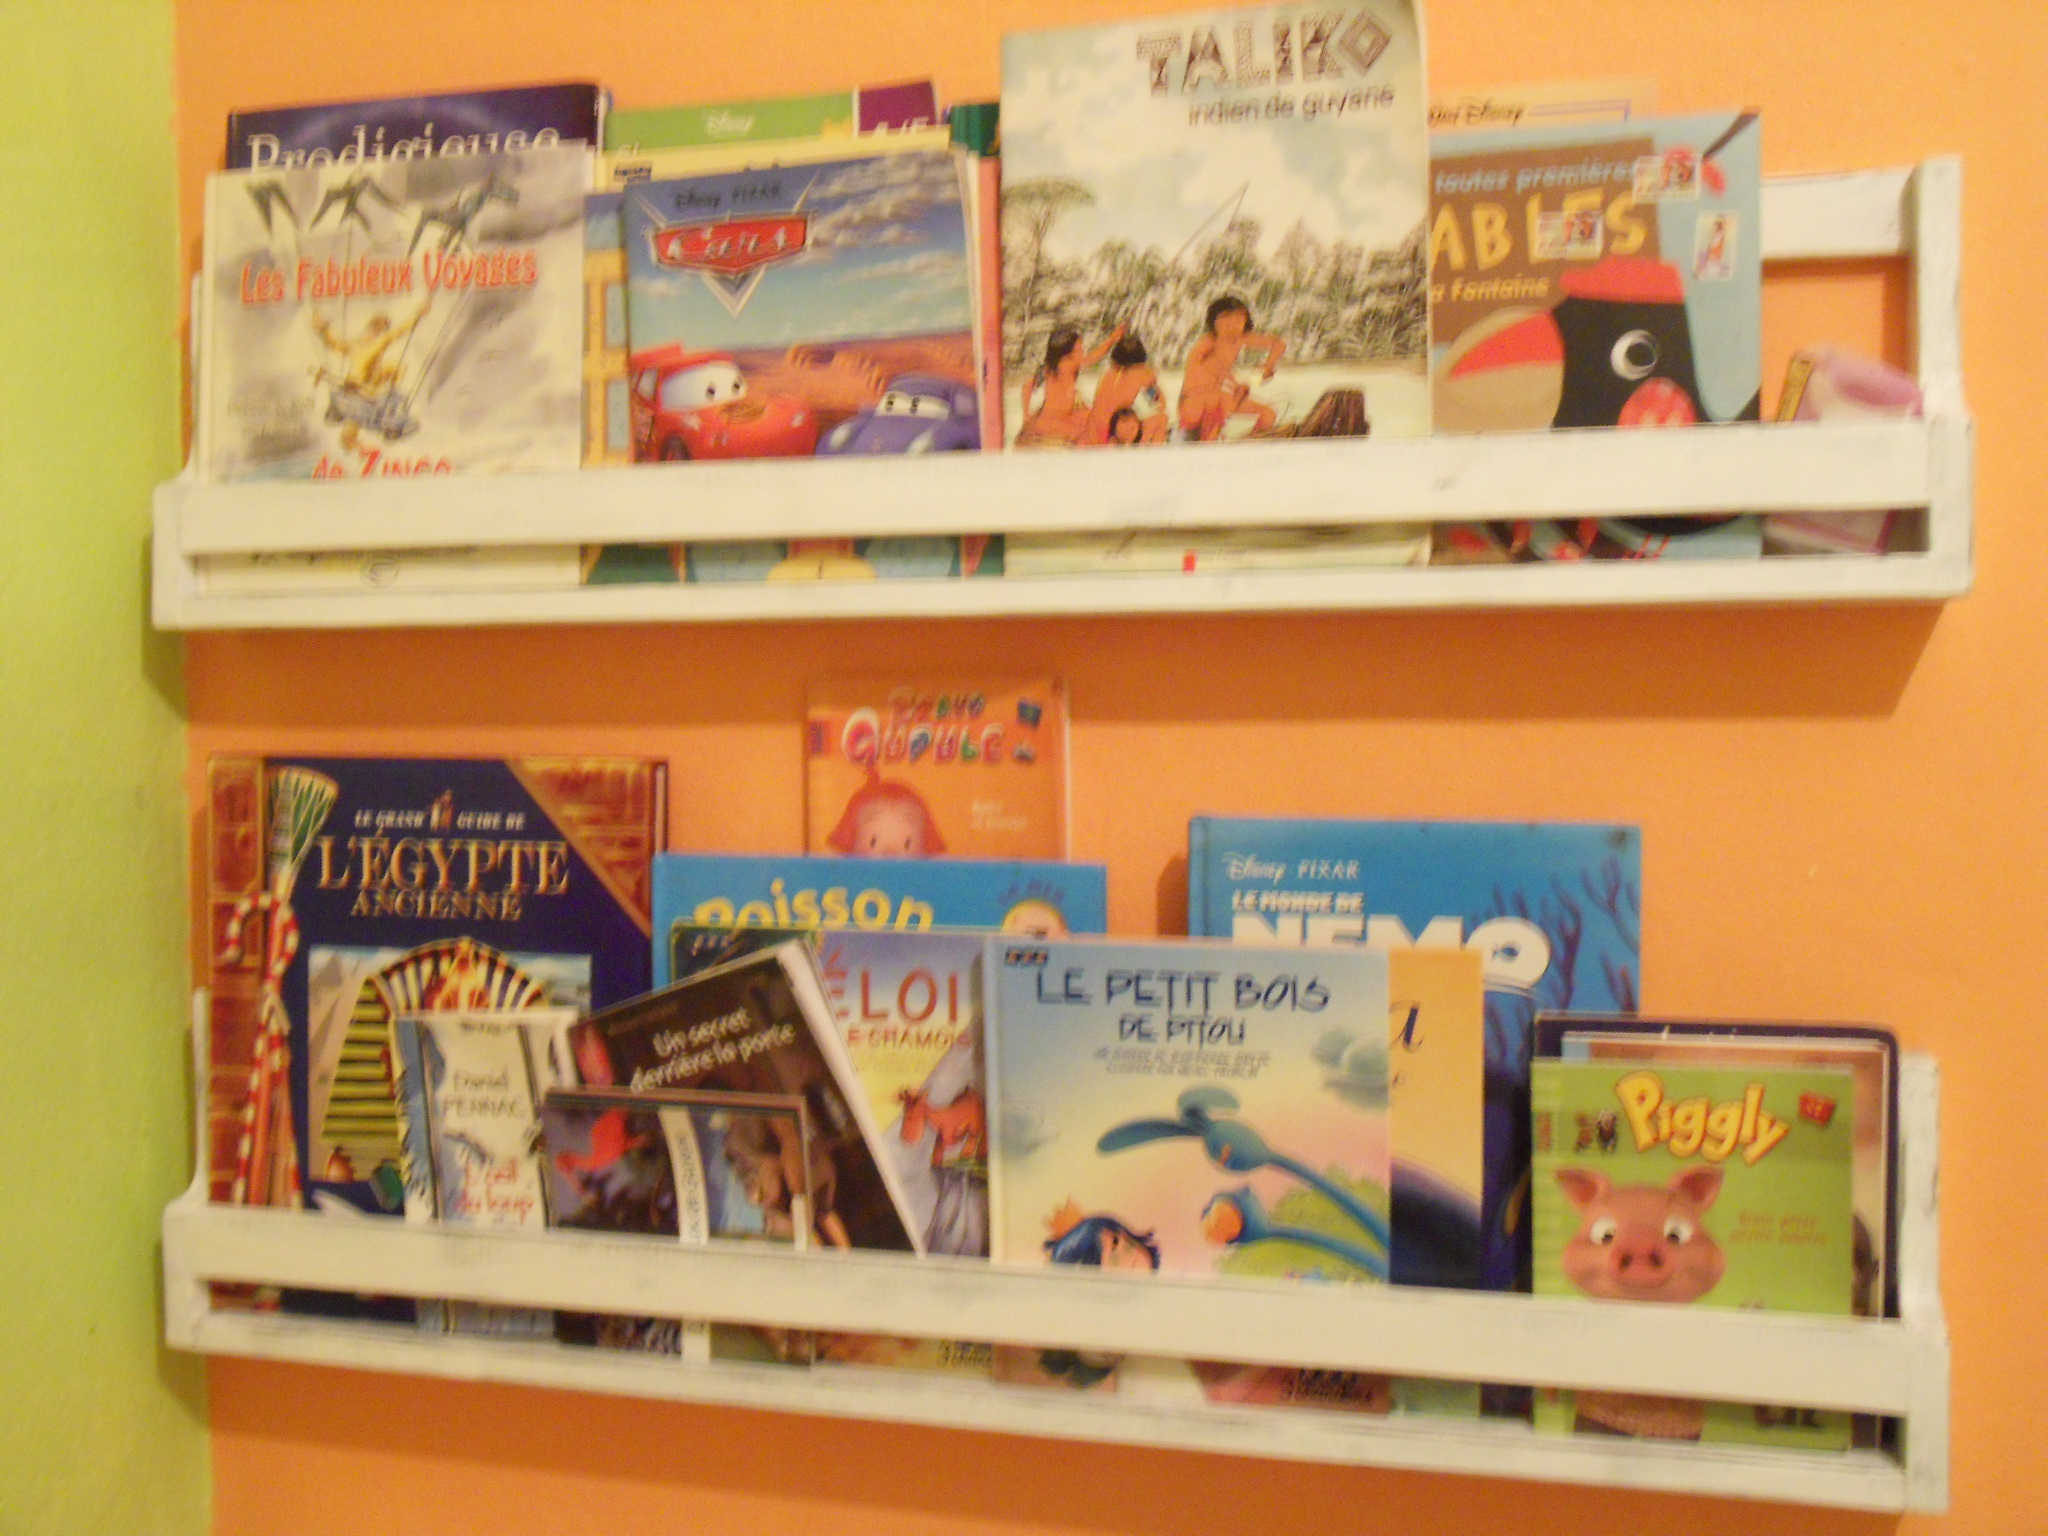
My son is 10 year old and I decided to change his room. His bedroom is very small so I built a full size bed whith storage. I hung up bookholders on the wall too.
Wee are very happy how it turned out.
Thanks Ana!

We originally re-sized these plans smaller to make a worktable for my office. Once that was built and we realized that we actually could make a table, we decided to make the full sized version. It turned out beautifully! A couple of clients have actually asked if they could pay us to make them one! Thank you, Ana, for the plans. :-)
This is my first attempt a making furniture. I enjoyed the process.
Thu, 04/15/2021 - 09:30
Unable to open the pdf for this plan, can someone fix this or provide new link? Thank you!!


Comments
Ana White Admin
Tue, 03/07/2023 - 20:13
Beautiful Bench and Finish!
Thanks for sharing your fabulous build!