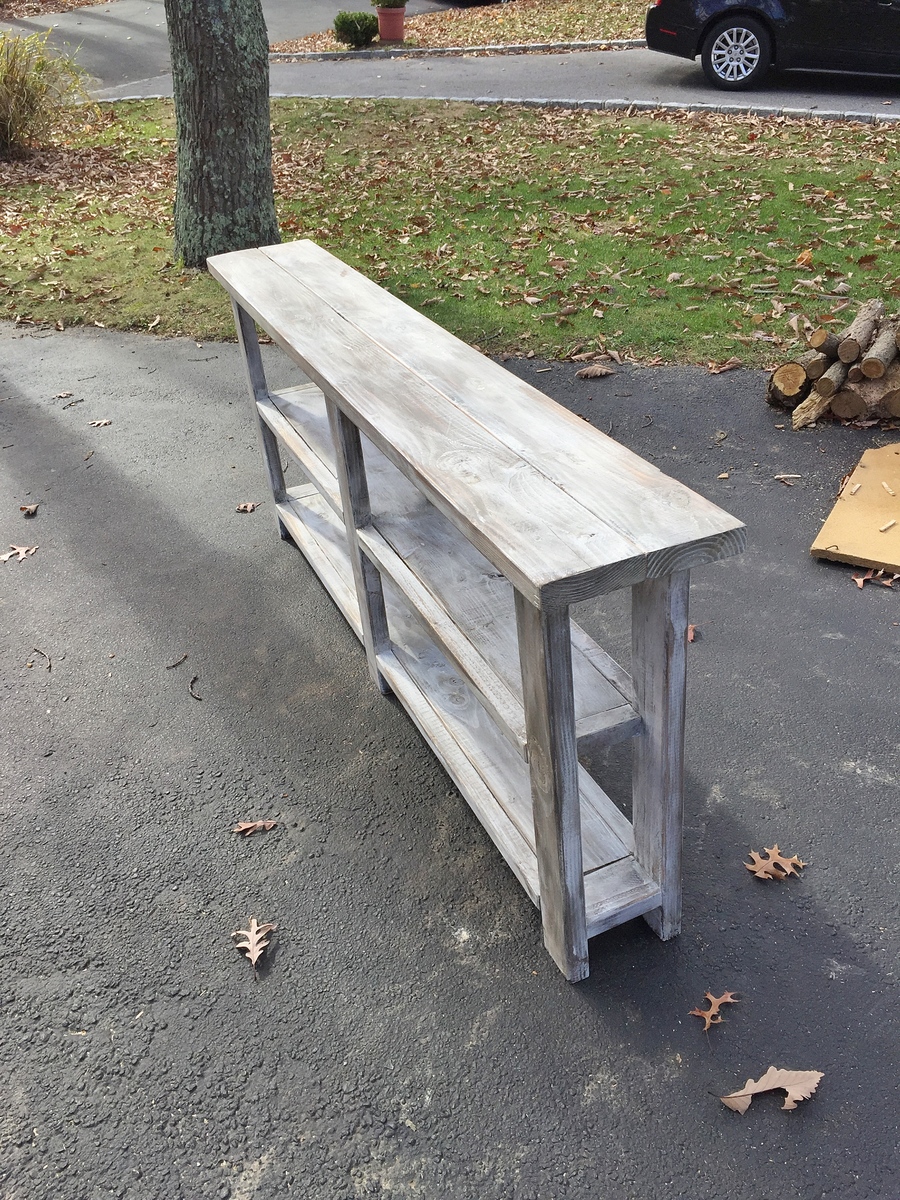
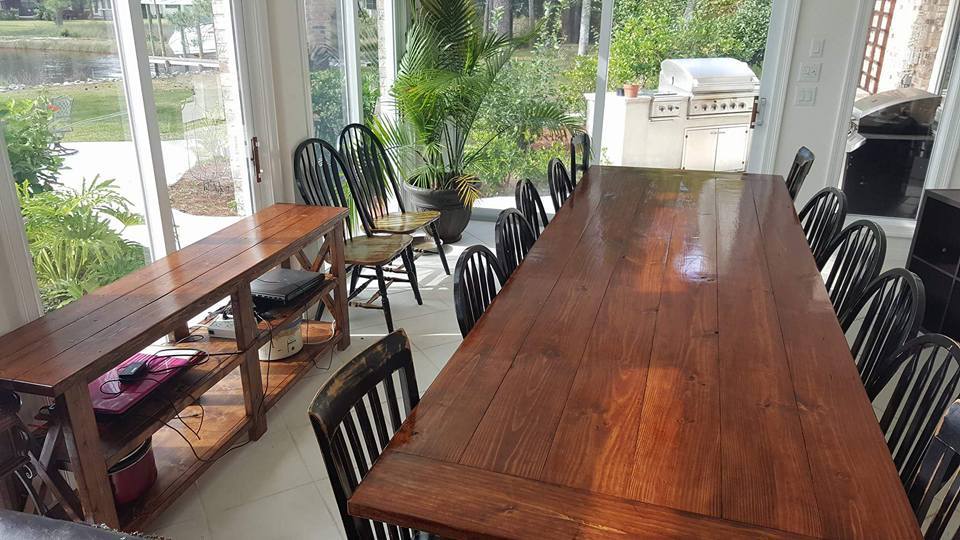
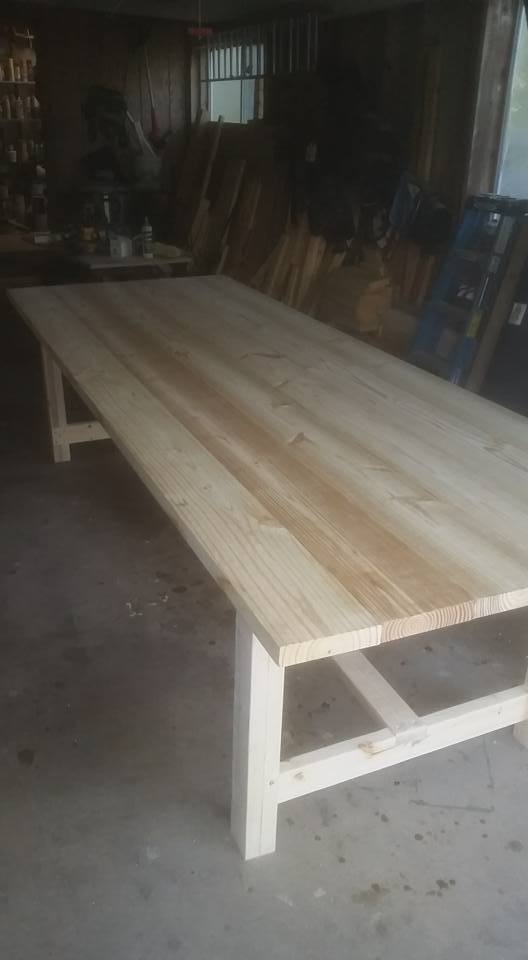
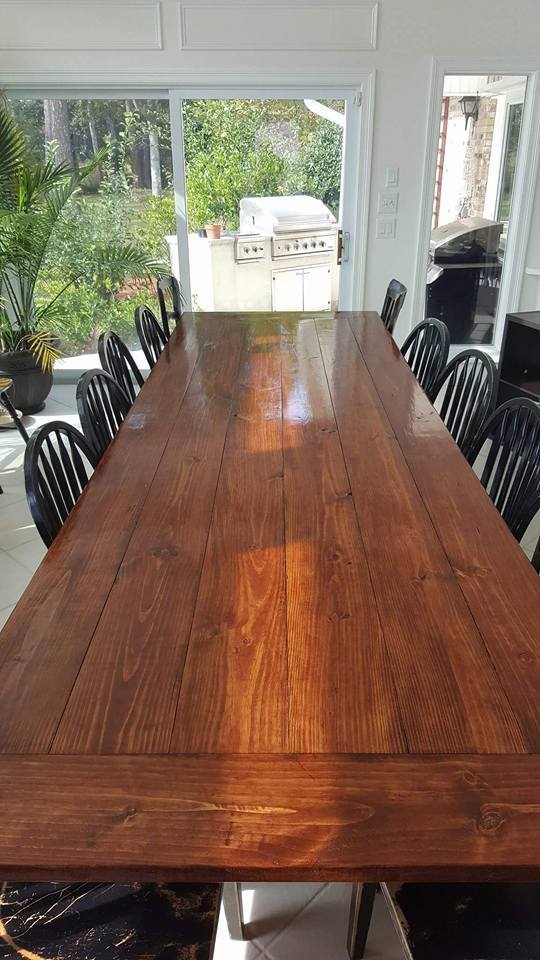
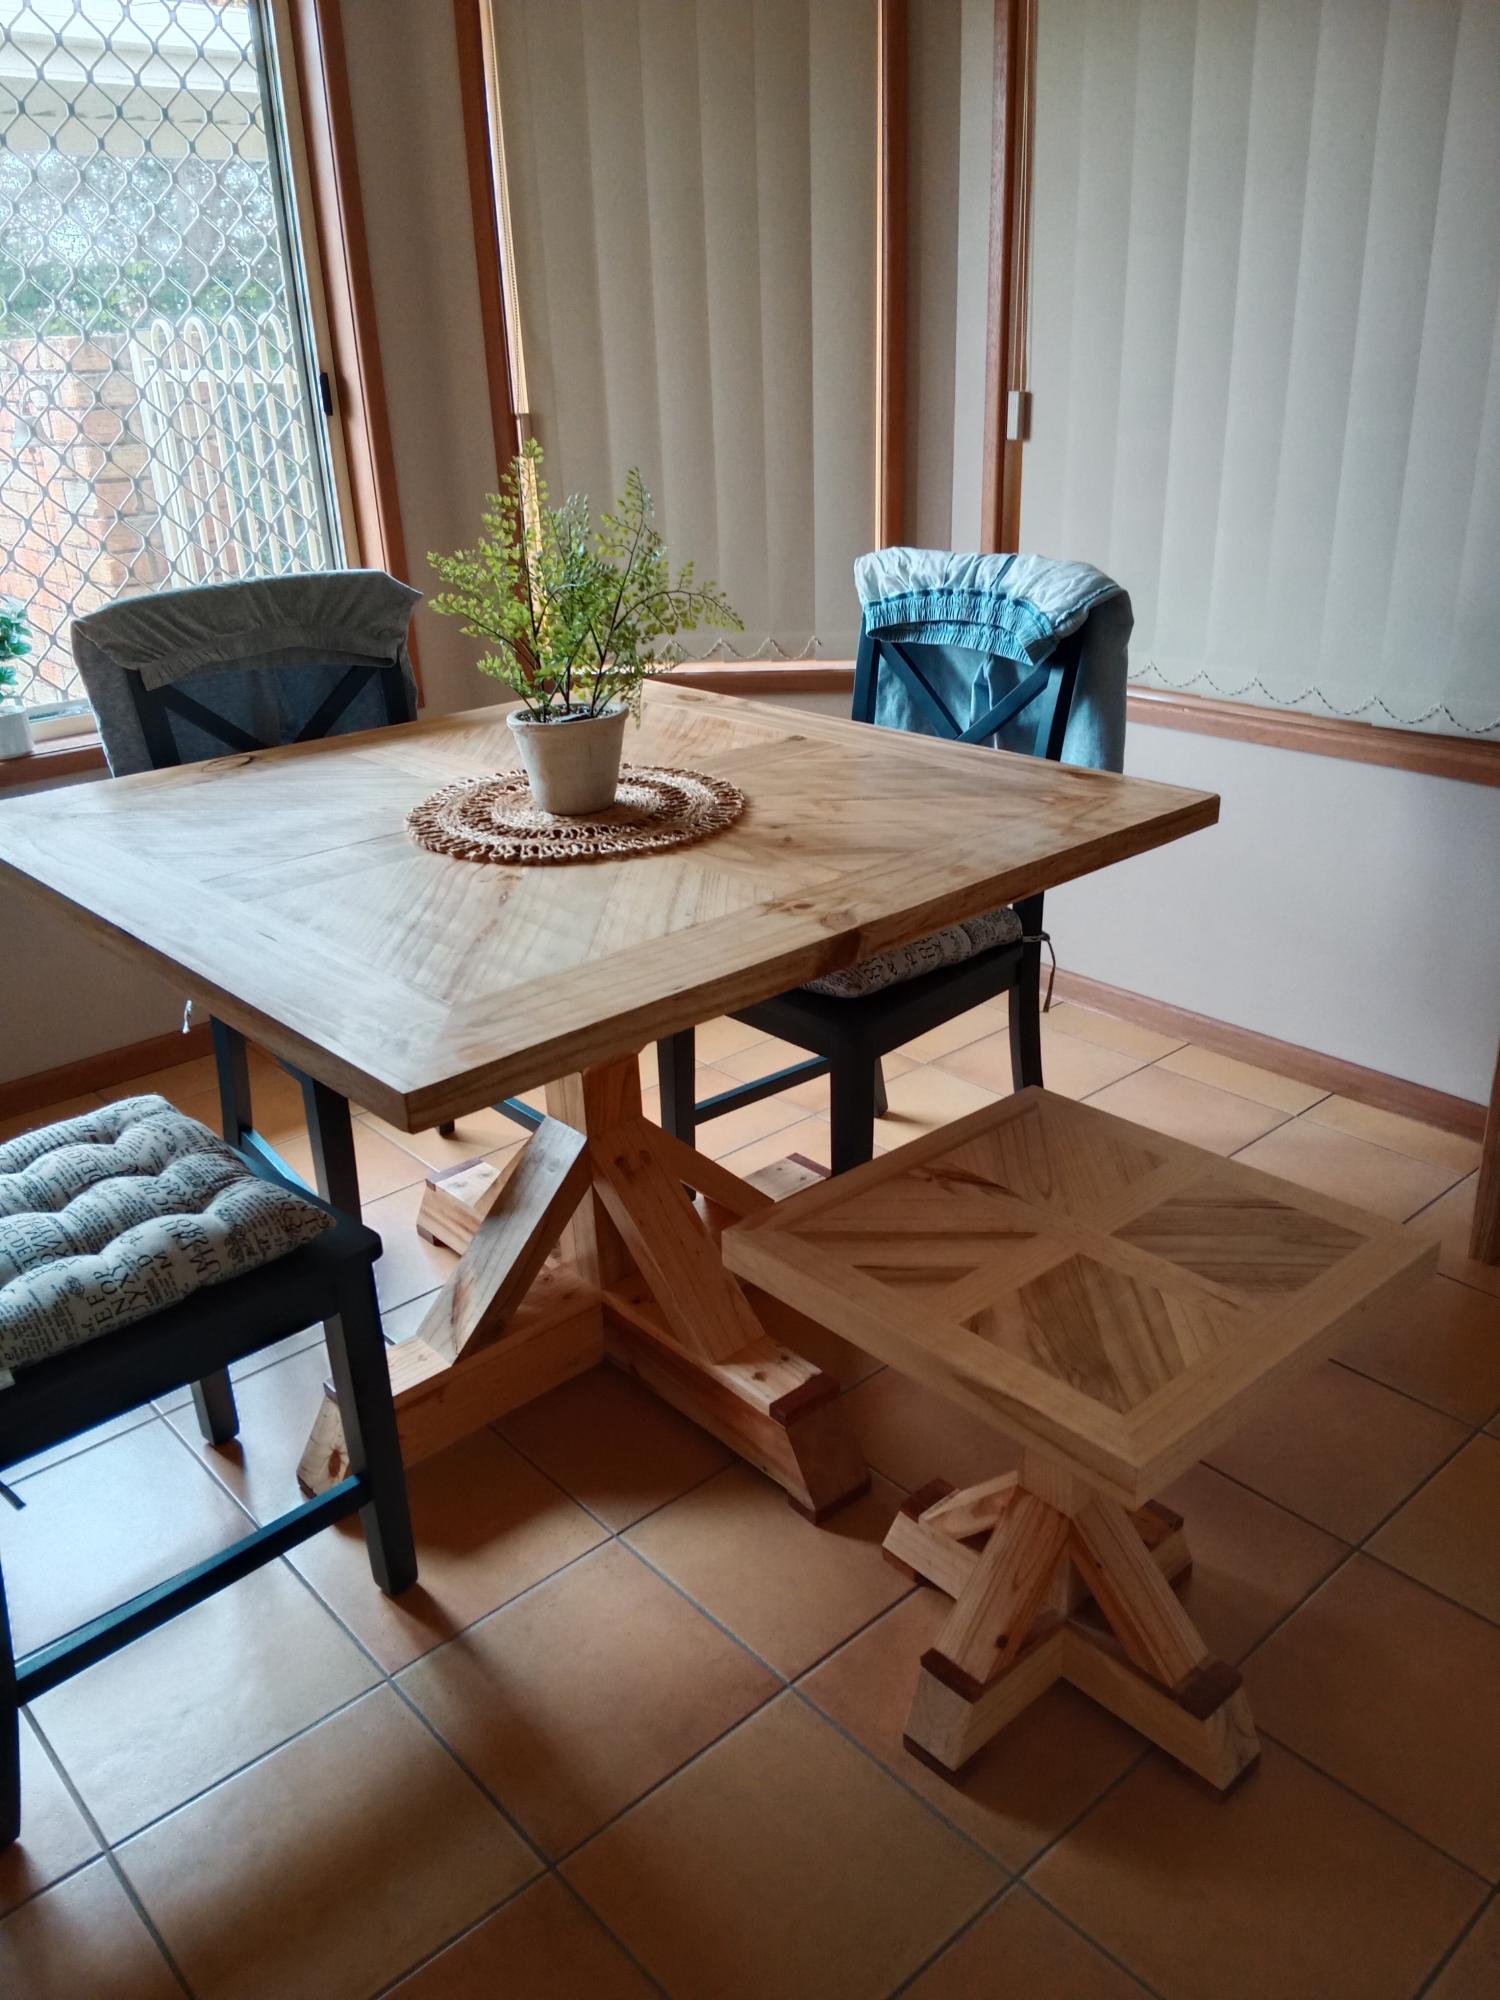
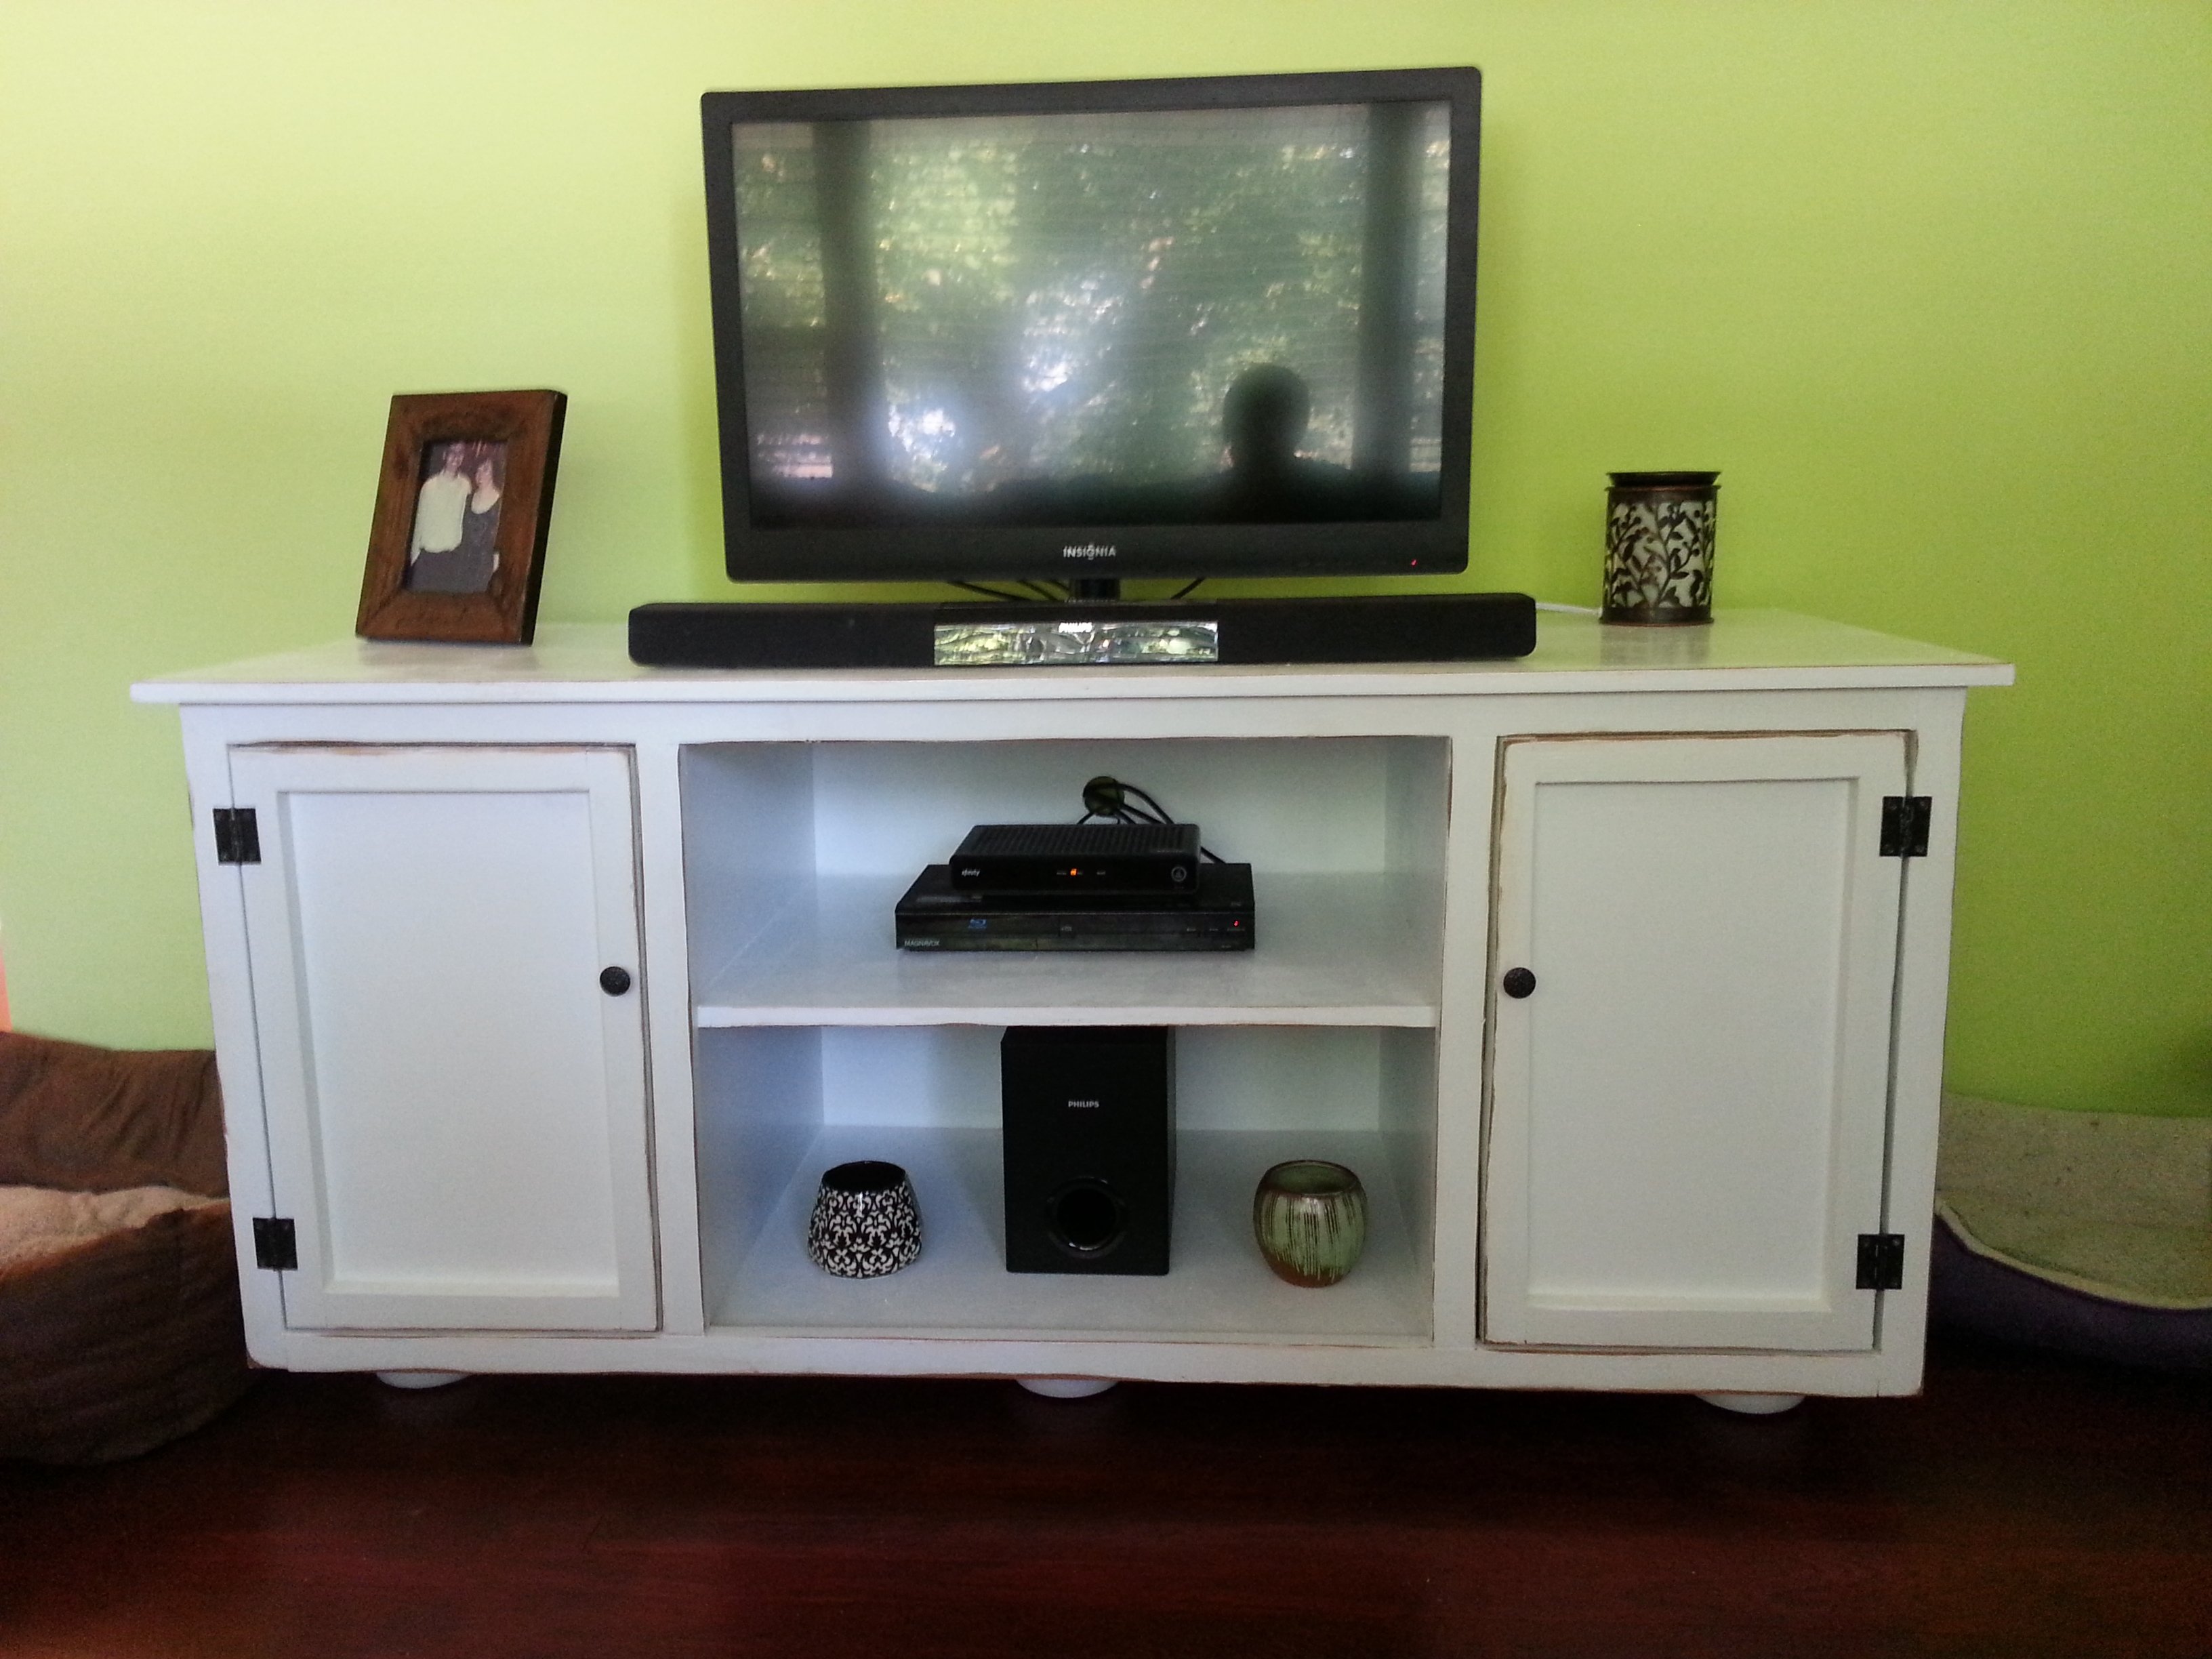
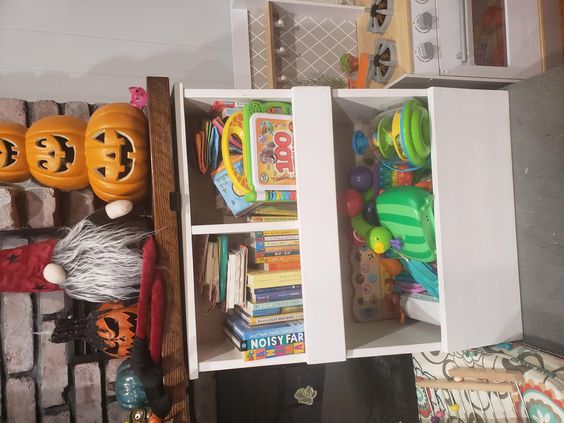
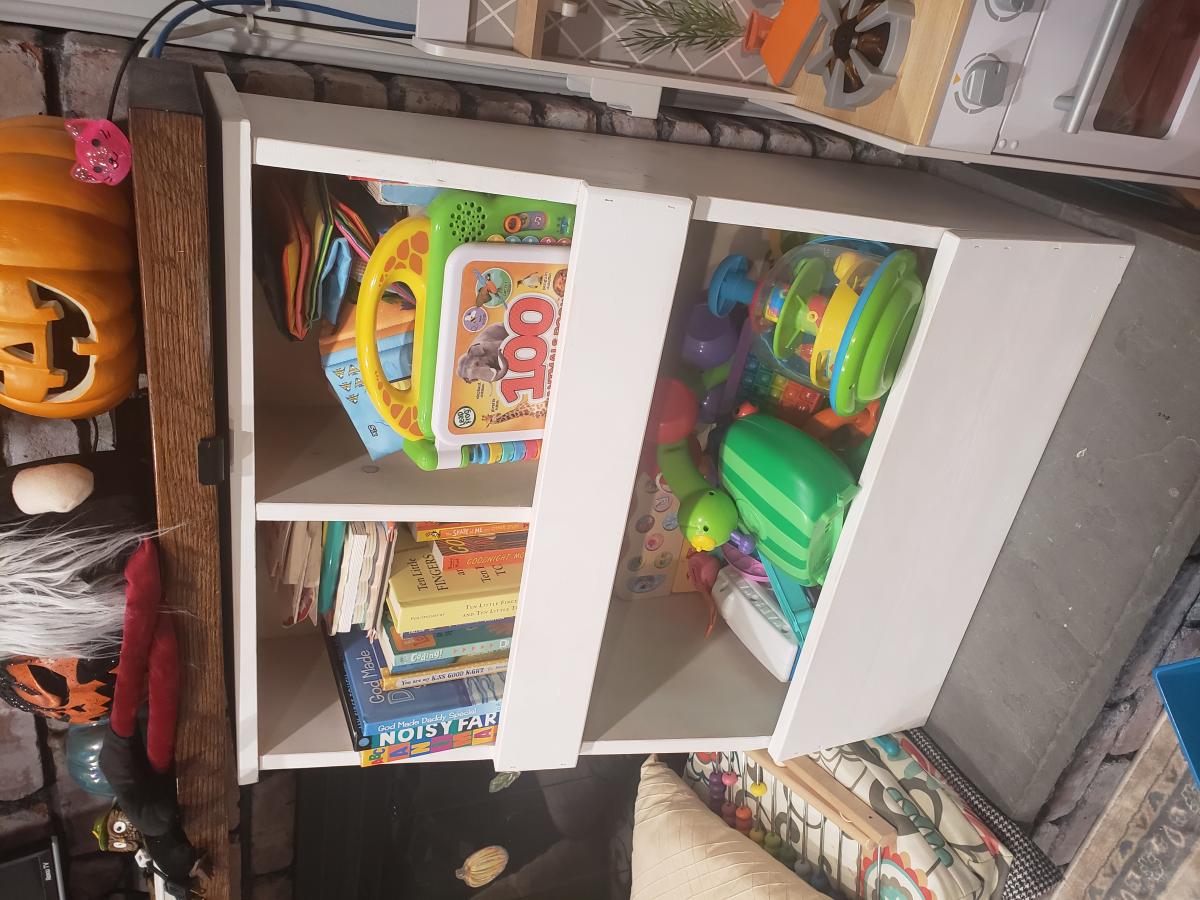
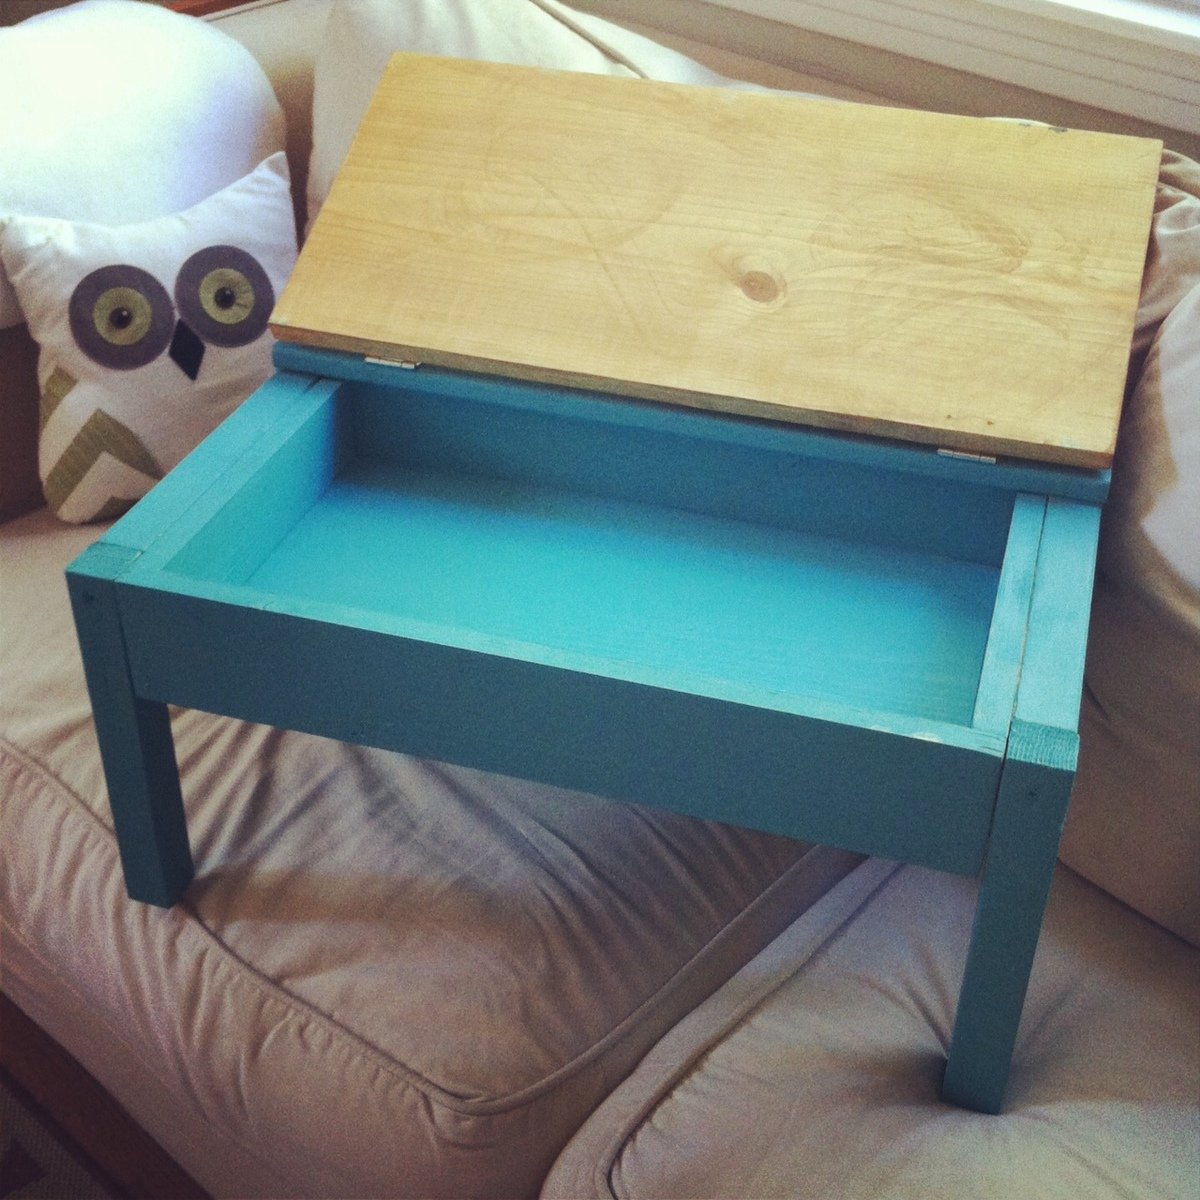
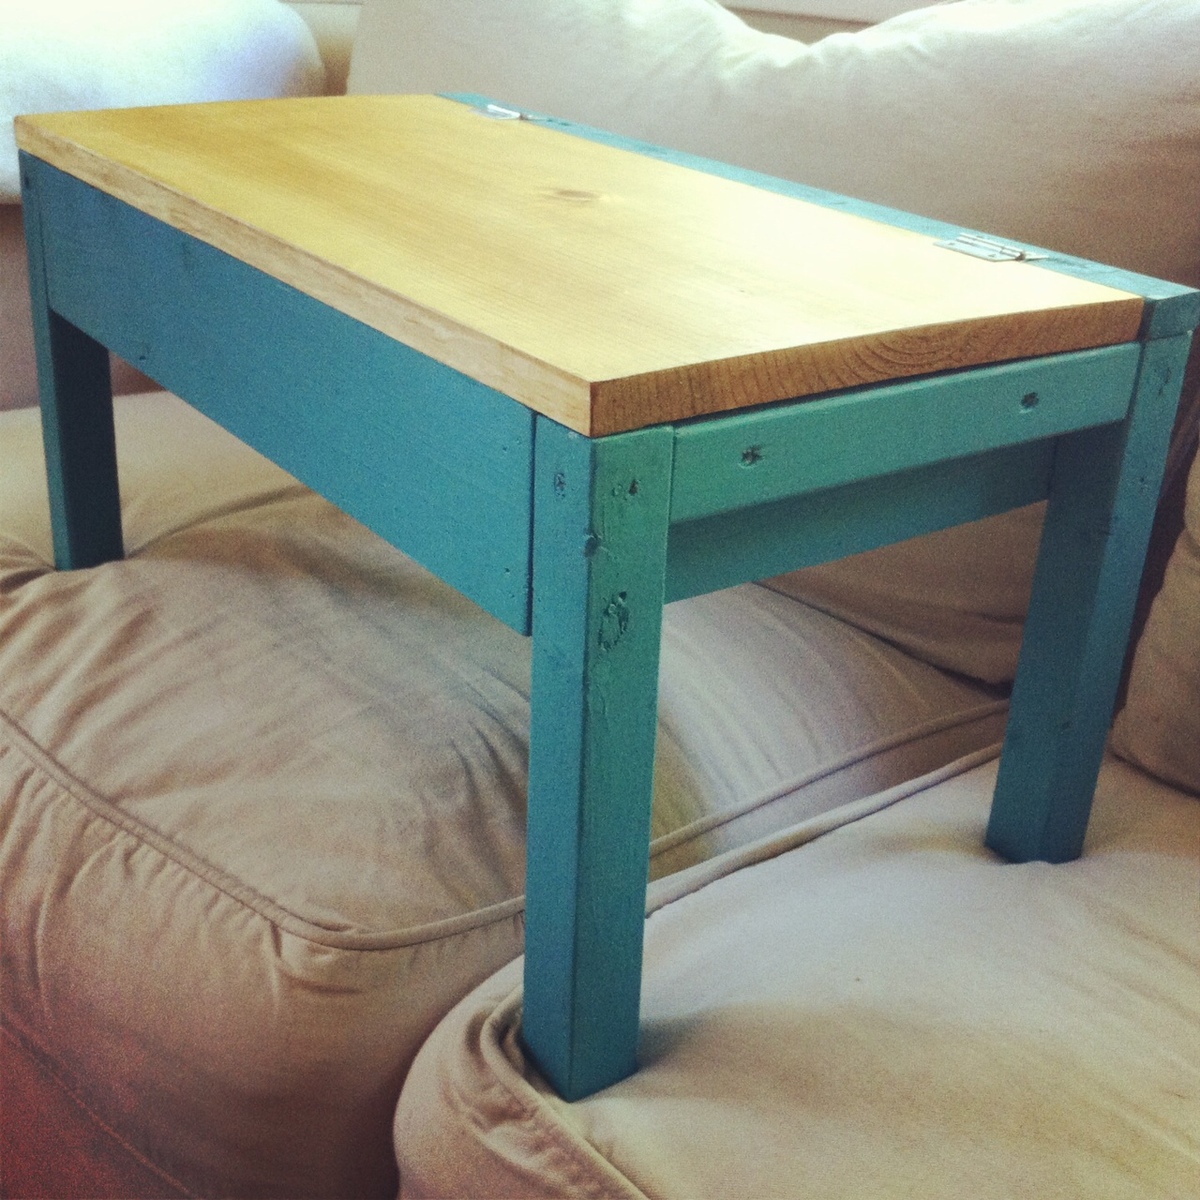
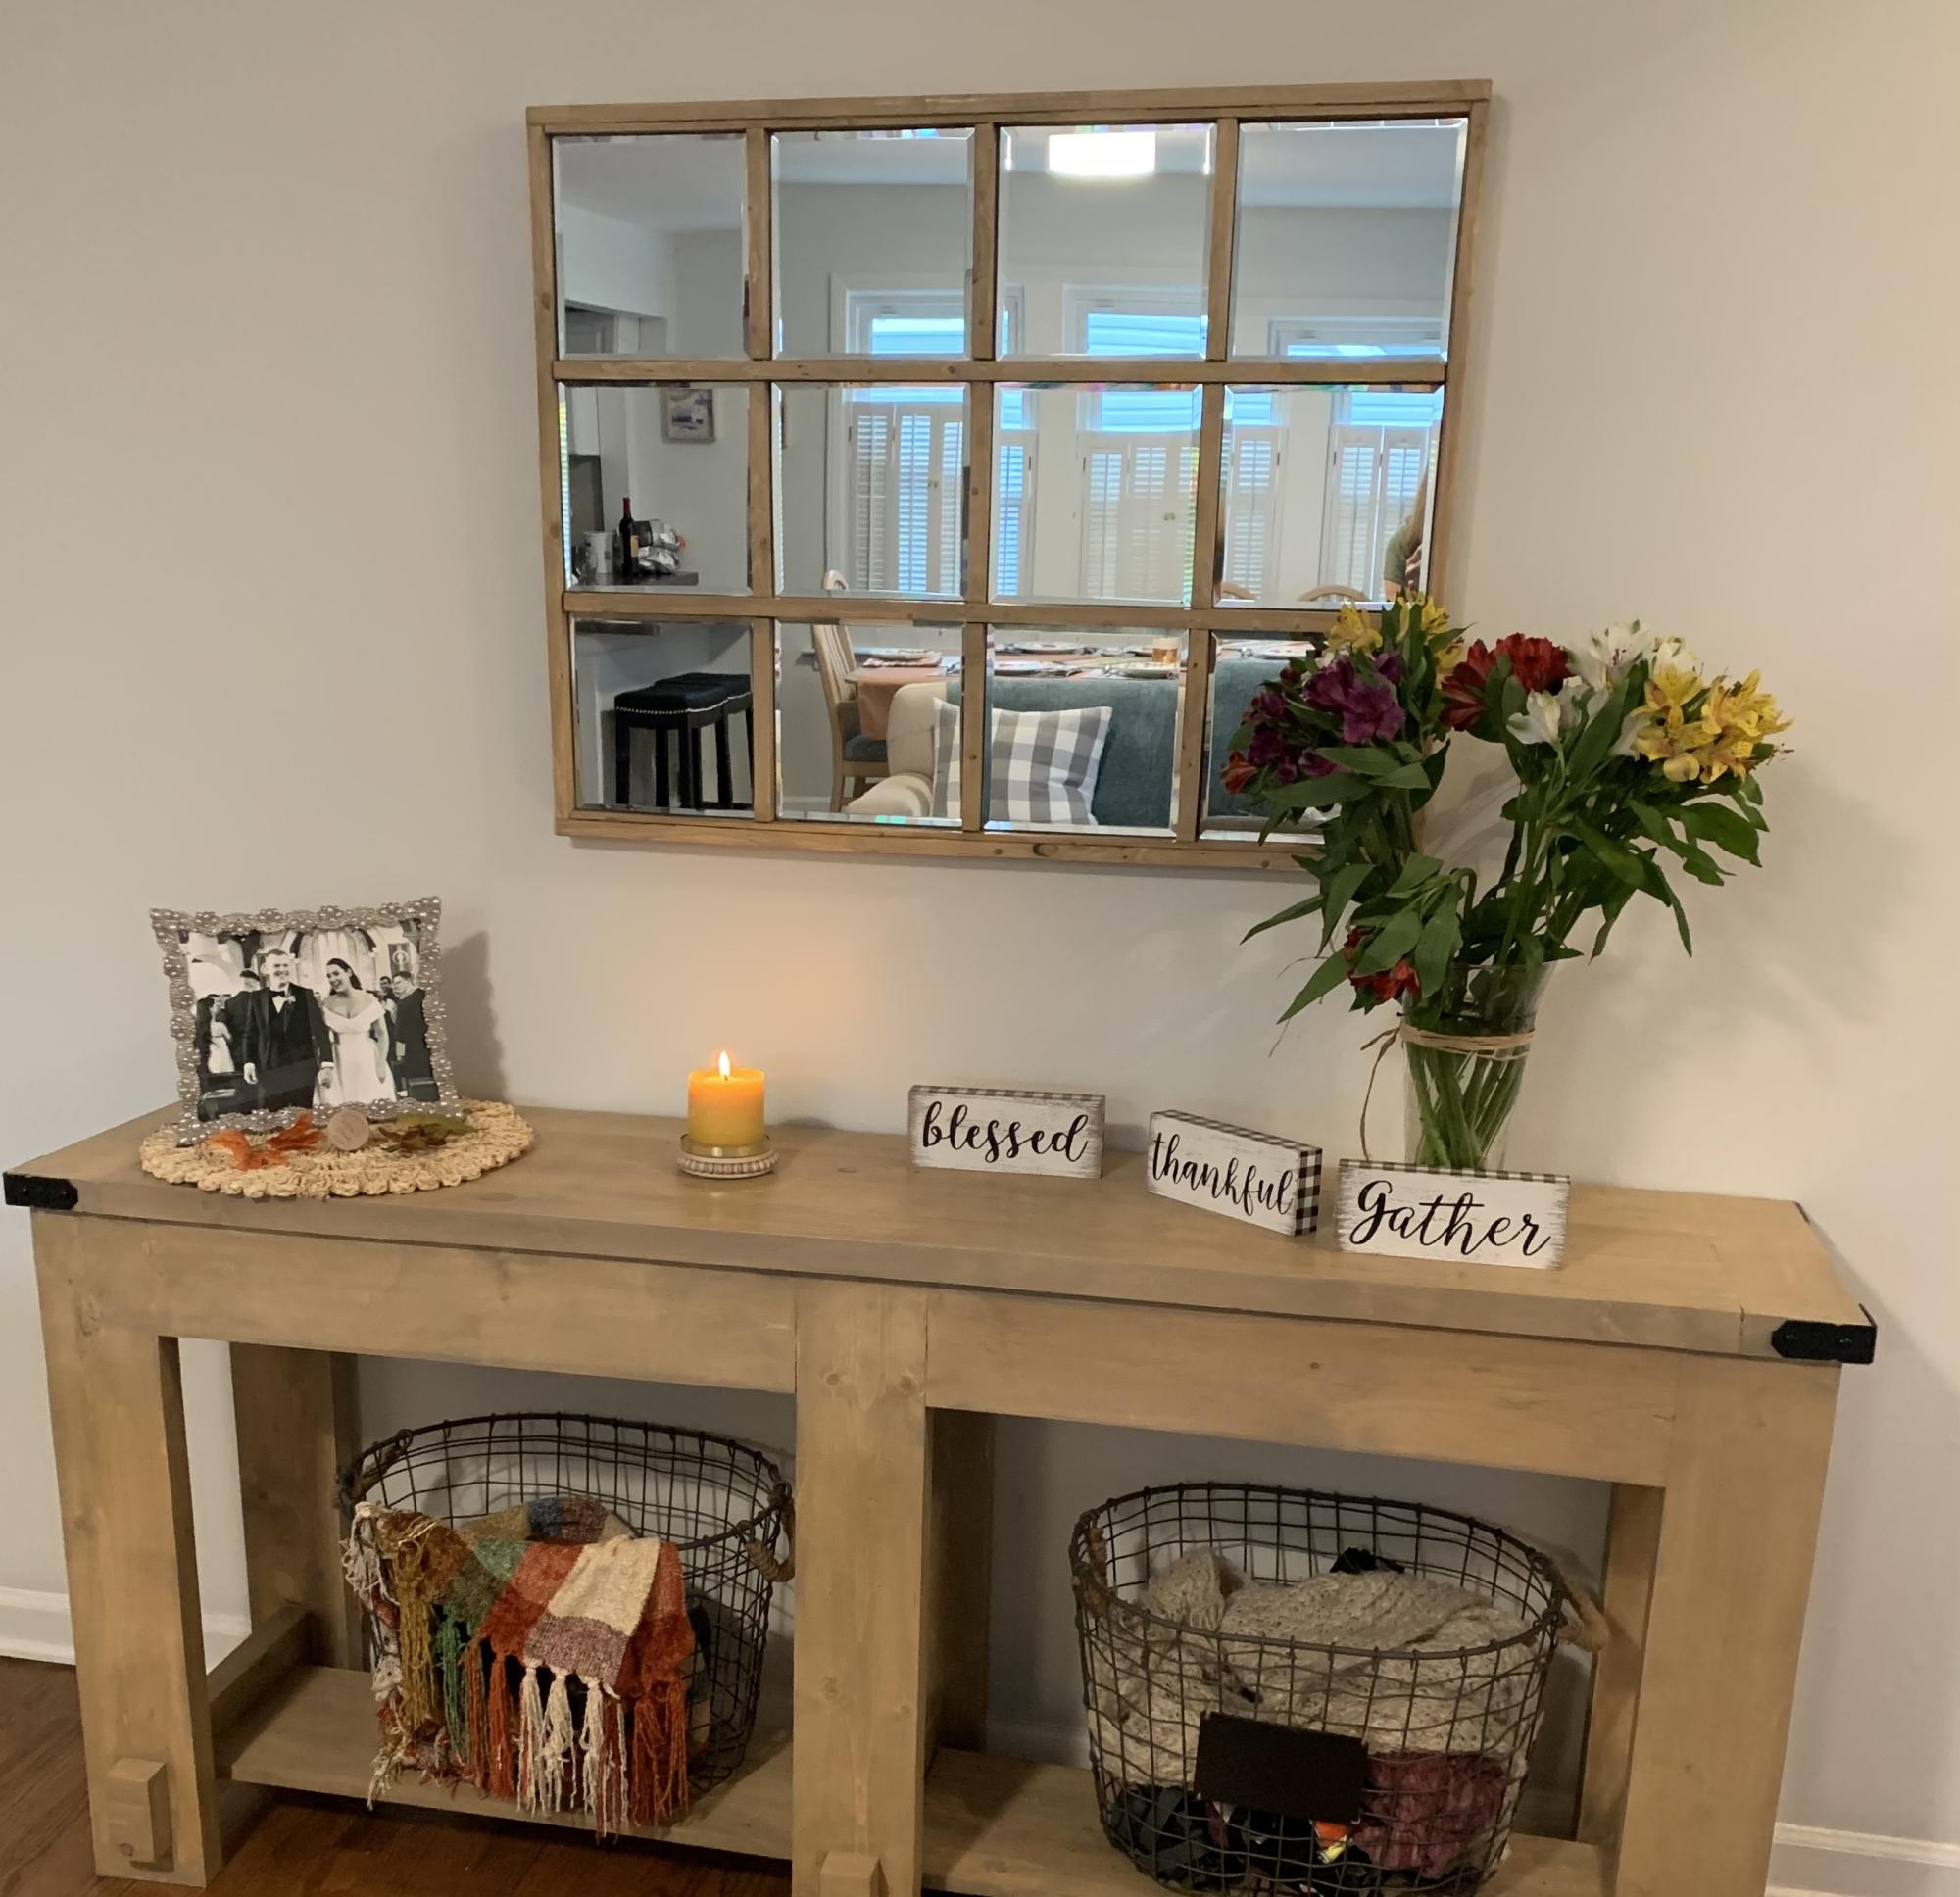
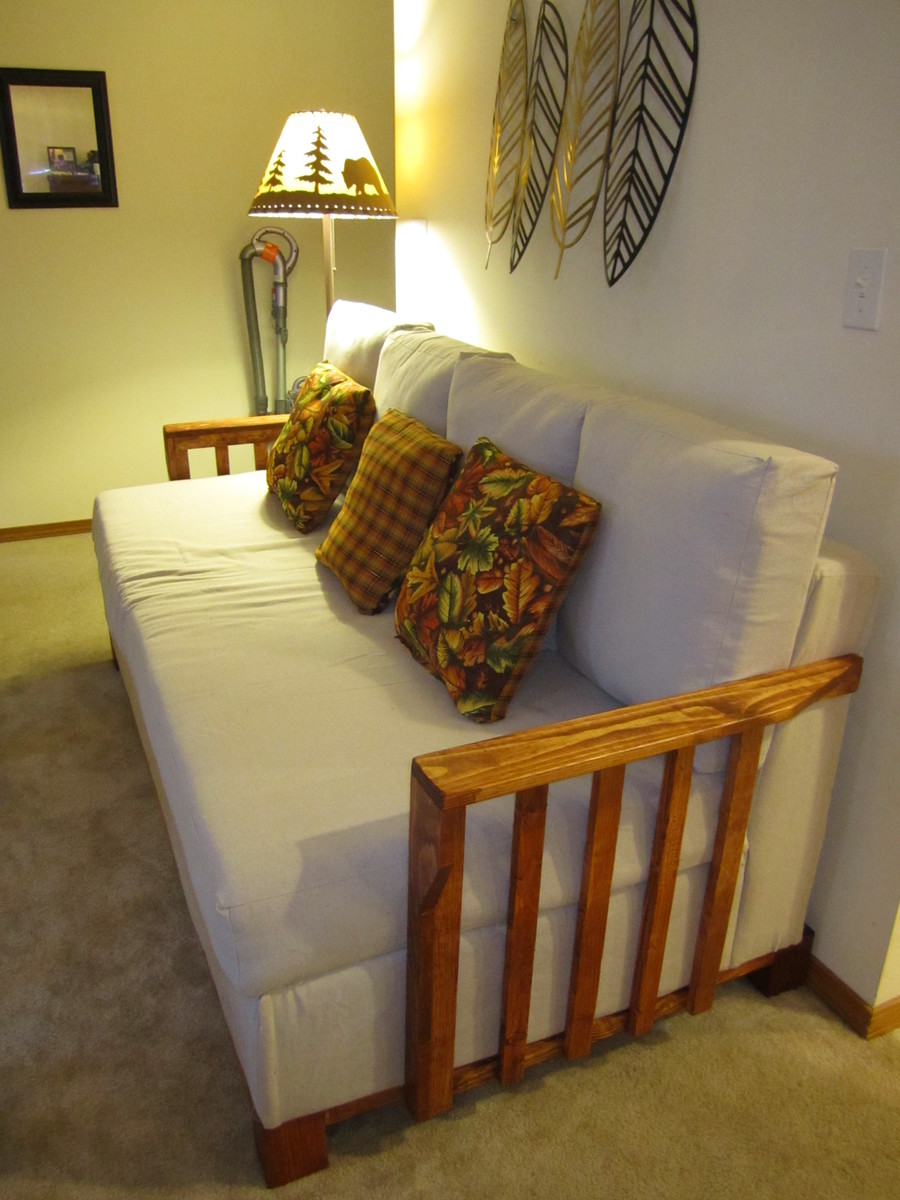
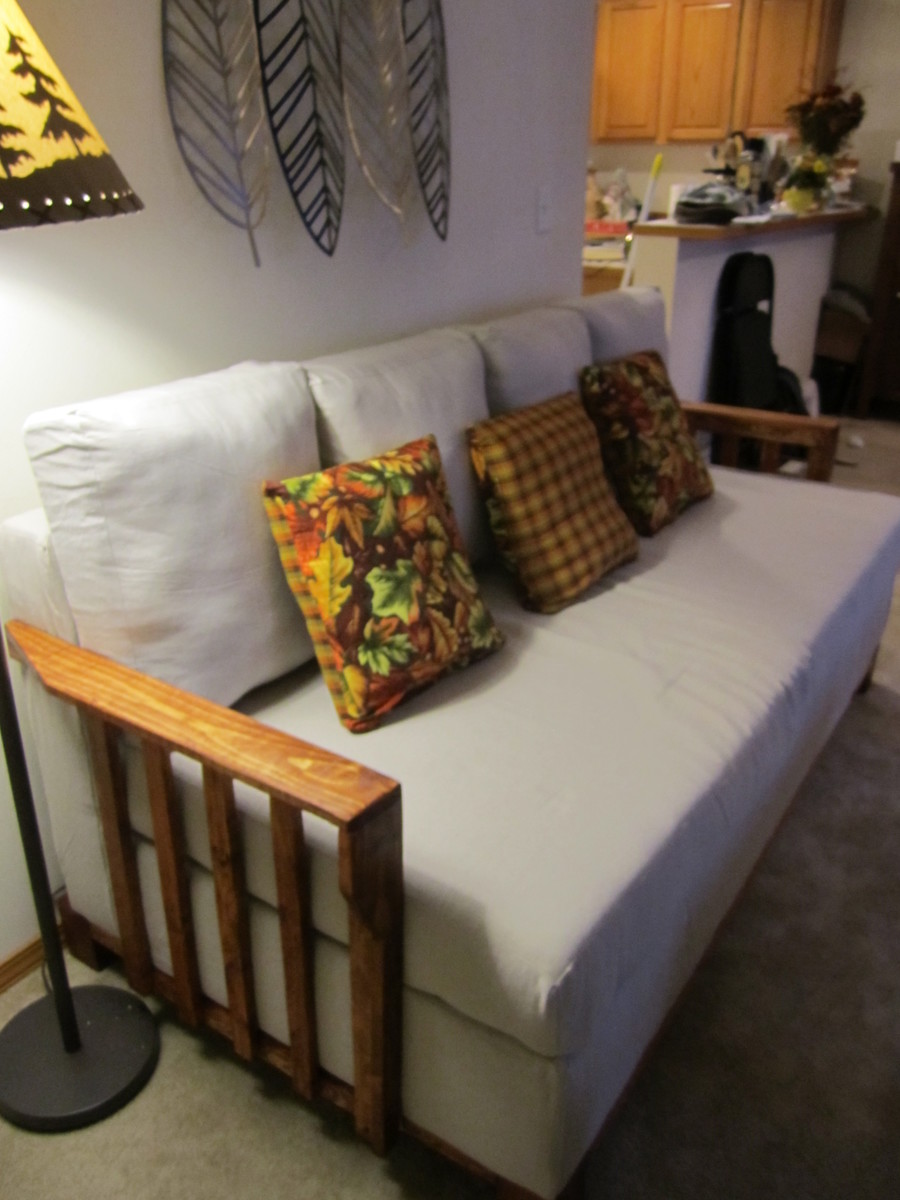
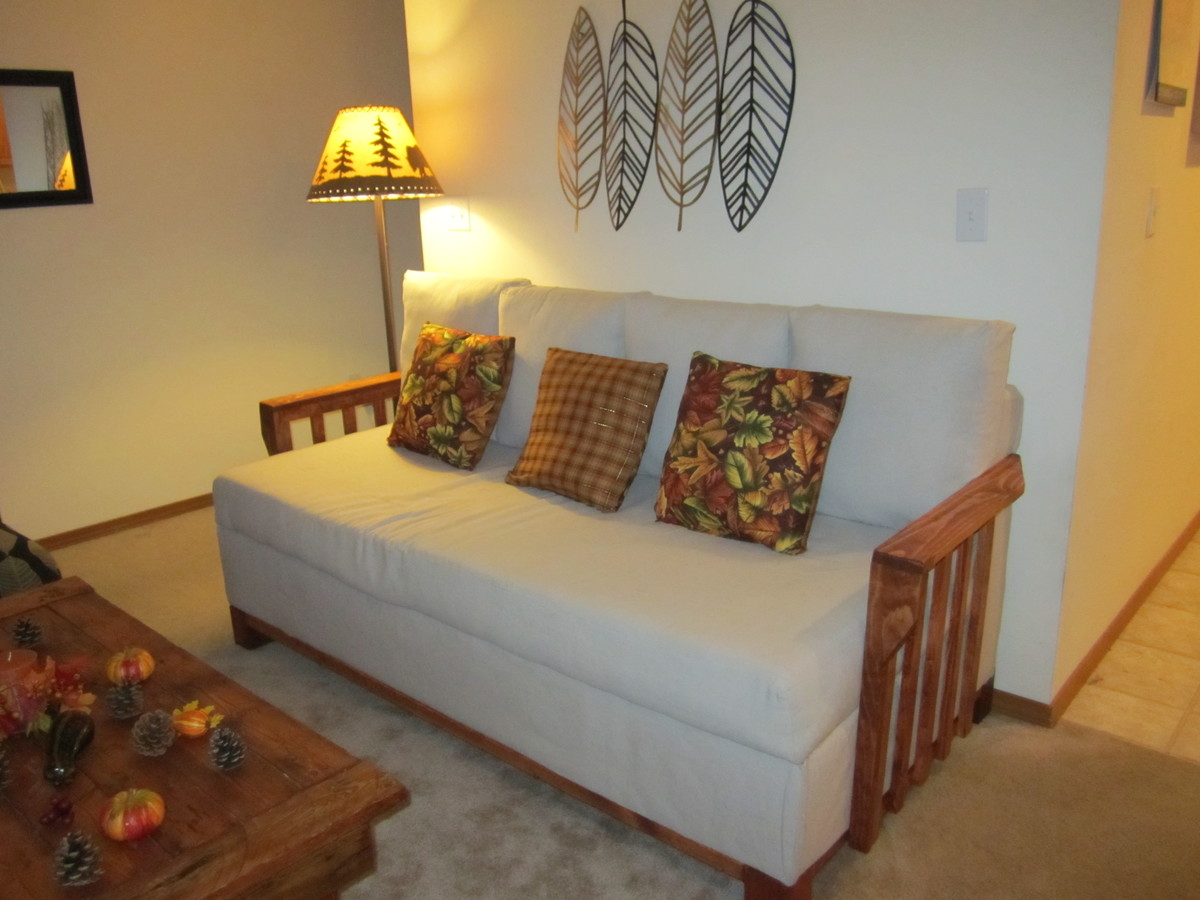
Community Brag Posts

Console/sofa table

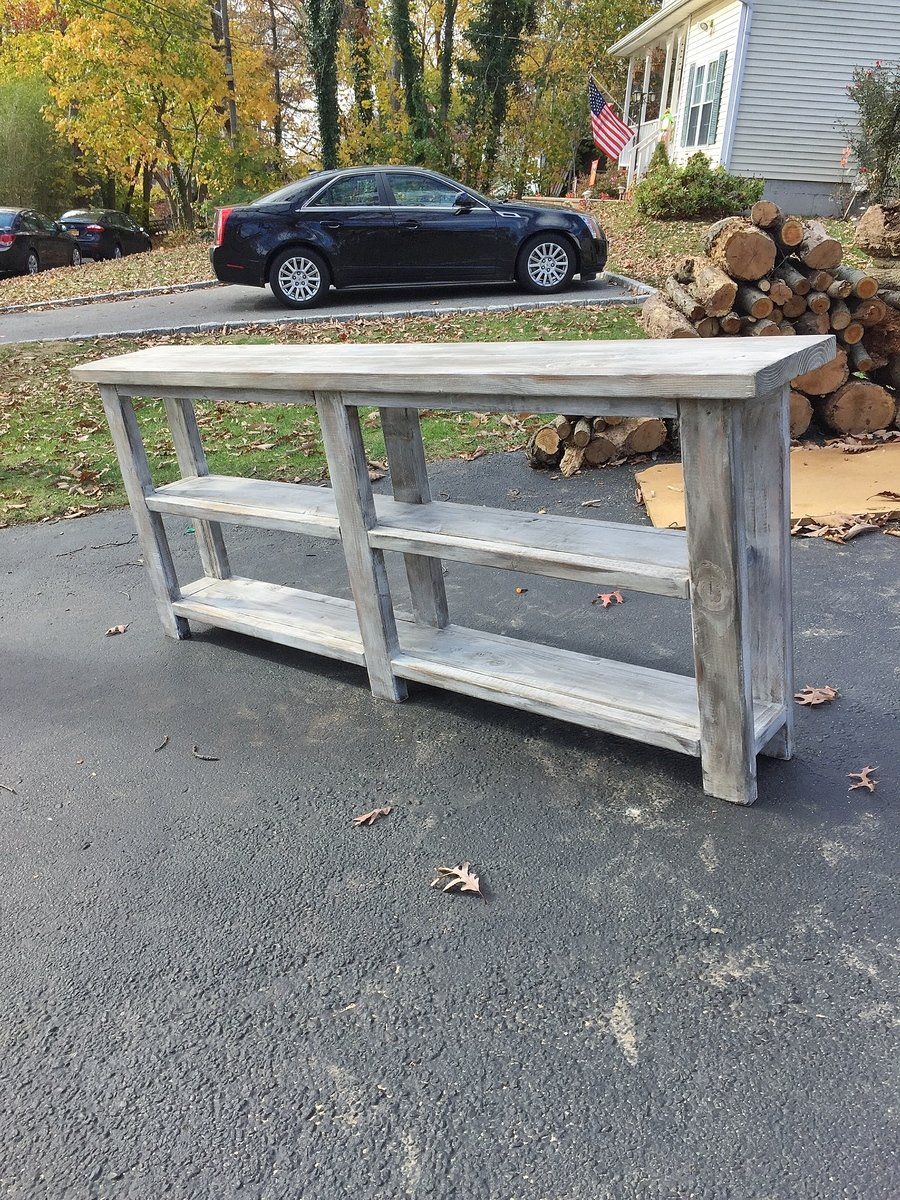
I made this table top with 2-2x6 boards to make it more narrow. I used 1-2x6 for the shelf and just adjusted the plan accordingly. The finish is dark walnut stain, then painted with rustoleum chalked linen white paint, distressed then covered with Minwax finishin wax in natural color.

Built from Plan(s)
Estimated Time Investment
Afternoon Project (3-6 Hours)
Finish Used
Minwax Dark Walnut stain
Rustoleum chalked linen white chalk paint
Minwax finishing wax natural color
Recommended Skill Level
Intermediate

Comments

Bookcase Dollhouse

Submitted by Anonymous (not verified) on Mon, 01/07/2019 - 11:23

My aunt wanted to get her grandaughter a dollhouse for Christmas.  I came to Ana's website and found this plan.  It was tedious and time-consuming, but it was worth it.  This was such a great confidence builder and has led me to build a lot more things for other people.  I can't wait to see what the future holds.  Used these plans...http://www.ana-white.com/2012/07/bookcase-dollhouse

Built from Plan(s)
Estimated Time Investment
Weekend Project (10-20 Hours)
Finish Used
White paint
Recommended Skill Level
Intermediate

Planters

Submitted by Anonymous (not verified) on Sat, 10/15/2022 - 17:36

Just made these planters. I haven't painted them yet but I had to post it. They came out perfect. Thanks Ana for easy to follow plans.

Comments

Niki's Modified Console Table

By using the simple console table project plan, I built my own console table. I changed some of the dimensions in order to make it fit in our apartment. I found the directions to be clear and easy to follow. To see more pictures, check out my blog, Sweet Southern Charm!

http://sweet-southern-charm.blogspot.com/2011/08/i-built-console-table…

Estimated Cost
$30
Estimated Time Investment
Weekend Project (10-20 Hours)
Finish Used
Antique Oak Stains and Off White Paint in Satin
Recommended Skill Level
Beginner

Table with storage crates

Large Table with 2 super large crates on wheels. It is about 4 feet wide and sits about 2 1/2 feet tall. I use the table for random projects, homework, crafts, ect. The crates I store extra blankets in one and in the other a lot of quilting items.

Estimated Time Investment
Day Project (6-9 Hours)
Finish Used
Table is painted a blue color and the crates stained in golden oak.
Recommended Skill Level
Beginner

LARGE FARMHOUSE TABLE

Submitted by mdbennes on Mon, 11/23/2015 - 09:25

I used Ana's plans for this project, but had to deviate since I built it for a friend who needed a table for 14!!  This thing is huge, 12 feet long, and about 44 inches wide.  I made it out of pine, 2x8s for the top but stuck to the plans for the frame.  It weighs about 200lbs or more, and had to move it with 4 guys...used an enclosed trailer to move it from my house to theirs. They love it so that's all that counts!  Oh ya, in the picture, you will see Ana's rustic X console table too! 

Estimated Cost
$150
Estimated Time Investment
Weekend Project (10-20 Hours)
Finish Used
Minwax English Chestnut stain, then a GLOSS polyurethane
Recommended Skill Level
Beginner

Functional Workspace

Submitted by jvos on Fri, 01/11/2019 - 20:19

I don't have much space for a workshop in my home - just the corner of my basement.  This plan was the answer!  It adds so much storage and functionality.  I plan to add some shelves to both units but love them already.  Thank you so much!

Estimated Time Investment
Afternoon Project (3-6 Hours)
Recommended Skill Level
Beginner

X based pedestal table

Submitted by Anonymous (not verified) on Wed, 10/19/2022 - 18:05

I was so impressed with the dining table i decided to make a lamp table as well

Comments

Farmhouse Doll Bed for Jennifer

I built the farmhouse doll bed for my 3 year old daughter. She has 2 dolls and always wants to sleep with her.I placed the doll bed near her bed and then they can sleep together. She is very happy. I am satisfied with the result and I think I will build an other doll bed.
Thank you so much Ana!

Estimated Cost
free, I used wood scrap and I already had the fabrics
Estimated Time Investment
An Hour or Two (0-2 Hours)
Finish Used
2 coats of Green acrylic paint and 1 coat of brilliant varnish
Recommended Skill Level
Starter Project

Comments

Media Console

Submitted by deondoond on Thu, 09/19/2013 - 10:32

This is my first attempt at any kind of wood working. We used the plans from:

http://ana-white.com/2011/03/rustic-media-console-0

We left out the middle doors and chose to do a little bit of distressing on the finish since we love the look. We're very happy with how it turned out and are ready for the next project!

Built from Plan(s)
Estimated Cost
~$150
Estimated Time Investment
Weekend Project (10-20 Hours)
Finish Used
We primed and then painted with a high gloss paint. We did some light sanding around edges to try and make it look like natural wear and then stained the exposed wood with Valspar transparent mocha glaze to make the exposed wood look older.
Recommended Skill Level
Intermediate

Fireplace Barrier

Submitted by ccapps4284 on Tue, 11/24/2015 - 10:54

I was worried about my 13 month old Grandson getting burned by the glass on our gas log fireplace. And I could not find a screen that was not metal and was sturdy enough that I felt comfortable using. So, I did some measuring and built my own to match our existing mantle and frame around the fireplace. Made my own 2x2s for the rail as I could not find any straight enough and "knot free". My wife was a little hesitant when I told her I was going to buld something because I am not the fastest builder as I just do it hwne I get time and feel like it but, this only took a couple of weeks including the painting and staining. I can take it apart in 3 pieces for the summer and store it in the garage.

Estimated Cost
75.00
Estimated Time Investment
Week Long Project (20 Hours or More)
Finish Used
Latex Paint and Minwax stain
Recommended Skill Level
Intermediate

Over Bed Fort to fit a queen size mattress

Submitted by Anonymous (not verified) on Mon, 01/14/2019 - 12:35

This is my first time building anything, and it was so fun, minus the million trips to home depot! I had to modify the original plans to fit over a queen size bed, and I actually built the roof that is part of the plans, but we decided to use fabric for the roof to let light in. For now, it's a convertible fort, ha! 


I also added shelves along the back wall, similar to the onces done by Jamie Costiglio. I thought it was a good way to incorporate storage for some action figures. Plus, I left a space in the front open so that my son could jump from the fort to his bed. Underneath I strung up some lights with small command hooks and they're connected to a smart switch so we can ensure they aren't left on all the time.


This took me significantly longer than it might take a skilled builder because it was my first time. It was a solid 3 days of work - a full weekend and then one day the next weekend. 


Overall this was such a fun build - now to add a rock wall on the side! :)

Estimated Cost
$300-$350 - but I had to buy a kreg jig and I used significantly more wood to make it fit a queen size bed. I had to buy wood - I didn't have much on hand.
Estimated Time Investment
Week Long Project (20 Hours or More)
Finish Used
I didn't add any paint or stain. I wanted it to feel like a tree house, so I thought the natural wood would work best.
Recommended Skill Level
Intermediate

Raised Pet Feeder - Small

Submitted by takahler on Wed, 08/31/2011 - 11:46

As soon as I heard my brother was going to get a puppy this month, I decided I was going to make this food and water dish holder. I LOVE IT! I am going to give it to him for Christmas. I made it with larger bowls for when the puppy becomes a full size Golden Retriever. She won't need it right away, so I've decided to wait until Christmas to wrap up and give to my brother. I had a lot of fun making this project. I need to make one now for our cockapoo.

Since I had to use larger bowls, I had to come up with my own measurements. I'm pretty proud of myself for tackling that all by myself. :-)

Coated it pretty heavy with the polyurethane to protect it from water spillage.

Built from Plan(s)
Estimated Cost
$9 for the bowls and about $6 in lumber--Total of $15
Estimated Time Investment
Afternoon Project (3-6 Hours)
Finish Used
Dark Walnut and polyurethane
Recommended Skill Level
Beginner

Comments

Lapdesk

Submitted by DogDoc25 on Sat, 09/21/2013 - 16:10

This was a pretty simple project and only took a few hours. I painted the bottom with some oops pain I found at Home Depot- I wanted the blue to be darker, but I still think it turned out ok and I will probably end up giving it to my nephew. I followed the instructions that one of the other builders had done on this project as far as making the legs shorter and leaving the compartments out to make it lighter. Happy with it overall!

Built from Plan(s)
Estimated Cost
less than $10
Estimated Time Investment
Afternoon Project (3-6 Hours)
Finish Used
painted the bottom with blue oops paint and used minwax golden oak (1 coat, left on 20 minutes then wiped off) and polycrylic for the top
Recommended Skill Level
Beginner

Barn door console

I made the sliding barn door console from your plans.  I liked it so much I made a 3 opening version for another wall.  I found patio door rollers to use instead of taking apart a pulley in the directions from the that's my letter plan.  I used old crates my parents had kept and scraps for my doors so it has sentimental value. 

Built from Plan(s)
Estimated Time Investment
Week Long Project (20 Hours or More)
Finish Used
Varathane golden pecan and espresso for the top. Vinegar and steel wool for the backing. Various colors for the doors. Min wax clear polycrilic finish.
Recommended Skill Level
Intermediate

Leaning Desk and Bookshelves

Submitted by Anonymous (not verified) on Sat, 01/19/2019 - 21:22

Used a handheld propane torch to “burn” the wood and it turned out amazing! 

Estimated Cost
$100 I didn’t have any wood on hand so had to buy all of it. The rest of materials I already had.
Estimated Time Investment
Day Project (6-9 Hours)
Finish Used
Propane to burn the wood
Recommended Skill Level
Beginner

Grid Mirror

Submitted by Anonymous (not verified) on Fri, 11/25/2022 - 06:05

Thank you Ana for your amazing easy to follow plans and videos! I’ve had so many compliments in the mirror and goes great with the table from Shanty2Chic. I went with 8 x 8 mirror tiles. We love it!

Comments

Storage Sofa with Armrests

When we bought our house a year ago, my husband was super excited to be able to get tools and start working with wood. At first, I didn't share his desire for DIY projects. It honestly wasn't until I found your website that I started to get excited. It was first a excitement of things that I could have my husband do/make as he had already made the coffee table that you see along with an entry table, 2 small bookcases, workbench, wall shelf, and storage shelves.

However, recently I started to get the crazy idea in my head that I could help and we could do projects together. When we decided that our couch was too big for our small living room space, we determined to buy a newer smaller couch. That was until I found the plans for this one. We decided that we would give it a try, and if it didn't turn out like I wanted it to, it could go in his man-cave.

Keep in mind, I am not a seamstress nor can I really sew in a straight line, but following Anna's plan made this project easy. My husband and I decided that he wanted armrests on the couch and came up with the armrests designs you see here.

I am already excited an working on our next project of a Farmhouse table that I have (not the hubby) done most of the work on.

Built from Plan(s)
Estimated Cost
$300
Estimated Time Investment
Week Long Project (20 Hours or More)
Finish Used
Early American, I believe. Fabric was the cloth paint drop cloth suggested in the plan which I love the neutral colors of and it makes things easier to decorate for the seasons.
Recommended Skill Level
Starter Project

Comments

Sammie

Thu, 01/02/2014 - 10:05

I love your couch! My boyfriend and I just started this yesterday too. Were the armrests hard to construct for the couch?

Factory cart coffee table

Submitted by Anonymous (not verified) on Thu, 01/24/2019 - 04:20

Awesome plan, used 10” boards and 6” wheels to add height. Also added hinges so that the top opens up for storage. Found some hardware to give it some personality. 

Built from Plan(s)
Estimated Cost
$85.00
Estimated Time Investment
Weekend Project (10-20 Hours)
Finish Used
Dark walnut & gray stain, layered.
Recommended Skill Level
Beginner