Community Brag Posts


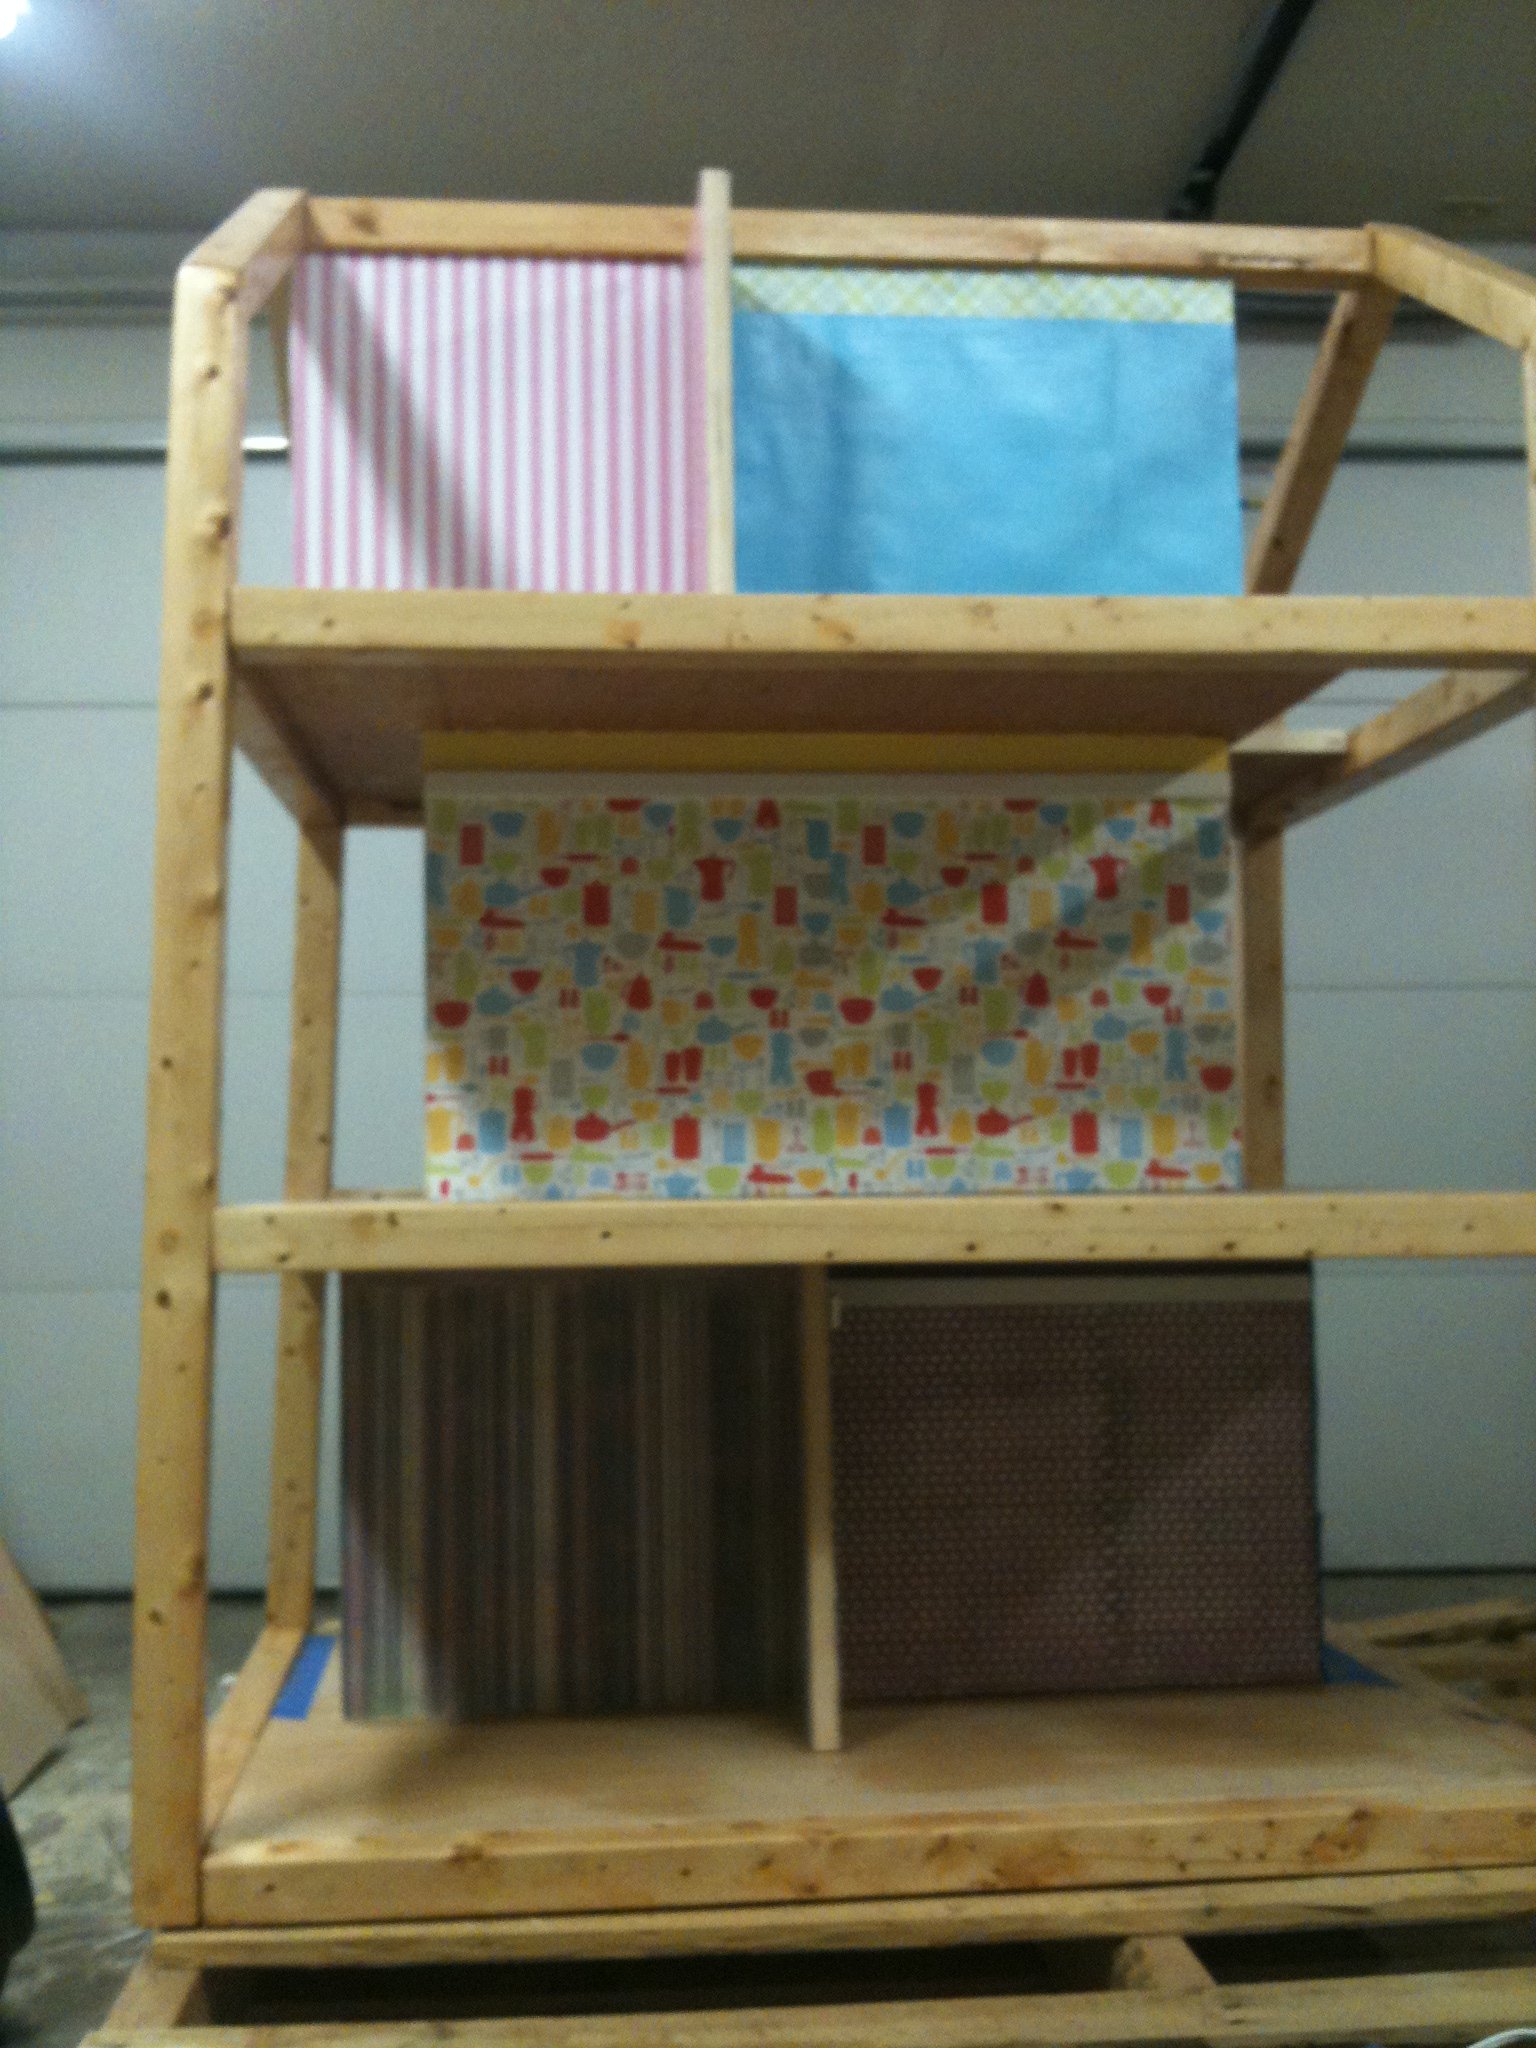
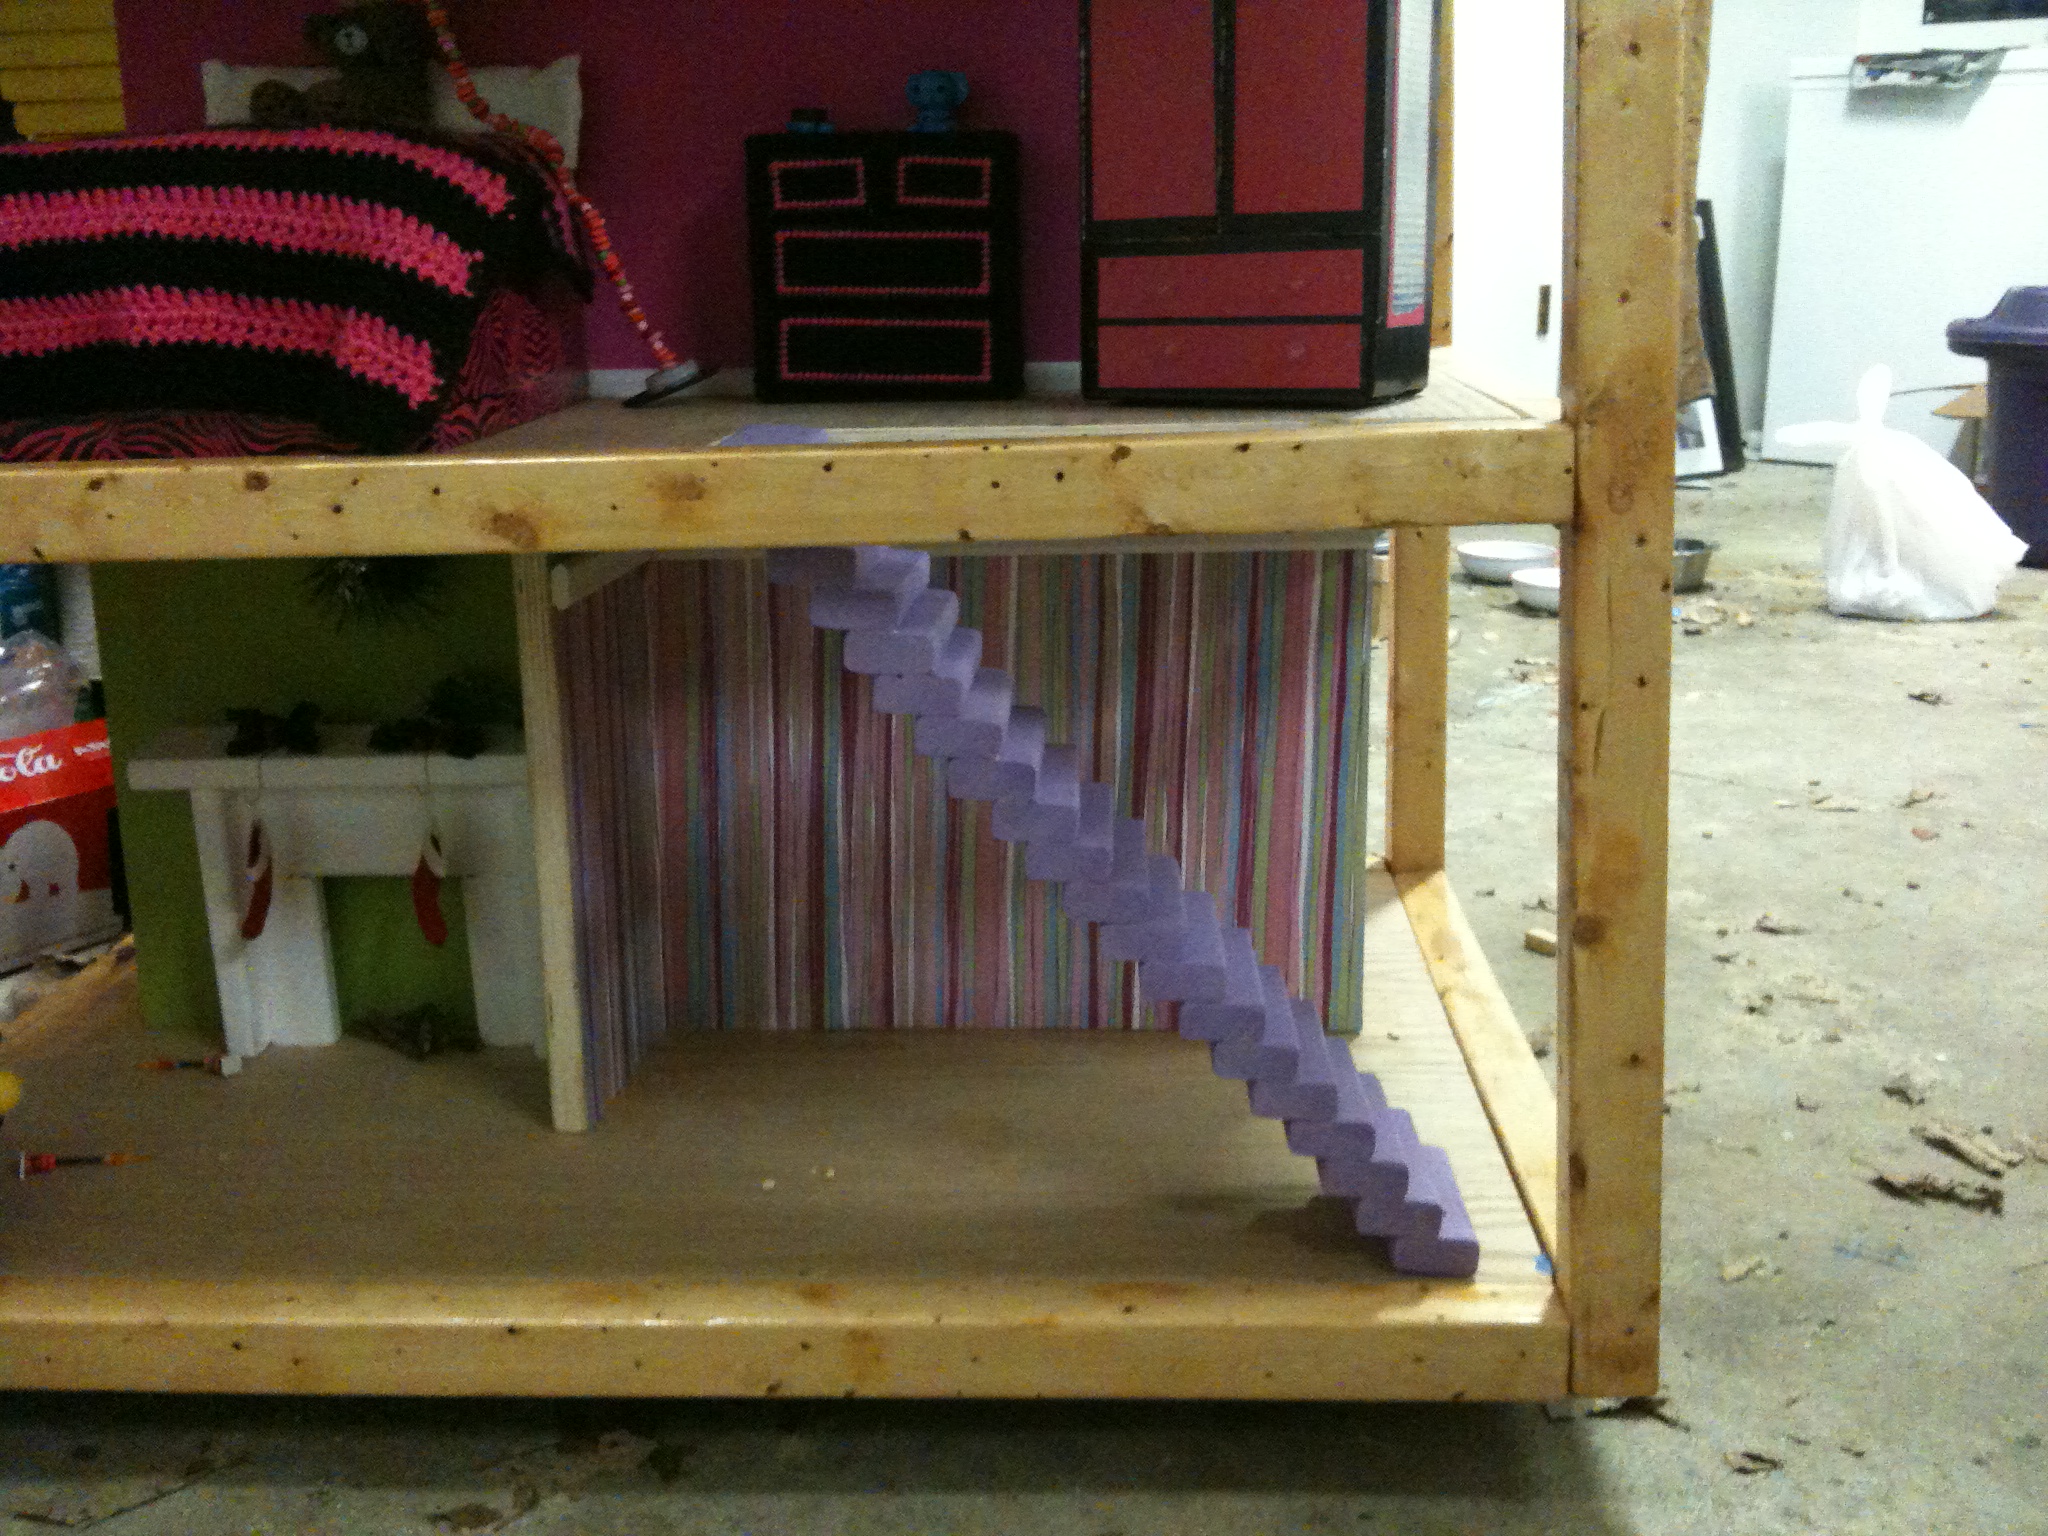
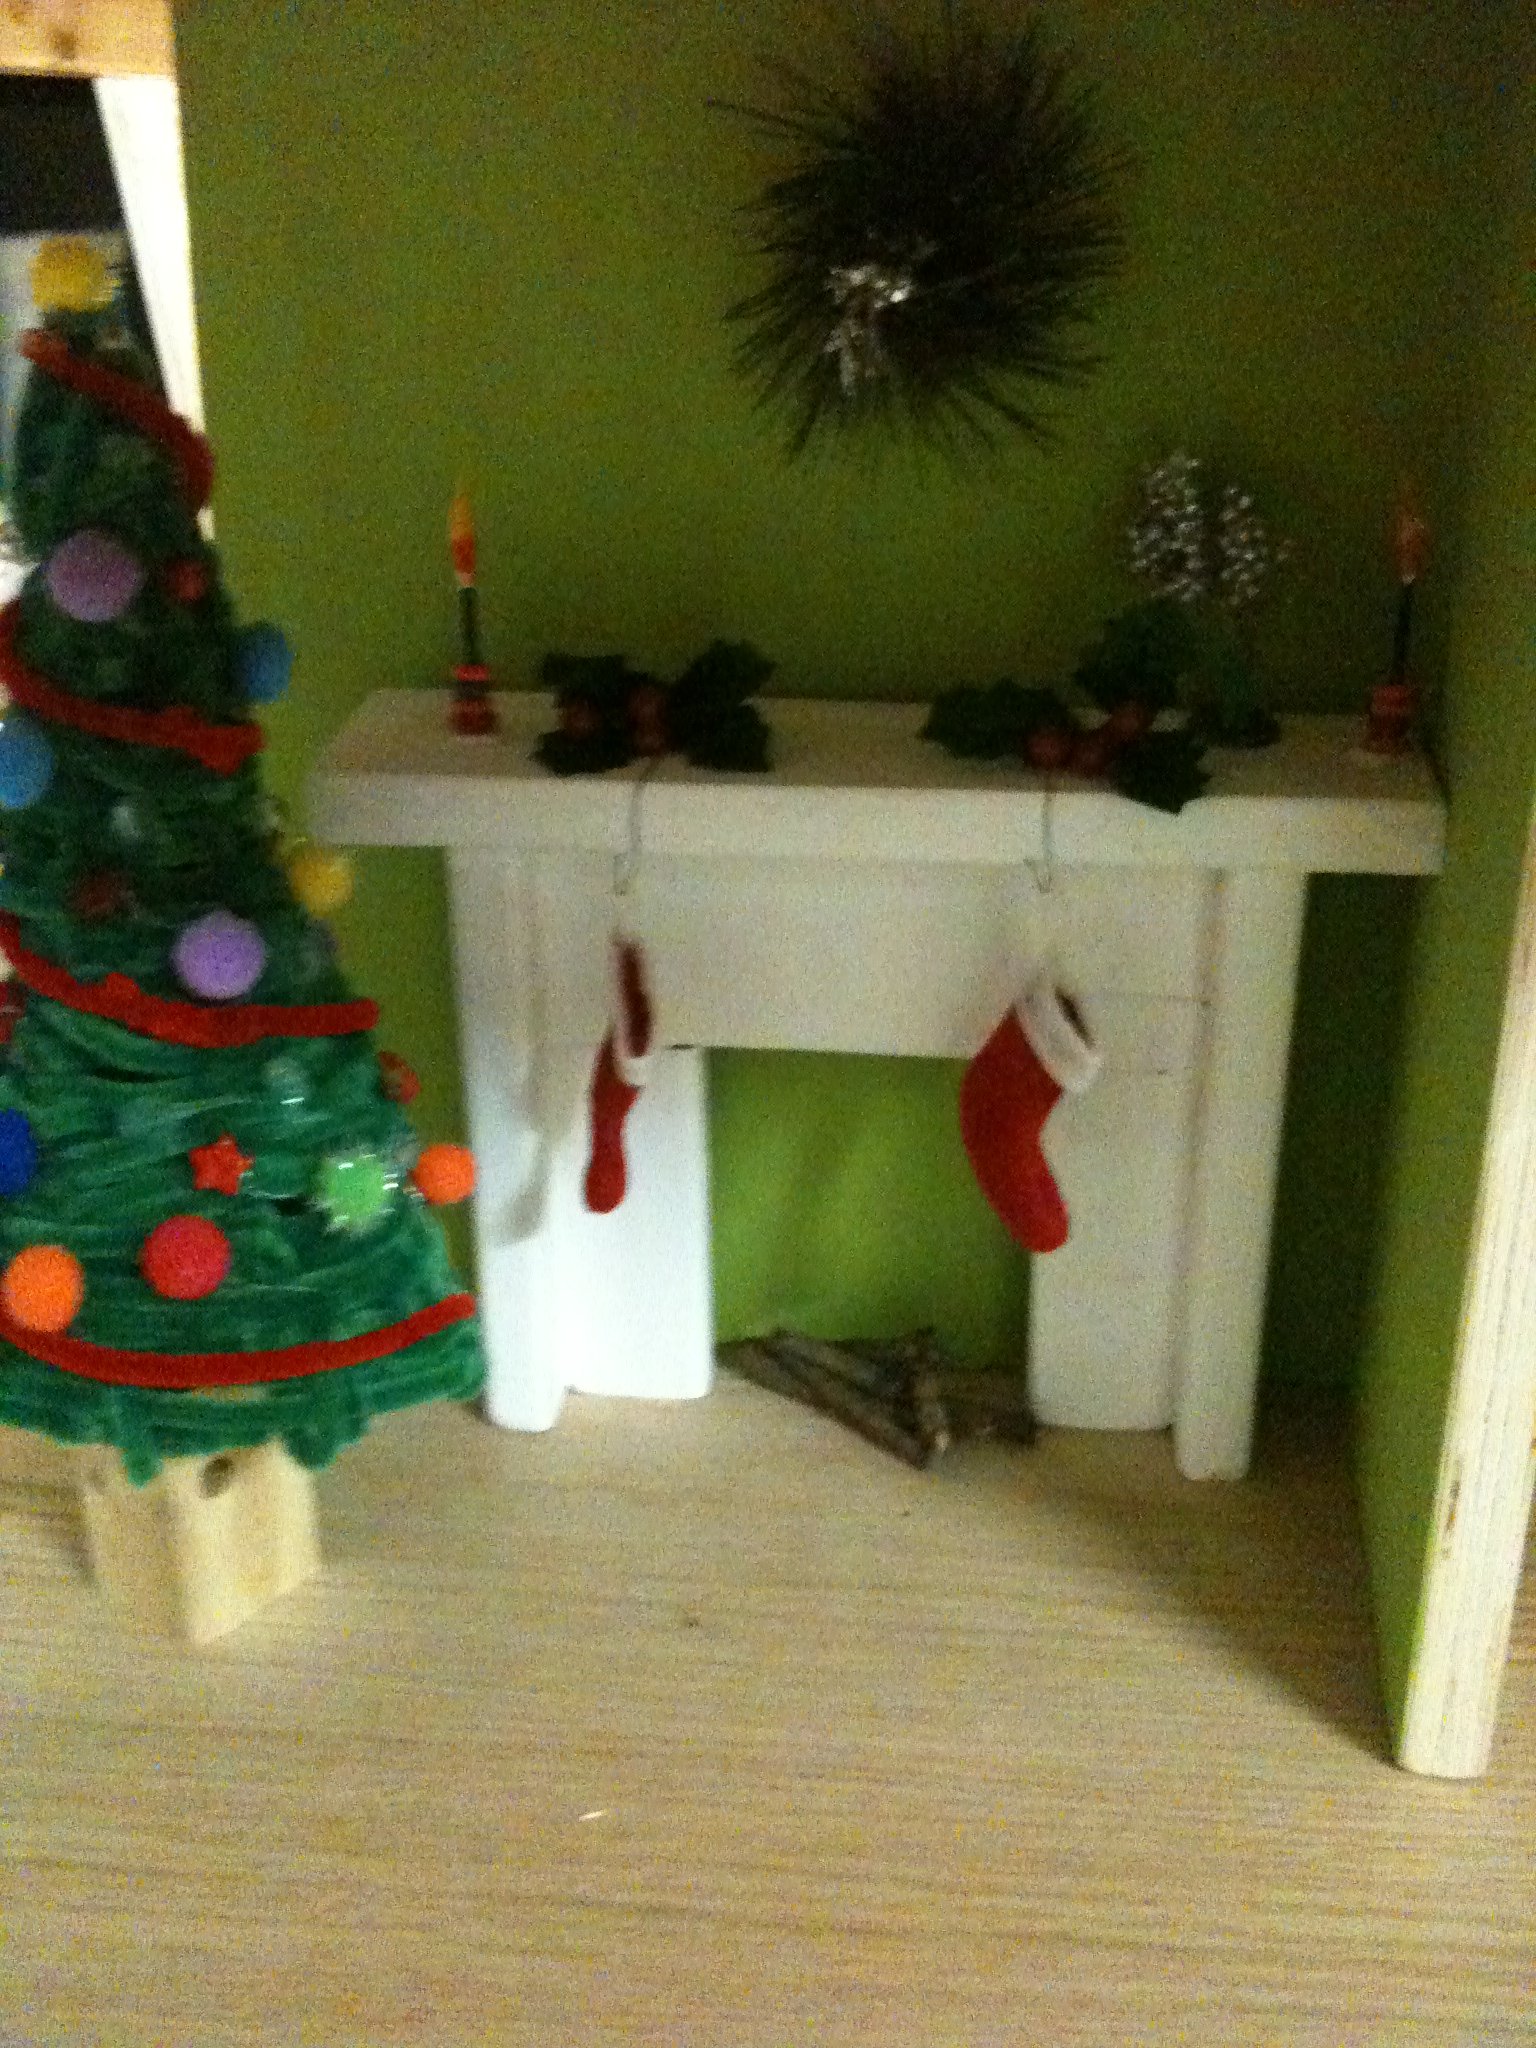
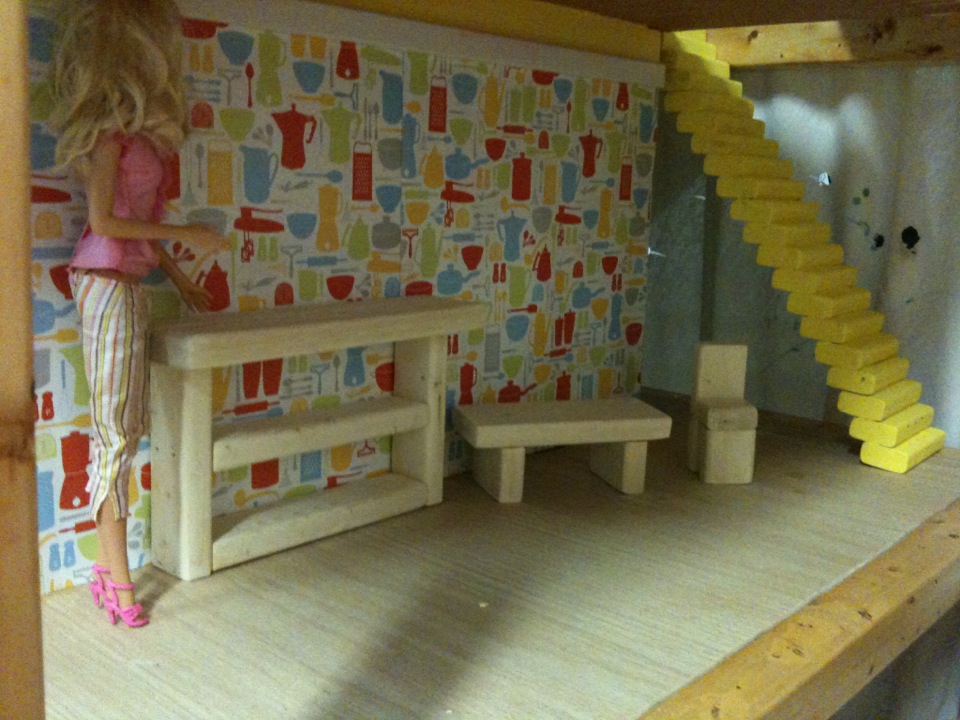
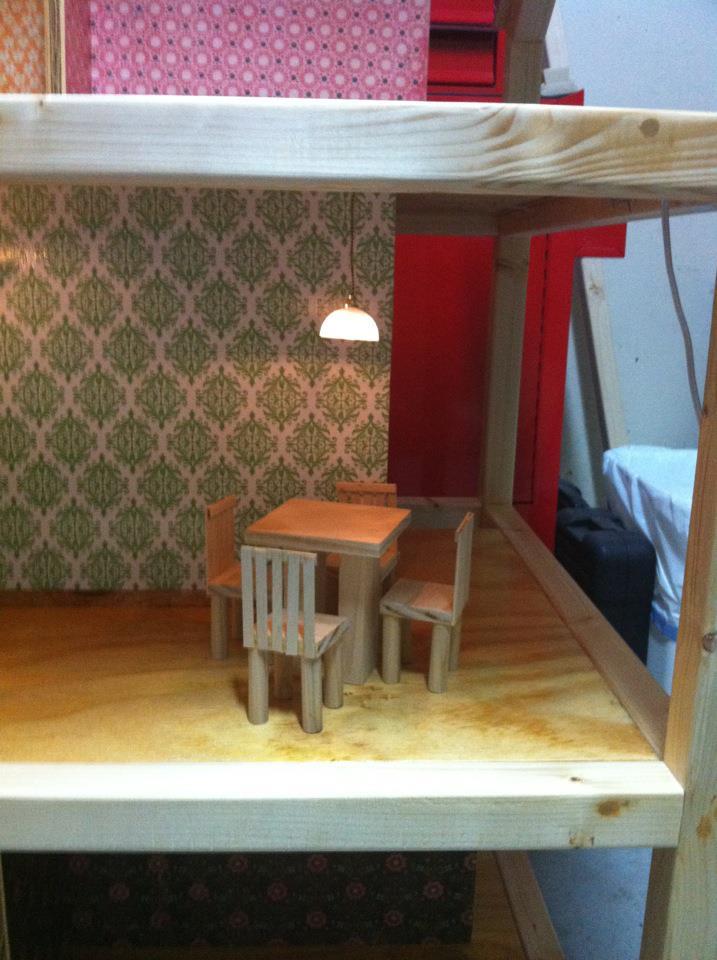
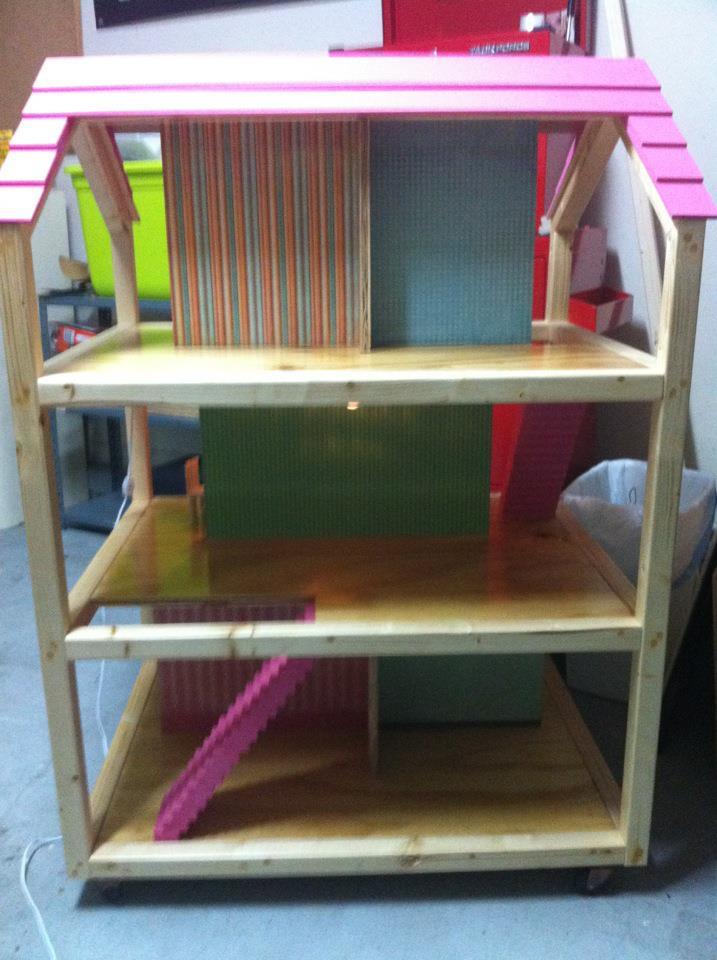
Tori's Dream Dollhouse
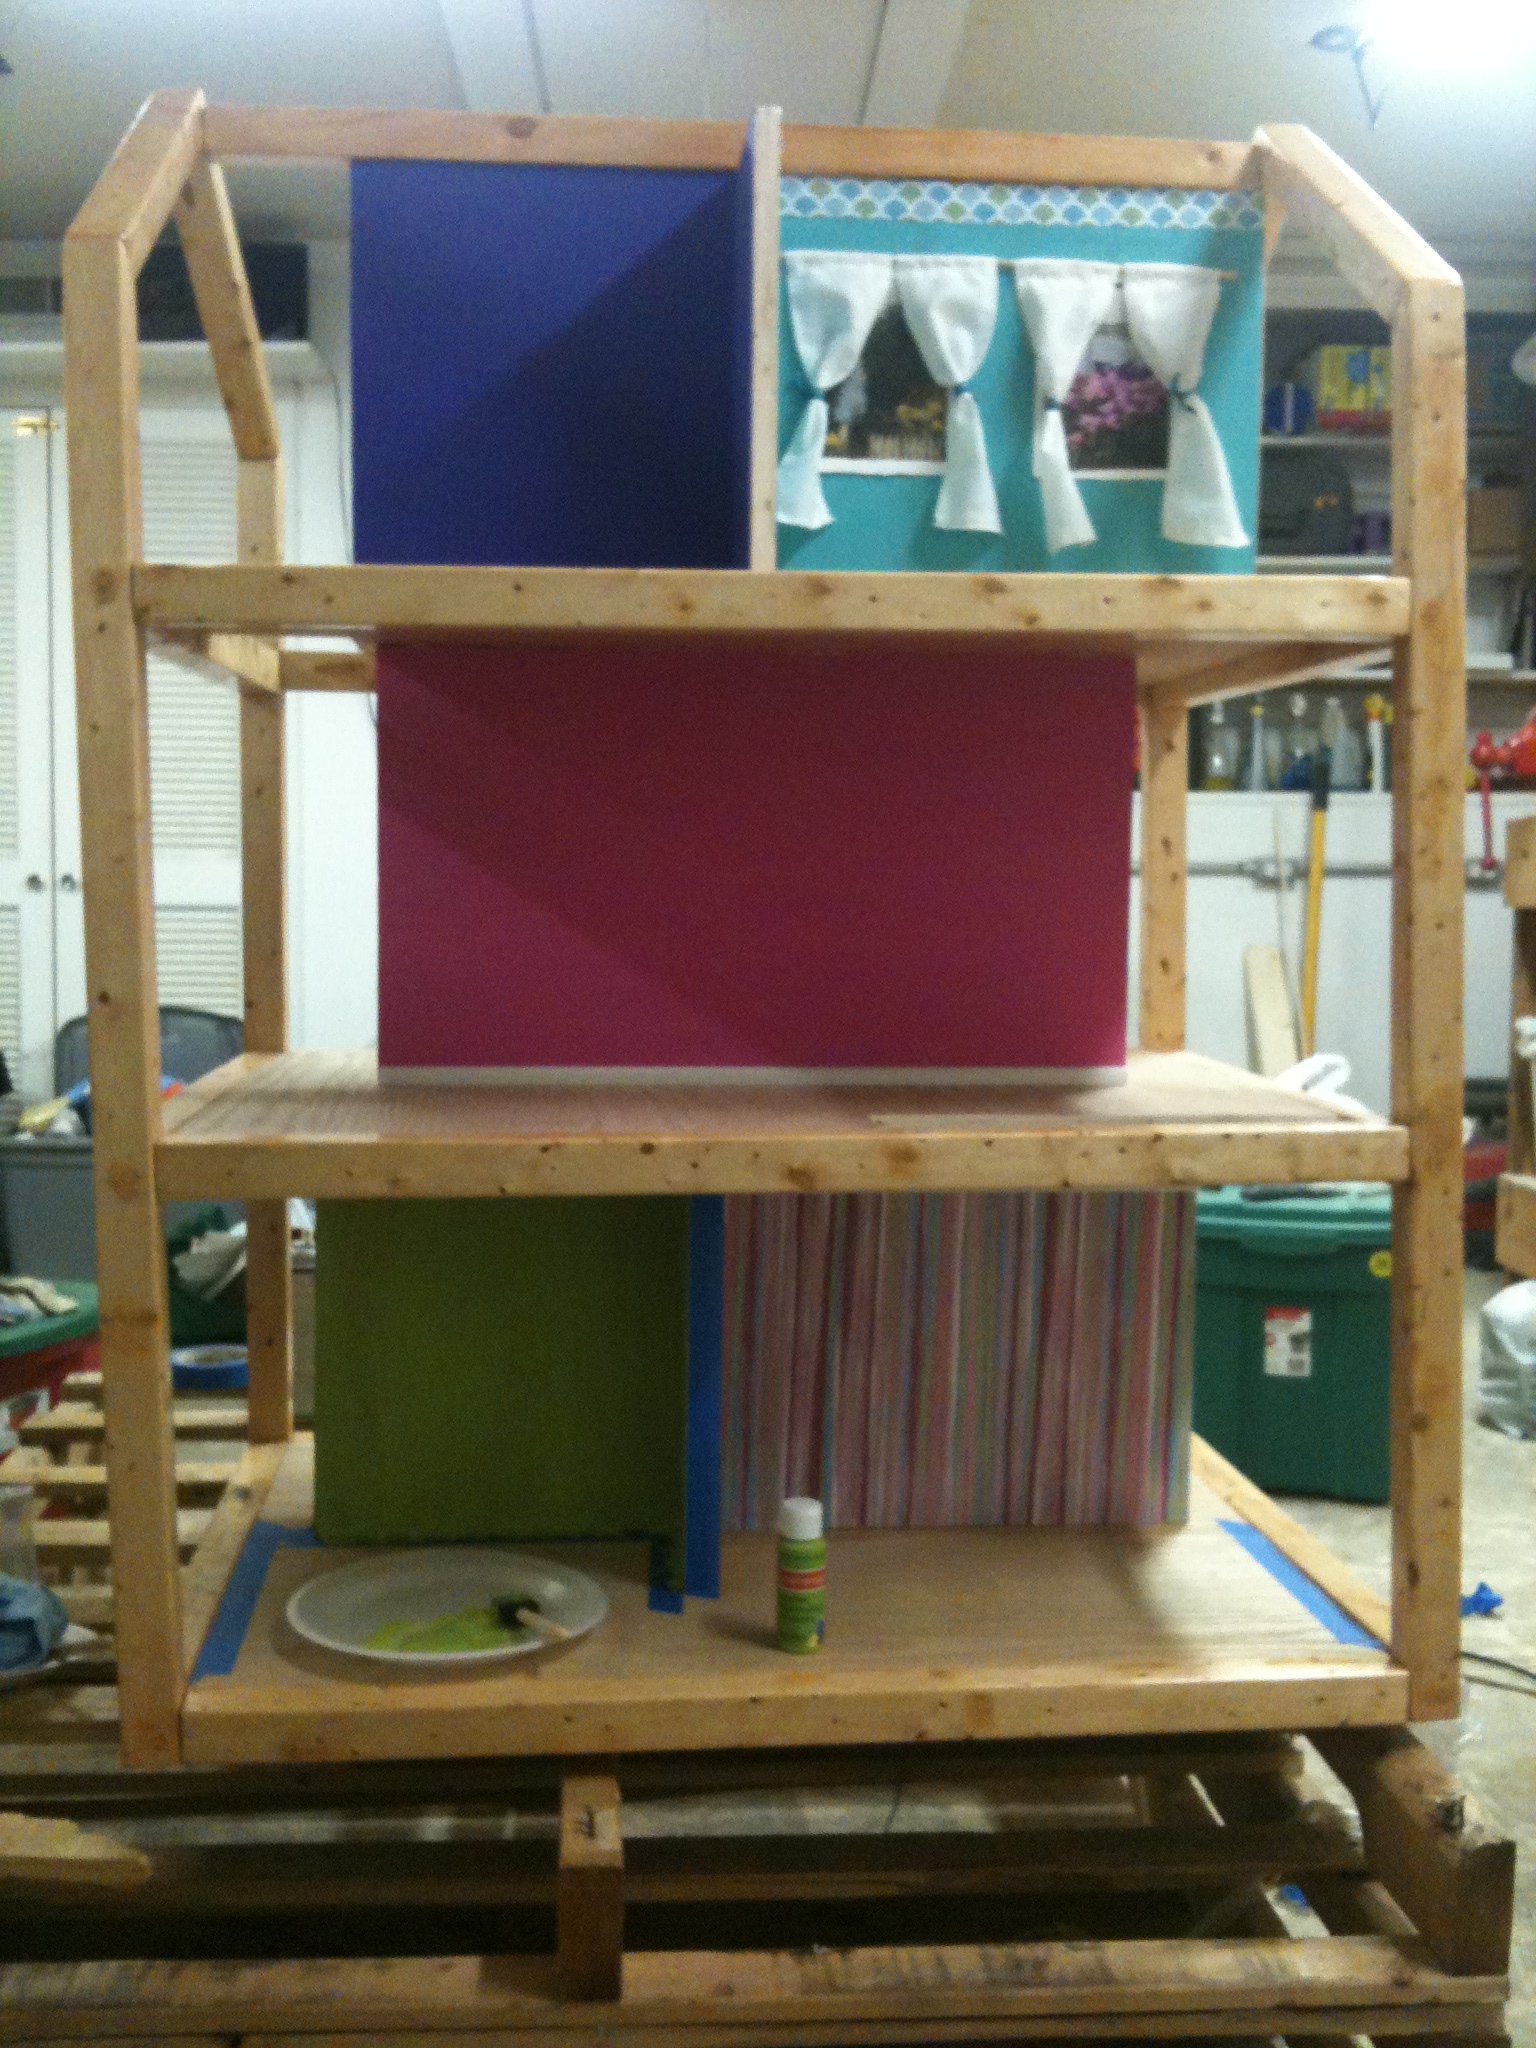
We had a blast making this dollhouse for Christmas!
It was a pretty easy build. I was nervous about the angles at first but it ended up being easy. I think the hardest part was choosing colors!
We used very thin trim to make crown moulding and floor board trim too. I think that makes it look more "real". THis picture was before we installed the stairs... The worst part of the stairs was sanding all those stinking pieces! Otherwise it was a piece of cake!
For furniture I have used a lot of scrap 1x2 and 1x3 and kept it very basic and simple. For details and fun stuff, I have used the amazing blog MyFroggyStuff.blogspot.com. SHe takes items you were about to toss out and makes them into Barbie treasures. Truly amazing stuff!

Built from Plan(s)
Estimated Cost
$100 (including decorating)
Estimated Time Investment
Weekend Project (10-20 Hours)
Finish Used
I used Minwax on the 2x2s. I can't remember the color but it's very light, barely darker than the unfinished pine.
For everything else, I used craft paint because it comes in small bottles for under a dollar and I wanted to go very colorful. Some rooms are wallpapered with very thick scrapbook paper. I tried mod podge but it wrinkled a lot. So instead I used spray adhesive to stick it down and then only mod podged OVER it and then sealed it with a spray sealer.
For everything else, I used craft paint because it comes in small bottles for under a dollar and I wanted to go very colorful. Some rooms are wallpapered with very thick scrapbook paper. I tried mod podge but it wrinkled a lot. So instead I used spray adhesive to stick it down and then only mod podged OVER it and then sealed it with a spray sealer.
Recommended Skill Level
Intermediate
Comments
Sat, 12/17/2011 - 12:30
Tori's Dream Dollhouse
Wow!This is absolutely amazing. Tori is going to have an amazing Christmas this year!
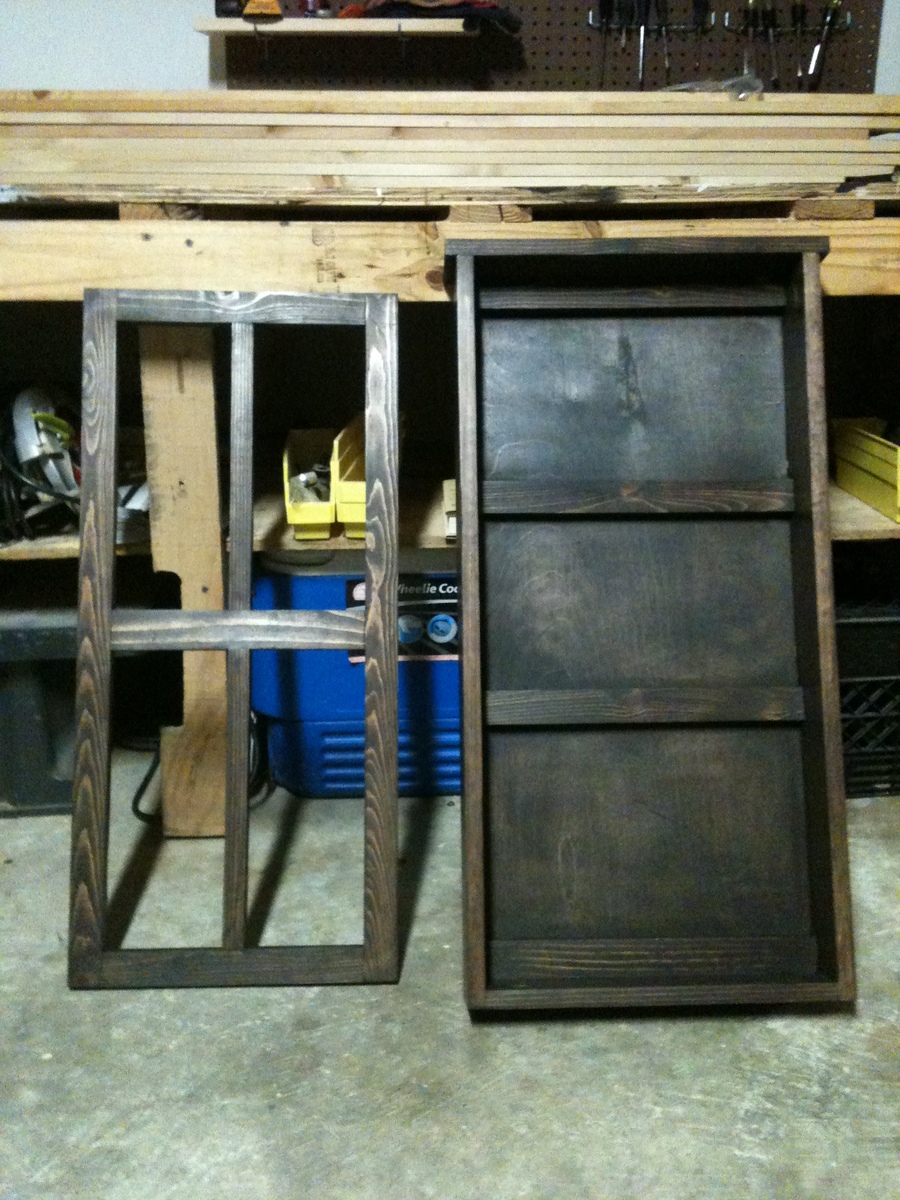
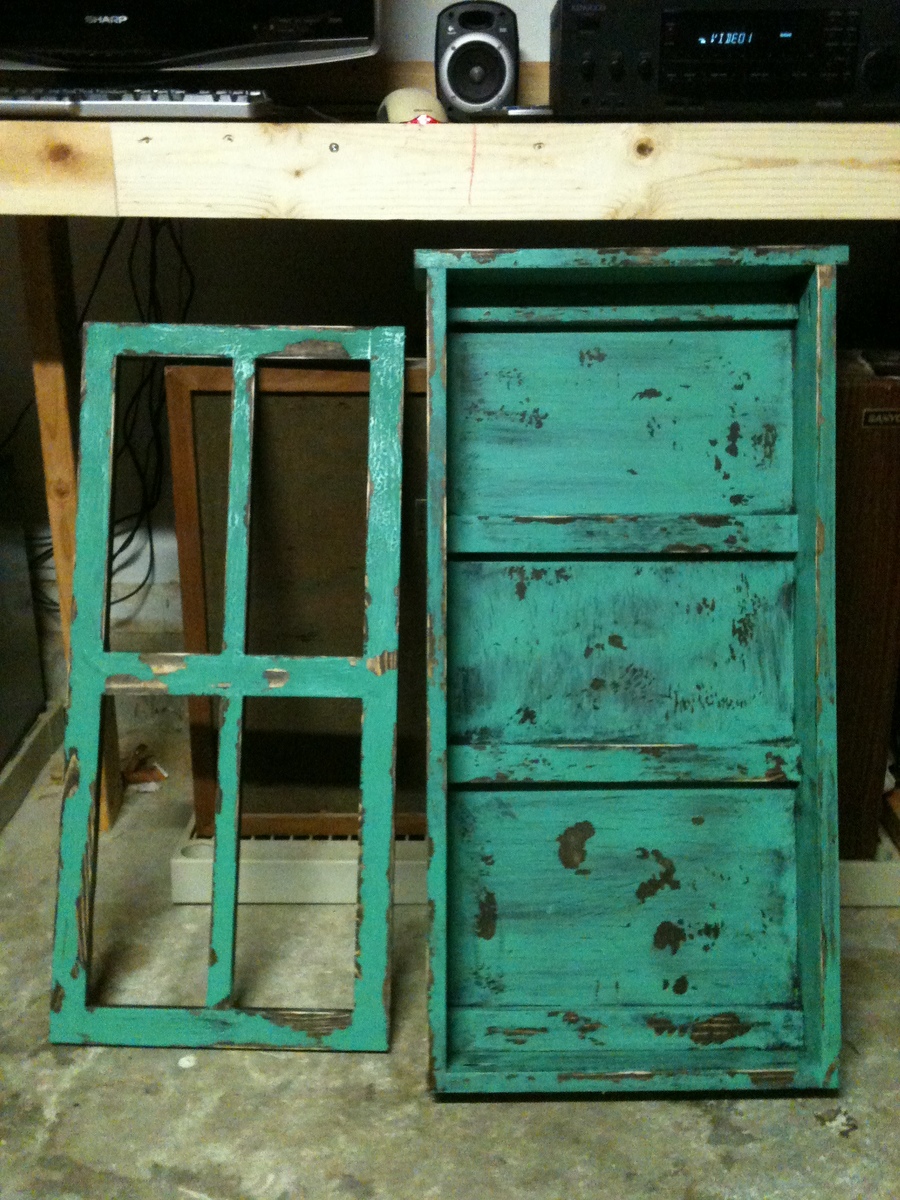
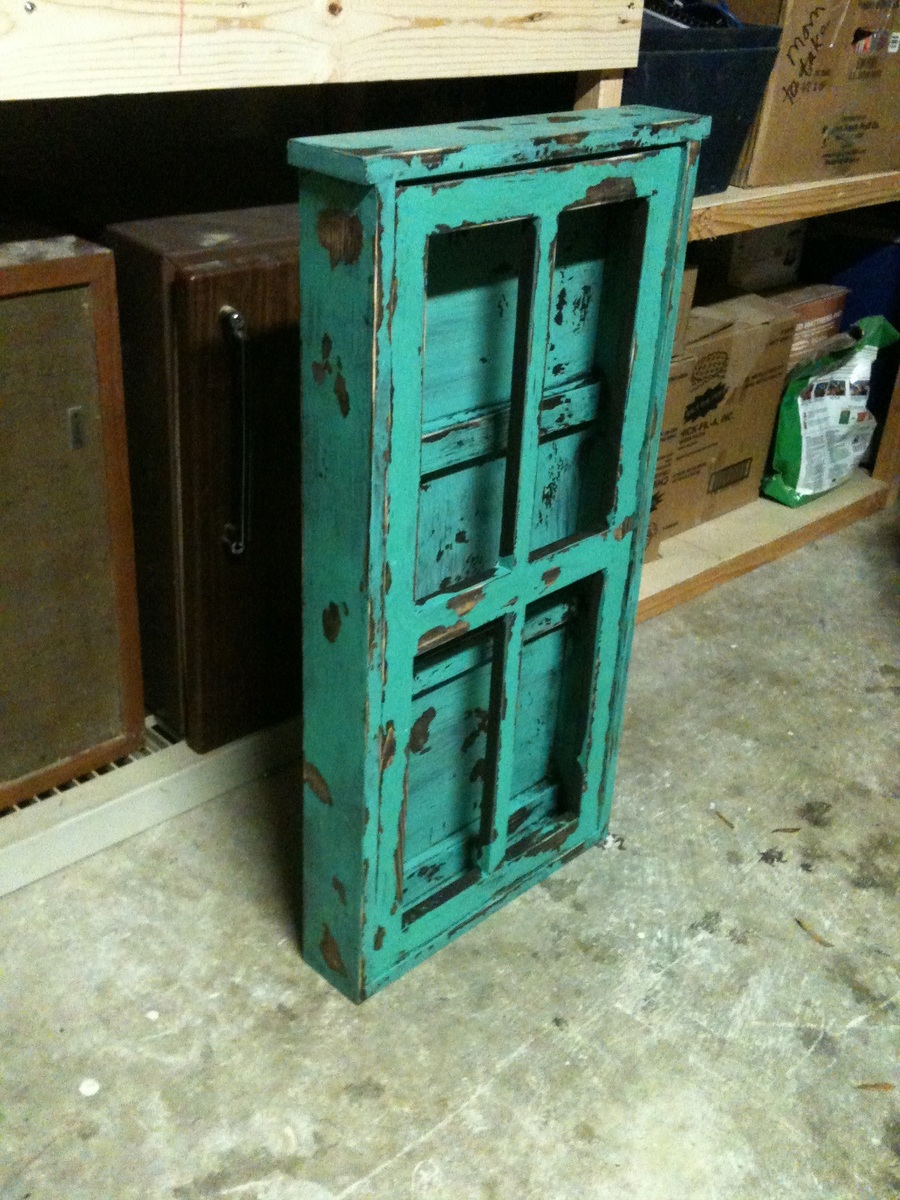
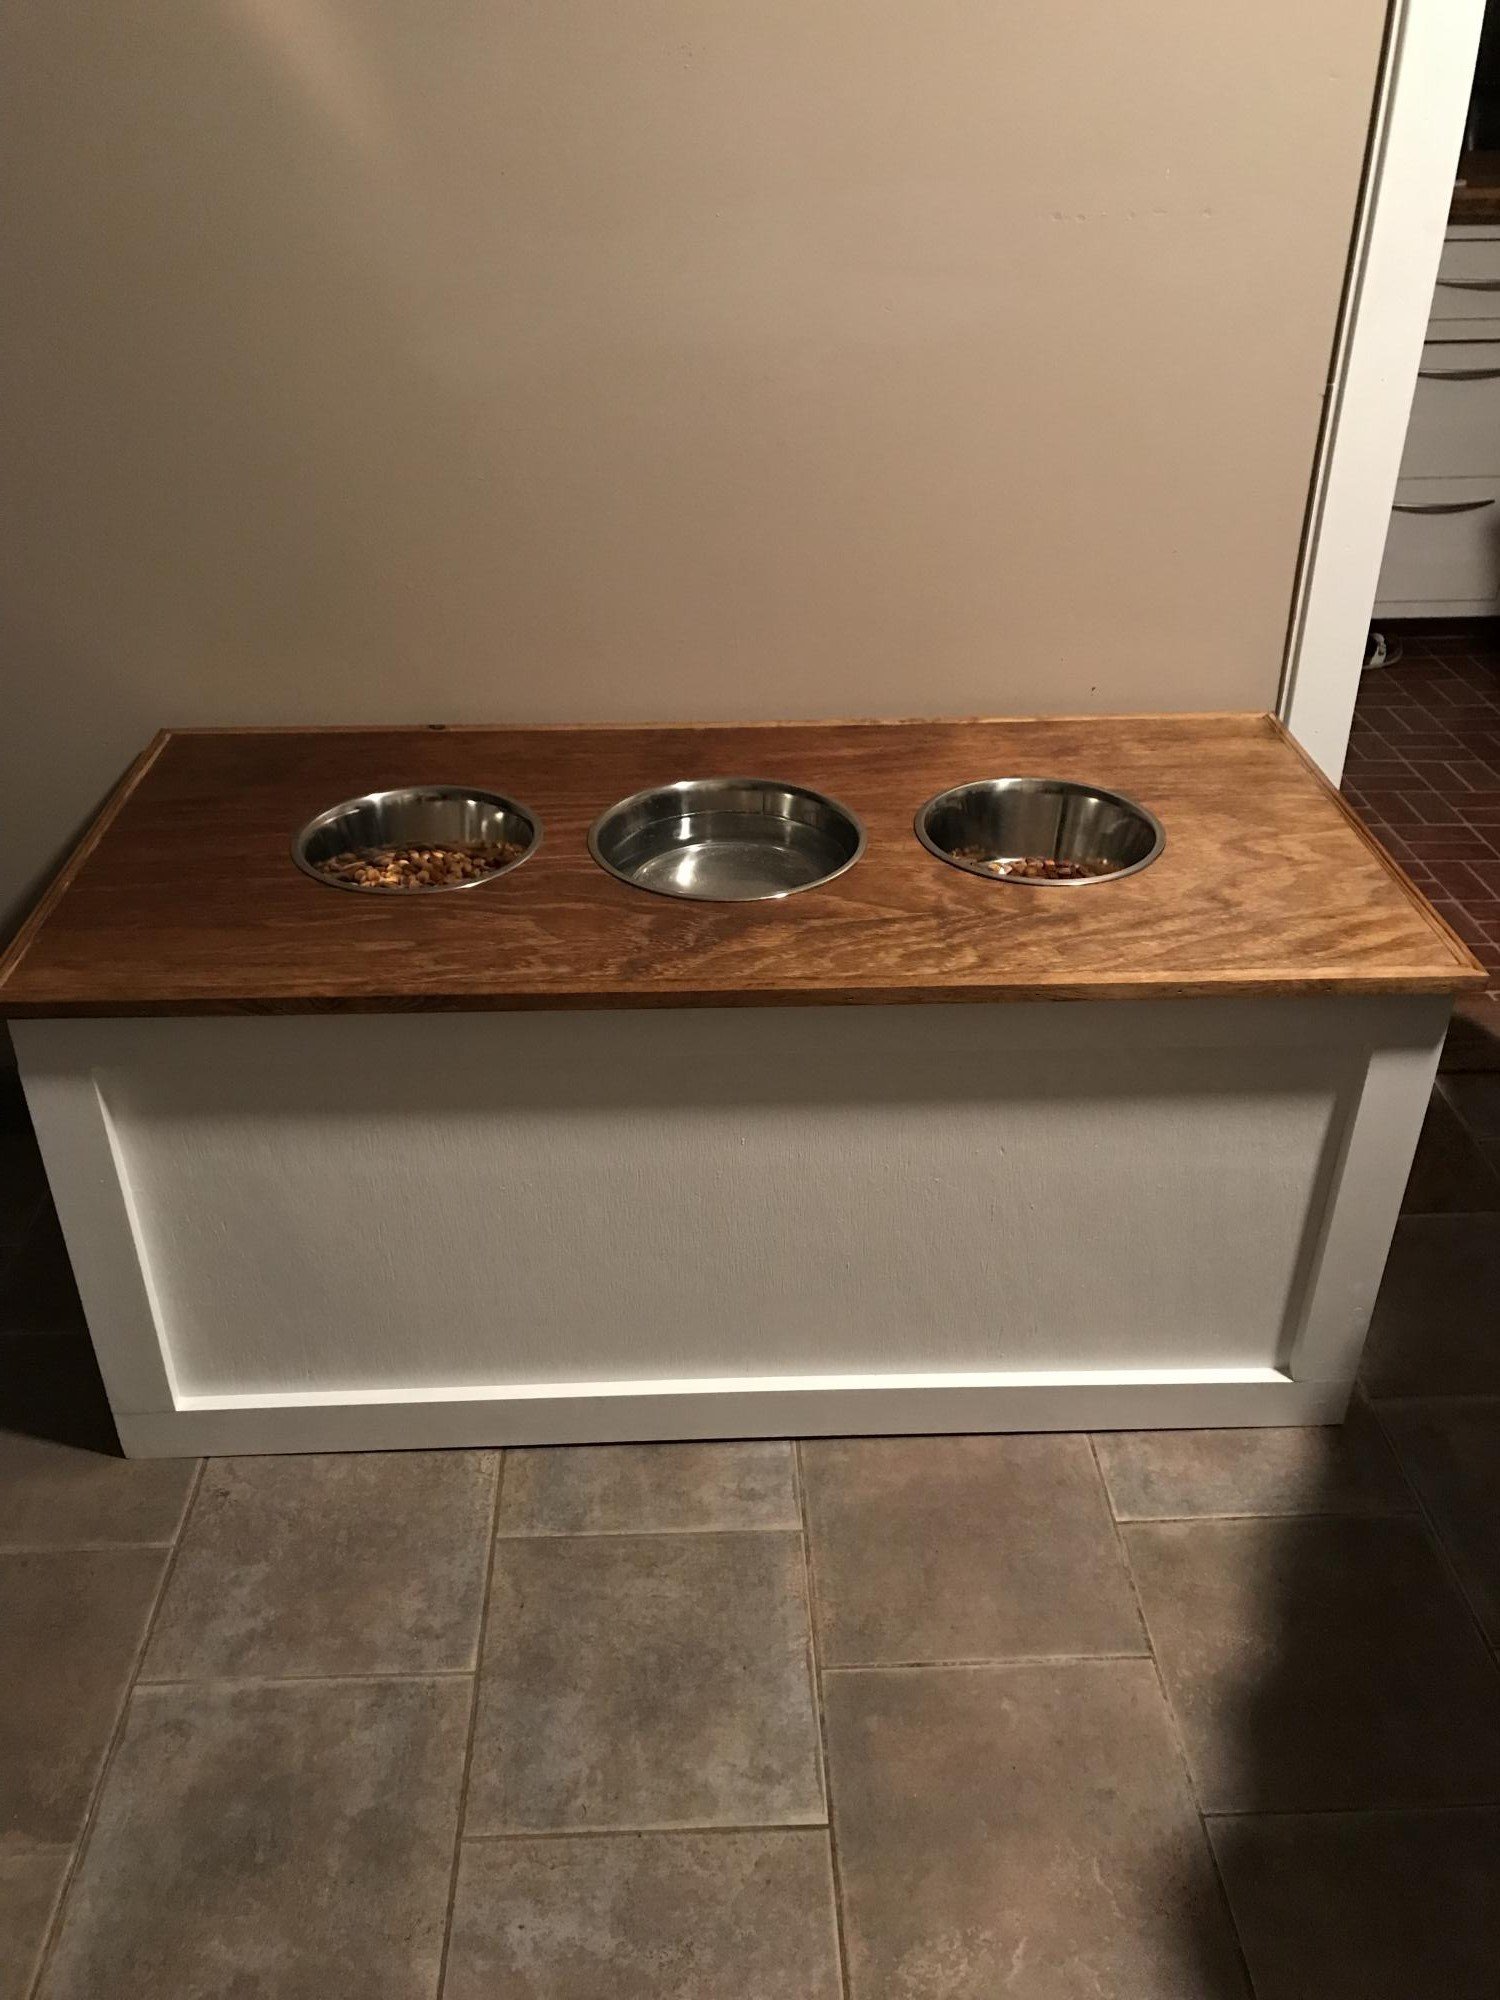
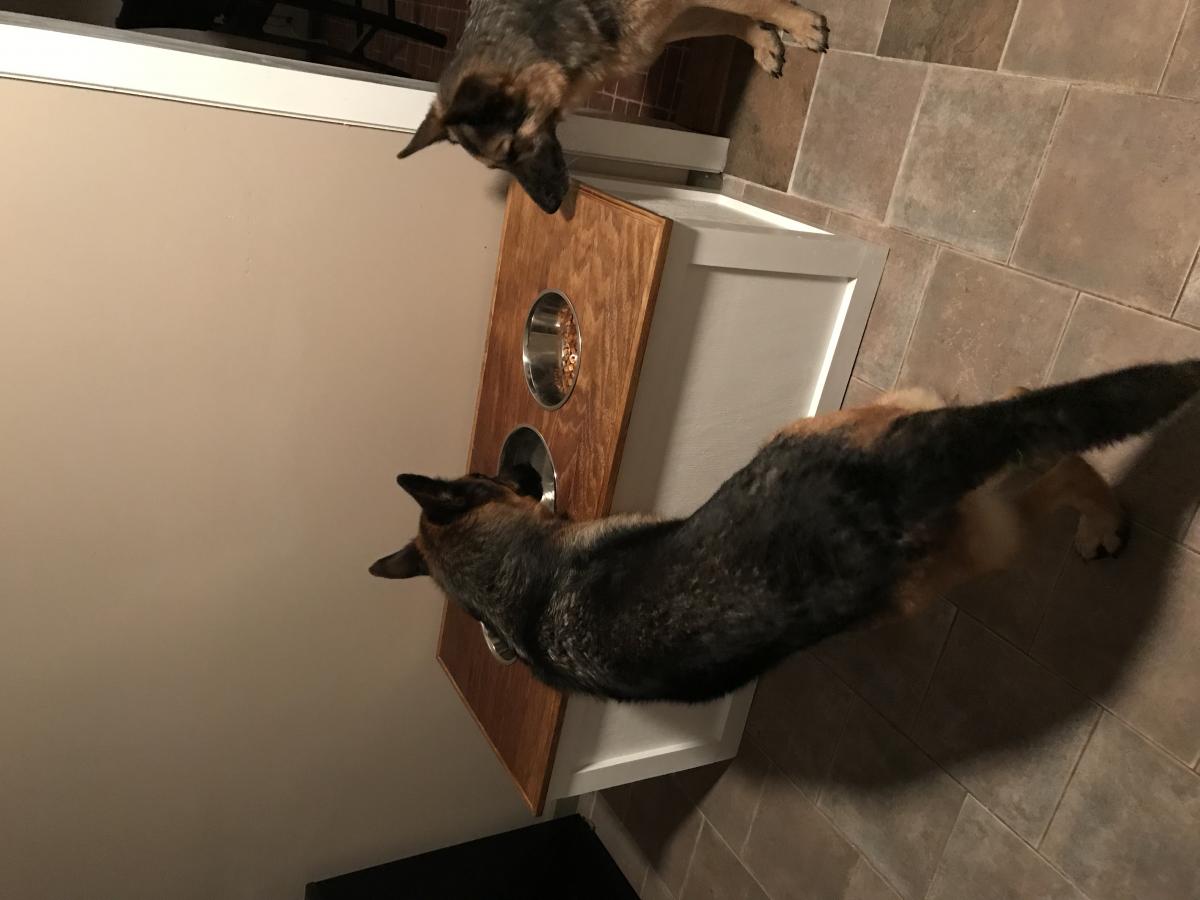
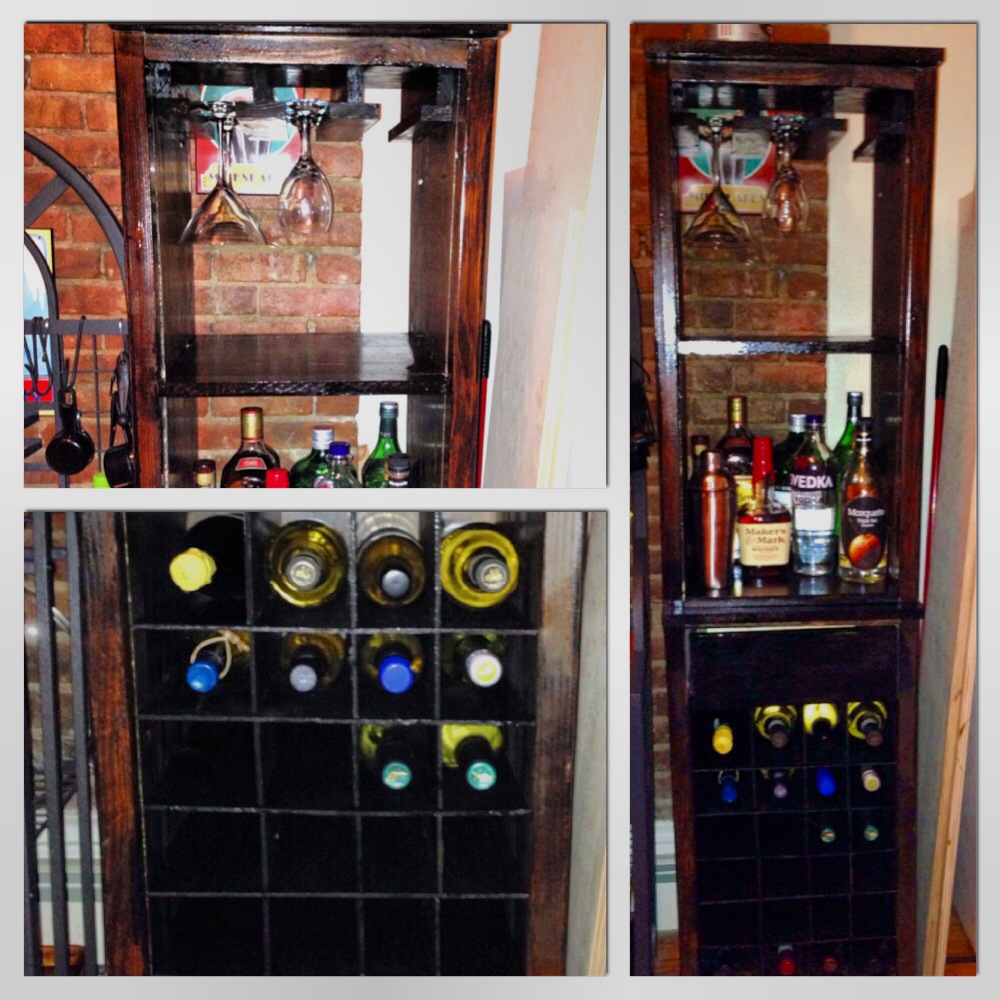
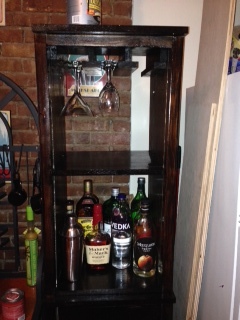
wall jewelry cabinet
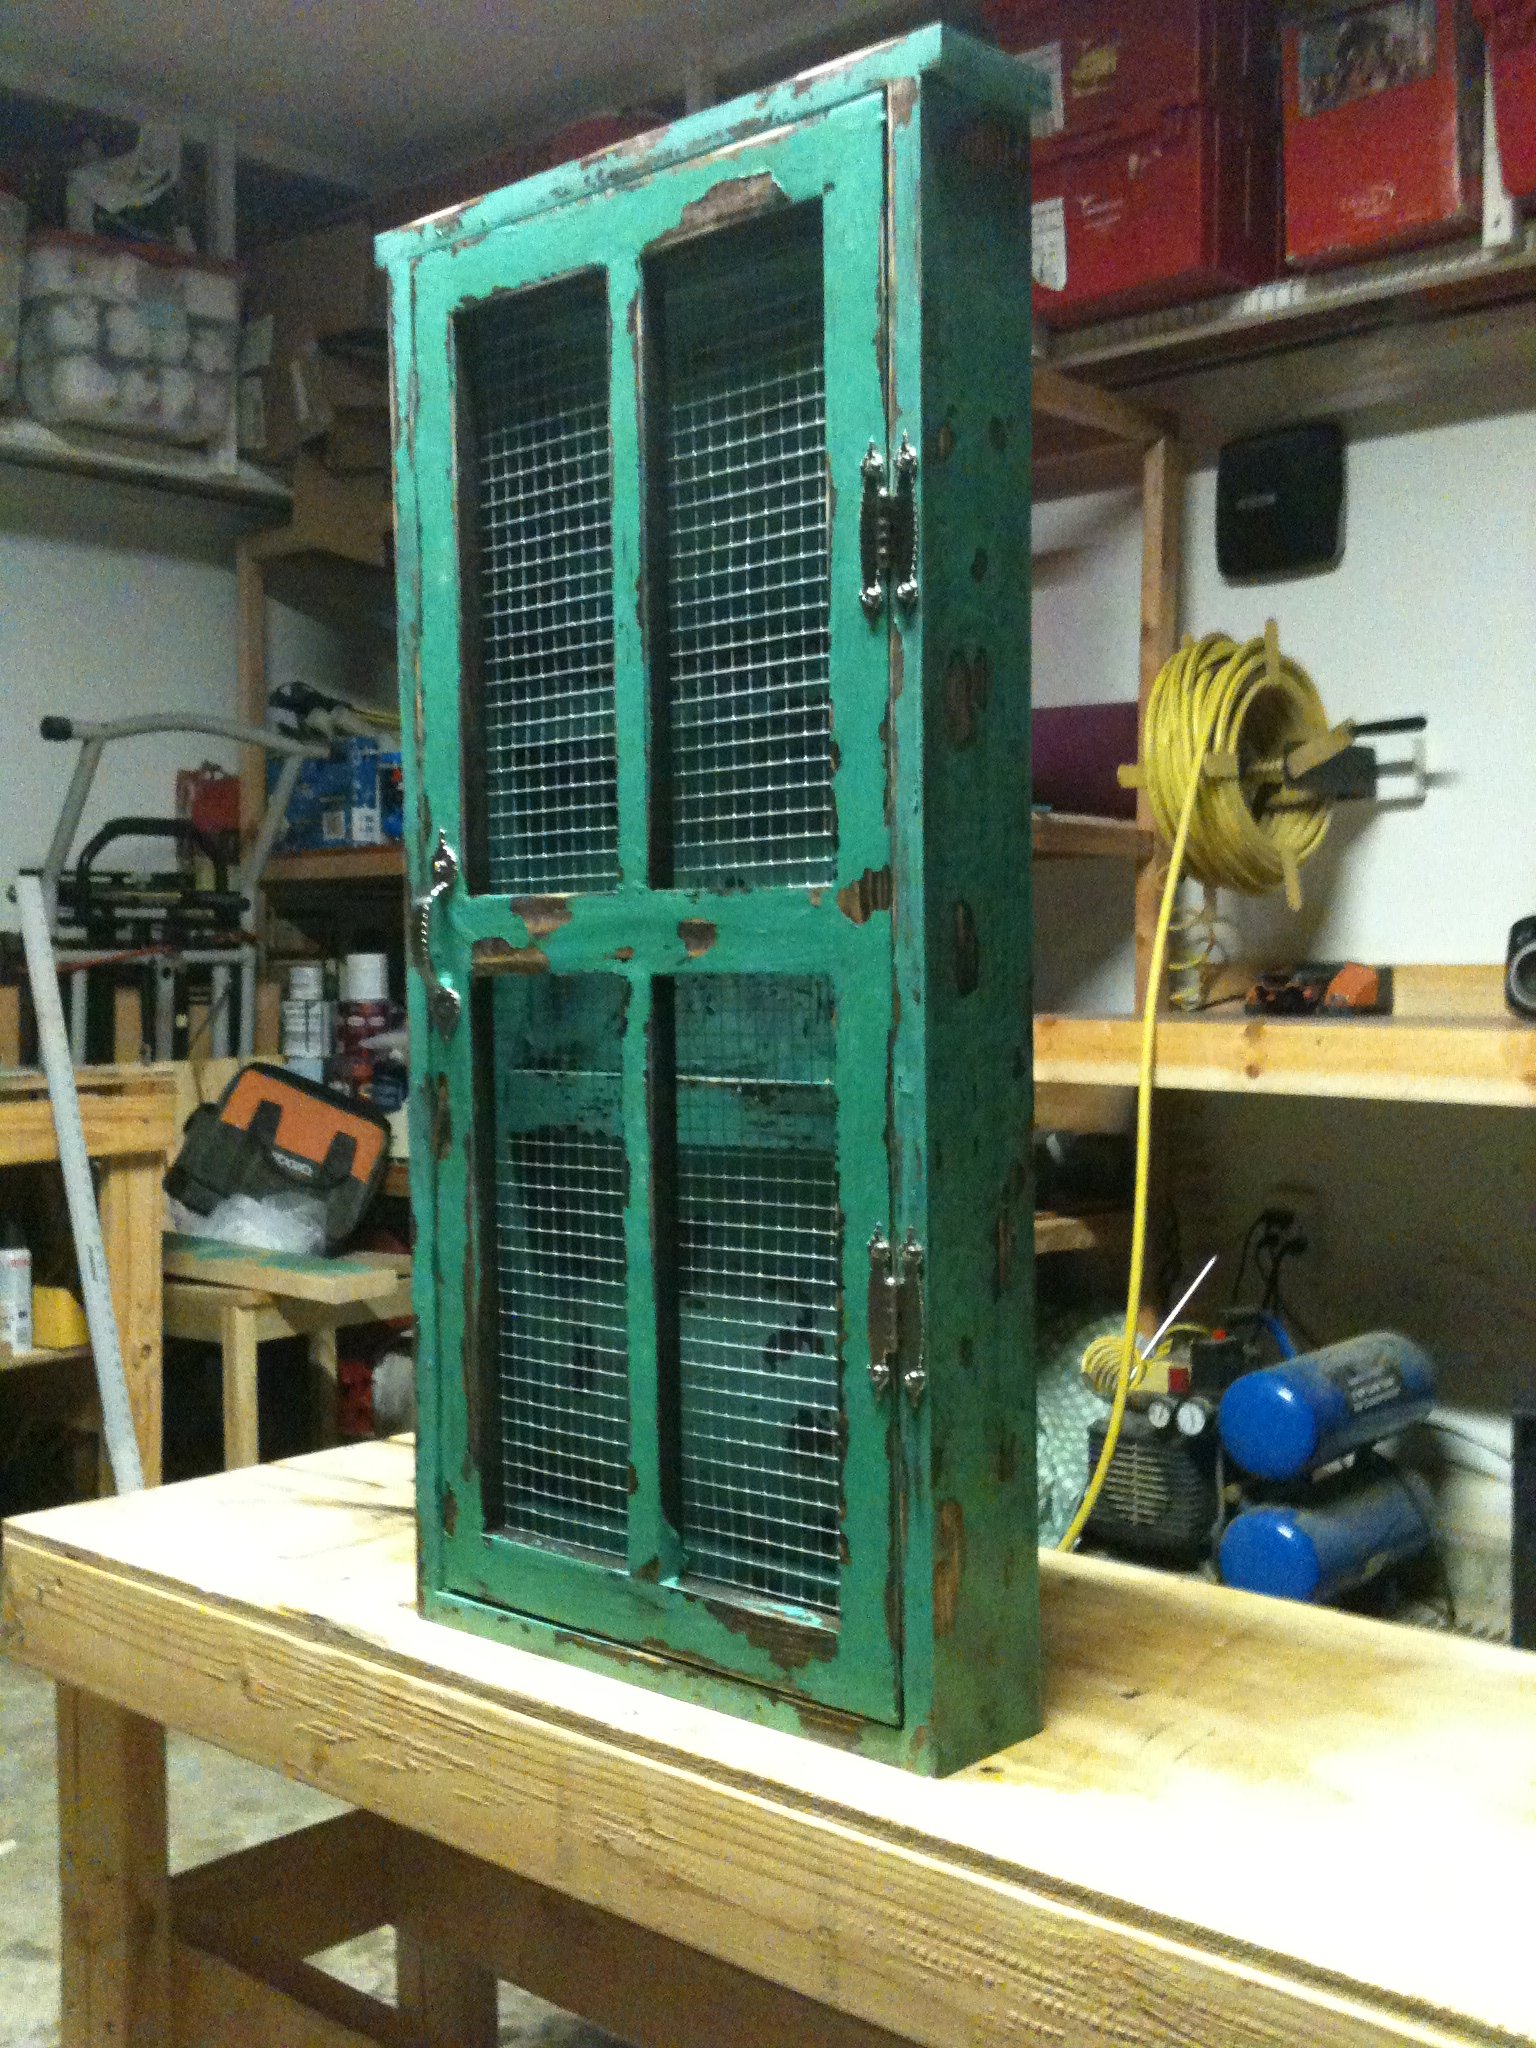
I wanted to get my wife something nice for are wedding anniversary and couldn't find anything i thought she would like. so browsing this site I seen this and new she would love it. I hope you guys love it to.
Built from Plan(s)
Estimated Cost
$60
Estimated Time Investment
Afternoon Project (3-6 Hours)
Finish Used
stain, school house glue and paint
Recommended Skill Level
Beginner
Comments

Thu, 11/07/2013 - 19:07
Beautiful and Rustic!
This project looks great. I love how the finish turned out!
Val
artsybuildinglady.blogspot.ca

Thu, 11/07/2013 - 19:21
Beautiful!
What a great project! You did a beautiful job, and the finish is fab!

Sat, 11/09/2013 - 17:53
Superb finish
The finish on this looks excellent. How did you manage such an authentic worn look? Also, how did you attach and finish the mesh inserts? We have no use for this piece right now, but it looks so good that I just want to go start making one straight away.....!
Sat, 11/09/2013 - 19:23
Finish
After construction
step 1 - stain the whole cabinet and wait for it to dry
step 2 - brush on Elmers school glue all over the project and wait for it to get tacky ( look on youtube for crackle paint effect)
step 3 - Lightly paint on color
Step 4 - dry the project with a blow dryer and watch it crackle
step 5 - I used a orbital sander and just went crazy hitting it all over ripping and peeling the top coat of paint.
I attached the mesh with a staple gun I think on the next one I am going to use stained glass instead of the mess though.

Doll Bed & Bedding
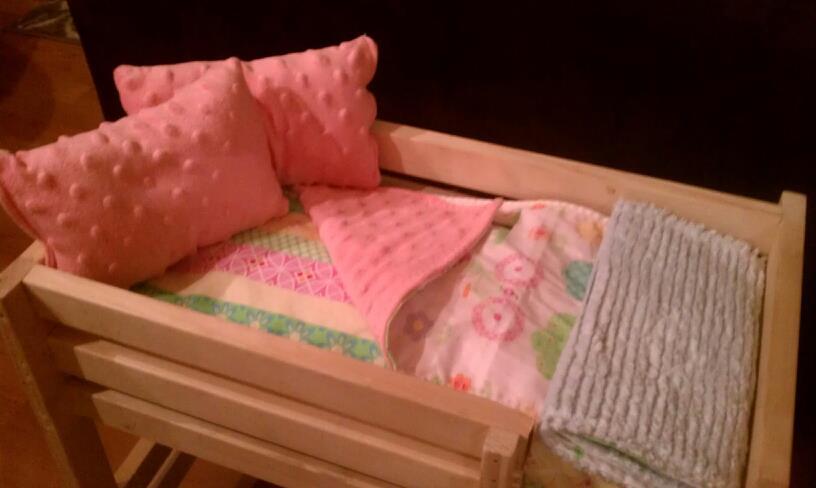
I was shocked at how easy this all came together! Hubby built the bunks, I made the bedding. Both mattresses, quilts and pillows came together in under 2 hours!!! I kept right on sewing and made a matching pillow for my daughter's bed, and a tote bag for myself!
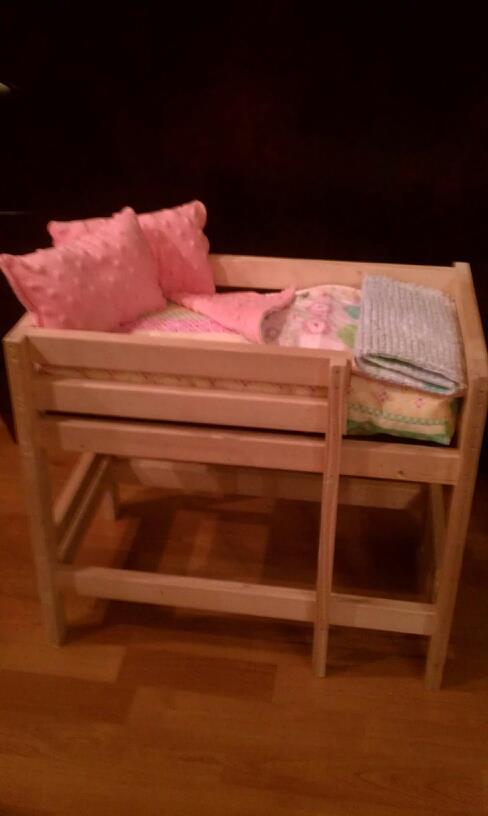
Built from Plan(s)
Estimated Time Investment
Afternoon Project (3-6 Hours)
Recommended Skill Level
Beginner
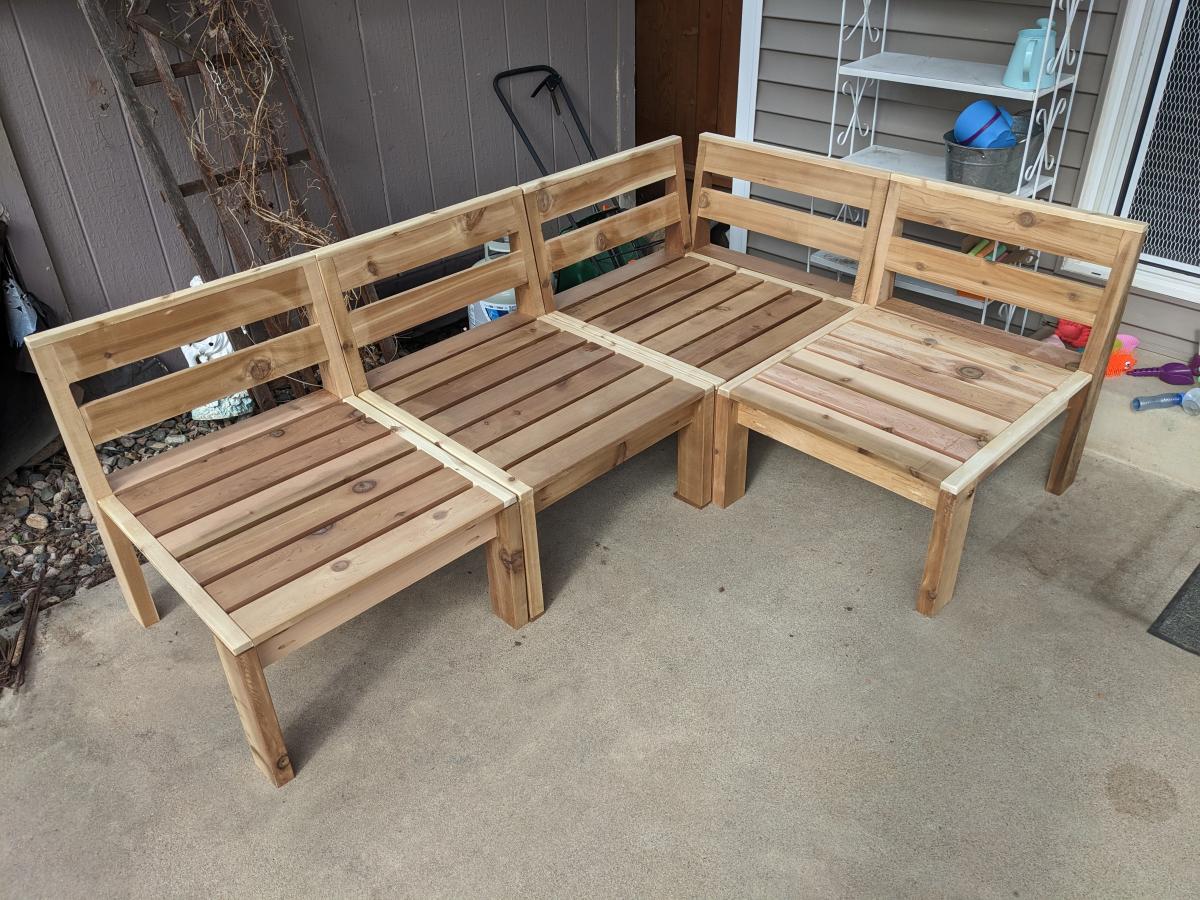
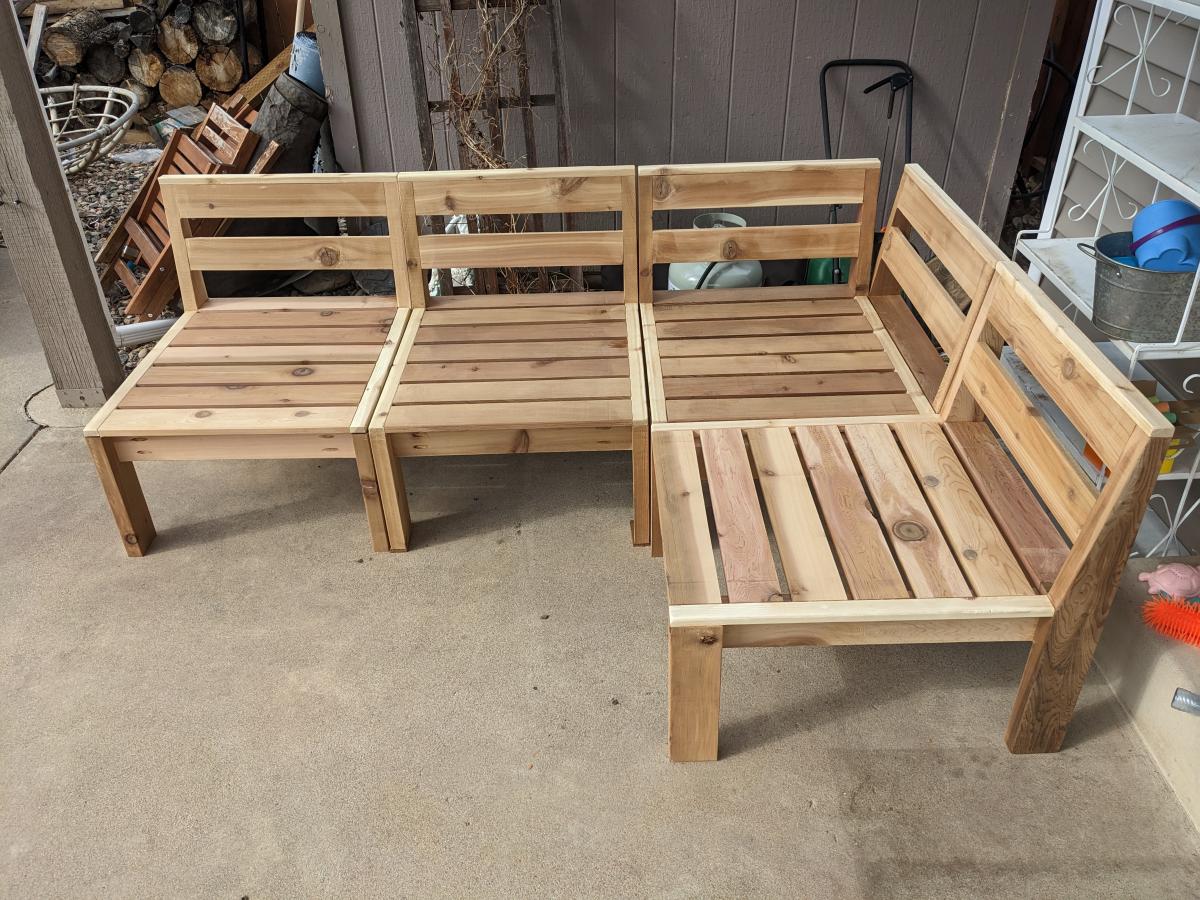
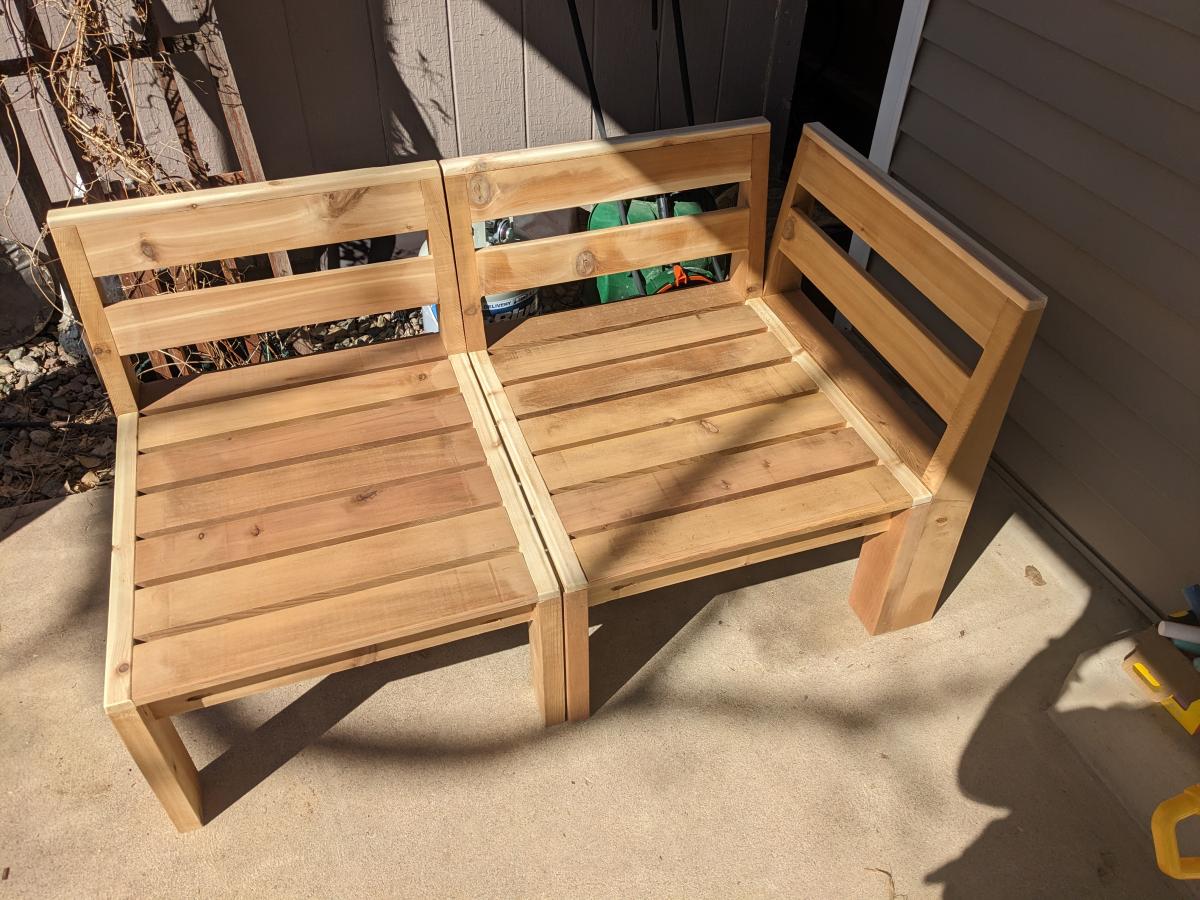
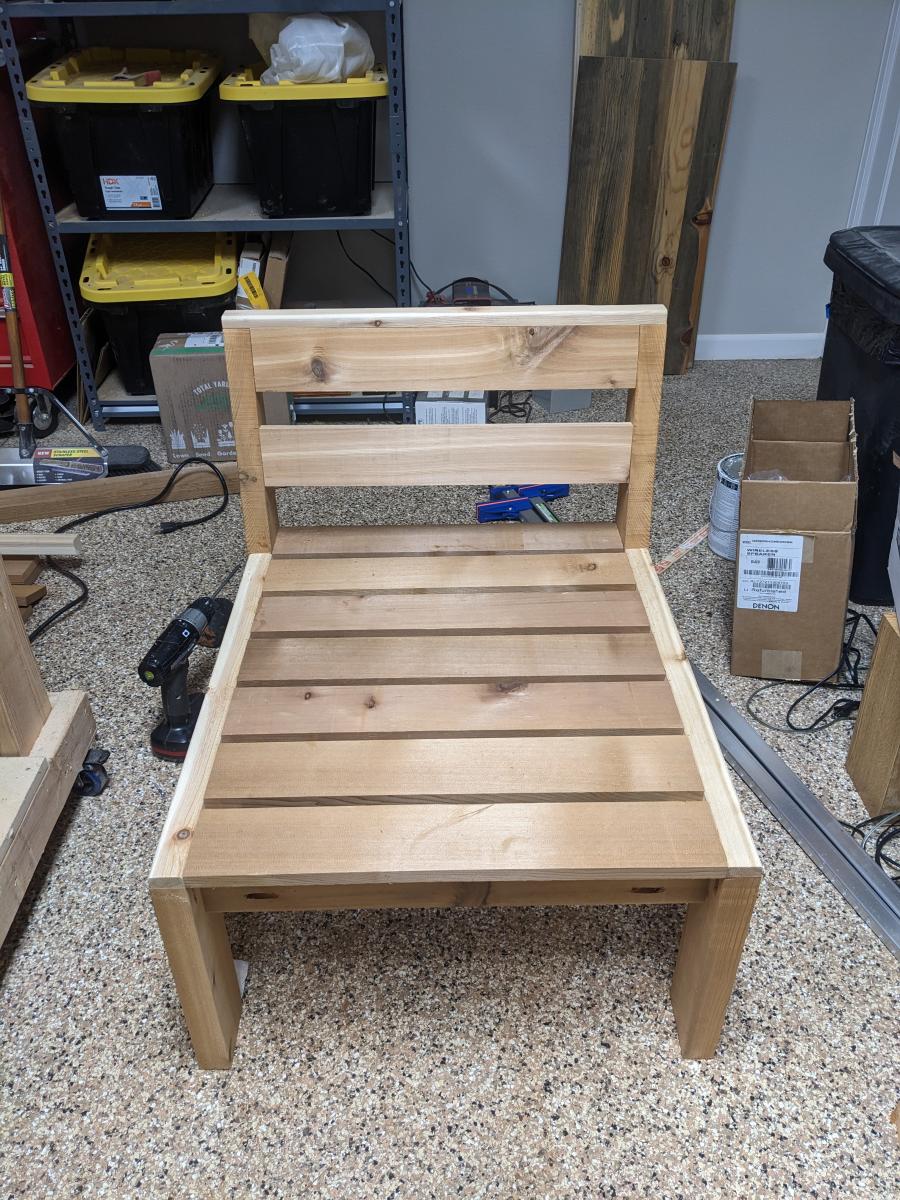
Outdoor Sectional Build
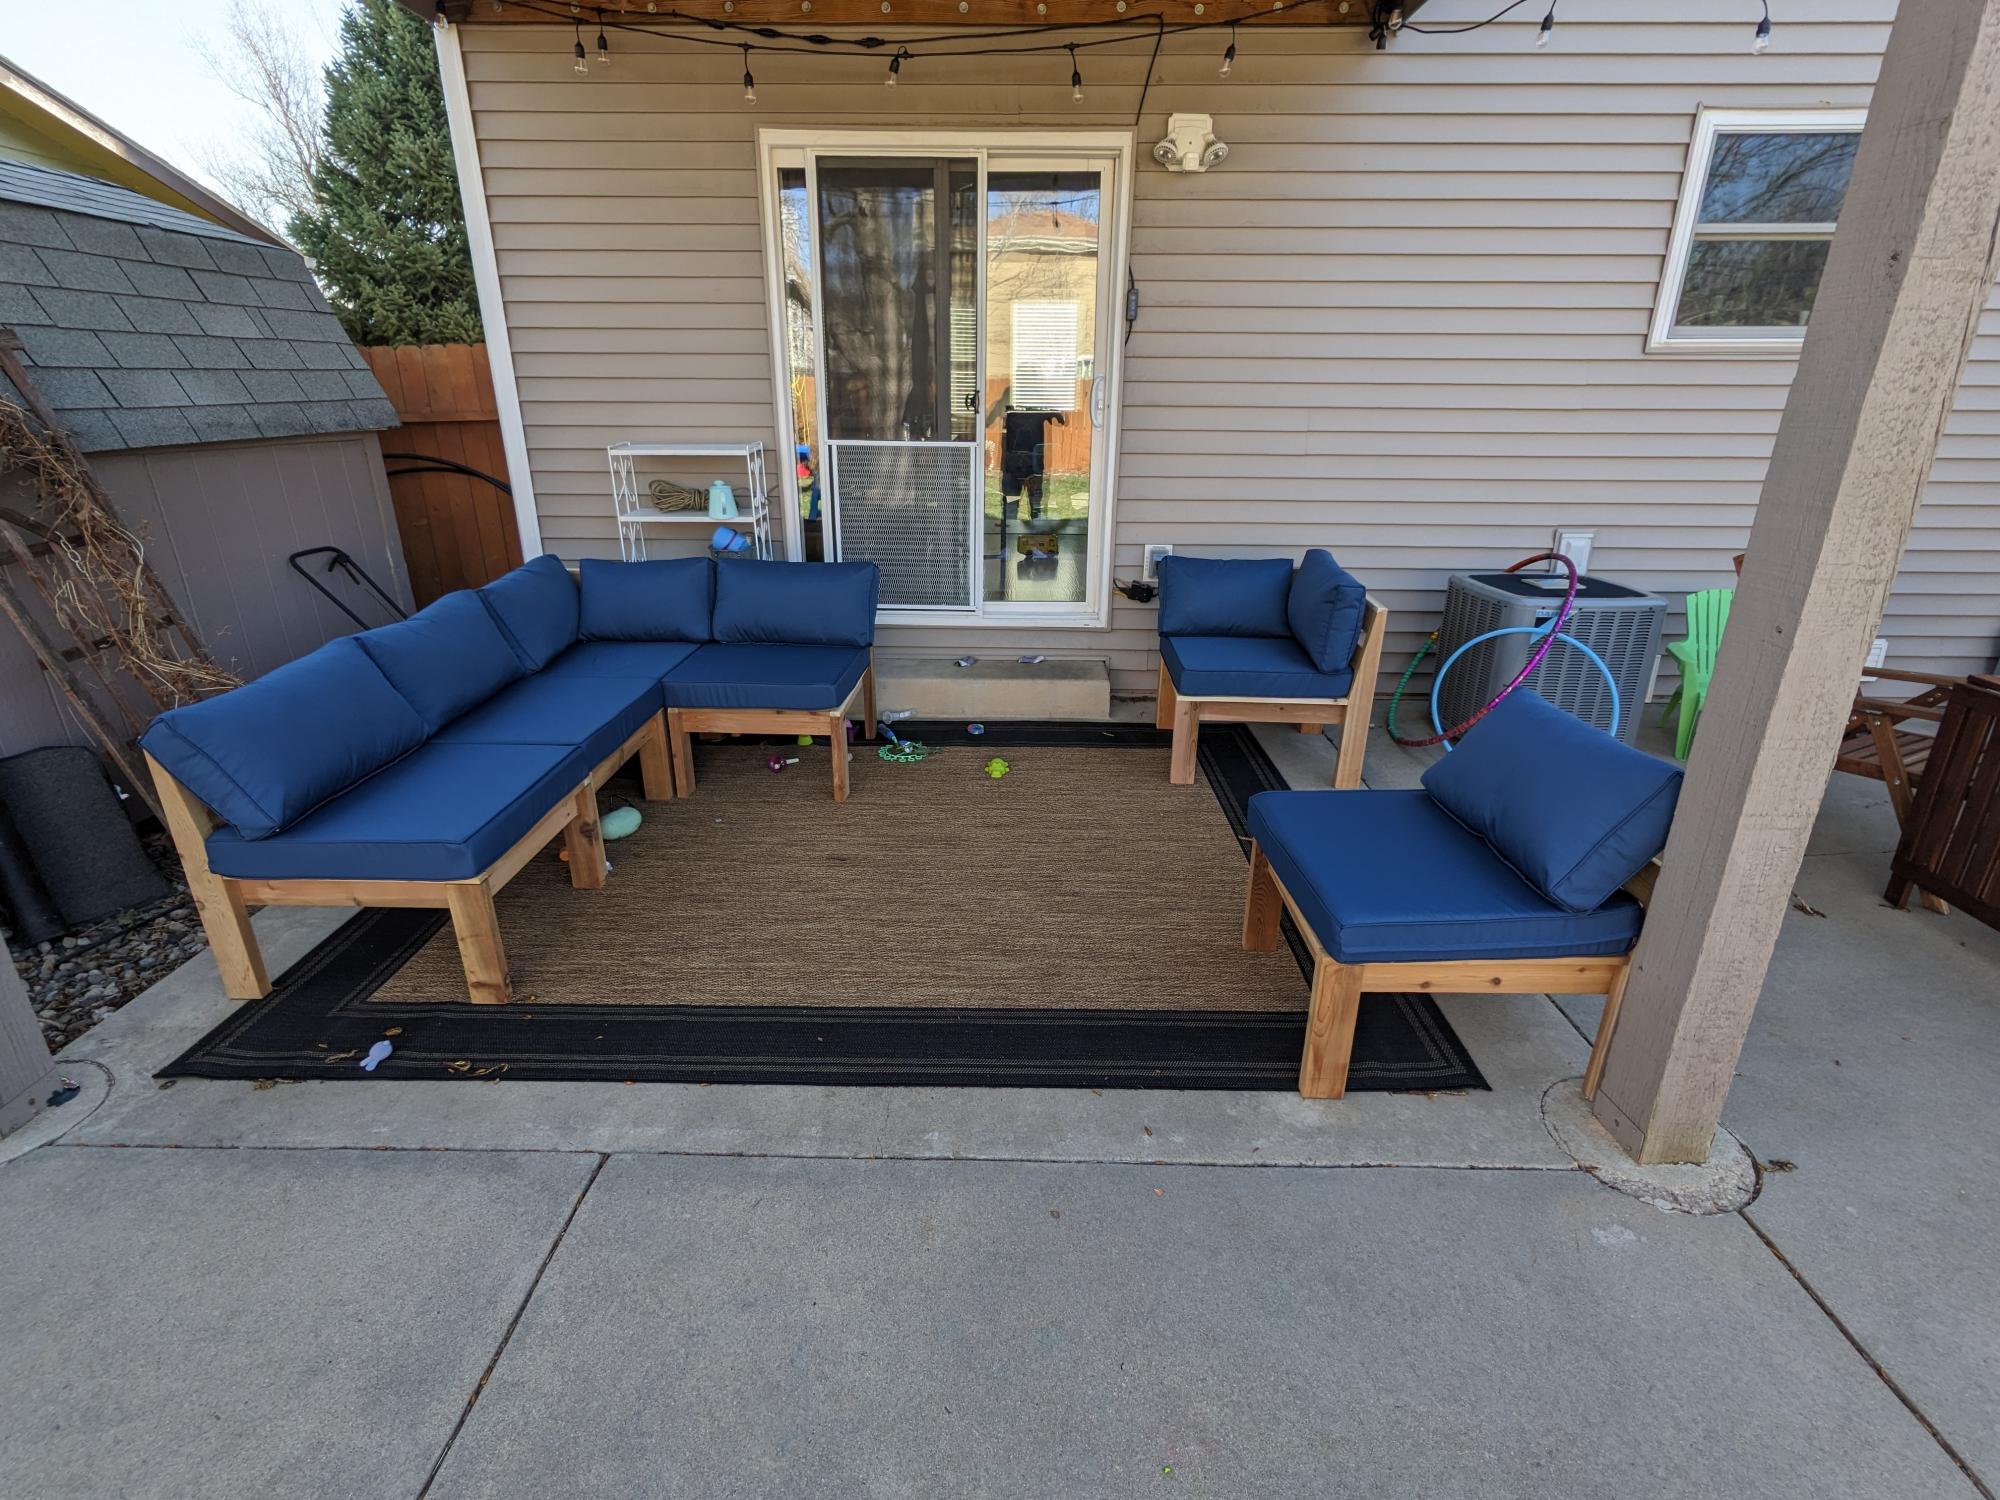
Fun project! Started with rough western red cedar which I ran through a jointer and planer to get good lumber.
I made a few changes to the design. I used thinner seat boards and cut a leaning tilt in the backrests. I also added 2 boards on the back rests.
I used all pocket holes to hide the screws. Once they dry out I will seal the sectionals.
Got a full set of cushions on Amazon for $300. Total for this project was around $700. Not too bad!
Built from Plan(s)
Comments
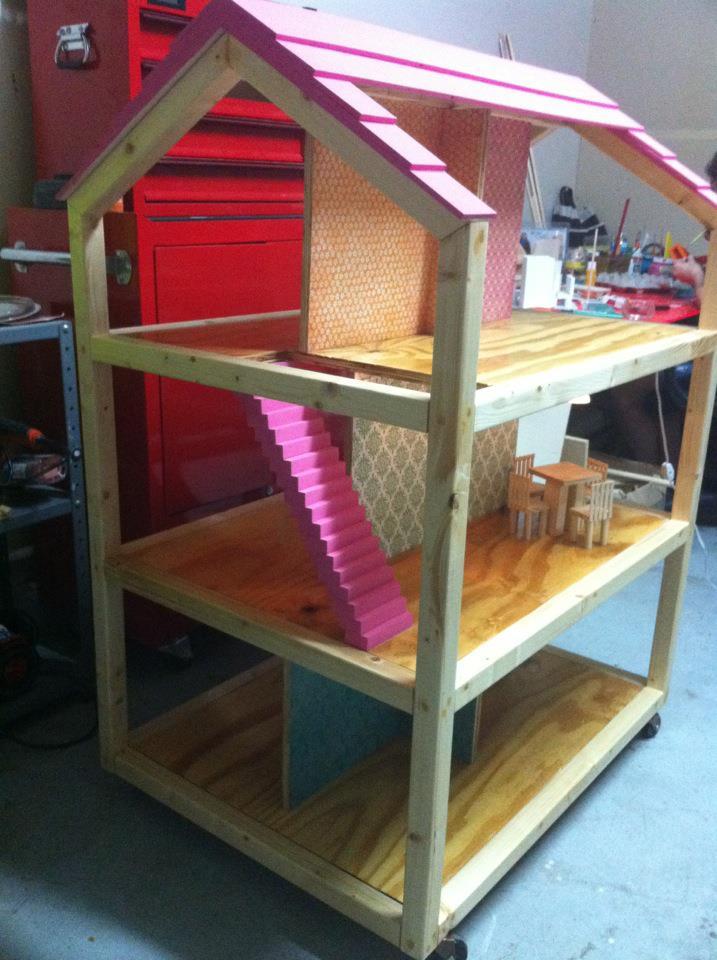
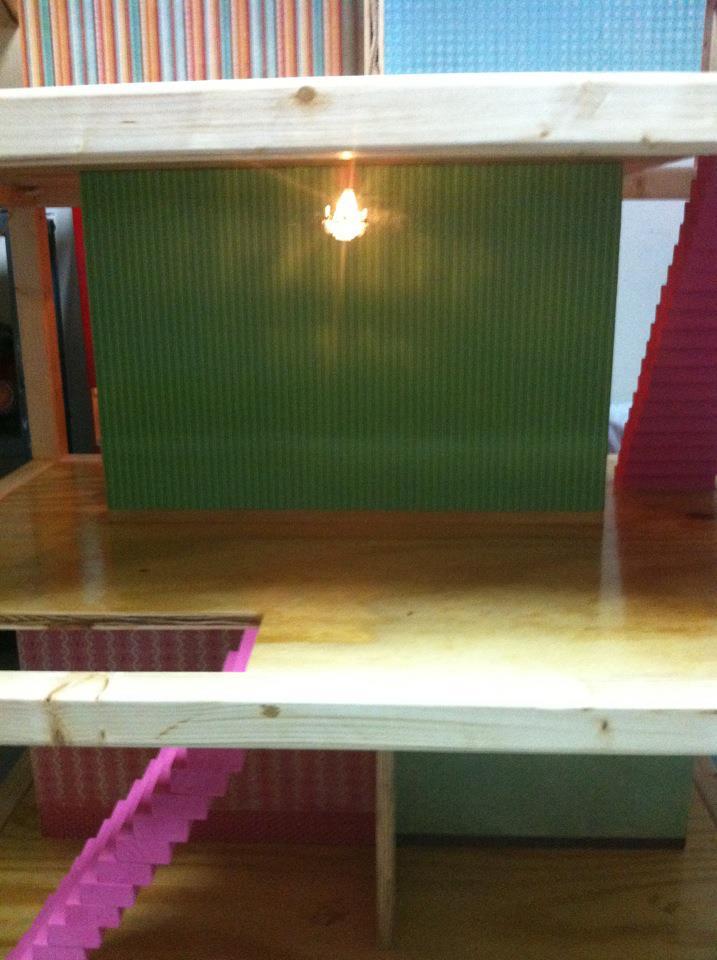
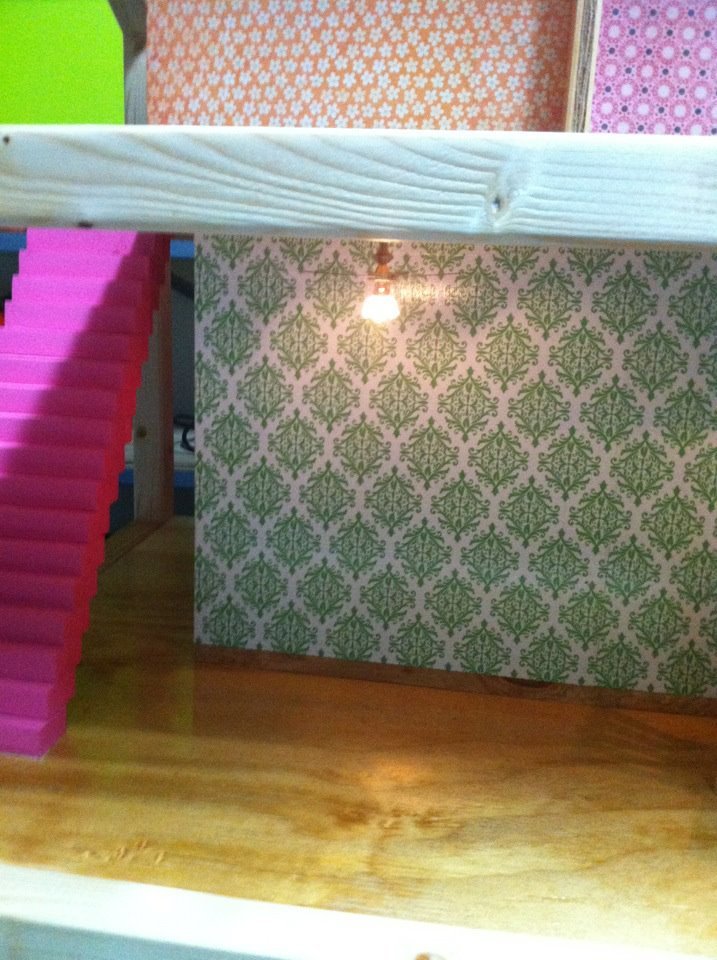
"So Chic" Dream Dollhouse

Finished up right before christmas! I built this for my girlfriends 5 year old daughter. Used the plans and modified slightly and added working lights!
Built from Plan(s)
Estimated Cost
100
Estimated Time Investment
Week Long Project (20 Hours or More)
Recommended Skill Level
Intermediate
Comments

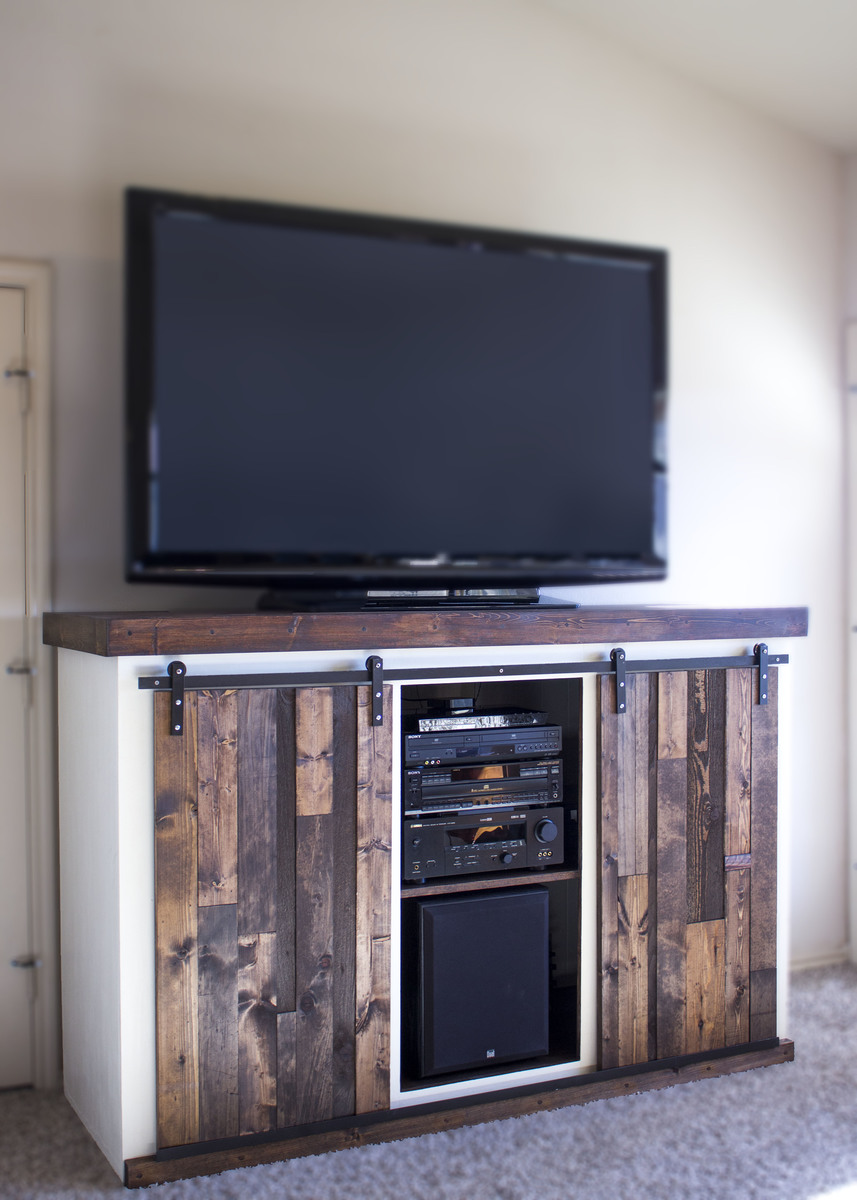
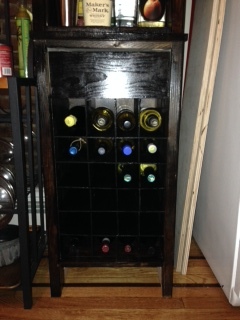
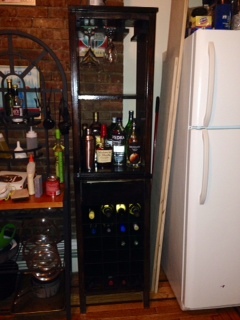
Mod Wine Bar
The mod wine bar is a great project. I made a mistake cutting the inserts forcing me to use extra 1/4" plywood, so I decided against putting a back on the hutch or a cover to the bottom of the base. I actually like the way those both turned out.
After reviewing the Pottery Barn collection, I decided to put a bottom on the hutch. I think it is more stable this way and allows greater flexibility in the future (since it is not attached to the base).
The one modification I would like to make (and potentially will make in the future) is the stemware holders are just slightly too small. I would modify using a 1x4 rather than a 1x3 for the two middle pieces.
I am extremely pleased with how it turned out and look forward to building two more in the future.

Built from Plan(s)
Estimated Cost
$120 (with a lot of spare wood leftover as you can see on the right side)
Estimated Time Investment
Weekend Project (10-20 Hours)
Finish Used
Minwax PolyShade Espresso
Recommended Skill Level
Beginner
Comments
Sun, 02/02/2014 - 22:22
whisky Bar
That particular blog post is written artistically and it includes many practical knowledge for everybody. I guess you've carried out a great job of handling this delicate
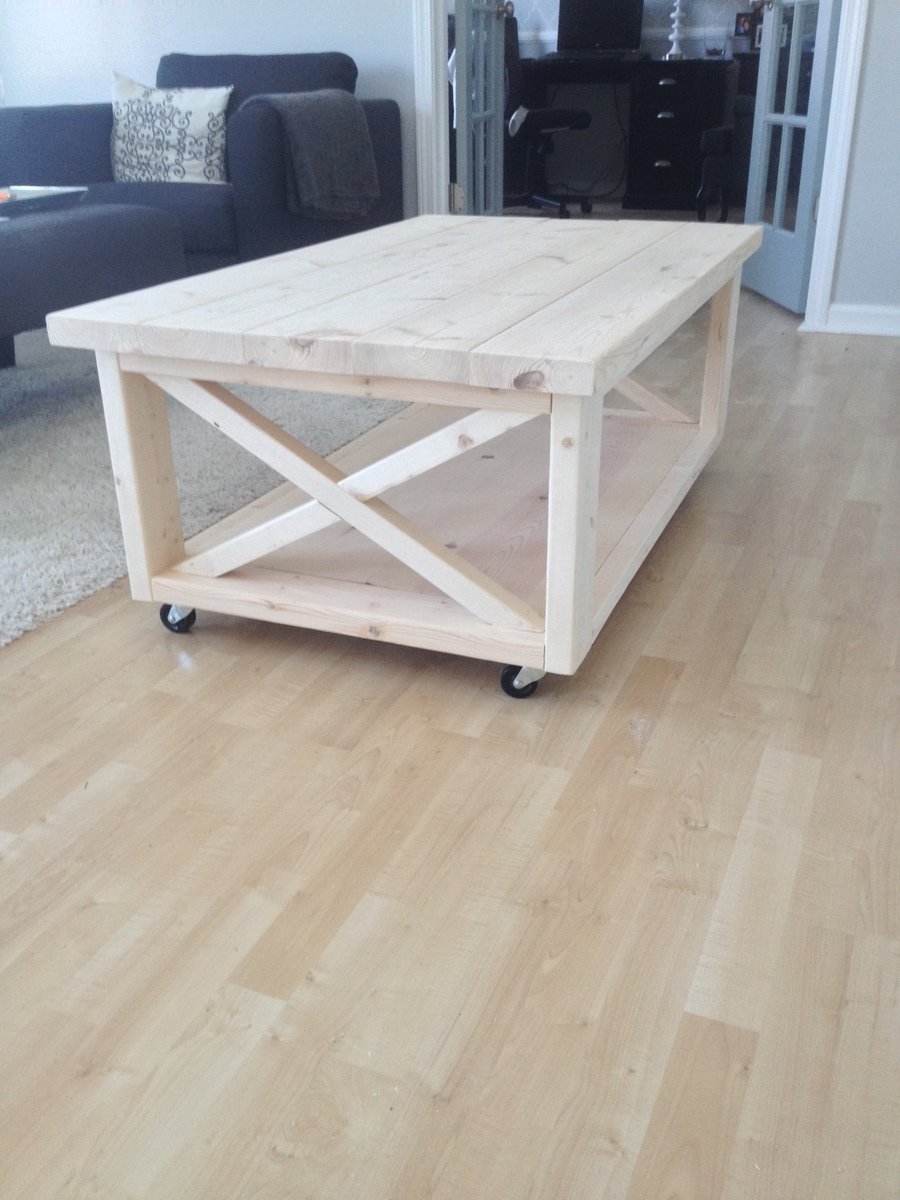
Rustic X Coffee Table
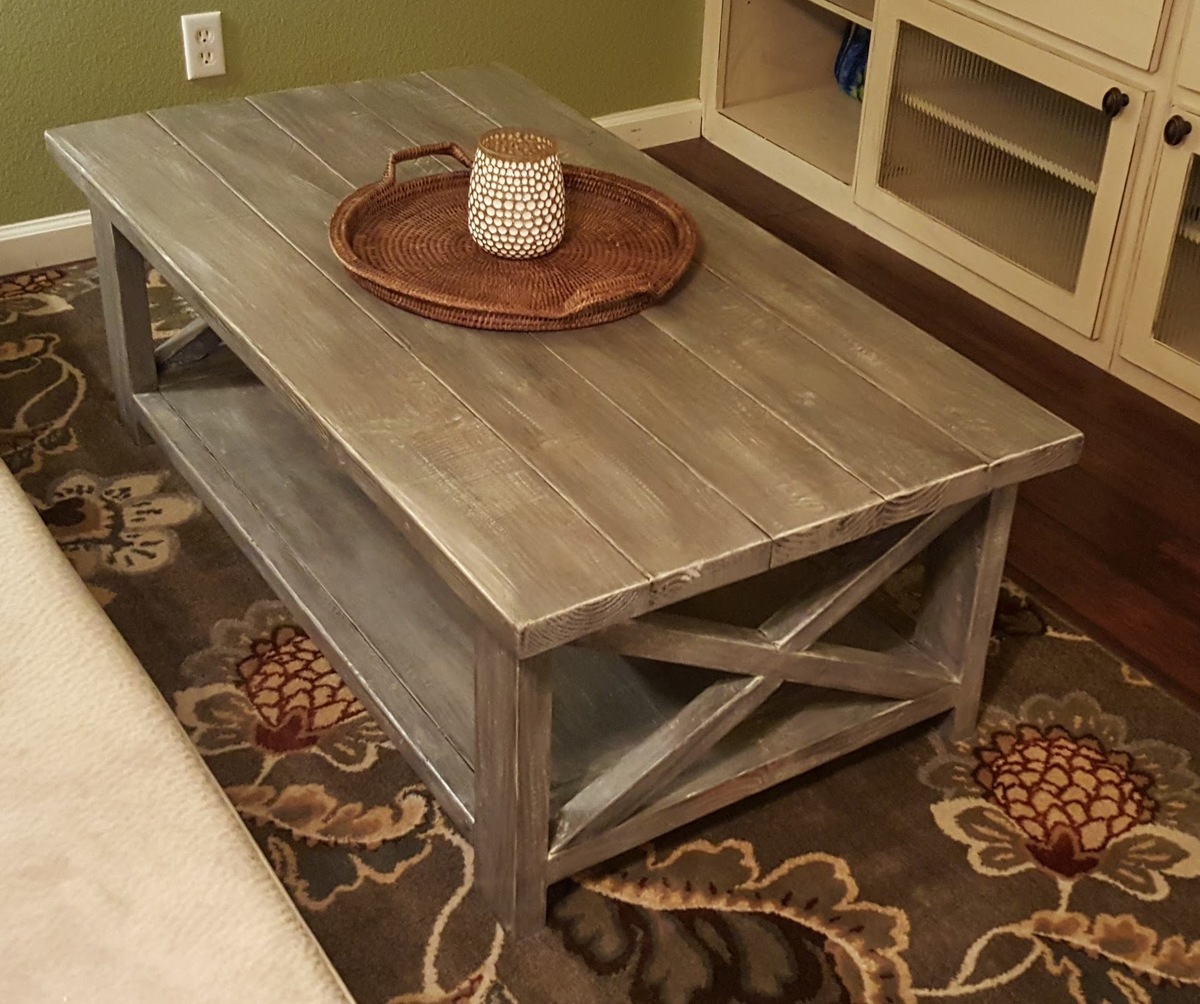
I built this coffee table in an afternoon, following the plans exactly. Super fun and easy build. I sanded the heck out of the coffee table and stained the base and top with Varathane Kona Stain. I then painted the coffee table with dilute Annie Sloan Chalk Paint in French Linen and dry brushed with ASCP in Old White. When dry, I sanded here and there to enhance the rustic look. I then finished with Minwax Polycrylic and assembled the top to the base in my living room...it's heavy! Love it:-)
Built from Plan(s)
Estimated Cost
$75
Estimated Time Investment
Day Project (6-9 Hours)
Finish Used
Stain, Annie Sloan Chalk Paint and Minwax Polycrylic
Recommended Skill Level
Beginner
Modern Bench

Built this modern bench to put in my prarie.
Built from Plan(s)
Estimated Time Investment
Weekend Project (10-20 Hours)
Finish Used
Exterior Paint
Recommended Skill Level
Beginner
Barnwood Frames - variaton
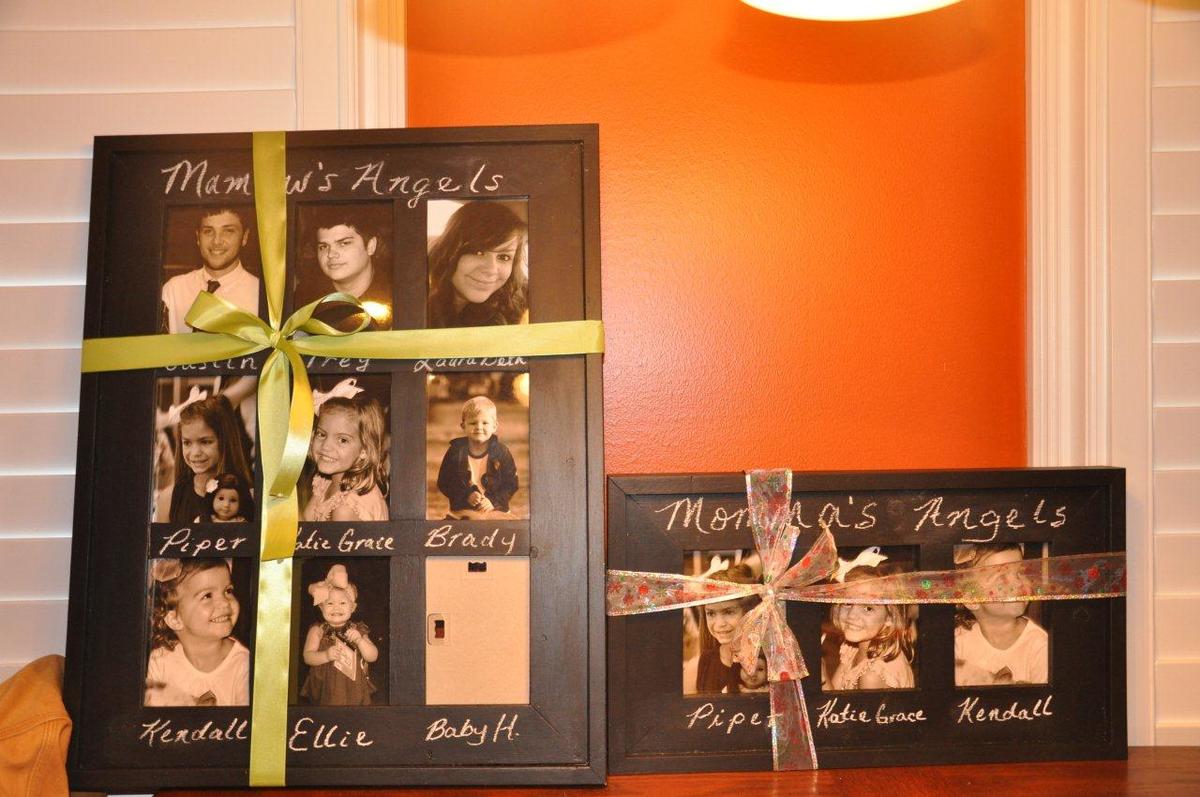
Frames I made for my Mother and my wife for Christmas. Painted with Chalkboard paint so they can change them however they want
Built from Plan(s)
Estimated Cost
$15-$20
Estimated Time Investment
An Hour or Two (0-2 Hours)
Finish Used
Chalkboard Paint
Recommended Skill Level
Starter Project
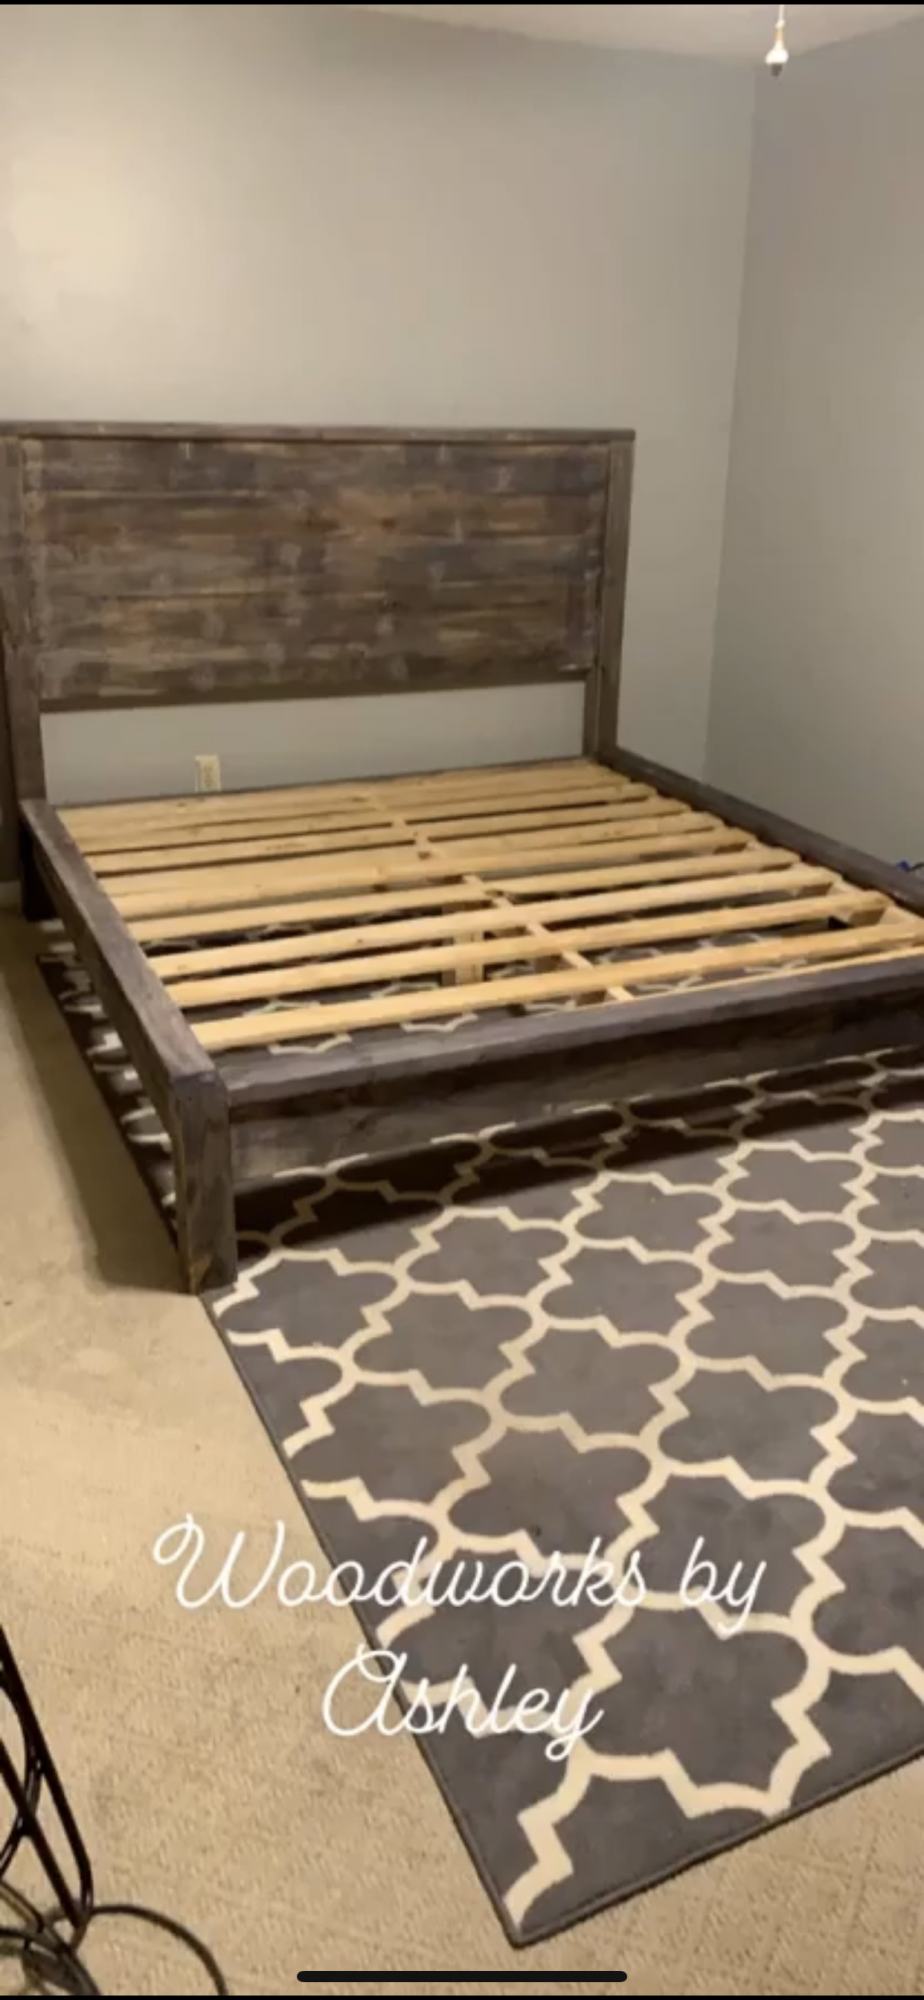
Farmhouse Queen Bed Made

This bed is amazing. Great design, very sturdy and another Ana White project in the books!
Built from Plan(s)
Estimated Cost
$200
Estimated Time Investment
Week Long Project (20 Hours or More)
Finish Used
Satin white paint with 3 coats of poly.
Recommended Skill Level
Intermediate
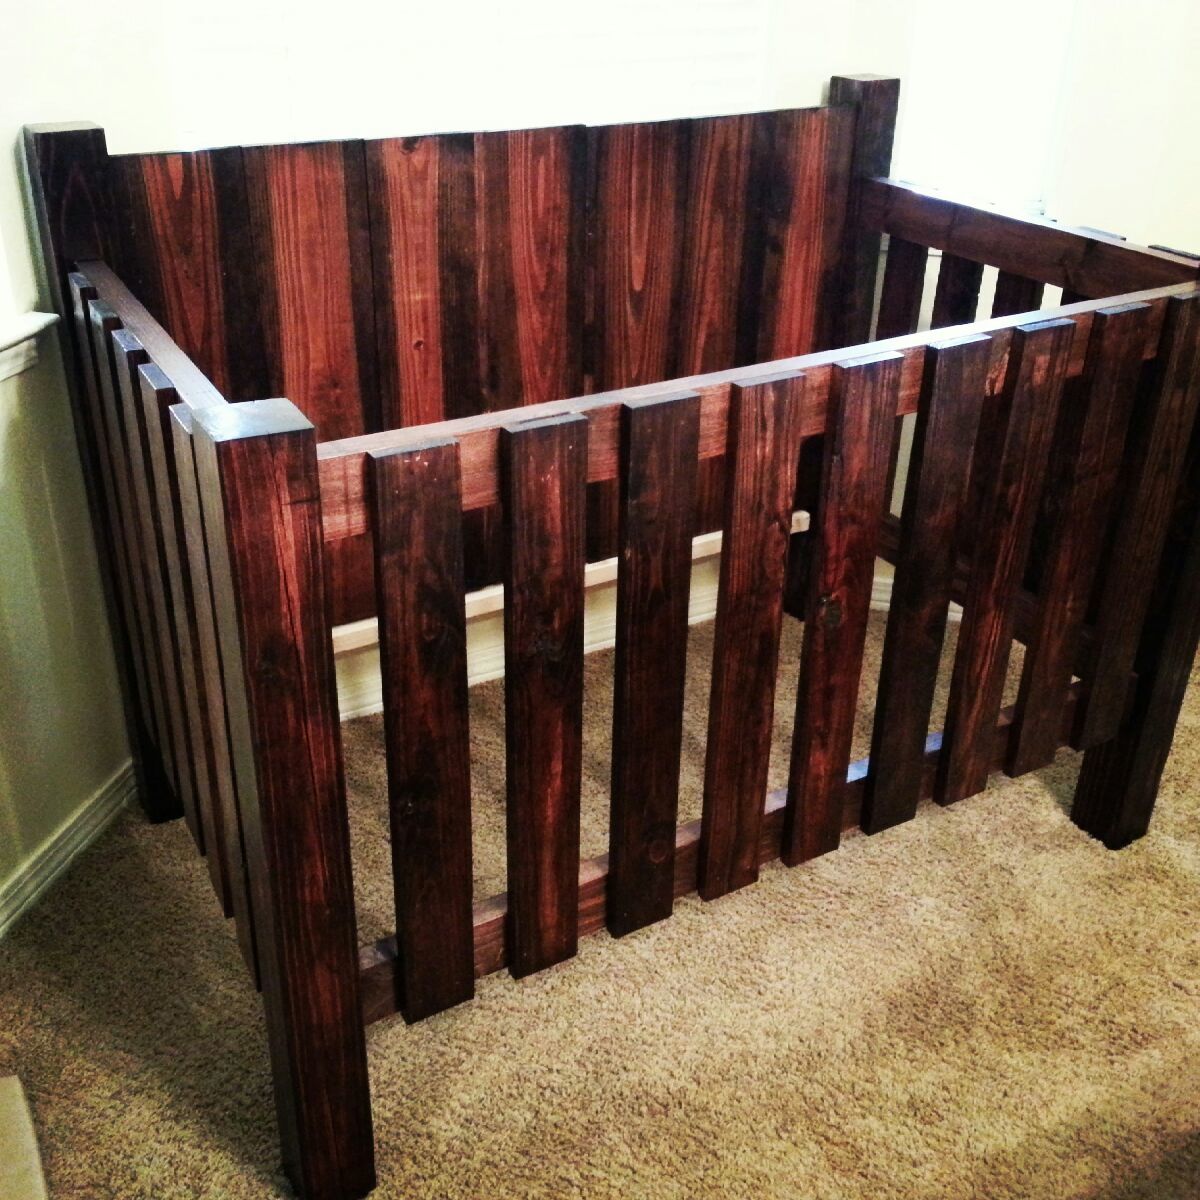
Toys boxes
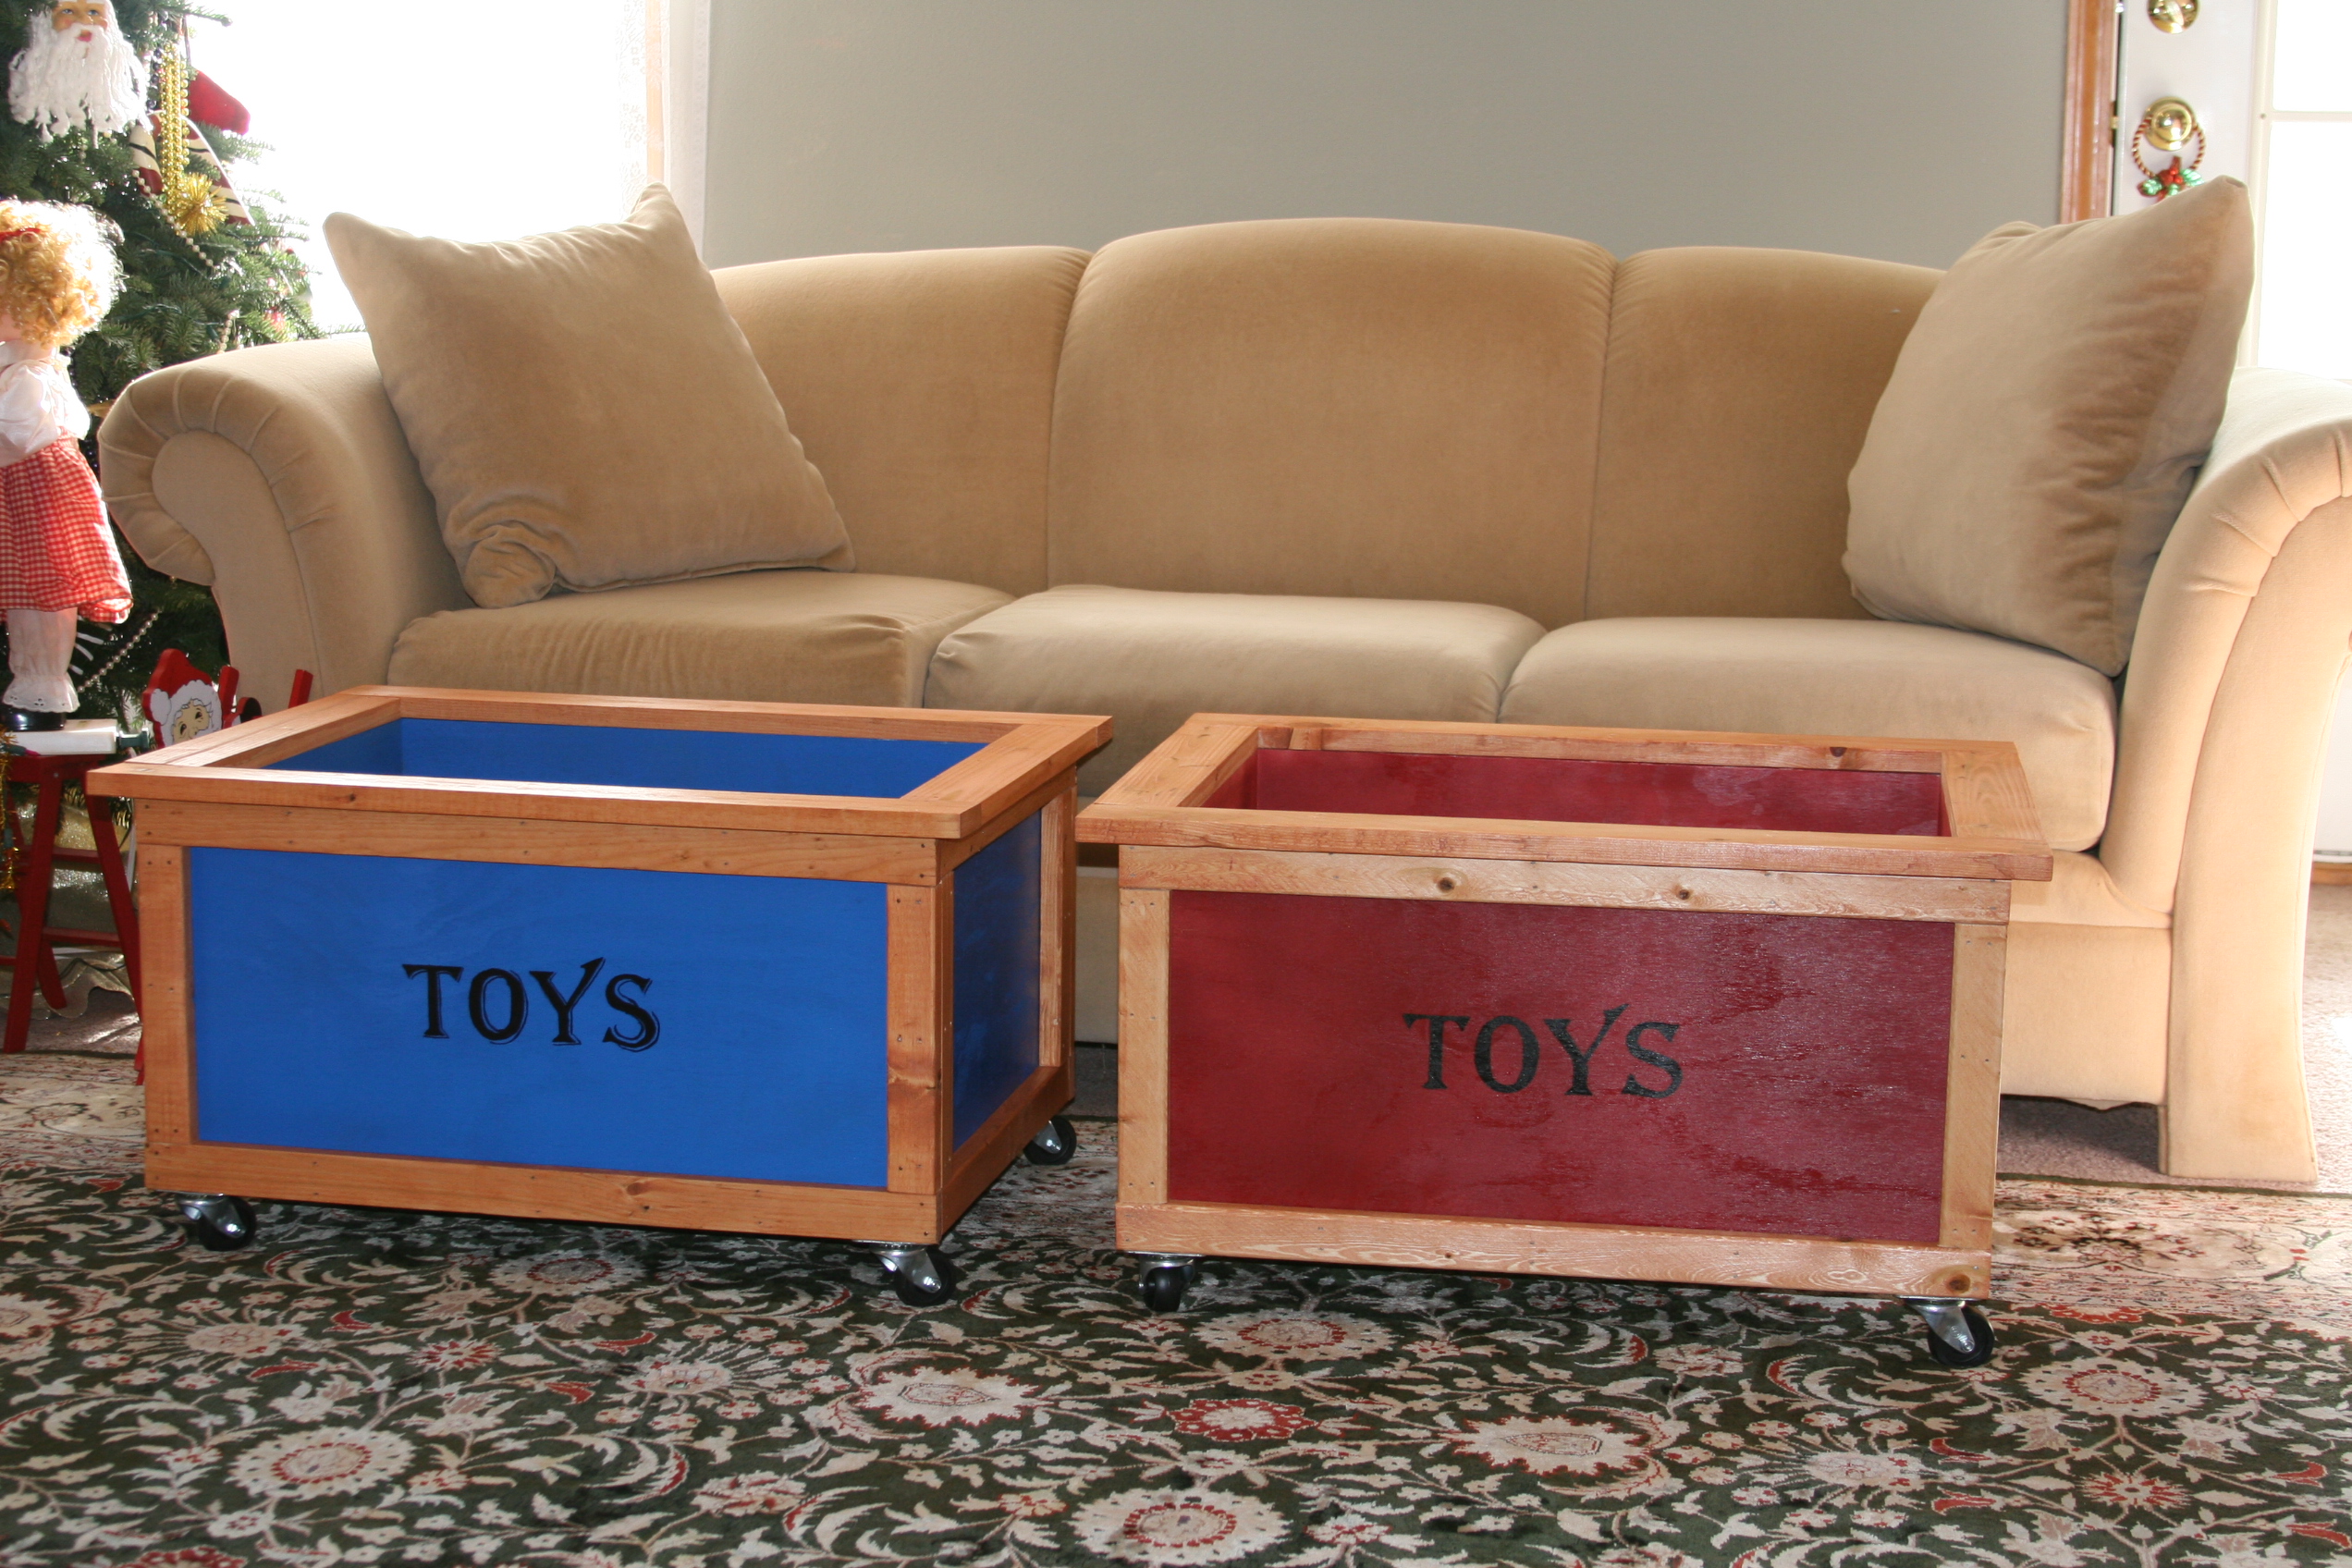
We made two toy boxes for the Make Two Challenge. A single mom with two small children needed a little boost for christmas this year. I used the stacking toy box plans but dressed it up a bit with trim and added casters. The plan was very easy to follow.
Built from Plan(s)
Estimated Cost
$40.00
Estimated Time Investment
Afternoon Project (3-6 Hours)
Finish Used
Red and blue spray paint and minwax stain
Recommended Skill Level
Beginner
Comments
Rustic X Coffee Table
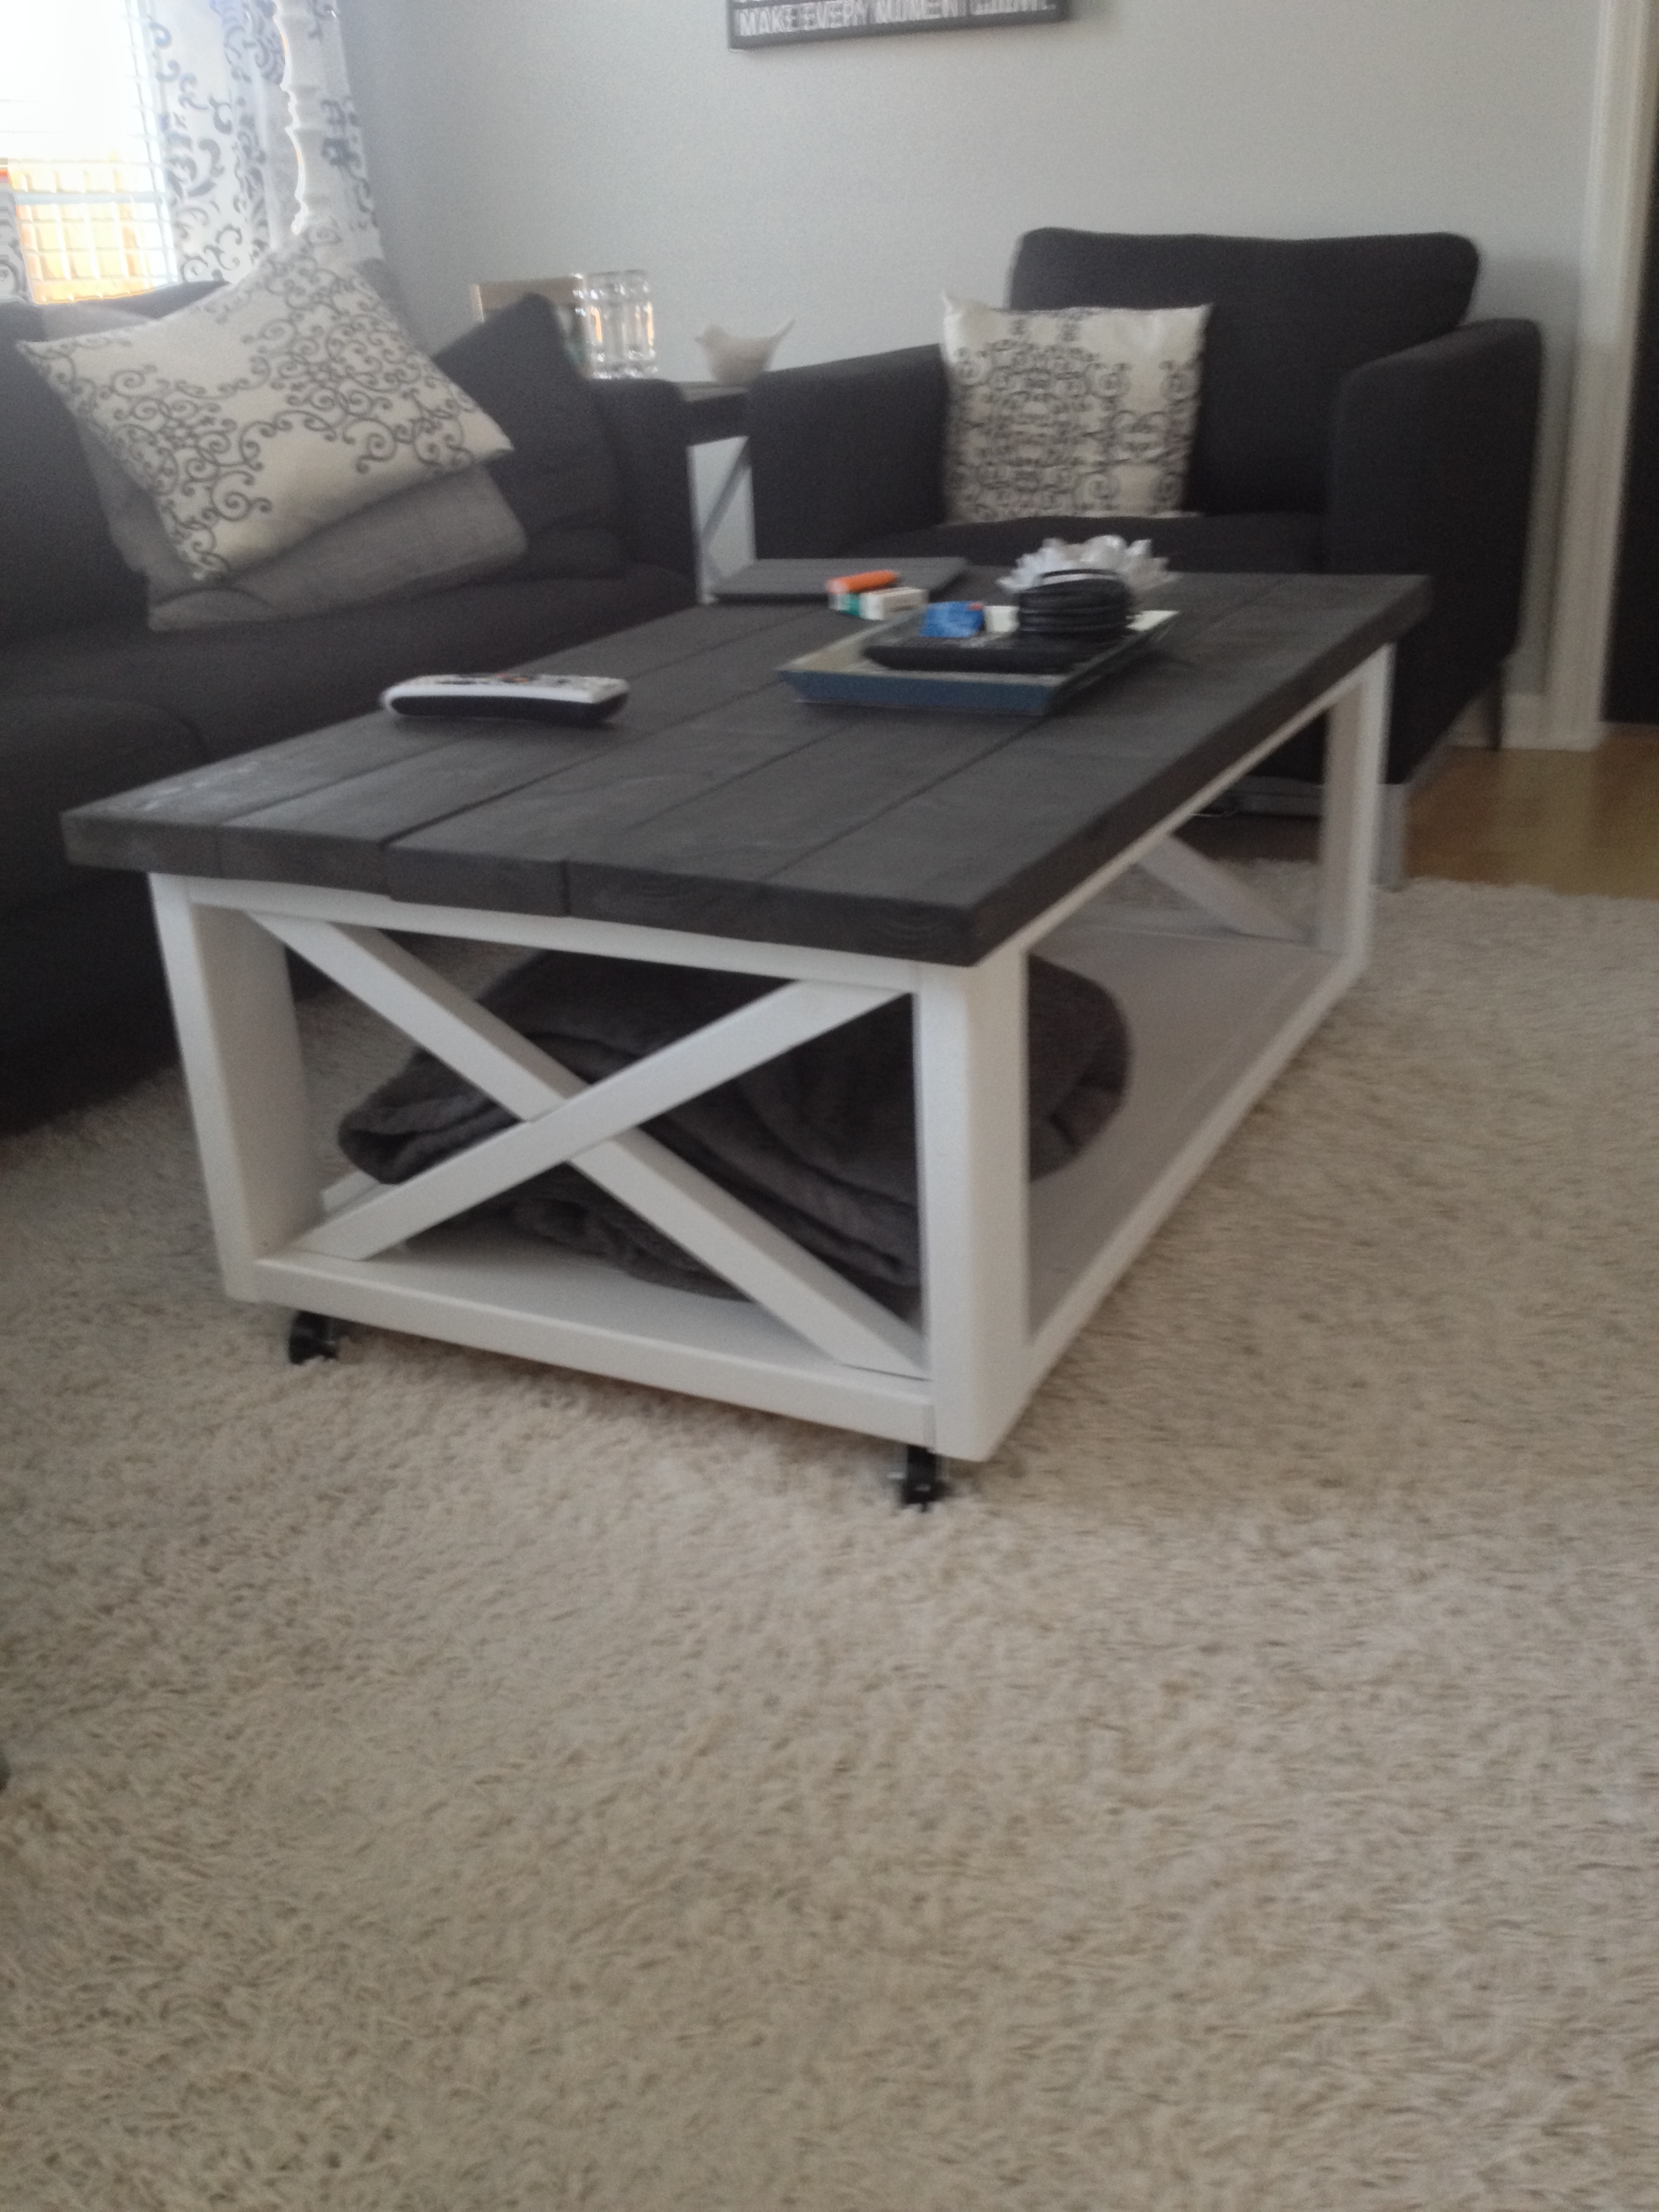
Modified the plan to have no legs and added caster to the bottom so that it can be rolled easily around. Easy to build. I am in love with Ana's plans! Only cost $40 in wood!
Built from Plan(s)
Estimated Time Investment
Afternoon Project (3-6 Hours)
Finish Used
Top: Minwax Ebony and Minwax Driftwood Stain
Bottom: White Semi-gloss paint
Bottom: White Semi-gloss paint
Recommended Skill Level
Beginner
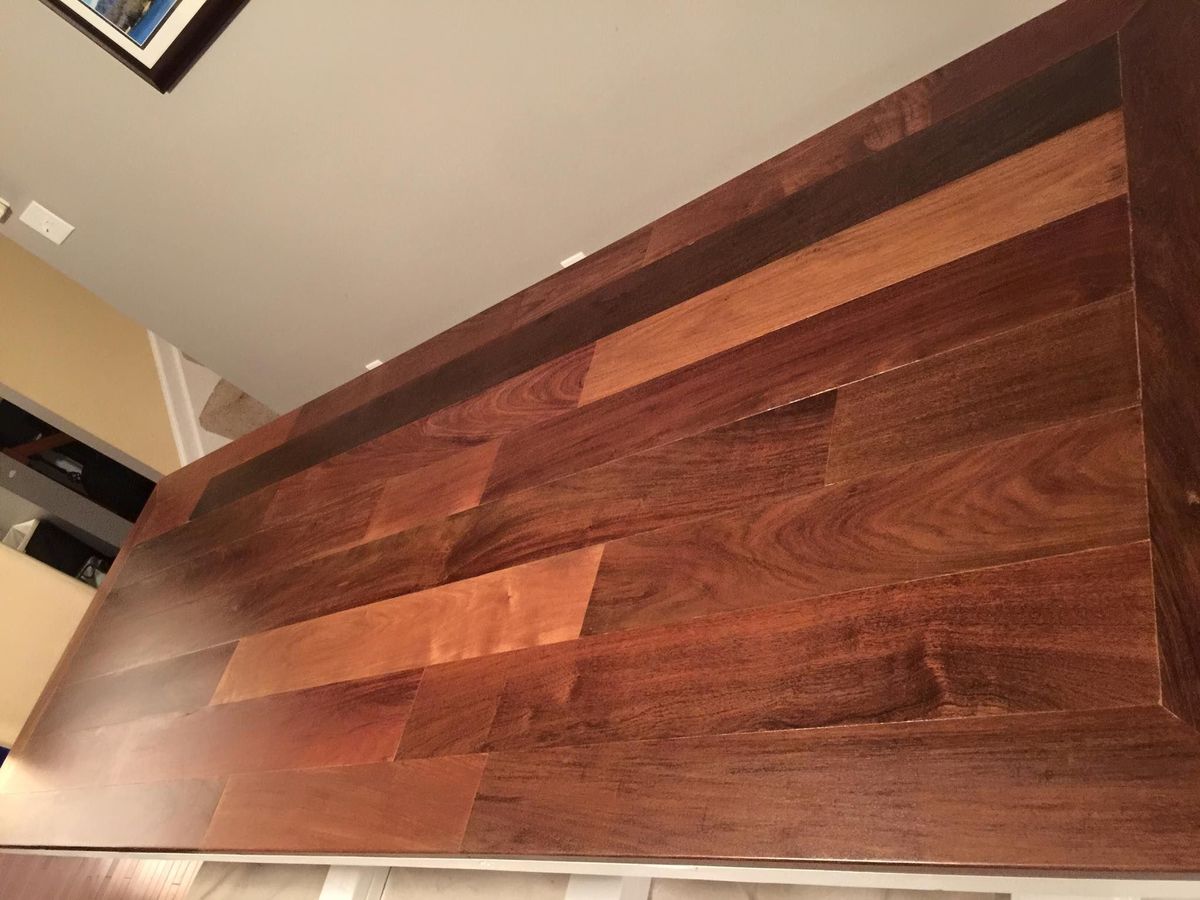
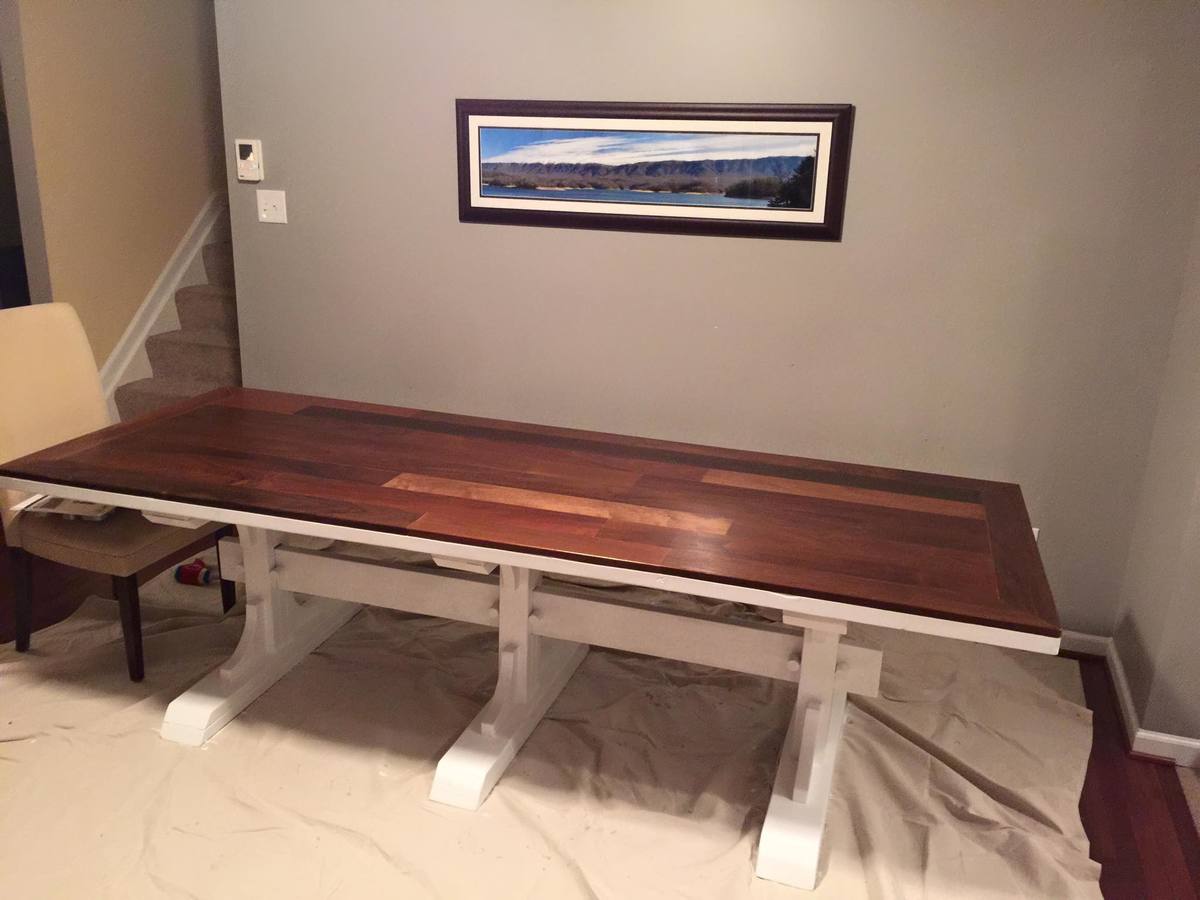
Farm Table

I followed the building plans from here: http://www.ana-white.com/2012/11/plans/triple-pedestal-farmhouse-table
I changed the plans slightly. I used Brazilian Walnut unfinished tounge and groove flooring that I got at a reduced price at lumber liquidators. This wood is so beautiful I couldn't help myself! This added about 50 lbs to the weight of this table and about 10 more hours of labor but it is worth it!
Estimated Cost
Because I used thebBrazilian Walnut wood it upped the cost to about double. So about $350.
Estimated Time Investment
Week Long Project (20 Hours or More)
Finish Used
Triple thick lacquer sanded in between. 3 coats.
Recommended Skill Level
Intermediate
DIY Corrugated Metal Wood Awning
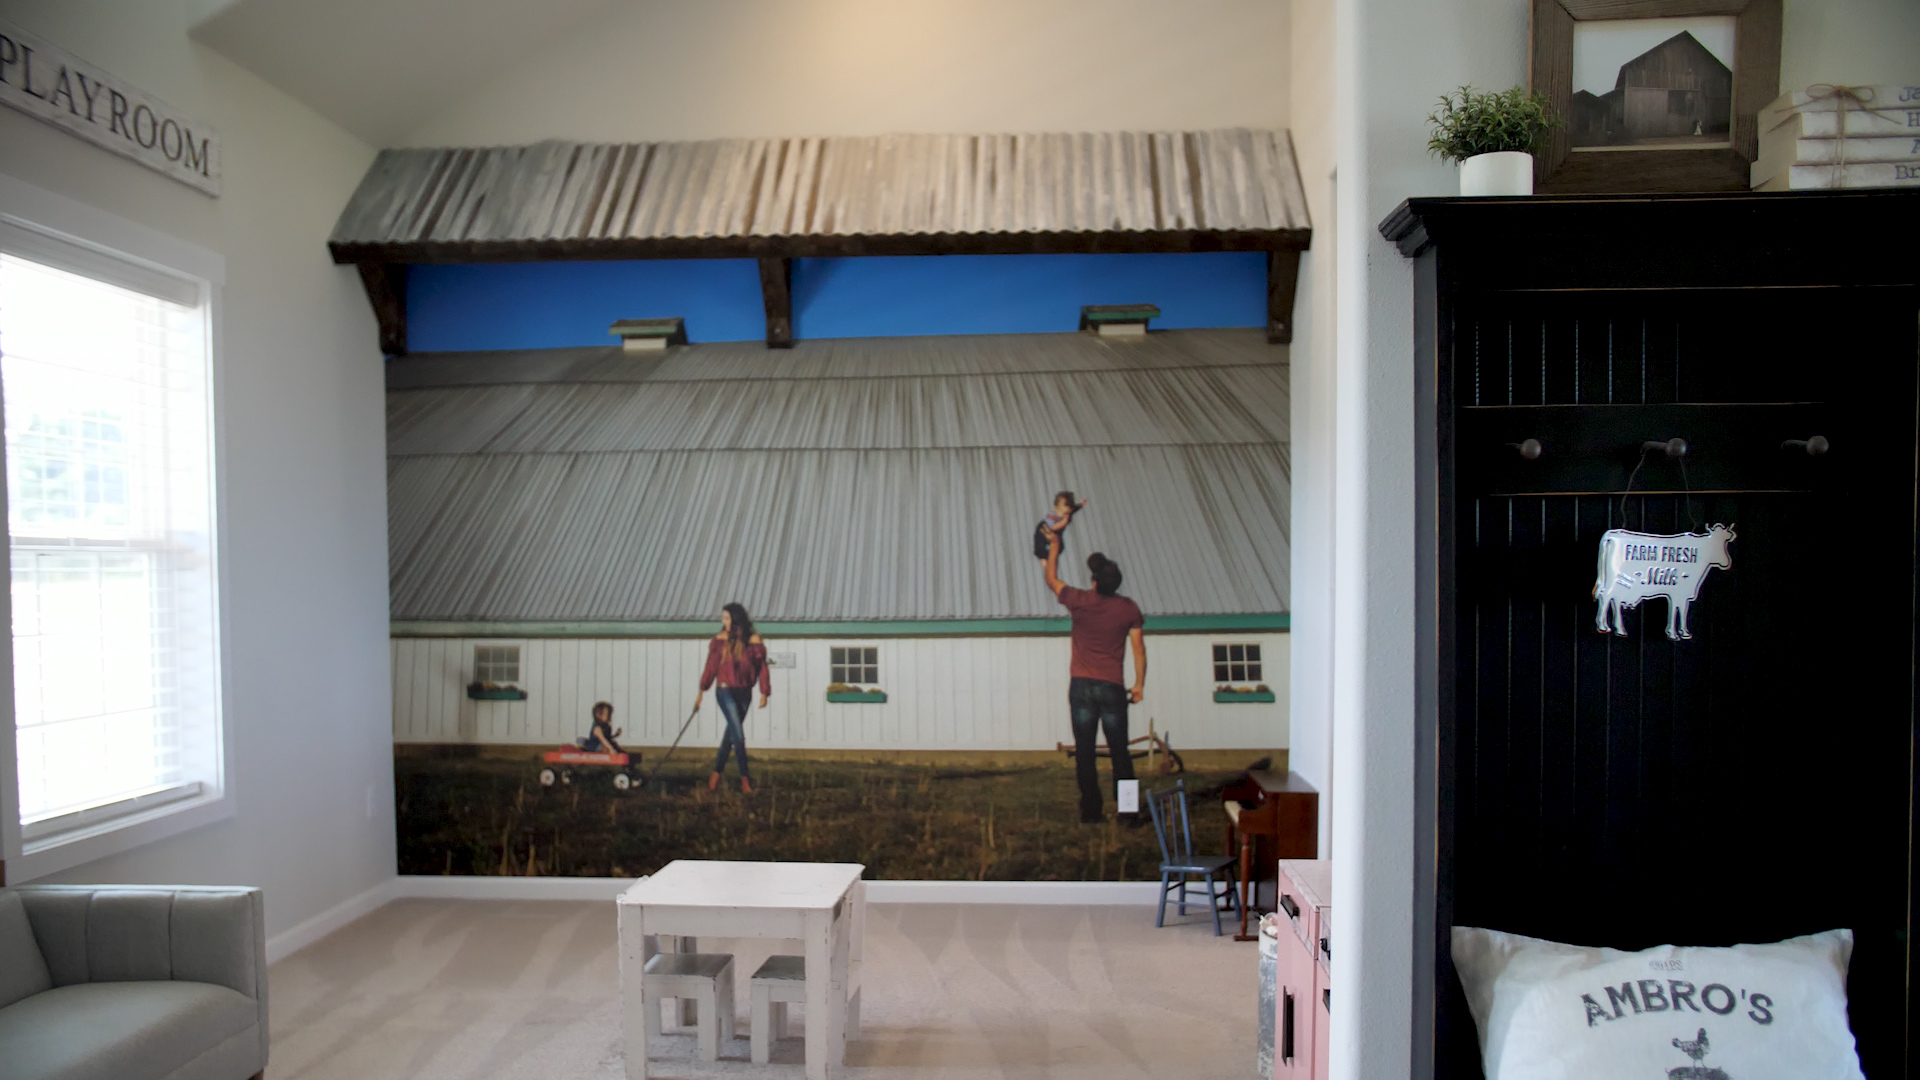
DIY CORRUGATED METAL WOOD AWNING
Made in less than 4 hours
(Awning takes 24 hours to get aged look)
Simple & fun way to add character above a wall mural, a family photo, a sign, or even a window indoors!
This DIY cost us under $100 to do and is 11 ft long
We do have a full tutorial on how to make it on our Youtube channel Living it Country
Fire truck bed

Had a great time building this bed for my 2 year old son. The toughest part was building a slanted ladder that he could climb up. The project turned out way better than I expected and my son loves it.

Estimated Time Investment
Week Long Project (20 Hours or More)
Recommended Skill Level
Starter Project
Comments
Wed, 11/20/2013 - 15:37
Marvelous!
You did a marvelous job on this, and your details are fab! Wonderful build! Your son is lucky his mom is an amazing builder. And this was your first project? I'm blown away! :)