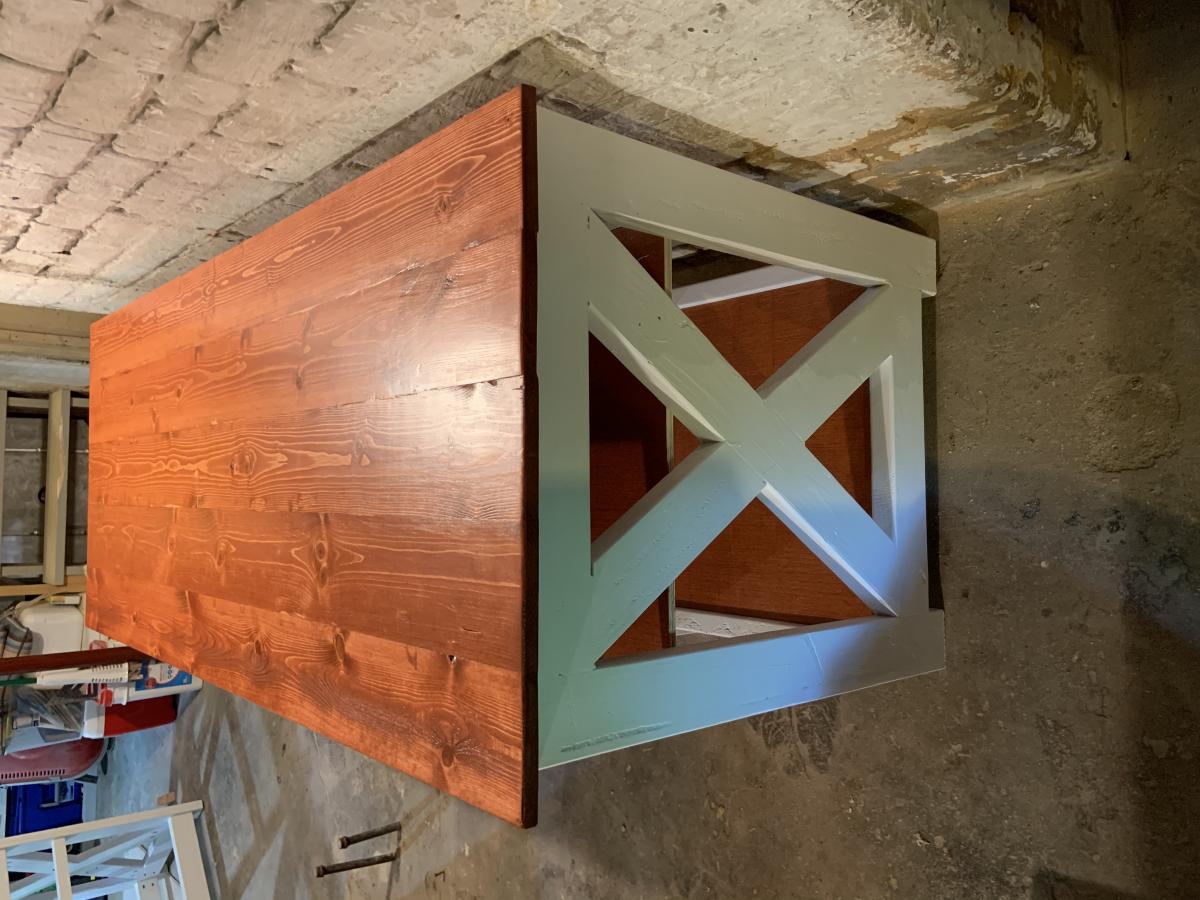
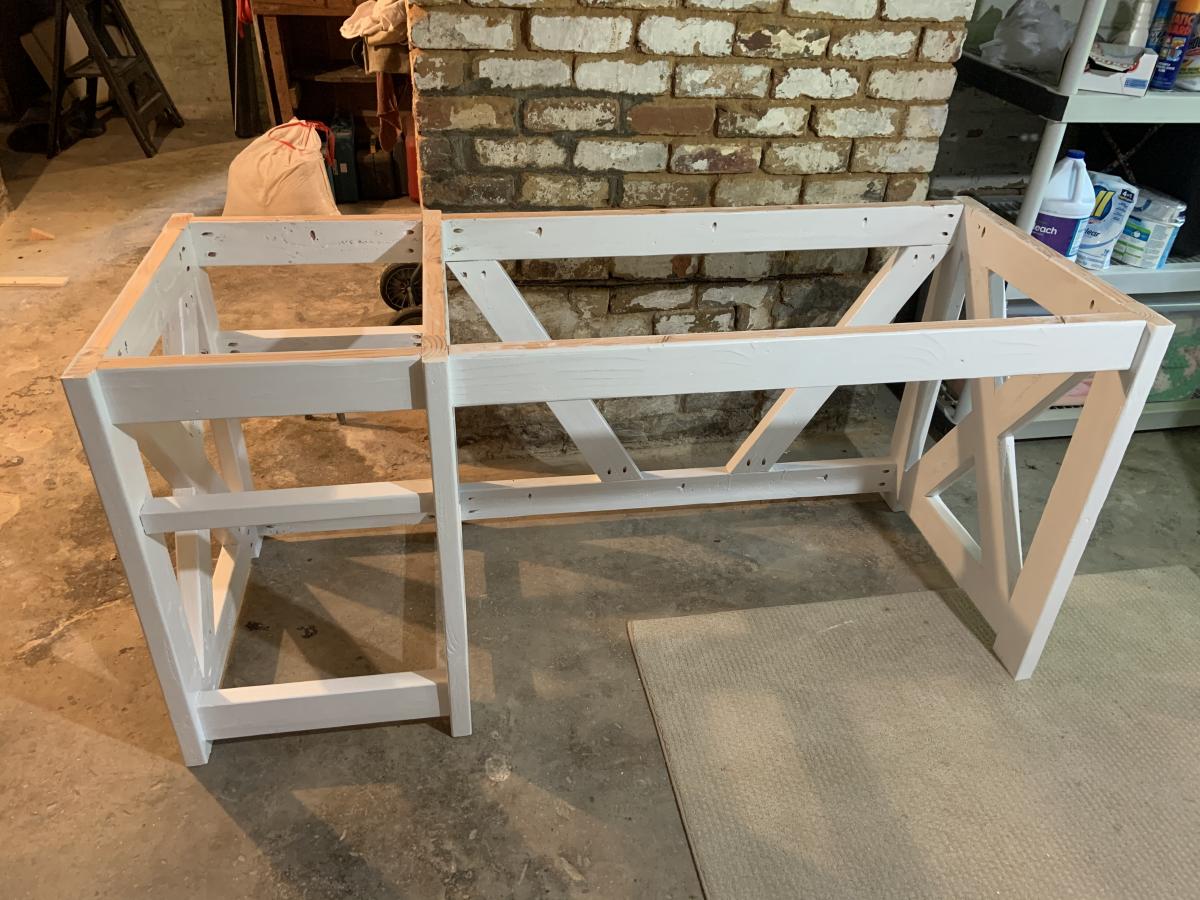
Medium Width Painter's Ladder
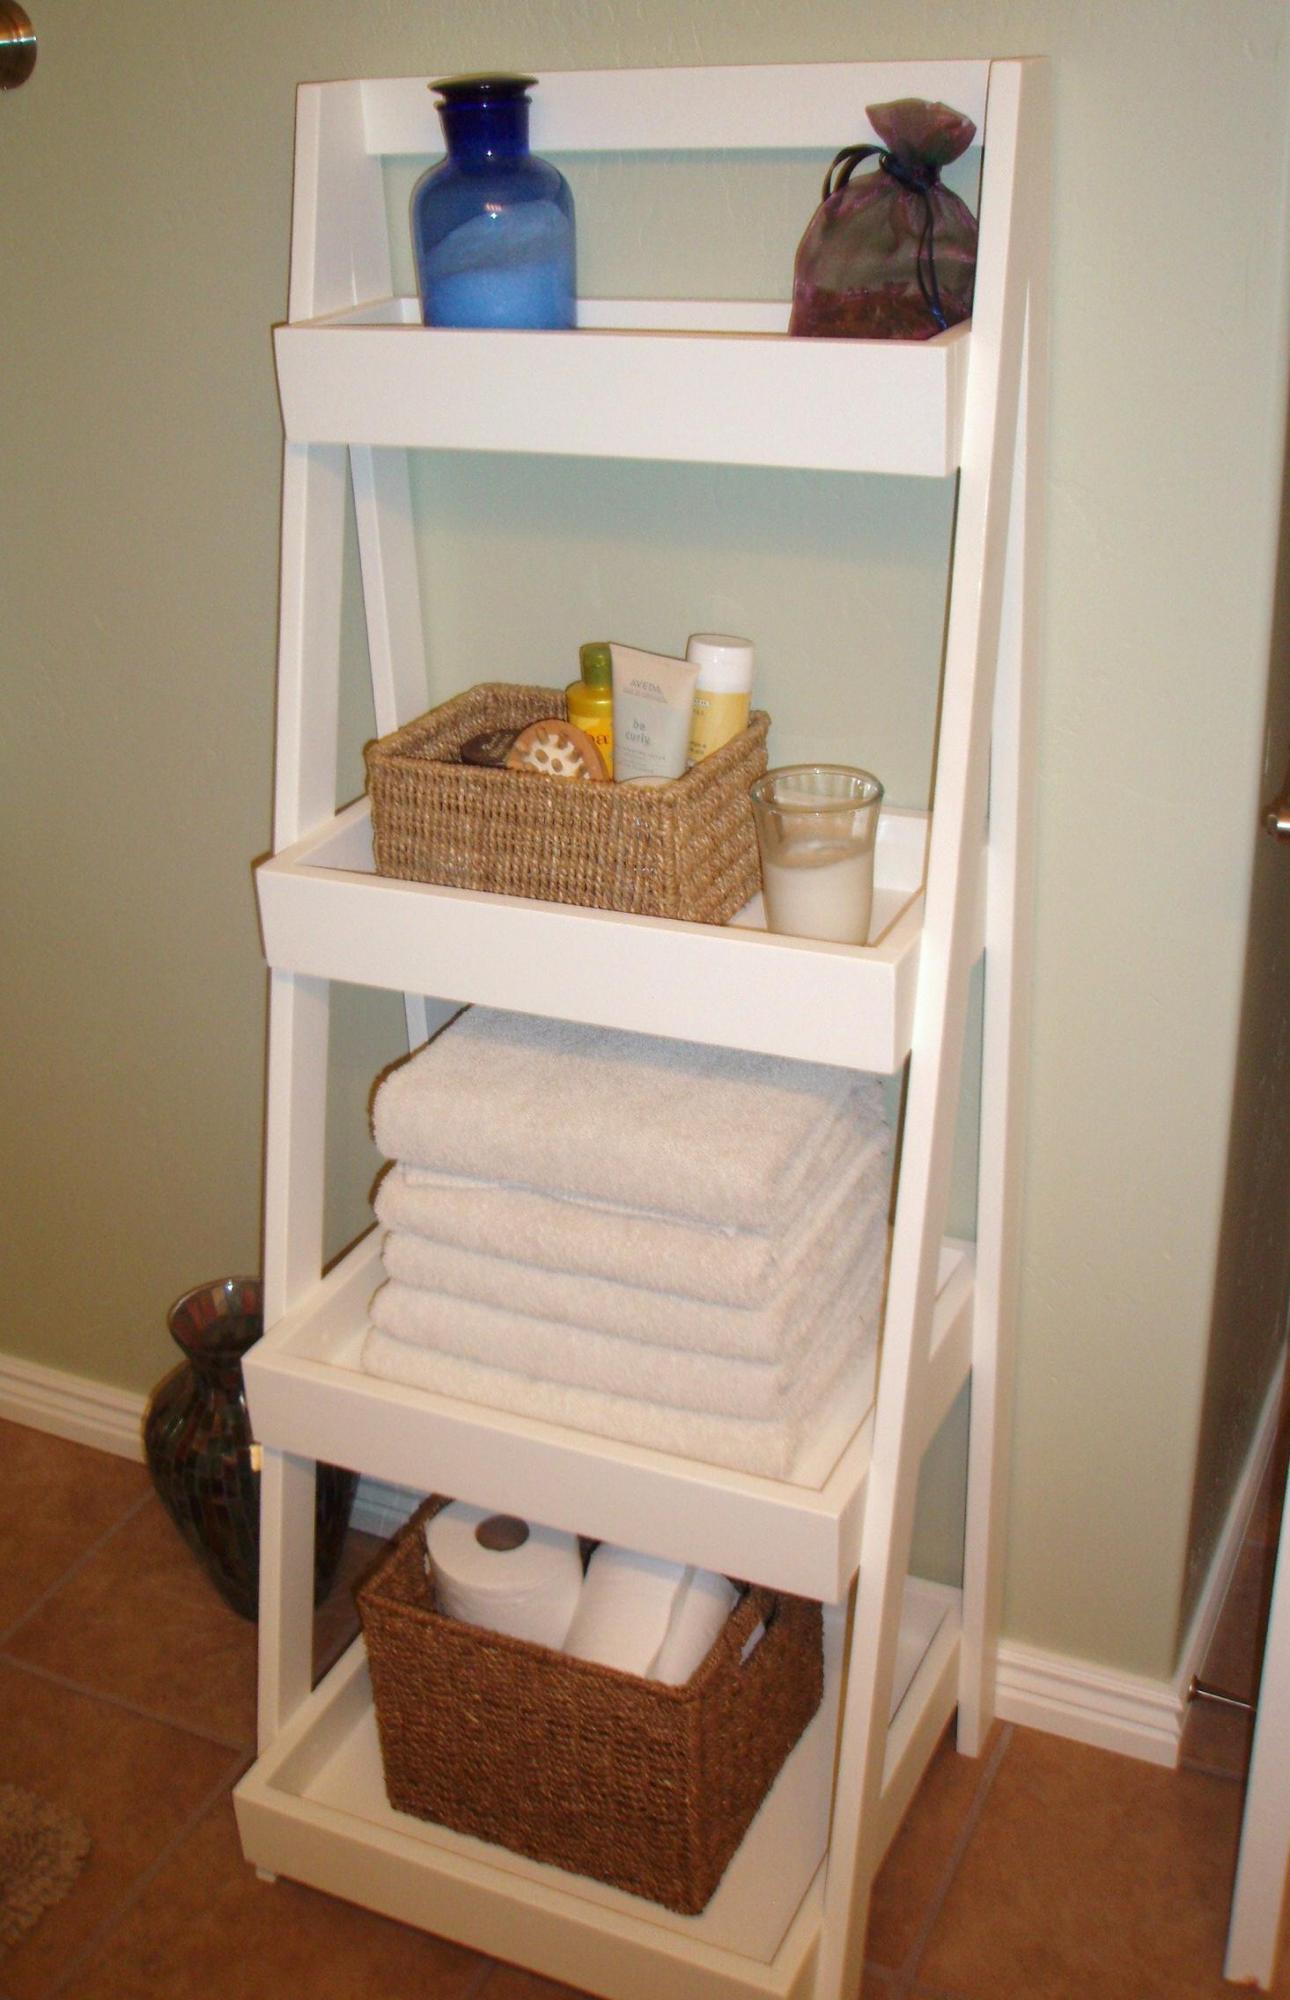
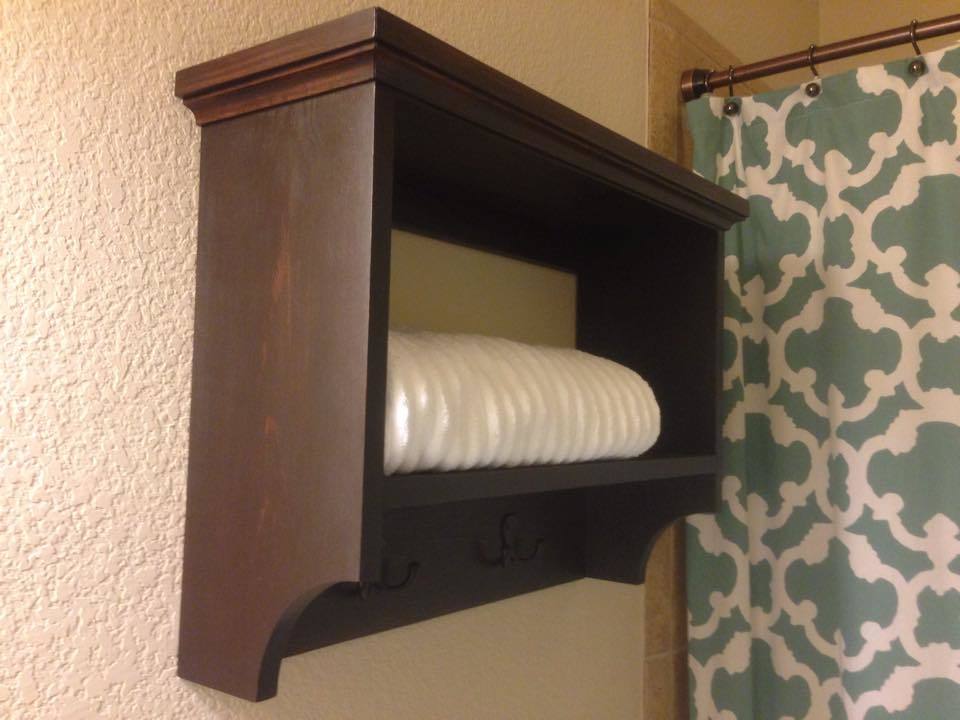
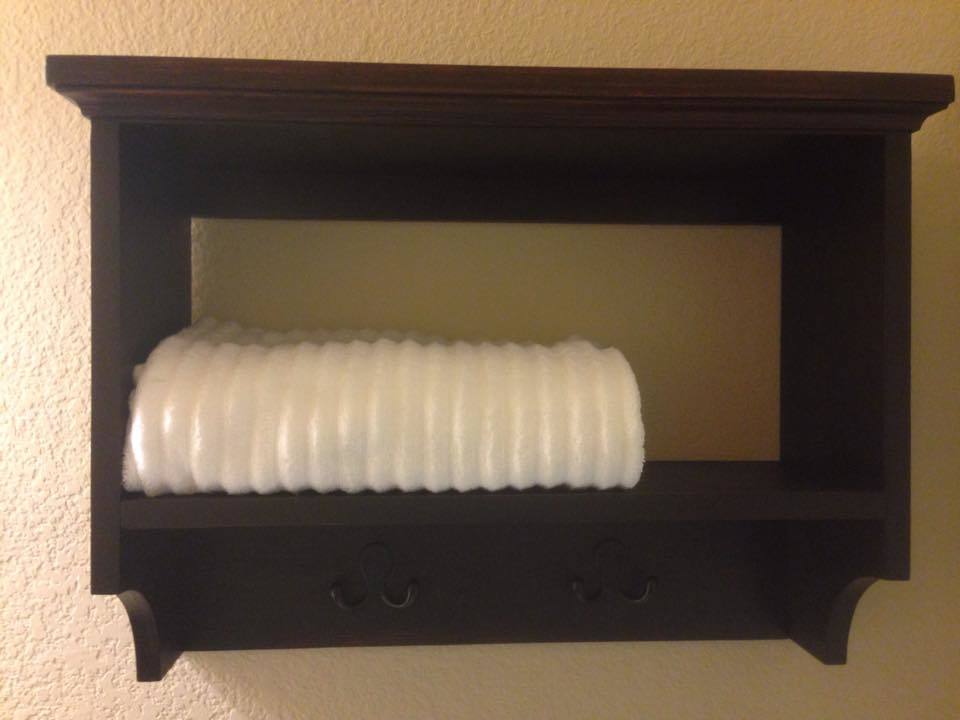
My husband built the painter's ladder shelf and I painted it, it's now featured in our guest bathroom and we love it! :)
Thanks so much for the plans Ana!
Modified to a wider width bottom.
Built from Plan(s)
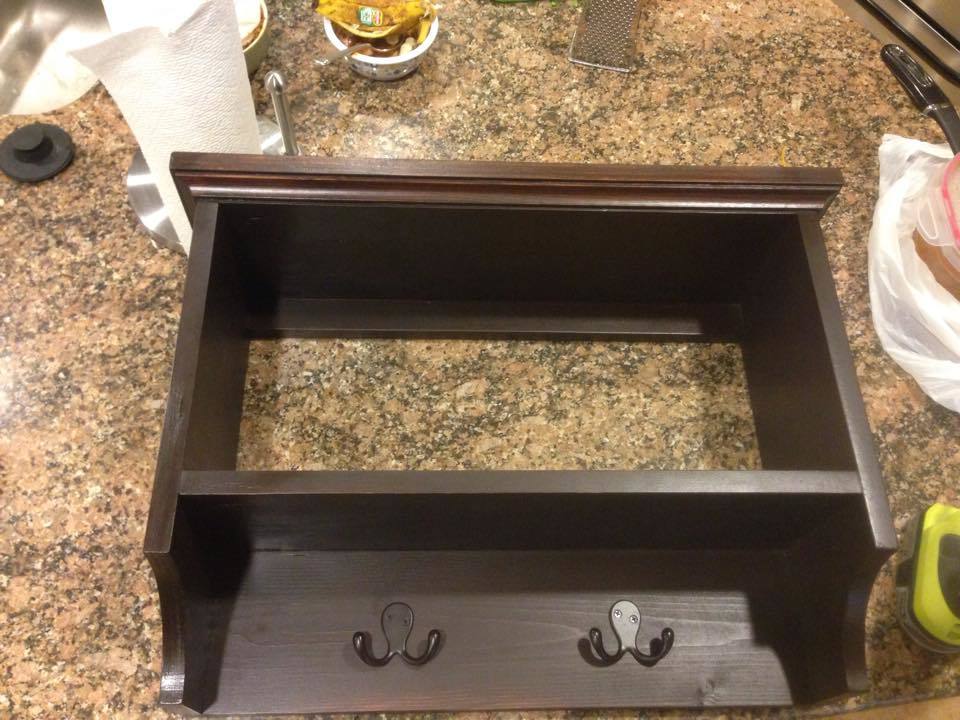
My husband built the painter's ladder shelf and I painted it, it's now featured in our guest bathroom and we love it! :)
Thanks so much for the plans Ana!
Modified to a wider width bottom.
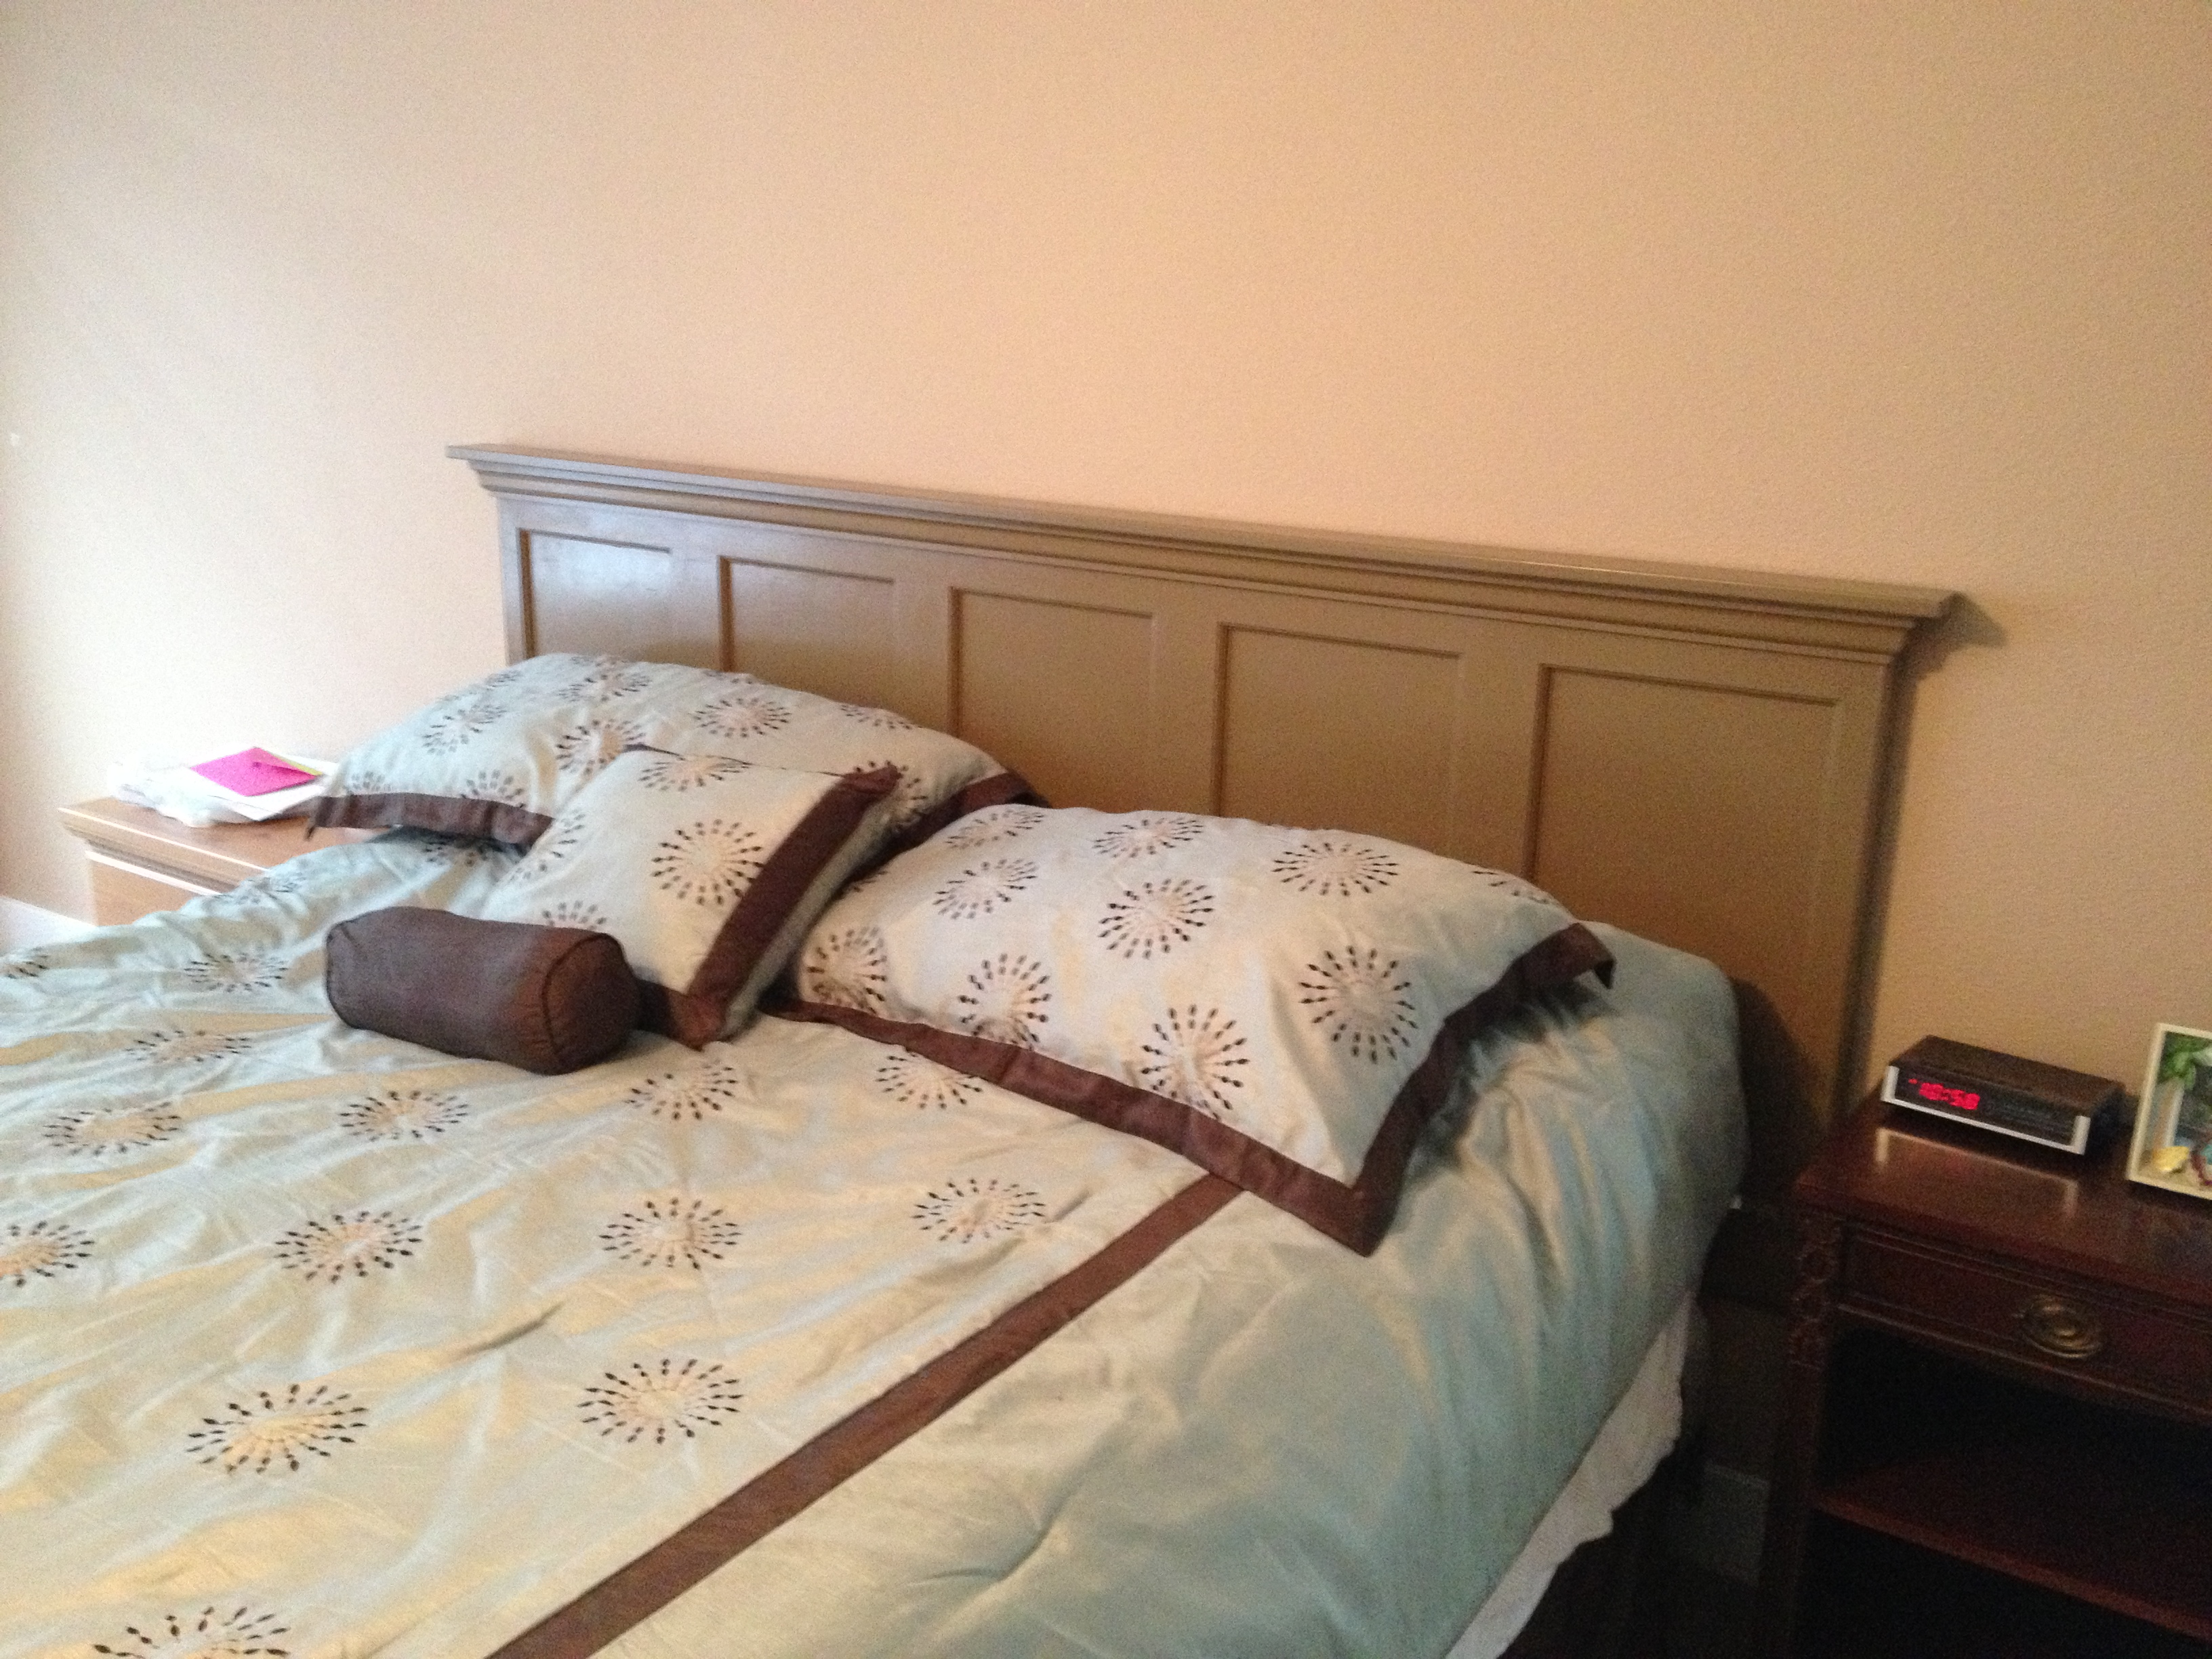
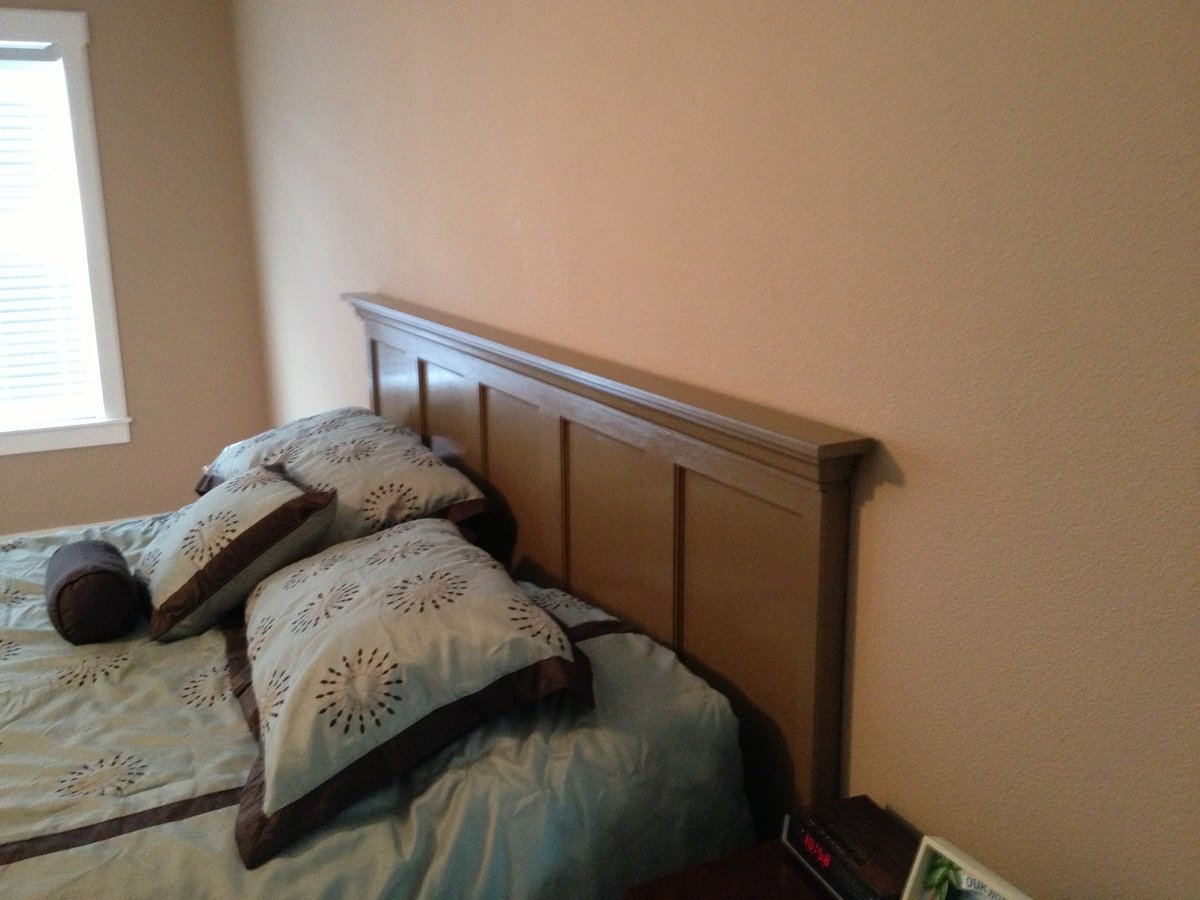
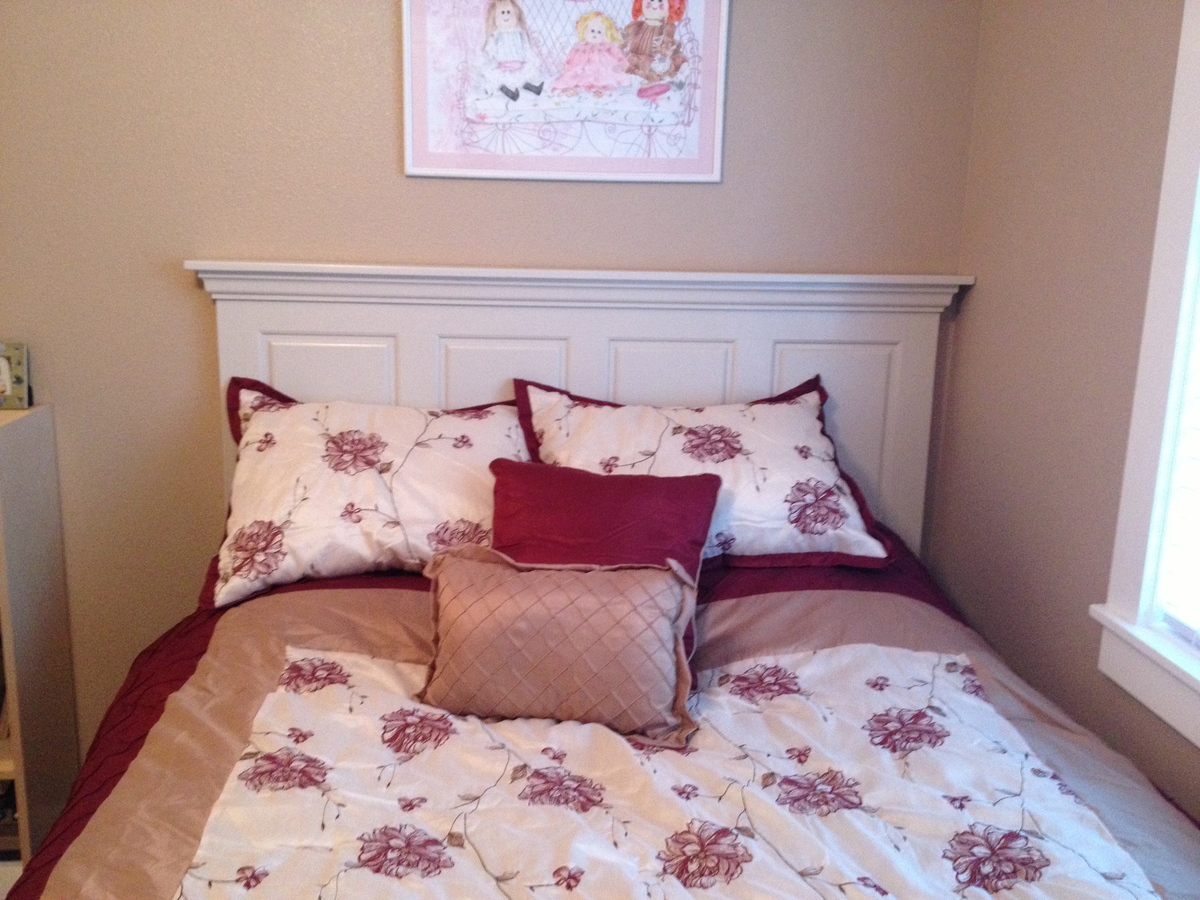
I made this Headboard from am old 5 panel solid core Douglas fir door I found at a building construction recycling place. I originally wanted to stain it, but the door, which was previously stained with a polyurethane proved to be very difficult. I wanted to avoid dealing with a hollow core door after trimming both sides to make it symmetrical.
I purchased some French cleats to hang this, but you could make some out of wood to cut more costs!
Very cheap to make!
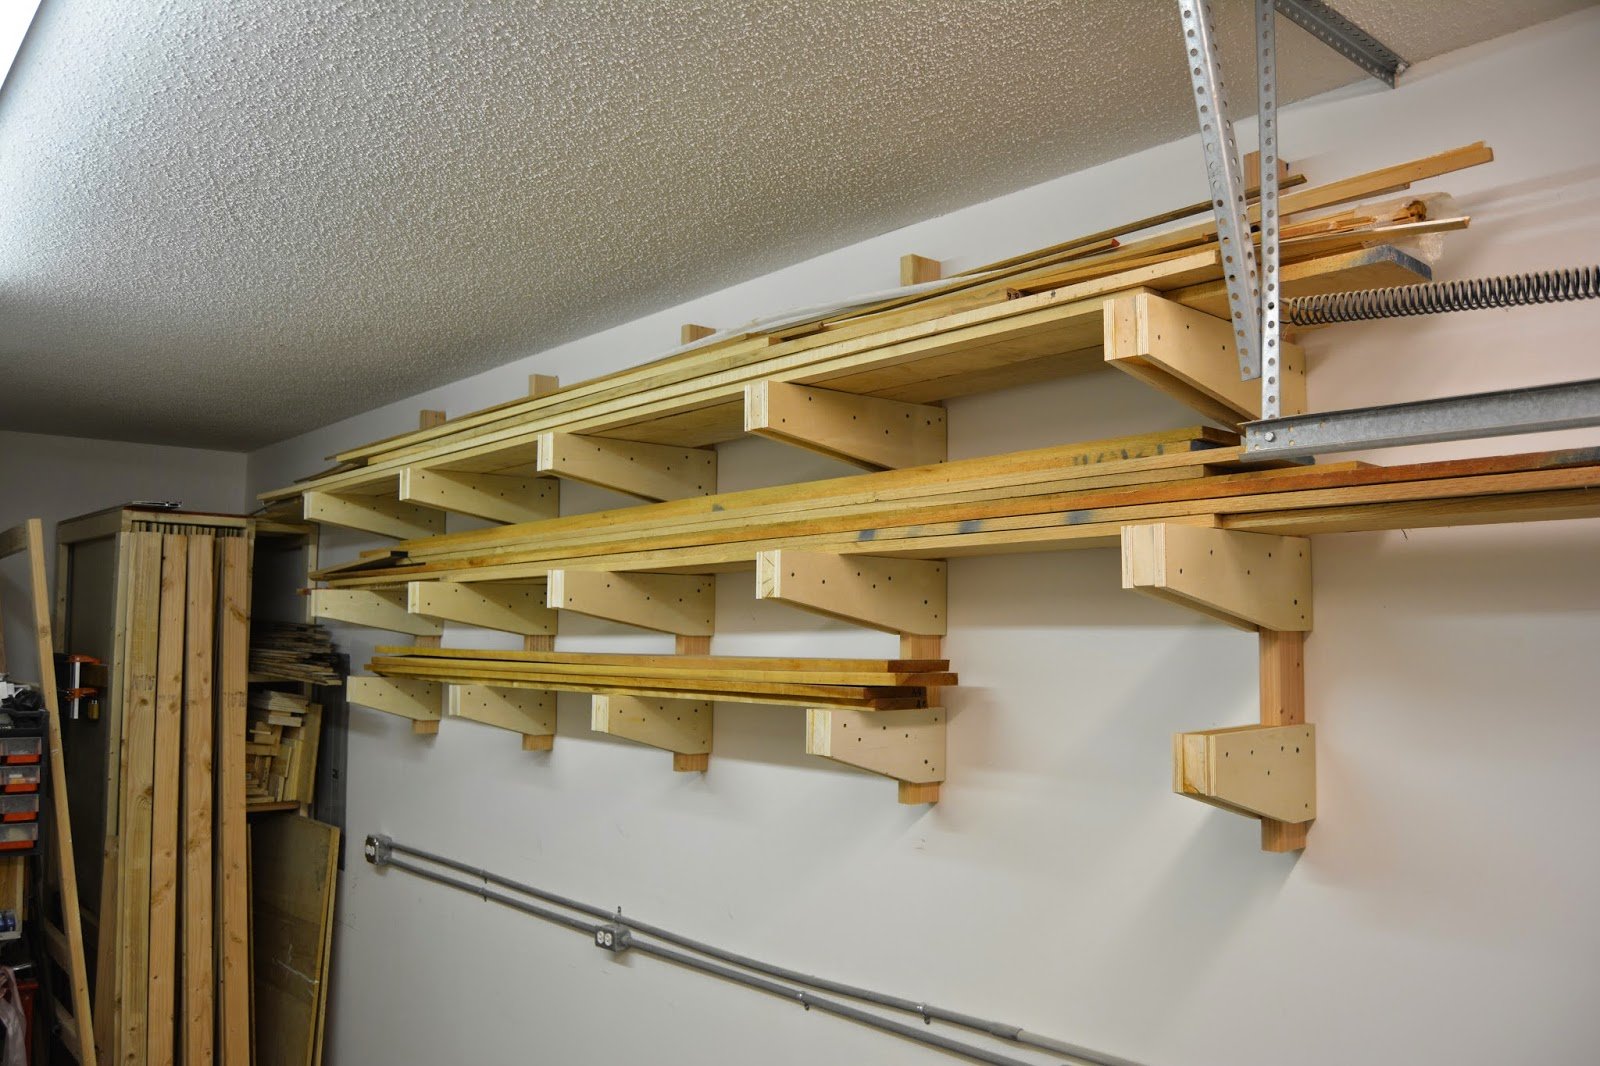
This is a lumber rack I built for my woodshop!
Details available at my website: http://www.lanebroswoodshop.com/
And my YouTube Video: https://www.youtube.com/watch?v=0gKpPJxoX7Q


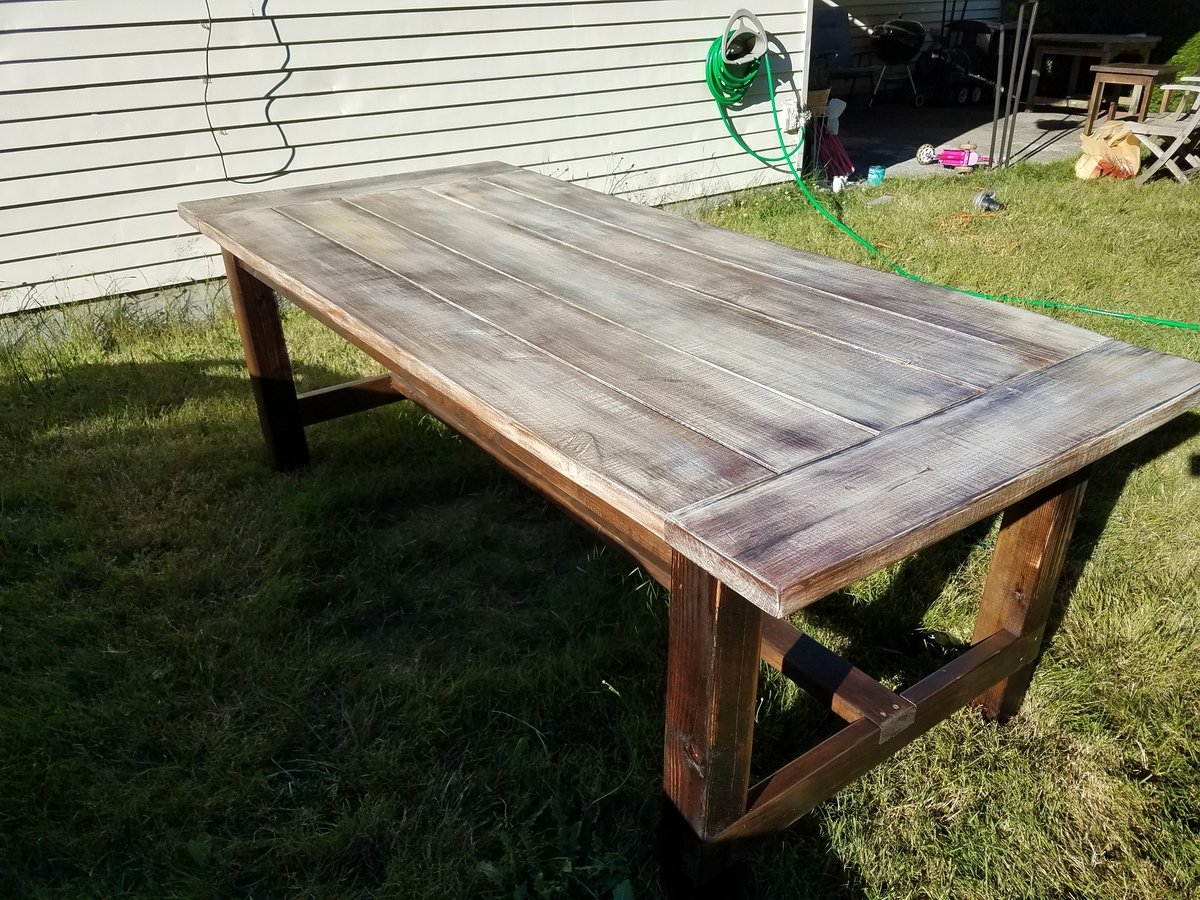
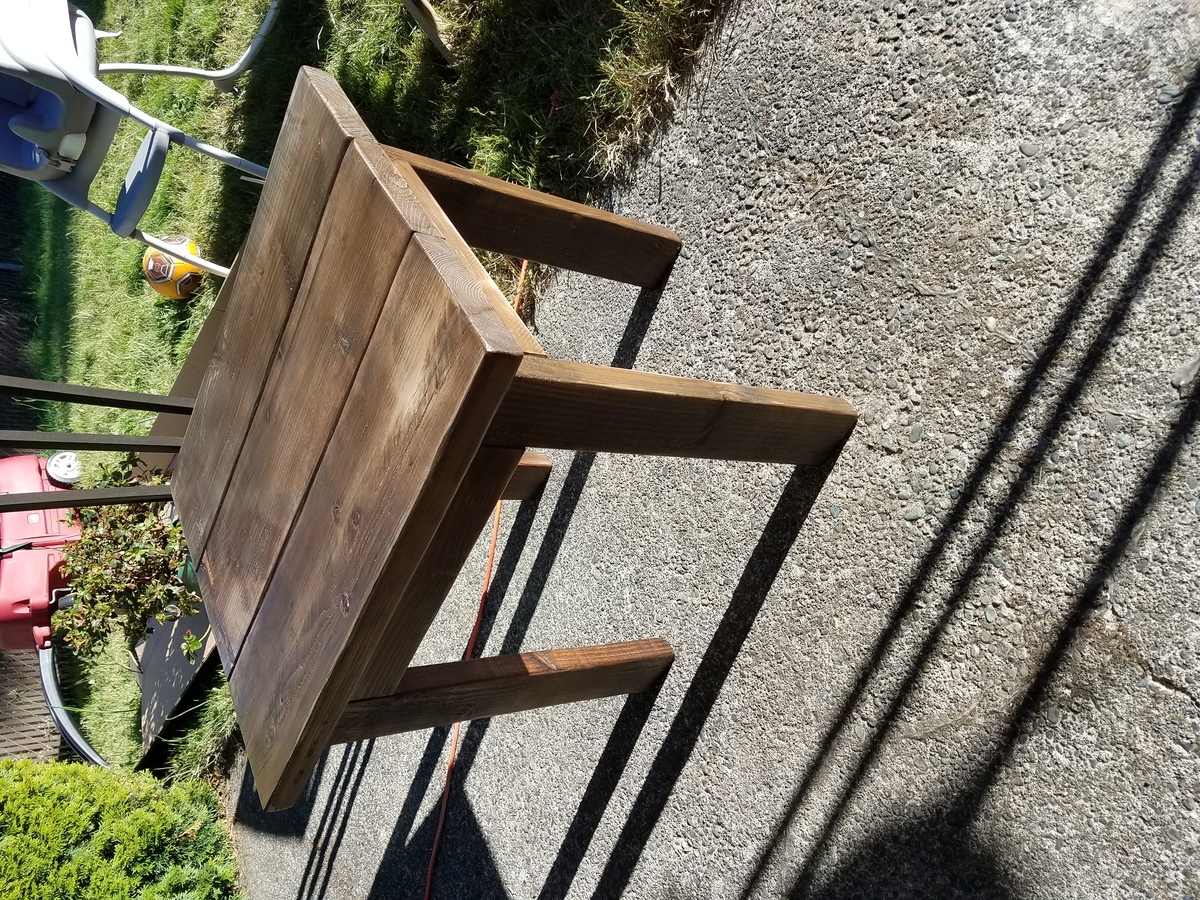
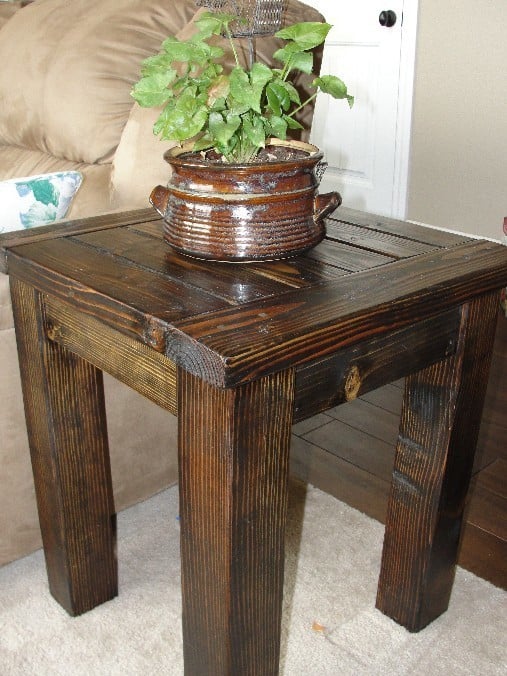
I liked the plans, and the table came out beautiful. Only issue is that there isn't much support for the bread board ends. Don't try to move the table by lifting up on the ends. May need additional bracing in the future. Was able to make a side table with the leftover pieces and an extra 2x4. Love it.
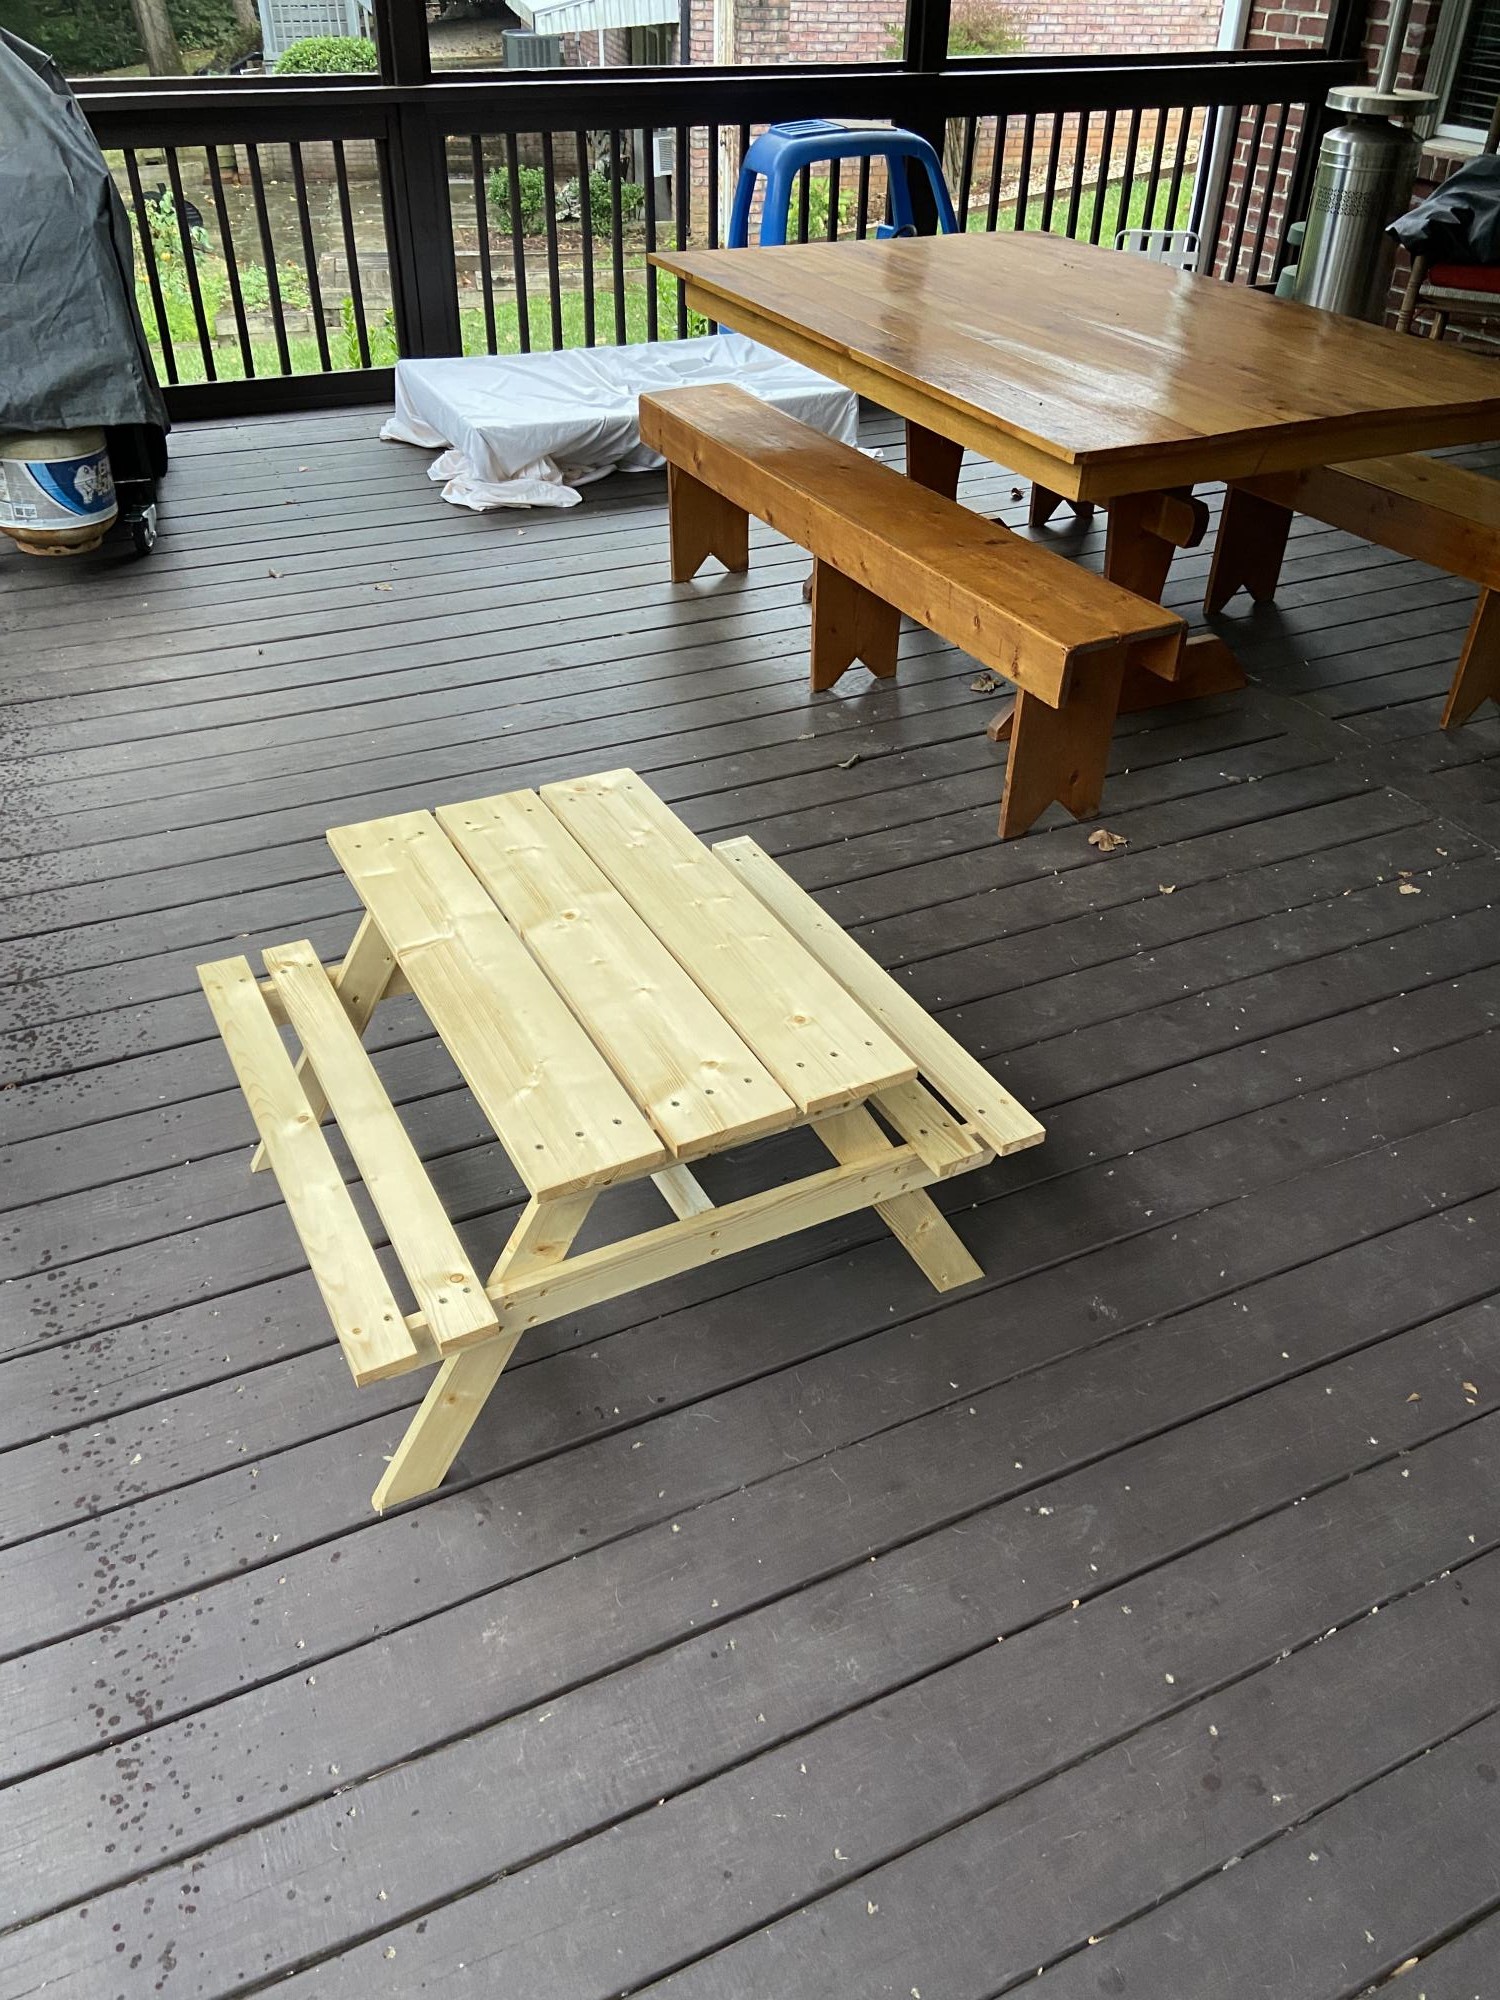
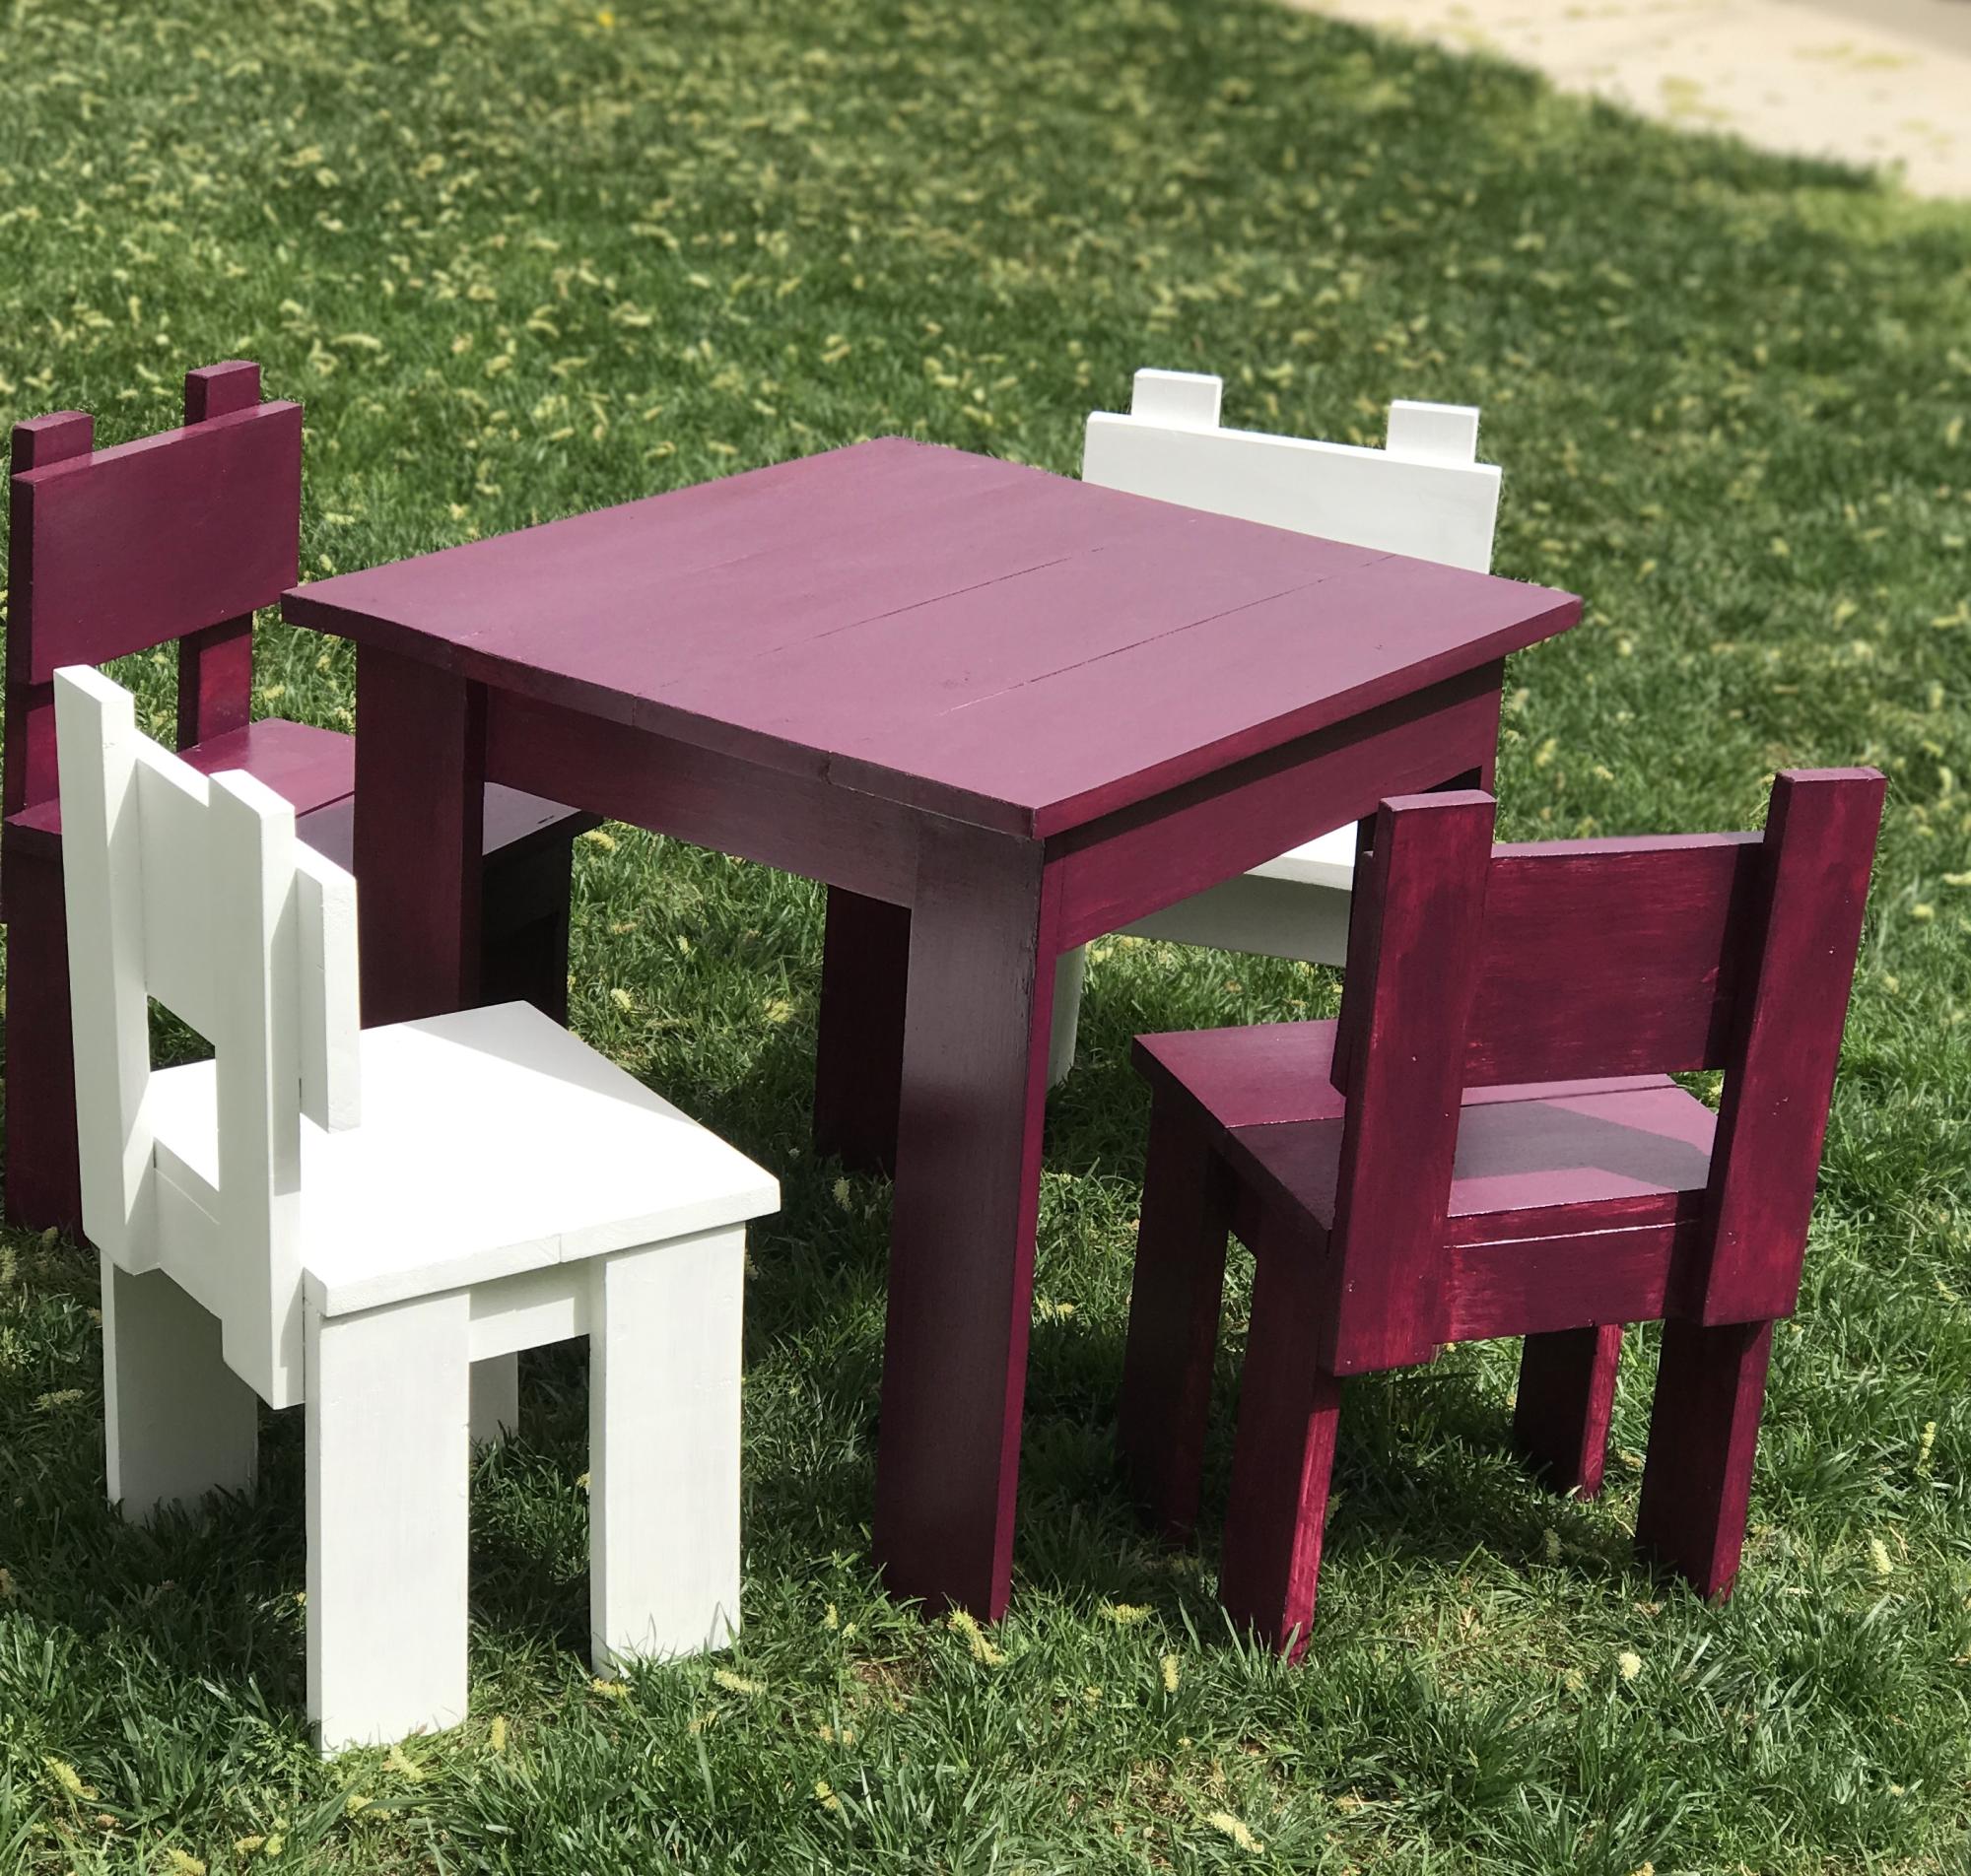
Our grandsons live 10 hours away. I always try to make something for them when they visit. When we saw them a few weeks ago they needed a table their size!
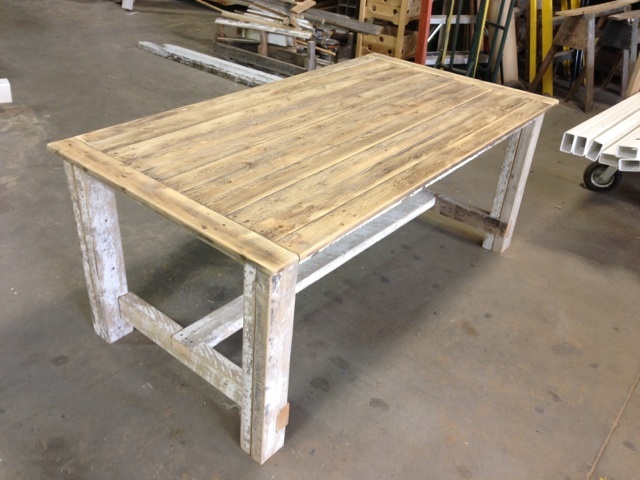
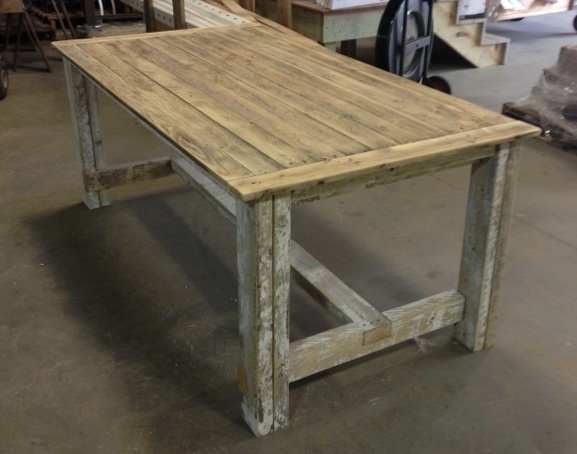
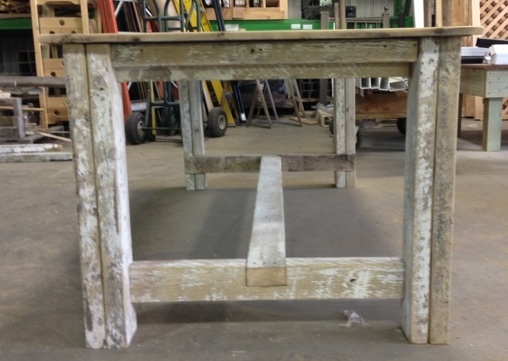
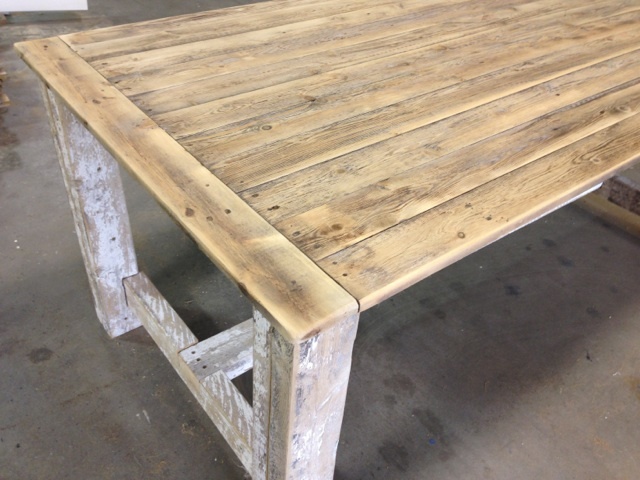
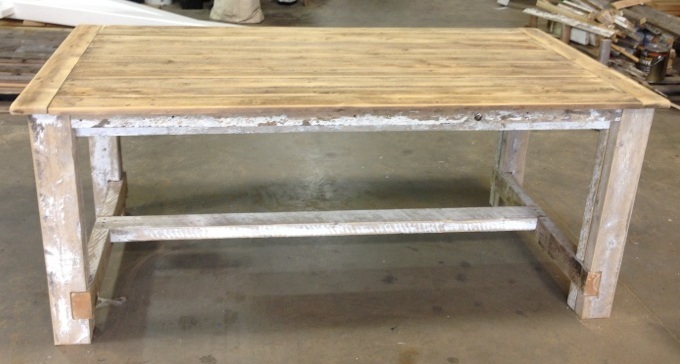
I have been building things from recycled fencing we acquire from our business for a while, but this is the first large table I have made. I used recycled backing rails and pickets to make the Farmhouse table from Ana's plans. I shortened the length of the table but otherwise pretty much stuck to the plans. I did use different wood for the top then Ana had, I used old white painted backing rails that are basically 2x4's for the base of the table and I used old gray weathered pickets for the table top. It isn't perfect and my notch's could have been more presice, but I am still happy with the outcome.

I followed the original plans, mostly. I mitered the corners on the trim and 1x2s, and I used a 1x2 just under the top instead of closing the back since I went with a dark stain (General Finishes Gel Stain- Java, Deft spray poly satin). This is one of my first projects, and I got to play with a block plane, gel stain, pocket-hole plugs, moulding, table saw, and my nail gun for the first time. I was especially pleased how well this matched the dark cabinets in the room. Man, stain is a pain. I may make everything in raw cedar from now on.

Built this desk with my son. Turned out real nice!


This was my first project ever, and while there are a few things I could have done better (don't judge the imperfections!) the shelves still came out beautifully. I followed Ana's plan exactly, painting the backboard a charcoal grey before attaching, and the shelves themselves white with light lemon yellow on the inside-sides. If I were to make these again, I would want to sand the shelves down more and use a higher gloss paint or sealer. The matte finish is more difficult to clean when it gets dusty, which happens pretty quickly!
I modified Ana's plans just a bit.
8ft long by 3 1/2ft wide. Used 2X lumber instead of 1X in hopes of reducing the chance for warping over time.
I also went w/ 4X4's for the legs.
Cost was a bit more for redwood here in the Bay Area of California.

This was a relatively easy project that my husband and I worked on together. We couldn't stomach the cost of buying two stables (hold one horse each) from Target for $80 for our twins' doll horses, but this price and project is perfect. The instructions were amazingly on-point and only appeared to miss the 1x1 cross-bar piece for the doors. Very minor for an amazing, free pattern.
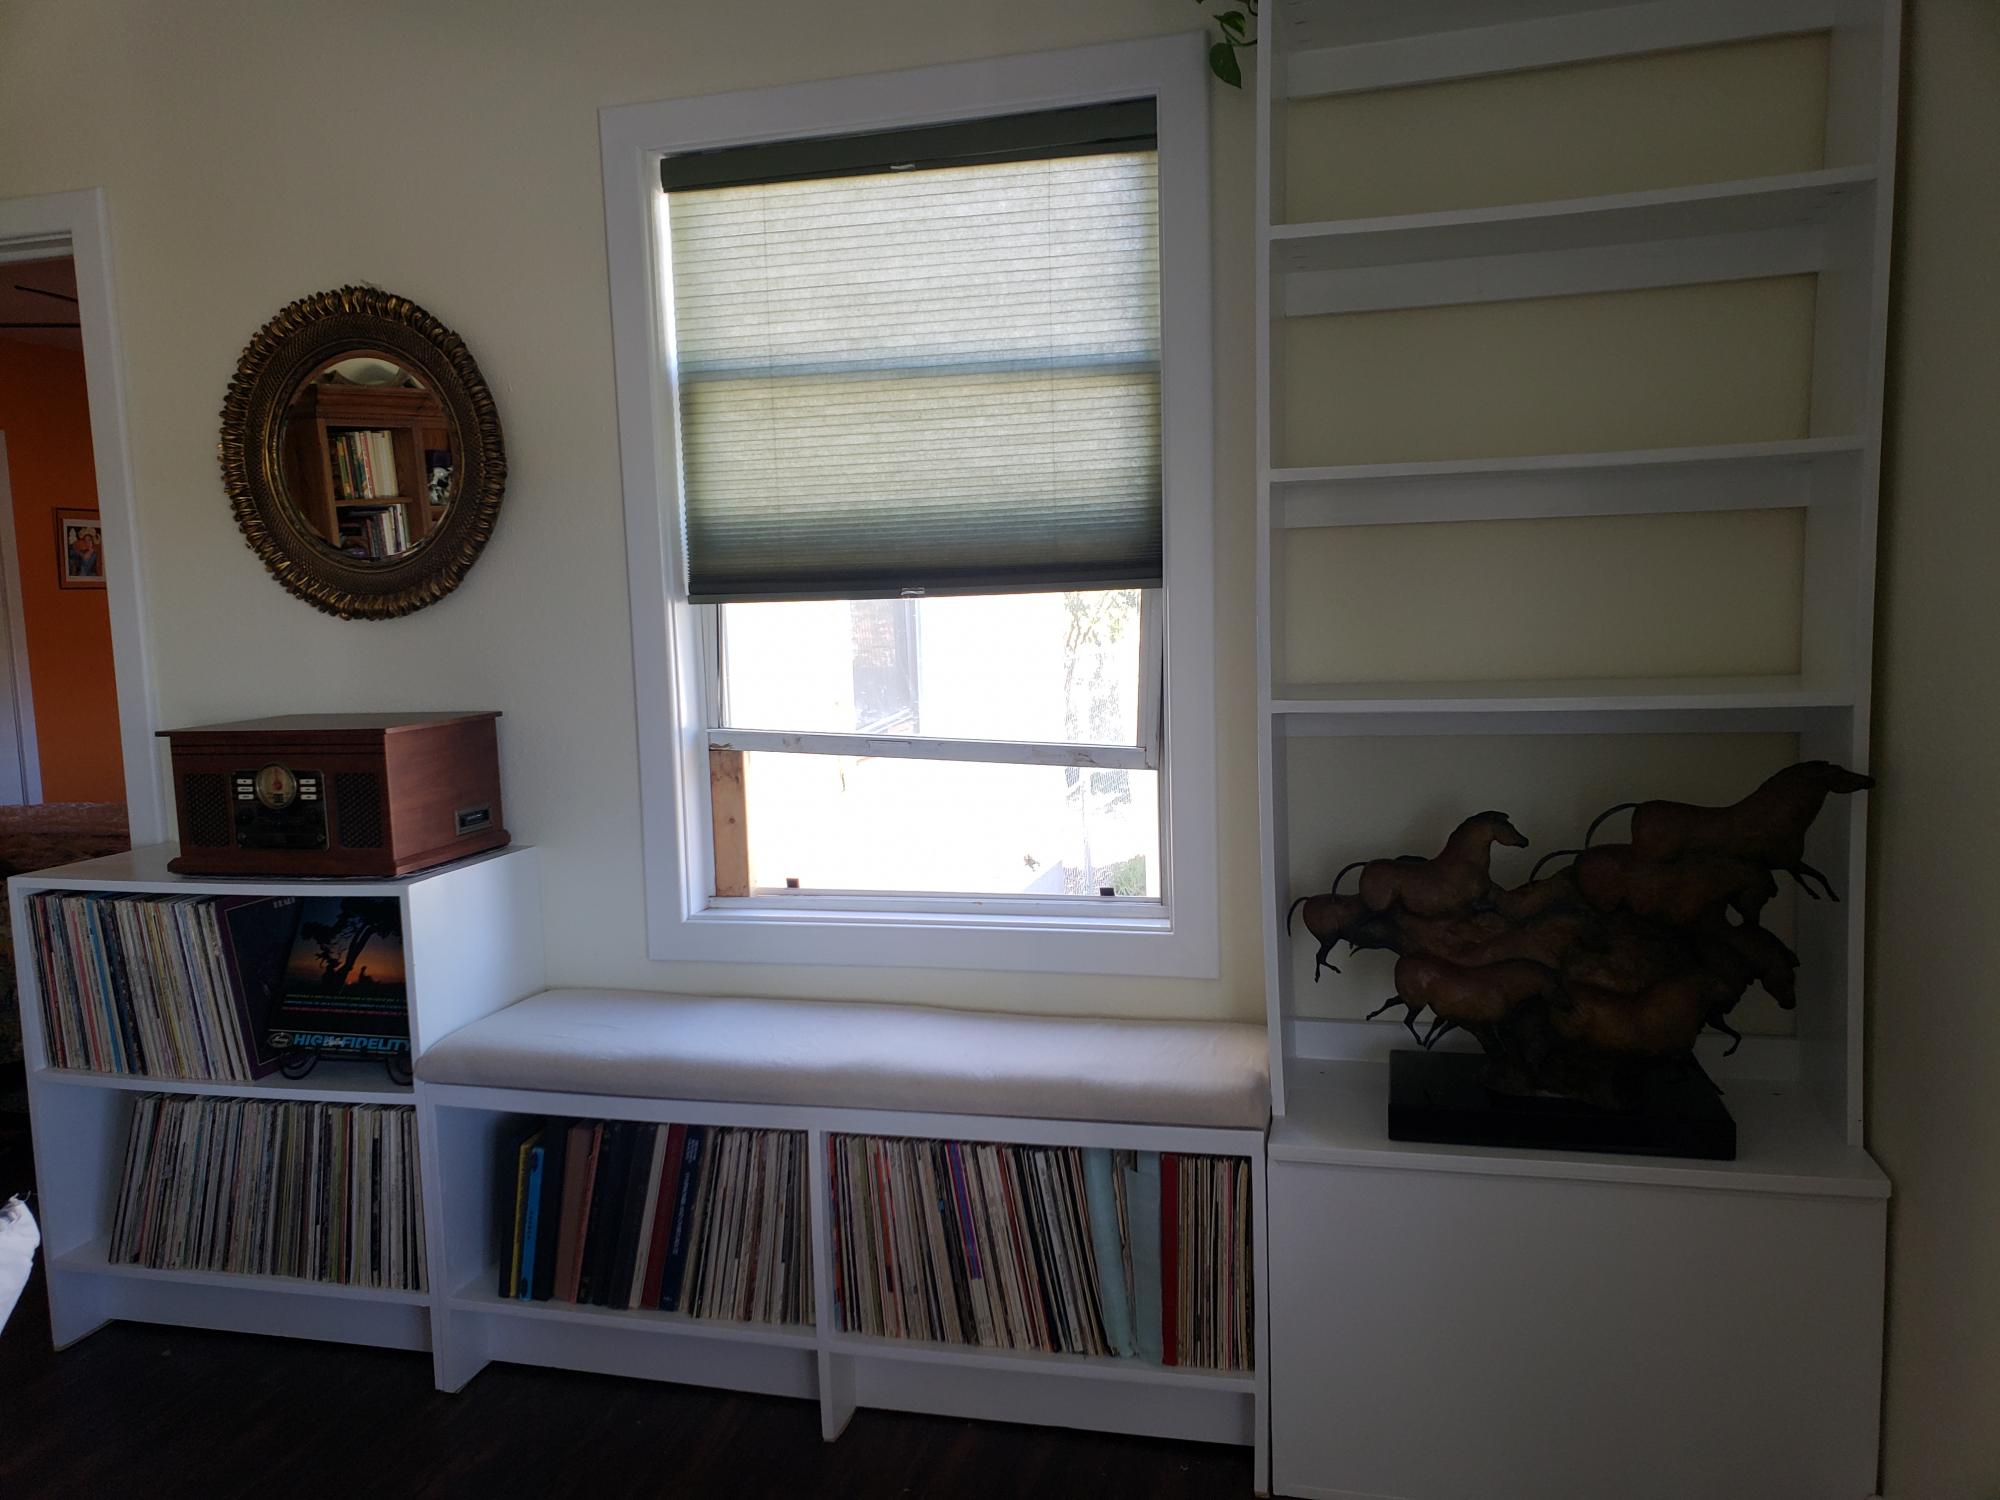
We wanted to build a home for our records and books. I found your channel and was amazed at the customization possible for our space through Shelf Help. This was our first major woodworking project and felt empowered. Thank you, Ana!
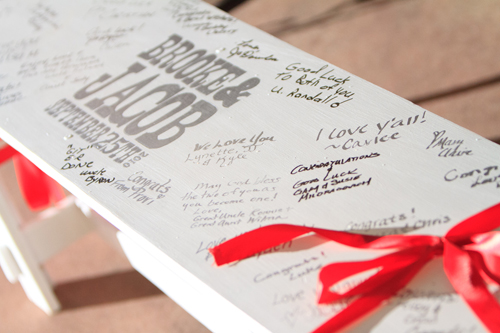
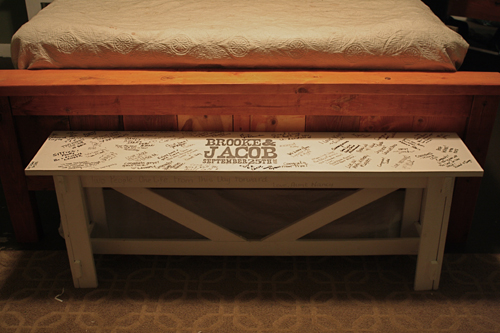
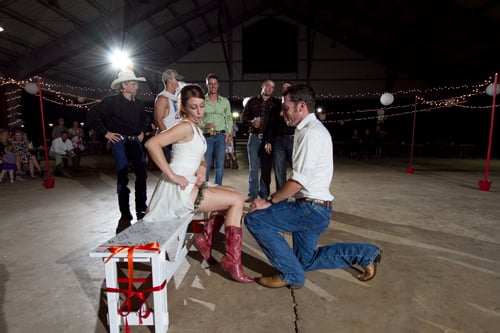
Having already built a rustic bench to go with my Farmhouse Table, I knew it would be the perfect guest "book" bench for my wedding. For only $15 (I had the lumber for the top on hand), and the help of all my bridesmaids during my bachelorette weekend, we built this bench in just about an hour. Everybody had a hand in it, which makes it even more meaningful. It sits at the foot of the Farmhouse Bed my husband and I built from reclaimed barnwood from my father. I love that we have something so hand-made and sentimental to commemorate our wedding celebration. It makes me smile every time I look at it!
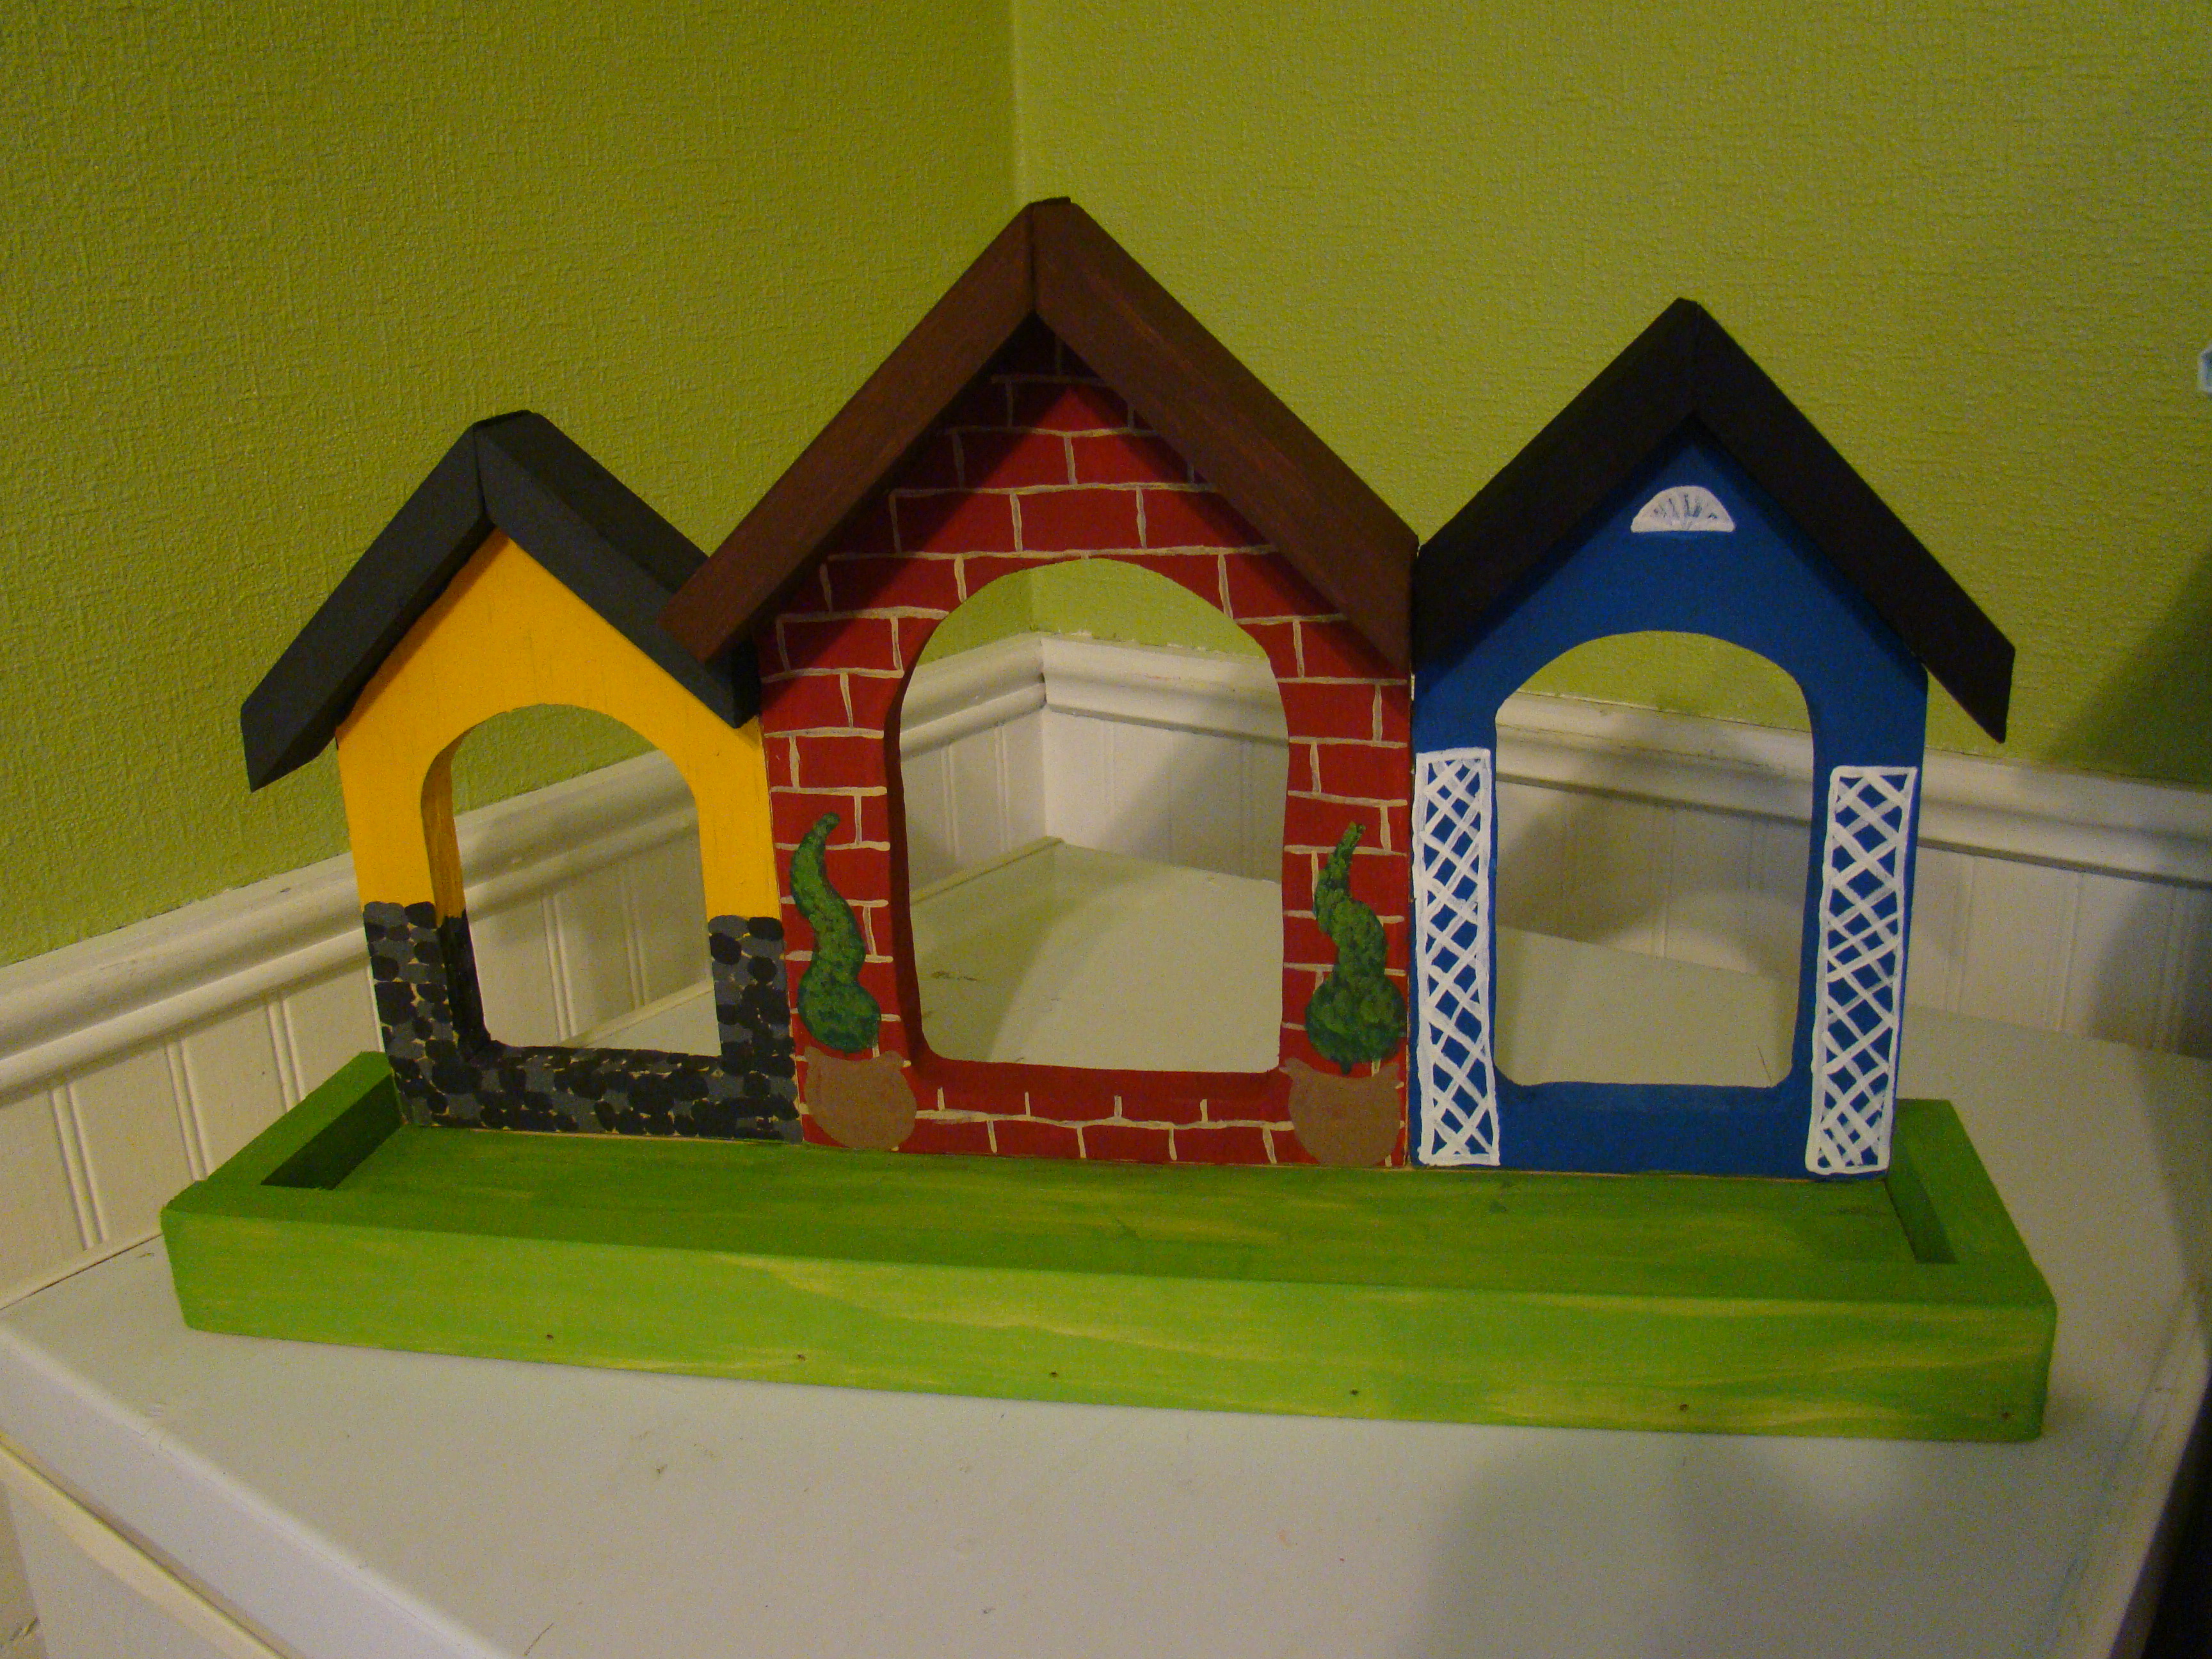
My homemade mother's day gift for my mother in law. She likes to sit in her living room looking out the big picture window at the birds eating at her birdfeeders. It's also a favorite passtime of my son who spends time there occasionally. What better gift than this! I wanted to do something a little less simple than the single "house" so I made the main one smaller, and then added two more houses to make bird townhouses.

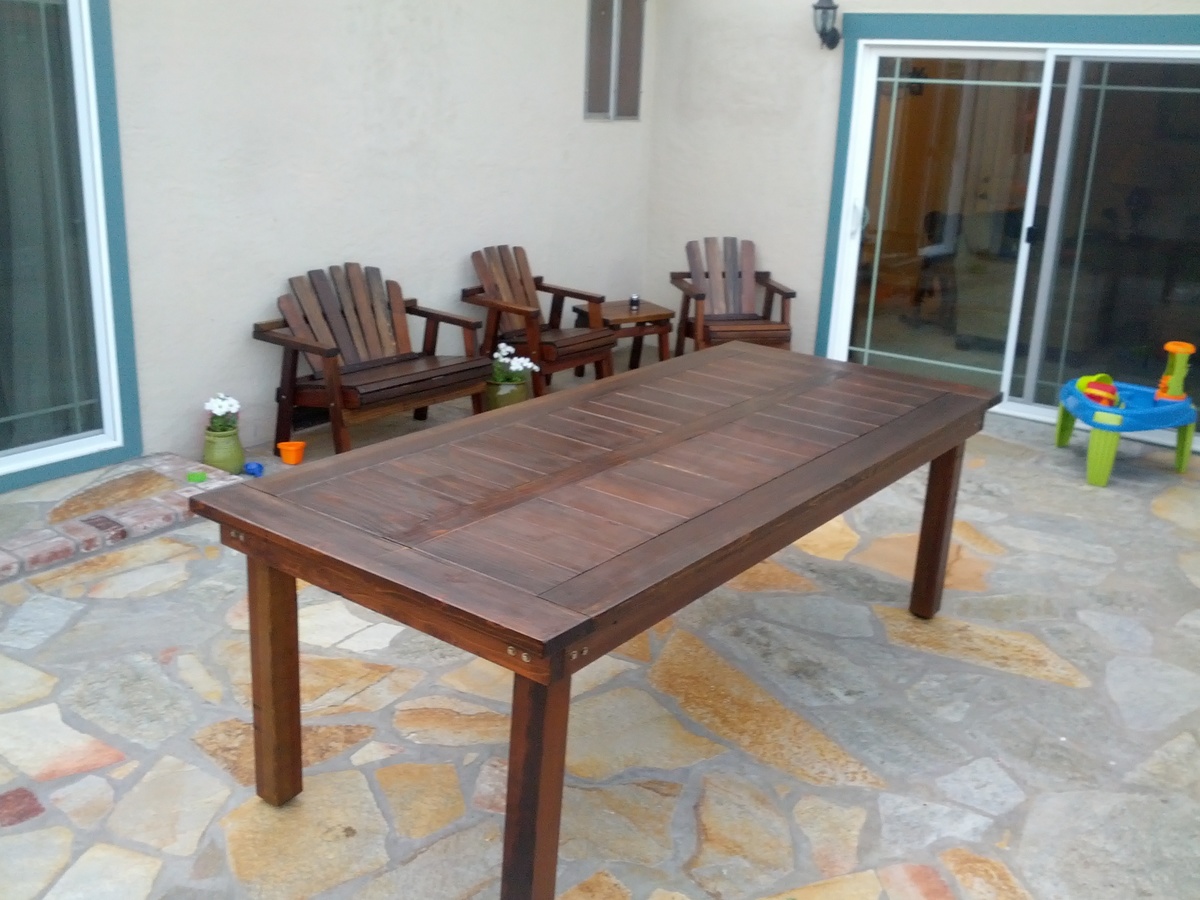
My husband and I were on the search for a dining room table. We loved the look of Pottery Barn and Restoration Hardware but did not want to spend the money for it. Then we came across the plans for this table. We had already used Ana's plans for a Restoration Hardware coffee table that we loved, so figured we'd give this table a shot. These pictures don't do this table enough justice. My husband and I LOVE the plans and everything about this table! It has so much detail and character as you would see from expensive stores. To top it off, we got it complete just in time for having our family over on Easter. Thank you Ana for sharing this gorgeous plans!
- Amber and Dave


Wed, 04/01/2015 - 16:29
Beautiful! I've been drooling over this table too. Yours looks amazing! It looks longer. How long did you make it?
Thu, 04/02/2015 - 11:43
Thanks so much! It is longer than I thought it would be. I was originally going to do three chairs on either side and two at the ends. But I love how it turned out even better. We followed Ana's plans and is 106" long. Fits perfect on 8x10 rug! :)
Thu, 04/02/2015 - 13:14
what beautiful work! The stain choice is just perfect. Do you mind my asking where you bought your chairs? I'm having a difficult time finding chairs with a plain fabric.
Fri, 04/03/2015 - 09:11
Thank you! We actually got them from Target. We have the counter stools in dark grey for our island and we really liked those so we decided to go with the same for the dining room.
http://www.target.com/p/threshold-brookline-tufted-dining-chair-set-of-…

Mon, 04/06/2015 - 16:14
Gorgeous! I love the look of this in your room!
Thu, 04/23/2015 - 11:06
Thanks so much Ana!! We LOVE it!! Already had several dinner parties and get SO many compliments! :)

The plans were very easy and the chair came together nicely and quickly. I used all 2x4's instead of 2x4's + 2x6's and alternated 1x2's for dimension. My husband is a pretty big and tall guy and he really liked how the chair felt sitting in it. Very roomy for even him. I could've gotten this done in about an hour, except where I live it was about 110 degree dry heat so I had to take a lot of water breaks. But overall, I love the chair!!!

I always wanted a corner bench for the kitchen table at my family cottage. Lots of room for everyone and little kids don’t fall off. Love this plan. Thanks for sharing it!
Tue, 10/05/2021 - 10:10
Thank you for sharing, it looks beautiful and functional!
This was my very first project, with a little help from the husband.

I just wanted you to see what a great Mother's Day gift your planter made. It was a great project for a 4 year old grandson!!!
Thanks, Ana
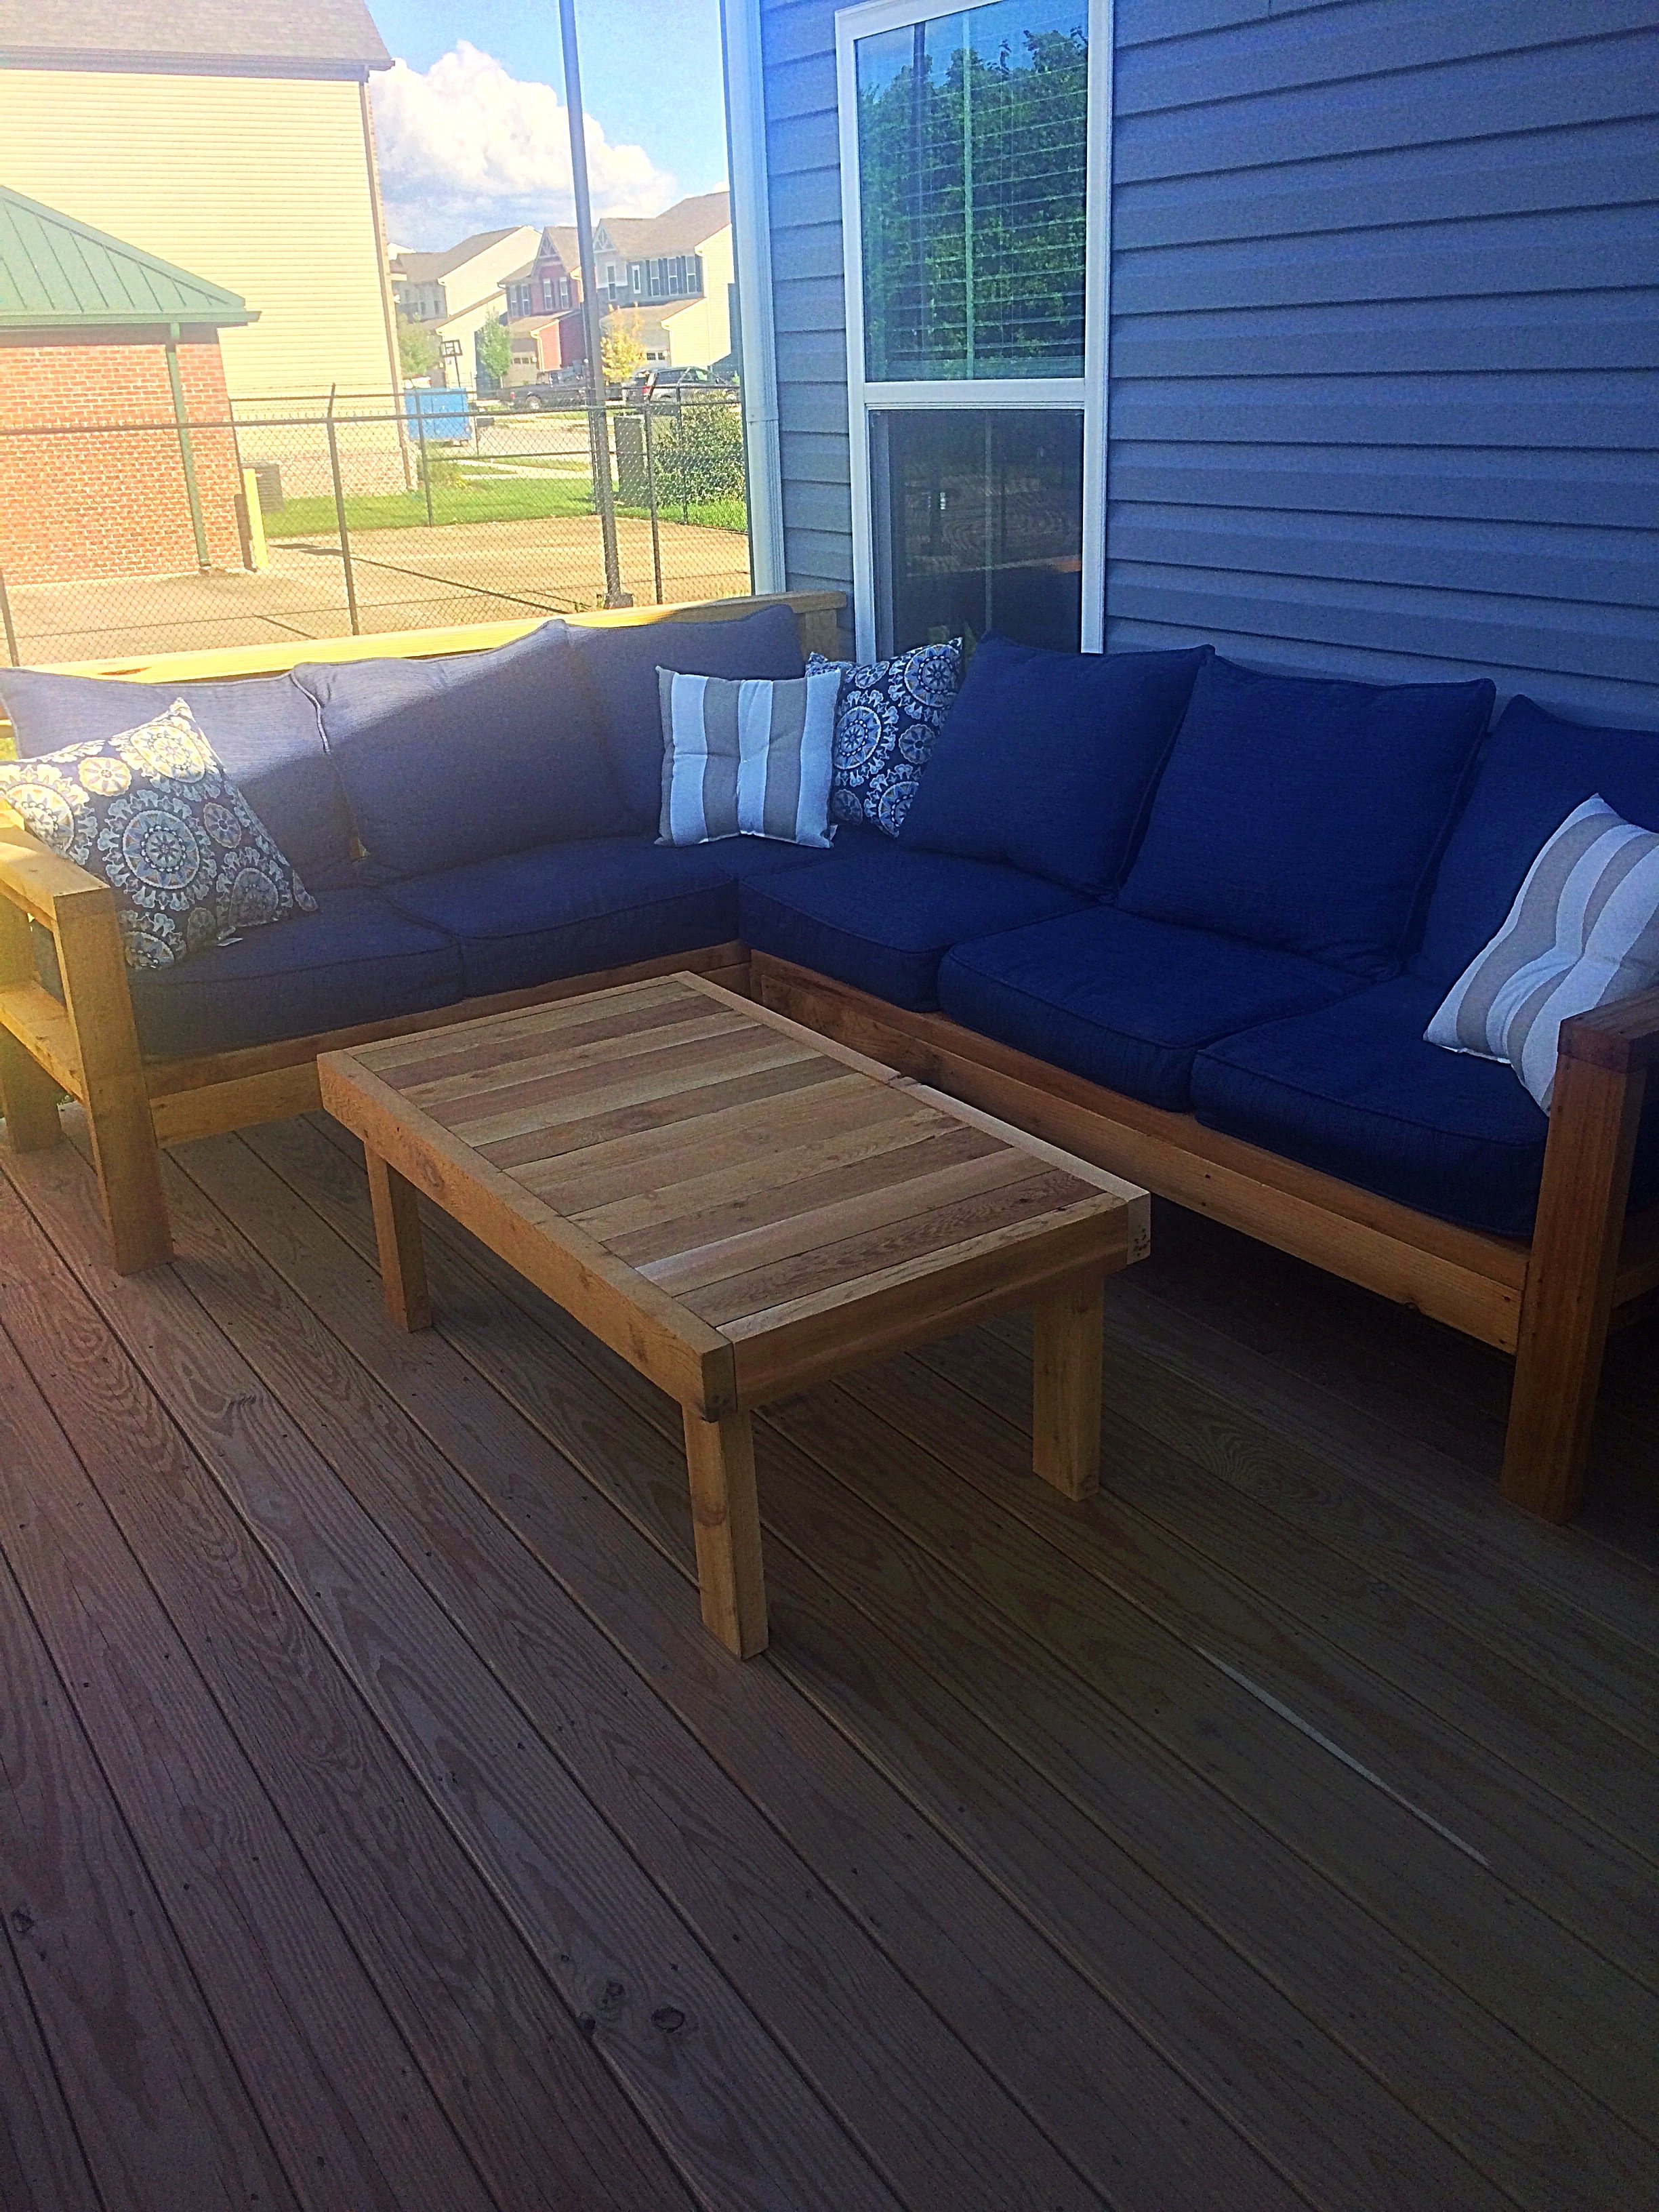
We built the one arm sectional but 8 ft cedar was all we could buy. So with the scraps left over we built the coffee table to match. Couldn't be happier with it.
Comments
Ana White Admin
Tue, 10/05/2021 - 12:07
Great shelf!
Thank you for sharing, wonderful teamwork!