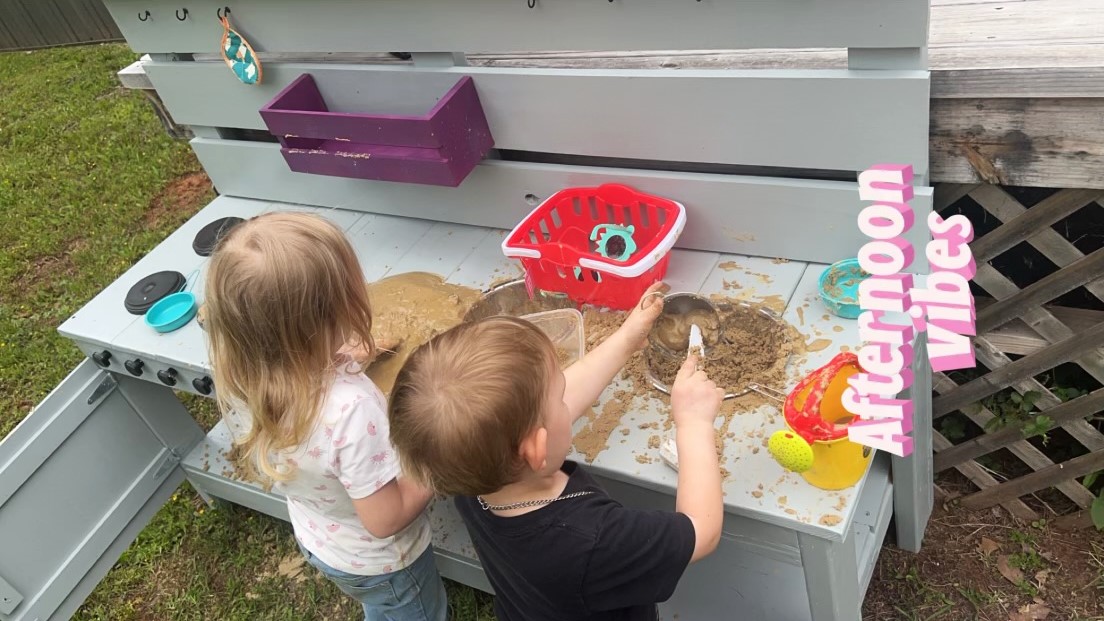
Mud Kitchen for 2
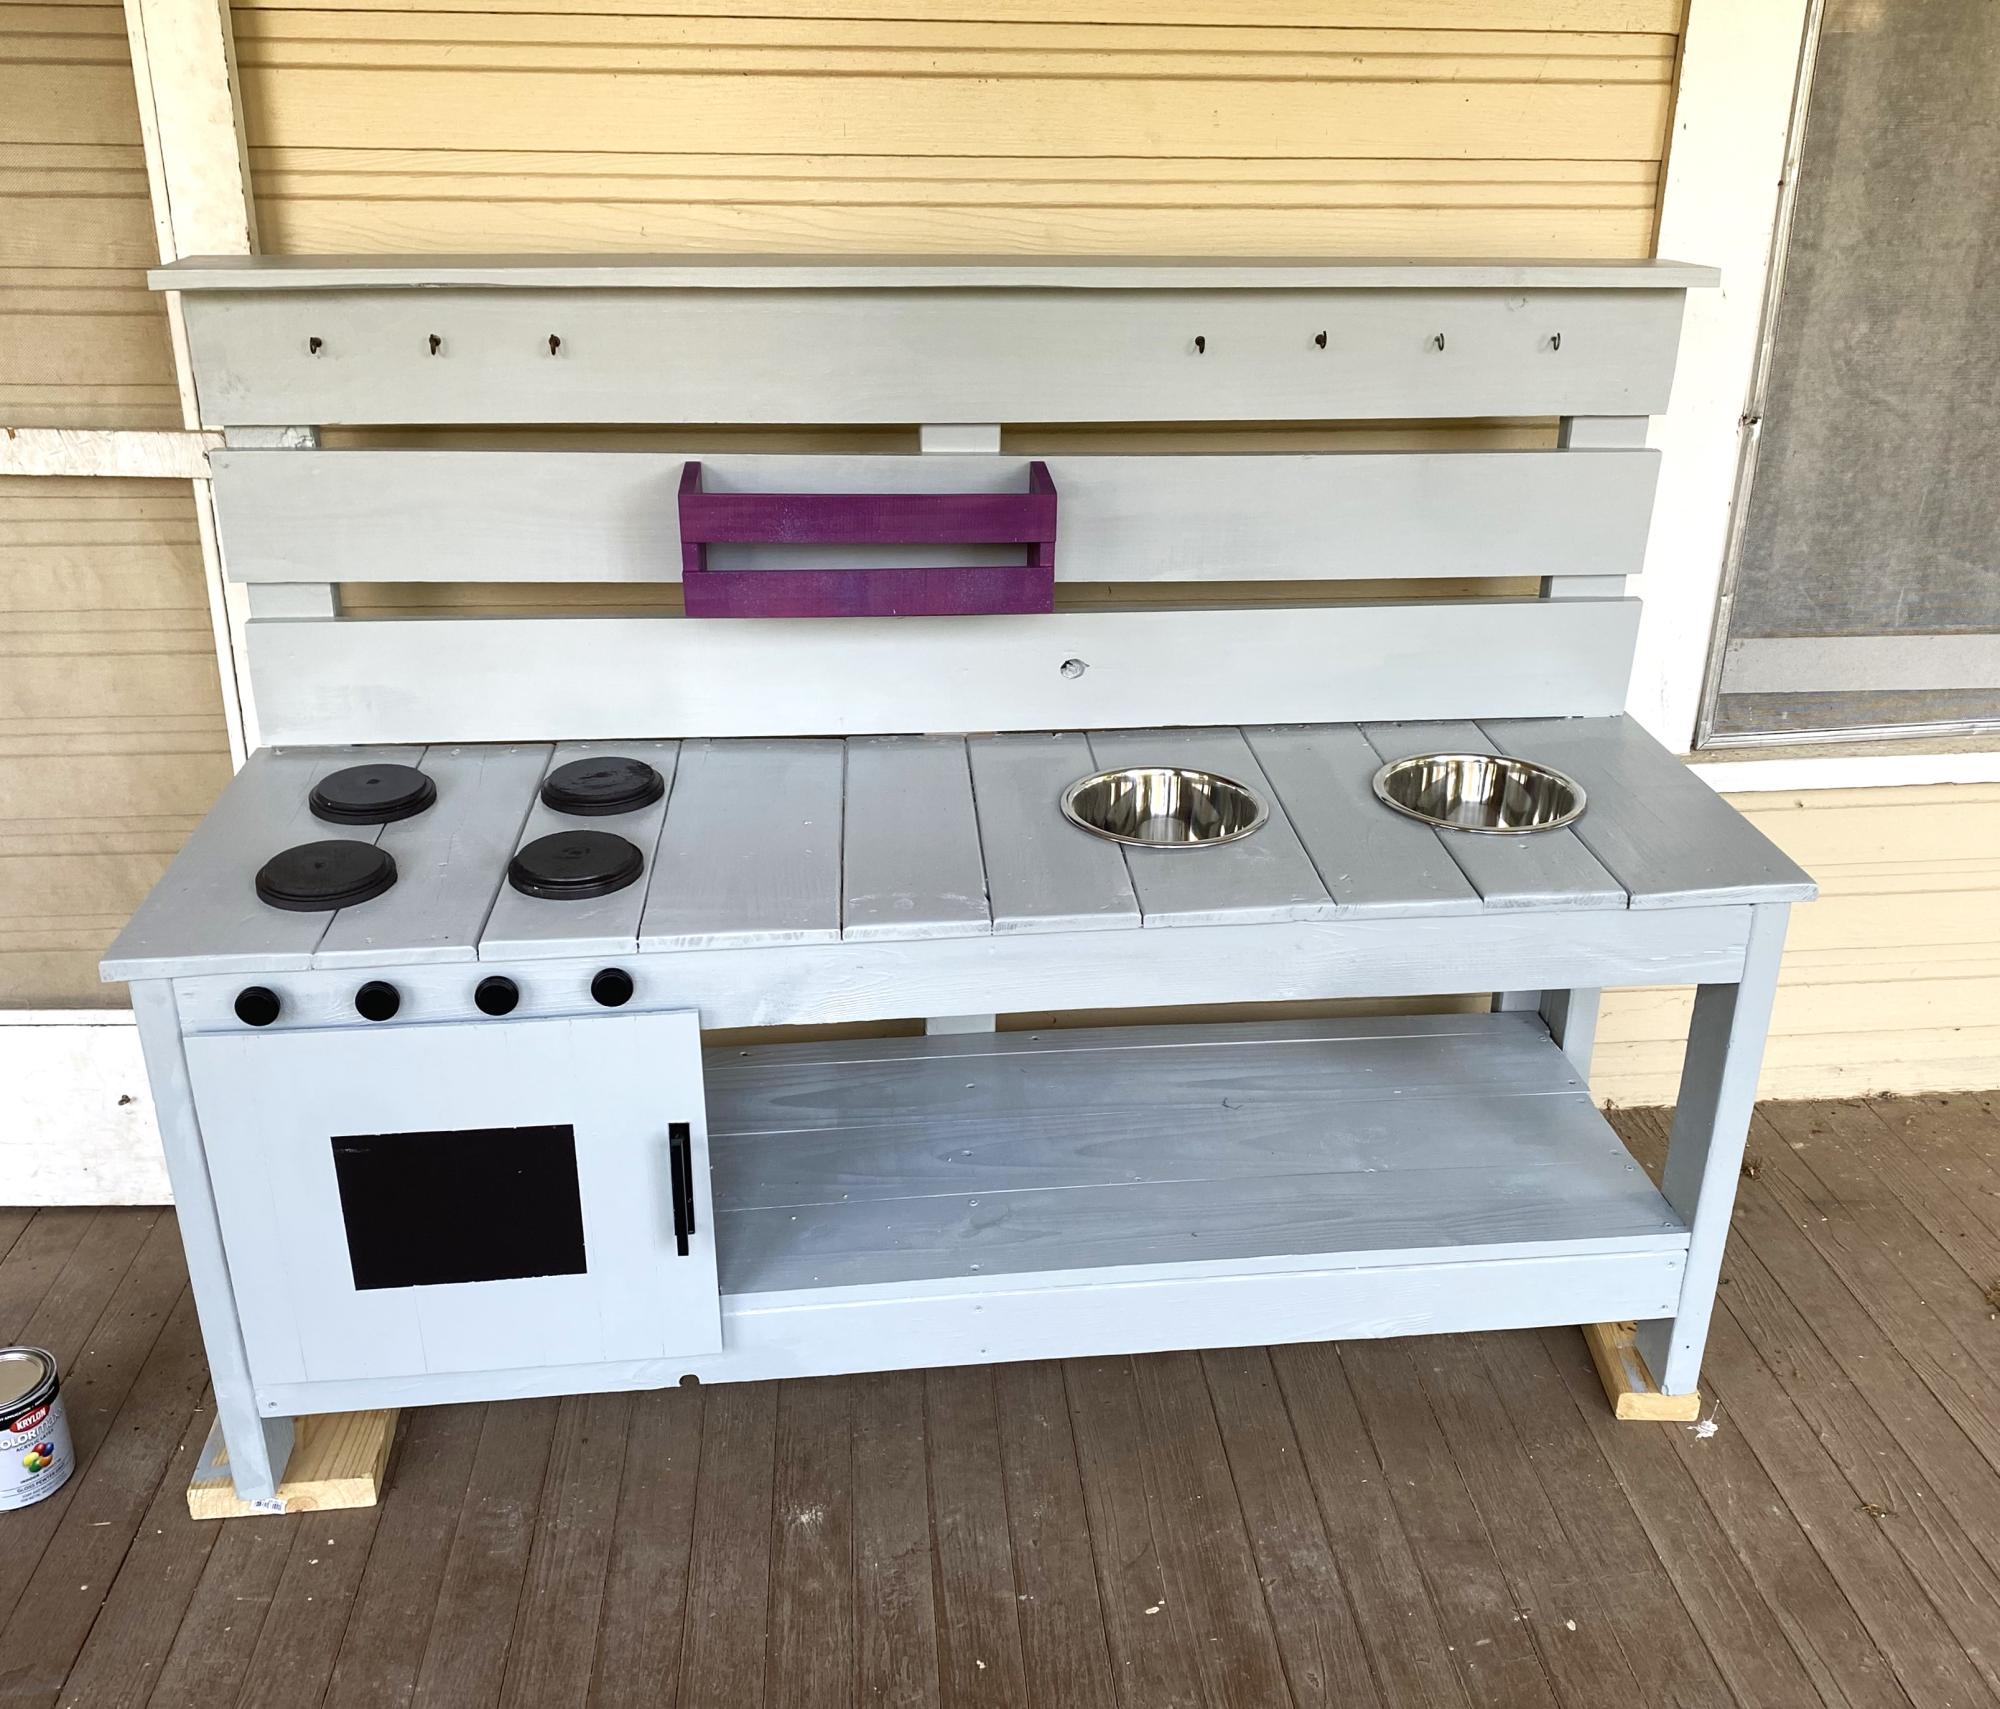
Mud kitchen made from scraps for my coworker’s kids. (Mud kitchen is a little kitchen to make mud pies and let the little imagination play.) They love it!
Aminnie Laws
Built from Plan(s)
Mud kitchen made from scraps for my coworker’s kids. (Mud kitchen is a little kitchen to make mud pies and let the little imagination play.) They love it!
Aminnie Laws
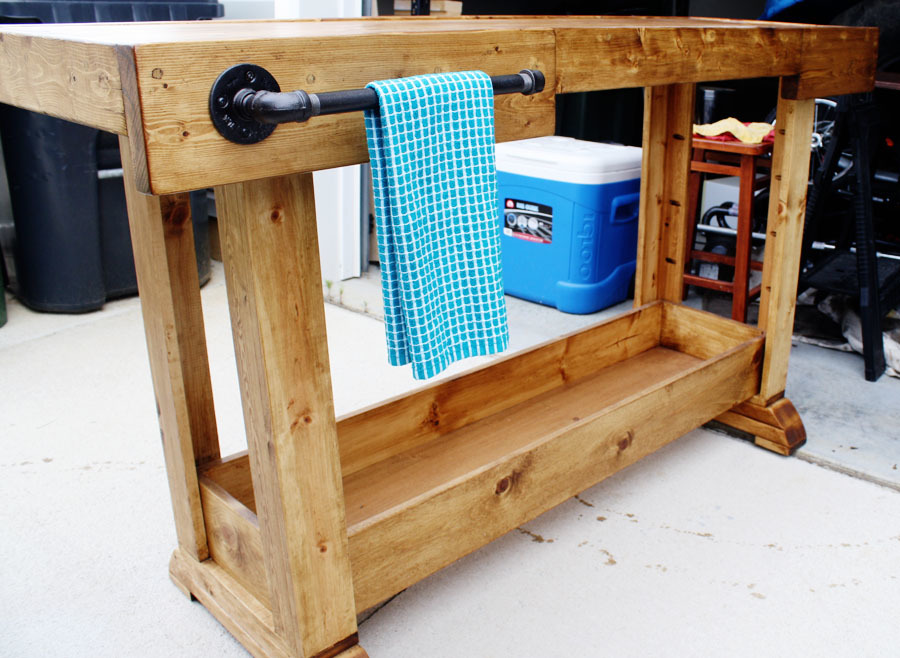
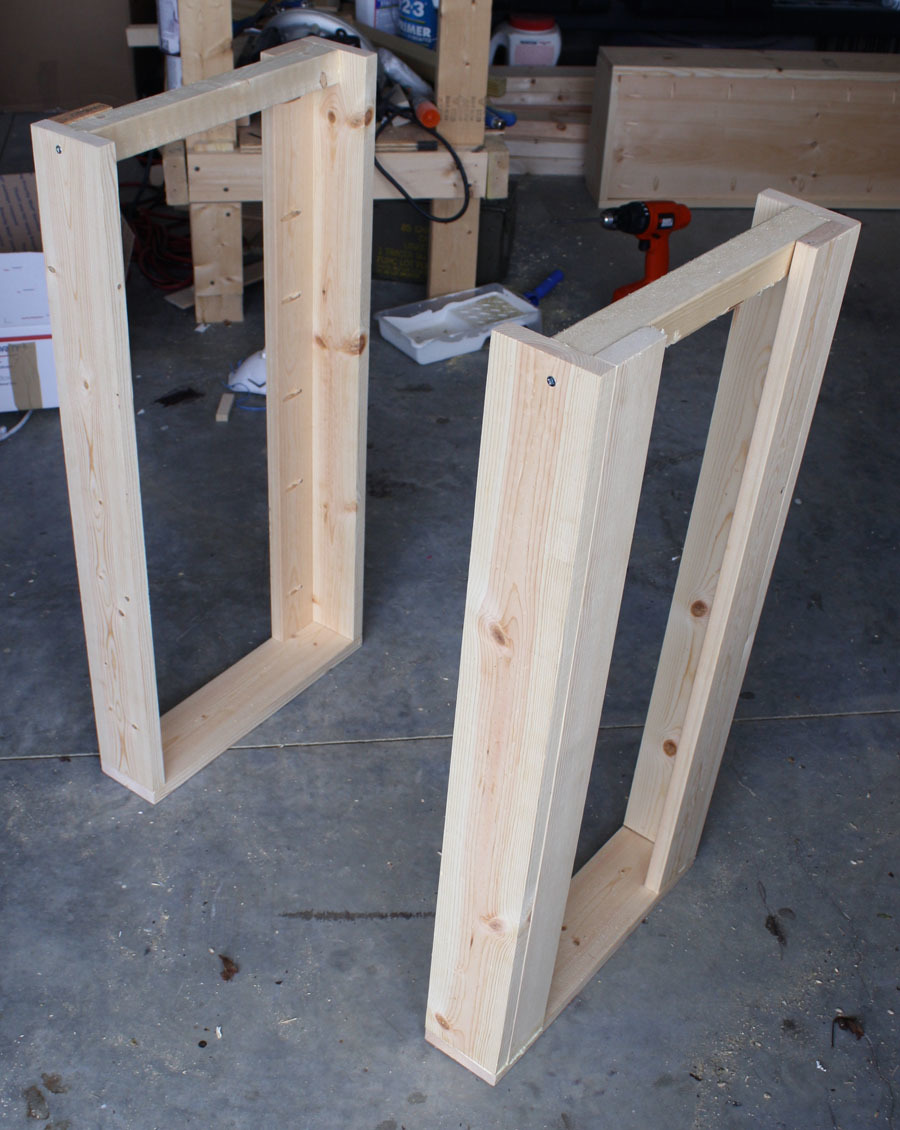
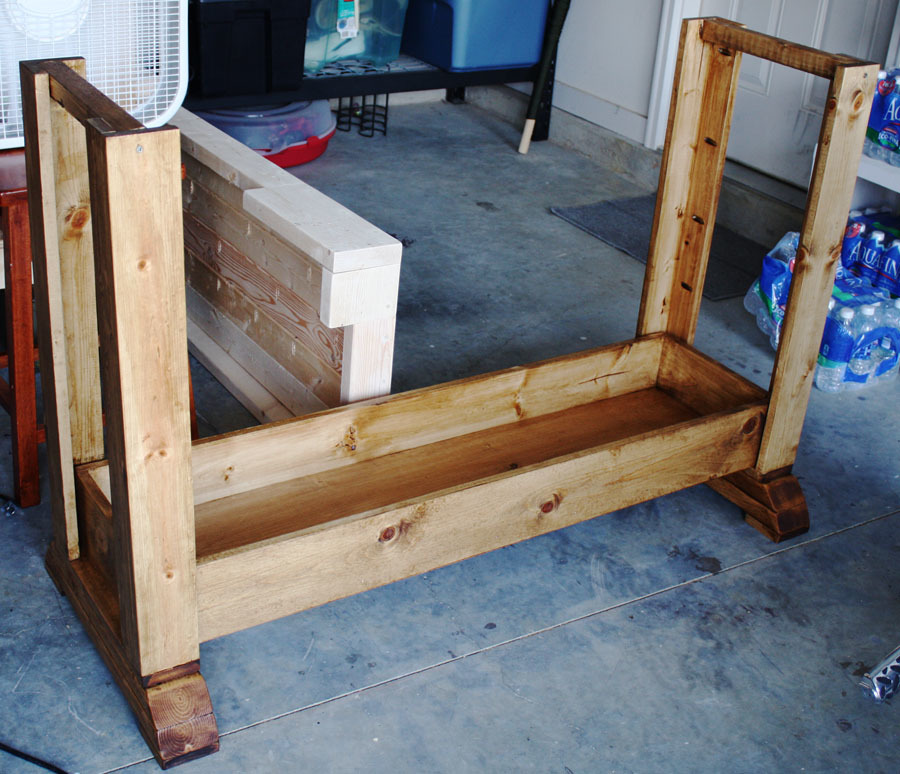
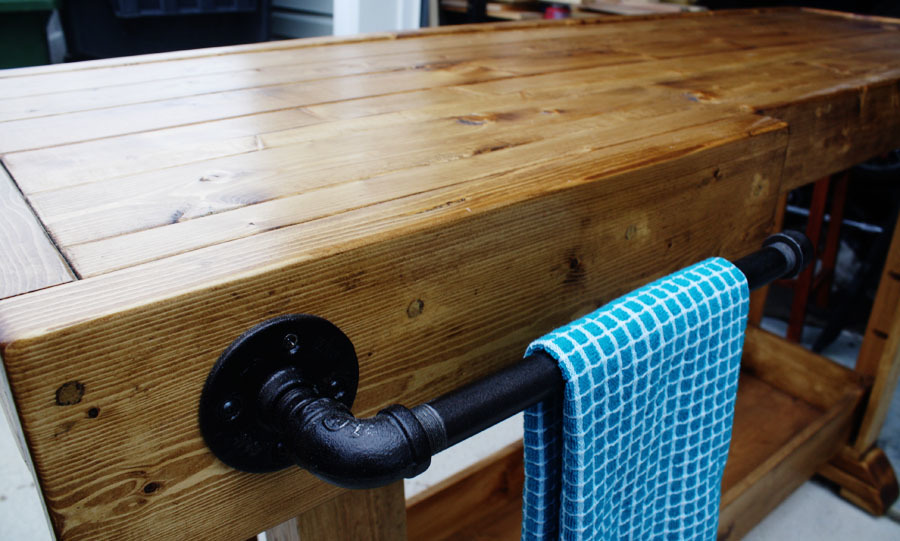
I built this workbench console as a housewarming gift for our good friends who just bought their first house. I'm thrilled with the way it turned out! Check my blog link for the complete play-by-play!
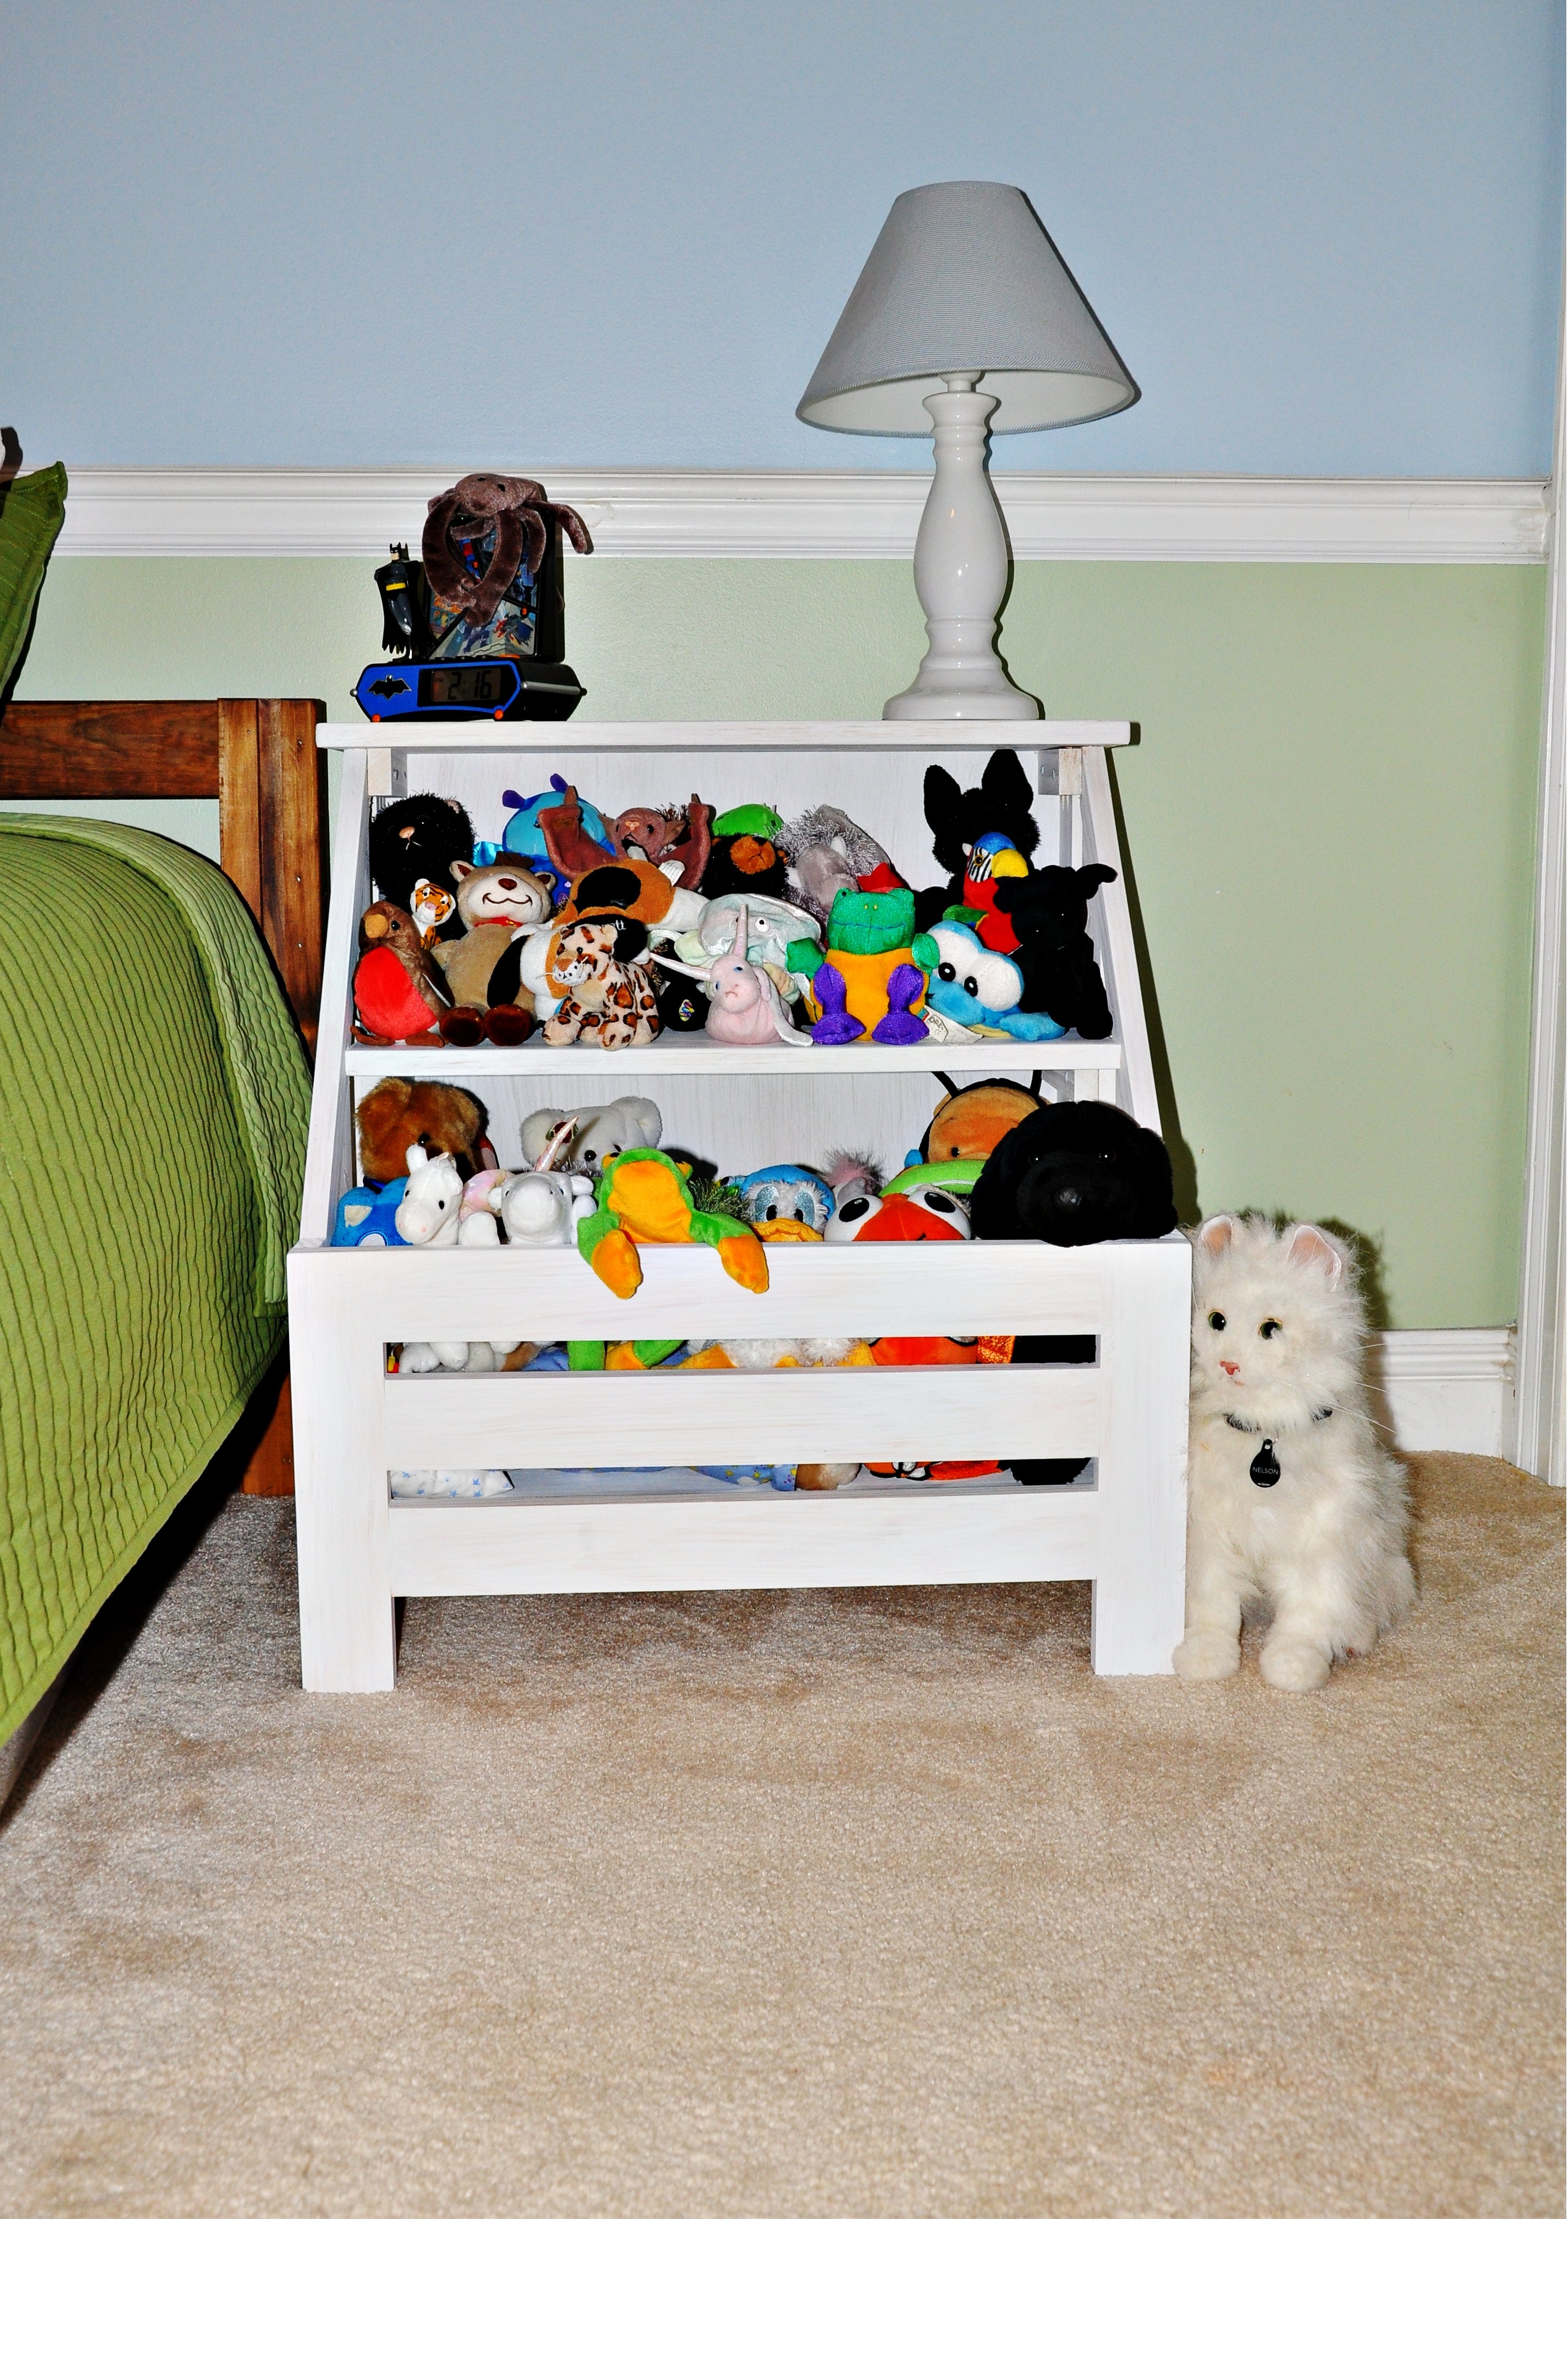
My home was being overtaken by wild animals. They started out confined to my son's room but with the presence of doting grandparents and other relatives, the animals quickly multiplied and were found lounging in every room. They were everywhere! We either needed to move out and put an Animal Sanctuary sign in the yard, or I had to build some type of containment system for them.
The Kendra Storage Console plans were perfect! The build was quick and the wild creatures were effortlessly corralled. My son gave each one an assigned seat. The animals love their new home and my family enjoys having them all in one location.
Thank you, Ana, for keeping our home safe from all of the wild animals!
Fri, 06/13/2014 - 18:52
Great job and cute story! Lol

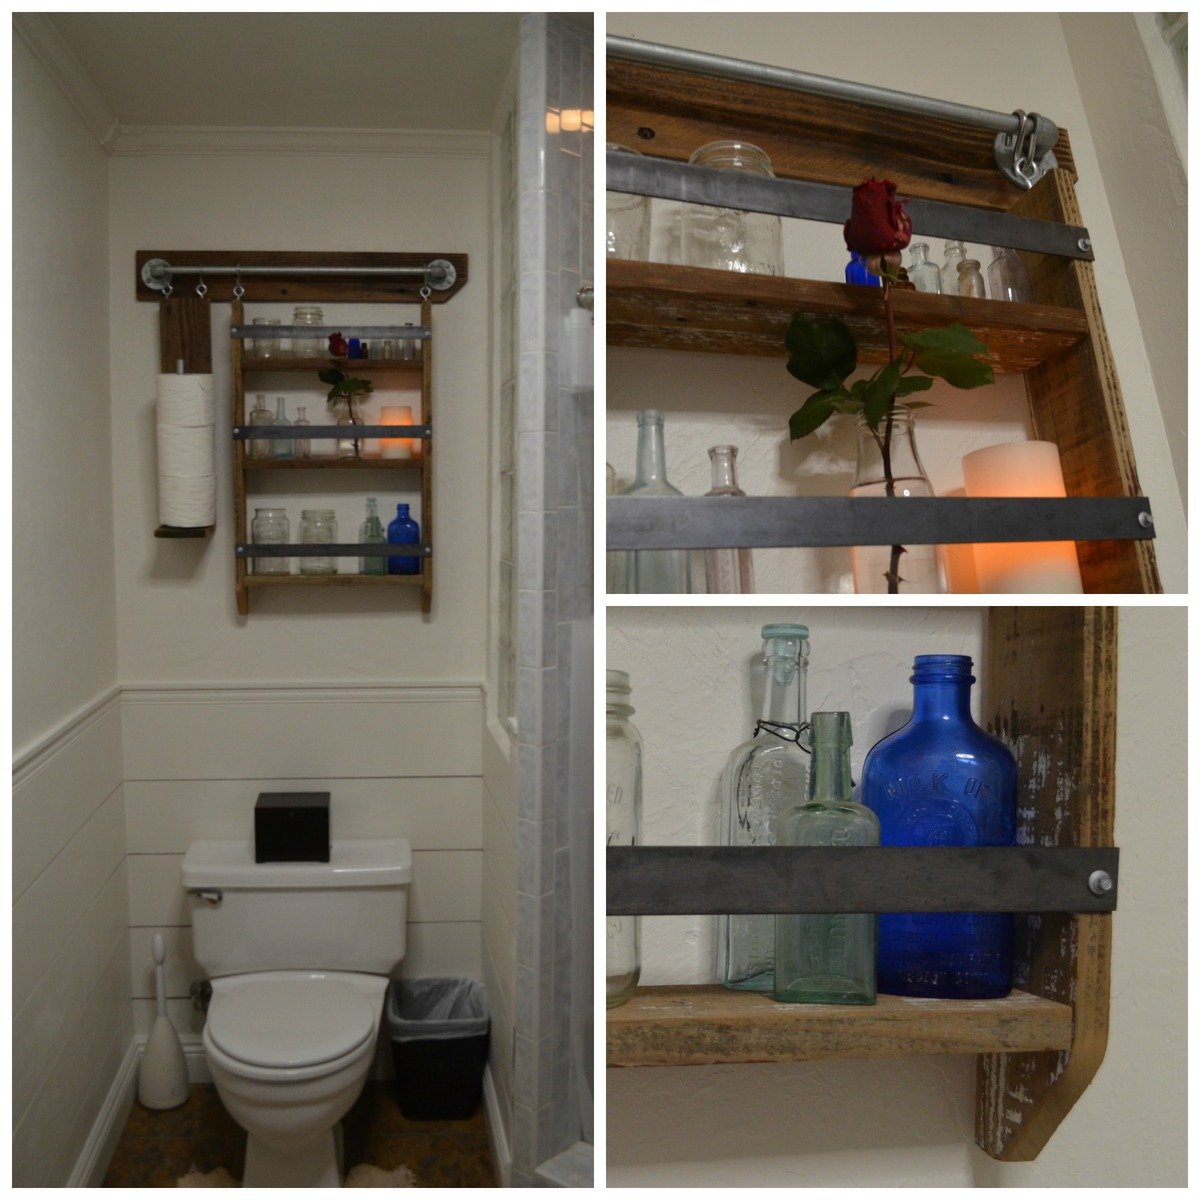
After following Ana for a couple years, I finally got to build something. This was made after watching the you tube video, I used old redwood fencing that was salvaged from a friend headed to the dump. I decided I wanted mine wider so I adjusted the measurements. It went together great, I hung it up before the metal was attached and found it looked funny being so wide. With the pocket hole construction, it was super easy to undo, trim and redo. Then the metal was added and walah! Done! Lovin it. I also made a TP storage hanger to fill the extra space. I will now be making them for 3 friends who have asked for them.

I've been searching for a deck set and I didn't want to spend a lot of money. I altered the plan to include a table instead of another seat (I used a piece of square patio glass from my old patio set). I made this sectional in an afternoon using green-treated lumber and cushion sets from Walmart.
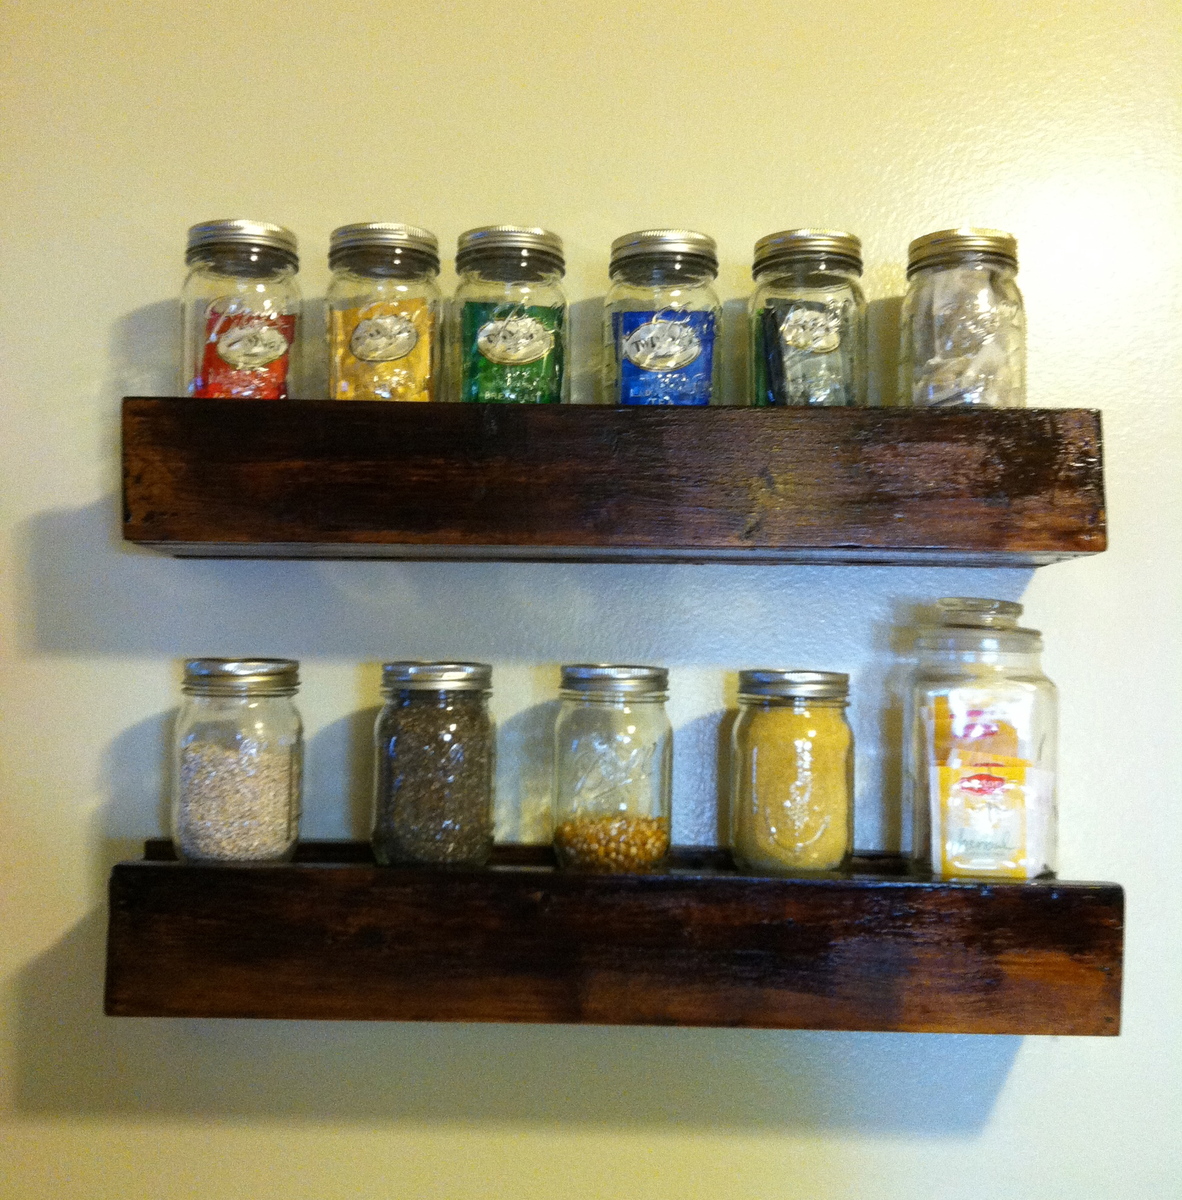
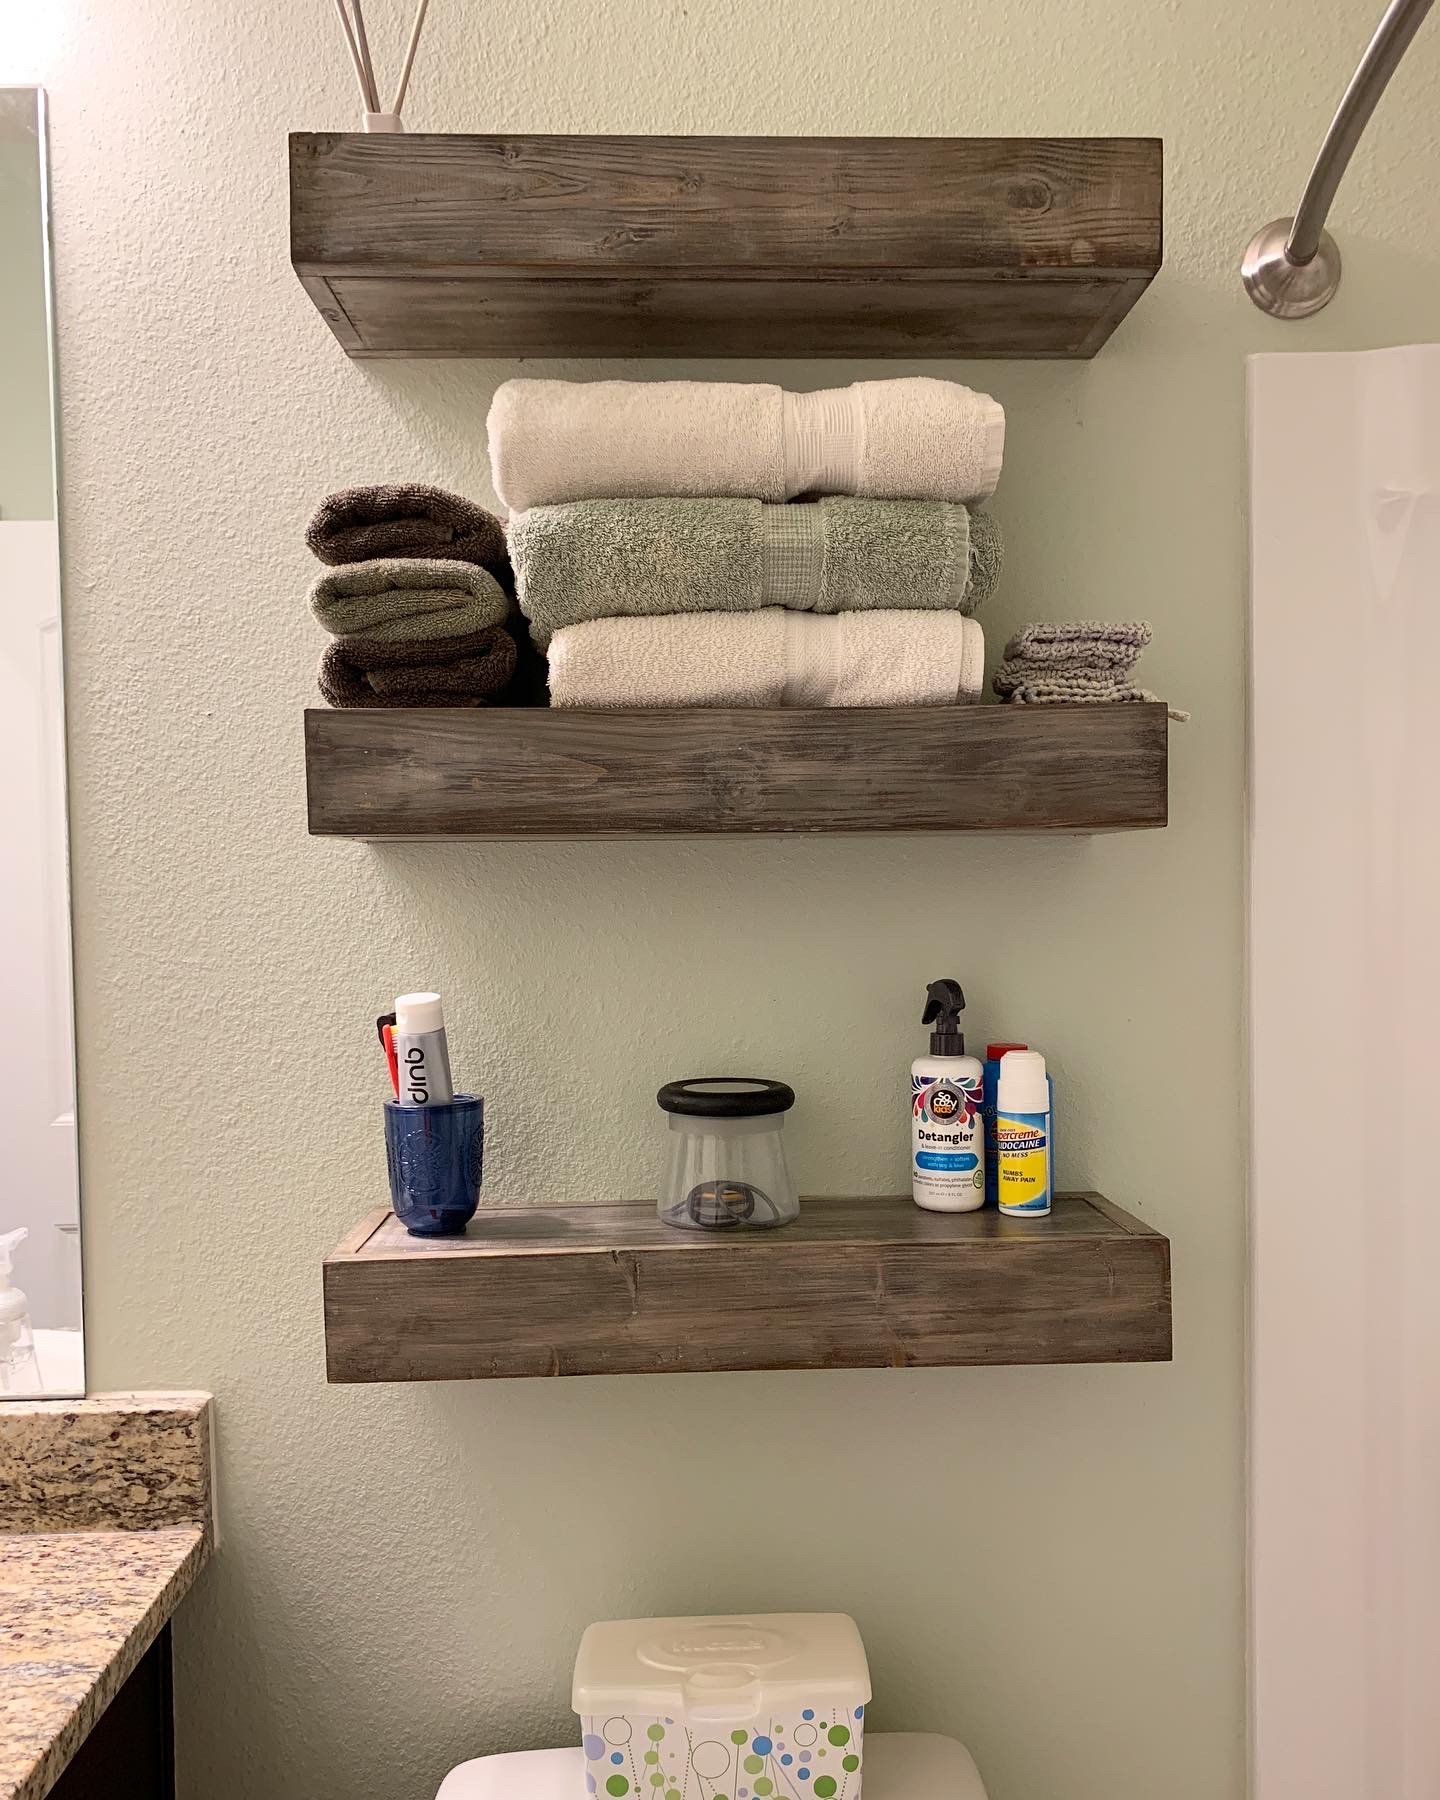
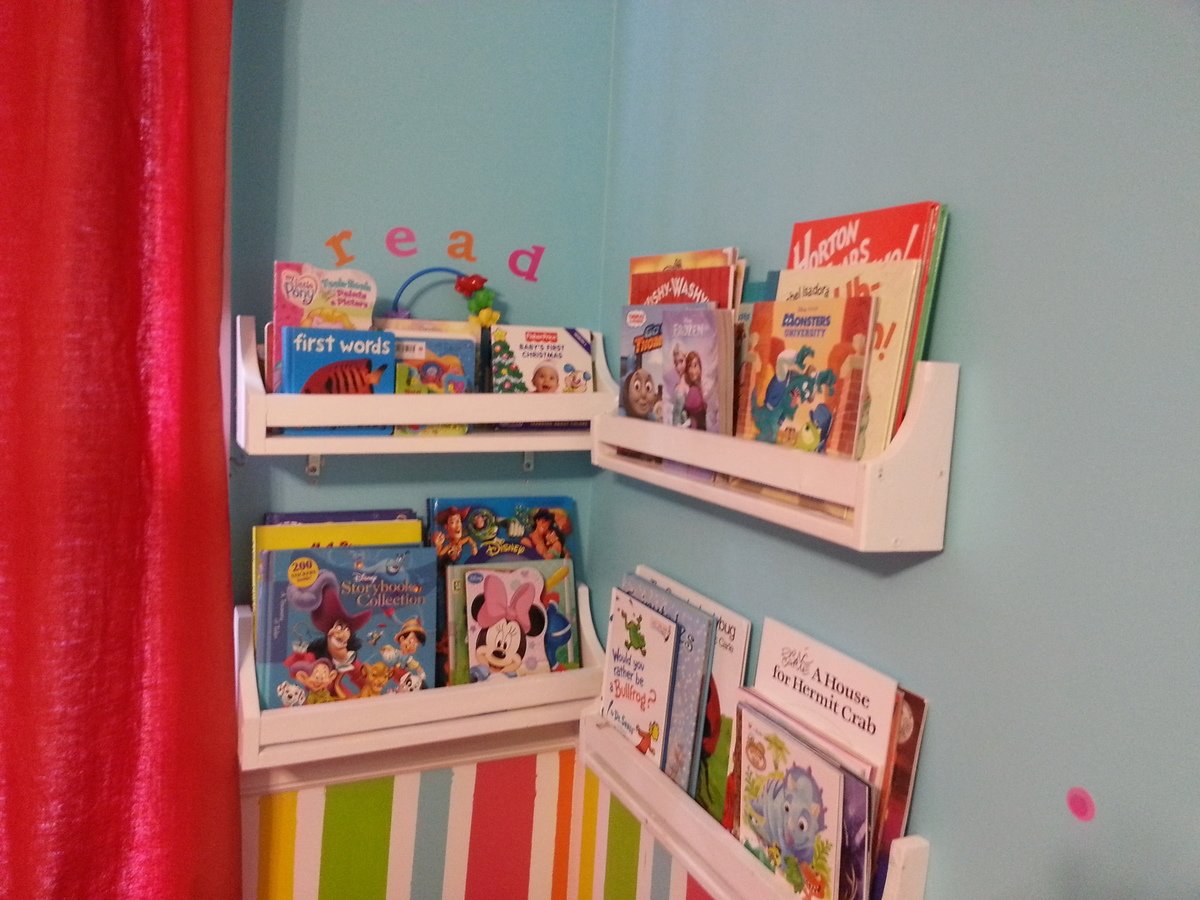
These ledges were my first DIY project. They're not perfect by no means, but I'm proud of them and they are still attached to the wall after 6 months. They look great in my kitchen and I love the fact that when we move again with the Army, I can take them with me.
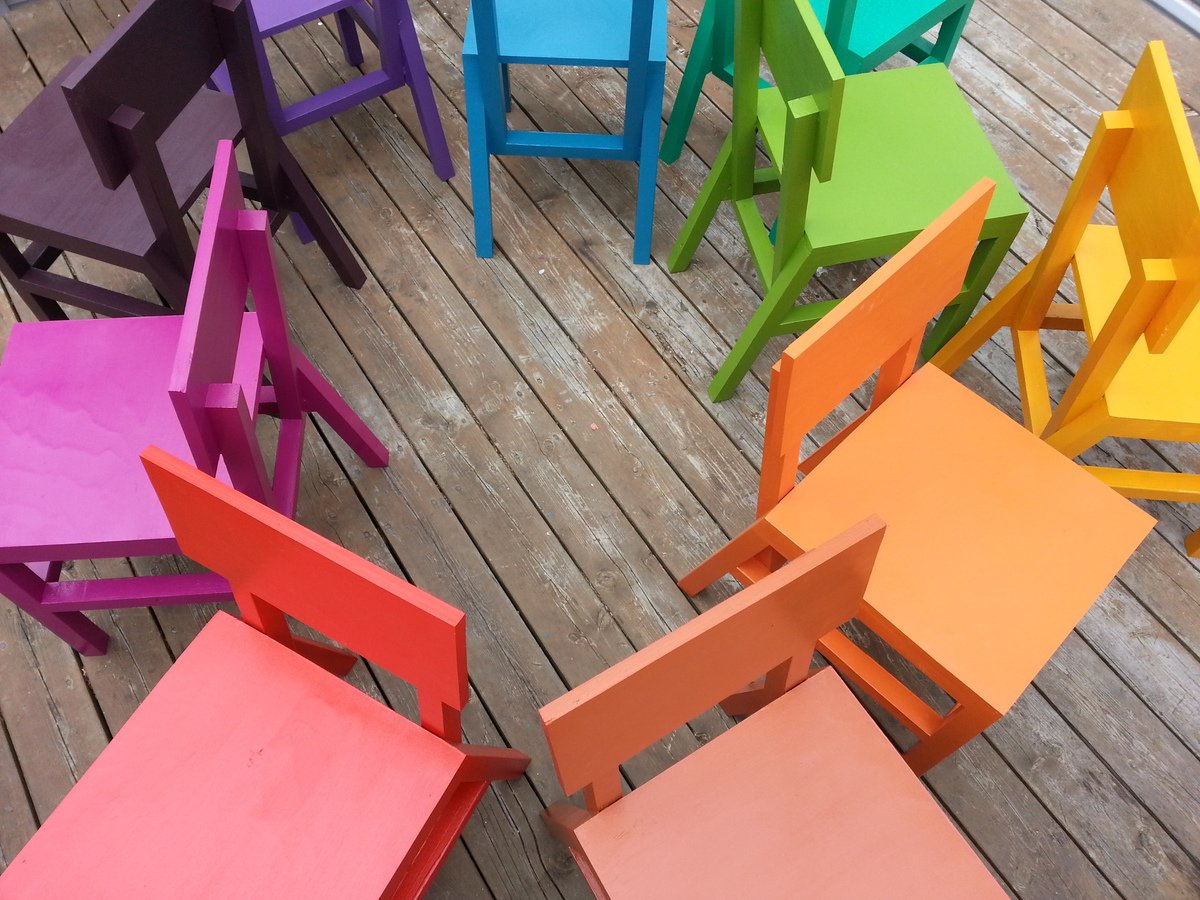
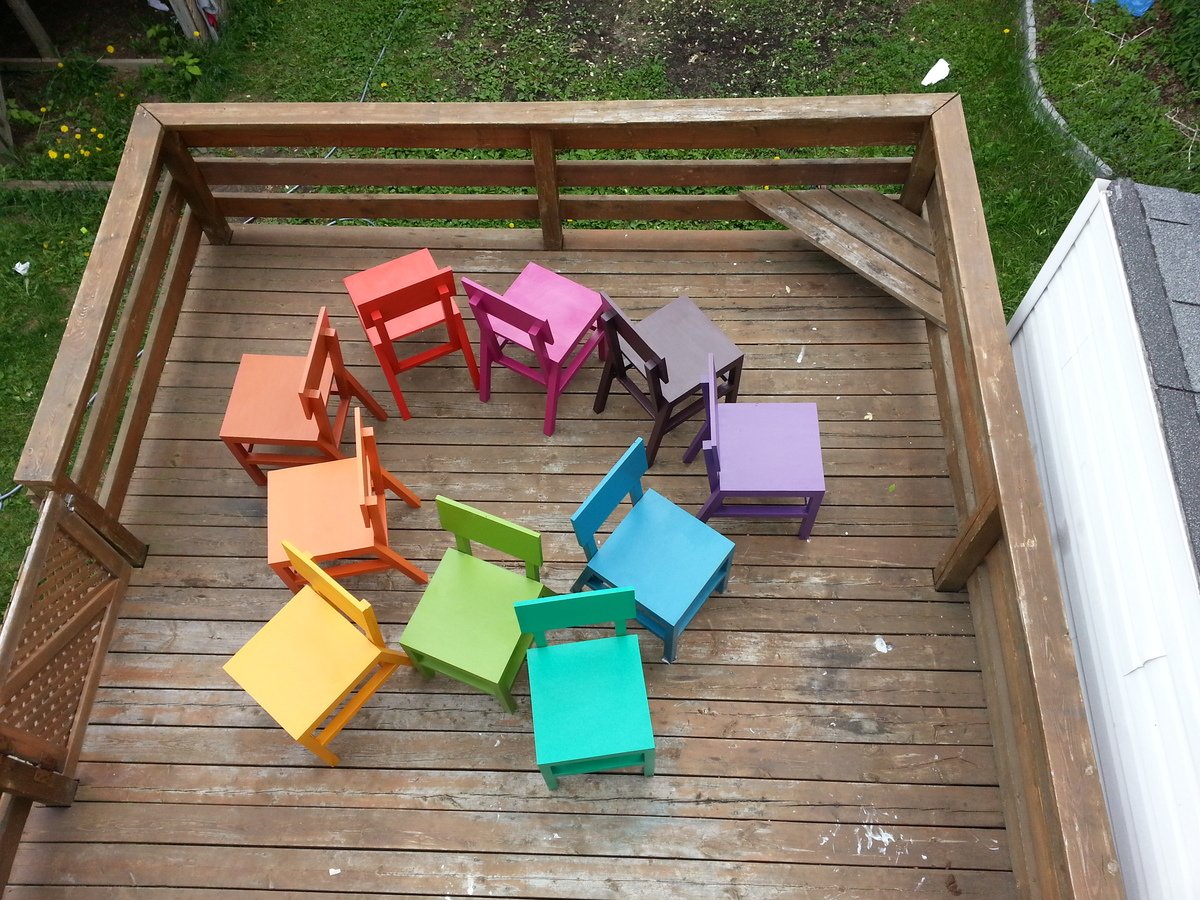
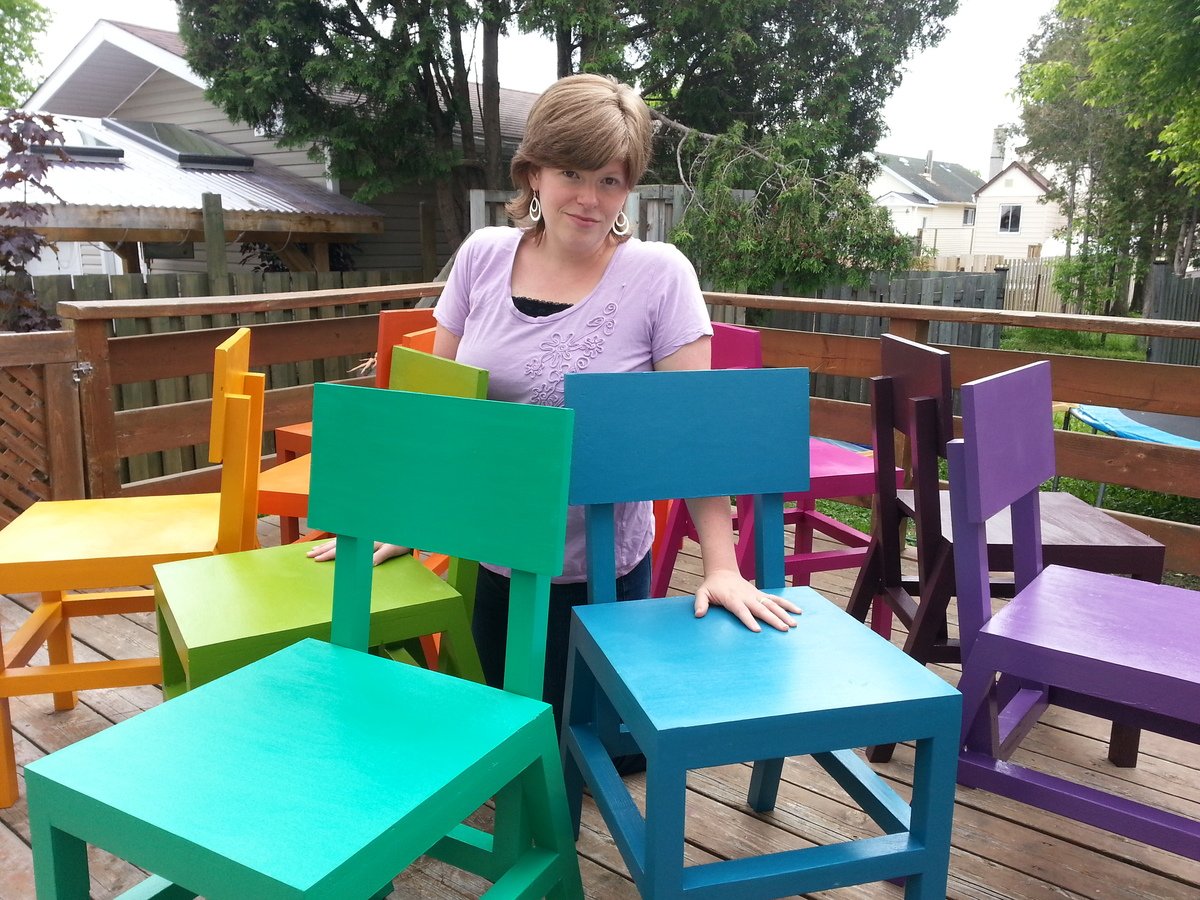
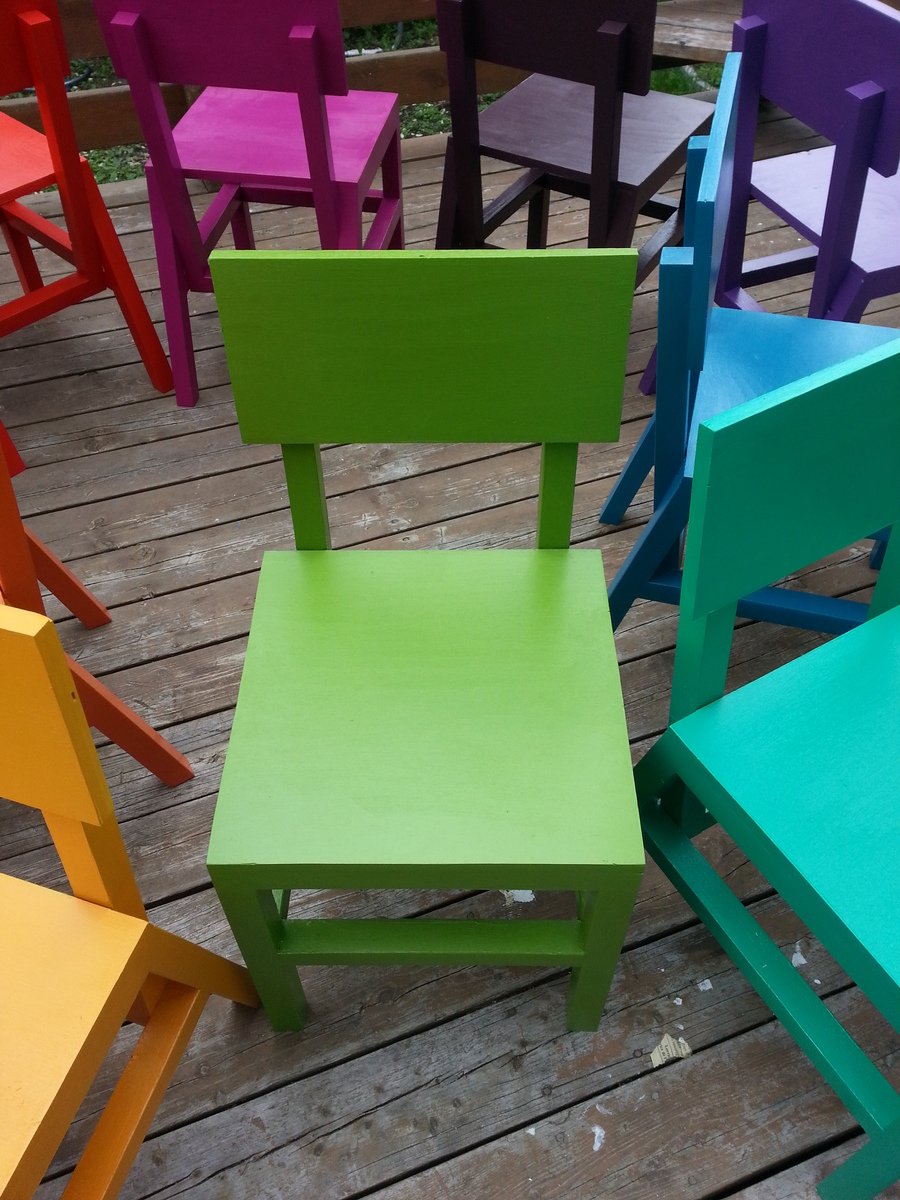
I built ten of these for my dining table. I'm so pleased with the result. I added the suggested support bar at the bottom for extra strength. I was surprised by how sturdy these are...and comfortable. I blogged about them over here http://skonkers.blogspot.ca/2014/06/pull-up-chair.html
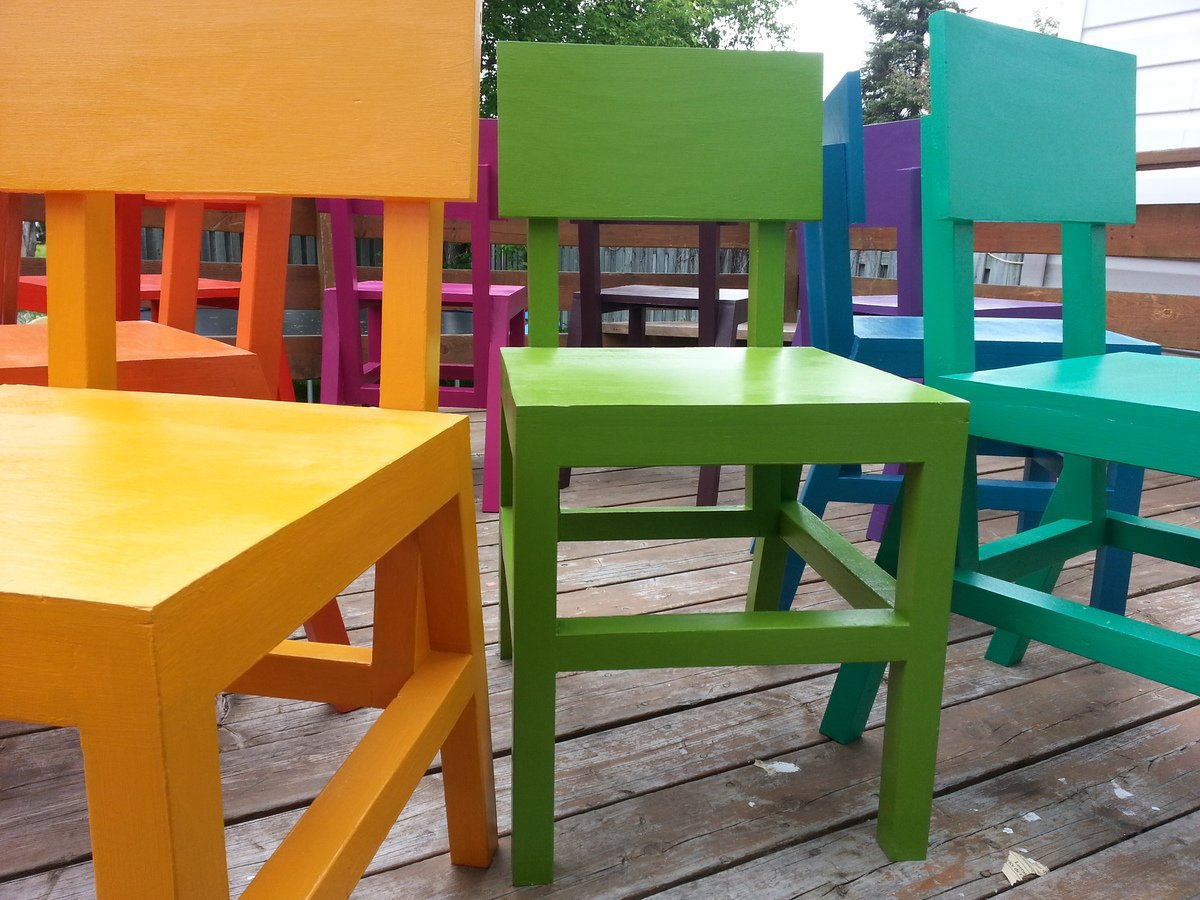
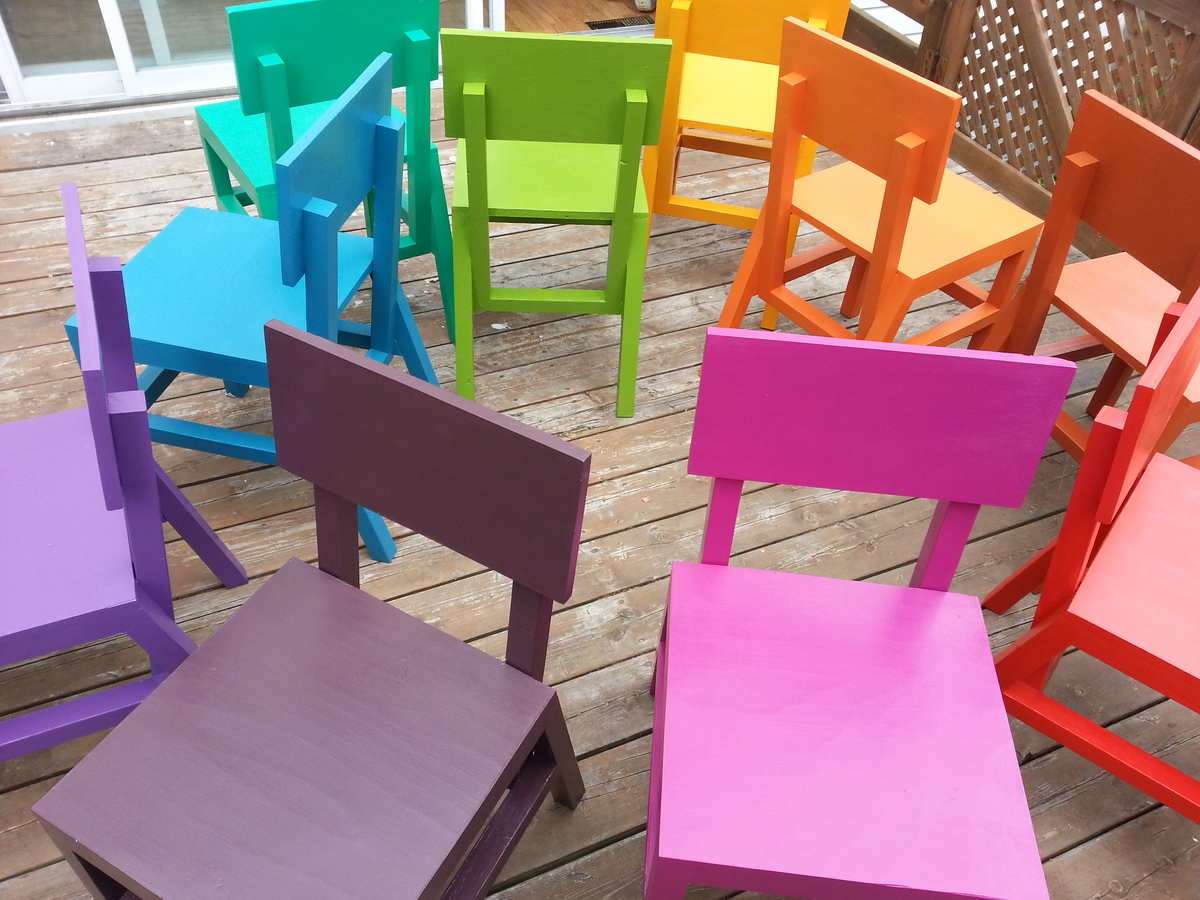

Mon, 06/23/2014 - 21:05
Those colors are just gorgeous! =D I am so inspired to find a series of things to paint in rainbow hues.
In reply to Beautiful colors! by yurra-bazain
Thu, 07/03/2014 - 08:07
I'm glad you like them! There's something so satisfying about a thorough rainbow :)
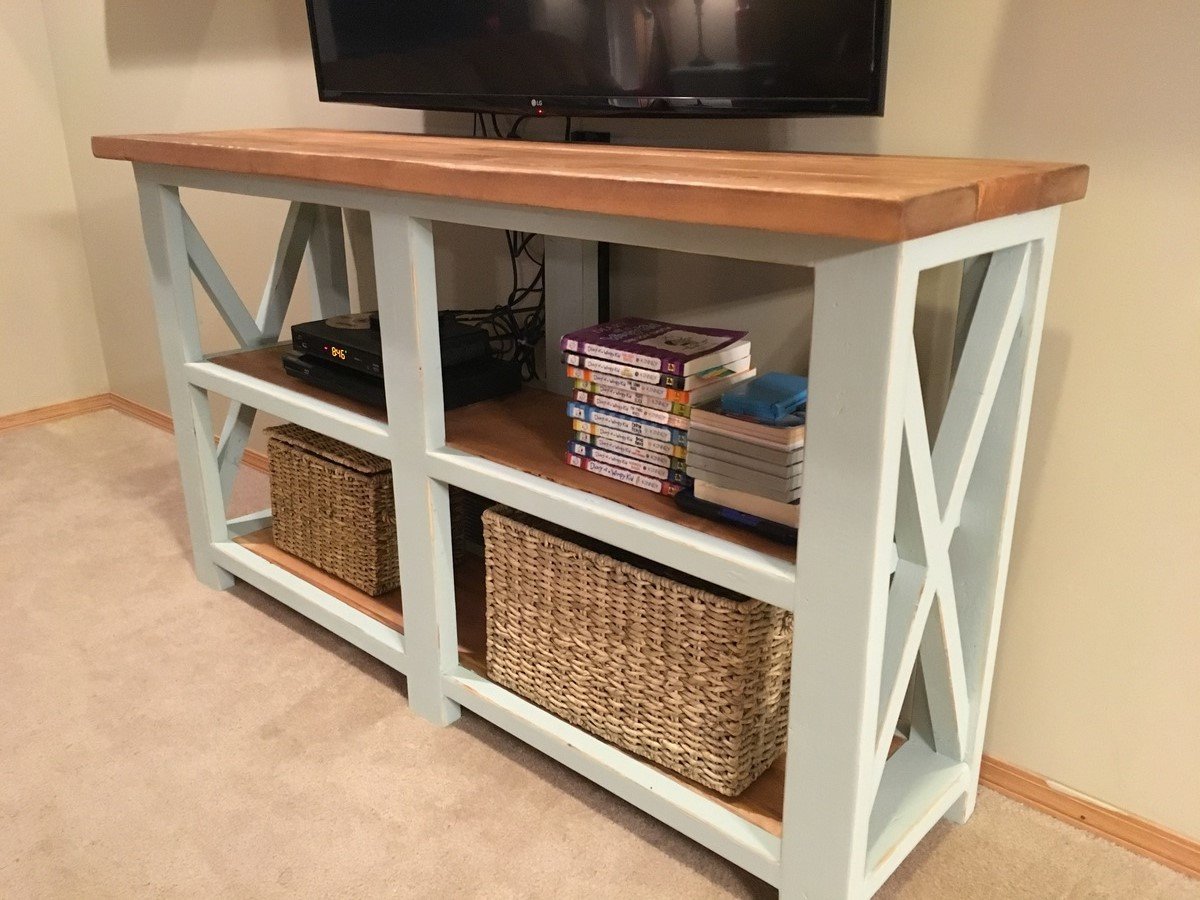
I followed the plans for the rustic x console table, making only a couple of adjustments for height and width (I made it taller and not quite as long as the plan called for). I am thrilled with how it turned out, and equally thrilled that I can get rid of the ugly tv stand we had before!
Very quick and easy! We did 6 in. boards and weathered the boards with stain, paint, and sanding. Looking for other places in the house to use this plan!
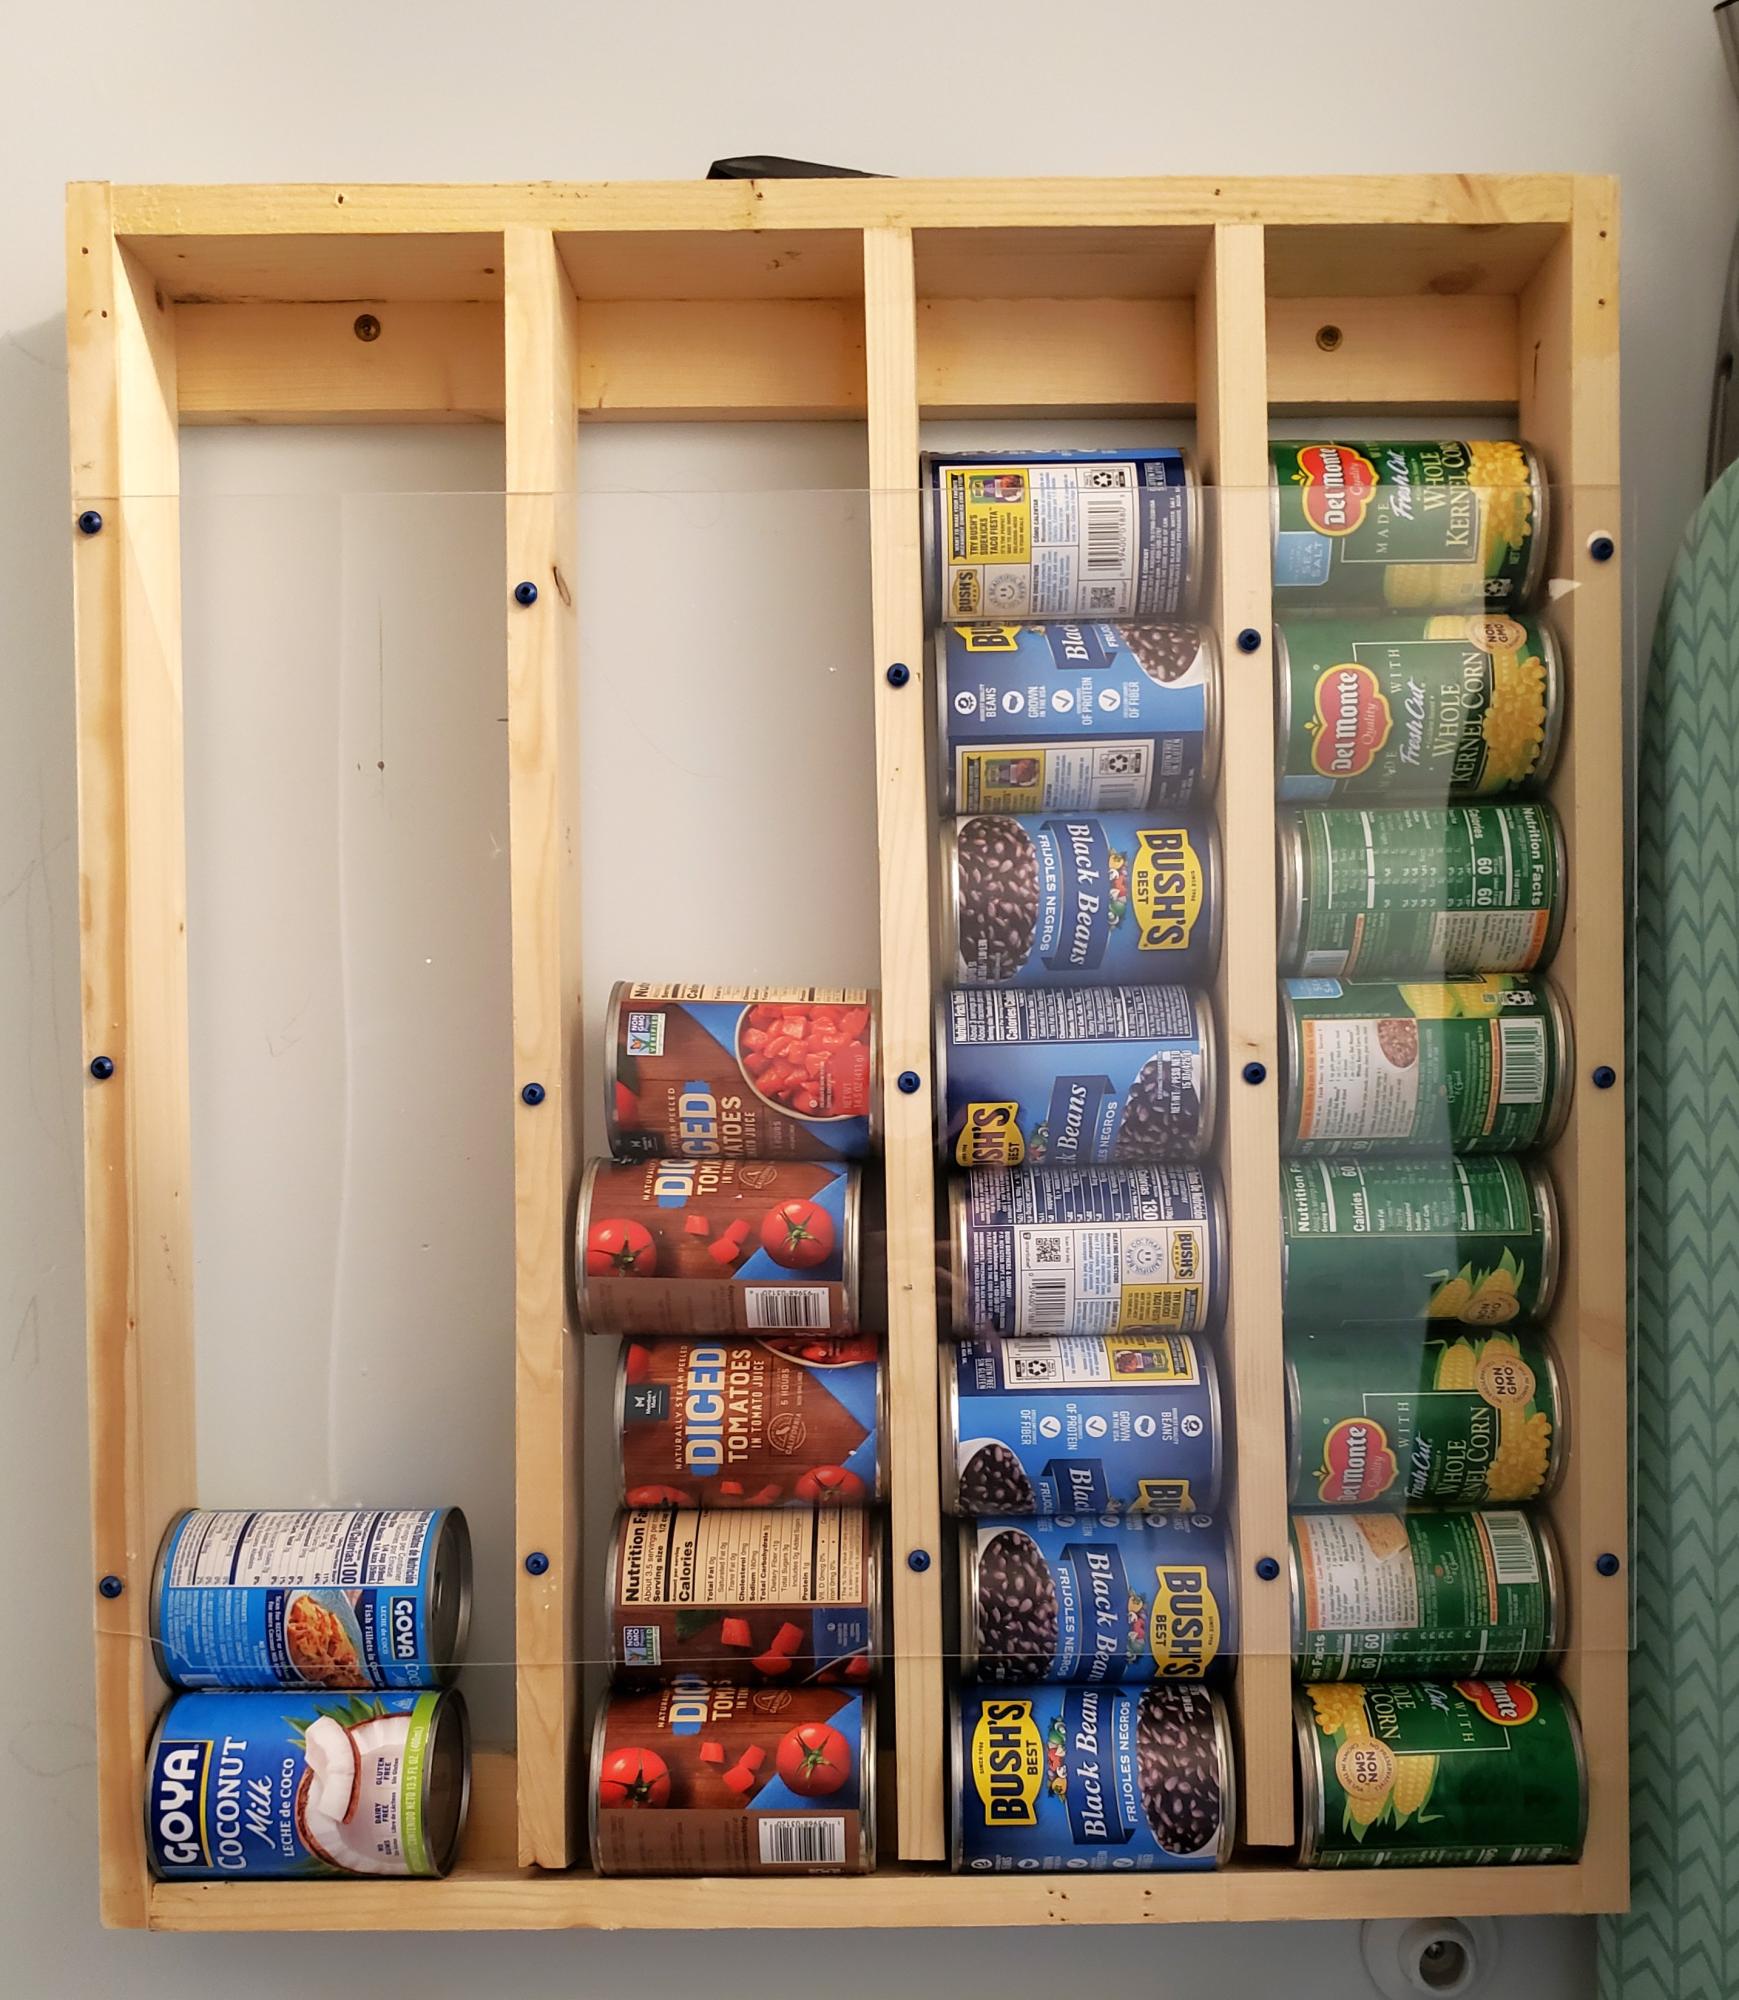
We didn't paint it, but between two newbies, it only took an afternoon. It has freed up a ton of space in the cabinets!
Hattie
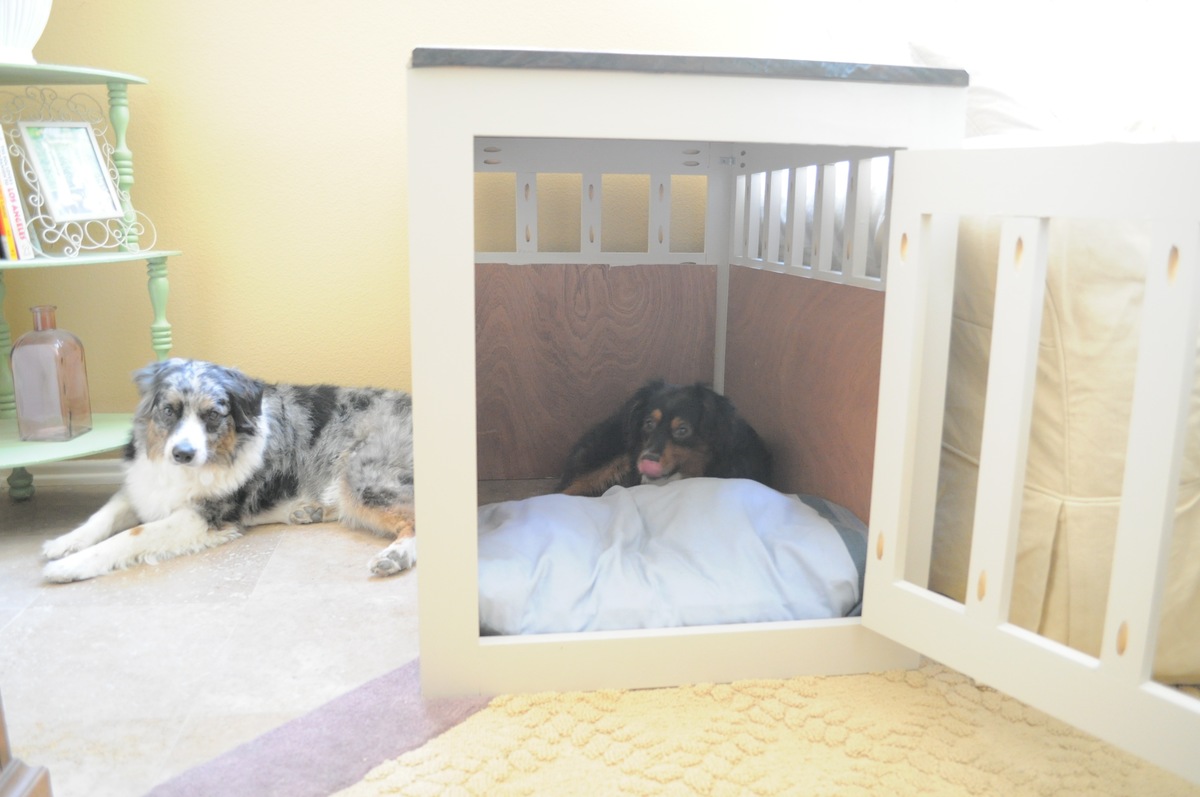
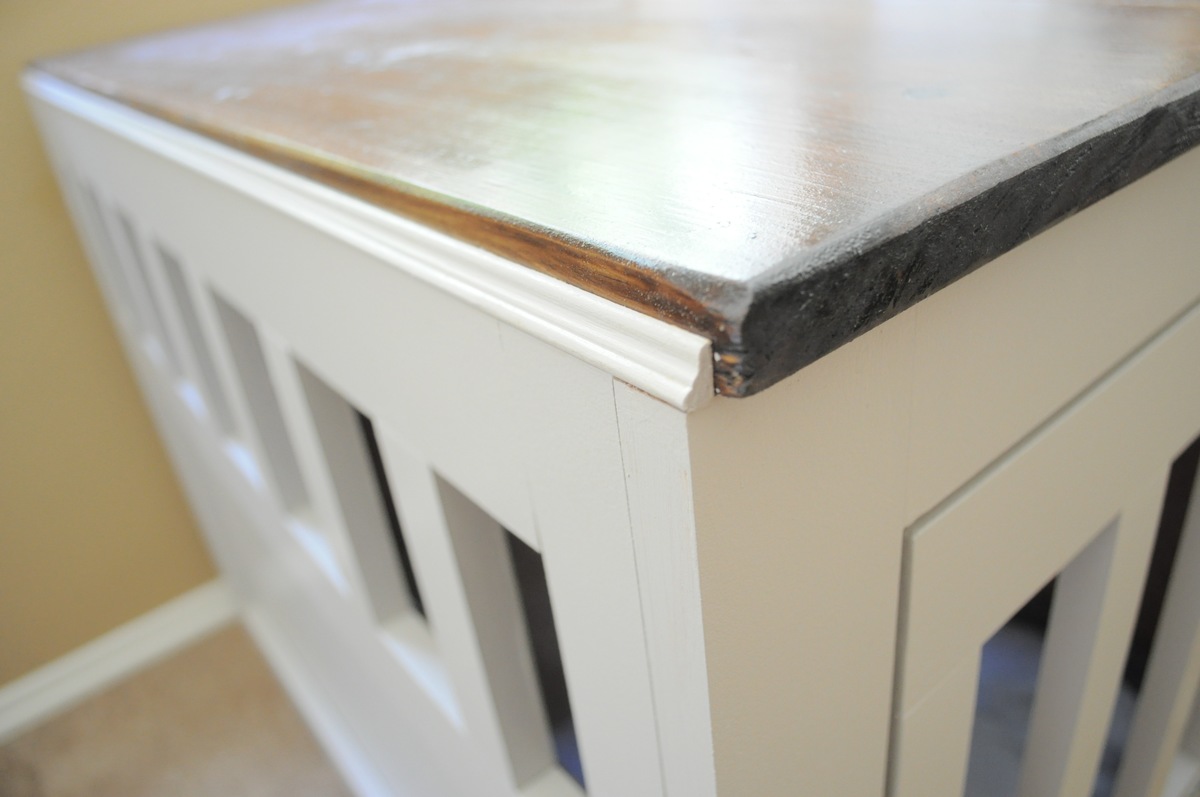
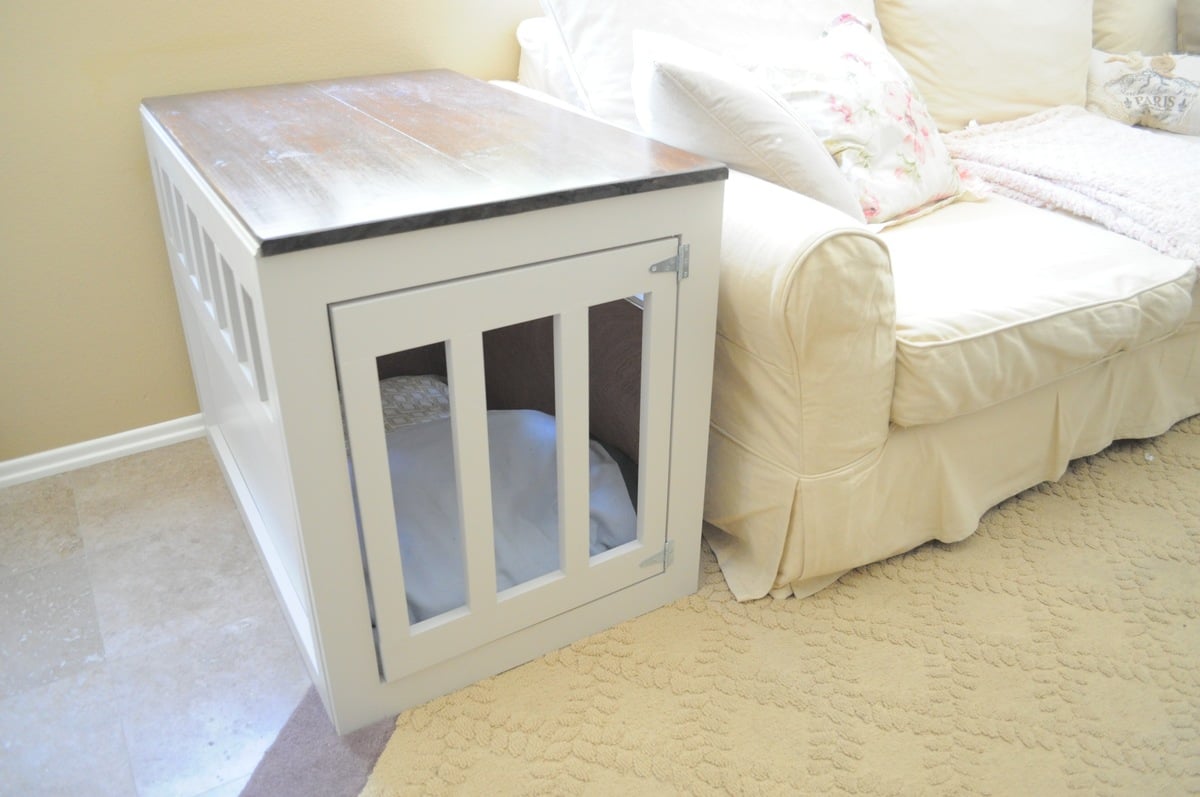
The husband and I have been very inspired by the awesome women (and men) on this site that have created their own pieces of furniture. They all look so amazing! So the husband wanted to give it a shot and try creating this dog crate / end table as his first ever project. Now mind you, he hasn't done any sort of woodworking since wood shop class in high school... and that was at least a decade ago.
I have to say that I'm quite proud of the hubby's first finished project! Although, he did mess up a bit with the table top being an inch too short width wise. I really didn't want him to create another one because that would mean I would have to stain another one and I really REALLY do not want to stain again! So we compromised and ended up gluing a thin wood trim on the side end of the table top to cover up the mistake.
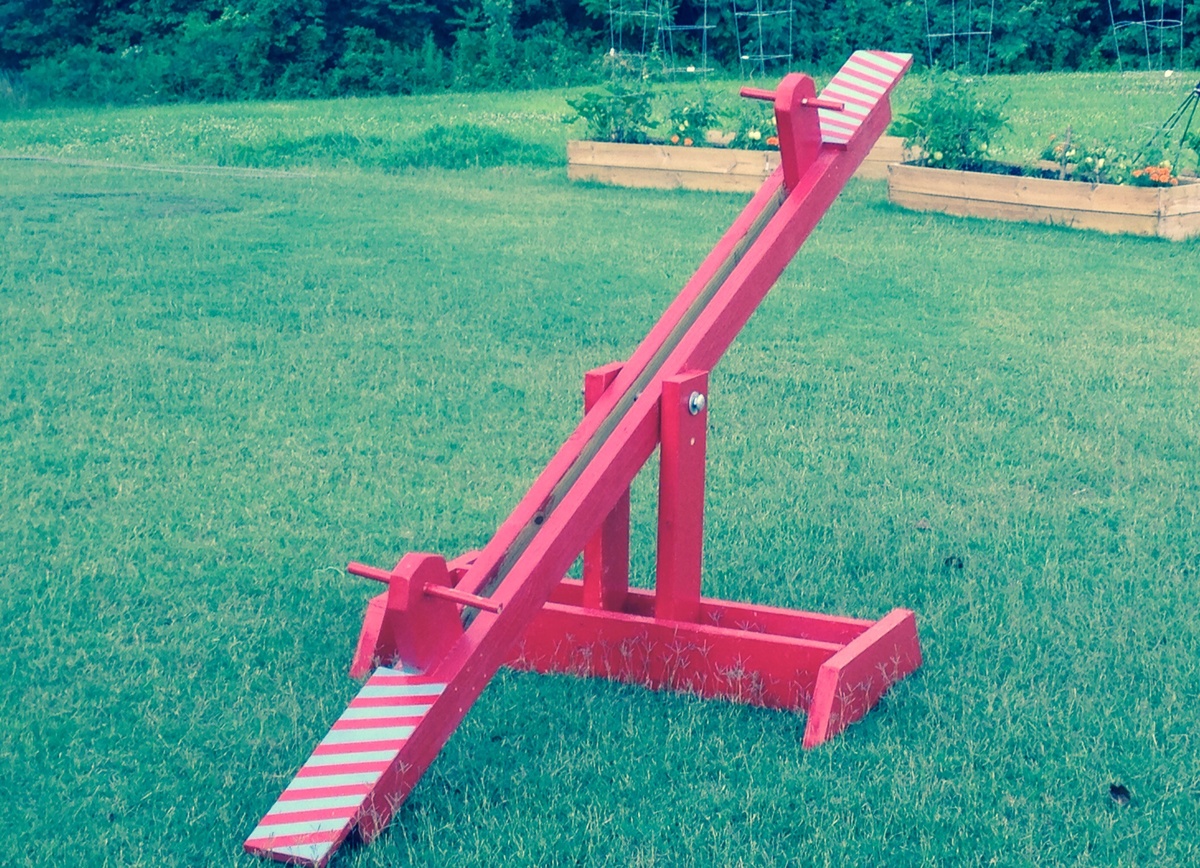
Fun project to build, and more fun for the kids. Ages 7-3 have been loving it. I used pressure treated 2x4s since it would be outdoors all the time. Thanks for the idea.
Outdoor bench made by Estate of Bliss LLC
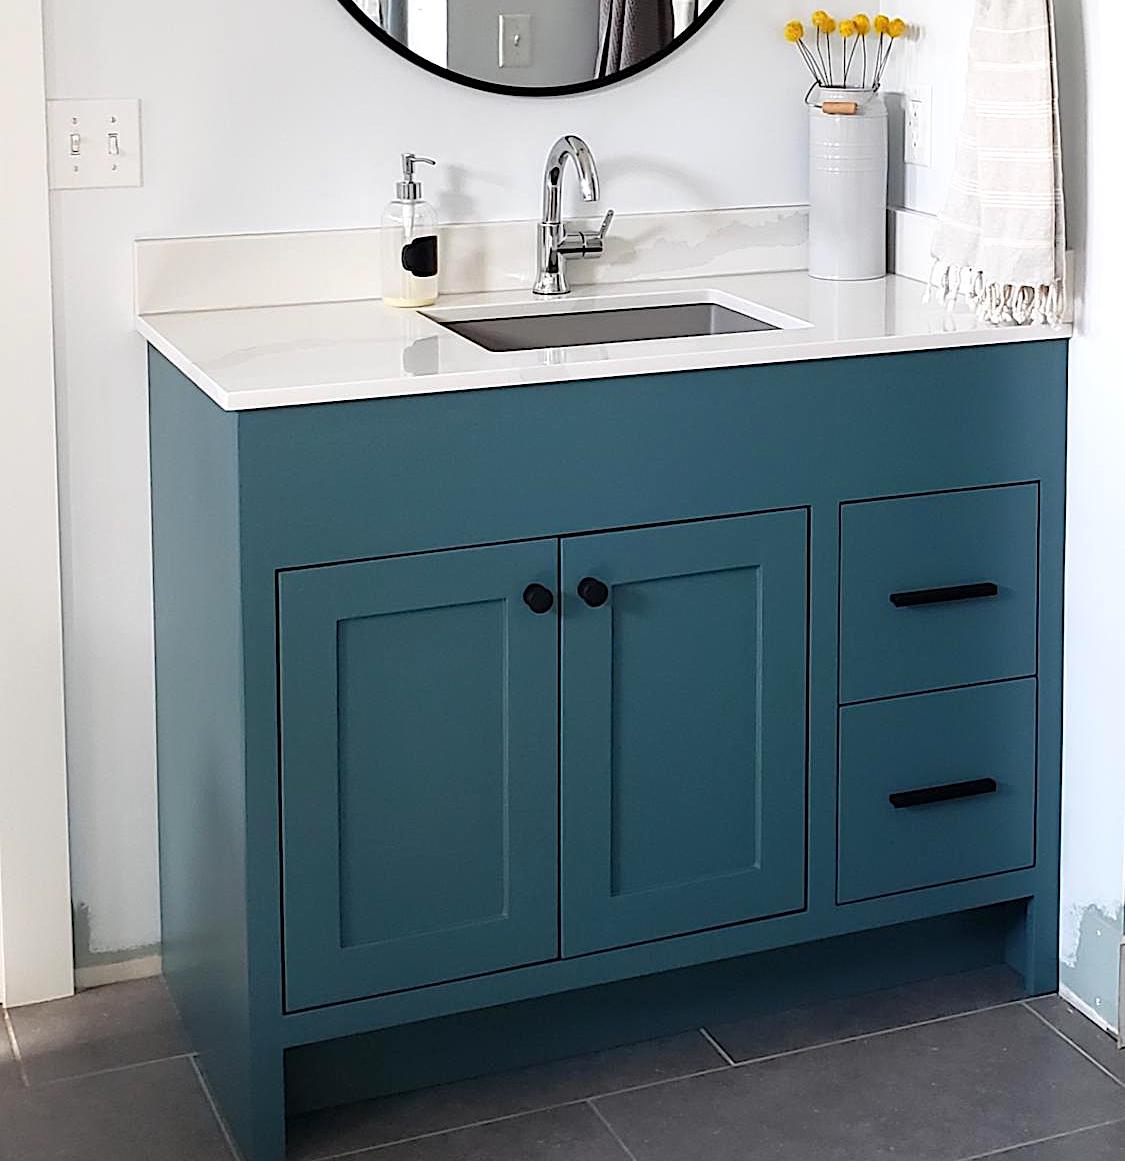
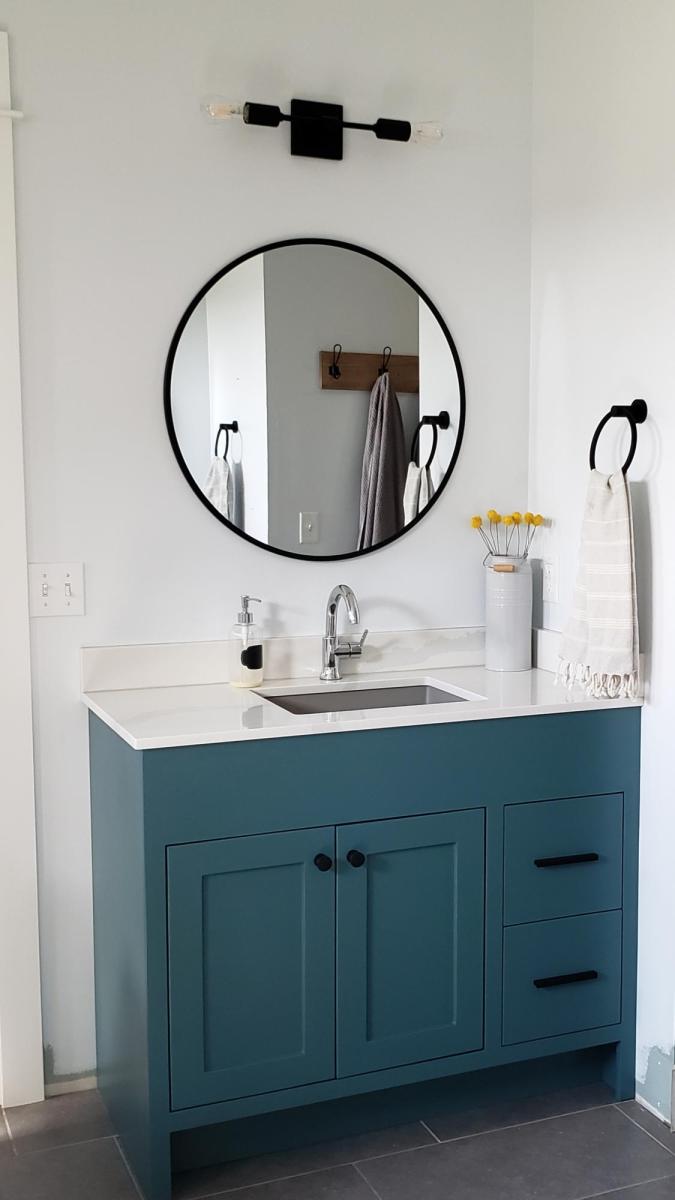
Needed a custom build to fit the plumbing and size requirement for my master bath.
Wed, 04/21/2021 - 10:01
This is exactly the size I need to build, potentially with the same plumbing requirements. Would you mind sharing your plans, please?
Tue, 06/13/2023 - 18:29
This is the exact size and style I am looking for as well. Would you mind sharing the plans with me as well?
Made this for our patio area very fun build, my wife loves it so of course she wants another one! Back to the wood stove.
Blair K
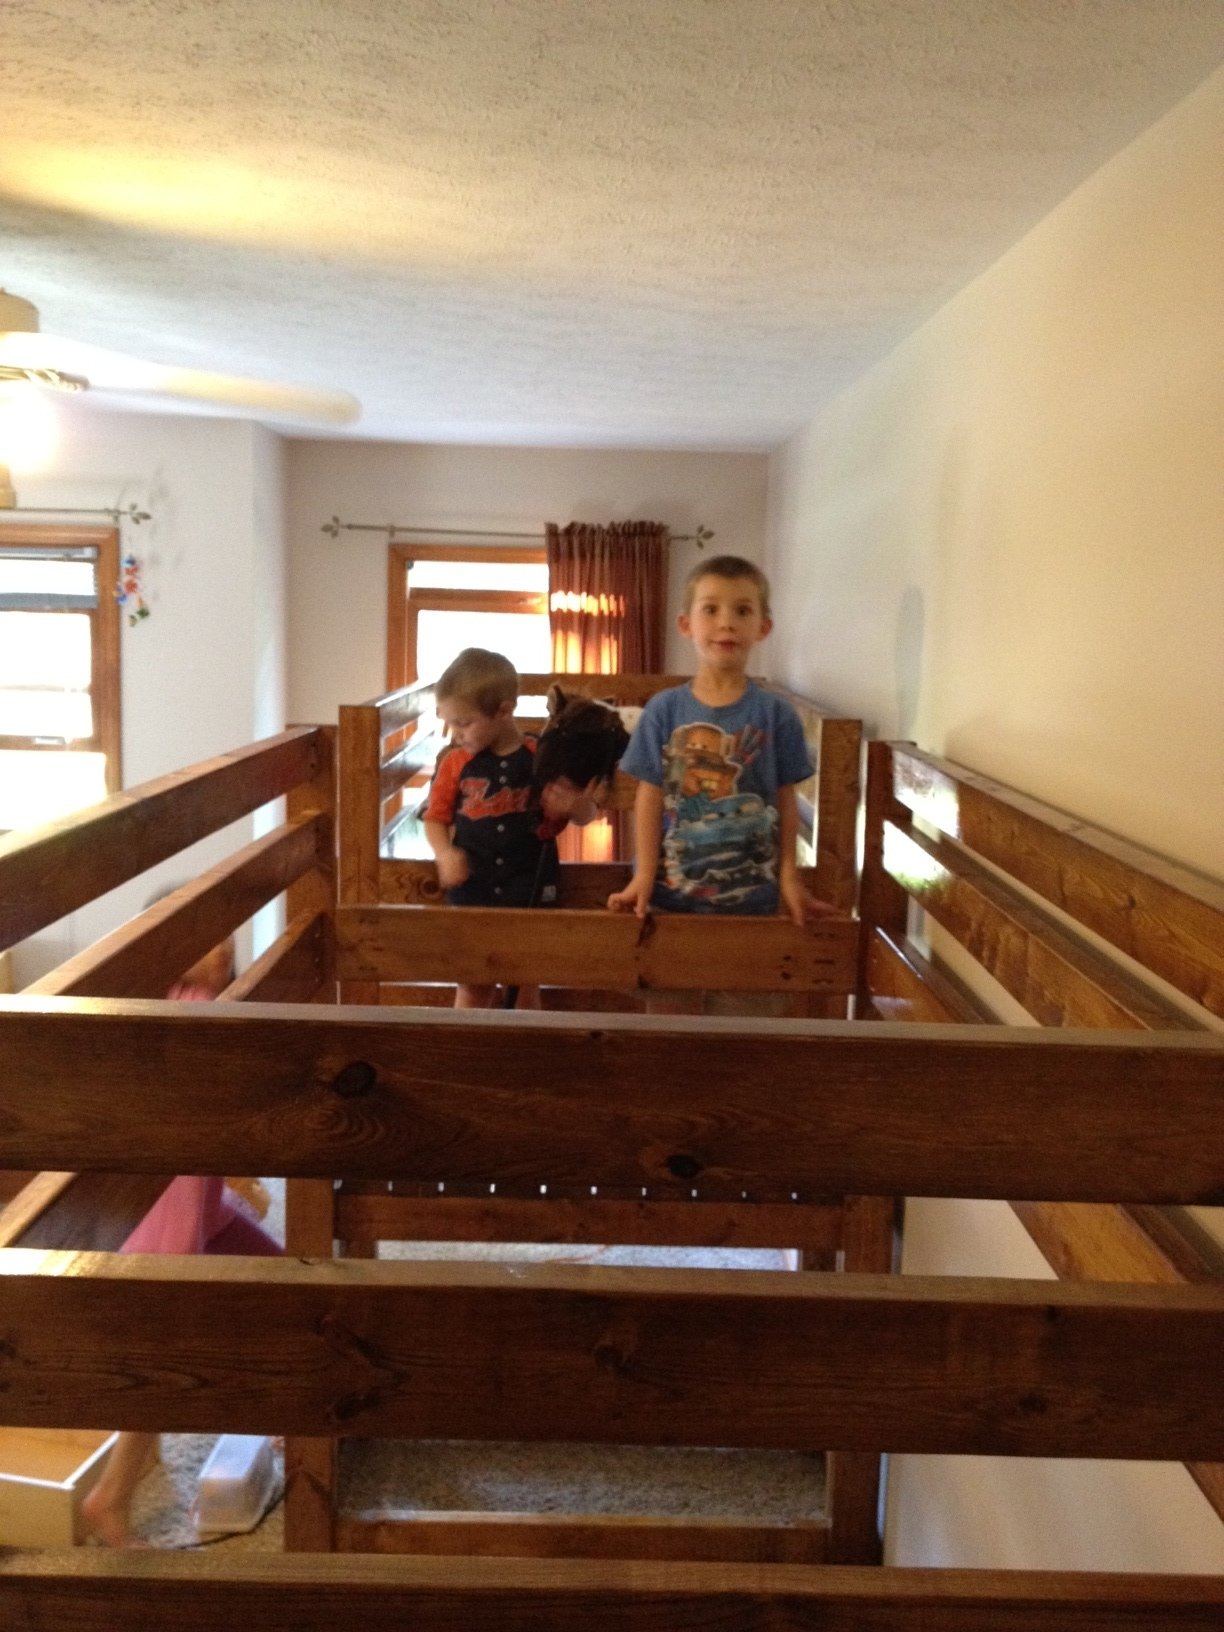
Have two boys who where in need of more floorspace to play. Saw the great plans for the Camp Loft and decided to make a double wide. One platform and two beds.
All in all went together as designed. Eliminated the stairs for a ladder. Works great if you have a long wall.


Thu, 11/29/2012 - 15:14
Really smart with the platform in the middle - I'm sure they love it!
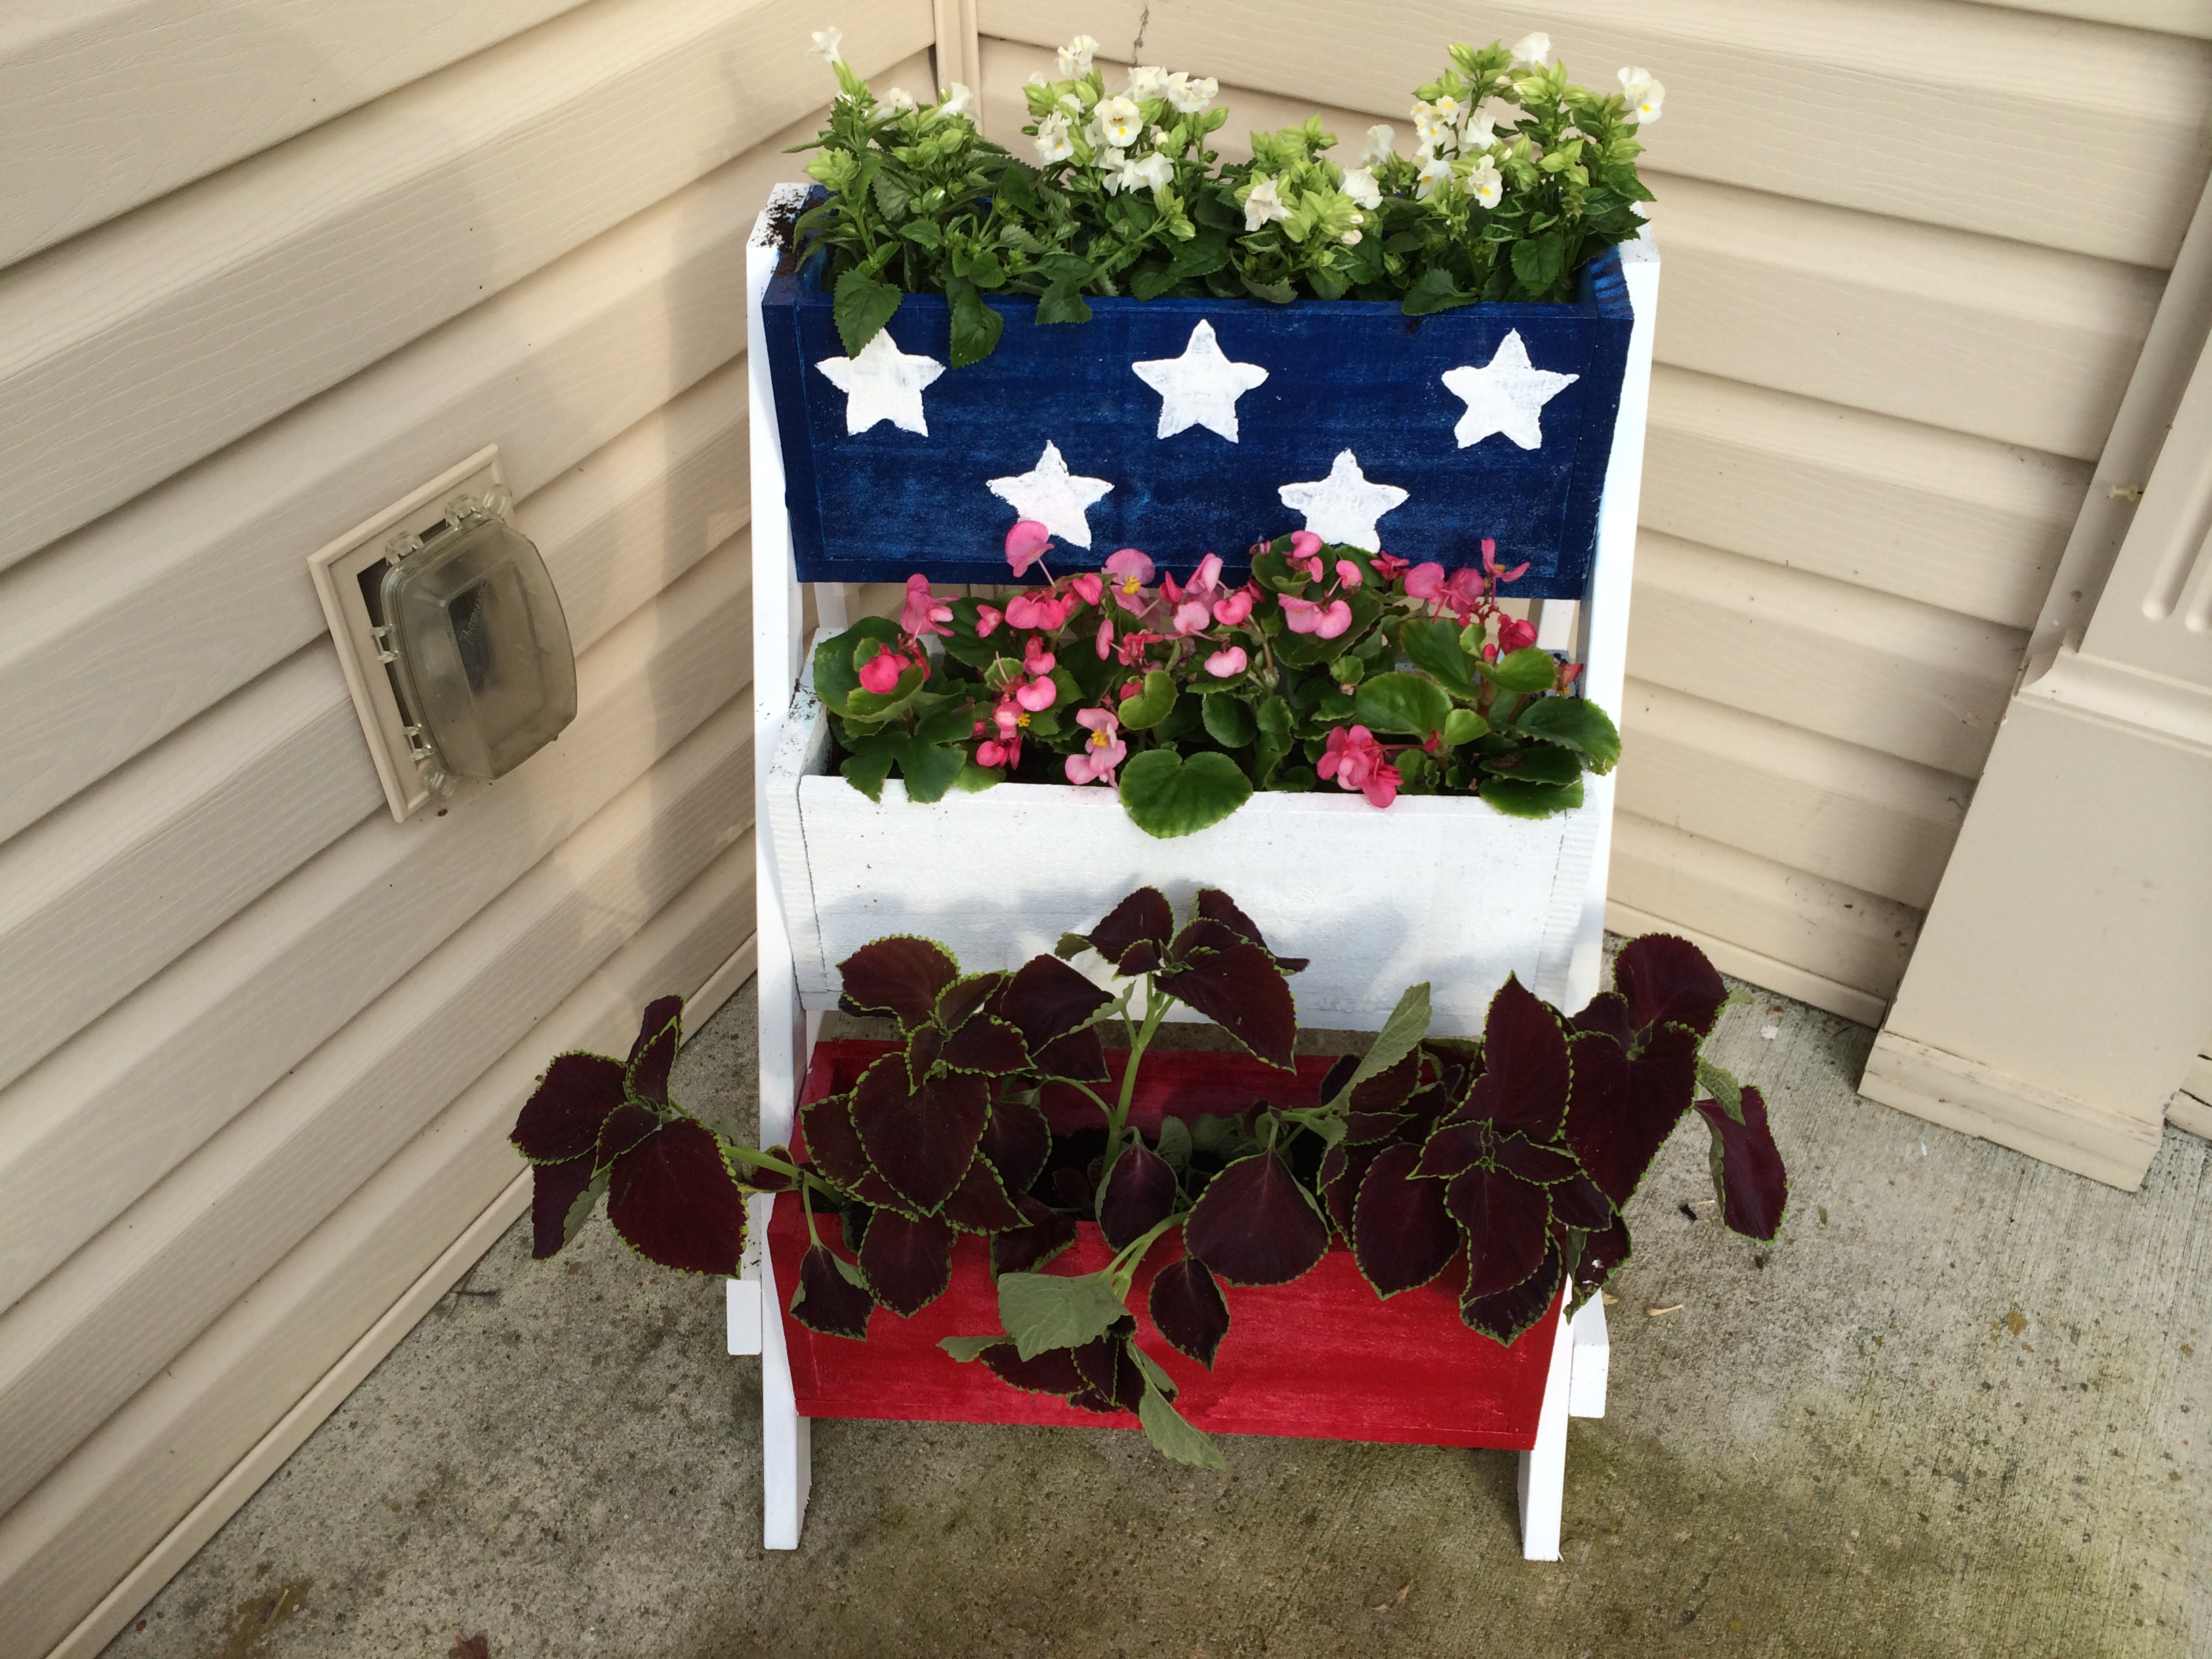
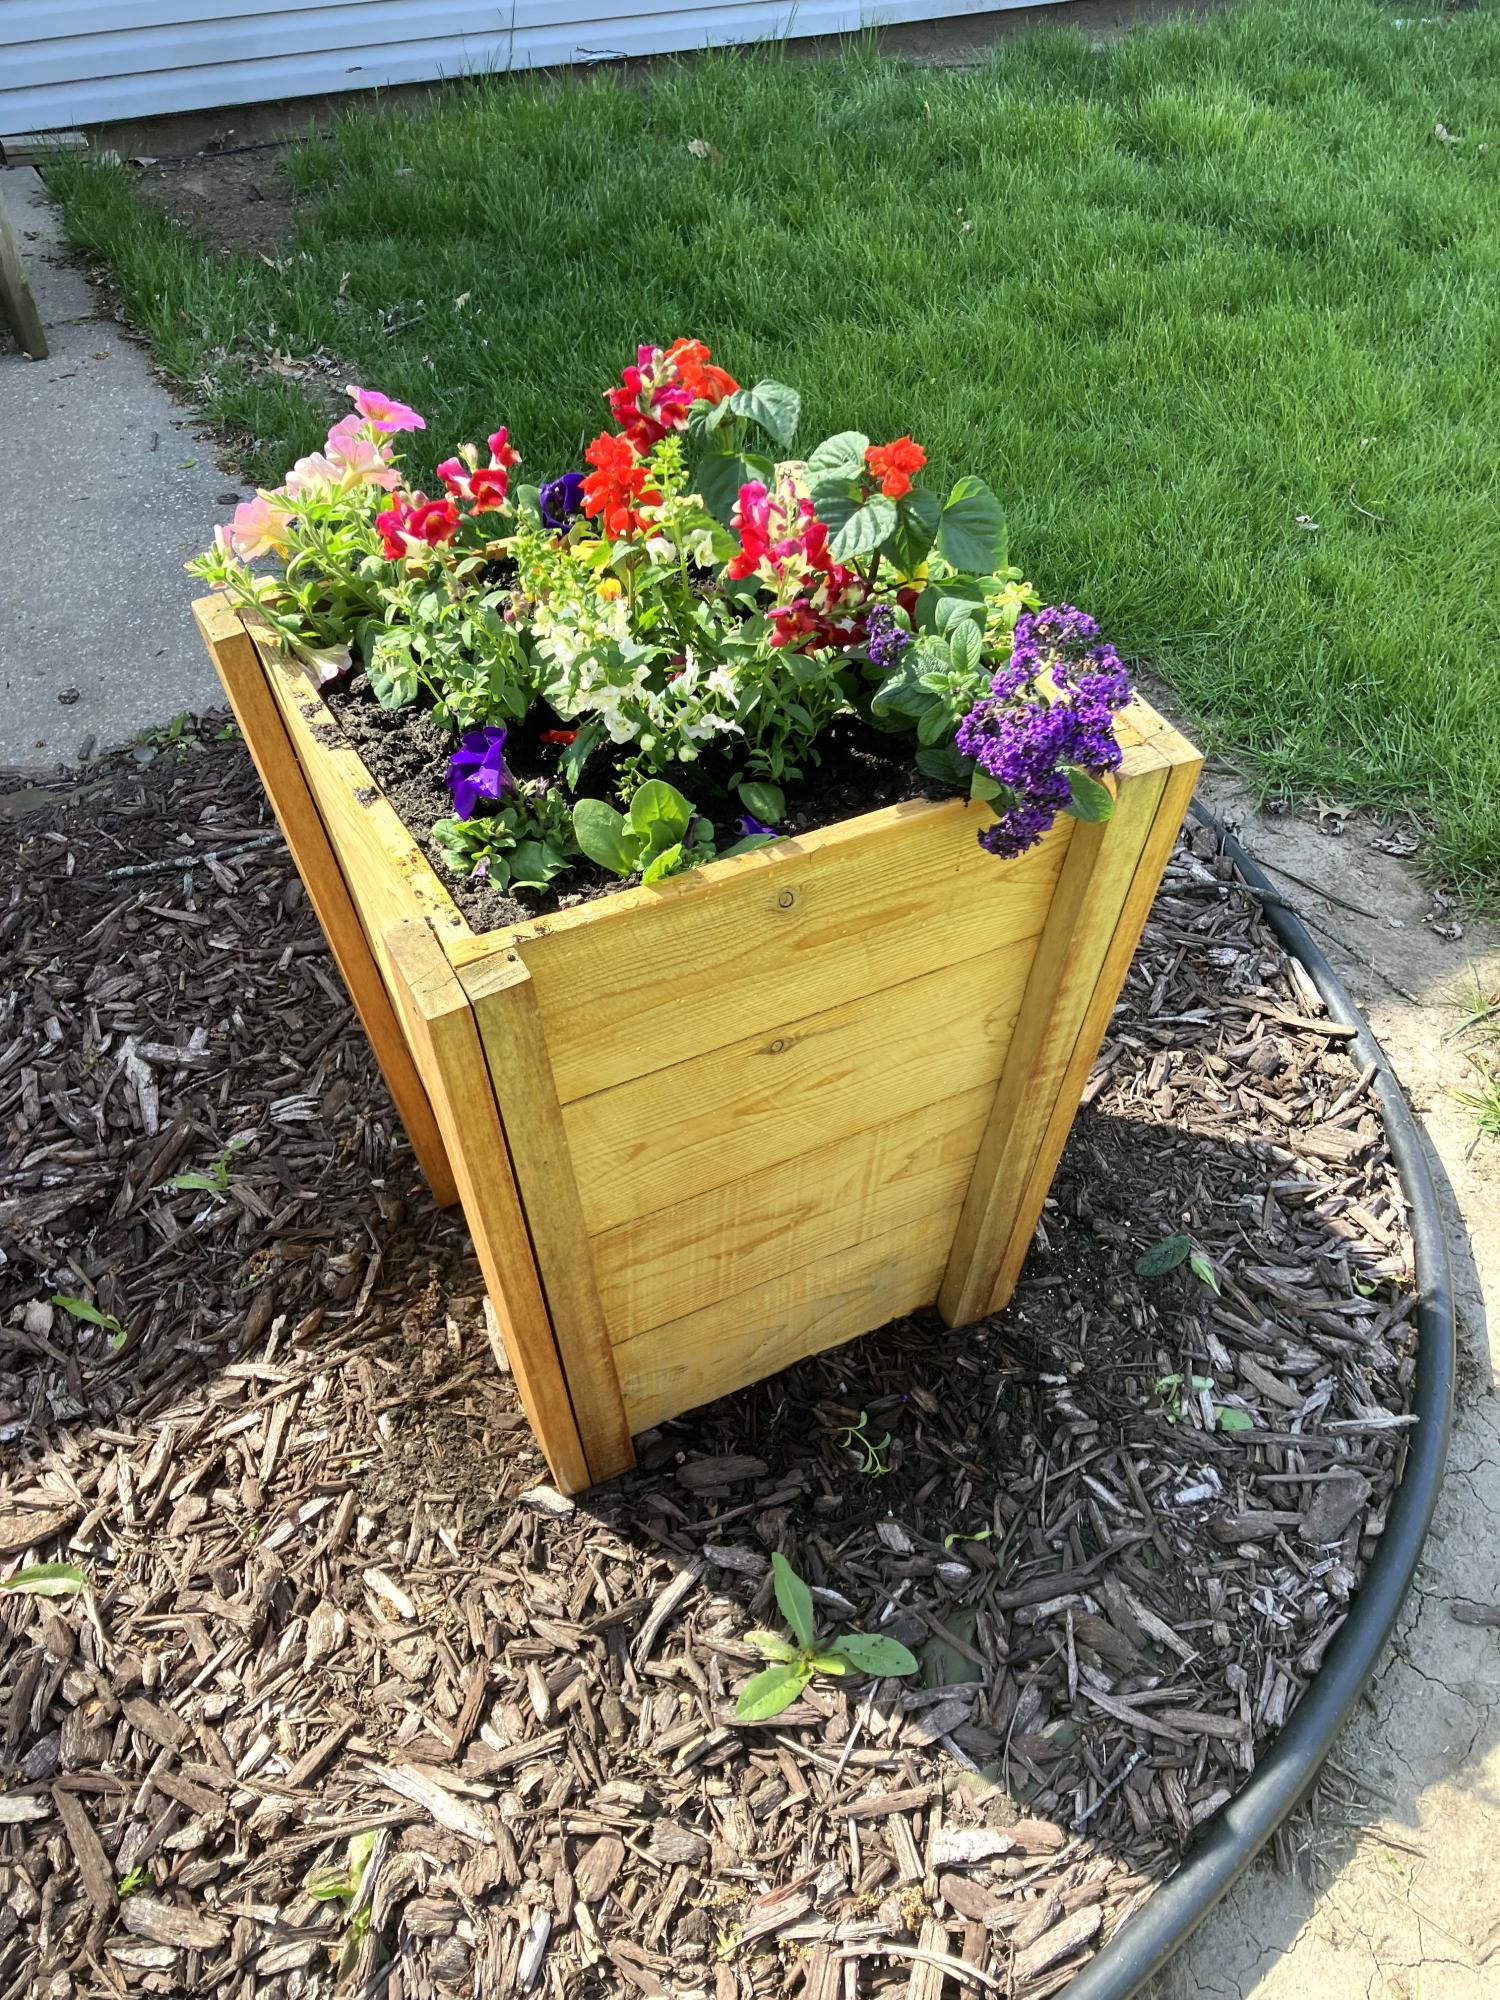
I made this using the $10 Cedar Tiered Flower Planter plans. Painted Red White and Blue with stars.
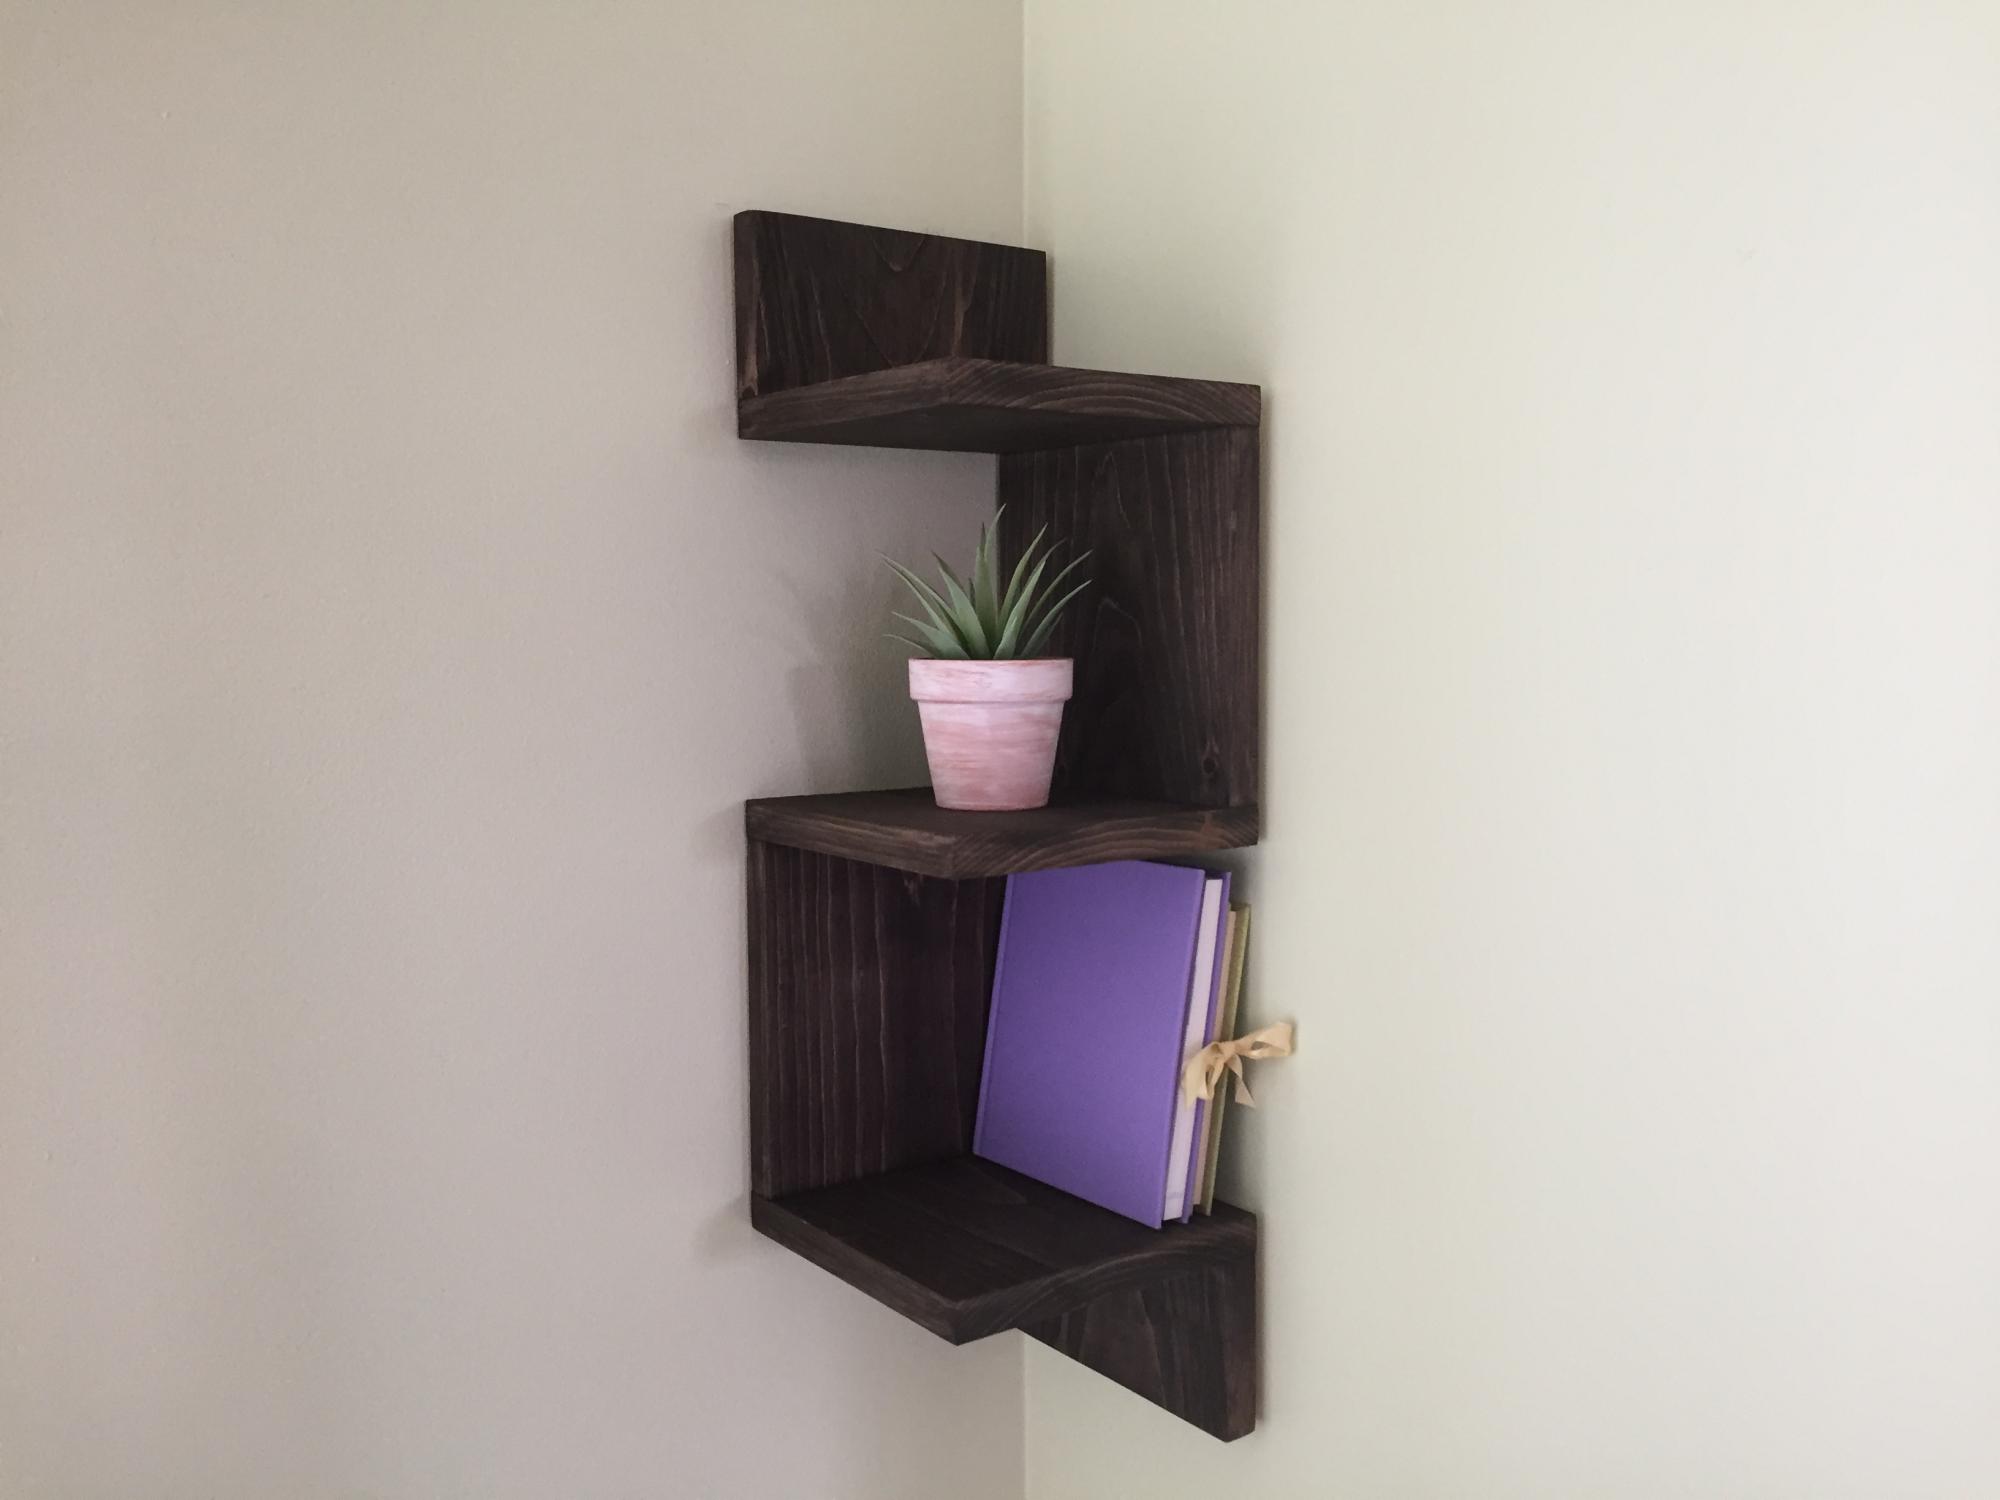
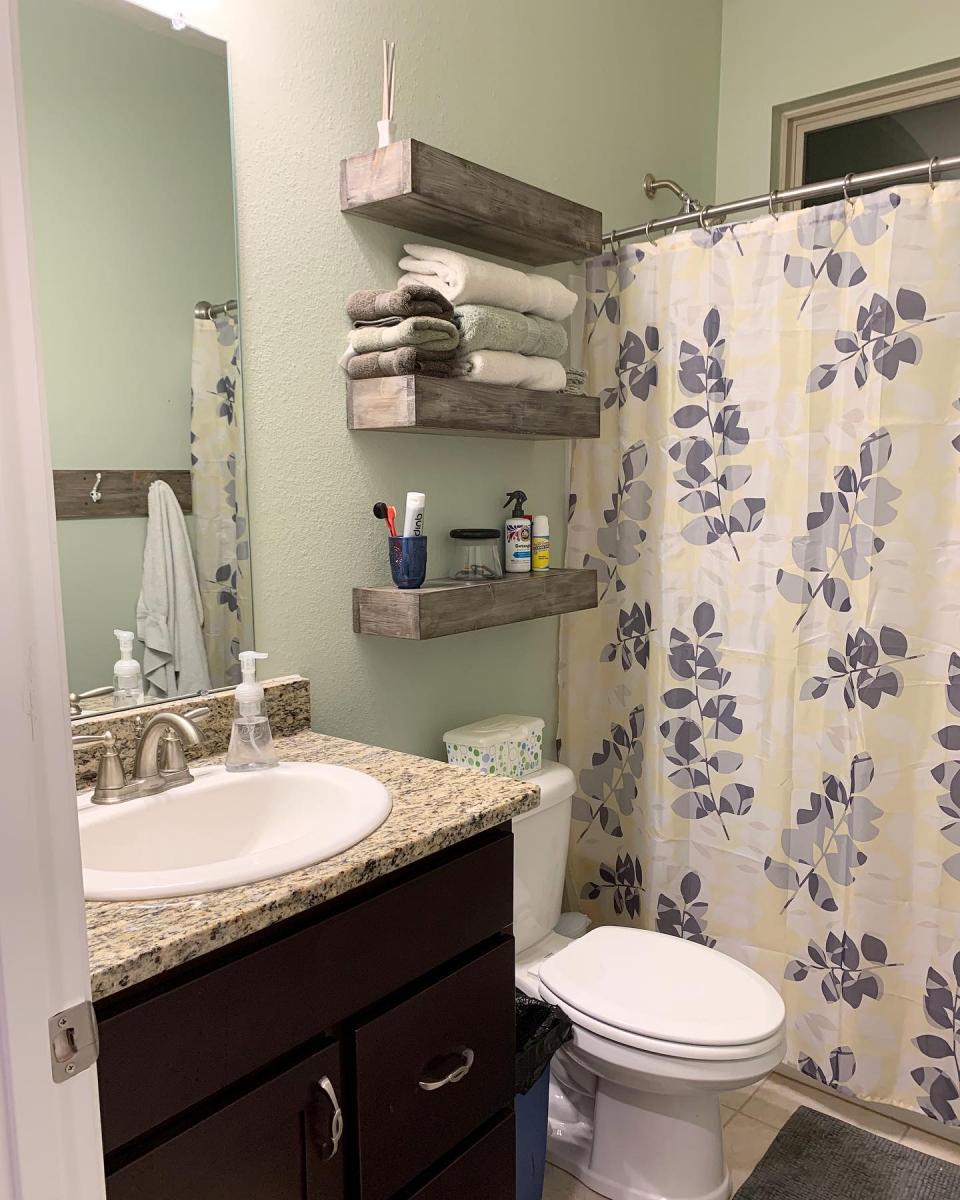
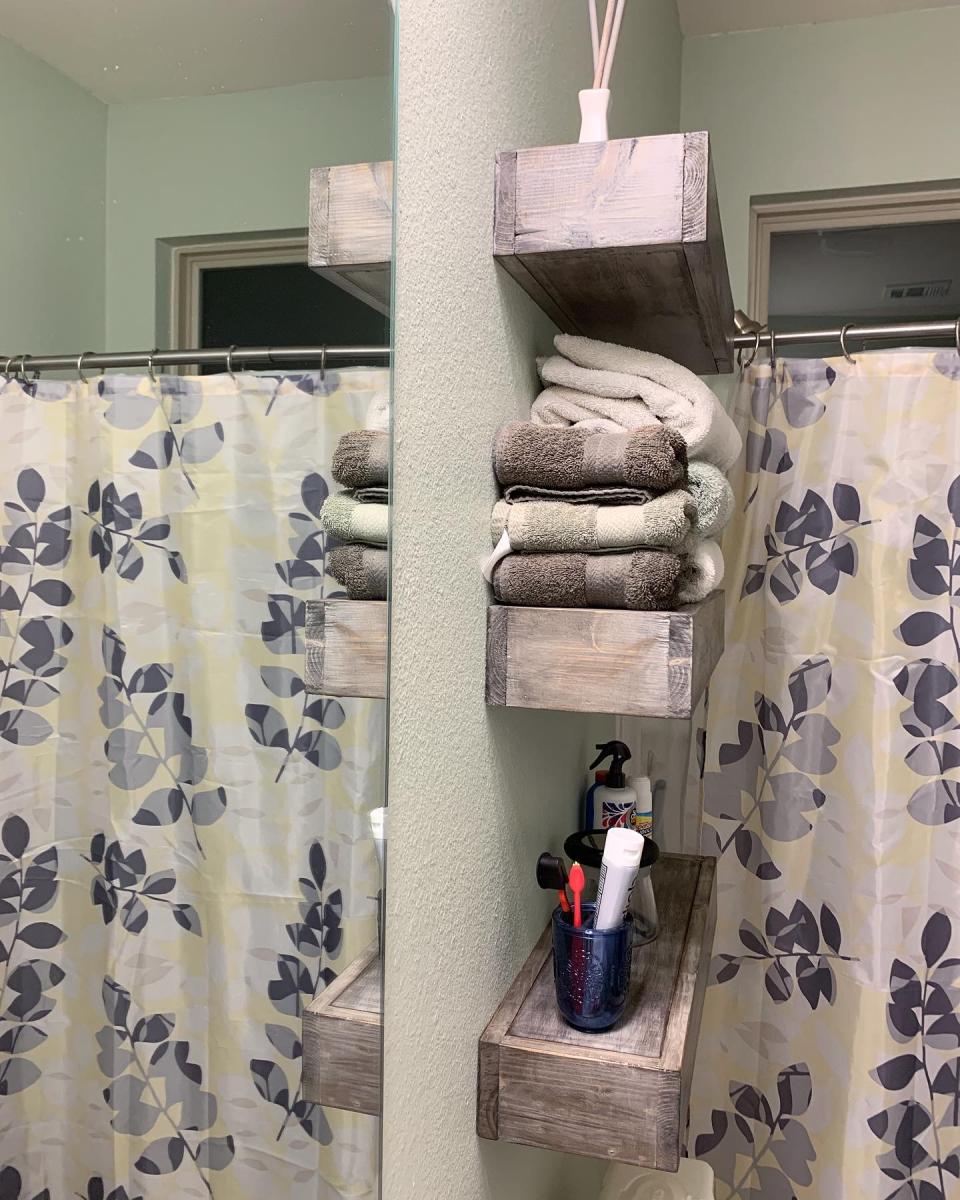
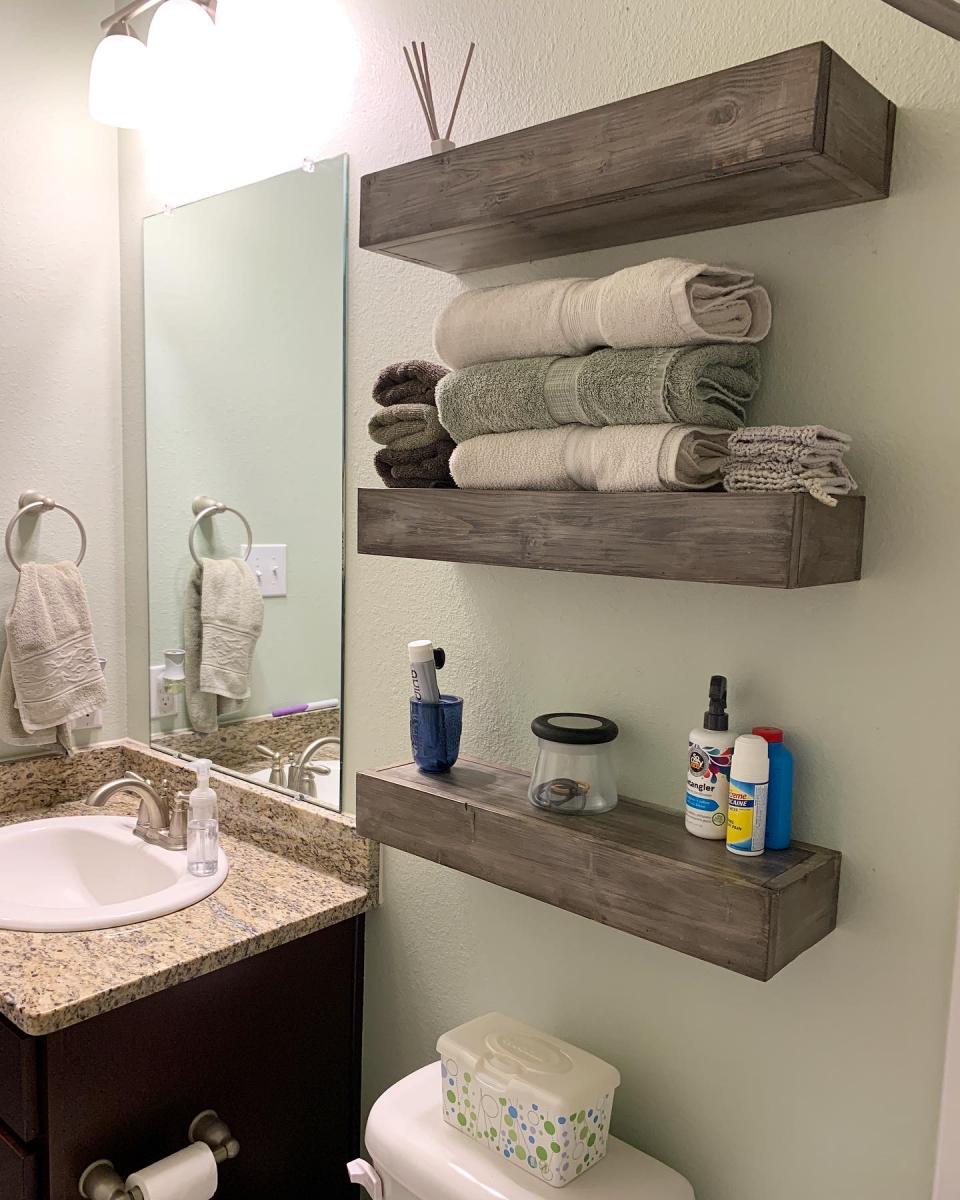
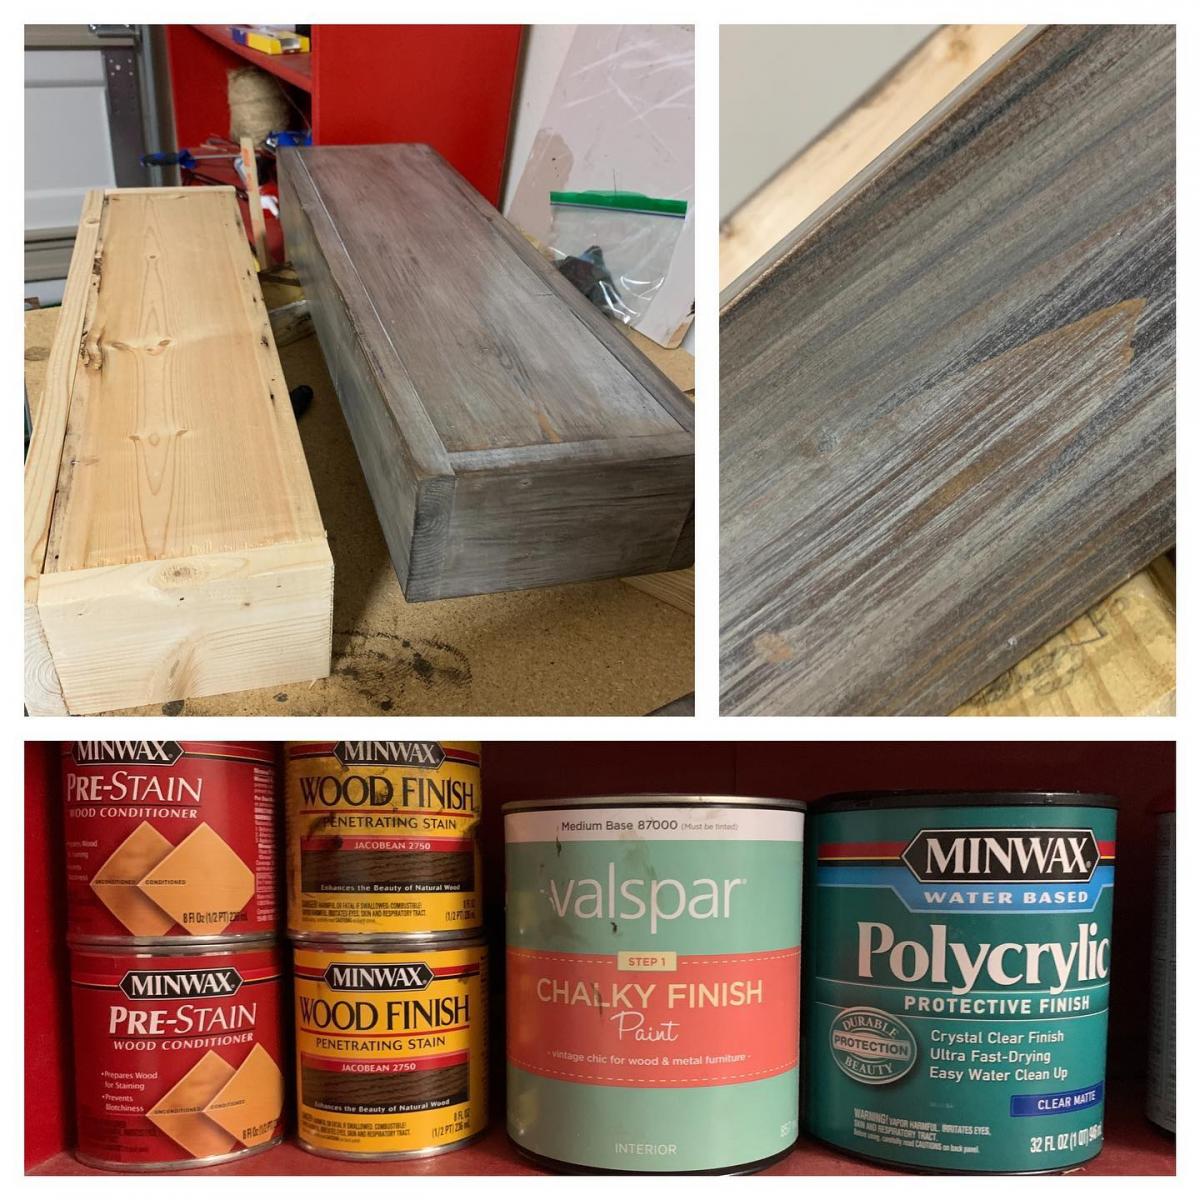
I built these beautiful corner shelves for a friend. It is a great beginner project. I used a 1x8 board but you could also use a 1x10 board. You could also build 5 shelves instead of 3. I used pocket hole joinery.
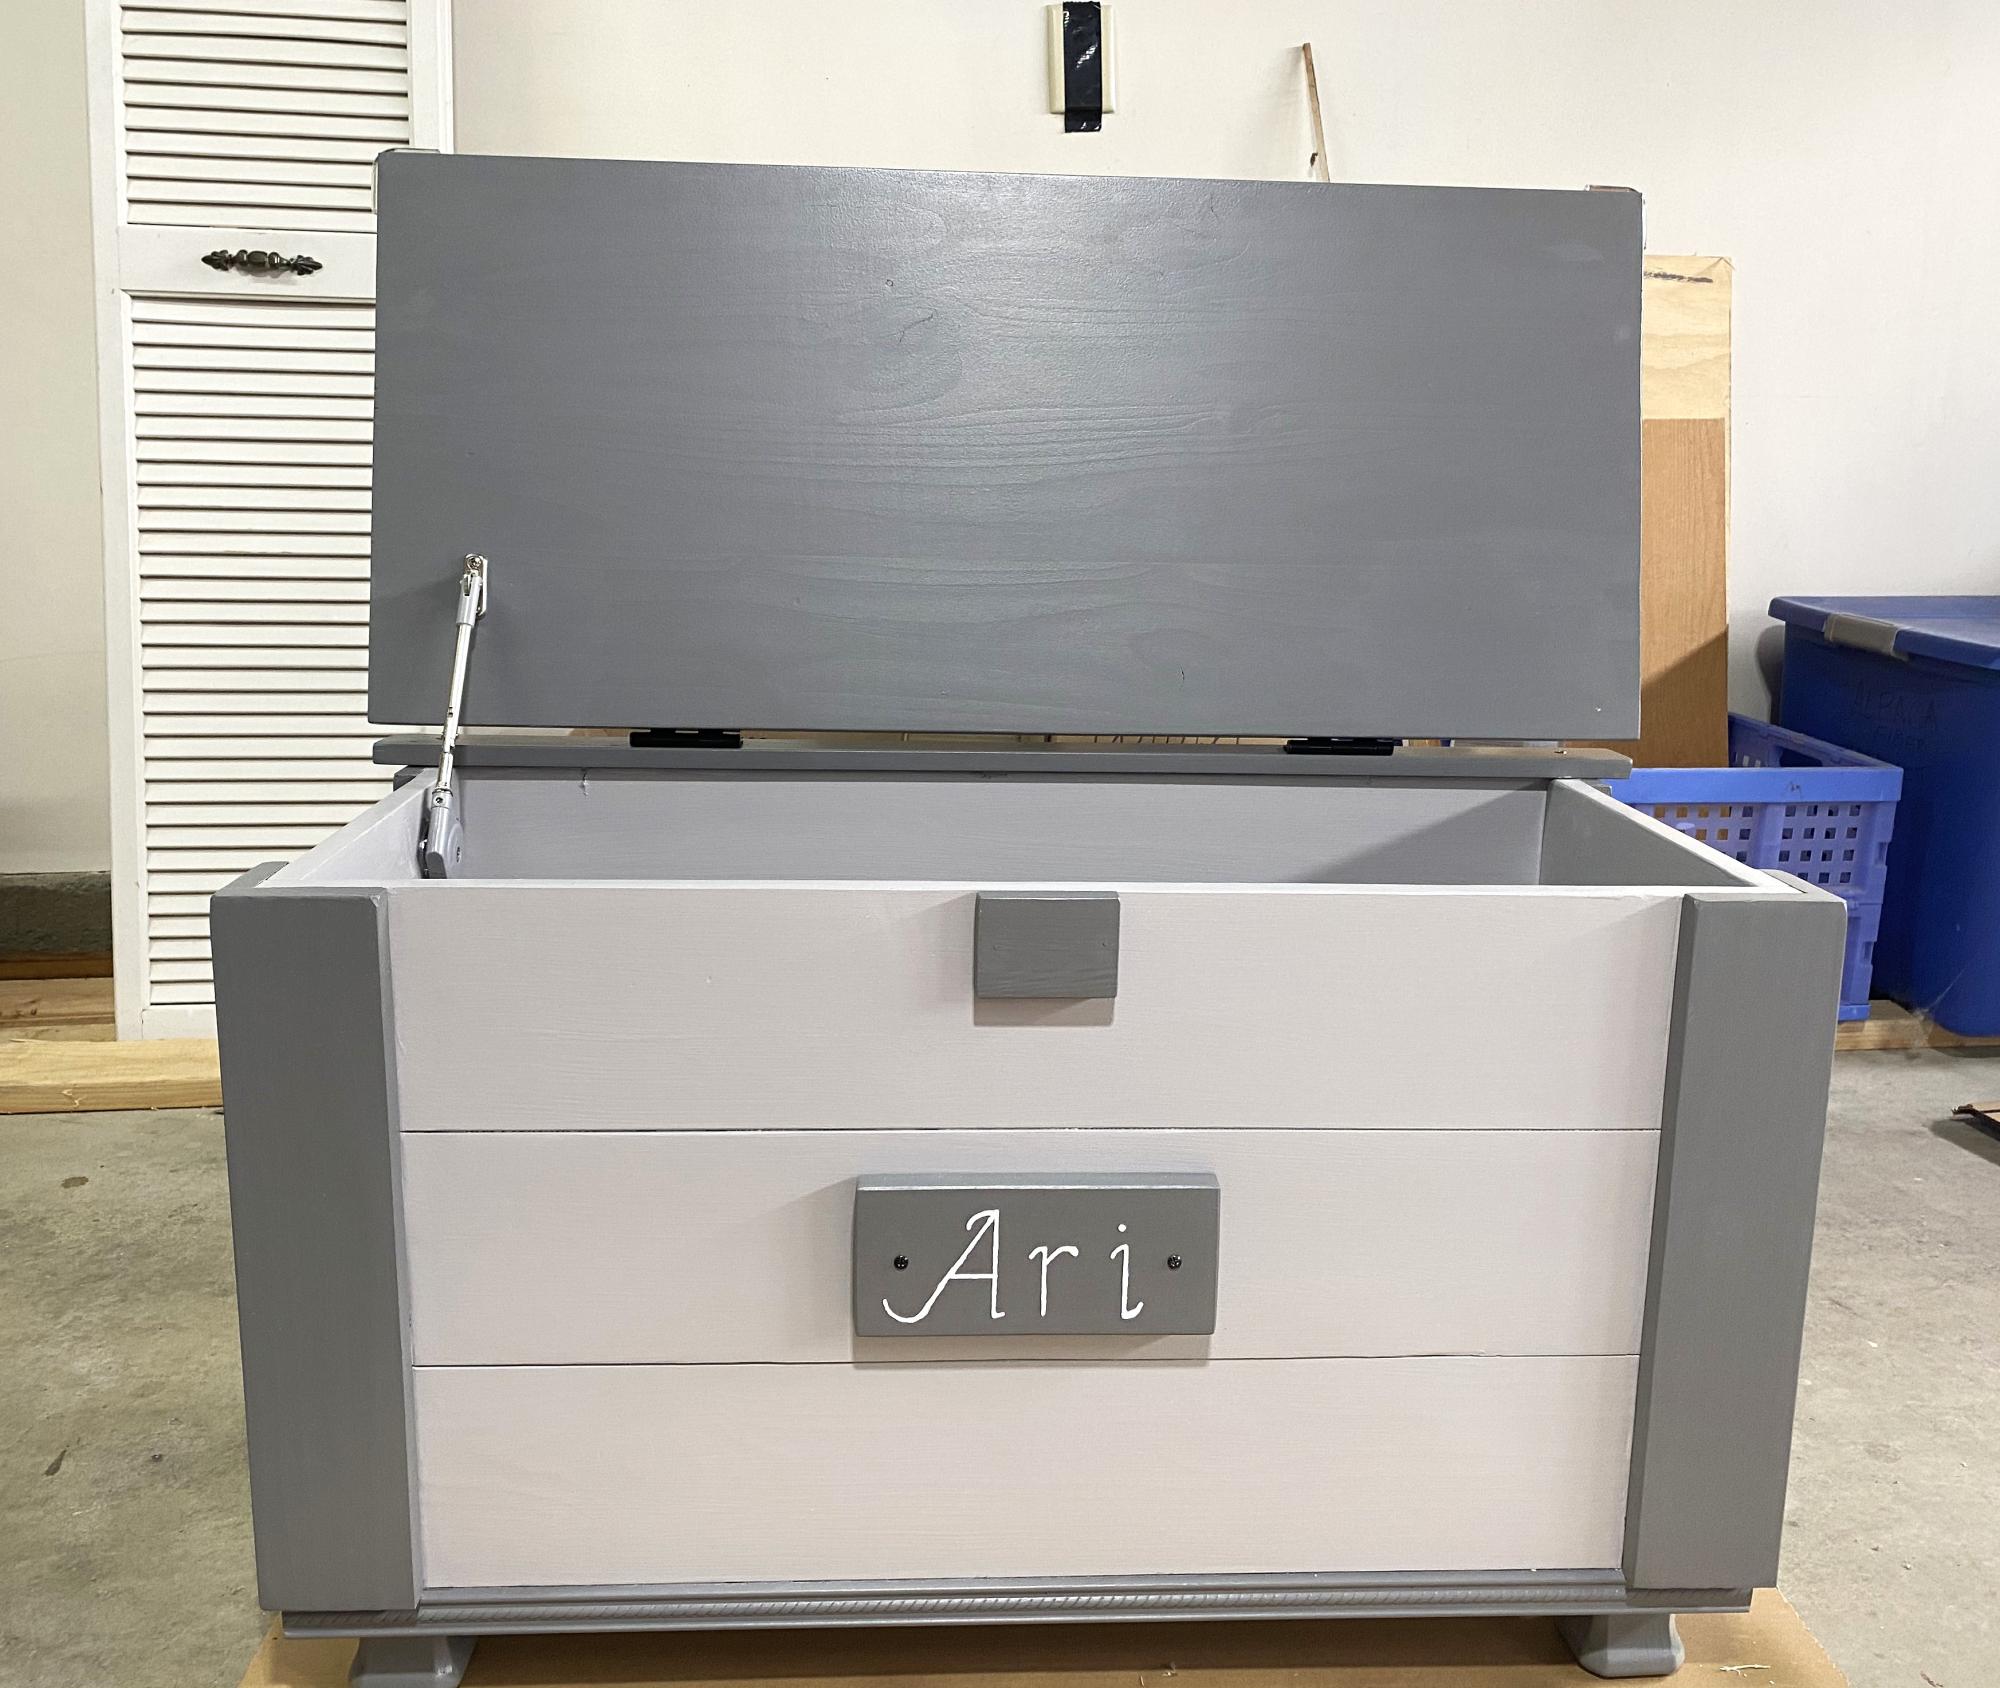
Your plan for this toy box was sooo easy to follow, but I added the feet. My grandson loved it. I have 2 other projects from your plans for him as well.
Charlene
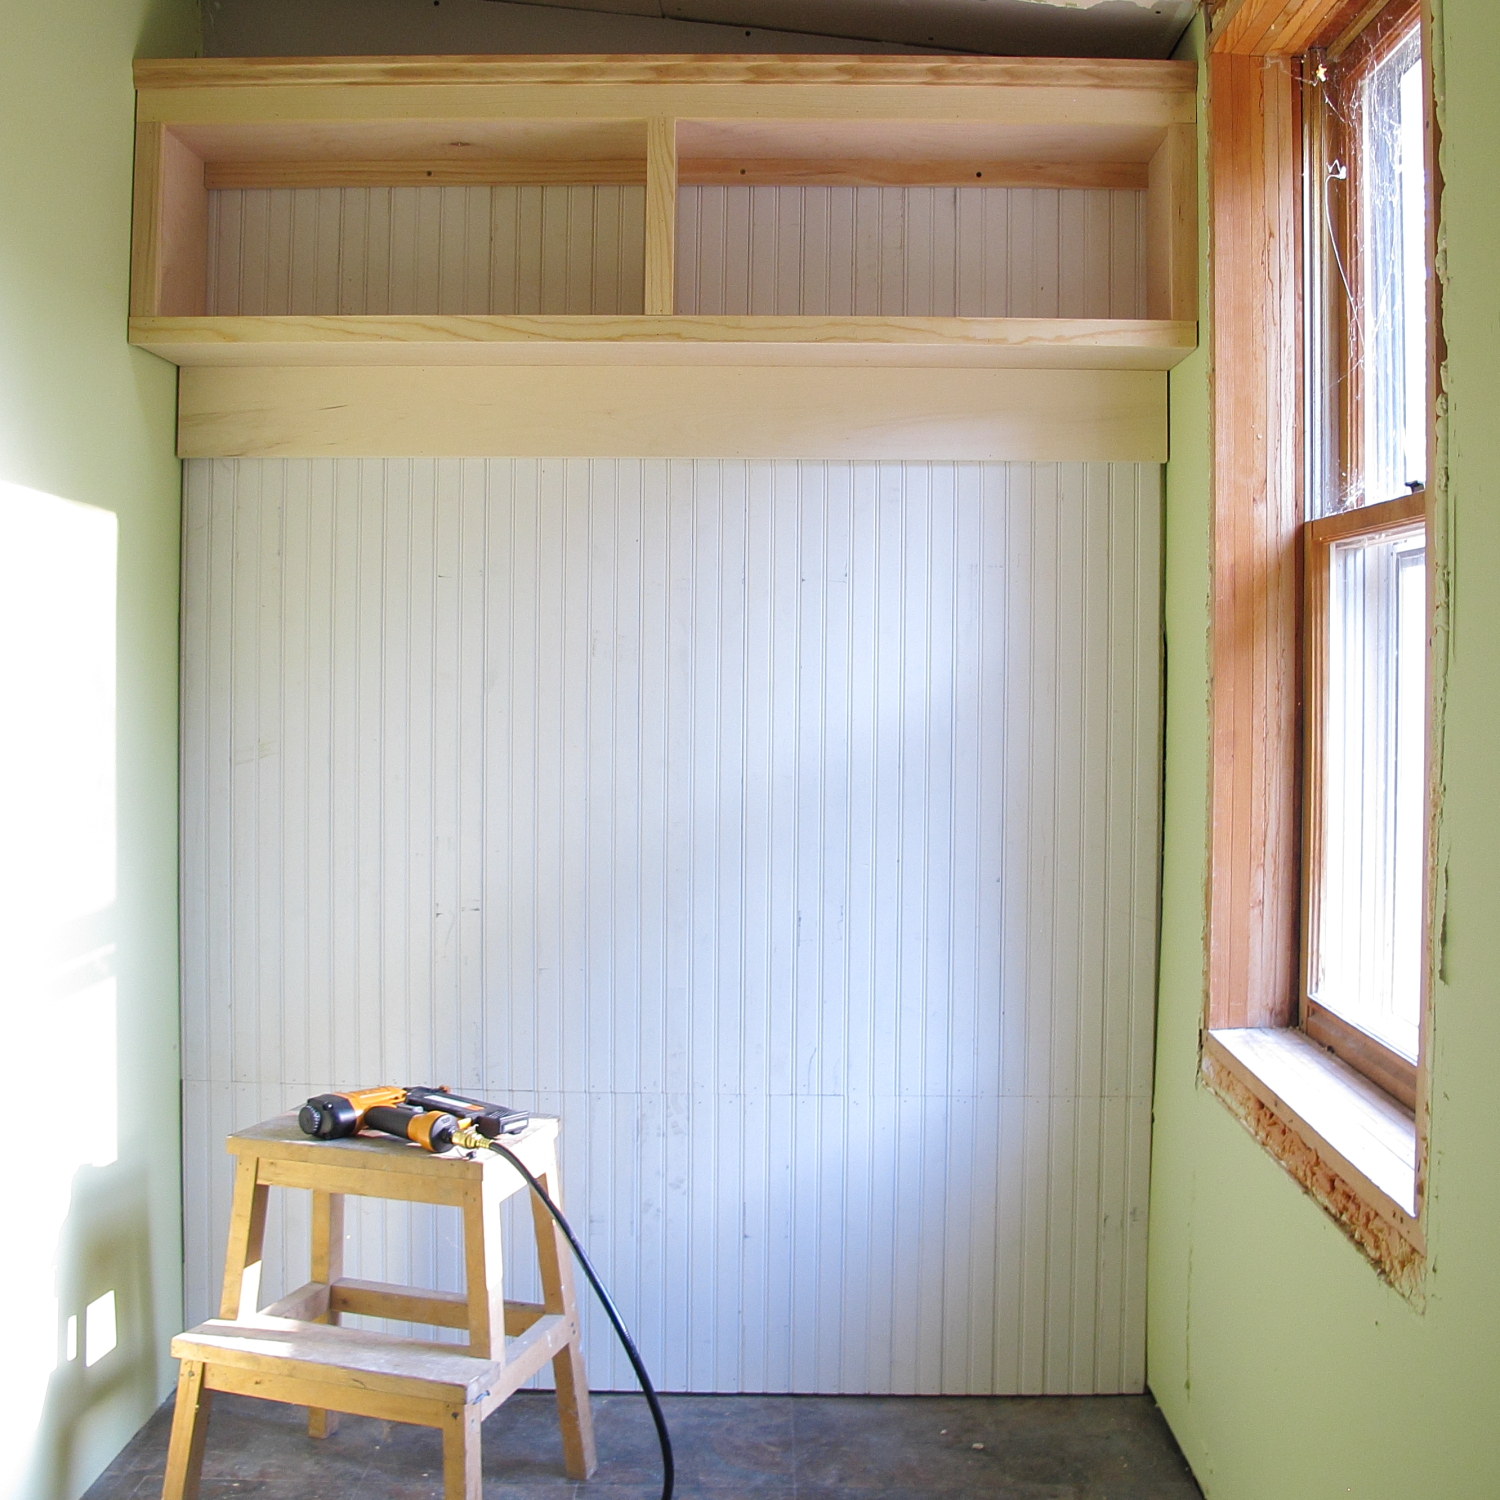
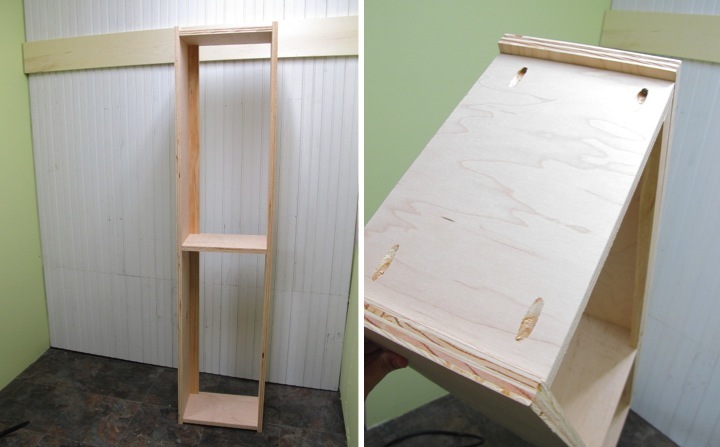
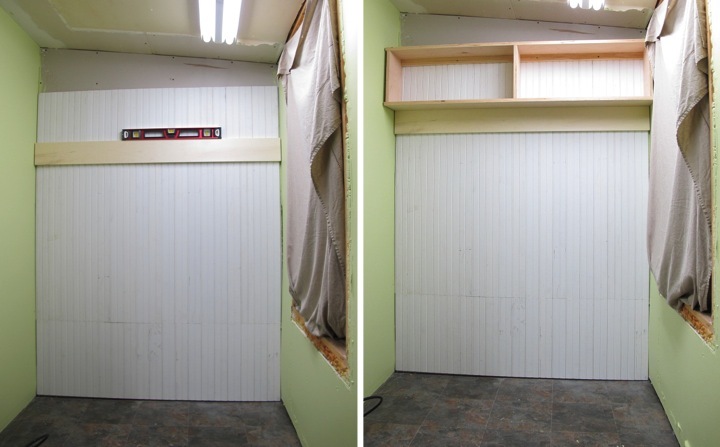
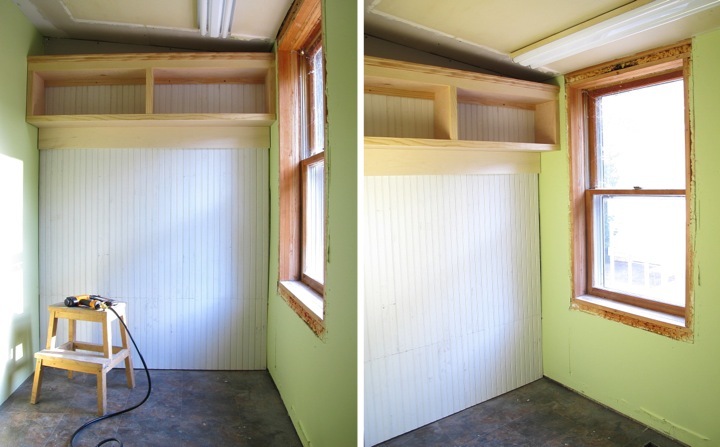
With my beadboard installed and the trim board for my hooks in place in my back entry I was ready to get building. I decided to tackle the shelf first since that would be easier to install without the bench in the way.
For my shelf design I planned it together with my bench so that I could cut everything but the bench top and face framing pieces from a single piece of plywood. Also, the width of my space is a little strange and the shelf couldn't be too deep because of my window location.
I think the shelf turned out cute and I can't wait to prime and paint it and add the coat hooks. I plan to do the finishing work at the same time as the bench so I need to build my bench first though.
For more details, check out my blog: http://homeandawaywithlisa.com/blog/2012/8/30/building-a-storage-shelf-…
Followed directions but altered the length of the bookshelf to fit tight space. Super easy to build, not as easy to put up. Recommend anxious and drilling into the backs of the bookshelf.
Fri, 12/05/2014 - 19:06
I was wondering how they were affixed to the wall? I've read several posts by people and although the plans seem easy enough nothing is noted on how to affix them to the wall...and I have toddlers. Thanks so much.