Community Brag Posts

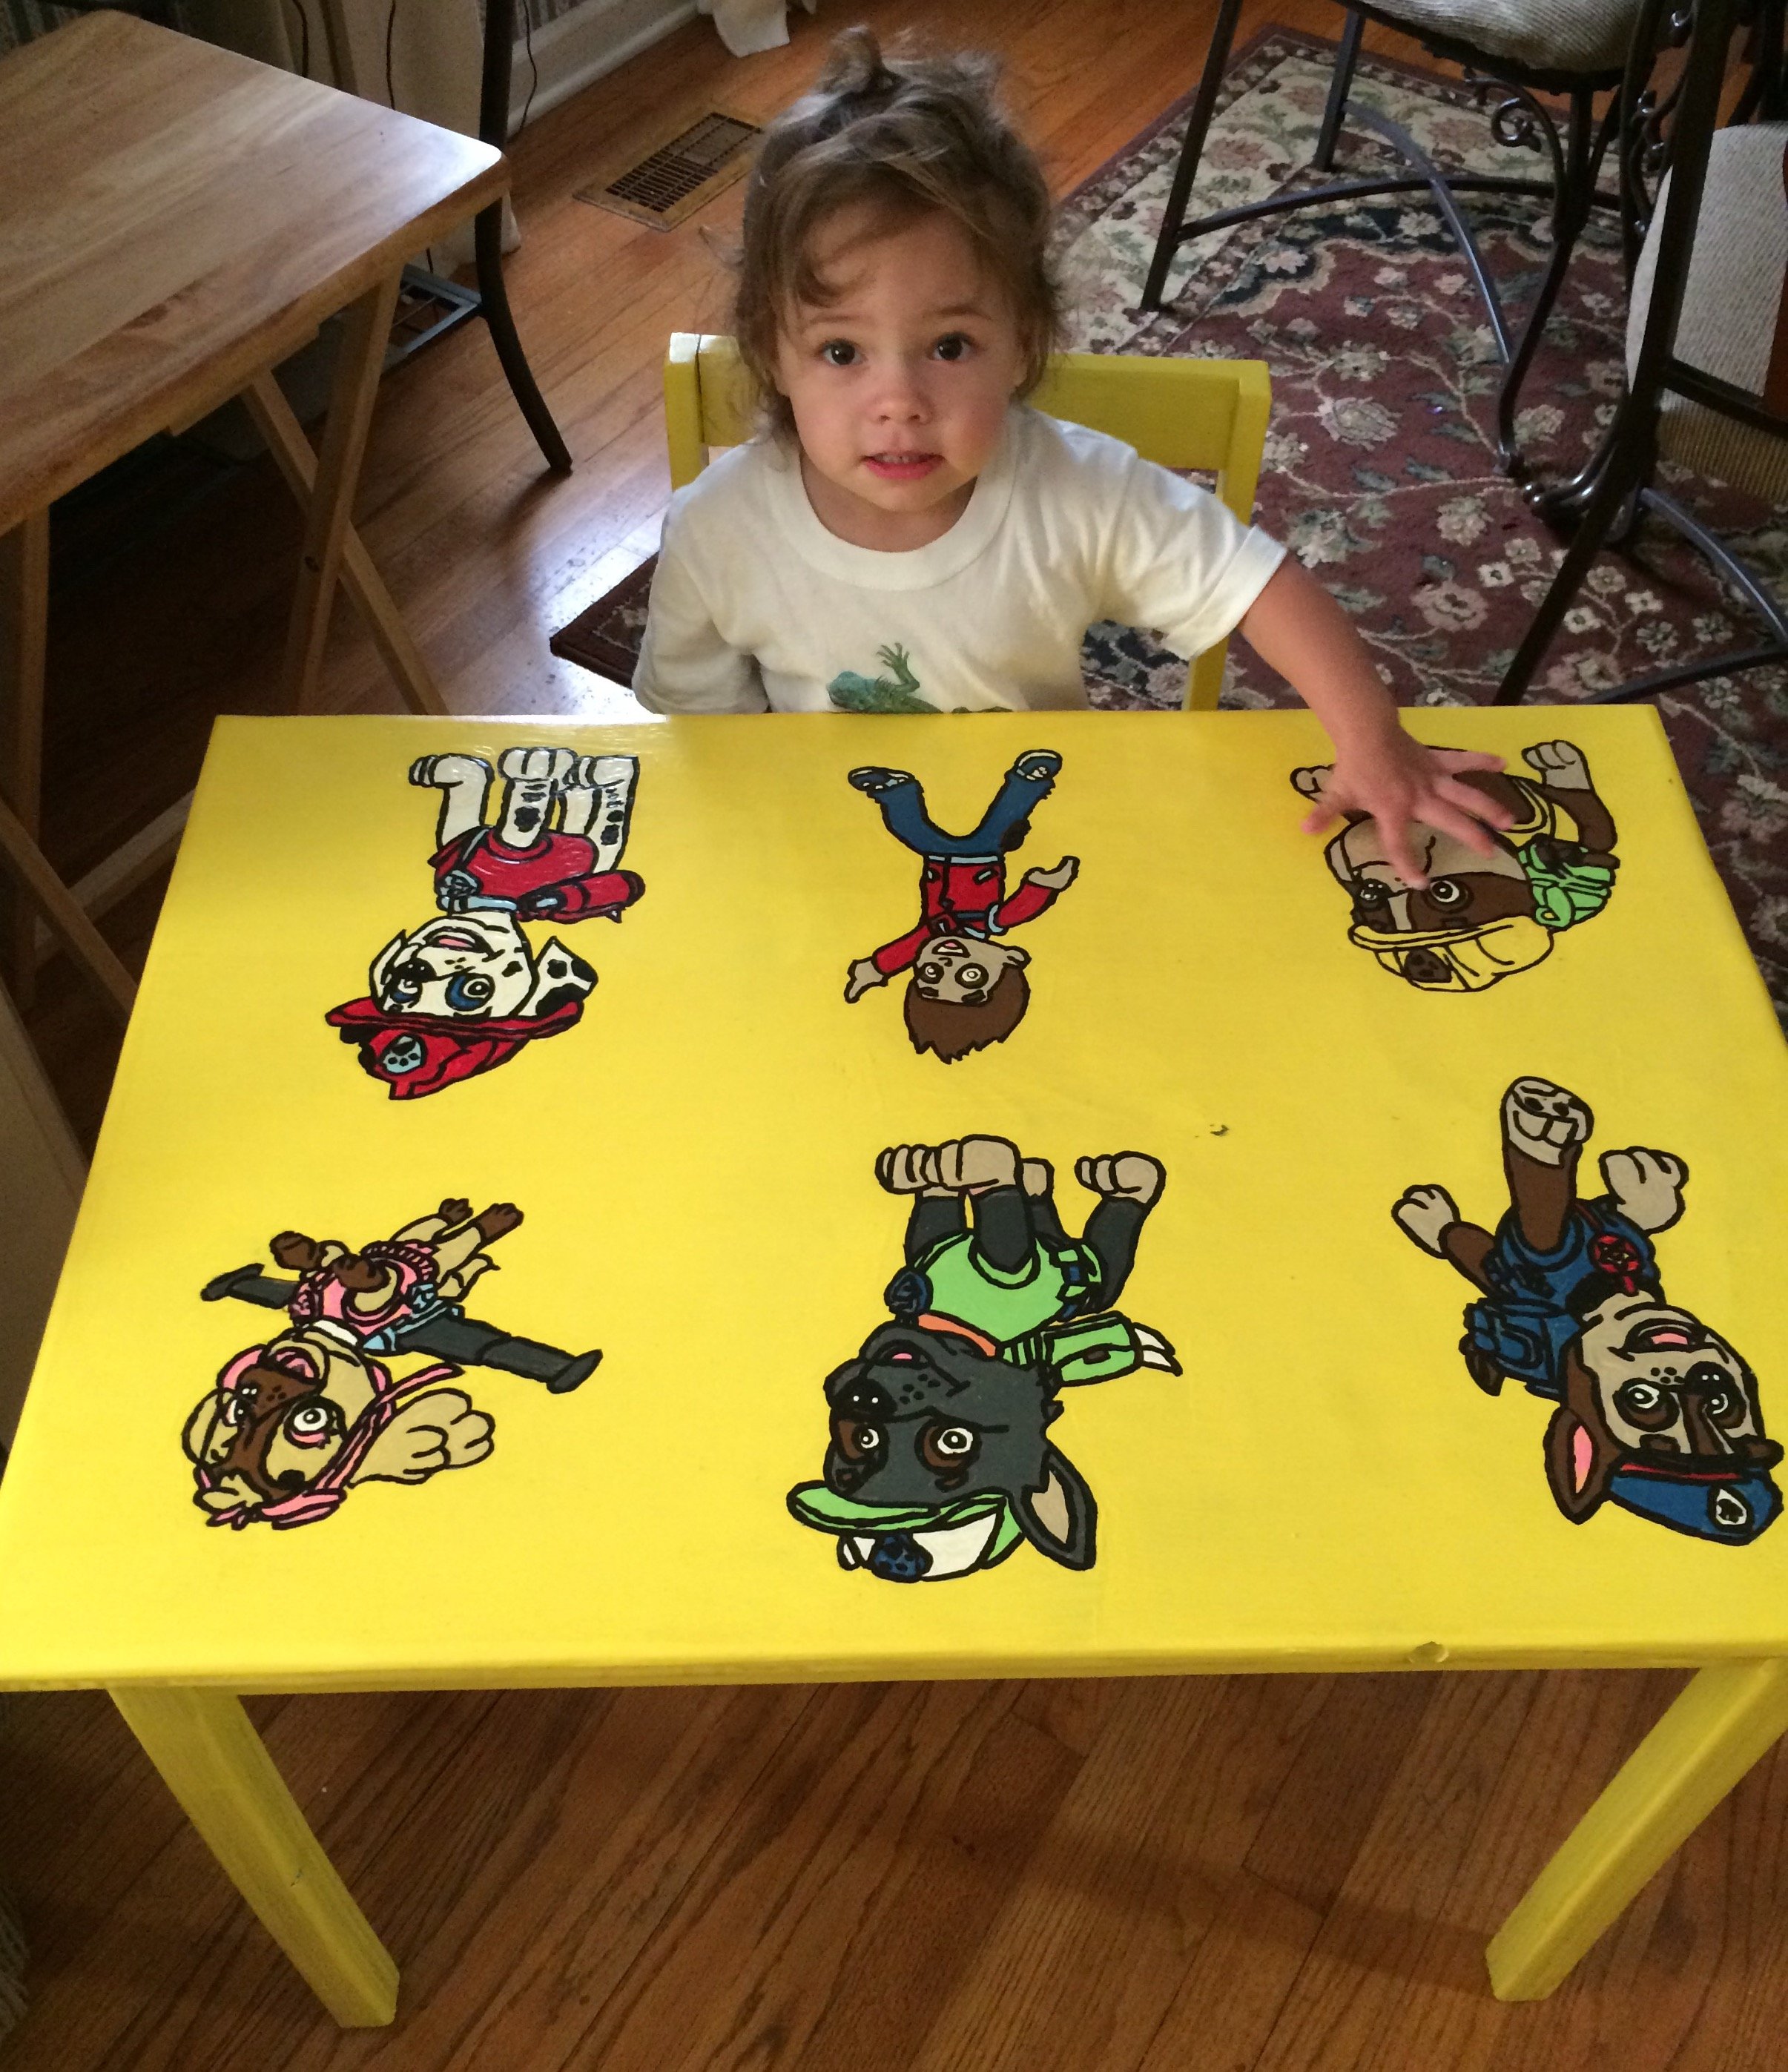
Clara Table and Chair

I was searching for a table and chairs for my son's playroom, and I could not believe the prices! I had just purchased a new saw for some moulding projects around the house, and then I found this site. This table and chair was my first wood working project, and they turned out great! I followed the plans for the Clara table, but used a combination of the 4 dollar chair and modern angle chair. I loved how the chair turned out. I am currently working on the second. I used poplar instead of pine which increased the cost. I wanted a weathered finish, I ended up using water-based walnut stain over a white wash. I am so happy I found this site, my next project is patio furniture.
Built from Plan(s)
Estimated Time Investment
Afternoon Project (3-6 Hours)
Finish Used
Minwax white wash followed by Minwax water-based walnut
Recommended Skill Level
Beginner
Comments
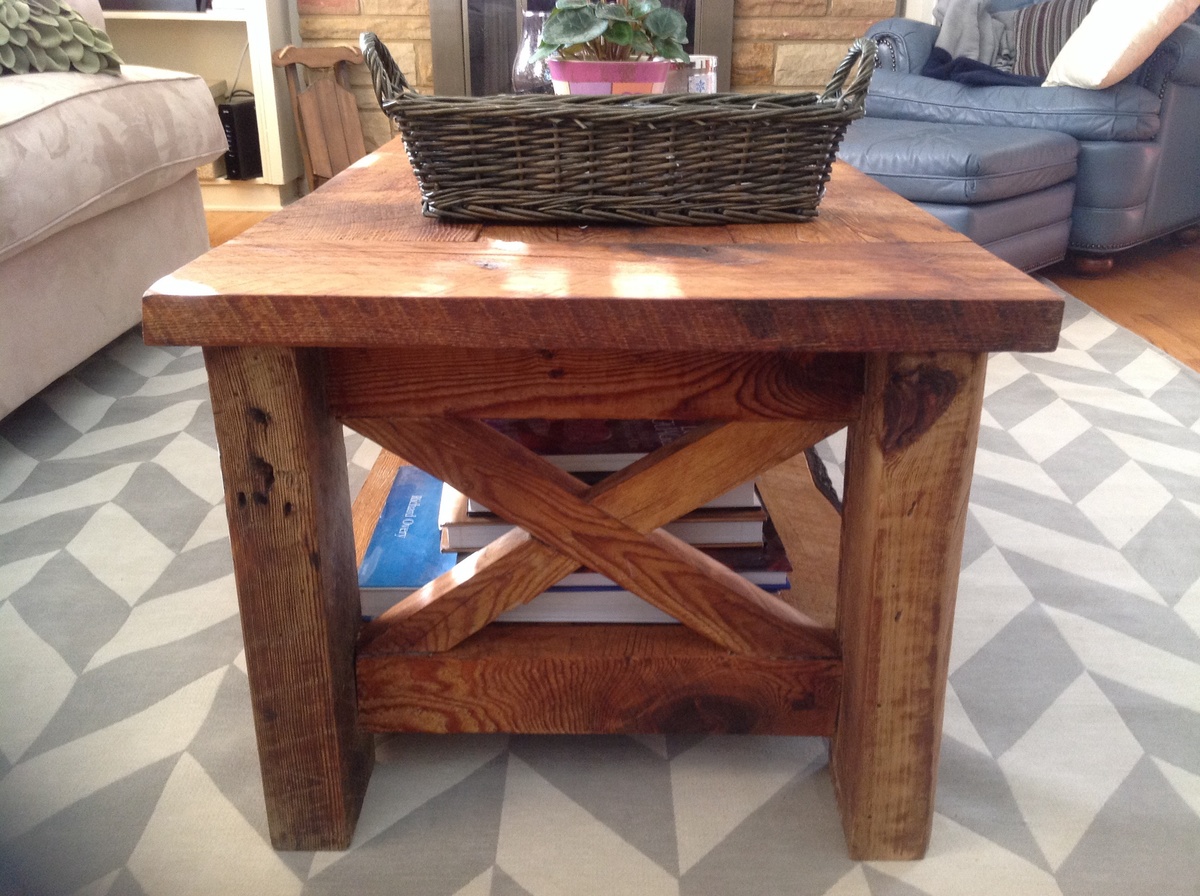
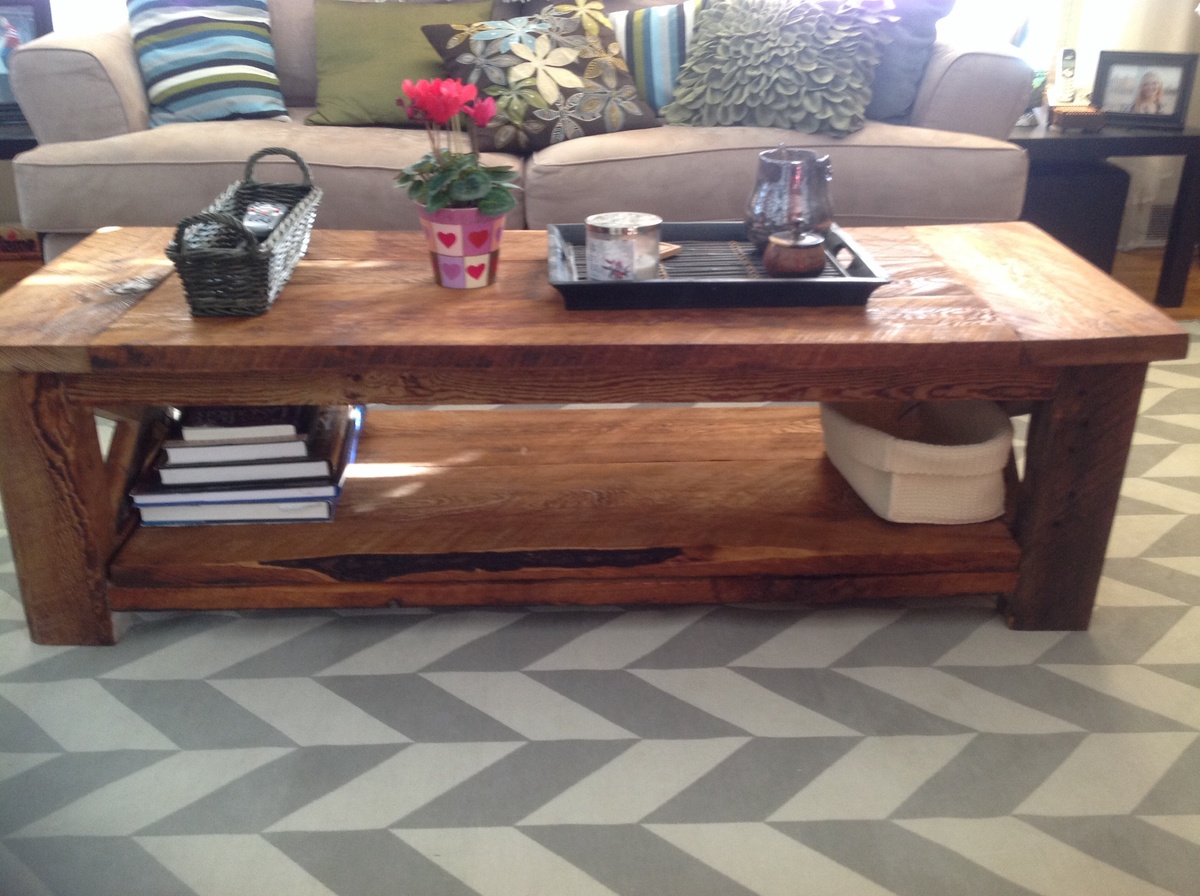
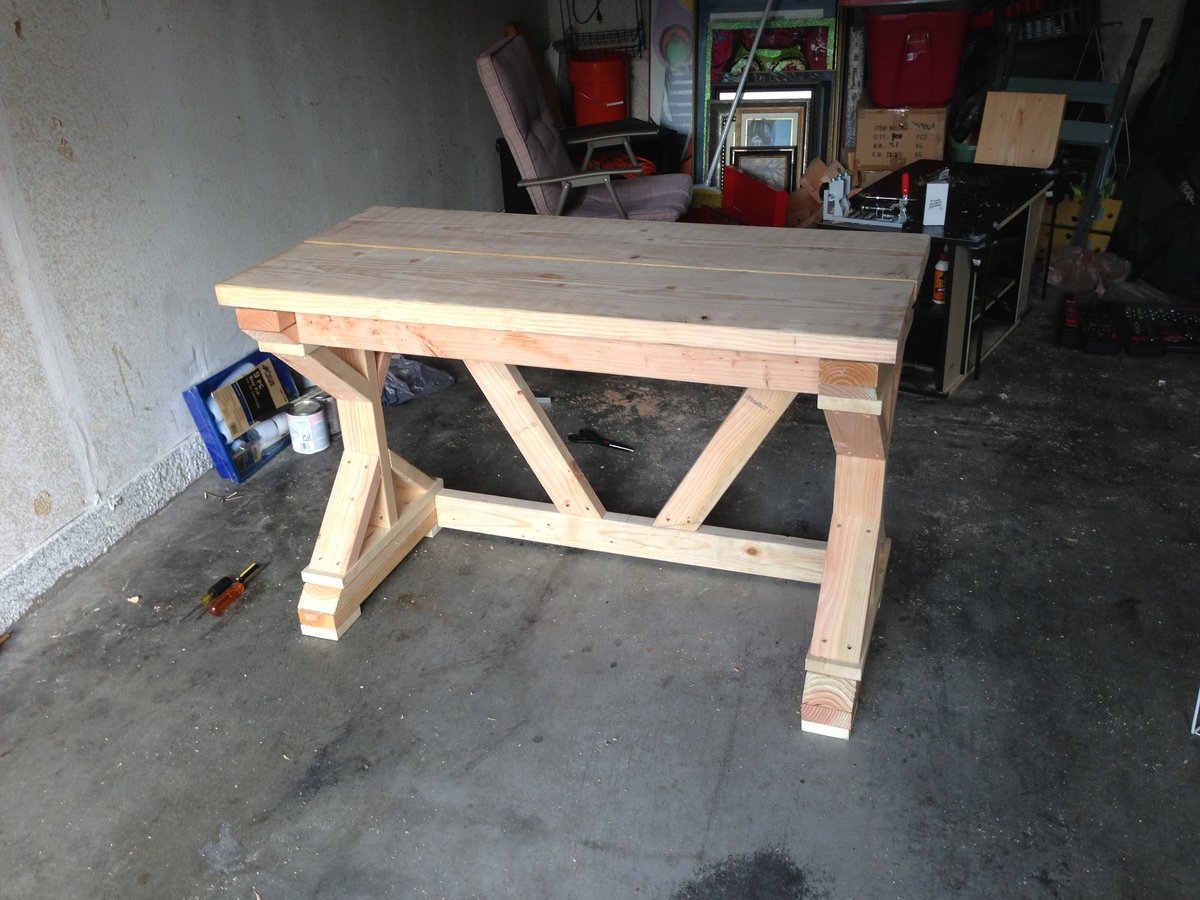
Rustic x coffee table

I was lucky enough to have 100 year old barn wood for this table! I used this rustic plan, but made a few tweaks of my own
For the bottom I decided to rest the shelf on top of the rails instead of pocket screwing them in from the side. I thought this would show more character of the barn wood (saw marks, knots, etc) while adding stability. With that change, you also need to adjust the height of the end rails (under the cross brace) to make it flush with the shelf.
For the top I decided to use bread boards instead. They are all fastened with 2 1/2" pocket screws (with a kreg jig), as are all of the rails and bottom shelf boards. For a different look, I recessed the x-brace and end rails to the inner third of the legs instead of flush to the outside. However, this made it difficult to screw the x-braces in, so those are just glued in place (with good quality wood adhesive!). Thankfully, they feel very sturdy and don't need screws! Also, the fact that they are recessed reduces the chance they are kicked or bumped.
I sanded through 220, to keep all of the original marks yet make it smooth to the touch
I finished it with 100% pure tung oil, which made the texture of the wood really pop, and turned it to a nice dark amber. It would be a shame to make this wood hide behind stain and poly forever. Tung oil is the best if you want imperfections highlighted, yet want a nice sheen. The top boards got 5 coats, the bottom shelf 3 coats, and the frame 2.
Built from Plan(s)
Estimated Time Investment
Week Long Project (20 Hours or More)
Finish Used
Tung oil 100% pure
Recommended Skill Level
Intermediate
Comments

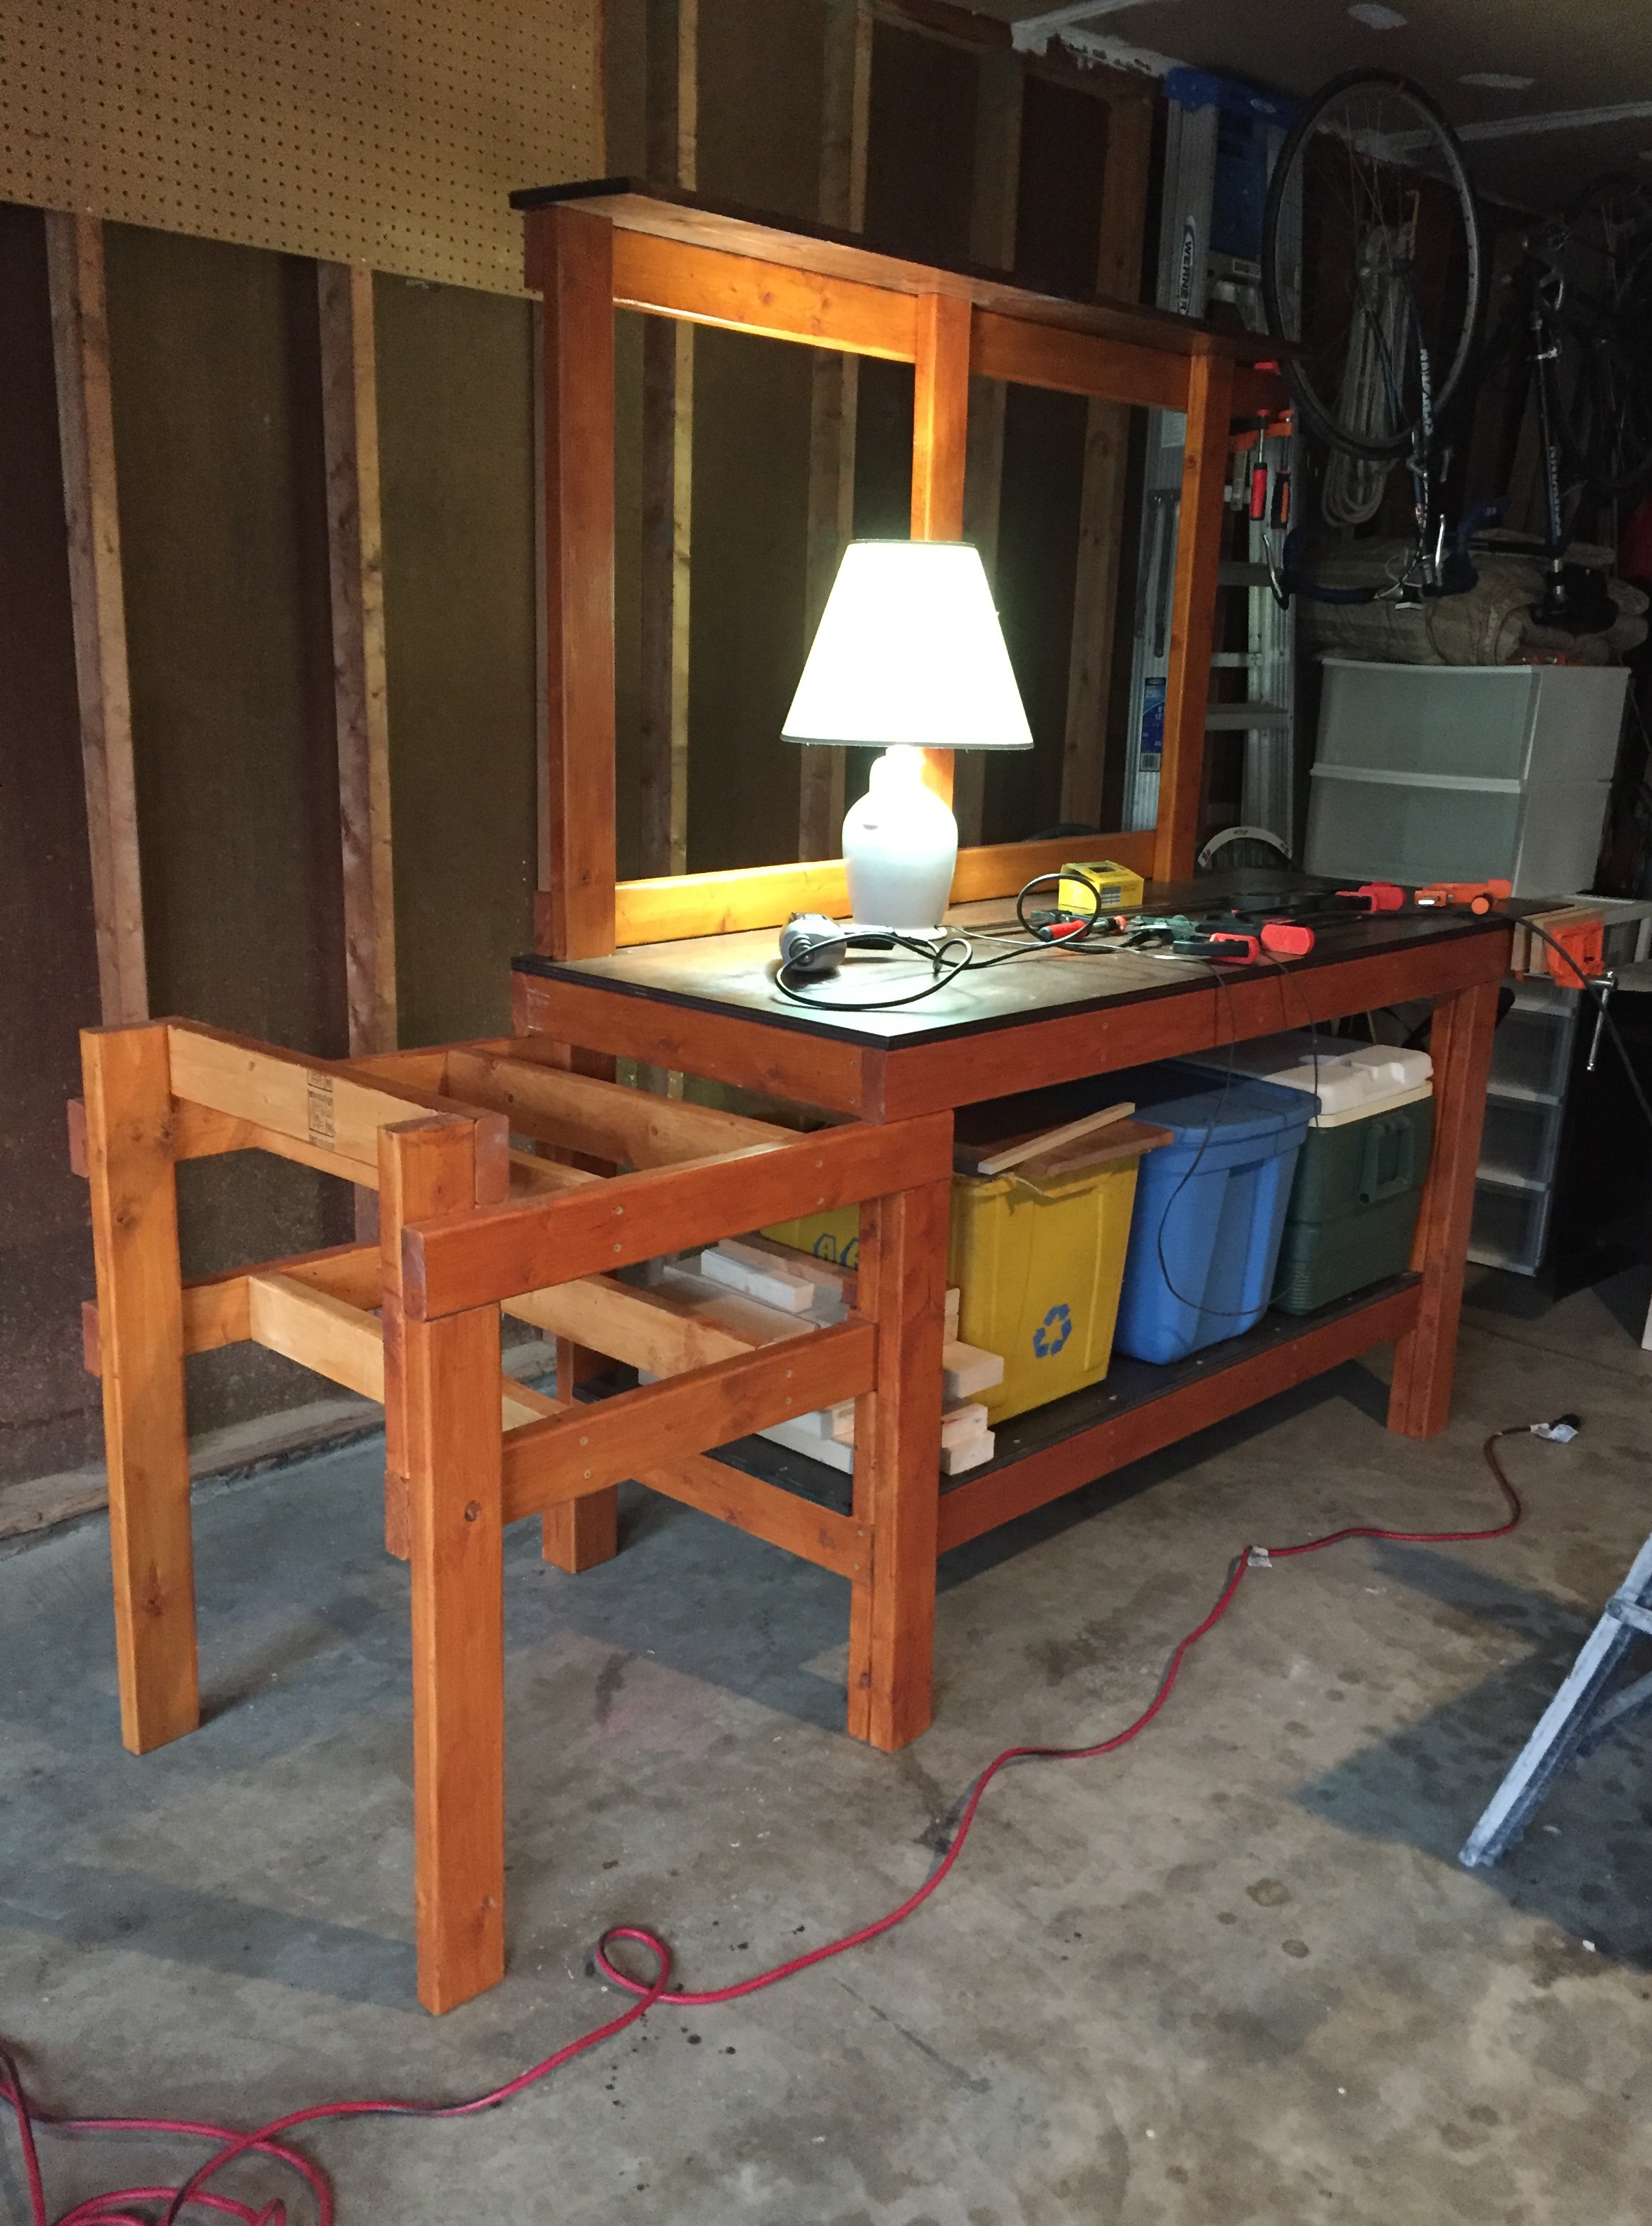
Workbench to look good and get the job done
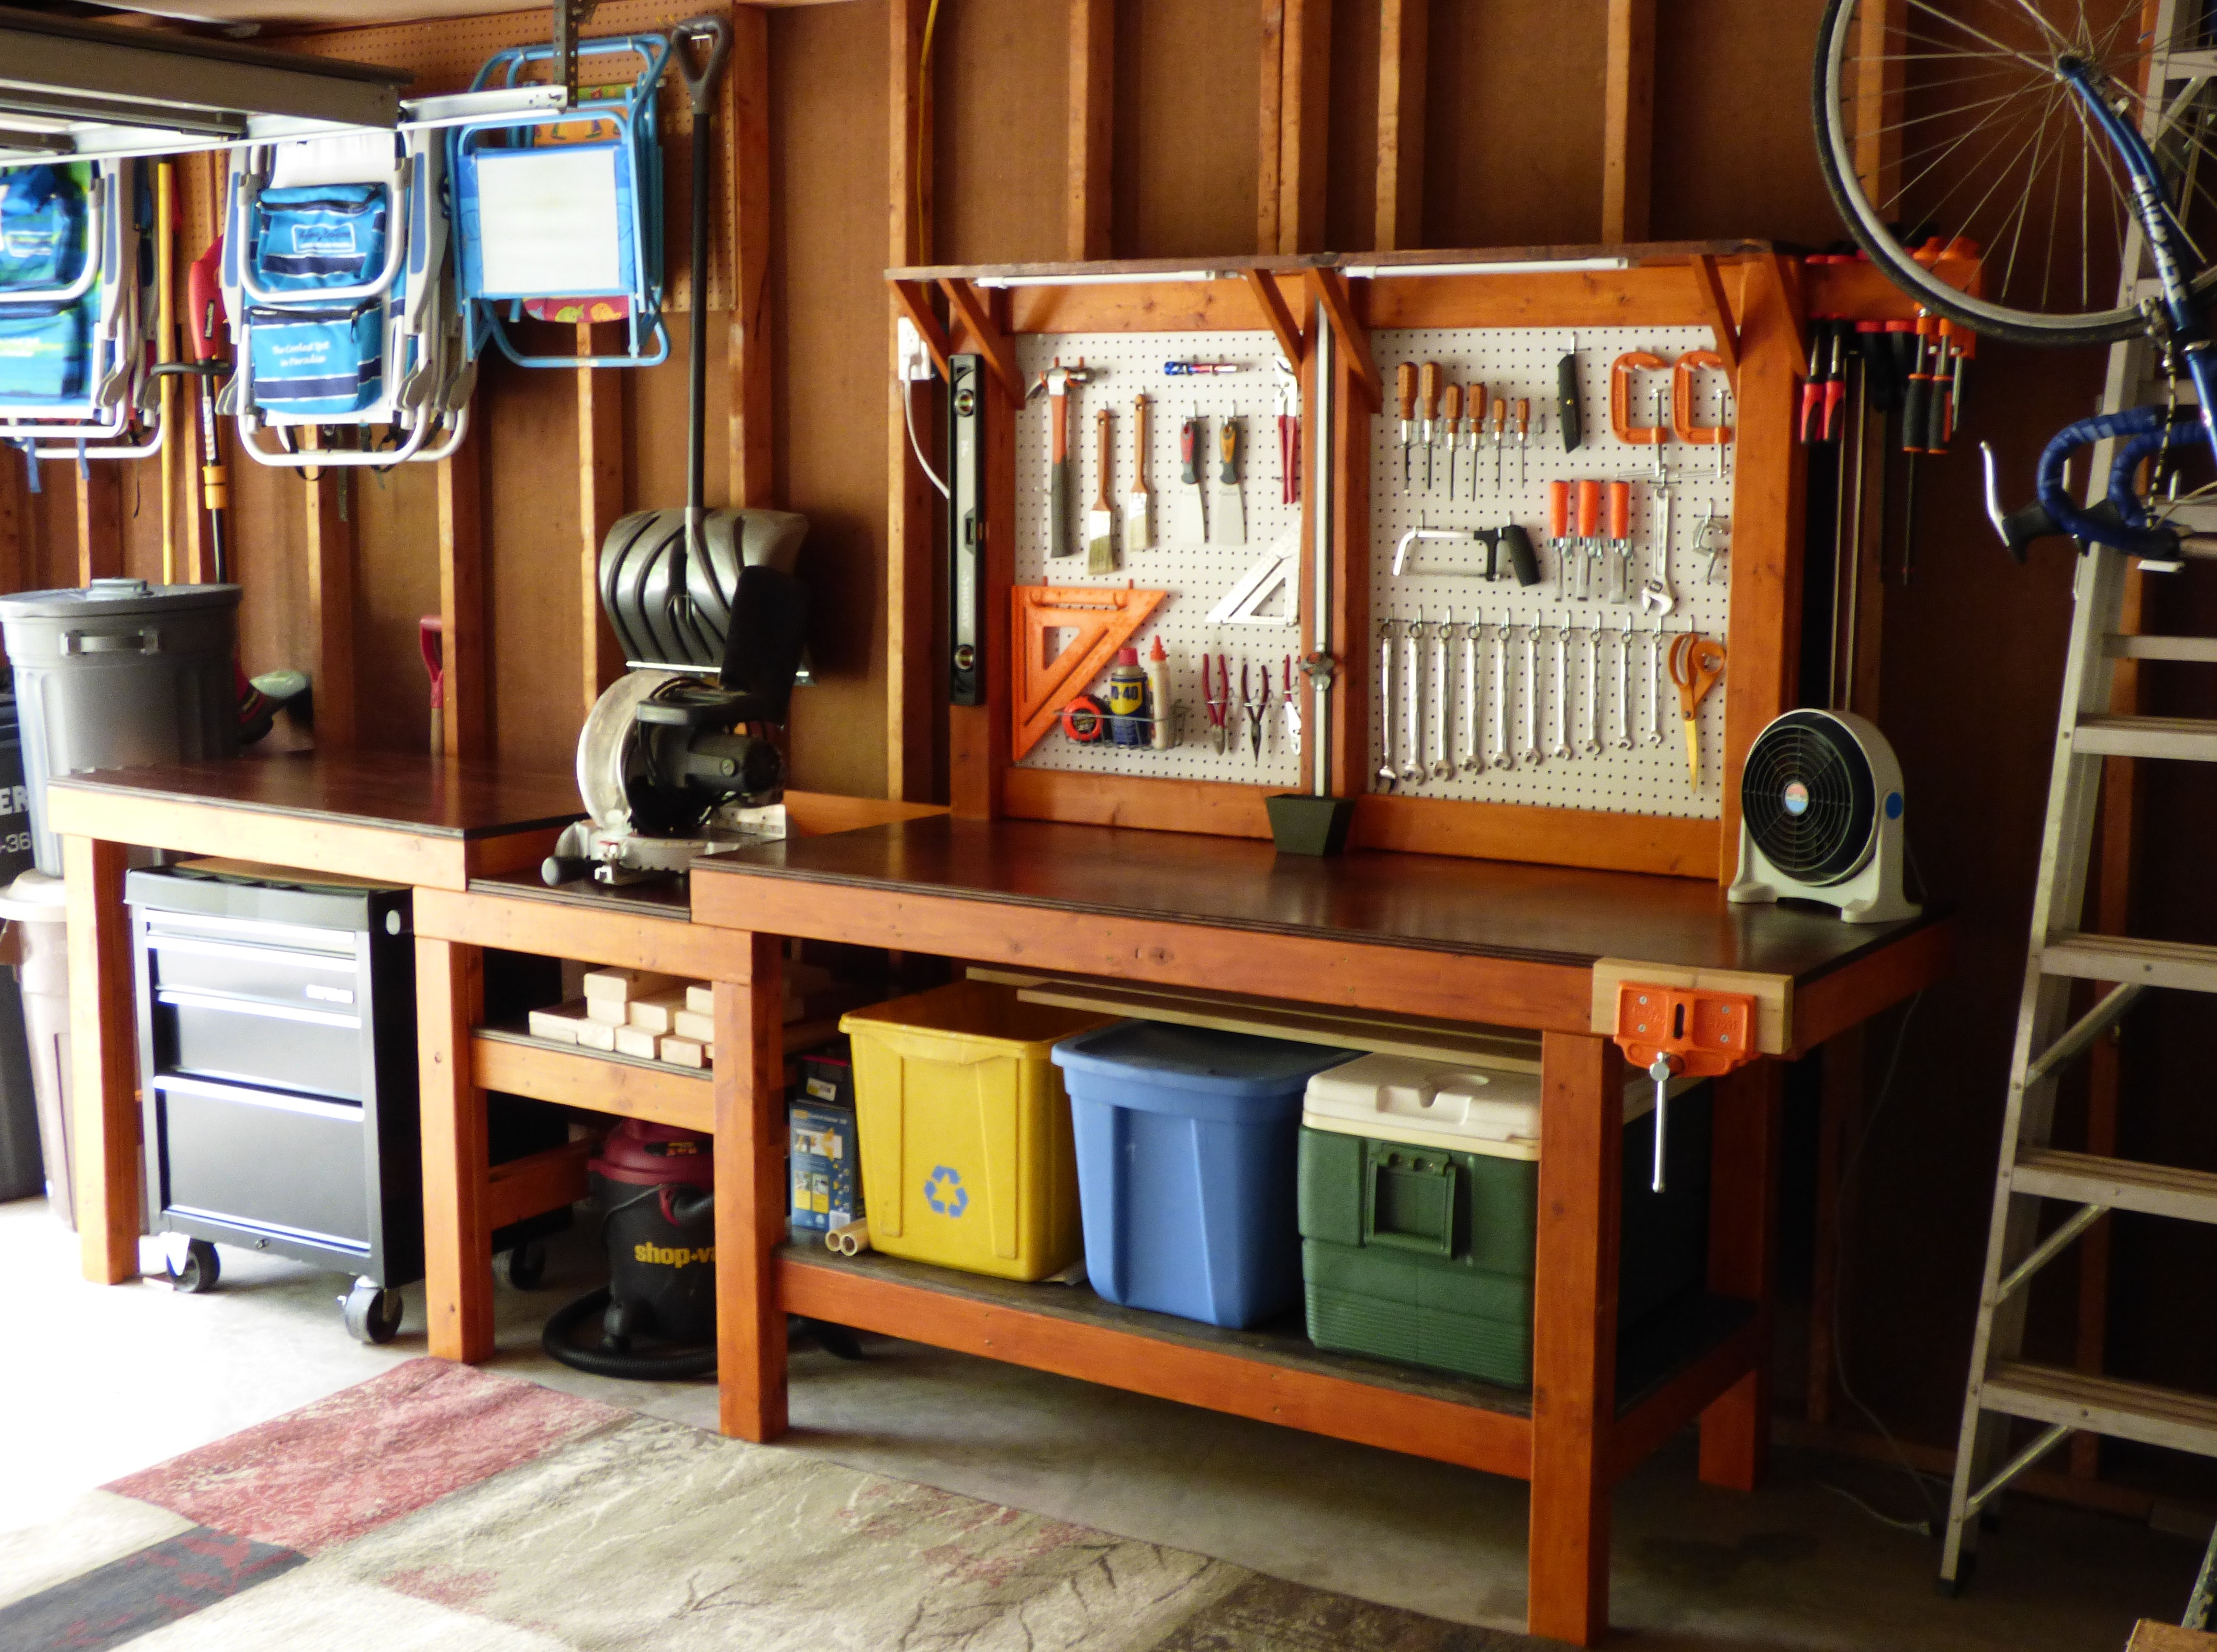
I designed this bench based off Ana's workbench to get the job done template. I added a few features like a pegboard, under-cabinet lights, and a recessed saw table and spent some extra time to stain each piece before adding to the bench. I took my time to build this - using free hours on the weekends and evenings over the course of about 4 months.
Built from Plan(s)
Estimated Cost
Probably about $250-$300.
Estimated Time Investment
Week Long Project (20 Hours or More)
Finish Used
Behr Cedar Naturaltone All-in-one wood finish for the frame. Varathane Cabernet Stain & Poly for the tops, with two coats of clear poly on top of that. I like the poly finish for the look and because it makes it easy to wipe up glue or other messes.
Recommended Skill Level
Beginner
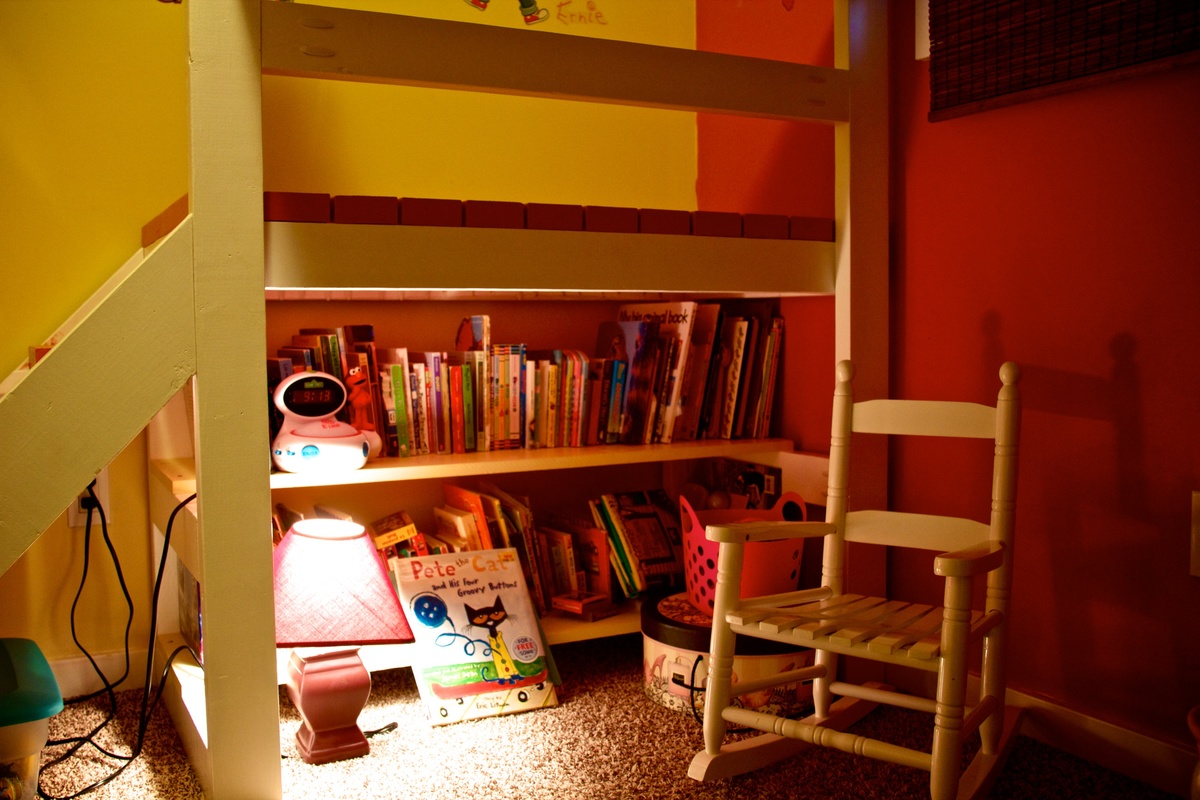
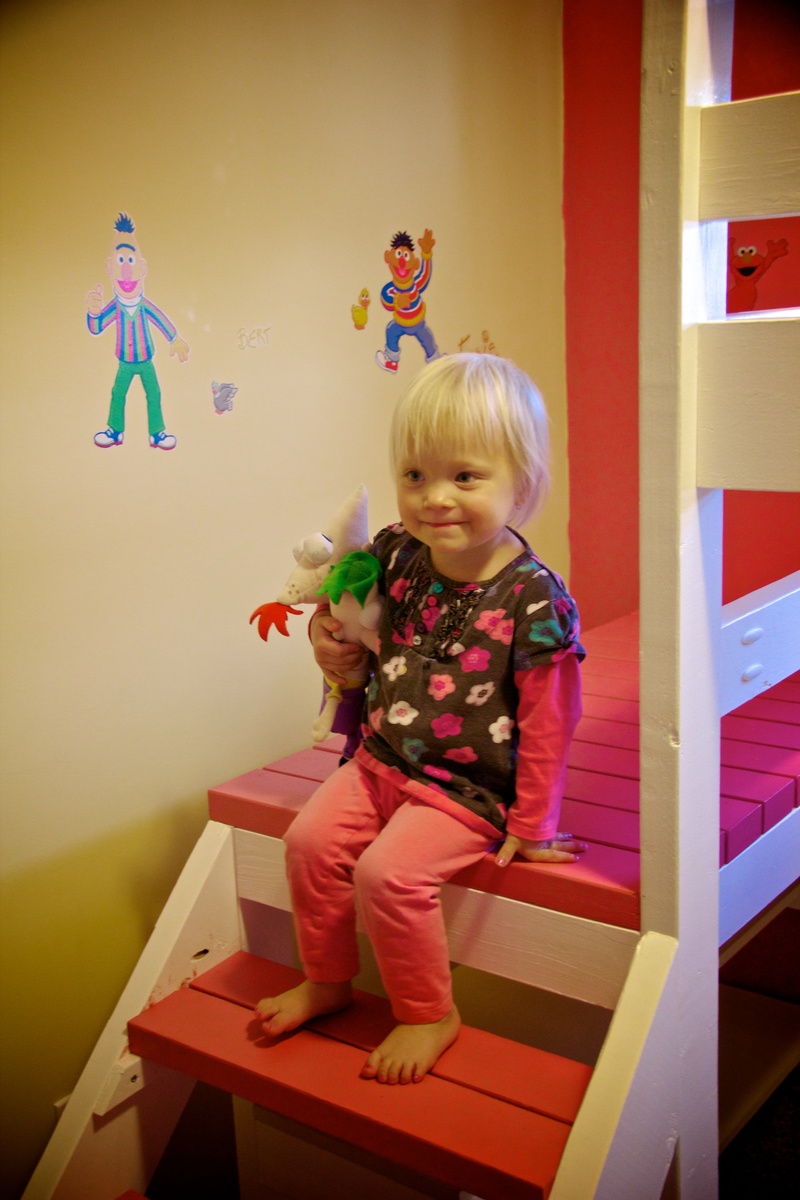
Camp Loft Bed for the Little Lady
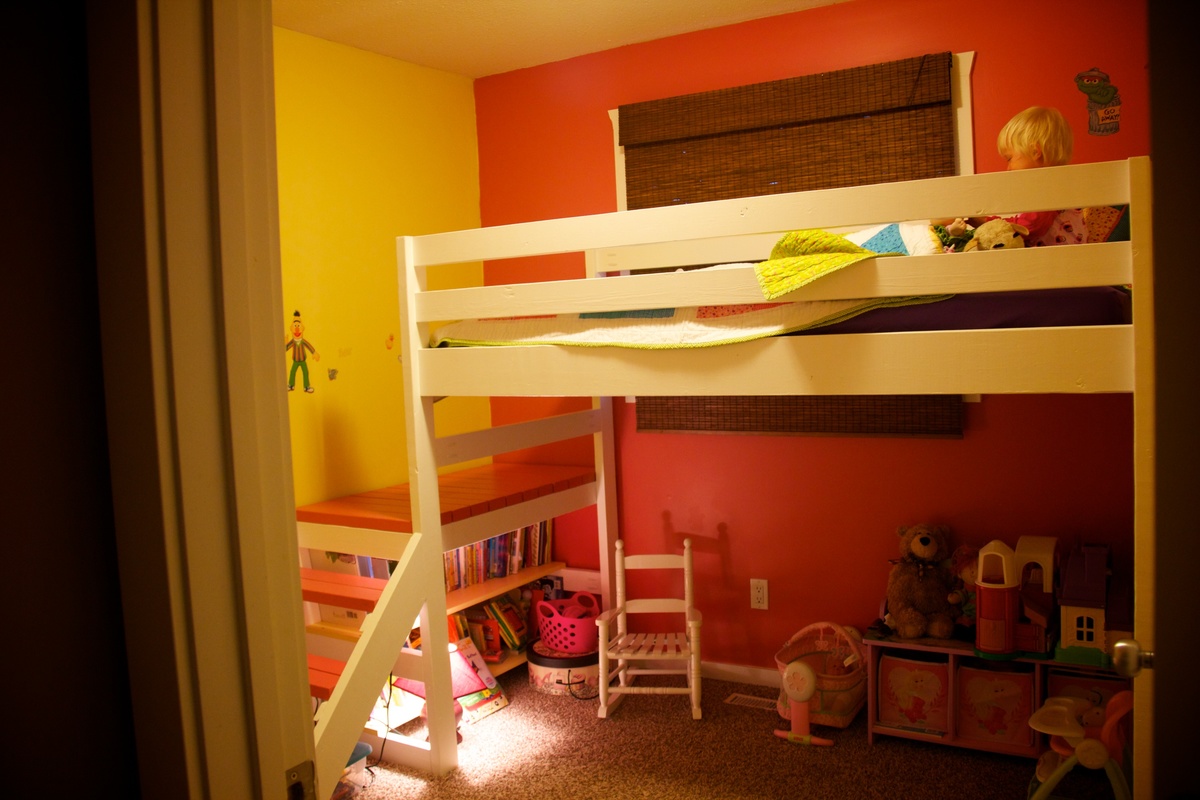
I came across the Camp Loft Bed on Pinterest a couple of months ago. My daughter was still sleeping in a crib, but I knew that she would need a big girl bed by summer. Since her room is small (inside walls measure just under 9'x9'), i thought a loft bed would be ideal.
I have NEVER done a DIY. I don't even own tools. But my step-dad is very handy, so I asked him to be my consultant and helper to tell me if I was doing things the wrong way! Fortunately, he was able to lend me a miter saw, some aluminum saw horses, and the odd screw (when I seemed to run out).
From start to finish, this was a 7 day project. I used construction grade spruce for my lumber, which cost me just shy of $100. I also went back the next day and bought a couple more 2x4s to make two shelves under the platform, which was another $30. I then pre-drilled with my new favourite tool the Kreg, and proceeded to sand, prime, and paint all of the pieces before assembly. With assembly being in my daughter's room, and having nice fresh paint on her walls and carpeted floors, I did NOT want to be finishing the bed in there, but there was no way I could move it into her room completely assembled. I did all the finishing BEFORE assembly.
Sand, prime, sand, paint, paint, paint. That process took three days, obviously not the entire day. Painting goes relatively quickly, but with boards, you paint one side, let dry, roate 90 degrees, paint, let dry, etc. I also had to work a couple of days in between as well. I went with Benjamin Moore Aura paint and that required three coats. I used to some leftover pink and yellow for the platform and shelves, but if I consider the cost, the paint set me back another $100.
I also had to order in the proper screws and I bought some of the white Kreg plugs to cover the exposed holes. Hurray for amazon! Even selecting the free shipping, the screws arrived within 4 days.
Assembly day:
My step-dad and I worked from 10:30-1:30. By this time, the bed and platform were completely assembled and in place. My daughter, however, needed to nap, so I put her down in her brother's bed, and we took a couple of hours off for lunch!
We then worked from 5-8:45 pm building the stairs, cleaning the room, measuring and screwing down the slats for the mattress, then making the bed and getting it ready for sleep. It seemed like a much longer day because in between, I had to run out and pick up a twin mattress, some extra screws, help my son play his new Skylander game, and deal with three kids trying to "help" with construction!
All in all, I am very pleased with the bed, with the plans, and with my first DIY. My kids are all in love with the bed and we spent a lot of time shooing them out of the room while we tried to assemble it.
Tips:
If I were to make this bed again (if my sons have their way, their beds are next!) I would not paint the wood, opting instead for a stained more natural look. I love the colours for my daughter, but what a pain all that painting and rotating the boards was. Paint was also a more expensive option for finishing.
That being said, if I do paint, I will NOT paint the ends of the boards that will be joined via pocket holes. In some cases, the boards were just a smidge too long to fit and we had to take the back to the saw and shave off the layer of paint in order for the board to fit.
I also opted to buy firm twin mattress as opposed to the plush ones. The plush mattresses add a lot of height and I was worried about my daughter having a bit too much fun up there and possibly tipping out from a high mattress. Stick to thinner mattresses on loft or bunk beds!

Built from Plan(s)
Estimated Cost
$250
Estimated Time Investment
Week Long Project (20 Hours or More)
Finish Used
Benjamin Moore Aura paint
colours: white, glamour pink and cornsilk (for the two shelves)
colours: white, glamour pink and cornsilk (for the two shelves)
Recommended Skill Level
Starter Project
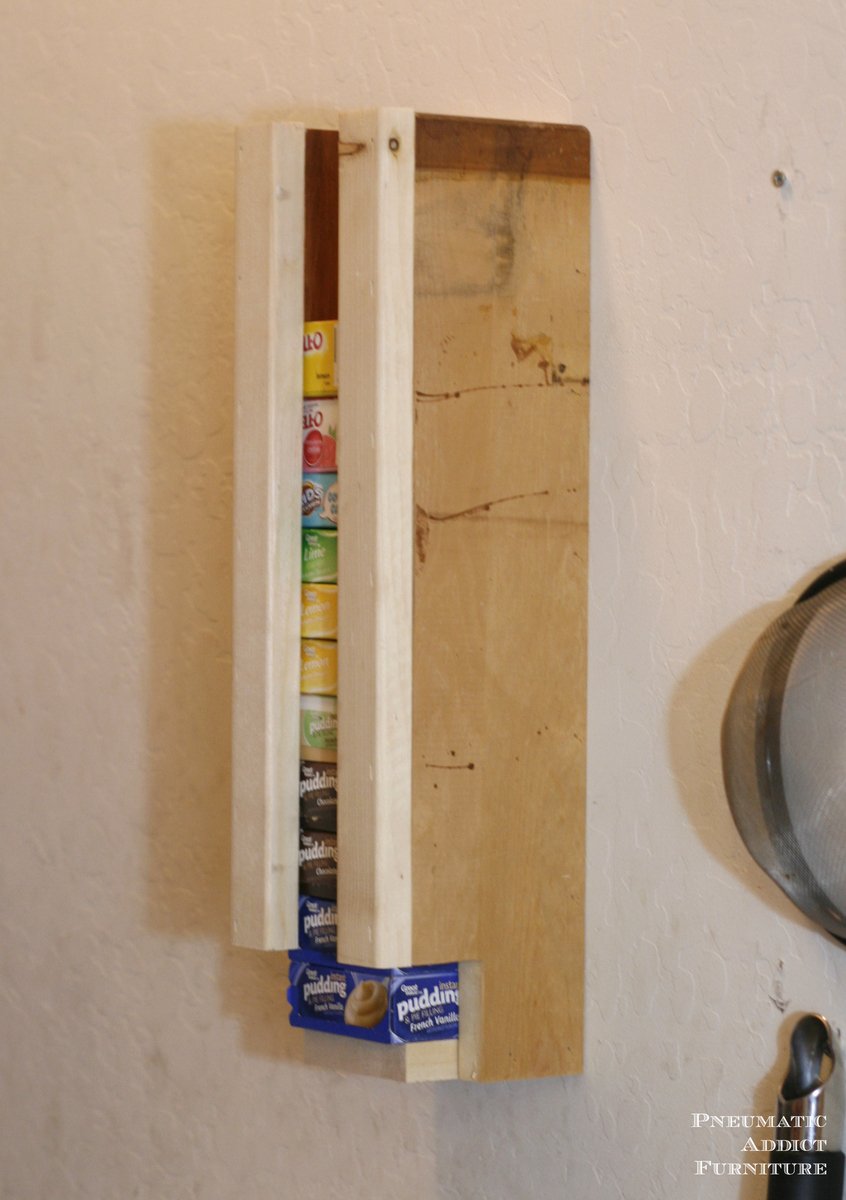
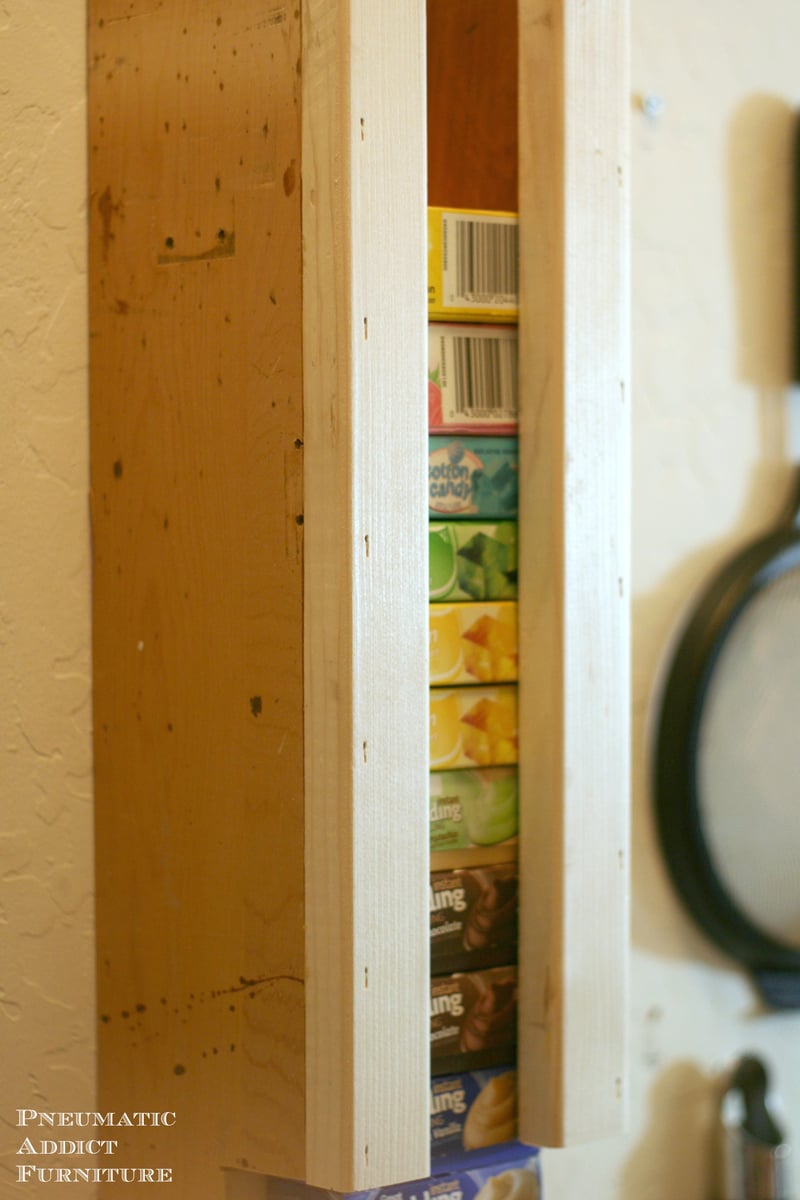
Pudding or Jello Box Dispenser
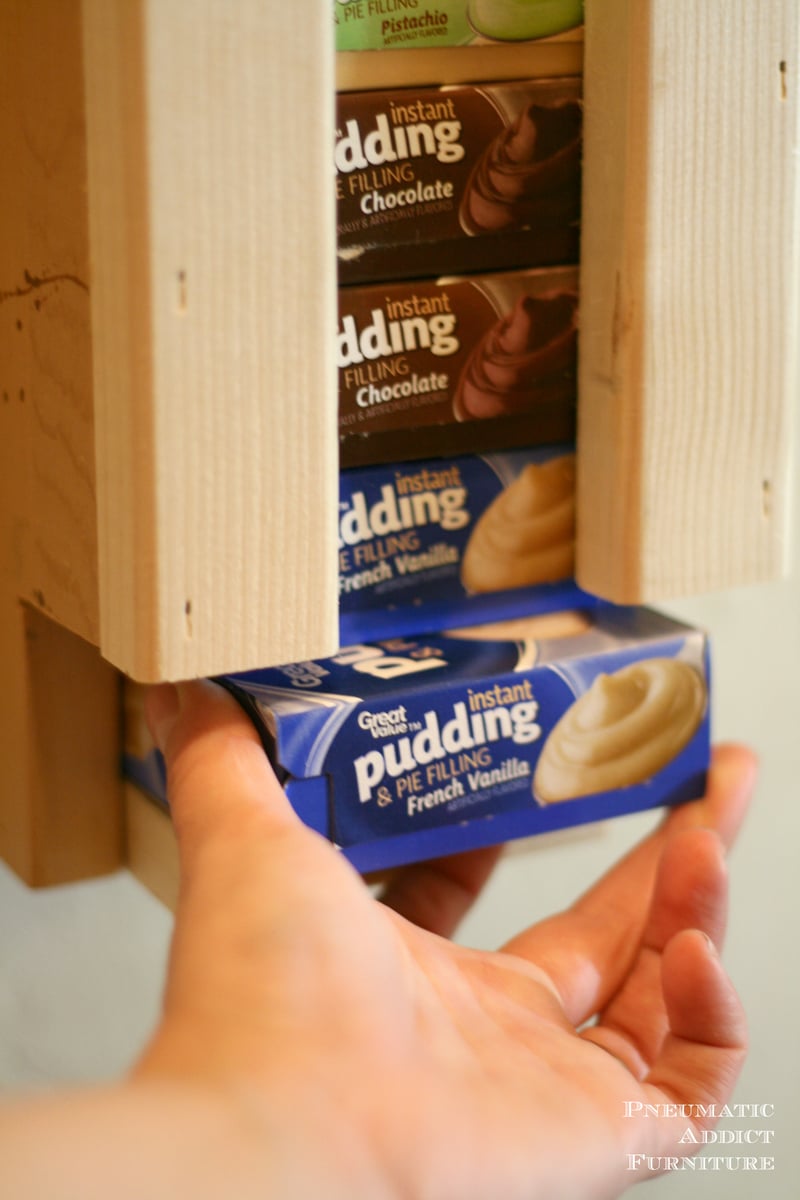
I love to build, but I also love to bake. I happen to have several small boxes of pudding and jello mix that clutter up the shelves of my pantry. Using a single 1 x 4 pine board and some scrap 1 x 2's, I came up with a simple dispenser to keep the boxes organized and out of the way. A really simple project, good for a beginner. The link to my blog contains building plans and step-by-step tutorial.
Estimated Cost
$5
Estimated Time Investment
An Hour or Two (0-2 Hours)
Finish Used
I left mine unfinished, but you could stain or paint this dispenser whatever color you could think of.
Recommended Skill Level
Beginner
Raised planter box (modified)
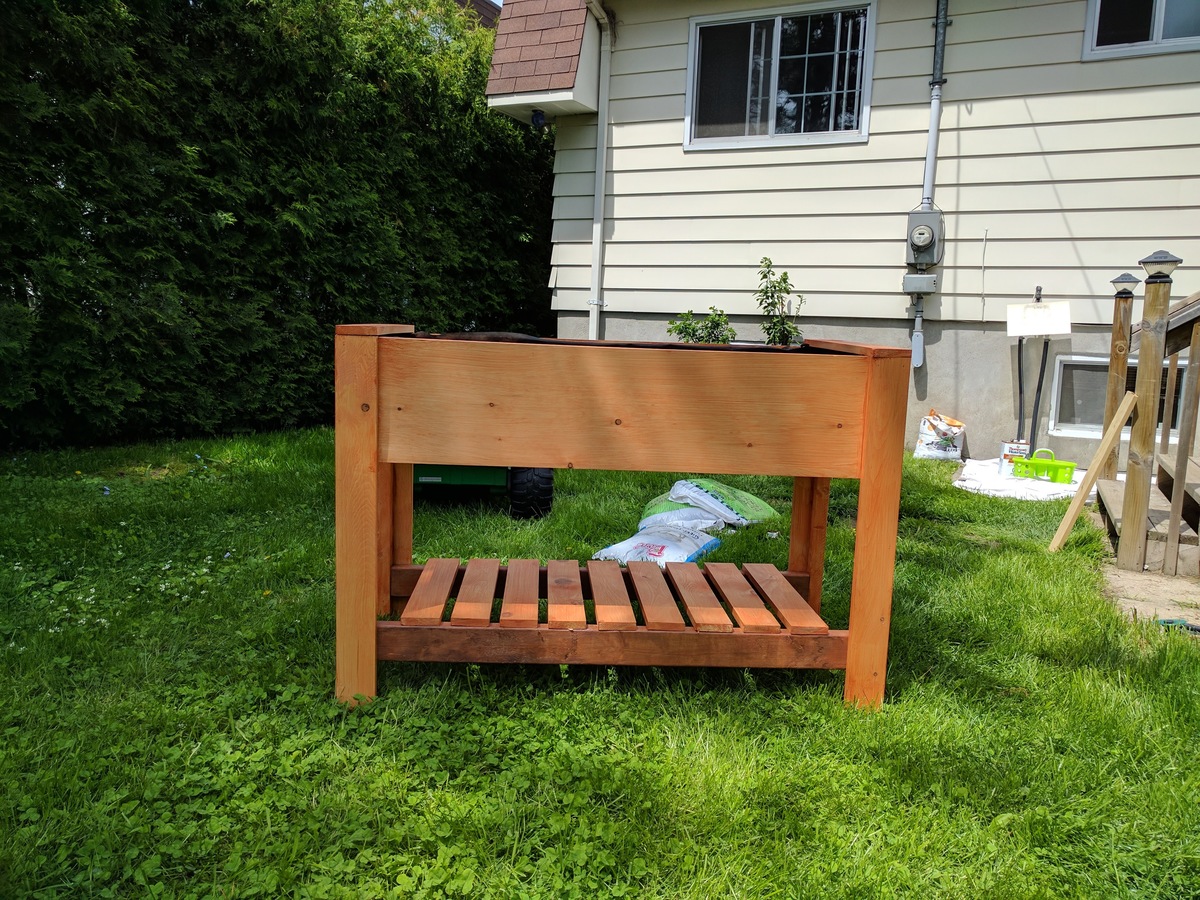
Completed the project in about 4 hours including pre-staining the cut lumber (Thompson's water seal). I made a few changes on the fly.
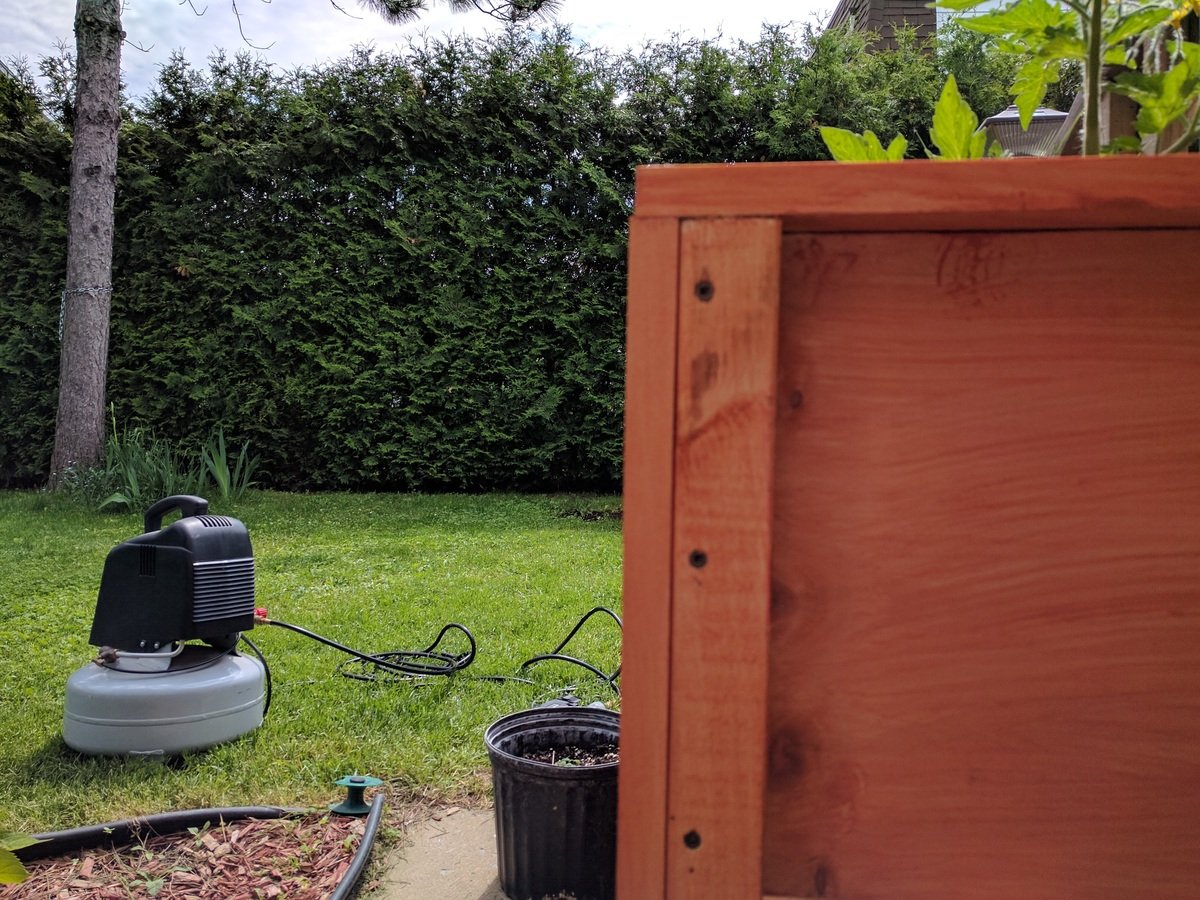
1: I assembled the front and back panels by tacking them together with a nail gun using 2 1/4 inch finishing nails. This allowed me to forego the drilling of pocket screw holes and instead drill pilot holes through the 2x2's and into the 1x12 panels then securing them with 2 1/2 inch deck screws (see the second picture).
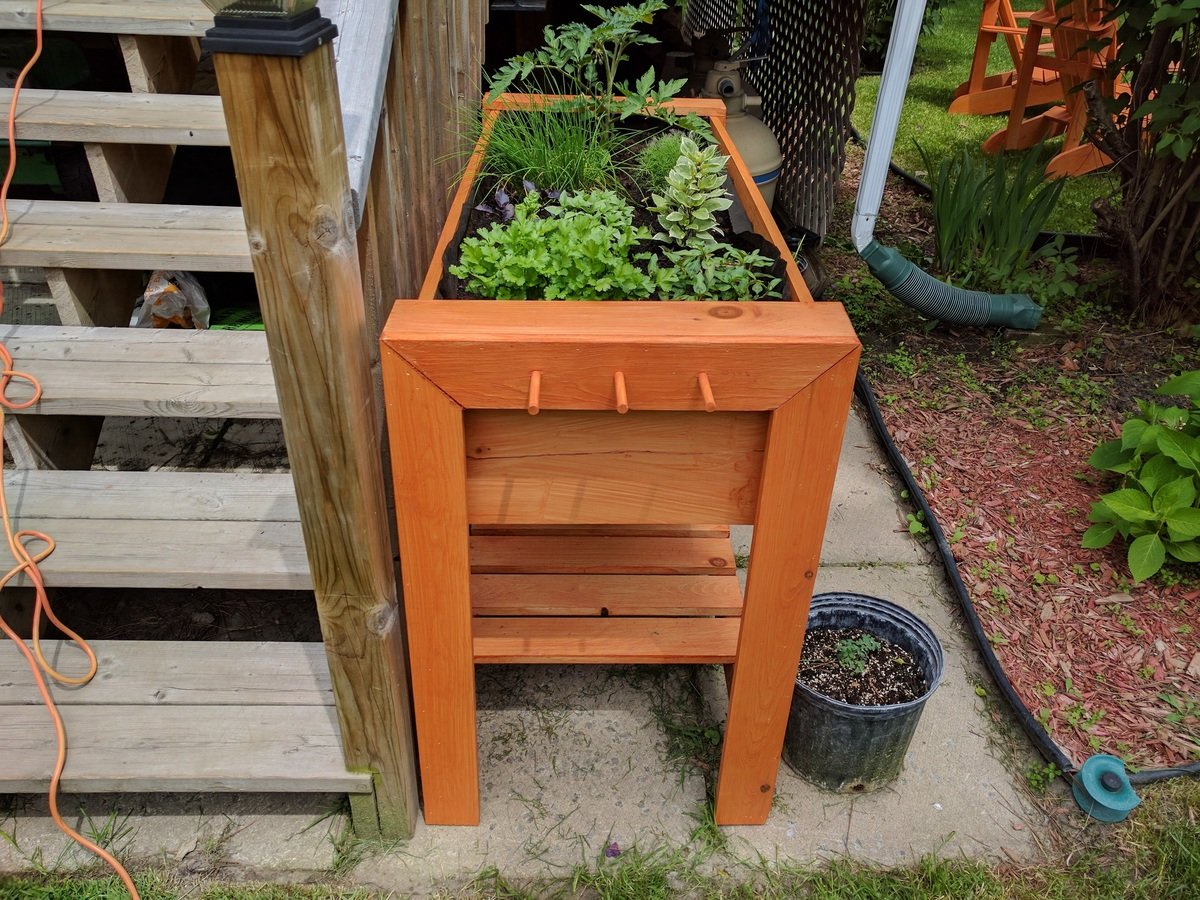
2: after completing assembly I found that I did not like seeing the 2x2 legs from the side. I cut some more 1x4's at 45 degree angles and nailed them to the sides in order to conceal the legs (see third picture).
3: I decided to add some pegs to one of the sides to hang garden implements (third picture). I used 7/16 round dowel stock, drilled holes for them using 3/8 bit with some tape wrapped around it at 1/2 inch mark in order to avoid drilling completely through the board. I slightly whittled the first 1/8 inch at one end of the pegs which I had cut to 3 inch lenghts. Applied some wood glue to the holes and gently hammered the pegs into the holes.
All in all a good looking planter.

Built from Plan(s)
Estimated Cost
$100.00 Usd
Estimated Time Investment
Afternoon Project (3-6 Hours)
Finish Used
Thompson's water seal (cedar colored). Sand boards before applying 2 coats 1 hour between coats.
Recommended Skill Level
Intermediate
Comments
Vegetable storage with slide out trays
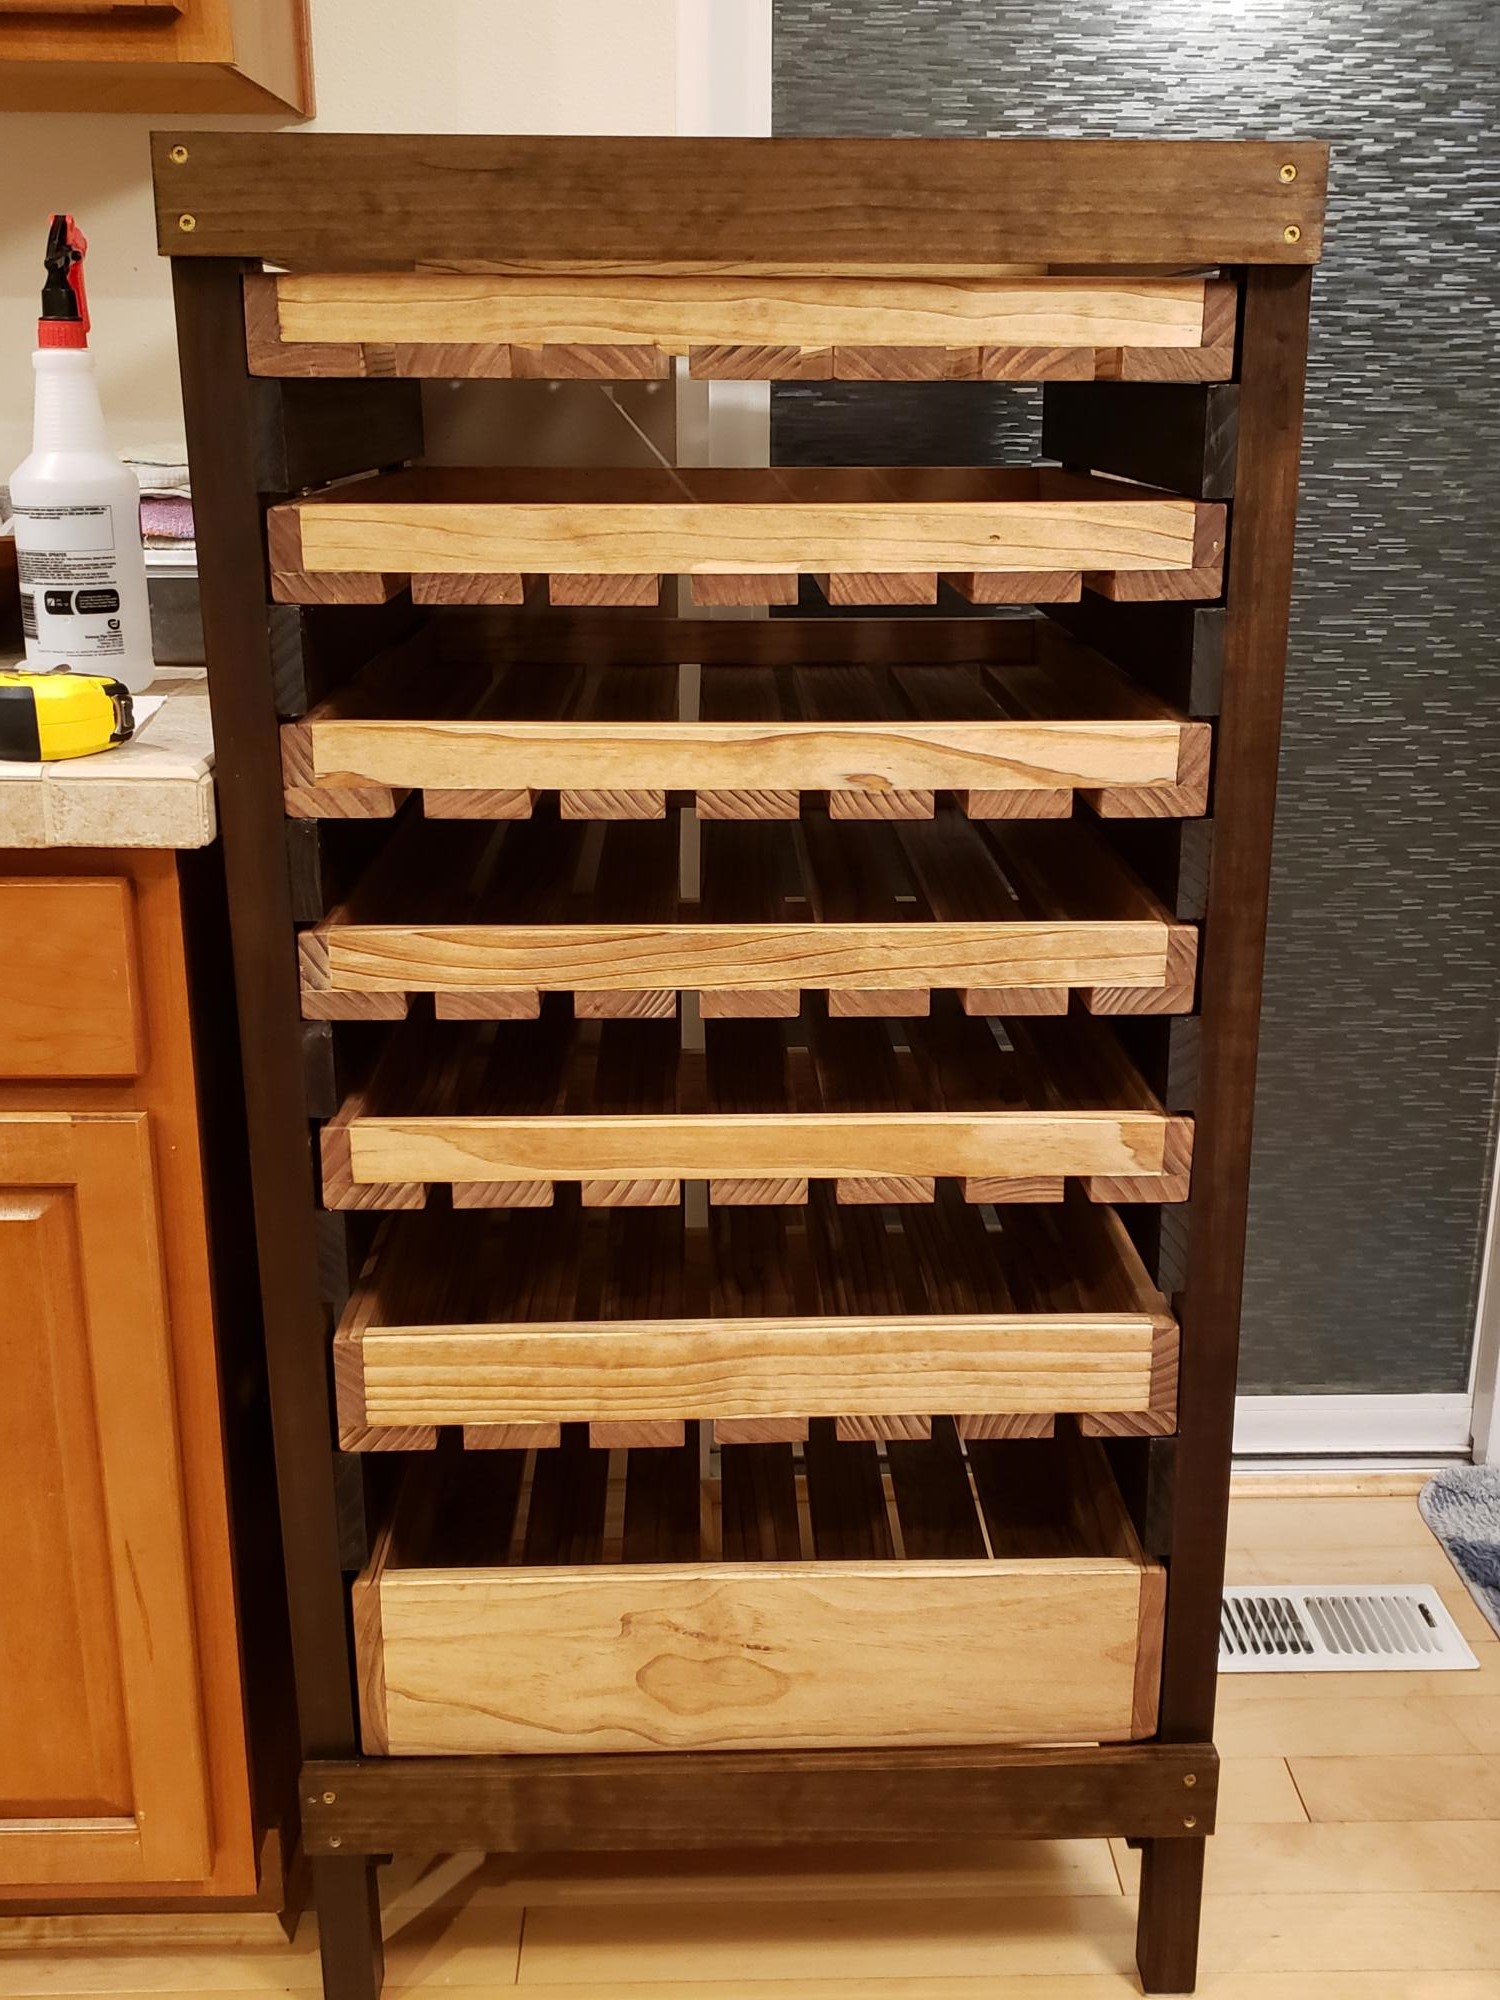
Been wanting to build this for awhile. Now I know why the plan pics are all unfinished! I modified the plans slightly to allow for 2 slightly larger trays on the bottom and allow for robotic vacuum to clean underneath.
Built from Plan(s)
Estimated Cost
$350
Estimated Time Investment
Week Long Project (20 Hours or More)
Finish Used
Danish oil in medium walnut for trays. The frame was a water based dye, gel stain in dark walnut, and waterlox.
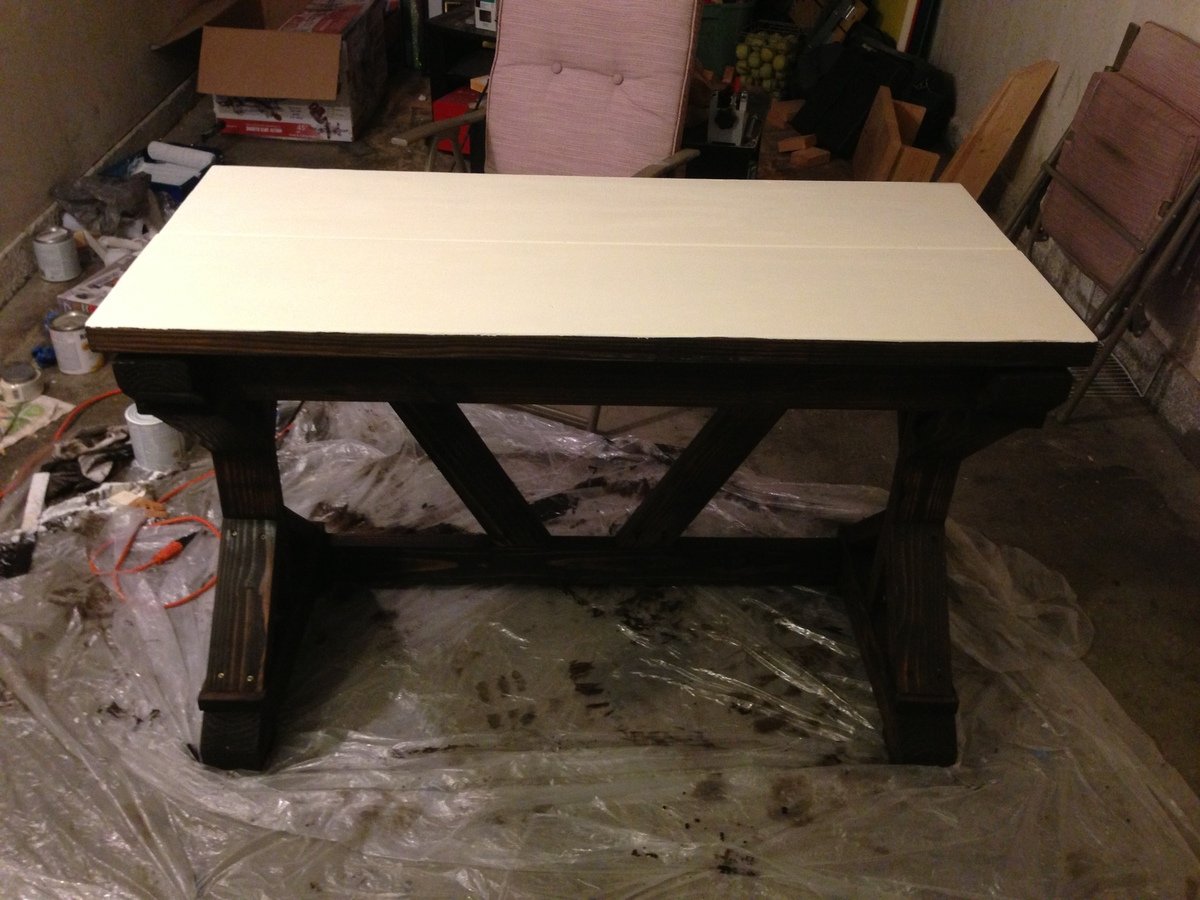
Rustic X Desk
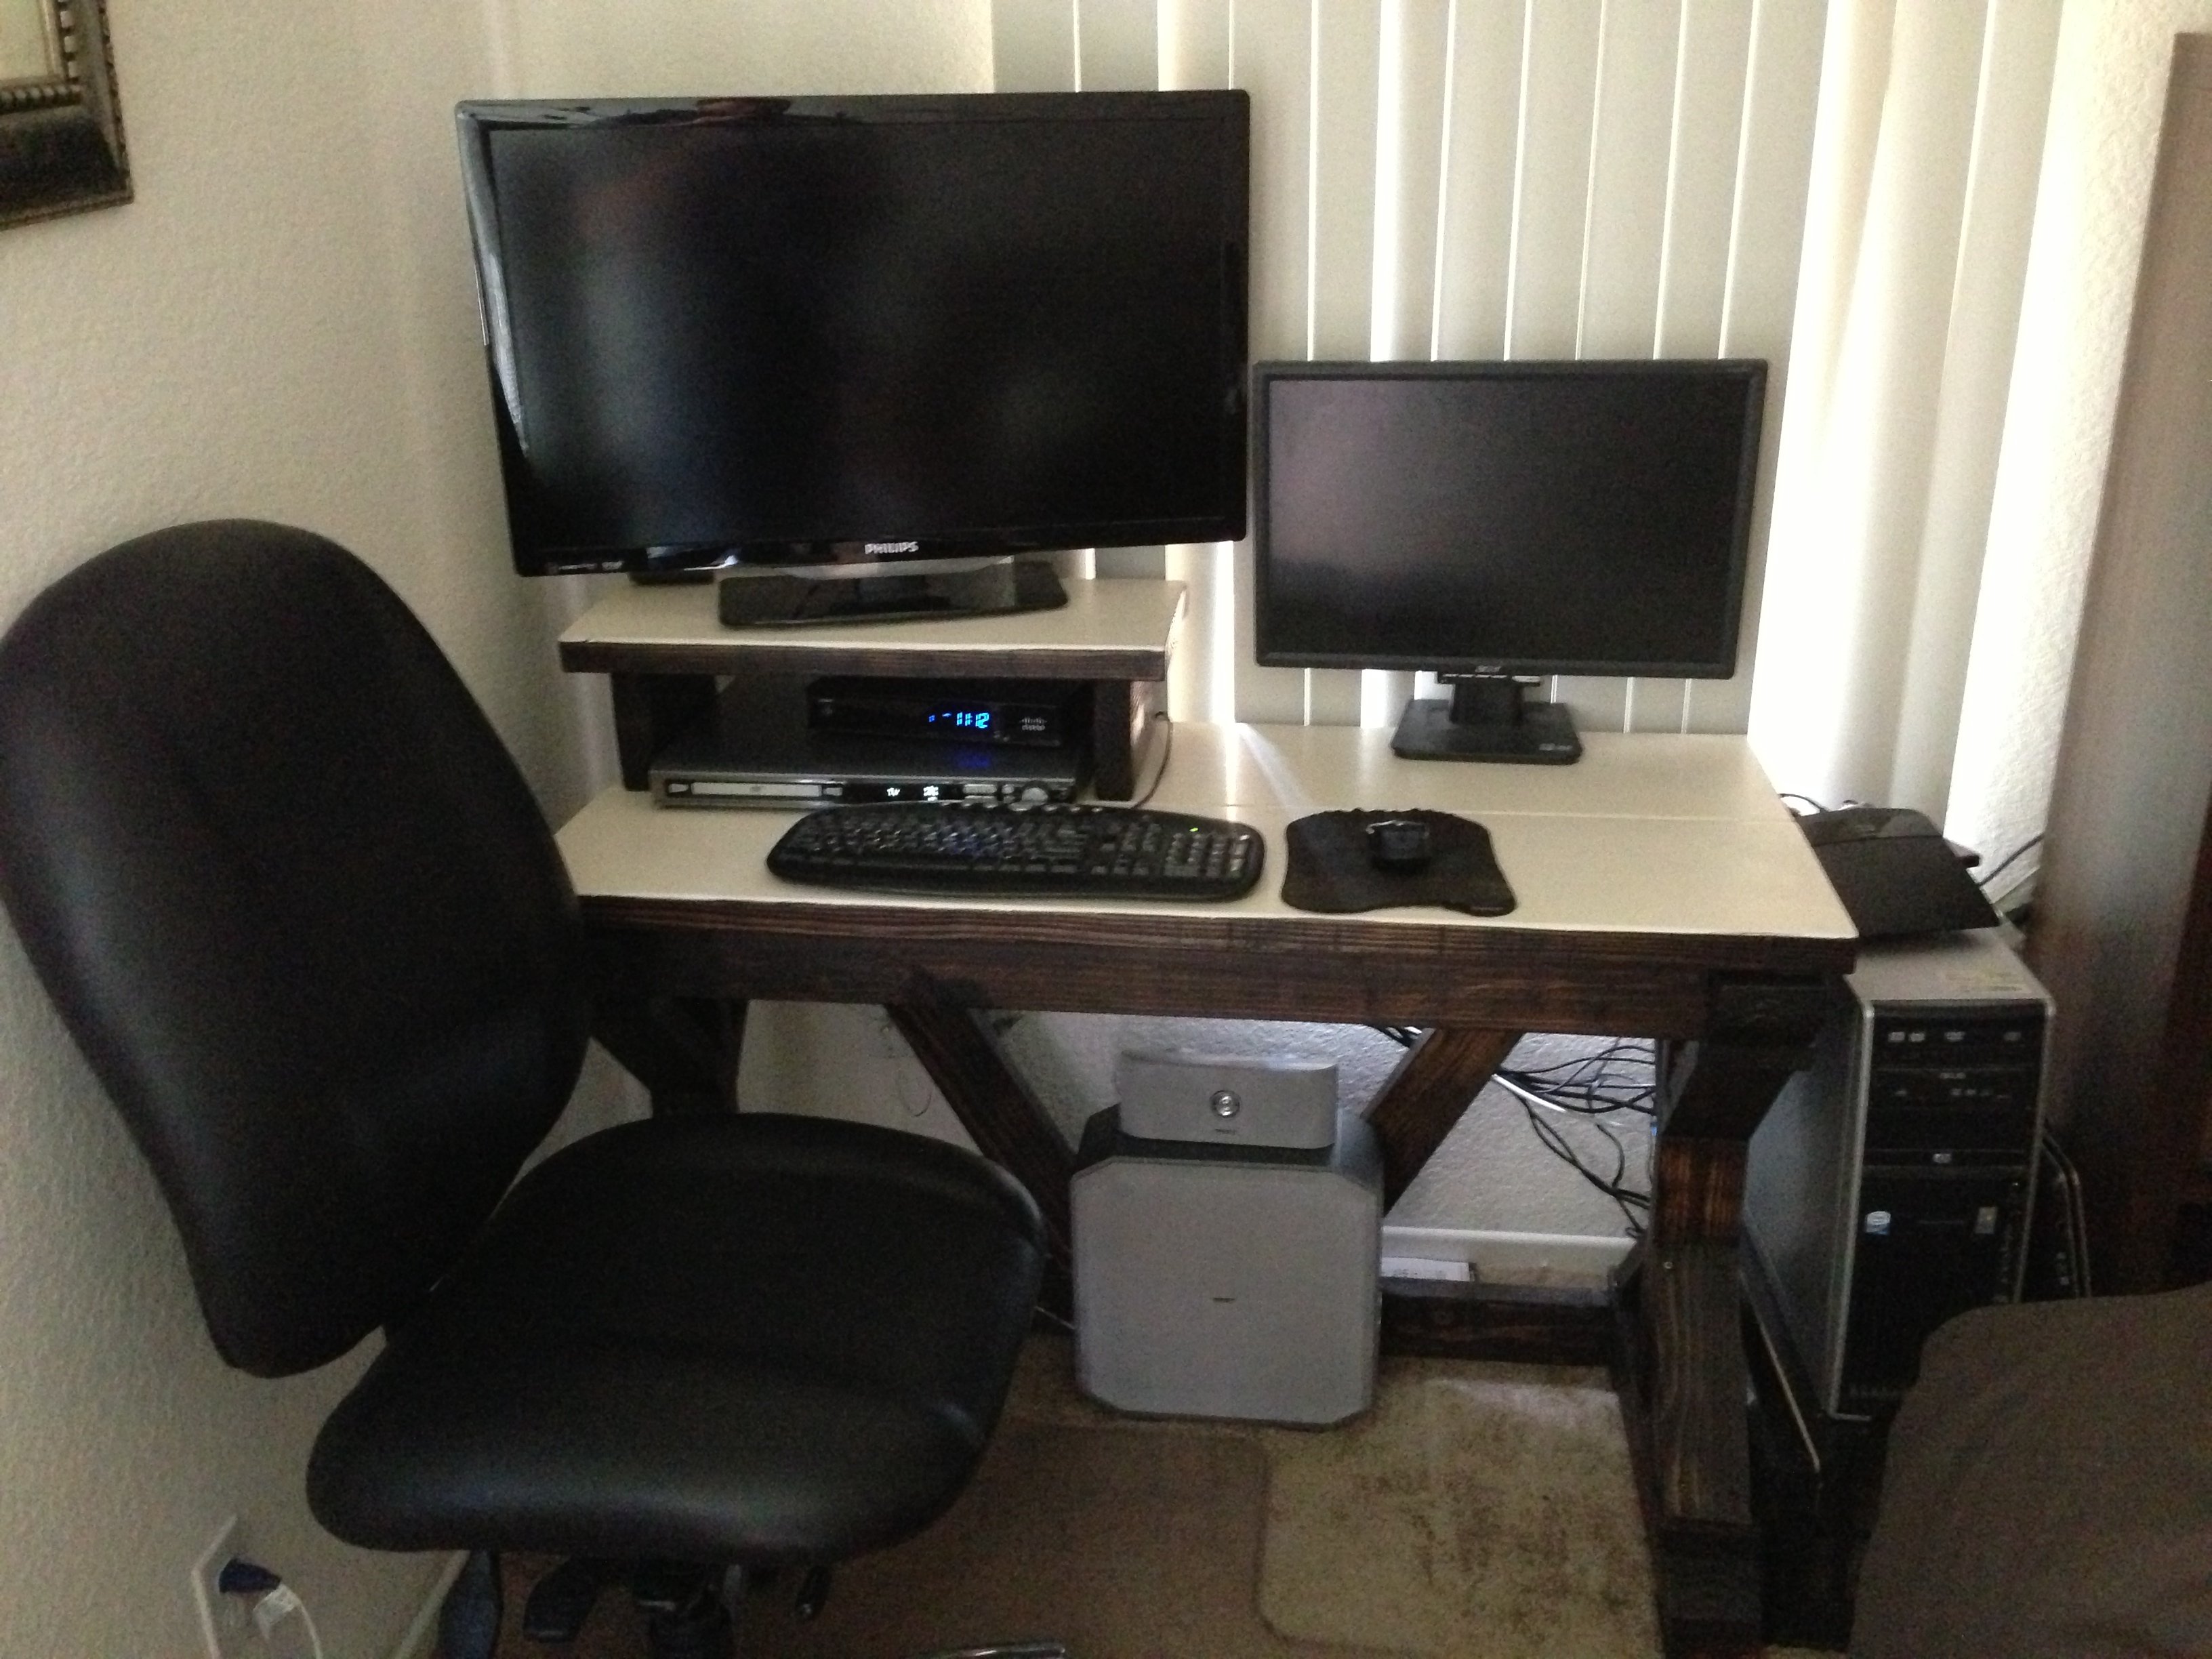
I found the Fancy X Desk plan and loved it. I shortened the length to 4 feet and added a little monitor stand on top so I could put stuff under my monitor and not have to sacrifice desk space.
Built from Plan(s)
Estimated Cost
$50
Estimated Time Investment
Afternoon Project (3-6 Hours)
Finish Used
I used minwax Kona stain for the bottom. For the desk top I used Primer and Satin paint sample that I found for $3 at Lowes. The sample was plenty to paint the whole top and I still have half of the jar left over.
Recommended Skill Level
Beginner
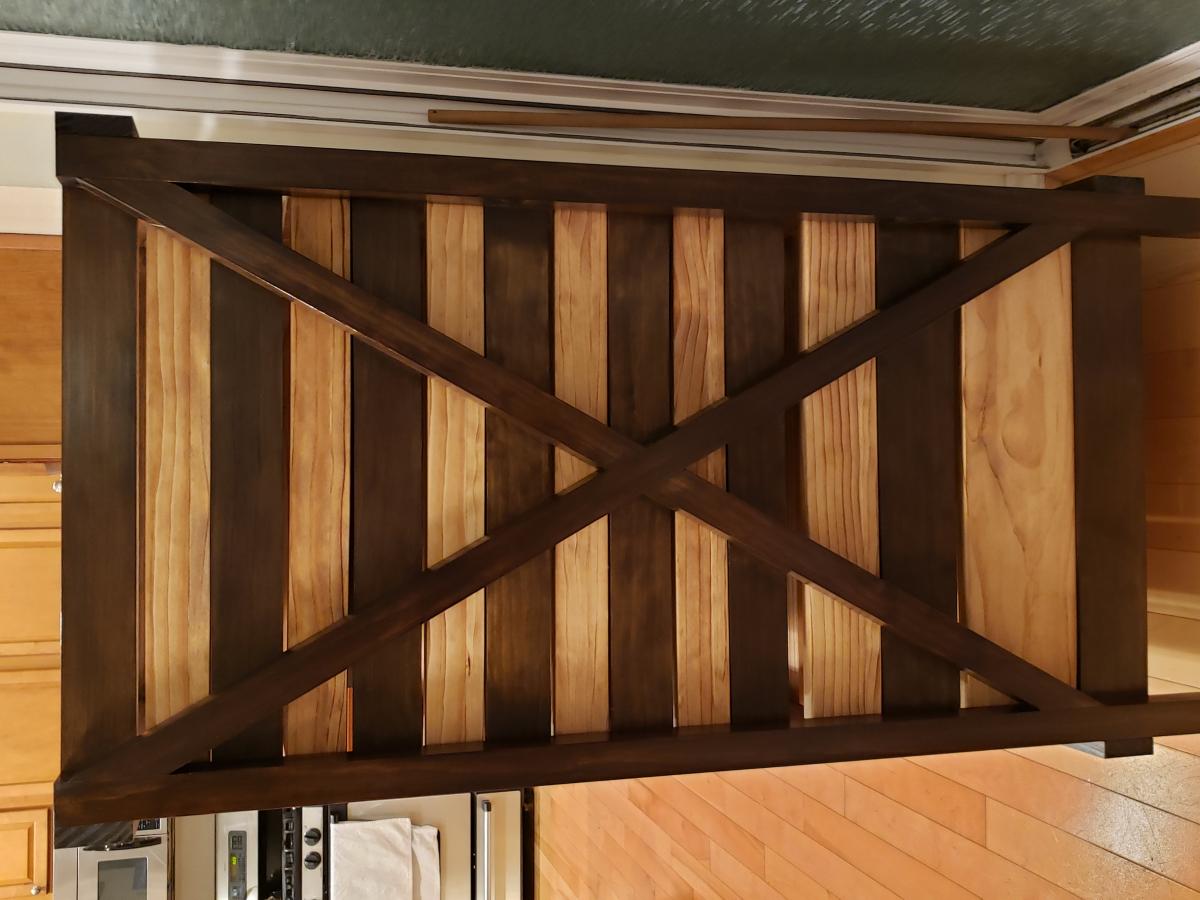
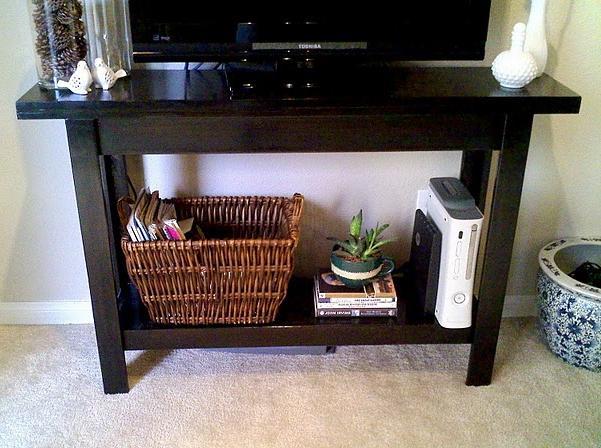
Entertainment Console
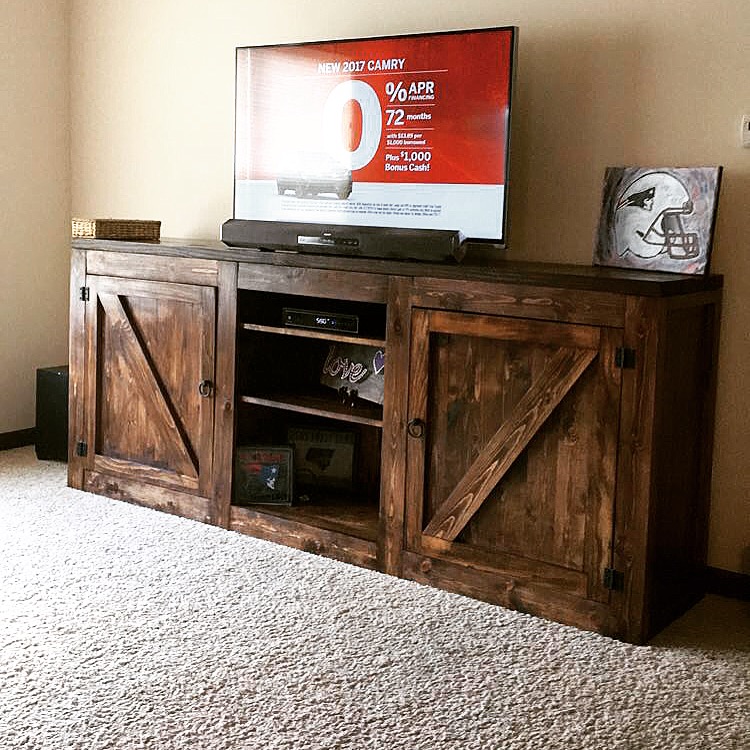
I loved the plans that were provided by Ana. I took a similar design from another website and blended it with her provided plans. Instead of using the sliding barn door look I modified them to be swinging doors with a shelf inside of each. I also added middle shelves that can be used for media consoles or decorations.
Built from Plan(s)
Estimated Cost
$200-$300
Estimated Time Investment
Week Long Project (20 Hours or More)
Finish Used
Miniwax Dark Walnut,Shellac, and Paste Wax
Recommended Skill Level
Intermediate
2x4 Outdoor Sofa & Sectional Piece
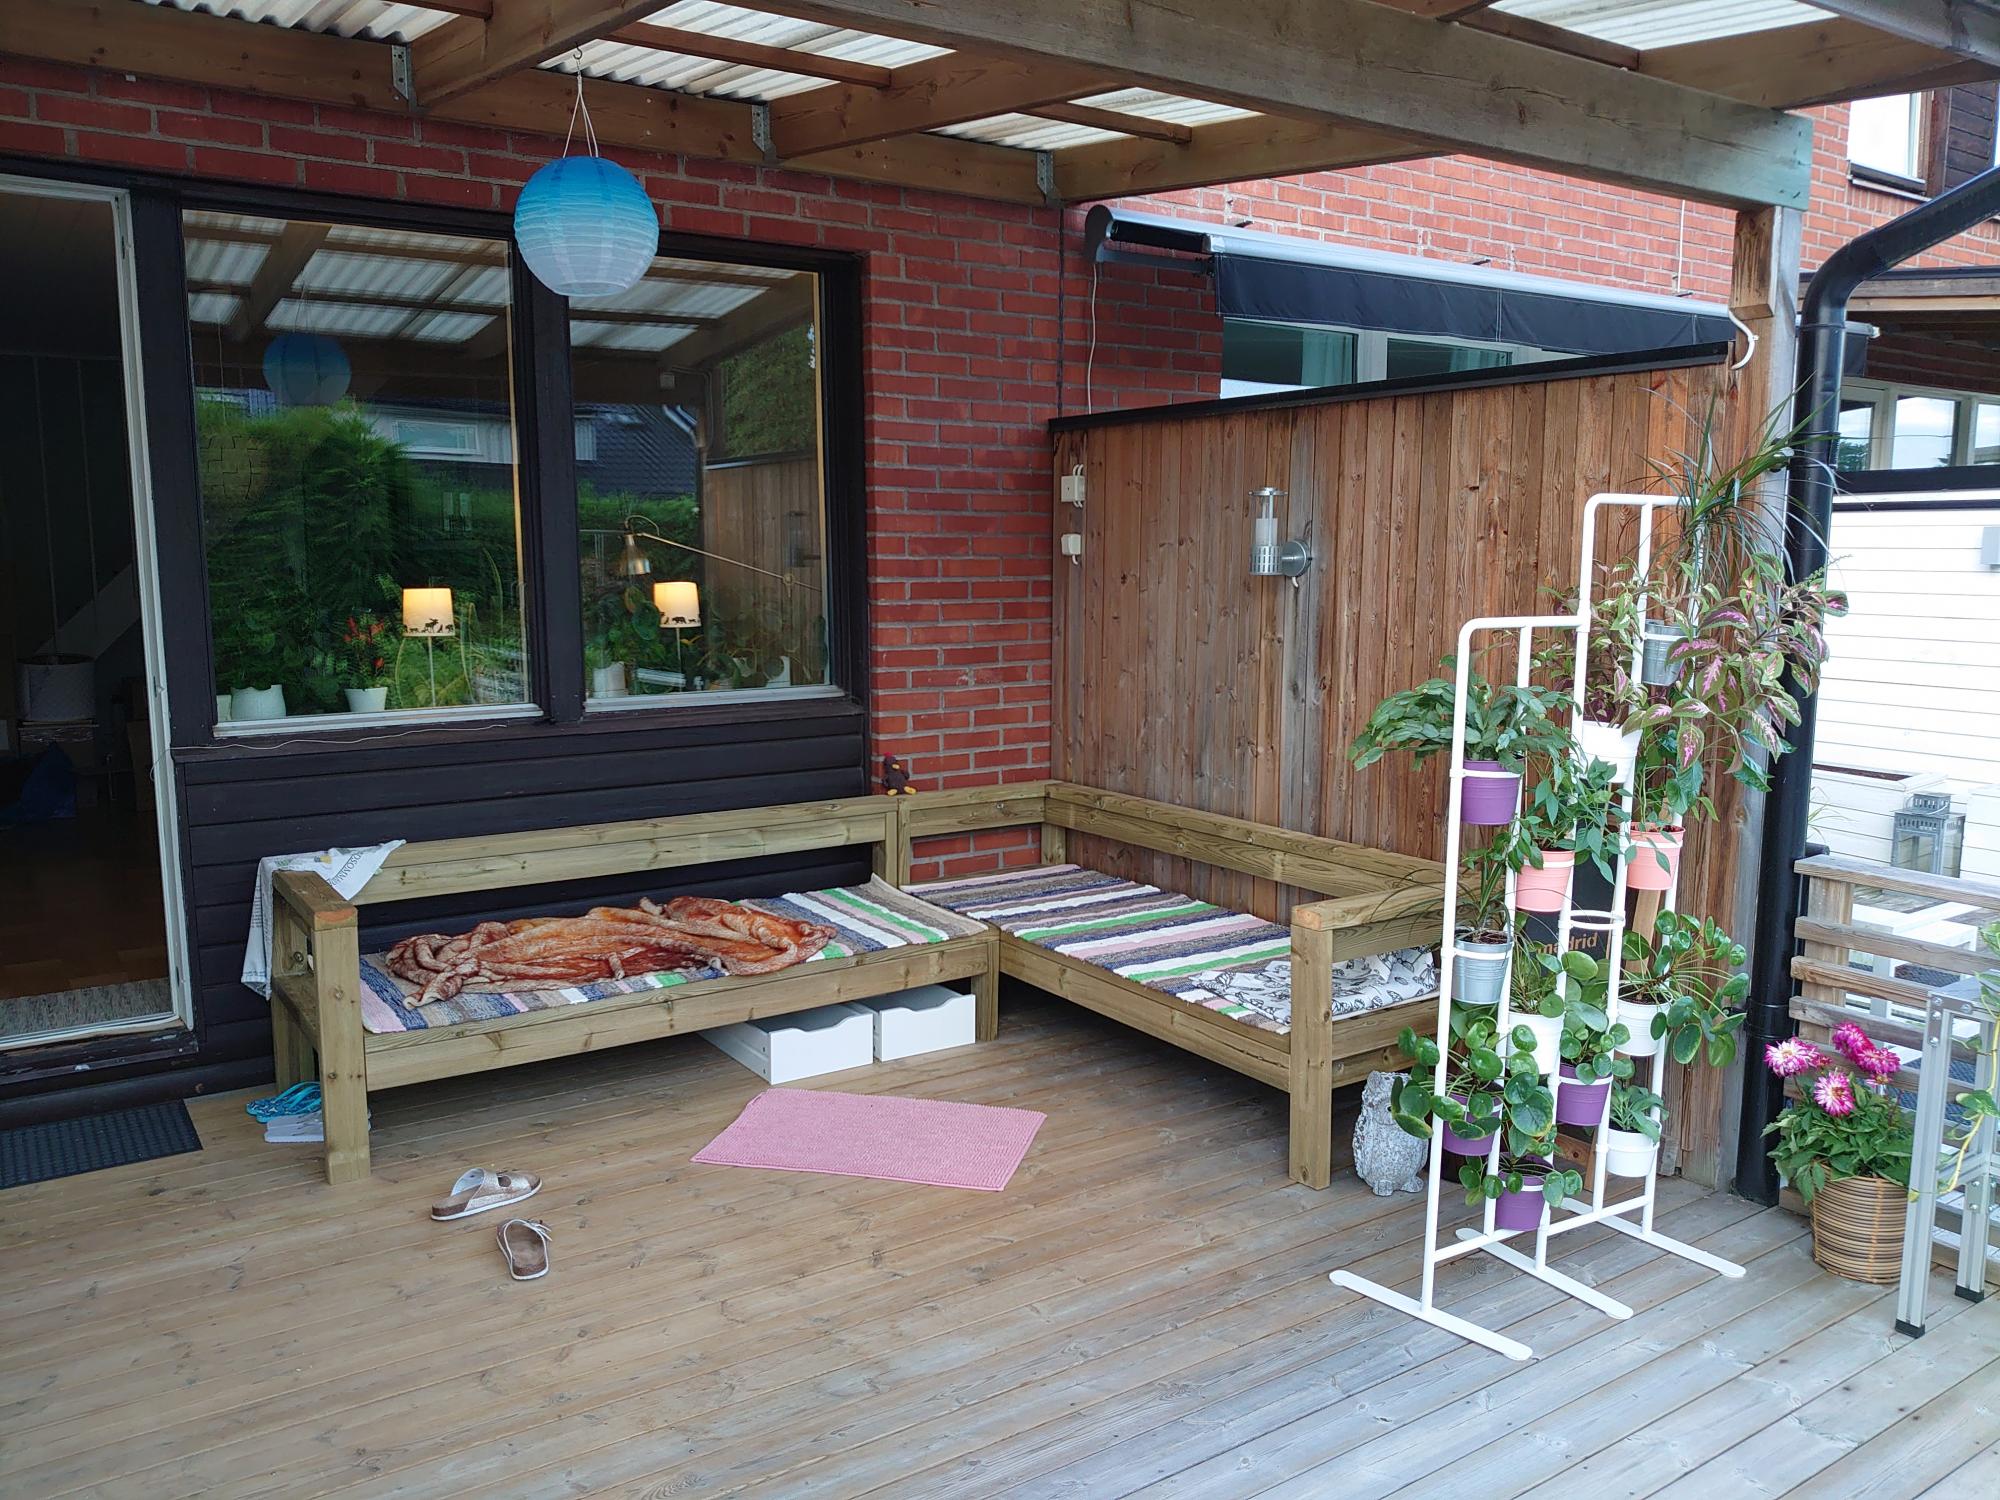
These plan were fantastic! Sorry for the messy picture!
As I live in Sweden I had to convert all measurements to metric. I also couldn't get hold of cedar boards easily so I went with regular treated construction pine. The pine boards are 45 mm by 95 mm, so I adjusted acording to that as well. The downside with using fresh treated pine is the extreme weight of the wood. It's also probably going to shrink a fair bit.
We live in a chain house, so it wasn't possible for me to build the sofa in place. Instead I hade to build it at my parents place. So I modified the plans a little to be able to build the sofa in pieces and transport the whole thing in my car. The sides are bolted to the base with carriage bolts and the back rest is bolted to the sides using hex wood screws.
To make the joints a bit sturdier I opted to use two 10mm wooden dowels and glue in every joint. I also didn't want any screw heads showing. So I used decking screws and screwed them in at an angle as hidden as possible.
Will probably sand all the rough edges in a few days and will be making a matching table later on.
As it's late in the store season (Ikea didn't have any good cushions in the store) we opted to go with rugs instead of cushions.
Built from Plan(s)
Estimated Cost
Roughly 200 $
Estimated Time Investment
Day Project (6-9 Hours)
Finish Used
No finish
Recommended Skill Level
Beginner
Comments
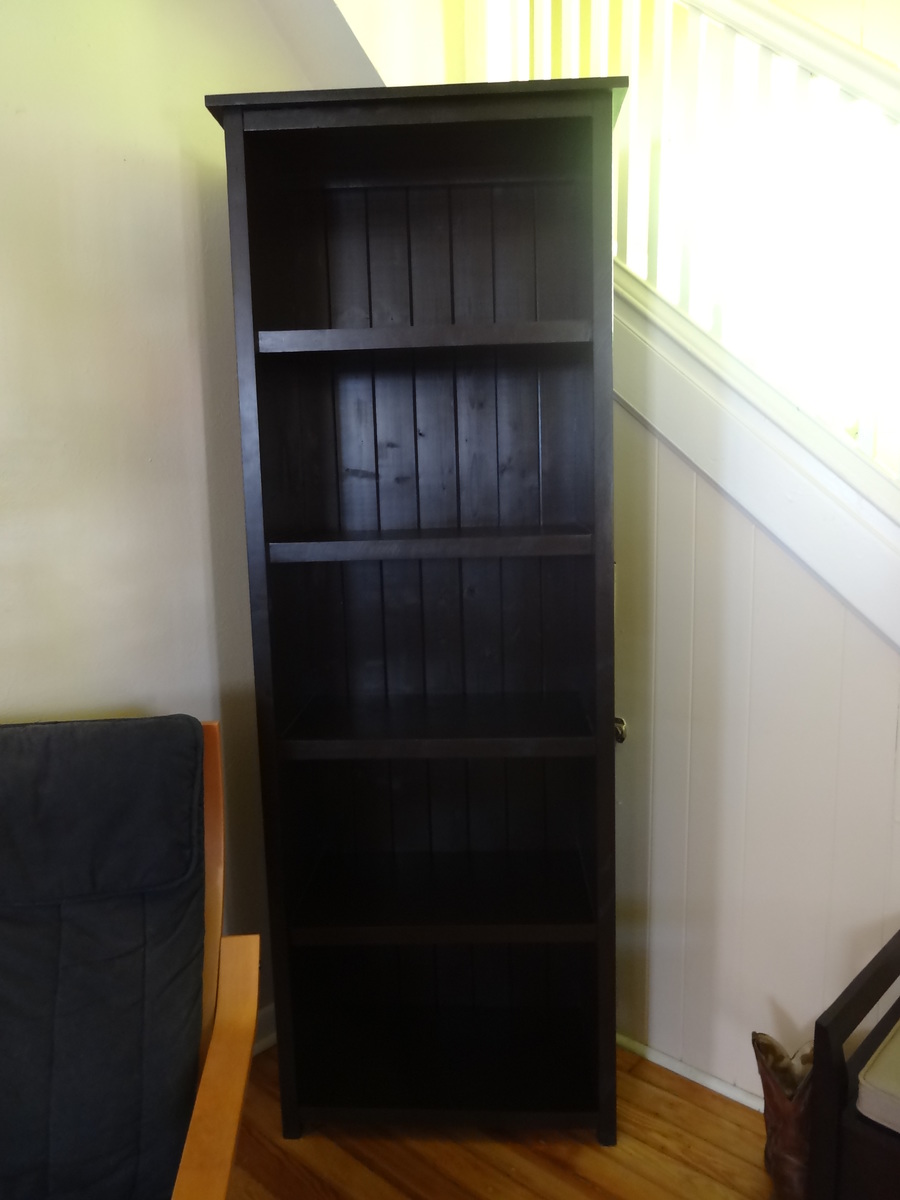
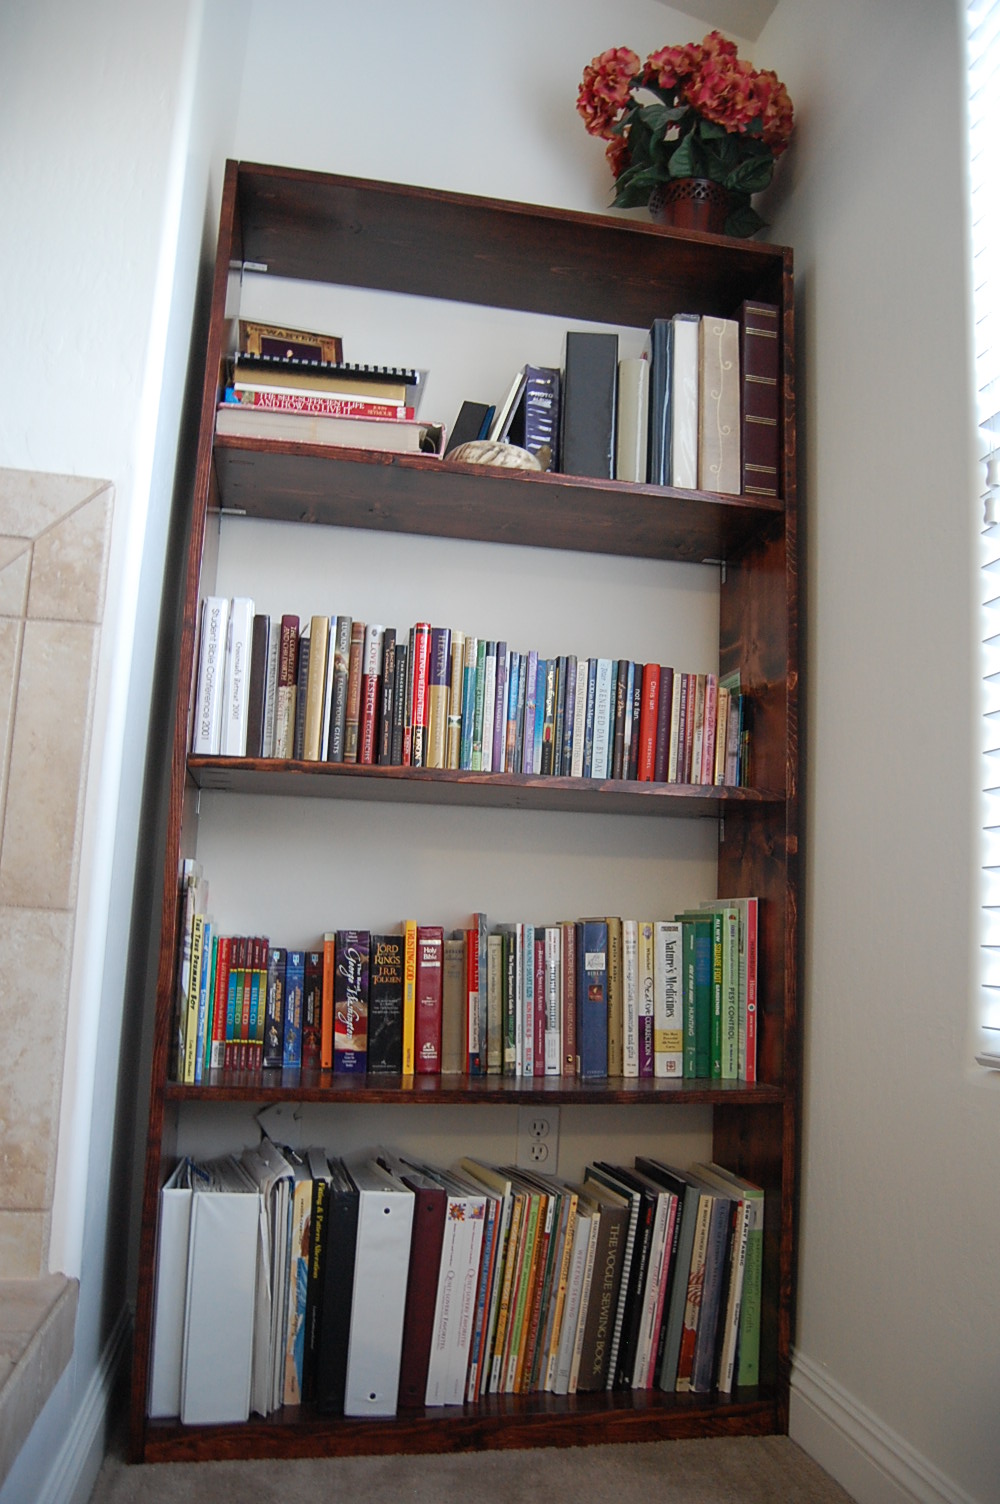
Kentwood Bookshelf
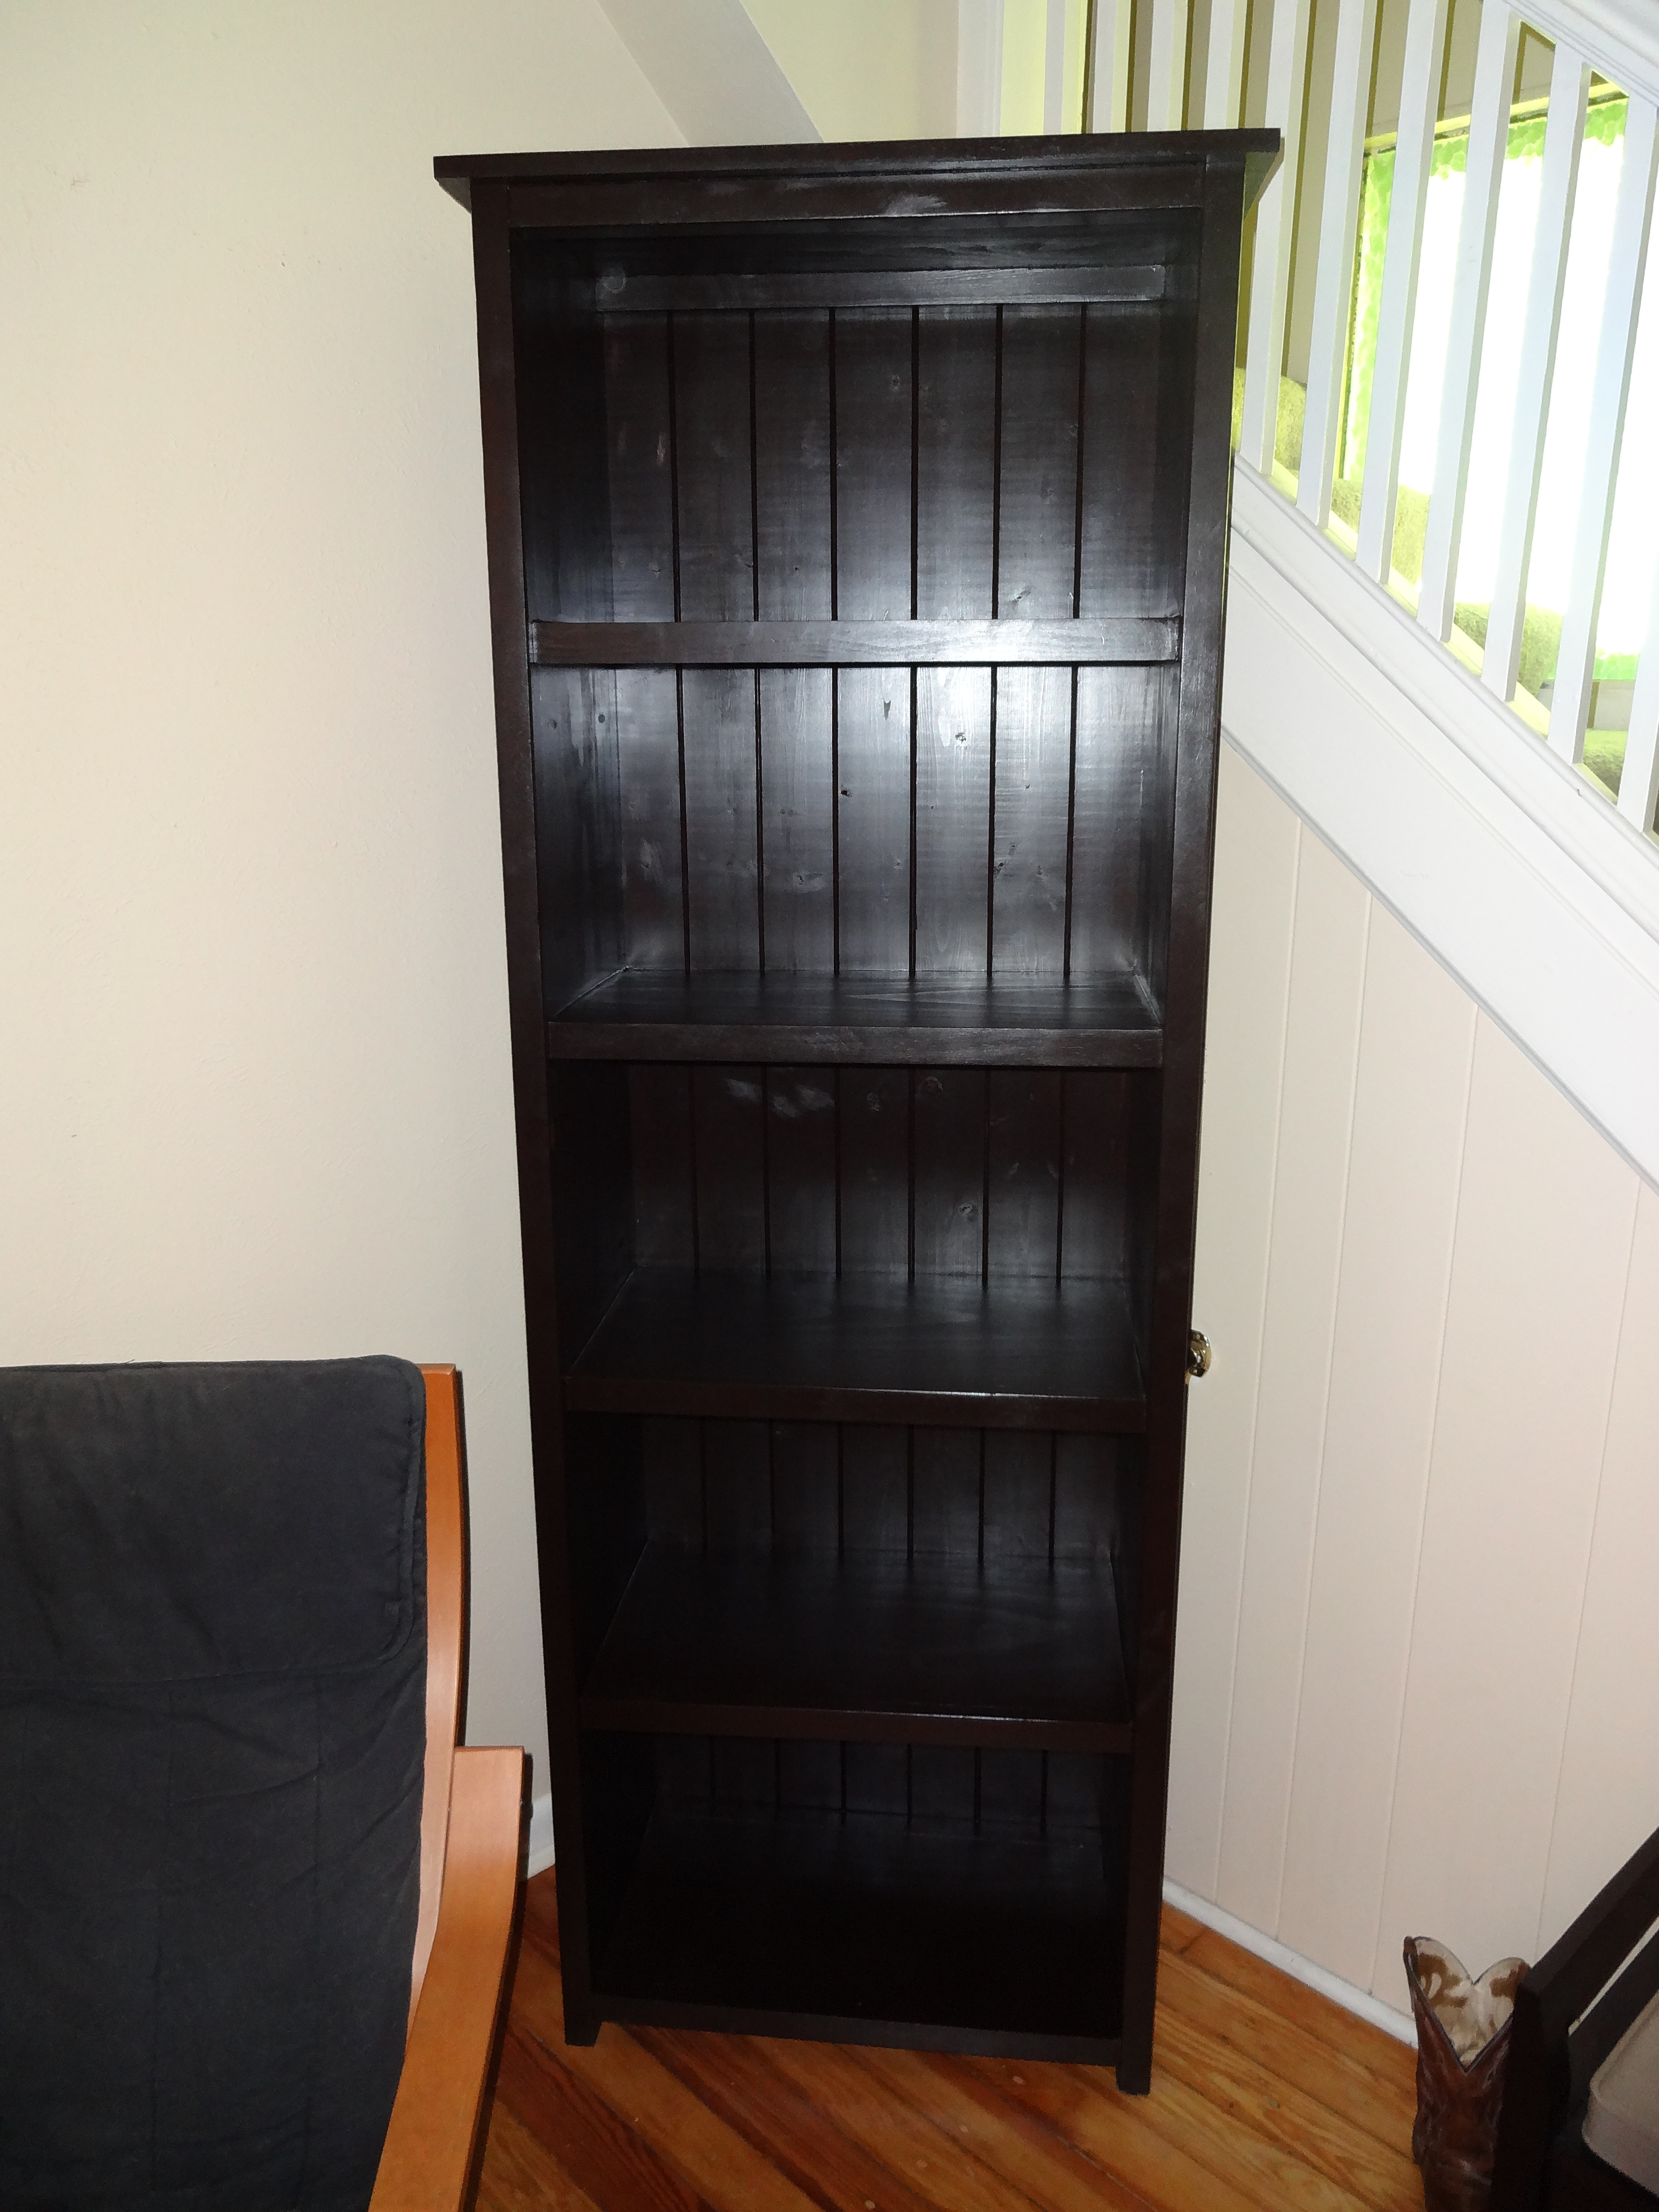
This was my first crack at a project. I changed the plans a bit to make it wider and taller by one more shelf. I wanted an "espresso" finish to match my other furniture and after testing a bunch of different stains I settled on the General Finishes Gel Stain in Java. It was so much easier to work with than the others I tried, requiring only two coats, and the color turned out almost perfectly matching my C&B coffee table. I used the General Finishes Arm-R-Seal semi-gloss topcoat (two coats). Thanks for the plans!
Built from Plan(s)
Estimated Cost
Approx $100
Estimated Time Investment
Weekend Project (10-20 Hours)
Finish Used
General Finishes Gel Stain in Java, General Finishes Arm-R-Seal semi-gloss topcoat.
Recommended Skill Level
Beginner
Comments

Fri, 04/26/2013 - 09:15
General Finishes
Beautiful build. I found out about GF from others on this site. I finally tried it and I absolutely love it, too! No comparison!
Fri, 04/26/2013 - 09:57
Thanks spiceylg! The manager
Thanks spiceylg! The manager at my local Rocklers swears by GF.
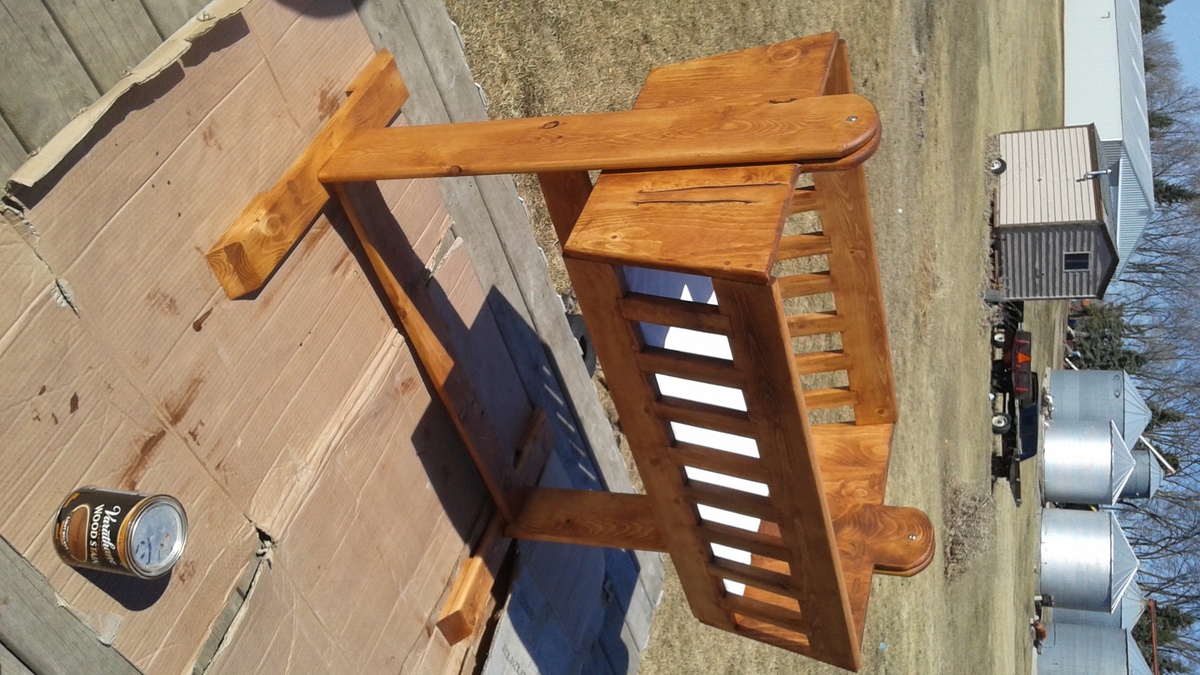
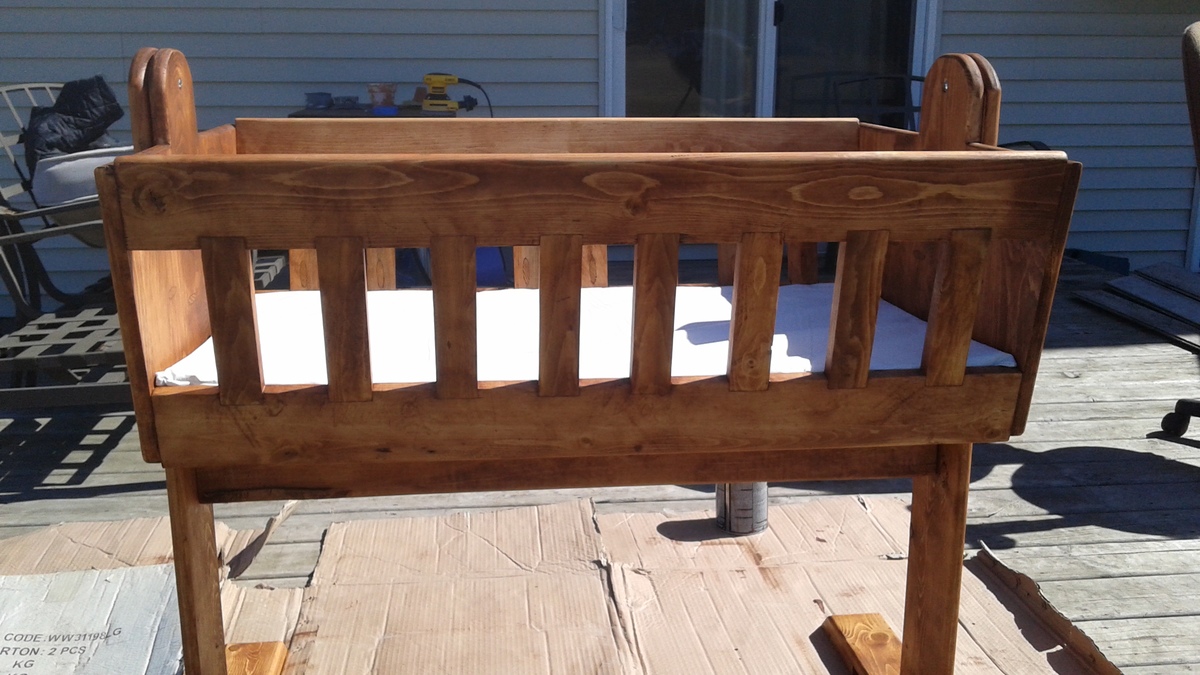
Baby Cradle

Made this from typical dimensions of other cradle plans online and designed it off the cuff. Years ago, my dad made a cradle for me. I thought this would be a fun project to make for friends and family for their new little bundles of joy. The bottom is braced with the idea that older children will probably be playing in it. It was tested up to 65 lbs. All for approximately $60 with the mattress. Hopefully the recipients like it as much as we enjoyed building it.

Estimated Cost
$60
Estimated Time Investment
Weekend Project (10-20 Hours)
Finish Used
Varathane Light Walnut
Recommended Skill Level
Intermediate
Comments
Thu, 12/17/2020 - 14:28
Could I have the plans for…
Could I have the plans for this cradle. Thank you Patty
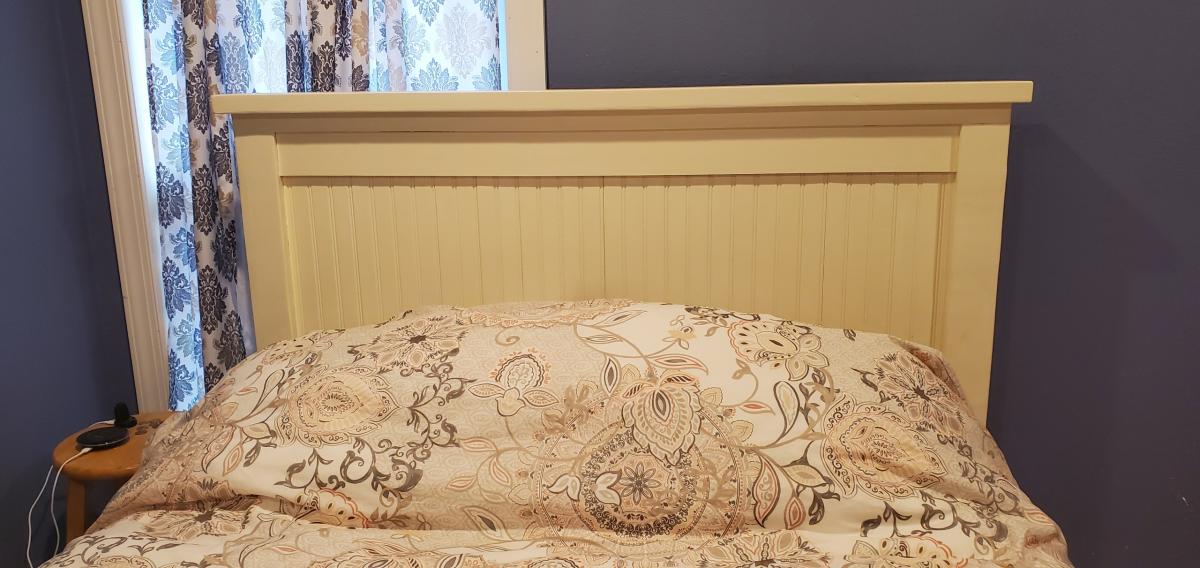
Farmhouse Bed
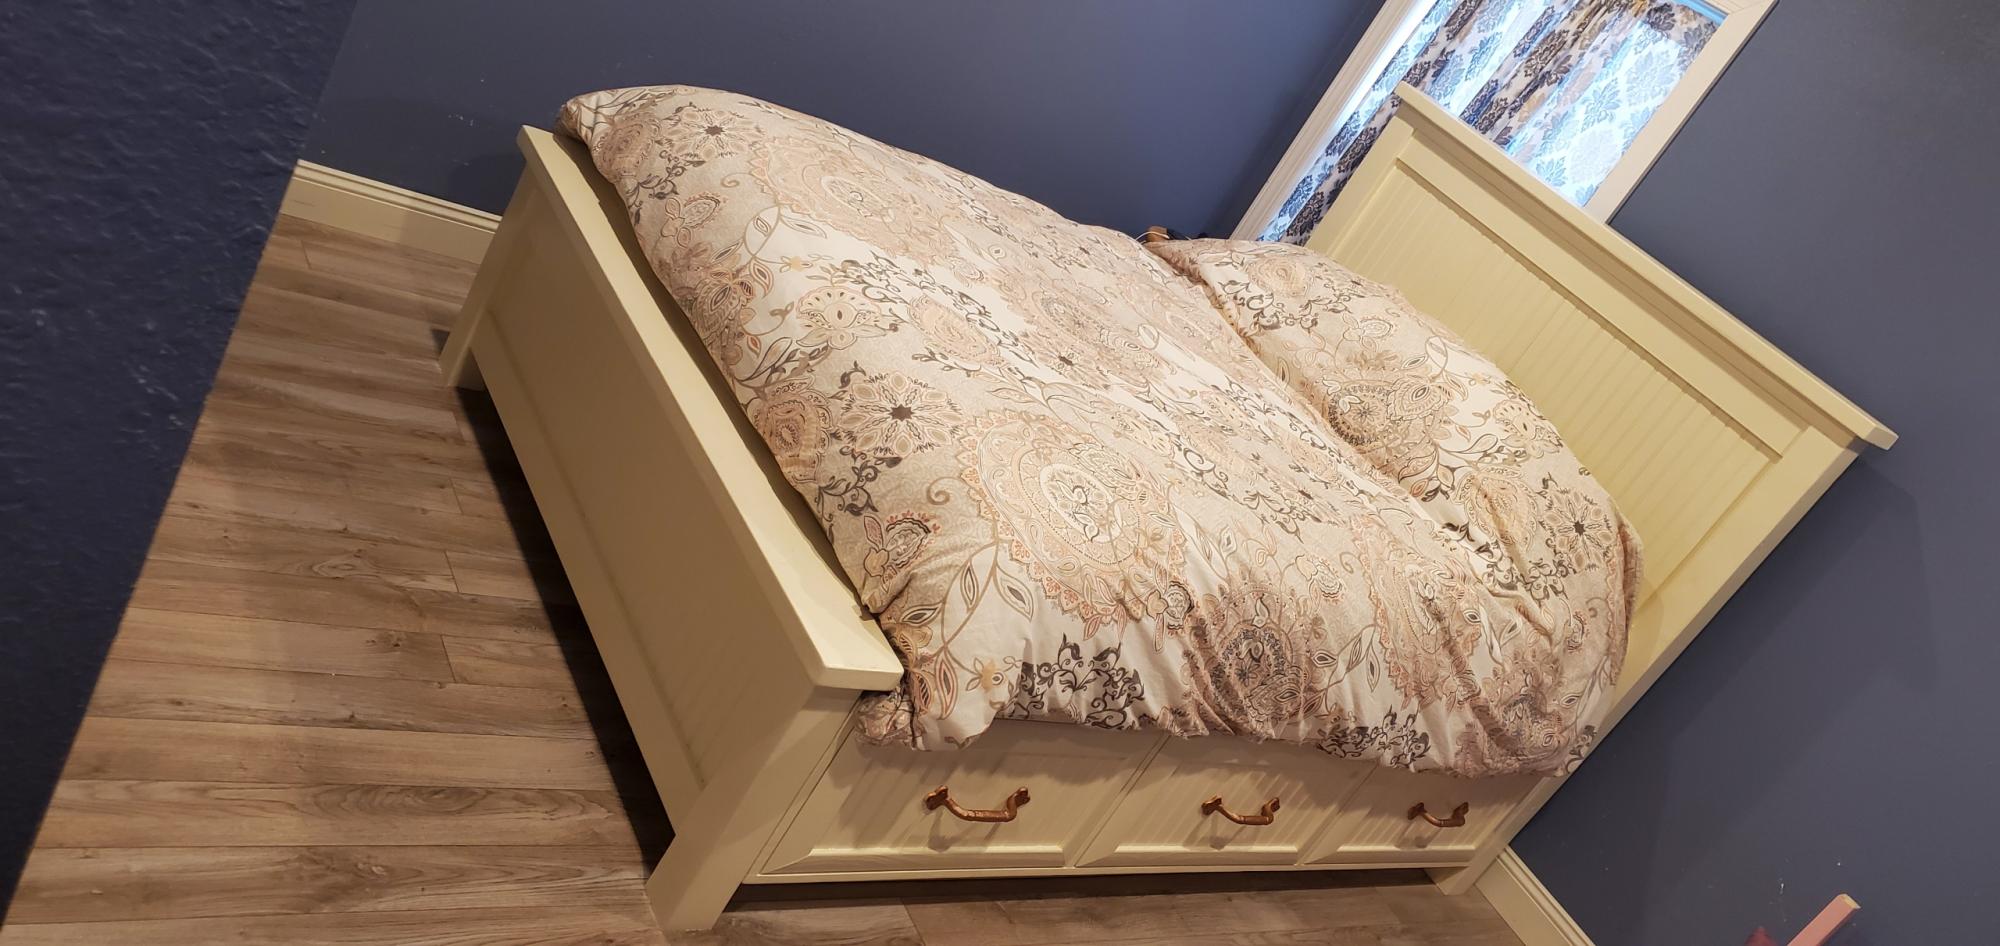
A modified version of the farmhouse bed with drawers. Thanks Ana white.
Built from Plan(s)
Comments
Skinny IKEA Lack Bookshelf
I found Ana-white.com and was so inspired! I have been sewing for 15 years and had been admiring all the projects on various blogs I follow, but Ana's plans were the last straw (in a good way!). I was given a table saw by a contractor friend of mine and got my drill and miter saw for Christmas and my husband helped me build this as our first build. He didn't want the weight of the 2x12s so we went 1x12s and figured if it starts to look like it needs more support, we could always back it. So far it's doing great and fits right in an alcove in our living room. It replaced a cheap walmart bookshelf so even if we botched it we figured it'd be better than what we had! But I love how it turned out and we plan to keep on building!


Built from Plan(s)
Estimated Time Investment
Weekend Project (10-20 Hours)
Finish Used
Minwax Red Mahogony,
Minwax® Fast-Drying Polyurethane
Minwax® Fast-Drying Polyurethane
Recommended Skill Level
Starter Project
Comments
Utensil Divider
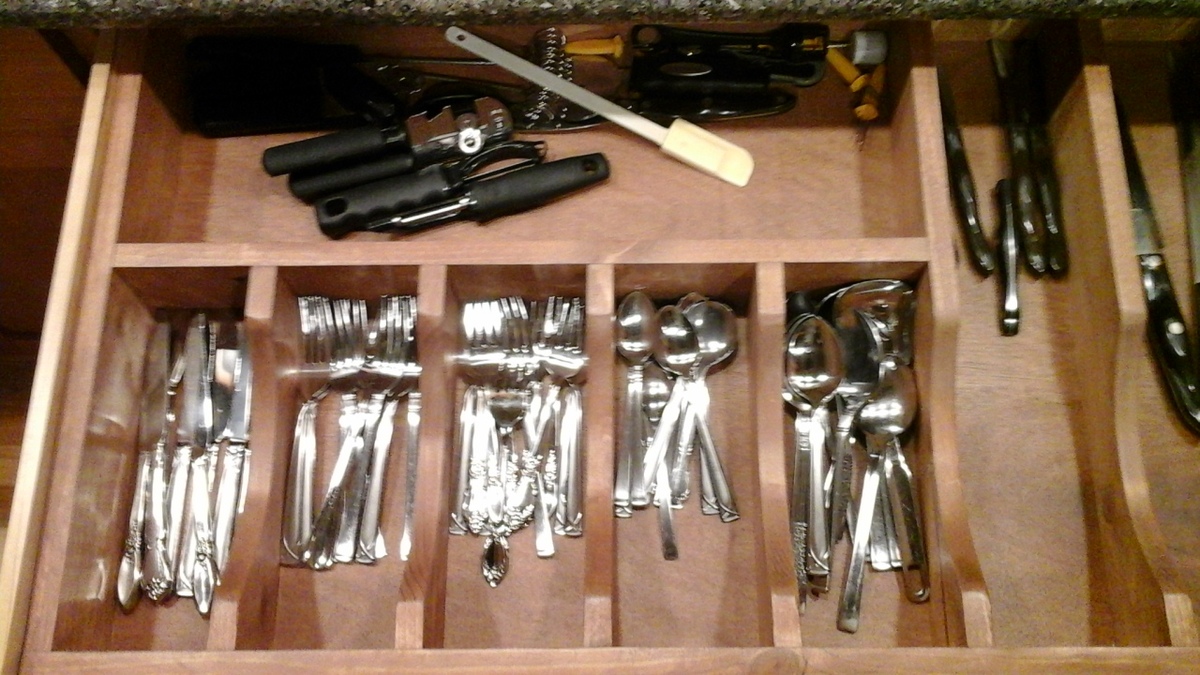
My wife loves this divider. I must say it makes things much more convenient and orderly.
Estimated Cost
30.00
Estimated Time Investment
Afternoon Project (3-6 Hours)
Finish Used
Minwax cherry stain and satin finish
Recommended Skill Level
Beginner
Comments
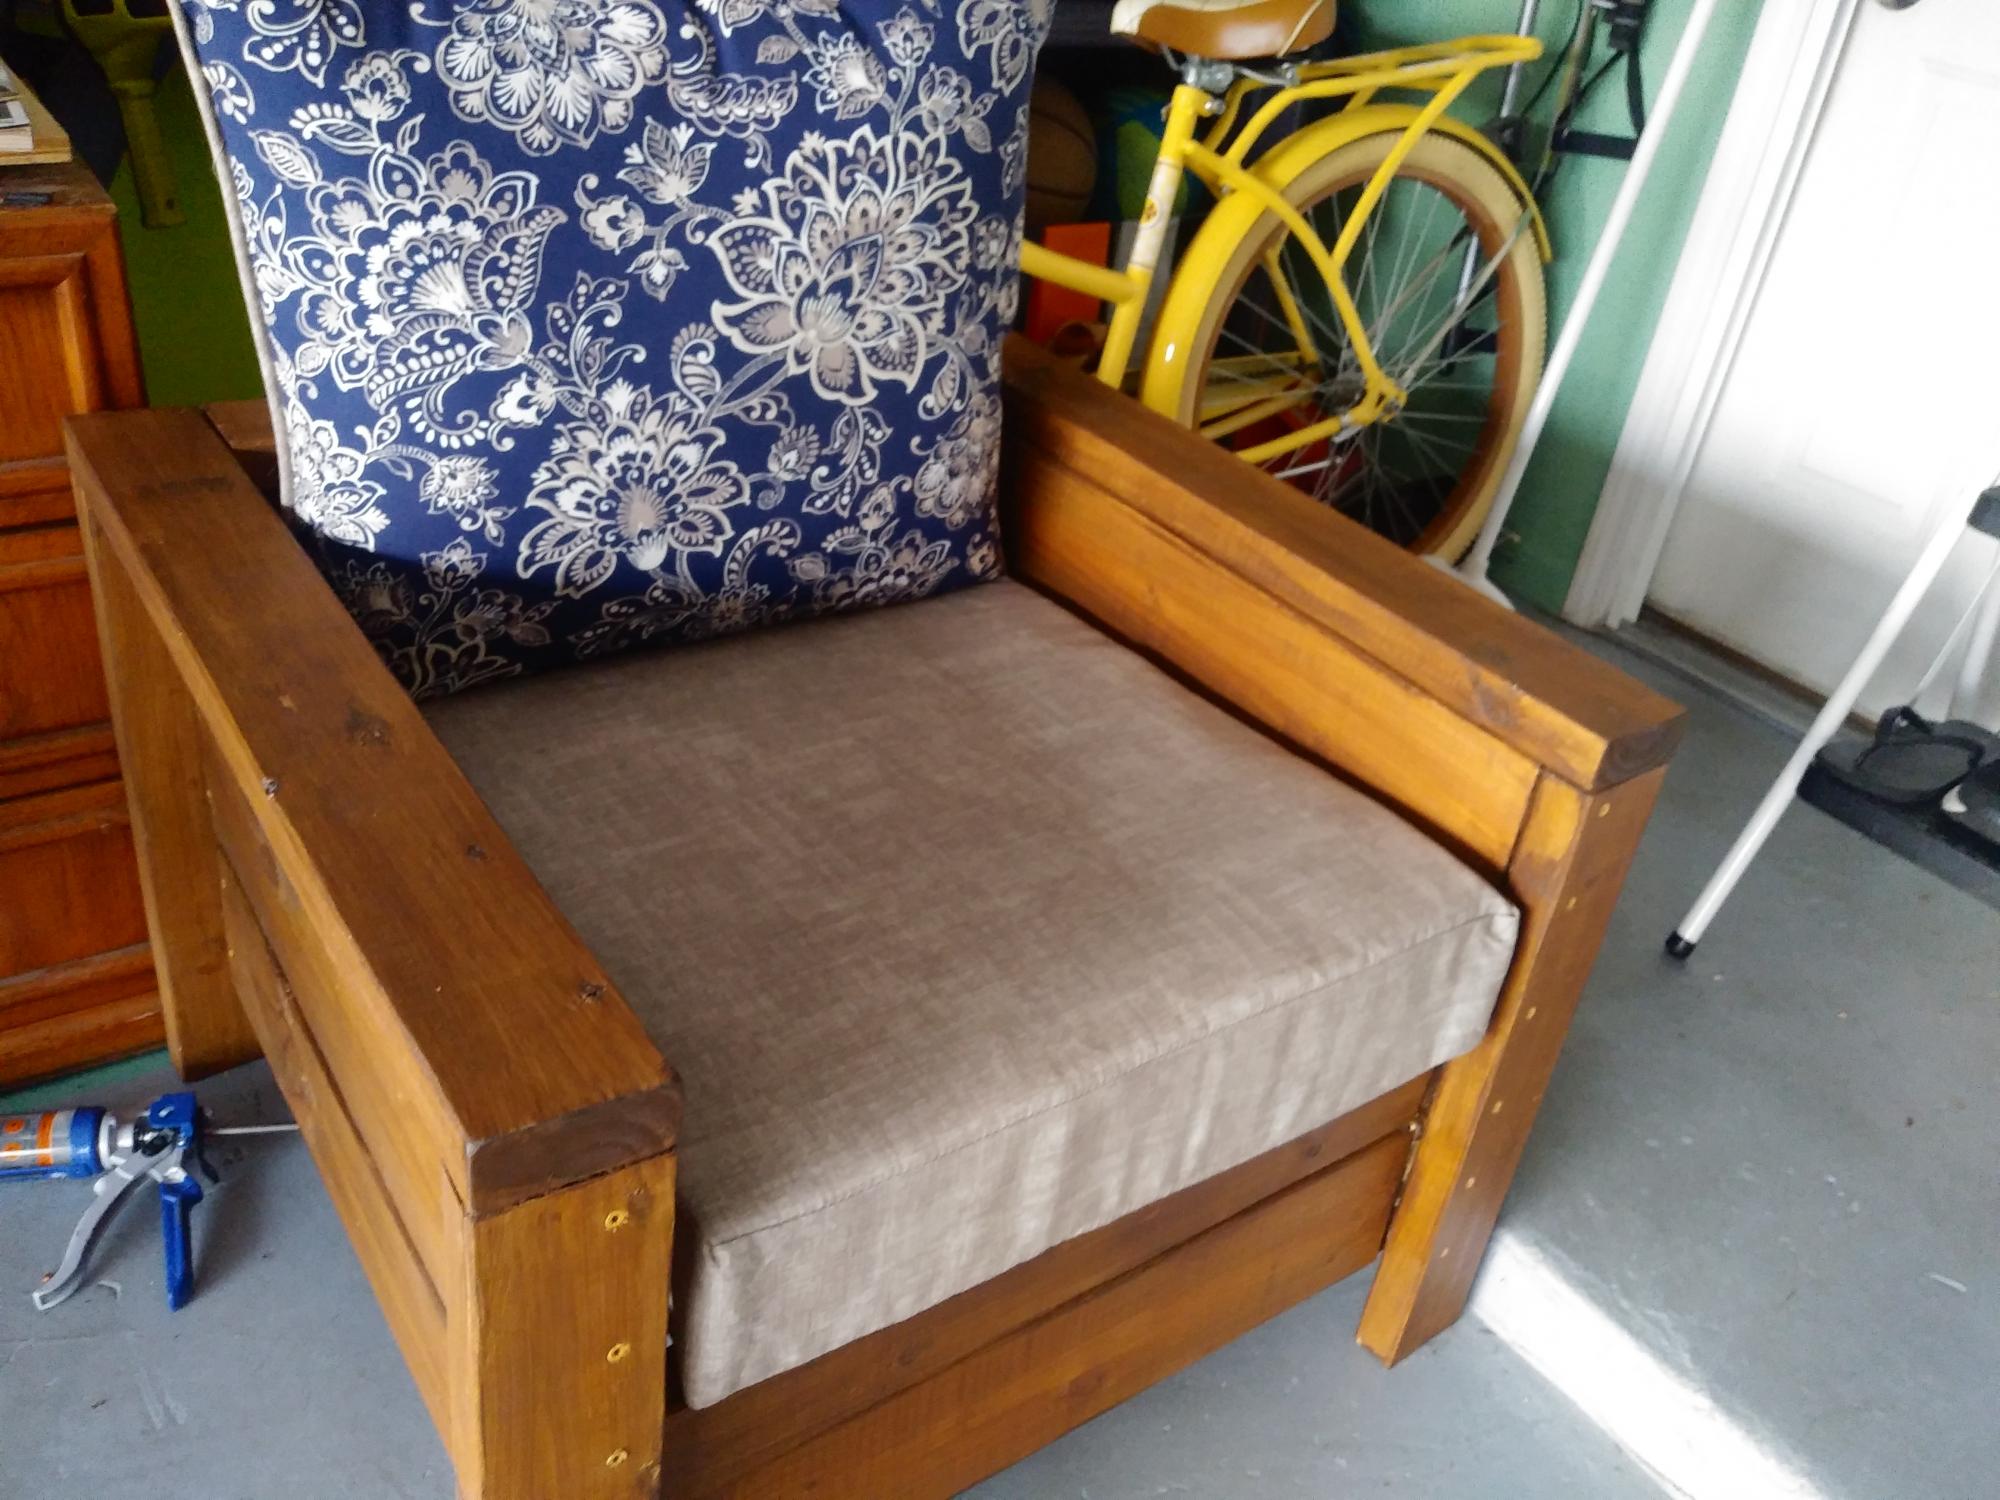
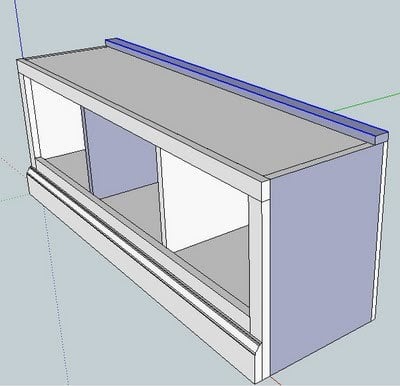
I painted mine!

I modified the back with a larger piece of wood because my cushions kept falling through. Then I painted it white to go better with my cushions. Only took about 4 hours to make and then a couple to paint. Good luck!
Estimated Time Investment
Day Project (6-9 Hours)
Recommended Skill Level
Beginner
Child Workbench
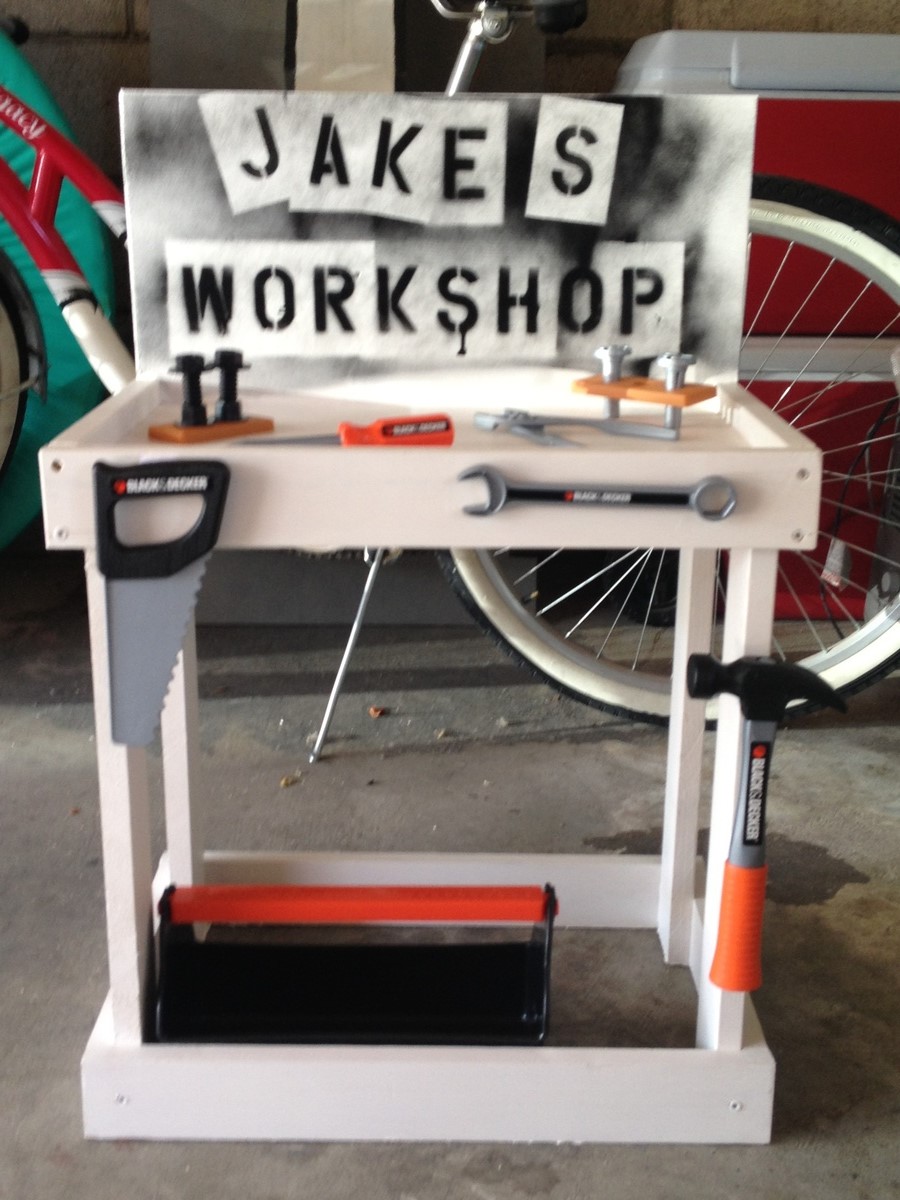
Super easy gift for a toddler
Recommended Skill Level
Beginner
Comments
Mon, 05/06/2013 - 04:49
boys play tool bench
To cute, really like the lettering. Not to many boy things to build, hands down one of my favorites!
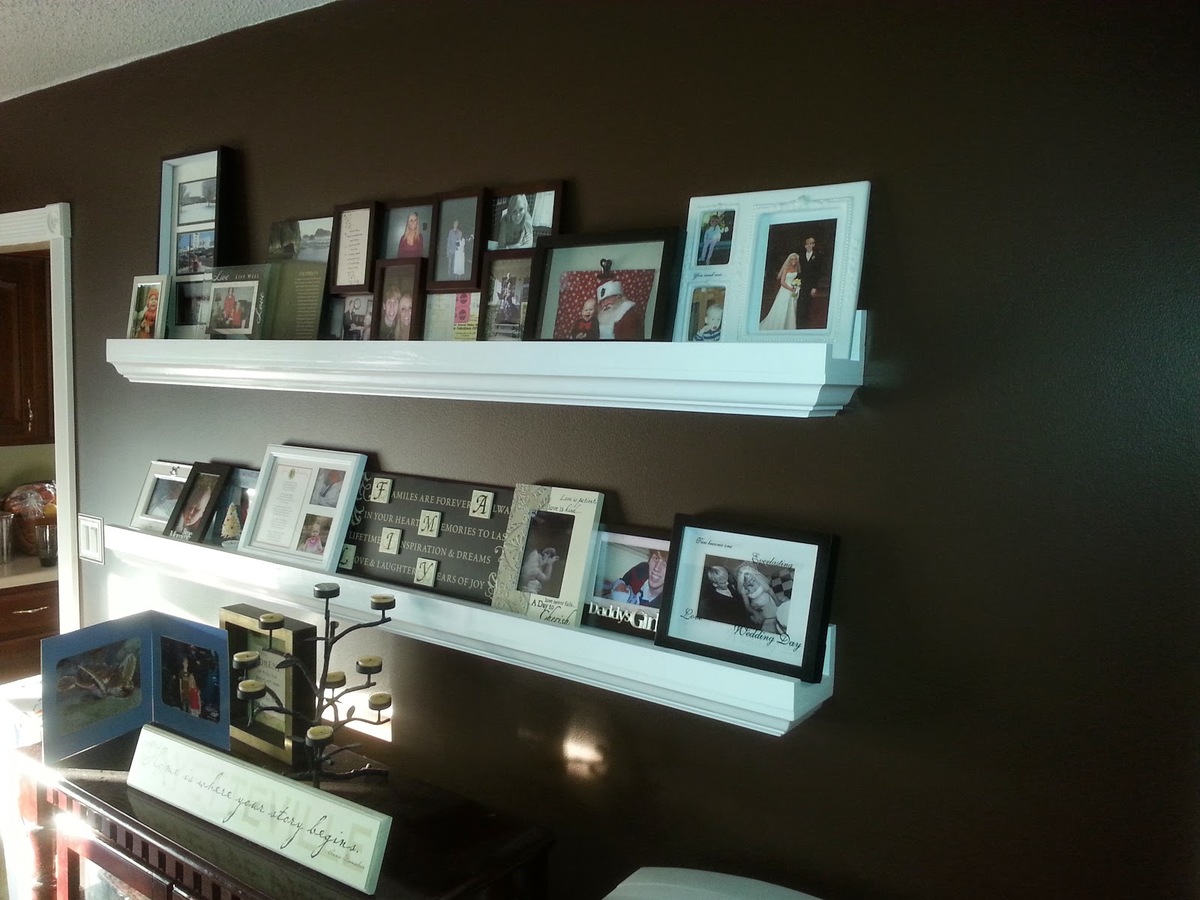
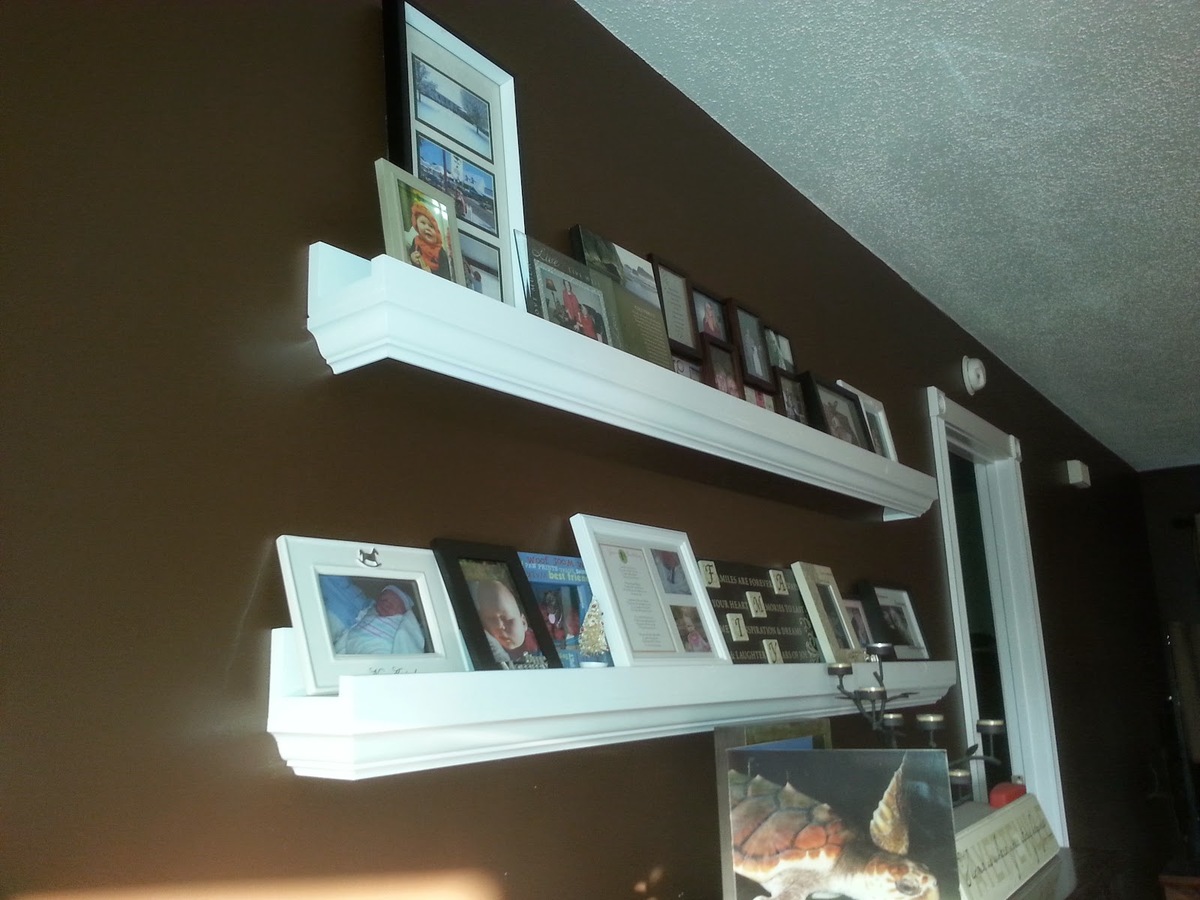
Photo ledges (with crown molding)
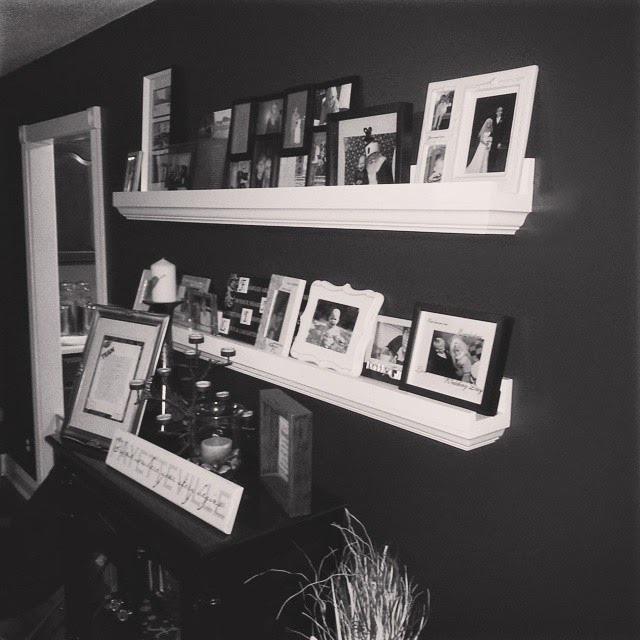
This is a set of photo ledges built for a friend!
Website article: http://www.lanebroswoodshop.com/2015/02/photo-ledges.html
Built from Plan(s)
Estimated Cost
$50 per
Estimated Time Investment
Day Project (6-9 Hours)
Finish Used
High Gloss White
Recommended Skill Level
Beginner
Comments
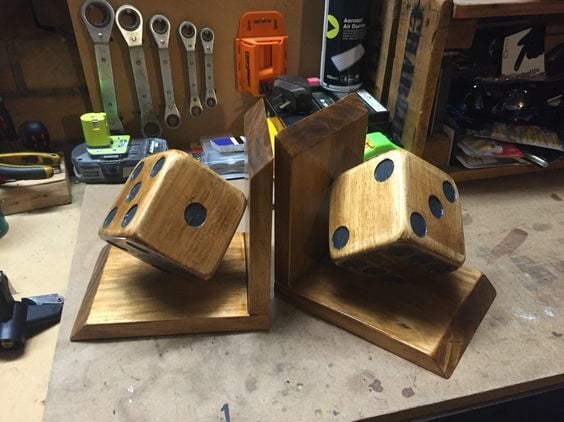
Dice Bookends
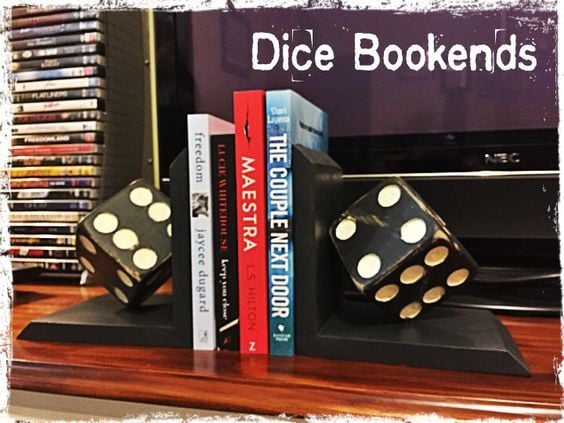
I made these bookends with 4x4 offcuts and pine scraps.
I couldn't decide what colour I wanted so I made 3 sets. White, charcoal and stained timber.
I think I like the charcoal best.

Estimated Cost
$0 because I had made a bed and bookcase and had plenty of offcuts.
The hardest part was getting dice dots layout correct.
The hardest part was getting dice dots layout correct.
Estimated Time Investment
Afternoon Project (3-6 Hours)
Finish Used
Charcoal Chalk paint, distressed then clear coated.
White Chalk paint, distressed then clear coated.
Charcoal paint, Stained then clear coated
White Chalk paint, distressed then clear coated.
Charcoal paint, Stained then clear coated
Recommended Skill Level
Beginner
Comments
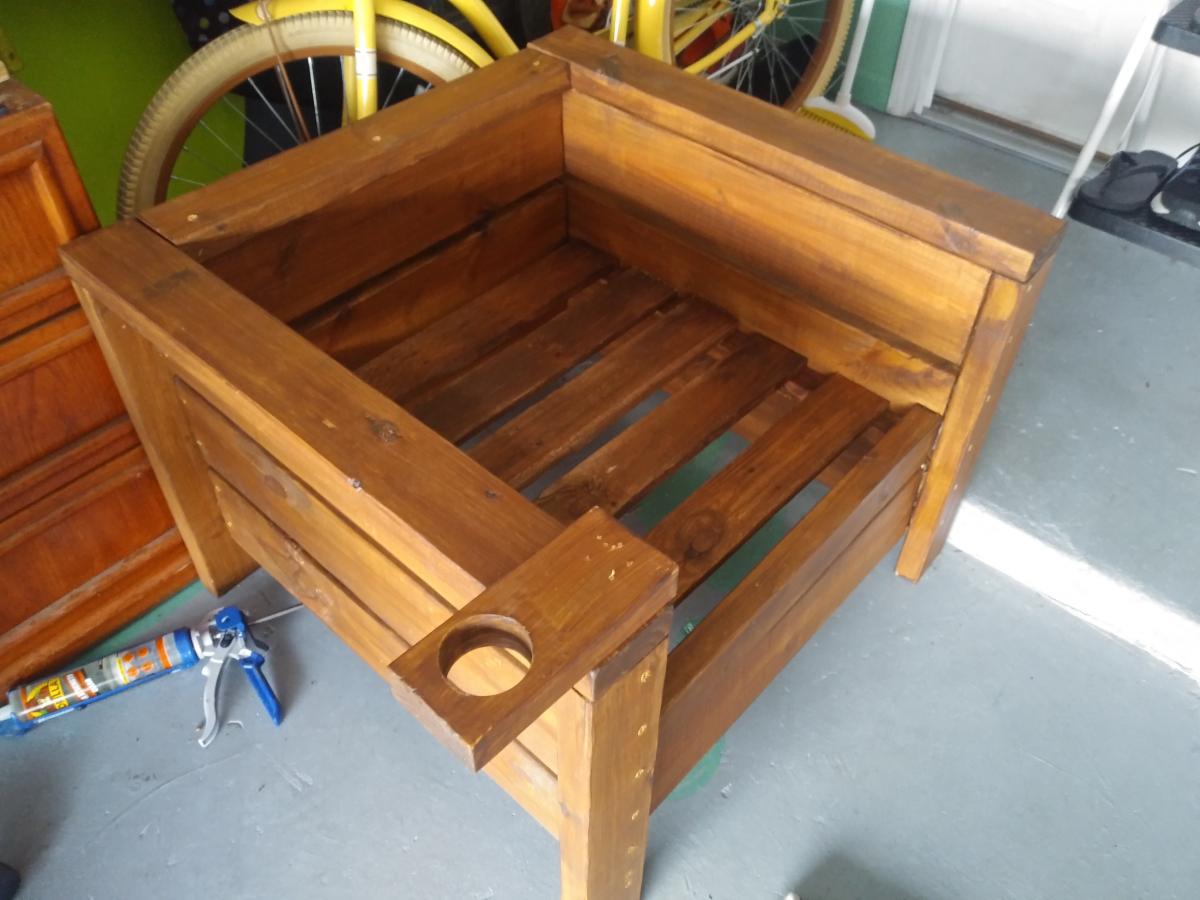
Ana White Admin
Tue, 07/13/2021 - 08:06
Great addition!
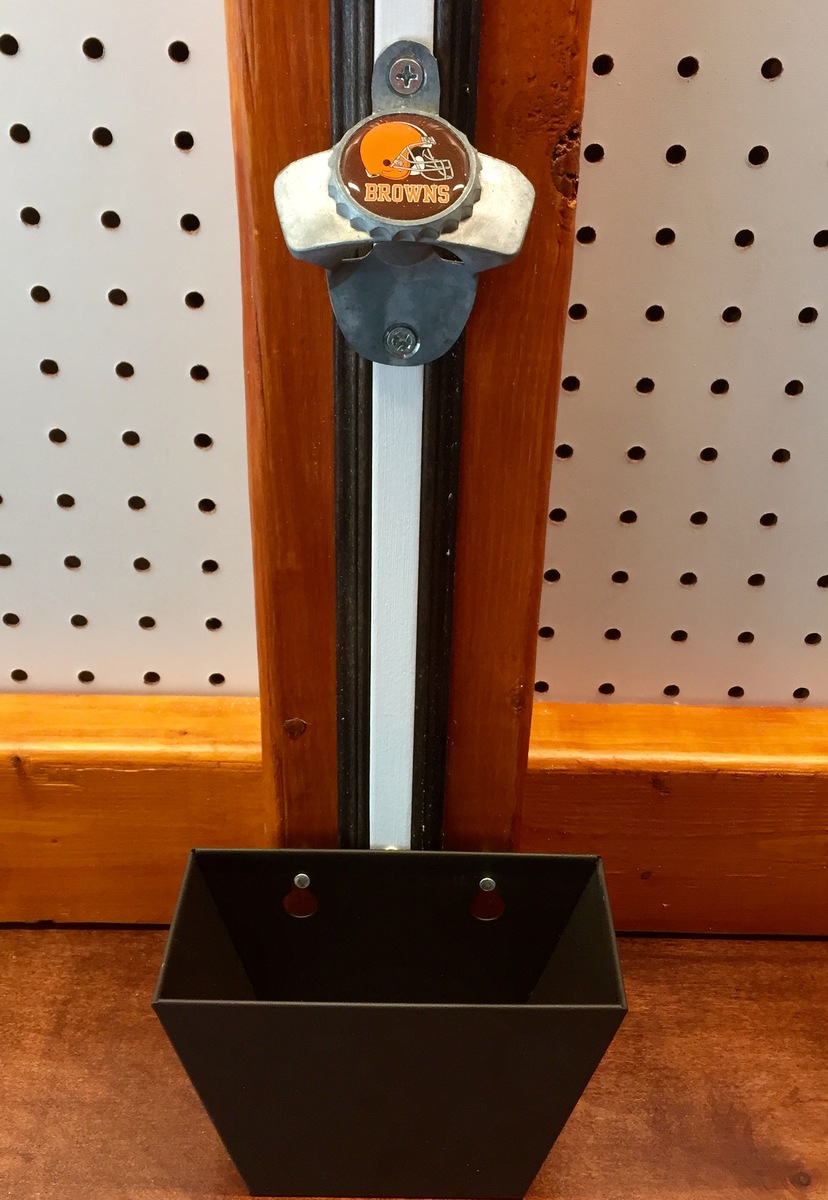
Wonderful build and I like the added drink holder:)