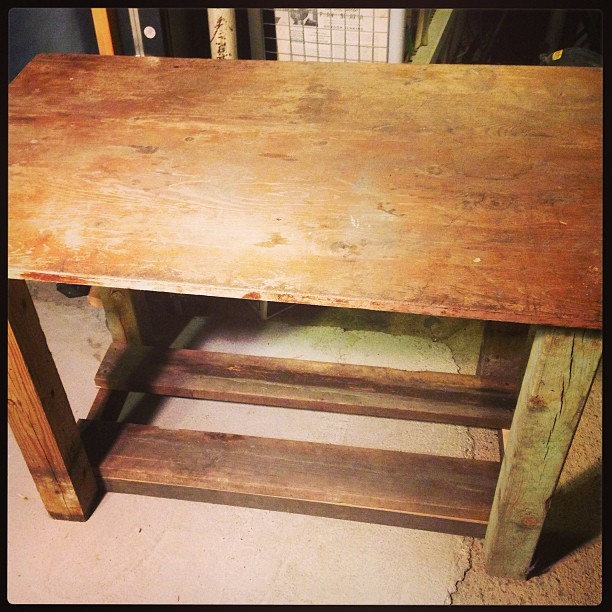
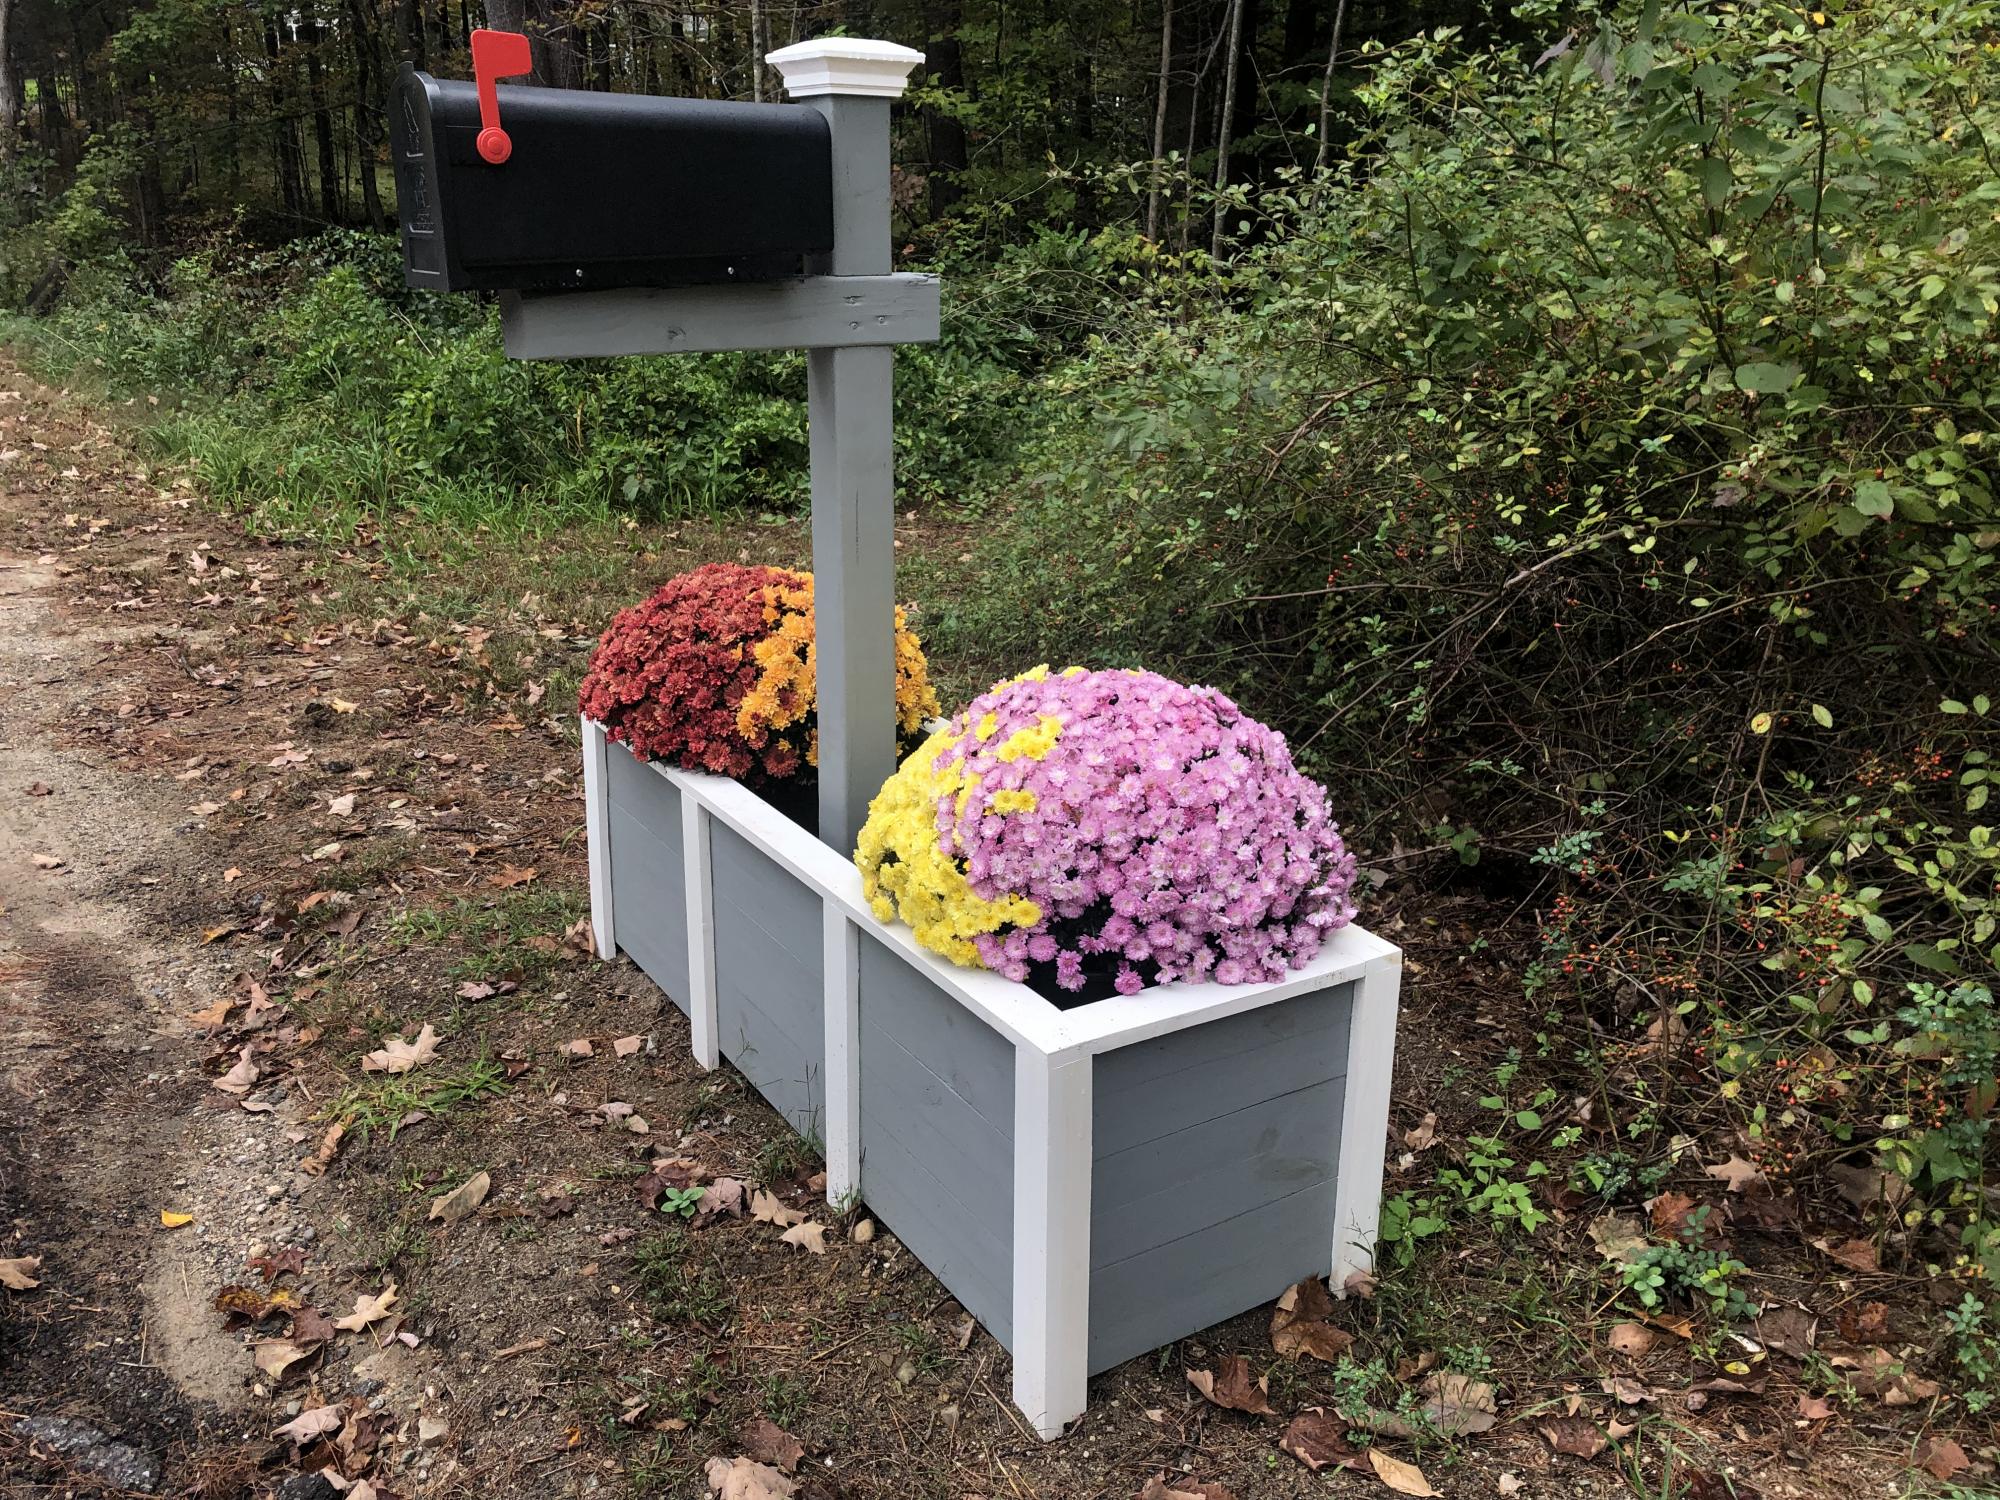
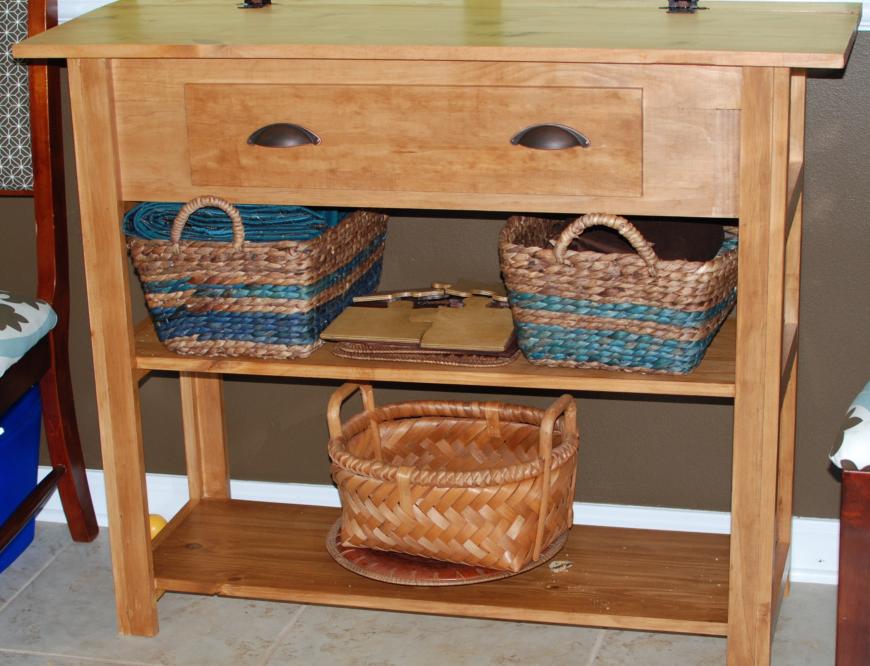
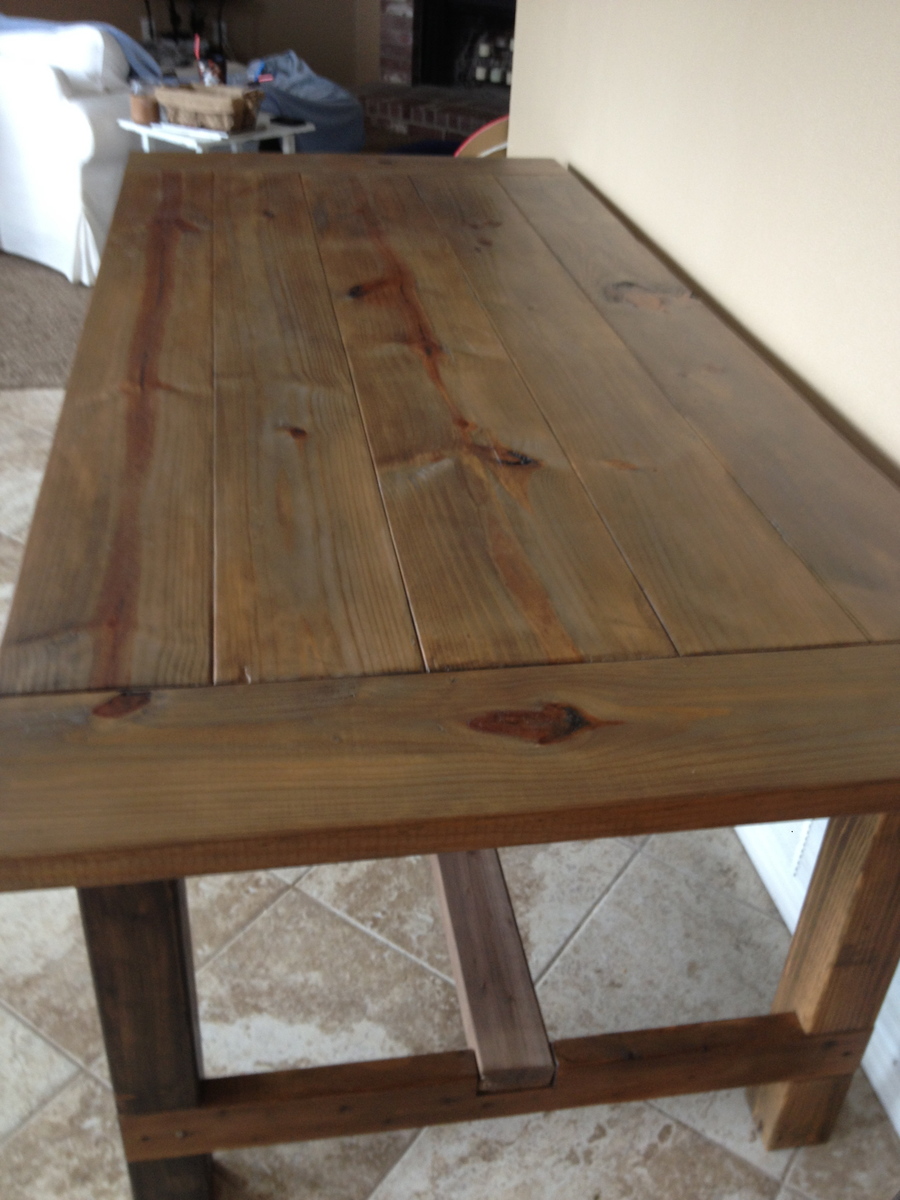
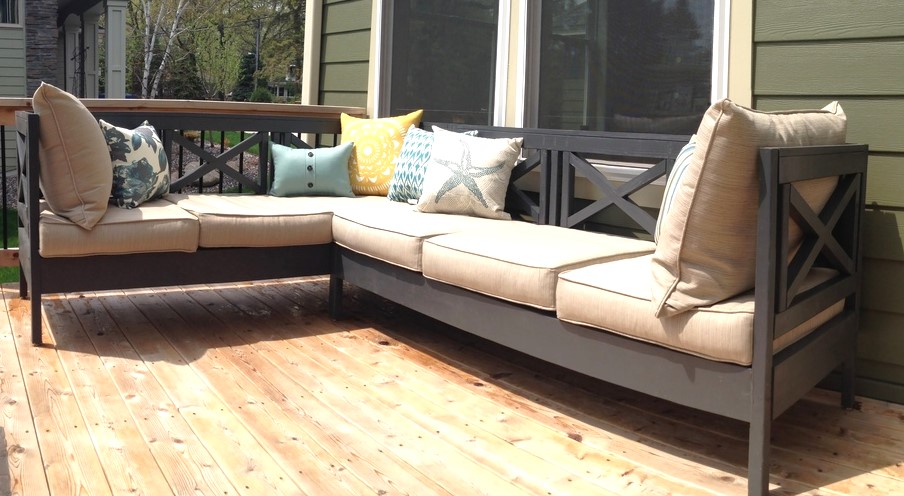
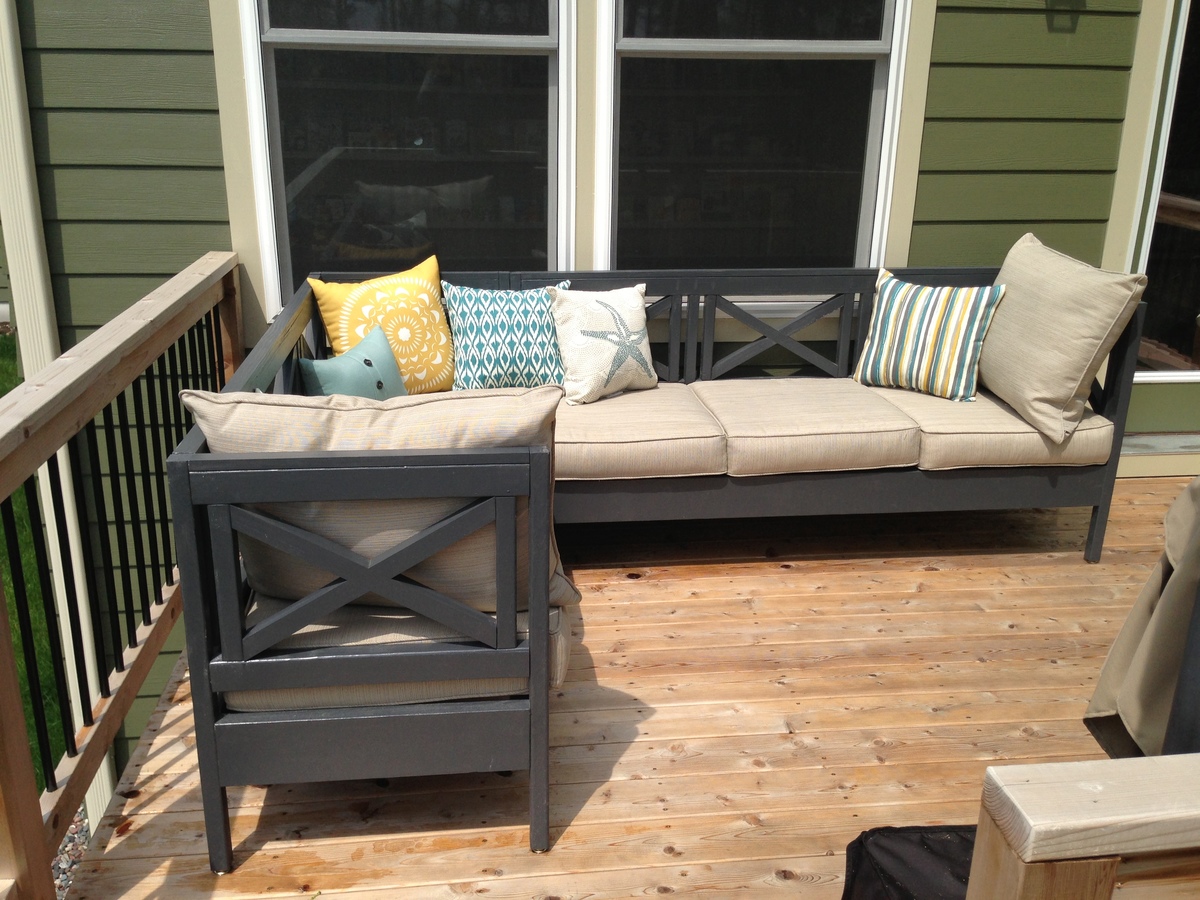
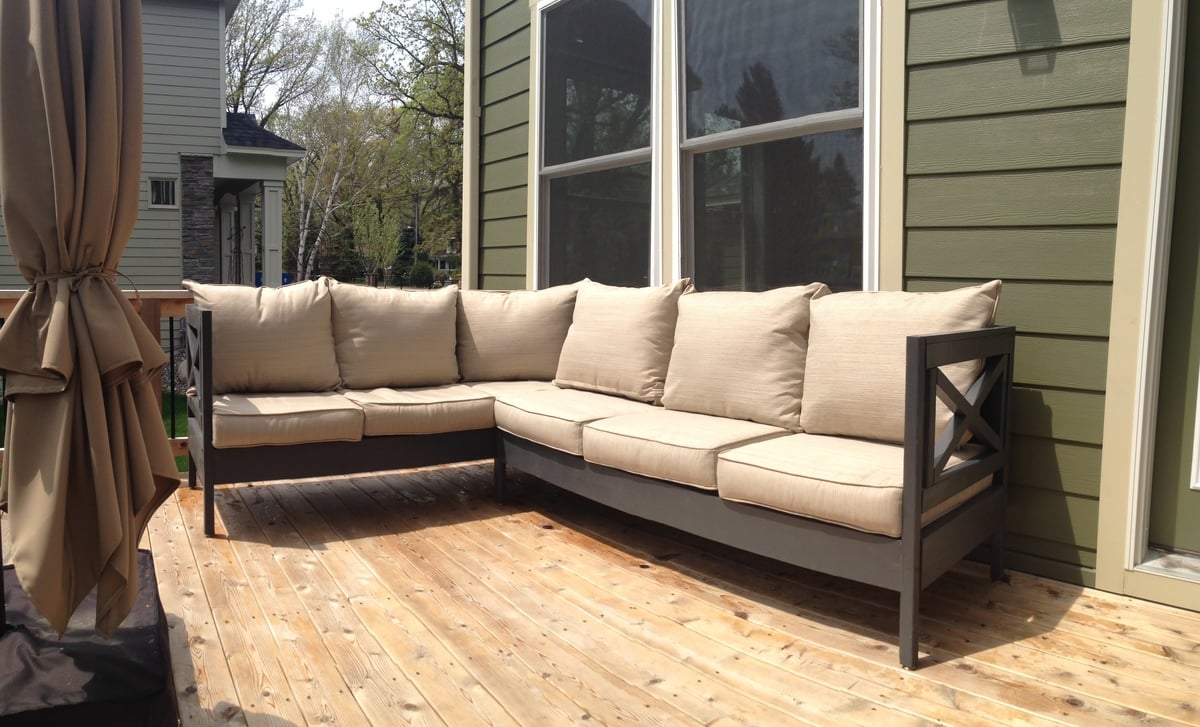
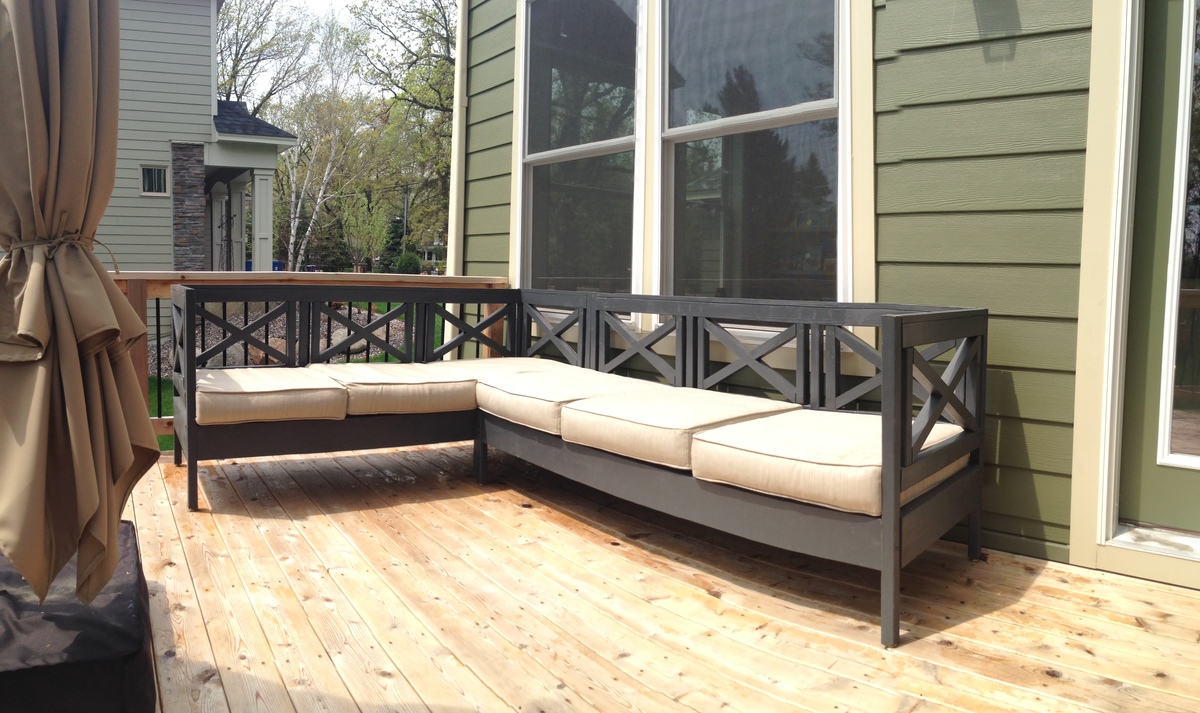
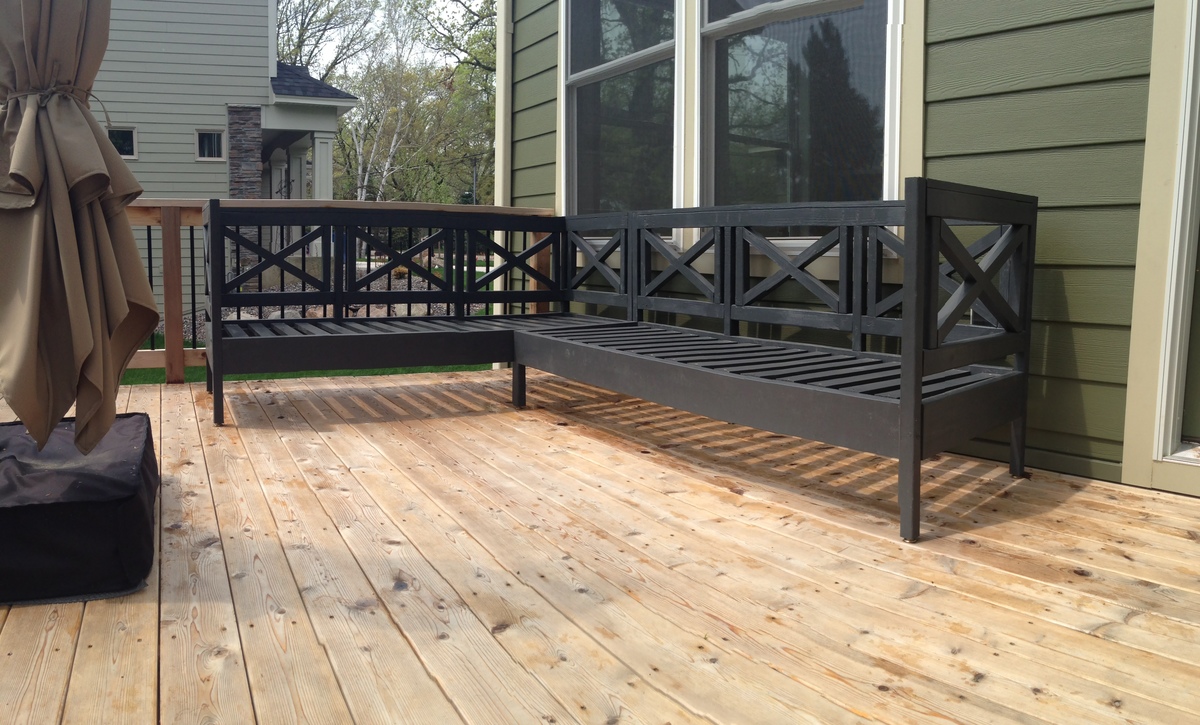
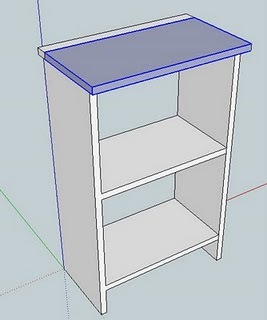
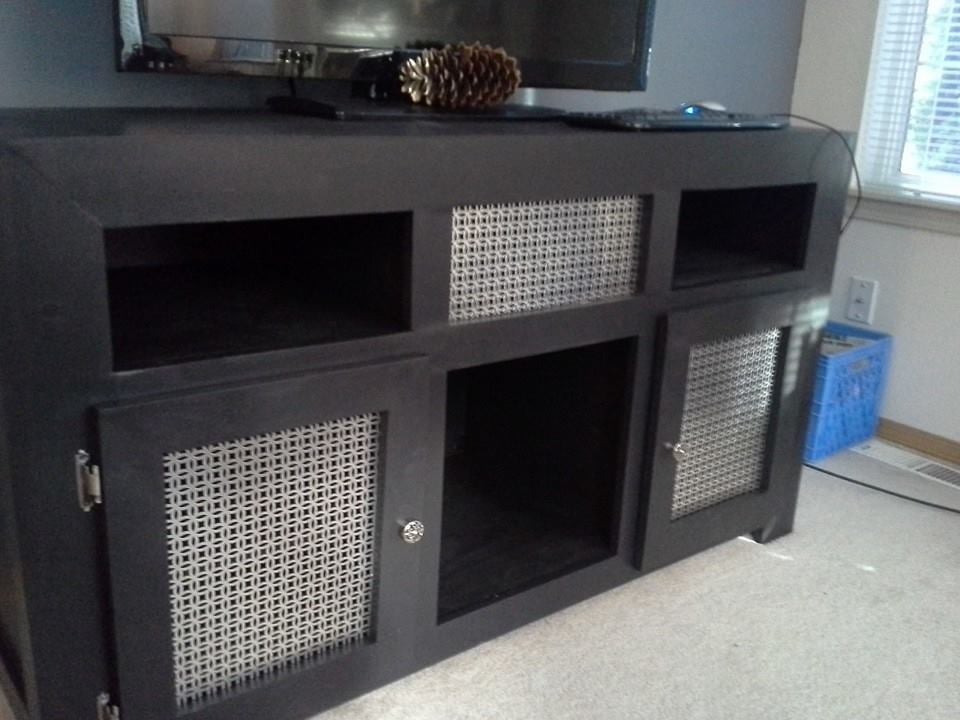
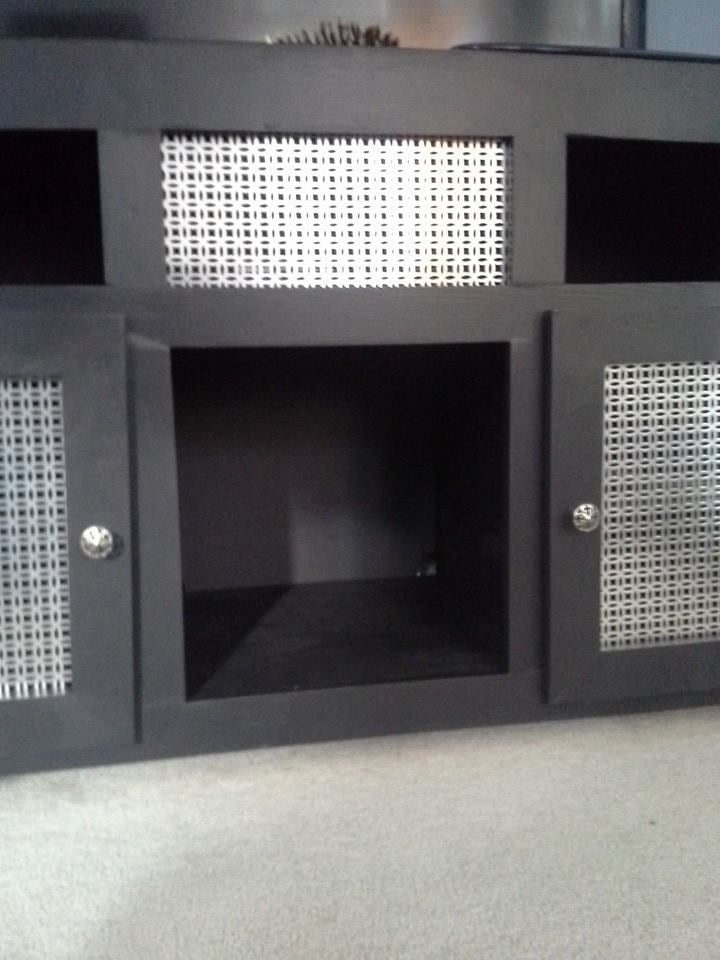
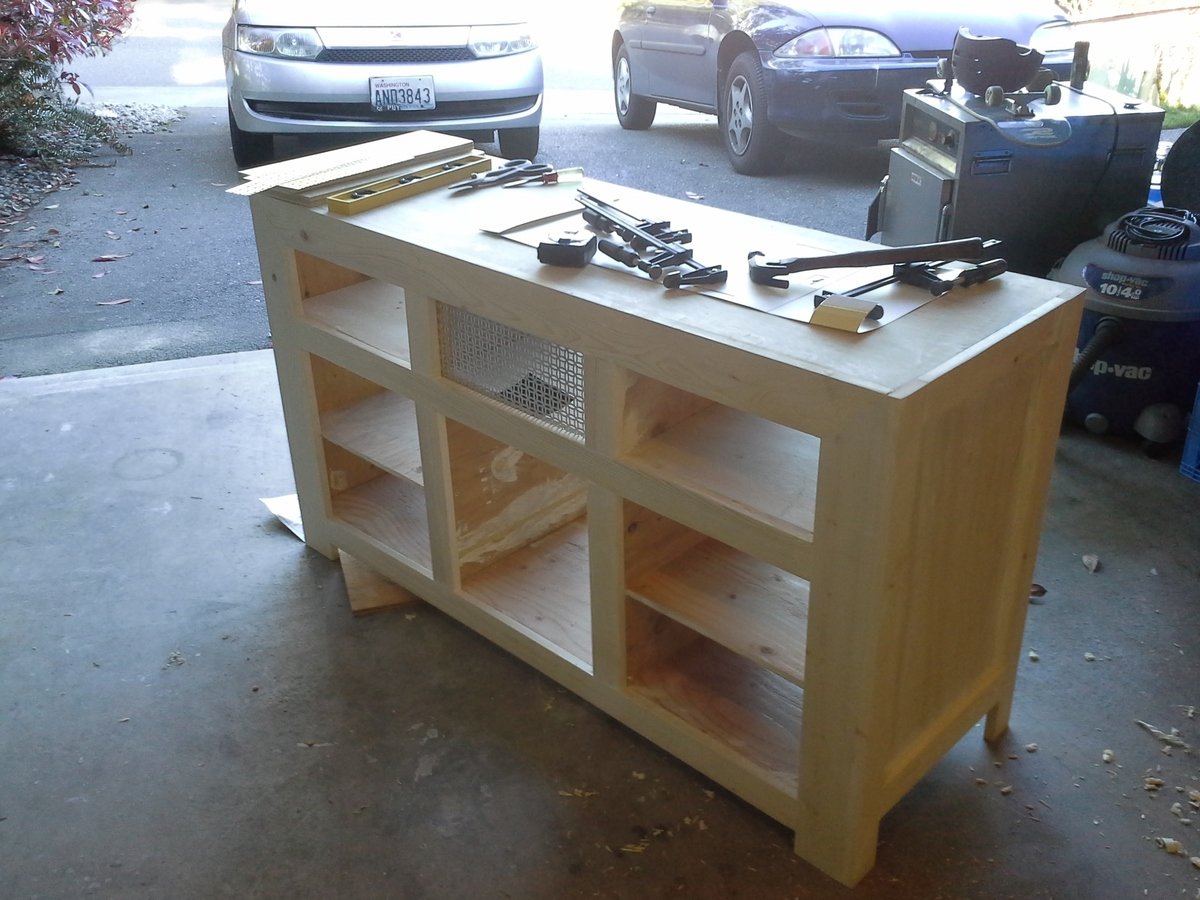
Console table
![](/sites/default/files/3154826580_1368050905.jpg)
I built this using the plans for the Perfect End Table. I made it a little taller and jazzed up the shelf a bit. The whole project cost me less than $35!
![](/sites/default/files/3154826582_1368050905.jpeg)
![](/sites/default/files/3154826583_1368050905.jpeg)
![](/sites/default/files/3154826584_1368050905.jpeg)
![](/sites/default/files/3154826585_1368050905.jpeg)
I built this using the plans for the Perfect End Table. I made it a little taller and jazzed up the shelf a bit. The whole project cost me less than $35!
I wanted to make a quick spring decoration. I dug through my scrap wood pile for some inspiration. This past winter, I made some snowmen out of scrap 2x4s. I decided I would make a bunny out of some scrap wood.
For more details and pictures of this and my other projects, please check out my blog at JaimeOfAllTrades.blogspot.com
This was super easy to make and it didn't cost me anything at all! What makes it great is that it is completely customizable! This would also make a great spring craft for the kids!
6 foot sliding door console with barn door style doors. Dark walnut top. Handmade hardware for the sliding door.
Easy to do though some thought required for conversion into centimetres .
Today I built a workbench from wood found in my alley. No money was harmed during the making of this workbench #renew #reuse #recycle
I made this for my daughter for Christmas. I used peel and stick tile for the back splash and marble look contact paper for the counters.
Great plans! I tweaked some dimensions to make it several inches longer, and I made the bars 12 inches instead of 6 to open it up more. Clyde loved it immediately!! It goes perfectly with our craftsman/mission themed design. Thank you!
I wanted to put a planter around our new mailbox. So, I took your single planter design and build it as if it were three separate boxes only leaving out the interior pieces. It required making a T section for the middle pieces, And I made sure I used plenty of glue to firm up the structure and provide stiffness.
Less than $15 for wood and paint. Learned the incredible value of a Kreg Jig in the mix. We ended up painting it a princess pink :) We think this will be a great gift for our friends' toddlers!
Easy and fun. Don't worry yourself over the angle on the left side of the stringer. The 15 degree one matters, the other, not so much. Buy an extra 1x4 unless you want to spend a pile of time figuring out how to cut them to maximize the space!
Taken from the Modern Outdoor chair project and added a back. Then decided that I love the andorak style chair arms and thus the Andrmodern chair was born..
I’ve been enjoying making the modern Adirondack chairs, only with reclaimed wood seats and backs. Finally made a love seat version.
Made a buffet table at the height I needed it based off the open to coffee table design of Ana's. It has a to that is hinged to open from the top so my little boys can't get into all the small items I need them to stay away from.
This was my first building project. All in all I'd say it was pretty easy. My husband had to help me on some parts because sometimes you just need more than 2 hands! I love my table and can't wait to start my next project. This was pretty large scale so I think I'll tackle something smaller next time.
We wanted to a group painting class that seems to be really popular right now and offered all over the place. Instead of spending $30/person on a class we thought we would try doing something like this on our own! We had a great time and would do it again! Ours was smaller than the original in the tutorial because we wanted to make 4. Each person found an image online that they liked to make it more individualized.
Now that I've had a taste of working with wood, I'm ready for more! Ana, you're an inspiration! Thanks for the great site!
Mon, 04/06/2015 - 08:05
What a great and fun project for a group of friends. They all look wonderful!
Mon, 04/06/2015 - 16:27
What a creative and cool idea! Thanks for sharing and these all look amazing!
Built this one based on a few of the other brag posts. We are happy with how it turned out!
I adapted the plans somewhat. The headboard is made from Pucte, a trpical hardwood with frame of Cedro, a Mahogany. The seats of the stools are also Cedro and legs of Caoba, another Mahogany. I live in Yucatan so these woods are available. The Pucte was repurposed old salvage free
We made two Weatherly Sofas and referenced the Weatherly Loveseat instructions for making one side of one of the sectionals armless. We were able to return several pieces of wood from the original wood list, so save your receipts if you're building something similar. After we placed it on the deck, we used two 5/16" carriage bolts with disc washers and nuts through the aprons to connect the two pieces of the sectional. ***General Advice*** There are a LOT of repetitive cuts in this so make use of cutting jigs to speed up the cutting process. This will allow you to simply cut, slide the next piece into place, and cut again. On a project of this magnitude it will save you a couple of hours. Paint before assembling. You end up painting more sides than necessary, but it goes faster than painting after assembly and your finished product looks better, too. If you are using a soft wood, finish brads will work fine when constructing the x's (as opposed to the finish nails recommended in the plan). *** Price Breakdown *** Wood $162.95 Screws, Hardware, Feet $27.77 Paint $38.58 Wood filler $17.13 Seat cushions w/ matching back cushions purchased from Lowe's (allen + roth 46.5-in L x 25-in W Natural Chair Cushion) $360.31 Pillows purchased from Target and West Elm $119.24 *** Duration of Each Step *** Purchasing wood: 90 min Straight cuts: 90 min 30* cuts: 70 min Assembling Xs: 60 min Sanding: 3.5 hrs Painting: 6.5 hrs More Assembly: 3 hrs Wood Filler: 60 min Final Assembly: 6 hrs Touch-Up: 15 min
Sat, 05/18/2013 - 18:57
My cushions are 25 inches wide and they are wedged in there REALLY tight. 24-inch cushions would fit much better.
In one of my pictures, you can see "back rest" pillows that use the same material as the seat cushions. If you want big cushy cushions like this, you will probably want to modify the plan so the seat is deeper. The cushions look great, but I've decided to leave them off for actual use.
I have been sitting out on the patio for HOURS reading a Pride & Prejudice spin-off and it is sooo cozy. Highly recommend this project if you want a comfortable luxurious sectional for your patio without spending big bucks at Pottery Barn!
We built our version of the Dawsen Media Console to replace our TV stand. We adjusted the size to fit our living room. The length is 59" and 20" deep. We went with the open areas and enclosed the front middle to "hide" the tv boxes. We also used the screen in the doors to match the middle screen.
Farm Table I built for my Son. 2 two different sets of plans then modified to the size I needed.
For the Table Top I used Wood Planks (2) 2x8 (1) 2x10
For the Bread Boards I used (1) 2x8
For the Base I used (2) 2x4
For the Legs I used (2) 4x4
For The Bench I Used
Seat of Bench (1) 2x6 Left over from the table
Bread Boards (1) 2x5
Legs 4x4 left over from the table
Tools Used
Drill
Kreg Jig
2 1/2 and 1 1/4 Kreg Screws
Clamps
Sqaure
Glue
Mitre Saw
Tape Measure
We made this Chicken Coop this summer , with lots of help. We doubled the coop and the chicken run is 8x8 . We used the base of a previous clubhouse!! Thanks so much for the plans
Mon, 10/04/2021 - 16:40
Beautiful, love the finish, thank you for sharing!