Community Brag Posts
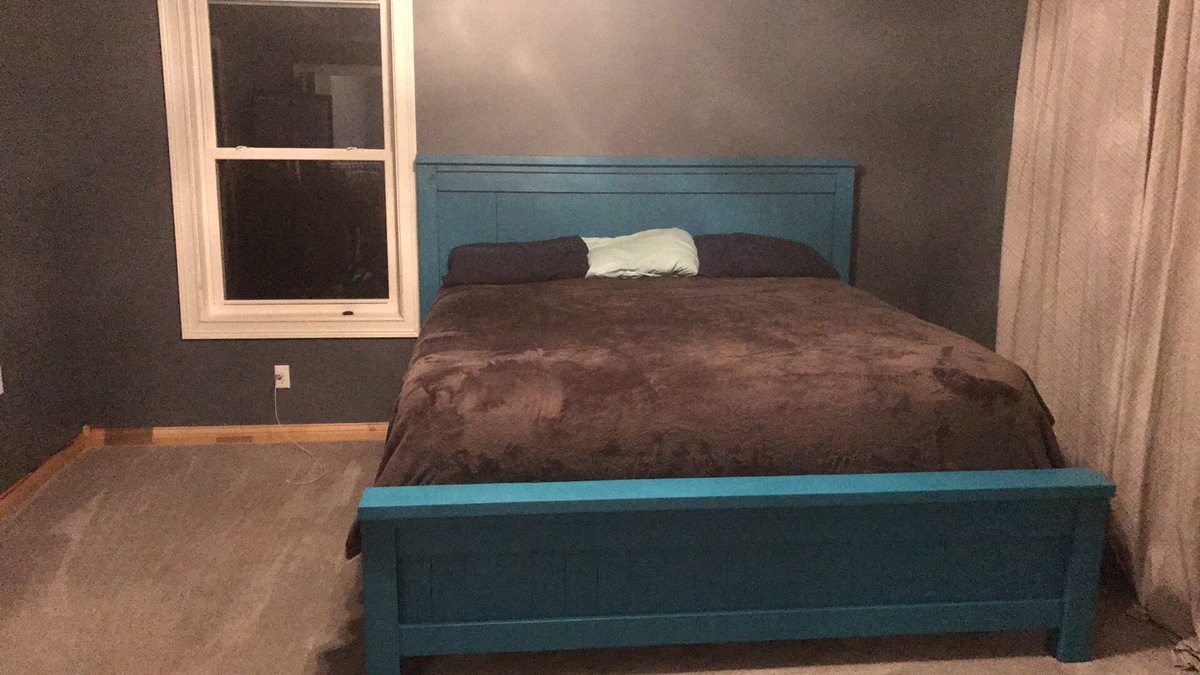
Modern Farmhouse Bed
Modern farmhouse bed frame from plan but mounted purebond plywood on headboard cleats instead of slats. Then aged red oak with the product referenced in plans, then whitewashed, and glued to plywood. Recommend laying out all pieces before gluing. Legs will be sore from a million squats to measure pieces.
Built from Plan(s)
Recommended Skill Level
Beginner
Comments
Jacobean 6 cube bookshelf for our nursery
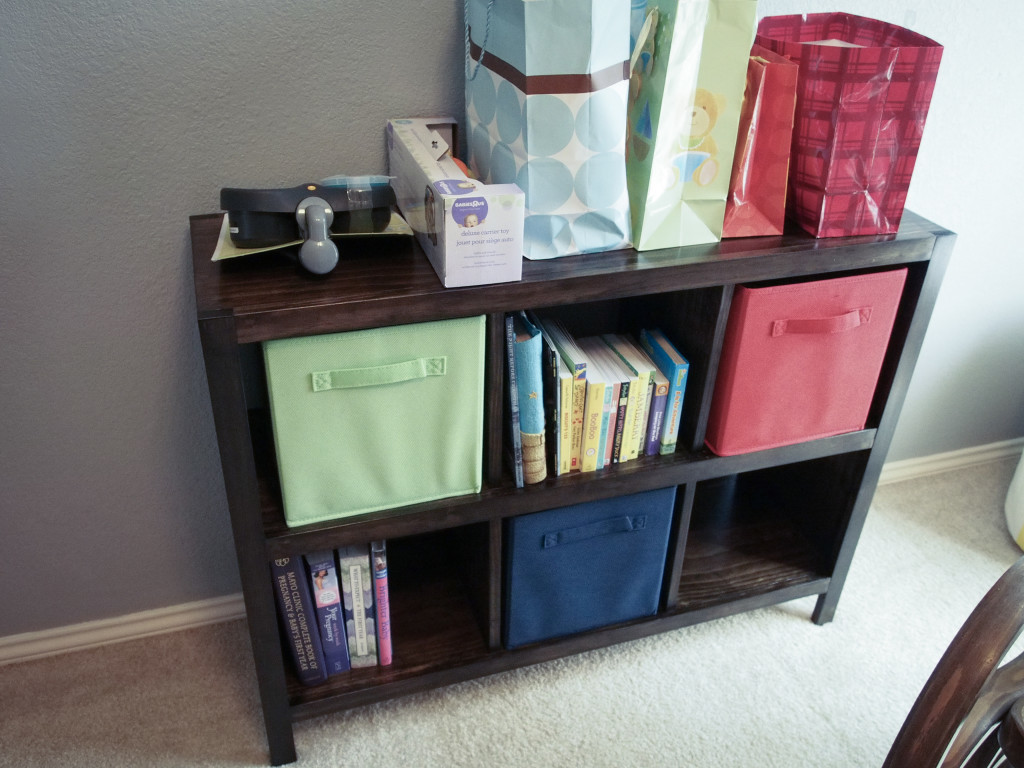
This was my very first wood working project since working around my grandfather's shop 20 years ago as a child. I had to buy a few tools to get it done (circular saw, Kreg Jig), but it was a great learning experience!
I made a rookie move of wiping up excess wood glue, which didn't take the stain at all. I had to remove that glue with a Dremel tool and spot restain. Since then, I've been told to let the glue drops dry next time and just chisel off after they are dry.
Since this was my first project, I had to buy EVERYTHING I needed, so my costs were a little higher. Now that I have some groundwork laid, the next projects will be a snap.
I also highly recommend the Rockwell Jawhorse product, it made working with the Kreg Jig super easy!


Built from Plan(s)
Estimated Cost
$80
Estimated Time Investment
Week Long Project (20 Hours or More)
Finish Used
2 coats of Minwax Jacobean oil stain
3 coats of Minwax fast drying Polyurethane
3 coats of Minwax fast drying Polyurethane
Recommended Skill Level
Intermediate
Office Cabinet

Office cabinet with shelf. Made only from 1 by 4s and plywood for shelves (and feet).
Finished in Varathane Carrington and Matte Poly.
The plywood inserts in the doors are from the same piece. Both were treated with pre stain and the same stain but have turned out totally different shades. I might at some point make new doors (perhaps 2 thinner doors per side) but will live with the difference for now. I guess this is one of the things about hand made - two pieces will never look exactly the same.


Estimated Cost
$140.00 Wood was about $105 and $35 for hardware and stain.
Estimated Time Investment
Weekend Project (10-20 Hours)
Finish Used
Varathane Carrington and Matte Poly
Recommended Skill Level
Beginner
Comments

Backyard patio
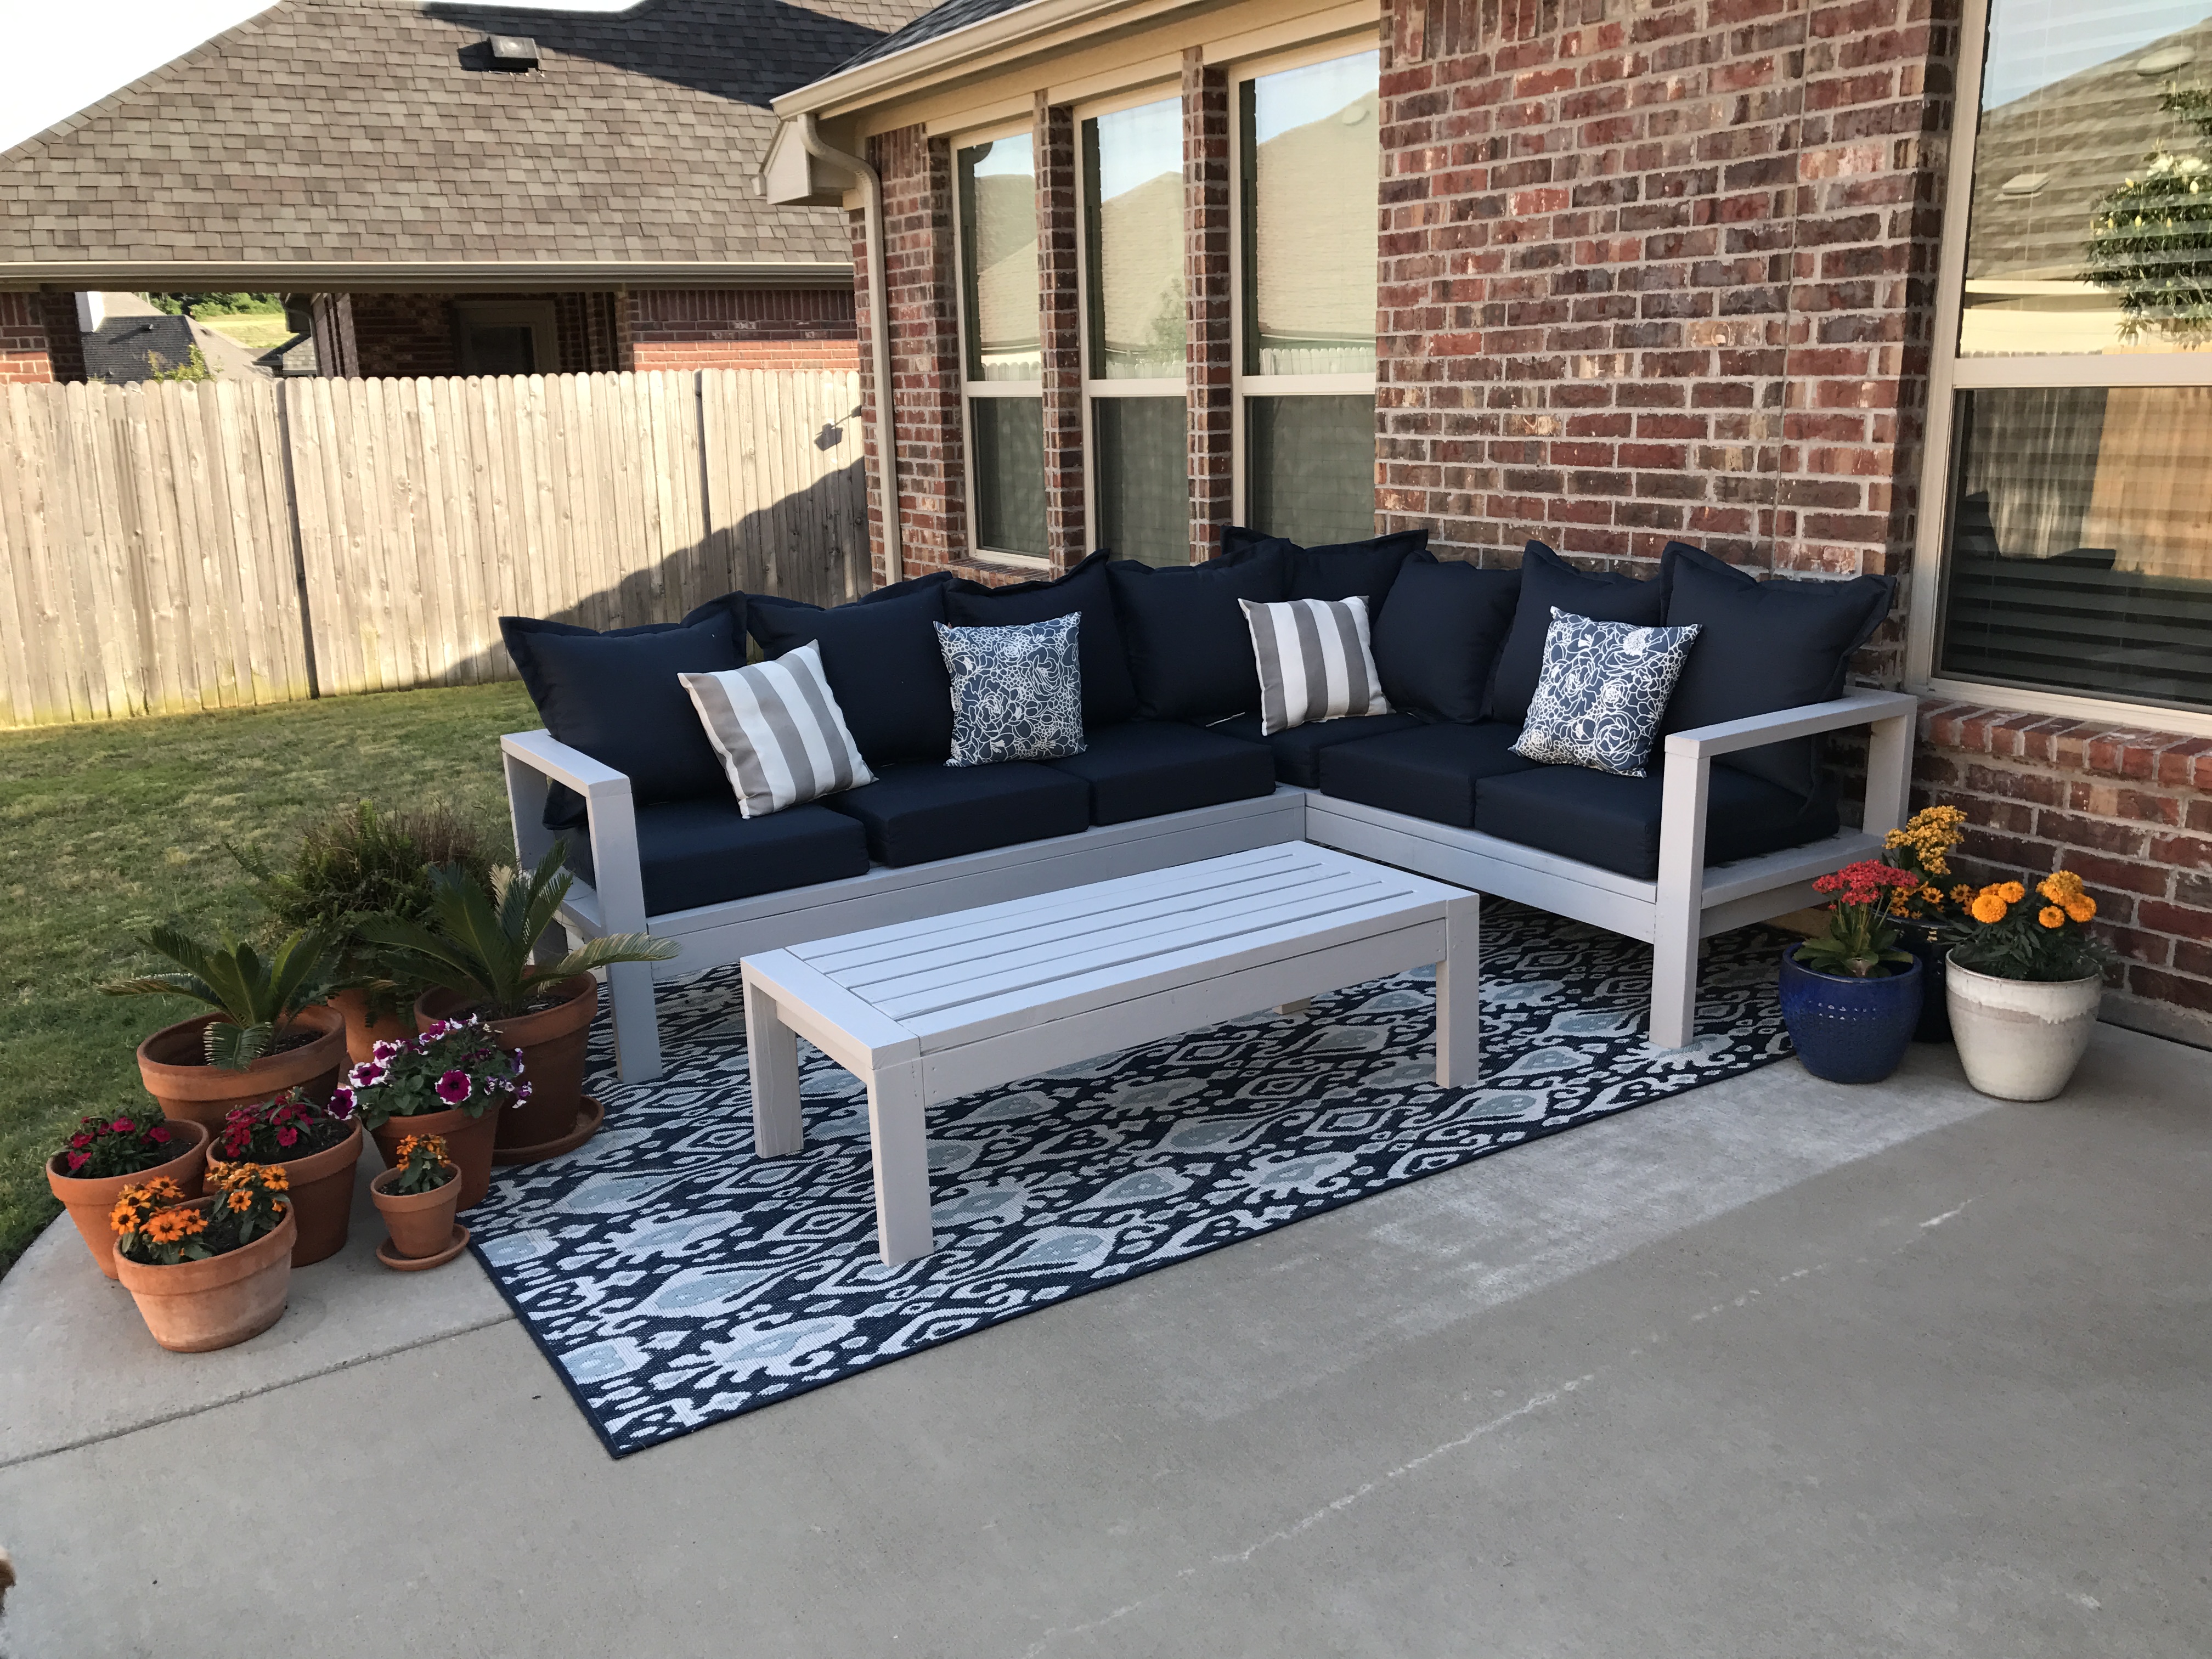
Found Ana's plans online and can easily say, longest part of the process was watching paint dry! Very easy and simple build--looking forward to lounging here all summer long.
Built from Plan(s)
Estimated Time Investment
Weekend Project (10-20 Hours)
Recommended Skill Level
Beginner
Camphor Slab Bench
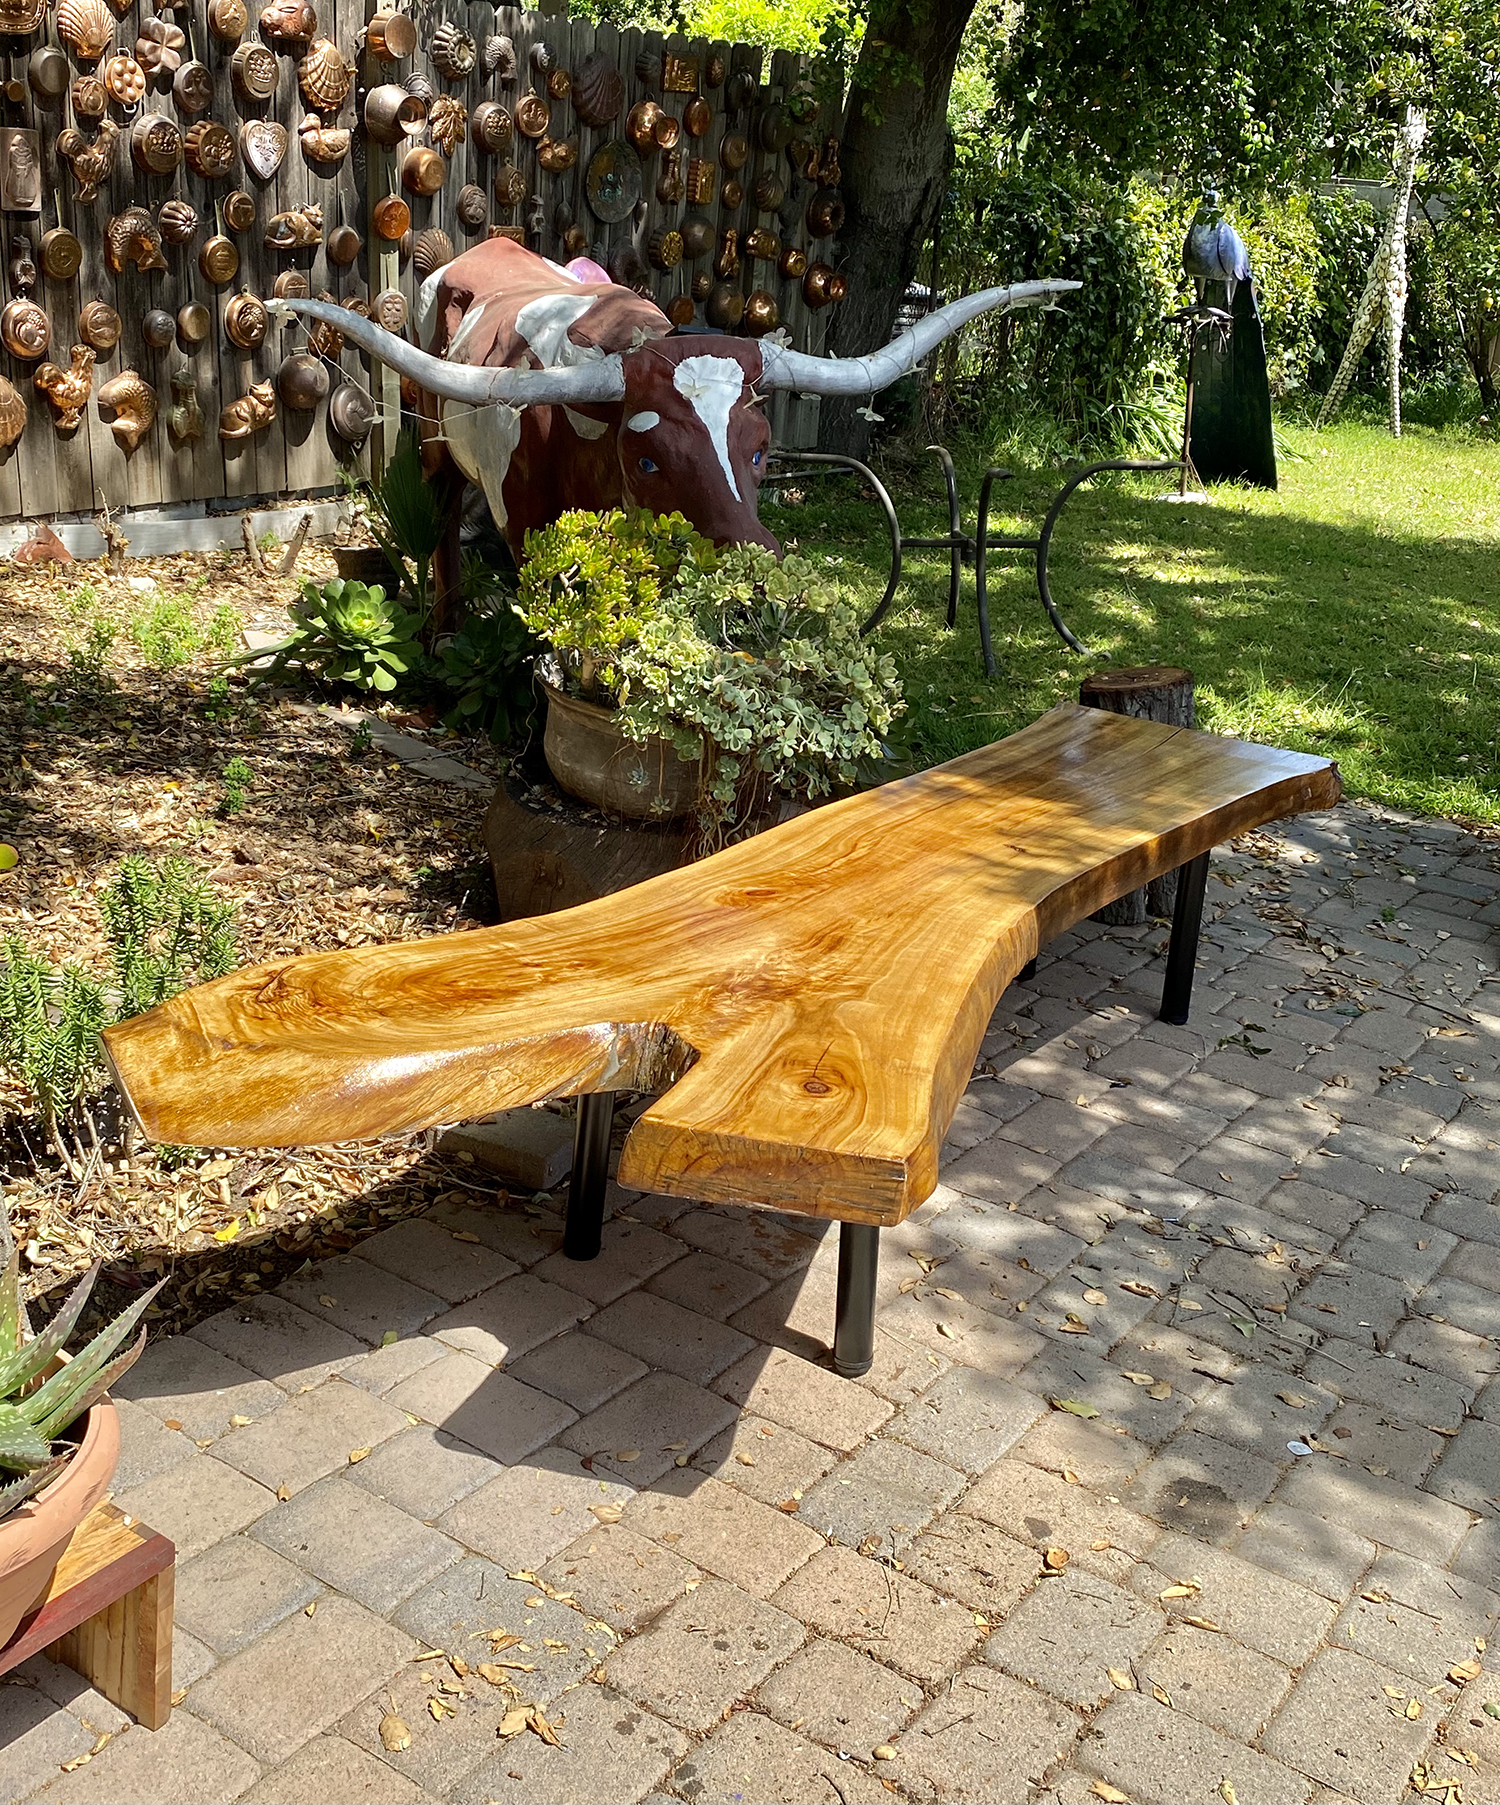
Giant slab of camphor. About 8' long, 23" - 36" wide and nearly 4" thick.
Sanded to 1000 grit, the bench has four coats of Danish Oil and two coats of wipe on poly. The latter was water based, and was not worth the time or money I put into it.
The whole project took about three weeks from start to finish.
I marked this project intermediate because I had to buy and use a belt sander and that may not be in everyone's took box.
Finish Used
Danish Oil
Wipe on poly
Lots and lots of flattening and sanding
Wipe on poly
Lots and lots of flattening and sanding
Recommended Skill Level
Intermediate
Comments
Fri, 04/09/2021 - 12:10
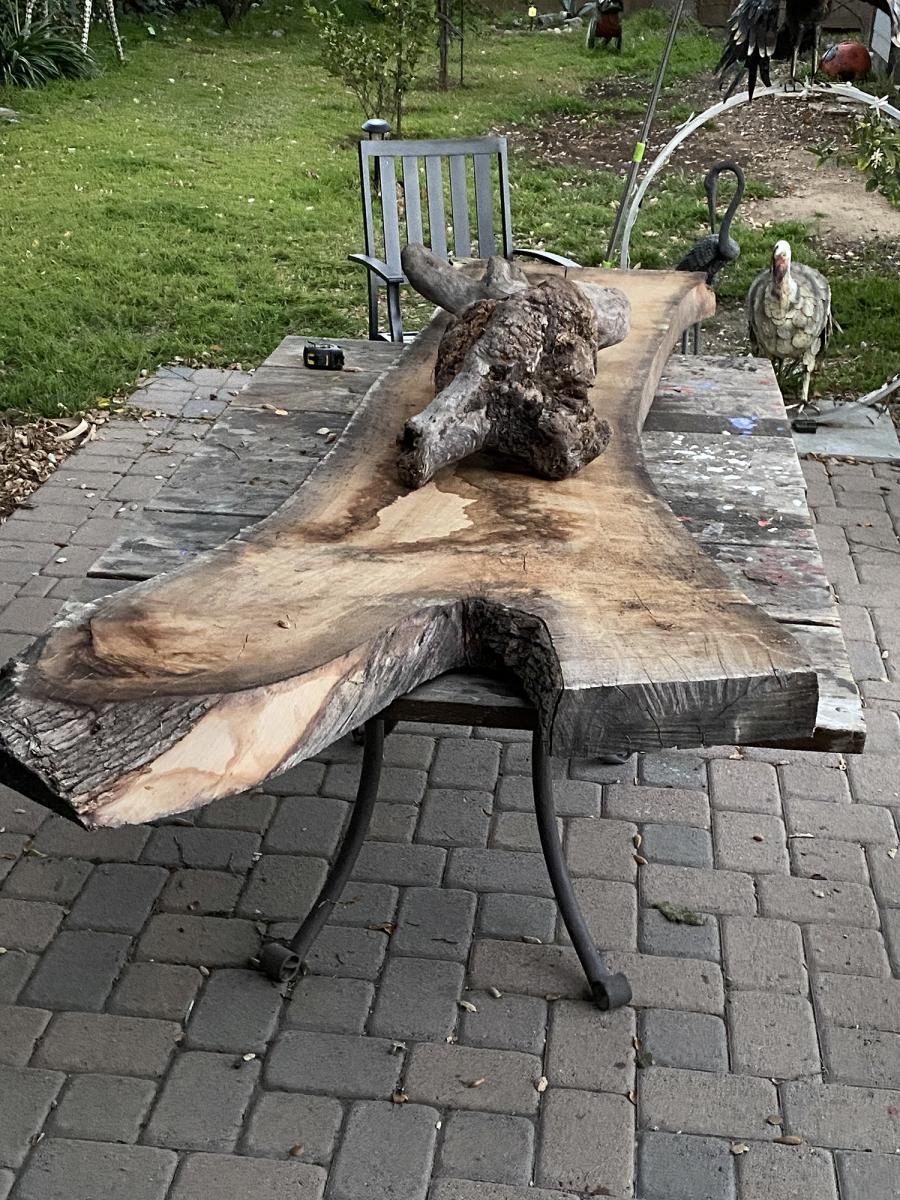
OBTW, that think on the slab…
OBTW, that think on the slab is a huge redwood burl.
Doll Highchair
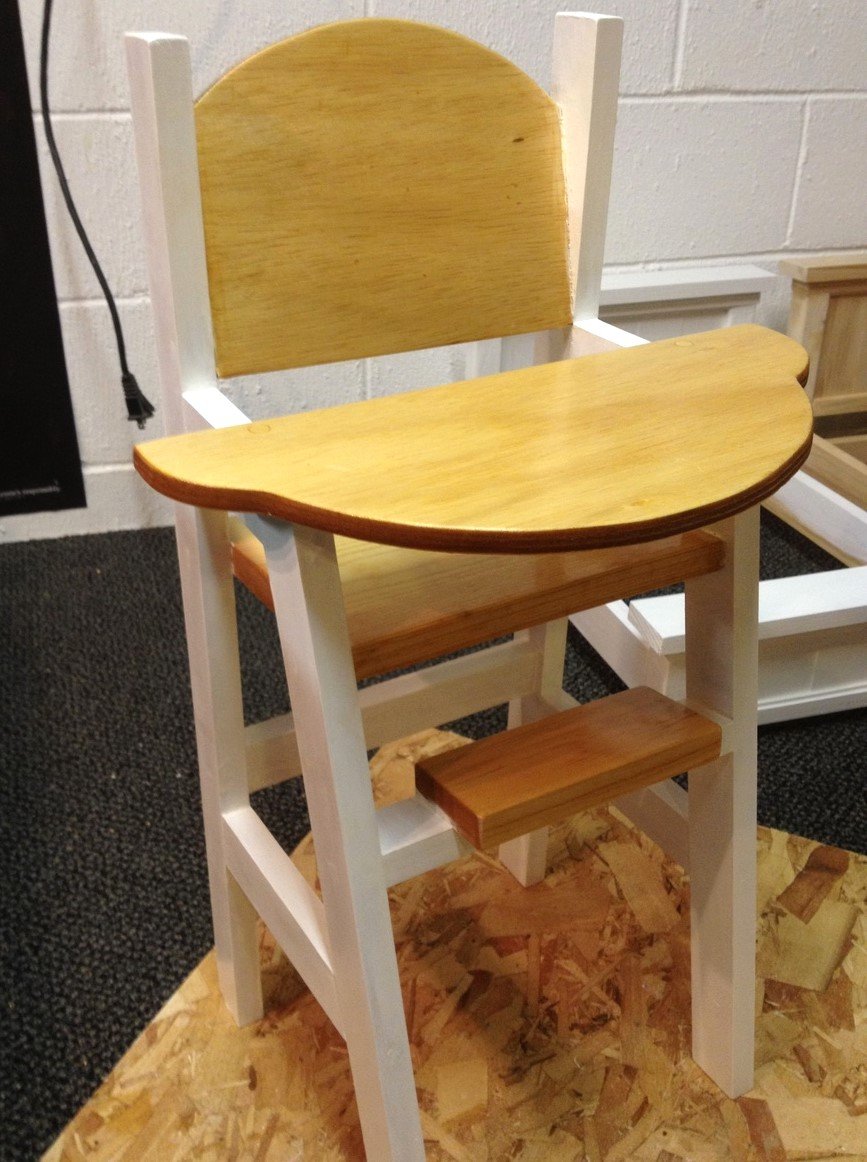
Used basic plan, with some customization to the seat back and the tray area of the chair. Finished with white enamel paint, pine stain, and high gloss polyurethane to protect the wood.
Built from Plan(s)
Estimated Cost
<$10 mostly scrap wood and leftover paint.
Estimated Time Investment
Afternoon Project (3-6 Hours)
Finish Used
White enamel paint for the frame and pine stain with two coats of clear poly on the natural parts.
Recommended Skill Level
Beginner
Rustic X End Table
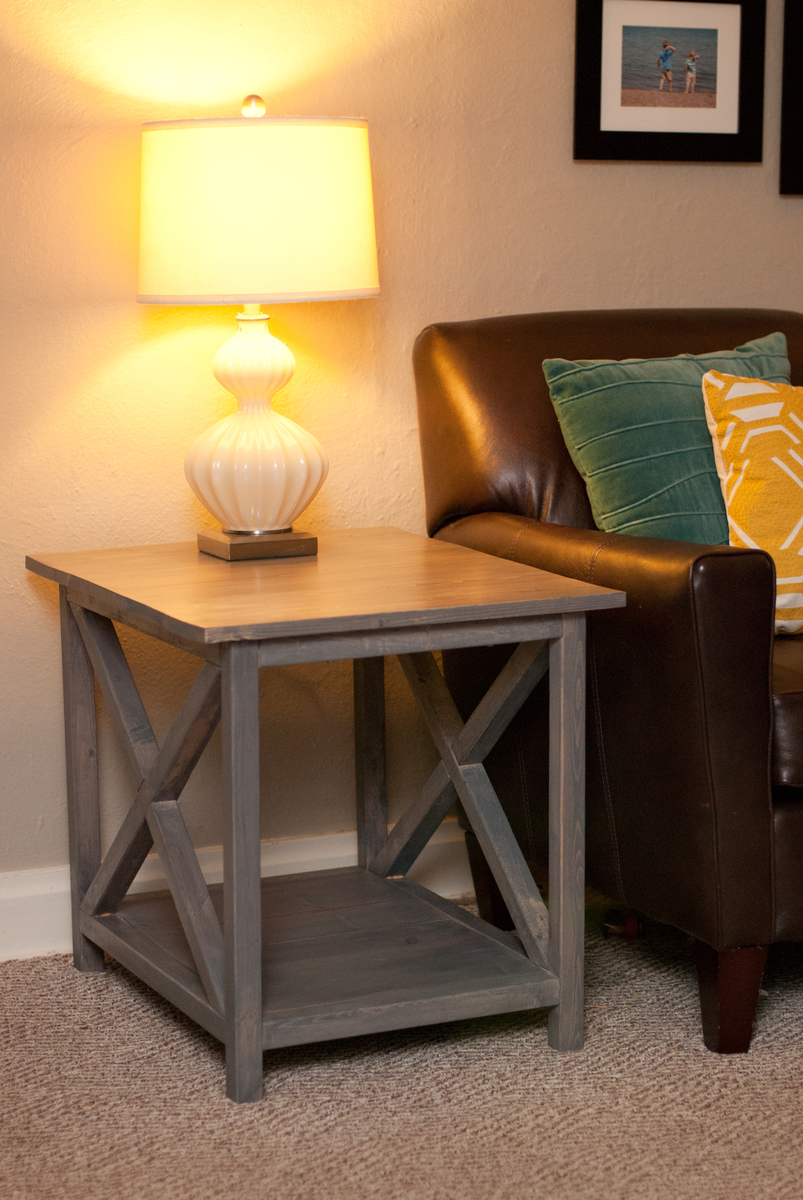
My husband modified the plans for the rustic X end tables to make a slightly smaller version for our living room. Instead of 2x6s he used 1x6s on the top. Instead of 2x4s he used 2x2s for the X and the legs. I am really excited about how they turned out! Thanks for all the great ideas Ana; they are inspiring!!
Built from Plan(s)
Estimated Cost
$50 for 2 tables
Estimated Time Investment
Day Project (6-9 Hours)
Finish Used
Wood conditioner, followed by Minwax Classic Gray, and Satin Polyurethene
Recommended Skill Level
Beginner
Comments

Simple 2x4 Potting Bench modified with inset tote for potting soil or water
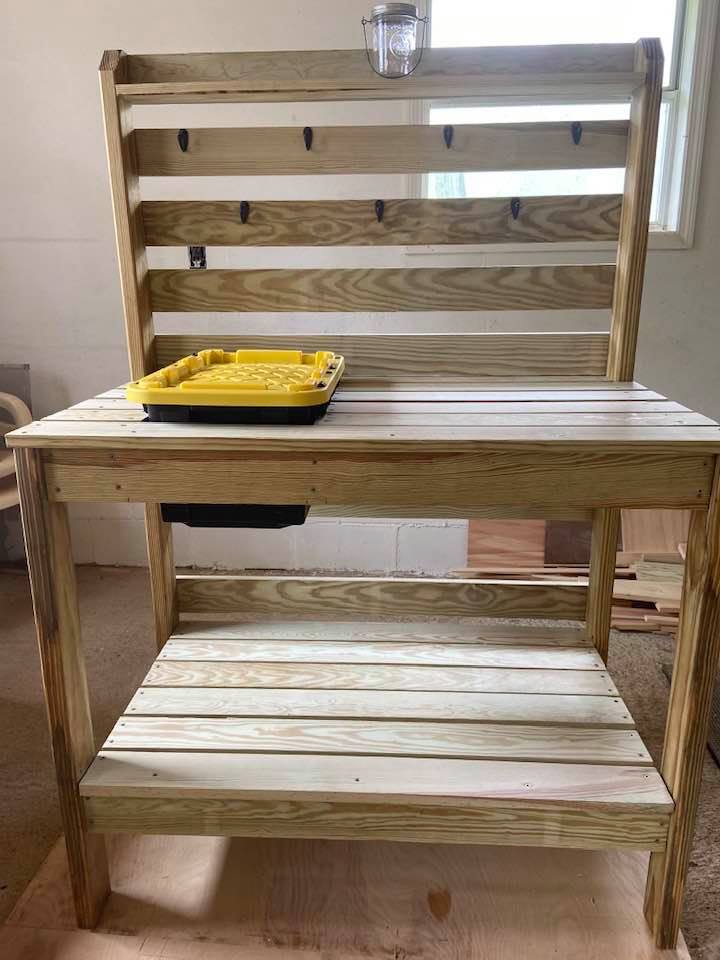
Made this for a friend who does cuttings of her plants for others. I used the Simple 2x4 potting bench plan and modified it to hold an inset 7 gal. Commander tote box with snapping lid with two 2x4 @ 22" braces to support the tote on each side attached to the front and back aprons. She wanted something that would hold a medium size bag of potting soil with a lid to keep snakes and other critters out since she lives in the country. There are plenty of hooks to hang tools and other items.
Built from Plan(s)
Estimated Cost
$224.00
Estimated Time Investment
Afternoon Project (3-6 Hours)
Finish Used
Thompson Water sealer
Recommended Skill Level
Beginner
Comments
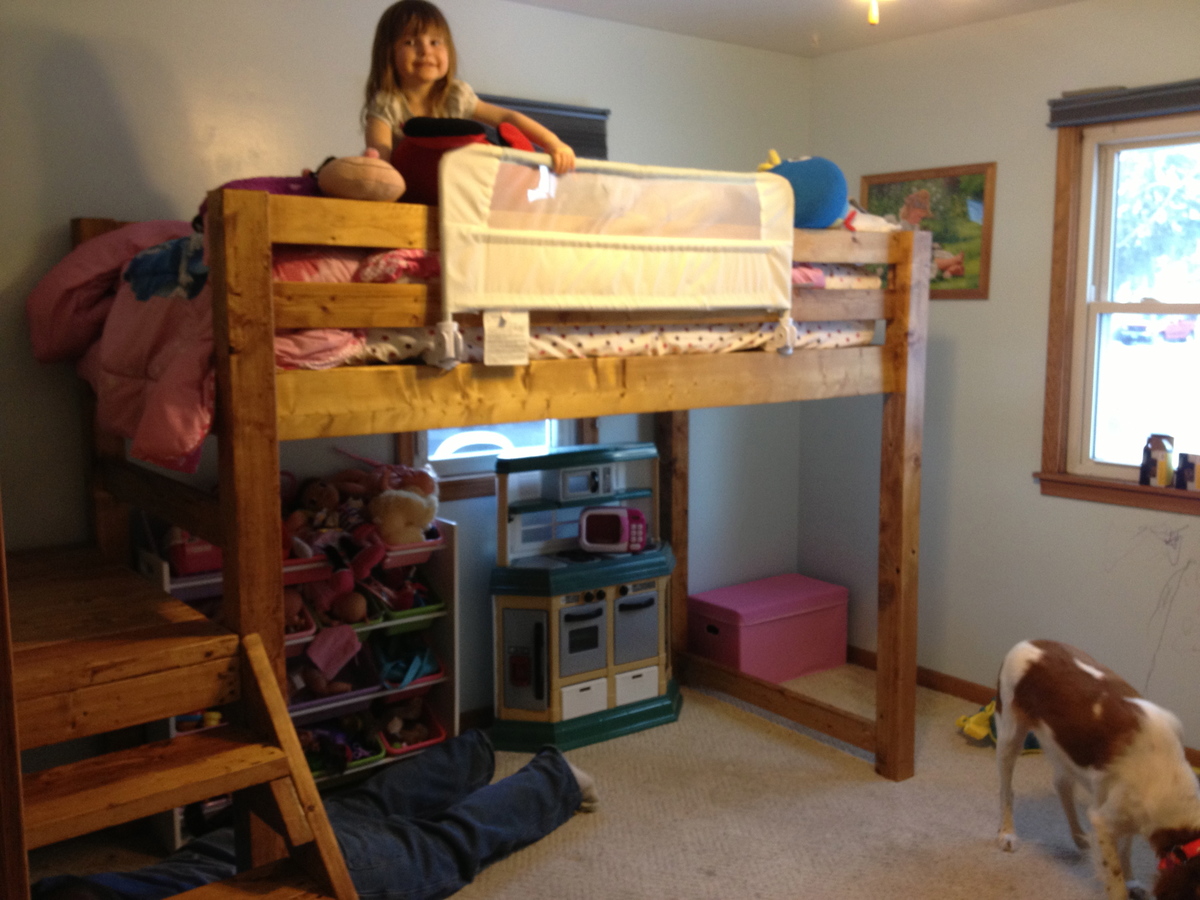
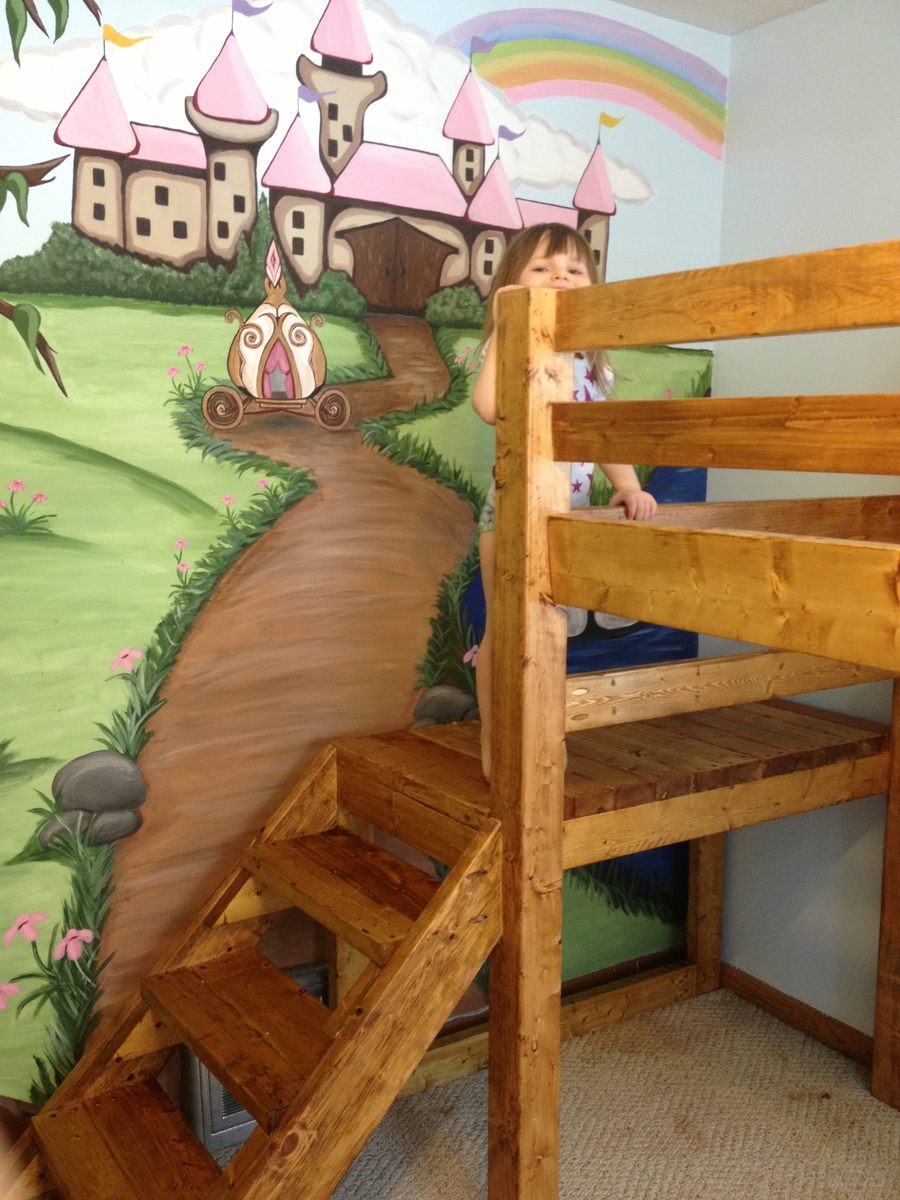
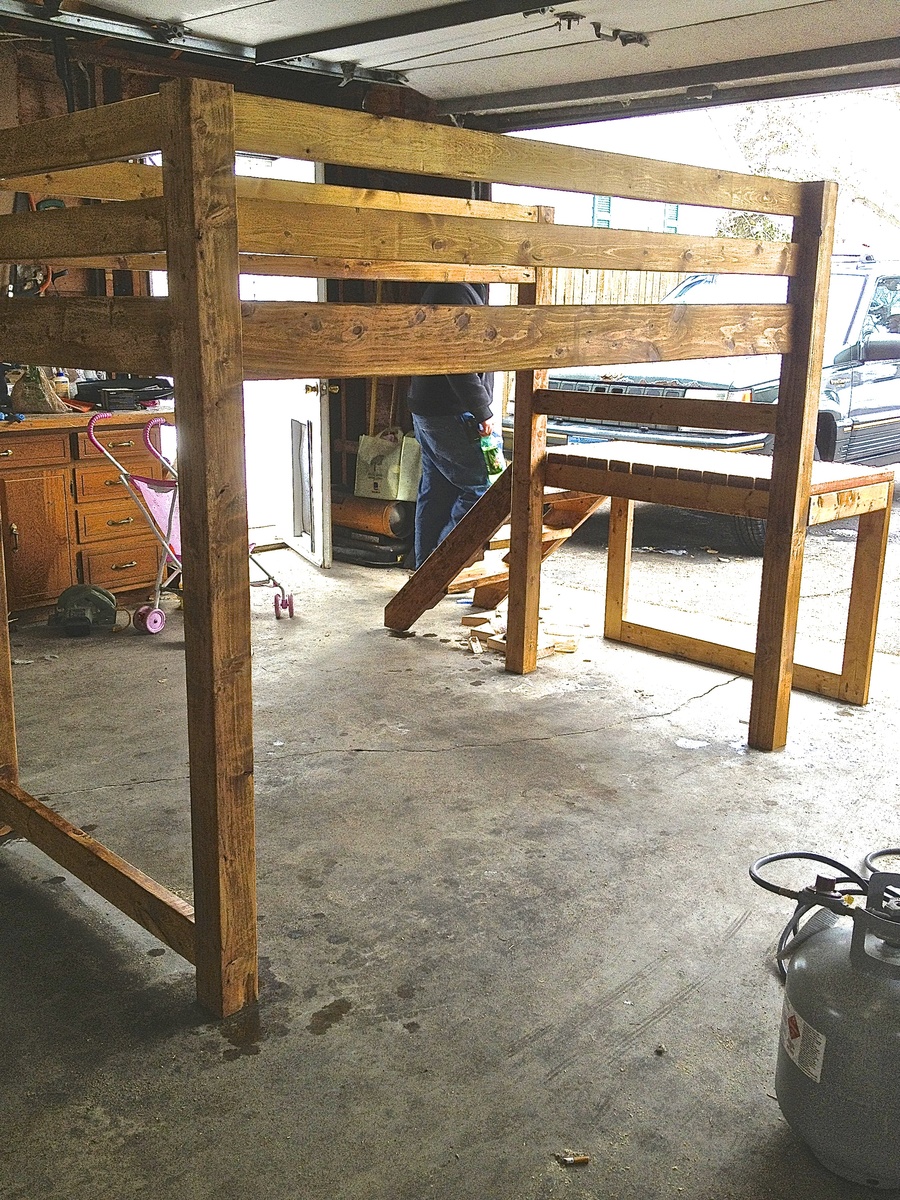
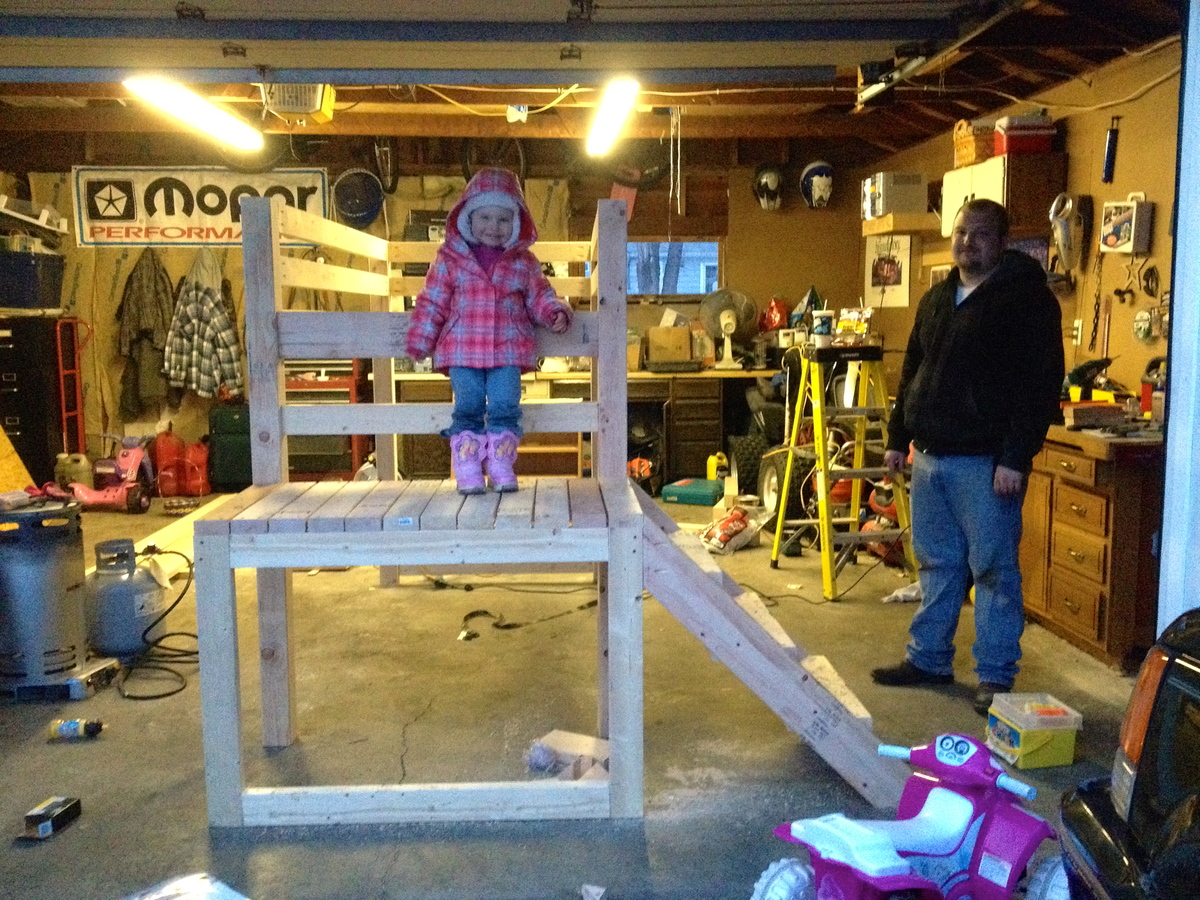
Stella's Loft Bed Conversion from Classic Bunk Bed Plans
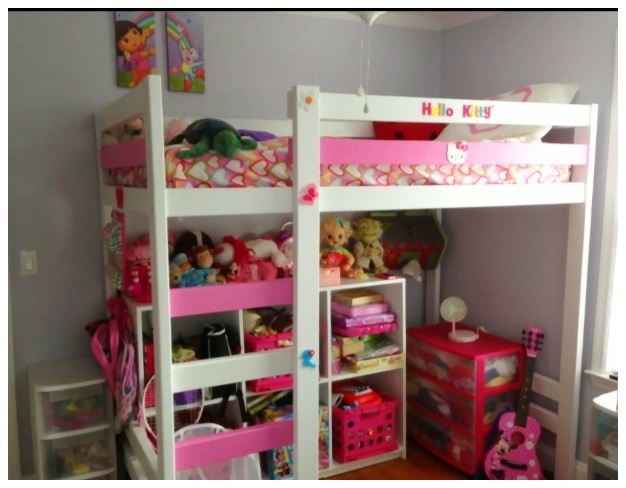
Loved the chunky look of the bunk bed plans but needed space for toys and junk.
Raised the height and used lag screws for extra security .
Stella can't wait to go to bed at night , so I take that as a successful project.
Estimated Cost
$80
Estimated Time Investment
Weekend Project (10-20 Hours)
Finish Used
Latex paint.
Recommended Skill Level
Beginner
Corona square coffee table
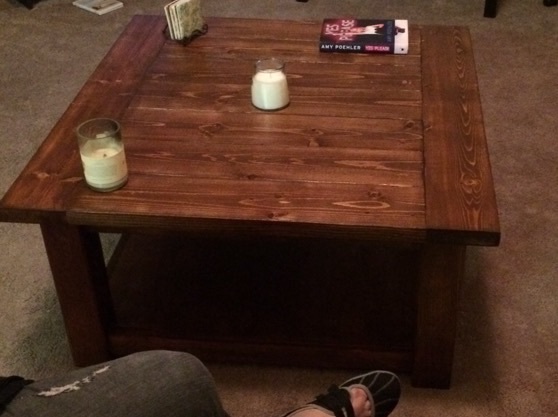
I worked on this project a few hours a day, I made the cuts one day and then drilled the pocket holes and assembled the table. The difference for the table and the original plans was I did not use the turned legs from the plans. I used non treated 4x4's. Longest time was waiting between stain and poly to dry. I love being able to get find these plans on Ana's site! Thank you Ana.
Built from Plan(s)
Estimated Cost
$120.00
Estimated Time Investment
Weekend Project (10-20 Hours)
Finish Used
Minwax stain and 2 coats of polyurethane
Recommended Skill Level
Beginner
Quilt Ladder Rack

Built with 2x4 and 2x6. Simple stain brushed on with a sponge and let stand a few minutes and wipe off.
Project assembled with pocket holes.

Estimated Cost
2 2X4 and 1X6 Project put together with pocket holes
Estimated Time Investment
An Hour or Two (0-2 Hours)
Finish Used
Simple brush on with a sponge, let sit a few minutes and wipe off.
Recommended Skill Level
Intermediate
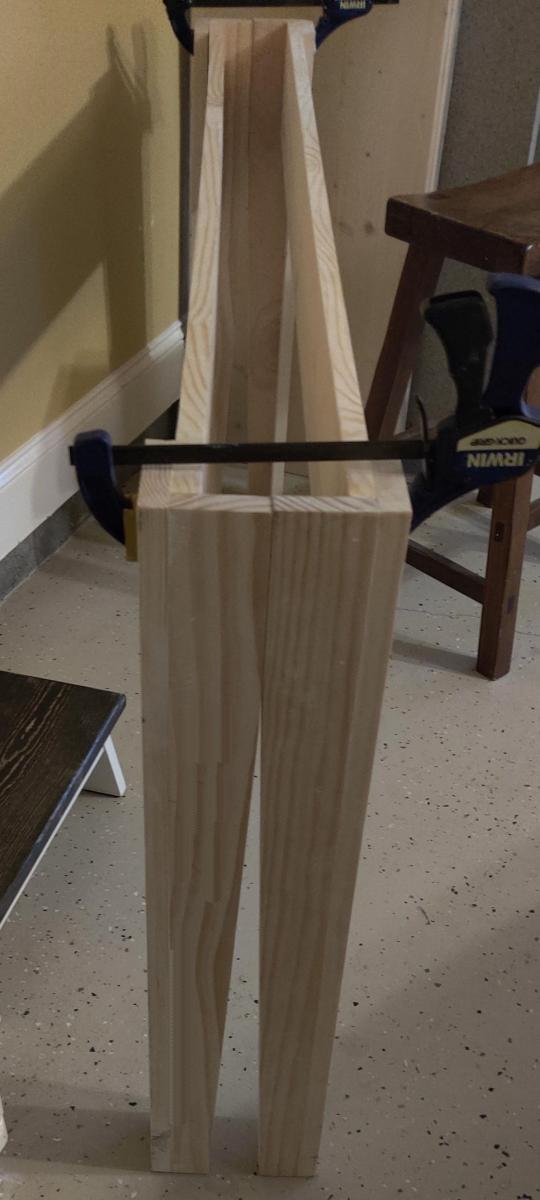
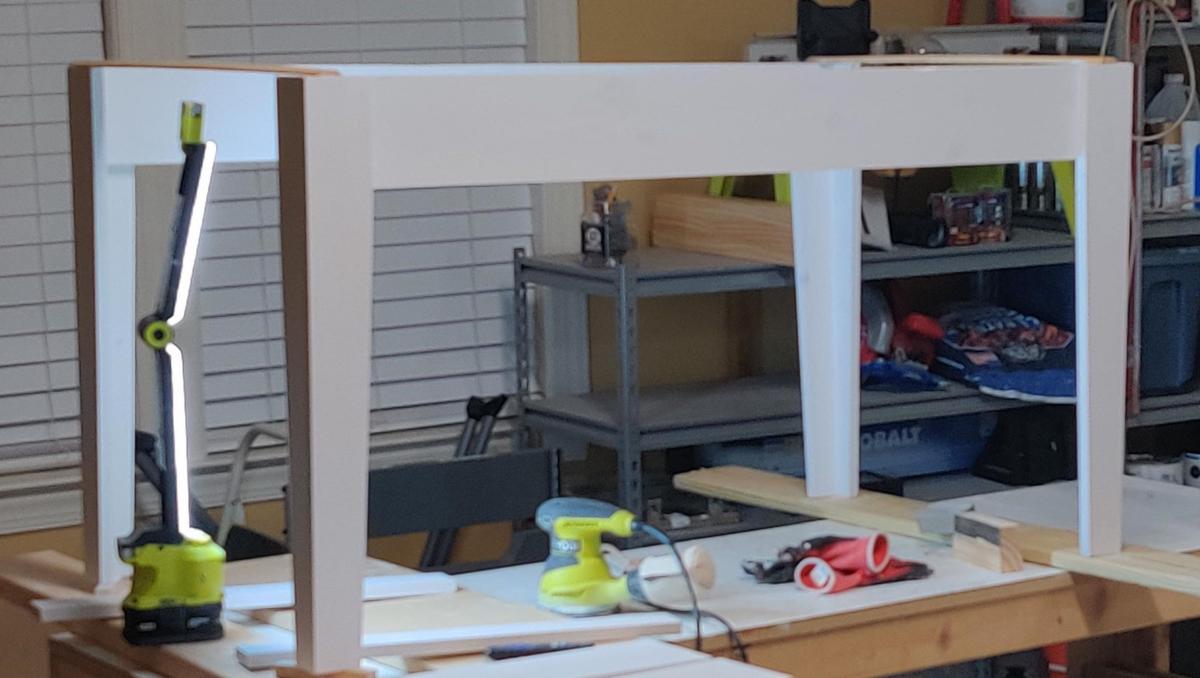
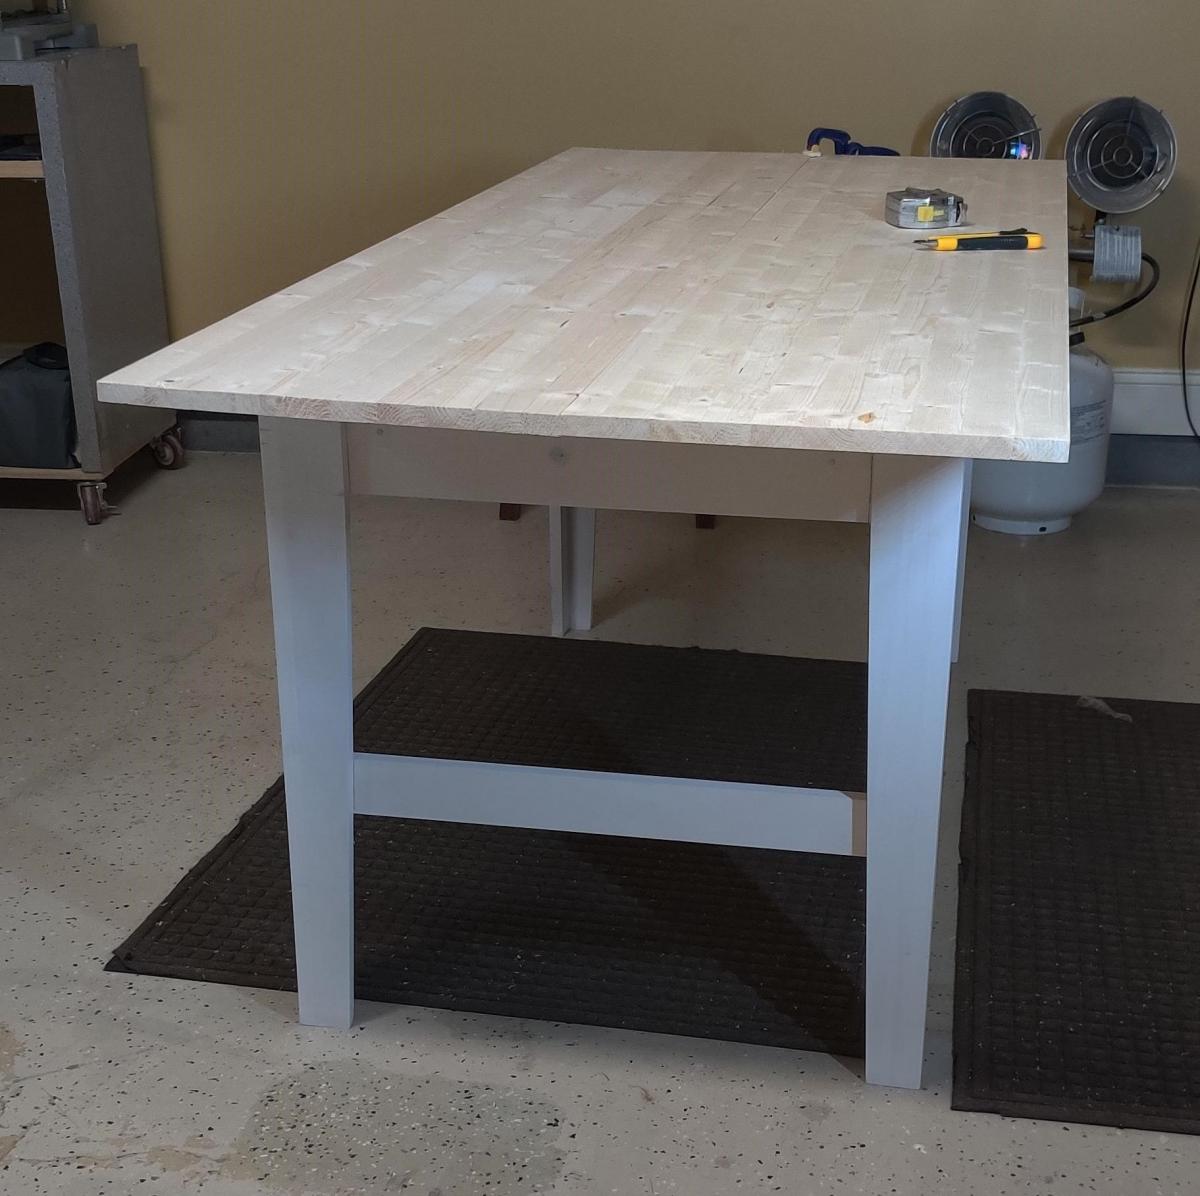
Narrow Farmhouse Table
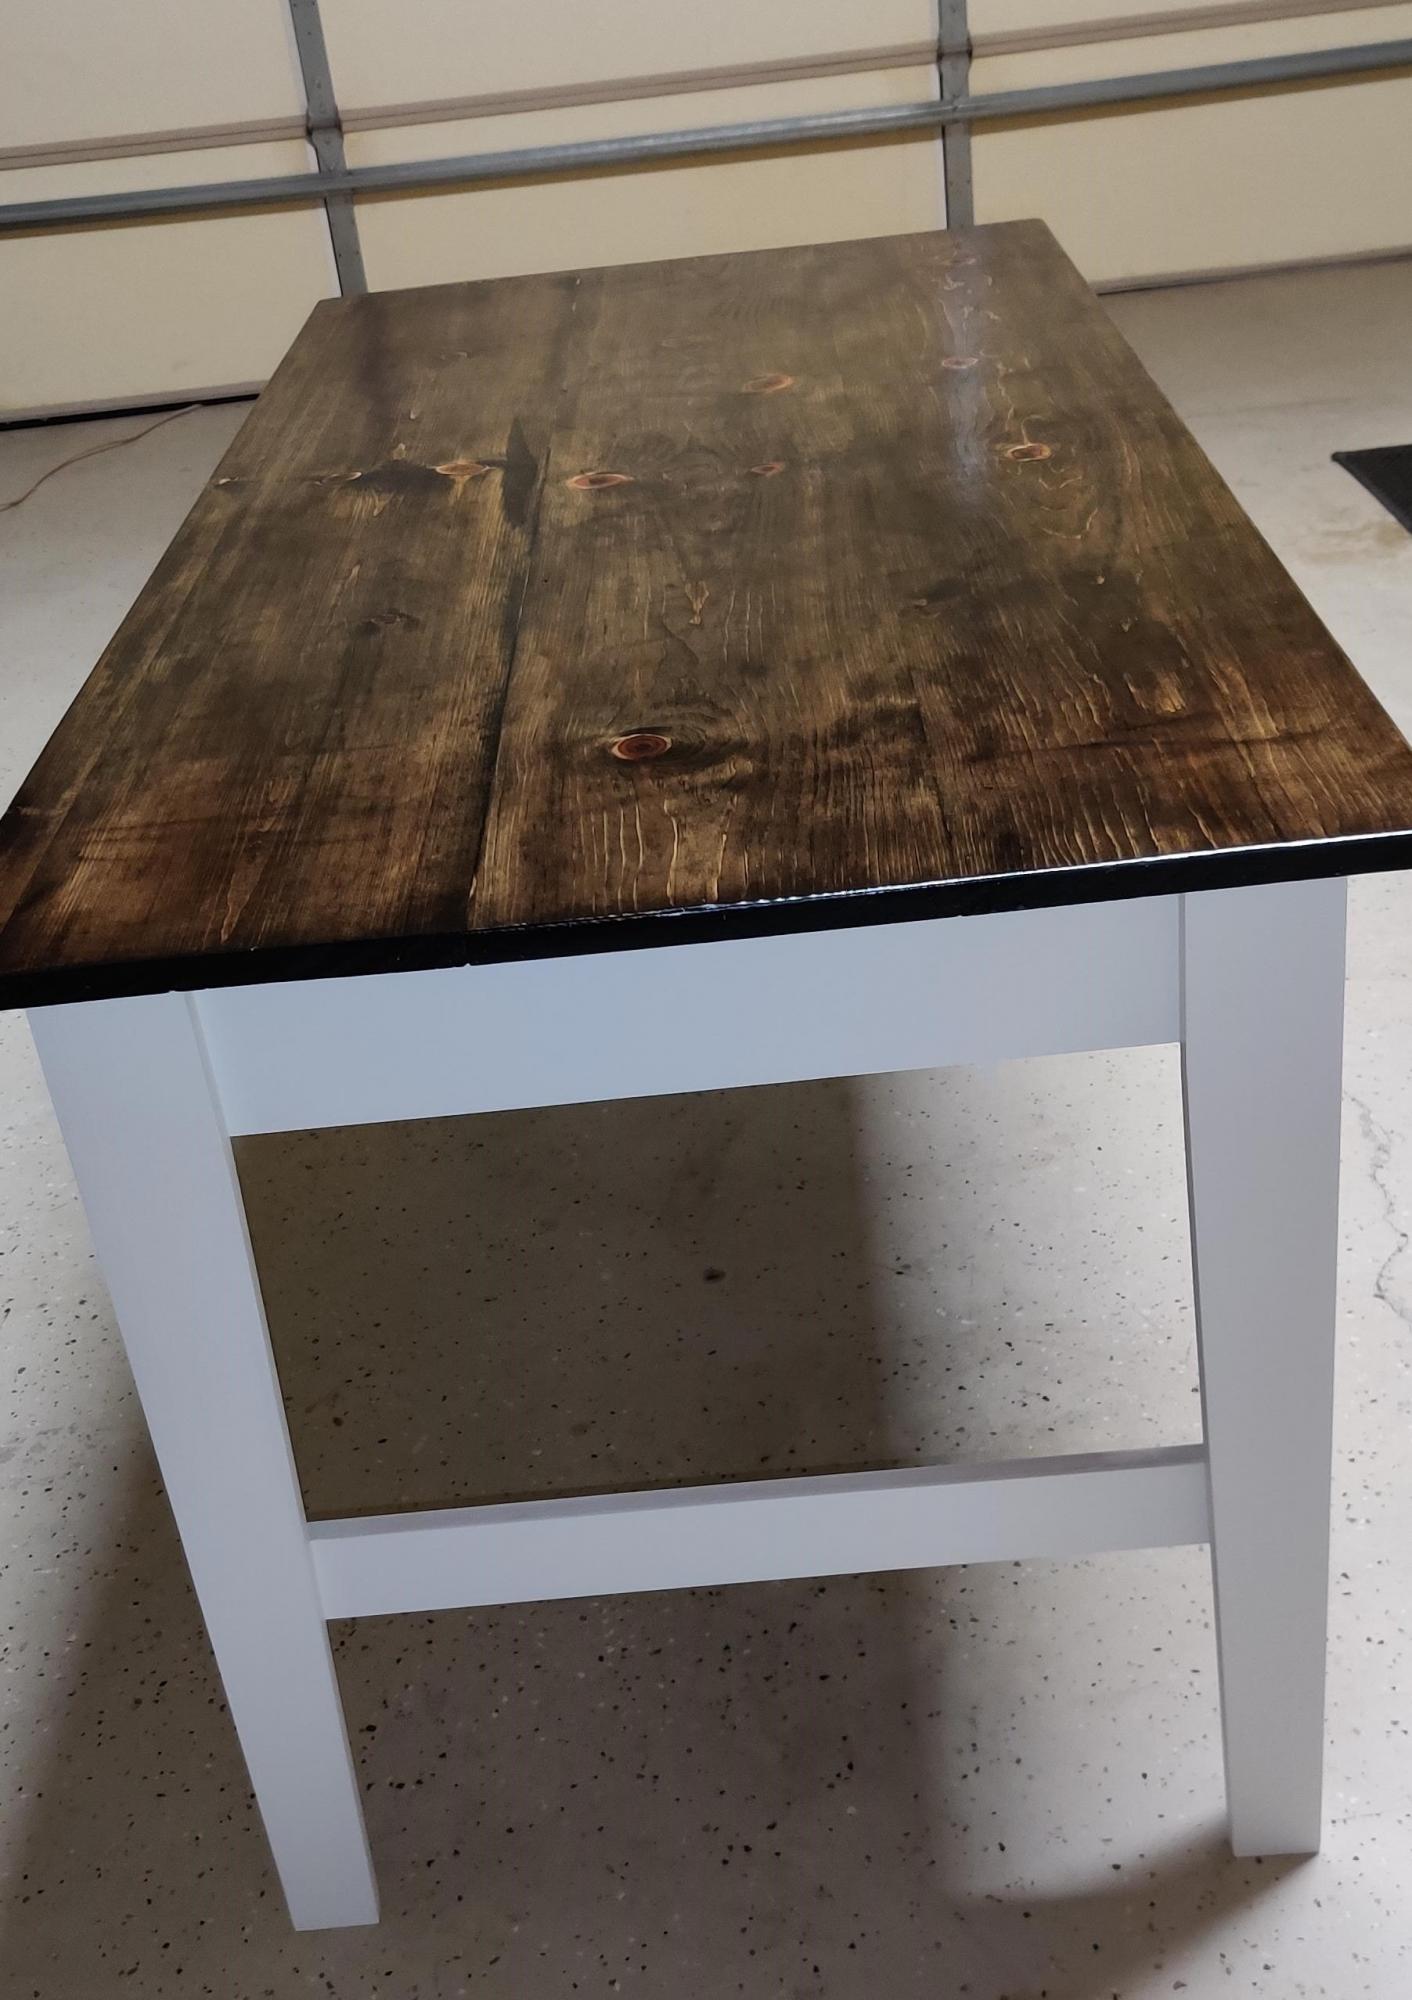
A customer wanted a 60" wide, 30" tall, and a 30" deep craft/homework table. I modified the Ana White narrow farmhouse table plans. I tapered the legs using track saw.
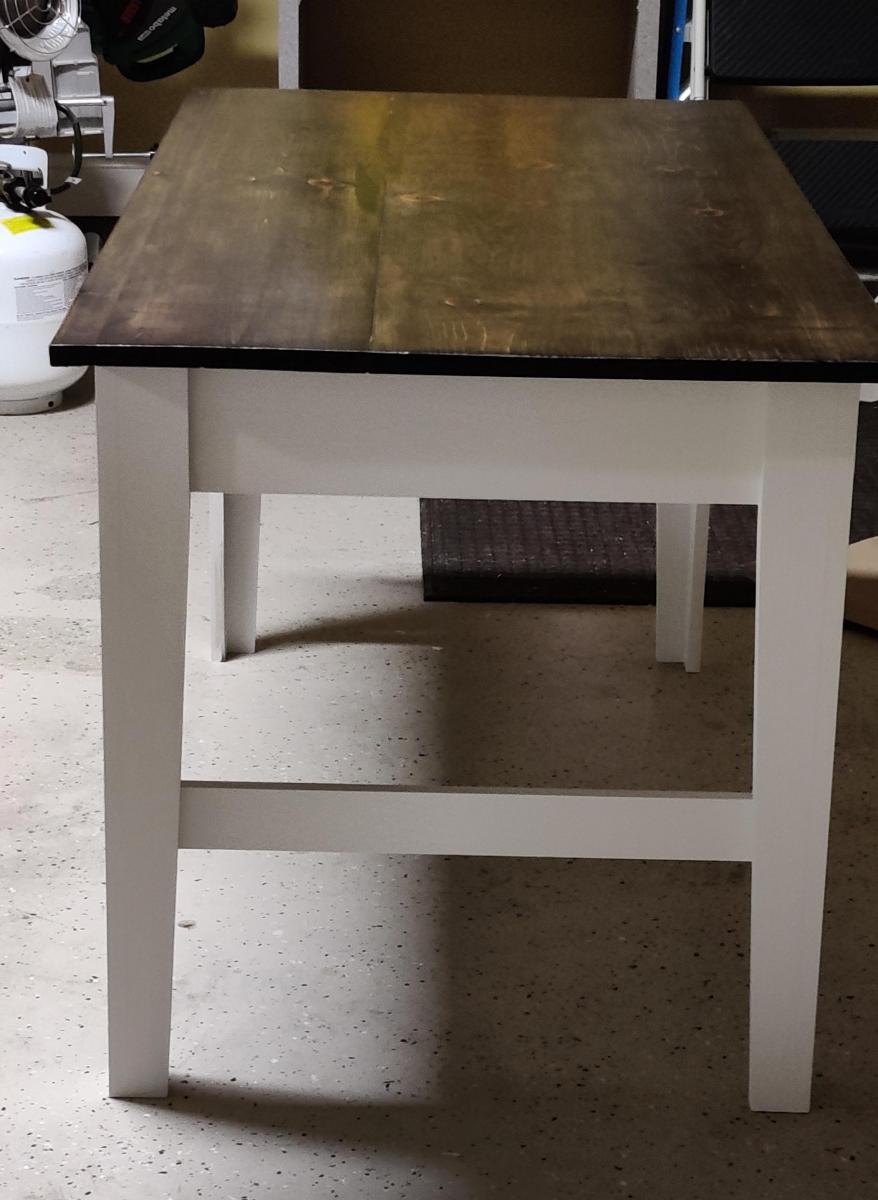
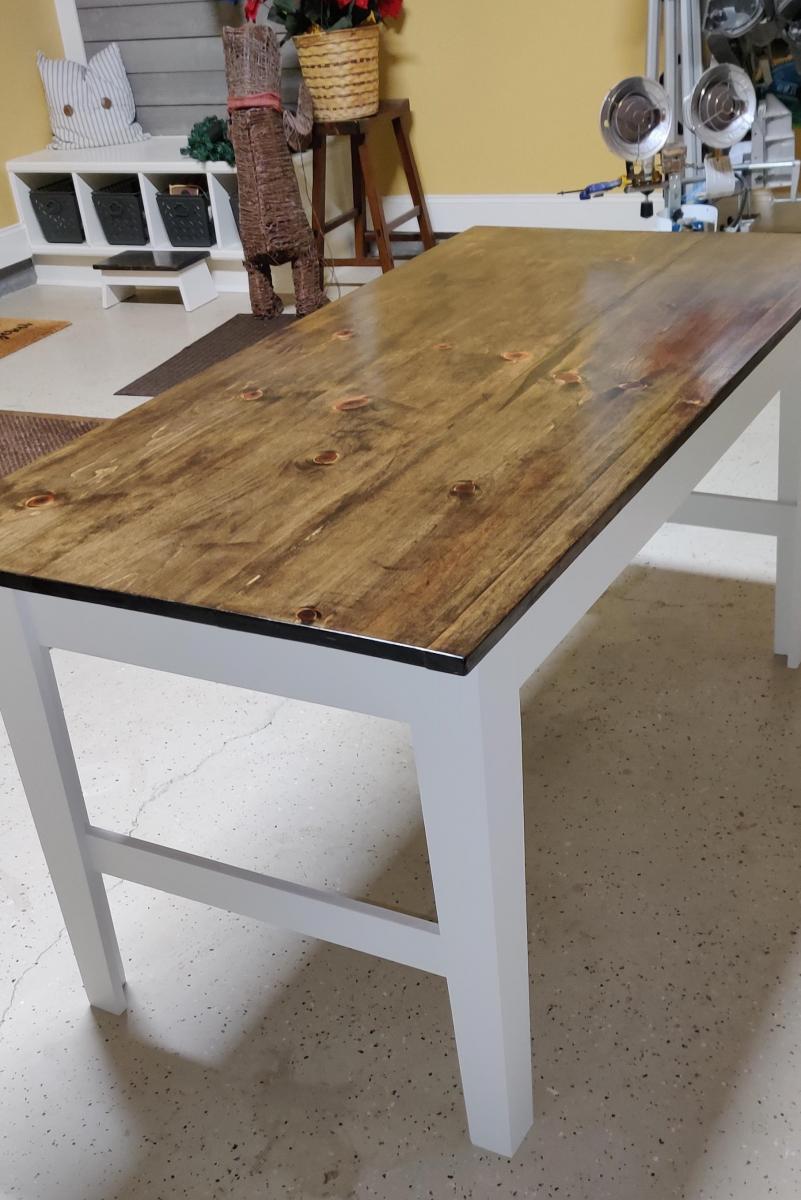
Built from Plan(s)
Estimated Cost
$100
Estimated Time Investment
Week Long Project (20 Hours or More)
Finish Used
stain and pint
Recommended Skill Level
Intermediate
Camp Loft Bed with Steps and Landing
We built this bed for our daughter. We needed more space in her bedroom and she LOVES it! Thank you so much www.ana-white.com and Pinterest for the plans! Turned out awesome!
Estimated Cost
$90 + a new saw for my father-in-law after we knocked his over by accident.
Estimated Time Investment
Weekend Project (10-20 Hours)
Finish Used
Minwax Wood Finish Golden Oak
Recommended Skill Level
Intermediate
Comments

Baby C's Extra Wide Dresser
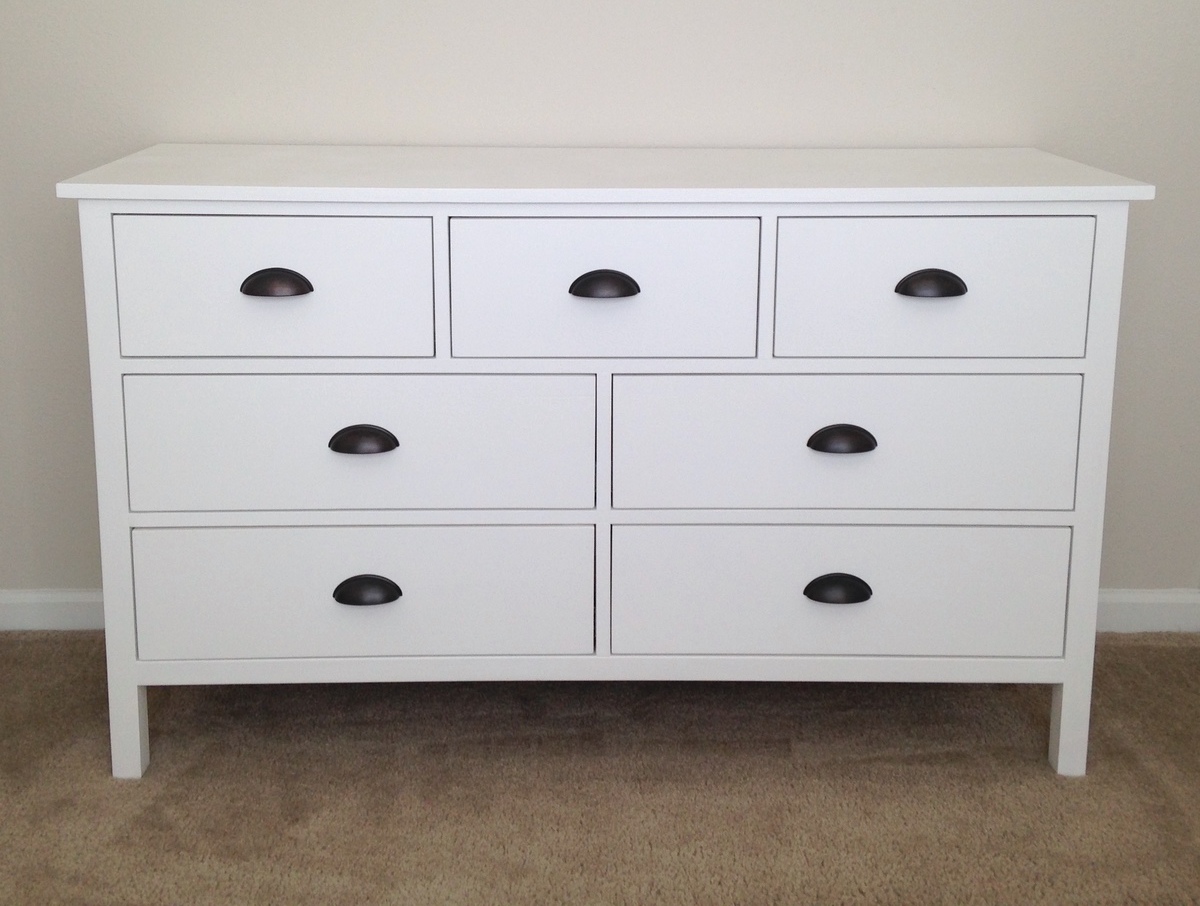
First dresser! I am very pleased...thanks for the great plans!
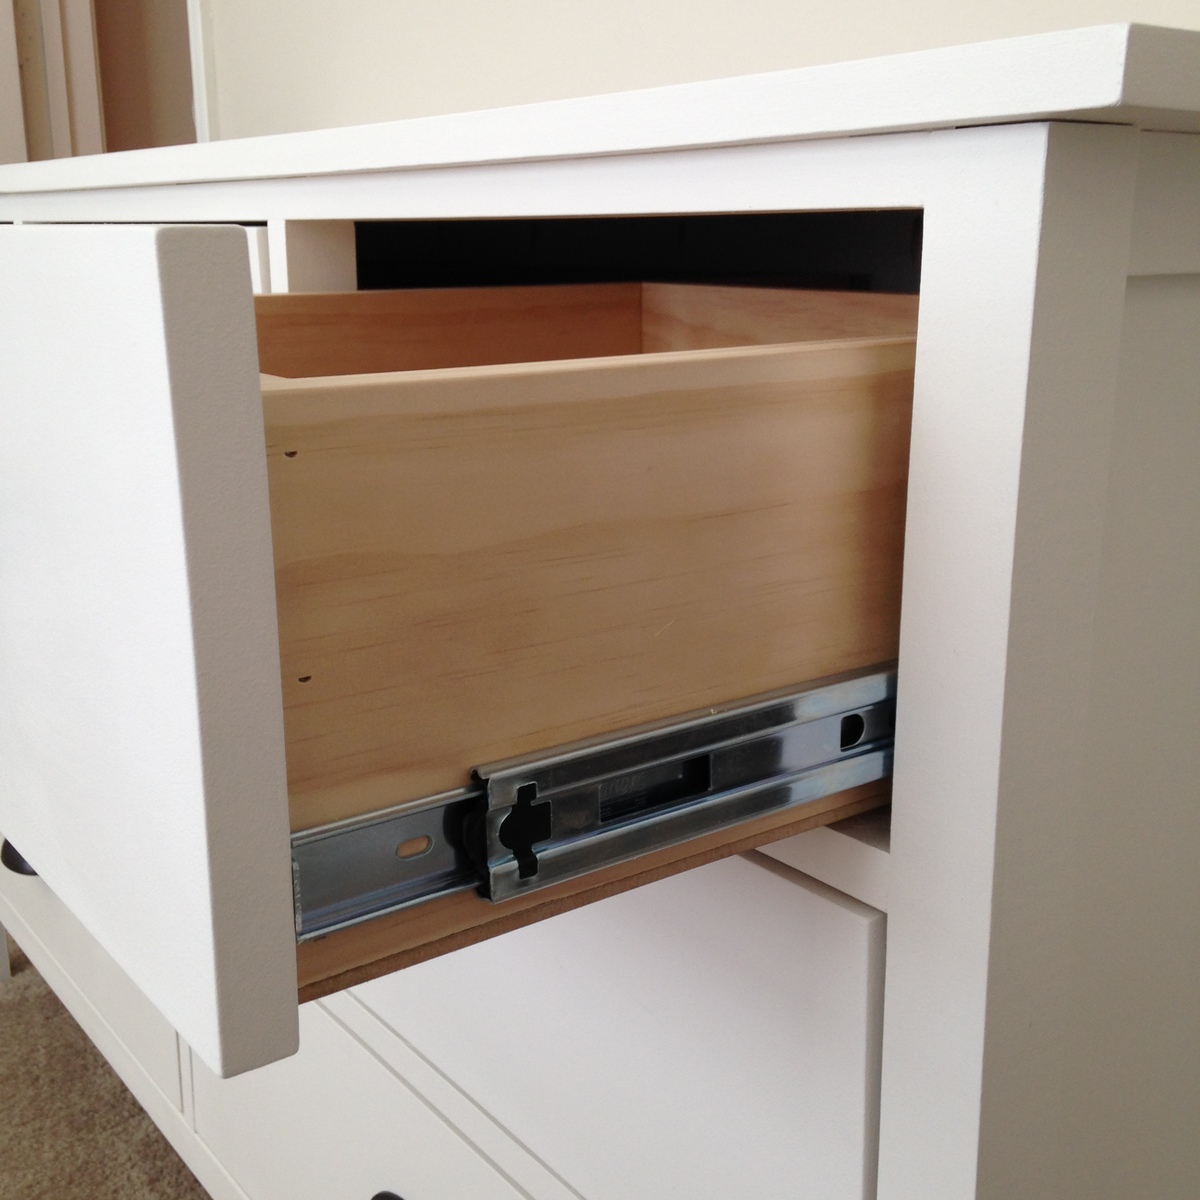
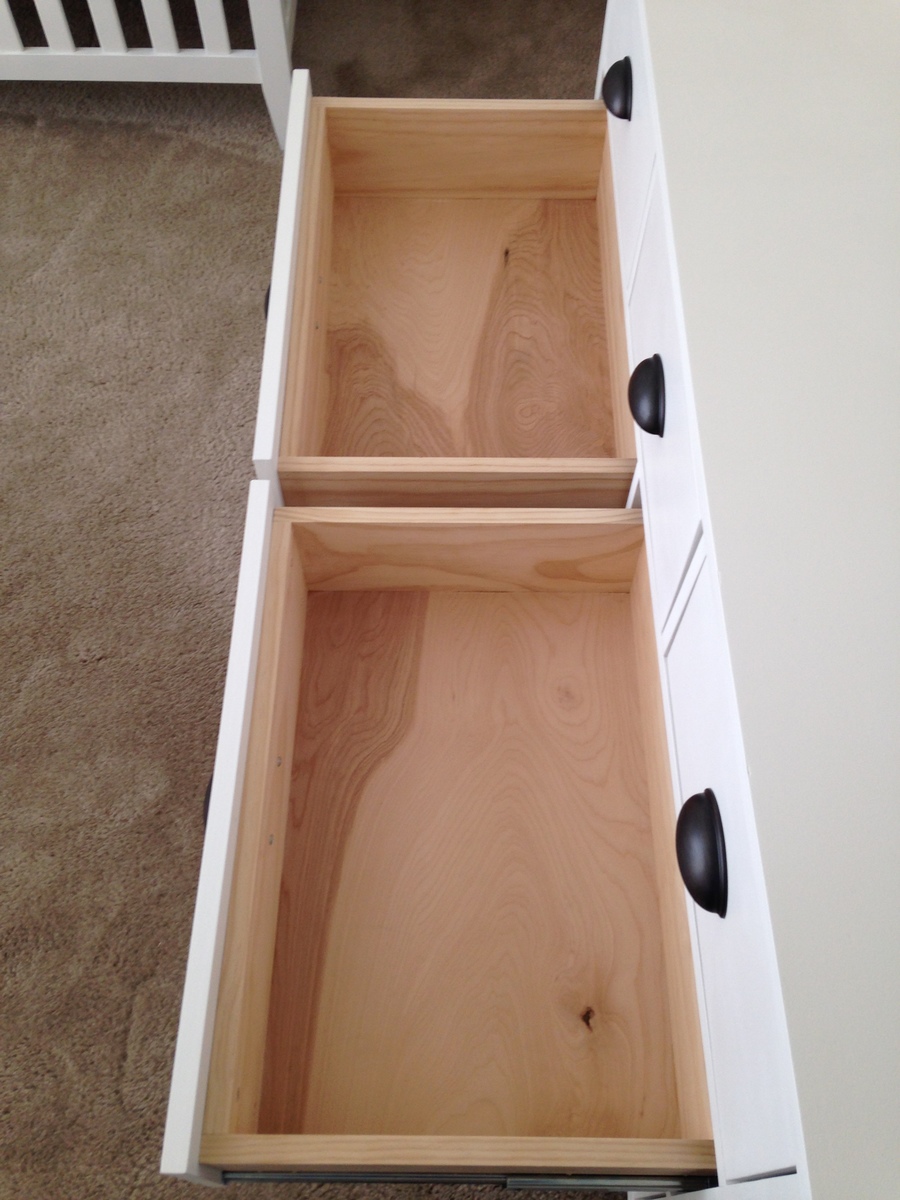
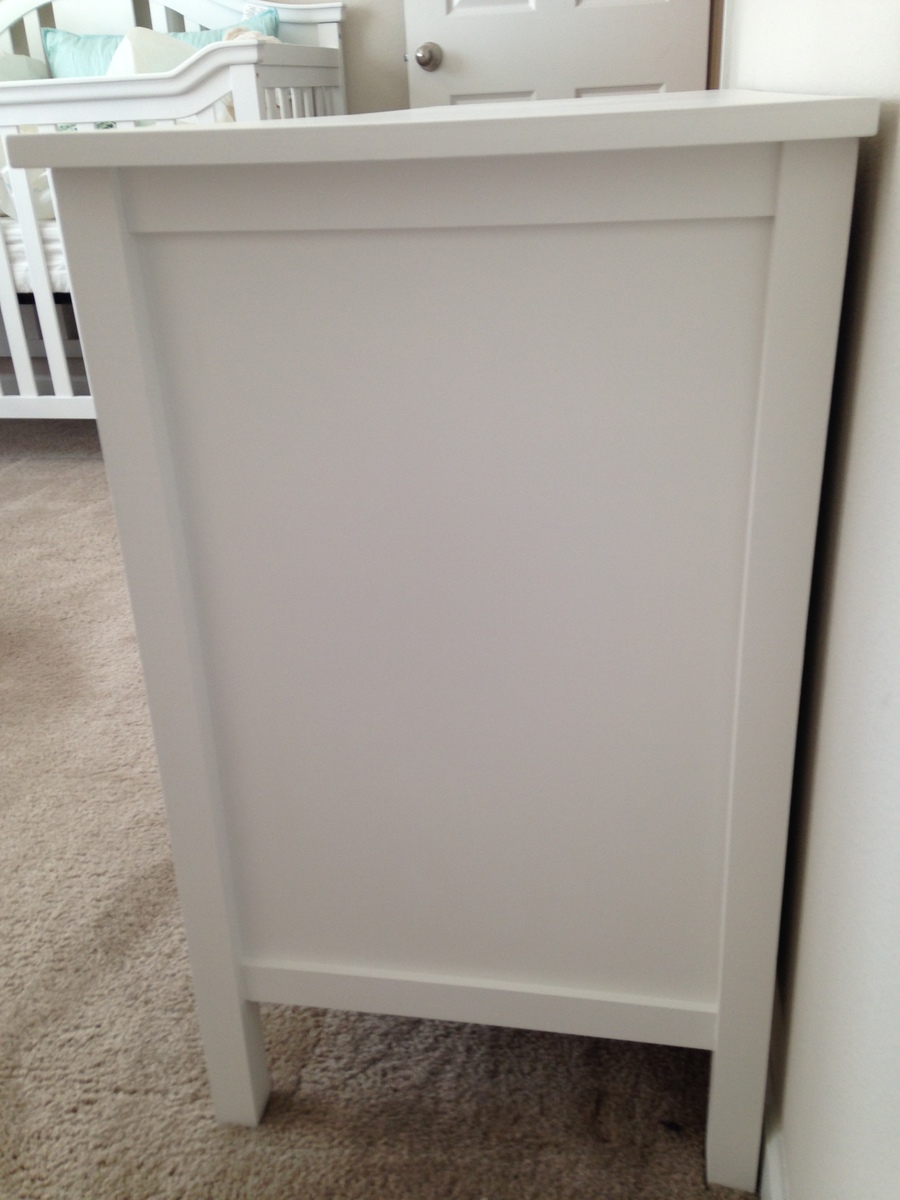
Built from Plan(s)
Estimated Cost
$300
Estimated Time Investment
Week Long Project (20 Hours or More)
Finish Used
I used Annie Sloan Chalk Paint (Pure White) with the Clear Soft Wax. I love the matte finish and the luster of the wax!
Recommended Skill Level
Intermediate
Narrow Farmhouse Table with Stenciled Desktop
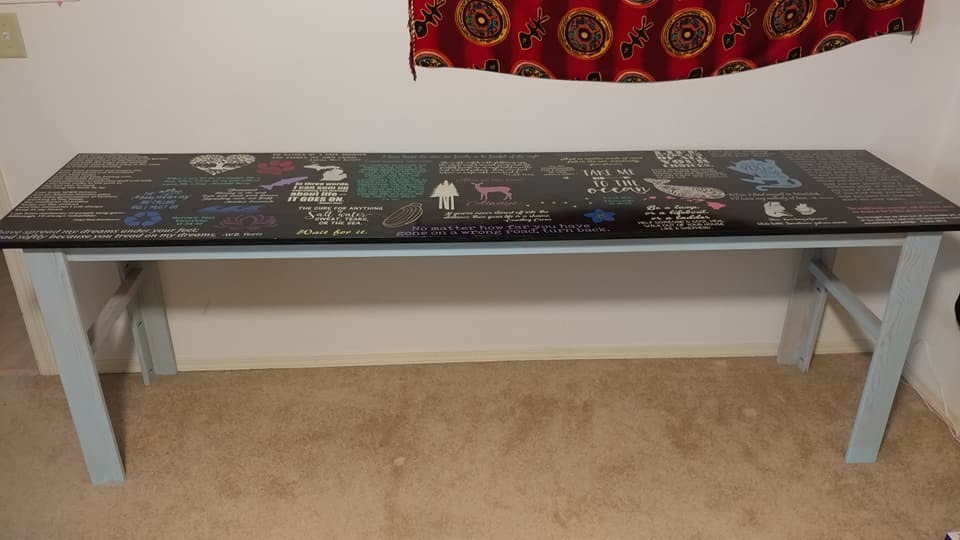
I've been looking at this project for 2-3 years. After spending a lot of time in the lumber store looking at 1x boards for planks (and not finding any that I was very happy with), I walked by the plywood section and saw a really nice looking piece of plywood made by the Araucoply company. Not only did it look better than the plank boards I found on my visit, it was 1/2 the price of the board I was looking at. I live in Fairbanks, Alaska and it only cost $29 for an 8' sheet of Aruacoply. I brought it home and ripped it with my circular saw, using a homemade rip guide. I made the table 2' wide by 8' long and stained it with ebony stain. I spent the next two weeks cutting stencils and painting the table top. Once it was covered with some of my favorite quotes, poems, lyrics, and graphics, I sealed everything with three coats of semi-gloss polyurethane. I blurred out poems written by my kids in the photo attached to this post.
I built the base in about two hours and stained the legs with a light blue Varathane stain that was on discount at the local box store because the can was dented. If I hadn't spent so much time stenciling, I could have easily been done with the whole thing in no more than 2.5 hours.
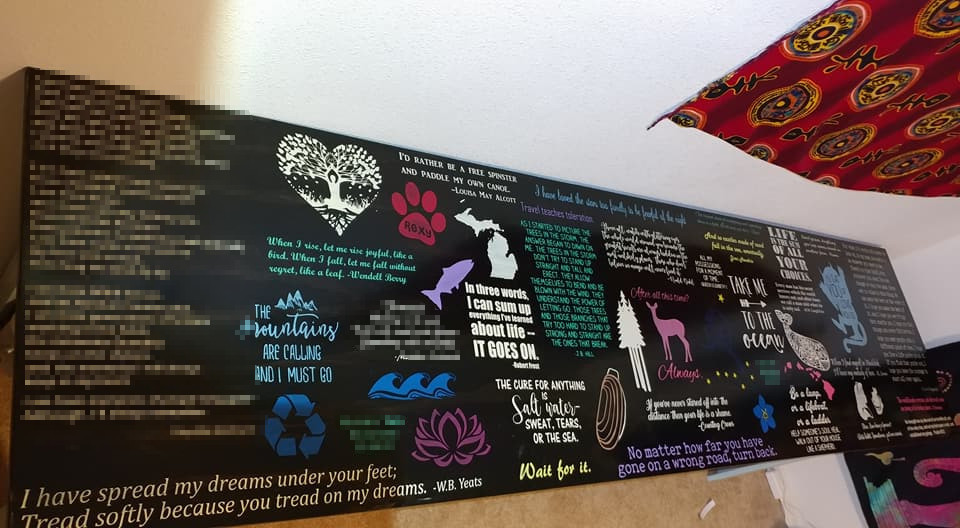
Built from Plan(s)
Estimated Cost
$90
Estimated Time Investment
Afternoon Project (3-6 Hours)
Finish Used
Ebony stain for the top, light blue Varathane stain (can't remember the name!) for the legs, three coats of semi-gloss polyurethane
Recommended Skill Level
Beginner
Adirondack chairs and table

You were right. These Adirondack chairs are super comfortable! I am so grateful for all of the plans that you post. I have made so many things from your website and I get so many compliments on them. Thank you again
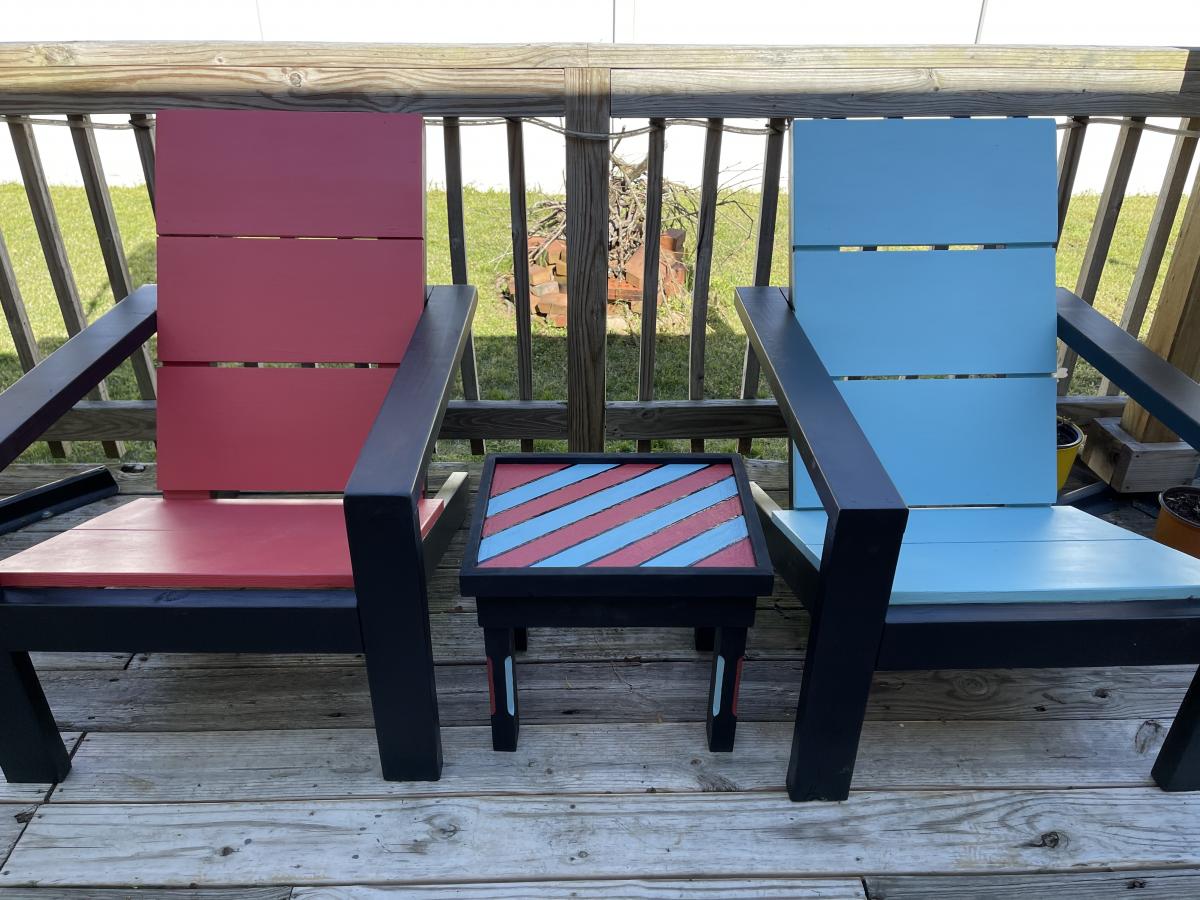
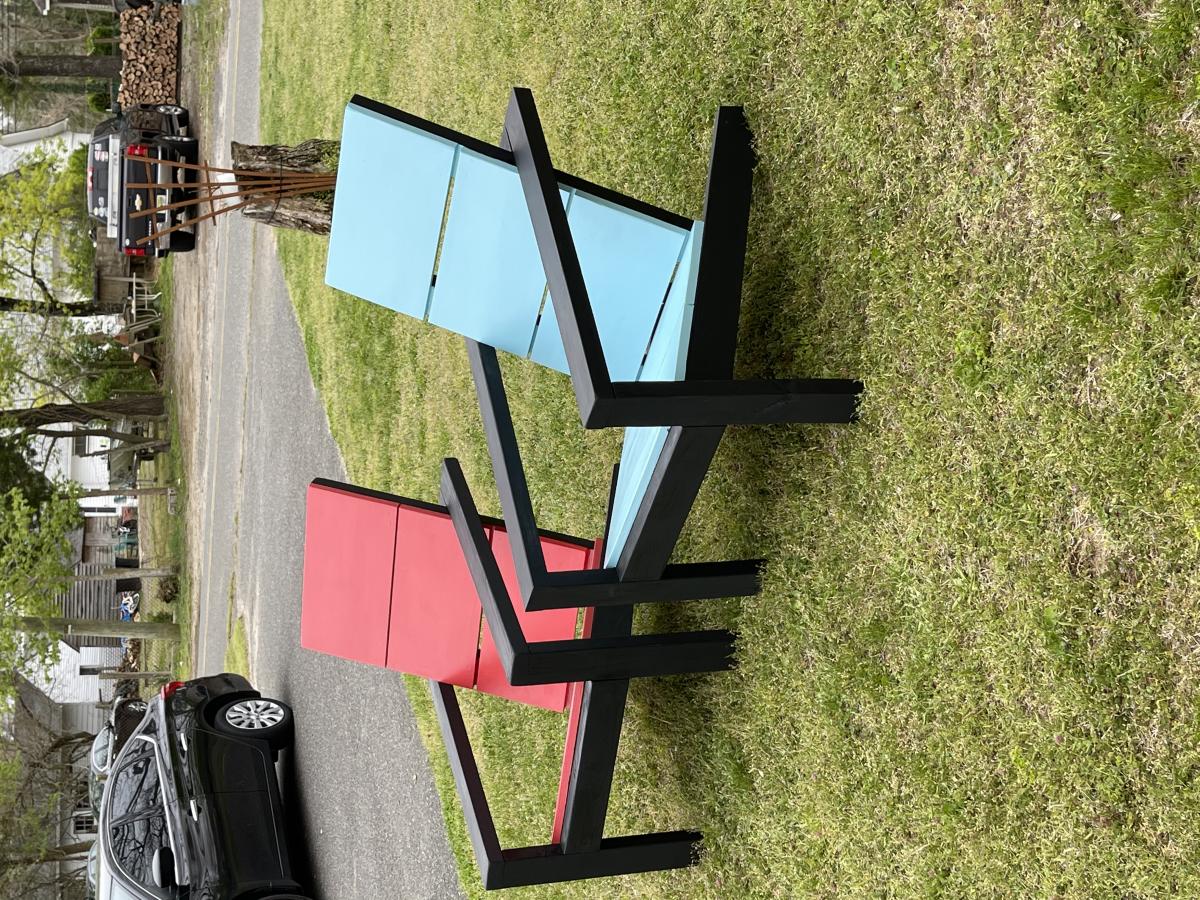
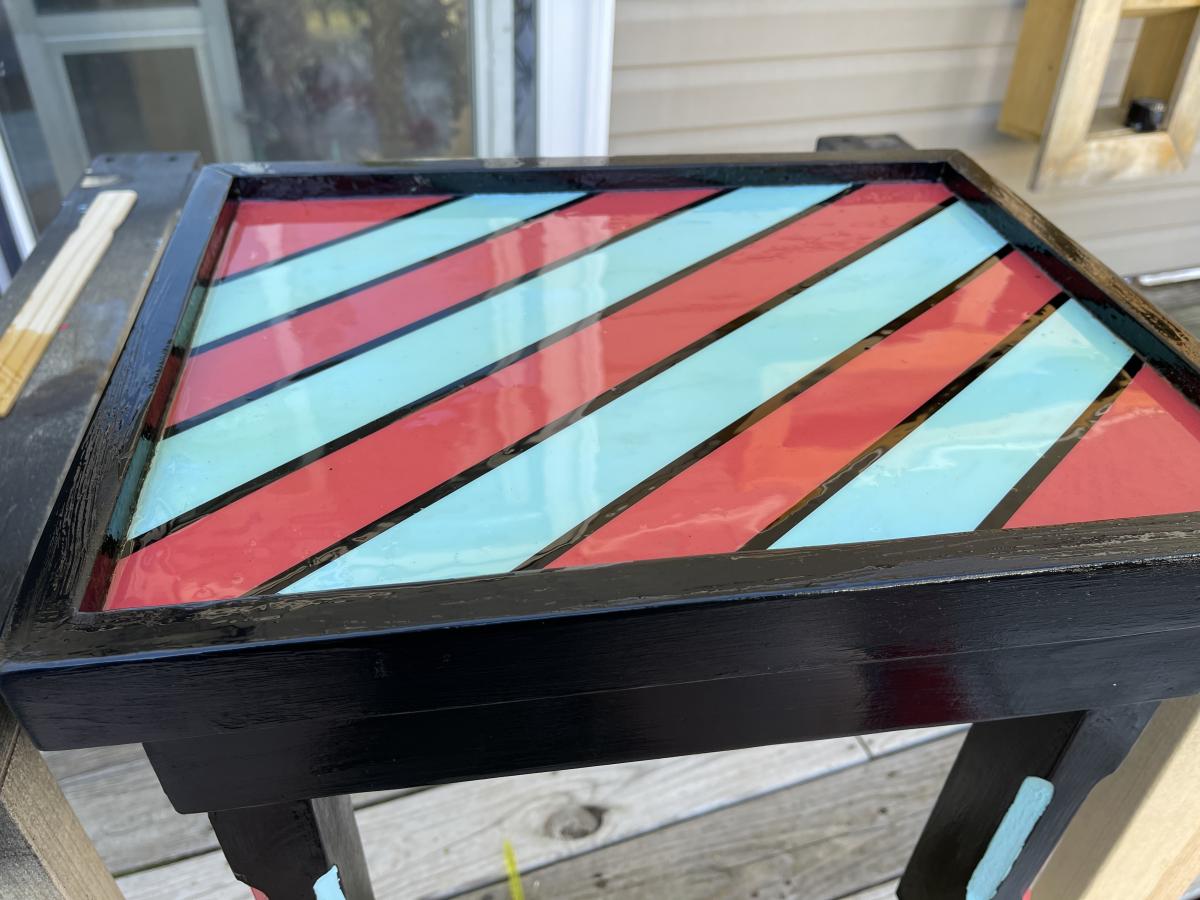
Built from Plan(s)
Comments
Coffee or Game Table Hayrake Style

The better half wanted a coffee table for the rec room to use for snacks and board games. I had seen the use of a hayrake stretcher on tables so, since I like to experiment, give it a try on this table.


Estimated Cost
About $60 since I went upscale on the top and the legs.
Estimated Time Investment
Week Long Project (20 Hours or More)
Finish Used
The frame is painted Pompeian Red. The top is stained with Kona and then two coats of antique oil. Lots of sanding preceeded all of the painting and staining.
Recommended Skill Level
Intermediate
Comments
Sat, 11/02/2013 - 12:37
Hayrake plan?
I would love to build a hayrake style table like this. Are there any plans available?
In reply to Hayrake plan? by stemar61
Sat, 11/02/2013 - 14:21
Hayrake Table Plans
I did not have any plans. Just built by feel. However go to this link
http://www.thedesignconfidential.com/2013/03/coffee-or-game-table-hayra…
where I have posted much more detail on my building process including some extra pictures. Interesting build. Good luck and post your results when finished.
kitchen nook
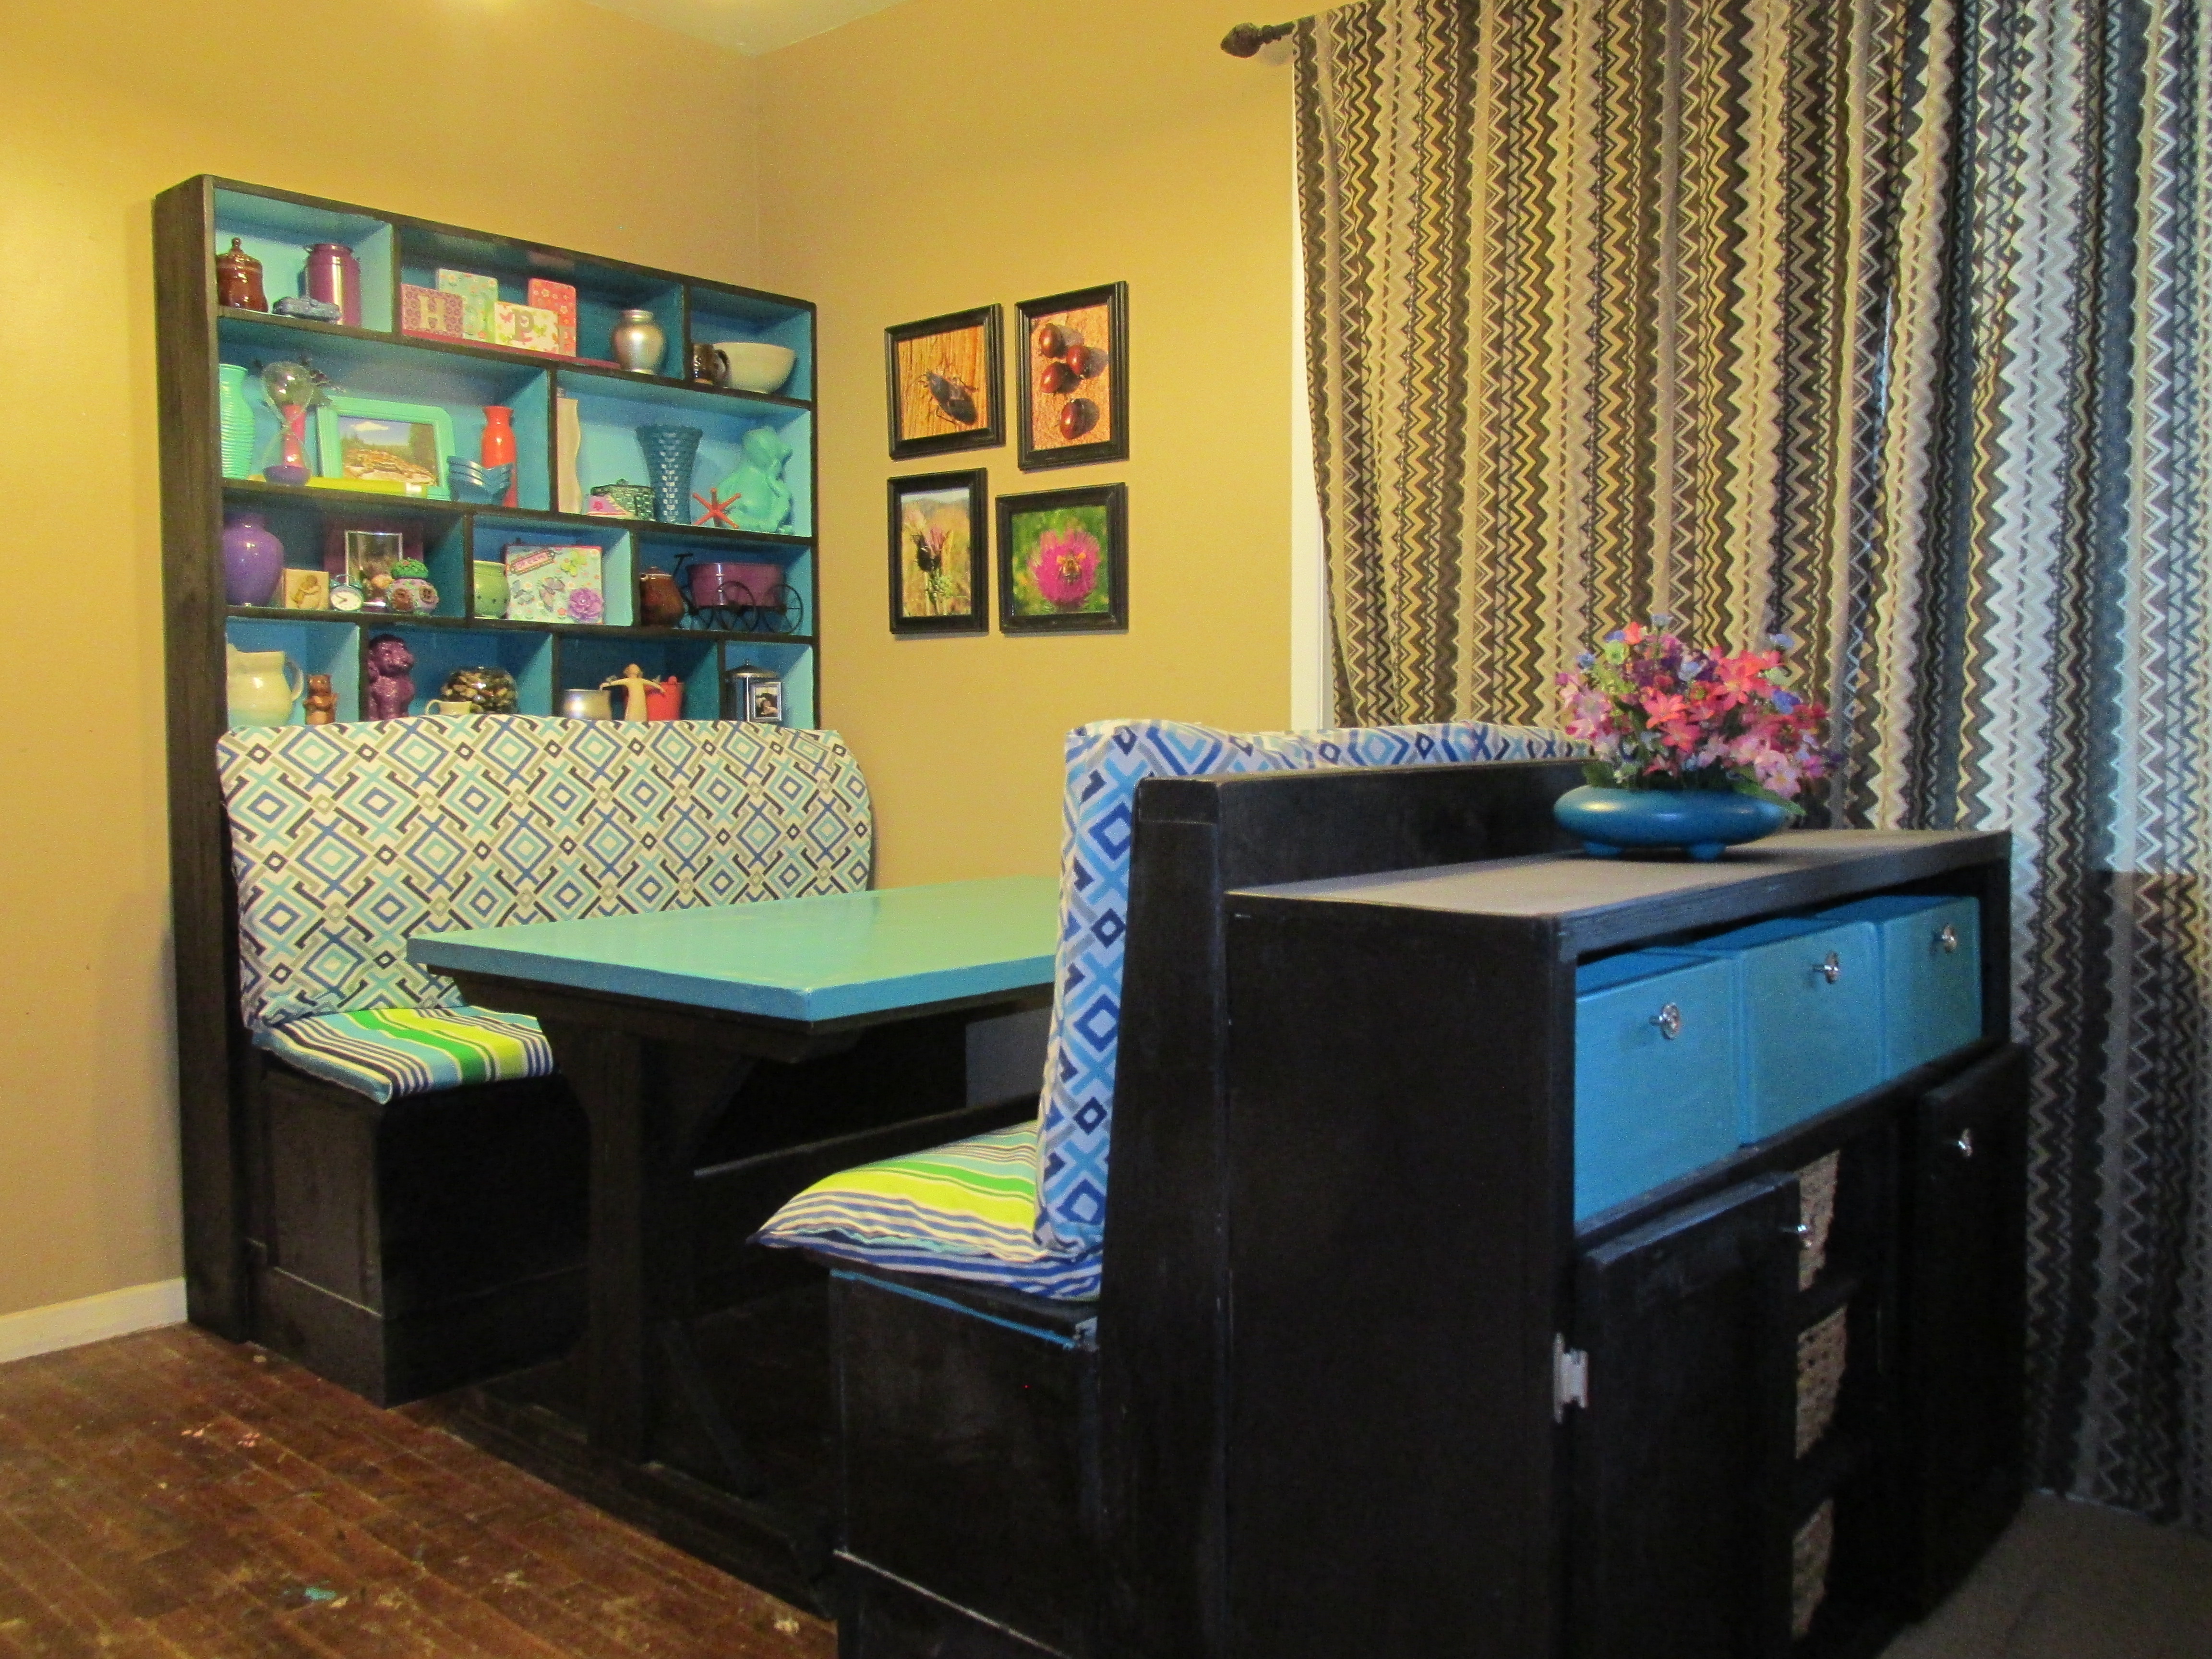
This was a fun build. For the benches I used the storage sofa plans to figure out how to build the backs but I used removable cushions So I can easily wash them as needed. The bench against the wall is deeper so the subway bookshelf fits on top. I only used 2 pedestals for the table since it's only 48" long. I made the entire project 48 inches long so I could get the most use out of the wood. It comfortably fits 4 people and I love how it turned out.
Built from Plan(s)
Estimated Cost
$300
Estimated Time Investment
Week Long Project (20 Hours or More)
Recommended Skill Level
Intermediate
Comments

Tue, 02/10/2015 - 17:45
Super build!
Great job on this build! Super use of space too, love the shelves above the one bench, and extra storage in the console behind the other. Did you do those blue storage boxes too? Great pop of color!
First Build

Thank you all for your inputs. I ended up building it 80x49 and was very surprised how well it turned out. The chairs were unfinished from homedepot.com. The key is buying straight boards and clamping. I'll be doing some other projects after seeing how well this one went.

Estimated Time Investment
Week Long Project (20 Hours or More)
Recommended Skill Level
Beginner