Subway Tile Bookcase
![](/sites/default/files/14264156_10103808637272400_2594947965142836487_n.jpg)
Project costed more than expected but only because I had to buy the Kreg and a new hand sander. Other than that probably close to $120. Great proejct and great addition to our home!
Actual: $120
Project costed more than expected but only because I had to buy the Kreg and a new hand sander. Other than that probably close to $120. Great proejct and great addition to our home!
This was super easy to do. Thank you for the inspiration and sharing the plan.
This is the first piece that I have built from your website. The plans were easy to follow. I had to change the dimensions to fit the console where we wanted so it made the parts list a little more time consuming to figure out with a few mishaps in the original plans. After that it was smooth sailing.
I tried to save money where I could so I created my own slides for the drawers rather than spending $100 for the slides. They turned out great. I also made the chalk paint with plaster of Paris since the cost of chalk paint is pretty high.
My wife and i were very pleased with the outcome. Thank you Ana for the great plans. With a little basic wood working knowledge and the proper tools, just about anyone could make this piece.
During the COVID-19 pandemic, I needed a new work from home station. So, I built this desk using the Rustic X Desk plan and just modified the shelf down to half size to make it a little less bulky for the room it sits in now.
Sat, 08/22/2020 - 00:13
Looks great! Absolutely love the top, I’m building one as well right now, and I’ll be using a similar color scheme. Happy building man!
i started this project during the pandemic, and it was amazing I did make even for my neighbors
This was my first BIG project. I was inspired by a console table from a blog Take the Side Street and the Ikea Hemnes Sofa table. I didn't use any plans, so just winged the whole project. I was a bit afraid taking on this project, so I used 89 cent utility boards (roughly 1'x4') that I found at Menard's. So I wouldn't feel bad if it turned out like crap or fell apart. Little did I know how wonderful it would look. I added parson legs to the bottom that I bought from the Home Depot and finished it off with a coat of Minwax Ployshades in Mission Oak.
I'm really excited about how it turned out and have less than $20 invested in the whole project by using the utility wood. This console table holds it all.
The table measurements are 48"x32 1/2"x11 1/2"
I love this table!! Simple build using recycled wood from dumpsters.
Our take on the modern outdoor chair! Fun and easy to build. Will be making the 2 seater loveseat to match.
My Awesome husband made this great bed from one of Ana's plan and I stained it!!
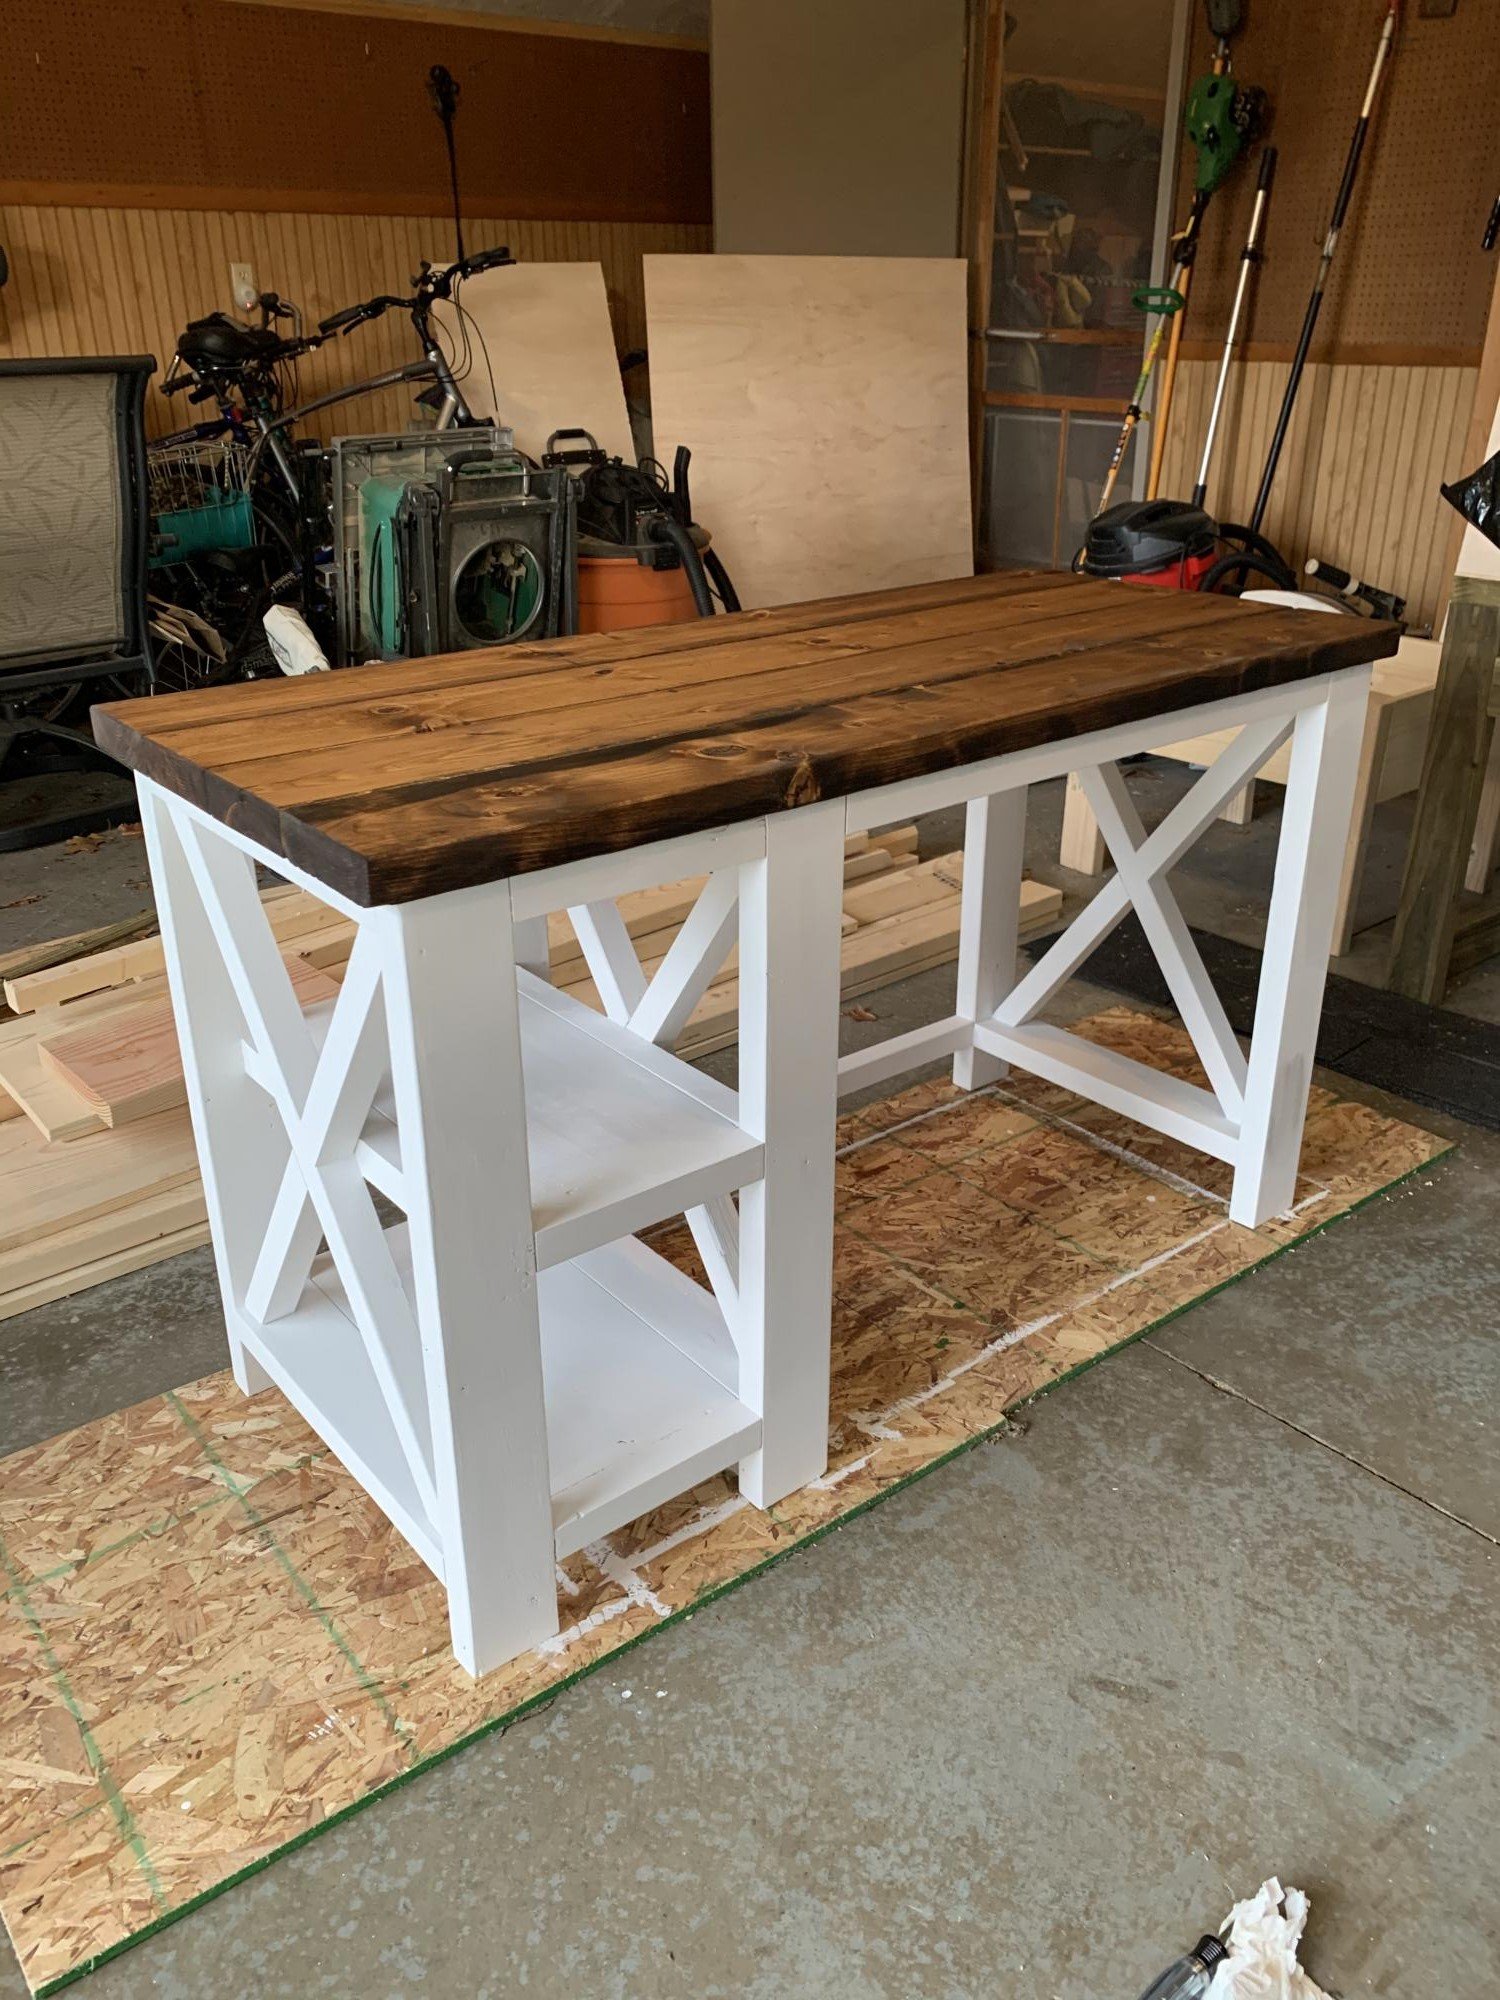
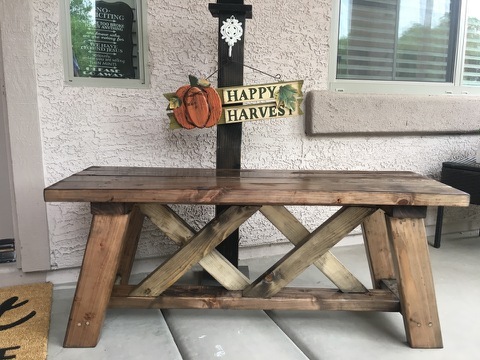
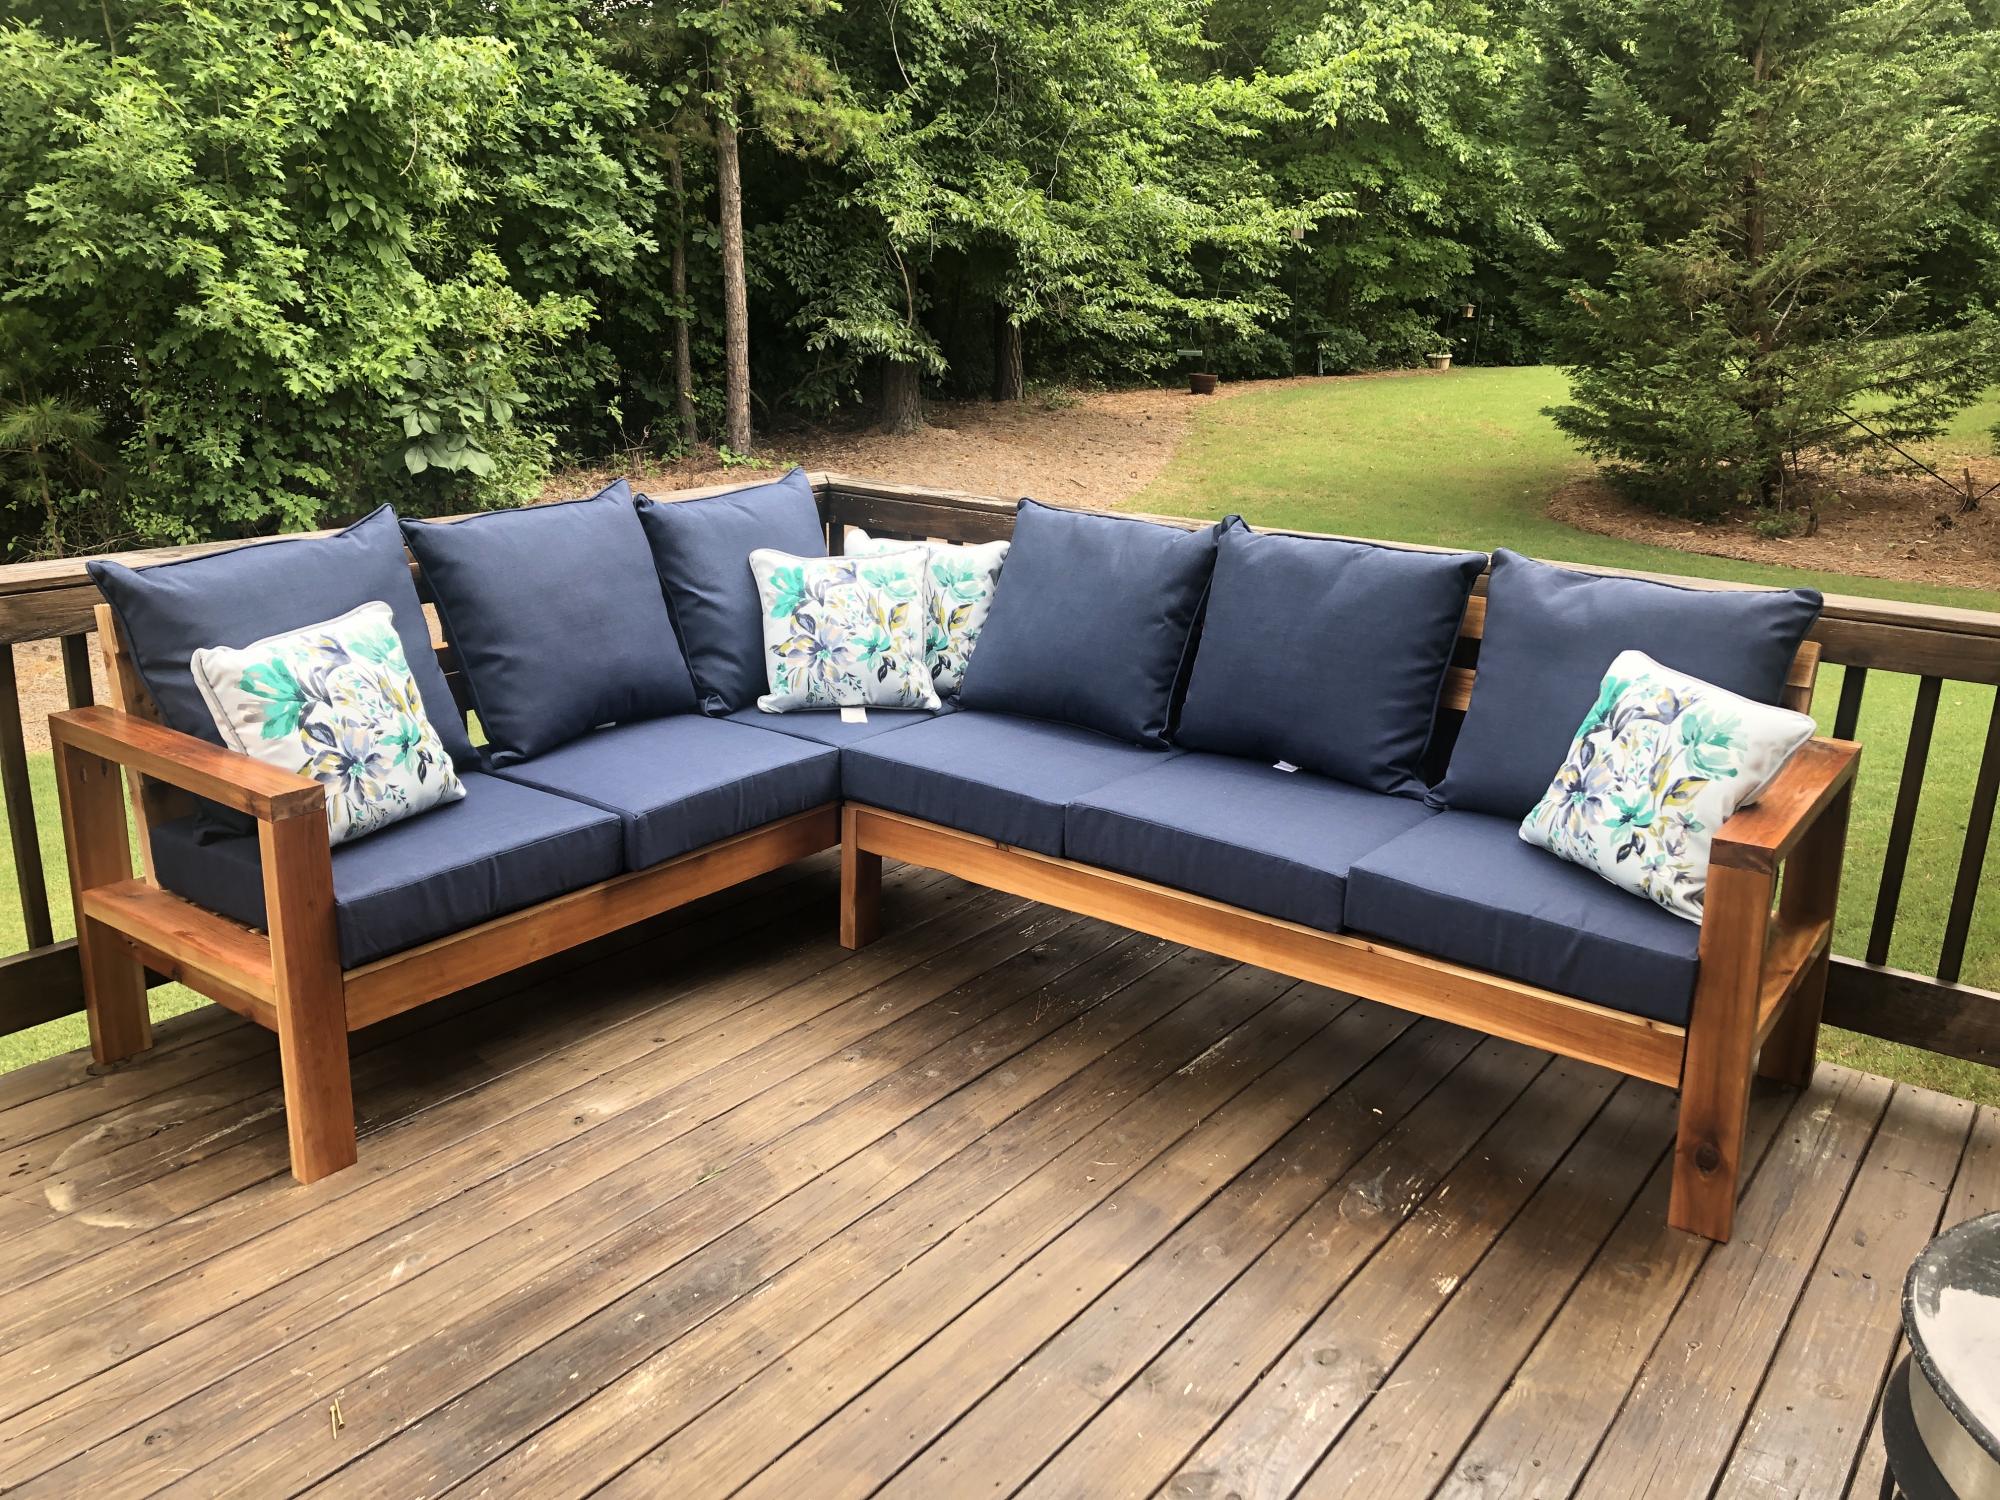
This was a great collaboration between a designer and an engineer, me being the designer and my dad the engineer. I recently moved from a small condo to a single family house with a nice wrap around porch. My father is recently retired and believes idle hands are the devil's playthings so I thought this would be a good project to undertake. Full disclosure, we built this in my father's wood shop and needed to purchase no tools.
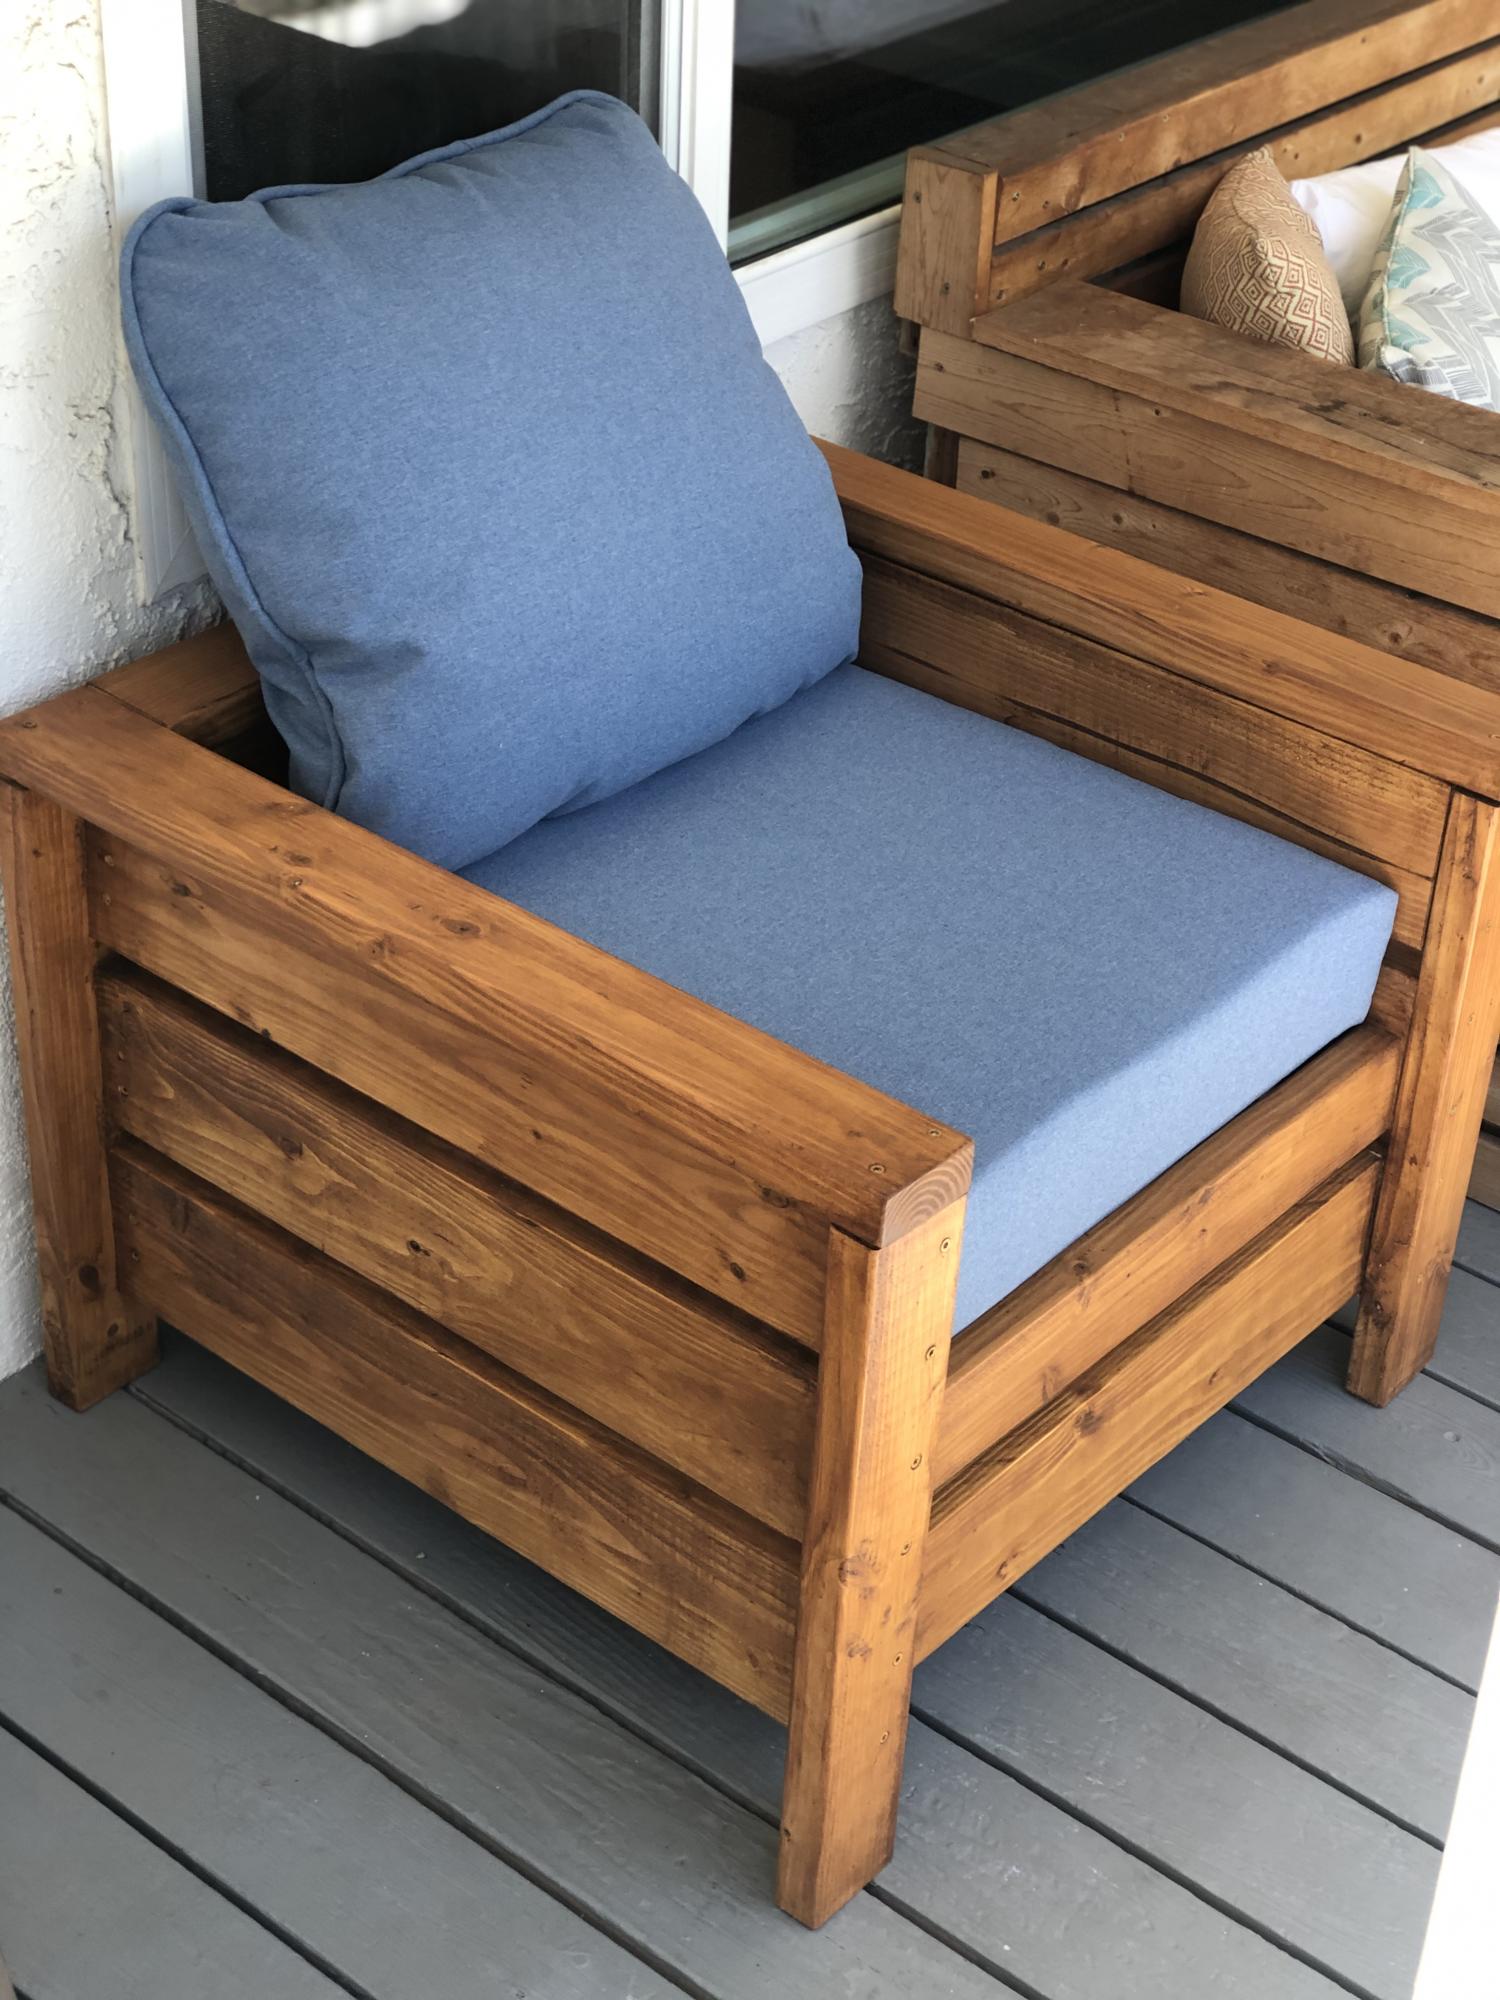
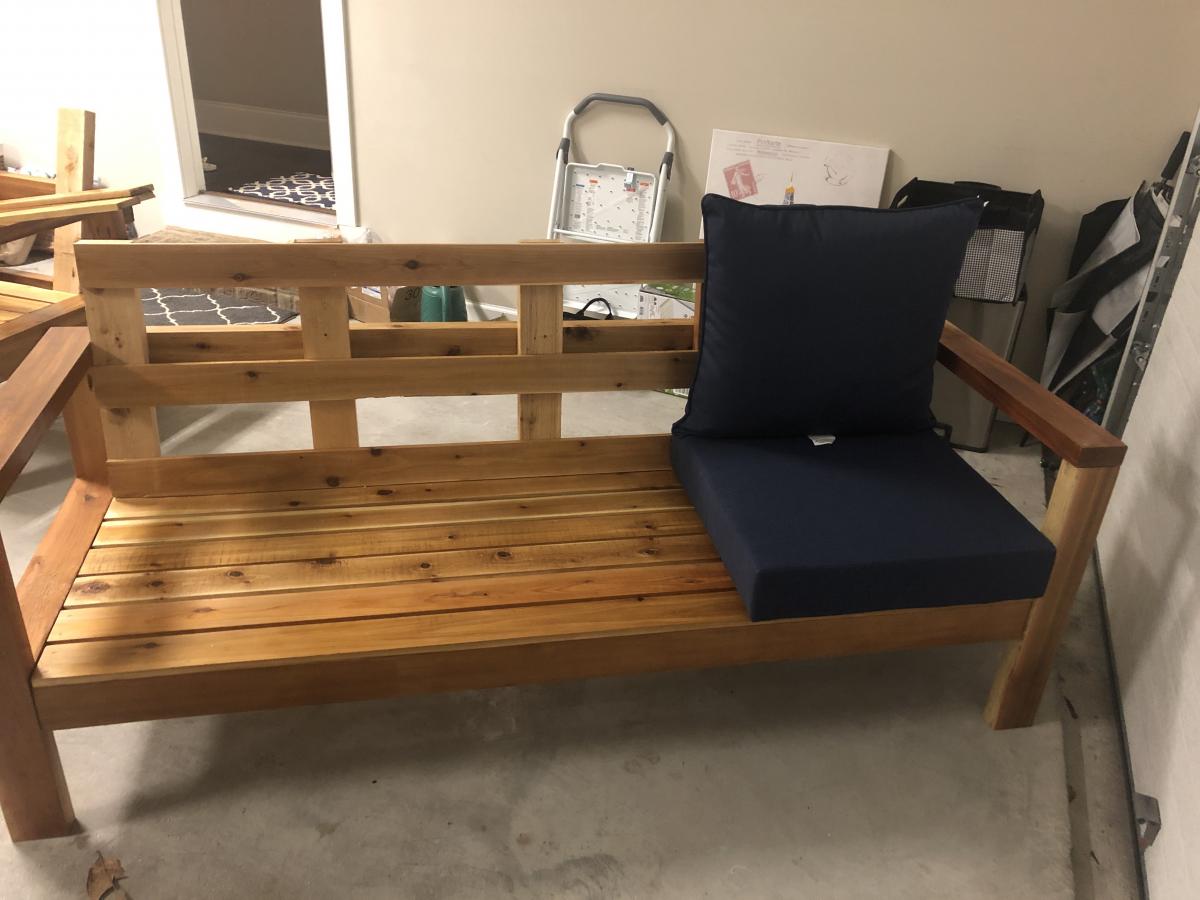
I took on this project because every couch I looked at was either very expensive or did not meet my tastes. When searching for a design online this one really stood out to me for a couple of reasons, the first being the design looked great, the process was easy to follow, and the construction methods seemed pretty solid. The only drawback I found was that standard lumber at a big box store had to many knots and shied away from it for the slats and arms and went with 'select' grade pine, this change increased the price. It also took some convincing my dad to use big box store lumber as most of it is warped and knotty, he wanted me to purchase cypress from a high end mill so that it could truly weather the elements. His theory is a good one, you are putting a lot of work into building this why not spend a $100-200 more and get a very long lasting wood? My answer, my wife will kill me if I spend $500 on this project!!!! In the end this was much easier than I thought it would be. The chop saw made quick work of the cut list, and the Krieg jig worked great. Painting took the longest, I used a power sander to sand it down. I then used left over wood conditioner and the shellac primer. This took about 4-5 hours. After the primer dried I sanded out a few areas where the primer had pooled. Using a paint sprayer we sprayed at least 3 coats probably more like 5 coats of white exterior semi-gloss. This took about 3 hours. I attached the back to seat after I painted them.
Modifications:
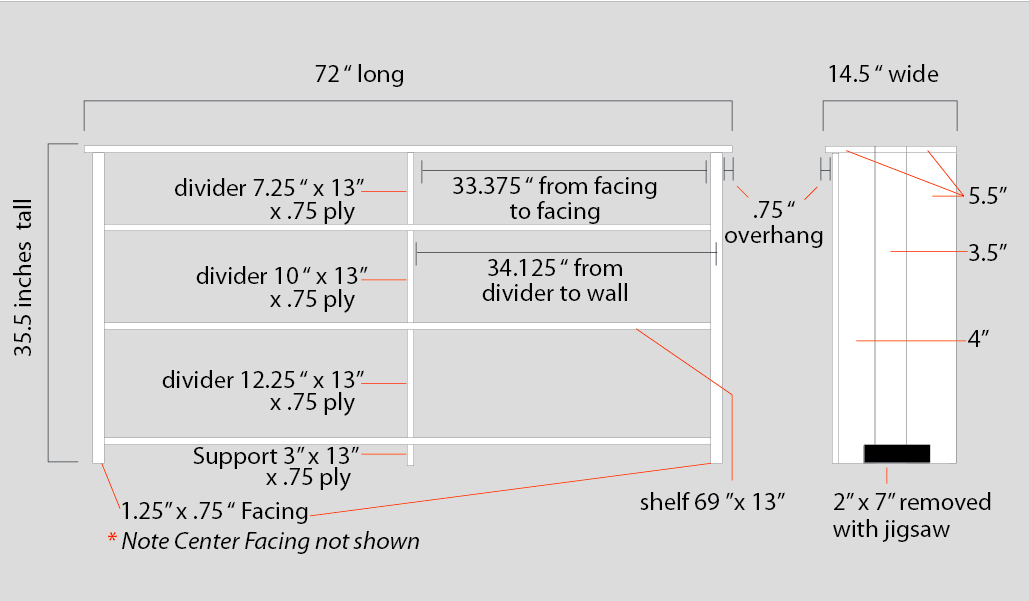
I reduced the overall depth in order to accomodate a 24" cushion instead of the 27.5". I researched online buying foam and fabric as suggested, but this in my opinion made the project too costly. I found outdoor cushions at Ikea which work very well with the style and layout. They are not super cushy but do the trick for a 1/3 of the price.
I also added heavy duty rubber furniture slides to the bottom to prevent any marring to my deck and hopefully reduce moisture wicking up the end grain.
Costs:
Lumber and screws: $190
Cushions: $120
Paint: I used an expensive shellac for the primer $42.00
and exterior grade latex for $25, plus a few paint bushes $10.00
Grand Total: $387
Timing:
1. Acquiring lumber - 1 hour
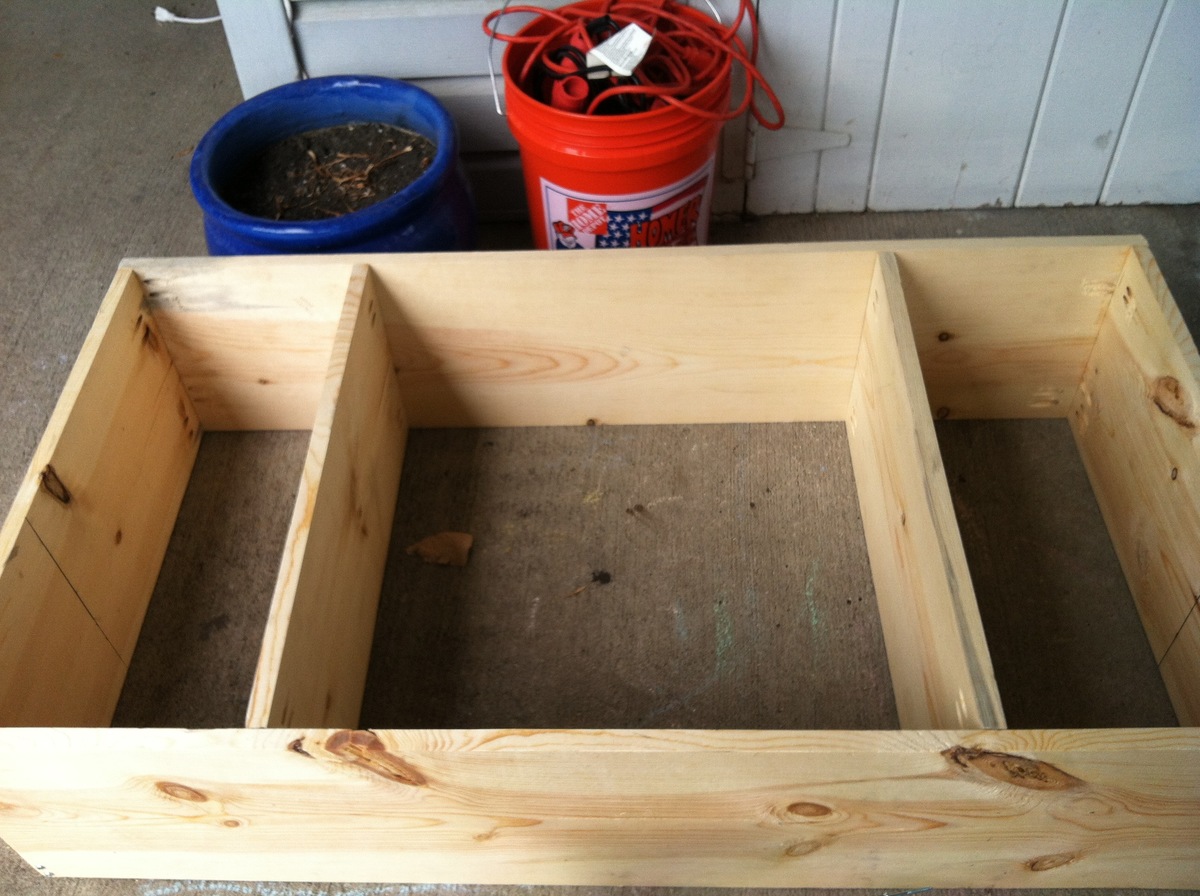
2. Measuring, cutting and labeling - 1.5 hours
3. Krieg drilling - 3 hours
4. Assembling - 3 hours
5. Sanding - 1 hour
6. Conditioning and Priming - 4 hours
7. Painting with sprayer - 3 hours
Total 16.5 hours
This is my first Ana White project and was a great learning experience. This project is a modified version of the 6 cube bookshelf plan.
Rips of Pine were used for the top, sides, and facing. 3/4" Plywood was used for the shelf planks and the shelf dividers. The sides were also modified so they worked as the legs. Overall dimensions for this piece is 72"x14.5"x35.5".
I built these beautiful corner shelves for a friend. It is a great beginner project. I used a 1x8 board but you could also use a 1x10 board. You could also build 5 shelves instead of 3. I used pocket hole joinery.
This was a blast to build, but more fun the watch my grandson enjoy it.
Thank you for the best plans.
Charlene
We removed the tiny closet in our mudroom (because kids and husbands seem to be unable to open a closet door to put their coats away). I found some pictures of cubbies that I liked, and then used some of Ana's plans to hybrid together what I had envisioned. They came together really easy and quick - the most time consuming part was the finishing. This was my first attempt at drawers and using glides, so that took a bit of tweaking. I bough a square AFTER building this, and I should have done that first! This was also the first time I used my new Kregjig.
Cool project! My wife liked it without the doors!
My sister needed new outdoor furniture for her deck and liked the look of the sectional. I used cedar with a clear varnish to creat this piece for her that was perfectly sized for her deck. The challenge to this one was getting it to her house about 3 hours from mine. Fully assembled it would have been tight getting it in my truck. I ended up cutting all of the boards and drilling all of the pocket holes in my shop and then assembling at her house. I have added backs to some of the pieces I have made fro others that want the extr support. I add a 1x4 laying flat across the back of the seat. The slats going up and down then have a slight angle to them which adds comfort and support. I attached the pieces to the 1x4 and the upper back rest piece in the plans.
Potting bench with a few modifications to fit our space.
Bill N