Community Brag Posts

Easiest Industrial Laundry Cart

Submitted by robinles on Tue, 05/30/2023 - 08:37

After a laundry area refresh, I was looking for a slim utility cart to fit between the washer and dryer. I couldn't find anything that fit the space appropriately, so after finding the Easiest Industrial Cart plan, I decided to make one for my space. I built it using a 2x6x10 board and aluminum angle.

Built from Plan(s)

Comments

Pull Out Trashcan

Submitted by etbuogie on Mon, 01/16/2012 - 20:01

I modified the plans to make the top even with the counter, and added a cutting board to the top. The cutting board top is great for cutting veggies, then scooping the scraps right into the can. I also opted for the bead board instead of the raised panel on the door, and finished the door with quarter round to give it a more finished look. Finally I used trim on the base; I had to rip the trim to width to fit my 1x3 on the bottom.

Estimated Cost
$100
Estimated Time Investment
Afternoon Project (3-6 Hours)
Finish Used
Black paint ruffed up with sand paper.
Recommended Skill Level
Beginner

Comments

Apothecary Coffee Table

Submitted by Idella on Tue, 12/03/2013 - 07:17

I built this apothecary style coffee table with a few modifications. I wanted the drawer to actually be attached to the table itself, so I attached two 1x3s (one on the front and one on the back) from the bottom inside of one side to the other, if that makes sense. I also attached a 1x3 to the bottom inside of each side vertically between the other added 1x3s for extra drawer support. I used my kreg jig for all of this. I then added drawer slides. I attached the casters to the new added bottom frame where the vertical and horizontal 2x3s meet and viola...an apothecary coffee table with a sliding drawer. I also added a planked back using some extra 1x4s I had in the shop. I wish I had taken a picture of the back, but I forgot! I am horrible at remembering to photograph all my projects, and this table has since gone on to be with a happy home!

Estimated Cost
$100
Estimated Time Investment
Weekend Project (10-20 Hours)
Finish Used
The top was stained with Kona from Rustoleum and heavily sanded for a distressed look. The rest was painted with Annie Sloan Chalk Paint in Emporer's Silk then distressed and finished with Annie Sloan dark wax to darken and age the red (which was quite bright to begin with).
Recommended Skill Level
Intermediate

Farmhouse Table

Submitted by Anonymous (not verified) on Wed, 02/17/2016 - 05:56

Loved this and after some searching for husky legs, I ended up using fence post from Lowes. They were fat and just perfect as the leg options in town were so thin and weak looking.

Estimated Cost
$150
Estimated Time Investment
Weekend Project (10-20 Hours)
Finish Used
Dark Walnut Stain with clear Satin finish
Recommended Skill Level
Beginner

All Cedar Farm House Dining Room Table

Submitted by Anonymous (not verified) on Wed, 10/02/2019 - 05:34

100% Cedar construction. Cost around $350 all inclusive. Took me close to 20 hours of work in my garage. The wife loves it. And we brag about it all the time. So I figured this contest is perfect 👌😊.

Estimated Cost
350
Estimated Time Investment
Week Long Project (20 Hours or More)
Finish Used
Stain and water based polyurethane. 800 grit sand paper.
Recommended Skill Level
Beginner

Comments

jreyes79

Wed, 06/10/2020 - 11:16

Is there any plans available for this design? I would love to build one of these tables.

Little Red Barn Coop

Submitted by Anonymous (not verified) on Sun, 06/04/2023 - 12:58

This was an Ana White plan. My first outside project. Late husband left me with lots of tools so decided I’d teach myself woodworking. Thanks Ana White for the super easy plans. I tweaked them a little especially the outside look. I put a single fold down door for the pullout tray. Put a hinged ladder for easy clean out attached to clean out tray.

Comments

Cal. King Farmhouse Bed

Submitted by netterj on Fri, 01/20/2012 - 19:56

My brother built my bed by not following my directives but I love it anyways. We(he) made some changes for a look I wanted and it only took a day to build. The sanding and painting took the longest. My son liked it so much he built a queen size for his girlfriend. His first build. His is the black one.

Estimated Cost
145.00 to 175.00
Estimated Time Investment
Week Long Project (20 Hours or More)
Finish Used
semigloss dove white paint/primer
Recommended Skill Level
Intermediate

Comments

goingfor3

Sat, 01/21/2012 - 06:08

Wow! That is awesome! How cool to tell people when they ask about your bed. A year ago, I would've never thought of making my own bed, now all I want to do is build a house and all the furniture in it! I absolutely love your bed, and actually bought one very similar. Wish I would've seen this first :)

FergieW (not verified)

Tue, 06/26/2012 - 16:20

Is the black one painted or stained? I can't really tell on my old school iPod lol thanks

Pantry

This is my second big project. Our home is rather small and my wife was in desperate need of a pantry. I was worried how well I could do with making everything square. I used 3/4” birch plywood for the case and shelves. The shelves are permanently attached with Kreg screws and glue. I used a HVLP gun I purchased from Harbor Freight to spray on the primer. I was really impressed with its performance…especially since I had never used one..lol. I painted the interior of the top doors with Valspar chalkboard paint and it works great. My wife chose to use colors that would match the existing colors of the kitchen. Had a lot of fun with this one.

Estimated Time Investment
Week Long Project (20 Hours or More)
Recommended Skill Level
Beginner

Comments

Jonjo

Mon, 09/21/2015 - 21:35

Wow! It turned out great! Nice work! We would love to do a project like this! Would you provide any information on dimensions/plans that you followed to give us a jumping off point to planning our own pantry? Again, love the design!

Cedar Planter

Very simple to make and looks very nice.

Built from Plan(s)
Estimated Cost
$20
Estimated Time Investment
Afternoon Project (3-6 Hours)
Finish Used
Satin Polyurethane
Recommended Skill Level
Starter Project

Comments

jimblackjim

Wed, 11/11/2020 - 08:38

This was a fun, easy project. I built two of them. The pickets that I used were 3-1/3” wide. I used five per panel resulting in an 18” (vs. 17”) wide panel.

For those who have difficulty sourcing cedar locally, check out this link for a fence panel kit sold by Home Depot: https://www.homedepot.com/p/Outdoor-Essentials-3-1-2-ft-x-8-ft-Western-…

~$80 with free delivery. Just enough for two planters. I ripped one of the 2x4s down to make two 2x2s for the legs. The other 2x2 I ripped down to make more 1x4s. Since these ended up being 1/4” wider than the pickets in the kit, I used them as the bottom cross pieces on the panels.

They look great and my spouse loves them!

Coffee table

Submitted by Anonymous (not verified) on Wed, 10/02/2019 - 16:02

My first build

Estimated Cost
80
Estimated Time Investment
Afternoon Project (3-6 Hours)
Recommended Skill Level
Beginner

Comments

Toy box

Submitted by Anonymous (not verified) on Fri, 06/09/2023 - 12:53

I made this toy box for a couple that I worked with. They like it so much, that they asked me to make them two more

Built from Plan(s)

Comments

Farmhouse Bedside Table

Submitted by kaytrishjr on Thu, 01/26/2012 - 06:44

The Farmhouse bedside tables I made for my bedroom.

Built from Plan(s)
Estimated Time Investment
Day Project (6-9 Hours)
Finish Used
Miniwax Sedona Red Satin with 3 coats of poly.
Recommended Skill Level
Intermediate

Comments

Shoe storage bench and coat rack

Submitted by SeanLC on Mon, 02/22/2016 - 10:07

Very easy project, just have to put stain and coat hangers on and all done. 

Estimated Cost
150.00
Estimated Time Investment
Afternoon Project (3-6 Hours)
Finish Used
Min wax
Recommended Skill Level
Beginner

Narrow console table

Attempted this plan, but I used 2x12 boards and made it 5ft long for my wife's coffee station.

Estimated Cost
40
Estimated Time Investment
Afternoon Project (3-6 Hours)
Recommended Skill Level
Intermediate

Comments

Storage bookcase inspired by Grace's Bookshelves

Submitted by sach on Thu, 02/02/2012 - 07:38

I wanted a prettier way to store my kids toys in the family room, but was having a hard time finding something with the right dimensions. I modified Grace's Bookshelf to fit my space needs. This is my first furniture build, so it's not perfect. I needed a lot of wood filler and it took forever to get the right finish. But I'm happy with the end product and am inspired to build more!

Built from Plan(s)
Estimated Cost
$40
Estimated Time Investment
Week Long Project (20 Hours or More)
Finish Used
Primer, 2 coats of Valspar Java Brown, 2 coats of Minwax Polyshades in Bombay Mahogany. I'm hoping it holds up!
Recommended Skill Level
Starter Project

Comments

Yo Joe (not verified)

Thu, 02/02/2012 - 08:39

Just surfed your web site through Kres site. Was able to look at severial beds. I did choose one to make.

Thank You

Jeo Brenner

Adirondack Chairs for the Littles

Submitted by Robynsnest on Fri, 12/13/2013 - 13:26

These chairs turned out great. I have five grandchildren and made one for each. To cut down on arguments, I painted them all the same color and painted their names on their chair. This is a really sturdy chair they will enjoy for years!. Thank you, Ana, for the great plan in your book, "The Handbuilt Home."

Estimated Time Investment
Week Long Project (20 Hours or More)
Finish Used
Painted with external Behr paint.
Recommended Skill Level
Beginner

Parson Tower Desk

Submitted by Anonymous (not verified) on Wed, 02/24/2016 - 06:38

Custom length Parson Tower Desk. 

Built from Plan(s)
Estimated Cost
$20-$50
Estimated Time Investment
Weekend Project (10-20 Hours)
Finish Used
Mini wax Dark Walnut with a Satin Polyurethane finish.
Recommended Skill Level
Beginner

Outdoor Patio Furniture

Submitted by Anonymous (not verified) on Tue, 06/20/2023 - 09:32

Our outdoor furniture from Costco was falling apart but the cushions were still in great shape so I decided to design the furniture around the existing cushion dimensions. I used all Cedar wood and stained it with Australian Timber Oil Honey Teak stain. The table design was from a picture I saw on another site.

Comments

Seasonal And Holiday

Entry Cabinet - My first piece

Submitted by Surly Duff on Mon, 02/06/2012 - 13:59

I found this website a while ago, but it was a while before I had an opportunity to utilize the plans as I have a long honey-do list of things around the house (insulation, installing new light fixtures, putting up crown moulding) that took priority. Well, I finally got some time and Hillary's locker cabinet was a perfect first project.

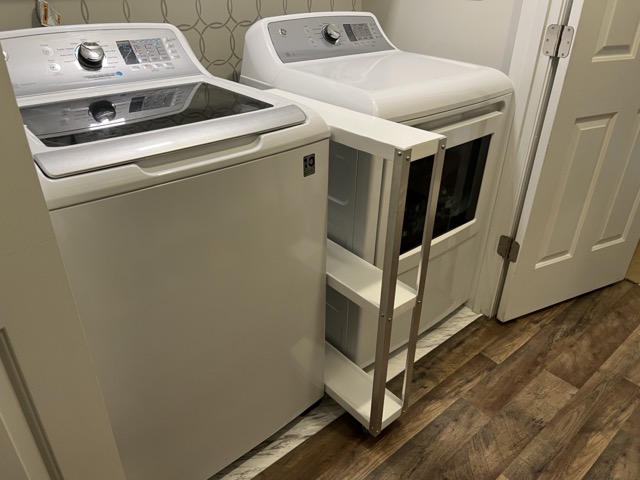
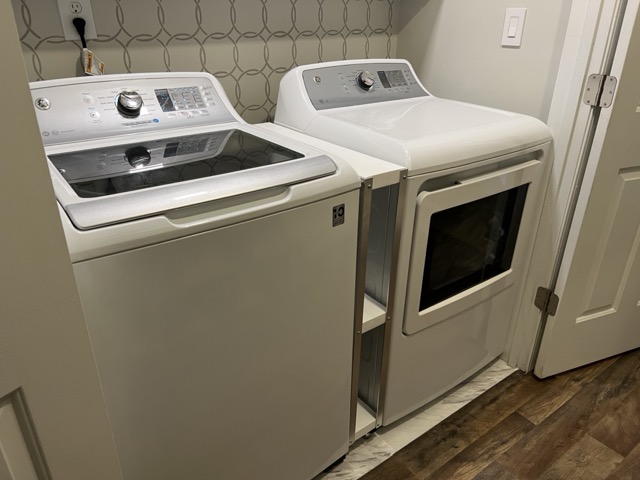
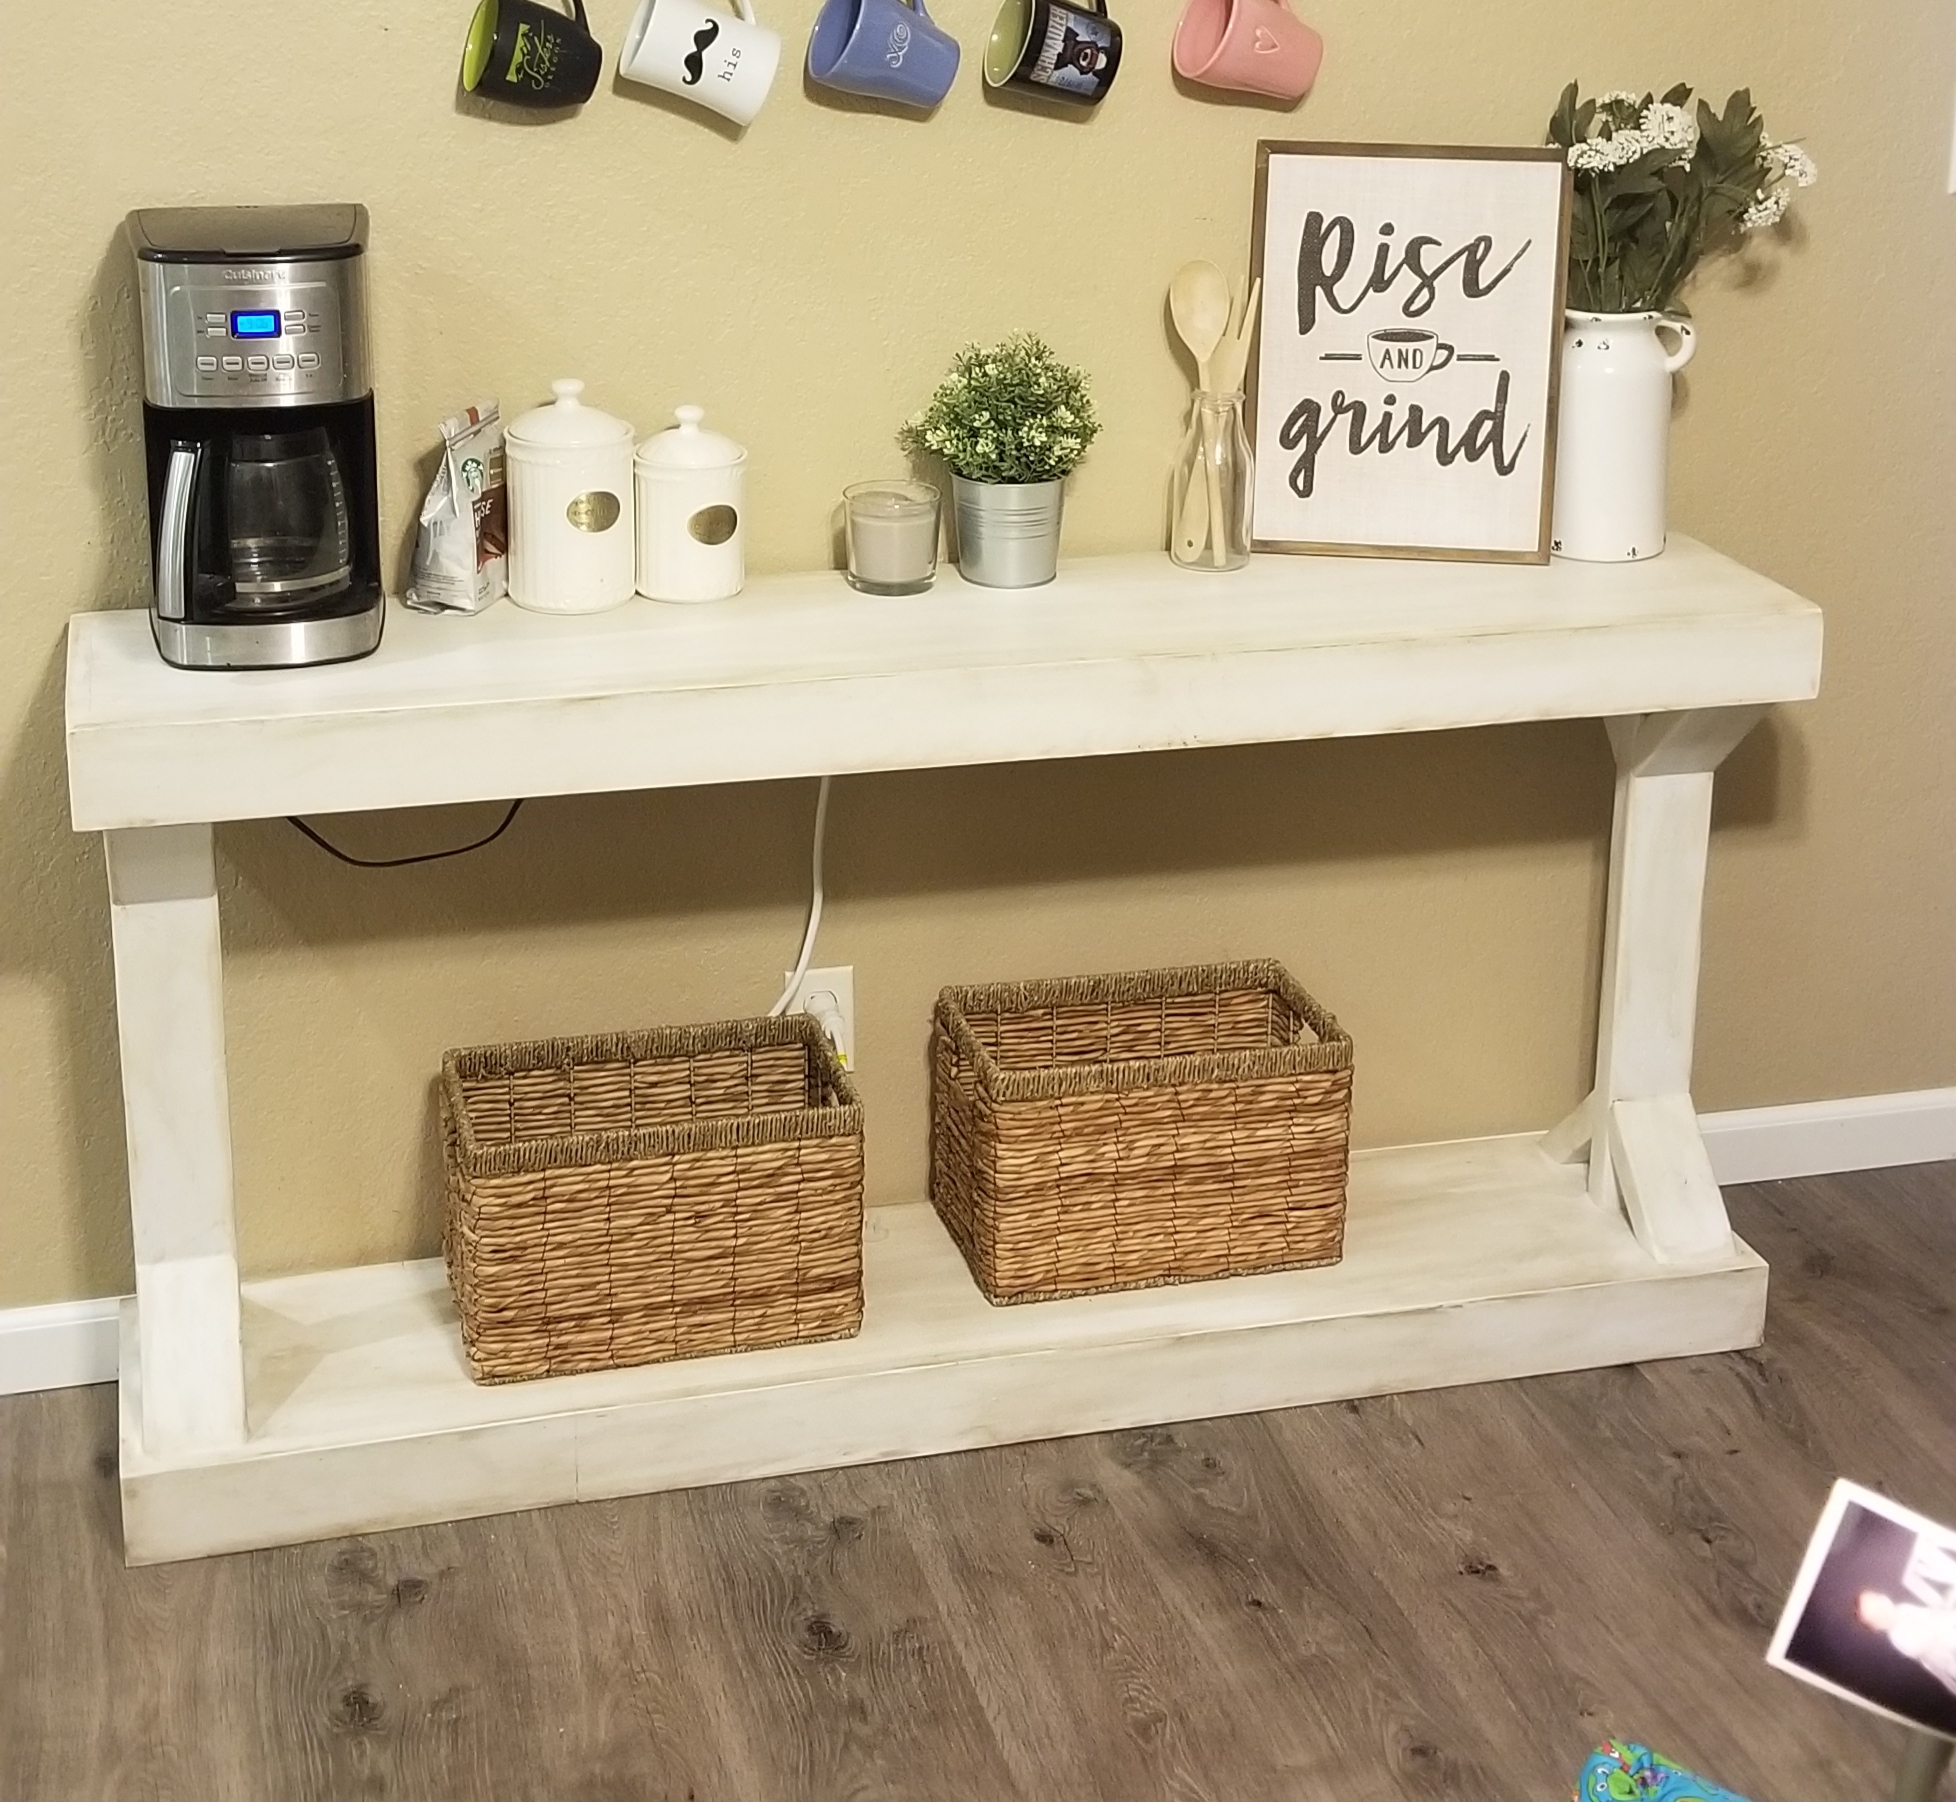
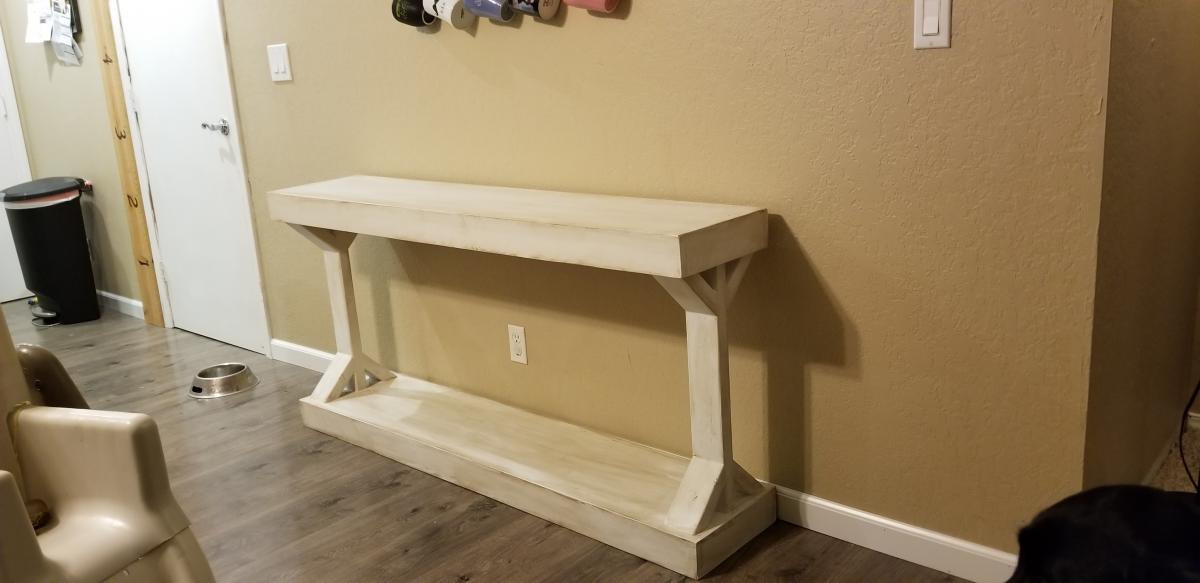
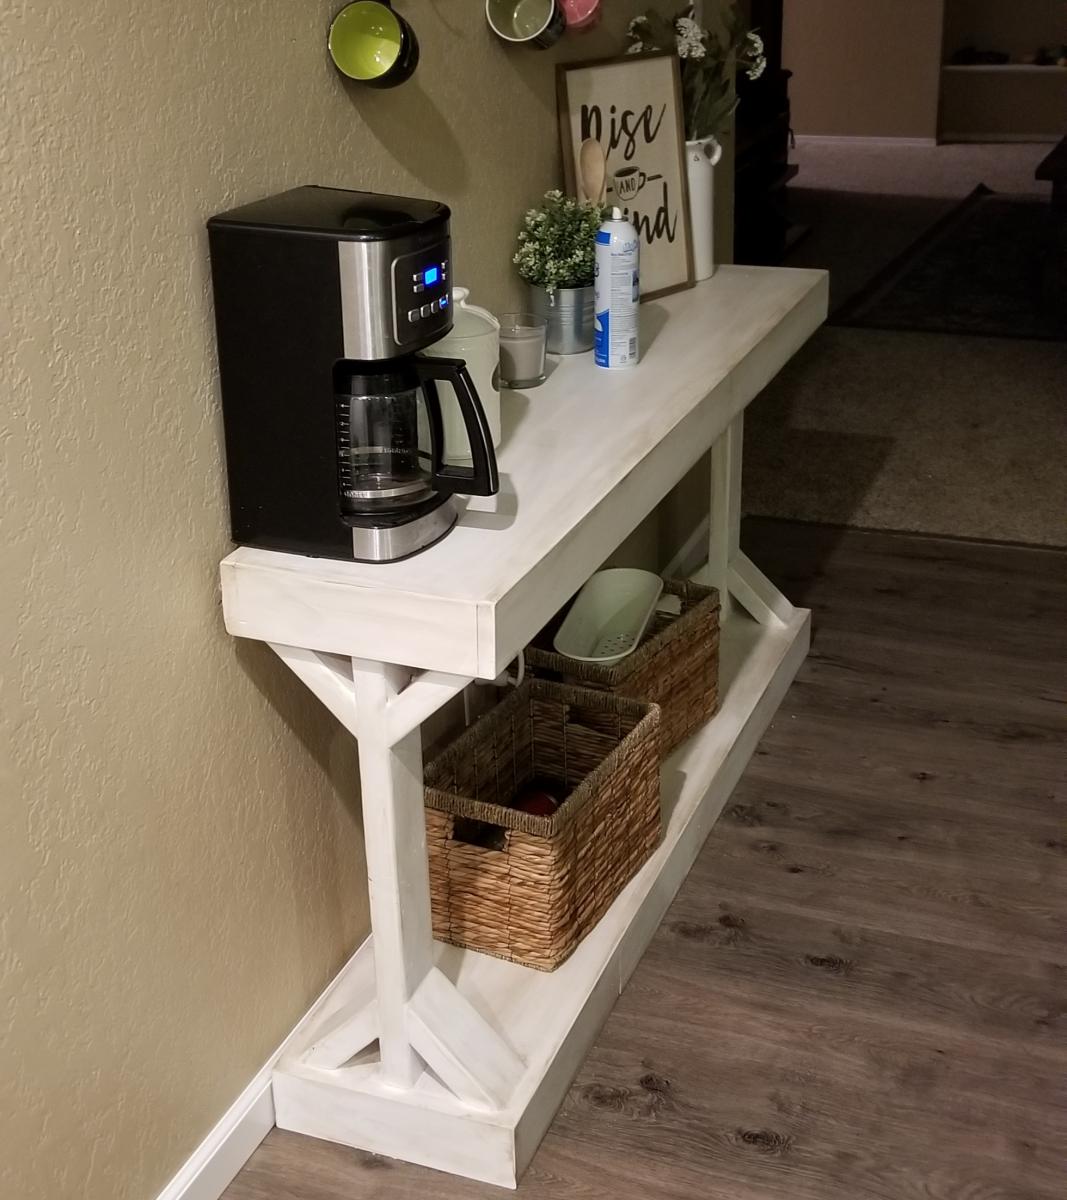
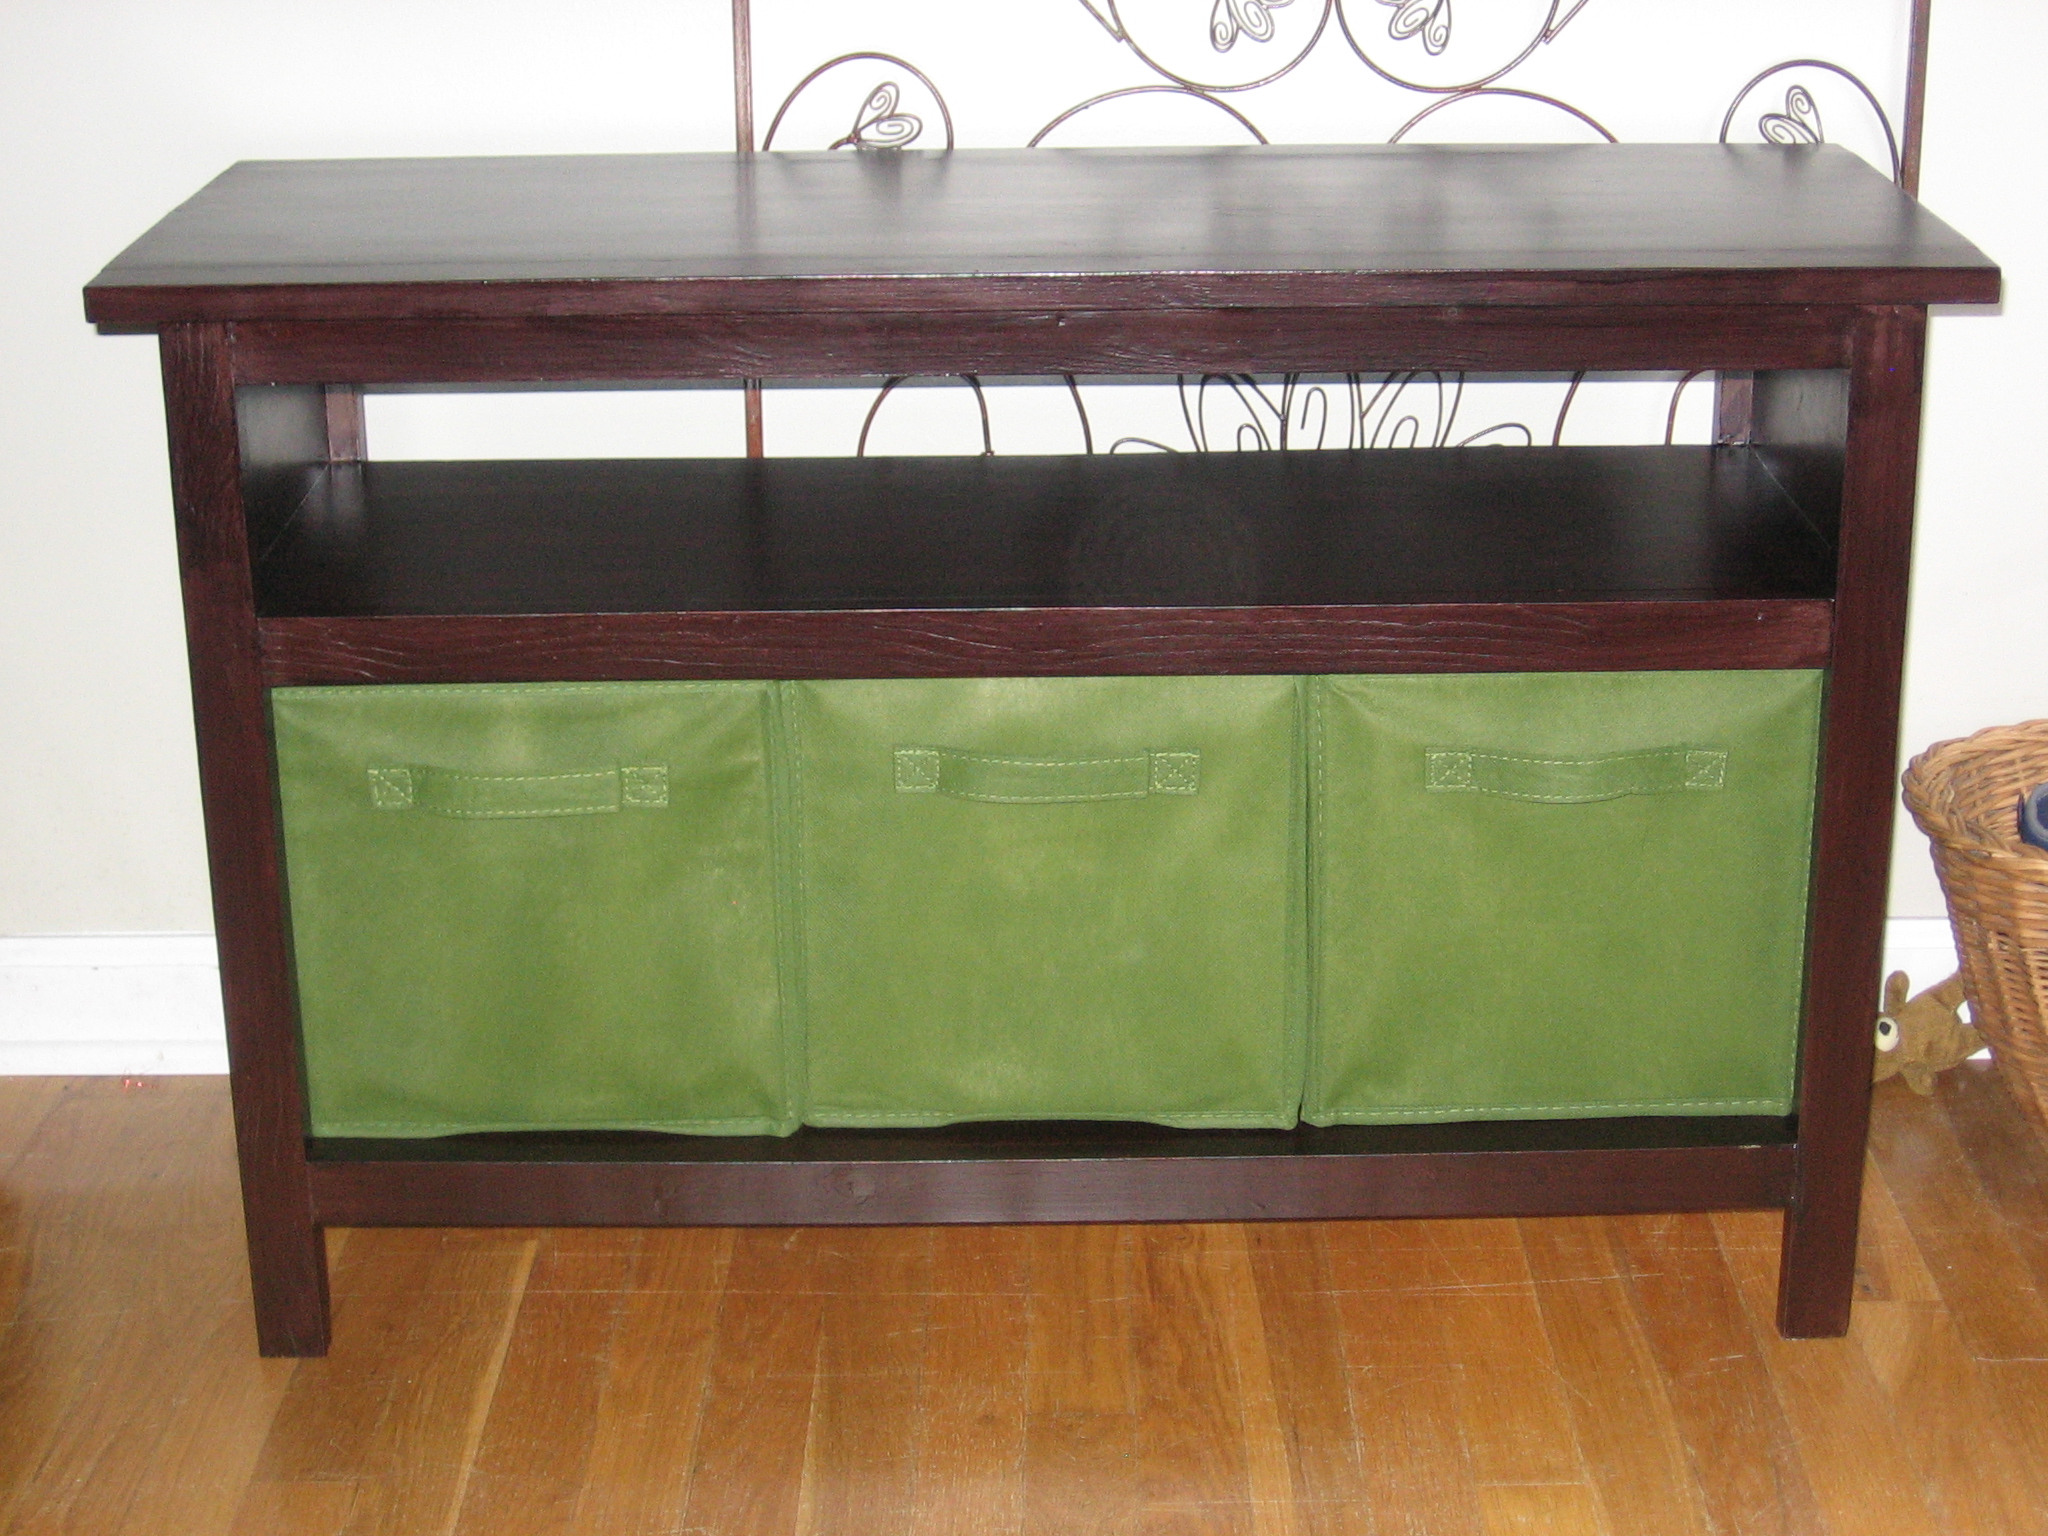
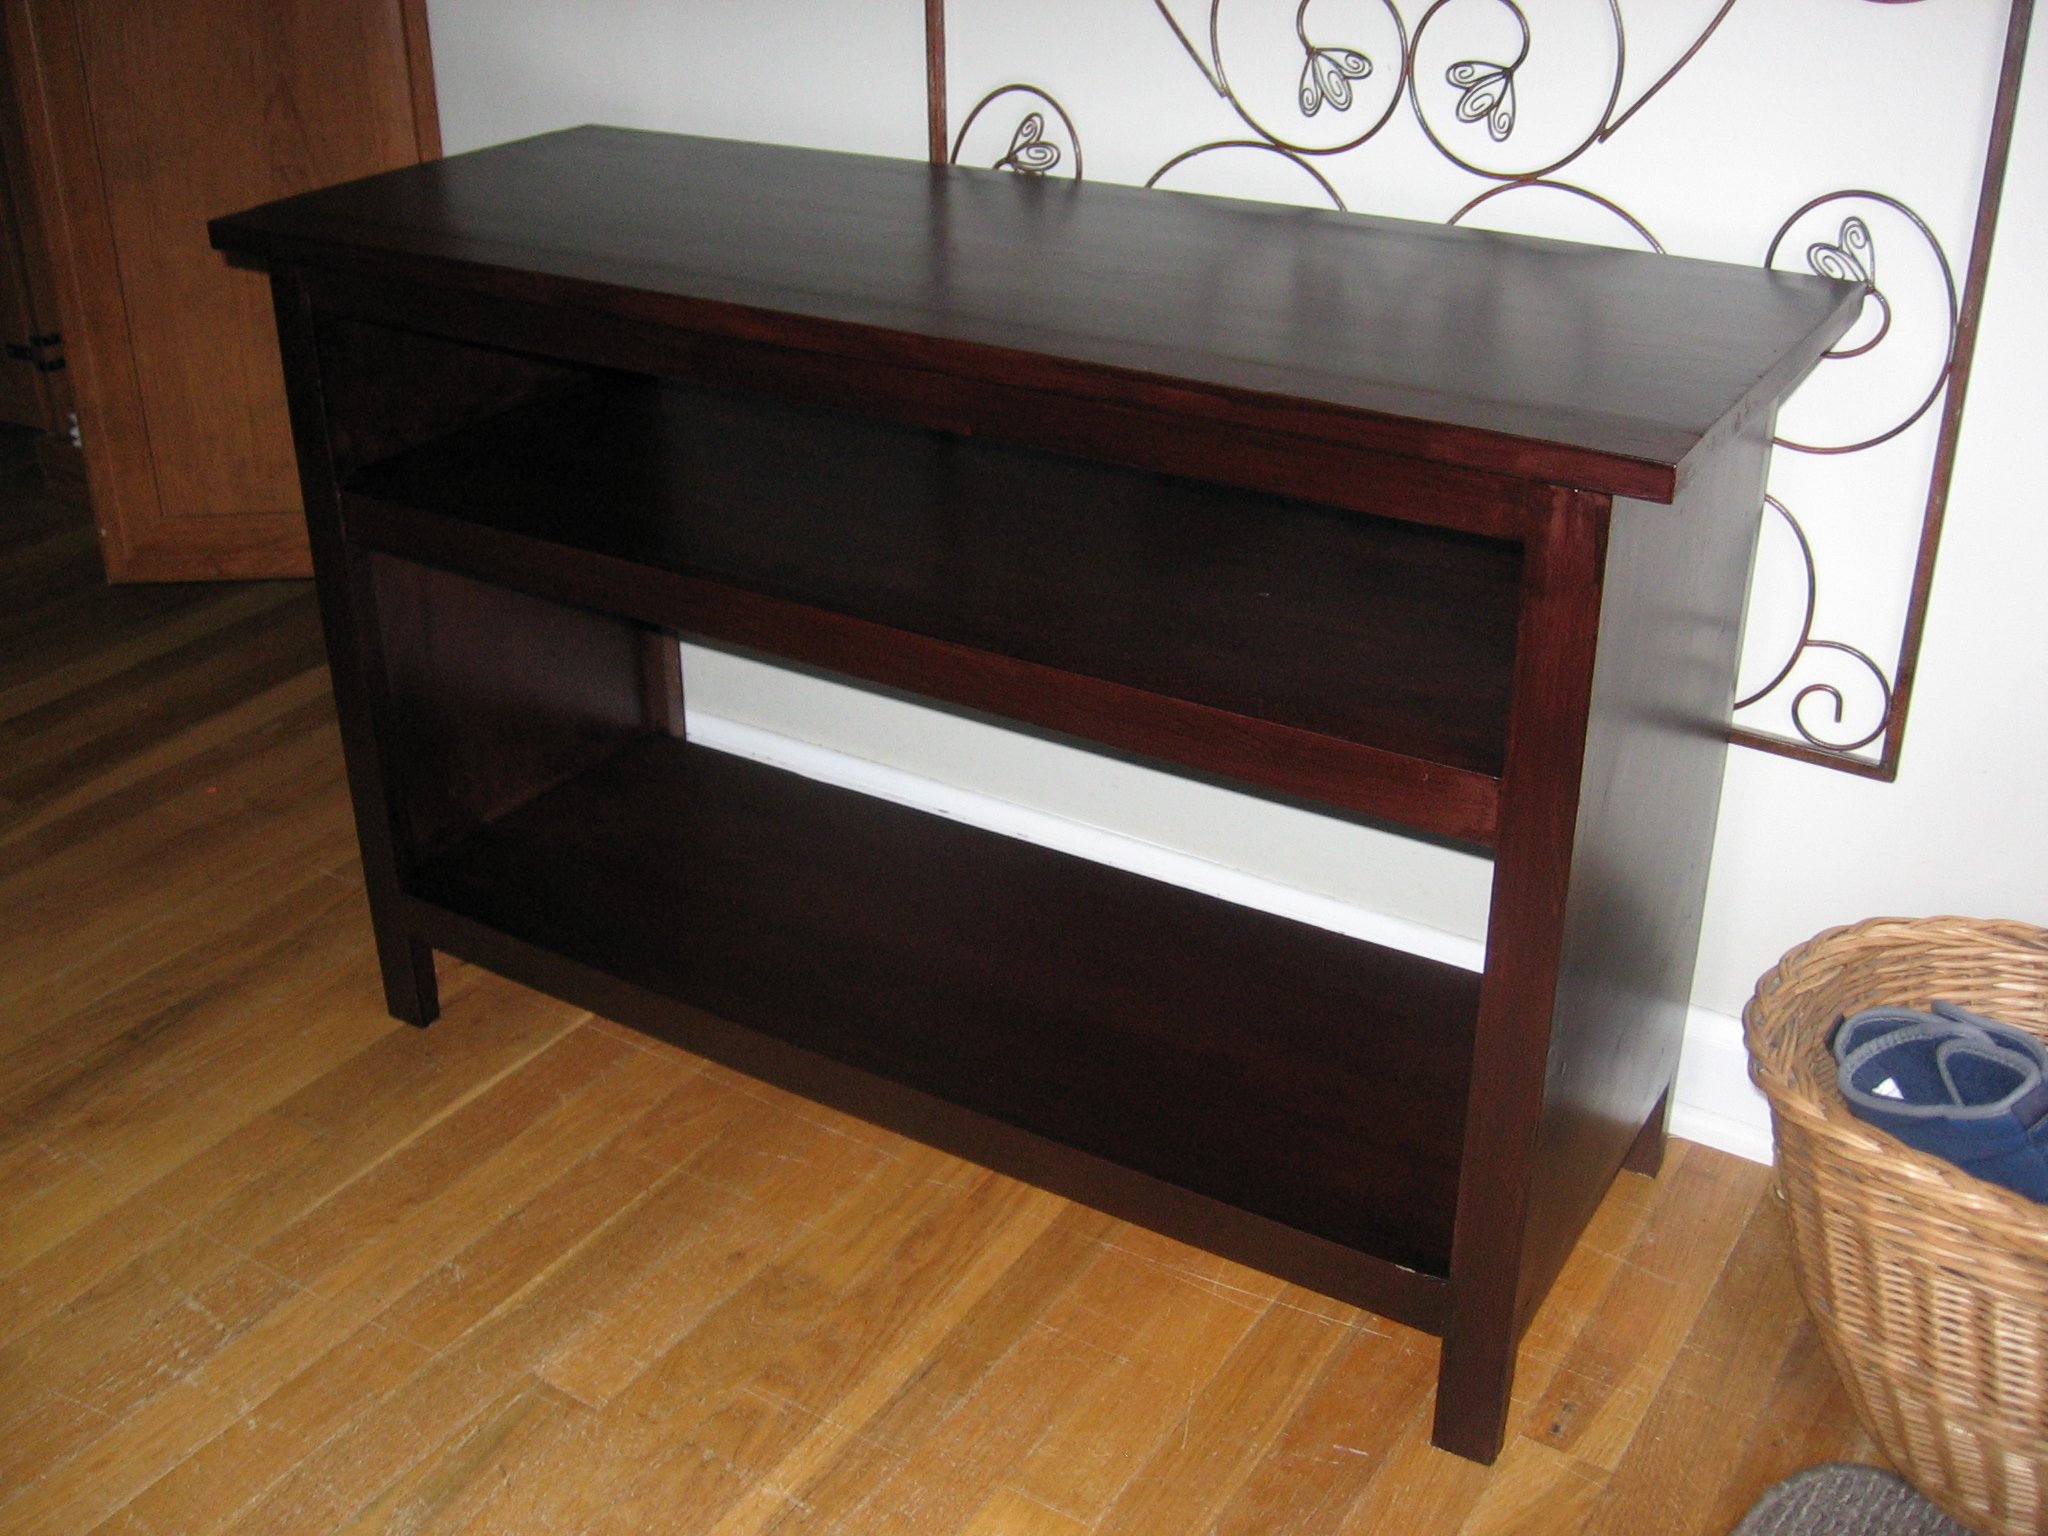
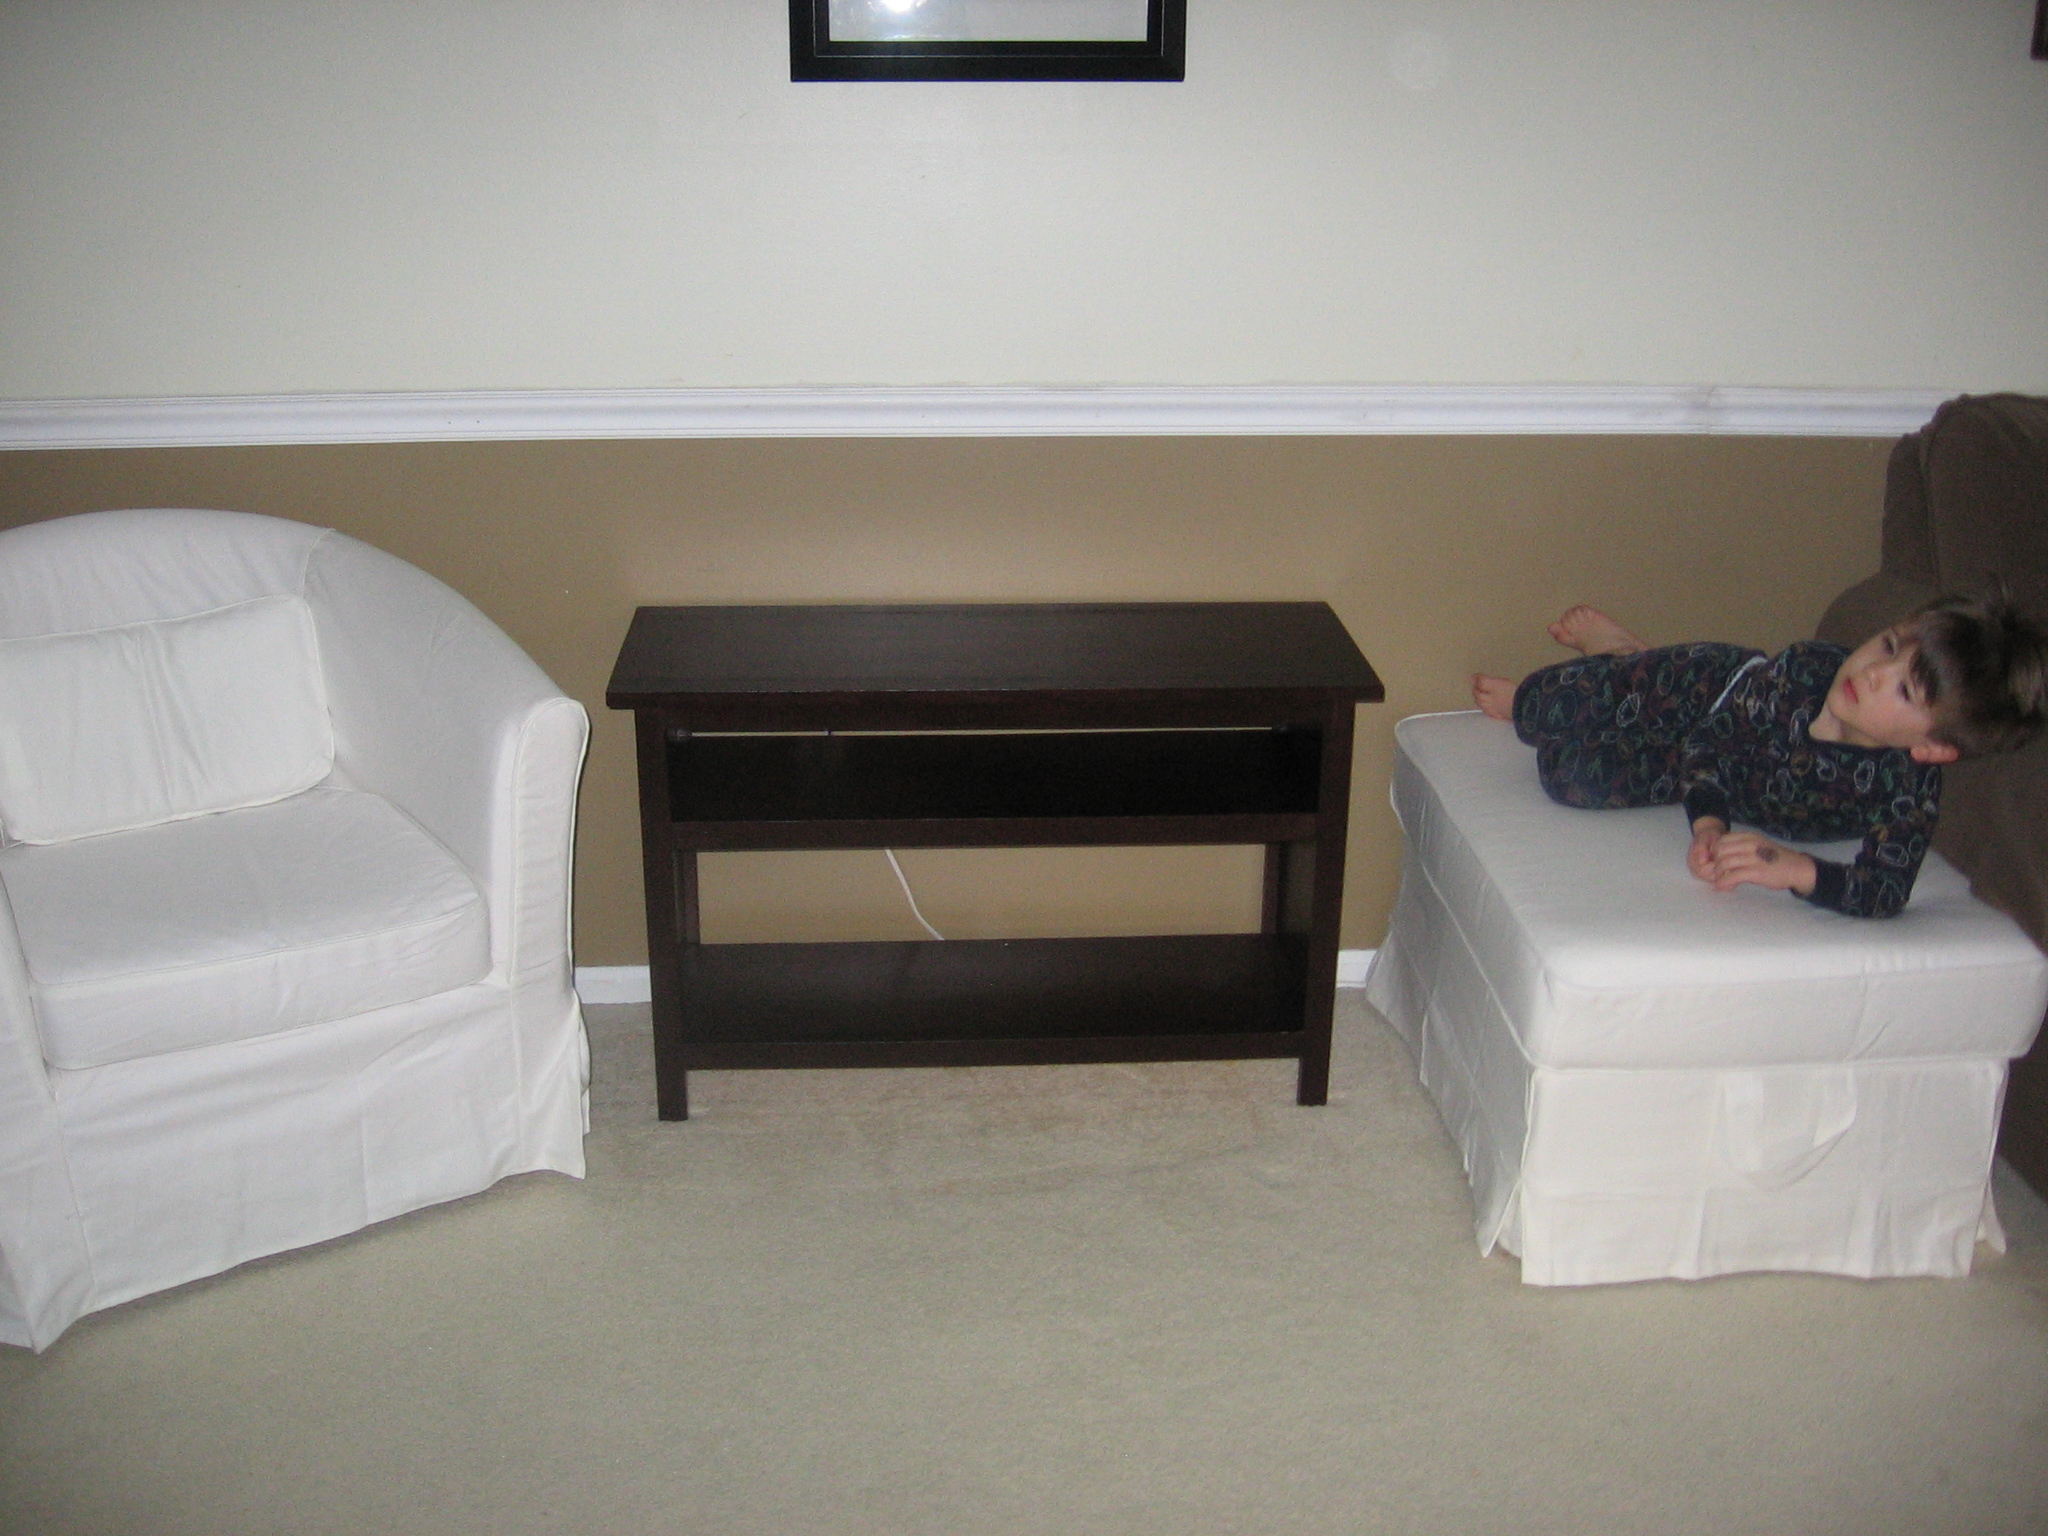
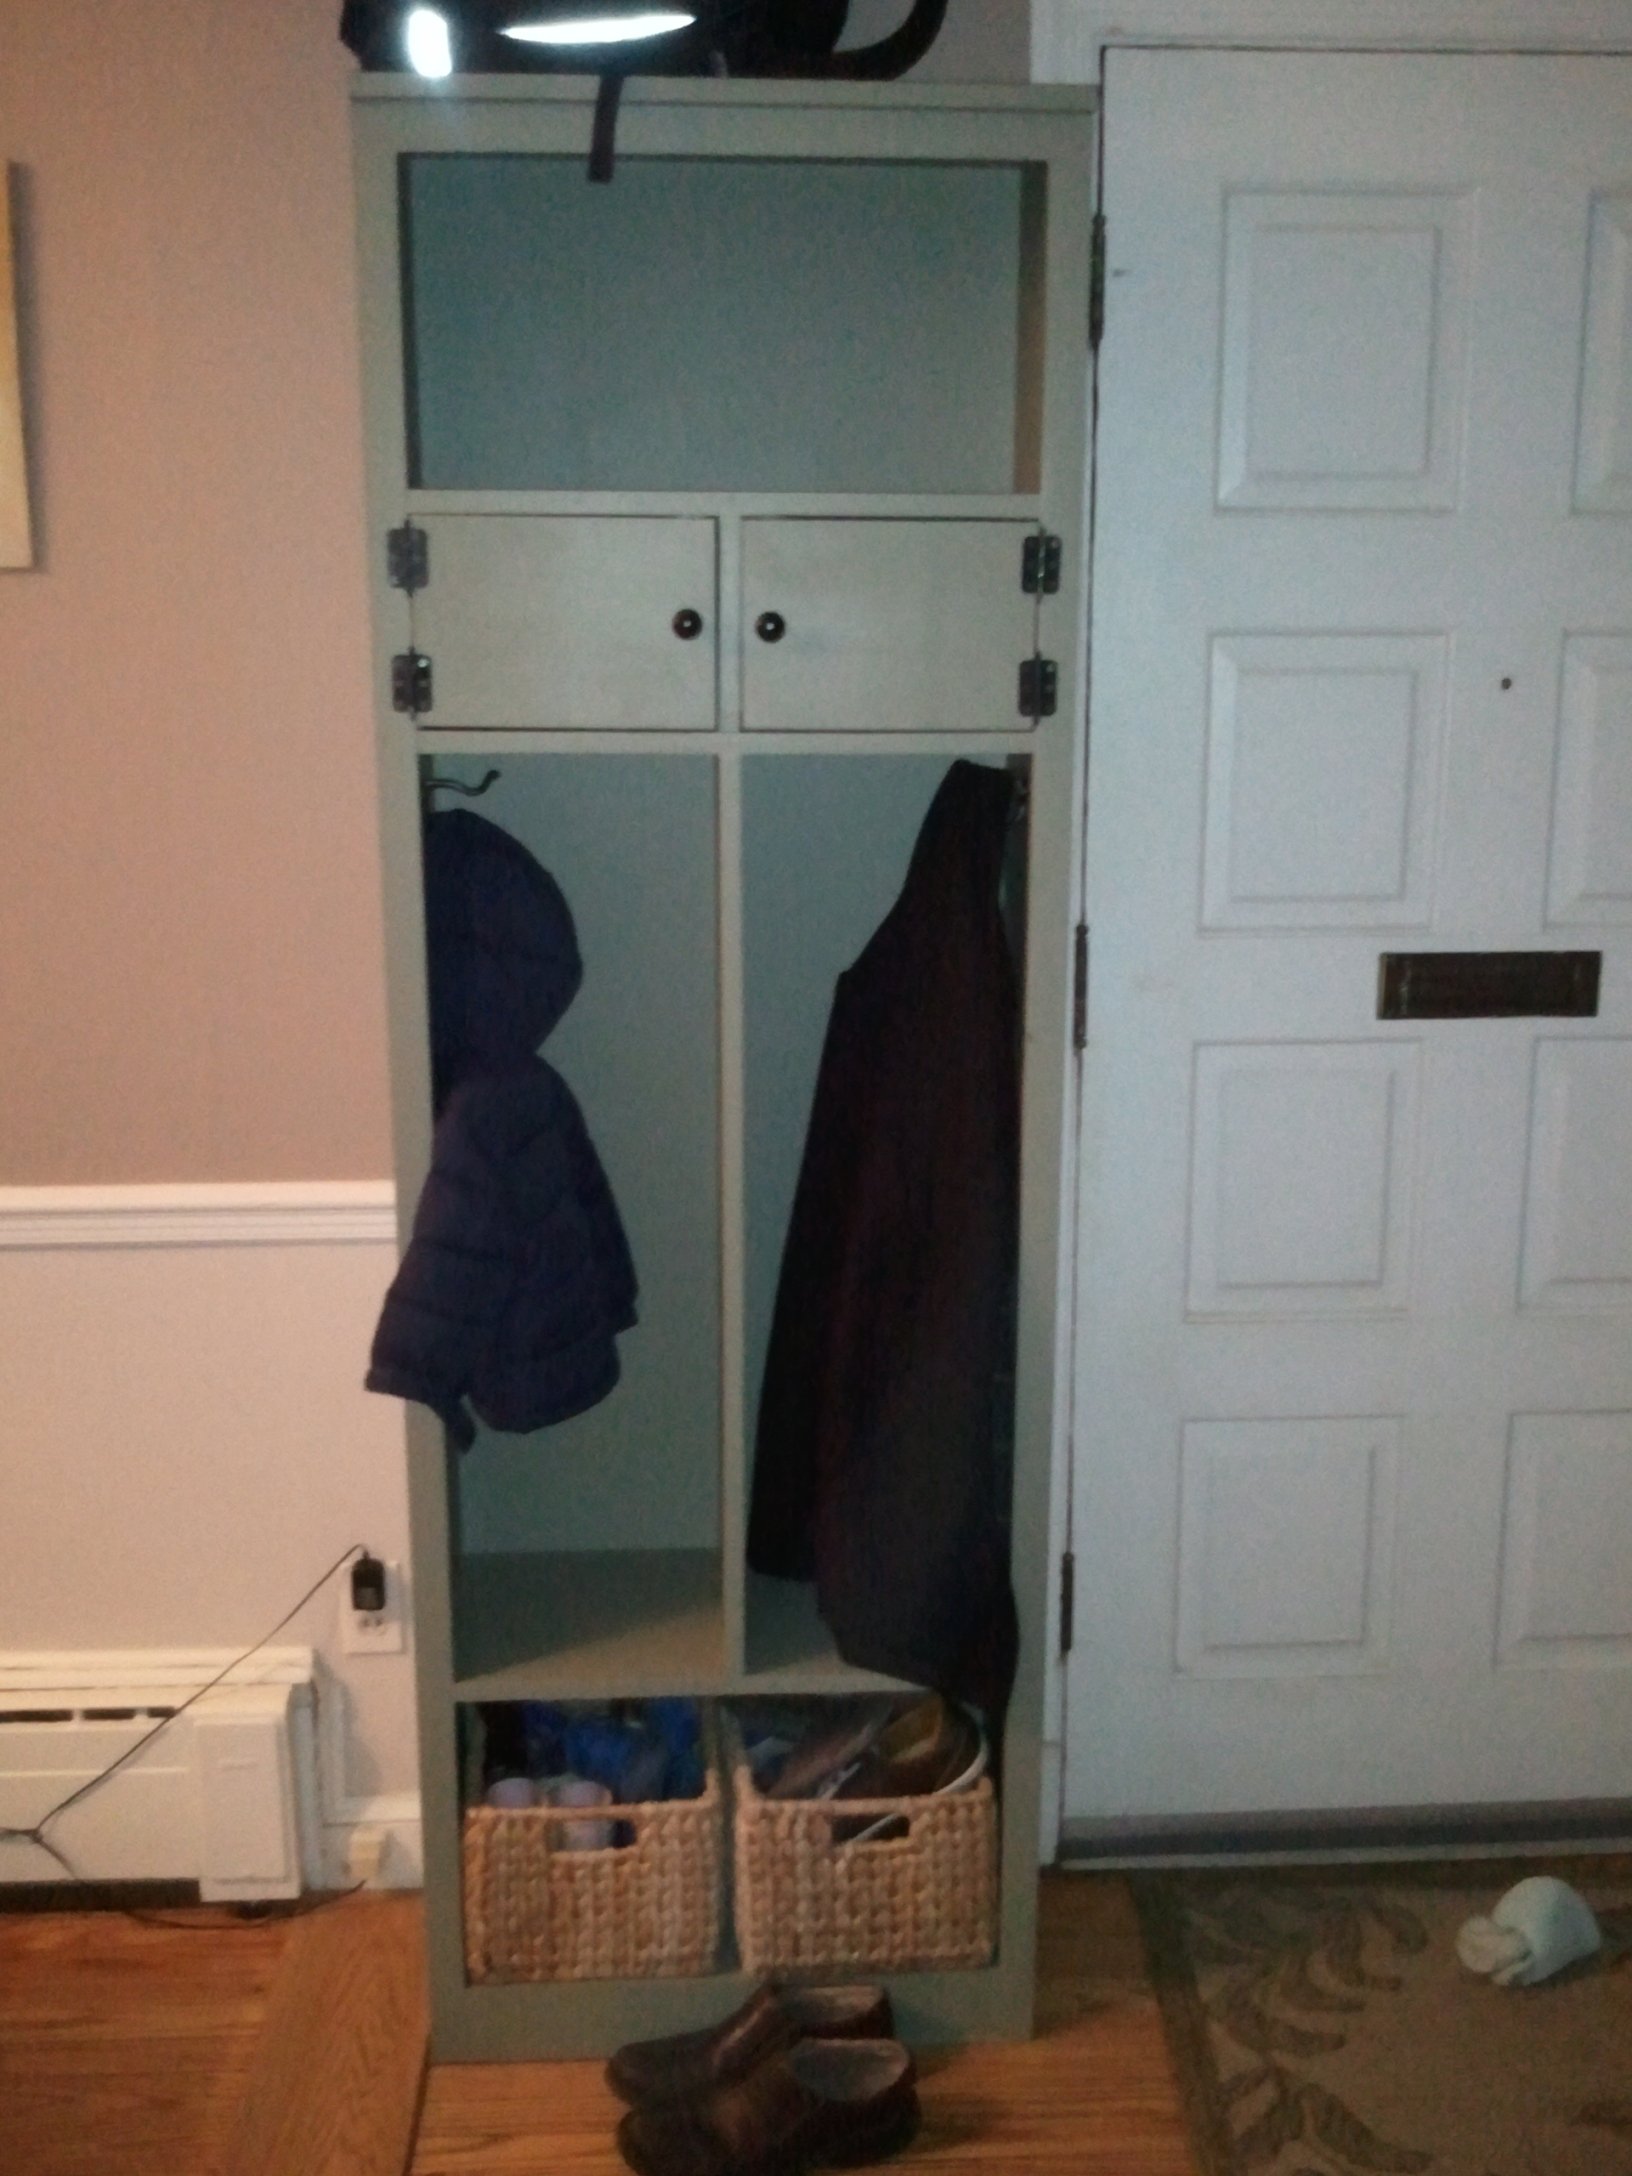
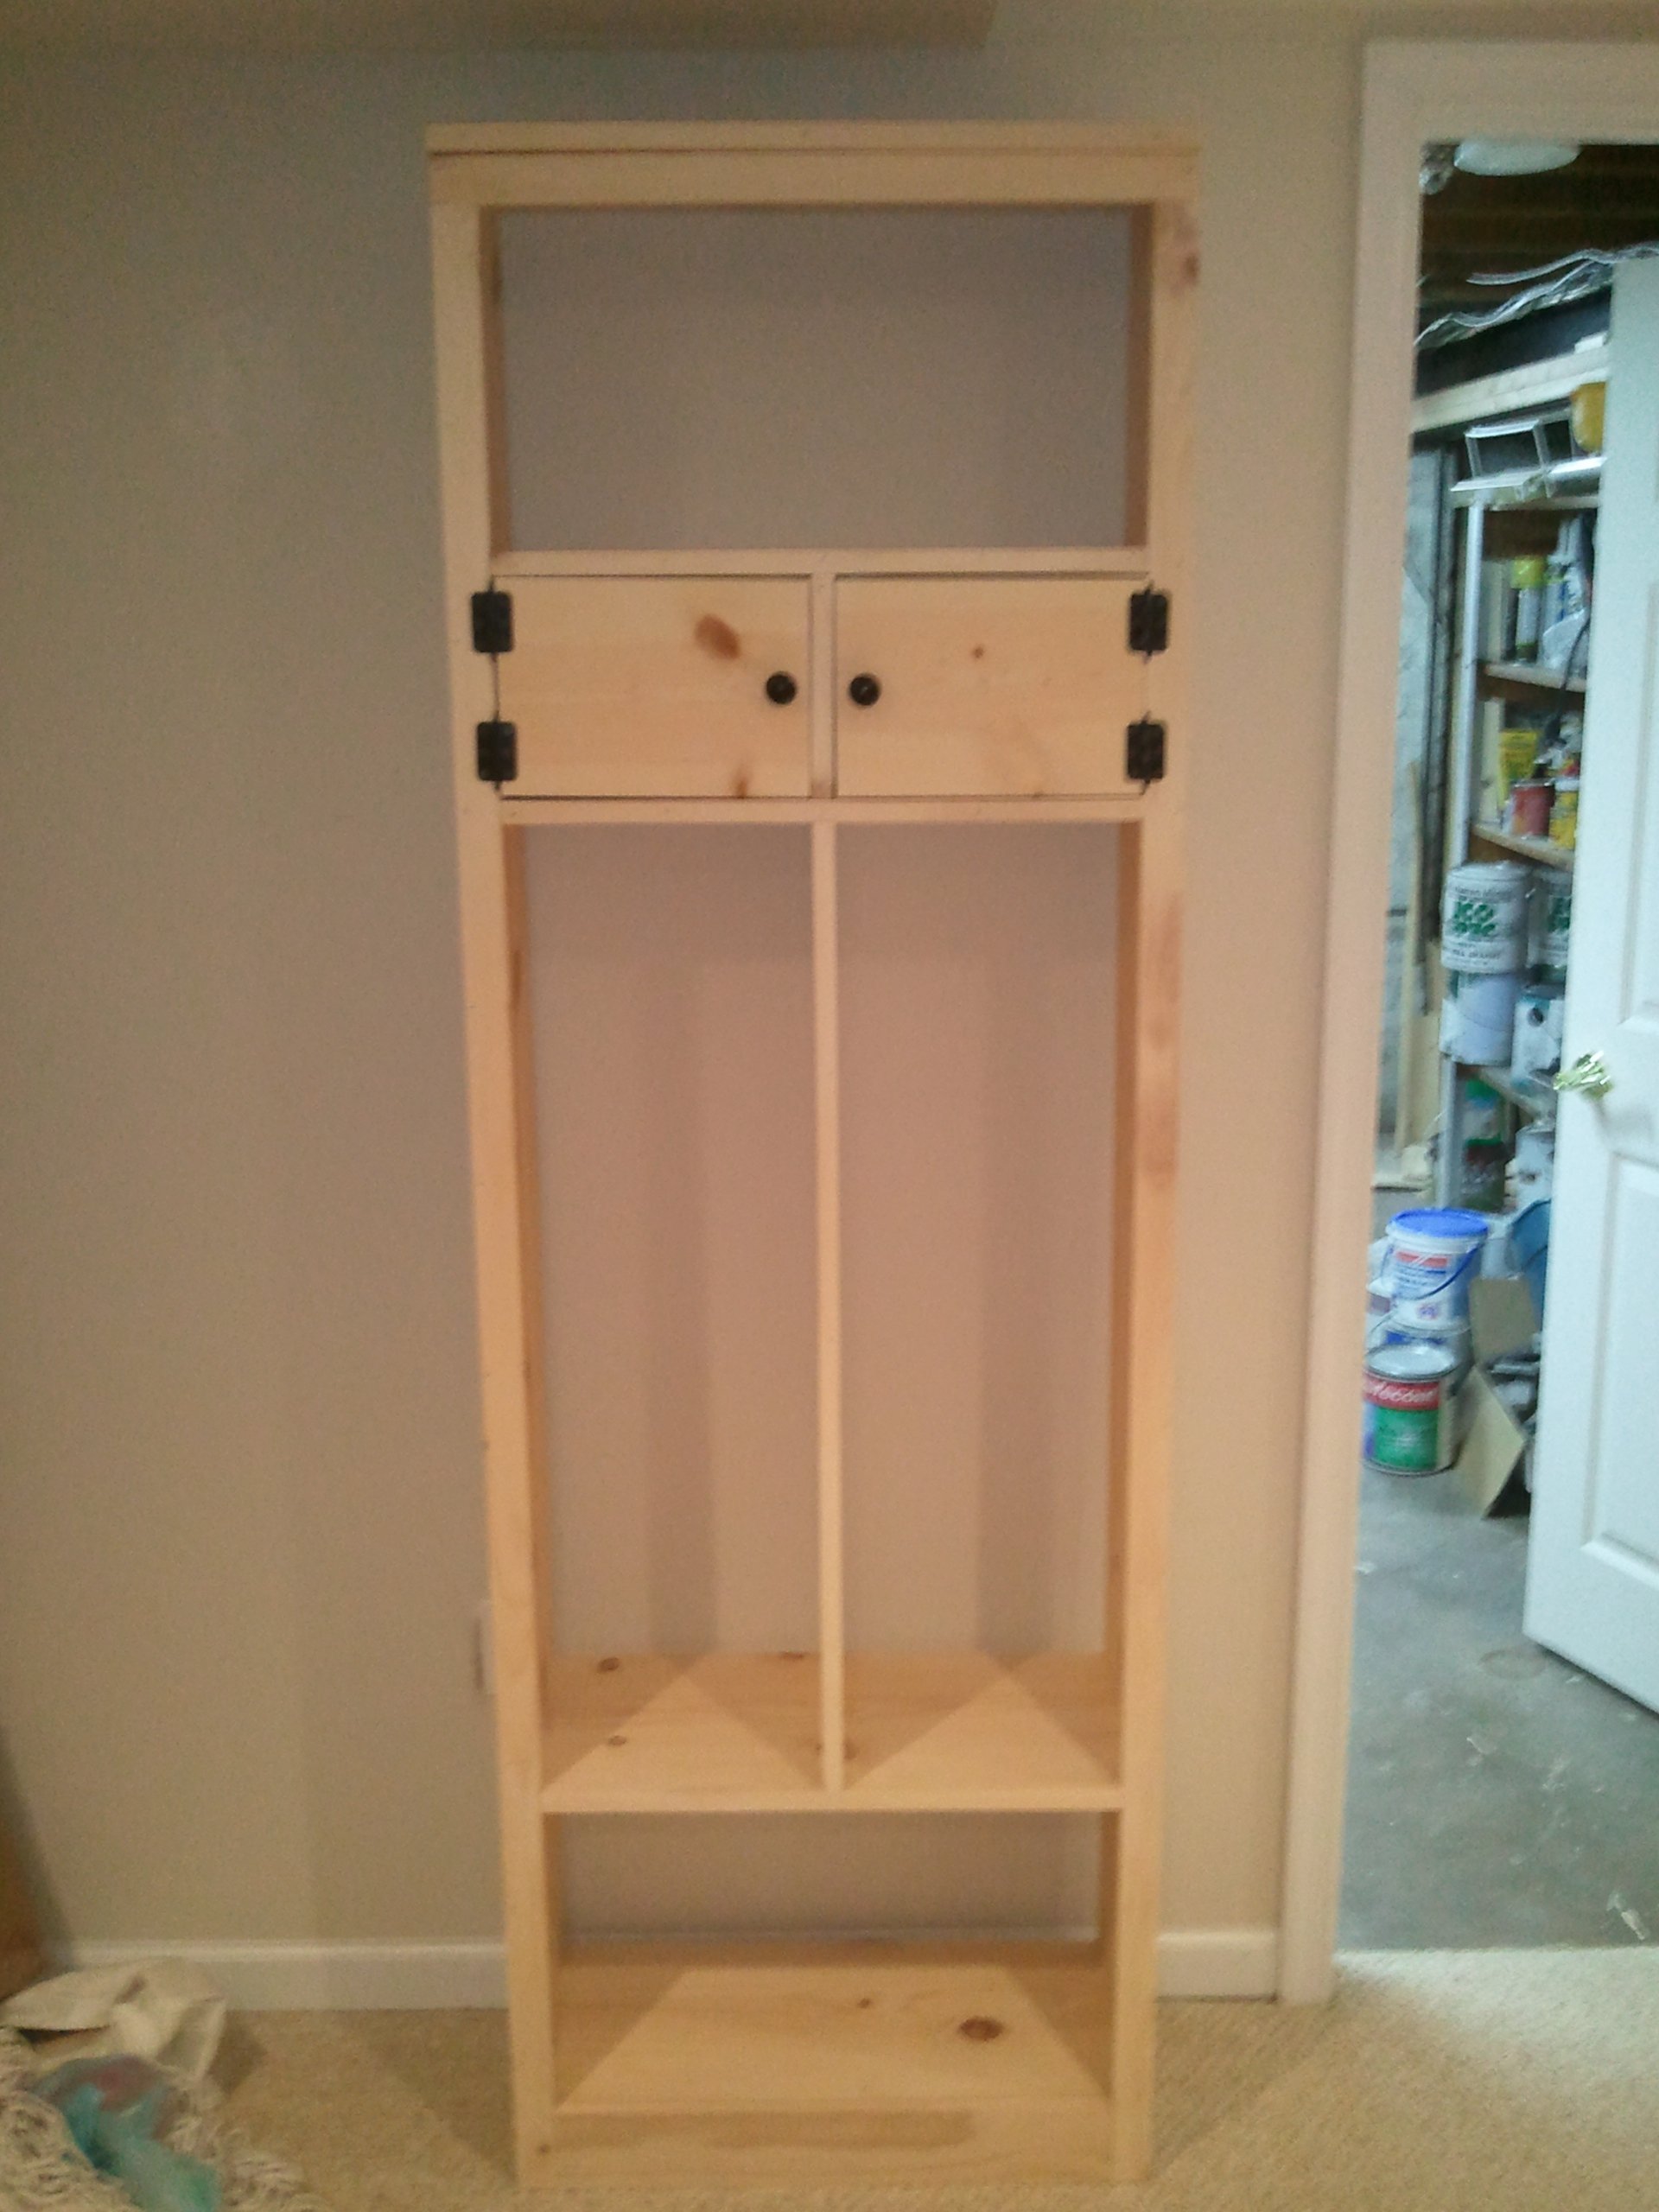
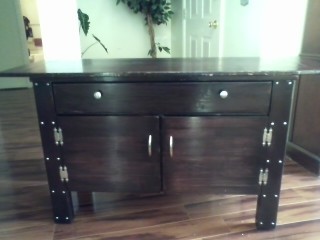
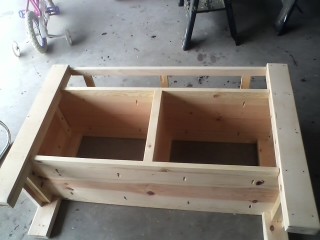
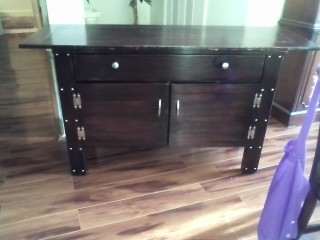
We have a small Cape Cod with no separate entryway, so our coats, shoes, bags, keys, and other accessories ended up on our windowsill or the dining room table, which was okay until dinner started and we had to clear it all off before eating. It was aggravating to say the least. So the narrow cabinet was the perfect solution. I made a few changes to the plan - added doors instead of drawers, and changed some dimensions to fit my space, and I also added trim pieces to the inside shelves to finish it off a little more - and it worked out great. The spaces between the doors and the trim are not even, and while that bothers me a little, I'll just have to improve on my next piece...and there will be a next piece. Soon.

Thanks Ana and Hillary!

Estimated Cost
$105 (paint and hardware incl.)
Estimated Time Investment
Day Project (6-9 Hours)
Finish Used
Mystic non-toxic paint, sage green (I think).
Recommended Skill Level
Beginner

Comments

Hillary (not verified)

Wed, 02/22/2012 - 18:36

Great work! How did you like using Mystic Paint? I've heard about it before but haven't worked with it before. What sheen is it? Did it sand well?

Media Console

I built this media console several months ago. In the beginning I saw the one Ridge Media Console and loved it, but I don't have the right tools to make the drawers like the plans, so I decided to take a couple of plans to make mine different. I also wanted to build a console that was easy enough because I'm still a beginner. I also loved the Benchwright media console and used some of the plans to get what I wanted. The storage flips down by adding euro hinges. And I added doors. I added my own silver decorative pieces. At 1st I thought that was too much silver, but now I like it. When I first built it I would pass by it and had to remind myself I did not buy this at a store, but built it. I can't say how much it cost because frankly I'm not that organized just yet. Since I'm a beginner I go back and forth to Lowes getting something here and there. Lowes and me have this weird relationship. They wonder why I'm there AGAIN; and I just keep coming back, AGAIN. They better watch it, I may dump them for Home Depot - lol.

For the finish I used Rustoleum stains and finishes. I use this because I don't wipe them off and they dry quicker. I use one coat and it's done. Dries by the end of the day and ready for poly. I added the pic for the stain, but Lowes didn't have my colors on their website (shame on you Lowes).

The colors I used were 1 part black cherry and 2 parts dark walnut. I loved the colors so much I plan on using them for the rest of my builds in my living and dining rooms.

Finish Used
Rustoleum black cherry and dark walnut.
Recommended Skill Level
Beginner