Community Brag Posts

Traditional Bird House Brag Post

Submitted by MMTruncale on Sat, 04/06/2013 - 19:15

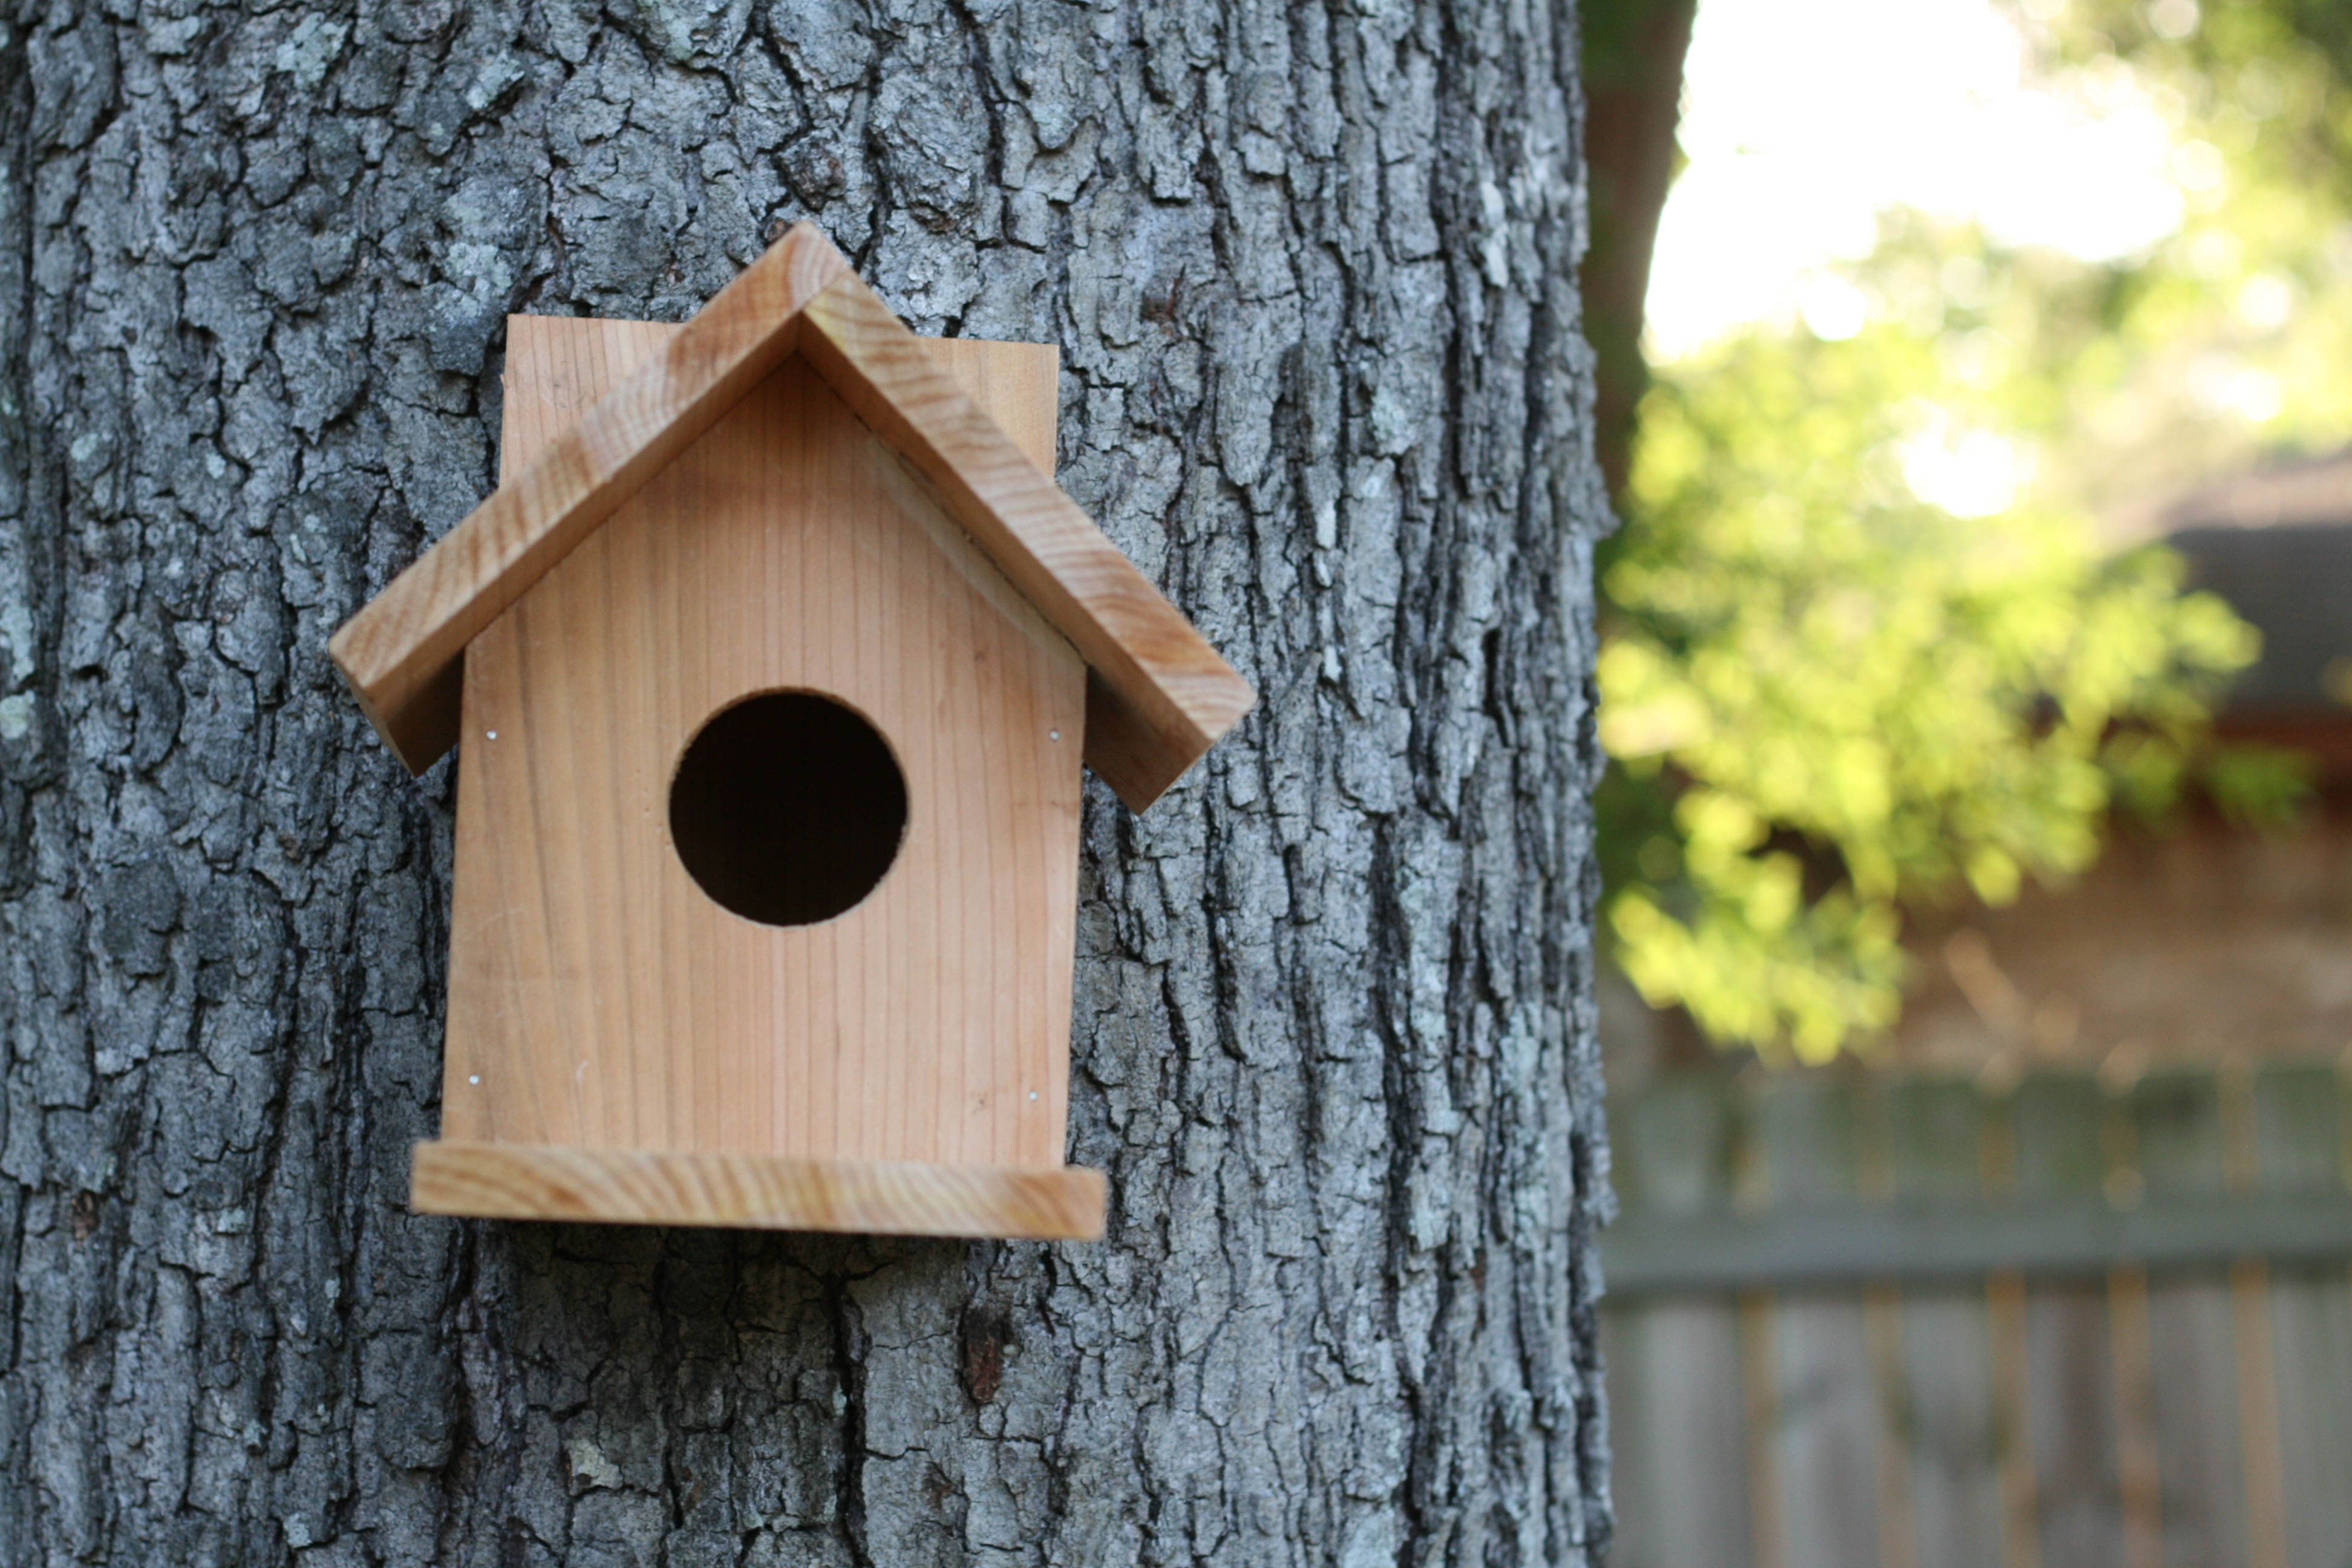
My very first project using the Compound Miter Saw. Easy Cuts. Easy assembly. Cost was about $1.50. I think I am going to make kits (as suggested in the sister plan) for a couple of birthdays coming up!

Estimated Cost
$1.50
Estimated Time Investment
An Hour or Two (0-2 Hours)
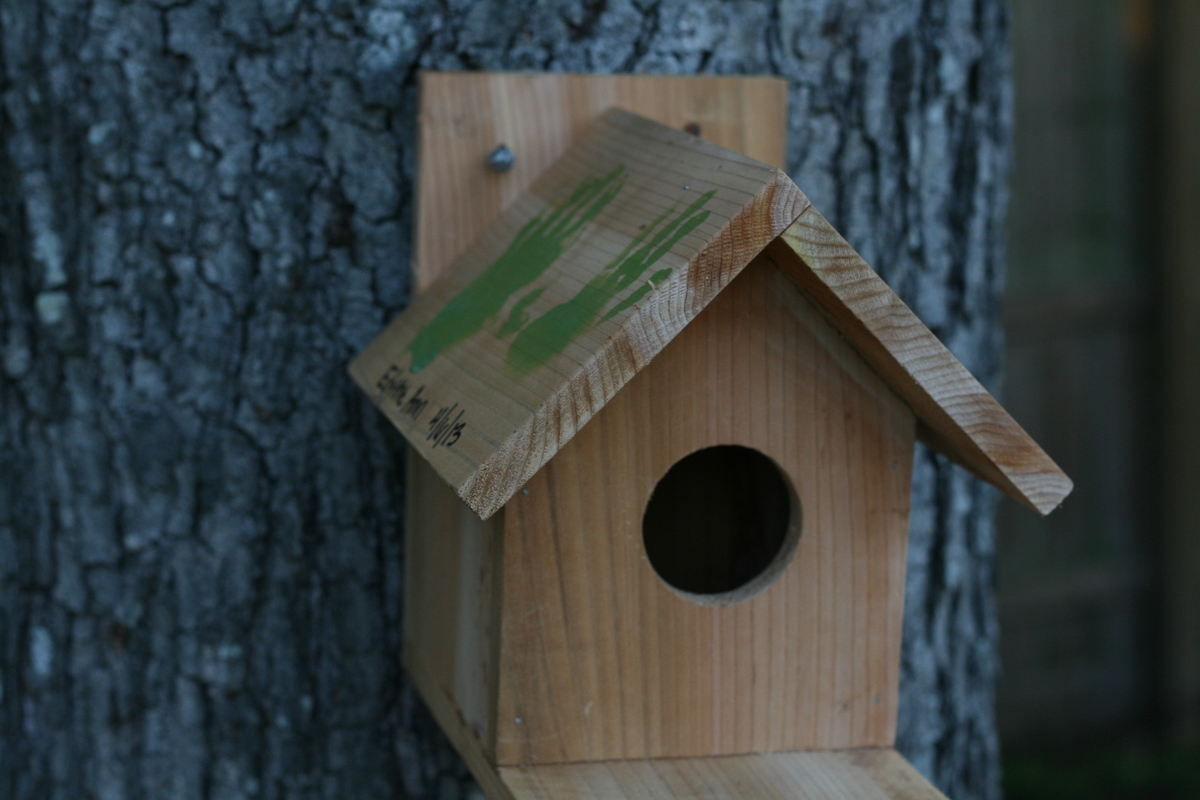
Finish Used
No finish. Used spray paint to put Little One's hands on the roof.
Recommended Skill Level
Starter Project

Cubby Desk

Made from pine boards. Had to add 2 2x4's underneath to hold the drawer.  

Built from Plan(s)
Estimated Cost
50.00
Estimated Time Investment
Day Project (6-9 Hours)
Finish Used
Minwax golden oak and wax.
Recommended Skill Level
Intermediate

Cedar outdoor table with scraps!

Submitted by Anonymous (not verified) on Sat, 08/21/2021 - 06:28

I had a pile of leftover wood after getting my deck rebuilt; so I had some brand new cedar as well as some used pressure-treated wood. (Of course, I made the deck builders leave anything worth keeping!) I thought it would be put to good use as an outdoor table for storage & serving on my new deck! I started off with the Rustic X Console Table plans from this website, and then I made just a few modifications on length (to fit the space better). I was able to re-use my leftover wood, and I think it turned out beautifully! It's been used several times for food serving when the neighbors come over for happy hour, for storage of random outdoor things, and for climbing on when I need to reach the TV above it...so it's definitely sturdy! Thank you, Ana White, for such great plans that are easy to use and easy to modify as needed. Really happy with this one!

Built from Plan(s)
Estimated Cost
Free
Estimated Time Investment
Afternoon Project (3-6 Hours)
Finish Used
None - naturally weathered cedar
Recommended Skill Level
Beginner

Comments

Garage Storage

Submitted by Smokeydog on Fri, 03/20/2015 - 08:59

Thanks to Ana's 2x4 storage plan and a neighbor's discarded kitchen cabinets we now have a very clean and convenient storage area  in our garage.  It even features a work bench and sorting area.

Estimated Cost
40-50 dollars
Estimated Time Investment
Afternoon Project (3-6 Hours)
Finish Used
None
Recommended Skill Level
Starter Project

Comments

Modified Adirondack Chairs and Coffee Table

Submitted by carvern on Mon, 10/04/2021 - 14:16

I had some Kebony deck boards left over from another project and thought they would work well. I think they did! Kebony is pine that is soaked in an alcohol and then heated up. It has a 30 year warranty and requires no care. I used a Penofin oil on the 2x4s and Cutek oil on the Kebony

Comments

Ana White Admin

Tue, 10/05/2021 - 09:53

Kebony sounds like a great material for outdoor builds, very pretty too! Well done, thank you for sharing!

Alice’s Table and Chairs

I built this set for my friends little girl, Alice. She’s the same age as my son Benjamin, and needed a kiddie table and chairs!
I had some trouble with the chairs, I need to work on my clamping and squaring. Now that I have picked up a better countersink bit my issues with screws should be solved though!

The table was super easy with the kreg jig! I got it clamped down well for each corner and the aprons/legs screwed together like a dream! I love that the table doesn’t have a single screw marring the surface of the wood, they’re all pocket holes underneath!

The chairs have a few more screw holes than they should’ve had, but they don’t look too bad. I decided to leave them unfinished so she can decide on the right finish for her space.
Thanx so much for the easy to follow plans Ana!

Built from Plan(s)
Estimated Cost
~50$ (honestly, I can't remember!)
Estimated Time Investment
Weekend Project (10-20 Hours)
Finish Used
Unfinished
Recommended Skill Level
Beginner

Adirondack Chairs

Submitted by Anonymous (not verified) on Tue, 10/05/2021 - 08:19

This was a fun and simple project. One of my first attempts at making outside furniture and it was nearly perfect the first time....why?... the plans were so easy to follow, the techniques used were not demanding, and the tool selection was ideal for my workshop. I put them outside and I have had good reviews, and requests, for these chairs.

Comments

Seasonal And Holiday

Modified Ann White Table

Submitted by Anonymous (not verified) on Tue, 10/05/2021 - 17:07

This is a modified version of your Farmhouse Coffee Table.

Comments

Wine oak barrel Adirondack chair

Submitted by Medickep on Thu, 05/30/2013 - 12:11

I got some oak barrels from a local vineyard and decided to try making some adirondack chairs. It was harder than I thought it would be, but well worth it!! The stain was a little darker than I thought it be, but it's rubbing off on me!

predrill, predrill, predrill, and learned a valuable lesson in predrilling, as solid wood under strain cracks easy when using 2 1/2" deck screws!

I need to whip out the nice camera and stop using my cell phone for finished products!

Estimated Cost
Around 100.00 dollars per chair (depends on cost of barrel!)
Estimated Time Investment
Weekend Project (10-20 Hours)
Finish Used
I used Cabot's Australian timber oil. Not the cheapest product out there, but they actually recommend one coat only and no sanding necessary for future coats. Once it stops beading water, just clean the chair and than reapply! It penetrates deep and forms a wax protective layer that repels water! This is why I chose not to varnish the item!!
Recommended Skill Level
Intermediate

Comments

spiceylg

Fri, 05/31/2013 - 05:16

I never heard of using wine barrels in this way! I love it. It came out fabulous!

Medickep

Fri, 05/31/2013 - 05:34

Thanks you. People make a lot of stuff out of wine barrels. Chairs, stools, Tables, candle holders, and even serving platters!

Joni

Fri, 05/31/2013 - 06:57

This is awesome! Very cool design. It looks very comfortable! Thanks for the tip on the Australian timber oil; I never knew what would be the best finish for an outdoor piece.

Joni

Fri, 05/31/2013 - 07:03

This is awesome! Very cool design. It looks very comfortable! Thanks for the tip on the Australian timber oil; I never knew what would be the best finish for an outdoor piece.

Medickep

Sat, 06/01/2013 - 11:38

It is very comfortable, especially with a glass of wine. I chose the finisher I did because I live in Oregon with a lot of rain!!

Why does everyone's post, including my own show up as duplicate?

Medickep

Sat, 06/01/2013 - 11:38

It is very comfortable, especially with a glass of wine. I chose the finisher I did because I live in Oregon with a lot of rain!!

Why does everyone's post, including my own show up as duplicate?

acd4476

Sun, 07/21/2013 - 17:05

Awesome chairs! Beginning to think I need to make some as well. Did you have plans for this project or follow a generic adirondack chair plan?

outdoor sofa from reclaimed wood

Using Ana's plan as a guide, I built two of these sofas to fit an outdoor cushion I already had. I used wood from our old deck -- a great way to re-use and save money, too!

Estimated Cost
$110/sofa (lumber was free)
Estimated Time Investment
Weekend Project (10-20 Hours)
Finish Used
None, although eventually I will probably seal it with outdoor PolyWhey by Vermont Natural Coatings.
Recommended Skill Level
Intermediate

Toddler bed

Submitted by Bradnag on Wed, 09/13/2017 - 05:13

I made a loft bed for my 4-year-old son using Ana's Chelsea Loft plans. When I finished, I was able to build this toddler bed for my 1-year-old using almost entirely scraps left over from the loft (save for the 1x6 runners). I skipped the curved headboard design and went with a solid piece of 1x12. I was going to round the top edges or cut a more rounded design, but my wife said she liked the squared off look better (she has lots of ideas for painting various designs on it, apparently). Since we were going to use paint and not stain, I ripped some leftover MDF board for the 1x6 footers. The whole project took a single afternoon, including cutting, assembly, woodfill and sanding. The end result is pretty sturdy. My wife laid on it with both our small children and the slats hardly bowed at all.

Built from Plan(s)
Estimated Cost
$5
Estimated Time Investment
Afternoon Project (3-6 Hours)
Recommended Skill Level
Beginner

Afternoon farm table

Submitted by Lizzardt04 on Wed, 09/20/2017 - 13:24

I saw this super simple farm house table plan on my Facebook feed from Ana and I just had to do it !!$50 in lumber a Saturday afternoon and I was done!!!! Followed all her tips and it turned out great

Estimated Cost
$50 in lumber
Estimated Time Investment
Afternoon Project (3-6 Hours)
Finish Used
Danish oil medium walnut
Recommended Skill Level
Beginner

Farm House Bench

Submitted by toes on Wed, 03/30/2011 - 14:25

First bench to match the Farm House table I have built.  Istill need to finish my table now to match the bench.  

Estimated Cost
$35
Estimated Time Investment
Day Project (6-9 Hours)
Finish Used
I first started my staining this bench with ZAR Moorish Teak (looked like I had painted it brown) sanded it down a little added Minwax dark walnut LOVED it! Added 3 coats of Deft stain lacquer.
Recommended Skill Level
Intermediate

For a big crowd

Submitted by Diesel911 on Wed, 05/13/2015 - 11:32

My first project built on the garage floor. Before I had work benches :)
I used a borrowed mitre saw, borrowed jig saw and a $20 drill.

Finish Used
Stained with early American and red elm. Clear coat afterwards
Recommended Skill Level
Intermediate

Comments

My version of the Simple Outdoor Dining Table

Submitted by cchalifour on Wed, 11/24/2021 - 19:48

My version of the Simple Outdoor Dining Table
- All Cedar

Built from Plan(s)

Comments

AllGardenBenches.com Farmhouse Table

Made this for my wife for our anniversary!
Check out a video of the project here: http://www.youtube.com/watch?v=3eyroIH517A
Check out more great furniture through All Garden Benches: http://www.AllGardenBenches.com

Thanks for the plans!!!

Estimated Cost
200
Estimated Time Investment
Weekend Project (10-20 Hours)
Finish Used
I used a basic oil based wood stain - dark - it was called Moorish Teak. One coat was sufficient. Lastly, I added a clear gloss finish - two coats.
Recommended Skill Level
Intermediate

Farmhouse Inspired Table

My husband and I used Ana's plans to create this BEAUTIFUL farmhouse inspired table for our dining room. The project was straightforward and we are EXTREMELY happy with the results. We added a touch of modern to the table by purchasing metal chairs from overstock.com. The table is perfect for family get togethers and even more important...family game nights!!

Estimated Cost
$100
Estimated Time Investment
Weekend Project (10-20 Hours)
Finish Used
Minwax Polyshades in Dark Walniut-we also applied a few coats of wipe on poly to the finished project. We wanted our table to look rustic so we did "bang it up" a bit before staining and finishing.
Recommended Skill Level
Beginner

Comments

wjc129

Fri, 06/28/2013 - 08:26

Looks great! Did you just use the cheap pine at Lowes/HD? Any tricks to getting the table top flat and level?

In reply to by wjc129

amandaherlache

Mon, 07/01/2013 - 06:15

We used the "select" pine boards from Home Depot..which are a bit nicer than just the ordinary ones. To make the table top level we used a level to be sure that there weren't any major bumps...then once we had the top secured we sanded it to make the boards flush to each other. Hope that helps! Thanks for you comments!

Channing Bookcase

Submitted by FrankJr on Sun, 06/28/2015 - 13:42

We needed a bookcase to fill a void in our living room and this was it. I altered the dimensions to increase the height to 72.5". I also added crown molding to the top which turned out nice. I used the same Bombay mahogany stain suggested by a previous post.

Built from Plan(s)
Estimated Cost
$150
Estimated Time Investment
Weekend Project (10-20 Hours)
Recommended Skill Level
Beginner

Joss & Emit's Train Table :)

This was my very first "Ana project"! It was a special Christmas treat for my boys and their expanding train collection. This table has had many, many hours of entertainment and enjoyment. It is a great beginner project and has very easy plans to follow! I didn't do the storage carts at the time. I may go back and do them later though...for now they like playing under the table as well. My obsession began :)

Estimated Cost
$50 (island living cost more)
Estimated Time Investment
Day Project (6-9 Hours)
Finish Used
Flat interior paint (2 coats) with two coats of poly.
Recommended Skill Level
Starter Project

Loft bed for son

I've built a few bookshelves and cubbies before, but nothing on this scale.  I built this in my basement this past December as a Christmas present for my three-year-old son.  The plans were easy to follow.  I believe I spent about $150 on lumber.  The bed is very sturdy.  My kids love it!  Now the the other kids want their own special daddy-made bed :)

Built from Plan(s)
Estimated Cost
$150 on lumber. $50 on wood putty, stain, sand paper, etc. Way better than the $1100+ similar model at the local furniture store!
Estimated Time Investment
Weekend Project (10-20 Hours)
Finish Used
min-wax water based stain protected with water-based polycrilic. It all dried way too fast and didn't give me time to correct errors. Next time I will use oil based.
Recommended Skill Level
Intermediate

Comments