Community Brag Posts
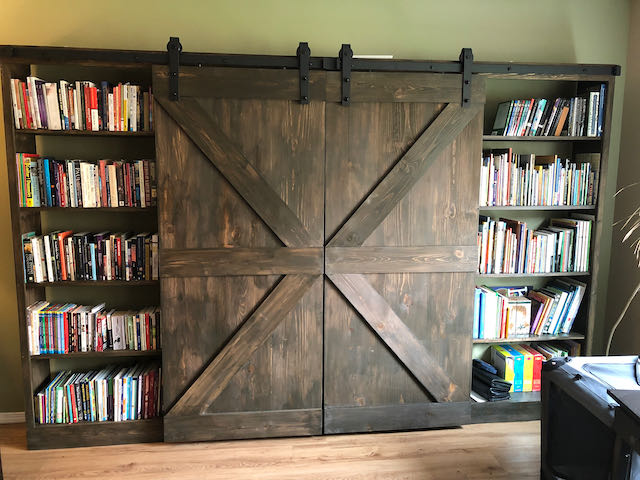
Entertainment System and Homeschool Bookshelves

We are a homeschooling family and desperately needed bookshelves. My husband made this entertainment system to reclaim space in style. It's gorgeous and functional! Thank you Ana for the plans!!
Comments
Counter-Height Dining Table
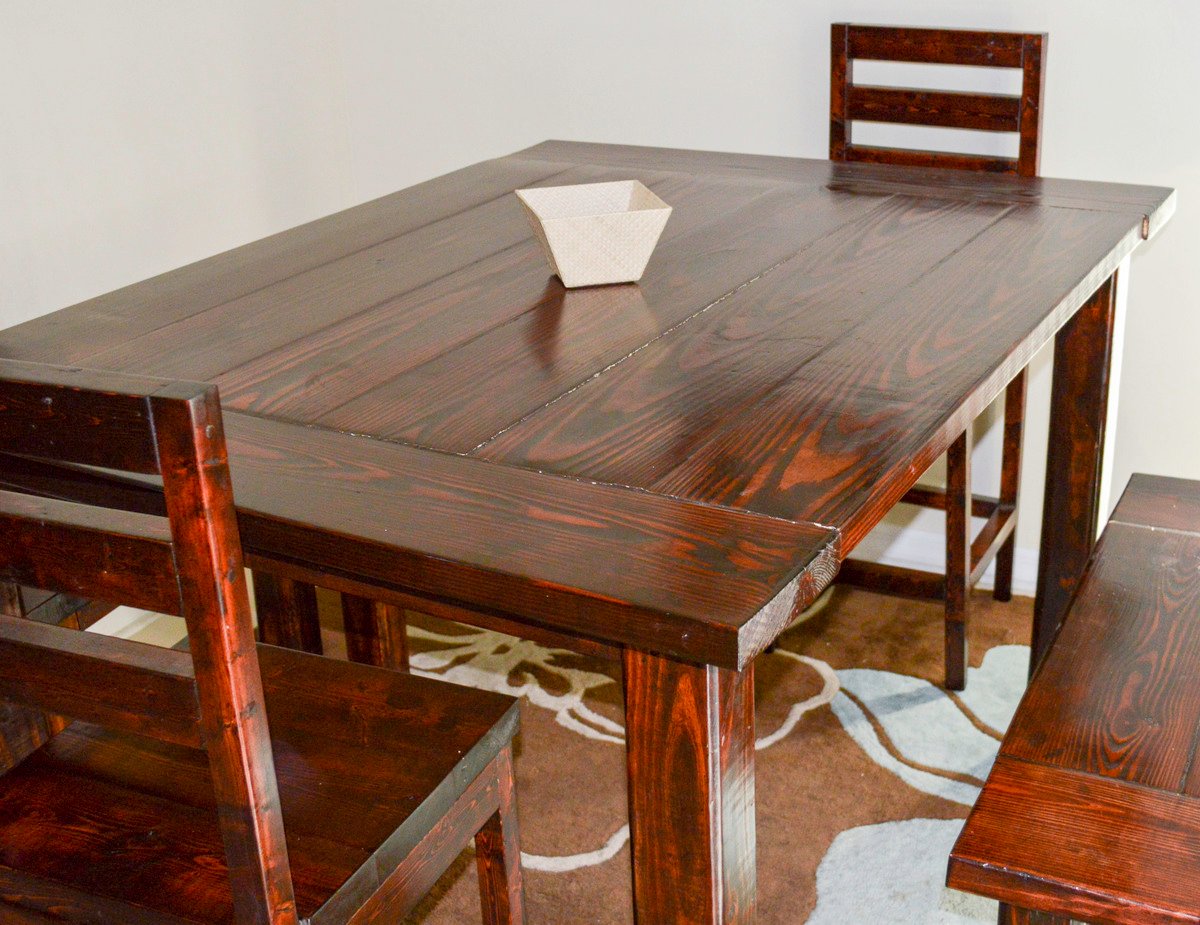
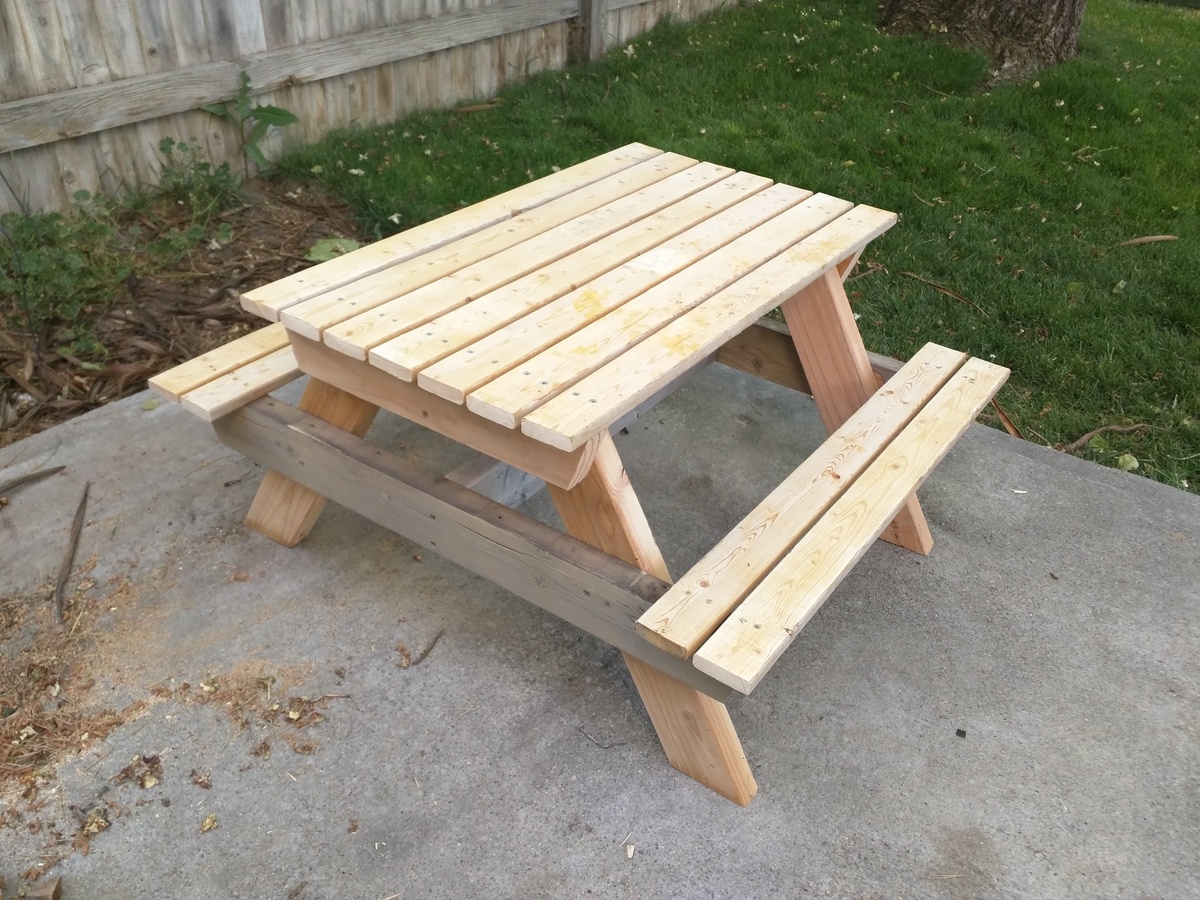
This was my first DIY building project. I wanted a counter-height table, so I searched websites looking for plans and eventually I found ana-white.com. I altered the plans a little and I added a farmhouse style table top. I used 2x8s for the table top which makes the table very heavy.
Built from Plan(s)
Estimated Time Investment
Weekend Project (10-20 Hours)
Recommended Skill Level
Intermediate
Comments

Tue, 03/17/2015 - 09:53
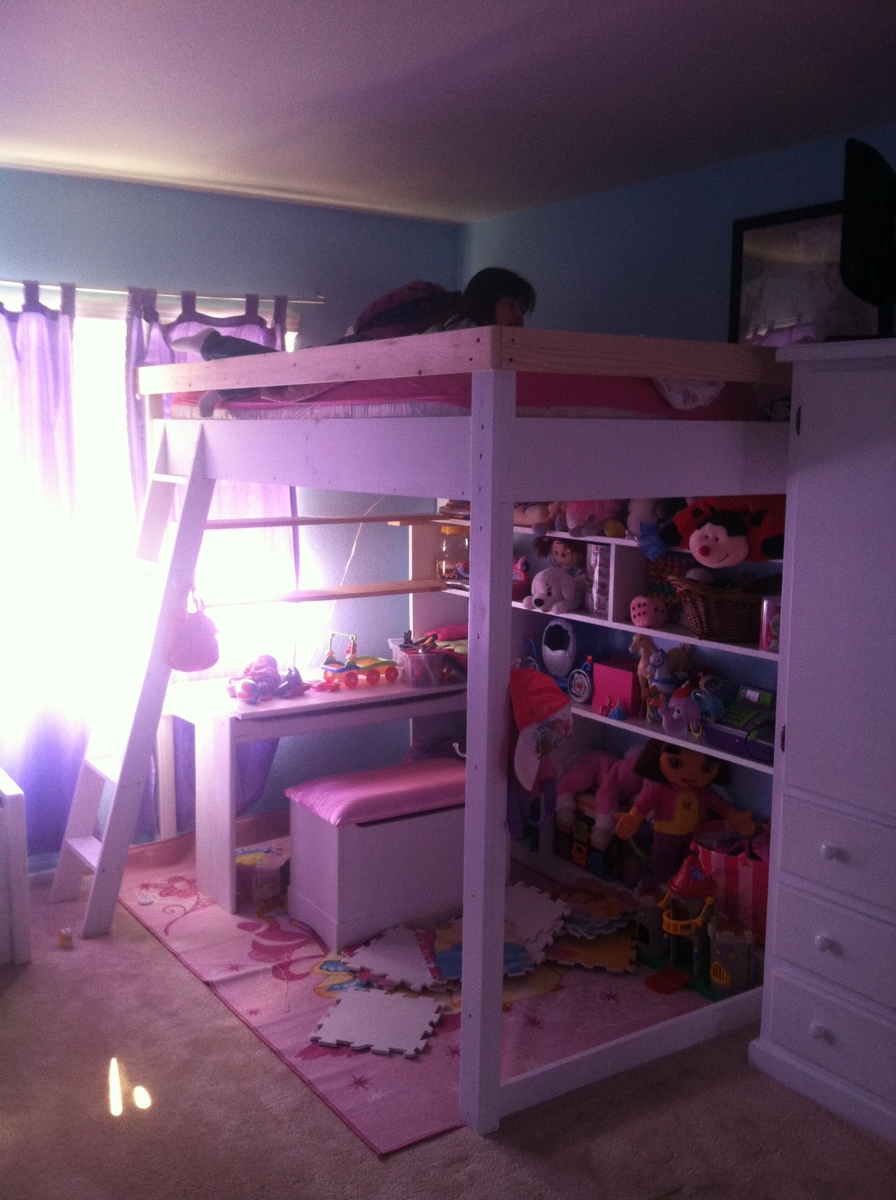
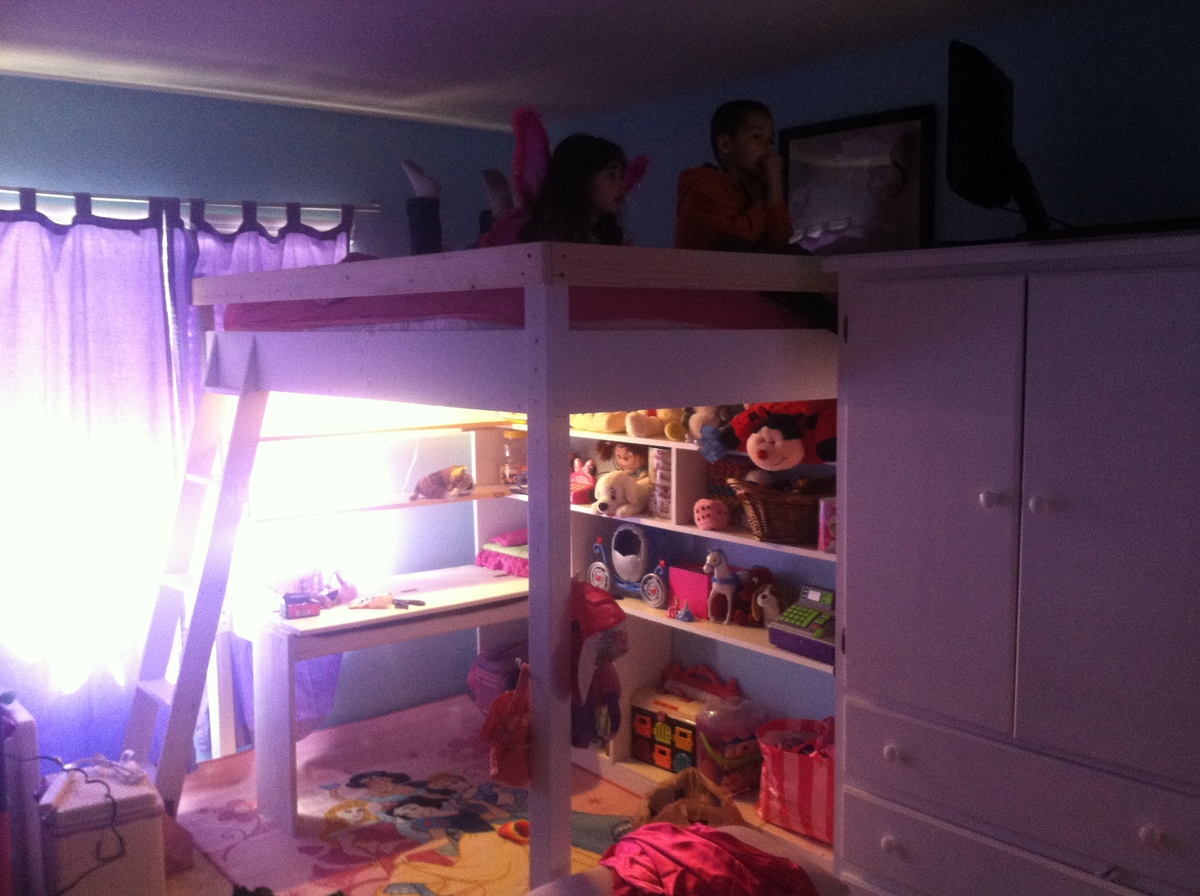
The benches are solid and we
The benches are solid and we haven't had any issues with them being wobbly or unstable. The height hasn't really been an issue for my kids either (they got used to it very quickly). I did build two stools with backs in case one of the kids had a problem, but they prefer to sit on the benches.
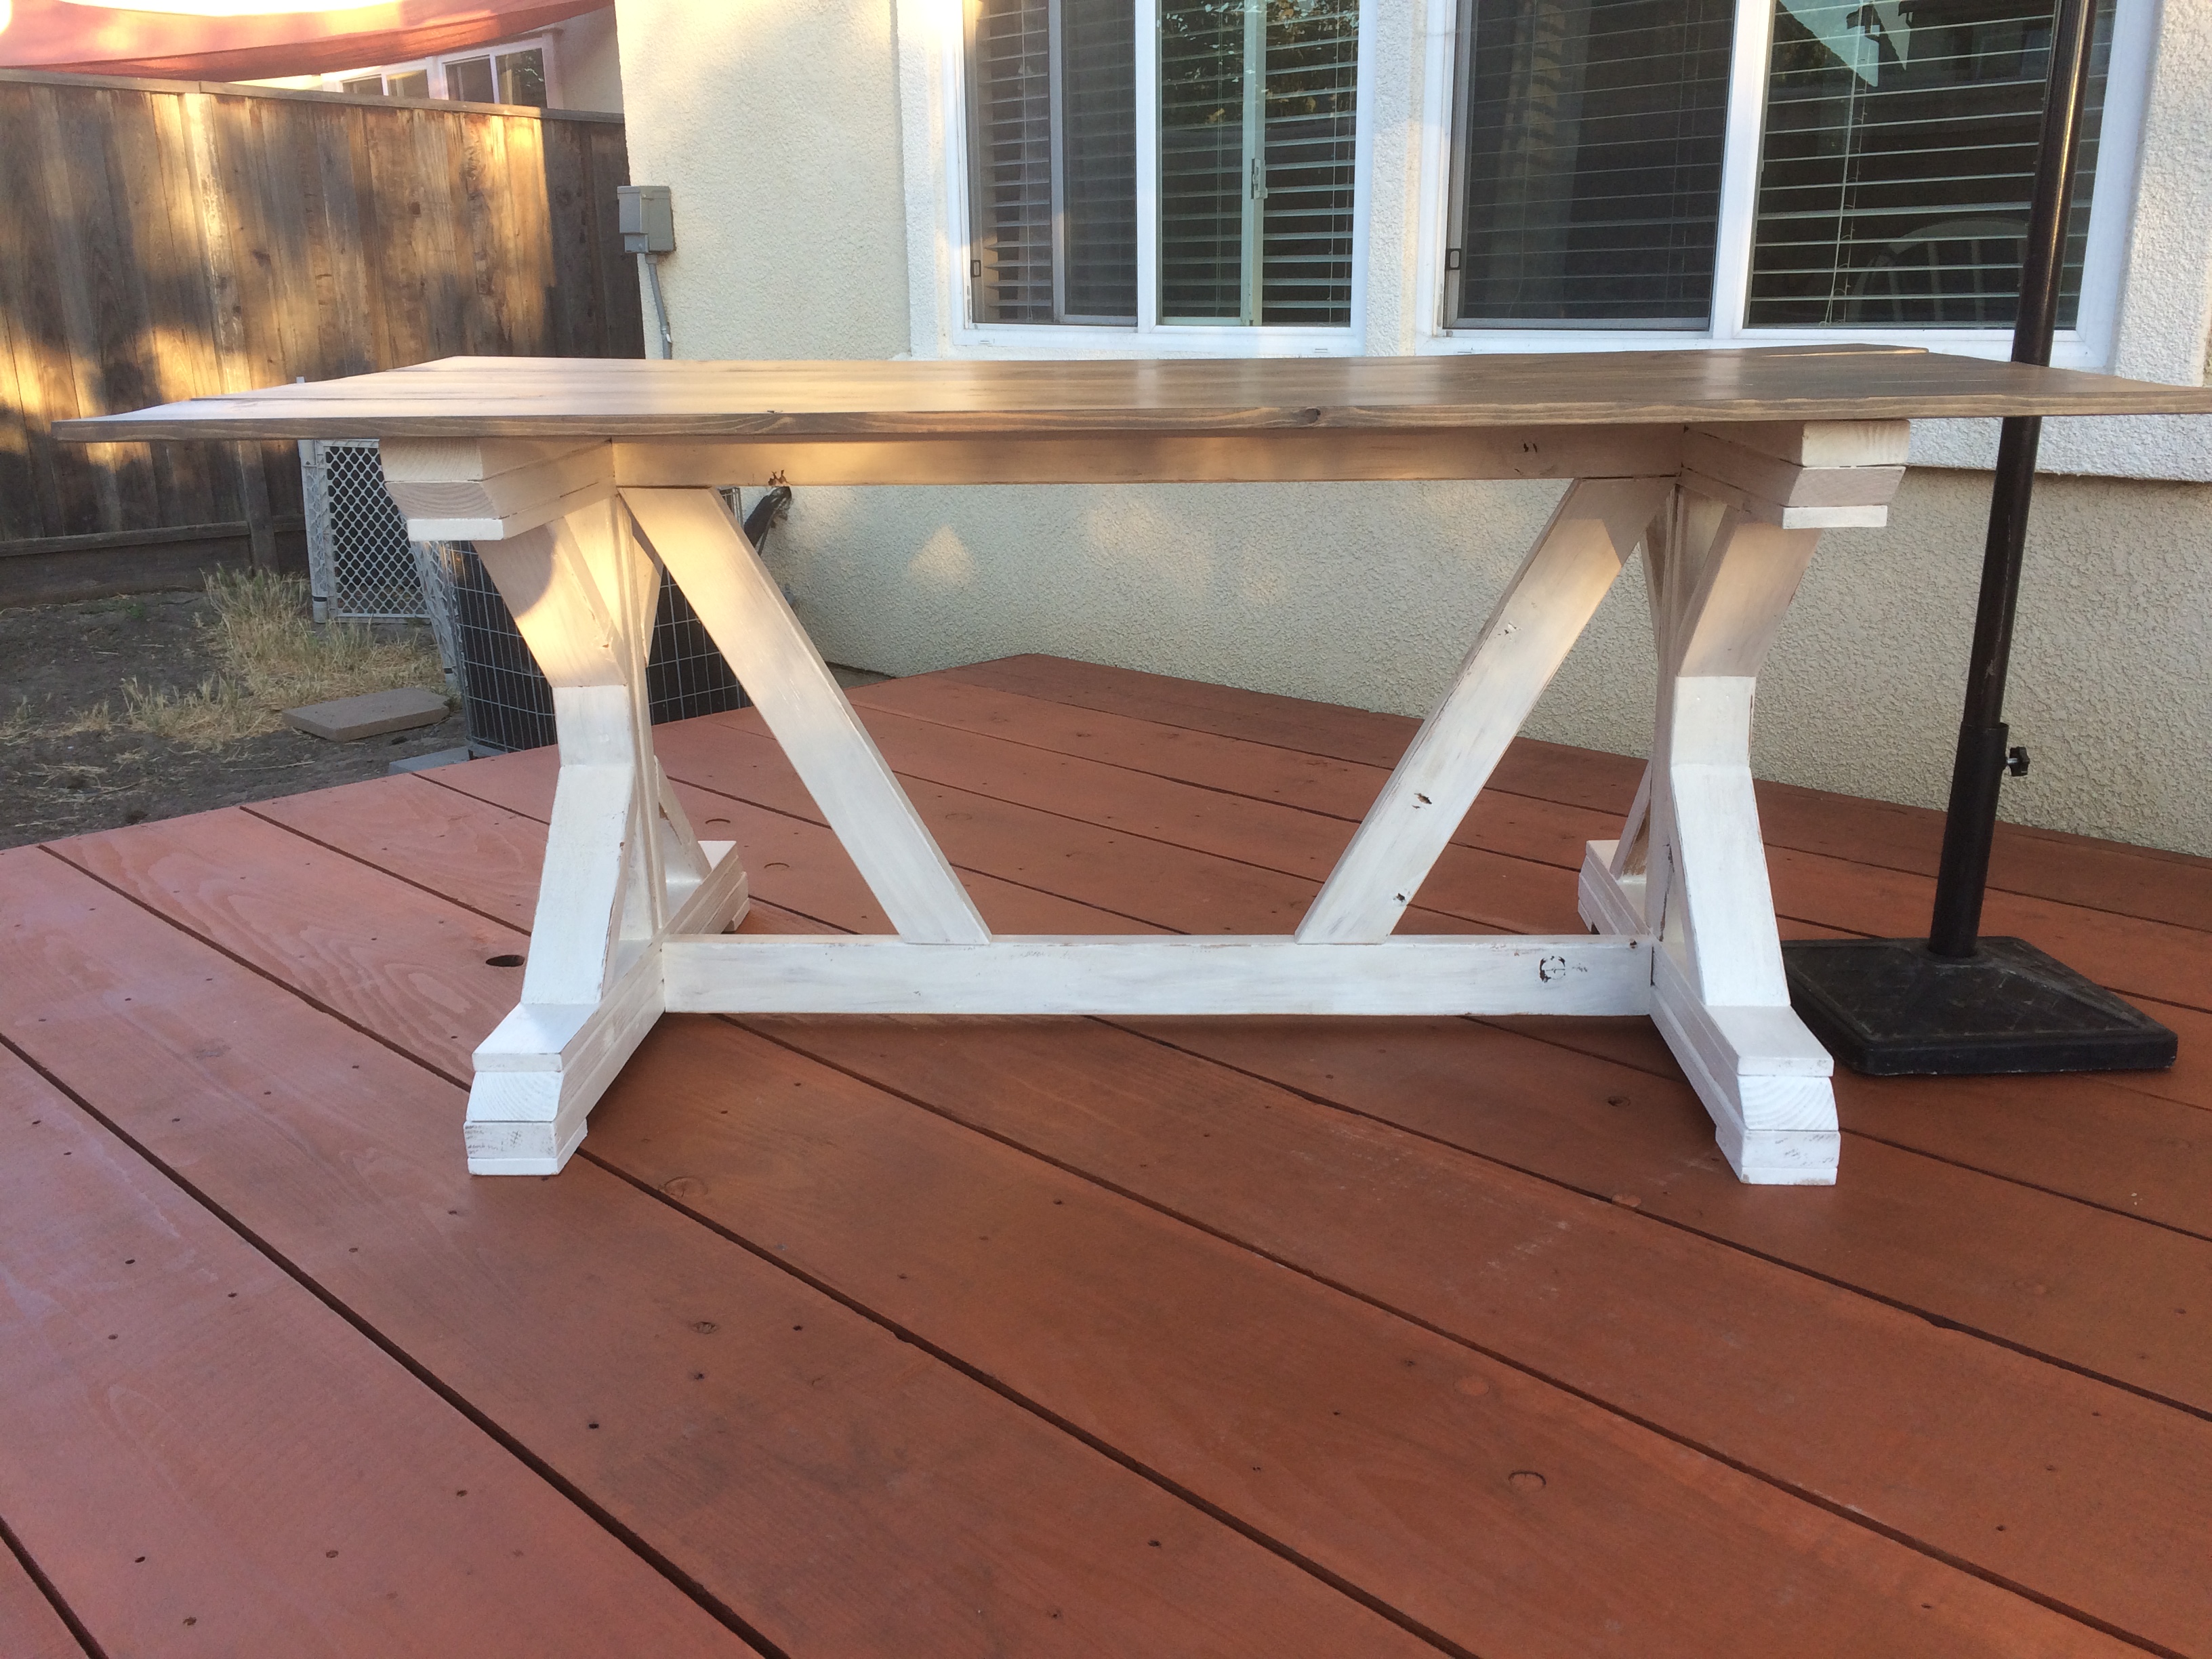
Fancy X
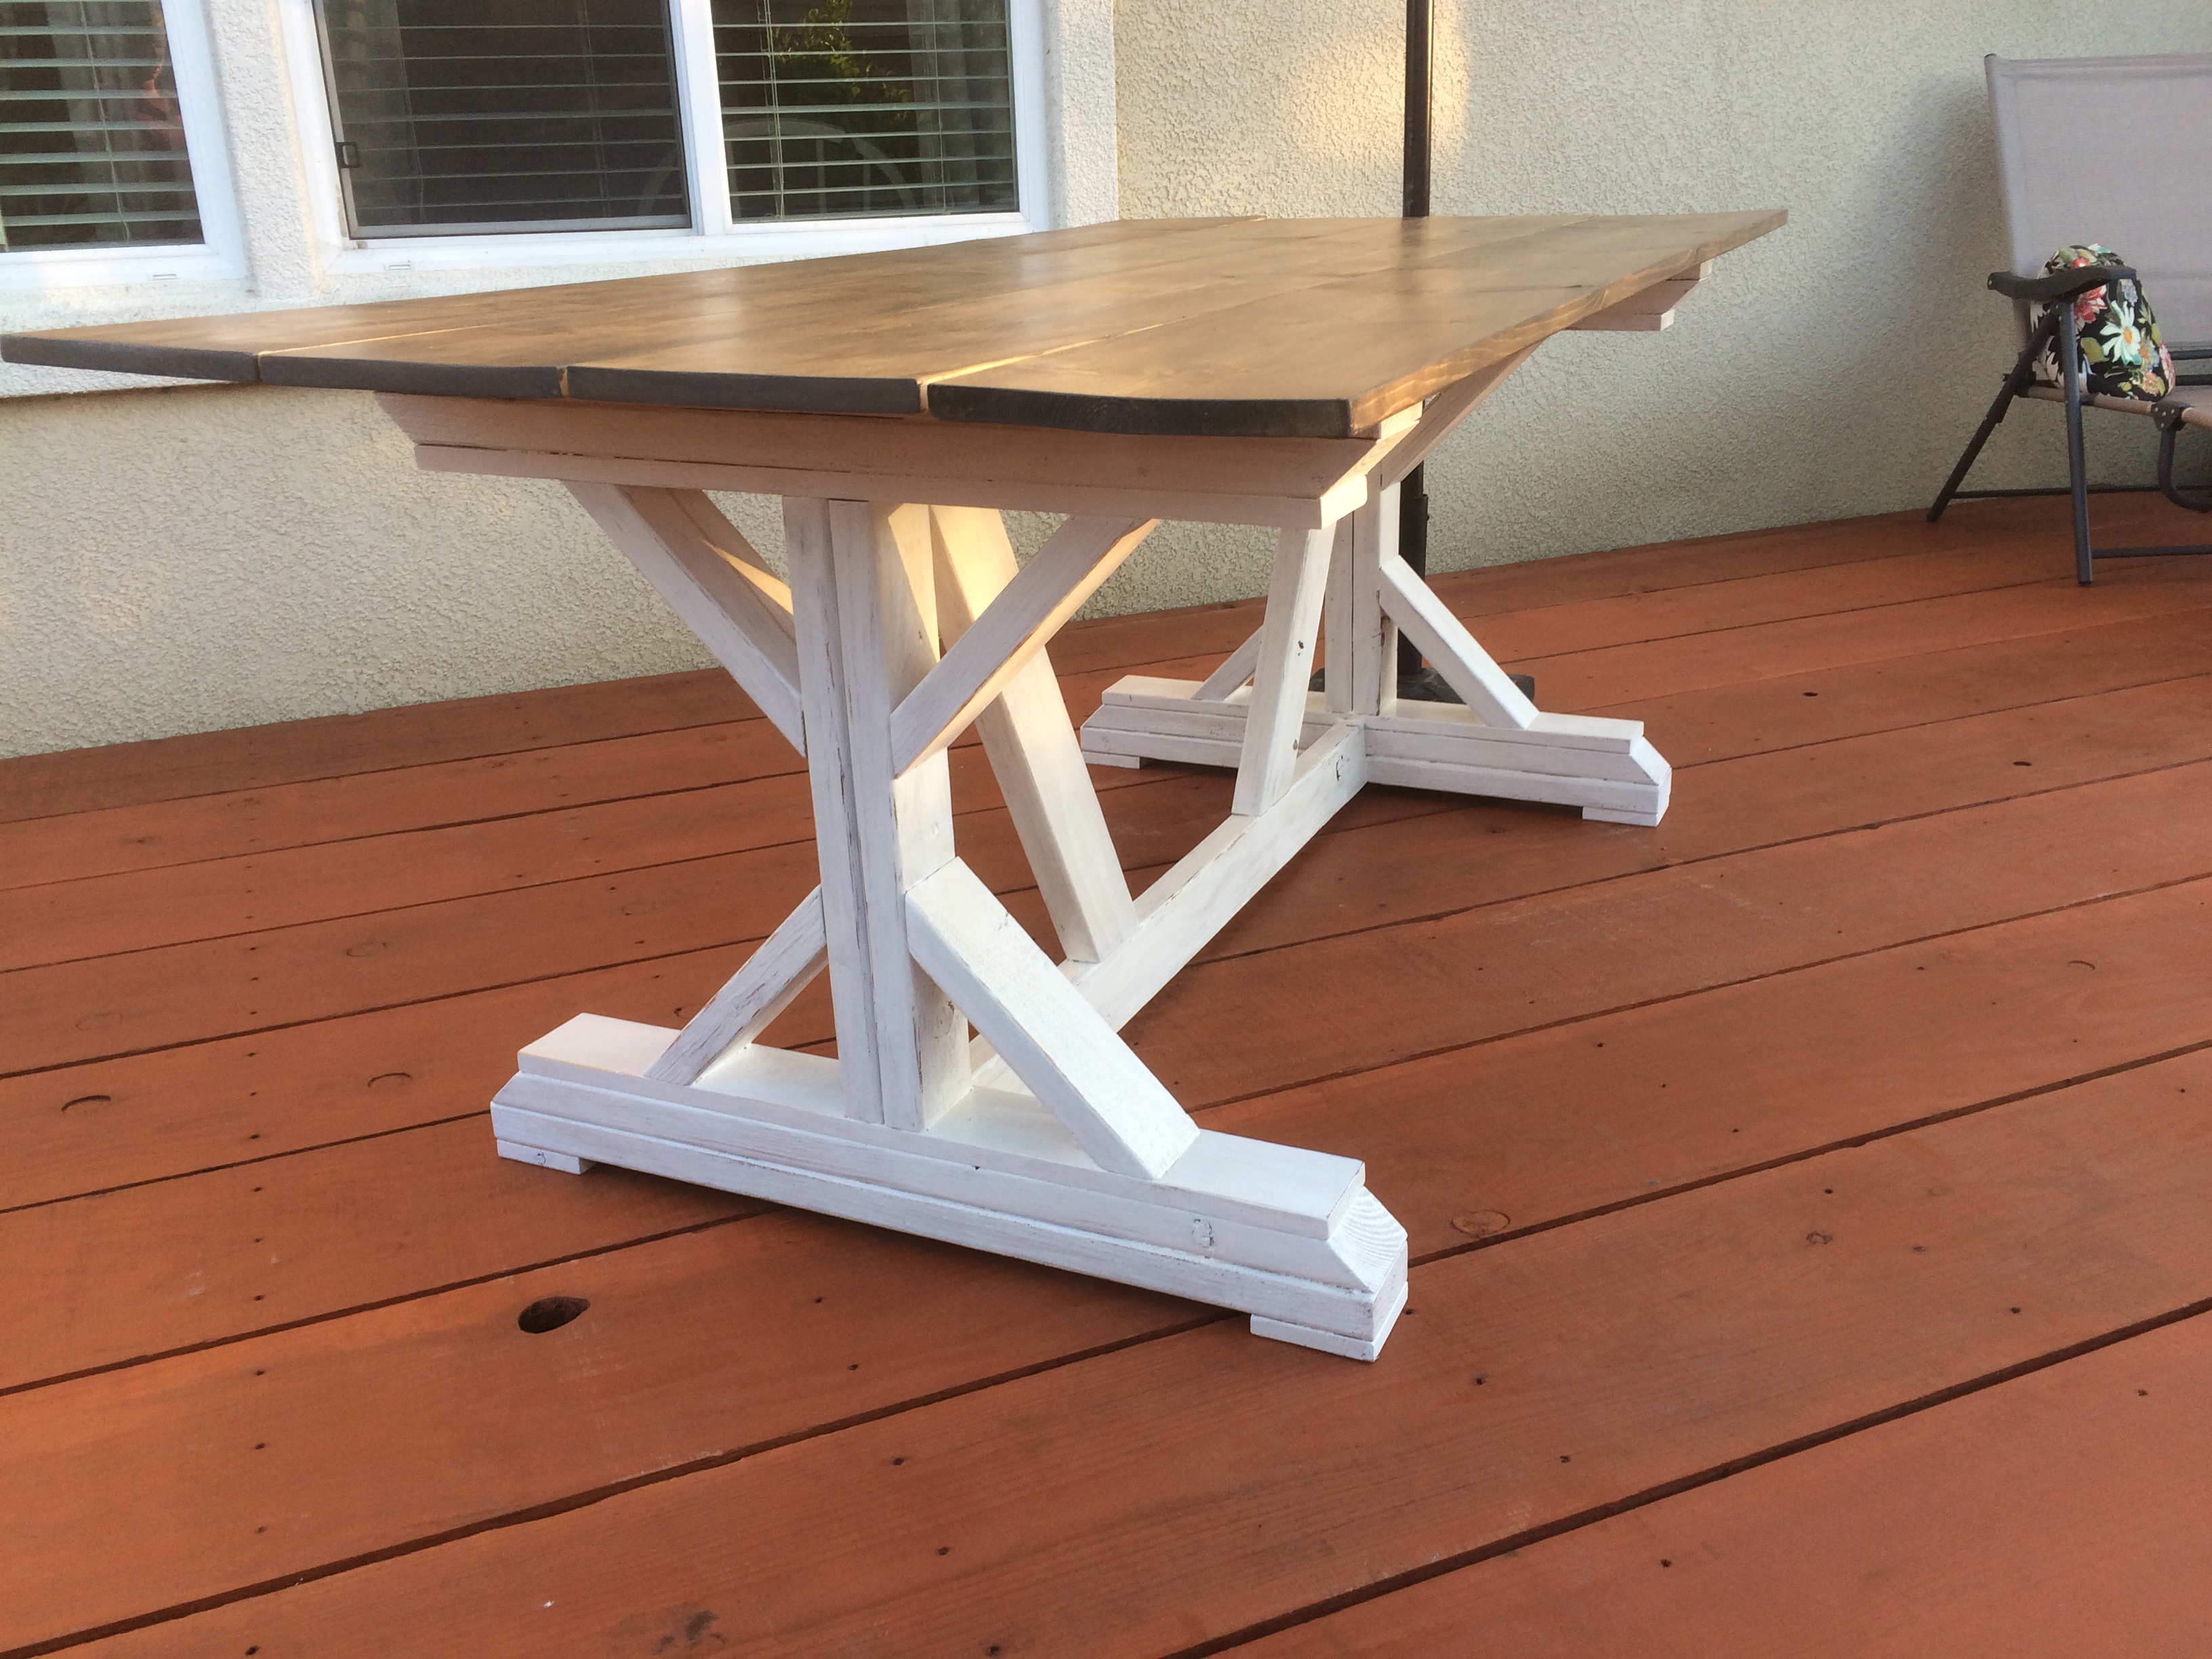
Second time building this table. Made it smaller, cutting support pieces to 45 rather than 60. Also tried 1X10 for the top.
Built from Plan(s)
Estimated Cost
$70
Estimated Time Investment
Day Project (6-9 Hours)
Finish Used
Swiss coffee white on base, lightly distressed. Top is Mix Wax Weathered Oak then watered down layer of Briarsmoke.
Recommended Skill Level
Beginner
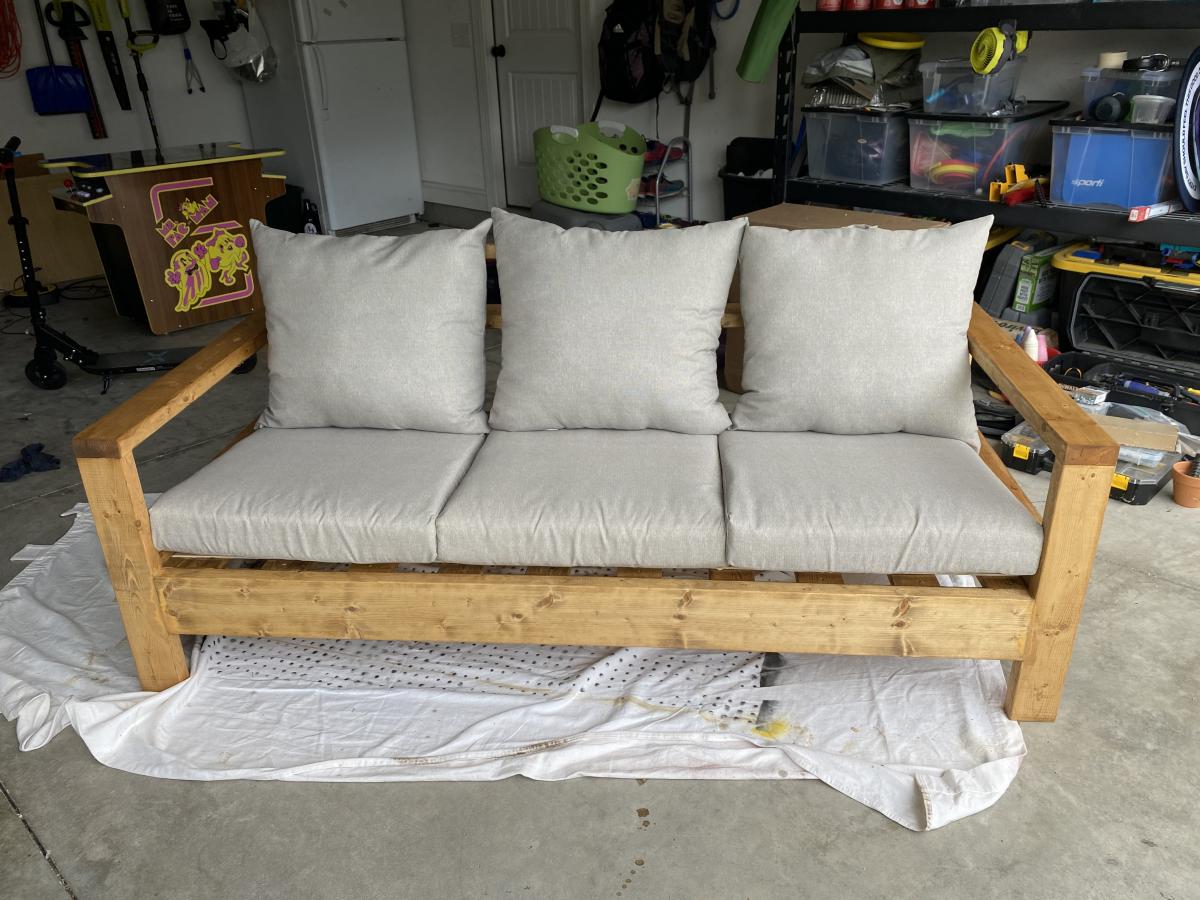
Outdoor sofa
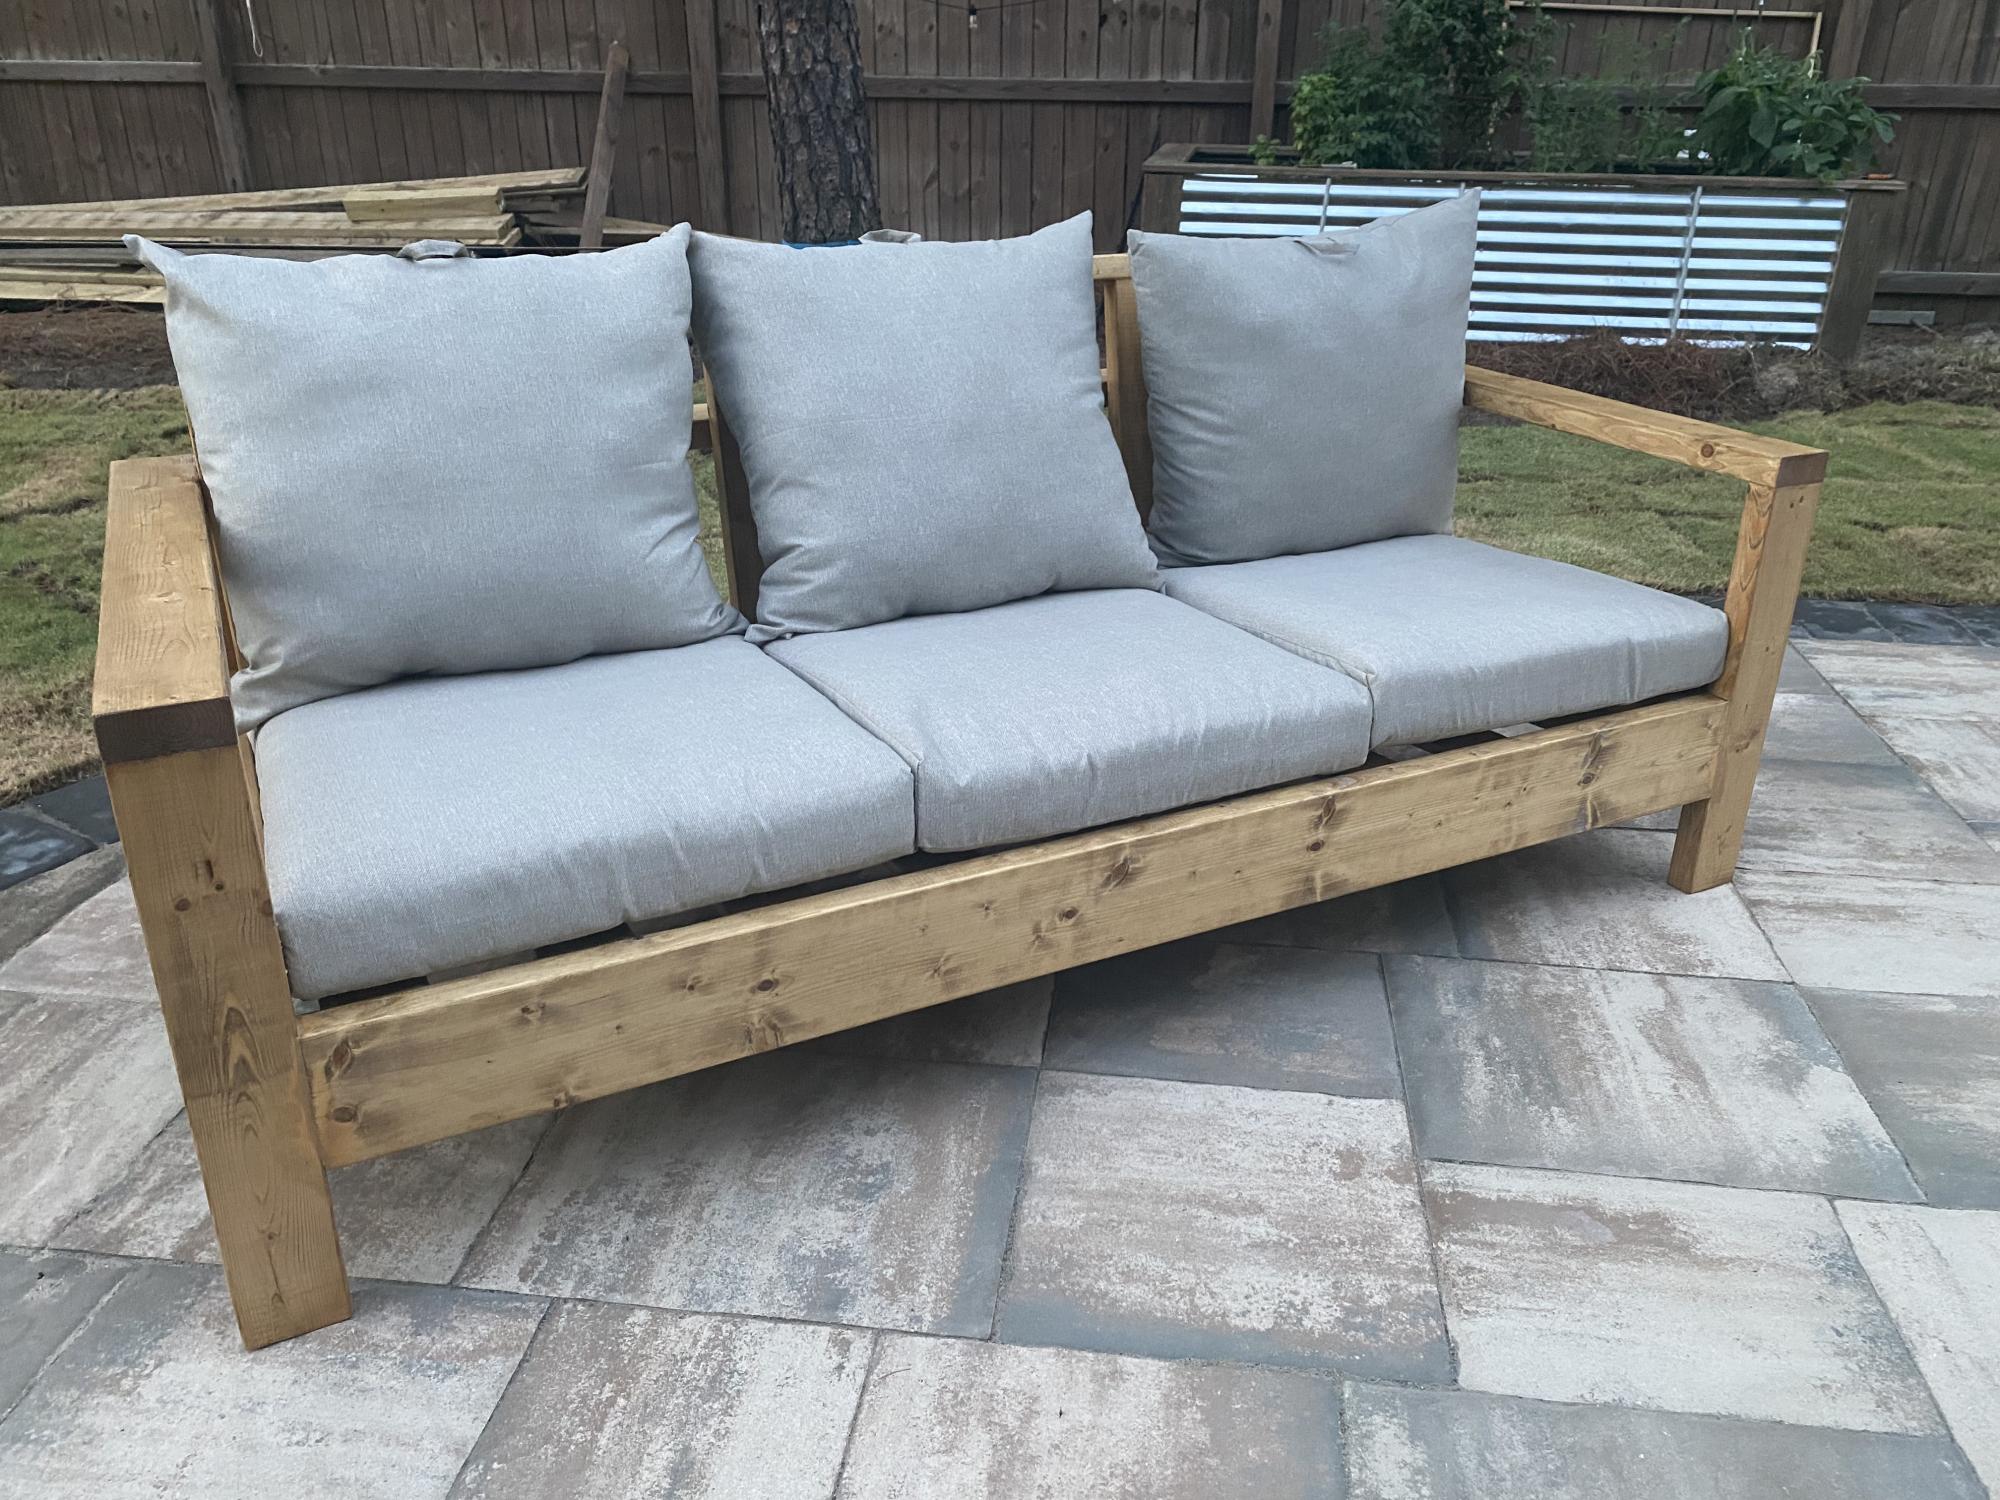
Shortened the width for 22 inch wide cushions. Stained with golden oak minwax and finished with tung oil.
Built from Plan(s)
Estimated Cost
$150
Estimated Time Investment
Weekend Project (10-20 Hours)
Finish Used
Minwax golden oak, and tung oil finish
Recommended Skill Level
Beginner
Comments
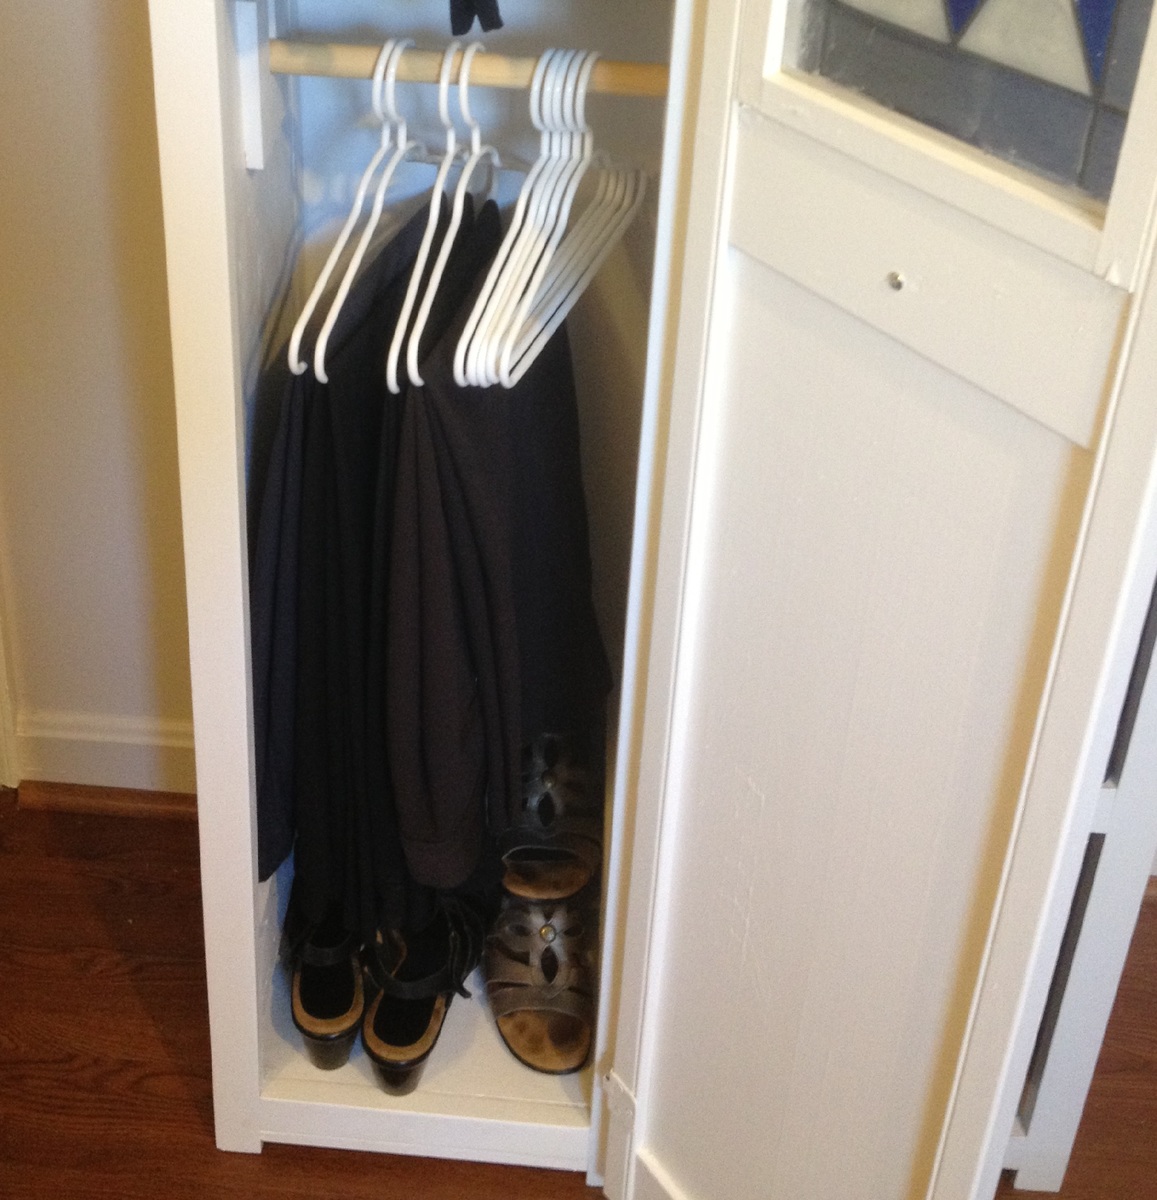
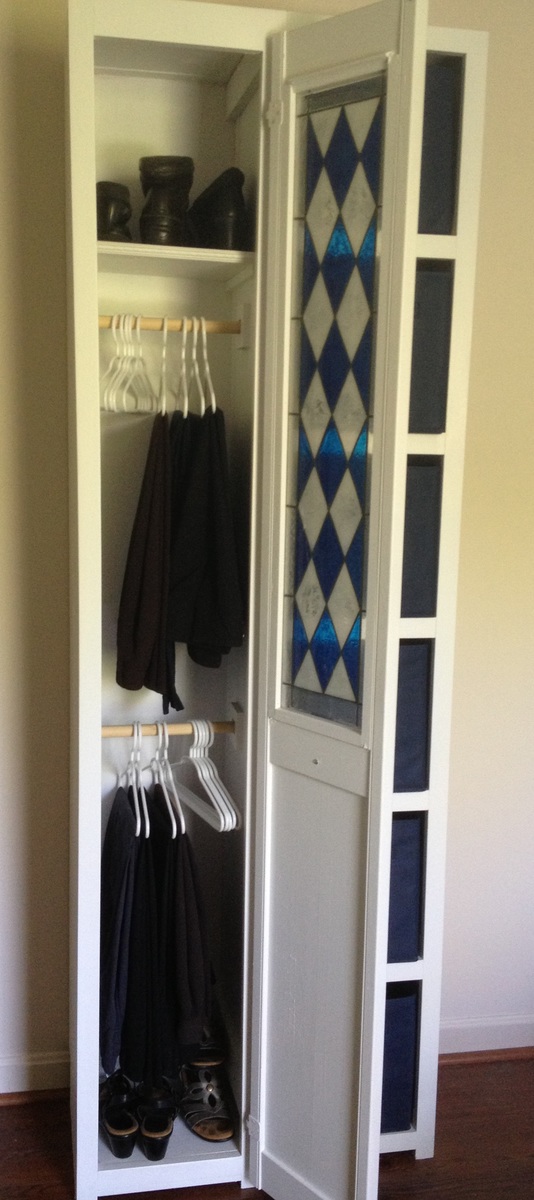
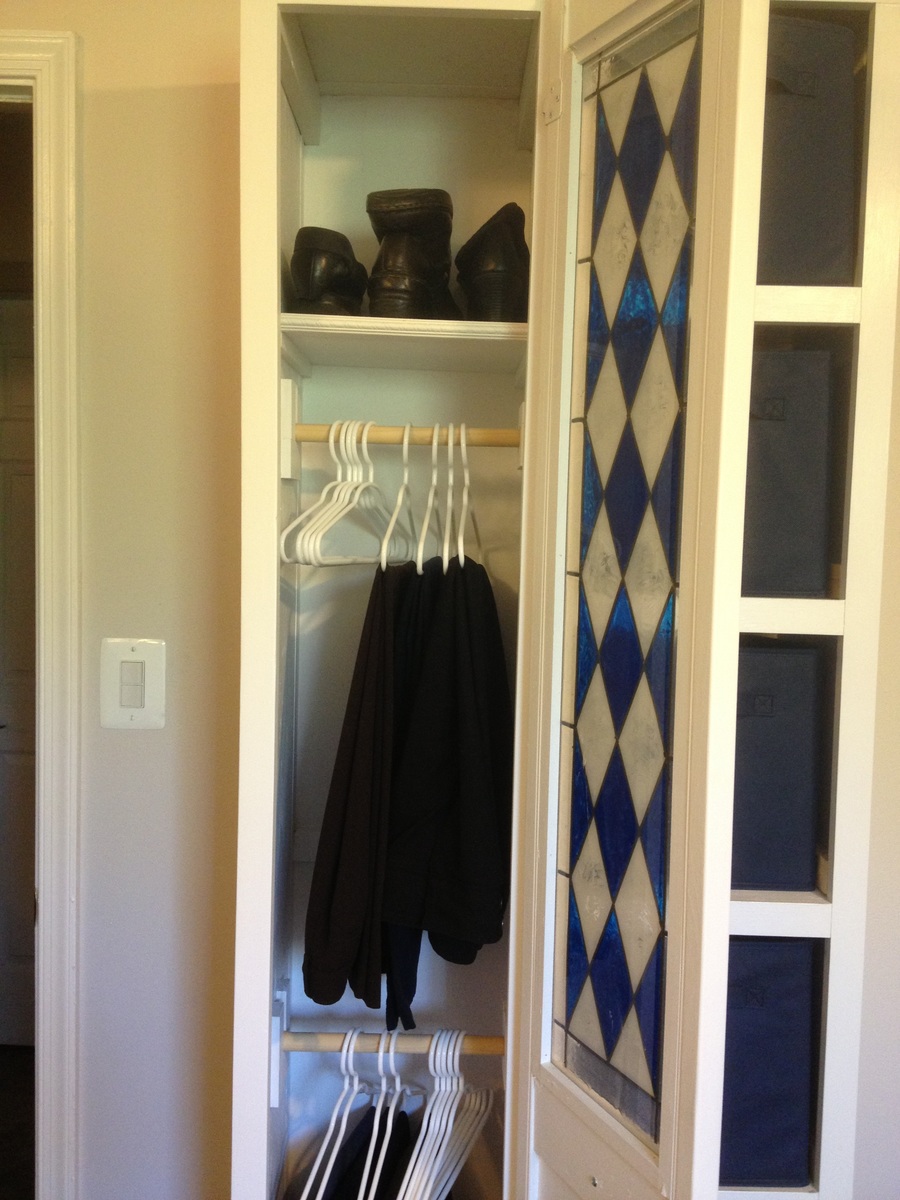
Closet Tower
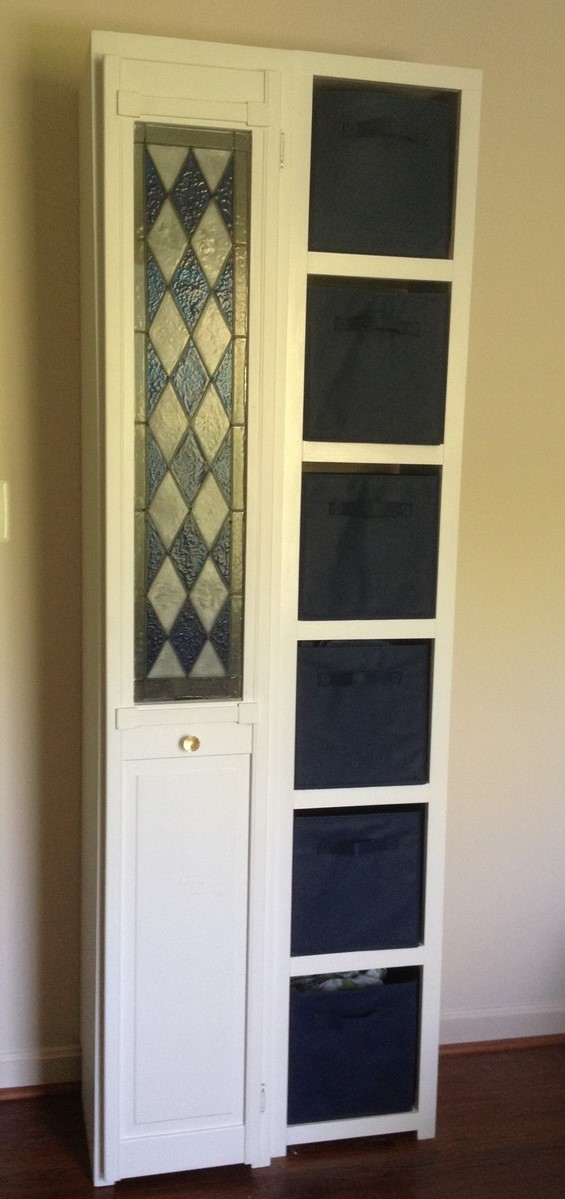
This closet tower is from the Craft Room Storage Tower plan, and made mostly with left overs from other projects. I wanted a shallow tower storage just deep enough to hang pants and slacks in, and to use a 12" wide door I already had in my garage. At Target I found some kid-size hangers that were just the right size - about 12" wide. Trouser hangers are about this same width, but they weren't available in-store so I went with what they had. The only things I bought for this project are the knob, hinges, some 1x2's, and the hangers. The sides are from a lengthwise half-sheet of C/D plywood, ripped down to 12" strips on the table saw, with 1x2 edge joined at the back to create a "toe kick" to clear the baseboard. The front is trimmed out in 1x2 with a scrap of 1x3 to trim the top. The removable closet poles are from a flagpole, and the ends are held in place with some 1/2" craft boards. The back is 1/4" plywood. The longest part of this project was the sanding, because the plywood wasn't the pretty kind - used lots of wood filler on the knots and as a grain filler, then sanded it a lot. This project took about 9 hrs total, (sanding took the longest), construction with the Kreg jig and nailgun was very quick, and then paint and adding the door and poles. The removable shelf was added as an afterthought and is a scrap of plywood, with some S4S to hold it up, and a 12" scrap of moulding across the front of the shelf. It is 82" tall, 13 1/2" wide, and 14 1/4" deep. It's a perfect pair with the 6-cube tower that I built from Ana's cube tower plans a couple of years ago.
Built from Plan(s)
Estimated Cost
$36 (for knob, hinges, 1x2's and hangers)
Estimated Time Investment
Day Project (6-9 Hours)
Finish Used
Ace Royal semi gloss paint in high-hiding white (left over paint)
Recommended Skill Level
Beginner
Comments

Fri, 08/30/2013 - 17:56
This is such a clever build!
This is such a clever build! :) Thank you for sharing in detail how you put this together. =D I love how tall this is and how little floor space it takes up, which is especially a big issue for smaller home dwellers like myself. =D

Sat, 08/31/2013 - 06:23
Thanks Yvonne!
Yvonne, thanks so much for the nice comment! I just love tower storage, you get so much for such a small 'footprint' in the room. We've replaced our bulky dressers with towers, which makes the room look much more spacious. If you build some, I'd love to see pictures!
There are 2 other items not mentioned above, that I added during this build: I added the 1x3 at the top of the insides, to help keep the joined side boards tighter together at the top (at the time I was thinking the joint might try to pull apart if it got humid). The second thing (you can hardly see this in the photo) is a 12" piece of 1x2 attached across the back, spaced between the 2 closet poles. This was added to help keep the side pieces the same distance apart when attaching the back, and provided an additional place across to nail it. I thought it would help make it more rigid. This piece is used every day, and so far it has held up great. :)
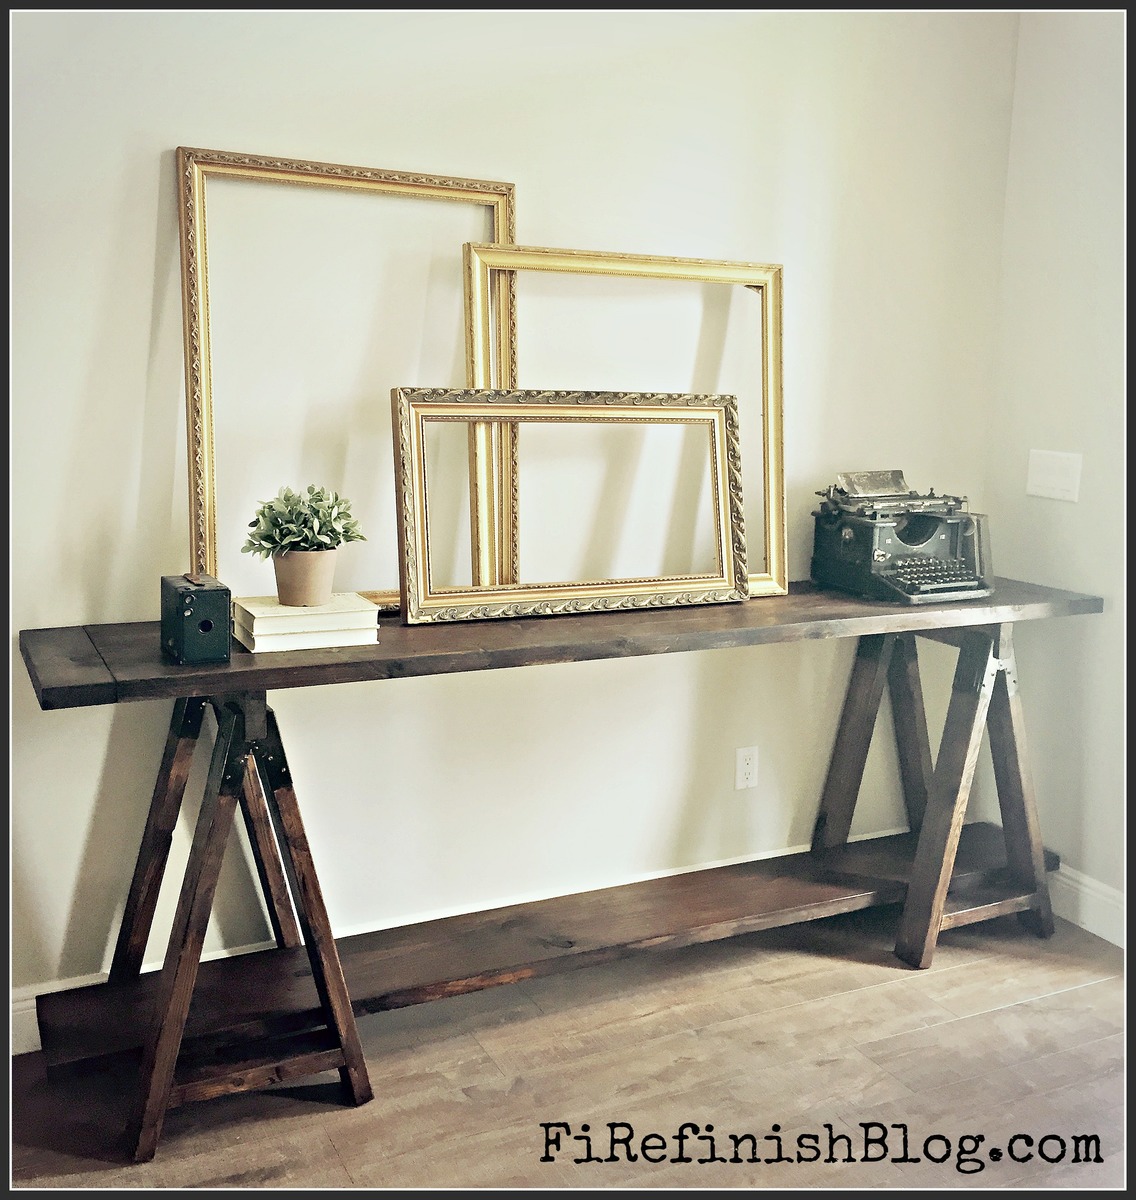
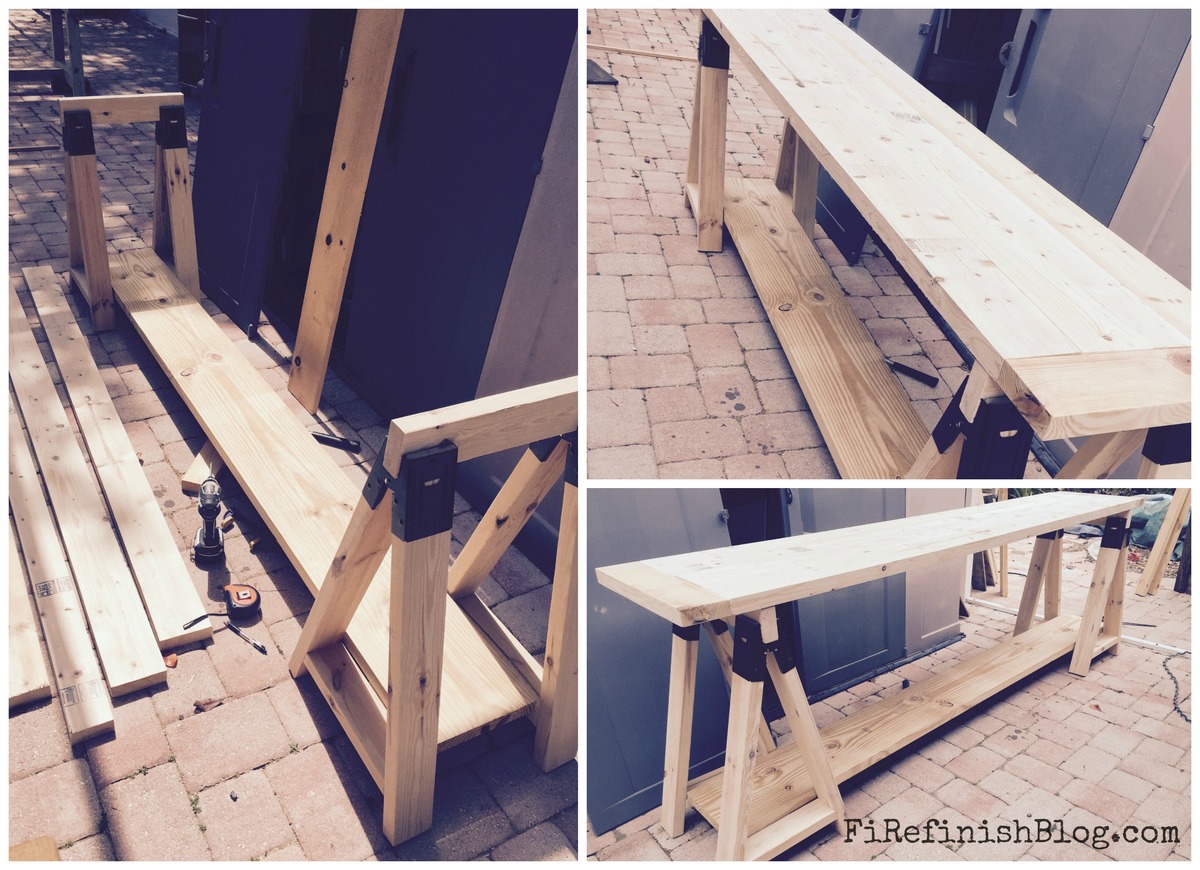
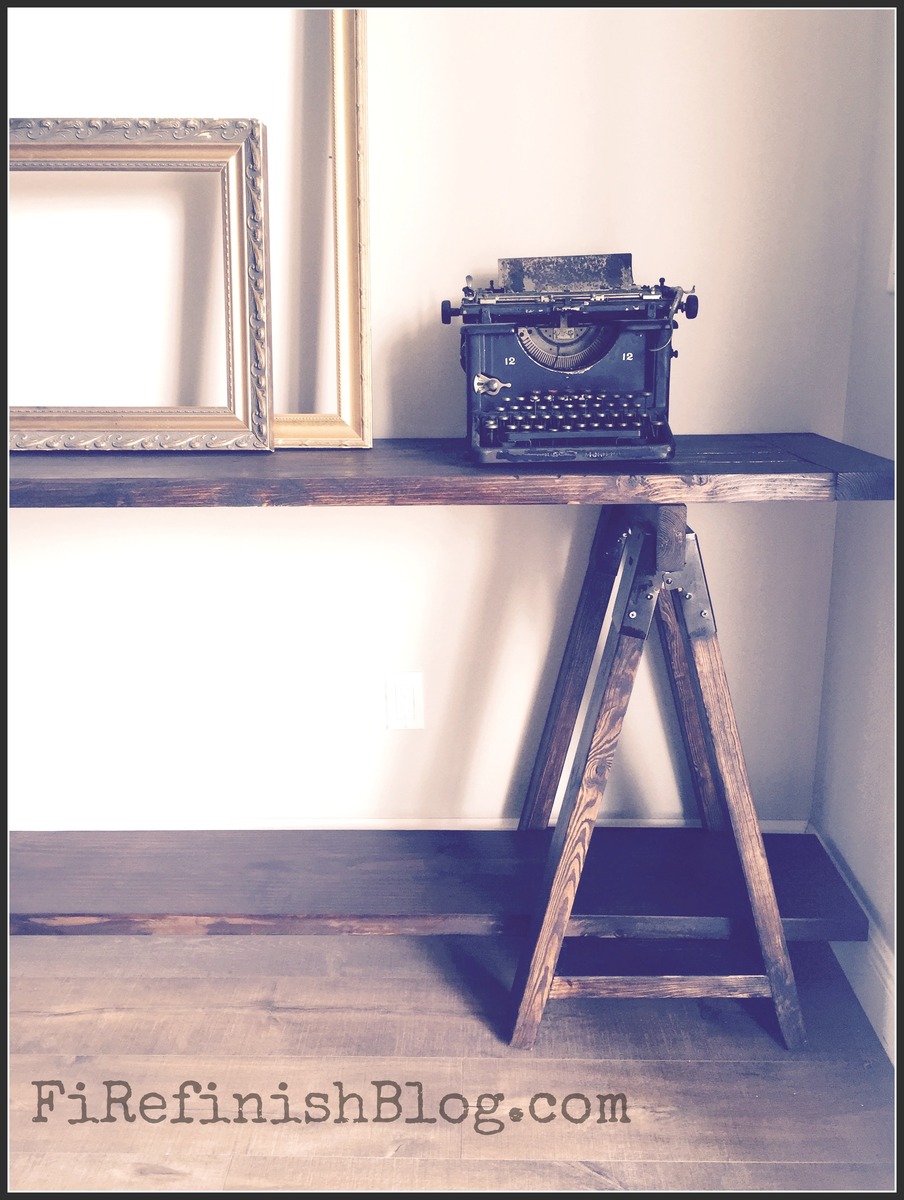
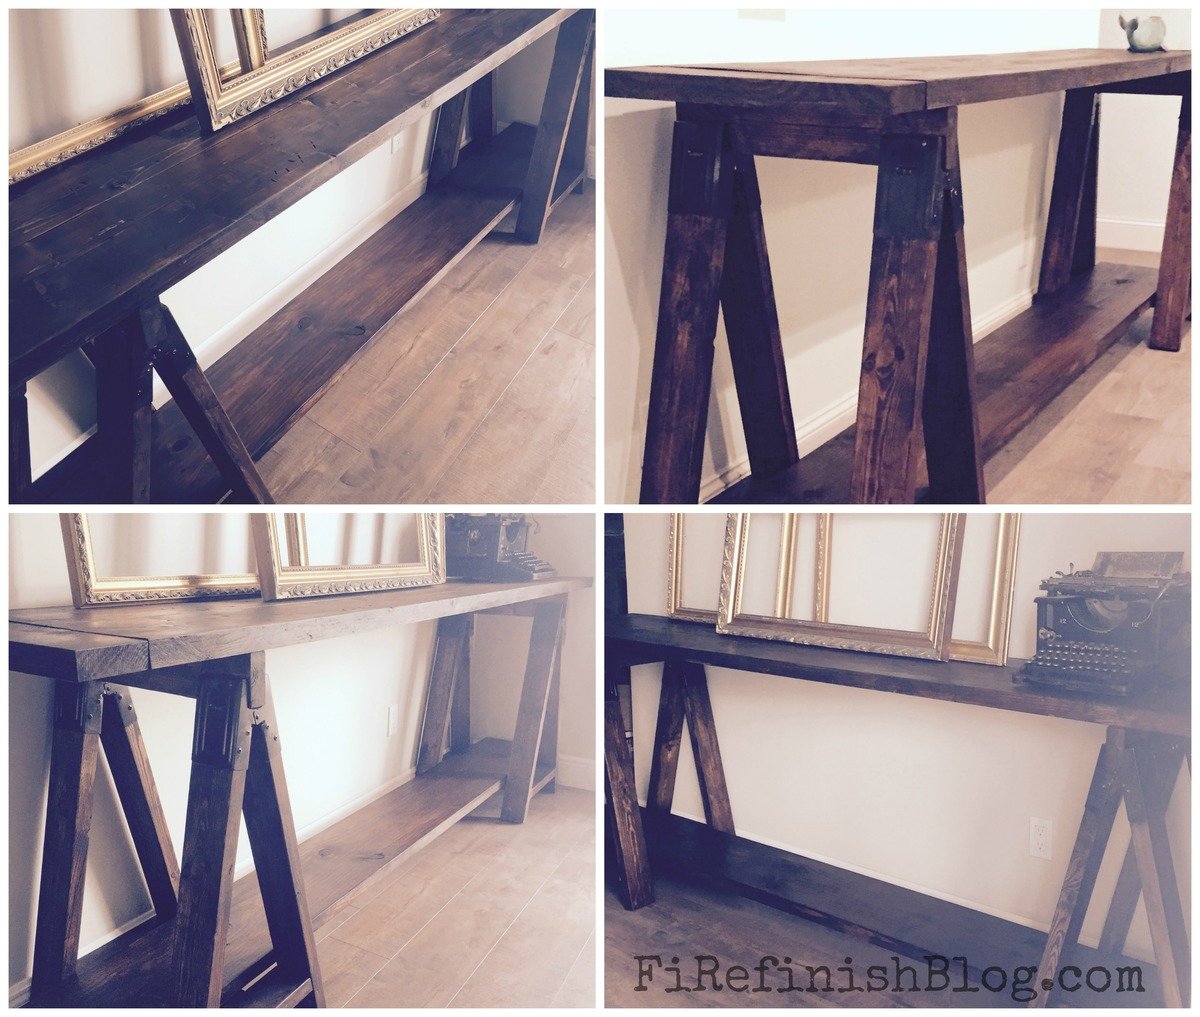
Sawhorse Console Table
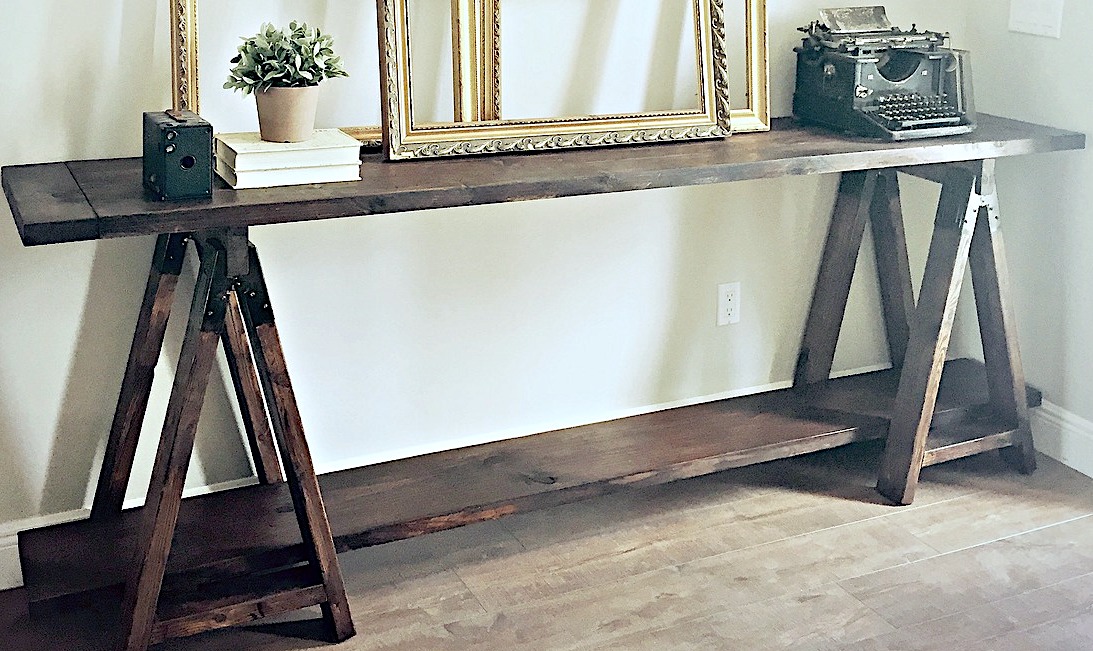
I saw a similar table on Shanty2chic.com and created my own version :)
Built from Plan(s)
Estimated Time Investment
Day Project (6-9 Hours)
Recommended Skill Level
Beginner
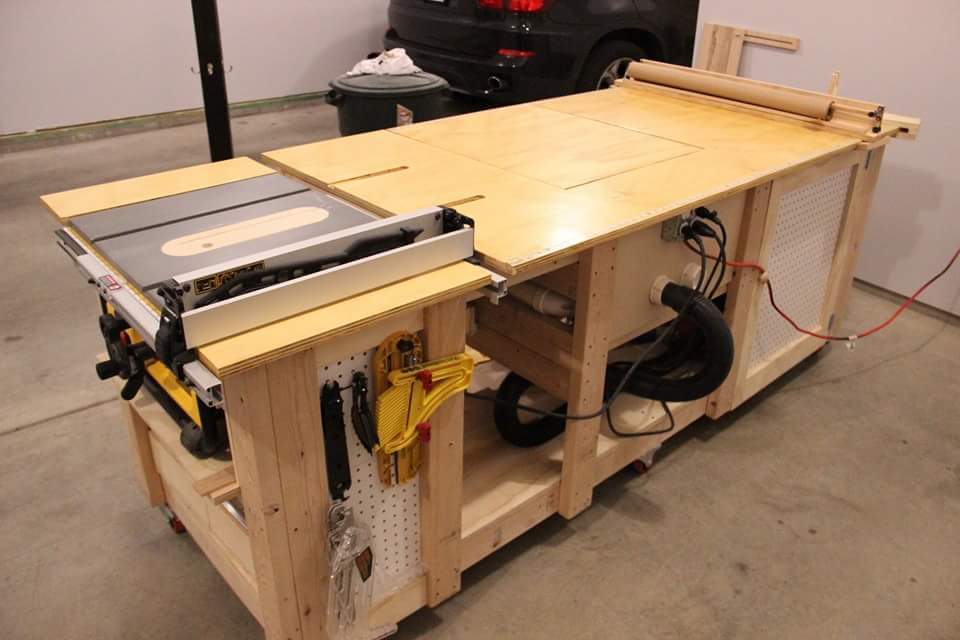
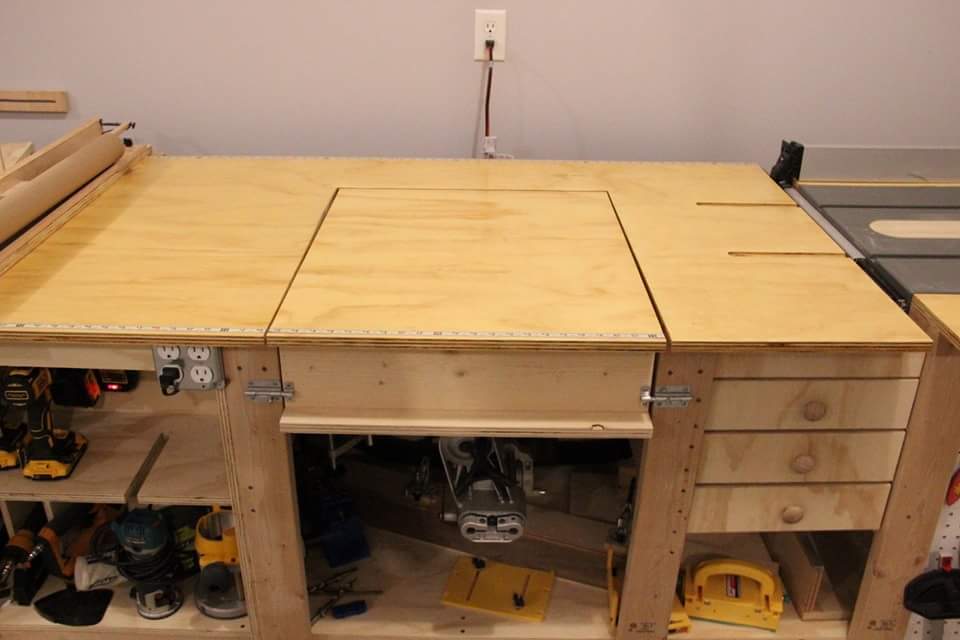
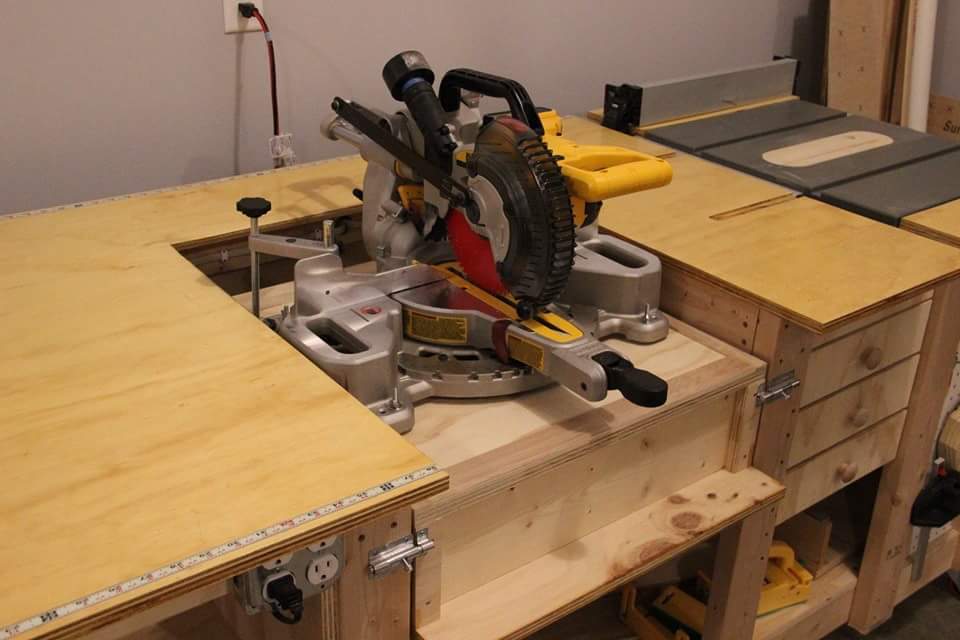
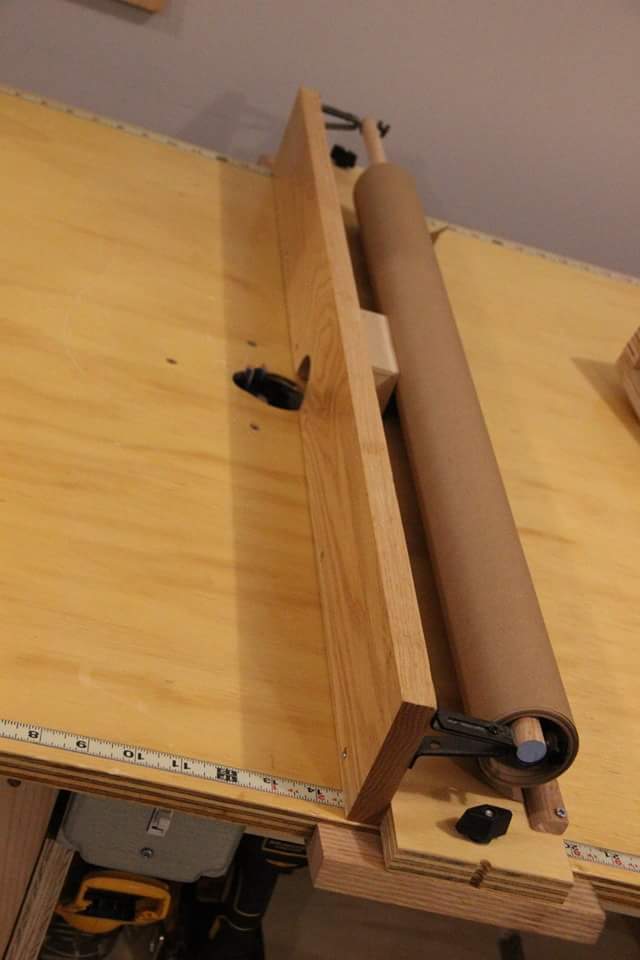
Ultimate work bench
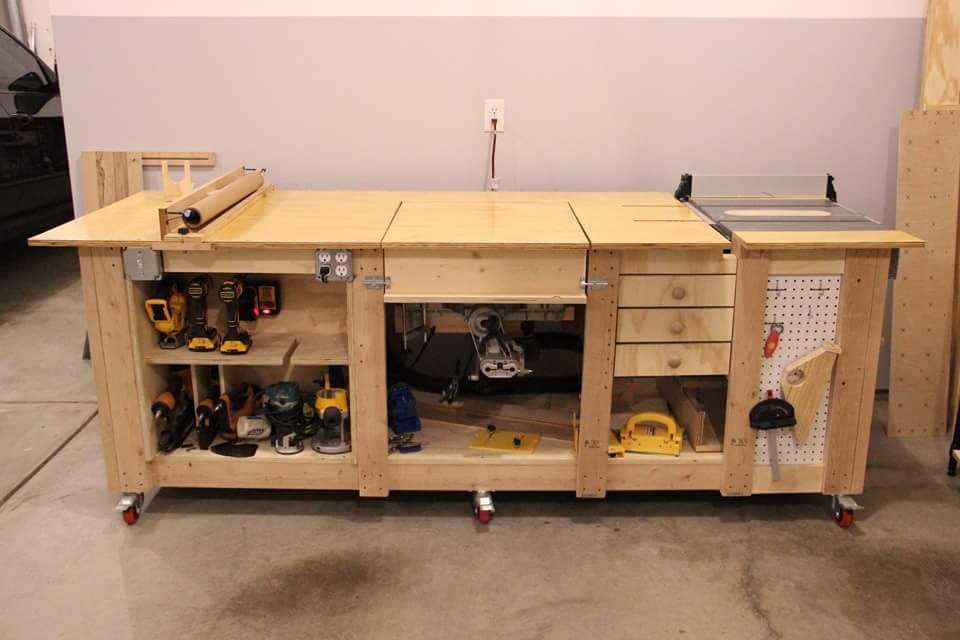
Tablesaw, router, fliptop mitersaw, and dust collection workbench.

Recommended Skill Level
Intermediate
Comments
Sat, 08/01/2020 - 08:27
Love The Look
That's a nice build. I would love to know if you do have plans for this workbench?

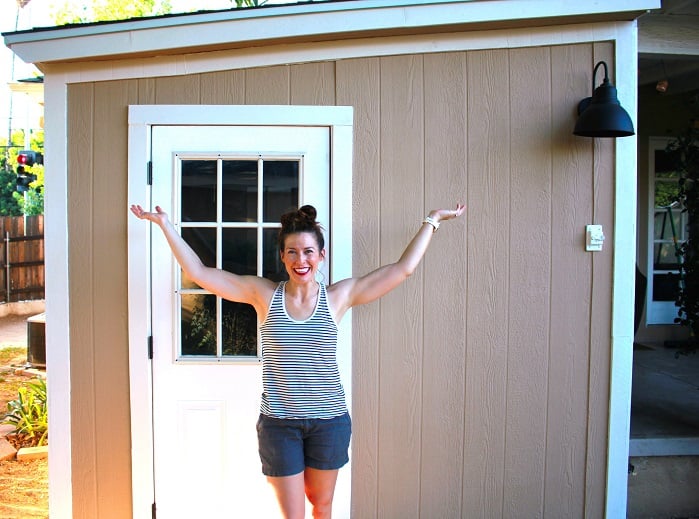
Outdoor Recording Studio Shed Build
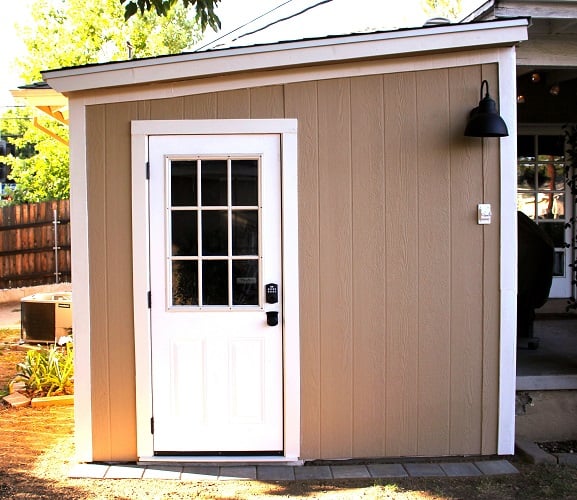
As an on camera actor, I found myself with zero work during the pandemic. All productions were shut down and my day job no longer existed. It was time to get creative.
Voice over work started booming, particularly for actors who could record from home, because recording studios were shut down. I've dabbled a bit in voice over and had been interested in diving in and took my first step by buying a sound reducing booth called a whisper room.
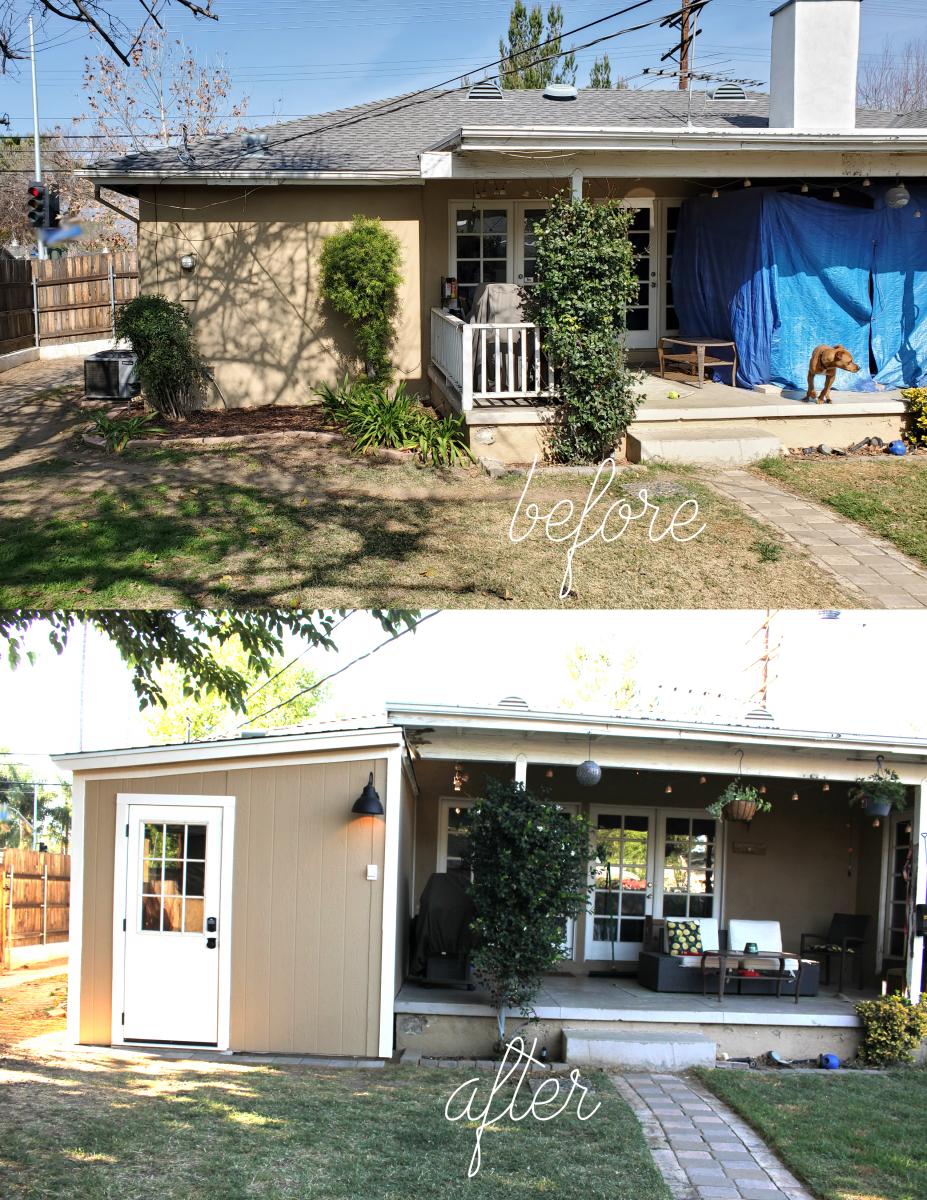
The problem? There was nowhere in our house to to put the 6'x8' booth. So it sat on the back porch for months, covered by a tarp.
For a woodworker, this just wouldn't do! It was time to build an out building to house the booth and have my own outdoor recording studio. I read endless books and watched videos on building recording studios and made my plans over a few months.
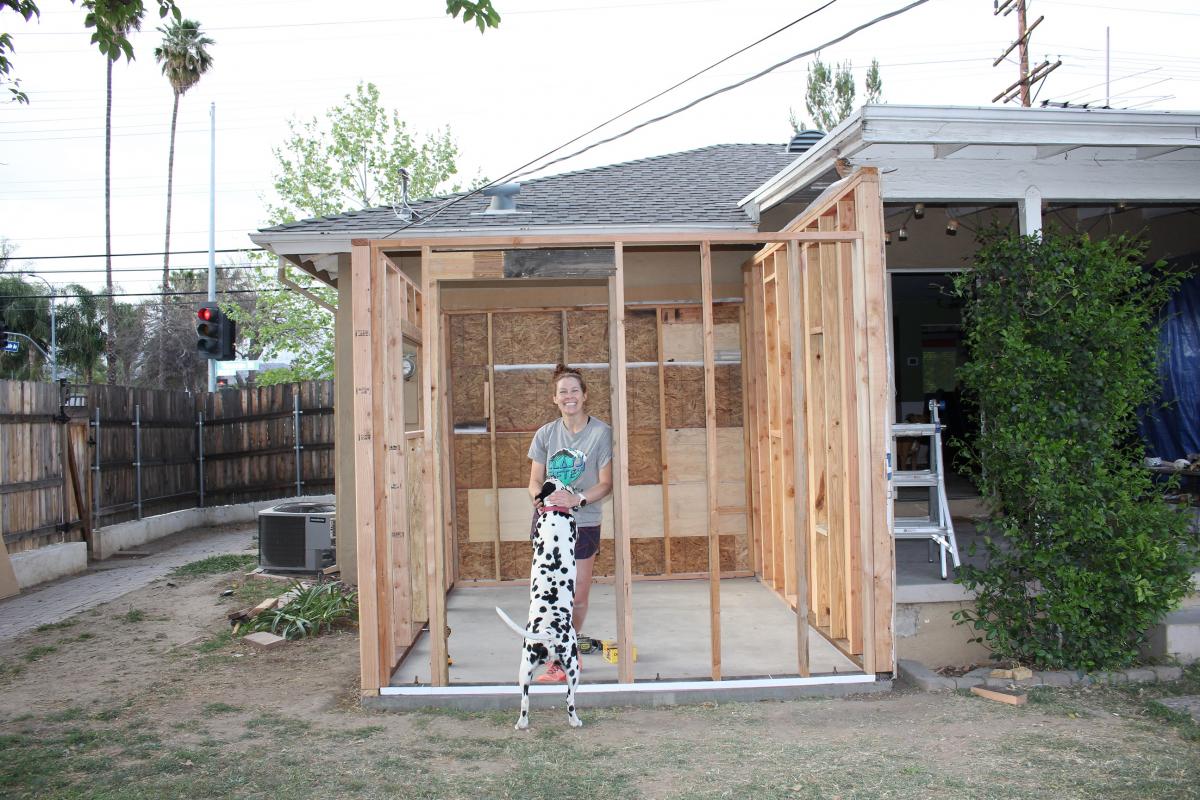
Finally, in March, I excavated the land and prepped it for a pour. We had a concrete guy come in and pour the slab.
As soon as that set, I began work from the ground up in building this fancy shed. It took me 3 months, but I learned so much about the basics of building a house, and now I am auditioning for professional projects in my beautiful studio. I couldn't be prouder.
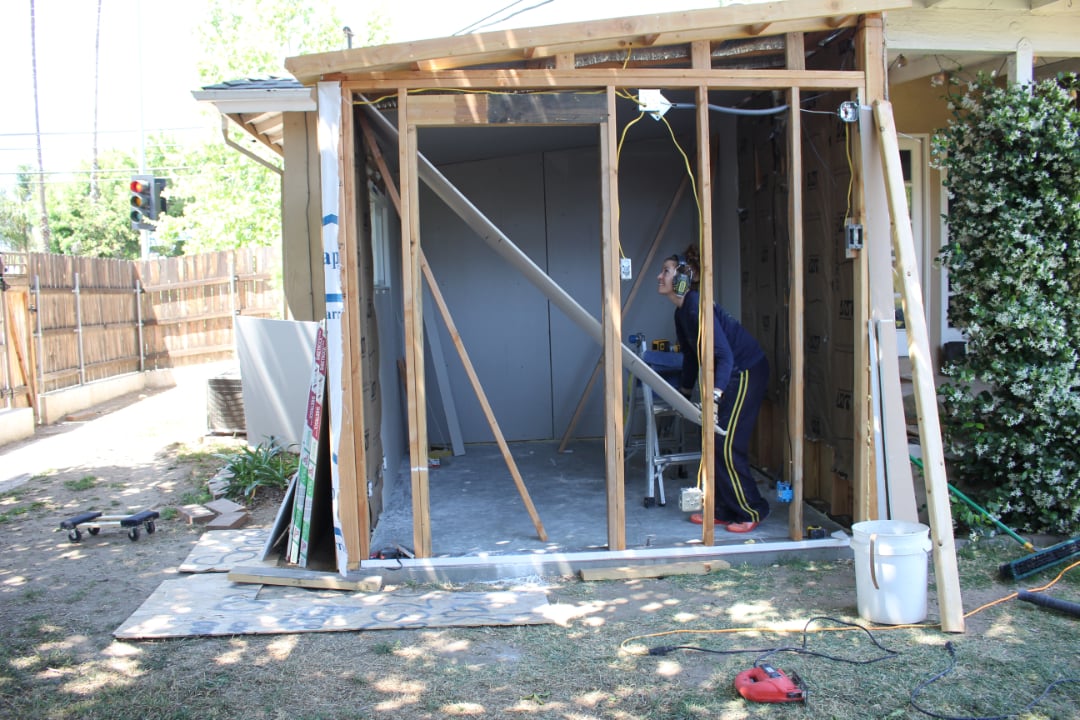
I ran electric, ethernet, I put in flooring, I roofed, drywalled, made a custom door threshold, inserted a window and framed every last bit of this building. There were bumps along the way- to be expected in a one person build- but she's done and ready for work.
I documented the build from start to finish here: https://www.youtube.com/watch?v=yPcEW6cqhcQ

Comments
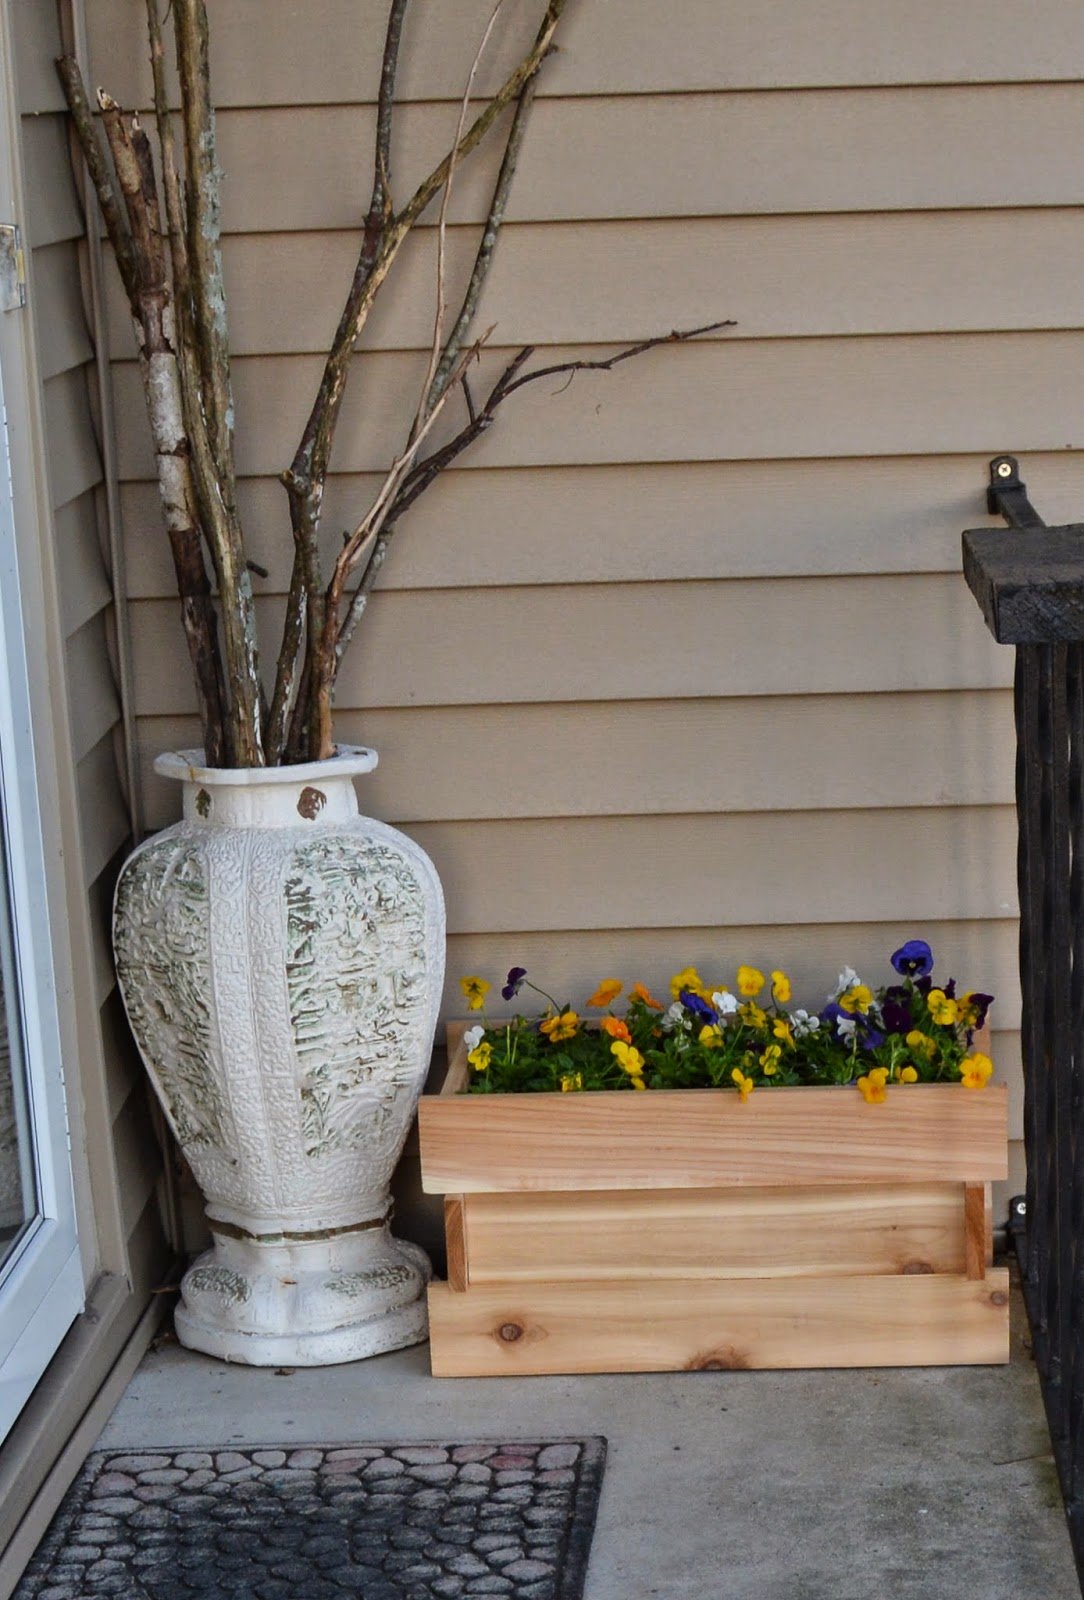
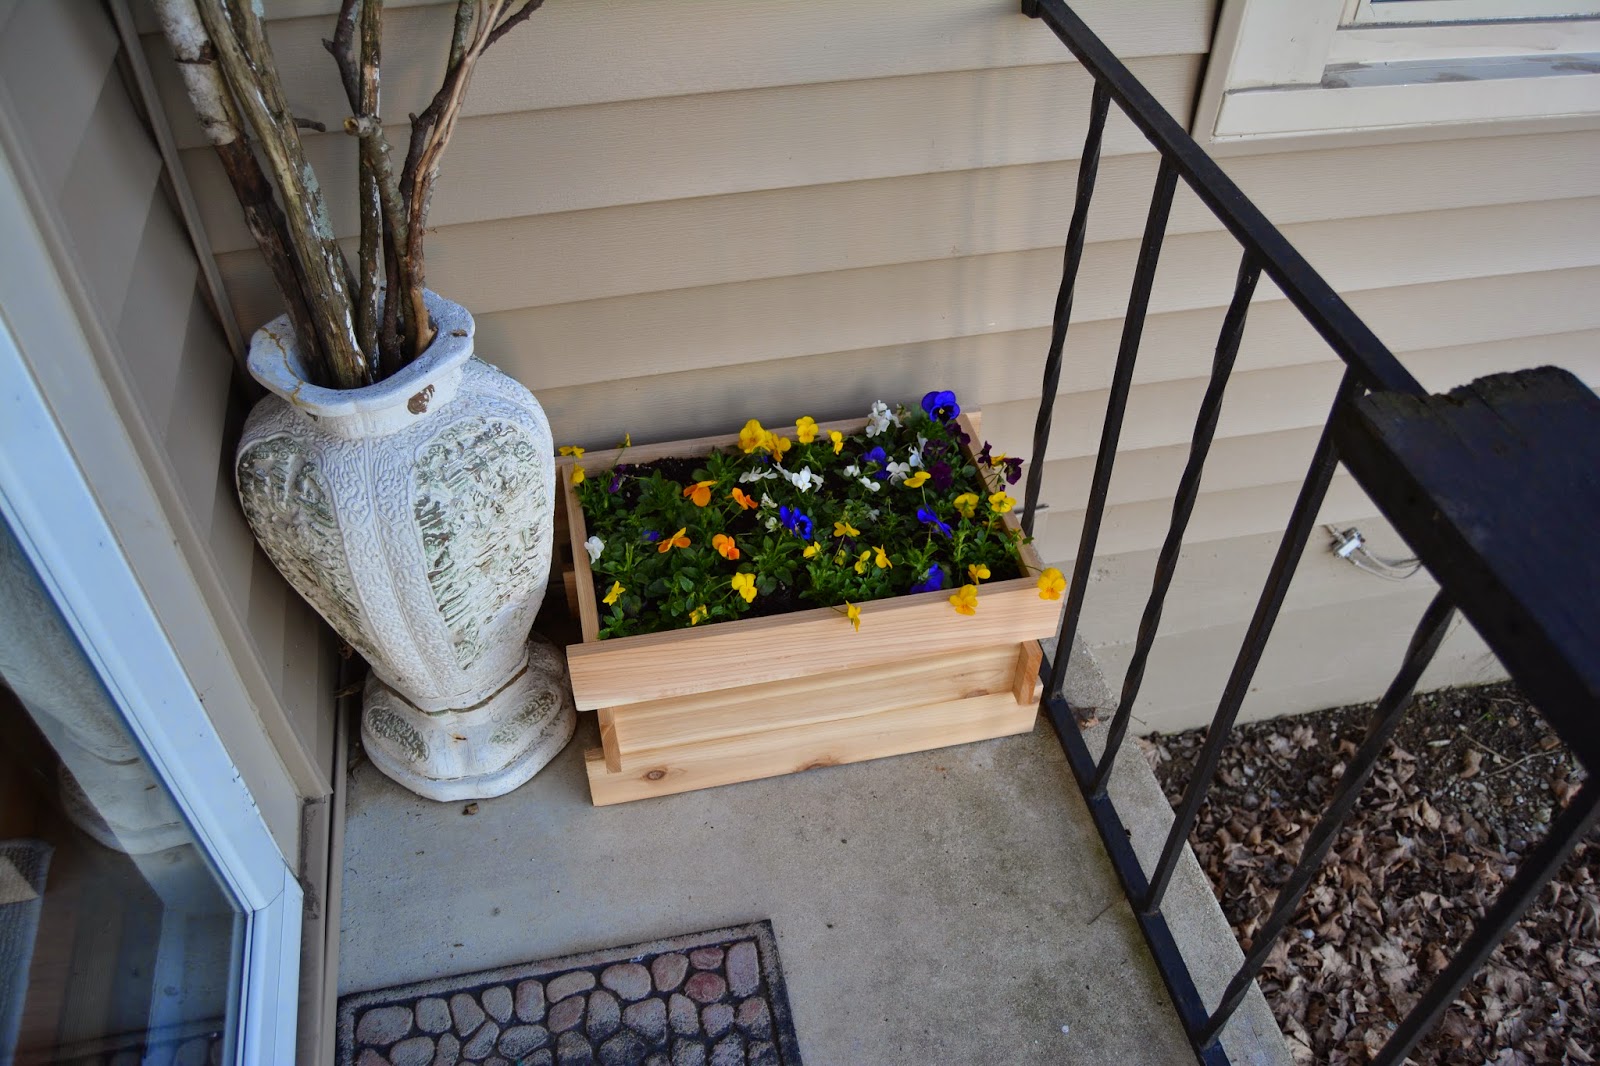
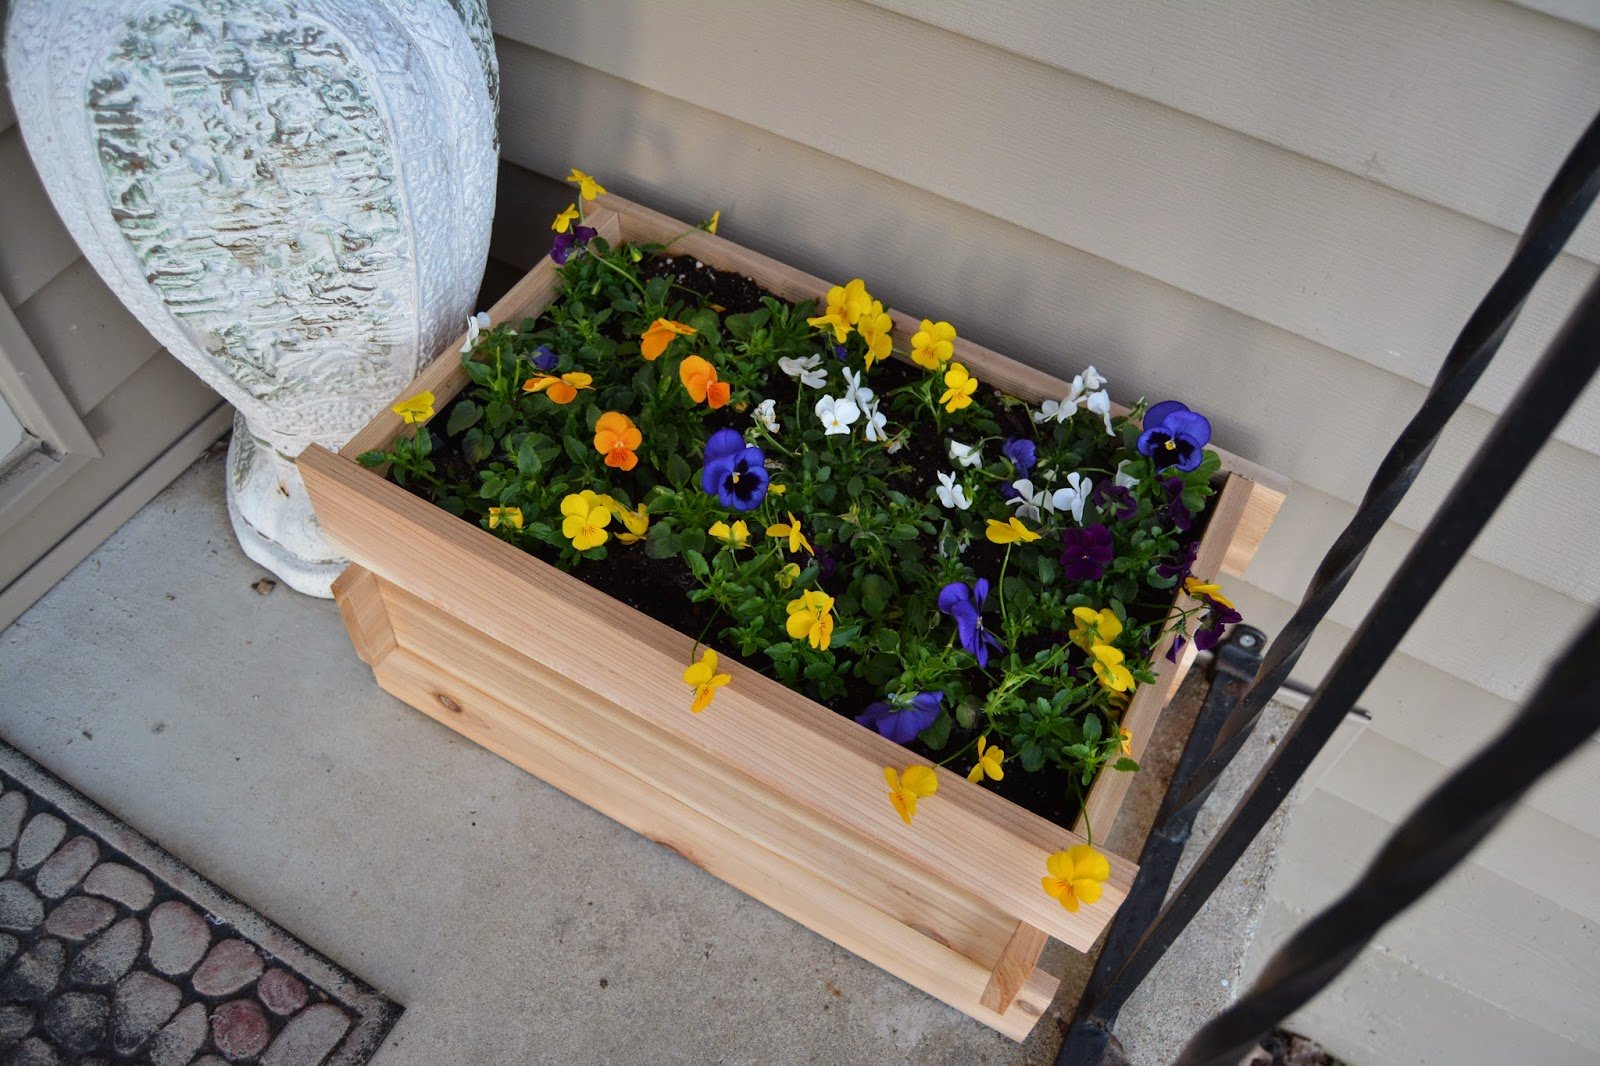
$10 Planter Box
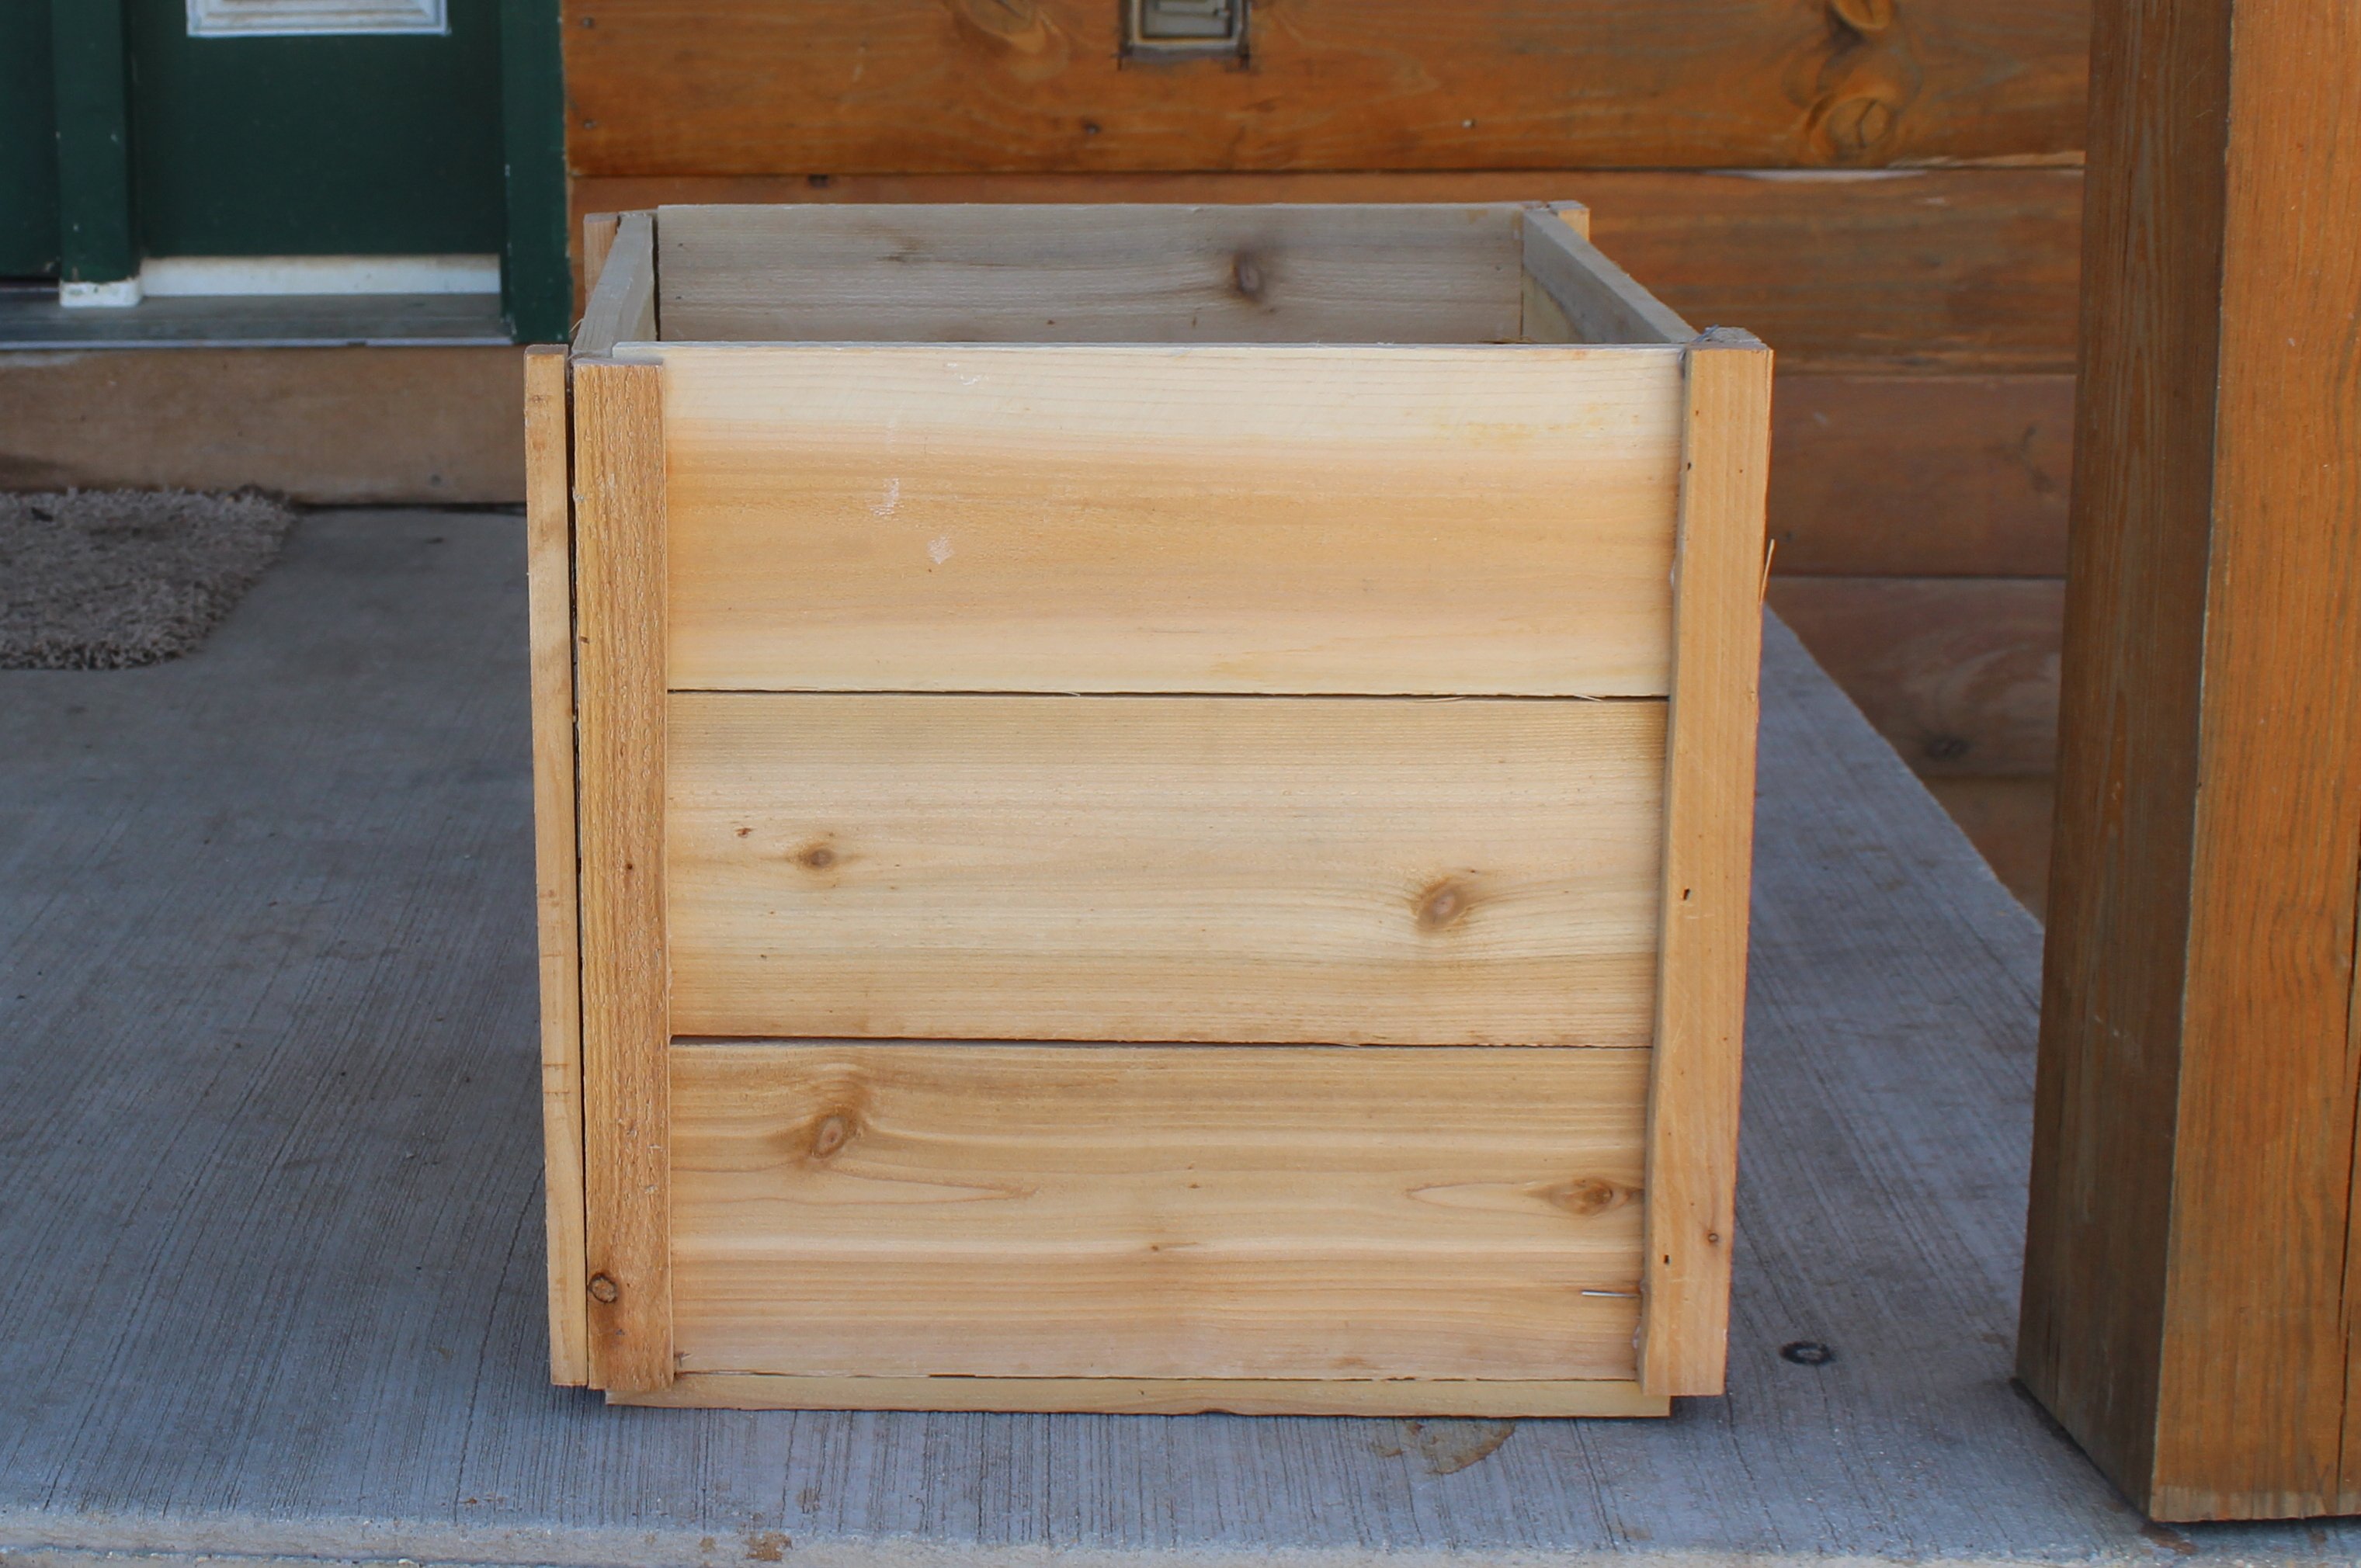
I had been looking for pretty wooden planters for the front porch and couldn't find anything affordable when I came across Ana's plans for a planter box. So I just made it a square and made it a bit taller.
I used finishing nails and glue to put the whole thing together. If you make the sides 17 1/4" then the bottom is wide enough for three pieces side by side. I added four pieces the same as the strips that were made to the bottom so that they stuck out into the center of the planter. Then I laid the bottom pieces on top of those. I left them loose so they could be replaced if needed after a few summers of water and dirt. You could also put a liner in. The width is just enough to give space for water to drain out.
Out of 5 pickets I could have made the side strips a bit longer and put a strip across the bottom. But I had a couple other projects in mind for the scraps so I didn't.
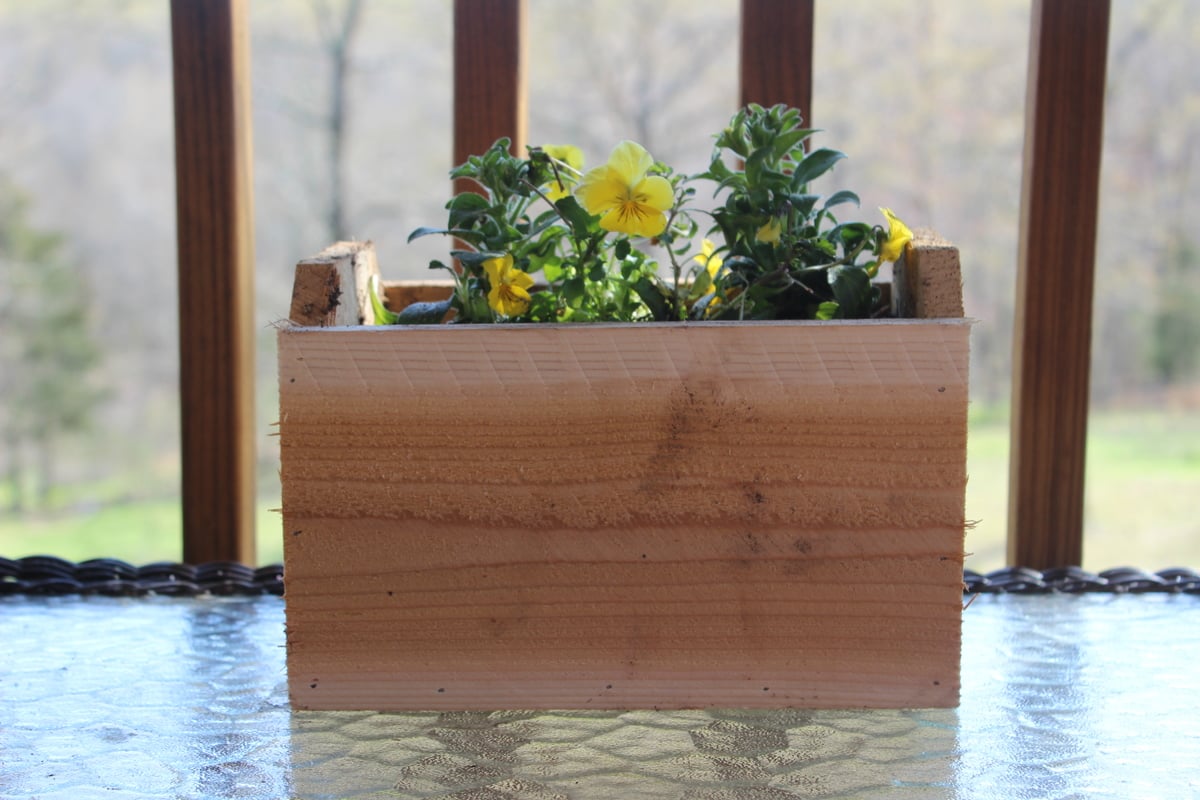
With the left over scraps I made the small flower box for a table on my deck. I glued and nailed that together too. So for less than the price of one planter box I made two and the small flower box. If I hadn't cut one piece wrong the first time I could have made a second small flower box.
Built from Plan(s)
Estimated Time Investment
An Hour or Two (0-2 Hours)
Finish Used
Left unfinished and I hope they will grey with age.
Recommended Skill Level
Starter Project
Cedar Planter Box
Here is a simple outdoor project built with the Kreg Jig and cedar from the home store!
Video Link: https://www.youtube.com/watch?v=FZjvj3mSeJ4
Estimated Cost
$35
Estimated Time Investment
An Hour or Two (0-2 Hours)
Recommended Skill Level
Beginner
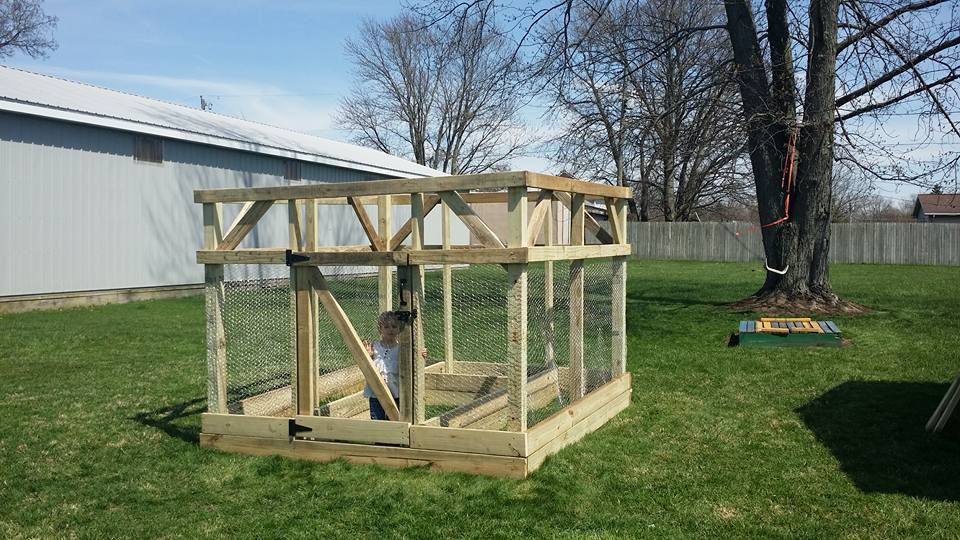
Evie's Garden
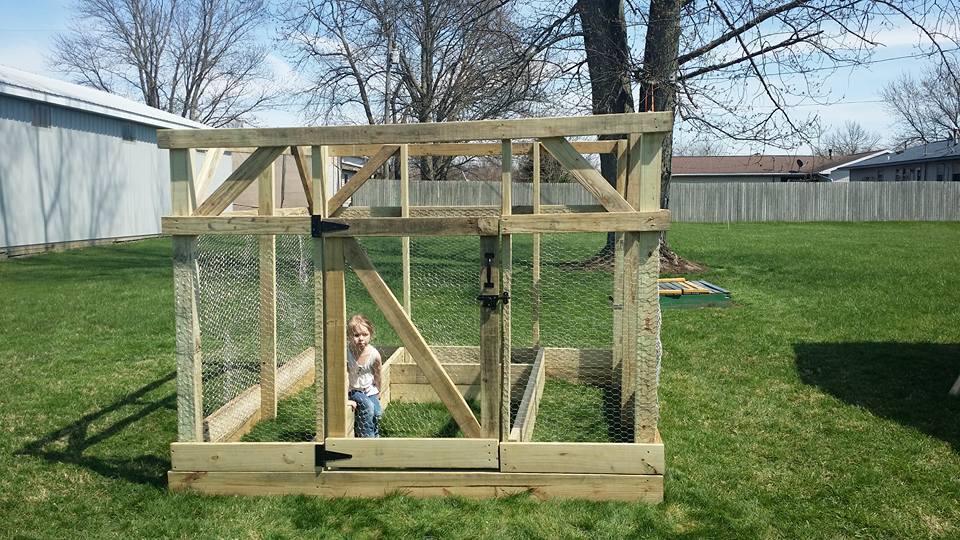
This was a great weekend project with help from my two nephews. My 4 year old daughter had been asking to grow a garden and has really enjoyed watering and watching everything grow!! She makes sure to check on everything daily!! Fun project!!

Built from Plan(s)
Estimated Time Investment
Weekend Project (10-20 Hours)
Finish Used
None
Recommended Skill Level
Beginner
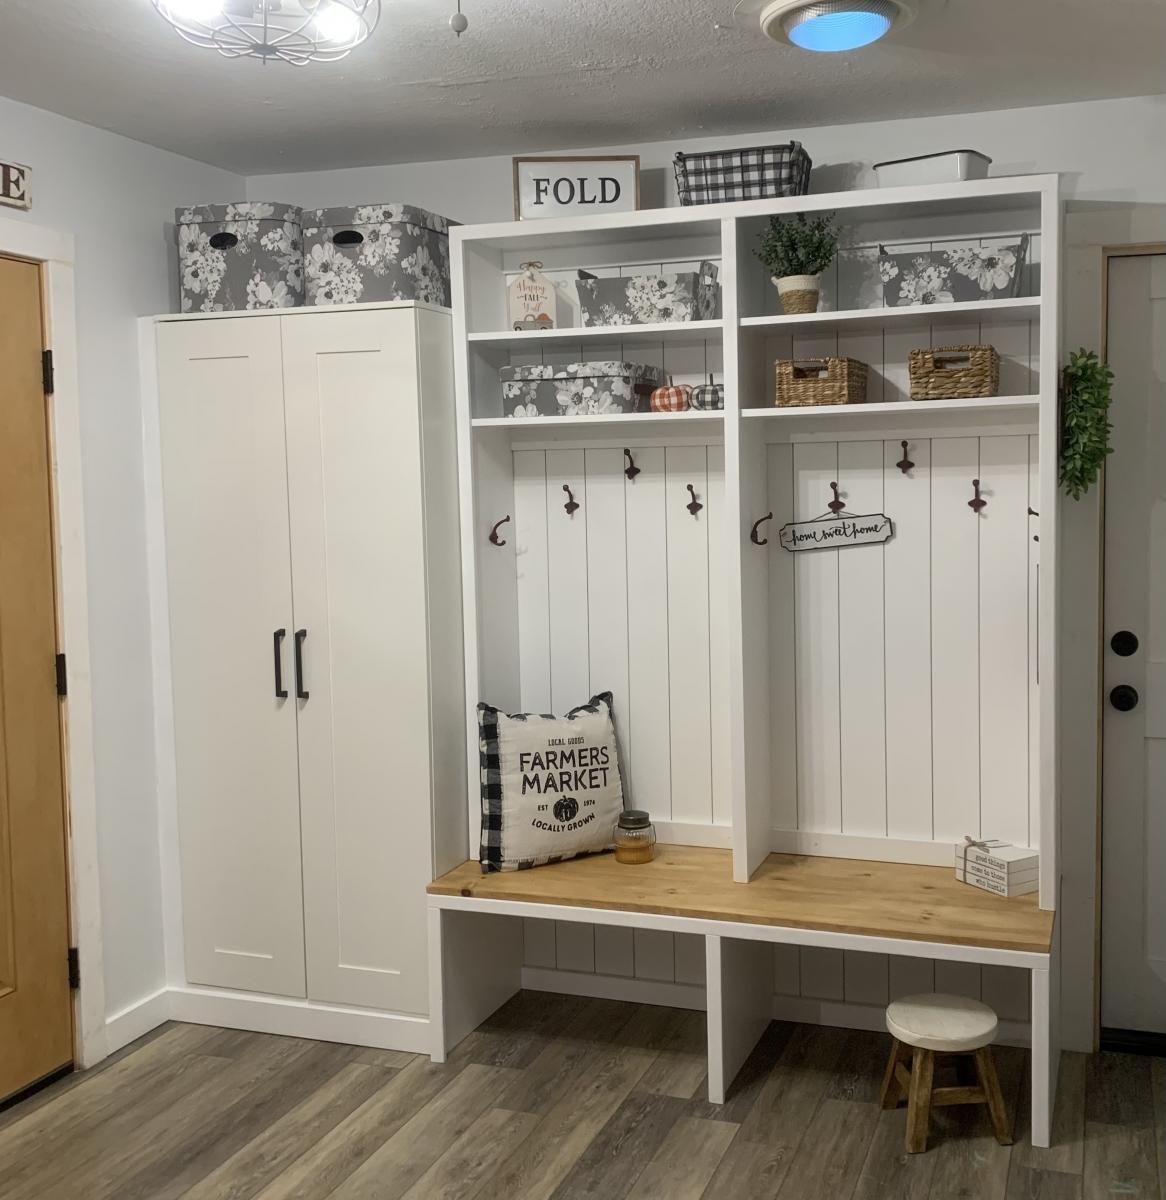
Mudroom Bench with Hutch
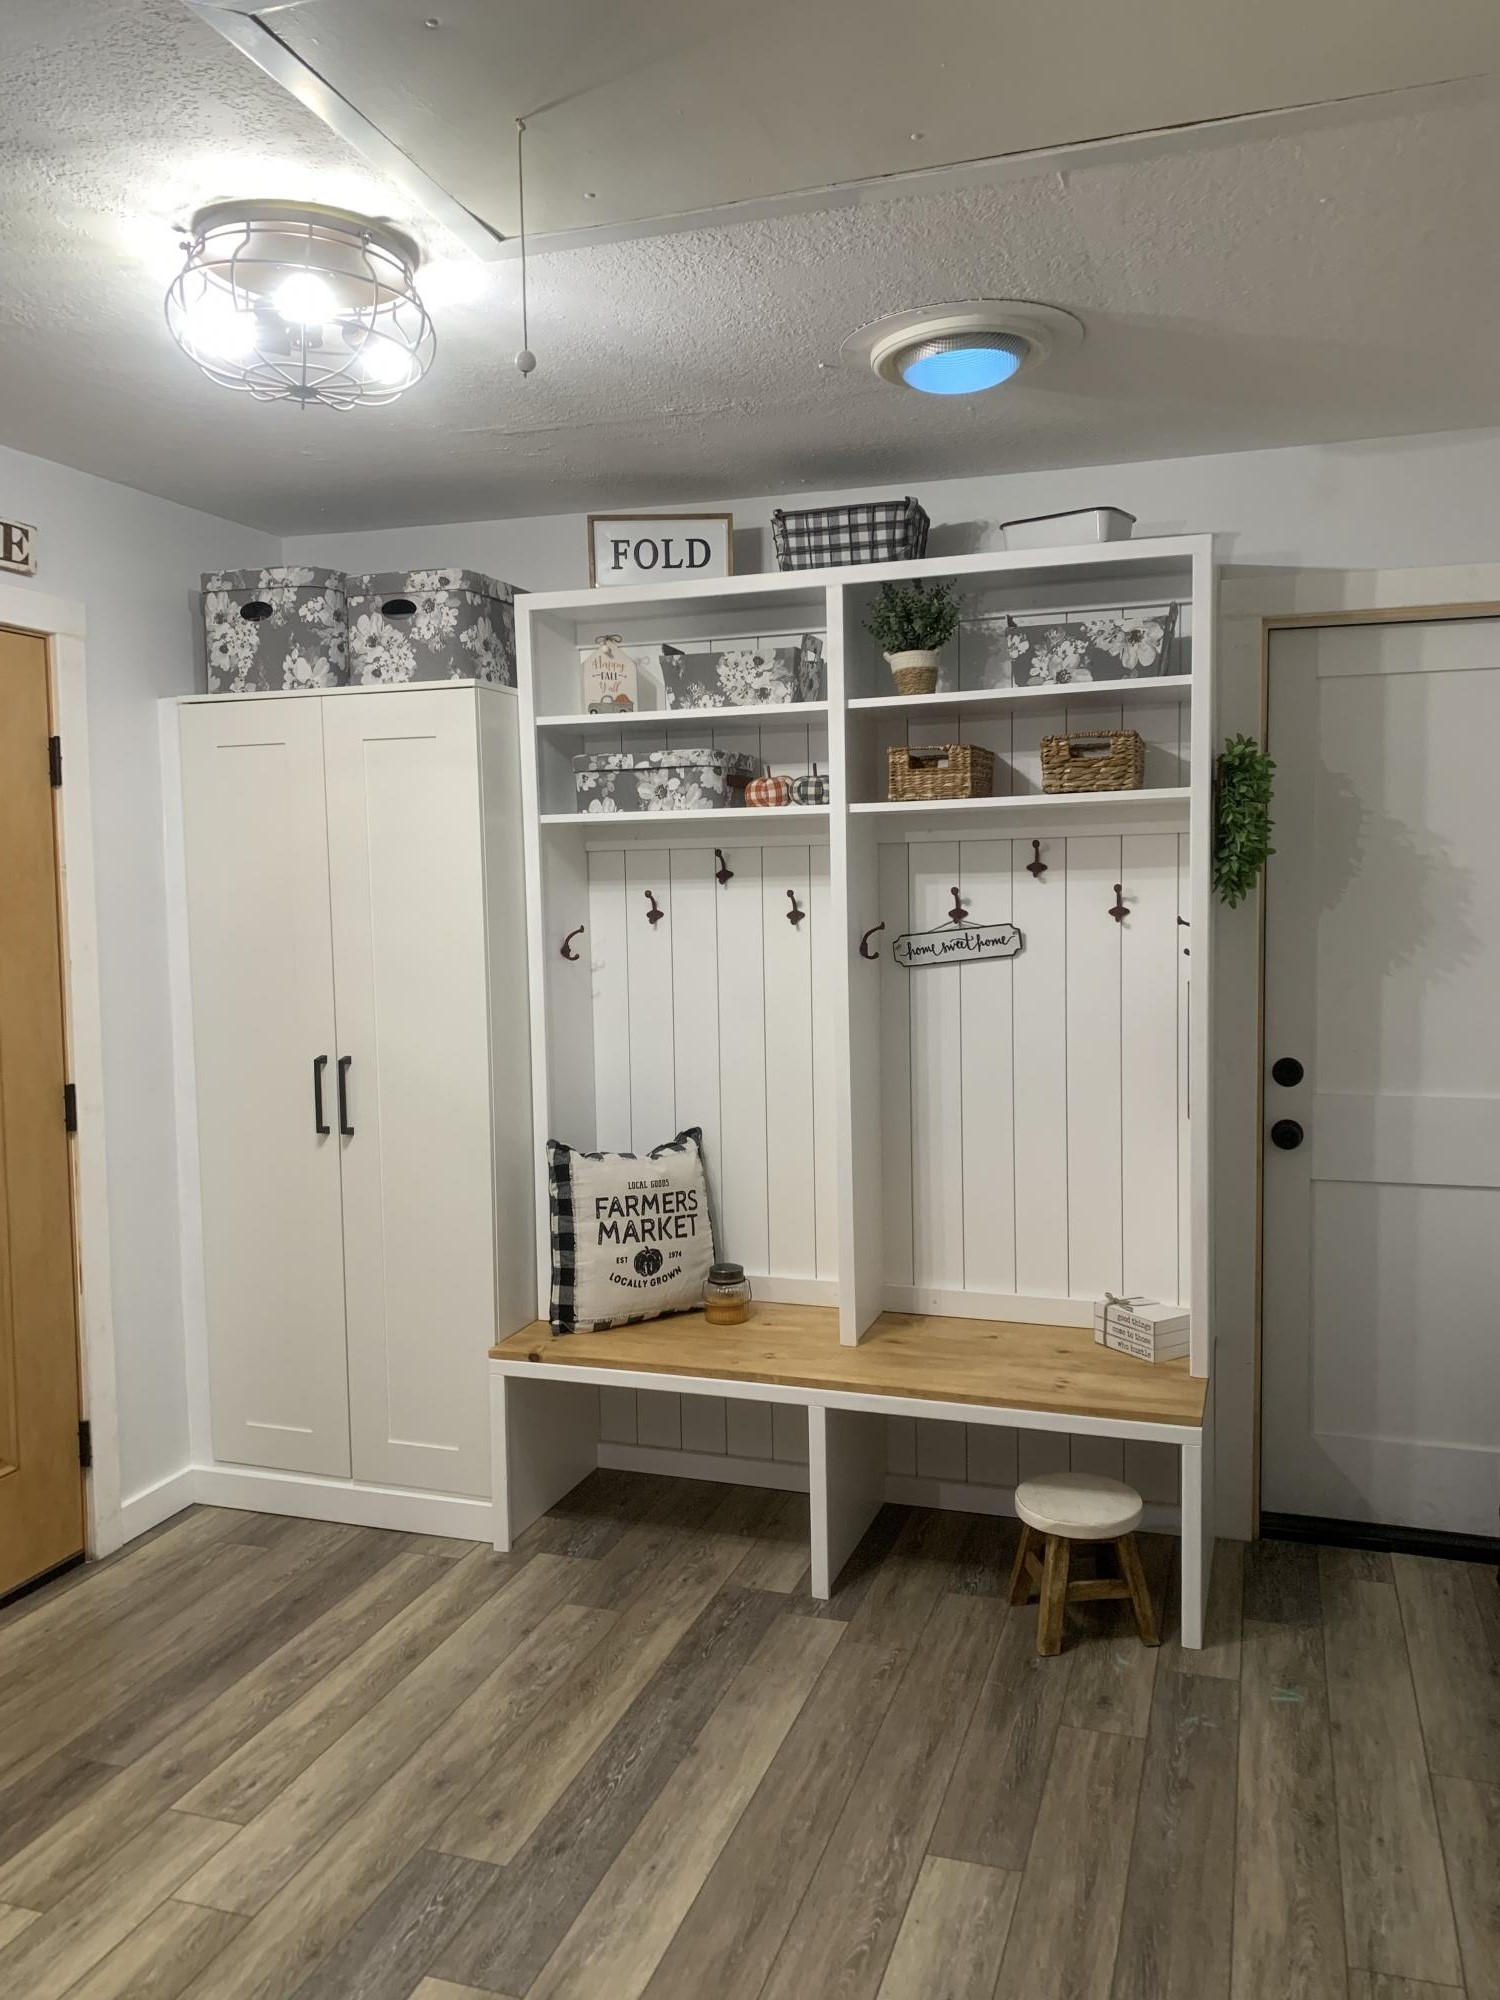
This is my laundry room and it is about 12x10. It looked so bare with only the washer and dryer. So I thought making this a mudroom also. I live in the mountains and have snow 3 to 4 months a year. This will be perfect. I purchased an IKEA cabinet built it in and added the Ana White plans with two bays.
Comments
Simple Bench
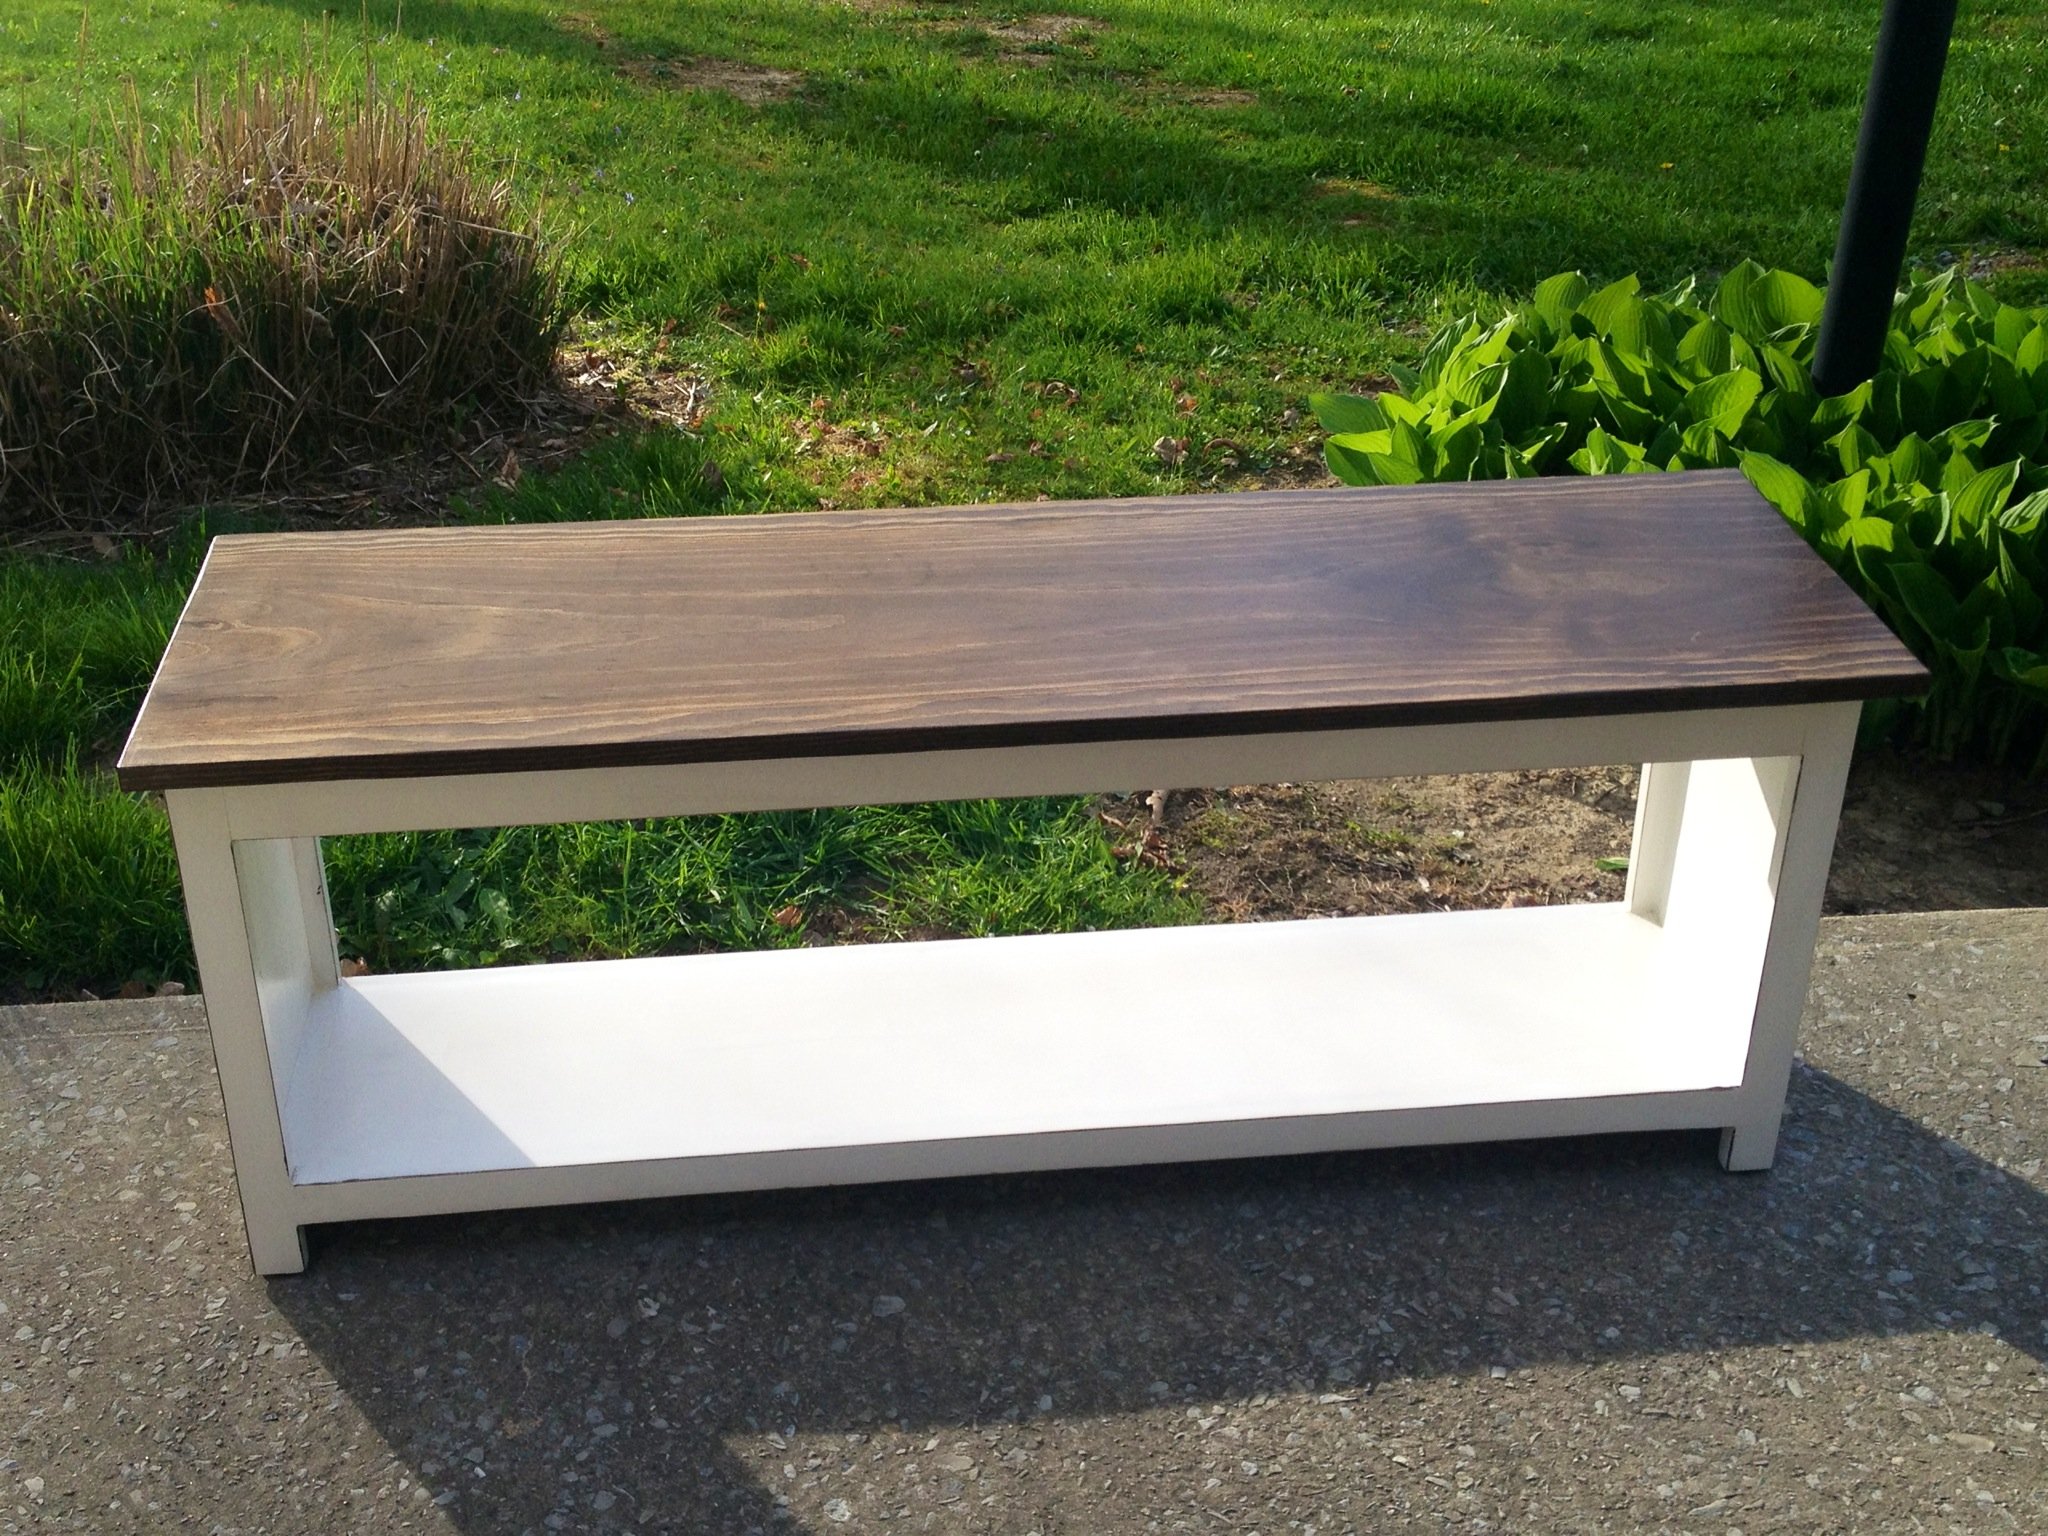
I modified these plans just a bit. I added 10 inches to make it 48 inches across. I also used a 1x3 on the top face frame instead of a 1x2. The plan calls for just a 1x12 on the top but I wanted it to be wider so I used my Kreg Jig to add two 1x2's to make the top 15 inches deep. I planned on staining the whole thing but made a few errors and had to paint the bottom as it is more forgiving. I loved how Brooke used the coffee staining technique but didn't like the way it was turning out so I just went with distressing the edges and staining the top like she did on her coffee table with the stain I had on hand. It took only a few hours to make the bench and about 3 days to finish it as I worked in the evenings after work.
Built from Plan(s)
Estimated Cost
$50-$60
Estimated Time Investment
Day Project (6-9 Hours)
Finish Used
Minwax dark walnut on top. Paint Olympic No-VOC Ultimate Interior Paint in Semi Gloss in white. Sanded edges with 80 grit sandpaper and put stain on then wiped off. I used waterbased polycrylic on whole bench and 3 coats on top.
Recommended Skill Level
Beginner
Comments
Sun, 08/11/2013 - 18:53
Solid, simple, elegant!
I love how the white paint and dark wood look. I like the extra width, and the light distressing looks great.
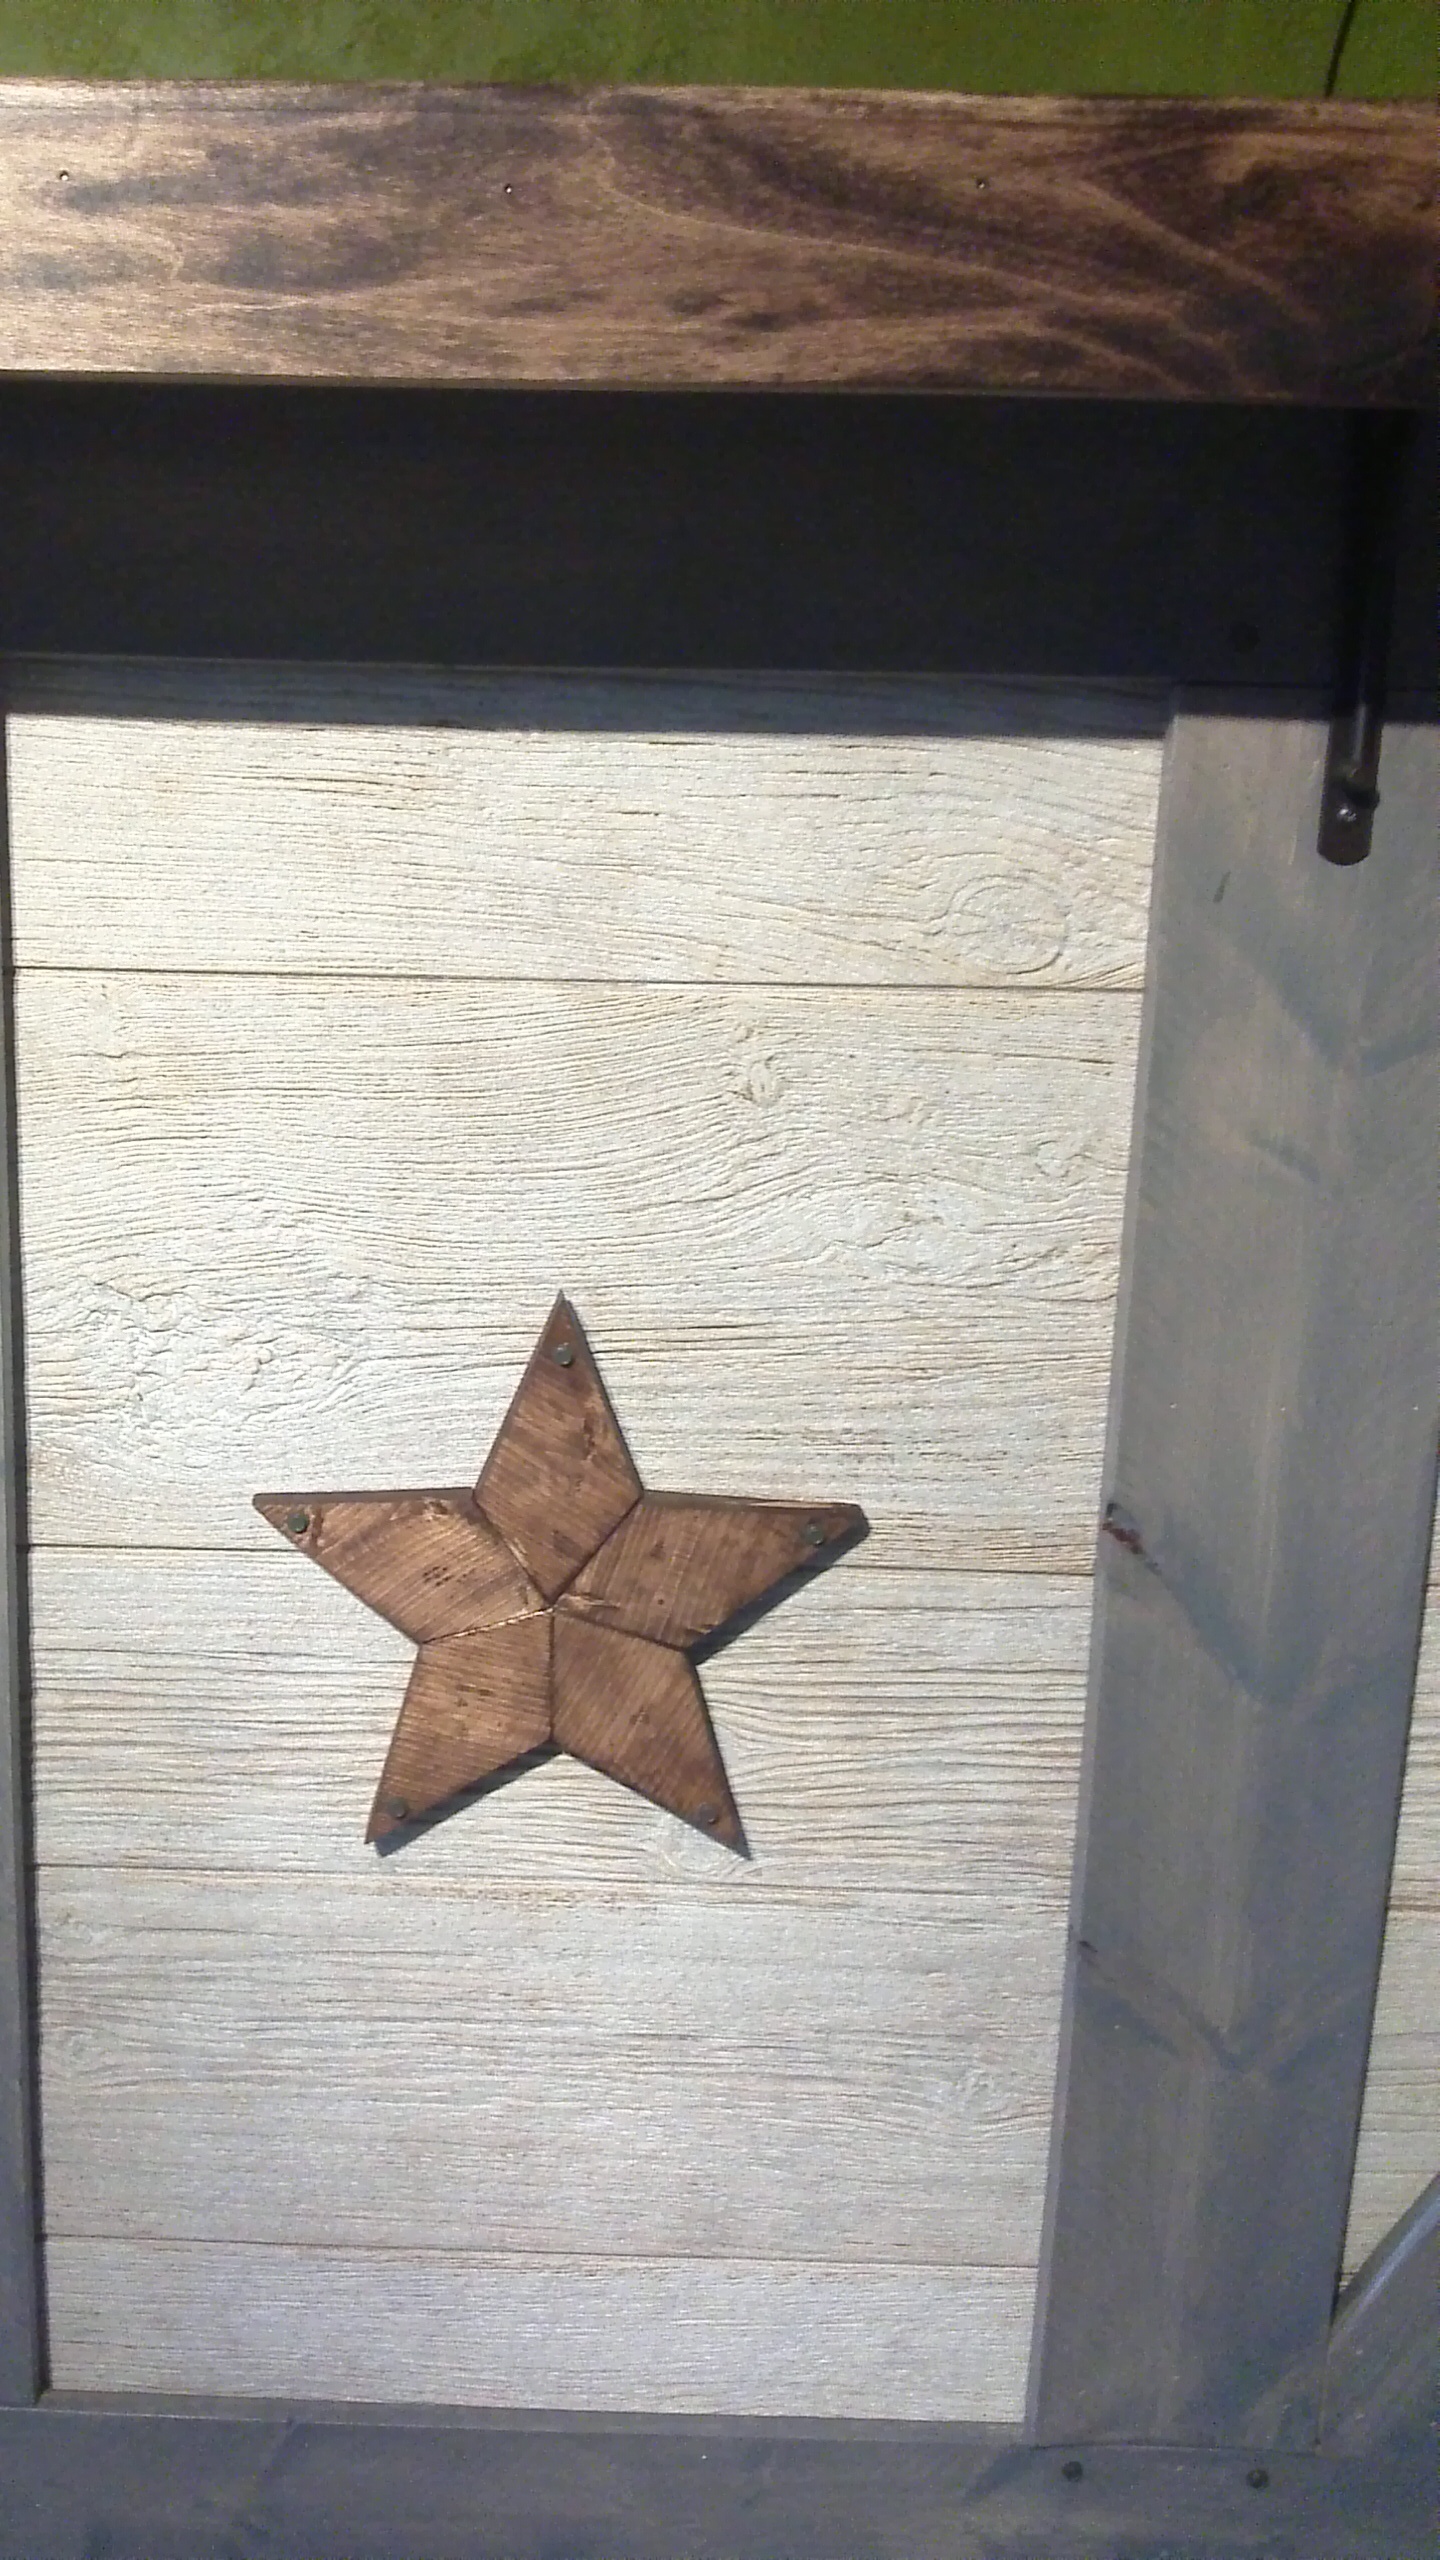
A star for the bar!
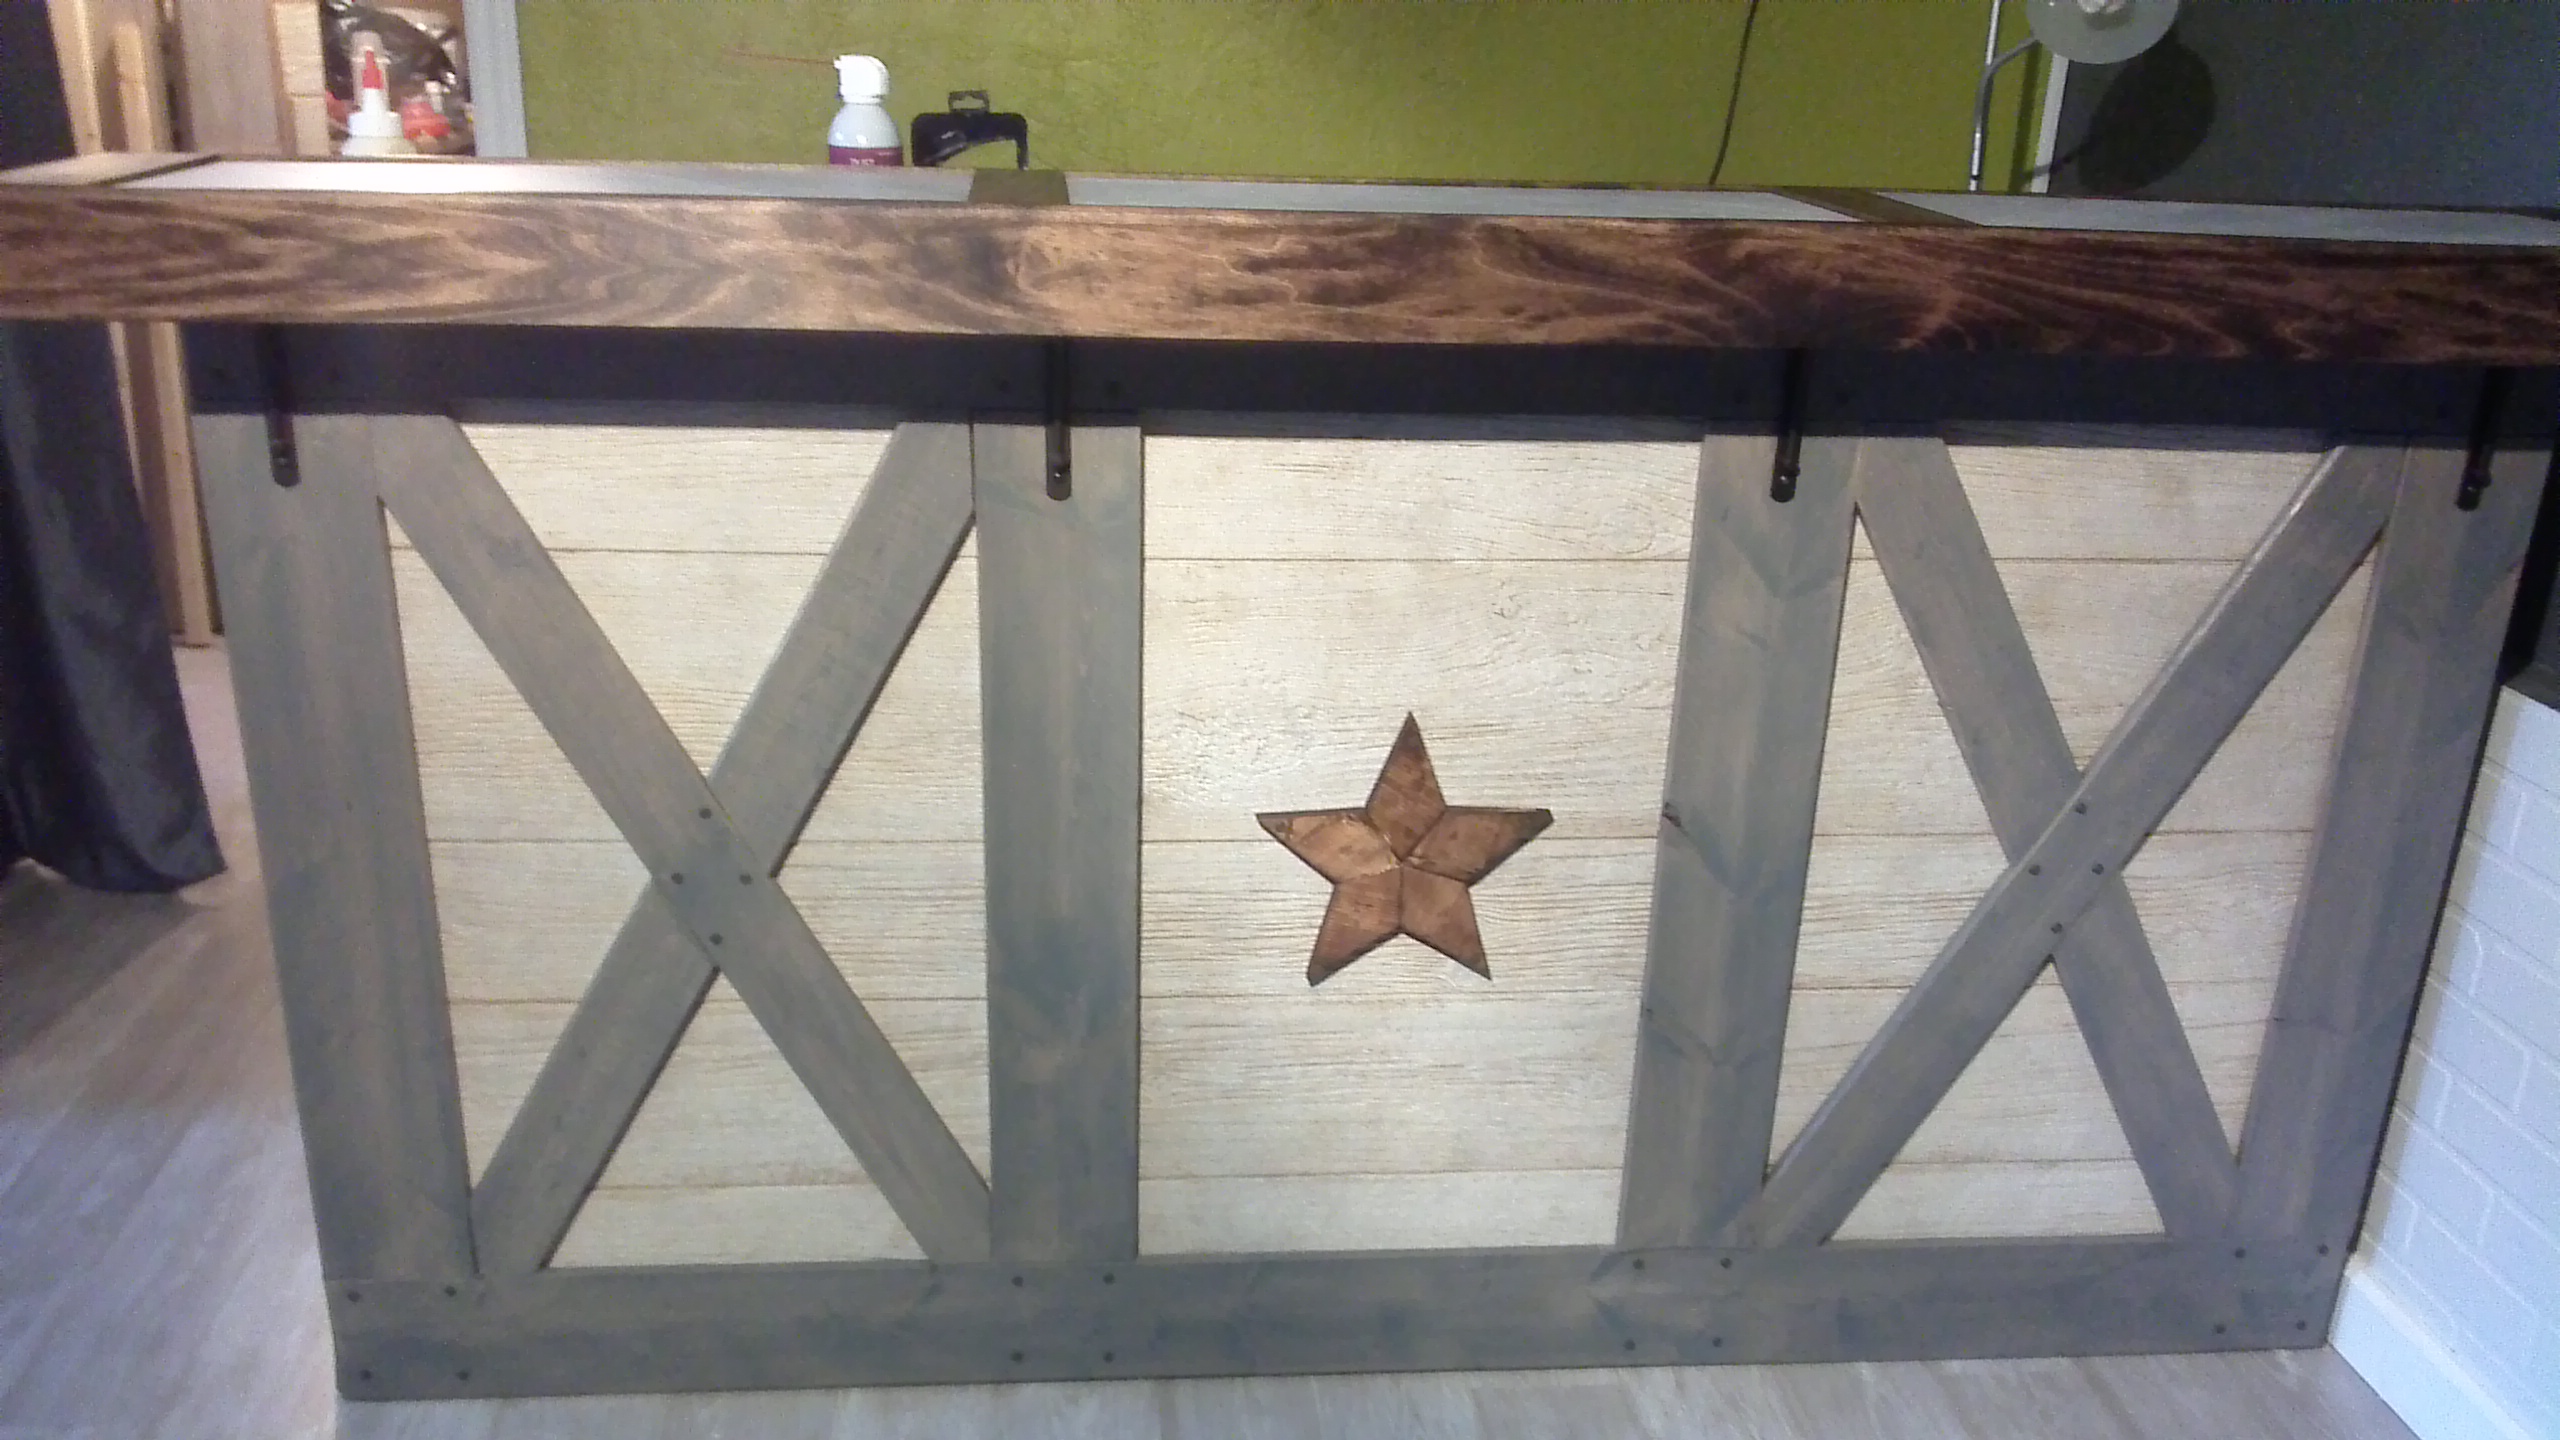
This plan worked great to add a finishing touch to the front of our rustic barn themed bar project. Love it!
Built from Plan(s)
Estimated Cost
$5
Estimated Time Investment
An Hour or Two (0-2 Hours)
Finish Used
MinWax stain in Provincial
Recommended Skill Level
Beginner
Comments
Kitchen Island Trolley
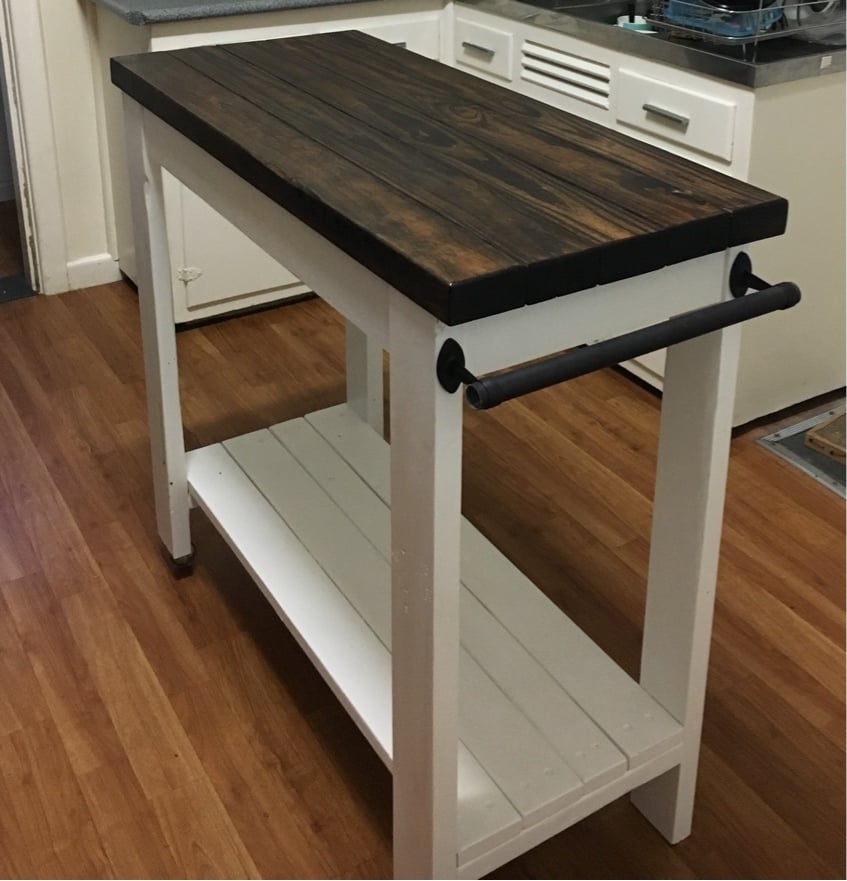
Base was made from recycled timber and the top was made with new pine.
The rails were made from curtain rails.
One end has wheels for easy moving.
Built from Plan(s)
Estimated Cost
$20
Estimated Time Investment
Day Project (6-9 Hours)
Finish Used
Enamel Paint and Brown Japan Stain
Recommended Skill Level
Intermediate
Comments

In reply to Amazing! I love the two tone by Ana White
Thu, 09/07/2017 - 05:50
Thank you :)
Thank you :)
Sun, 08/11/2019 - 22:41
Cost
Hi,
All of the base was made from free pallet Wood and the timber top was one line length of new timber which cost about $8 and the wheels I had in the shed and the curtain rail was a couple of dollars from Bunnings. The paint and stain I already had.
I hope this helps. 😀
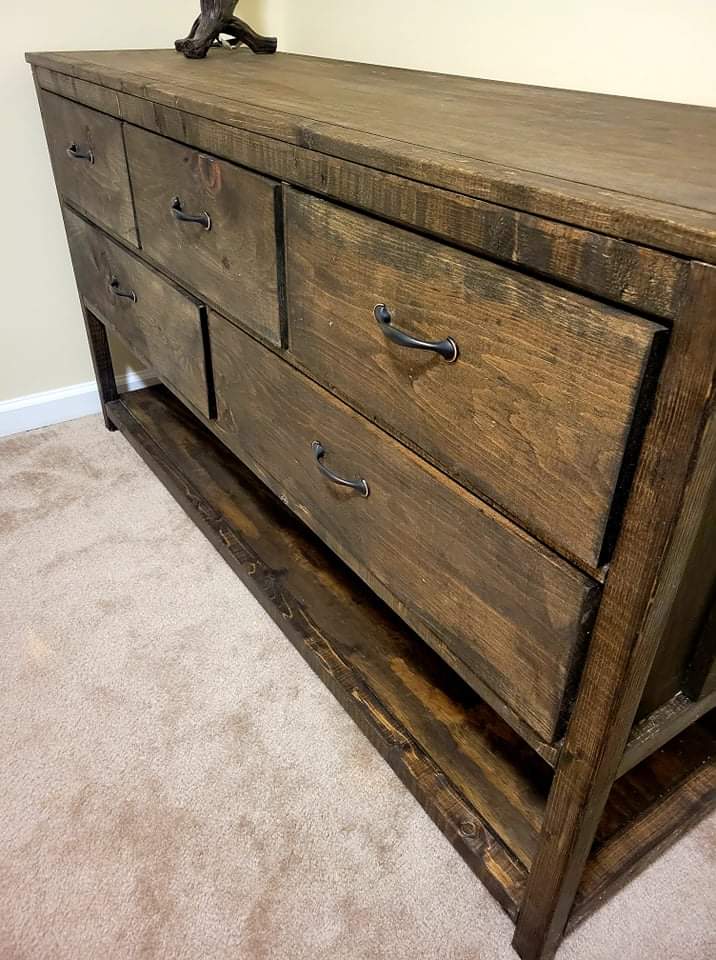
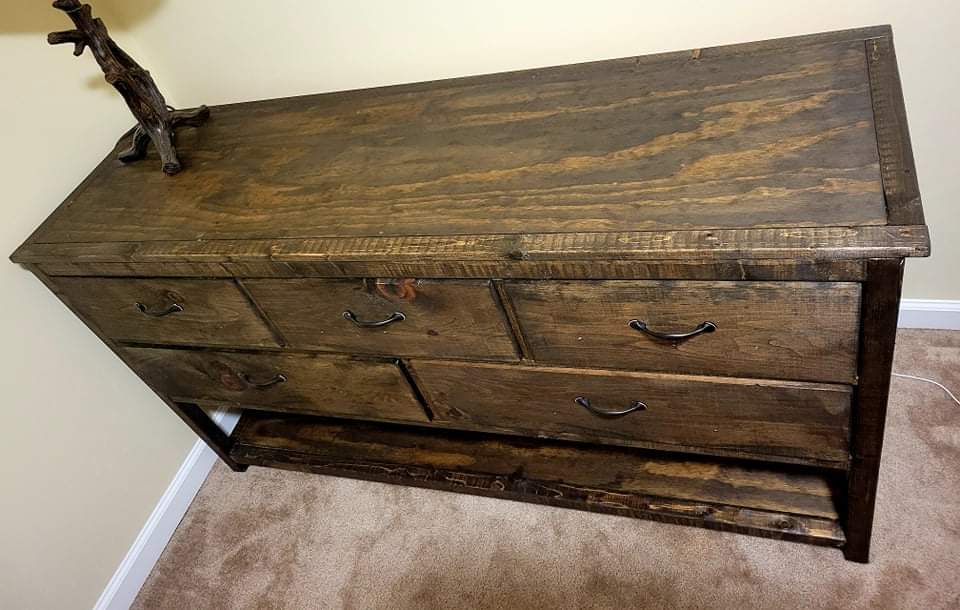
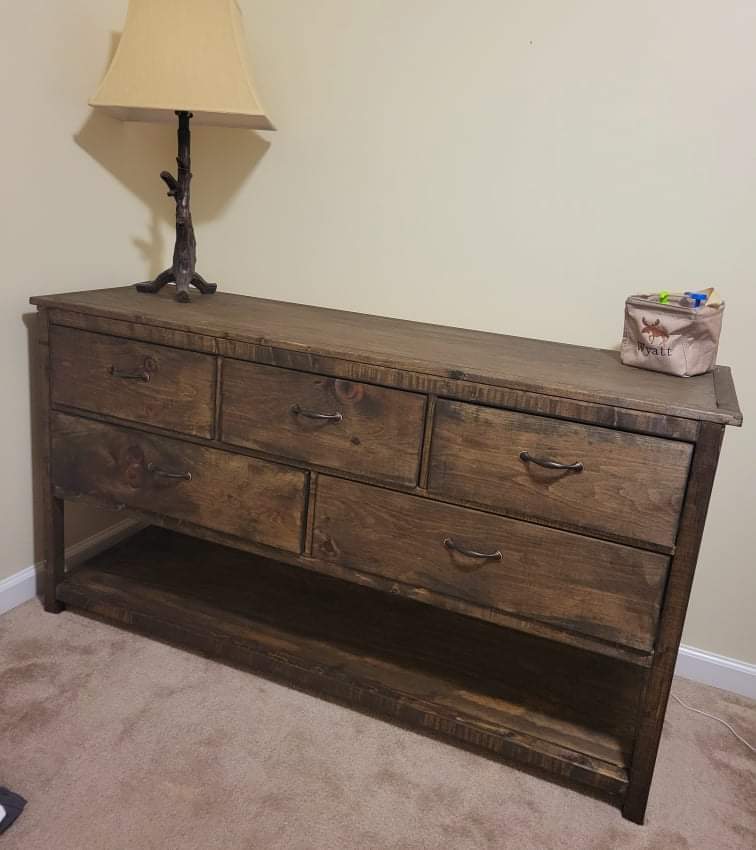
Kids dresser
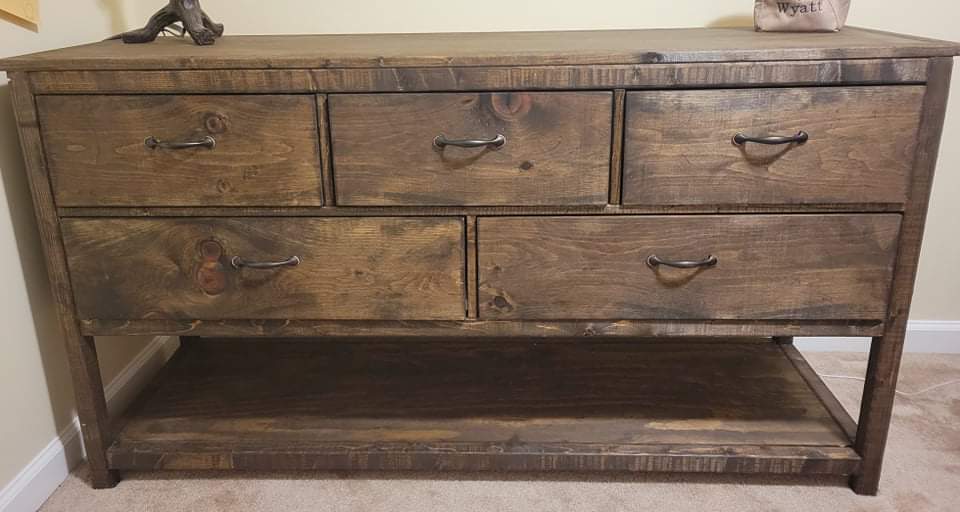
We found ourselves in need of upgrading our 4 year-olds dresser situation. This dresser answered the call and then some. We really like that it's short enough that he can access the top, and wide enough that the risk of it tipping over is fairly non-existent.
Jacobean finish to match his bed.
Built from Plan(s)
Comments
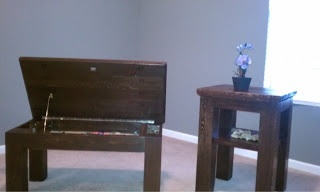
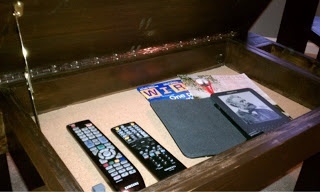
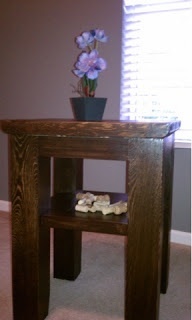
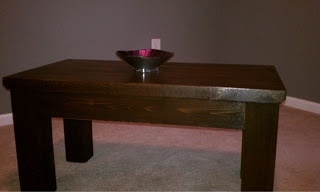
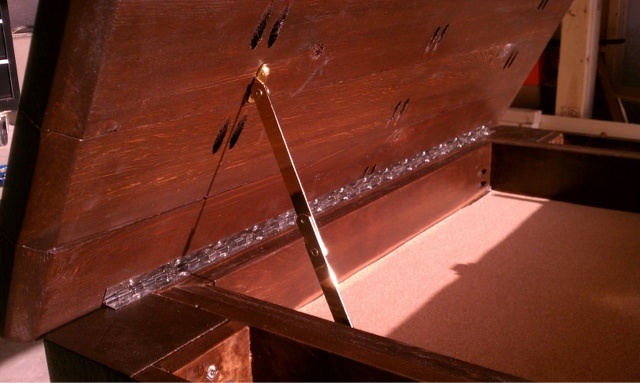
Modified tryde table with hidden storage
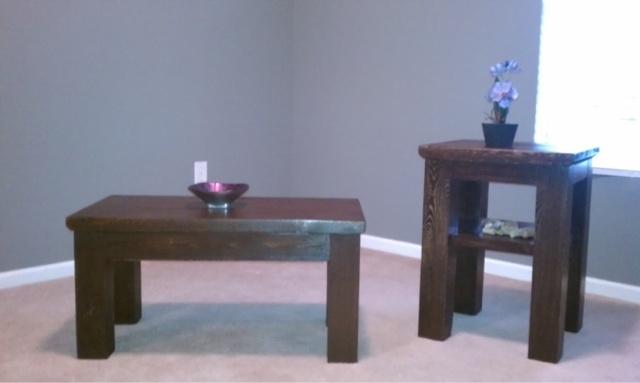
This table was built from my existing plan of a modified tryde coffee table. This was built with hidden flip-top storage and a matching side table. I hope you like it
Built from Plan(s)
Estimated Time Investment
Weekend Project (10-20 Hours)
Finish Used
Rustoleum dark walnut stain
Recommended Skill Level
Intermediate
Comments


Mon, 05/06/2013 - 06:44
Thank you. It was a bit
Thank you. It was a bit challenging but overall it came out ok
Changing Table

My Grandson will be born any day now so I want to create a cozy environment for him. We still haven't put the bed up or added any of the decorations, but at least the changing table is finished  . Painted walls, added new flooring, still have to customize the closet, but with Ana's help that will be a snap. I would have never gotten the courage to do some of the builds I've done without Ana's site. Thank You Ana!!!
Built from Plan(s)
Estimated Cost
Cost about $100
Estimated Time Investment
Weekend Project (10-20 Hours)
Finish Used
I used Minwax Sedona Red with a little Minwax Ebony in the mix to darken a little. Finish is Minwax Satin Poly.
Recommended Skill Level
Intermediate
Studio 82 Build: Computer Table

Farm style computer table. Simplistic so the design does not naturally attract your attention, but once you notice it, you notice the beautiful details.
Of note, make sure you sand ALL corners before calling the project complete. Otherwise you'll be banging your knees and bleeding all the time.


Estimated Cost
~$300
Estimated Time Investment
Day Project (6-9 Hours)
Finish Used
Epoxy finish for top. Rubbed varnish for the body.
Recommended Skill Level
Beginner