Community Brag Posts

Modern tree house

Submitted by Anonymous (not verified) on Sun, 06/14/2020 - 11:24

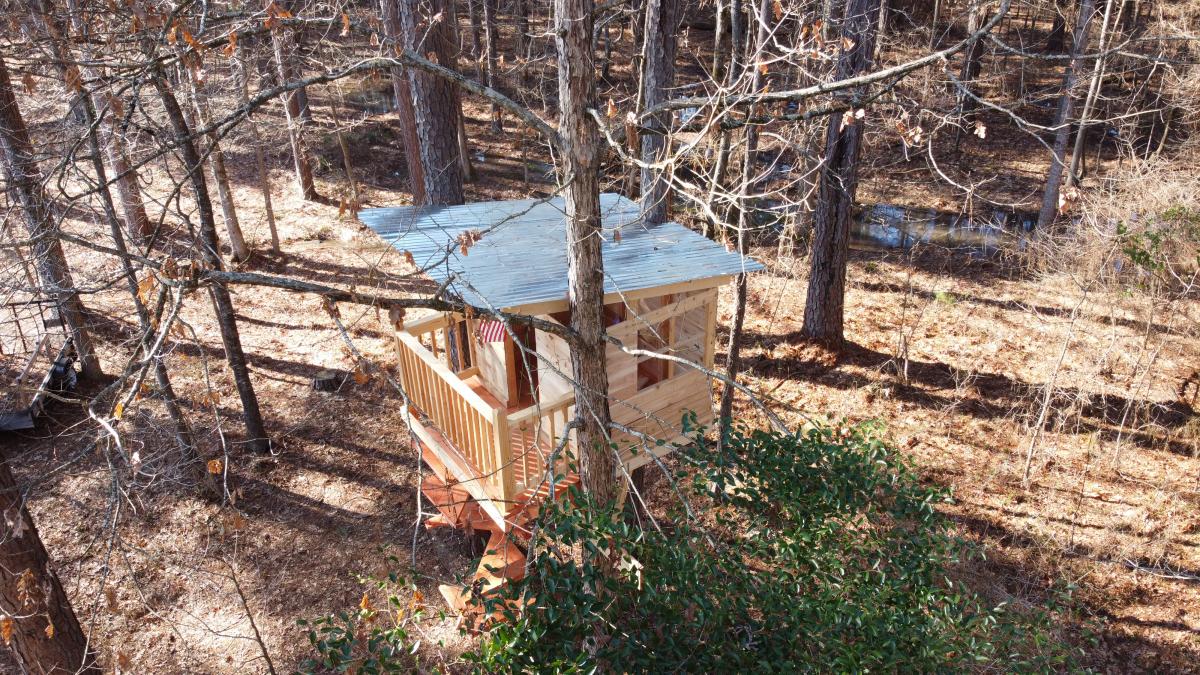
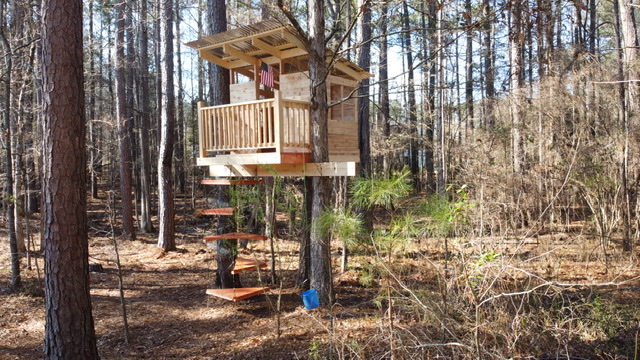
I modified the modern tree house plan and added some safety features for young kids. I did a spiral up ladder enclosed with a mesh net so they can’t fall very far. I also added more siding and put cross bracing in window wells to limit opening size. Finally, a full porch style railing and the main support beams are pinned at one end and have a self designed treehouse sliding bracket to allow for tree movement in the wind.

Estimated Cost
$1500
Estimated Time Investment
Week Long Project (20 Hours or More)
Recommended Skill Level
Intermediate

Comments

kmccrac2

Sat, 10/30/2021 - 07:09

Hi! I know this post was forever ago, but this is exactly how I want the treehouse to be for the my kids! I am trying to see if there was anyway you could show me how you did the modifications! I’d be forever grateful!

Storage Dining Bench

Submitted by Anonymous (not verified) on Fri, 03/22/2024 - 07:34

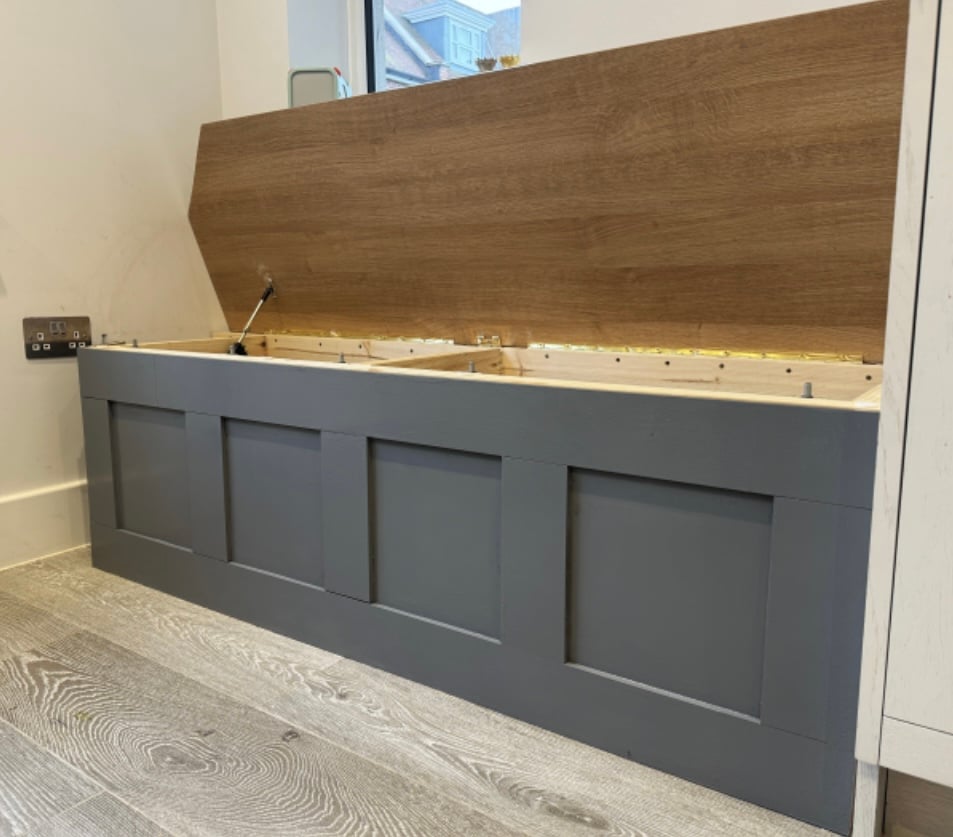
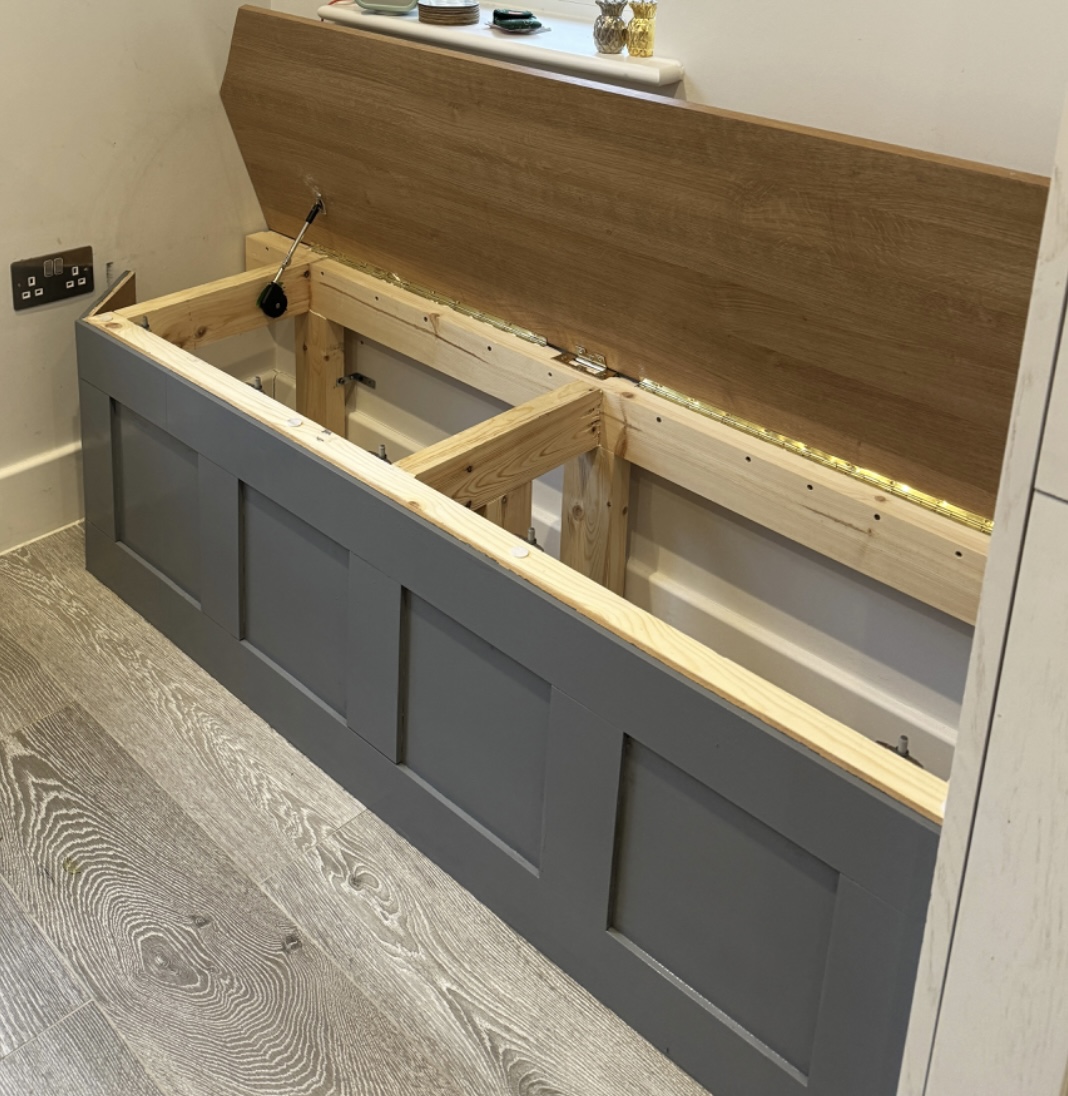
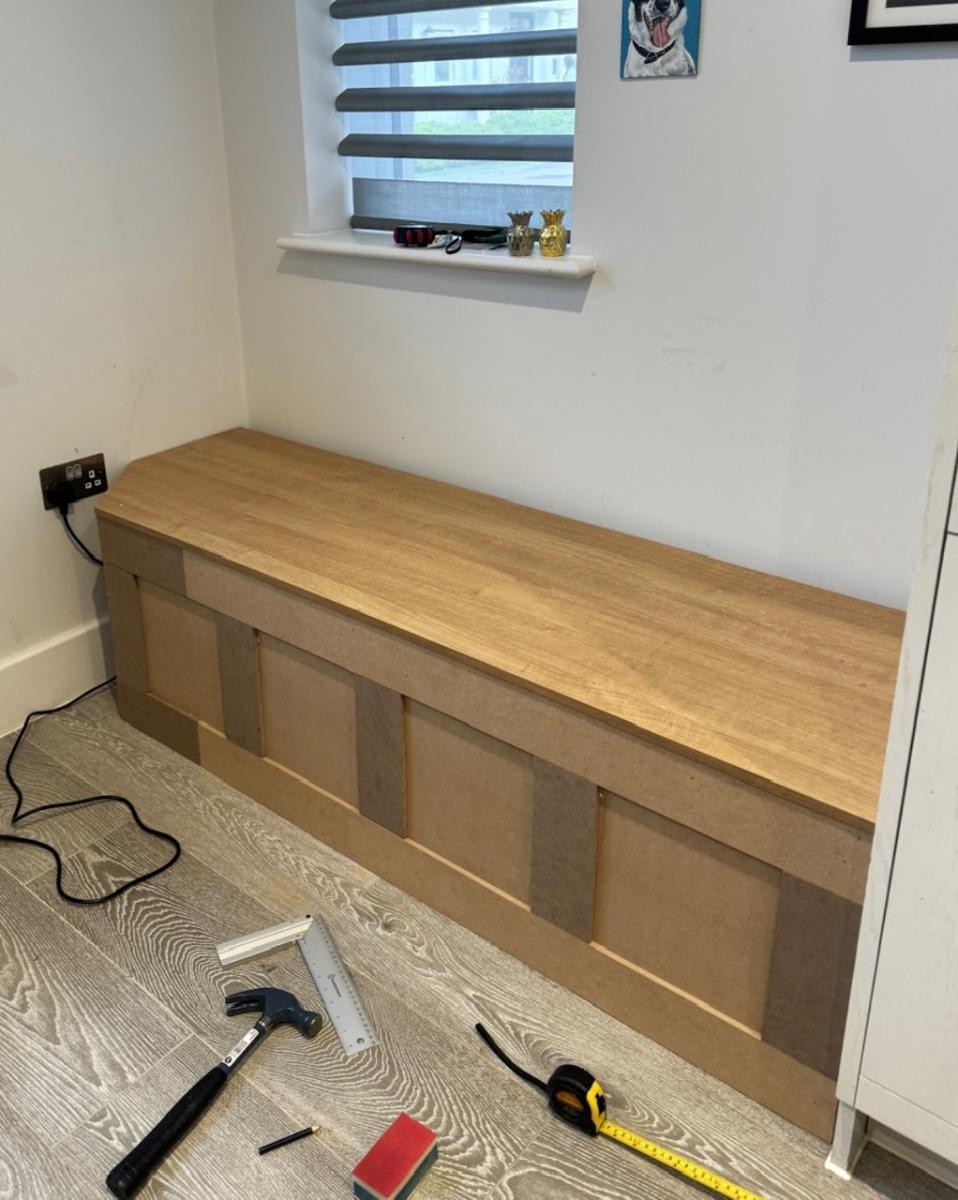
Kitchen dining bench with storage. Due to the plugs being in an awkward position, I opted to build this bench with a facade as opposed to adding a back and sides. This also meant it had to be panelled in situ which was a fun challenge! It has piano hinges as well as soft close pistons making for a great storage bench that is in keeping with the rest of our kitchen.

Barn Style Greenhouse

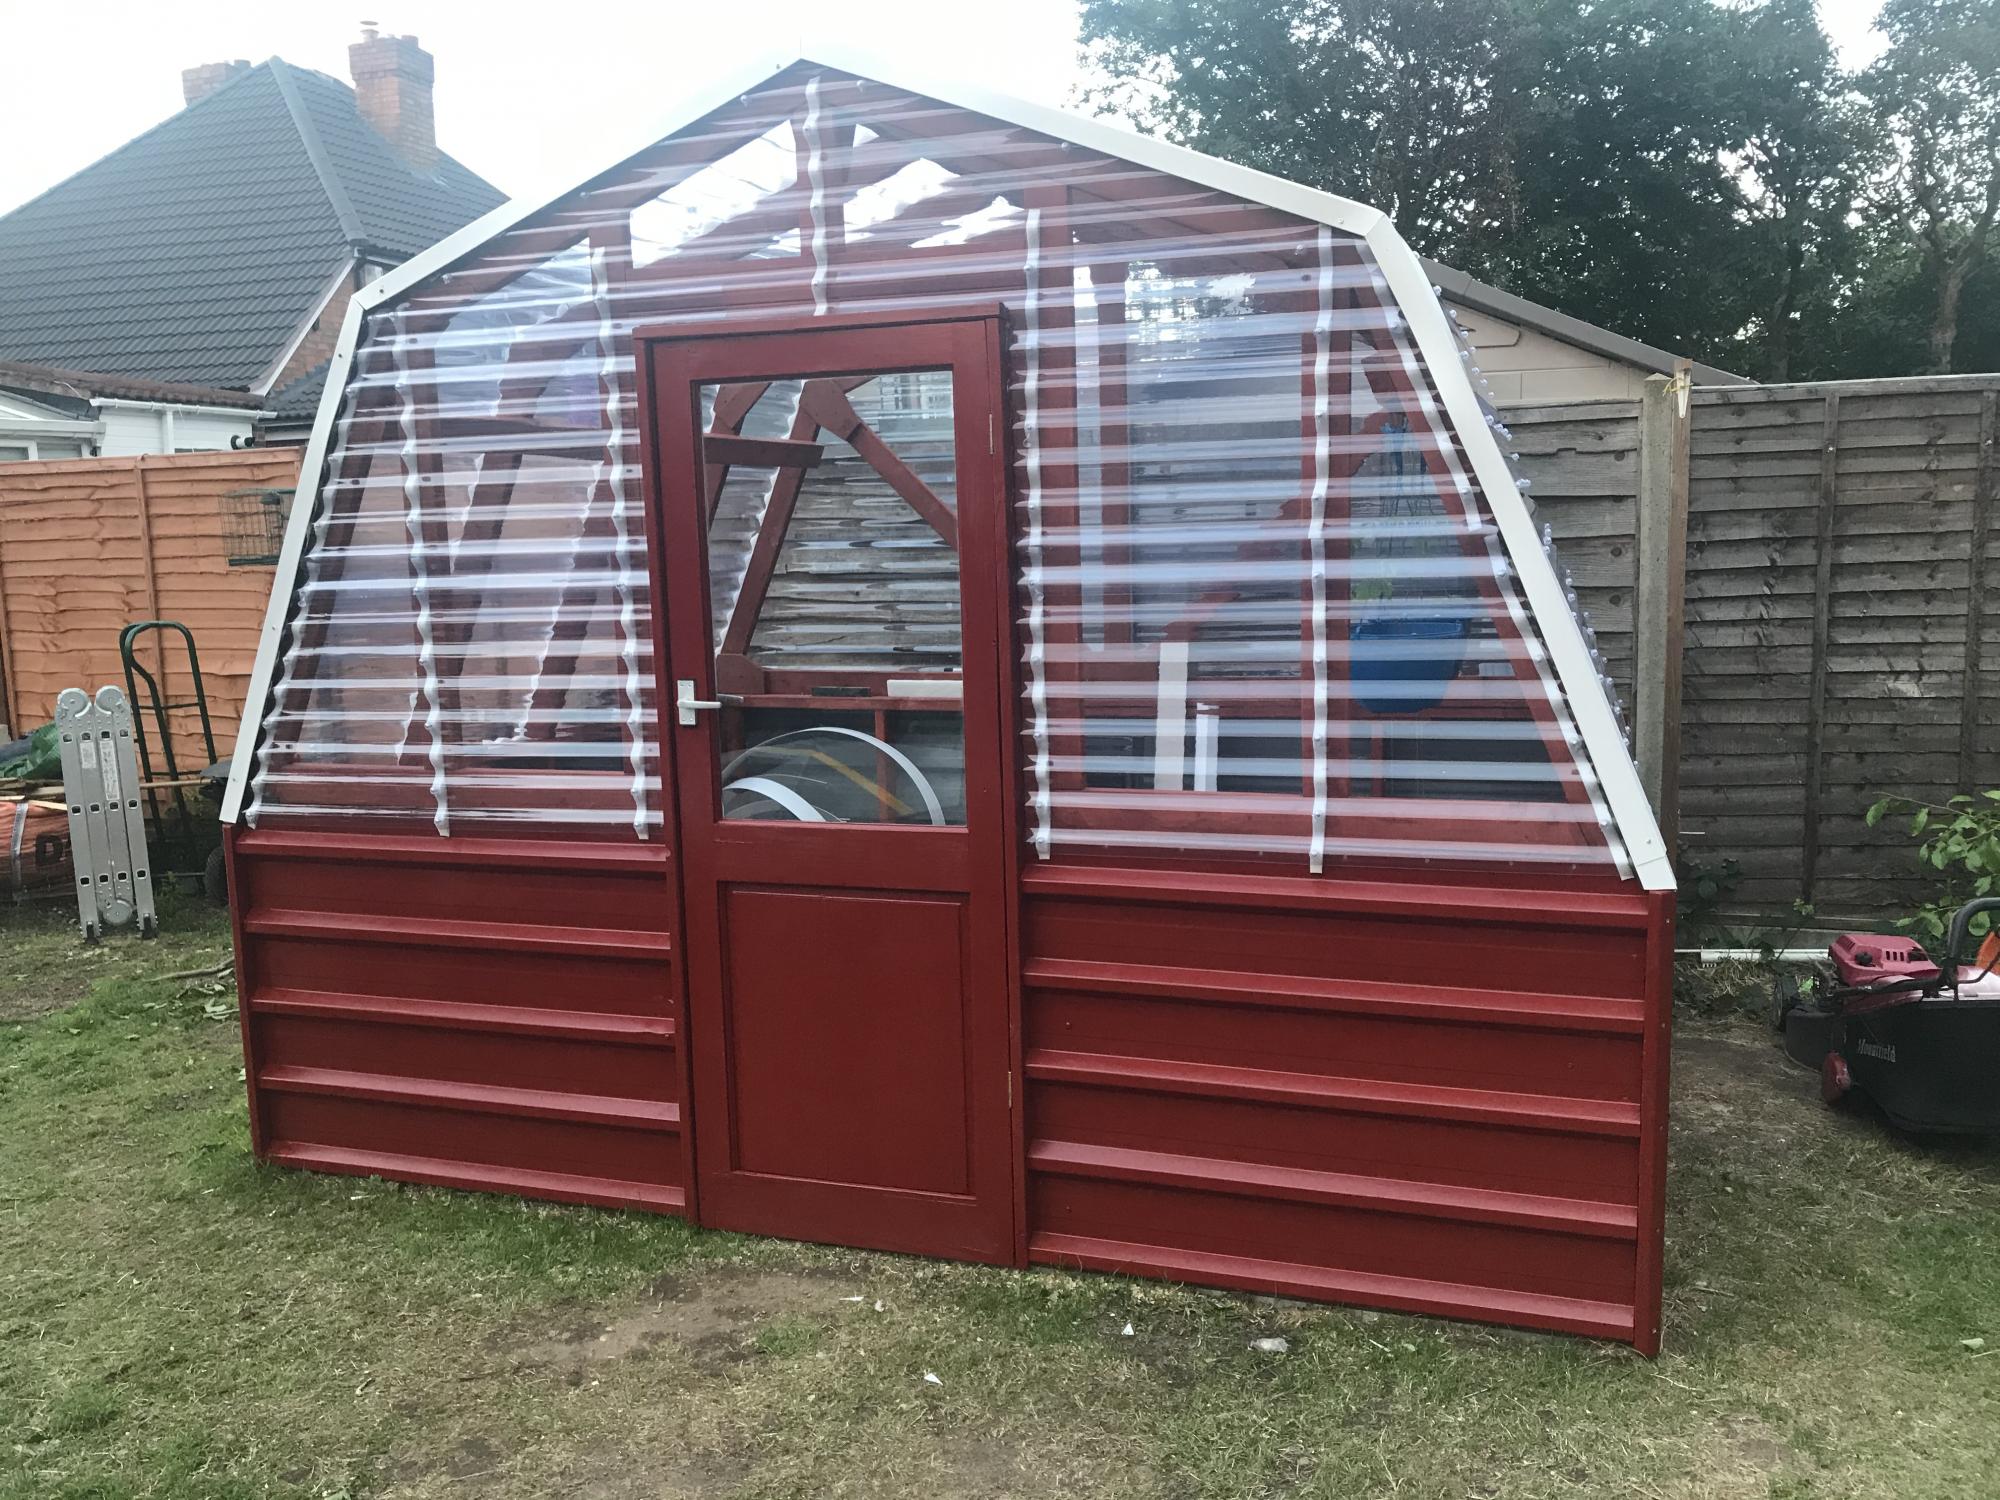
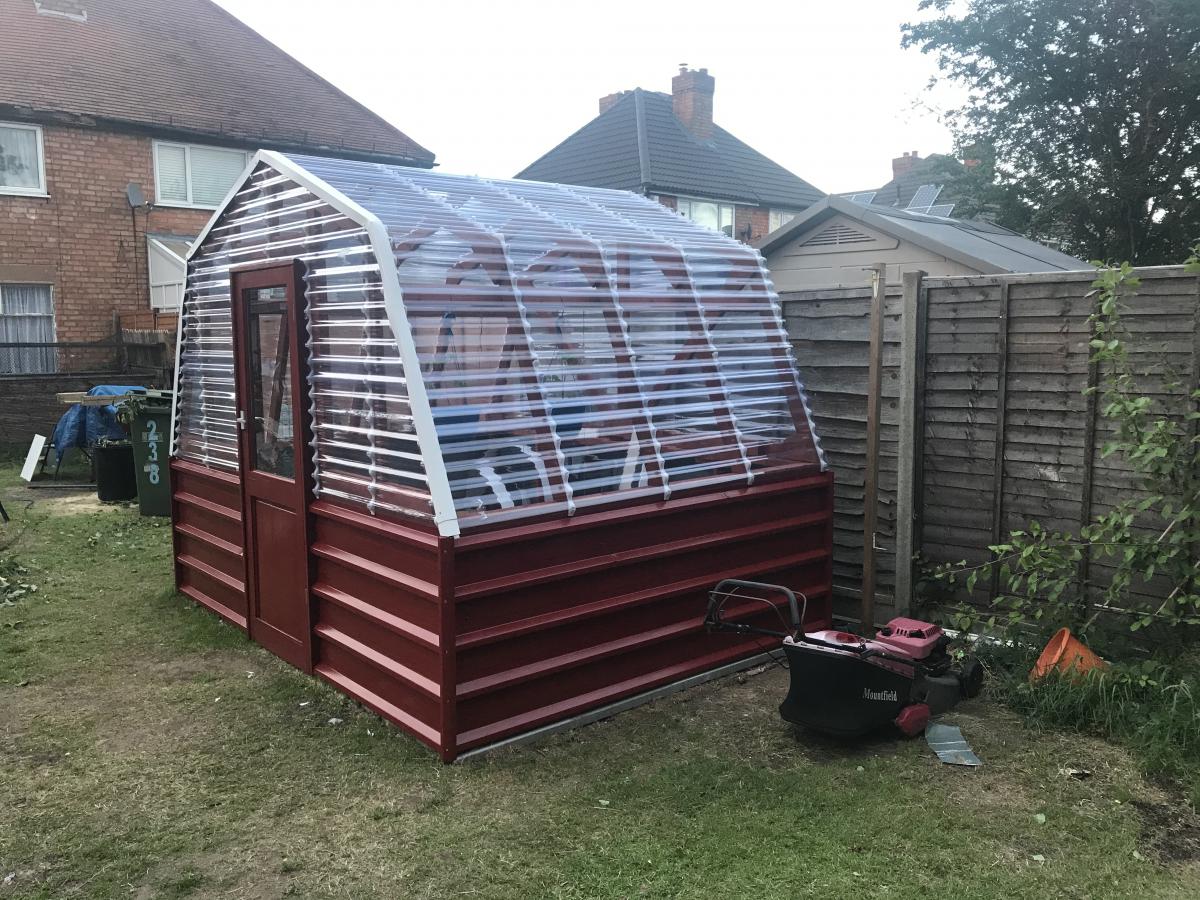
Followed your excellent plans, thank you.
Adapted to make smaller...approximately 10ft X 8ft.
It gave me a very enjoyable project to complete during 'lock-down ' and with Greenhouse.

Built from Plan(s)
Estimated Cost
£800
Estimated Time Investment
Week Long Project (20 Hours or More)
Finish Used
Treated all wood with preservative.
Steel panels (old roofing) were obtain from a kind neighbour for free and all external metal/wood was given several coats of 'Red Oxide' gloss Barn/agricultural paint.
Adaptions made by myself were :-

I put self adhesive 'Flashing' on the bottom wood of the vertical sides...to attempt to protect the wood in contact with the floor from getting over wet......time will tell if it works.

I made additional gussets to support the top piece of wood (attached to each end).

I had trouble with keeping the corrugated roof running parrallel....but the reason for this was that it was not manufactured with straight@right angle ends (when I held a level/straight edge along end - there was a quarter of an inch gap in the centre).
Recommended Skill Level
Intermediate

Tool Organizer

Submitted by Anonymous (not verified) on Thu, 07/02/2020 - 07:02

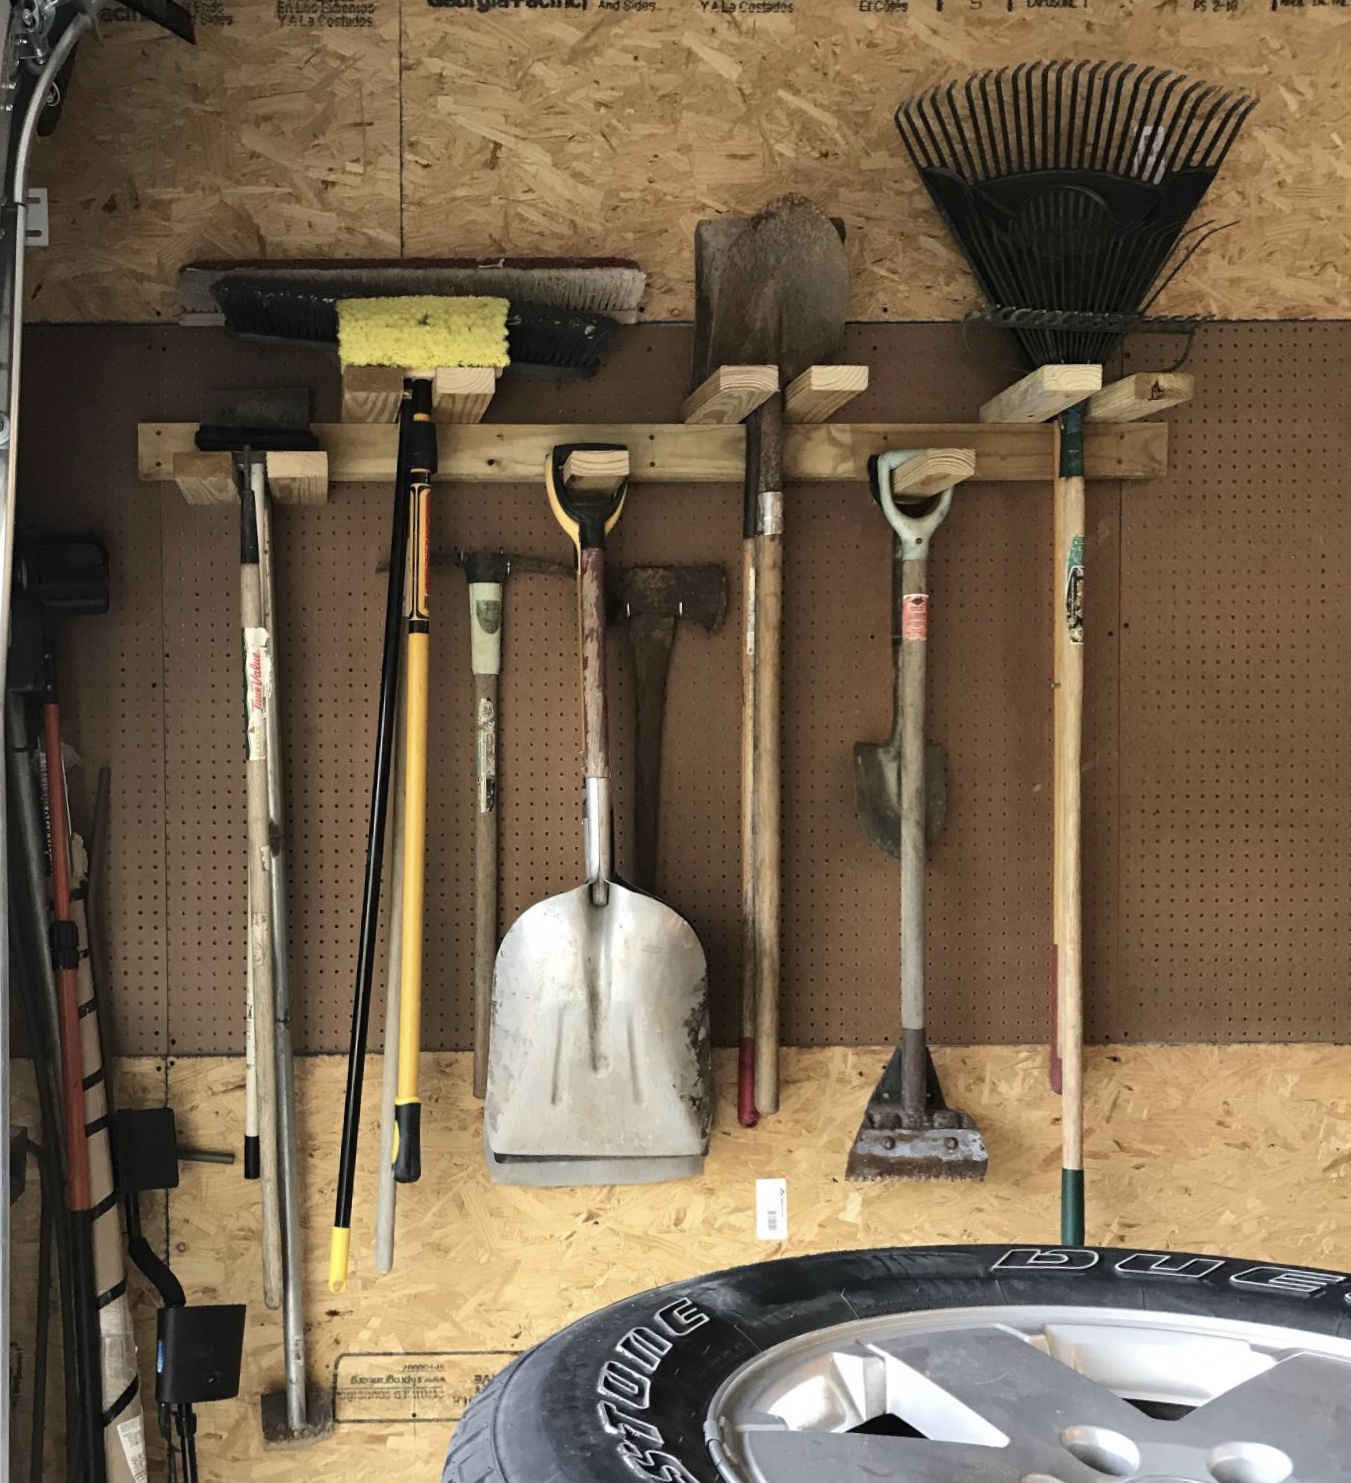
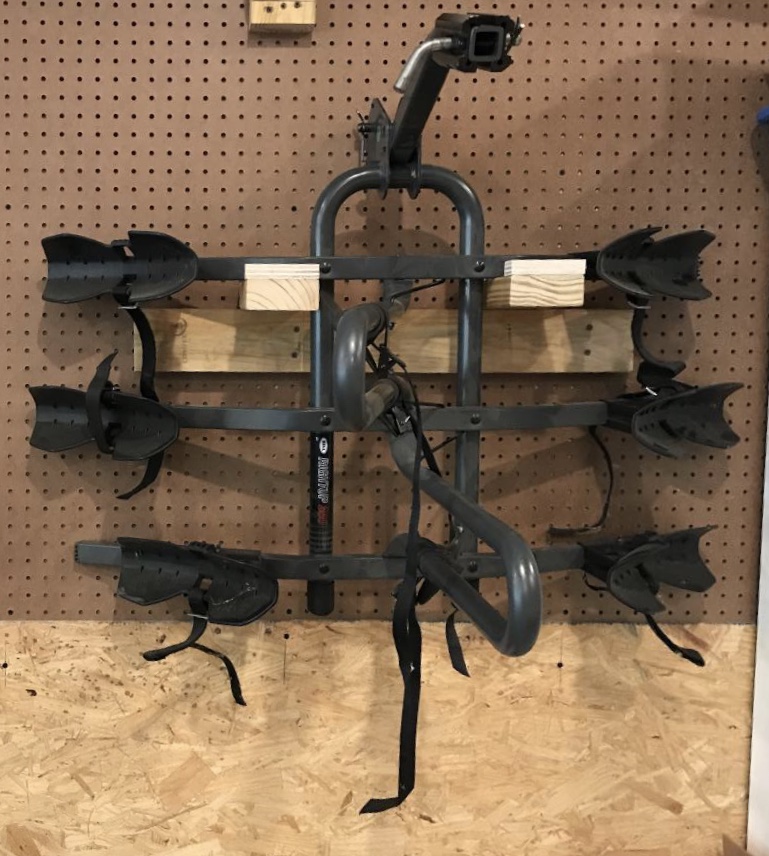
I’m very happy with my tool organizer. I also used the tool organizer idea for bracket to hang our bicycle rack. We love the way it all came out. Thank you so much for sharing!

We run a fence company. The best thing about this project is that it cost me $0!! I used 2X4 cutoffs that we were going to trash!

Built from Plan(s)

Hall-End Photo Ledges

Submitted by SaraLodise on Fri, 09/23/2016 - 13:03

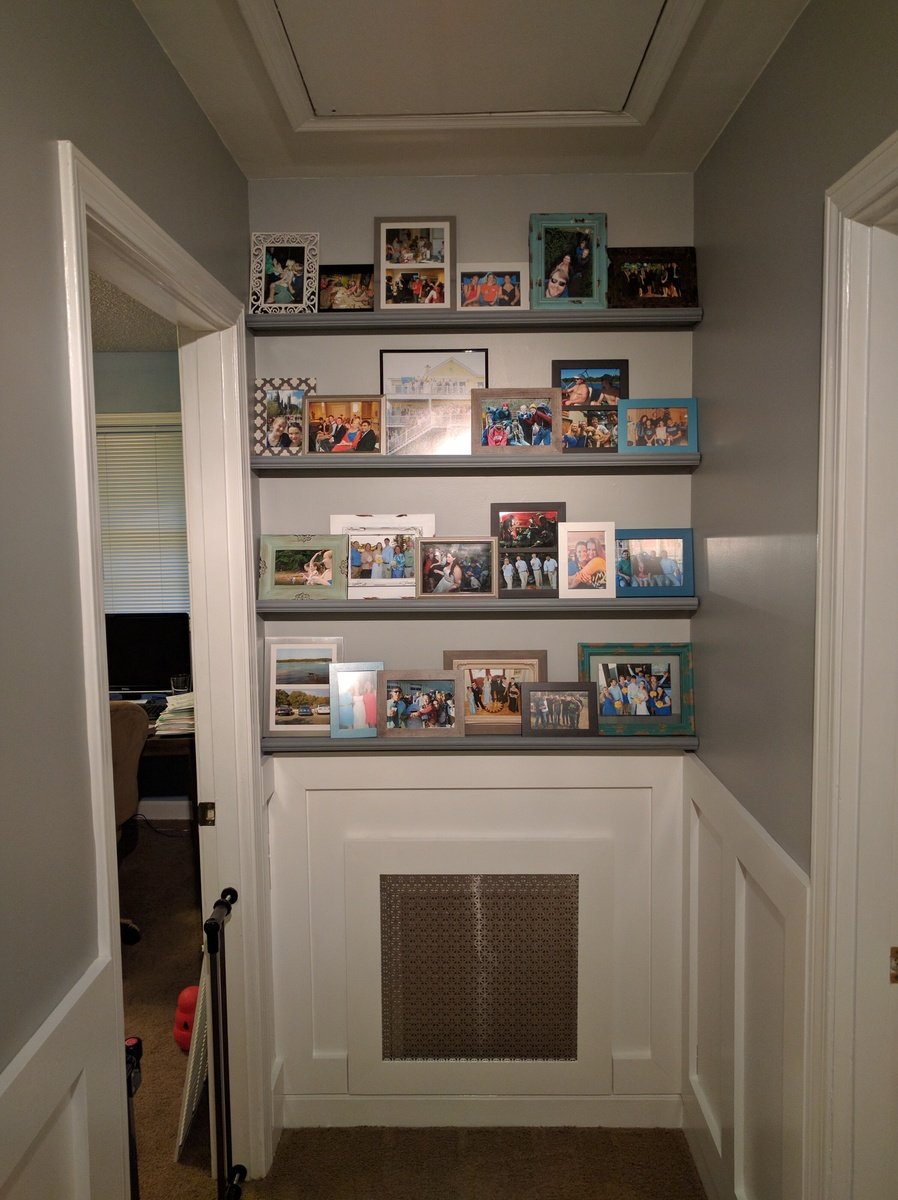
$10 Ledges made with 1x3s instead of 1x4s and fronted with cute trim pieces I found at Orange store. Finished with Behr Marque sample paint that didn't make the cut for the hallway walls (color: Gotham Gray).

Estimated Cost
Select Pine Lumber = $40
Pine Trim = $17
Behr Marque sample = $4
Total = $61
Estimated Time Investment
Afternoon Project (3-6 Hours)
Finish Used
Behr Marque - Matte - Gotham Gray
Recommended Skill Level
Beginner

Comments

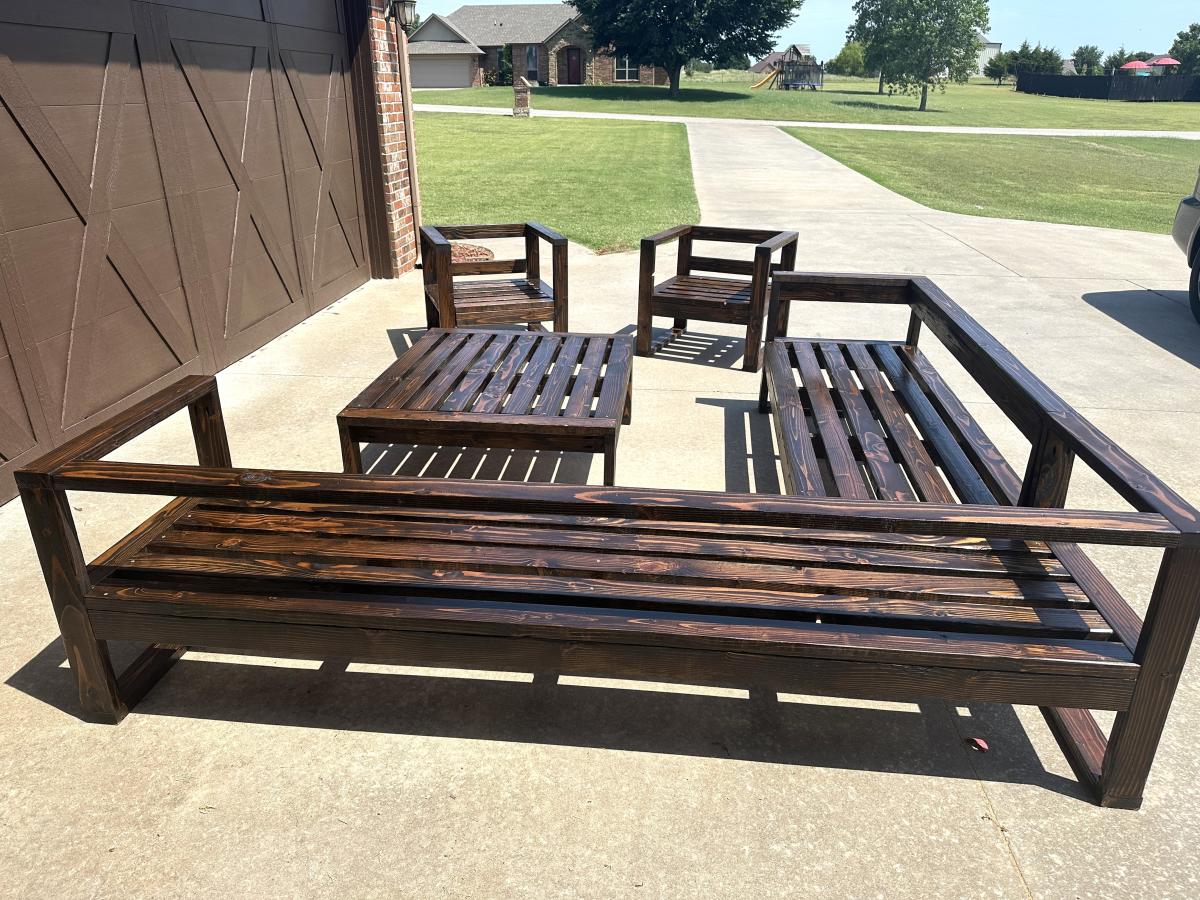
Modern Outdoor Sofa

Submitted by Anonymous (not verified) on Mon, 07/06/2020 - 08:44

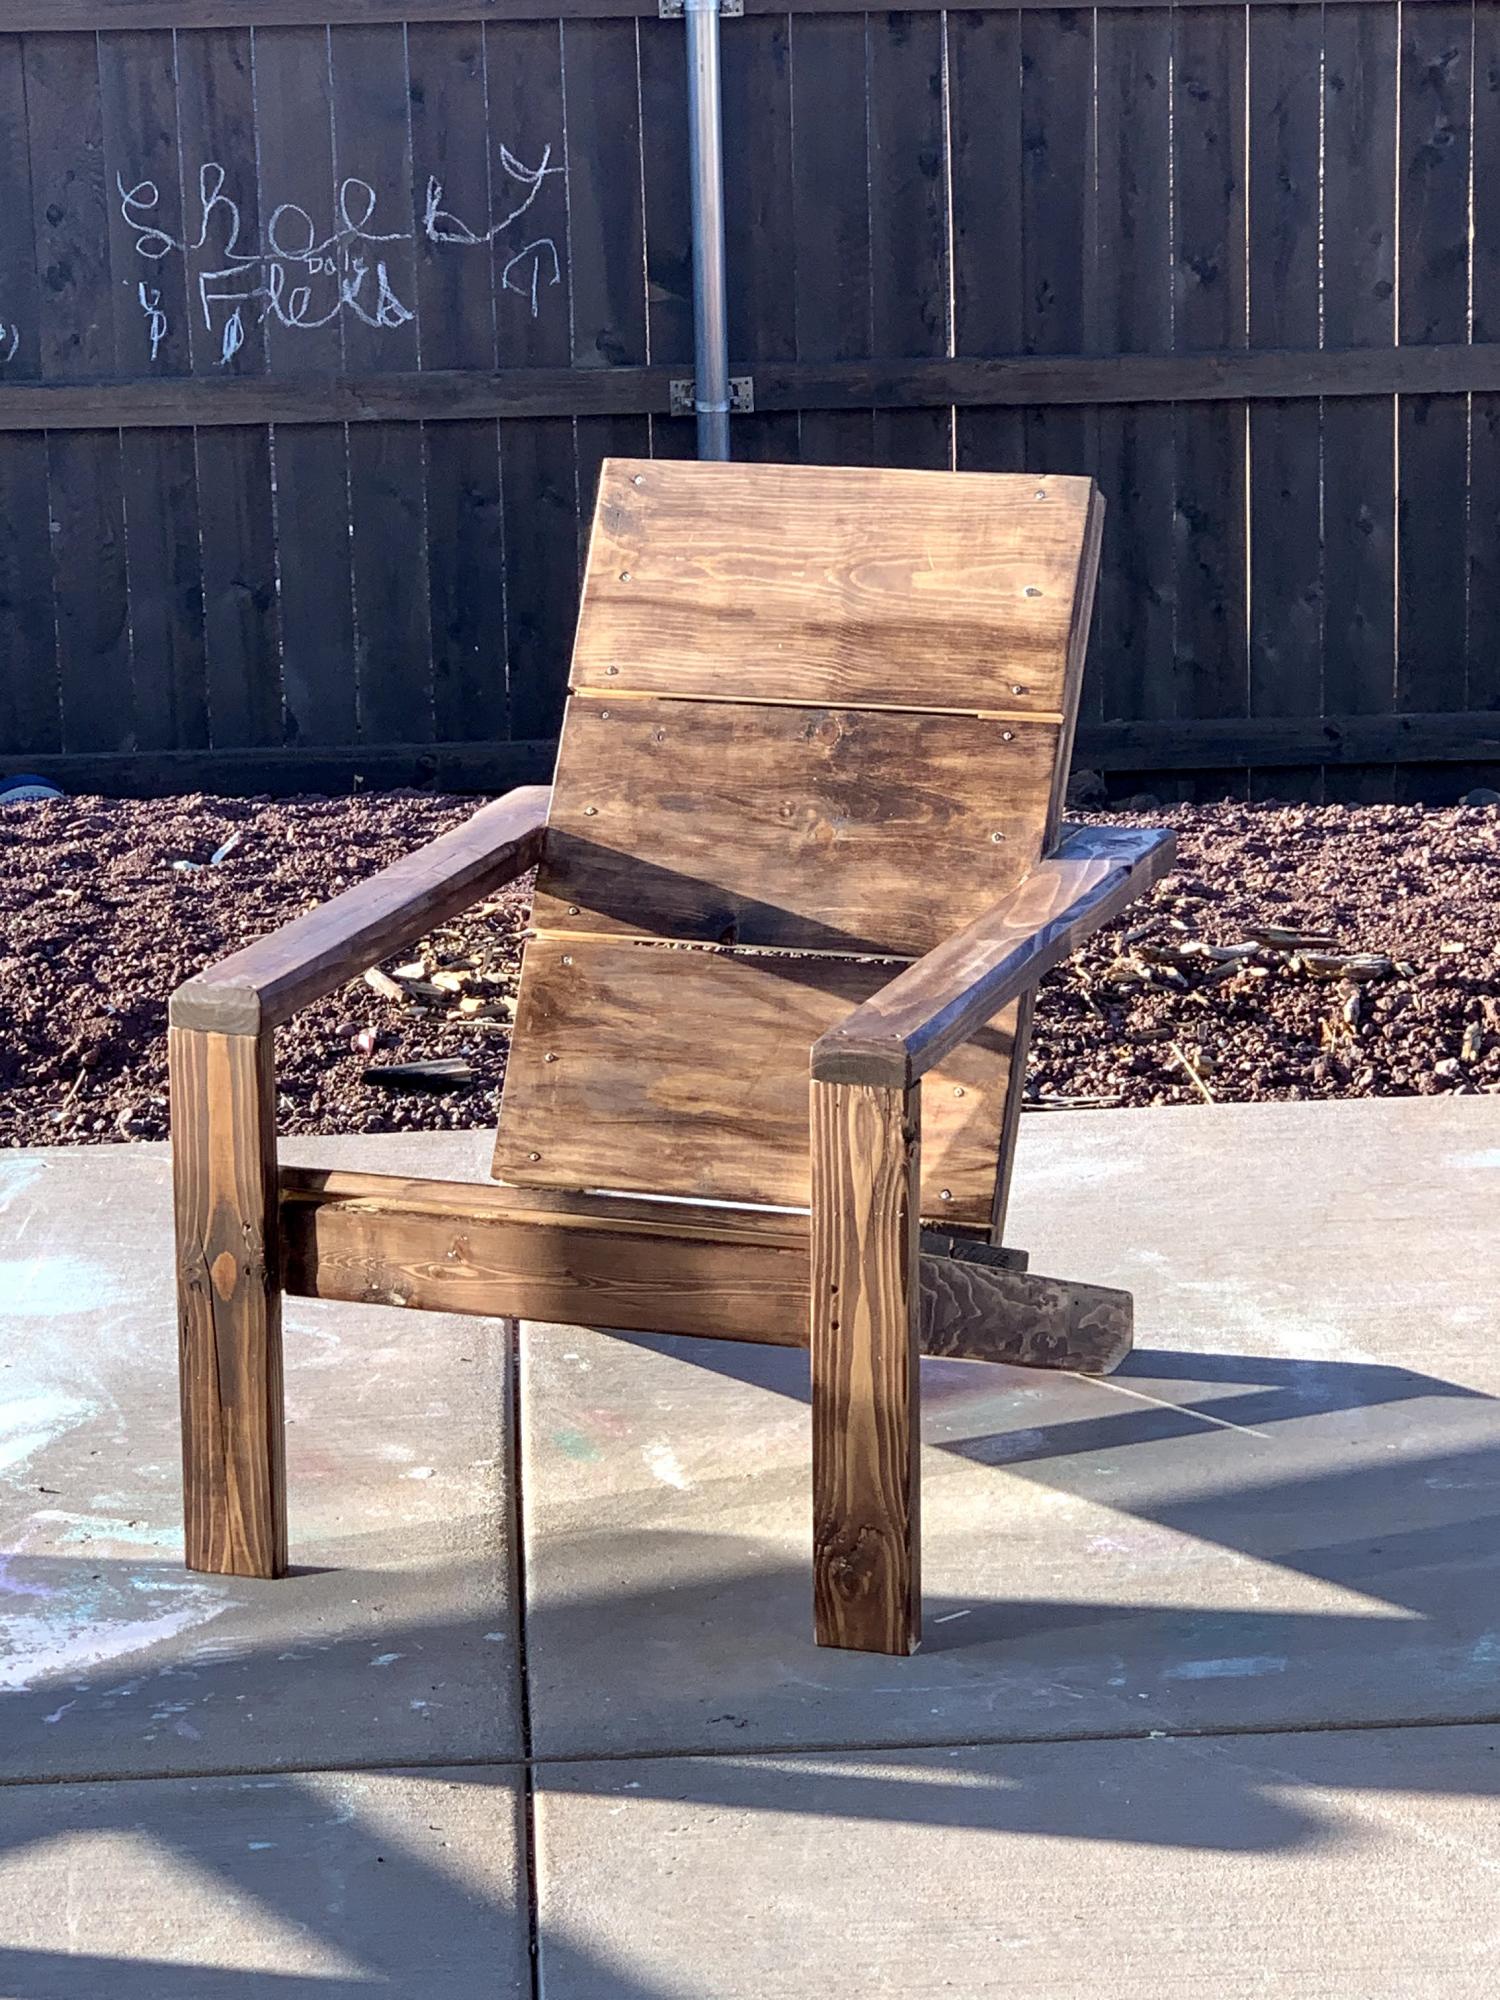
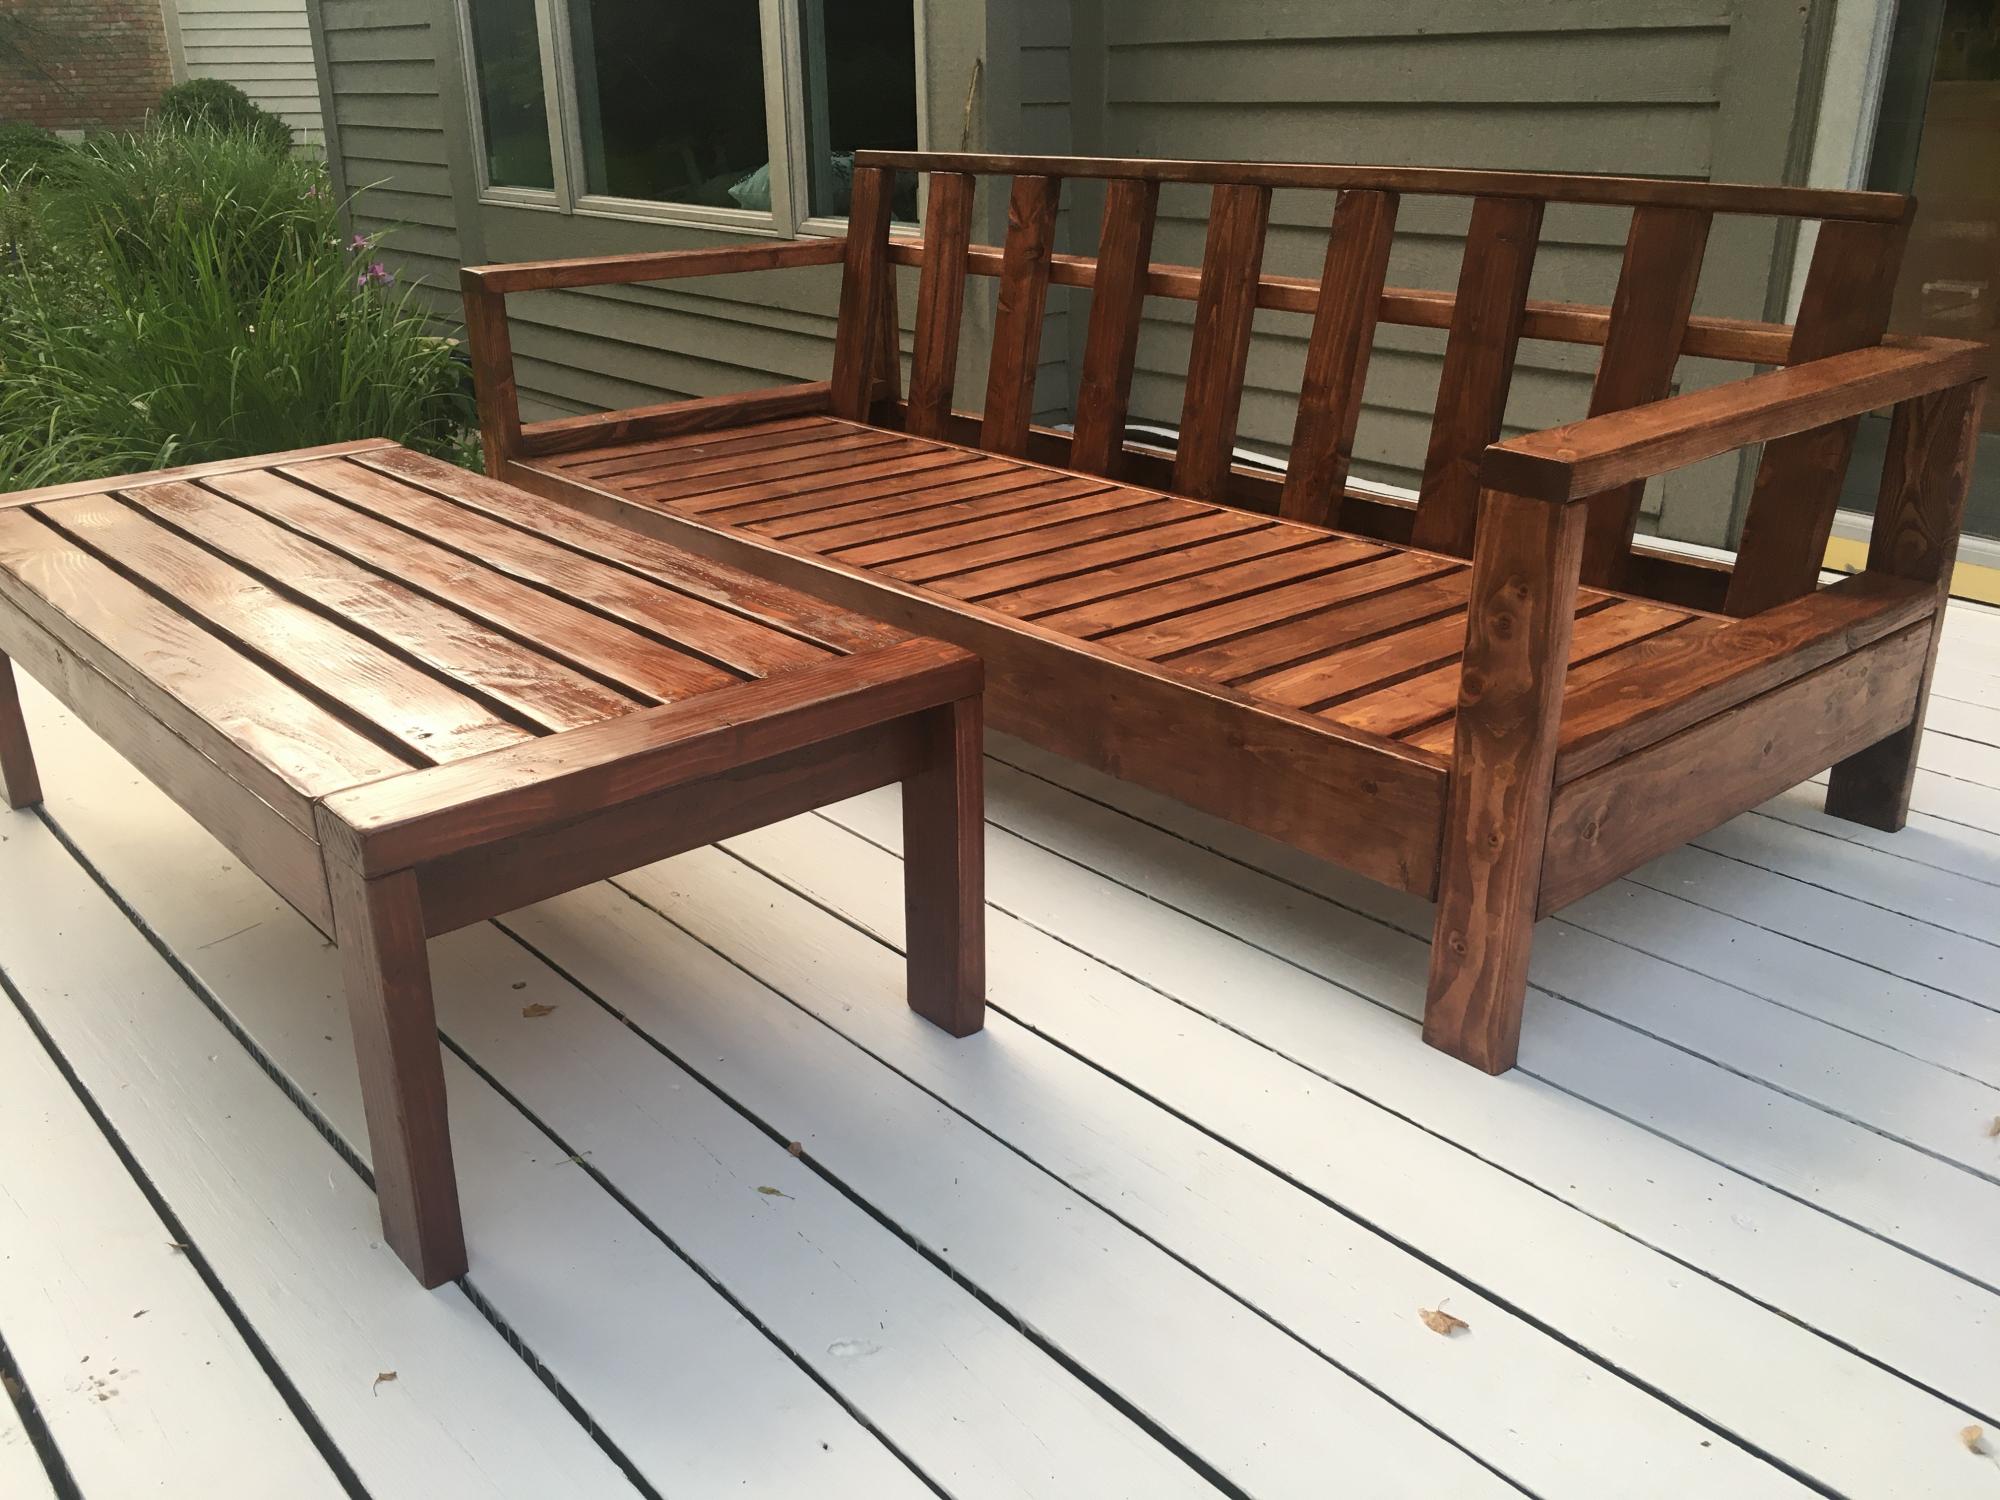
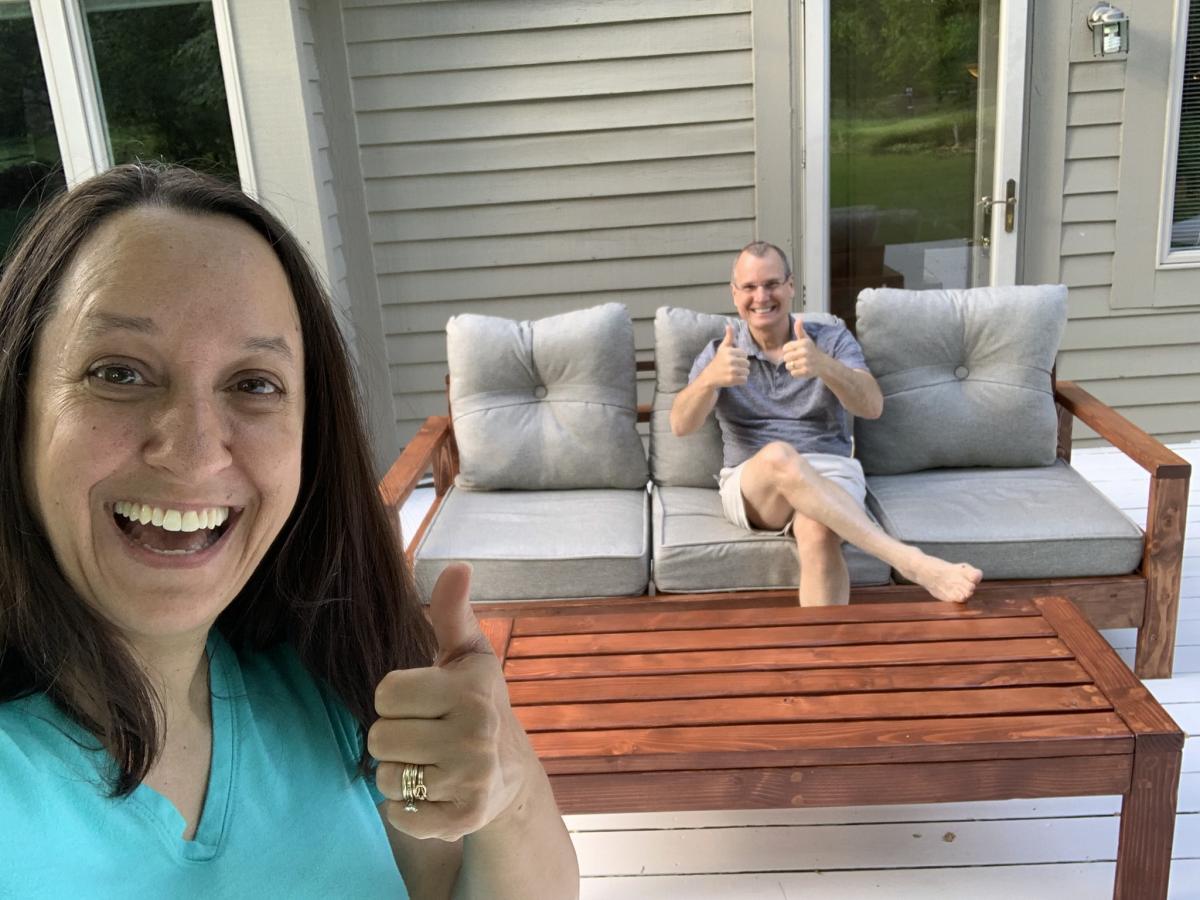
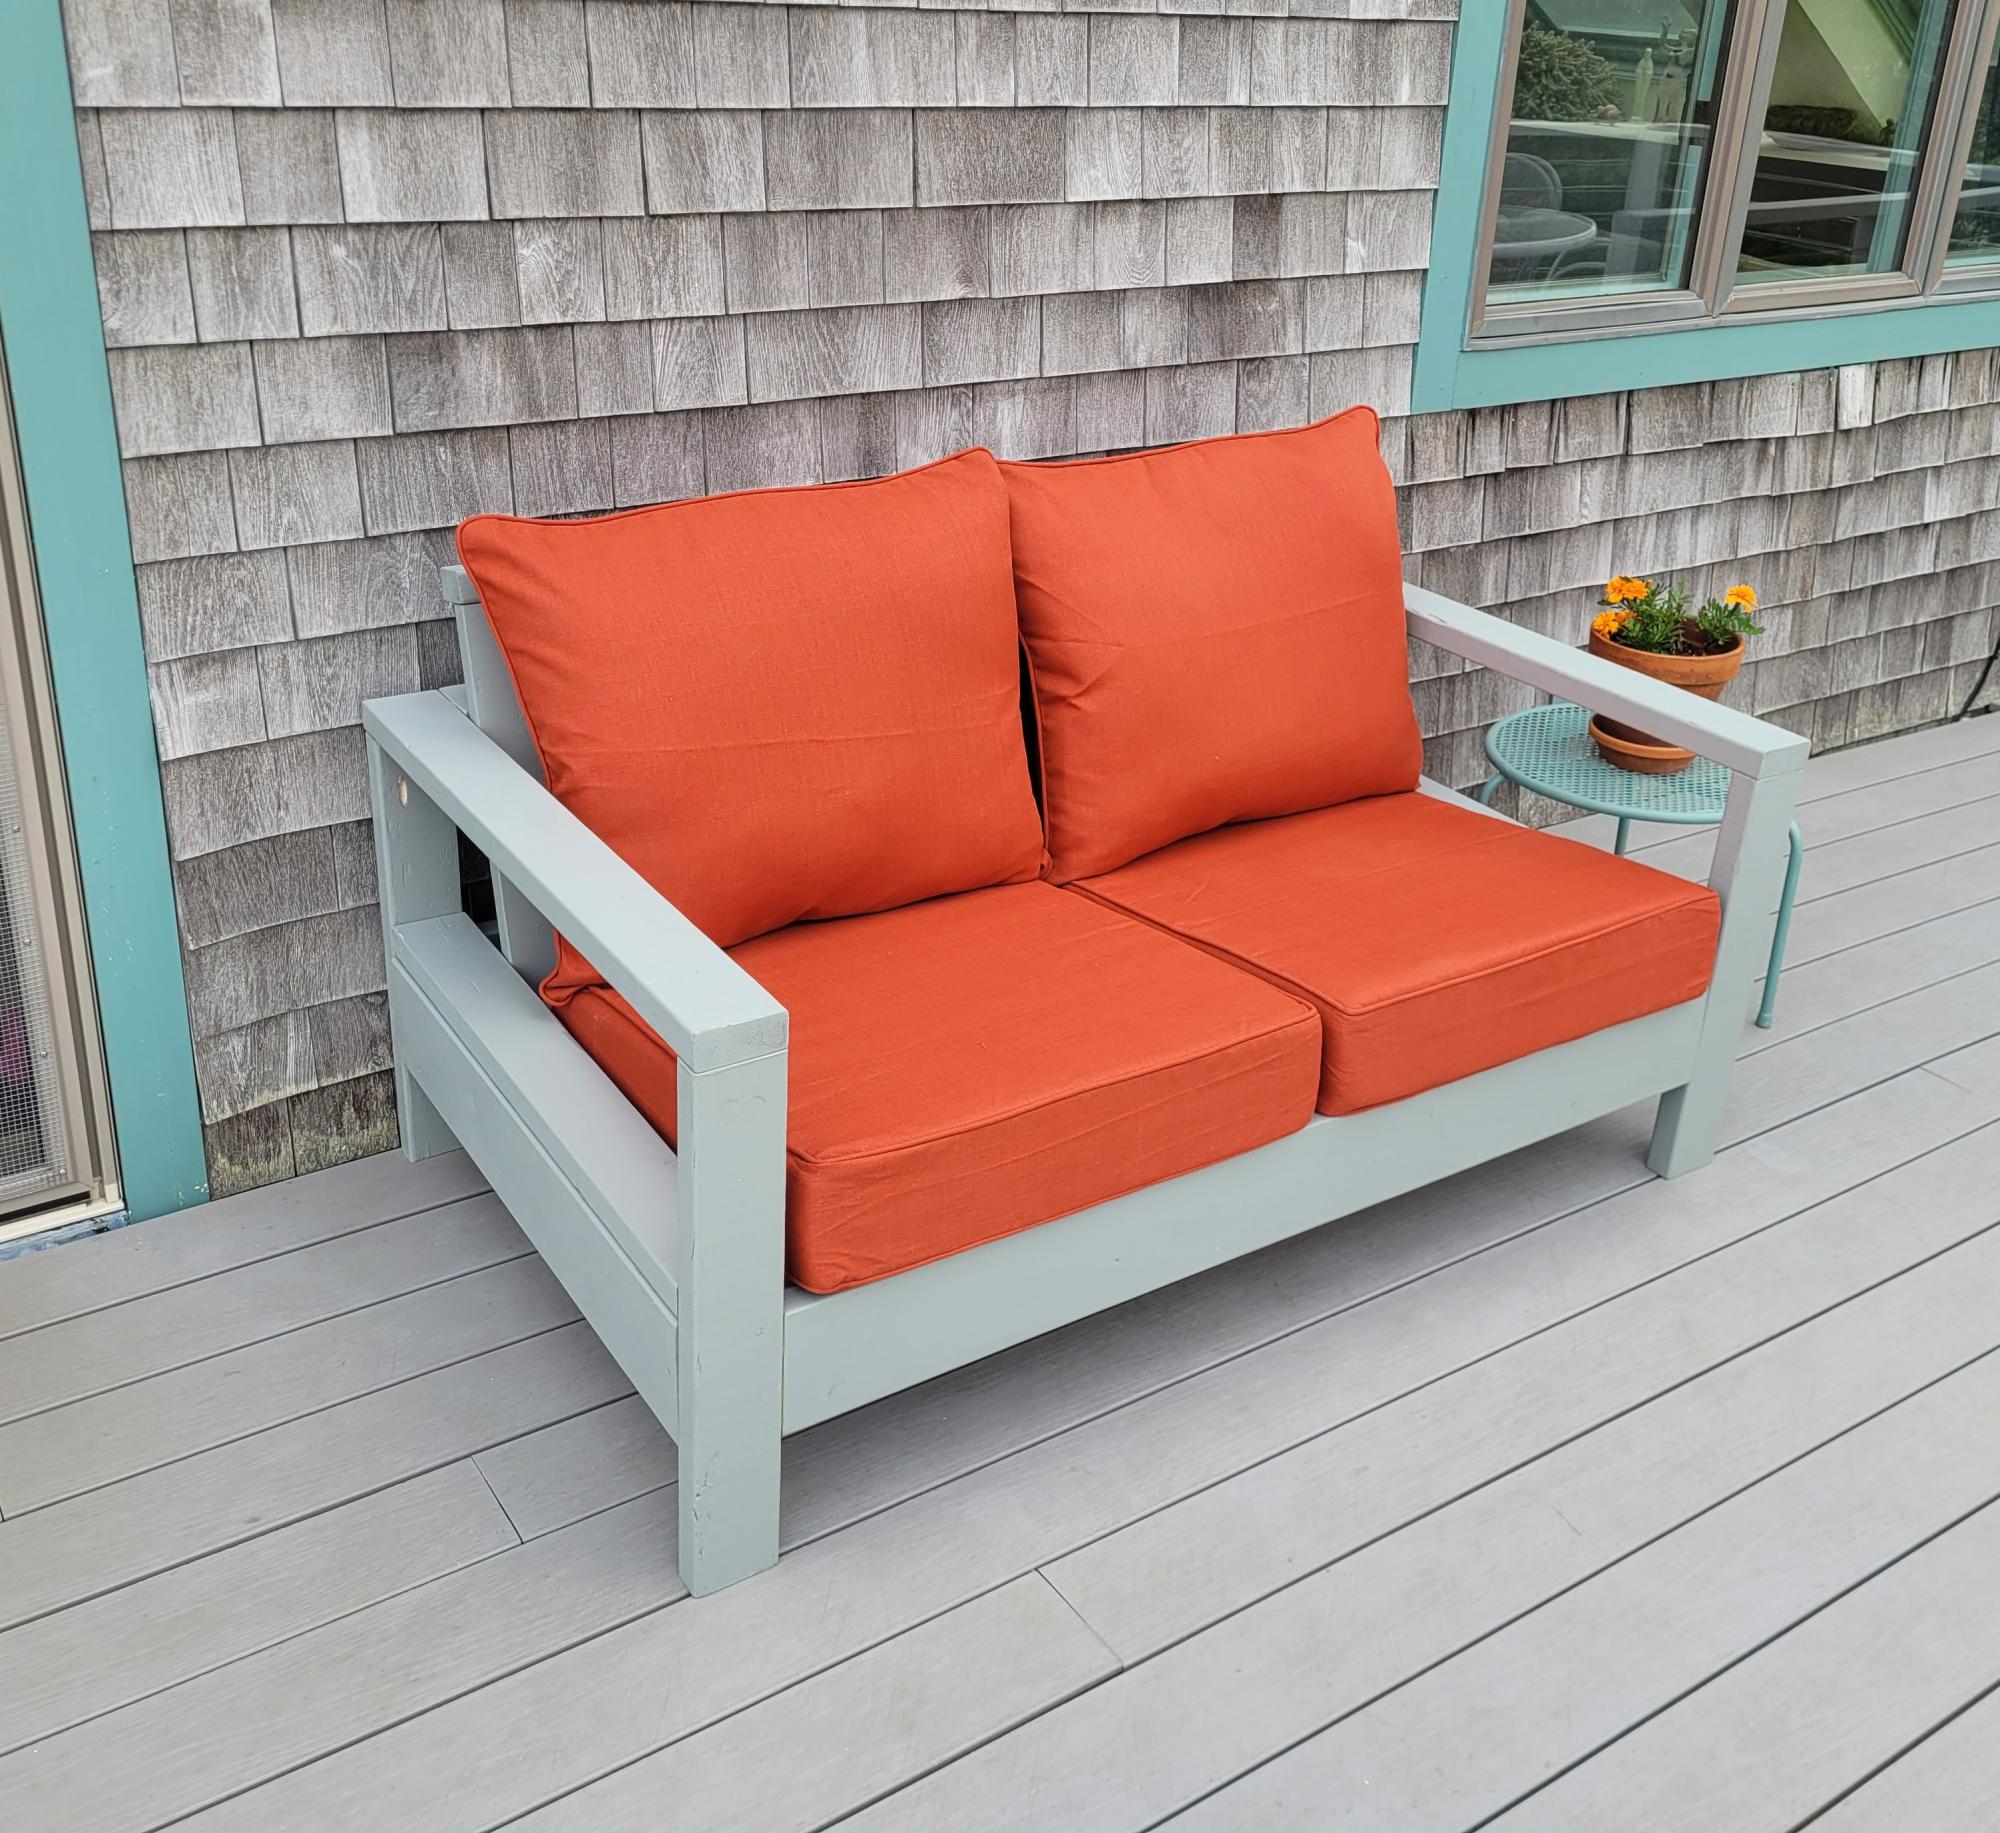
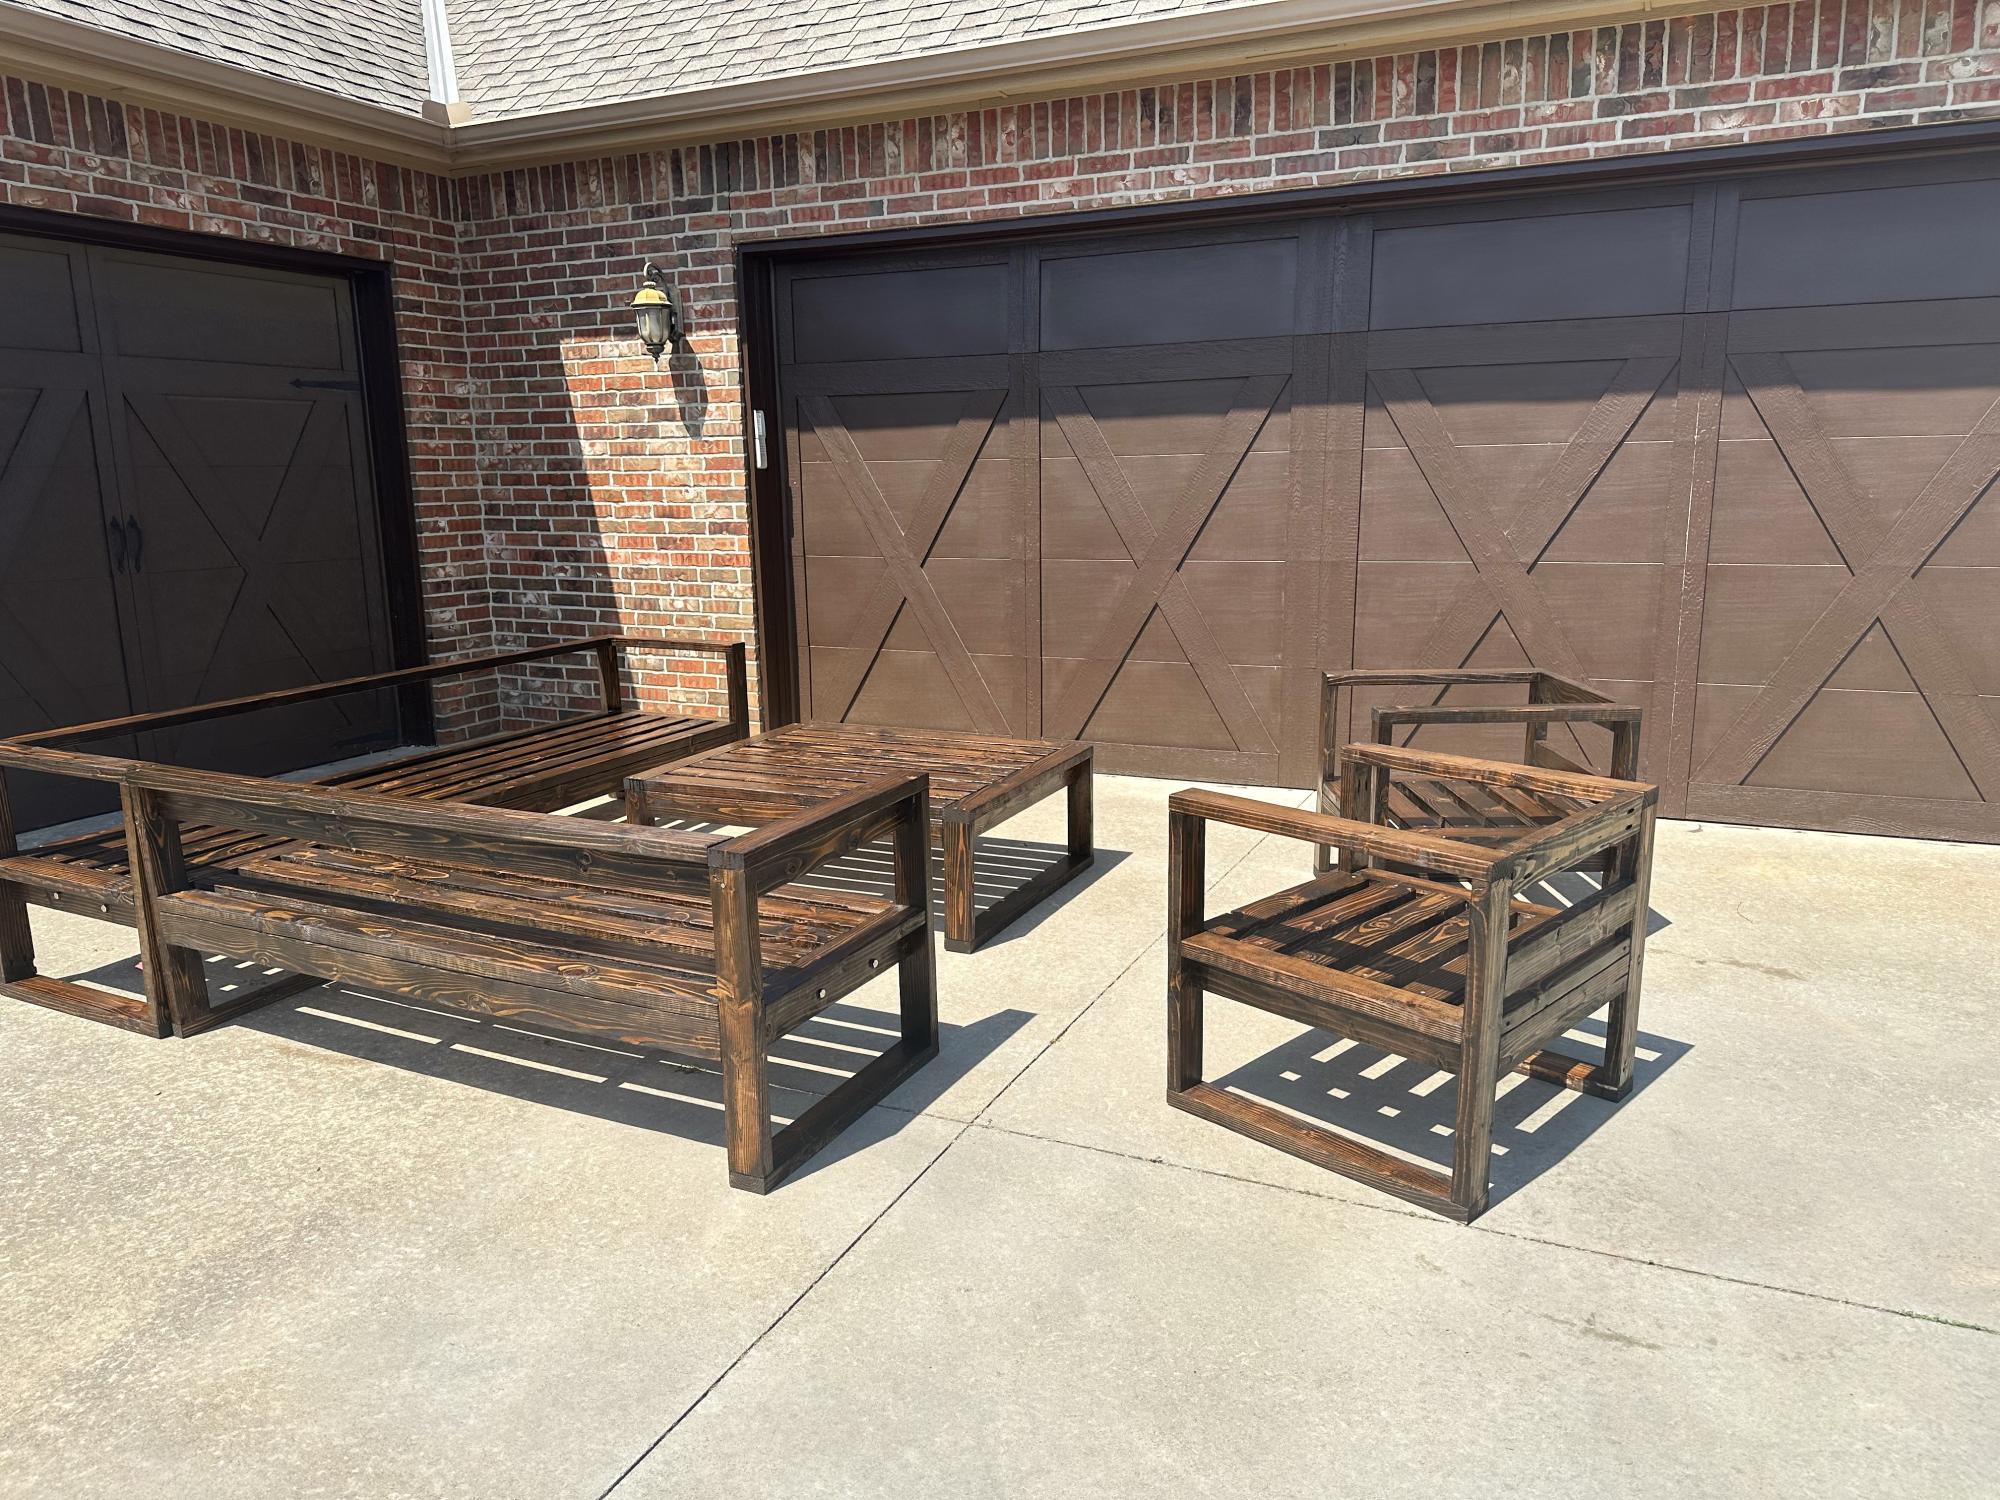
We are building memories and patio furniture! We're total beginners and we built an outdoor sofa and coffee table! My husband and I have never built furniture before and really needed some patio furniture as we prepare to host our son and his sweetheart's wedding reception! We learned that it's a lot of work, but so worth it!

The plans we used are from Ana White's website (Ana, you've made a wanna-be carpenter out of me!) https://www.ana-white.com/woodworking-projects/outdoor-sofa-modern-comf…

Estimated Cost
Under $200
Estimated Time Investment
Weekend Project (10-20 Hours)
Finish Used
Minwax Helmsman Polyurethane
Lightly sanded between coats and applied 2 coats all over and 3 coats on arms
Recommended Skill Level
Beginner

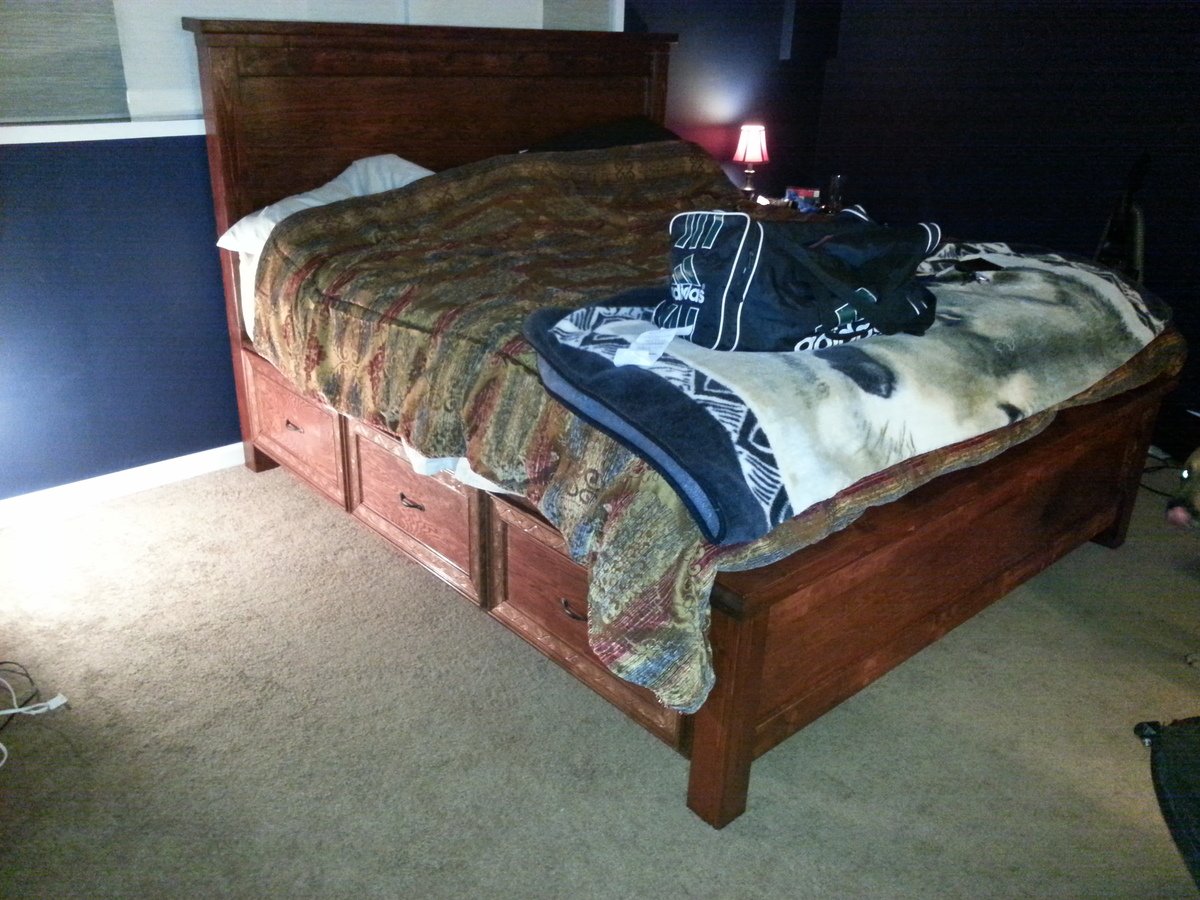
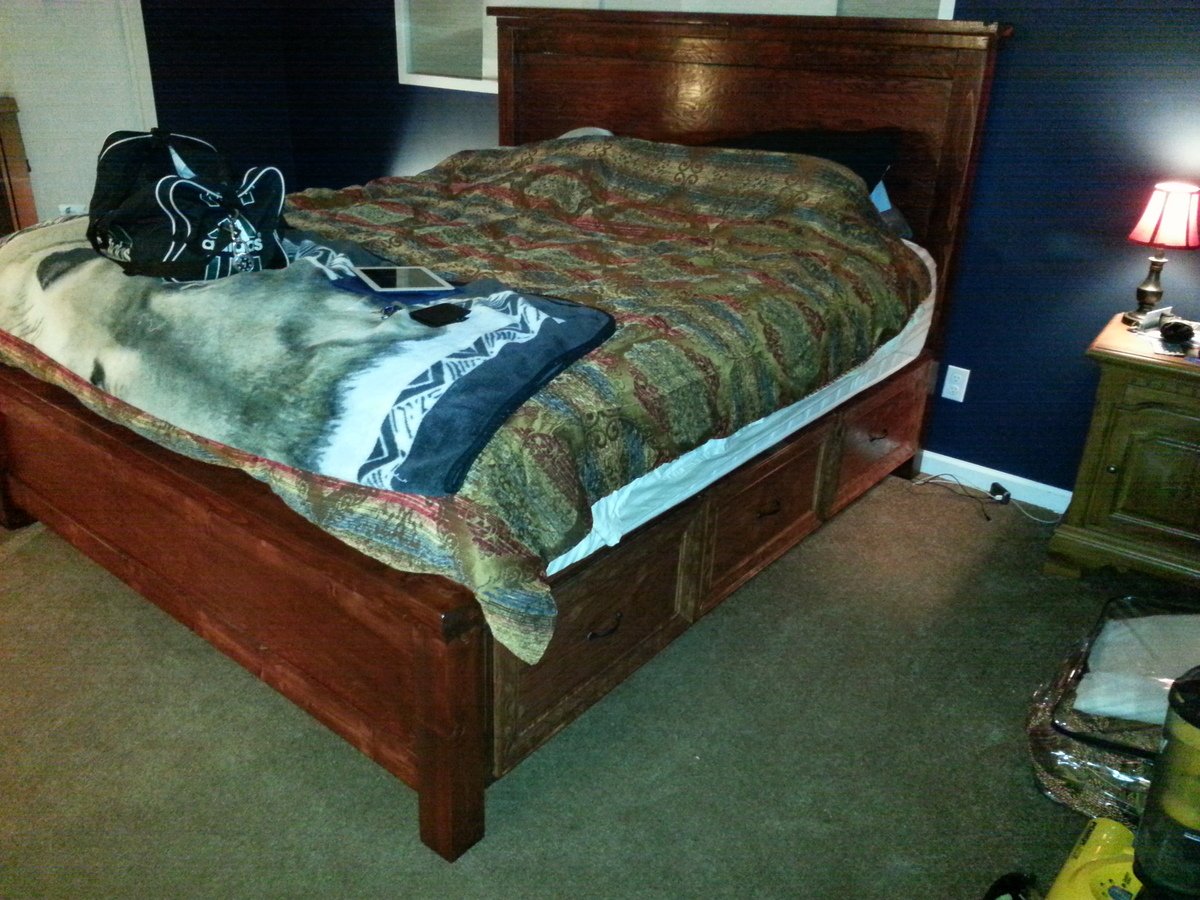
King Sized Farmhouse Storage Bed with Storage Drawers

Submitted by mwindsor6 on Sat, 06/28/2014 - 22:04

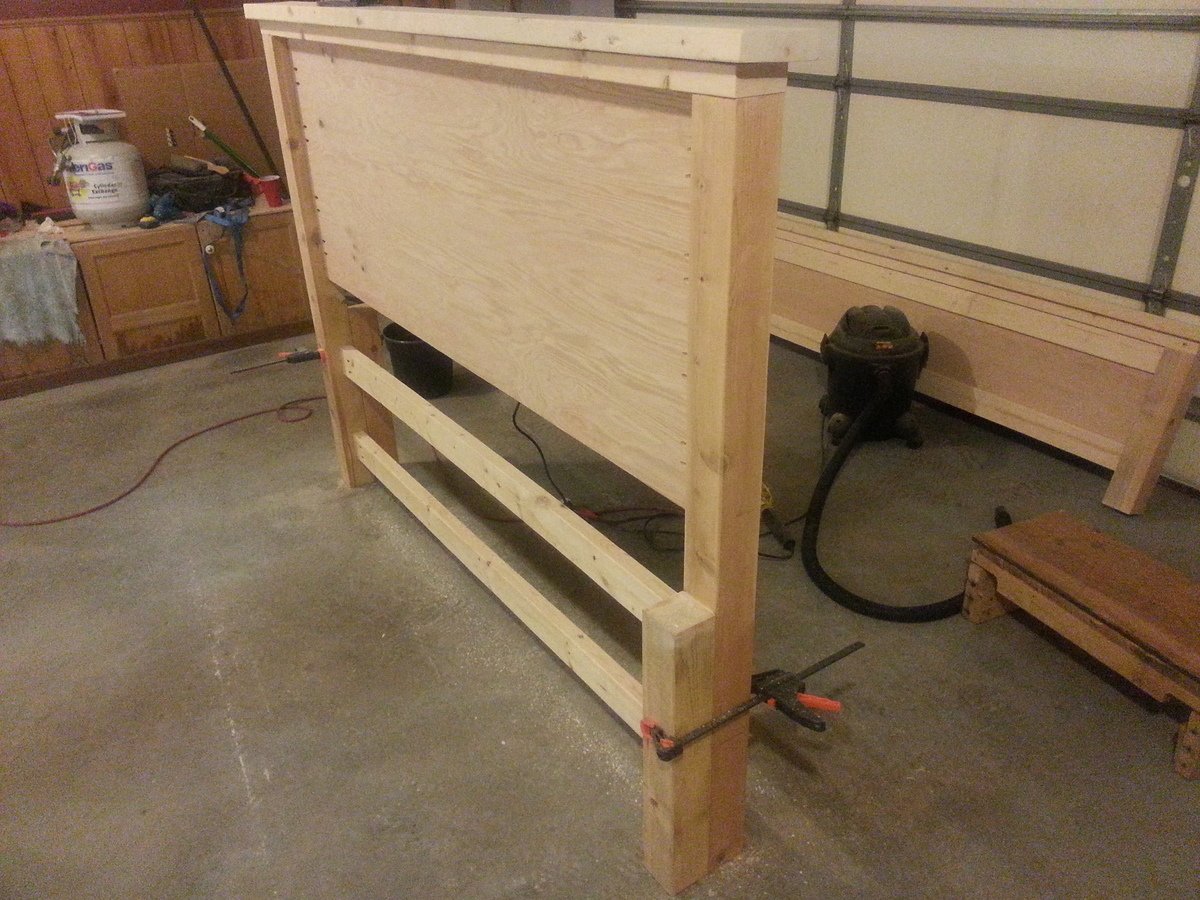
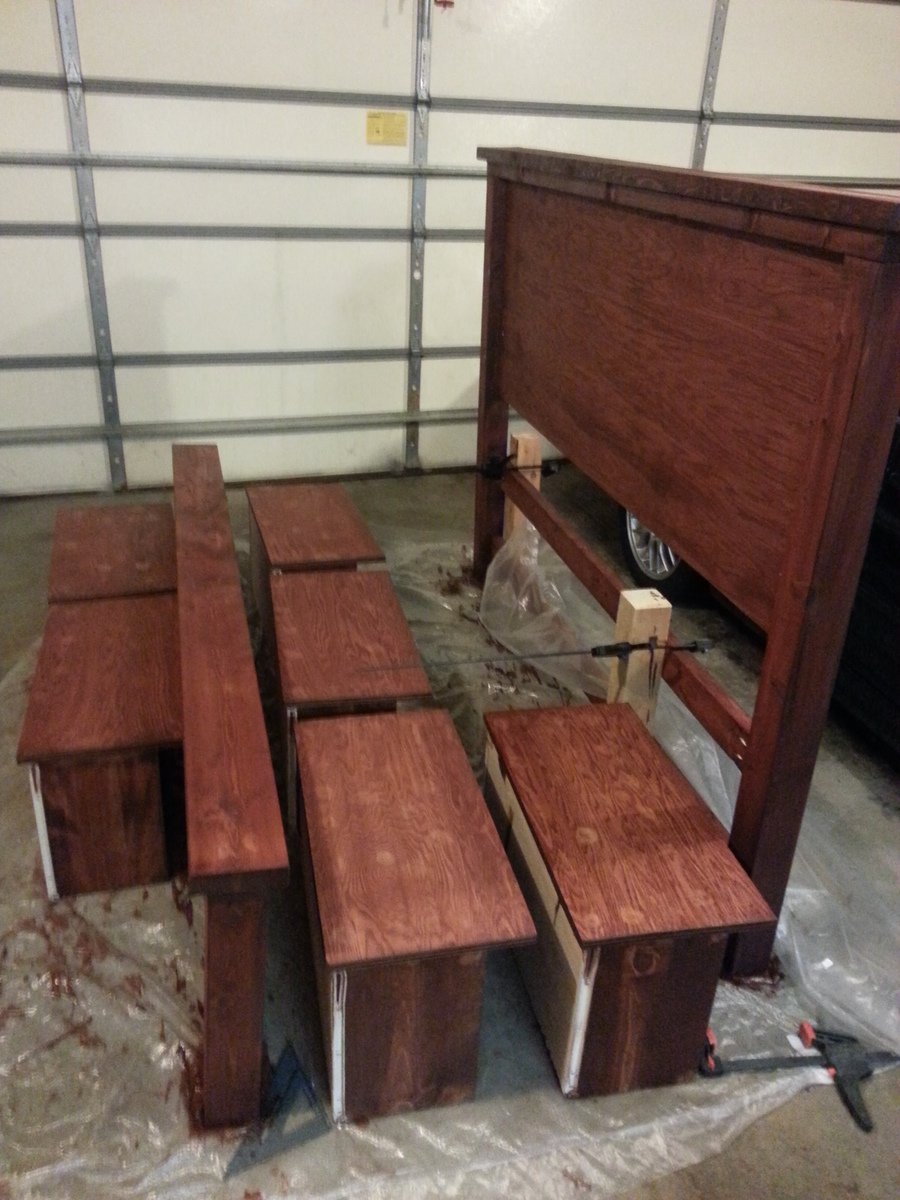
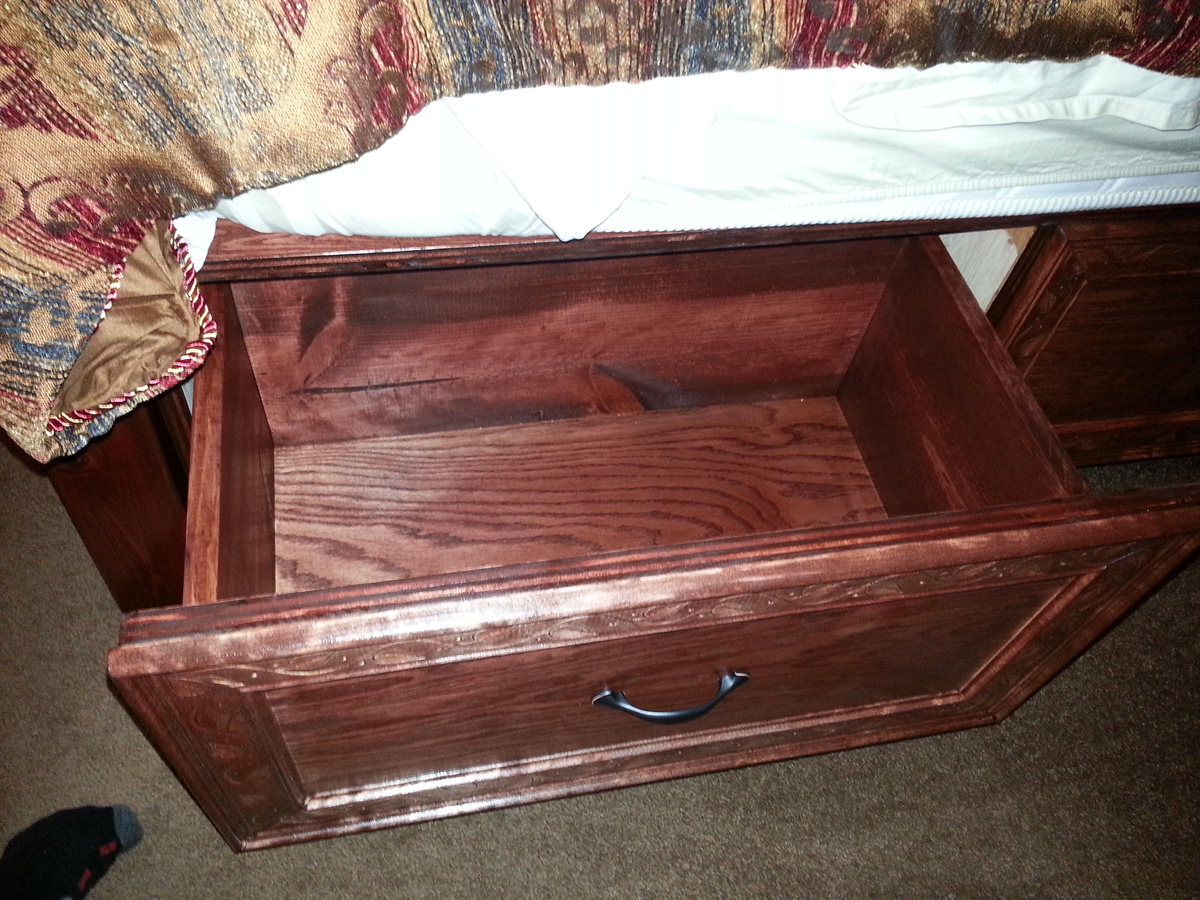
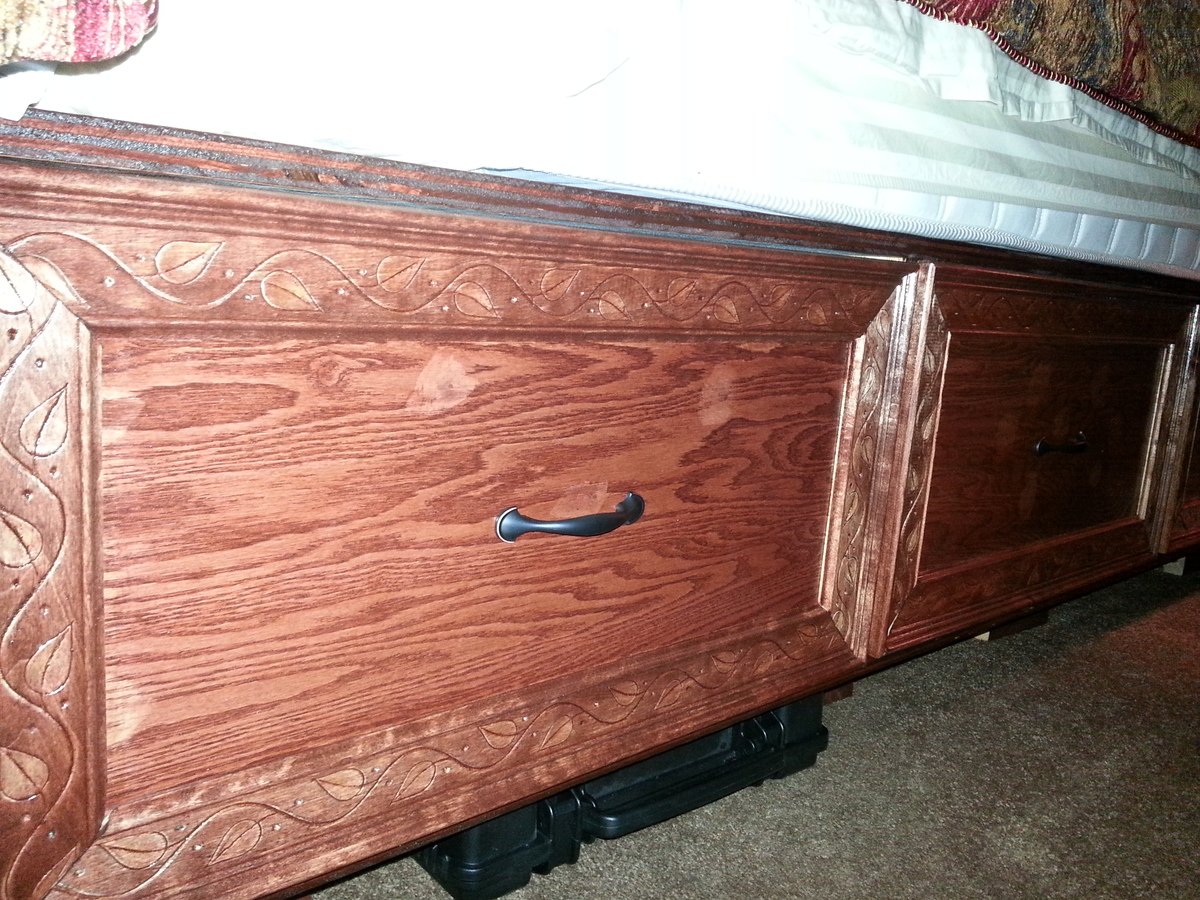
This was the first project that I have ever attempted, and I do believe it came out very nice. The color is red oak, and it has 3 coats of lacquer on it. I adjusted the plan sizes to make it from a queen sized bed into a king size bed. It took a lot of hours to build it due to measuring and cutting and ensuring accurate cuts, fitment, and square. The bed is made out of primarily Oak hardwood, but the 4x4 posts are ceder because Home Depot did not have oak 4x4 posts. The regular lumber (2x4, 1x3, 2x6 ect.) is white wood.

Estimated Cost
$600
Estimated Time Investment
Week Long Project (20 Hours or More)
Finish Used
Miniwax Red Oak Stain, and Miniwax brush on lacquer.
Recommended Skill Level
Intermediate

Comments

athingvall

Sun, 12/28/2014 - 22:40

Love the bed. I am glad that you were able to make it work. Is there anything that you would change? Do you have enough support in the middle? Storage? I am trying to make the conversion from queen plan to king plan. Any thoughts would be great. Thank you.

mwindsor6

Mon, 01/19/2015 - 23:58

Thanks our for the comment, i would not change my ha of anything inn. the. Not thing I think I think i change and still might in the future is to make the drawers come out a littler further so the faces do not try to sit completely flush and come out about an 1/8 of an inch so the trim I have on it would sit a little more flush and not try to push against the bed.

As for support the is more than enough support in the middle. There is enough cross braces where there is only about 1/2" between them. Also for additional support I used 2 4x4 scap piece in the middle-ish of bottoms of each side on the bottoms. I set them about directly center of the sides of th center drawer. Also for the brackets I used thick house framing brackets with 1/2 bolts because I have been moving a lot over the years so it comes apart easier. If you would be more interested in that I can send additions all pictures.

Hope this helps you, the bed is extremely sturdy and we absolutely love it more than any bed we could have purchased from a store.

emily3982

Sat, 12/31/2016 - 07:56

Hi Great Job. I saw your previous comment. "Also for the brackets I used thick house framing brackets with 1/2 bolts because I have been moving a lot over the years so it comes apart easier. If you would be more interested in that I can send additions all pictures"  Where did you put the house framing brackets and 1/2 bolts?  We are in the process of building two twin beds with storage and the easy take down part is something I am mentally trying to wrap my head around.  If you have pictures of this as well that would be super helpful.  Thanks so much!  

Cedar Patio Table

Submitted by rygy on Thu, 07/03/2014 - 18:19

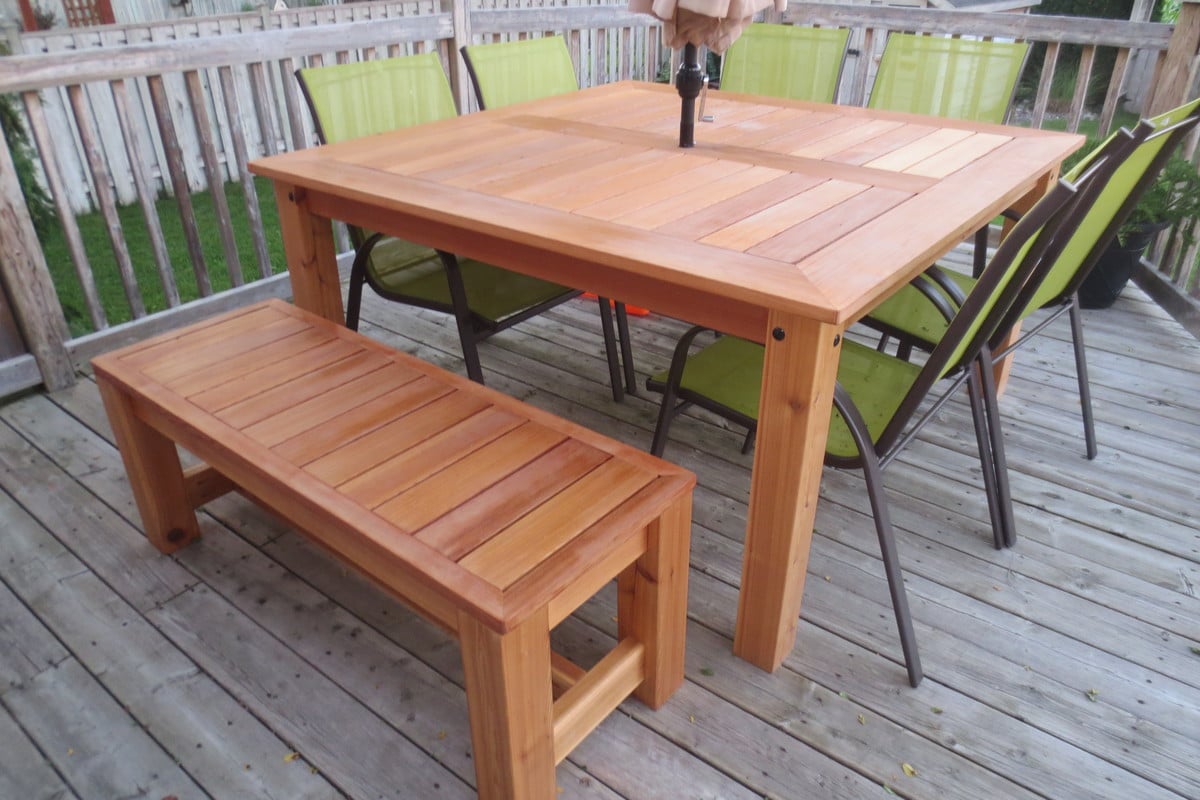
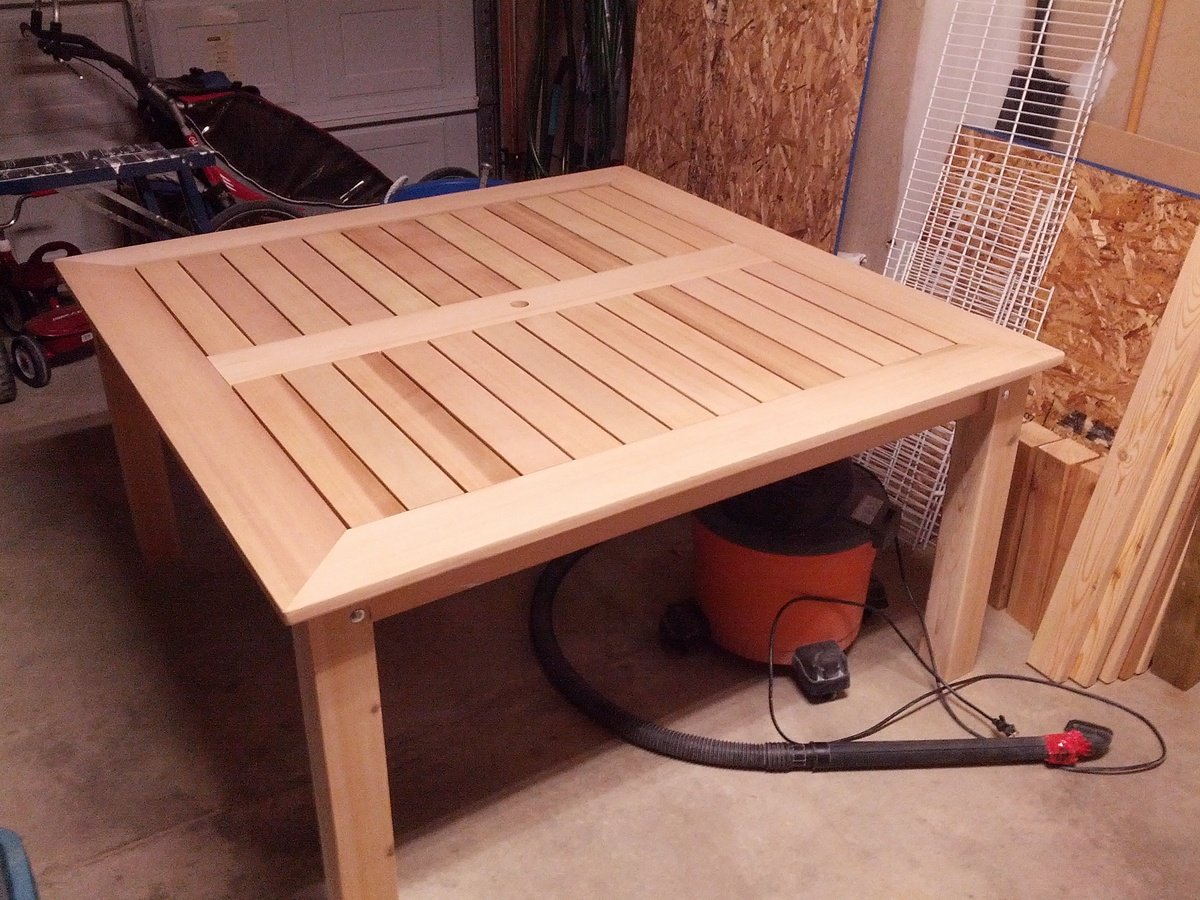
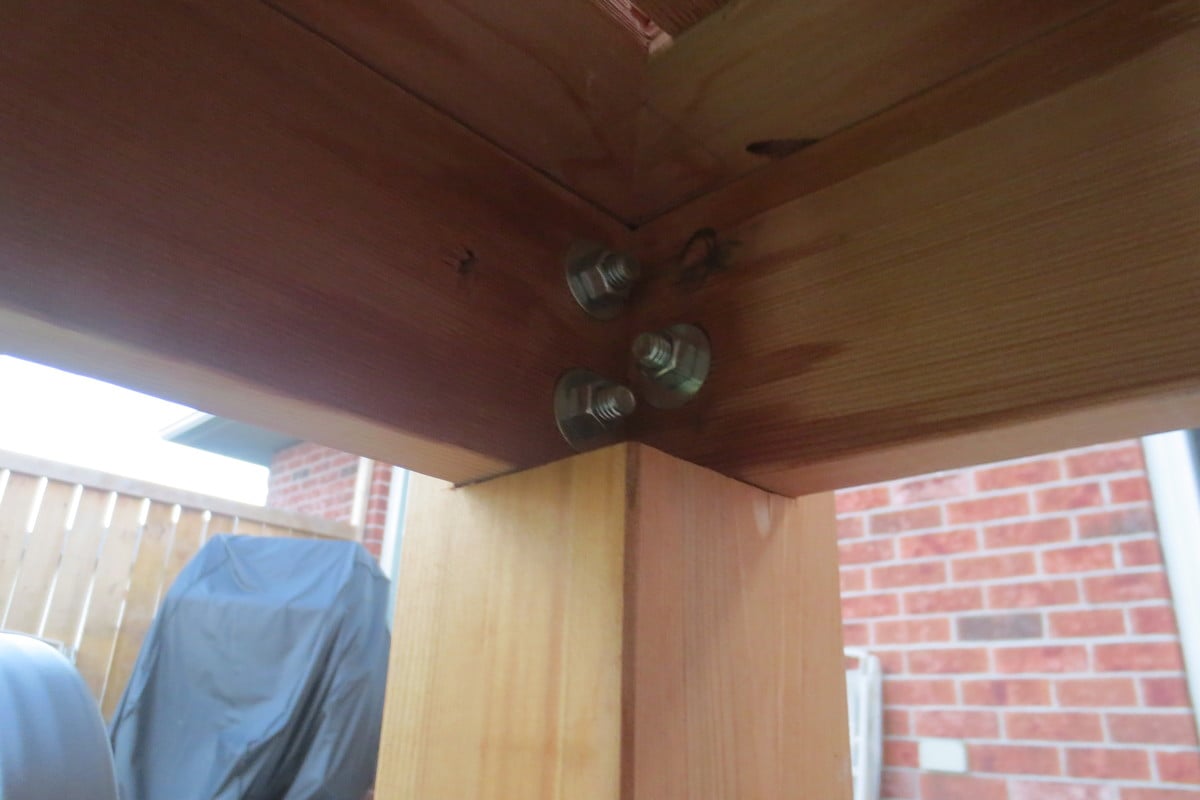
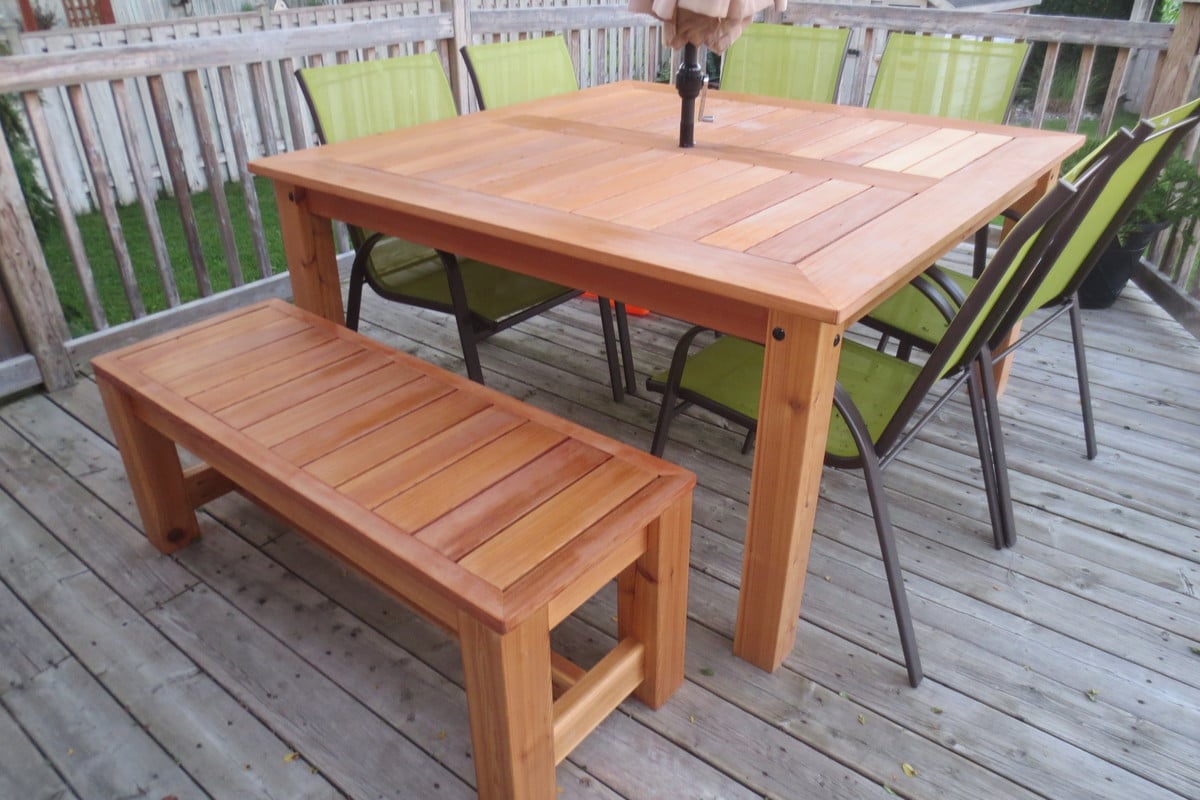
I grabbed this idea from one of the brag posts linked off of Ana's easy dining table post. The entire table top is made from clear Western Red Cedar. The legs are made from 4x4 cedar fence posts (the clearest I could find). The table top is 5ftx5ft. All the joints were made using Kreg's pocket hole kit.I did change a couple of things from the original picture that was posted:

1. I notched out the 4x4 cedar legs to accept the main frame of the table top (which provides the best support possible) and also bolted though the leg and frame. Not to mention it gives it a more finished look than simply putting the legs inside the frame and bolting through.

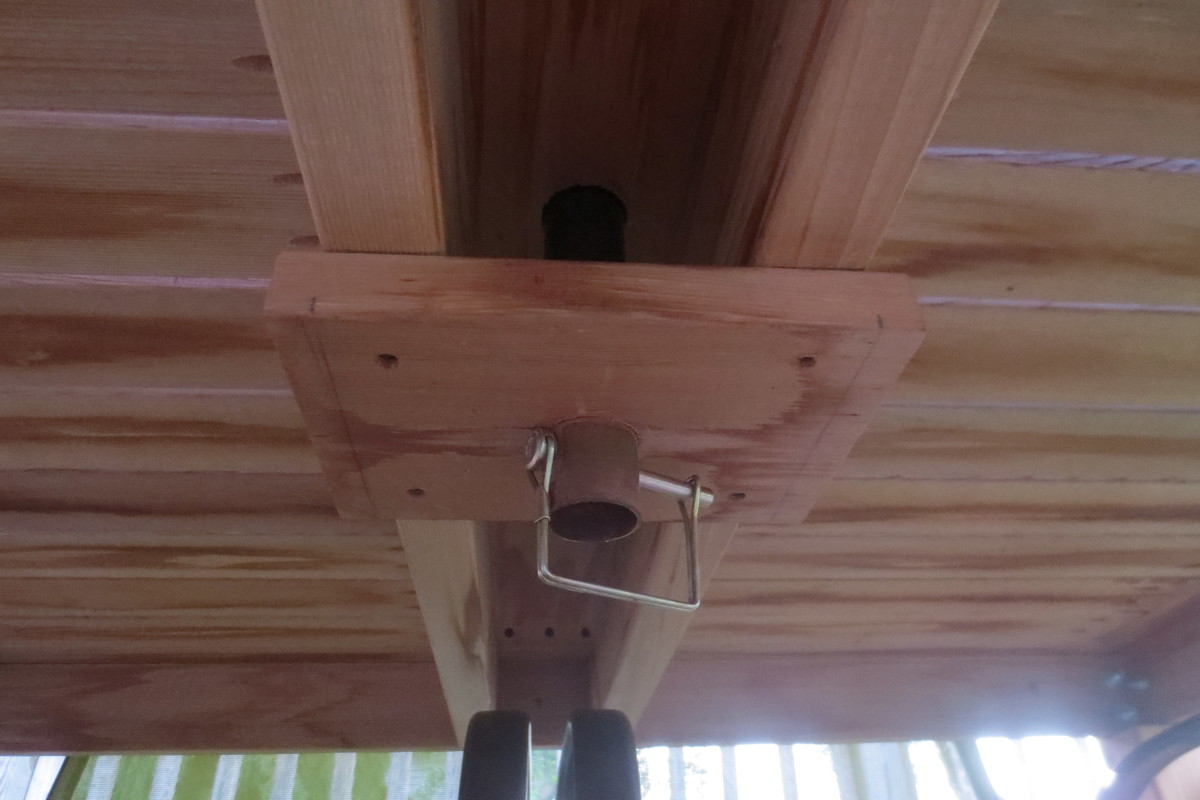
2. I also made a custom bracket to support an umbrella so that I did not have to have bulky umbrella stand under the table (see attached pic)

I finished the table and bench with two coats of Teak Oil. I am not convinced this was the best choice, but it sure did look awesome the first month after it was complete. The colour of the cedar has faded a bit now that it has been out in the elements for two months. Any further suggestions on great finishes that hold up to the weather are appreciated.

Estimated Cost
$290.00
Estimated Time Investment
Weekend Project (10-20 Hours)
Finish Used
Teak Oil
Recommended Skill Level
Intermediate

Comments

mmeixner

Thu, 06/30/2016 - 20:50

I really love this table. Could you provide more details on construction, or post more photos of under the table? What is the table top's thickness? Looks like you used 13 boards 1x4 and the outside boards seem to be 1x8 but I'm not sure. Also, how did you attach the table top to the base ?

thank you, great work!

Michael

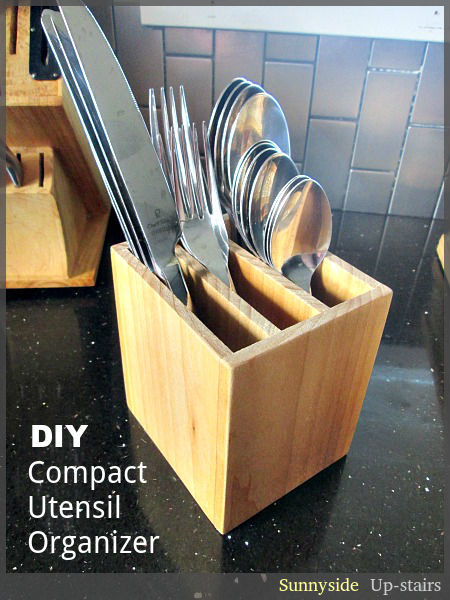
Compact Utensil Organizer

I made a counter top utensil organizer for our little kitchen and love how it solved a few utensil difficulties for us. I wish I could post plans, but all I can offer for now are photos and a brief explanation on my little blog: http://sunnysideup-stairs.blogspot.com/2014/07/compact-utensil-organize…

Estimated Time Investment
An Hour or Two (0-2 Hours)
Finish Used
Cutting Board Conditioner (beeswax, carnauba wax, oil blend)
Recommended Skill Level
Starter Project

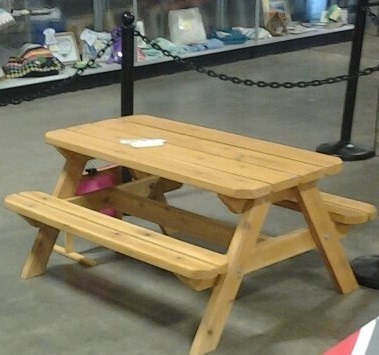
GREAT FOR KIDS AND FOR COUNTY FAIR EXIBIT

This was a fun project. I built it for our local county fair and it was a hit, I won an award.

I used all cedar 2x4 and 2x6 lumber. I used pocket hole screws. and glue and  I used carriage bolts to make it stronger. I used Thompson Simi- transparent stain/ sealer in a Honey color for the finish. It will last a long time and  will be perfect for  all kids, 

Estimated Cost
$65
Estimated Time Investment
Weekend Project (10-20 Hours)
Finish Used
Thompson's Honey semi transparent stain/ sealer
Recommended Skill Level
Intermediate

Beautiful steps

Directions worked like a charm, thank you, Ana for what you do!

Comments

Mud Kitchen

Submitted by Noyehx4 on Mon, 07/20/2020 - 12:48

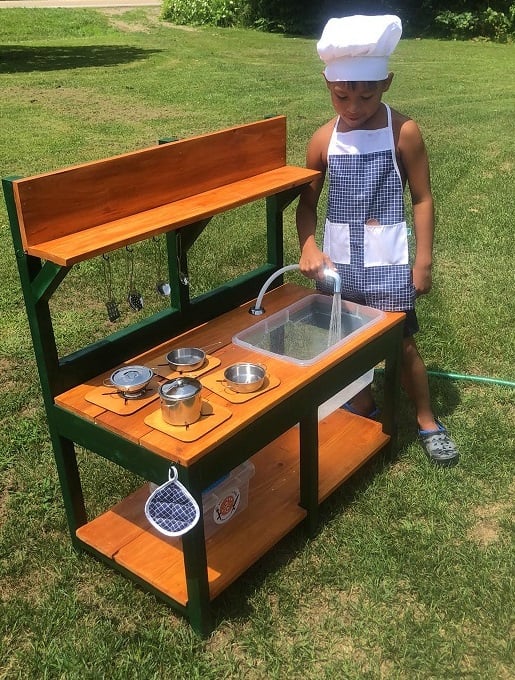
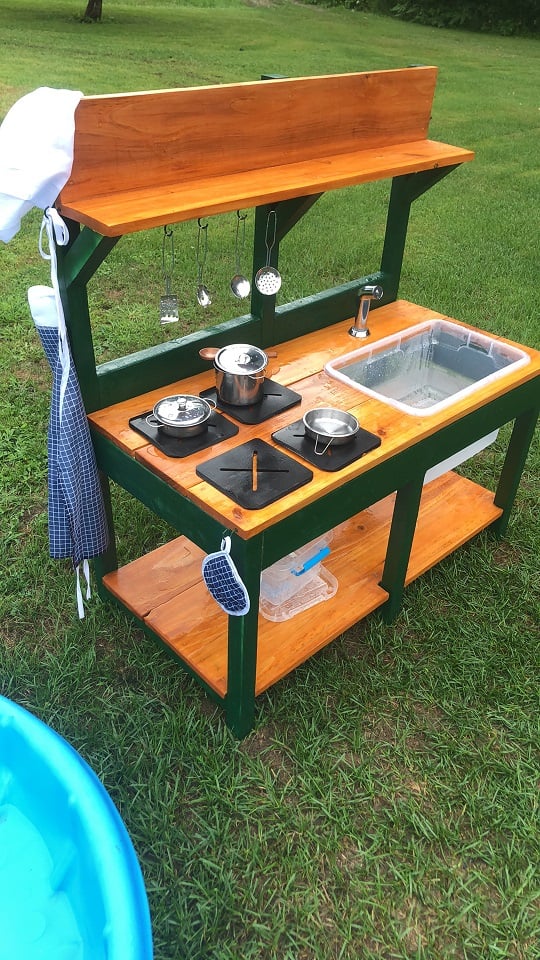
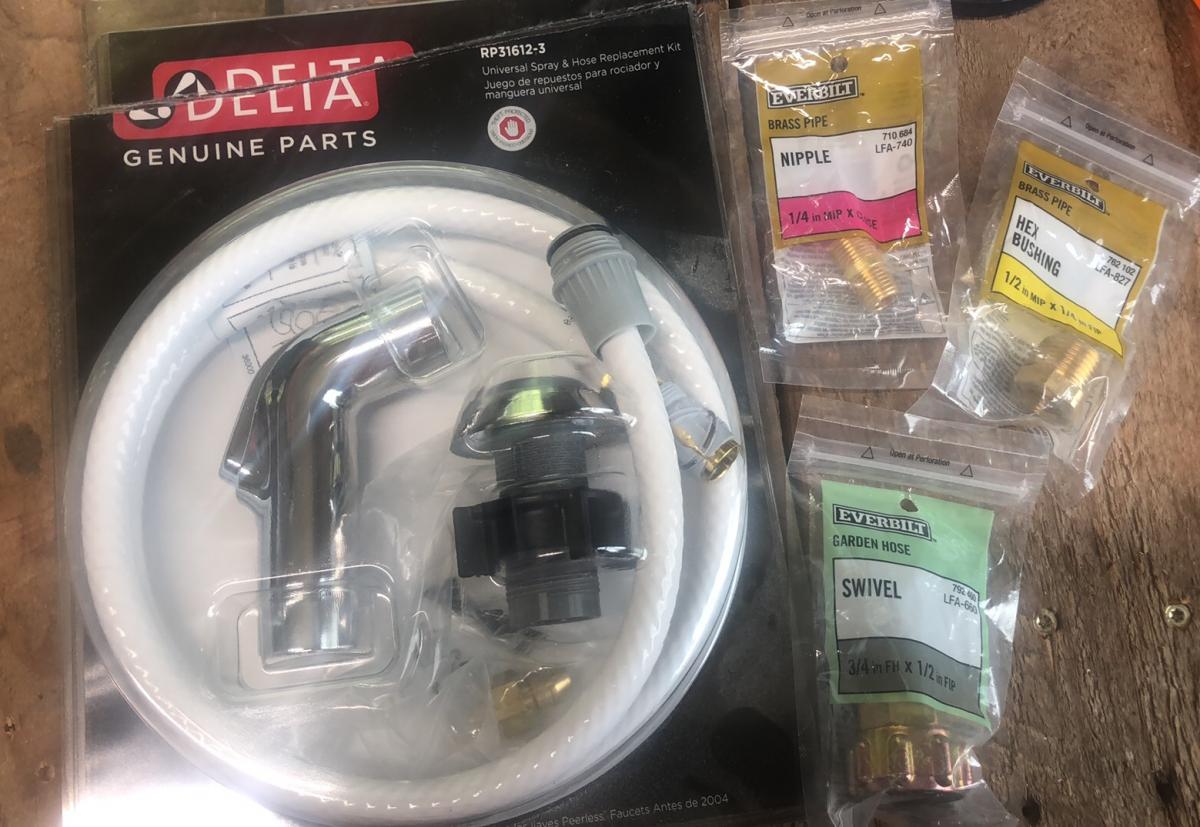
This was my first build, like ever. I am very proud! Props given to my hubby who is a carpenter by trade. I went back and forth on stains and paint colors at home depot. He didn't rush me and was awesome the entire time! He actually picked up the supplies, and is now a fan of the self tap screws! He thought he knew where everything in home depot was, but he had to ask to find those LOL. He wanted to use his new nail gun, but I wanted to follow the plans. The plans are awesome! We decided not to add an oven door just yet. Likely will soon. (Avoiding pinched fingers for now) I also have the knobs for the front, but it was hot and since I had only just stained them, they needed time to dry and second coat yet. (I kind of forgot about them once I finished them with my new dremel) We purchased the hose kit from the kitchen section at home depot. It came with everything, I searched market place and even posted asking if anyone had a used one for sale. No luck. This was $20 and came with everything, the guys at home depot showed me what adapters to get to ensure that it would hook up to our garden hose, and we grabbed those too and they worked perfectly! I messed up cutting one of the angles for the shelf the wrong way, but there was enough scraps for my husband to help me fix it. It was a fun build, and so rewarding to see our kids playing with it! I used my dremel 4300 and it wasn't powerful enough for the thicker wood, so my stove tops are thinner, but he actually enjoys setting them up and spraying them off the table with his hose! I painted the brass hooks green when we were painting the kitchen so they would match. The pots and pans came with the little tote and the apron chef hat and pot holder. It was a perfect finishing touch. *Edit to add photos kitchen hose kit from home depot, reading comments, others had a hard time finding adapters. I suggest taking what you have with you to home depot so they can show you what adapters you need. We needed three because we have a quick attachment on the end of our garden hose, (for our sprayer) now little mans mud kitchen can be connected and disconnected easily!

Built from Plan(s)
Estimated Cost
$75
Estimated Time Investment
Weekend Project (10-20 Hours)
Finish Used
Rust-Oleum Ultra Cover 2X Enamel Spray Paint and Behr Semi-Transparent Waterproofing Exterior Wood Stain and Sealer
Recommended Skill Level
Starter Project

Barn Door Pantry

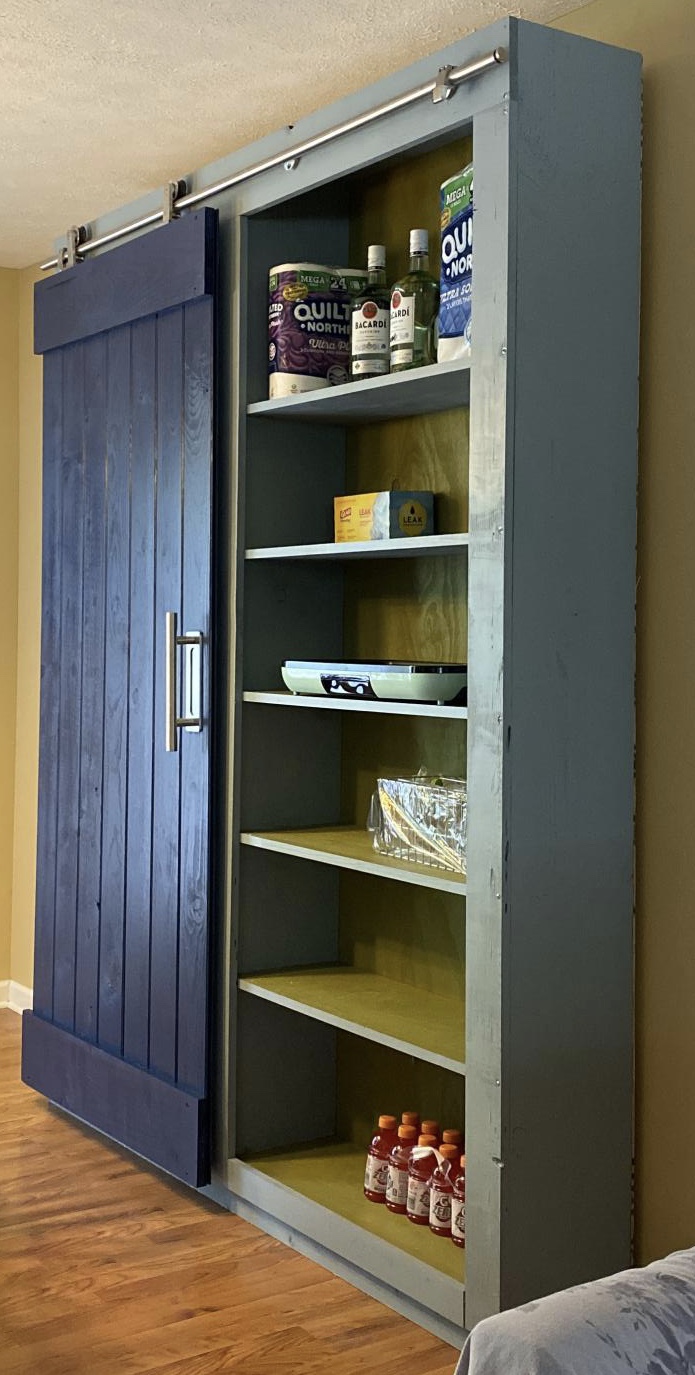
We didn’t have much storage space in our little galley kitchen. Imagine how excited I was to find this plan on my favorite site.
This was my first build using my new circular saw. For previous projects, I’d take both the shopping list and cut list to Lowe’s and have them cut the wood. This time, I made all my cuts. I was nervous but love how it turned out.
I anchored it to the wall because with the barn door and the hardware weight, it felt a little front heavy.
We used the same color as our kitchen cabinets (AH13 Salty Dog) and then selected coordinated colors for the body (AH18 Debonair) and shelves (AH15 Rural Green).

Built from Plan(s)
Estimated Cost
500
Estimated Time Investment
Weekend Project (10-20 Hours)
Finish Used
Sherwin Williams paint:
Barn Door (AH13 Salty Dog)
Cabinet (AH18 Debonair)
Shelves & Back (AH15 Rural Green)
Recommended Skill Level
Intermediate

Comments

Sister's distressed table

Submitted by SamWiseMan on Mon, 10/08/2012 - 17:46

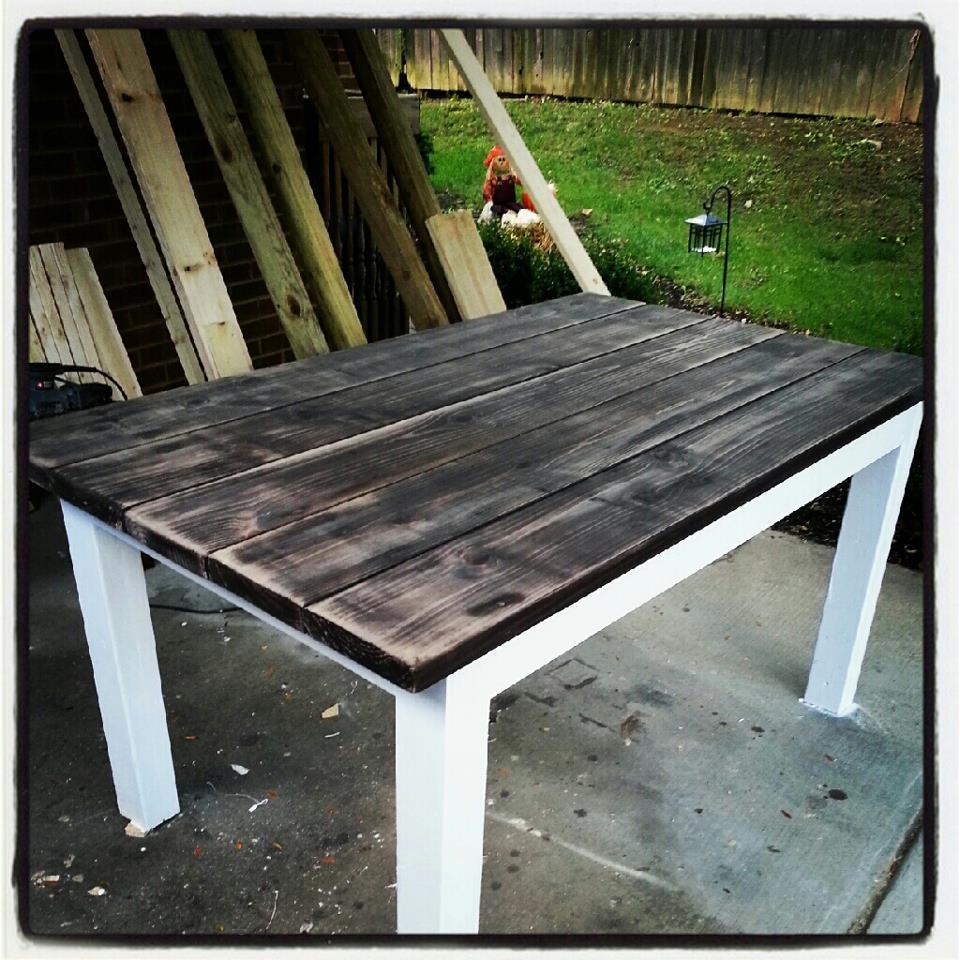
After I built my table (the farmhouse/tryde), my sister wanted a table for her new home. She had looked online and found a table that someone had refurbished from an old table, and put a new top on it..

So once she described it to me, I got started. I again used 2x4s glued/screwed together for the legs. Then I got 2x8 and start putting them down. Since these are such big boards, you have to be extremely careful not to get ones that aren't straight. If they are warped, they will make your table wobbly once you screw them down. After I finally got past that, I began staining.

For the distressed-ish look, I used Rustoleum's water-based Kona stain. I stained each board and then use a wire brush to "scruff" the boards up a bit. From there, I sanded the tops with a combination of 60 grit and 220 grit. I used Rustoleum's matte-finish poly to give it a very soft feel and look.

This table compares best with the farmhouse.
Estimated Cost
$65
Estimated Time Investment
Afternoon Project (3-6 Hours)
Finish Used
Rustoleum's water-based Kona stain and ultimate-matte finish poly.
Recommended Skill Level
Beginner

Comments

SamWiseMan

Mon, 10/15/2012 - 14:48

I'm sure you can build it to come apart. This particular one, no. I made another where the top will come off as a one solid piece, but this top is screwed in each individual piece.

Now you could unscrew everything and screw it all back together, but then you would have to make touchups to the paint and stuff. I use white caulk to fill the seams from the base of the table to the table top, and to the legs to the base.

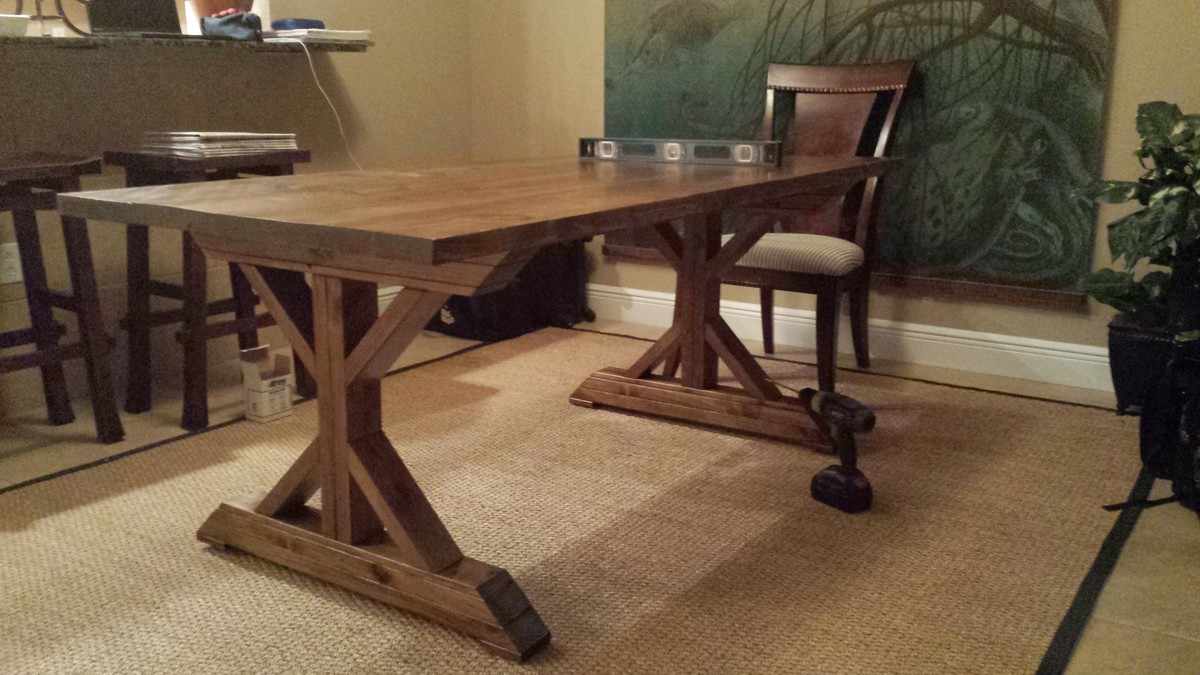
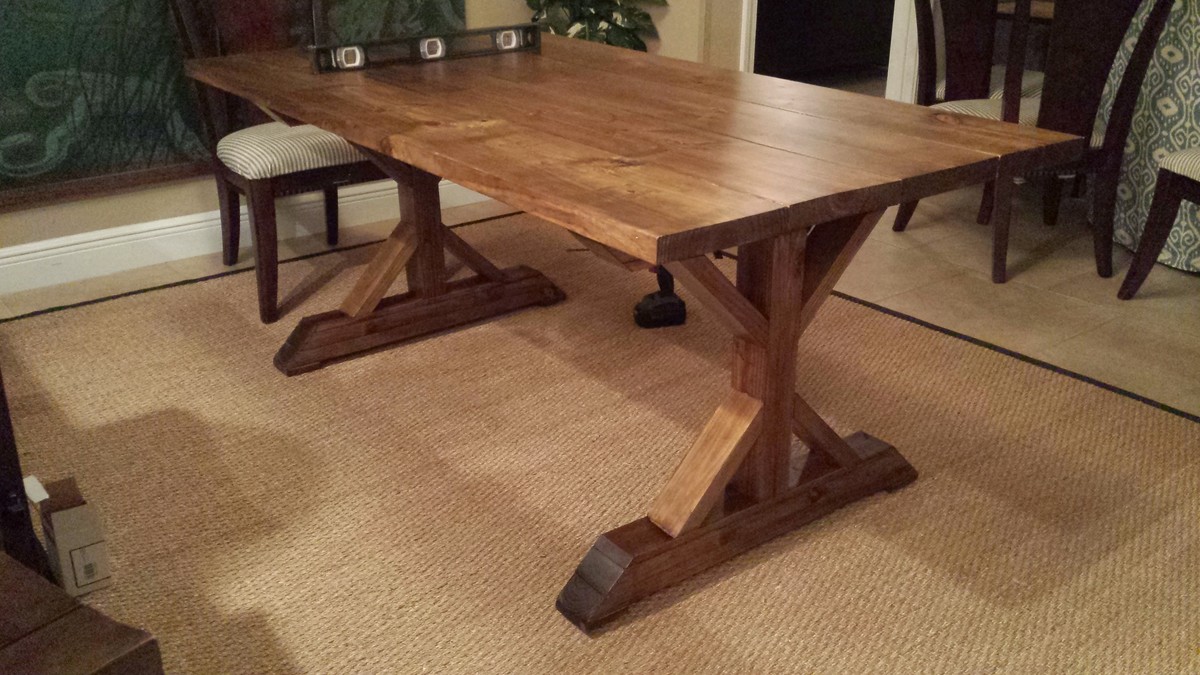
Fancy X Farmhouse Table

Submitted by jesskb on Wed, 12/21/2016 - 07:51

Made the table 6 feet long to better fit the space. Made it 2 years ago, just now getting around to post it, but it has held up well in our vacation rental.

Built from Plan(s)
Estimated Cost
$50
Estimated Time Investment
Day Project (6-9 Hours)
Finish Used
Oxidation stain and 5 coats of poly
Recommended Skill Level
Beginner

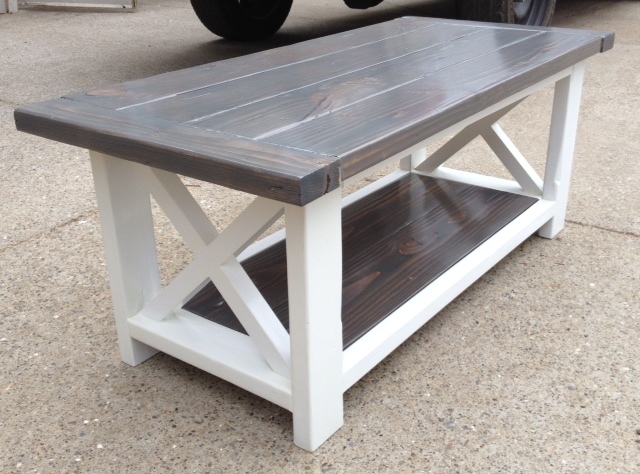
Rustic X Coffee Table

Submitted by OWJ3 on Mon, 09/08/2014 - 20:10

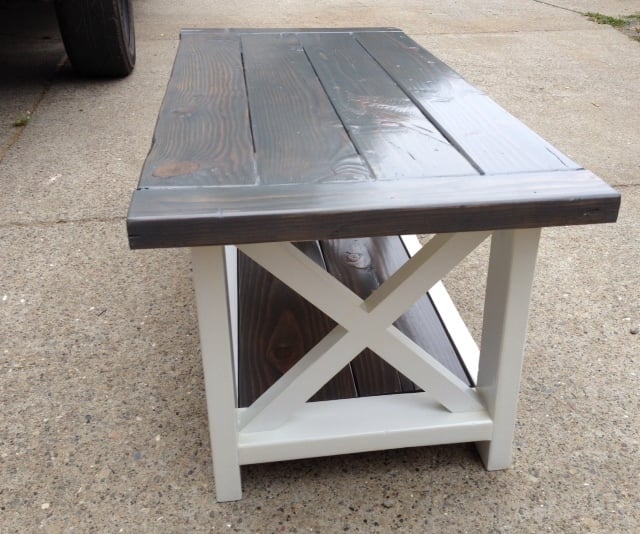
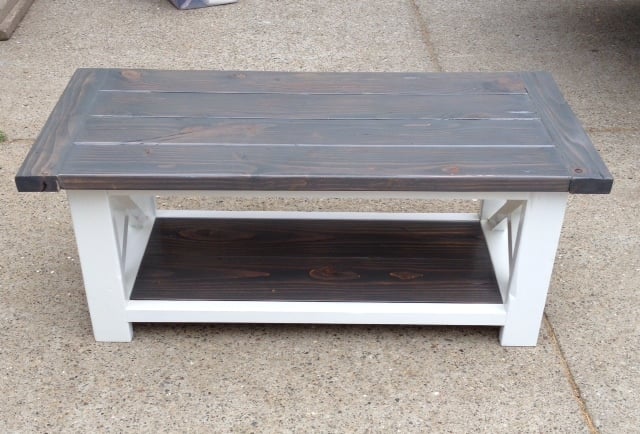
New to woodworking, first Ana-White plan.  Changed the dimensions a little to fit our living room decor.  Bottom shelf is 2x8's.  Ground through the learning curve but pretty happy with the end result.  Hand distressed the project.  Kreg jig made it much easier.  Love this site and looking forward to building new projects!

Built from Plan(s)
Estimated Cost
$51 of wood
$15 of additional materials
Estimated Time Investment
Weekend Project (10-20 Hours)
Finish Used
White - 3 coats of Rust-Oleum Gloss White,
Minwax Pre-Stain,
Stain - 2 coats of Minwax Classic Gray,
Sealed in with 2 coats of Minwax Polyurethane,
Sanded with 220 grit in between coats
Recommended Skill Level
Beginner

Comments

michele098

Tue, 09/09/2014 - 07:32

Hello!


I'm looking to scale this project down for my living room as well - do you mind sharing your final dimensions?

Thanks!


OWJ3

Tue, 09/09/2014 - 08:37

Top surface:  (4) 2x6's cut 42" long - which will be 22" wide;

Breadboards:  (2) 2x4's cut 22" long - Top surface becomes just shy of 49" in overall length;

Bottom surface:  (2) 2x8's cut 36" long;

White frame: 18" wide to the very outside edges,

                      43" long to the very outside edges,

Hope that helps.

Drop leaf round storage table

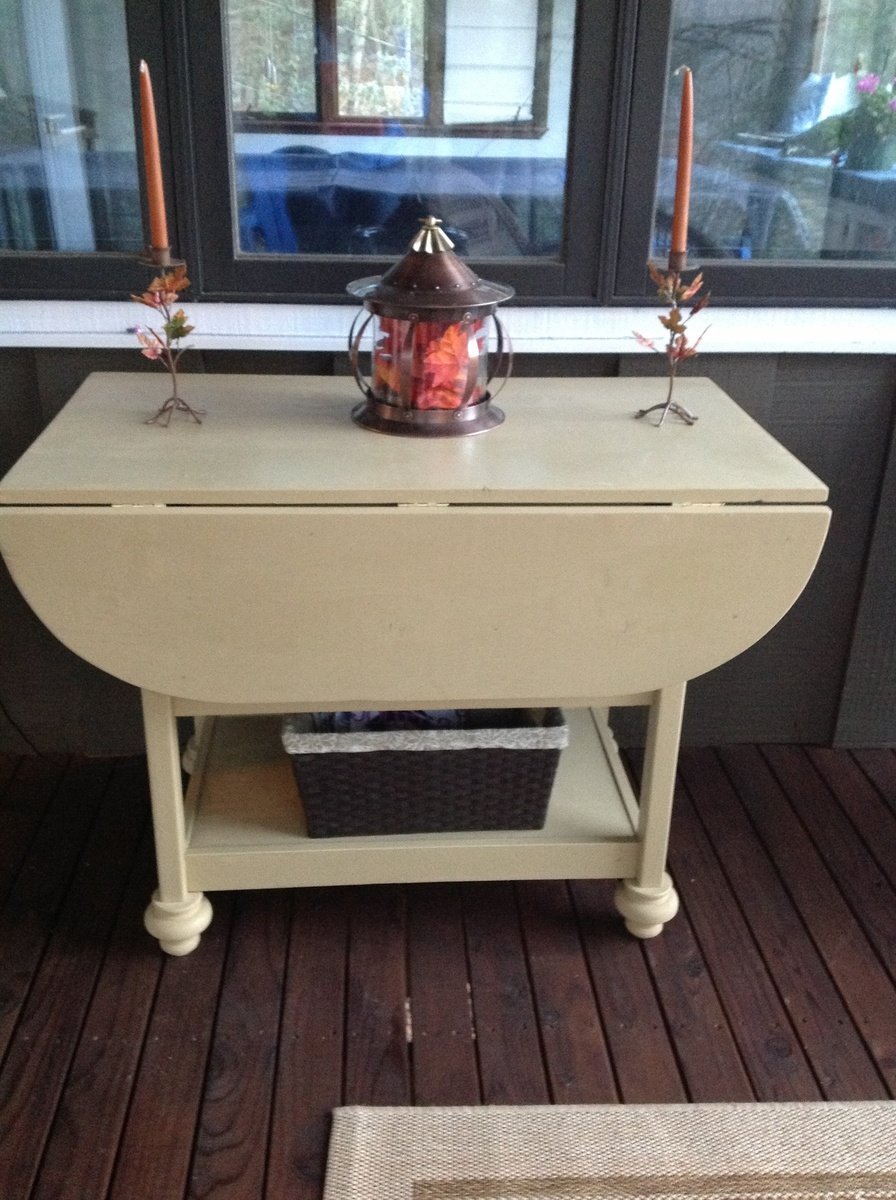
This table is perfect for our screened in porch at the lake house. Everyone seems to gather there so we have rockers and casual seating. When we want to eat out there we just open the table and move it to the center.

Built from Plan(s)
Estimated Cost
75.00
Estimated Time Investment
Afternoon Project (3-6 Hours)
Recommended Skill Level
Beginner

Comments

Jake

Thu, 11/29/2012 - 04:22

NCLimo...you do really excellent work. I shy away from curves because my jig saw has a mind and GPS of its own. And to build this table in an afternoon is amazing. I would probably take several days. Keep the projects coming and offer any advice you can throw my way.

Back