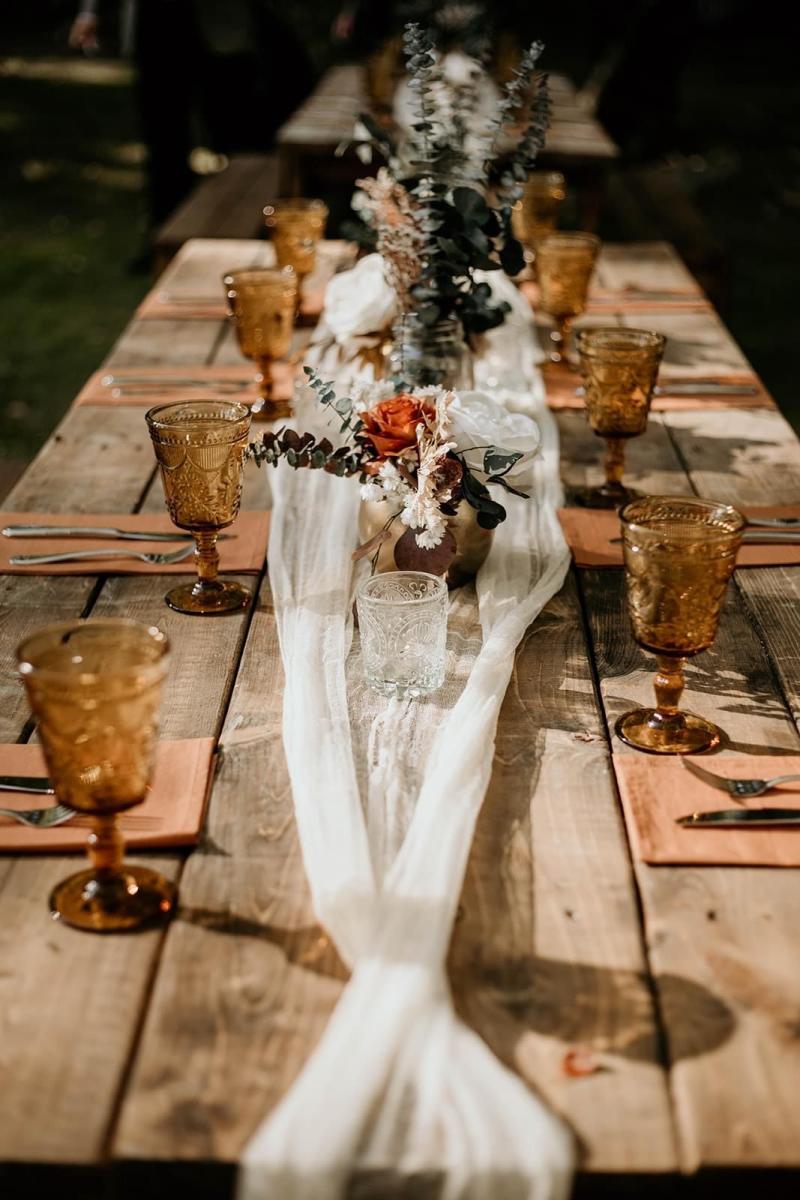
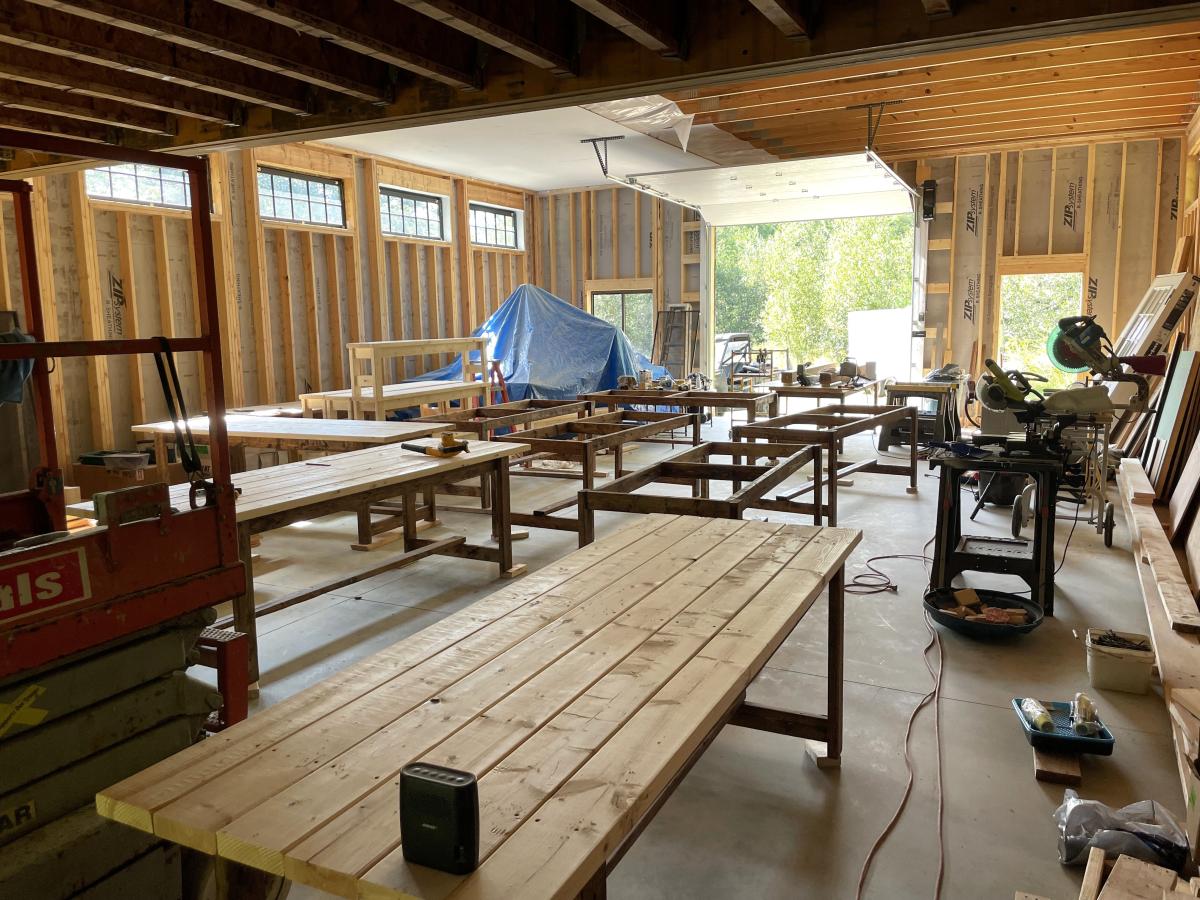
DIY Wedding Tables and Benches
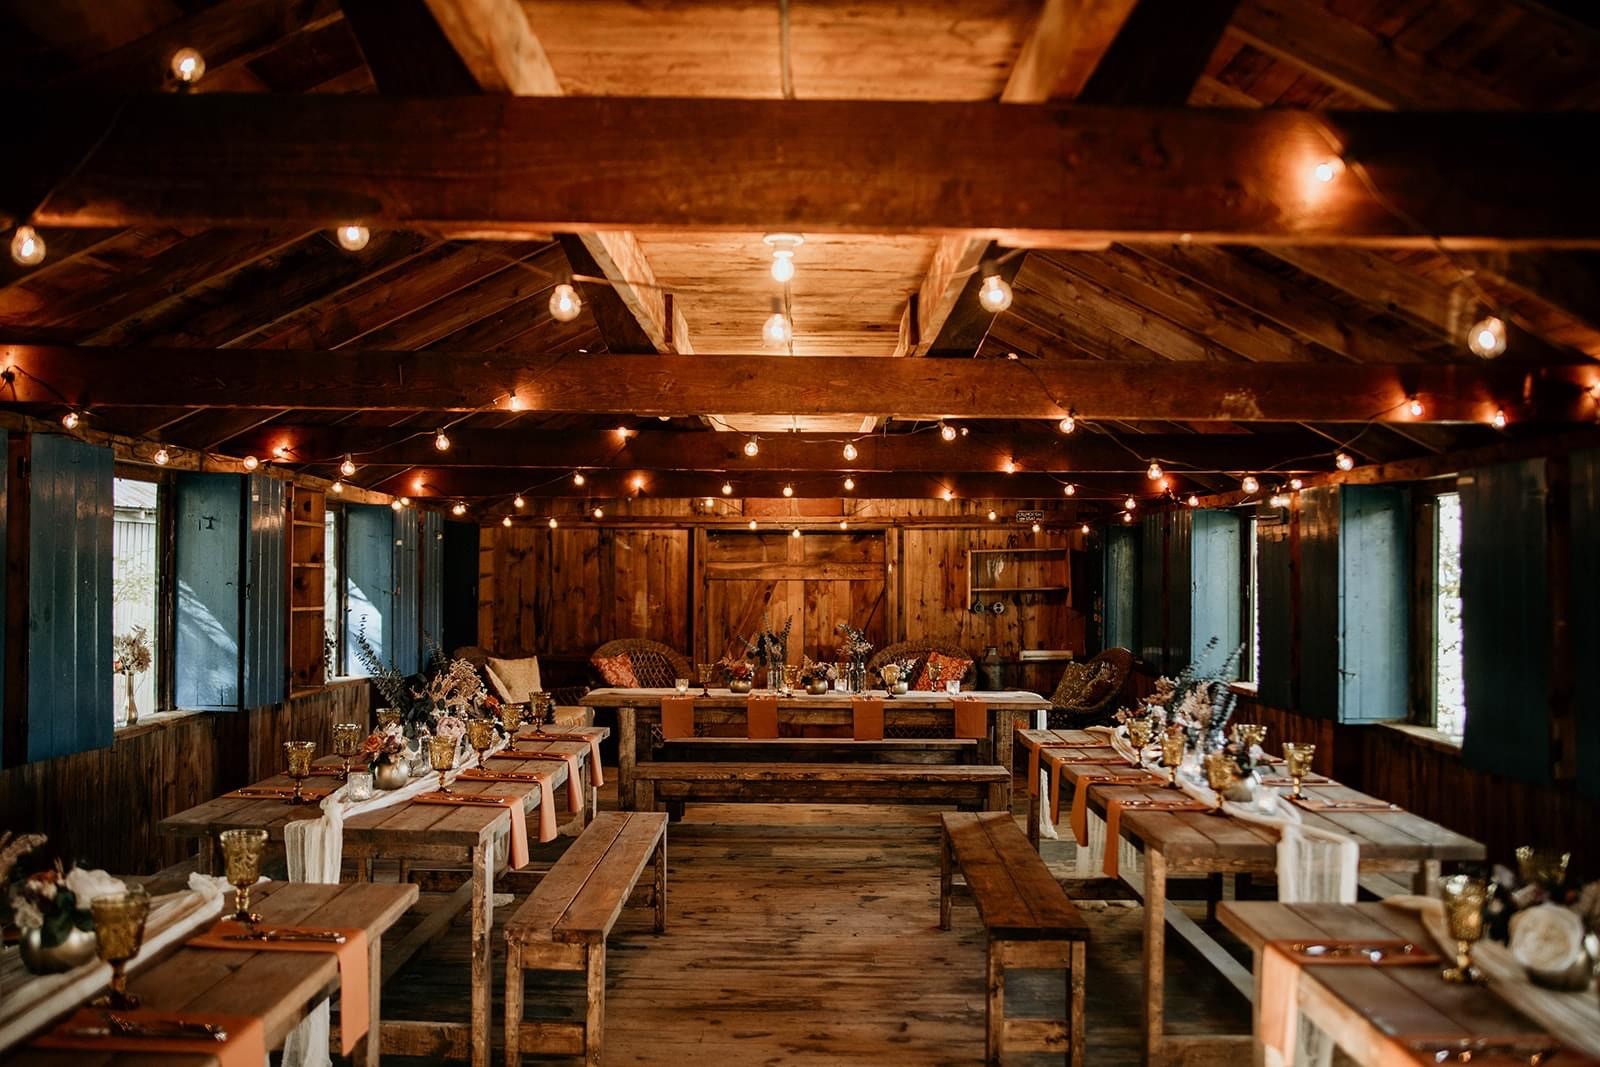
We made these tables and benches for my daughter’s wedding. They made setup for dinner just what she wanted!
Cindy Prescott
We made these tables and benches for my daughter’s wedding. They made setup for dinner just what she wanted!
Cindy Prescott

Thanks for the plans! My wife and cat love that cart, and I'm not sure who will win )))
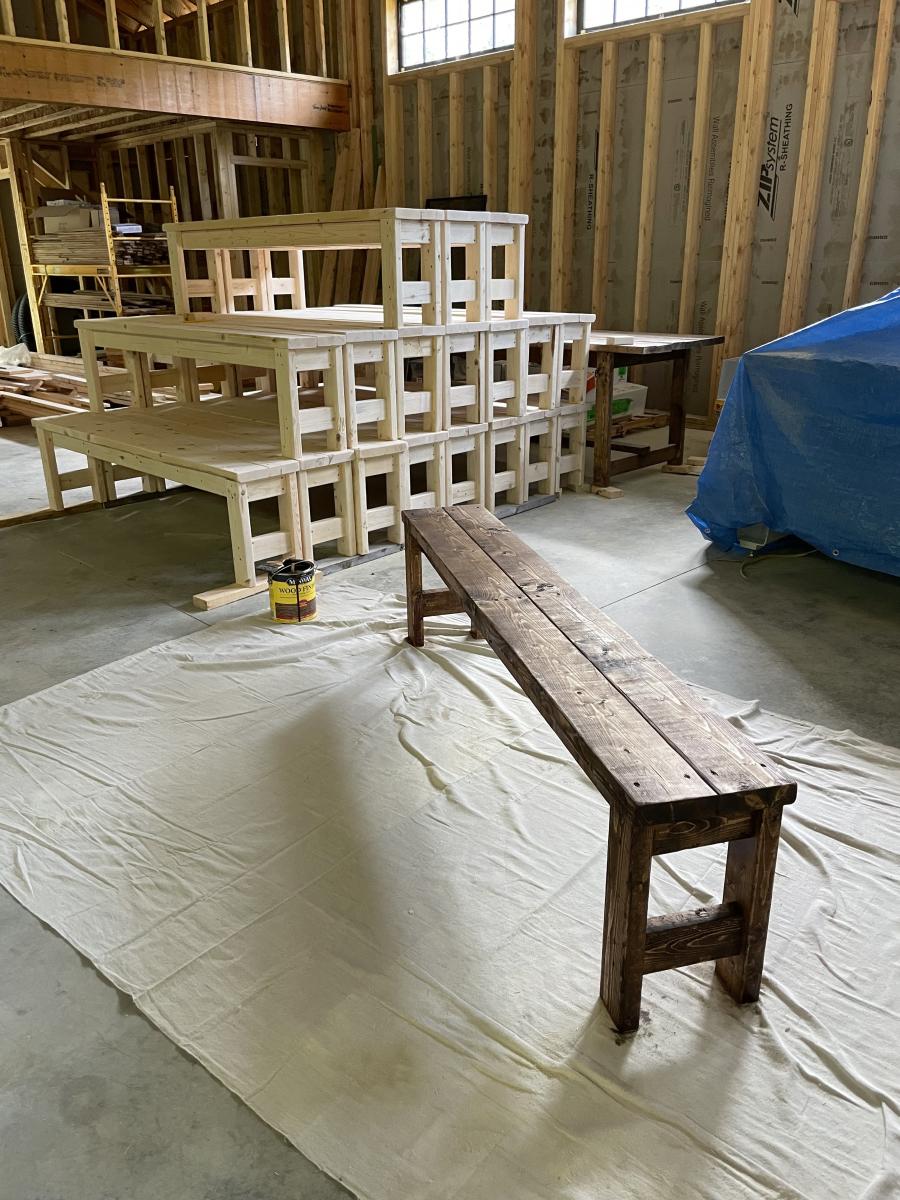
This is my first build from Anna's plans.

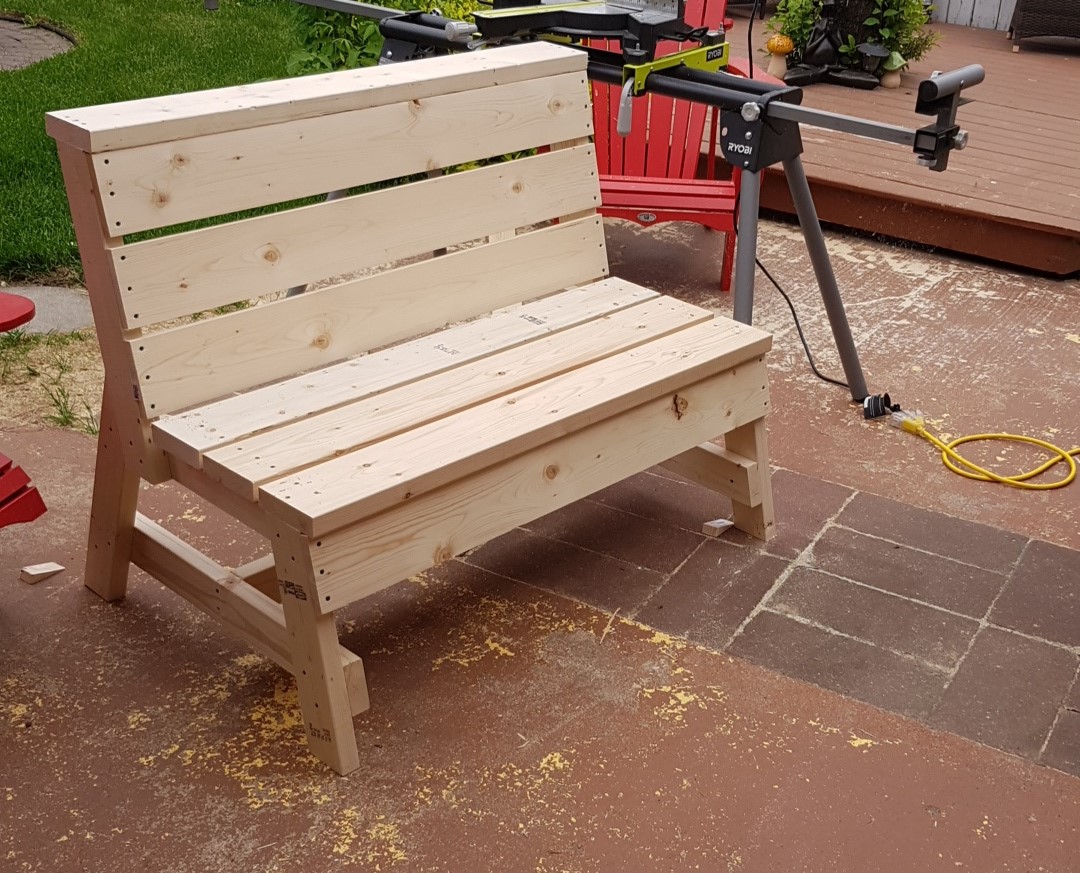
I built the one bench using the original plan with the storage and table top unit but needed two additional seating benches to go around the firepit without the bulk of the backside of the bench.
I modified the original plan as follows:
Shopping List:
(2) 2X6X8
(3) 2X4X8
(2) 1X6X8
Cutting List:
(2) 2X4X17" front legs, 15 degree cuts, parallel long to short
(2) 2X4X23" back support, 15 degree cuts, parallel long to short
(2) 2X4X20.75" back legs, 15 and 60 degree cuts, not parallel long to long
(2) 2X4X23" Back support, 15 degree cuts, parallel long to short
(2) 2X4X24.75" under seat, 15 degree cuts, not parallel long to long
(2) 2X4X30" bottom support, 15 degree cuts, not parallel long to long
(1) 2X4X42" bottom cross brace between leg sets, 90 degree cuts
(2) 2X6 cut equally in half, 3 for the seat and 1 for the top plate
(2) 1X6 cut equally in half, 3 for the back rest and 1 to be tucked under the seat overhang
Sat, 08/15/2020 - 22:52
I am the individual who submitted this modification on June 14, 2020. I was making a change to the submission but somehow sent it before correcting the cut list. The "(2) 2X4X23" back support, 15 degree cuts, parallel long to short" is repeated twice and should be only once.
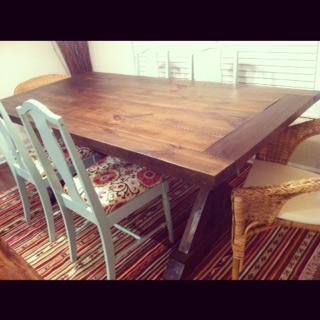
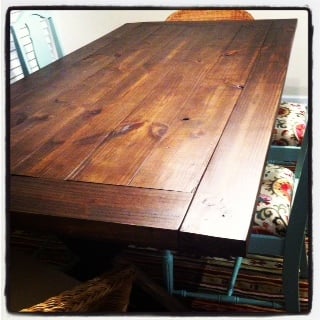
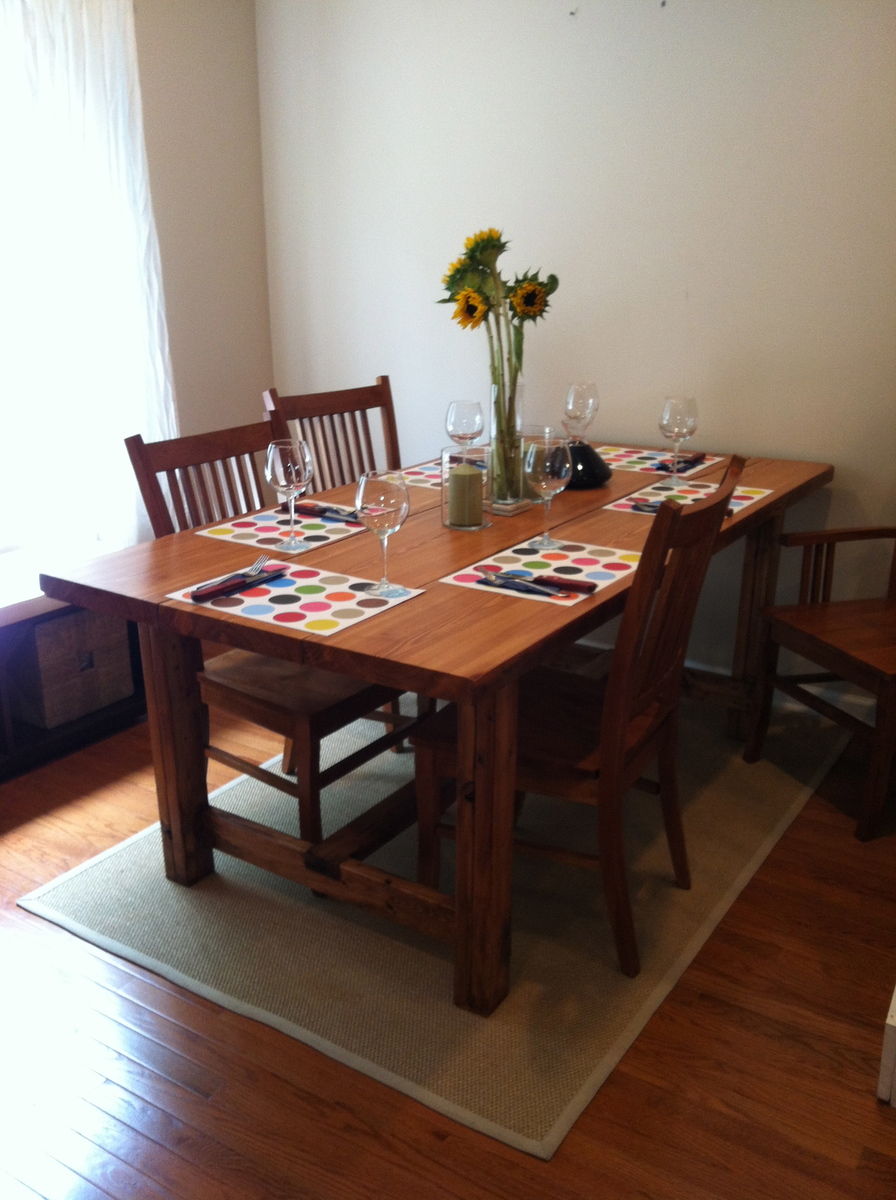
I decided to make this table about three weeks before this plan came out! I wanted a dinning table so I found one at William Sonoma that I loved and figured I could take several pieces from other table plans to make this one from WS. Then sure enough out comes this one after I had already started my plan! So, its not exactly the same but it is close and I do love it so much. I was afraid it wouldn't be secure enough with just the top boards running across the legs so I added a frame to support underneath like one of the other table plans does. This was yet another learning process so it took awhile and the boards aren't as perfect as I'd like them to be but I think that adds to the character I tried to give it! Overall, not an awful project.

Fri, 11/09/2012 - 14:52
I love the look of your table, what size boards did you use? I wanna copy. :)
Sat, 11/10/2012 - 07:18
Remember I was copying a table I fell in love with, so I ripped 2x8's down to exactly 6 inches for the inside boards and the outside boards are 2x6's ripped to 5 inches. I know that sounds wasteful but I did use all the scrap from the 2x8 boards on other projects. This is obviously not necessary. I insisted on having an odd number of boards so I could have a middle board that showed the heart of the pine, but I needed to keep my dimensions as close to the original table (so I felt). This was one of my first projects for my little family so I got a little sentimental! You could very easily use four full 2x8's in the middle and two full 2x6's for the outside pieces and the table will only be an inch wider then mine. I'm so thrilled you like it! Let me know if you have any other questions.
Sat, 11/10/2012 - 21:07
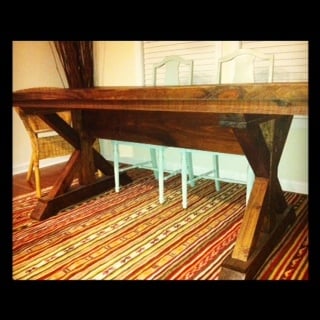
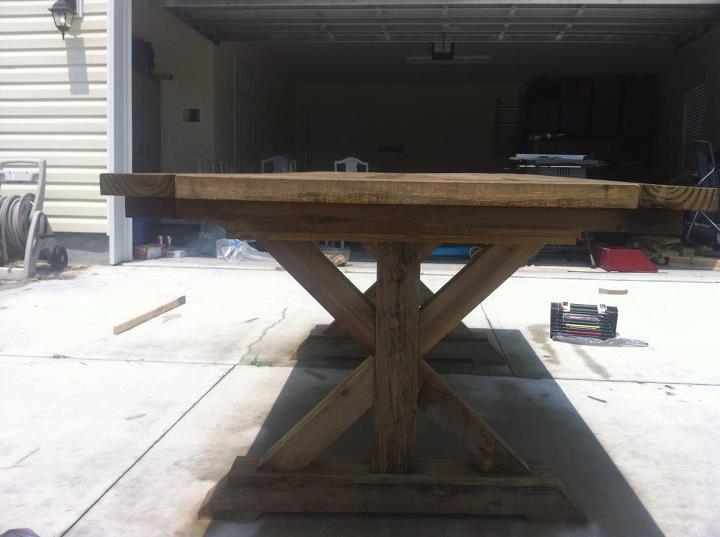
I really do love your version, and thanks for taking the time to respond! One more question, did you use 4x4s on the legs? They look a little beefier, but it's hard to tell from the photo...
Mon, 11/12/2012 - 15:44
I did! But I, again, ripped the angled sections down until they looked right. Wish I could tell you what the measurements came out to but I just cut until I liked it! It was something like 3.25x2.75 or pretty close. Leaving all the peices of the legs the standard 4x4 looked too bulky to me but I thought 2x4's were too thin so I made my own something in the middle!
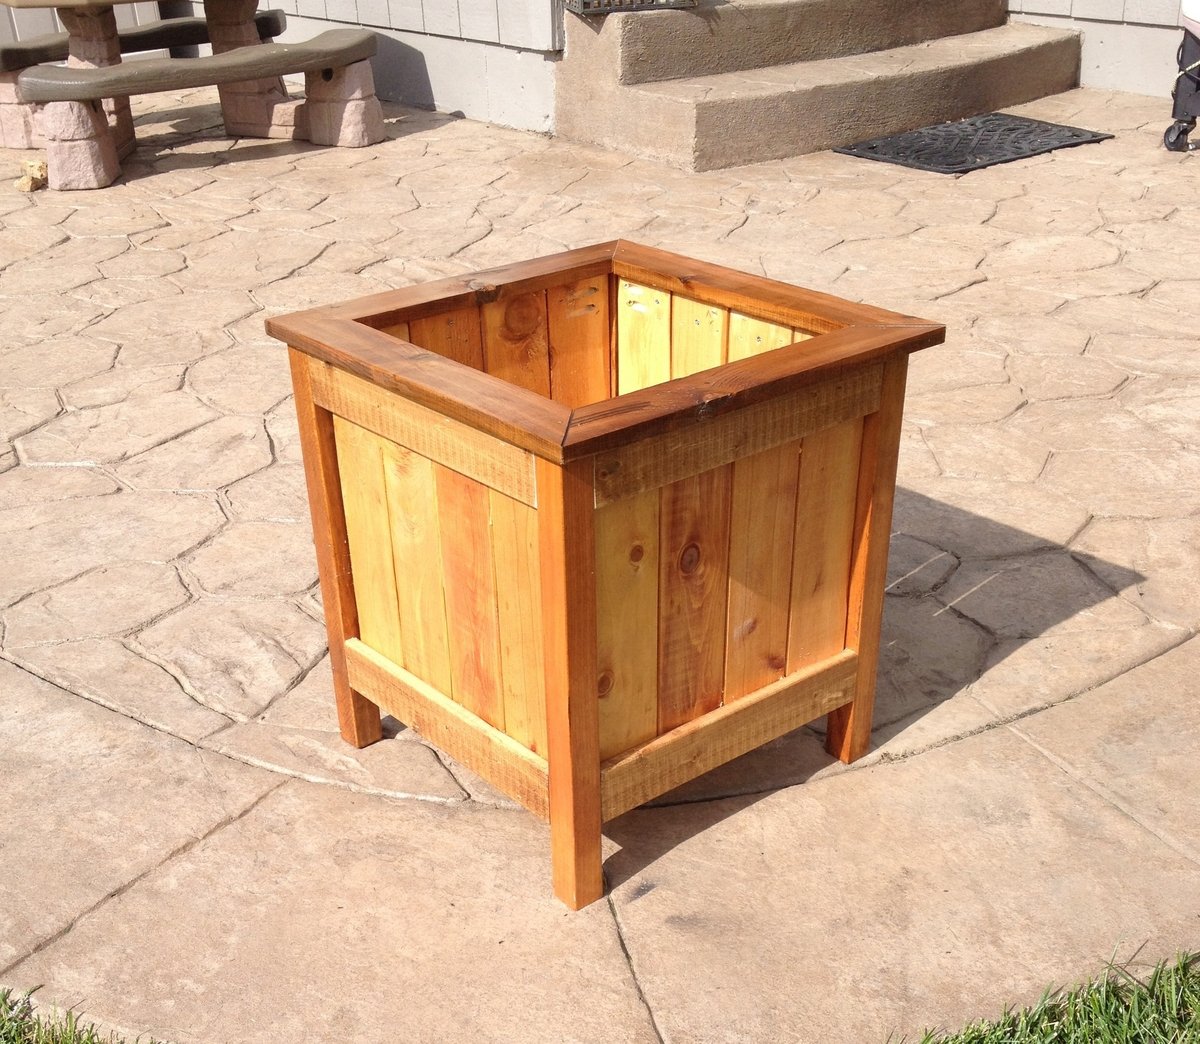
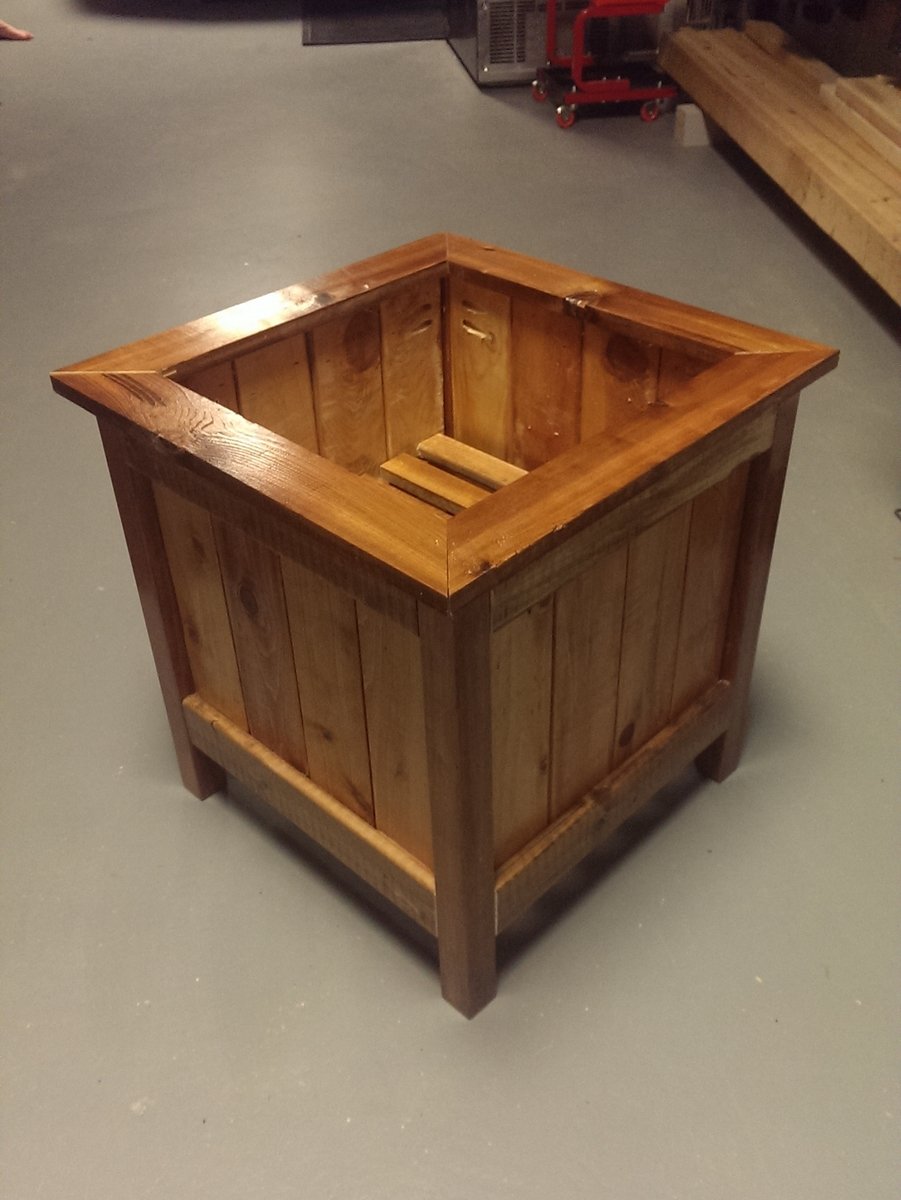
I used the main plan for ideas, but opted to use 3.5 inch pickets instead, which allowed for a smaller planter that wasn't as big. Also chose to miter 1x3s for the top which I think really finishes it off. Sanded everything with a belt sander to 220 grit. Used min wax golden pecan plus three coats of poly inside and out. Finished size was about 17x17. Tile spacers work great to keep the gaps even!

I built a shorter wider version of the bathroom shelves for storage. Stained with Minwax Early American.


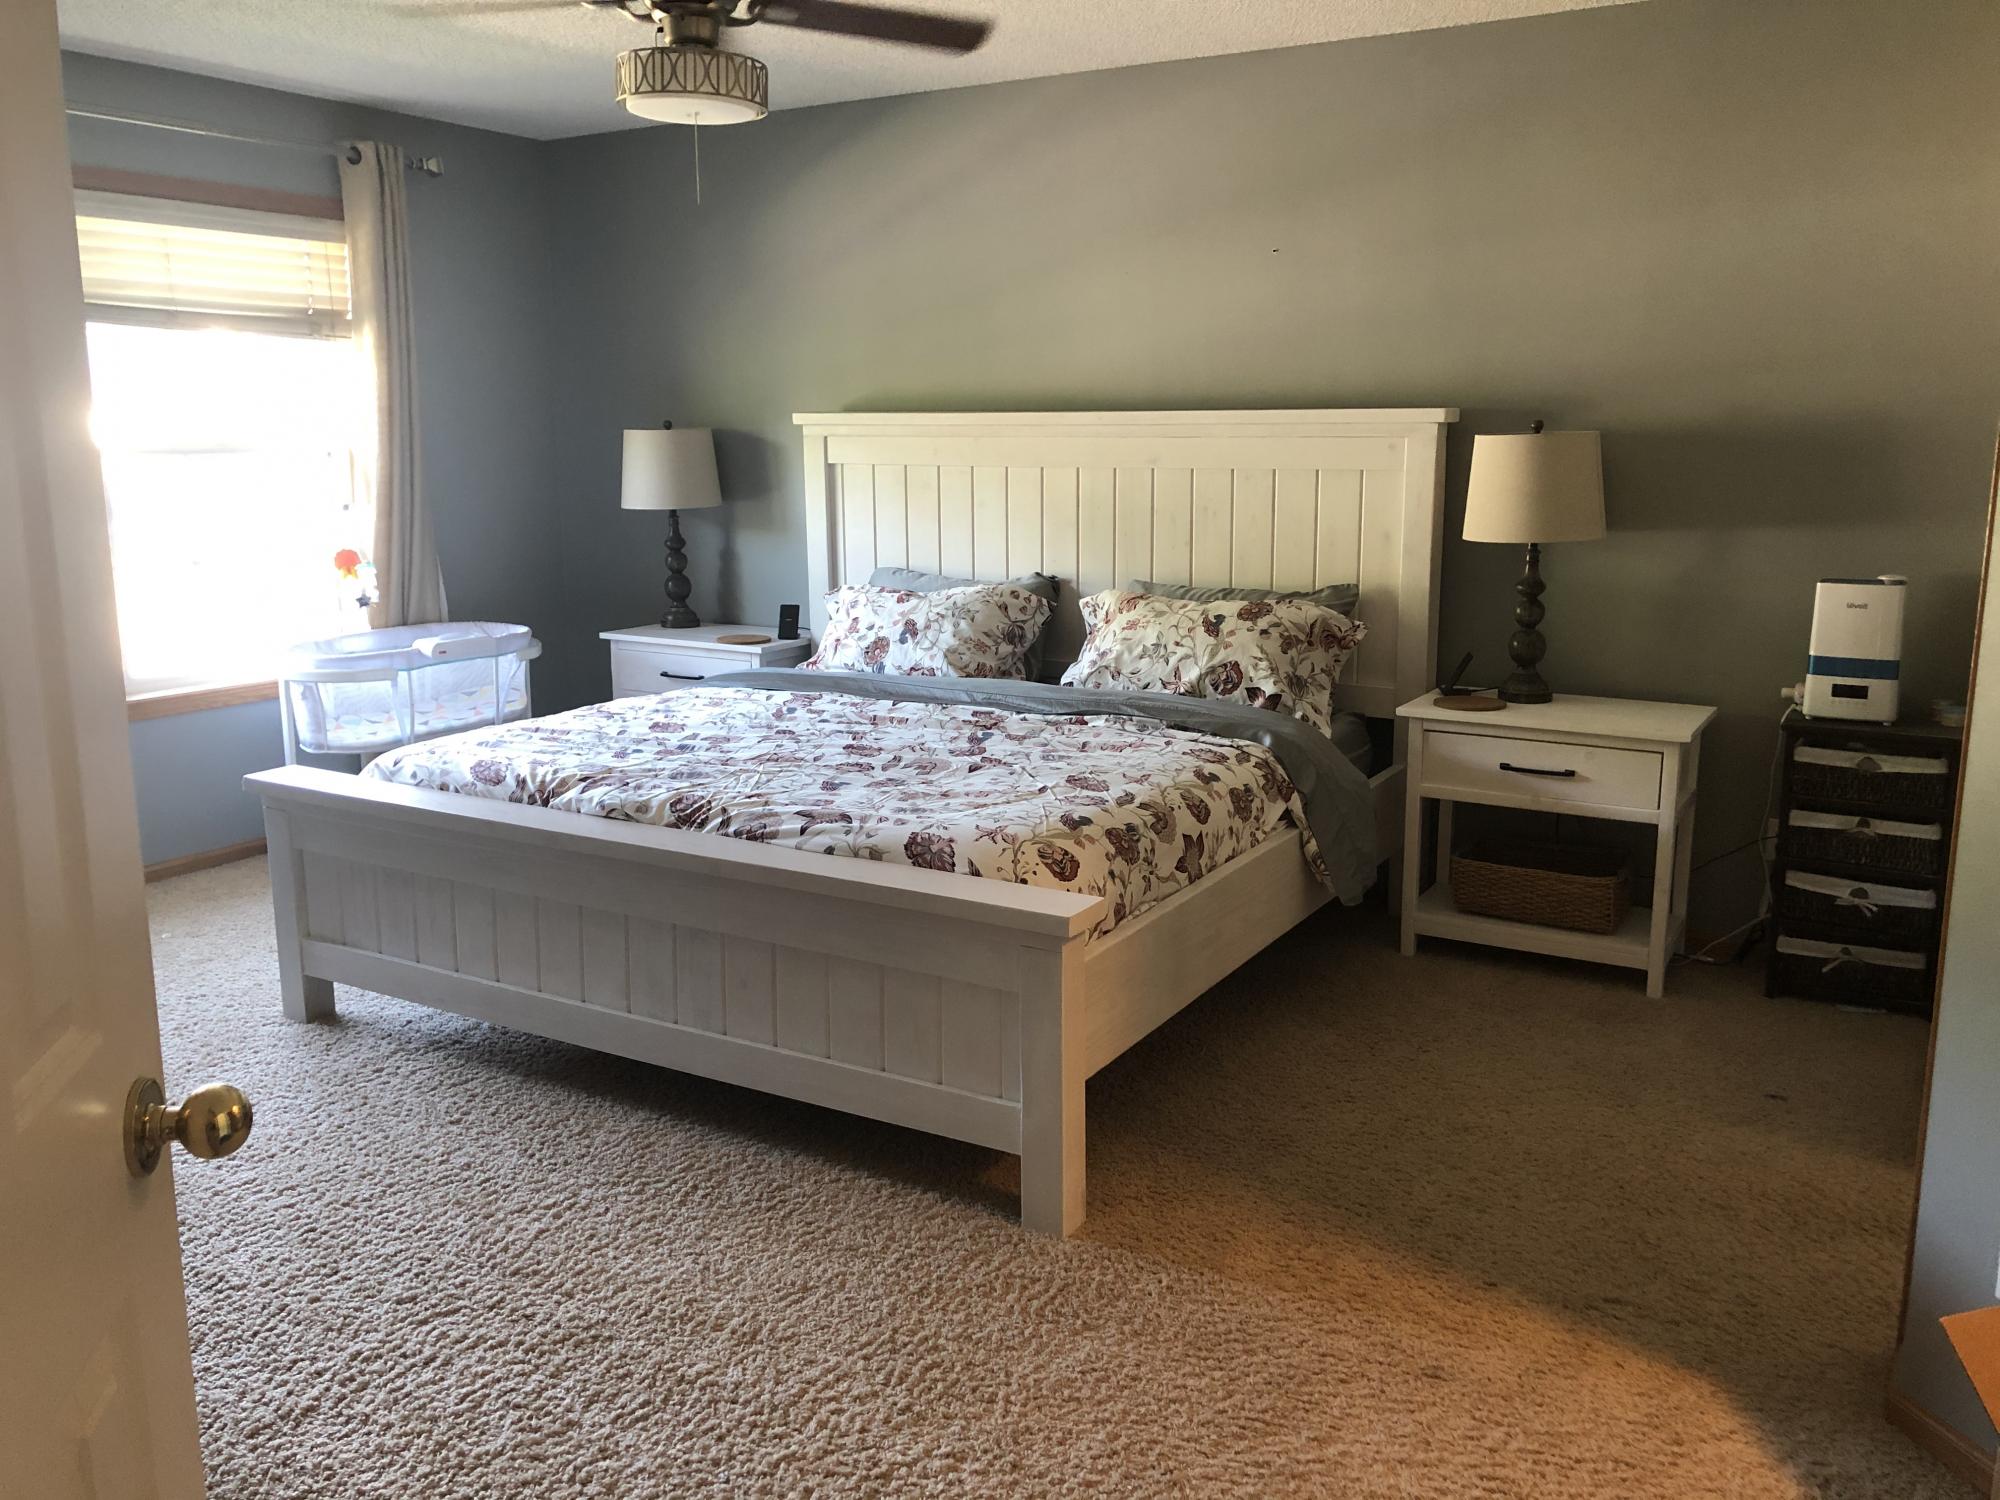
My husband built this beautiful king frame and we stained it with Minwax semi-solid pure white. He made a few tweaks- used tongue & groove pine in the headboard and footboard to decrease the likelihood of any gaps we may get from subpar wood at the big box store. The night stands are From the Farmhouse bedside table plans.
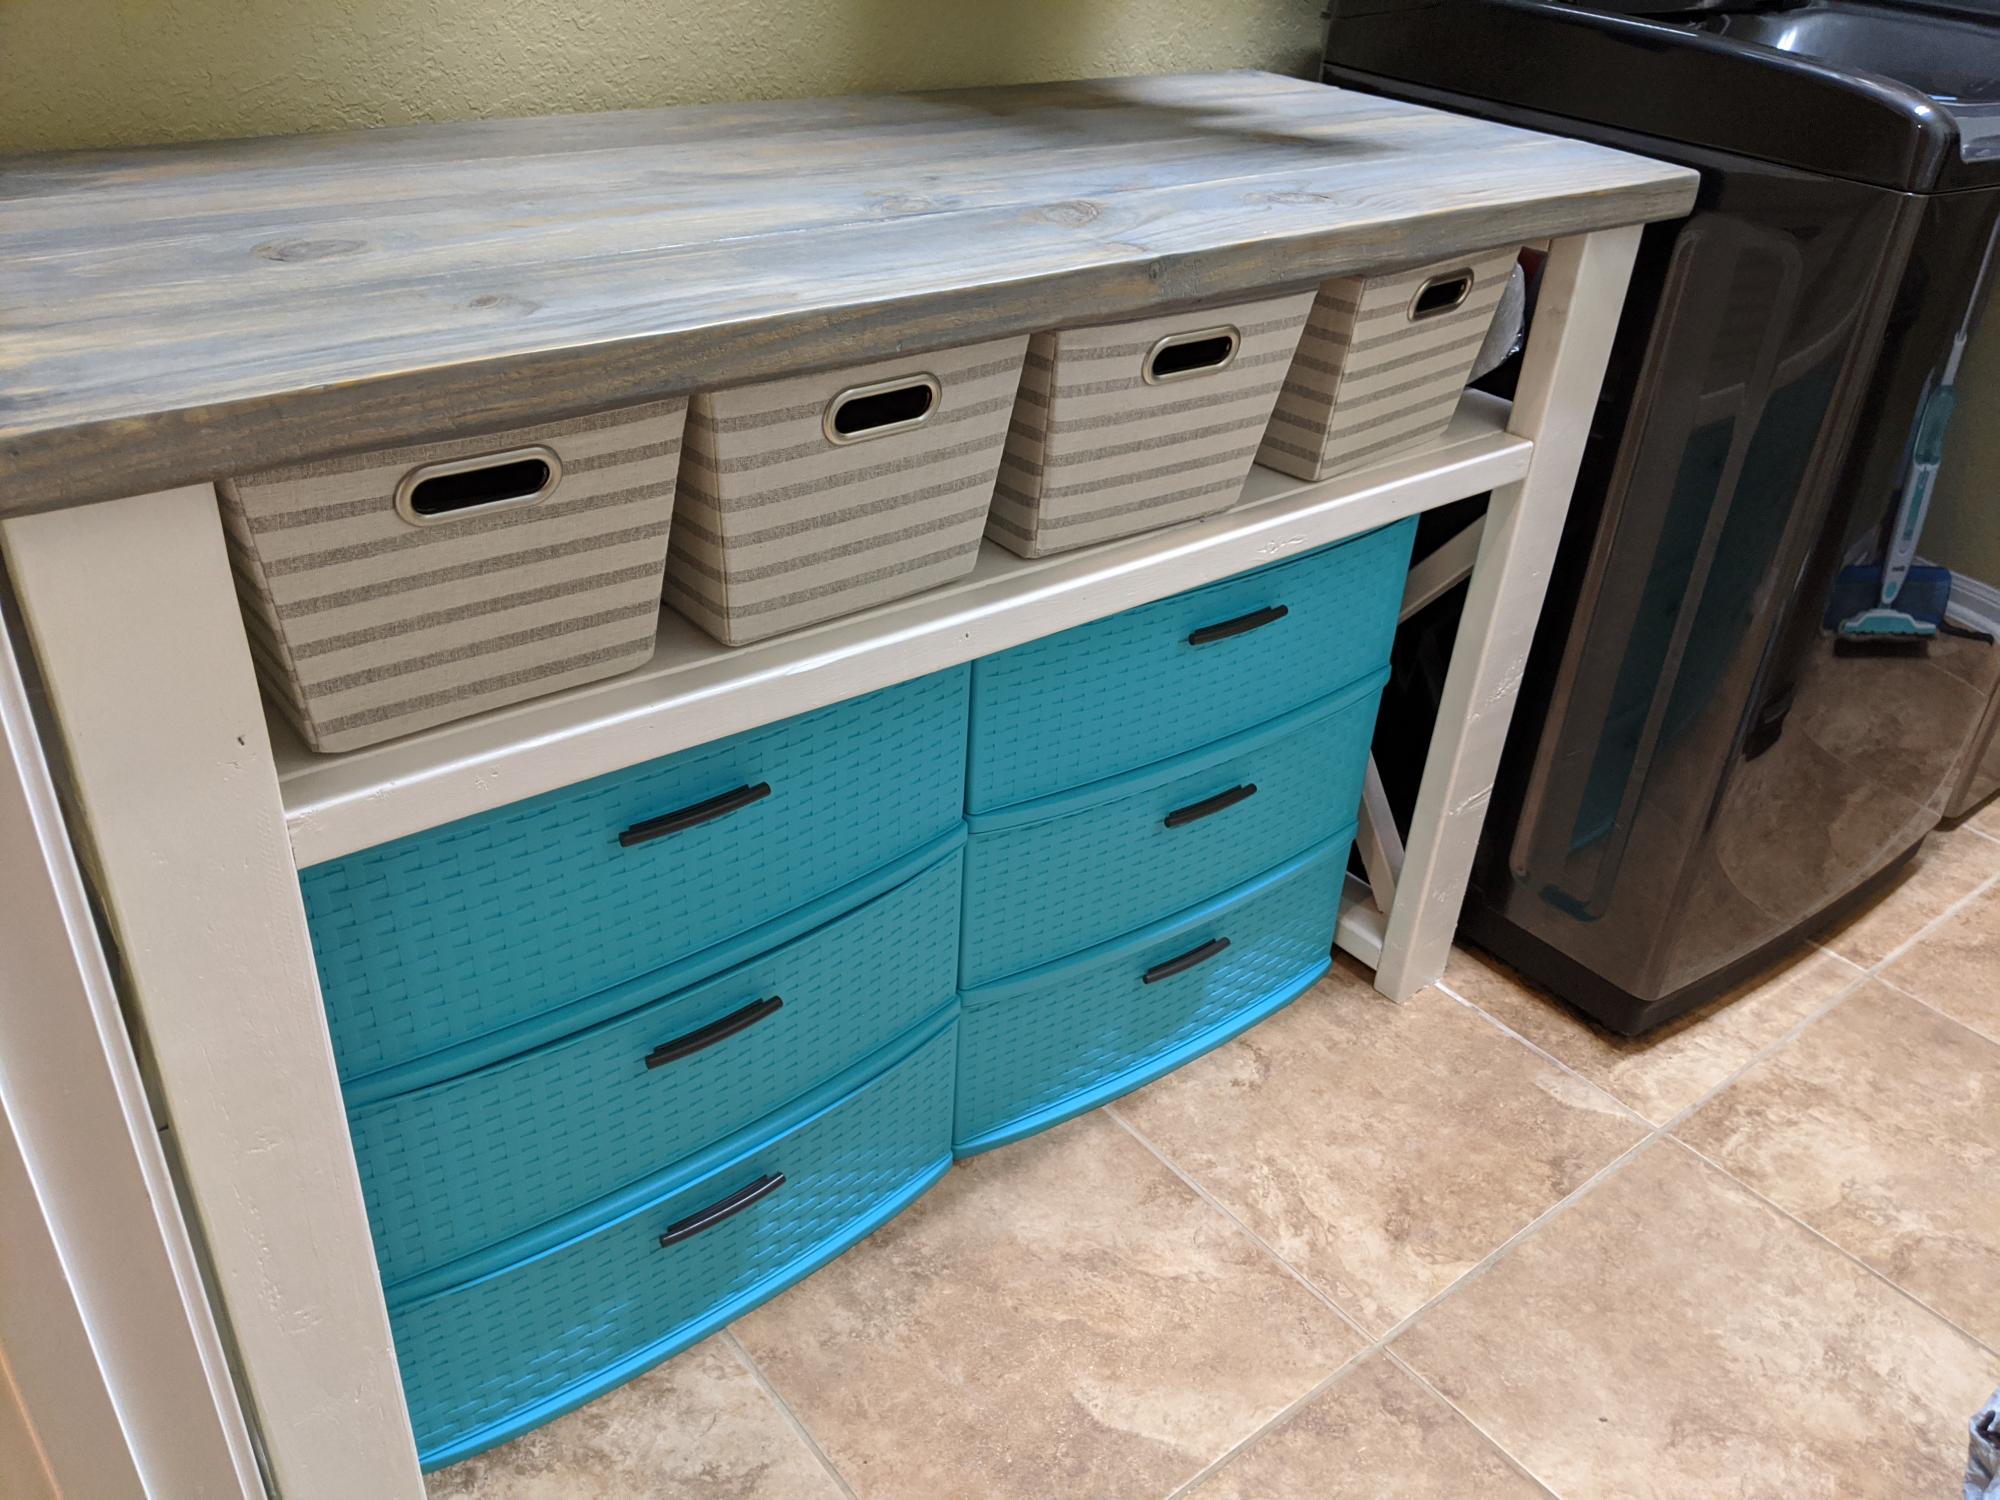
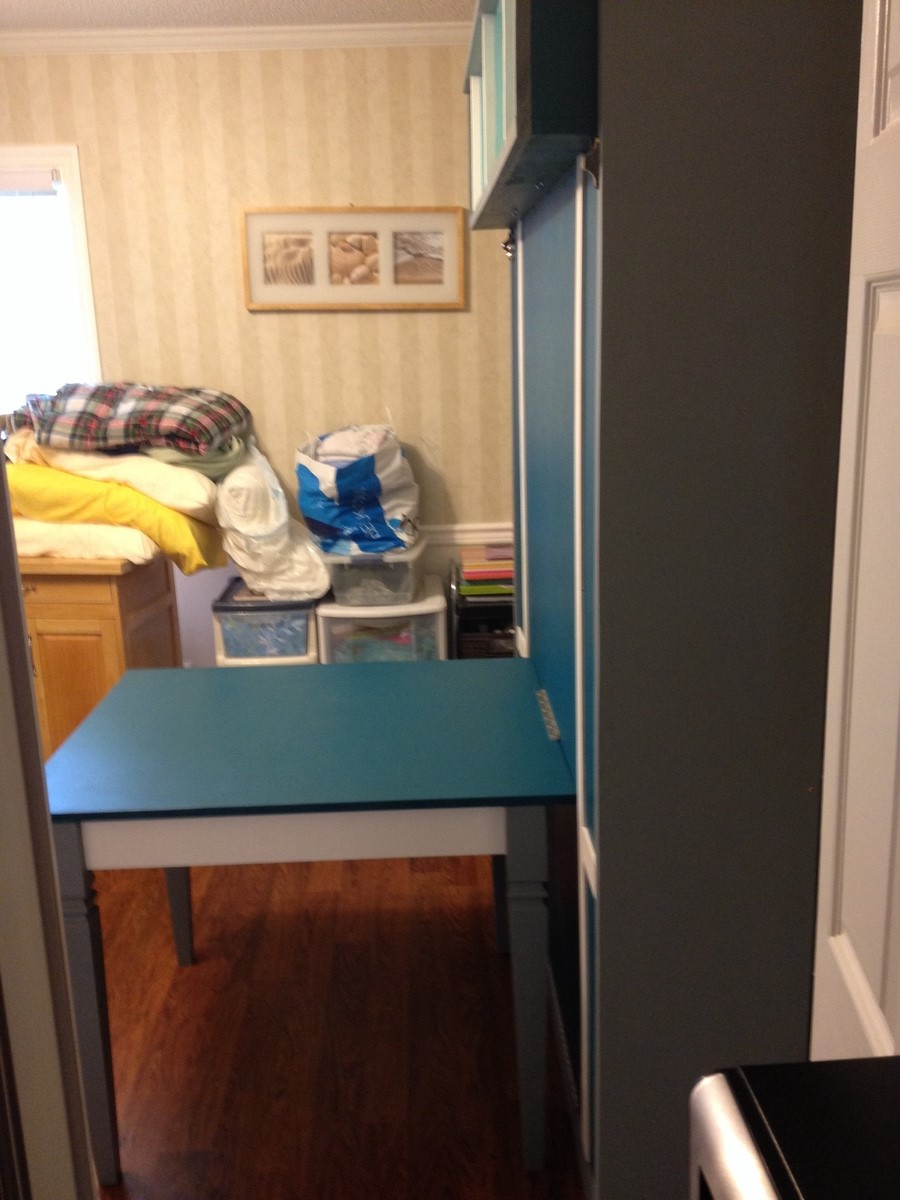
I modified the plans for the farmhouse console table to create a laundry room table. I changed the shelf height and used 2x4s running the entire length for the shelf.

Some built-in bookshelves finished using milk paint.
General Finishes 'Lamp Black' base coat + 'Driftwood' top coat, sanded down so 'Lamp Black' showes through. Yellow Ochre Glaze coat to add an aged look, then a quick coat of polycrylic for protection

Sat, 09/24/2016 - 10:35
What a great way to add custom storage to your home! These look awesome!
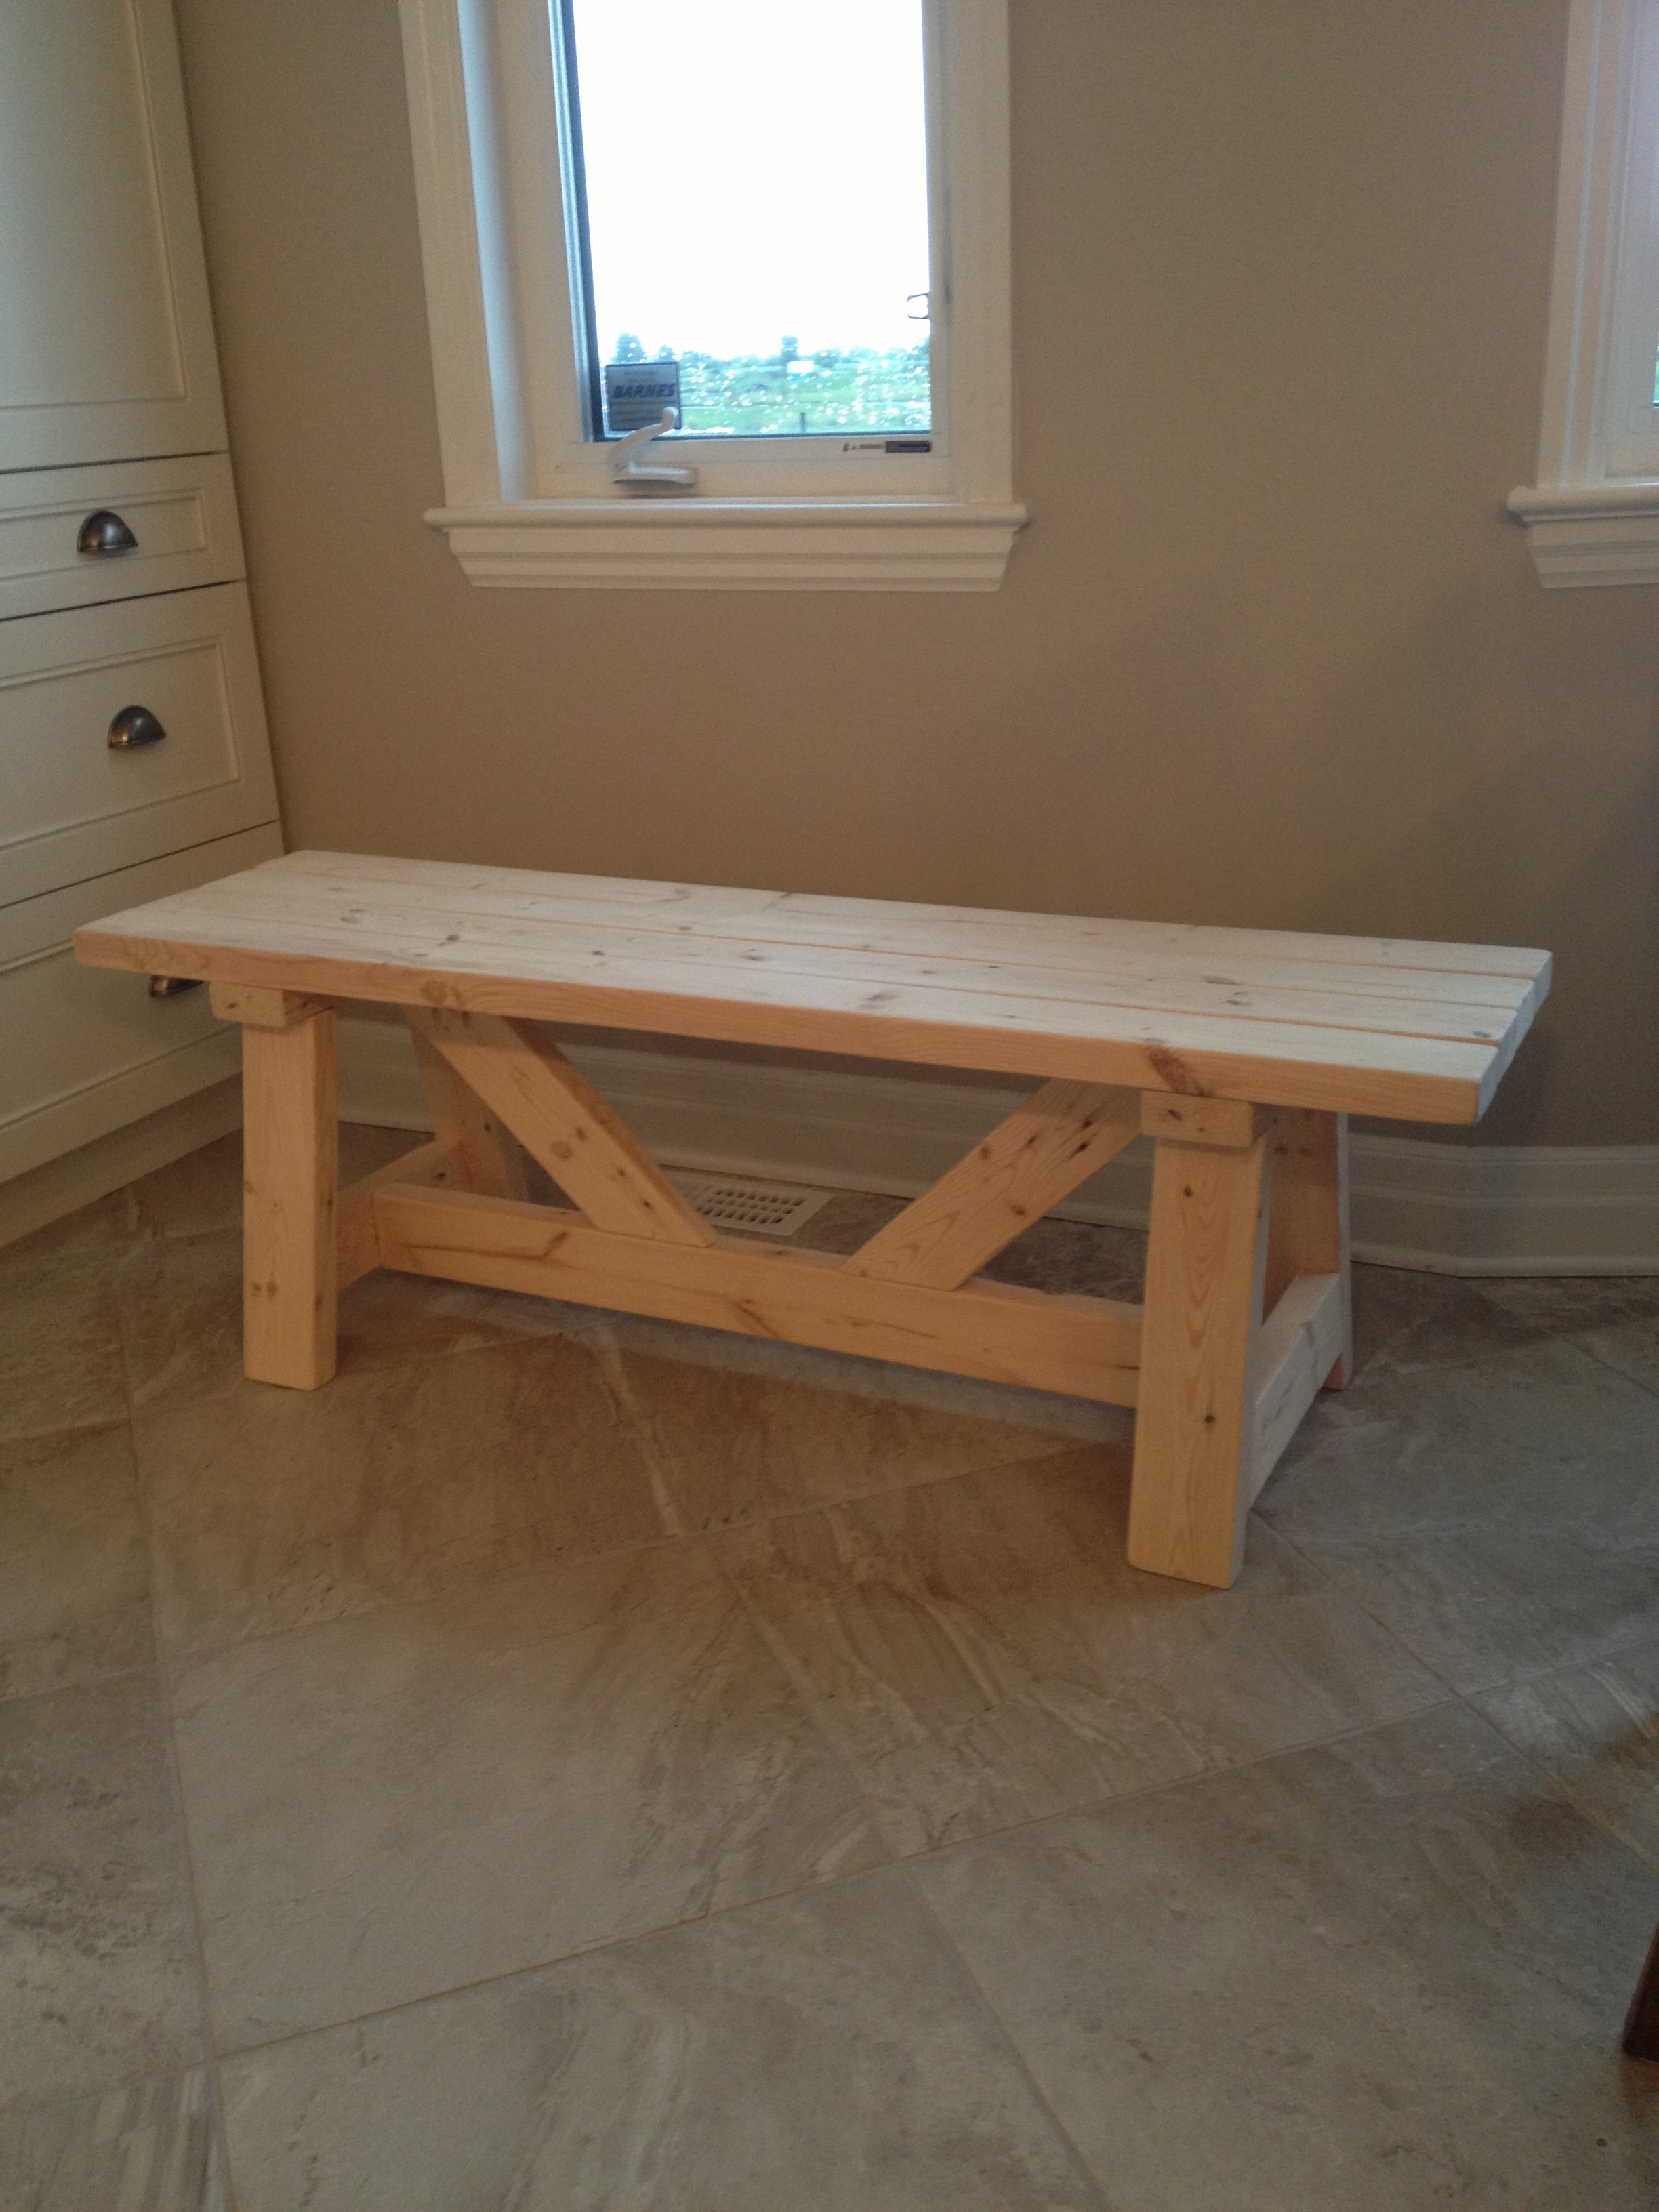
This was my first build from your site! Farmhouse bench.
I was a little confused with the miter saw instructions "bevel cut at a 10 degree angle off center". I had to google to figure out what you meant. In the end the bench looks awsome and I feel very empowered with my tools.
(still need to stain the finished project, bought all the wood and built in 1 day)
Thank you Ana for sharing your plans!! I love your site and I love my Kreg Jig!
Vicki
(Canada)
Wed, 04/15/2020 - 11:38
It looks great and rock solid. I can't find a plan for it. Could you please help me?
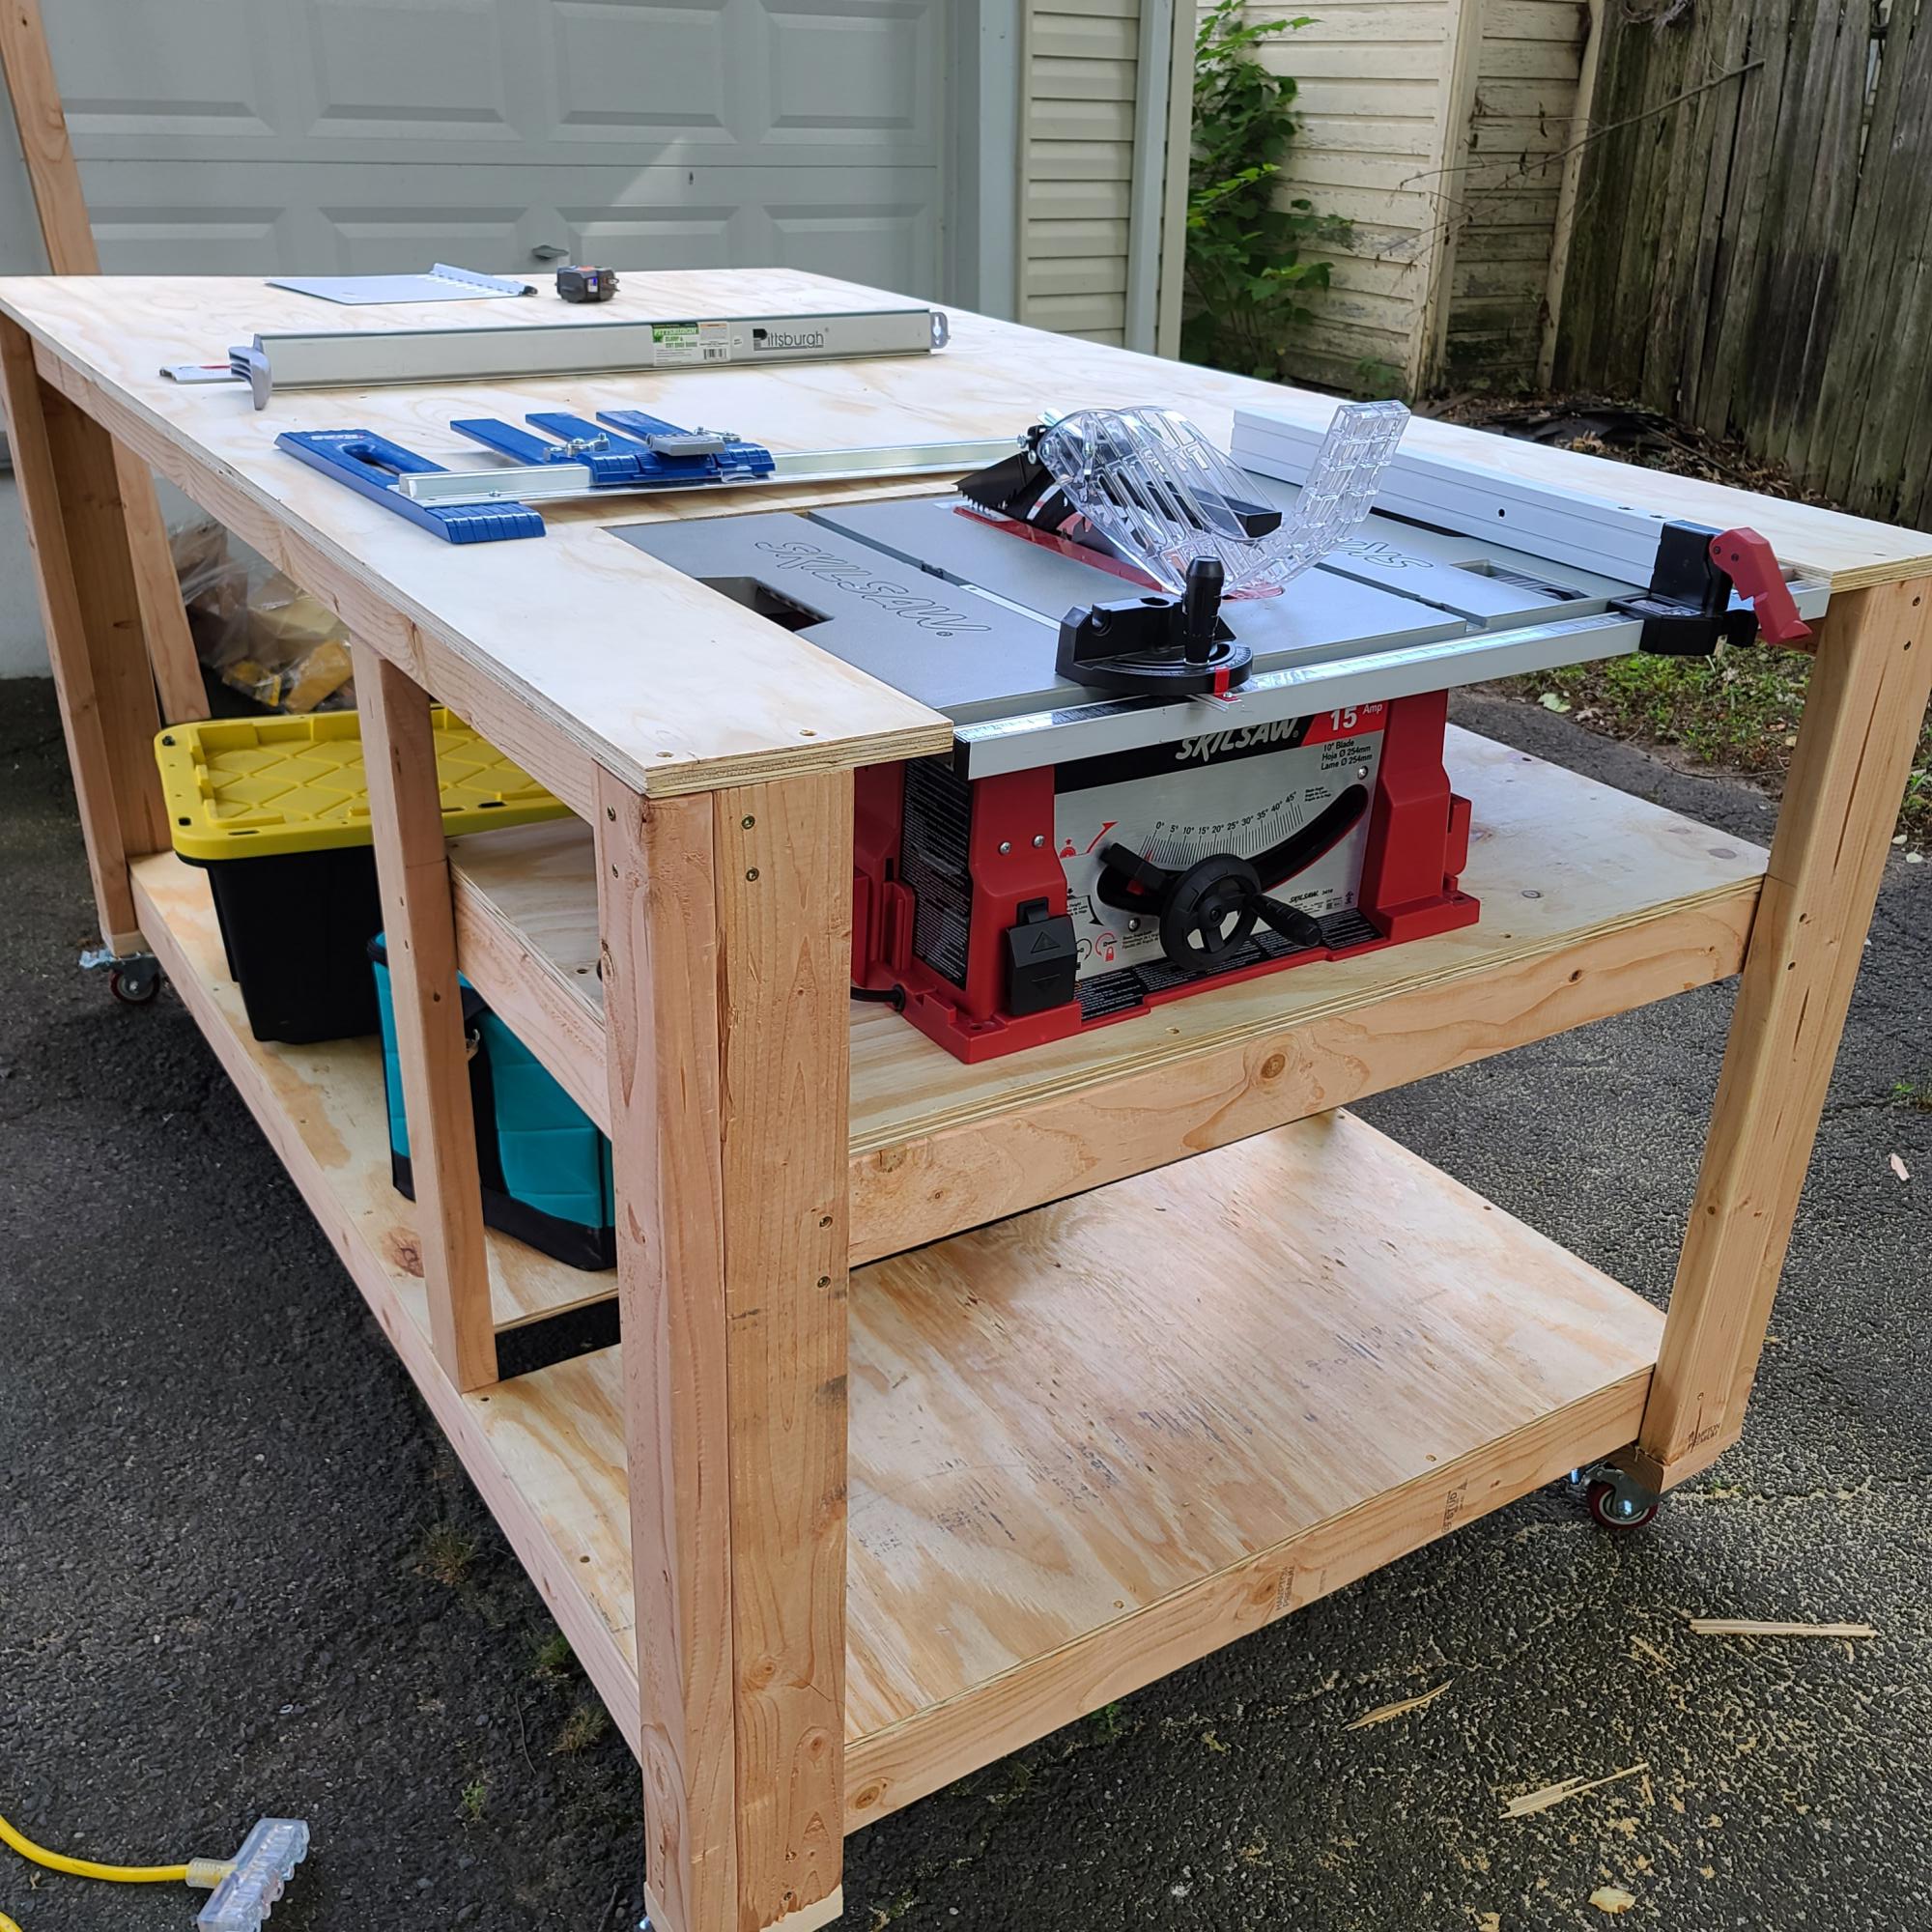
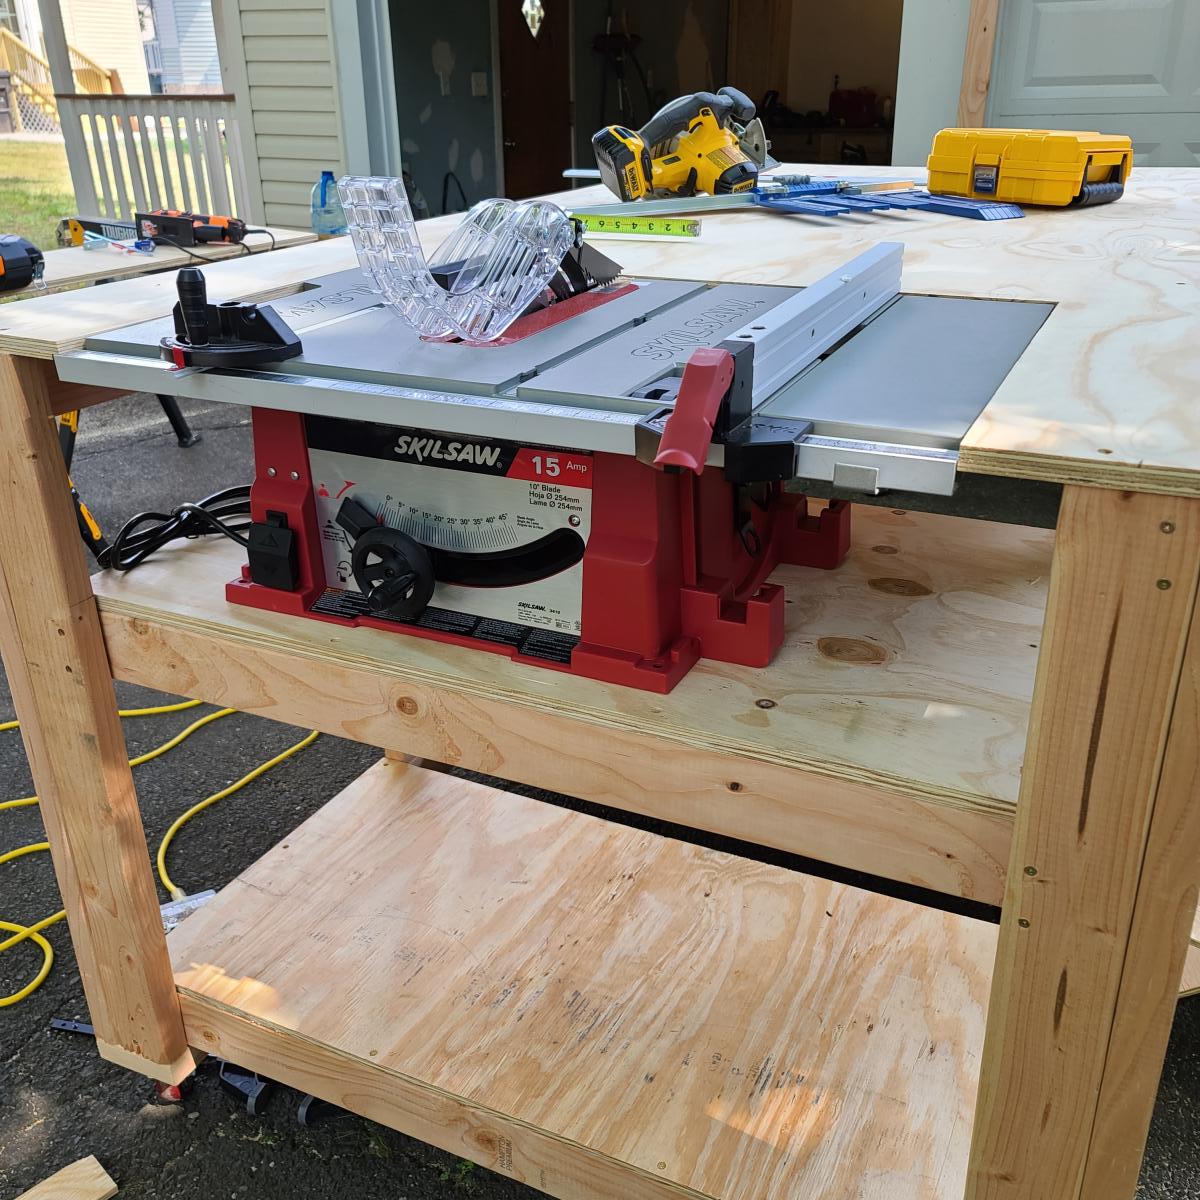
This is my first attempt and first woodwook project ever. I used the plans from this site for the workbench with space for a table saw. I changed the dimensions to 4'Wx7'Lx3'H (originally 3x6x2 1/2). It ended up bigger than I imagined though. But hopefully not bad for my 1st shot at a project of this scope. Next step is a polyethylene finish. It looks like the plan has been removed from this site though.
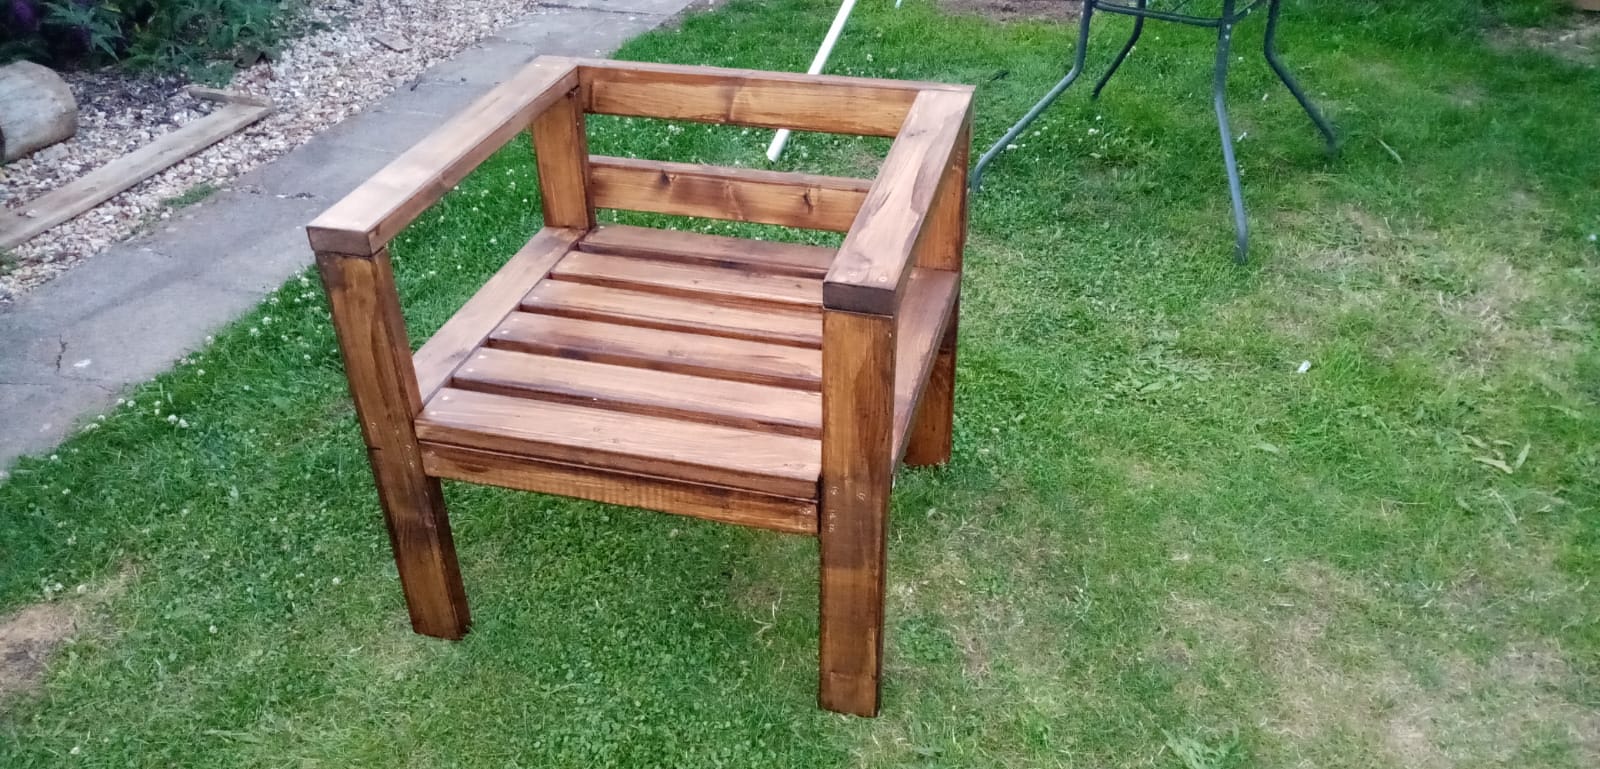
Single seater chair to match the sofa
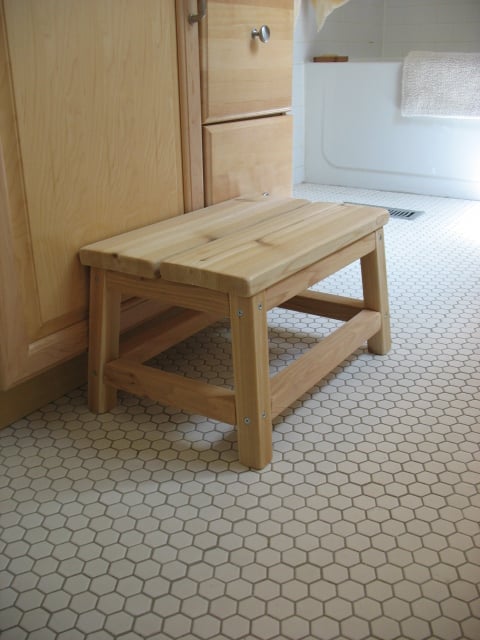
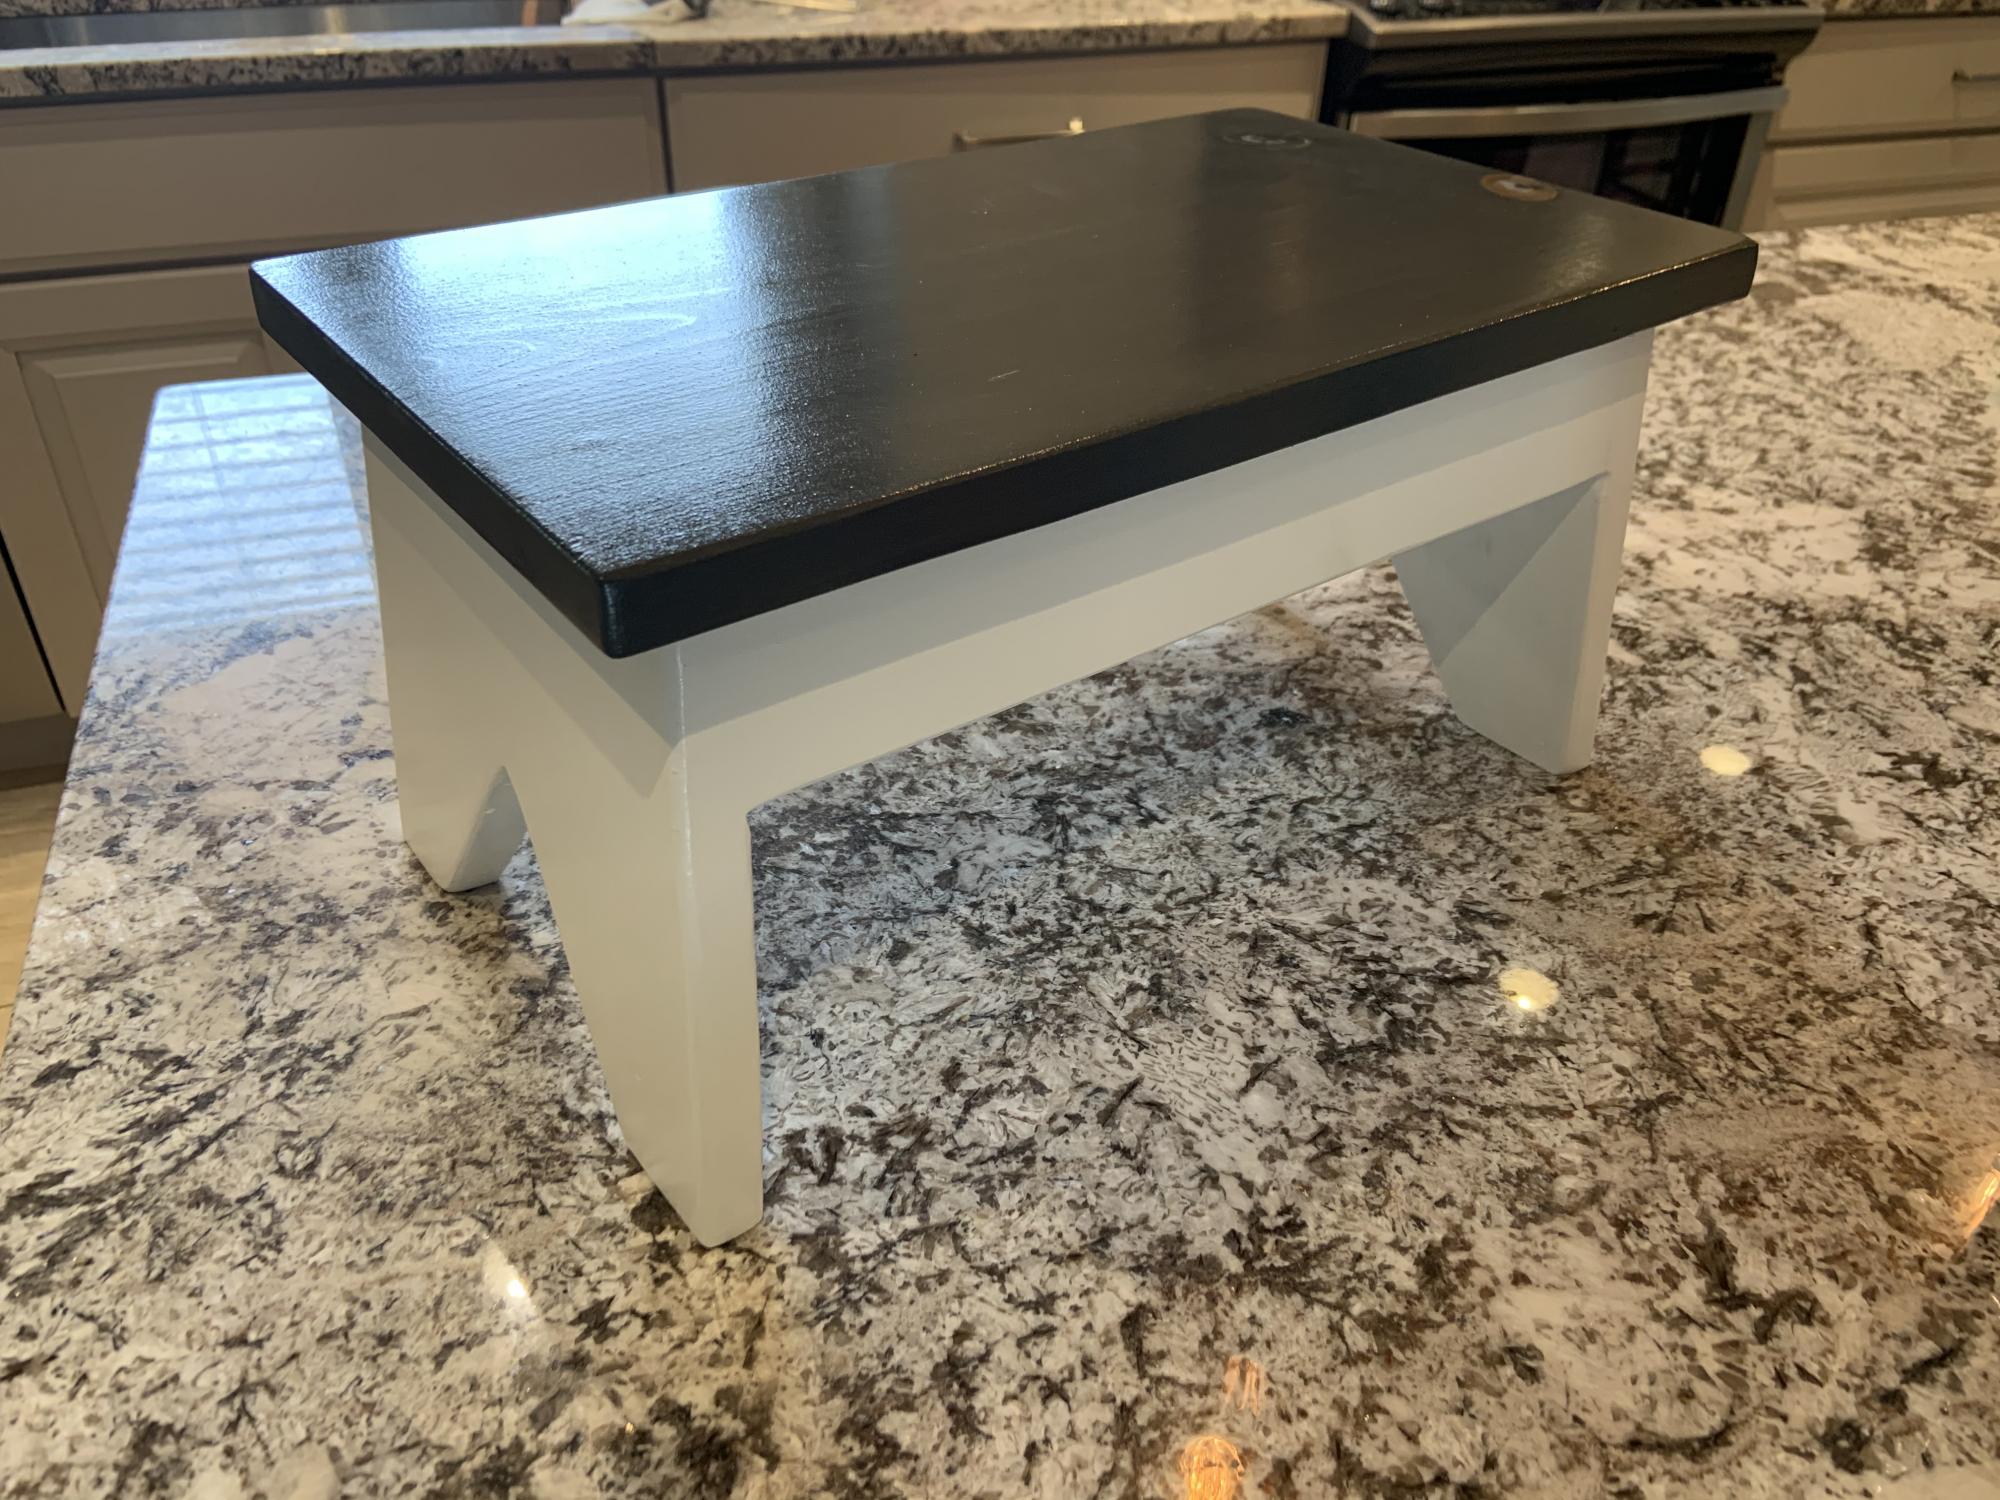
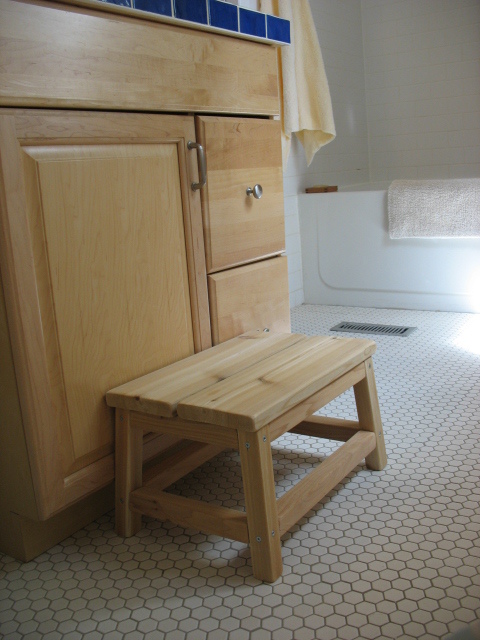
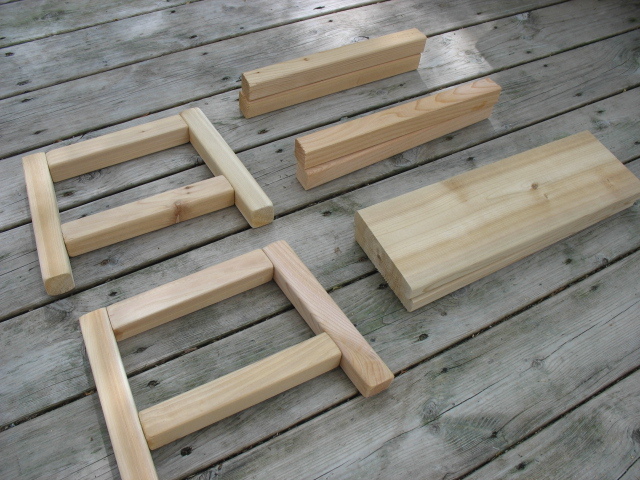
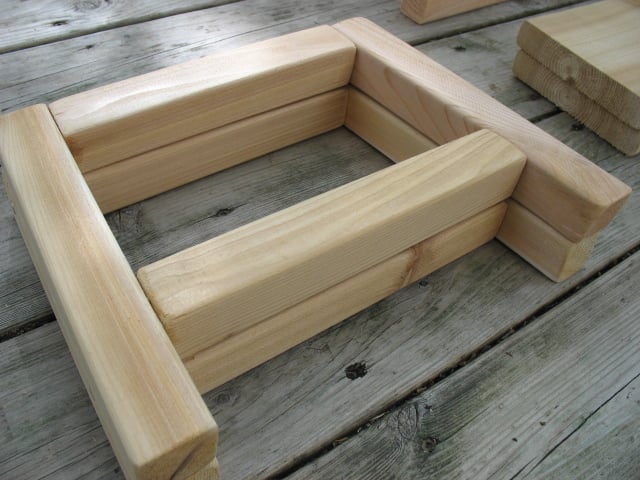
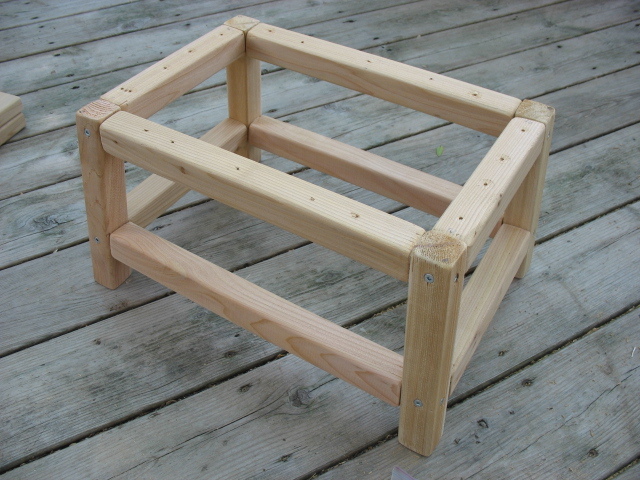
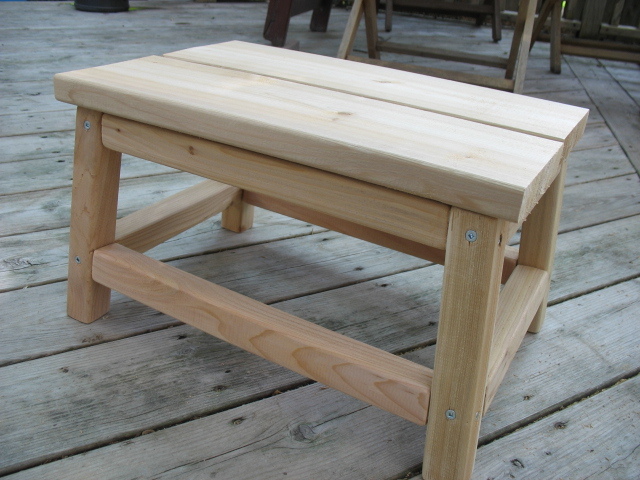
After searching the town high and low for a 10" high wooden stool, I decided to make one. Ana had the perfect stool pattern to modify for our needs - A little shorter, a little wider.....et Voila!
It's the perfect height for little ones to reach the taps in the bathroom, as well as helping out in the kitchen from time to time. And, the cedar smells wonderful.
Finished height: 10"
Top measures: 11.25" x 16.5" (2 boards, cut 16.5" long + a space in the middle)
Footprint: 12.375" x 17.375"
I also lined up the rails (instead of staggering them), similar to the Harriet Higher Chair plans. The joint will be weaker, but I prefer the cleaner lines on such a short step stool.
Thanks Ana for the great plans!
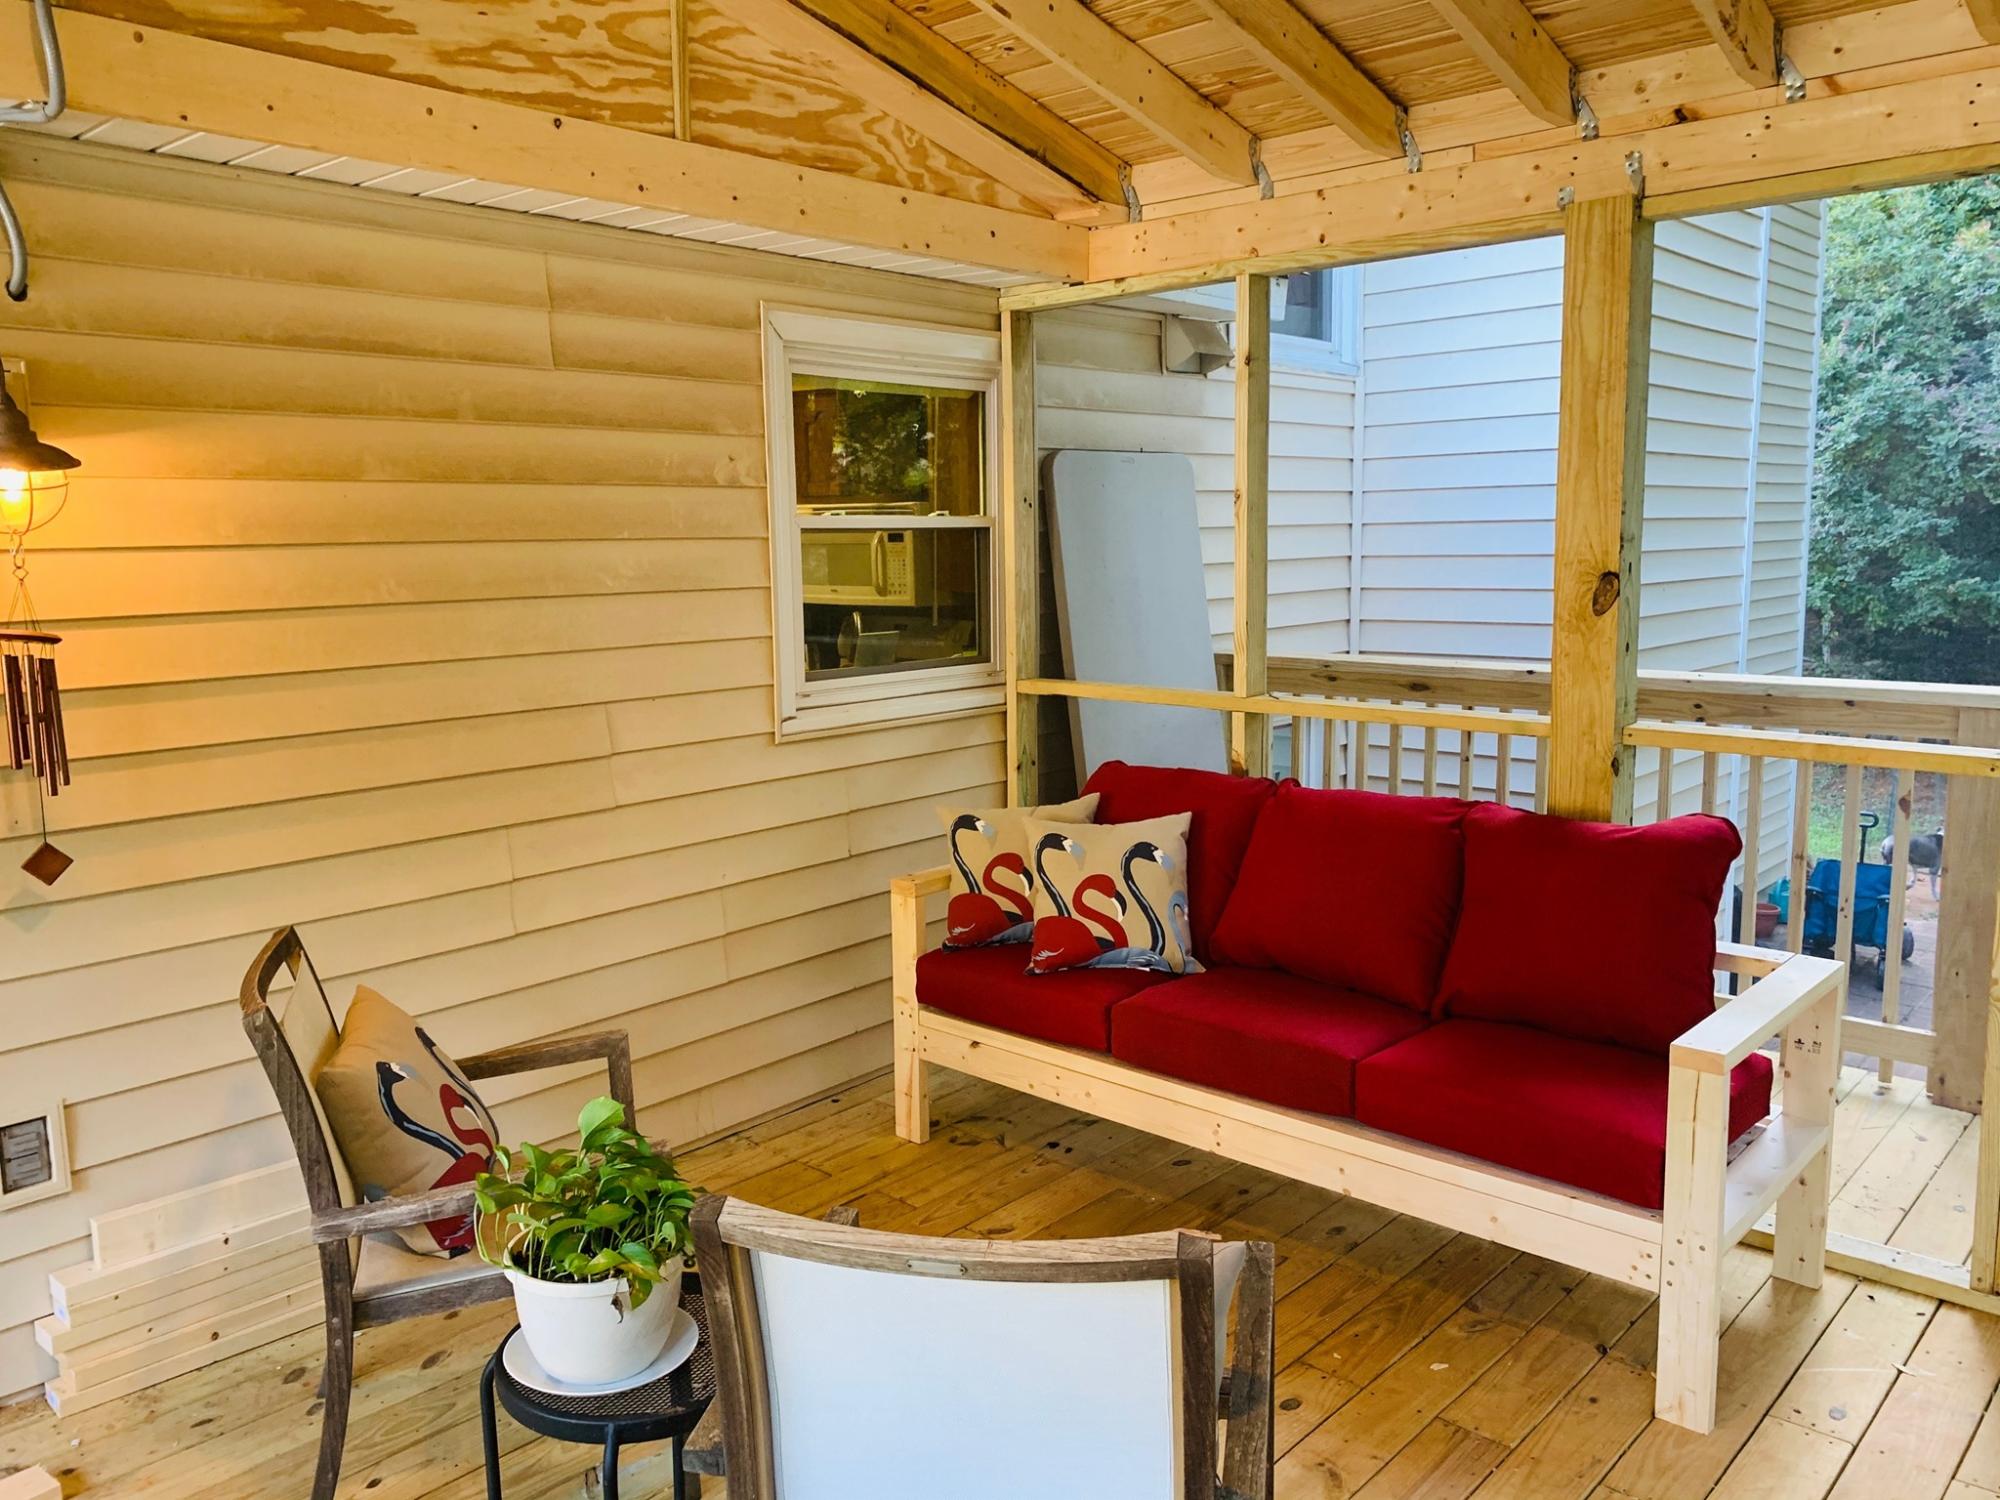
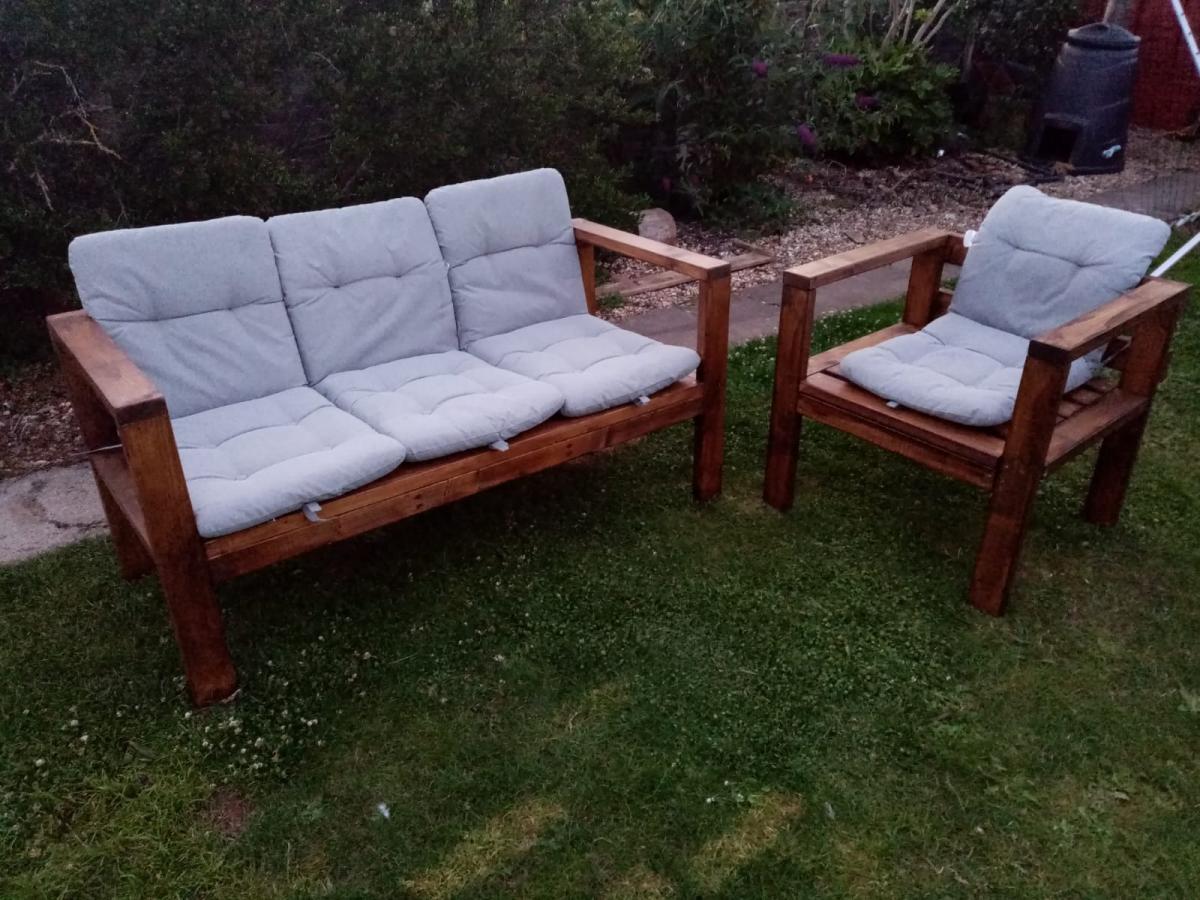
Followed the plan exactly. Added an extra 6 foot board across the back for better pillow support. Got the 24" cushions from the big box store. With one extra 8 foot board + left overs, I have enough to make a modified, small 34"x17" coffee table from the 2x4 plans linked below, which is perfect for the space I need. Will add a photo for that when I'm done.
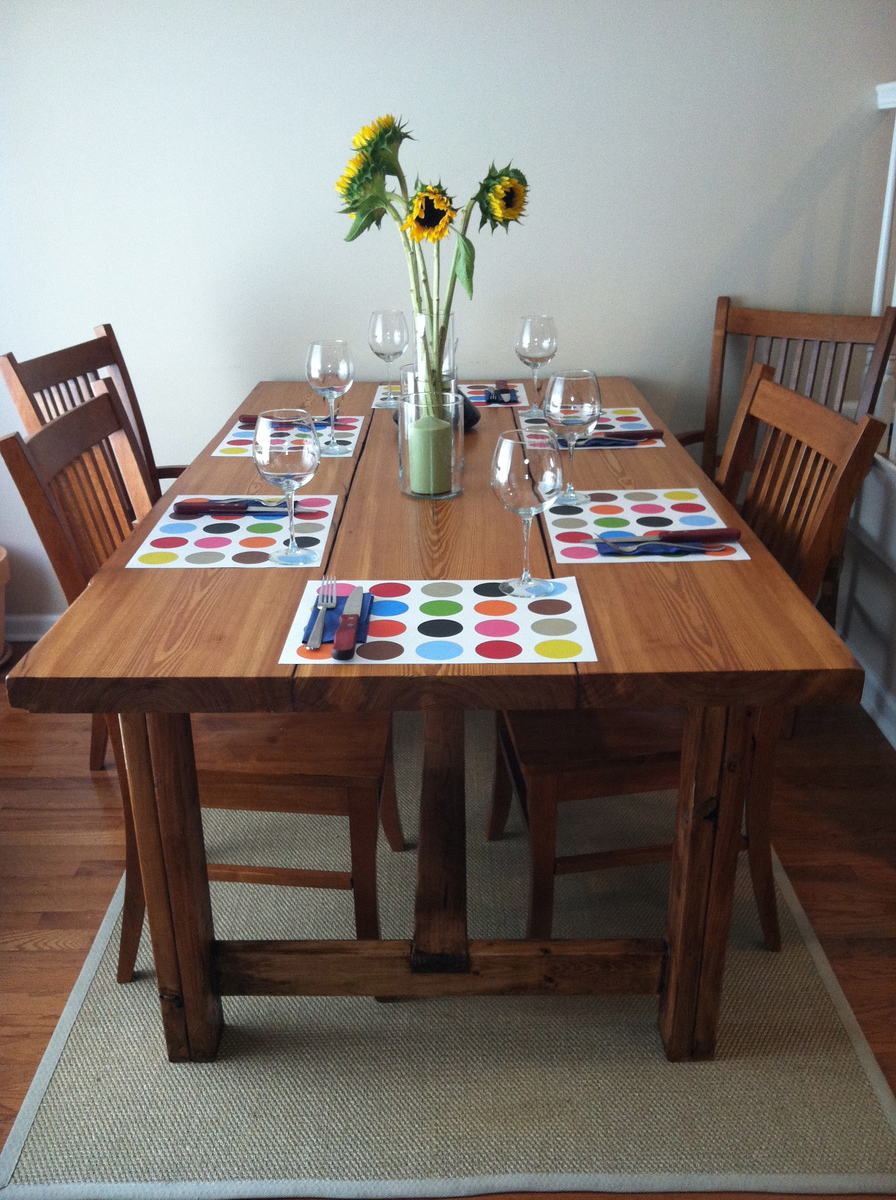
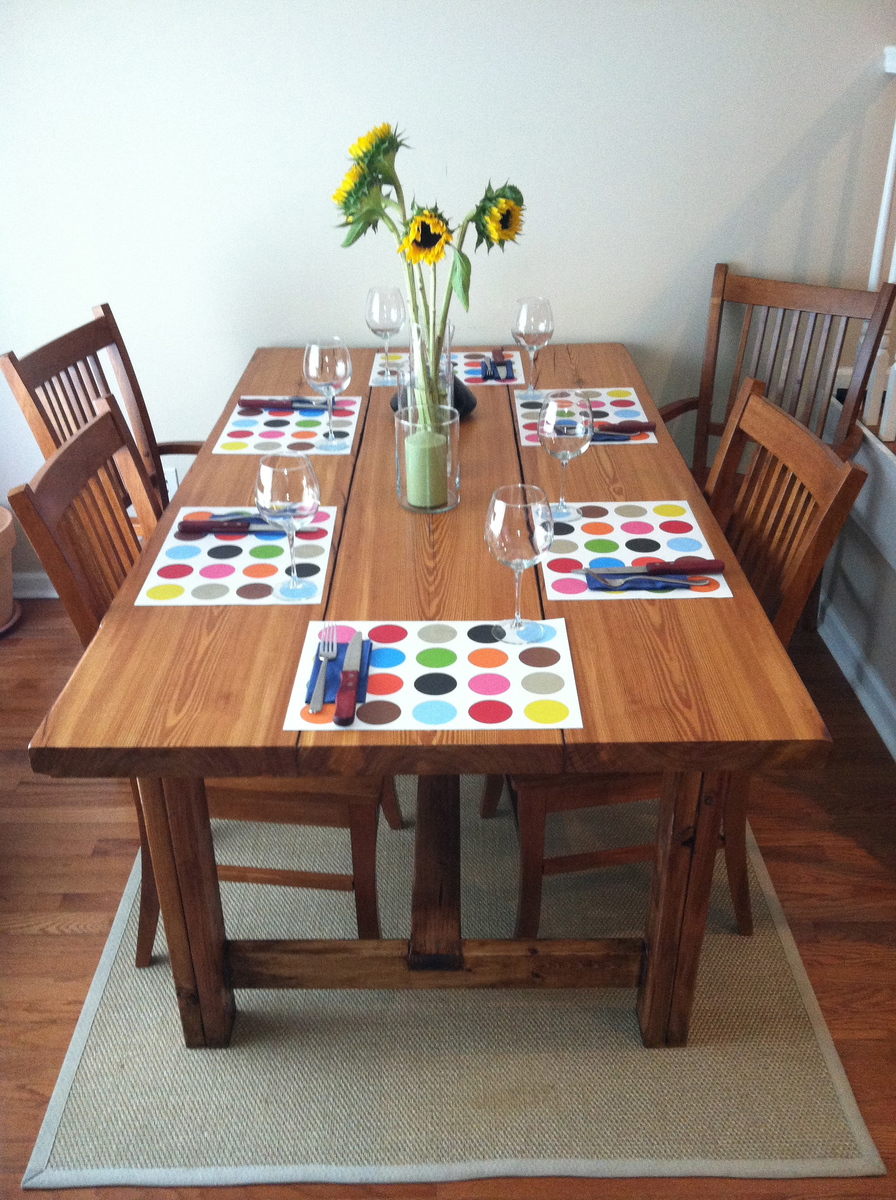
Farmhouse table. Tabletop is reclaimed from a church built in 1890 (bought at Manyunk Timer in Philadelphia). So glad we went that route (the knots, grain, etc match on the outer two pieces which you can see in the pic... it's really great, but it is expensive).
Top has only minwax polyurethane, there's no stain whatsoever. Frame is stained with Minwax "polyshades" (Mission Oak shade).
Chairs you see are the "Winslow" chairs from coaster. Highly recommend them. The match was luck.
Omitted the breadboard ends only because my tabletop pieces are 13 in (!) across: that would have been too wide for ends I thought.
Many thanks to this fantastic site for the plans. I am new at this and the table is KILLER; there's no possible way I could have expected it to turn out so well.
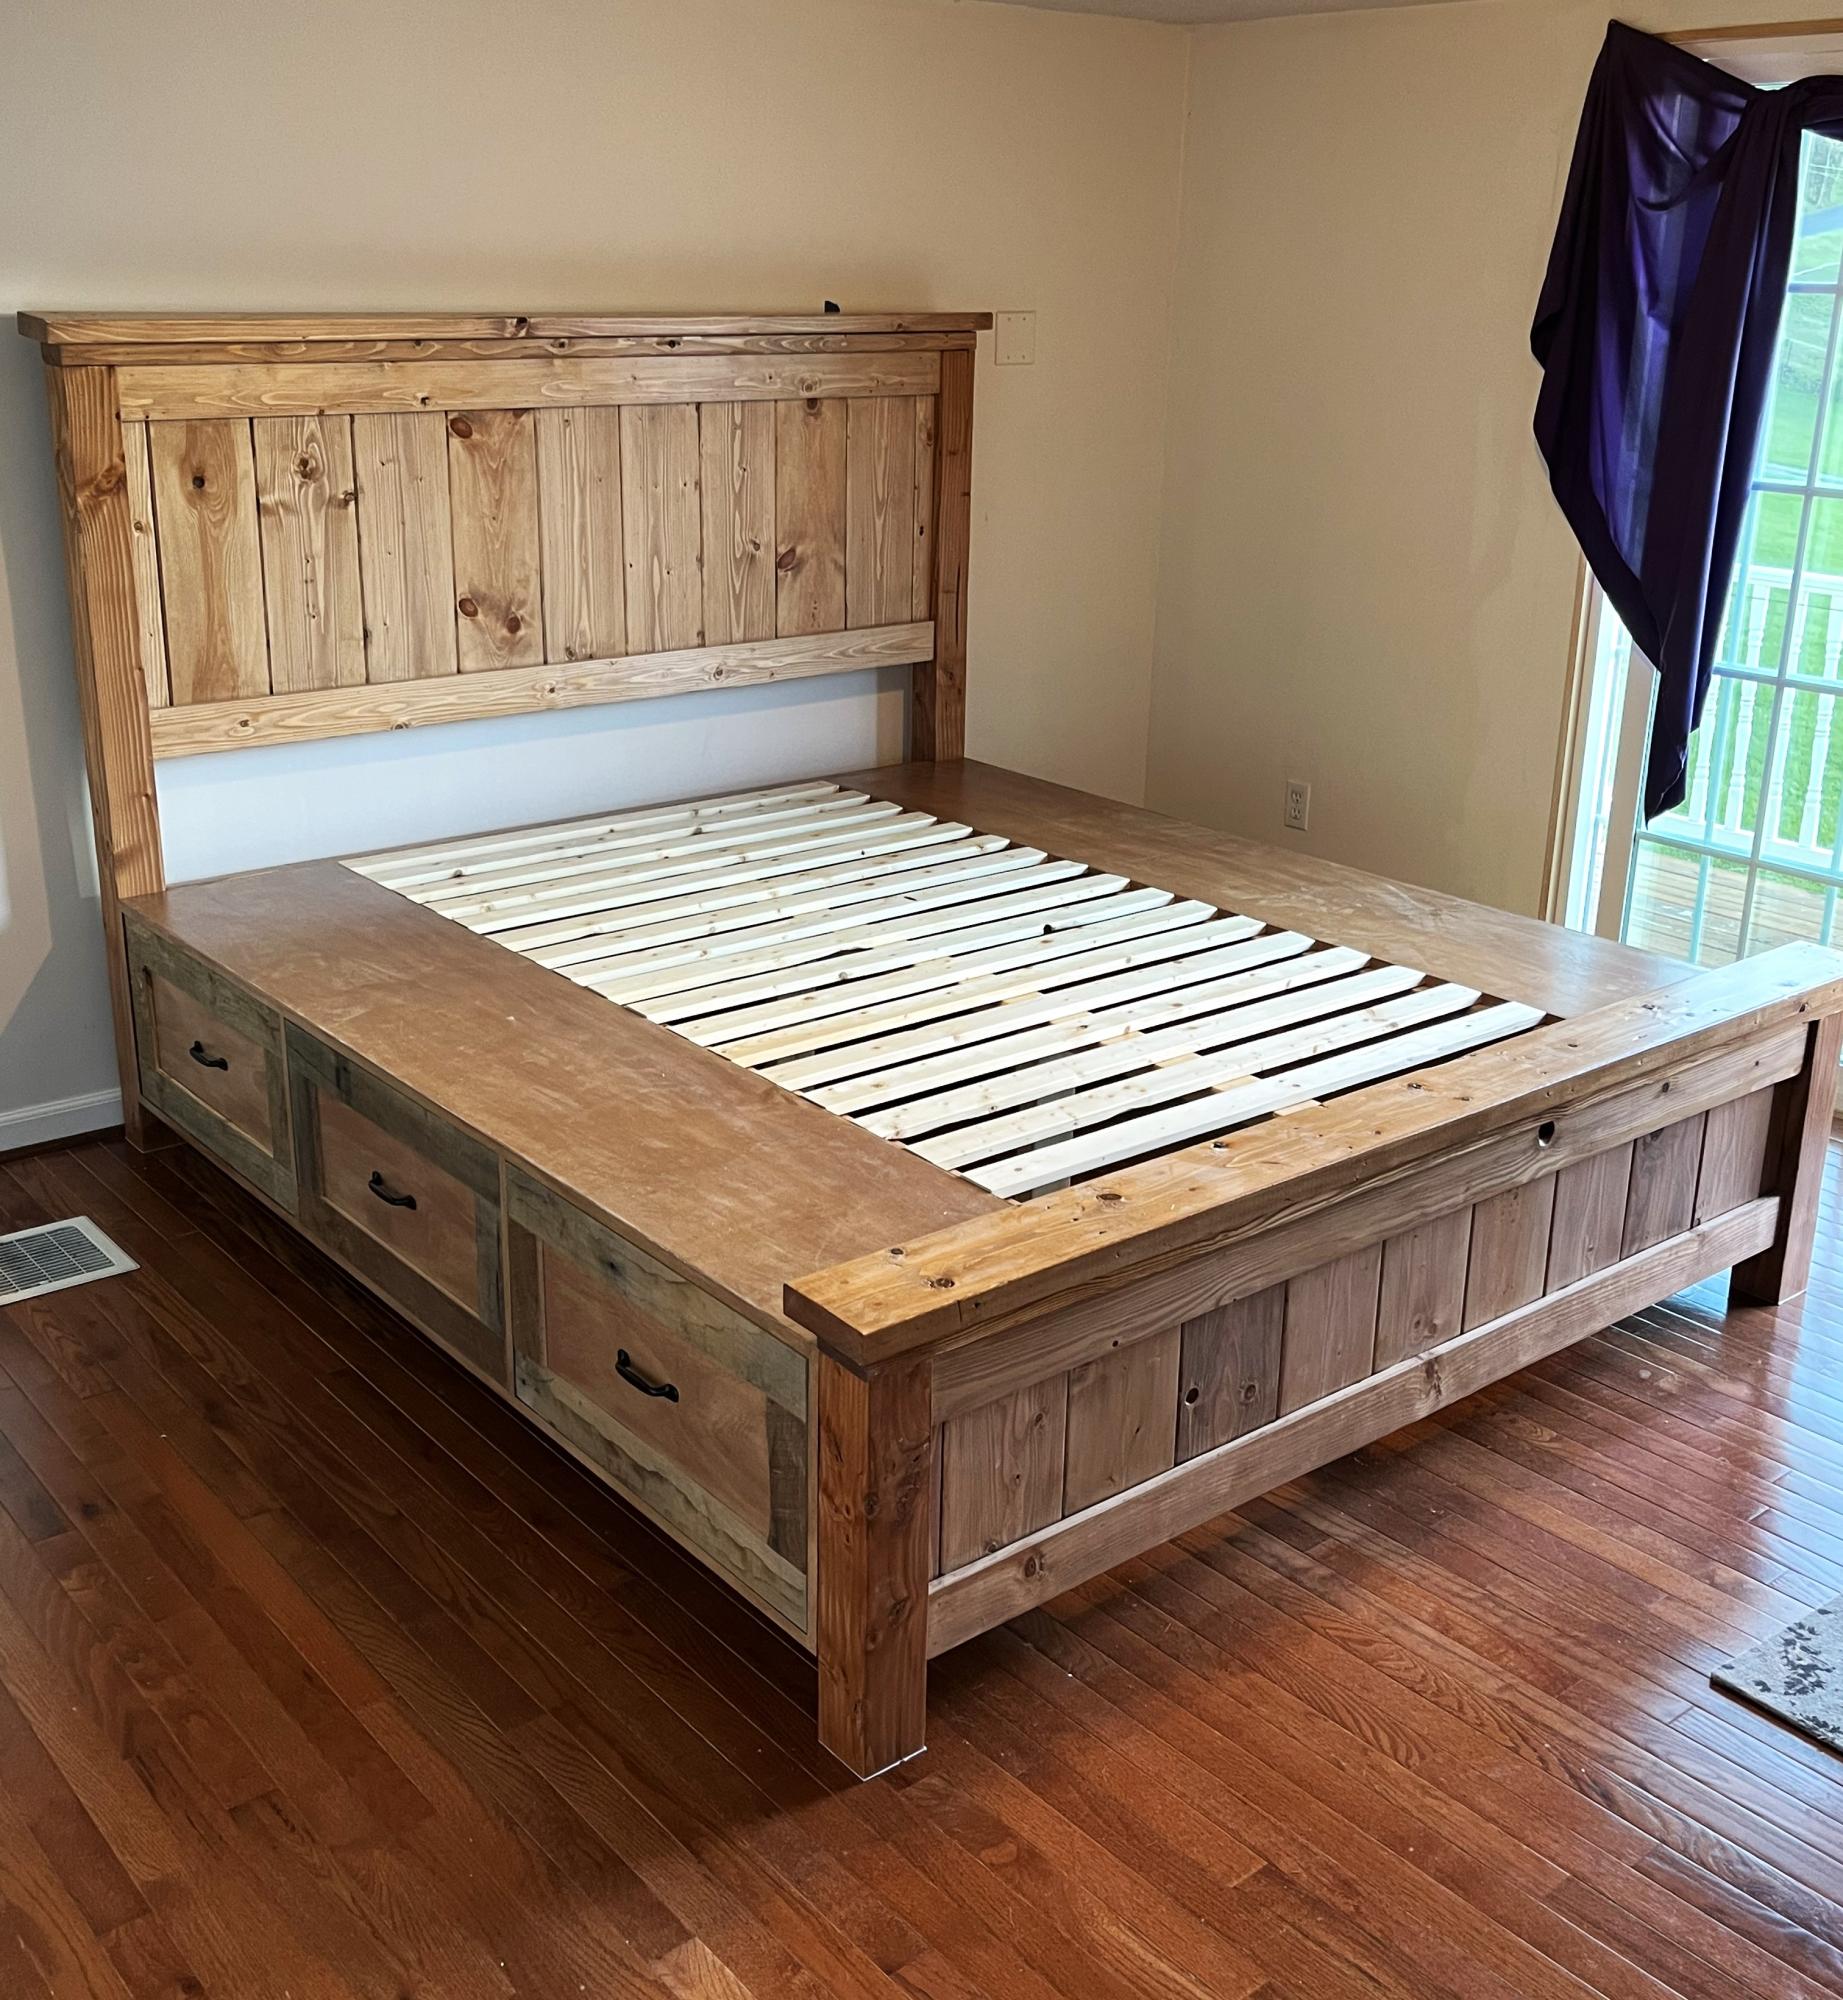
King size farm bed with storage, modified from queen bed plans. Used 1x10’s instead of a solid sheet of plywood and routed the slates to add some nice depth. Used reclaimed barn wood 1/4” for the border of the drawers.
Michael Gallatin
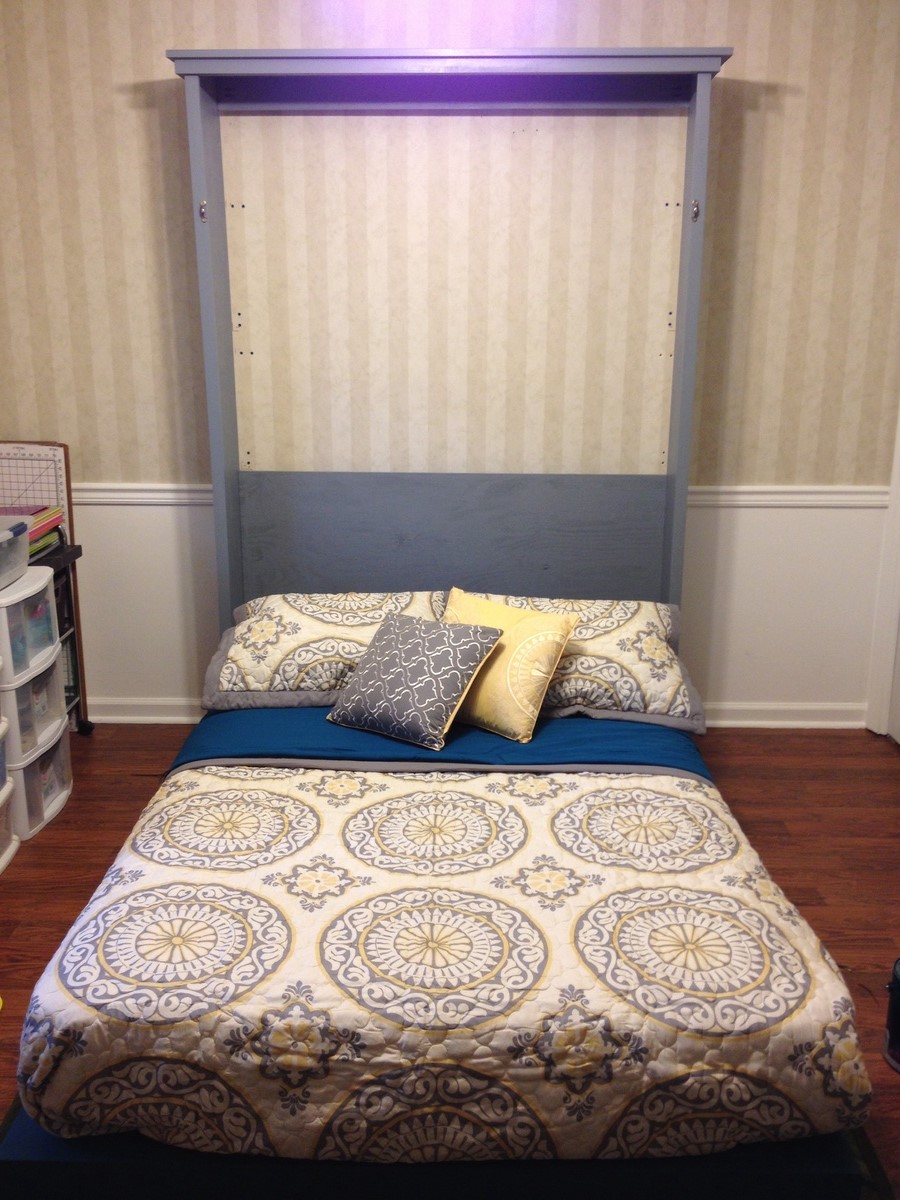
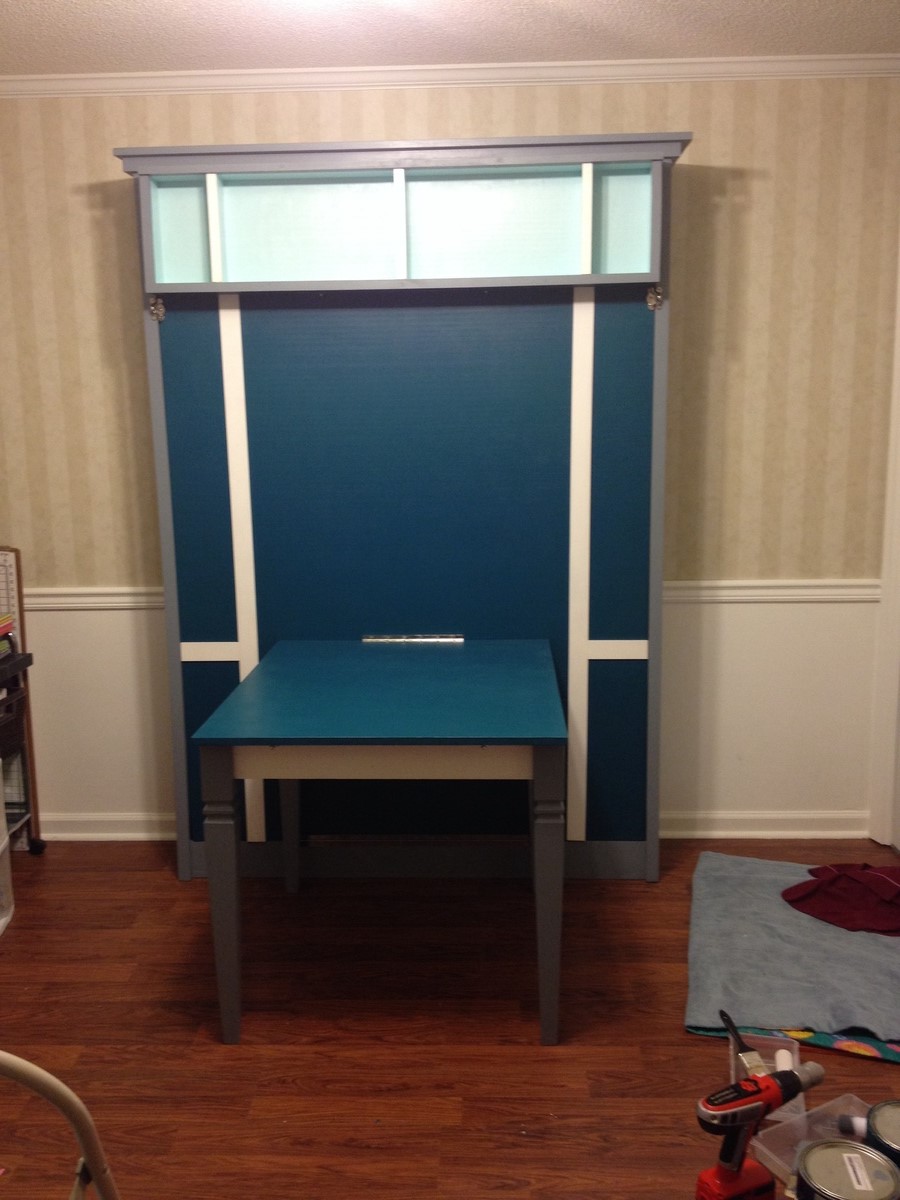
I followed most of the measurements with the Murphy bed with added dimensions for a full sized bed. I also added a shelf to provide support while the bed is down since I brought the platform off the floor. The table is also hinged to the bed platform so that it folds up and locks in place for a center support for the bed.
Fri, 07/25/2014 - 16:06
This is awesome! This is just what I need. I can't see how the table provides center support. Do the table legs come off?

Fri, 07/25/2014 - 16:52
What an awesome project! Love how the added shelf at the top creates the "legs" at the end of the bed when it is lowered (looks like it keeps the bed about 4" off the floor?). Are those window sash locks for closure? Those will keep it in place nice and tight when it's closed. The fold down desk is brilliant also, and love the legs and the colors!
Fri, 01/23/2015 - 14:13
Super job! Can you provide plan details for the table and feet for the off floor design?
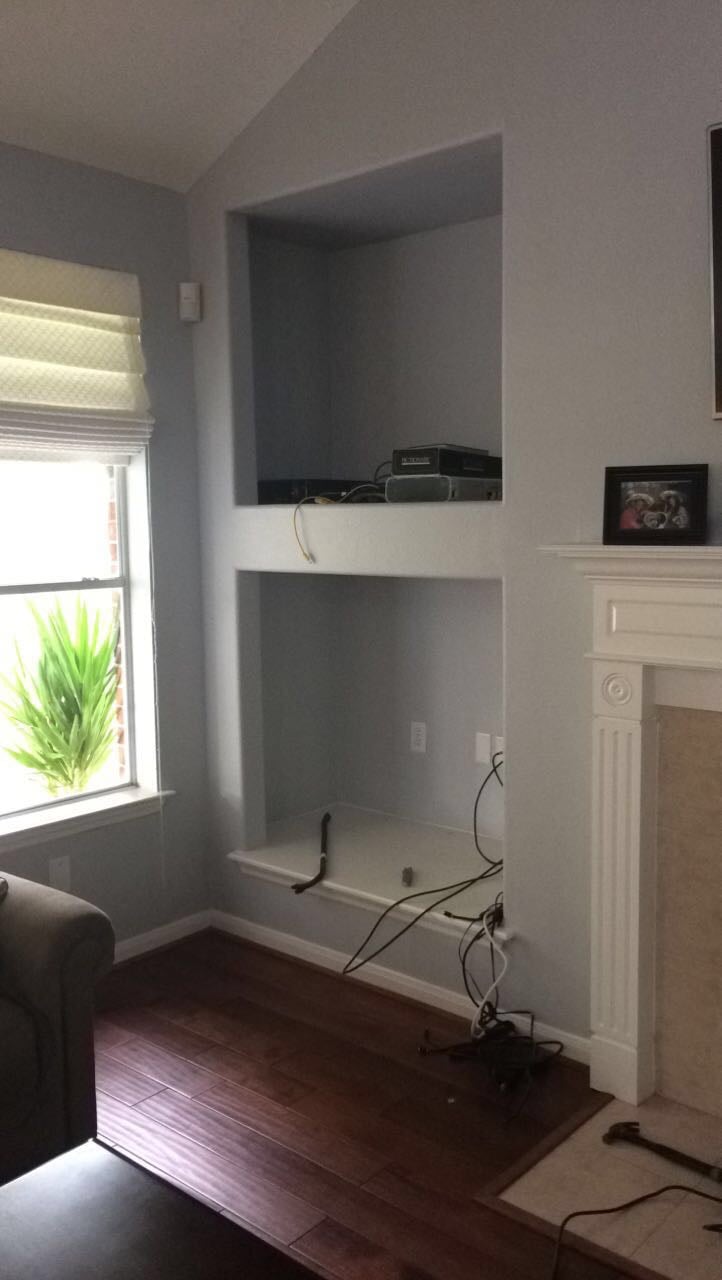
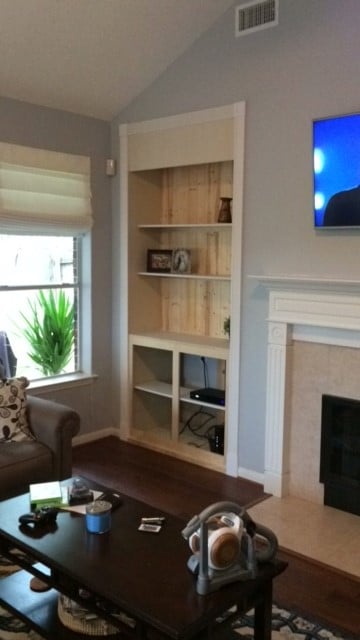
We bought this house about a year ago and we finally got around to removing this pointless niche! The center divider and bottom were removed. The cabinet and hutch were assembled seperately.
This is still a work of progress. I am looking for a nice decorative molding face for the top. If anyone has any suggestions please let me know! We will most likely paint it white to match the fireplace mantle.
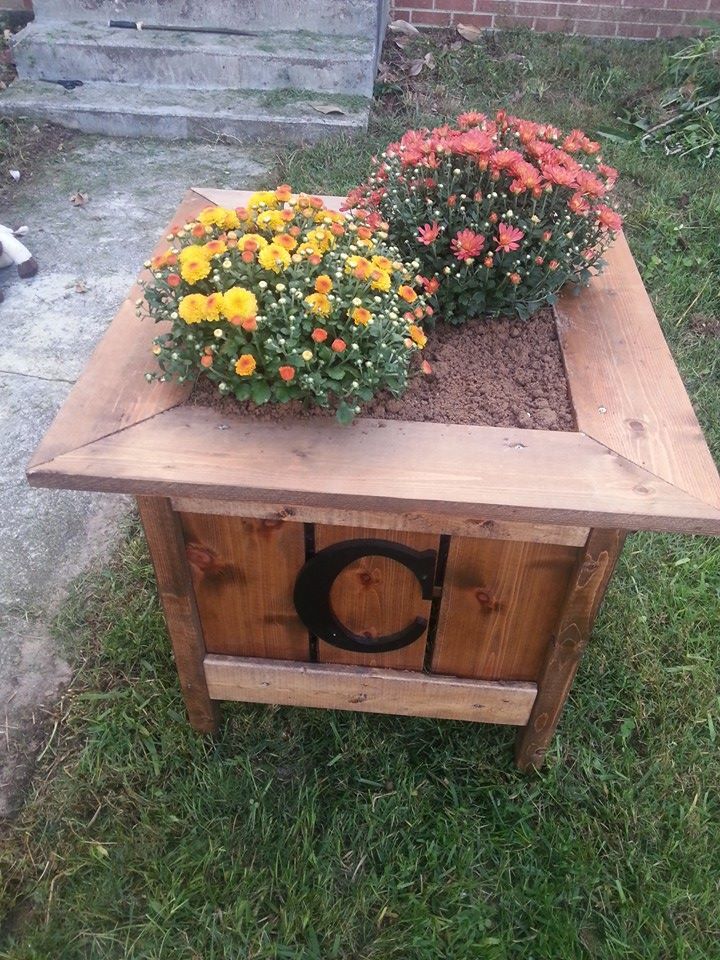
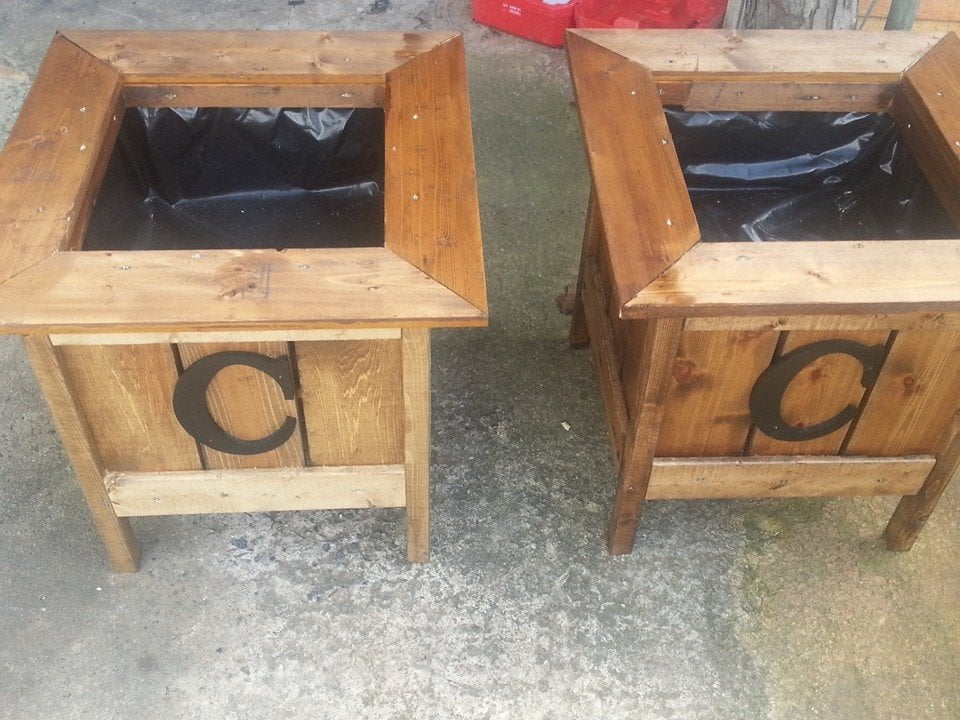
I used your "cedar planters for less than $20" plan and modified it to create two beautiful planters for my house. I framed out the top of the planter to give it a more complete look. Also, I added a "C" for our last name. -Shaye

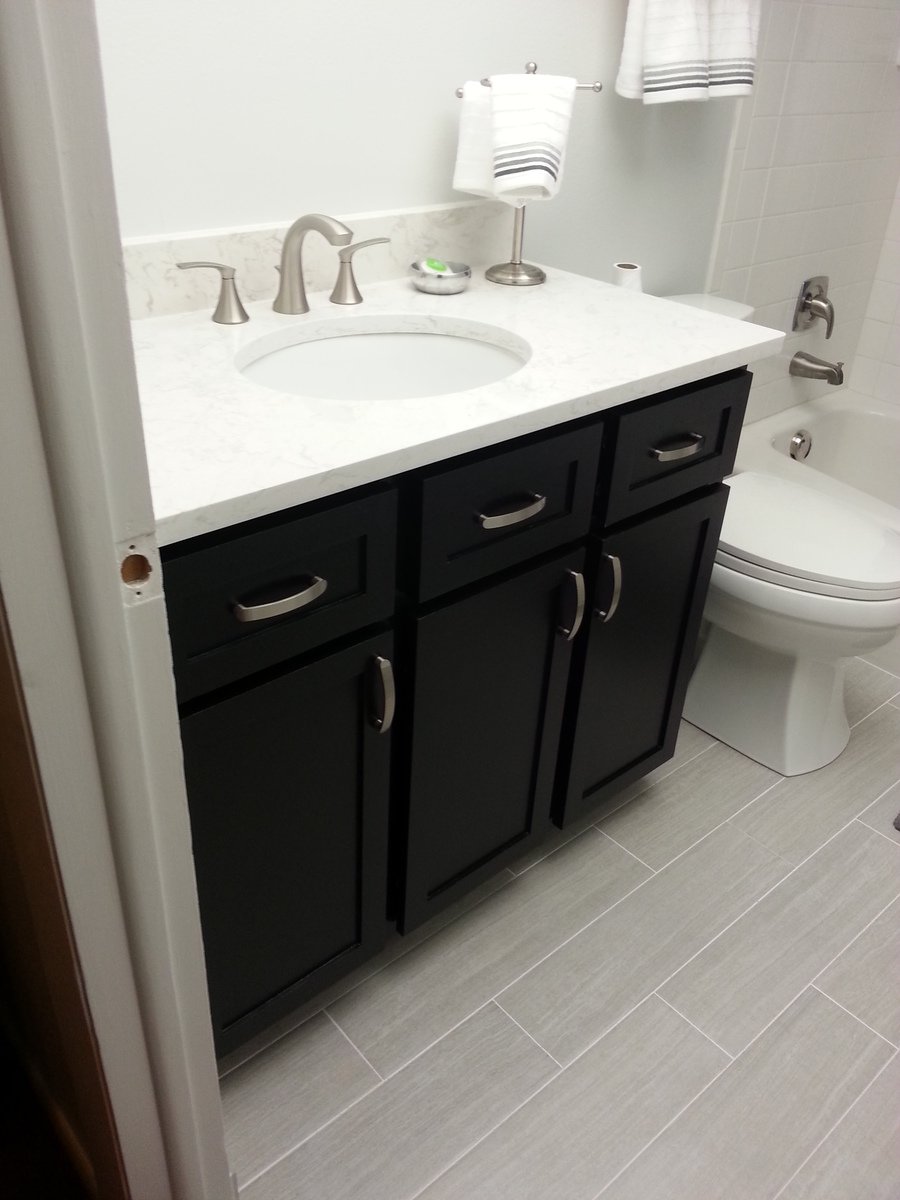
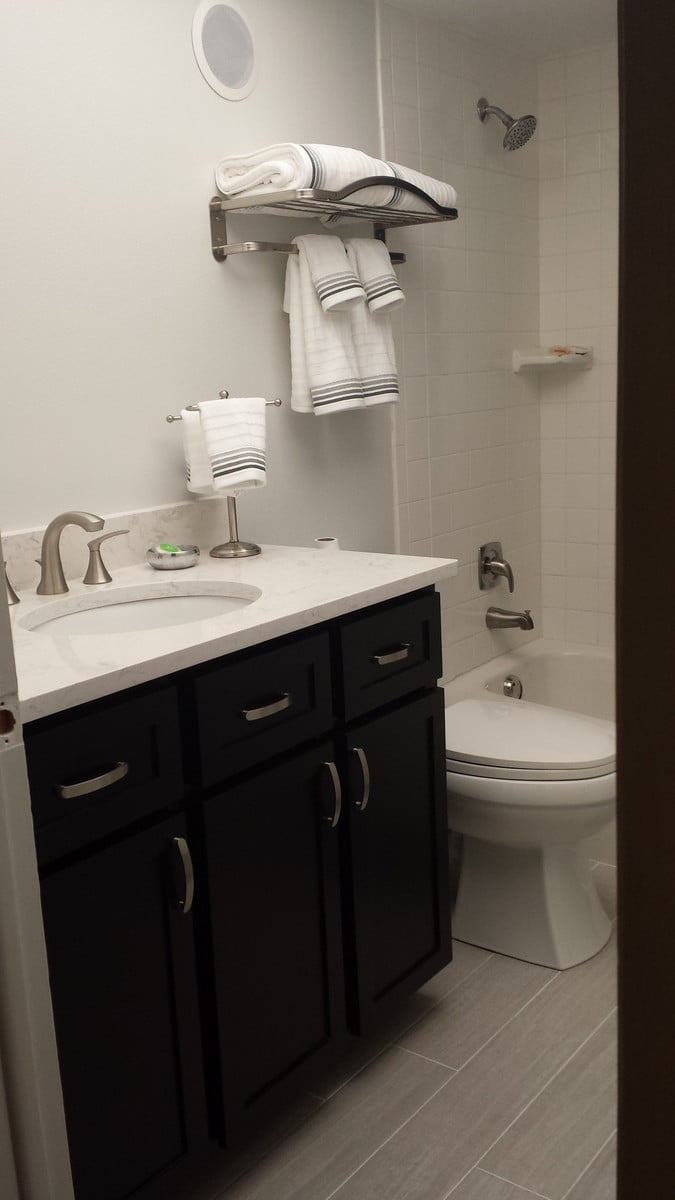
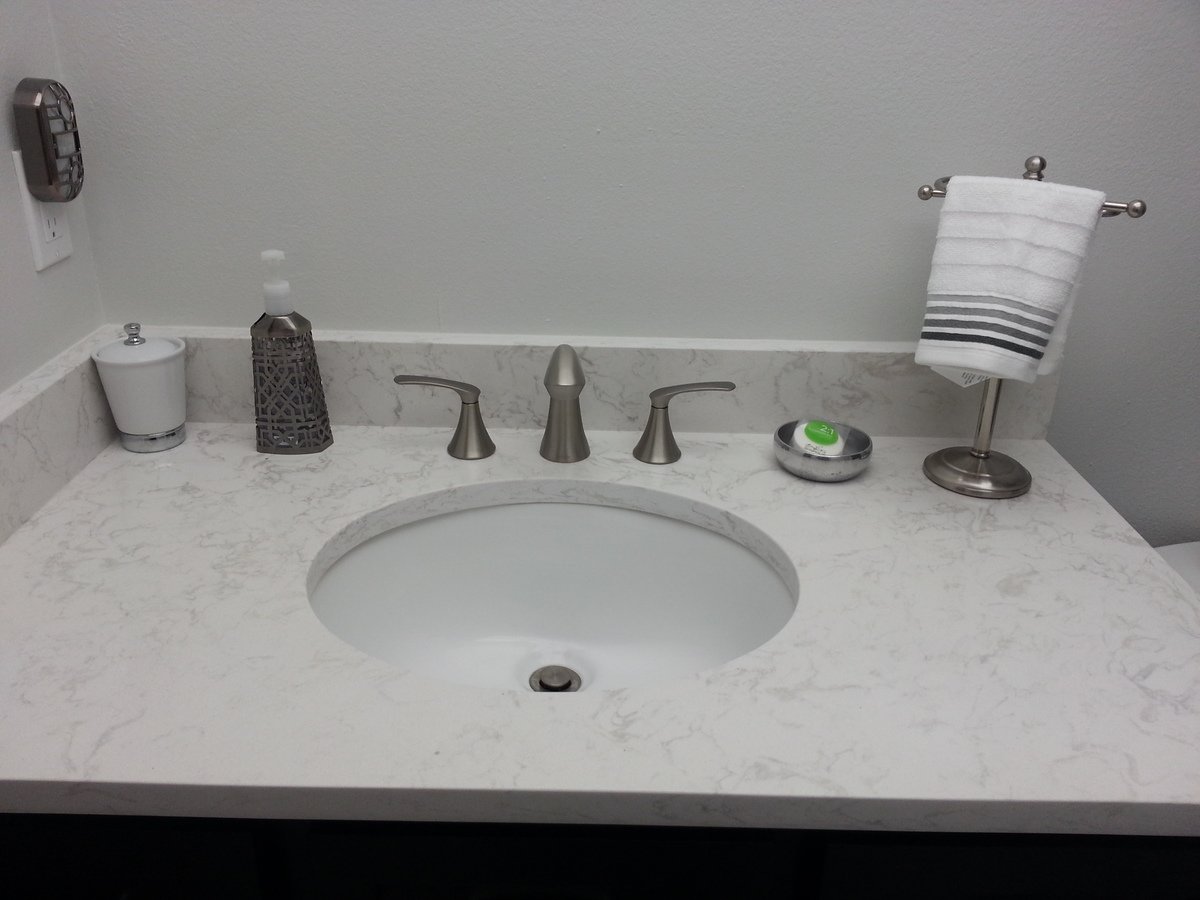
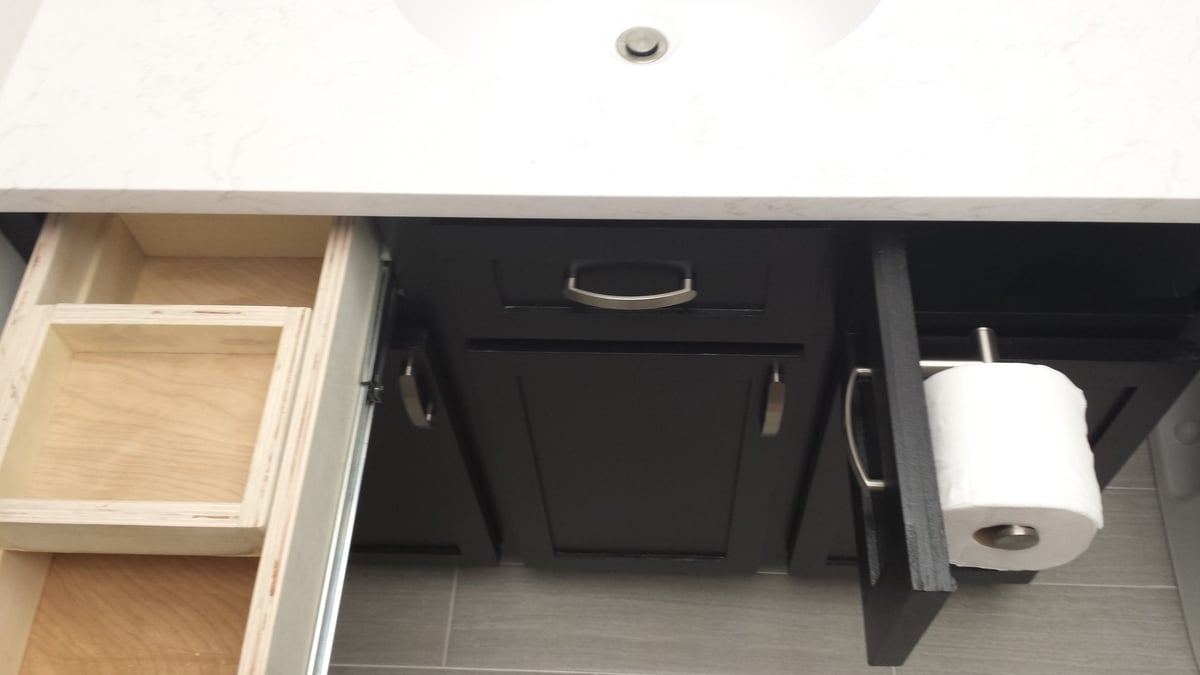
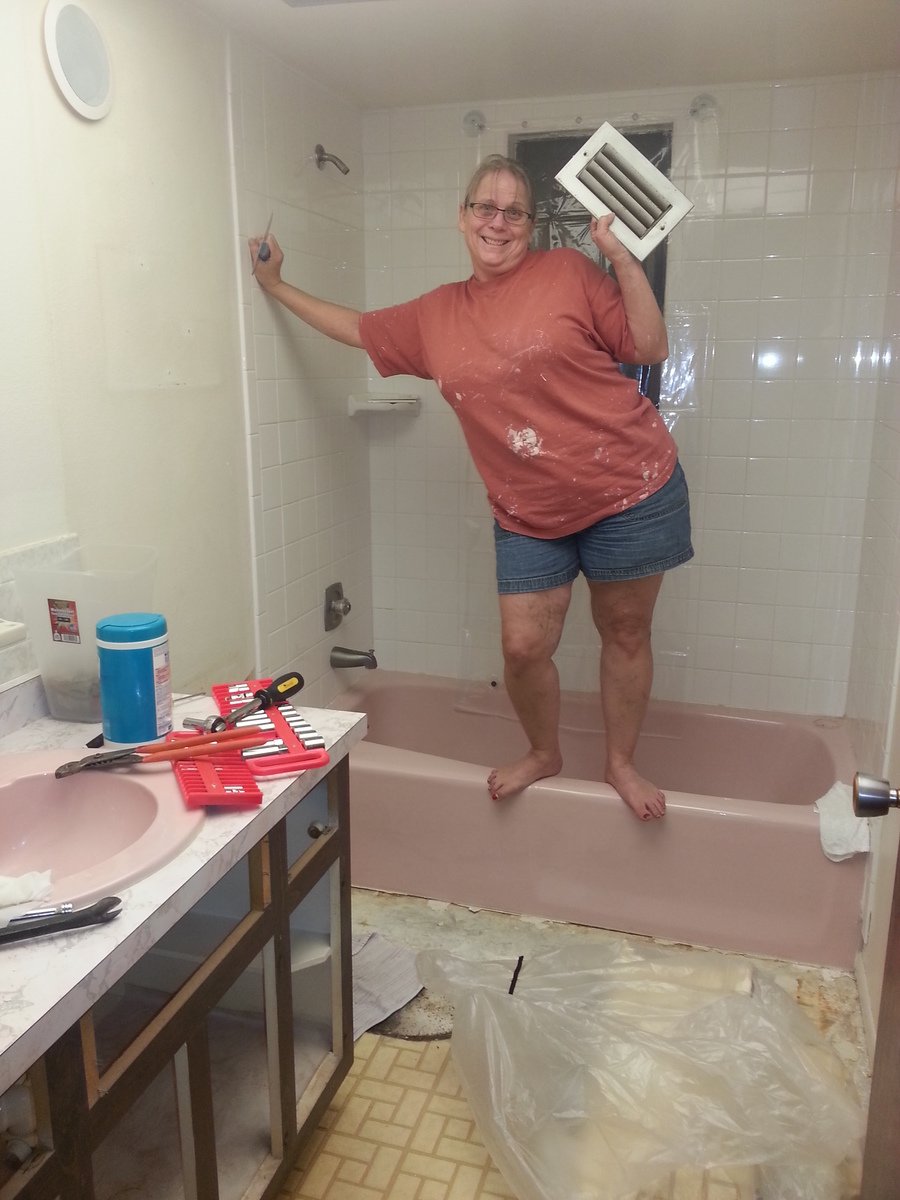
So we had a pretty hideous bathroom (as seen in the last picture). The toilet was pink too, matching the tub and sink. This complete little bathroom remodel was an experiment to see if I wanted to tackle the master bath and eventually the kitchen. We had a drywall guy come in to fill the holes where the original towel bar, toilet paper holder and medicine cabint were. I actually used the plans from the Kitchen Cabinet Sink Base 36 Full Overlay Face Frame because I wanted a toe kick and a Face Frame. I added my own twists like a hidden toilet paper holder on the right, 45 degree tilt out in the middle, and a sliding shelf in the left drawer. I adjusted the dimensions for the space we had and used a soft close track and hinges. We went with a granite top due to the money we saved on building the vanity. We went with brushed fixtures and accessories like a hotel style towel holder. I want to give credit to my girlfriend and her Mom who did most of the demo work (not really sure why and that's her Mom in the last picture). My girlfriend's step father and I laid the tile (I have never laid tile before) and my girlfriend did all the decorating / finalizing to make it look complete and totally awesome.
Fri, 02/27/2015 - 09:38
Nice job customizing the plan. I'm attempting something similar -- modifying the kitchen sink cabinet to fit our vanity top, and adding drawers.
Sat, 07/25/2015 - 13:21
I love your finished vanity with all the little extras. Wish your plan was available! I'm not confident enough to do that much customizing yet. Great work!