Community Brag Posts
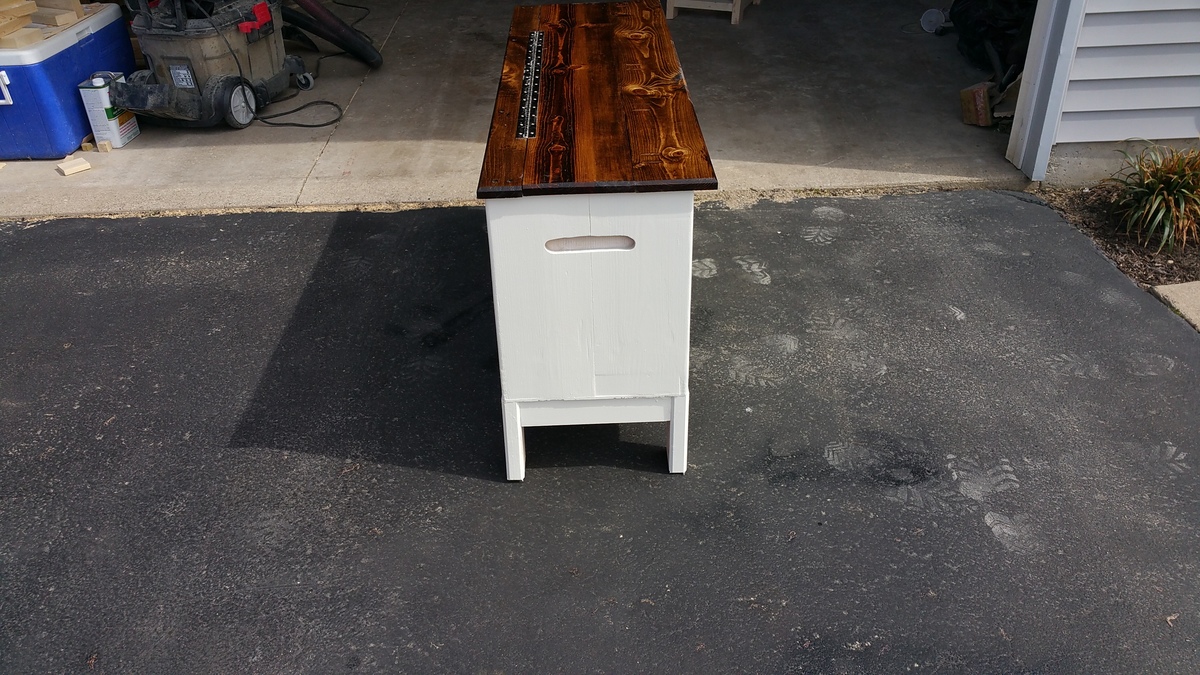
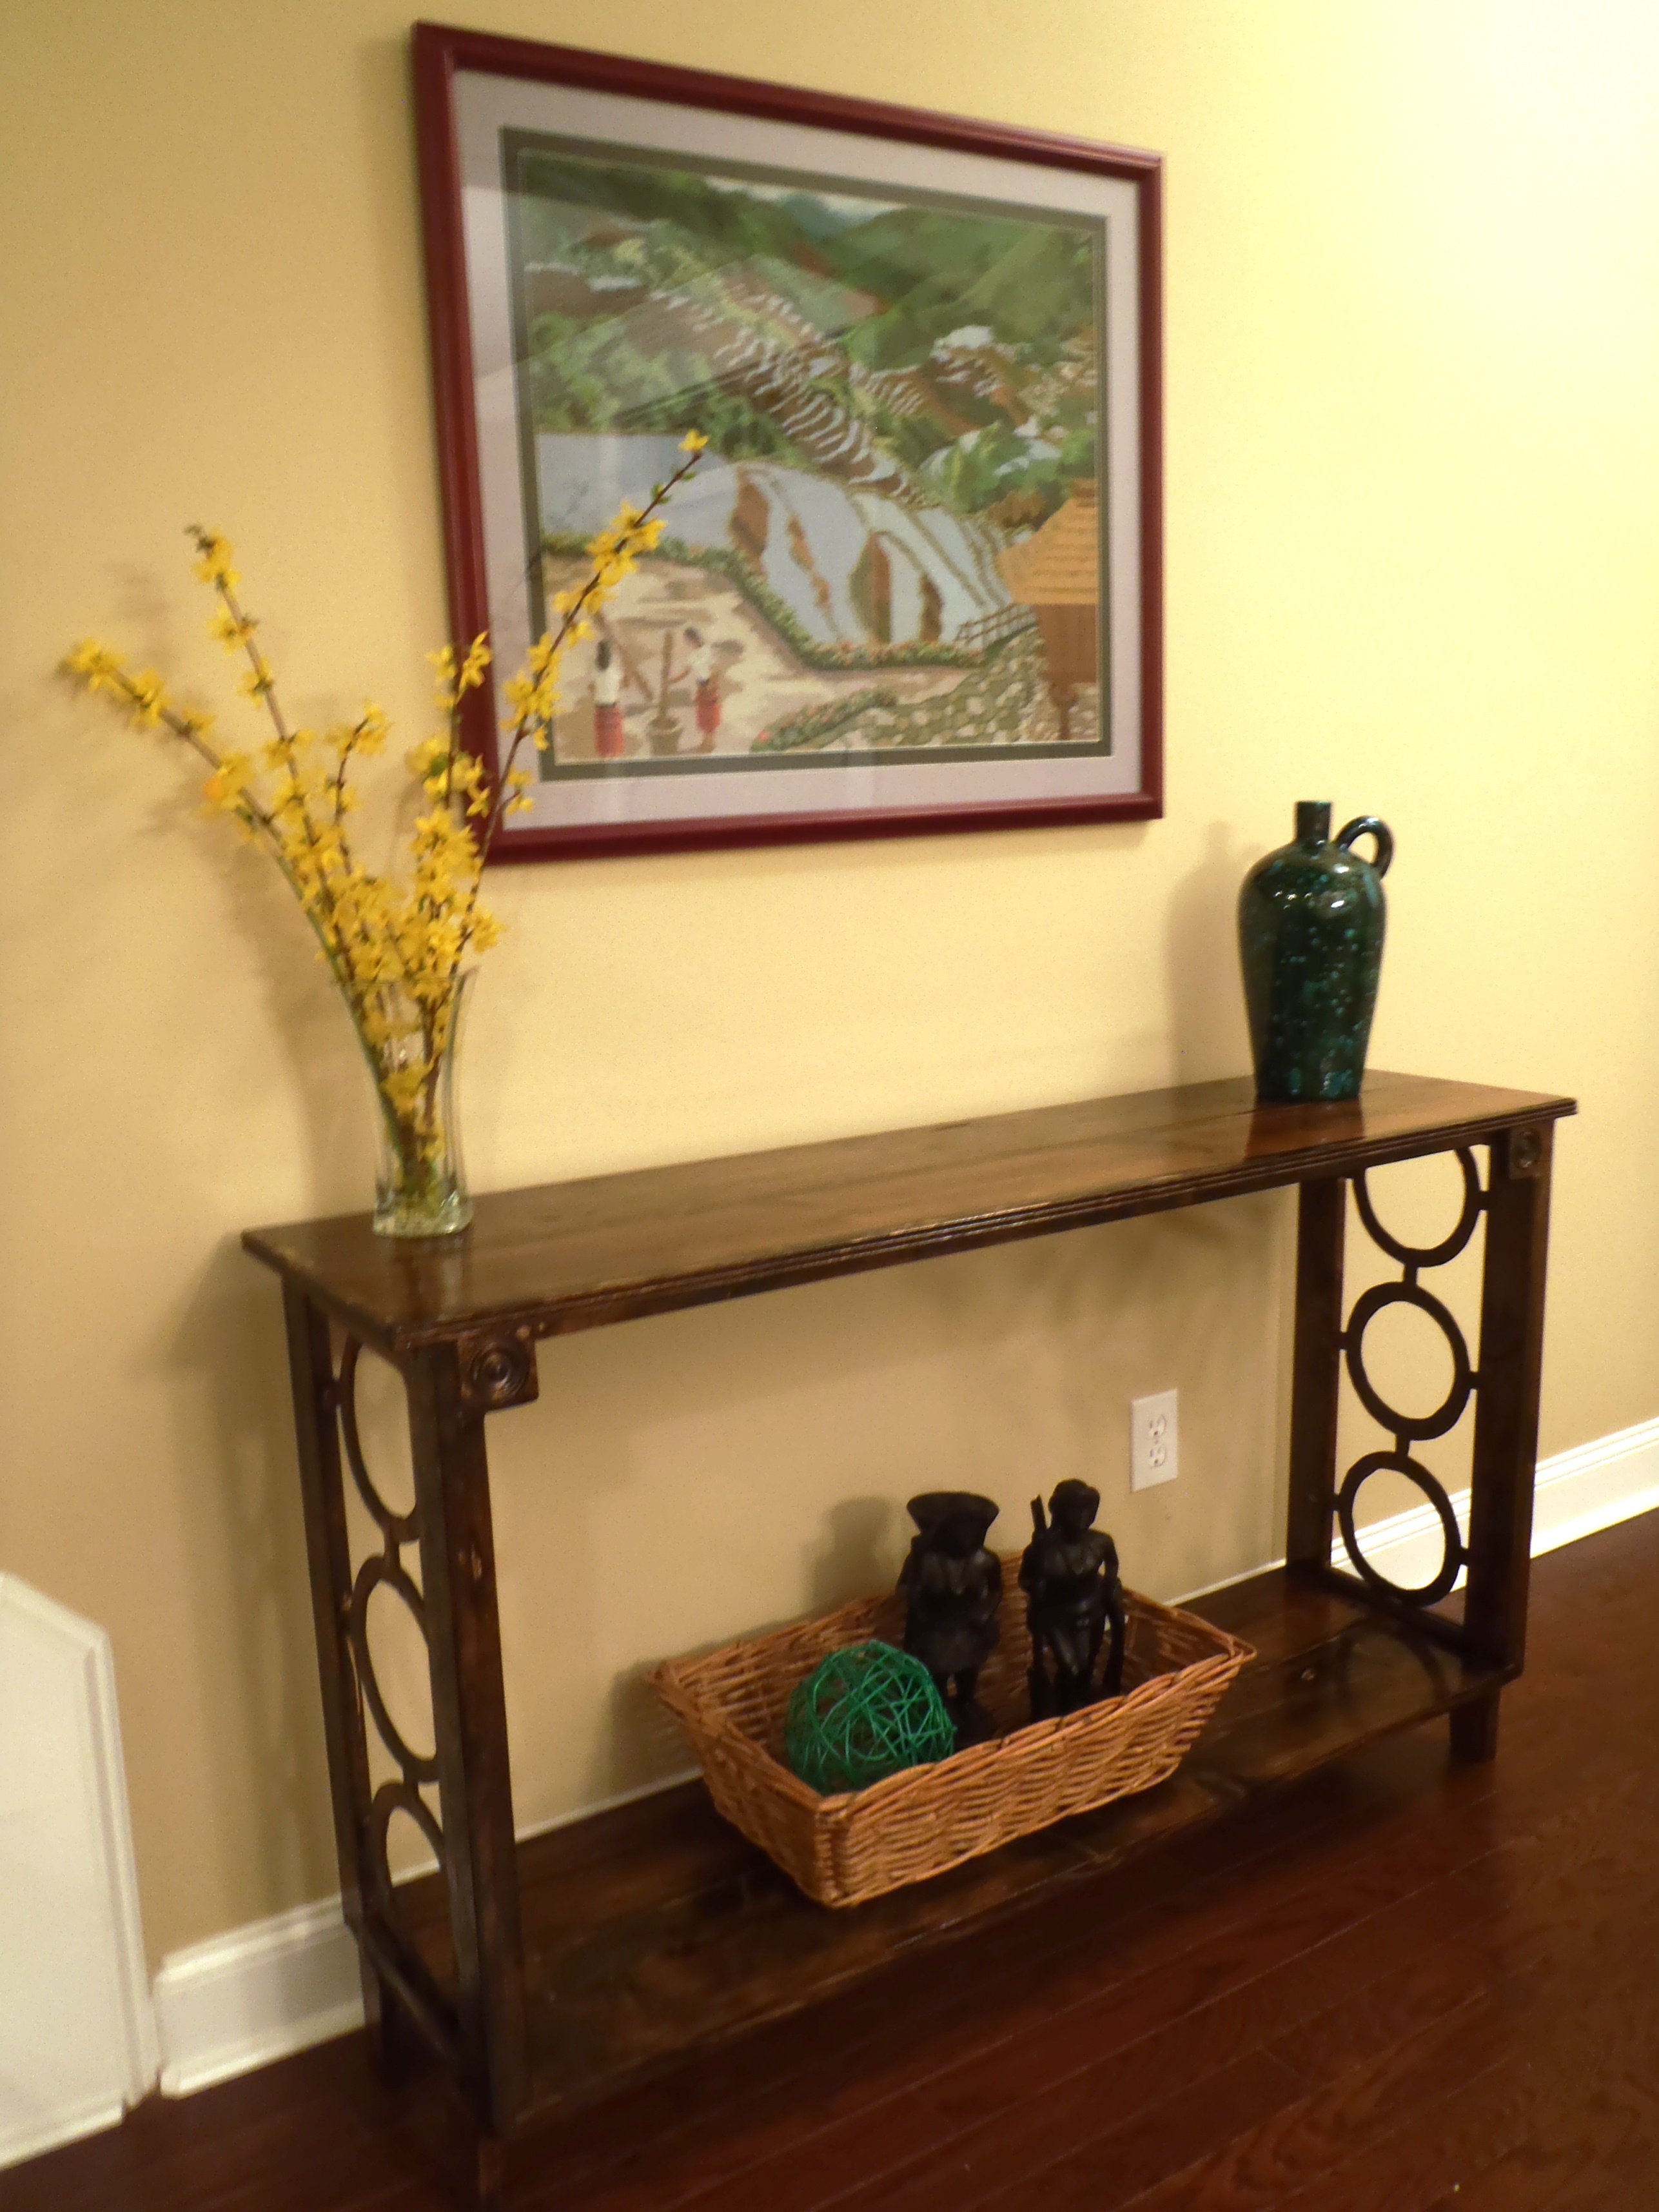
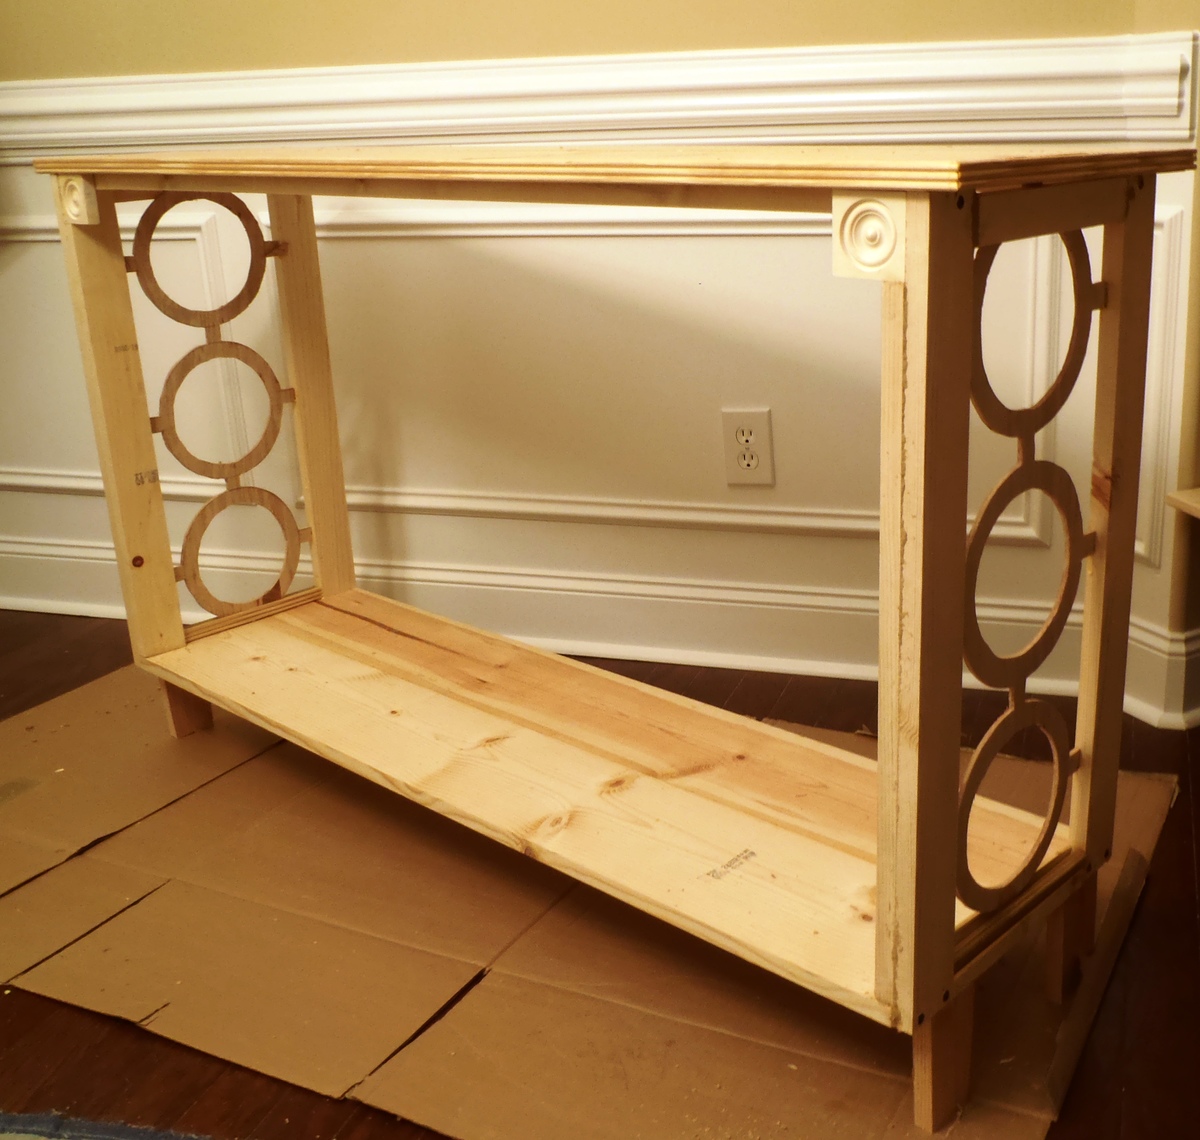
Entry console table
Thanks for the awesome and easy plans
Built from Plan(s)
Estimated Time Investment
Weekend Project (10-20 Hours)
Recommended Skill Level
Beginner
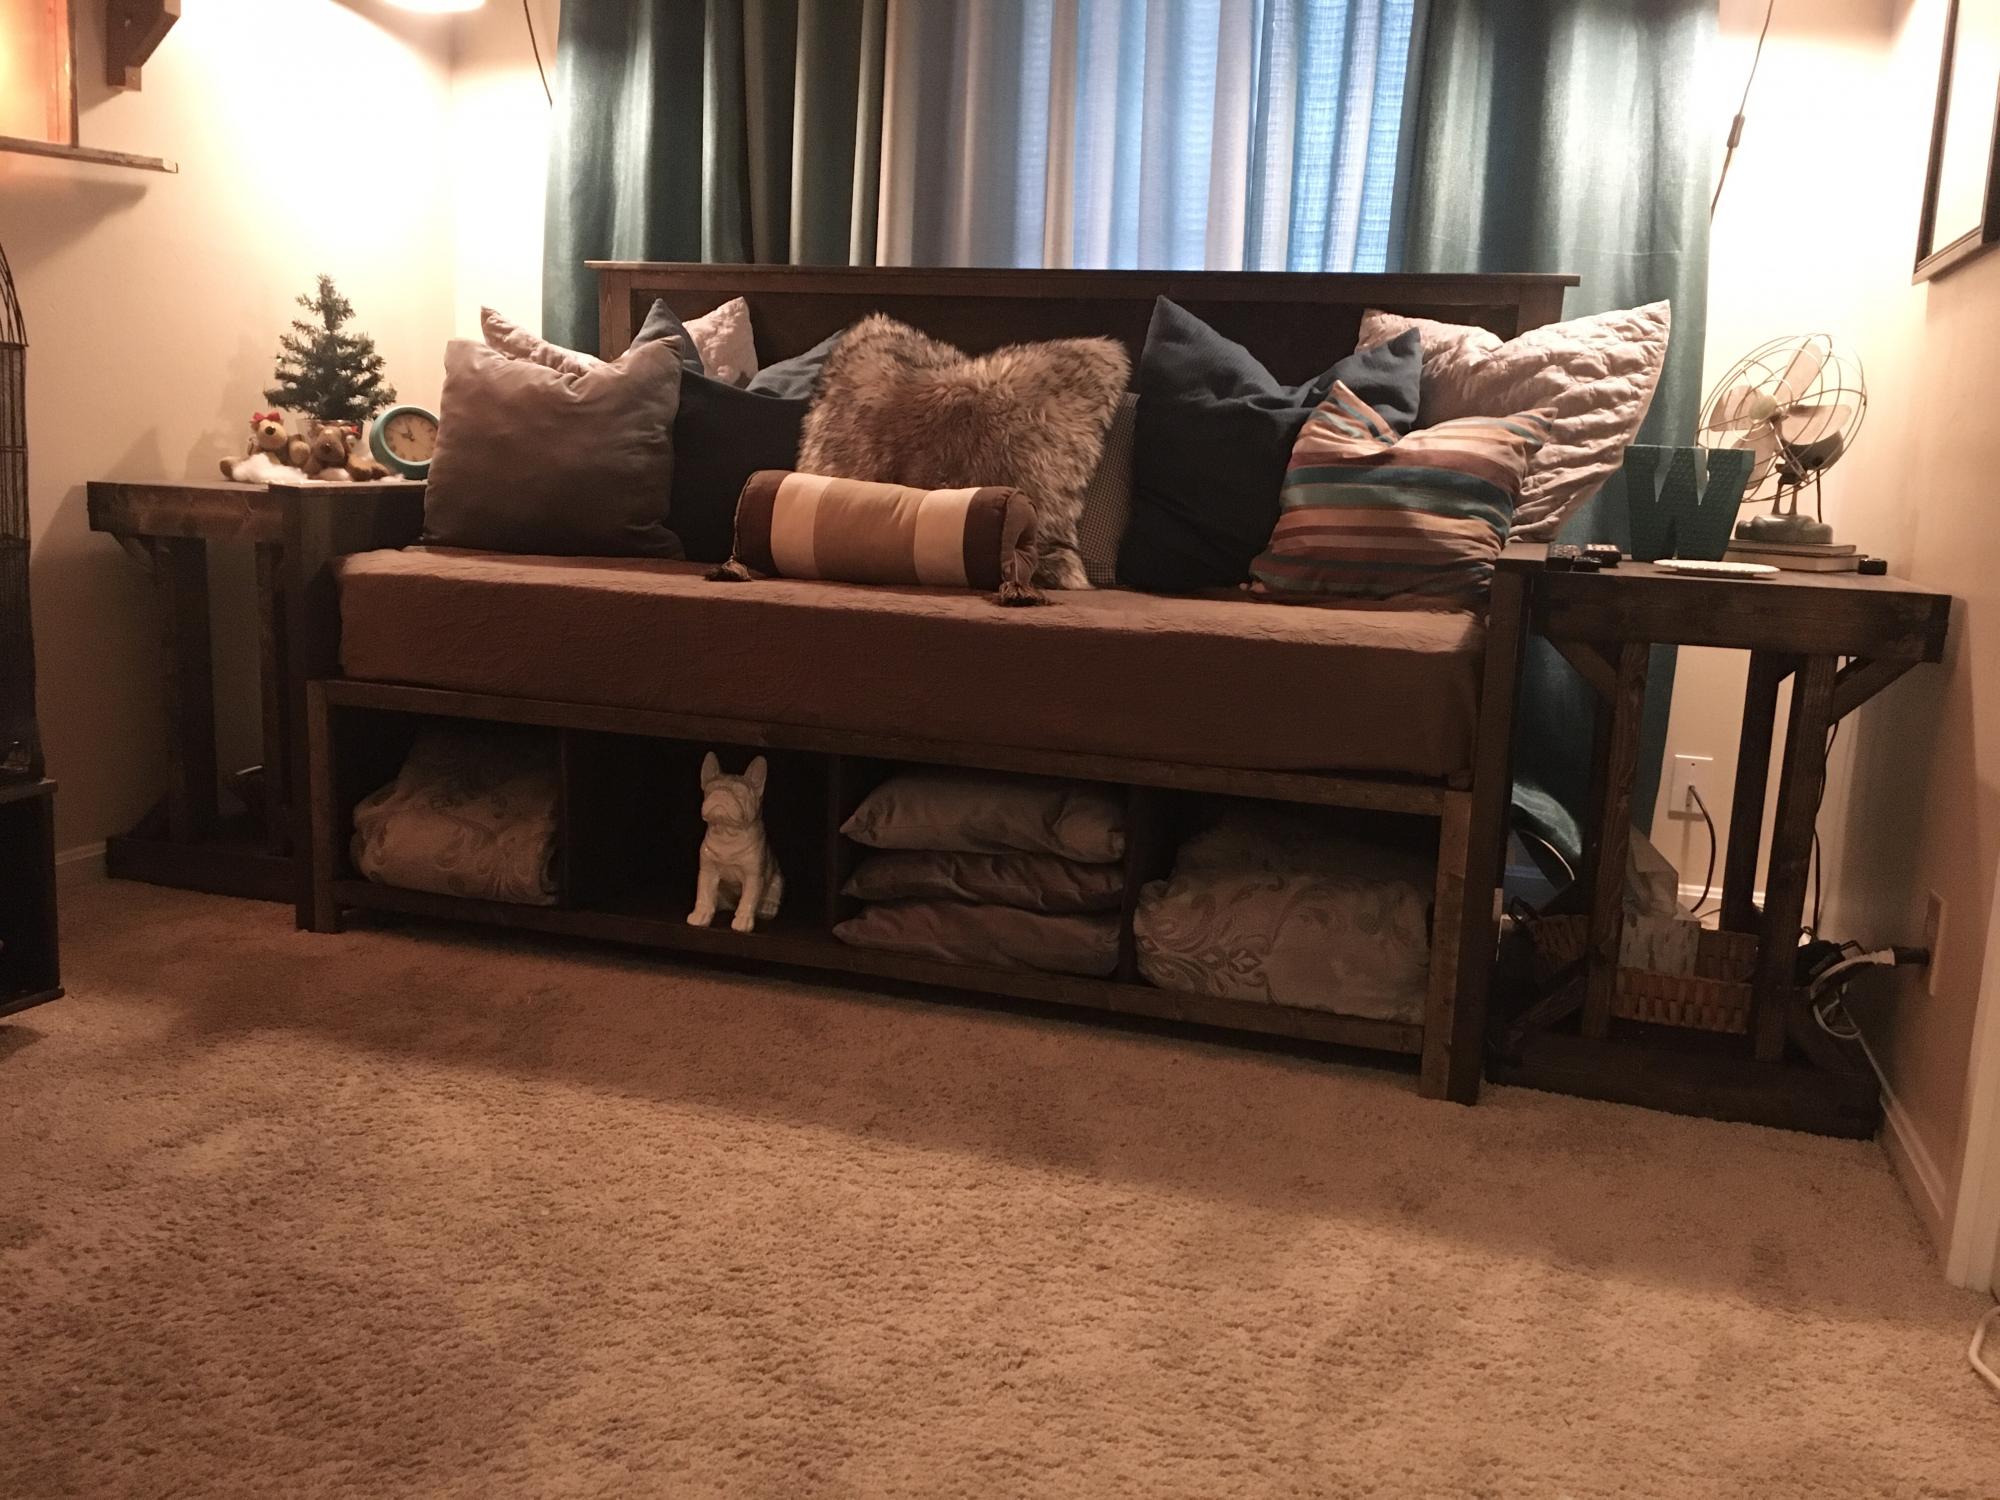
Reclaimed Wood Outdoor Sofa
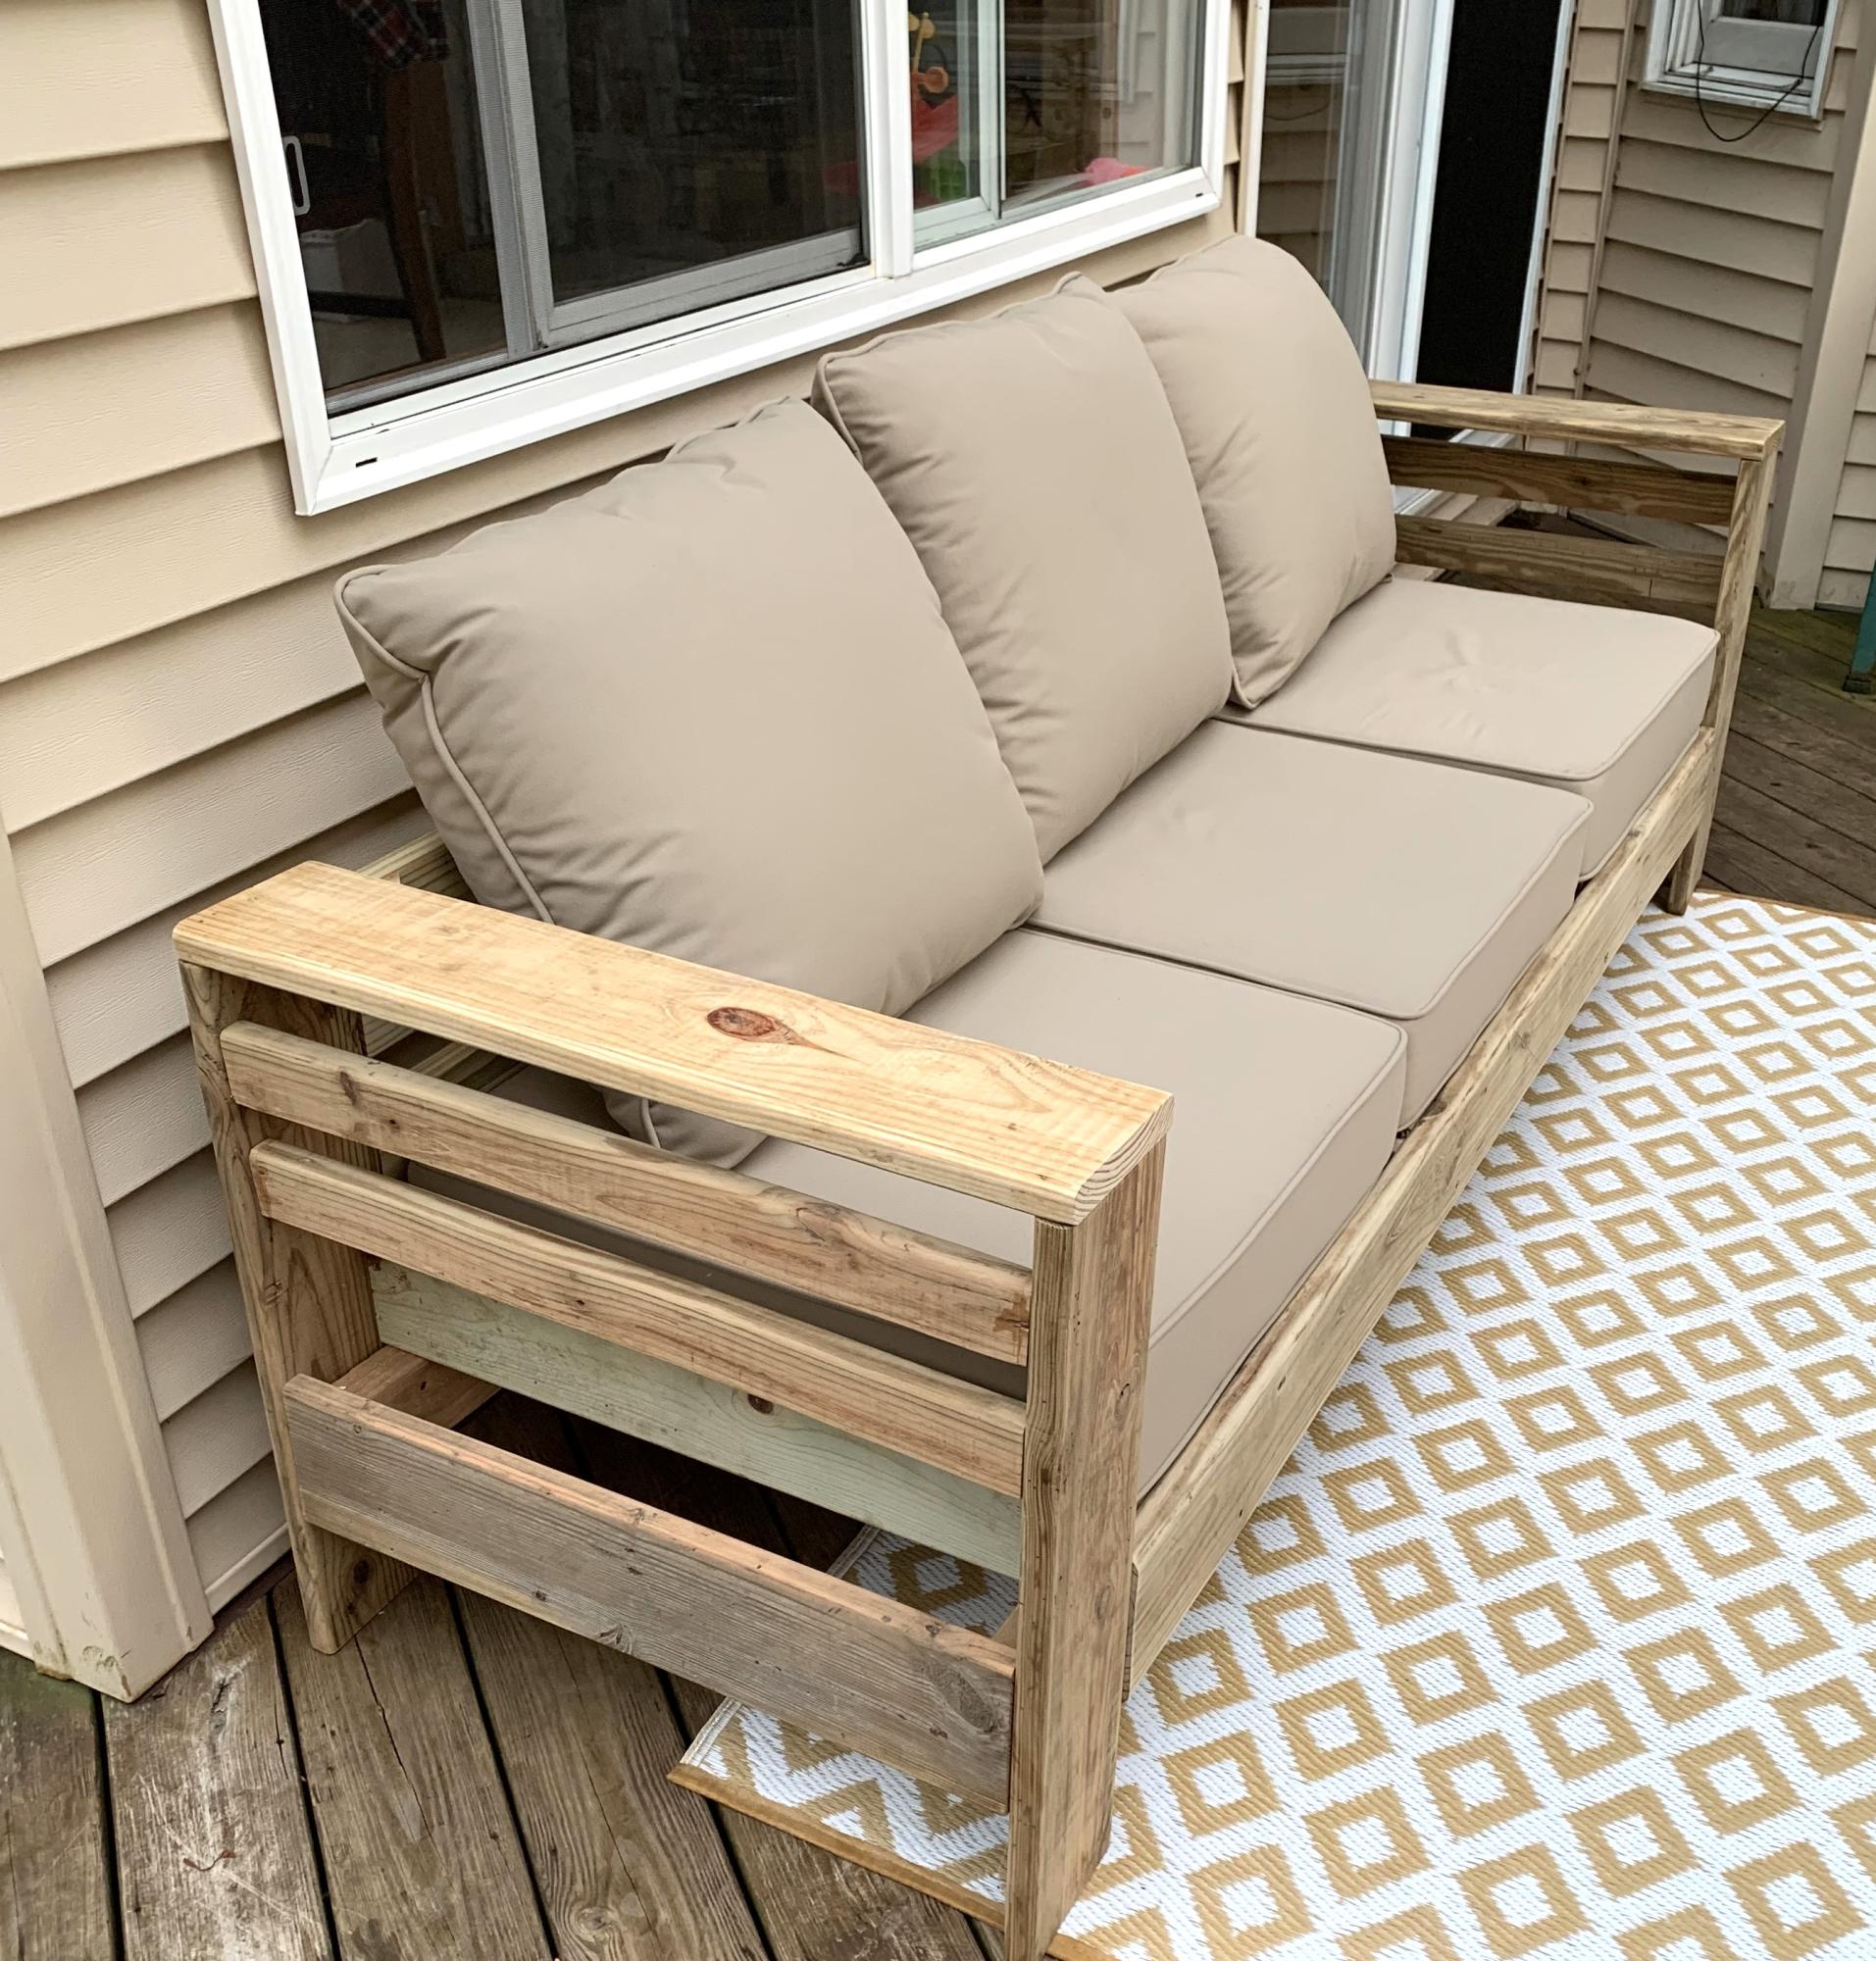
We had a small deck with many rotted boards. The contractor who demoed it, knowing my interest in diy projects, sorted out any usable boards. I loved the idea of an outdoor sofa, so altered your beautiful pattern to accommodate decking boards - I literally only had to purchase 2 boards for the entire project! I’m so thrilled with how it turned out! Thank you!!
Camey Brown
Built from Plan(s)
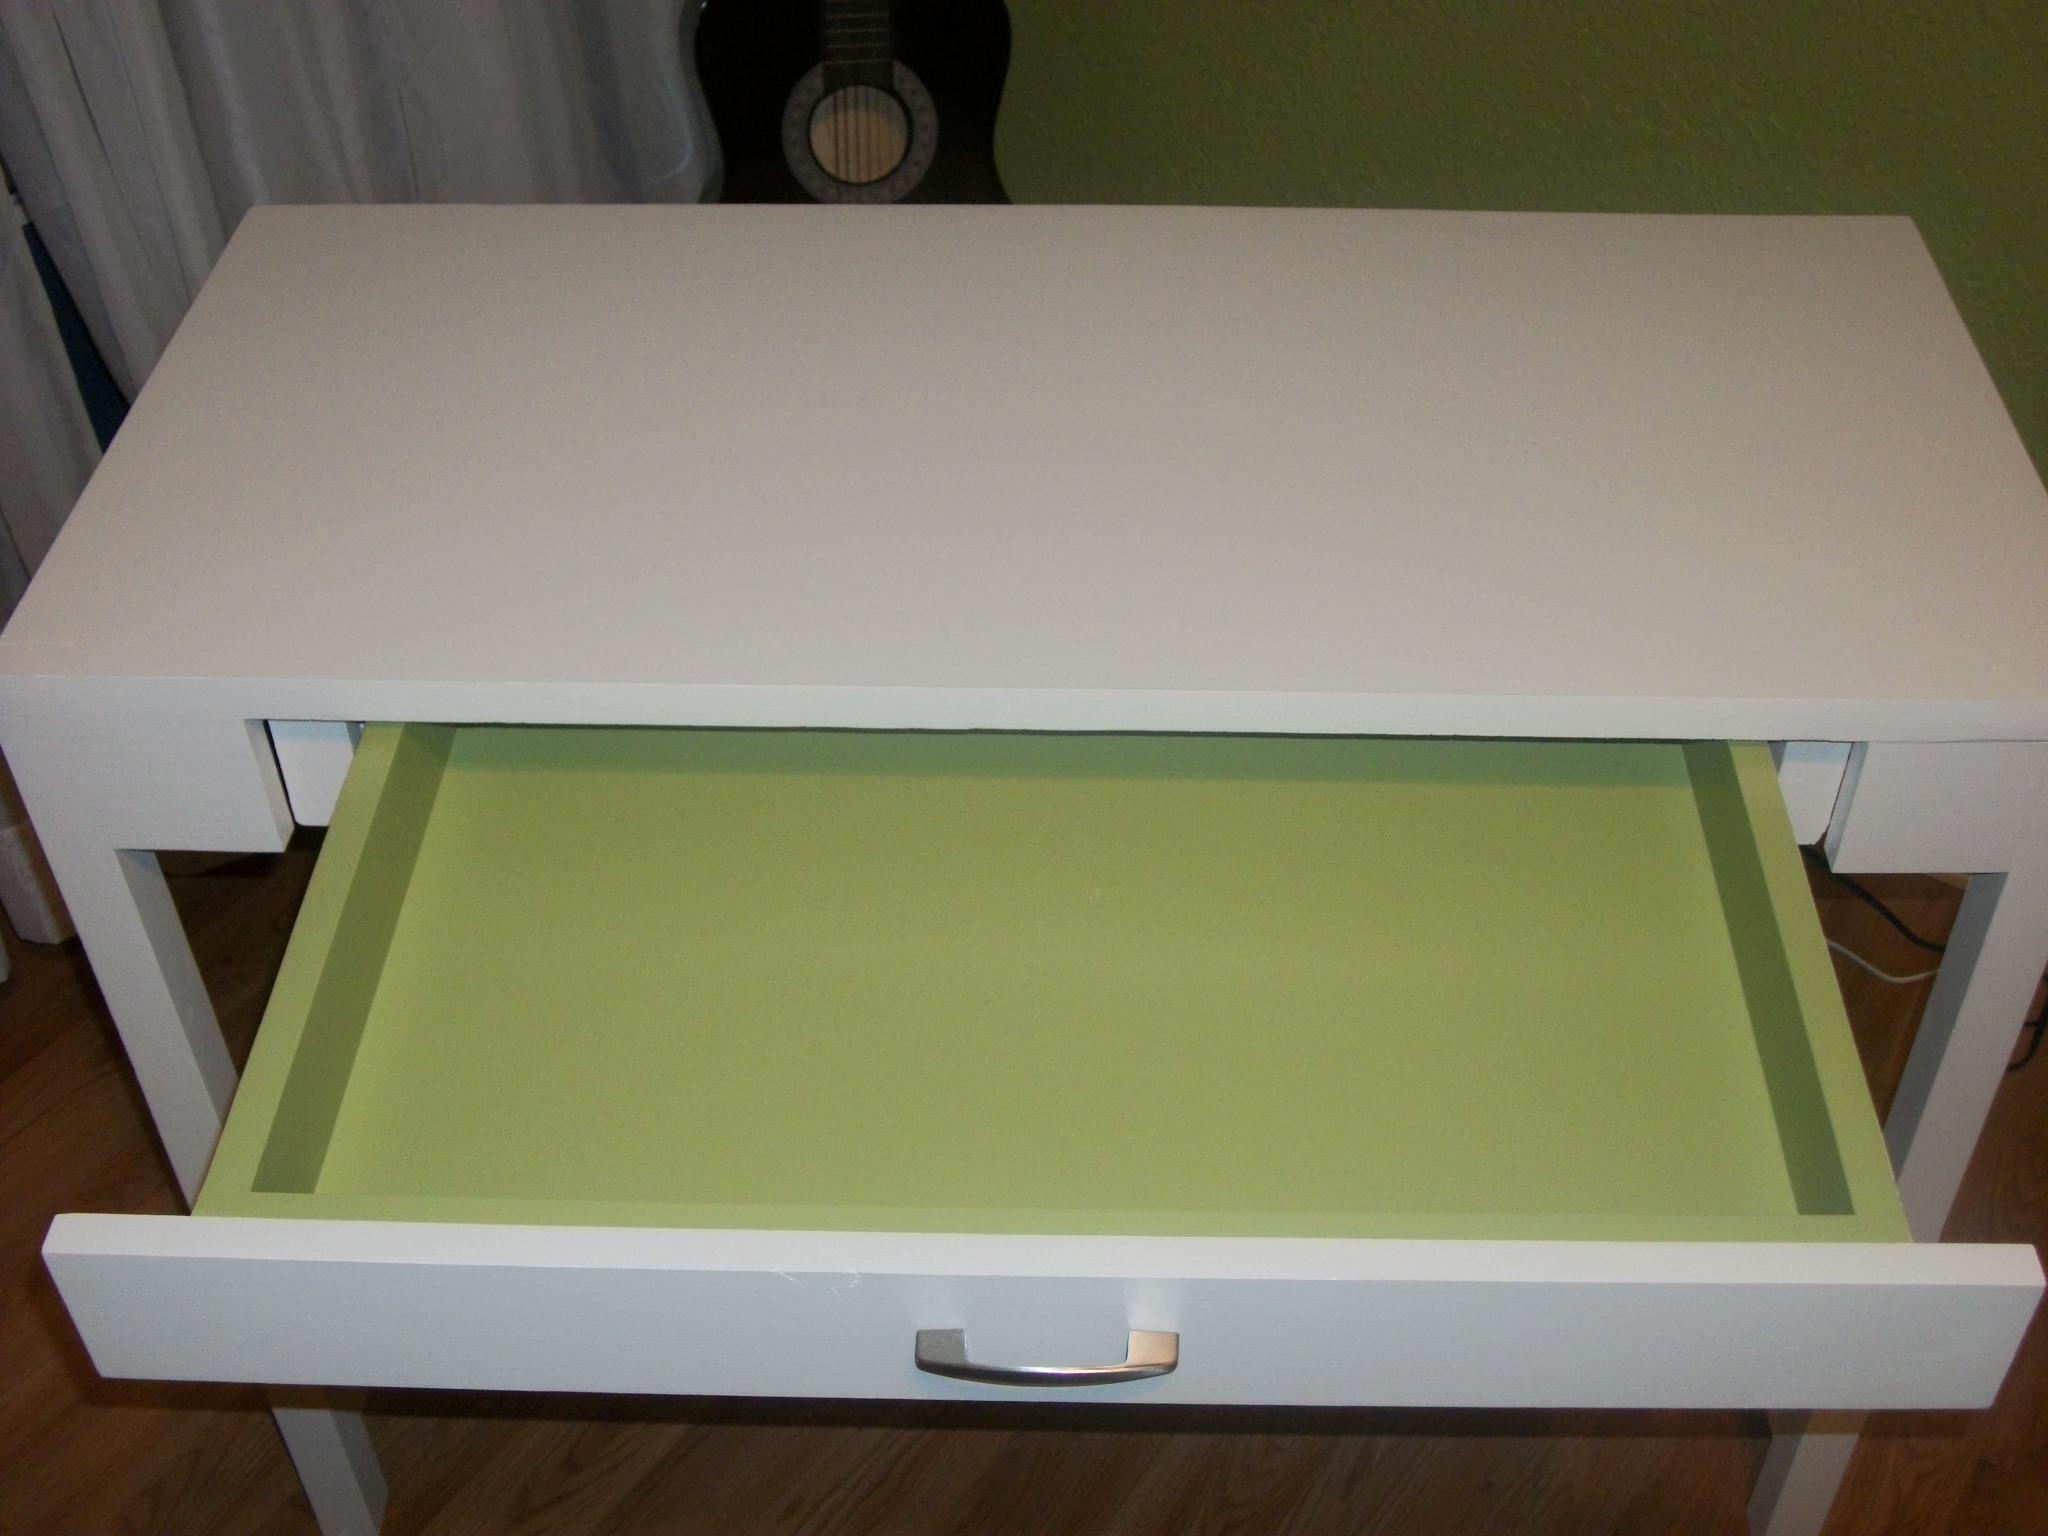
Perfect Teenage Desk!

I built this desk for my 15 year old daughter. We needed to size it so that a neat yard sale find seat could fit under it. I also added supports for the legs at the bottom. It just didn't feel sturdy enough for me. Large, single drawer was painted on the inside to match the color of her walls, pulling the whole look together! Lots of fun to build!
Built from Plan(s)
Estimated Cost
FREE
Estimated Time Investment
Afternoon Project (3-6 Hours)
Finish Used
I used Glidden Cappuccino White for the main body of the desk and in the drawer, I used Glidden Spanish Olive. Both are in a satin finish.
Recommended Skill Level
Starter Project
Comments
Tue, 03/20/2012 - 16:48
Turned out great!
Love your daughter's desk! And I also love that it was FREE. The Hubs always wants me to throw out the scraps and I just can't, especially after seeing projects like yours :)

In reply to Turned out great! by kristen
Tue, 03/20/2012 - 22:05
Thank you Kristen!!! I love
Thank you Kristen!!! I love dipping into the ole scrap bins... of course, I have three of them..LOL I also use the stuff that I can't make into a project out in the Ghetto Fire Pit so we enjoy it any way we can!!! Someday I'll have to take a pic and post it on Ana's site somewhere.. I doubt anyone will want one but it works for us!

Tue, 03/20/2012 - 23:07
Me love!!! It so well named
Me love!!! It so well named - perfect is many ways!
In reply to Me love!!! It so well named by Ana White
Wed, 03/21/2012 - 08:38
Thanks Ana! I always love
Thanks Ana! I always love getting compliments from you on the projects I've done. Actually, I love getting compliments period, but thank you very much! Couldn't have done it without you! :-)
Mon, 12/21/2015 - 15:08
Great Job, can you help me!?
I love how you changed the design alittle on this, I am trying to build something very similar to what you did for my vanity/dressing table! I noticed on yours the front aprons are not noticable how did you do that? I want your exact design, and my dimensions are 29" w X 16" d. Thank you in advance!
Rustic X Table
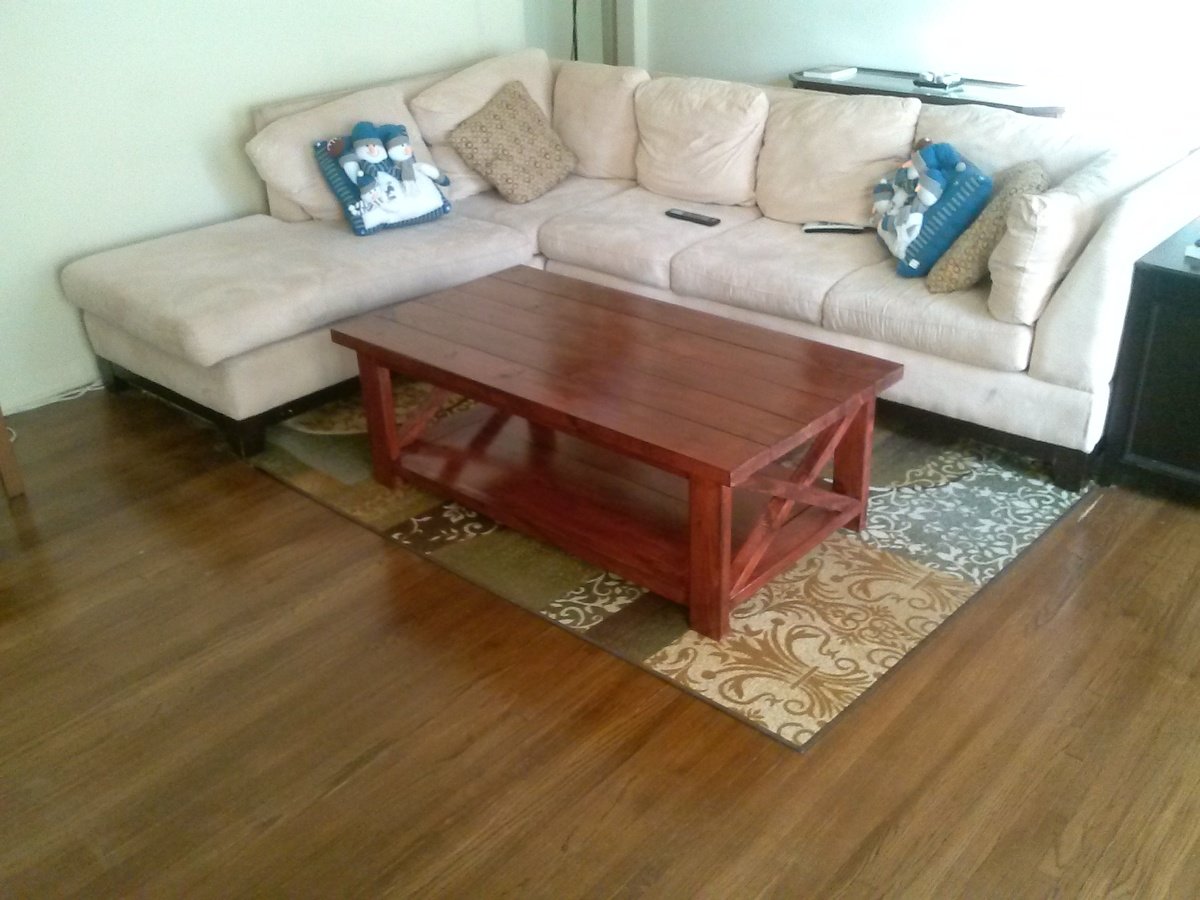
I hated my old flimsy coffee table and I decided that I needed another one. After searching online for tables that I could build, my wife and I came across this one. Its large, sturdy and has the underneath shelf for additional storage. Plus the styling was cool too.
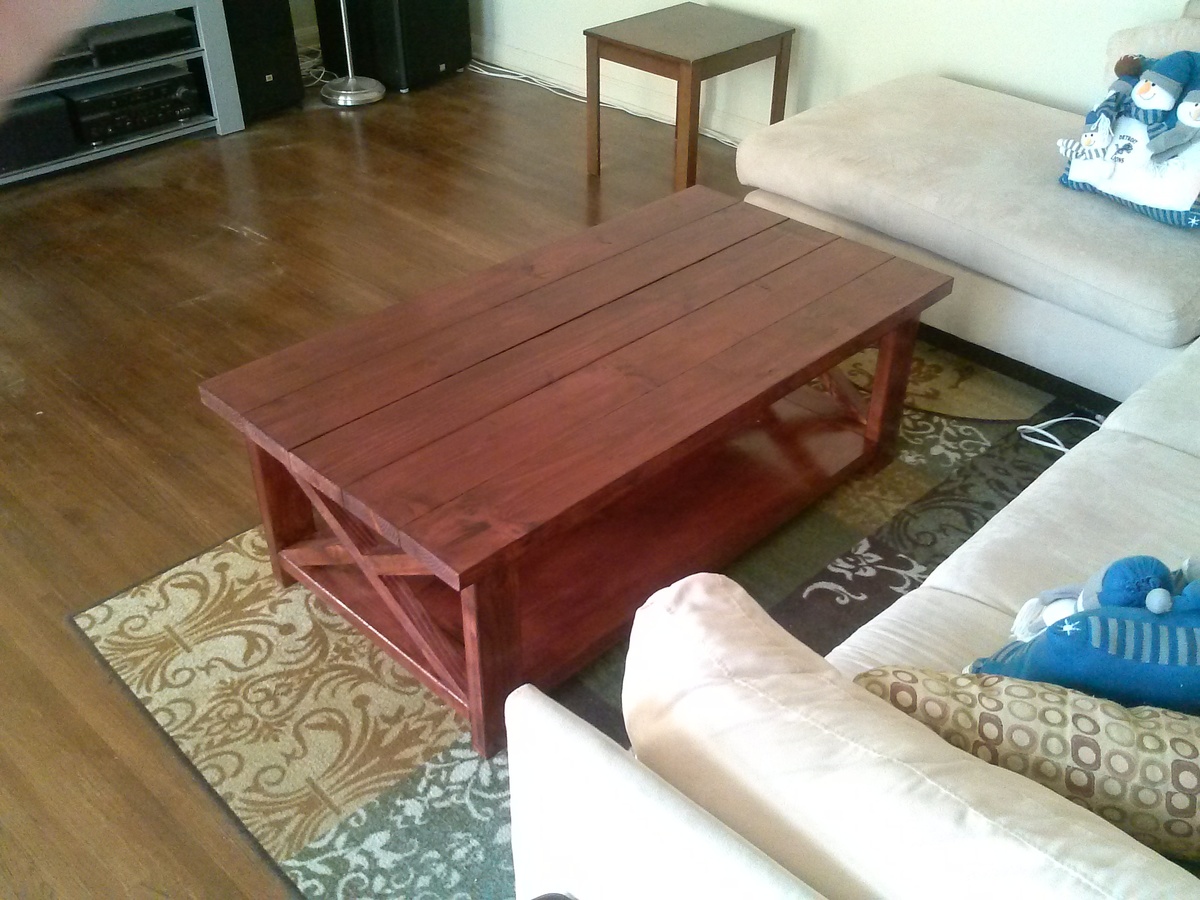
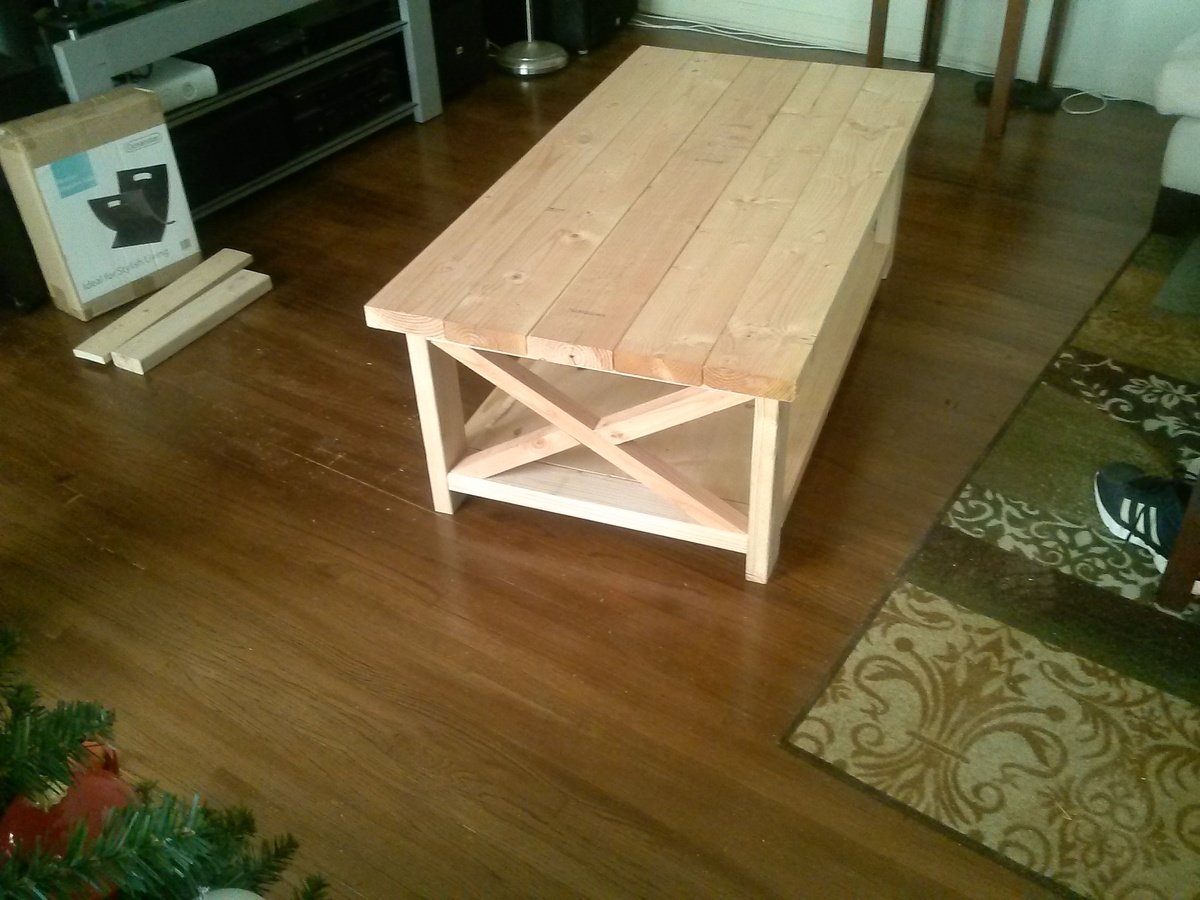
Built from Plan(s)
Estimated Cost
About 80 dollars.
Estimated Time Investment
Weekend Project (10-20 Hours)
Finish Used
To finish this table the first thing I did was coat the table with Minwax Pre-Stain Wood Conditioner. I did a double coat of that before I used Varathane Stain+Poly in Cabernet. I chose the semi-gloss. It took several coats before I got the color that I was happy with.
Recommended Skill Level
Intermediate
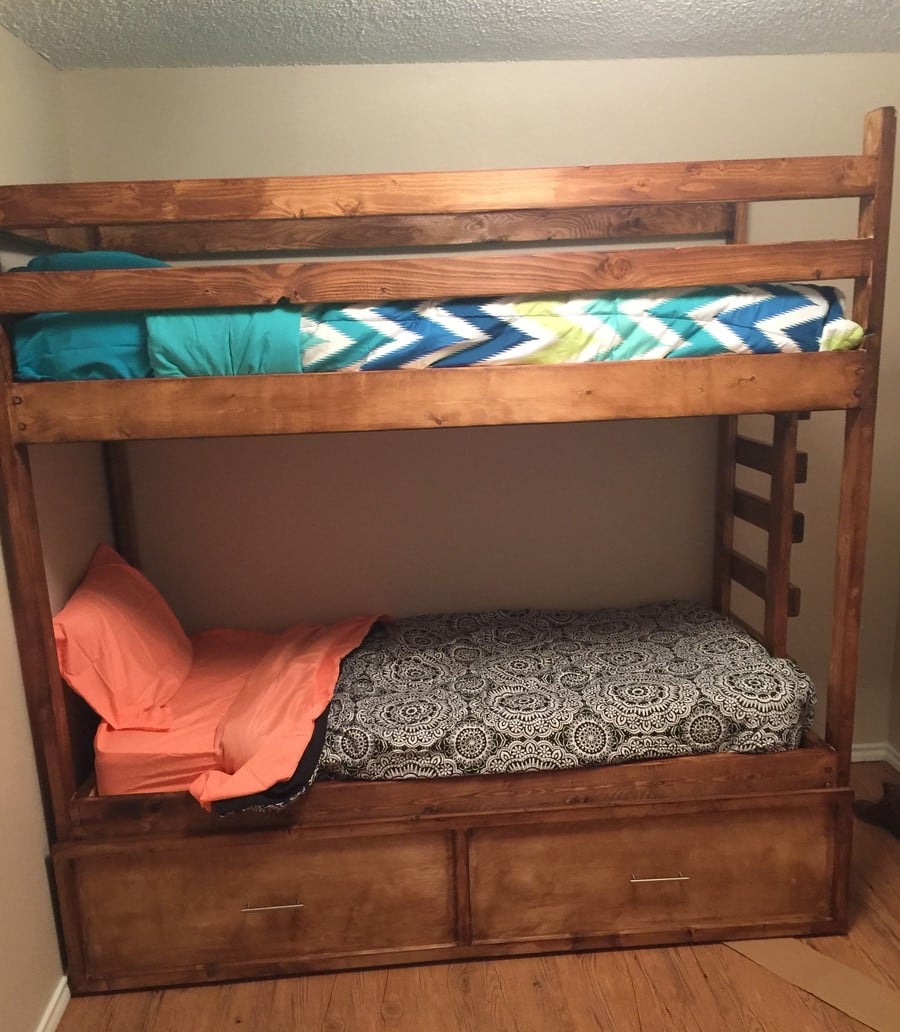
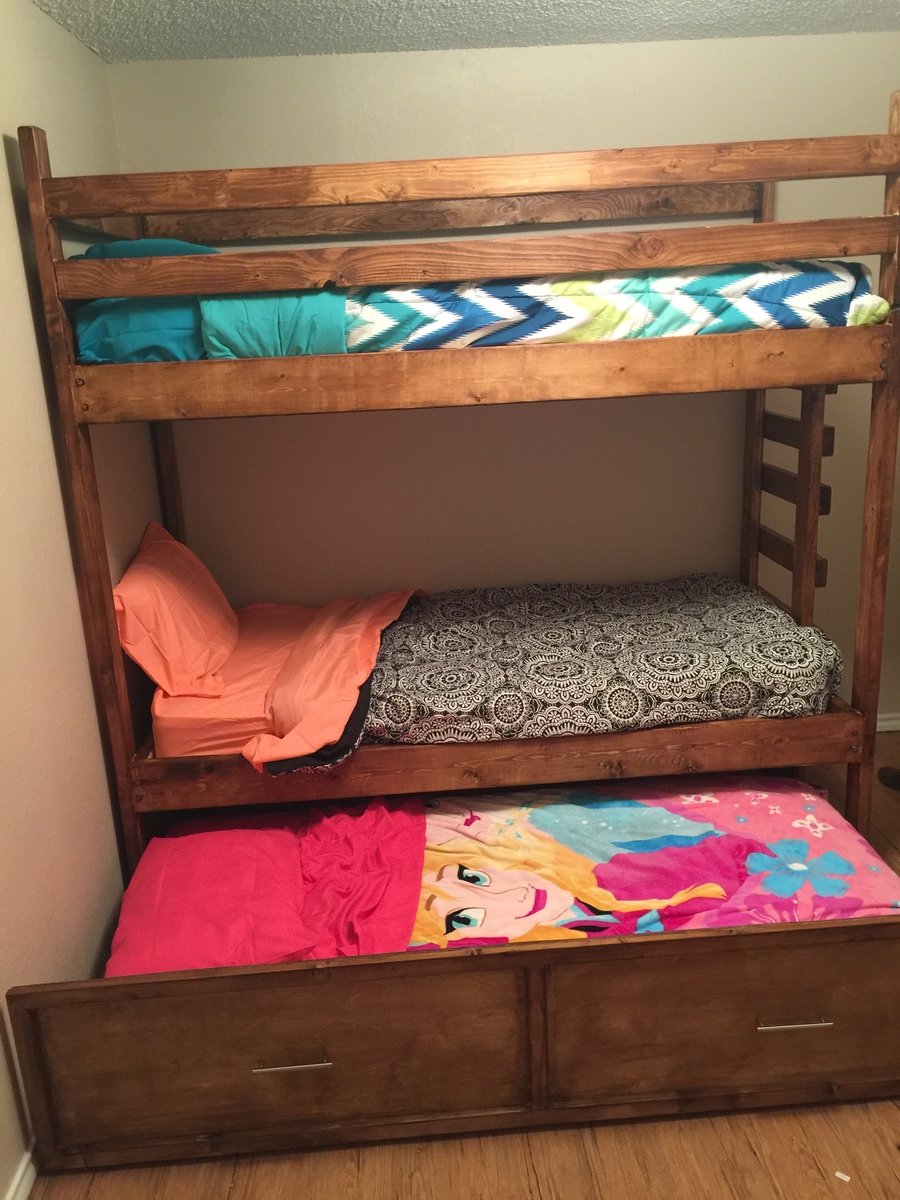
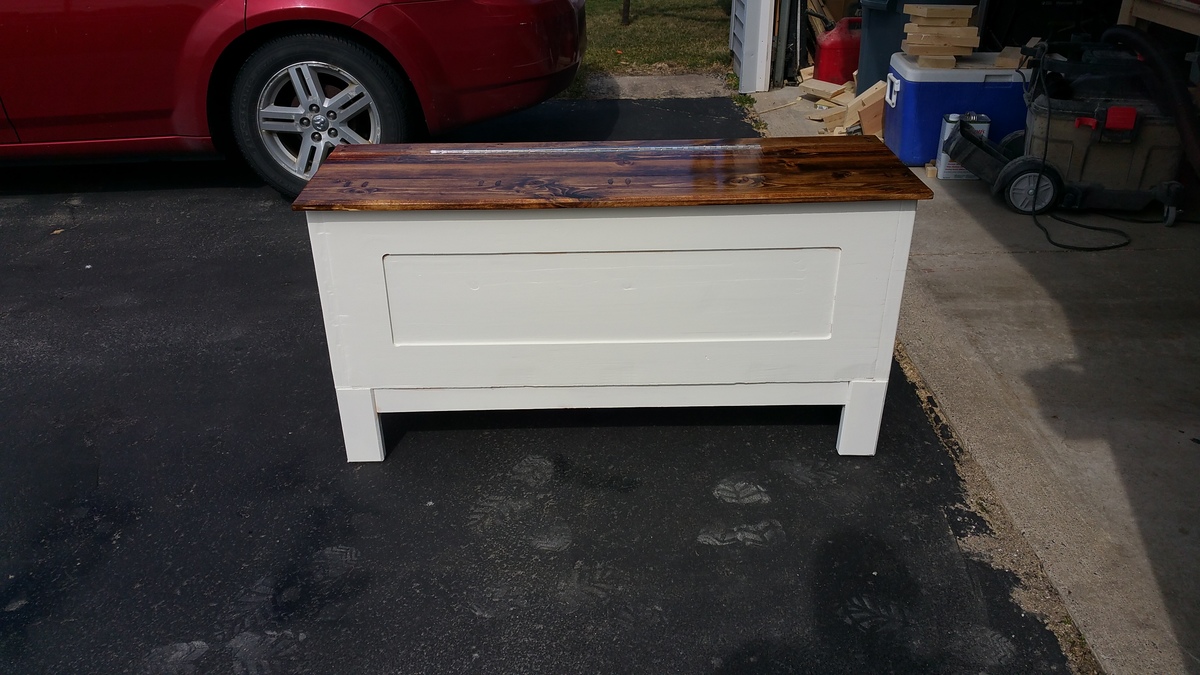
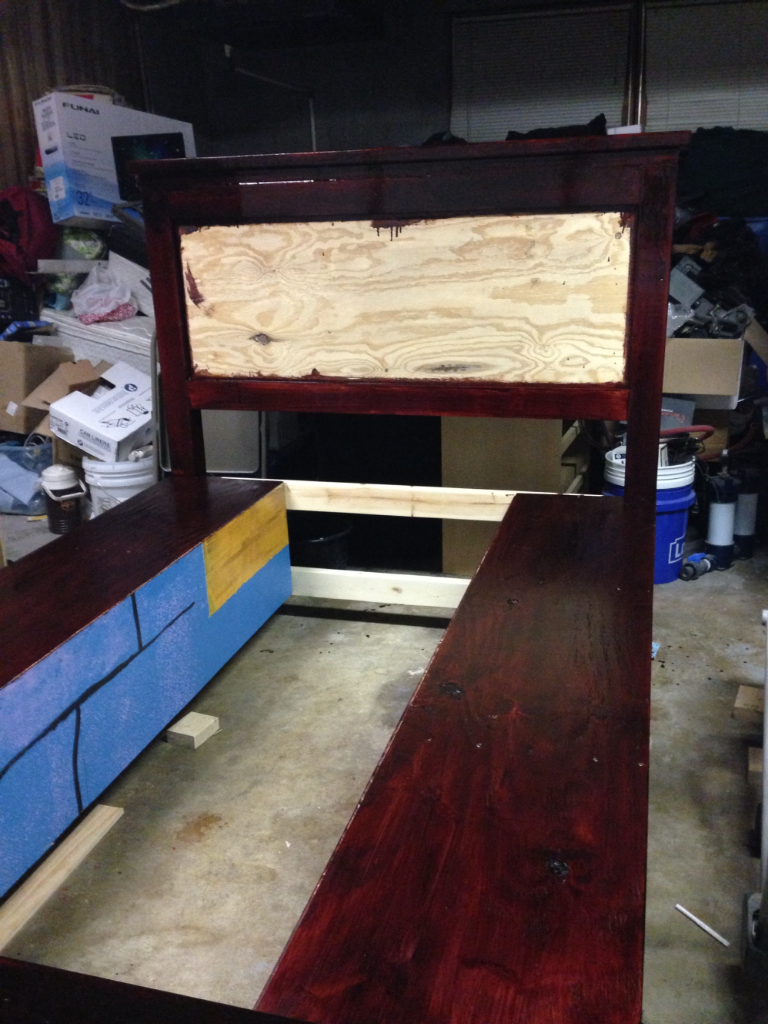
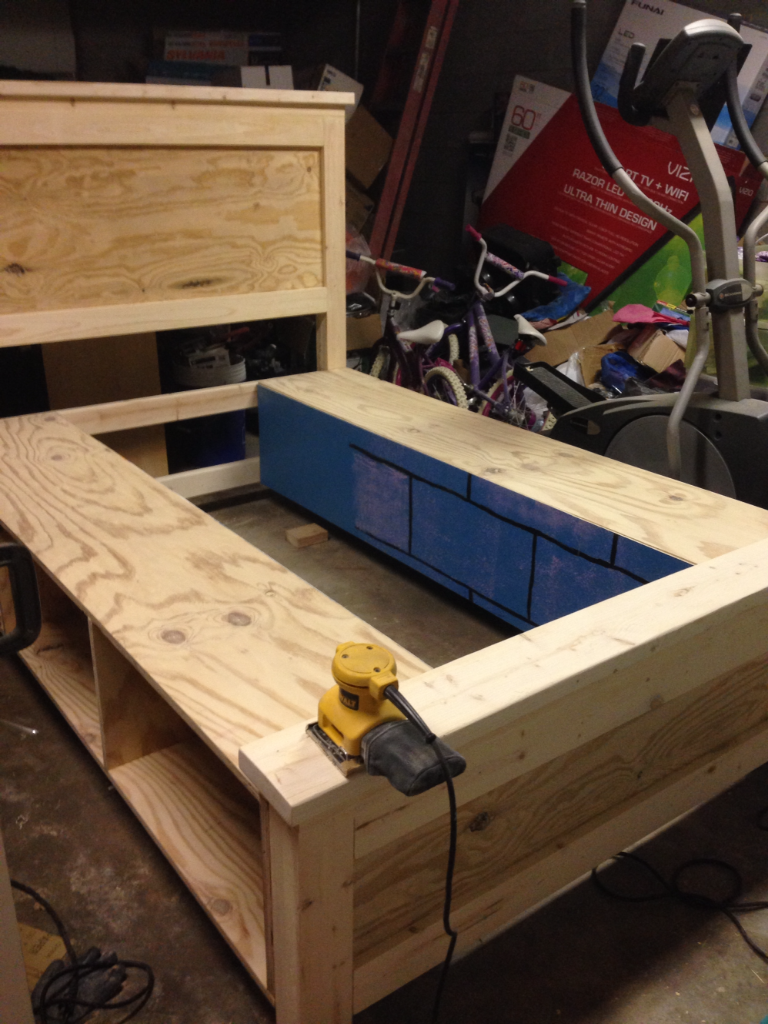
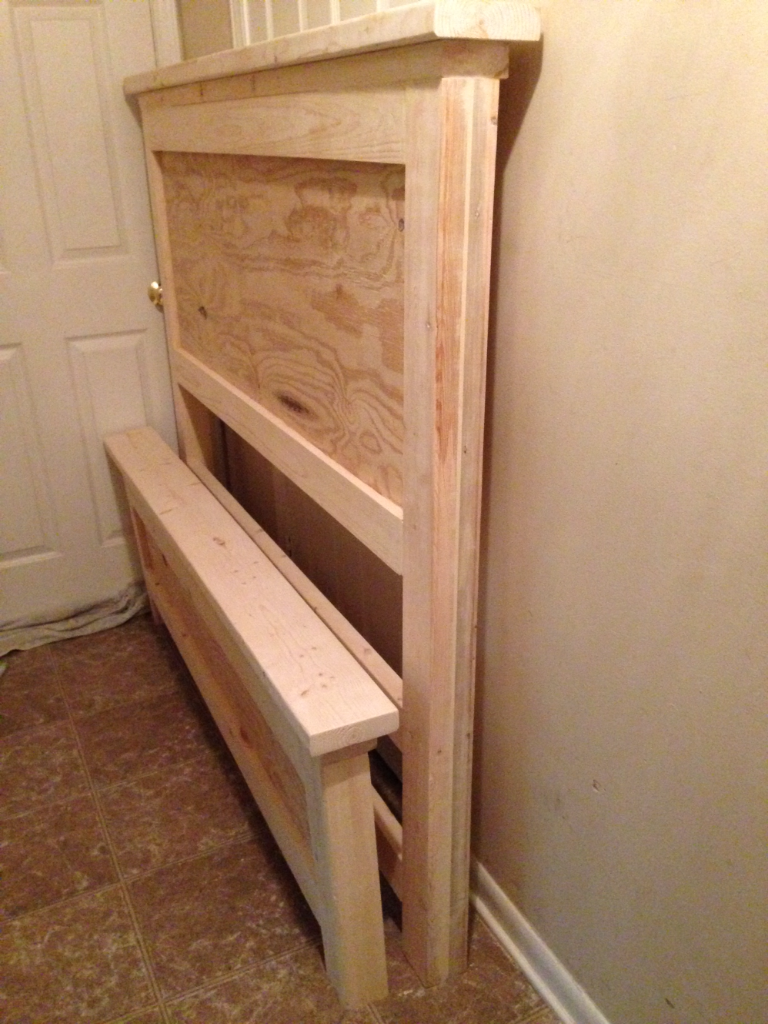
Farmhouse Storage Bed
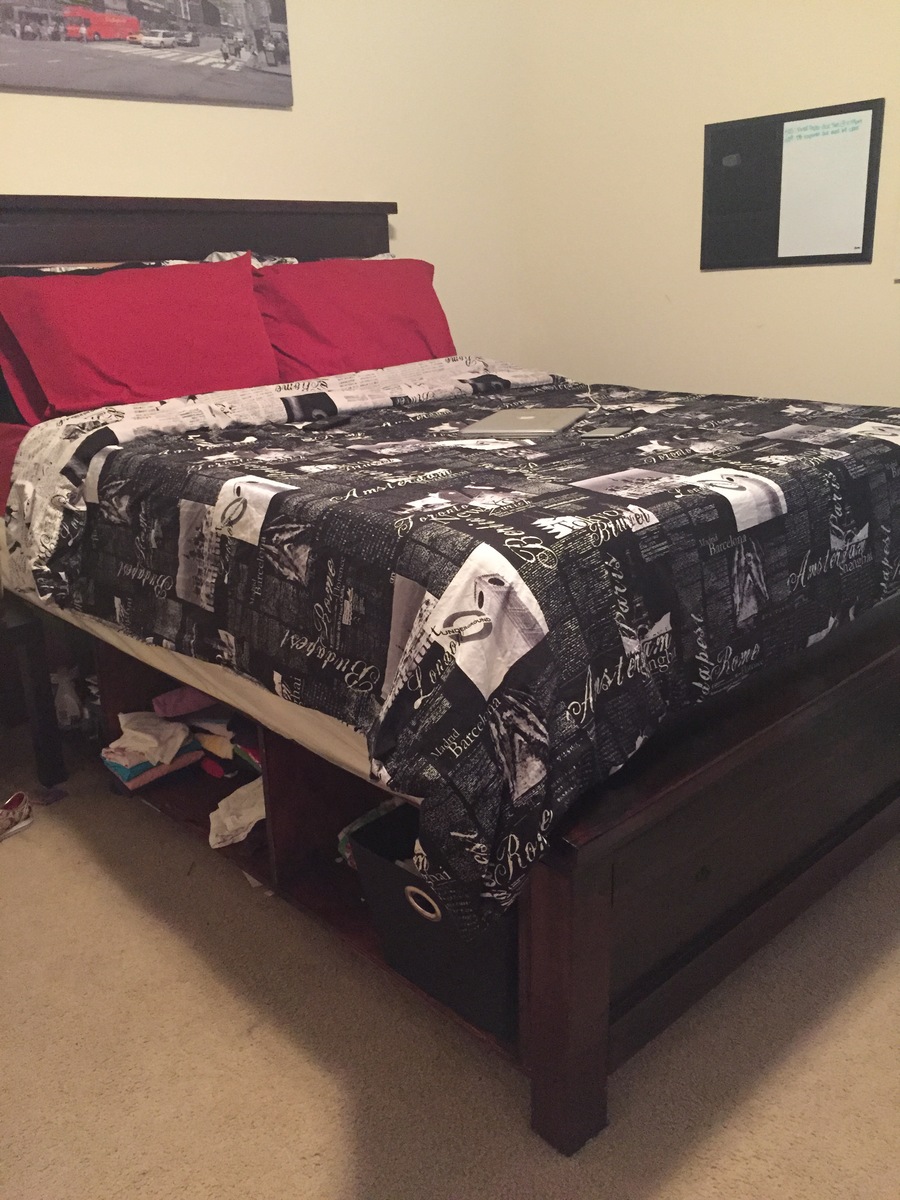
Absolutely loved making this bed! It became my summer project and I needed it done in a two week time frame. Between working on it after i got off work and on my days off, it came out exactly how I wanted it to.
I only ended up spending a total of $140 dollars by using scrap wood around my garage and new nails and screws and such. This was the absolute way to go before moving into my first apartment with little to no furniture! The storage boxes were the perfect solution to not wanting to buy a dresser. It's completely durable and I'd definitely do it again! Thanks Ana White!
Built from Plan(s)
Estimated Cost
~$140 by using scraps
Estimated Time Investment
Weekend Project (10-20 Hours)
Finish Used
Minwax PolyShades Bombay Mahogany Gloss Stain and Polyurethane
Recommended Skill Level
Beginner
Sideboard Companion to 4x4 Truss Table

After the enlarged 4x4 Truss Table, we needed someplace to store the dishes. The Planked Wood Sideboard was the thing. Not an easy piece. This was my first attempt at "Doors & Drawers" and was a steep learning curve, but we are so pleased with the big, sturdy results that match the table.
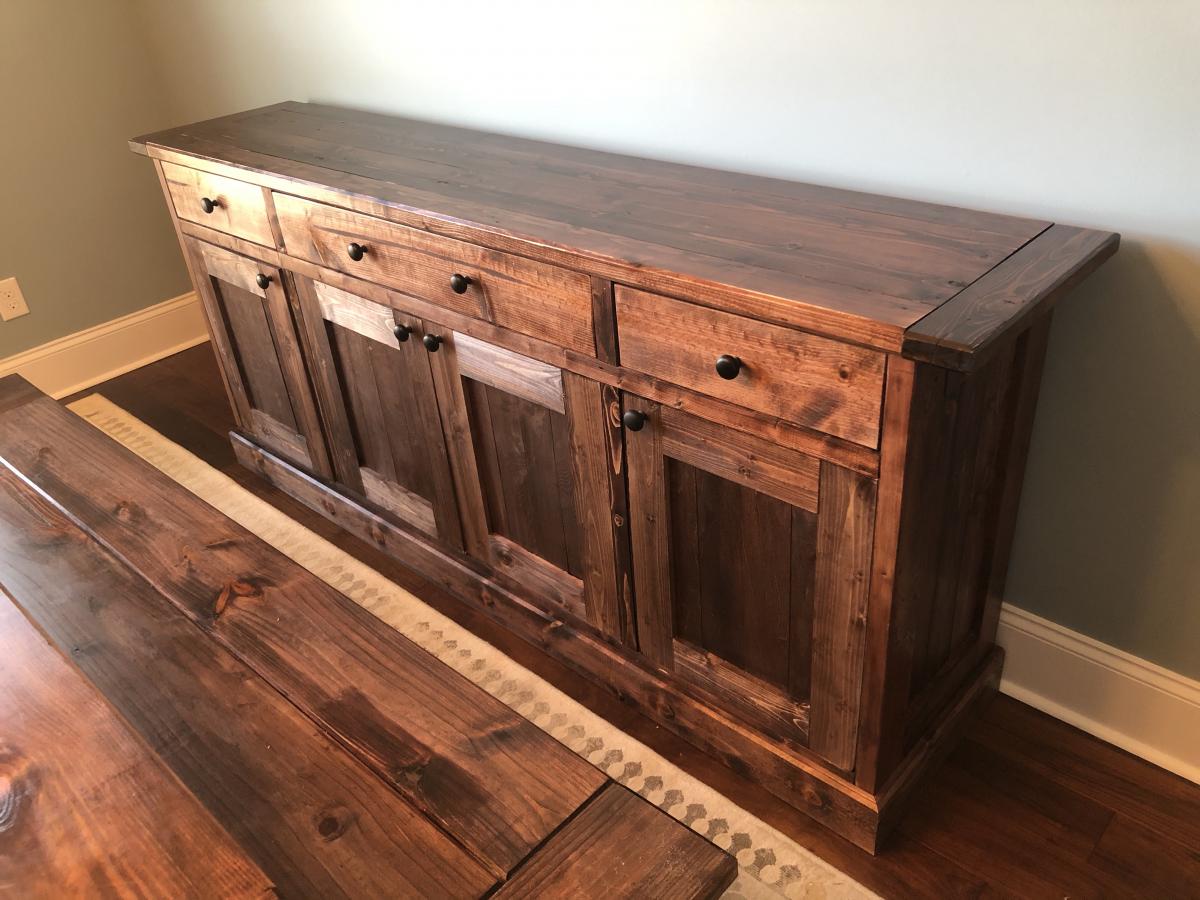
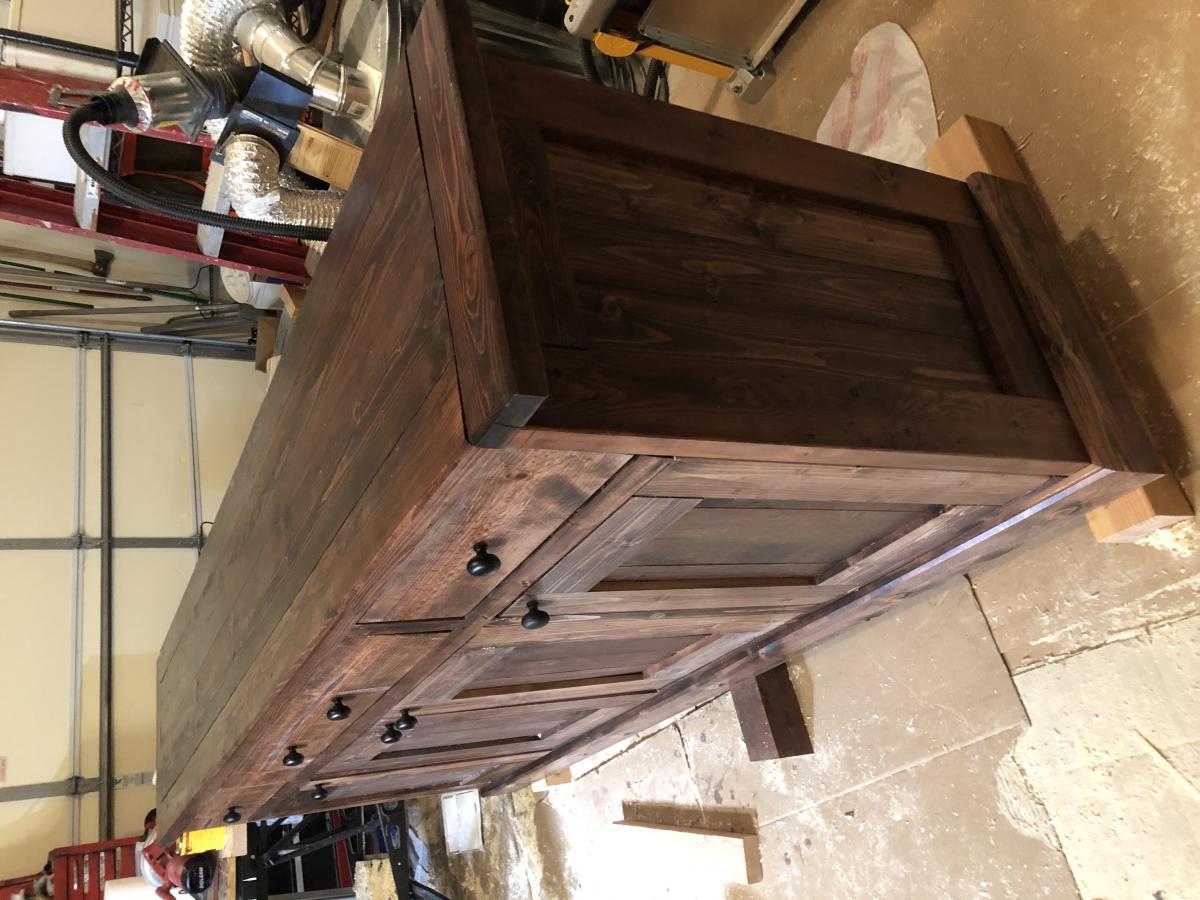
Built from Plan(s)
Estimated Cost
$550 with Kreg hinge and cabinet knob jigs (Will be reused)
Estimated Time Investment
Week Long Project (20 Hours or More)
Finish Used
Minwax Red Mahogany Stain
Recommended Skill Level
Advanced
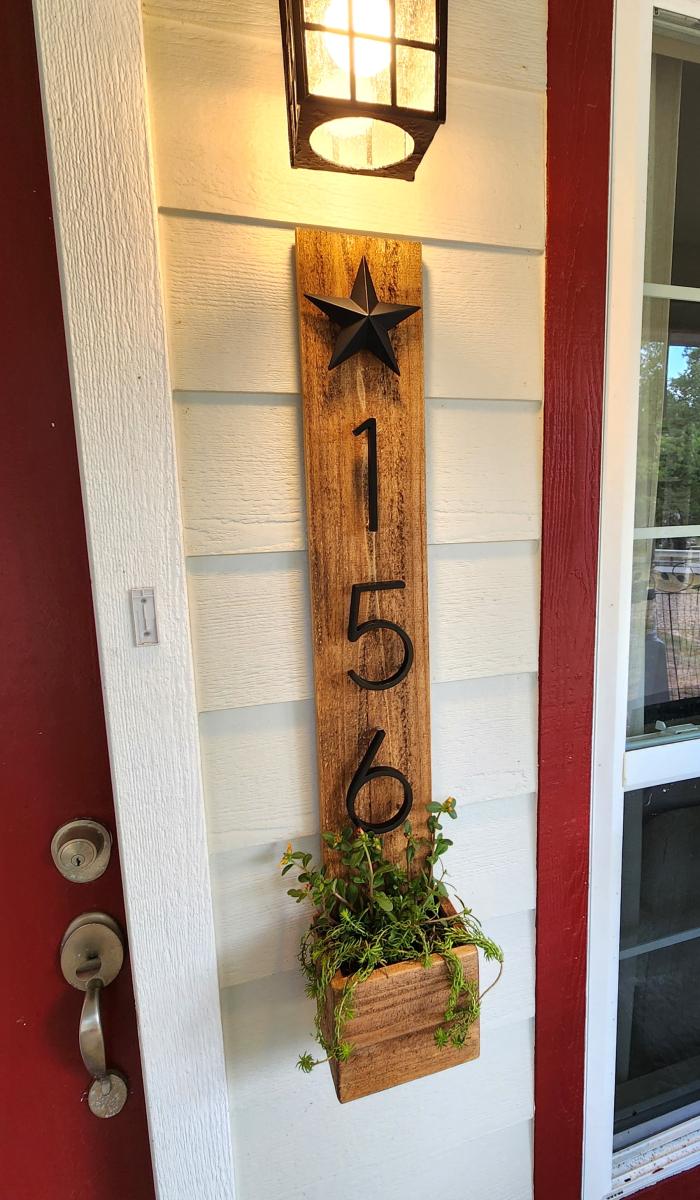
Small Address Planters
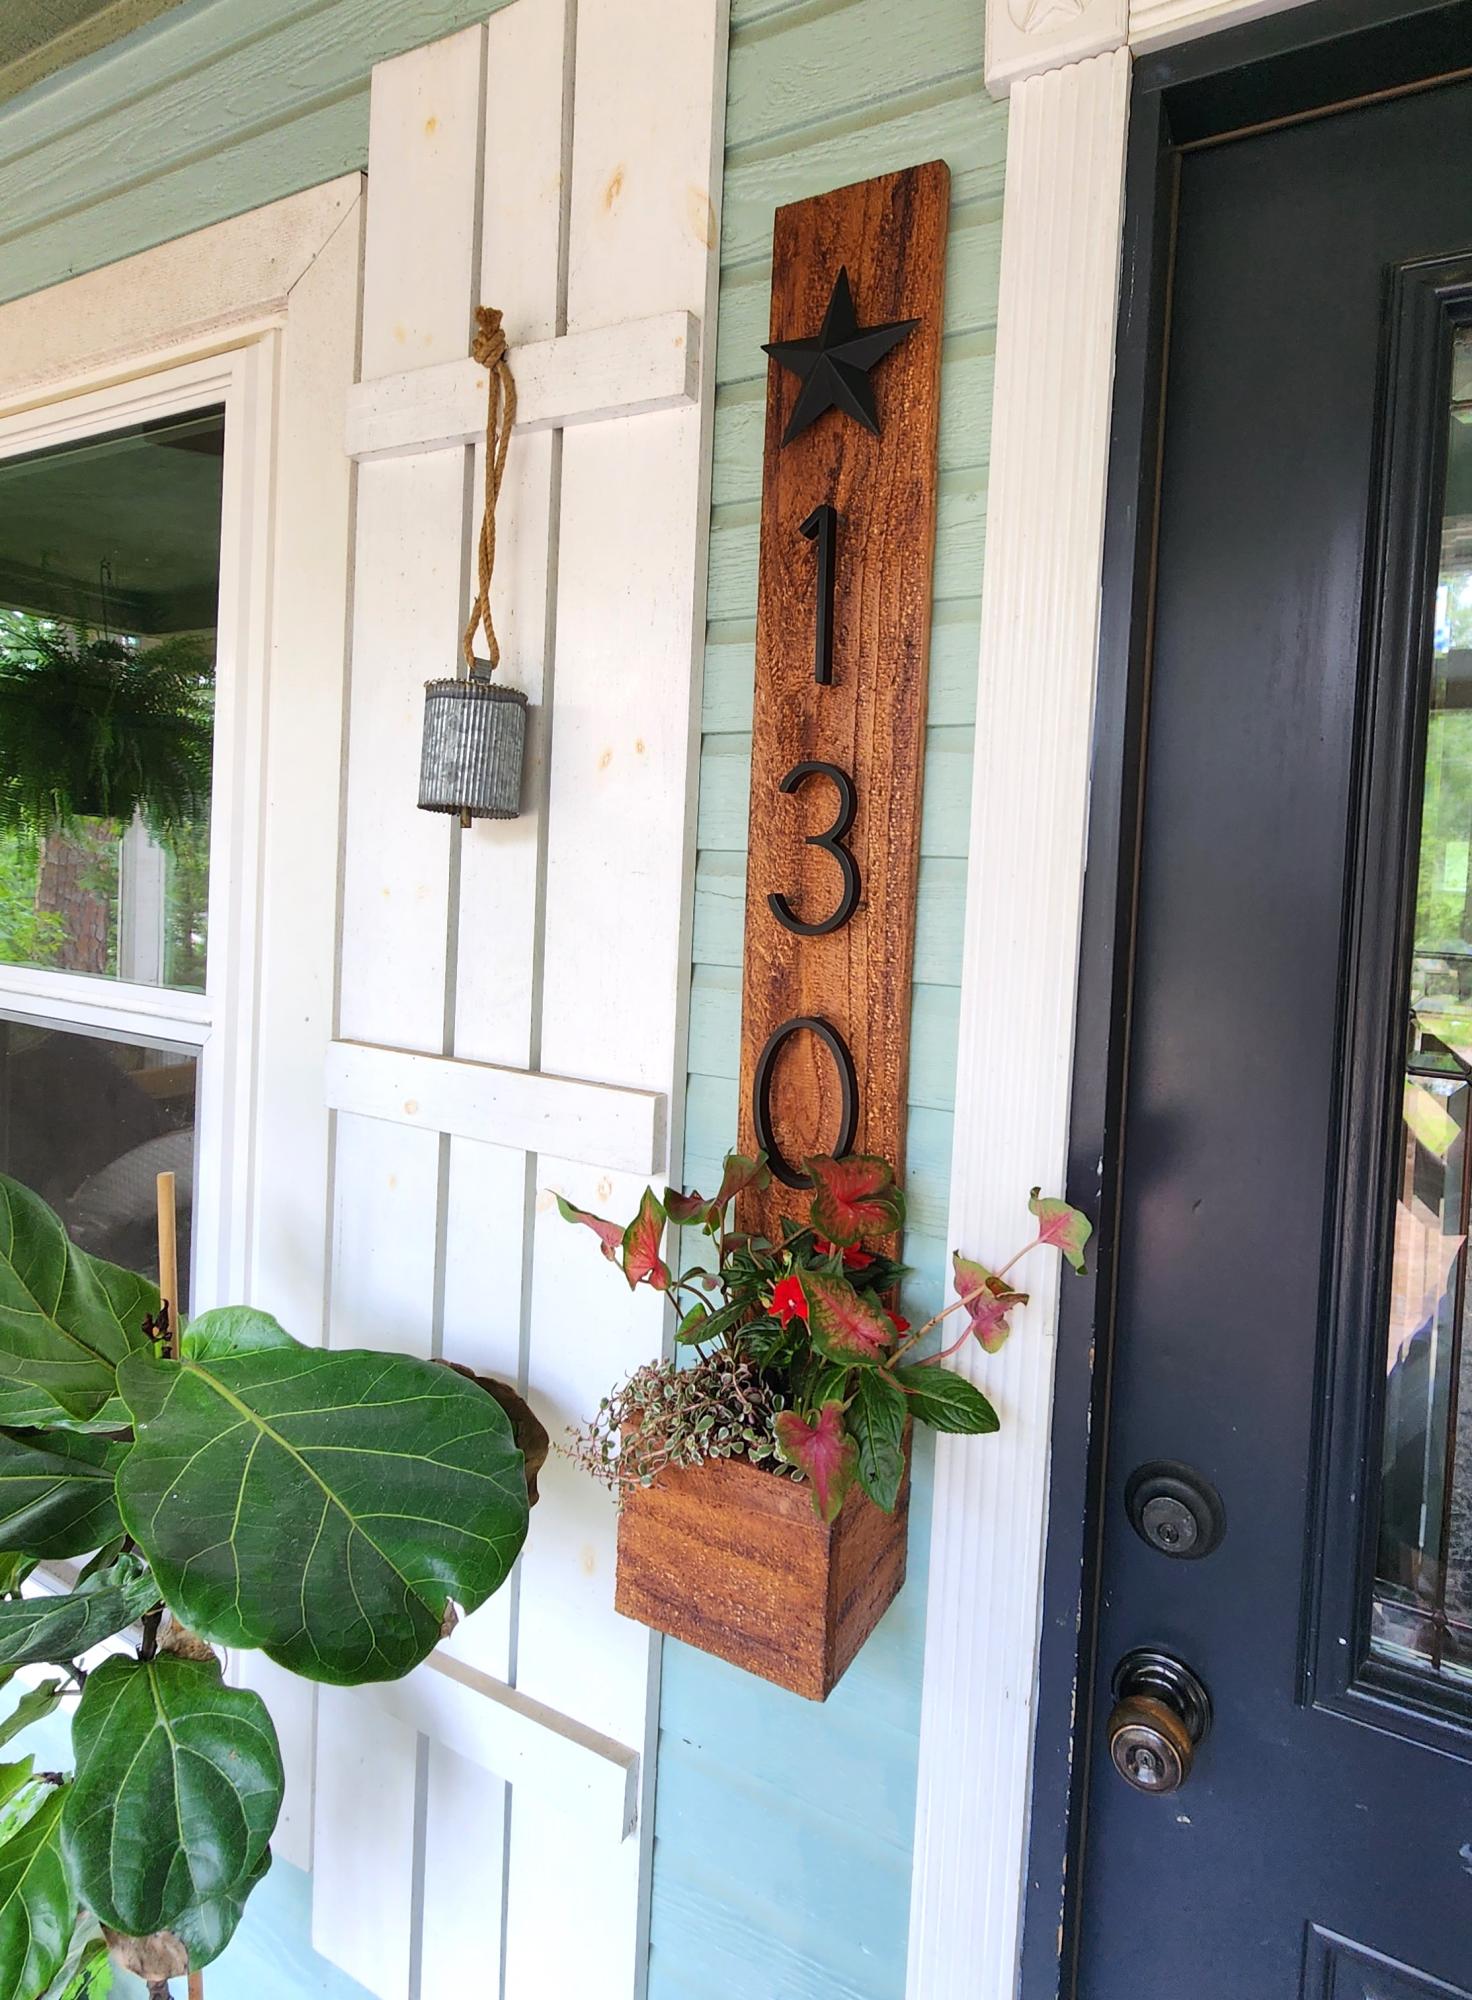
Address signs!
Built from Plan(s)
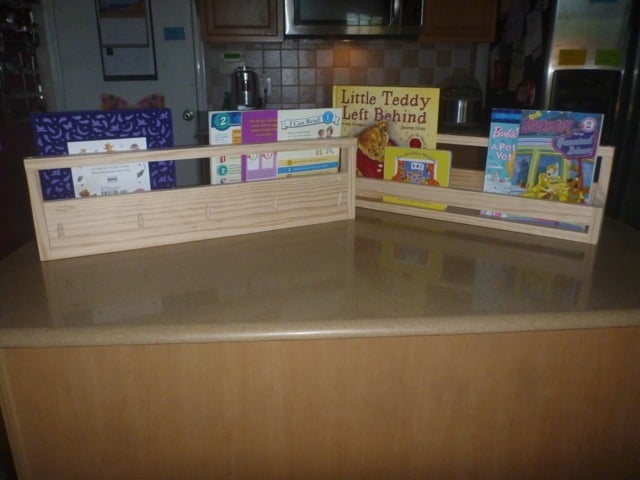
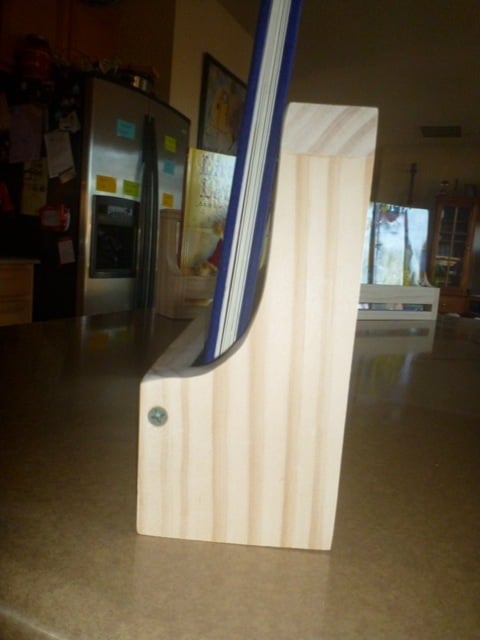
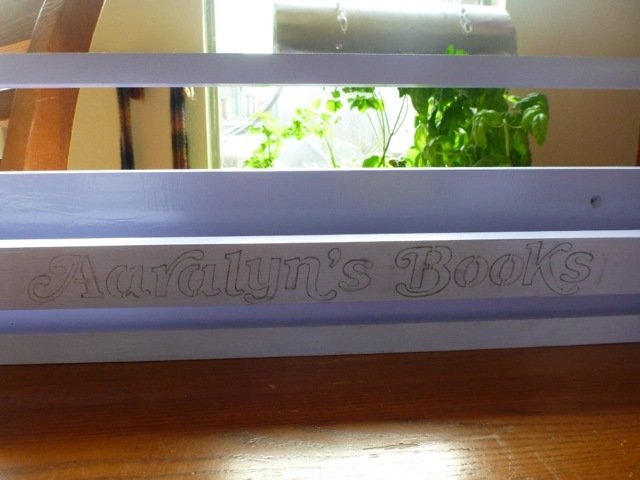
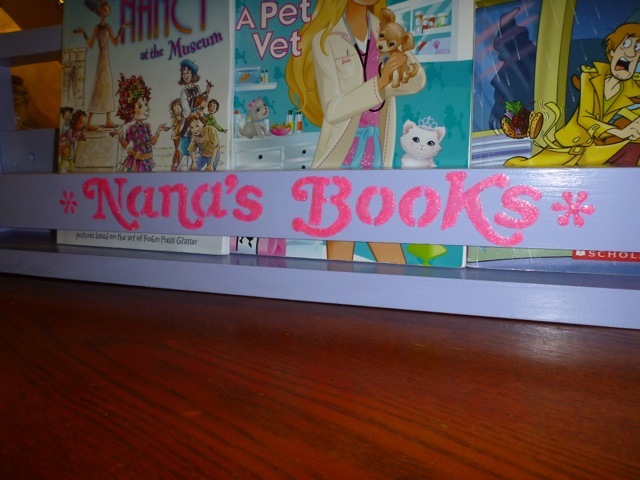
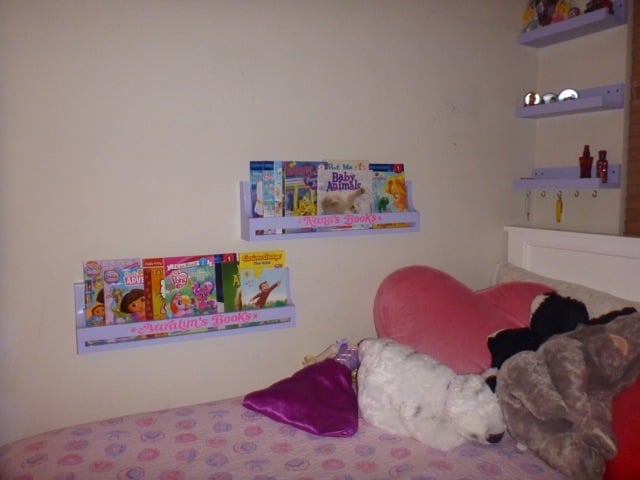
Flat back book racks
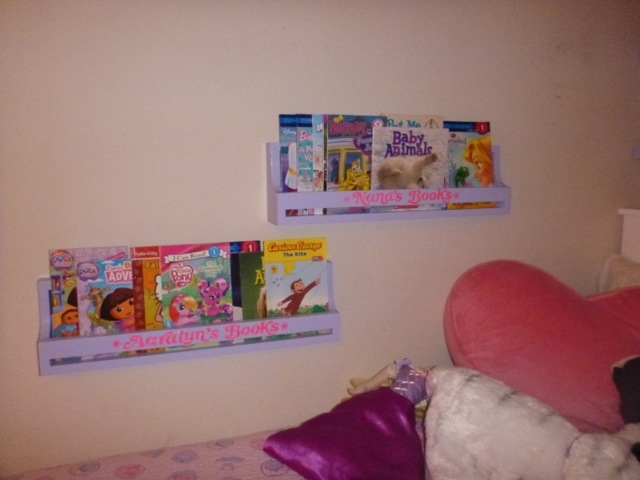
These came together nicely but I definitely advocate the right tool for cutting the curves on the sides. Also, the next time we make them, and we most likely will, I will make the roomy version. The wider size will give us a little more room for a few extra books. All in all the girls are very please with them. I like that they are just above their bed to make night time reading easy and fun. Couldn't have done it without you Ana. Thanks.
Estimated Cost
10ish dollars minus paint
Estimated Time Investment
Day Project (6-9 Hours)
Finish Used
We painted all the surfaces a No Voc semi gloss for easy cleaning. When it came time to add the girls names I found that a bright semi gloss with layers of corresponding glitter paint added the vivid contrast and bling that all little girls love.
Recommended Skill Level
Starter Project
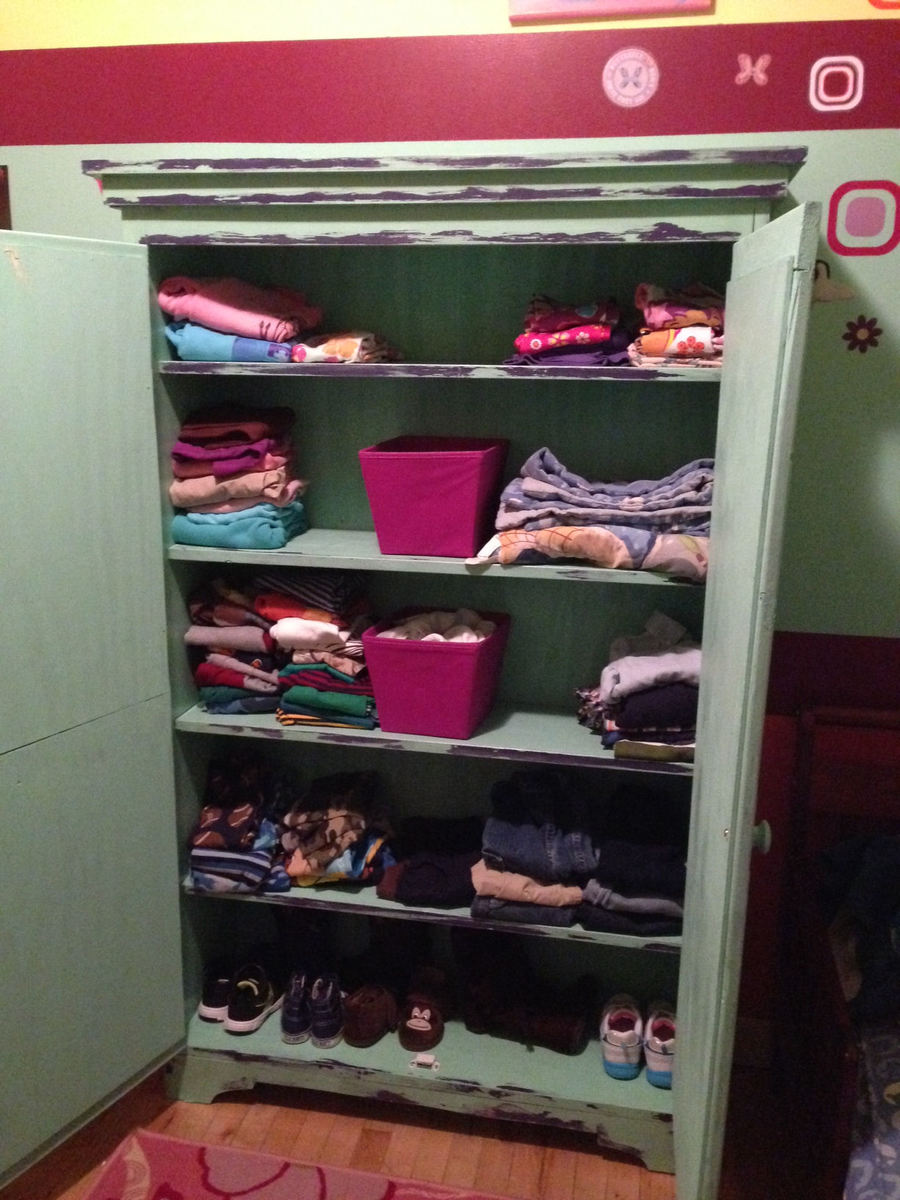
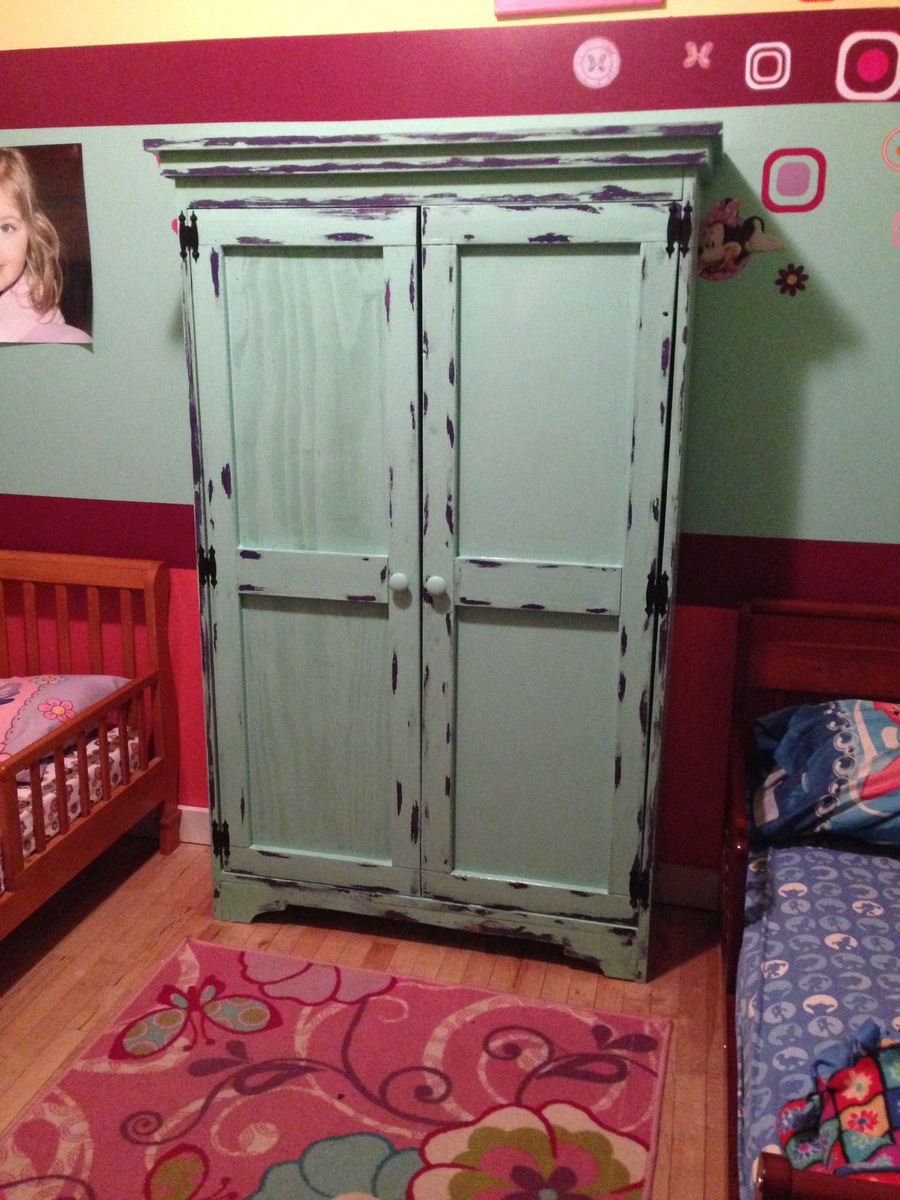
Simplest Armoire

We needed something to put clothes in. A dresser wouldn't of been big enough, so I decided on the armoire. I shortened the height so I'd only had to buy 2 1x12's. Everything else is the same. The 1x12's were so warped I had a heck of time with the doors.
I'm not digging the distressing. I tried the Vaseline thing. Never again it was a mess. I'll just stick to sanding it down from now on.

Built from Plan(s)
Estimated Cost
$100
Estimated Time Investment
Day Project (6-9 Hours)
Recommended Skill Level
Beginner
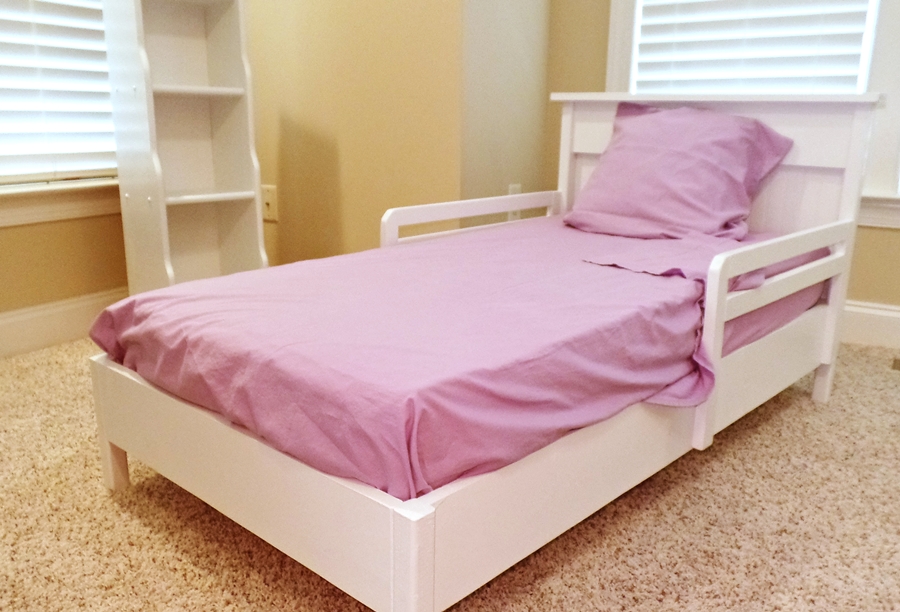
Toddler Bed
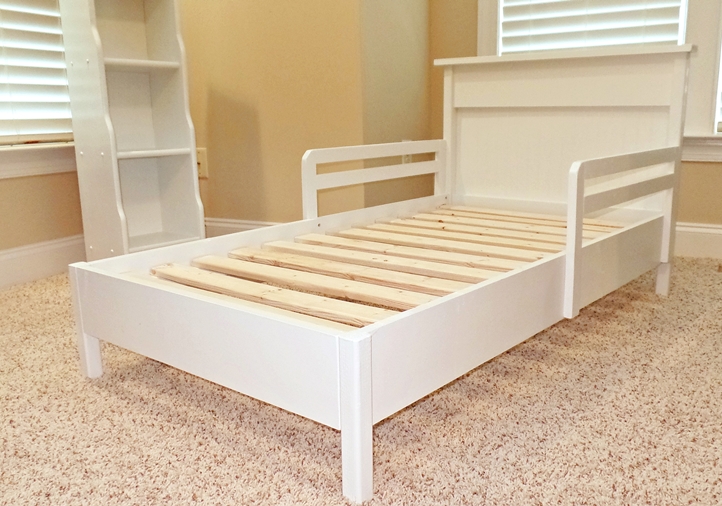
This was my second project from Ana White's plans. I felt confident in my new woodworking skills once I learned how to use the kreg jig for pocket holes. The child's table and chair I made came out so good, I decided why not try a toddler bed for my 4 yr old granddaughter. She loves her new bed. And I love how easy and fun it was to make.
I only had to make minor adjustments to the size to accomodate her mattress. I brought the footboard out to the edge of the legs because I needed to add an inch to the length, but the sides are set in like the plans. I also added a couple inches to the rail height since her mattress is 6 inches deep and I wanted it to be above the mattress.
I was afraid I couldn't get the rounded headboard neat, so I used the whole 6 inch board, adding to the height of the headboard a few inches. I also added the top board on the headboard because it just made it look cleaner on top. You might not be able to tell from the photo, but I did use the beadboard - I had a scrap the perfect size.
Built from Plan(s)
Estimated Cost
$40
Estimated Time Investment
Day Project (6-9 Hours)
Finish Used
Glidden Satin in White
Recommended Skill Level
Beginner
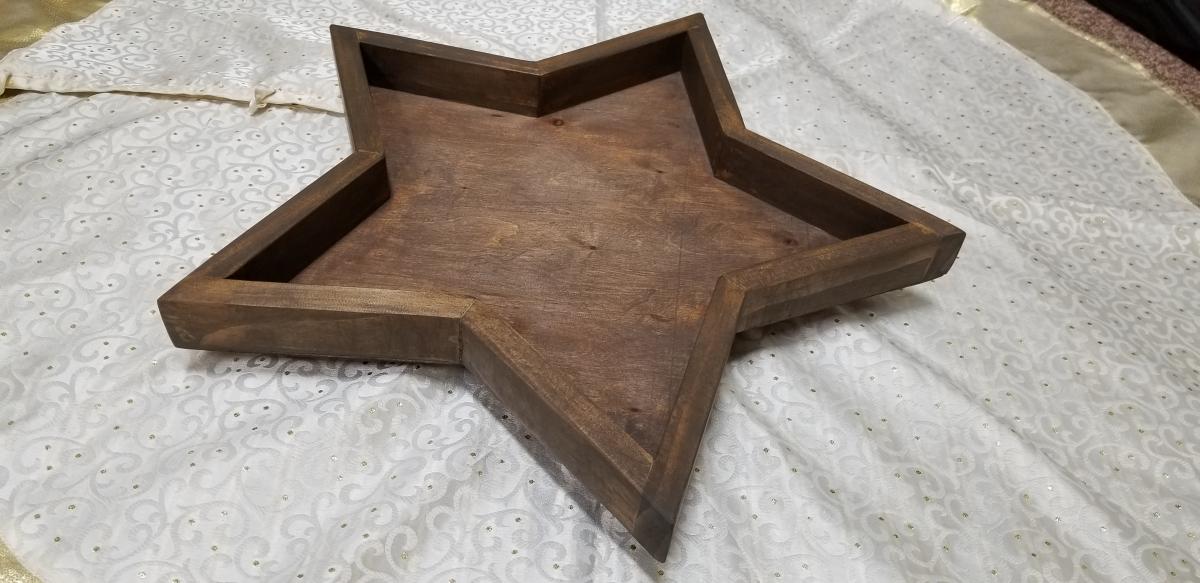
Wood Star Serving Tray
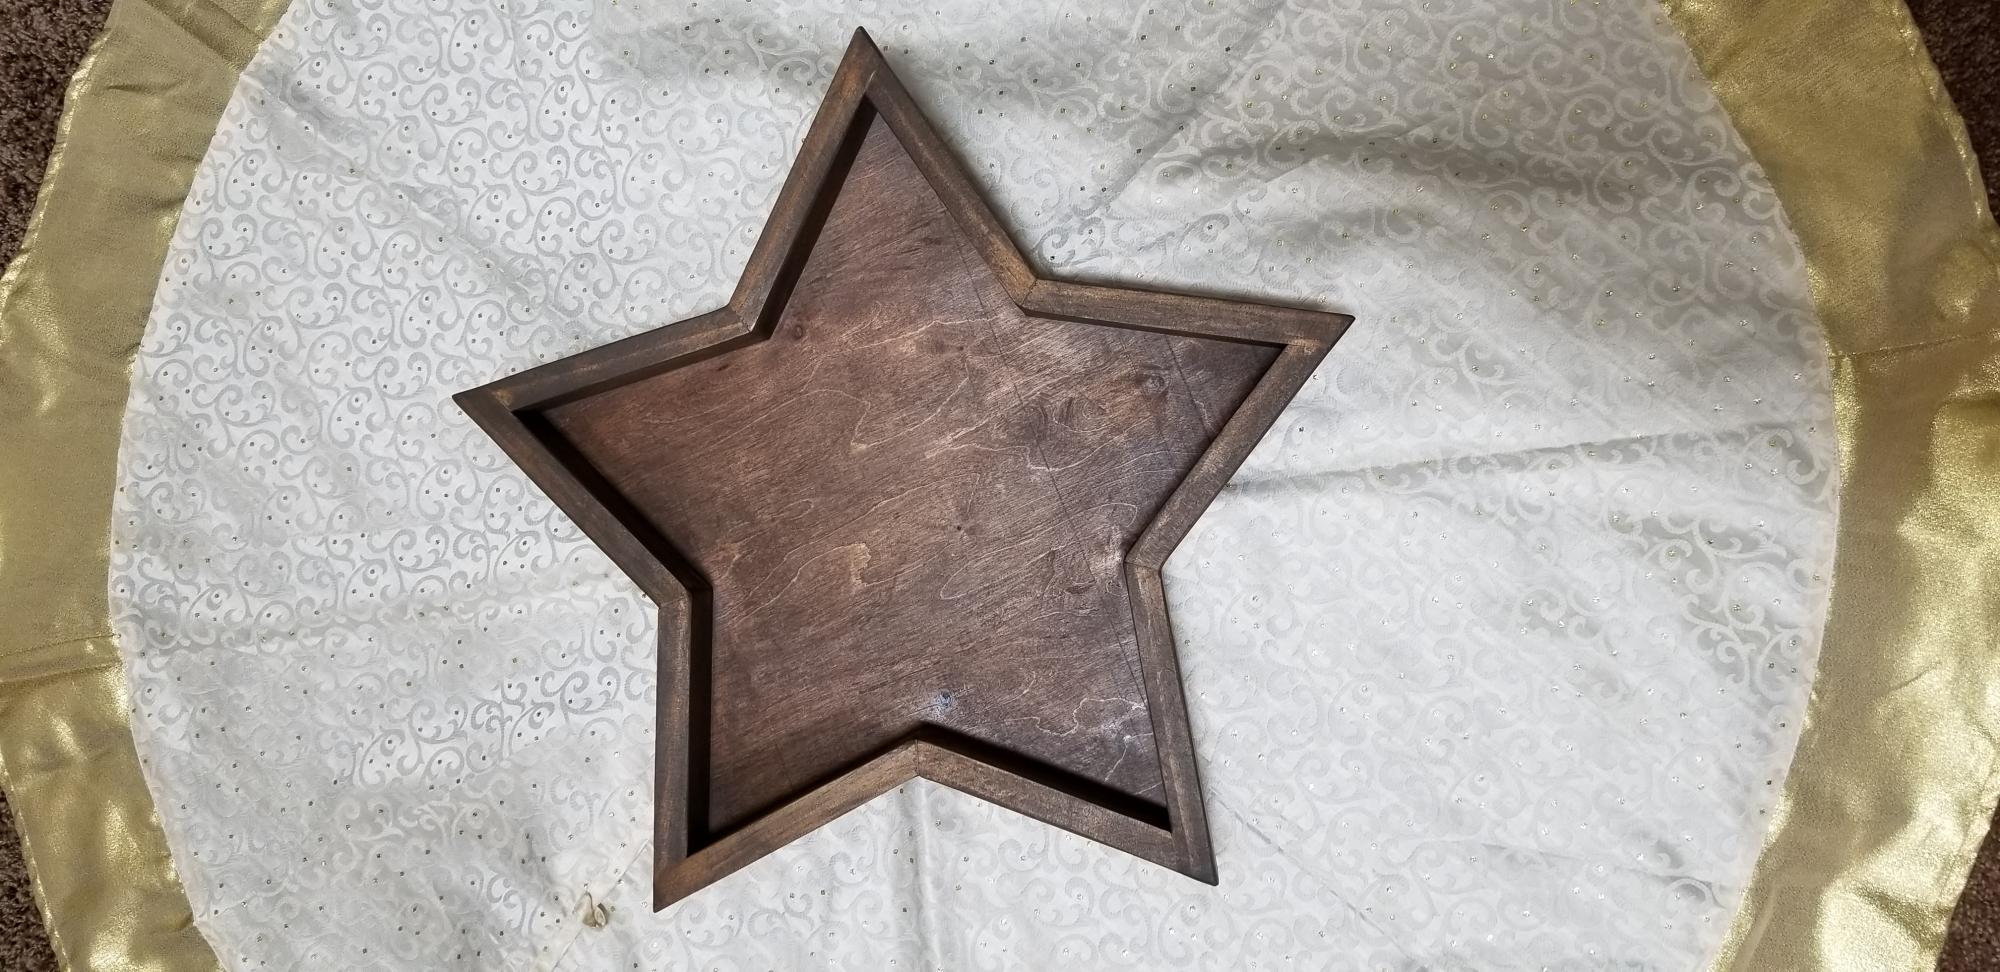
I followed the plans for the Wood Star Serving Tray. I thought it was a little tricky cutting all the angles to the correct length. One tip I would suggest is to mark which end has the 24 degree cuts, since you'll be attaching these joints first. Any gaps in the joints can be filled with wood filler, then sanded smooth. I would say this is an Intermediate level project due to the angles and trying to attach them without the nails popping through the other board. Would be fun doing a set of 3 and painting them red, white & blue for the 4th of July. Thanks for the plans, Ana!
Built from Plan(s)
Estimated Time Investment
Afternoon Project (3-6 Hours)
Finish Used
Stained with Varathane Briarsmoke, then a light layer of Dark Walnut to help give it an aged look. Sealer on top.
Recommended Skill Level
Intermediate
Comments
Sat, 12/07/2019 - 17:51
It’s beautiful! Thanks for…
It’s beautiful! Thanks for the tip on the cut list error I fixed it. I appreciate you taking your time to let me know! Ana
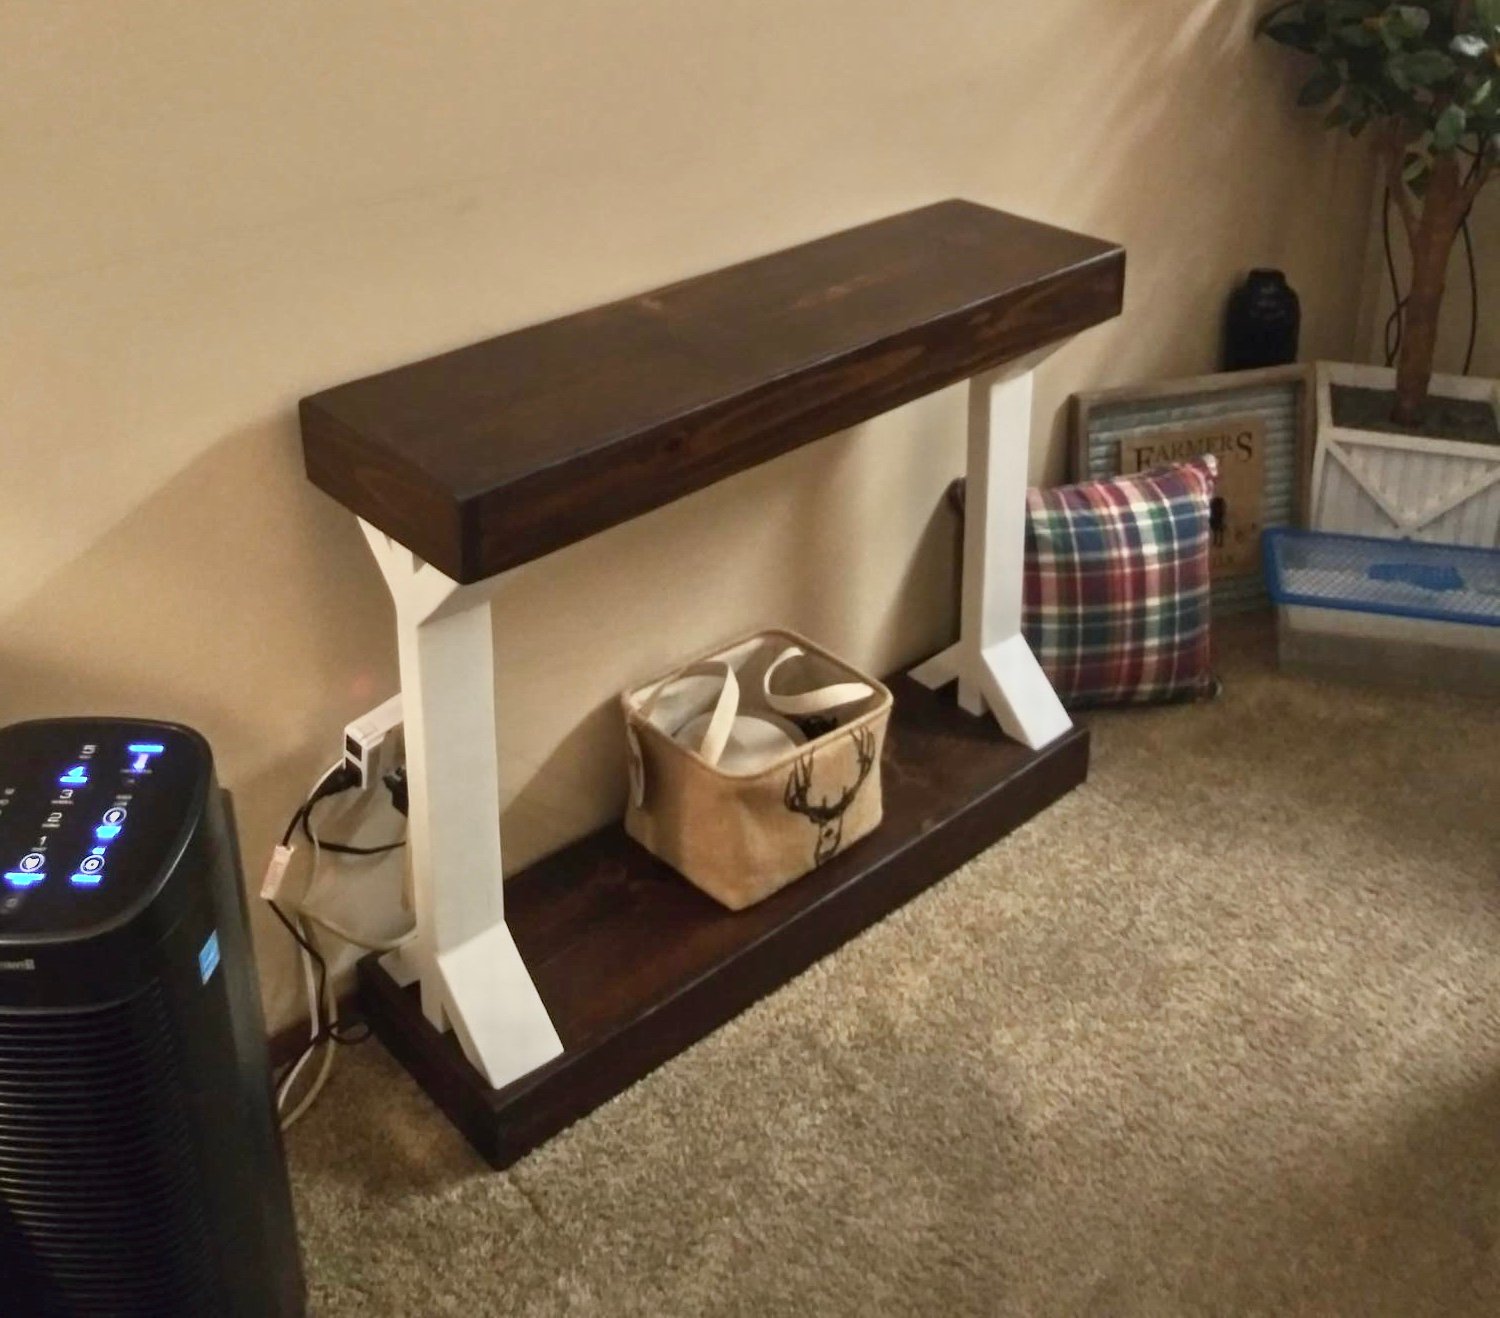
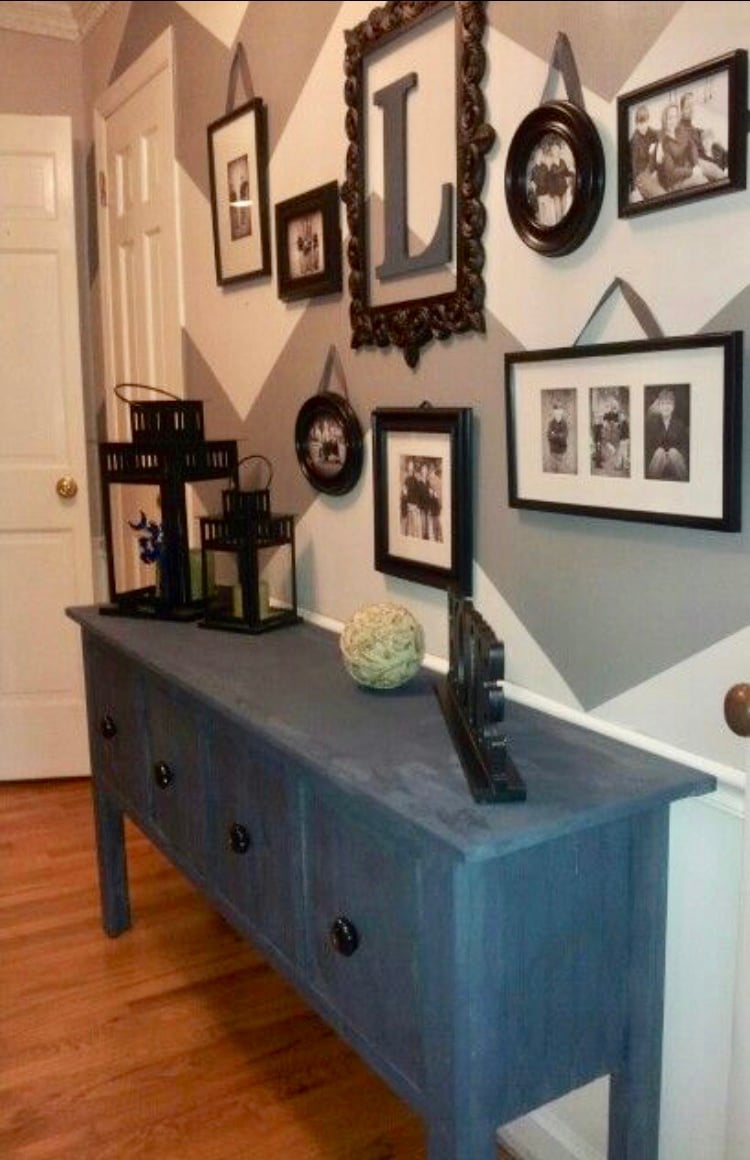
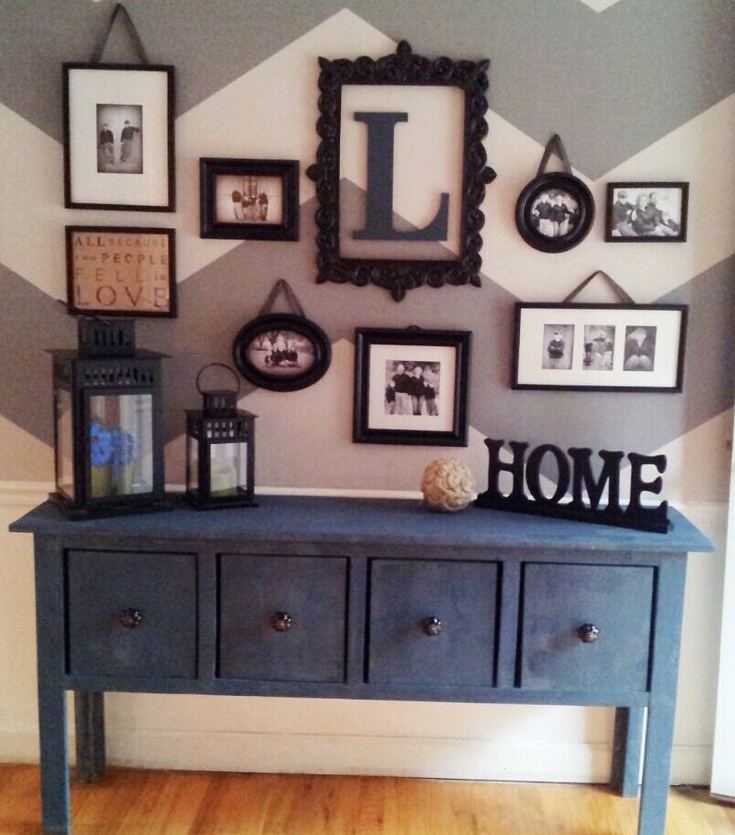
Narrow Console table
I wanted a hallway side table, using Ana White's Simple, Cheap and Easy console table directions (as usual with most of my built) and revising the measurement and adding some thing in here and there I was able to build me this! Thanks to my new jigsaw my husband bought me :) Measures 55" long, 34" height and 14-1/2" depth.
Built from Plan(s)
Estimated Cost
$ 45.00
Estimated Time Investment
Afternoon Project (3-6 Hours)
Finish Used
dark mahogany and poly
Recommended Skill Level
Beginner
Comments
Thu, 04/12/2012 - 13:17
Pretty modifications!
I am looking at making this soon and really like what you did with the sides. Any tips should I decide to go a similar route on mine? I haven't done that type of work before with my jigsaw and am not sure can pull it off but it looks so good!

Tue, 07/24/2012 - 11:11
could you pretty please share
could you pretty please share how you did the sides and everything on this table...I love this exact table (the one you built) and it would be PERFECT in our family room under the t.v. Pretty, pretty please :)
First project
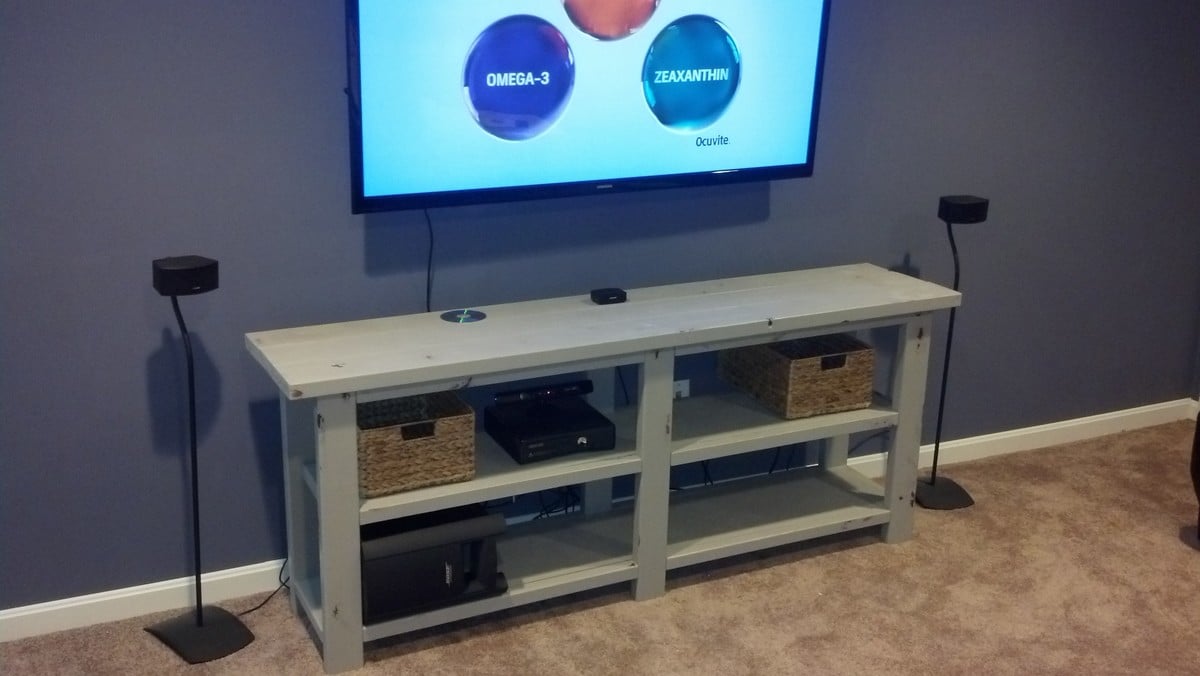
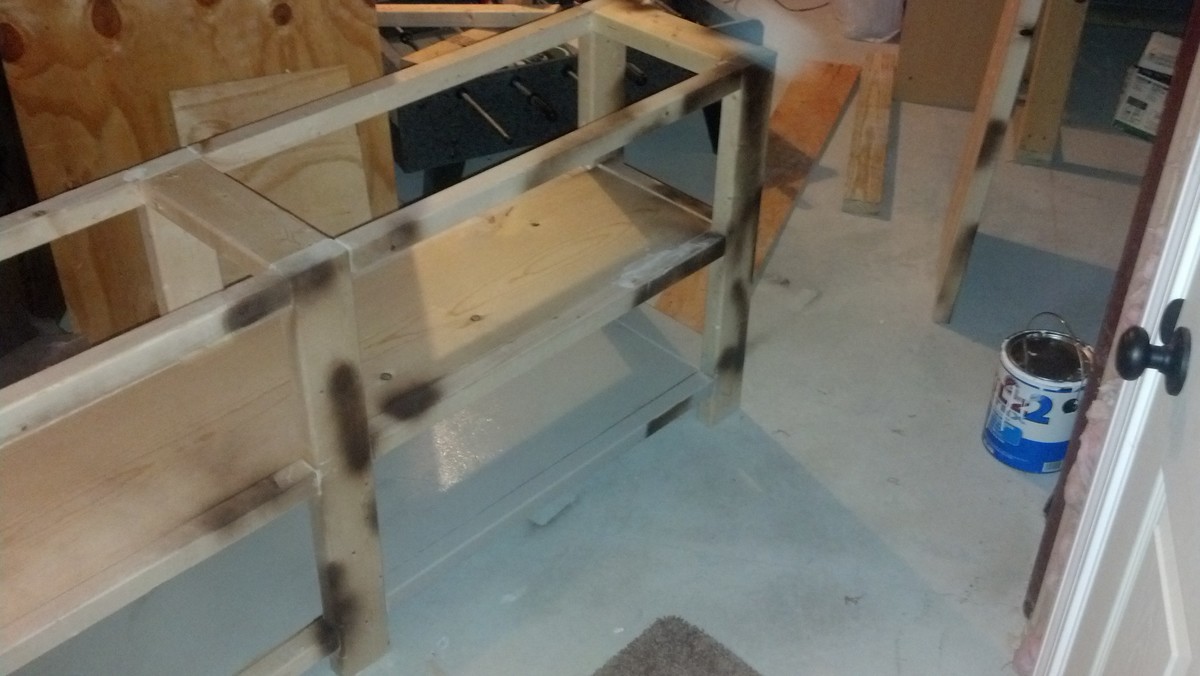
Rustic X Console, minus the X. And I used the finishing techniques from another project. I also built a bar before I found this site and we painted the bar stools the same color as this console to tie in the two spaces in the finished basement. I would say the most stress was that I couldnt find straight boards.. so being square was a challenge. Also when you follow the plans, it says to make both sides ( figure 8s) then attach the shelves.. I put the 2x4s on the top to connect and then did the shelves. I figured if all the pieces were right lenght, then it was best way of assuring the project would be as square as possible. I know it would be on carpet, so I wasnt too worried, but when I brought in into basement to paint, all 6 legs sat very flush on the ground with the slightest of wobble. So, I would say rest one side on the ground.. line up the 2X4s that connect the two sides at the top and then go from there, then do the shelves.
Built from Plan(s)
Estimated Cost
$217 ( including Kreg Master JIg set )
Estimated Time Investment
Weekend Project (10-20 Hours)
Finish Used
Krylon brown spray paint over the bare wood when assembled. Mostly along the edges and knots. Then vaseline over parts of the spray painted area. Then painted over this with Behr Satin Natural Gray.when it was all dried in 12 hours. I wiped off vaseline exposing some of the brown and then sanded lightly to rough it up. We wanted Beachie feel, so we avoided the X on the end. But I can see how it would be stronger with the X. We are mostly using it for a few light components and subwoofer and baskets.
Recommended Skill Level
Intermediate
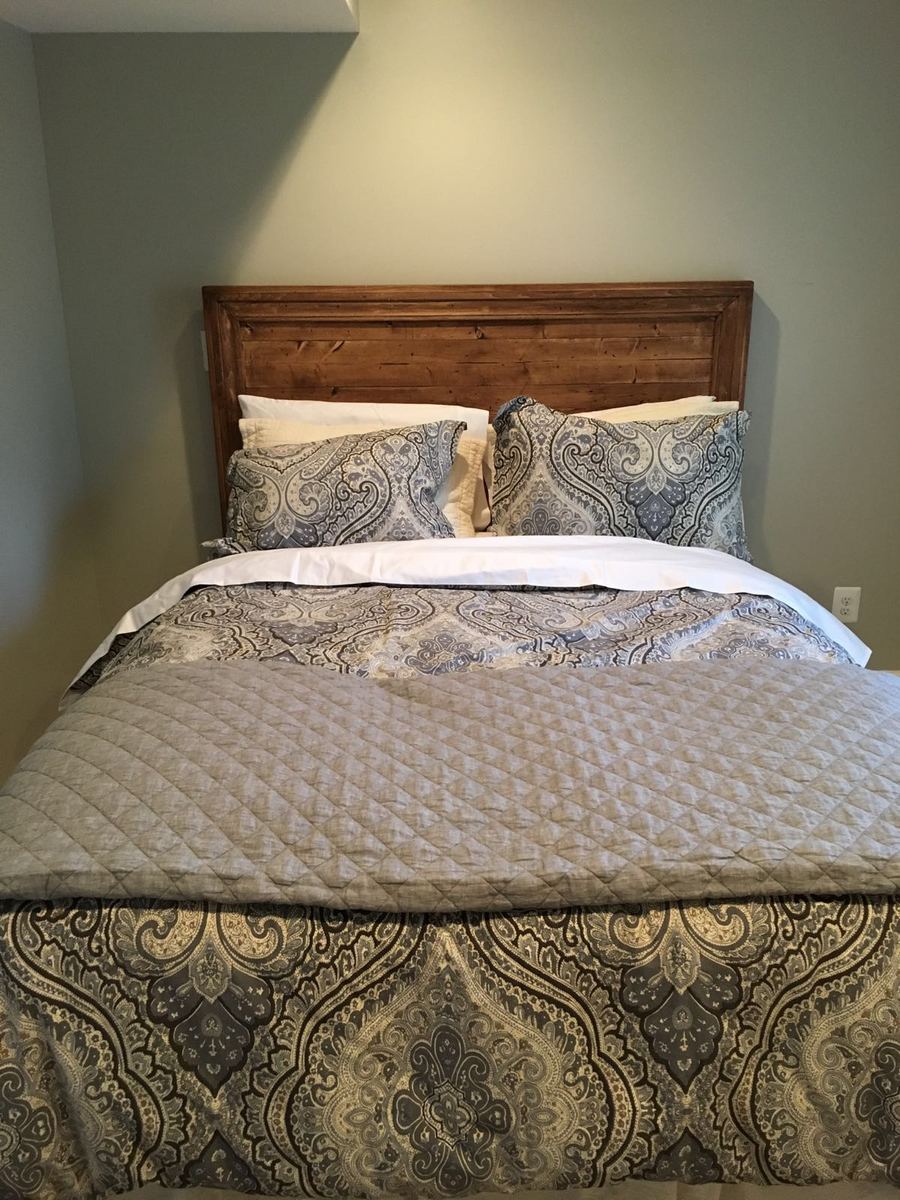
Head Board
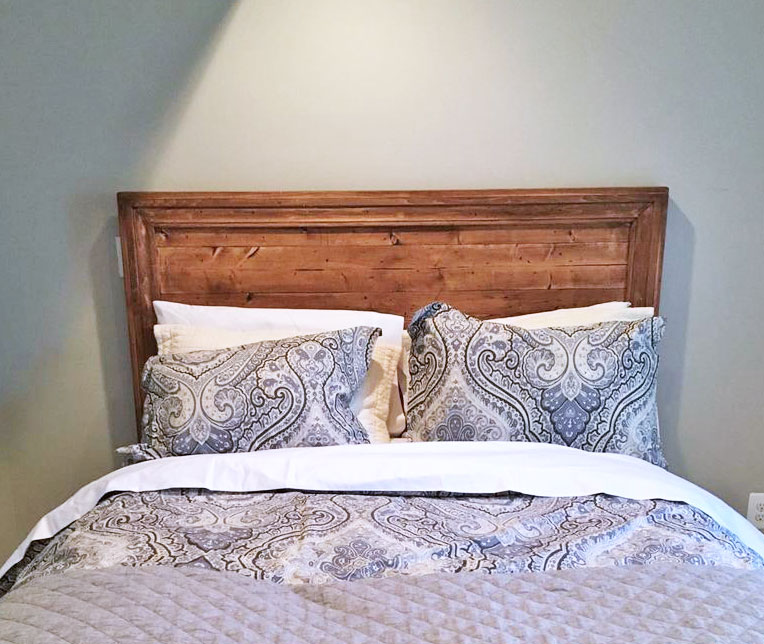
Head board we made over the weekend. Great beginner project.
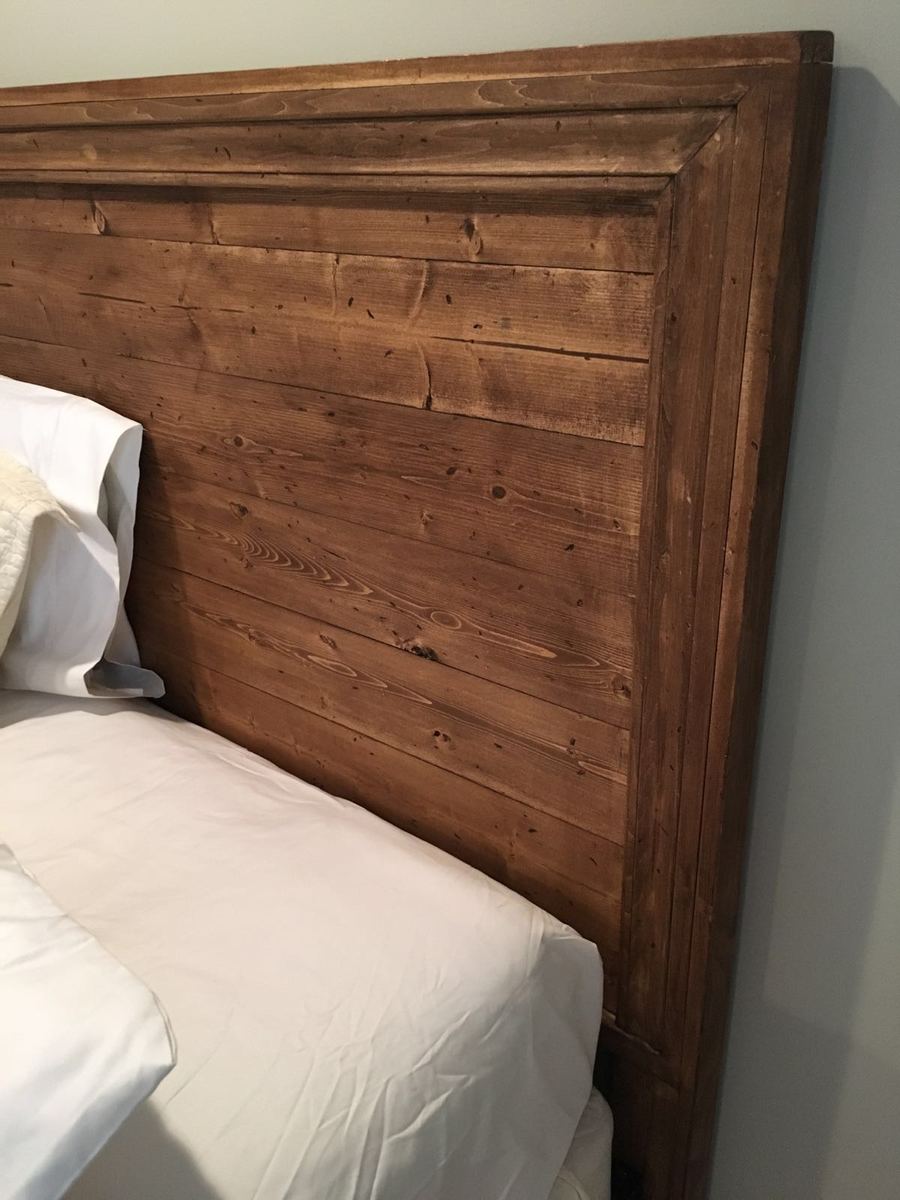
Built from Plan(s)
Estimated Time Investment
Weekend Project (10-20 Hours)
Finish Used
We used an antiquing wax for the finish. Bought it off amazon
Recommended Skill Level
Beginner
Foyer table
This was my first project.
Built from Plan(s)
Finish Used
Semi transparent stain in blue.
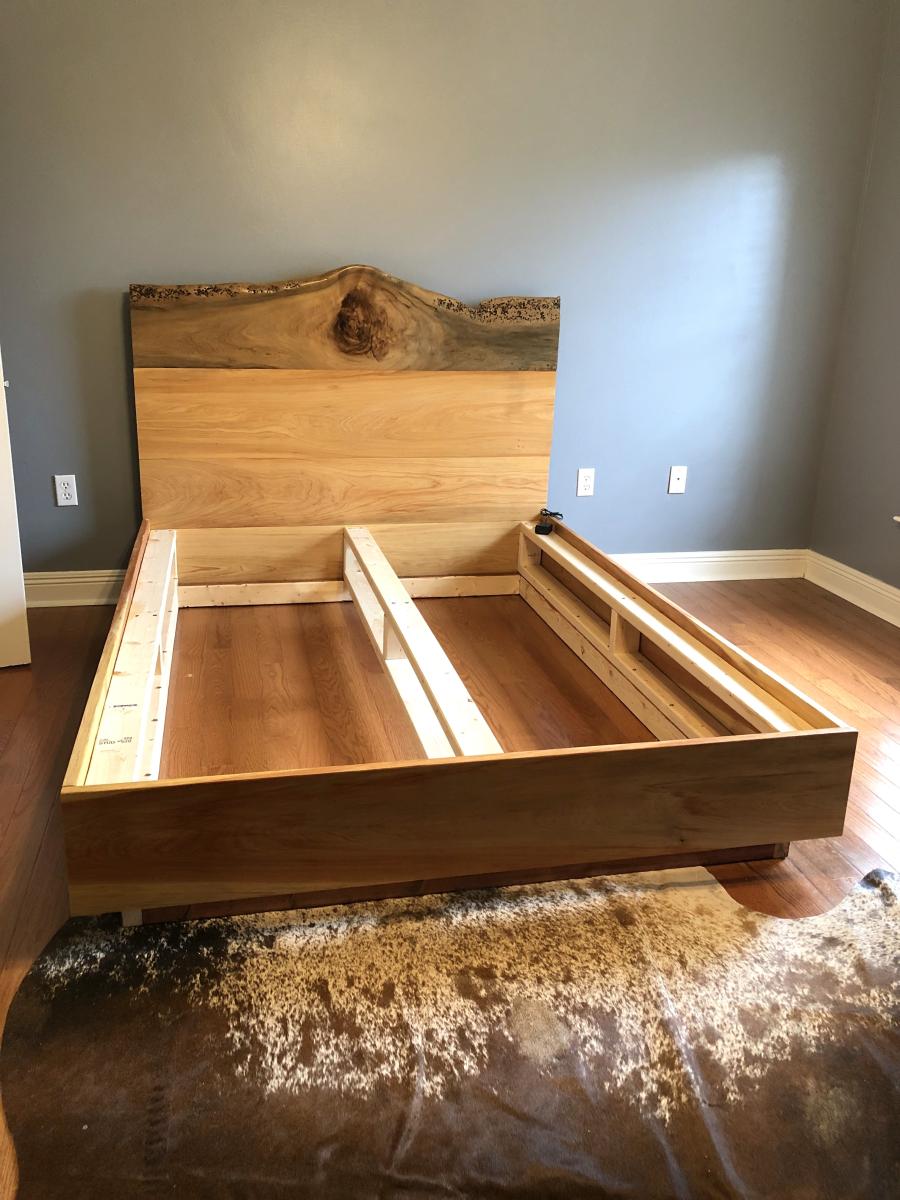
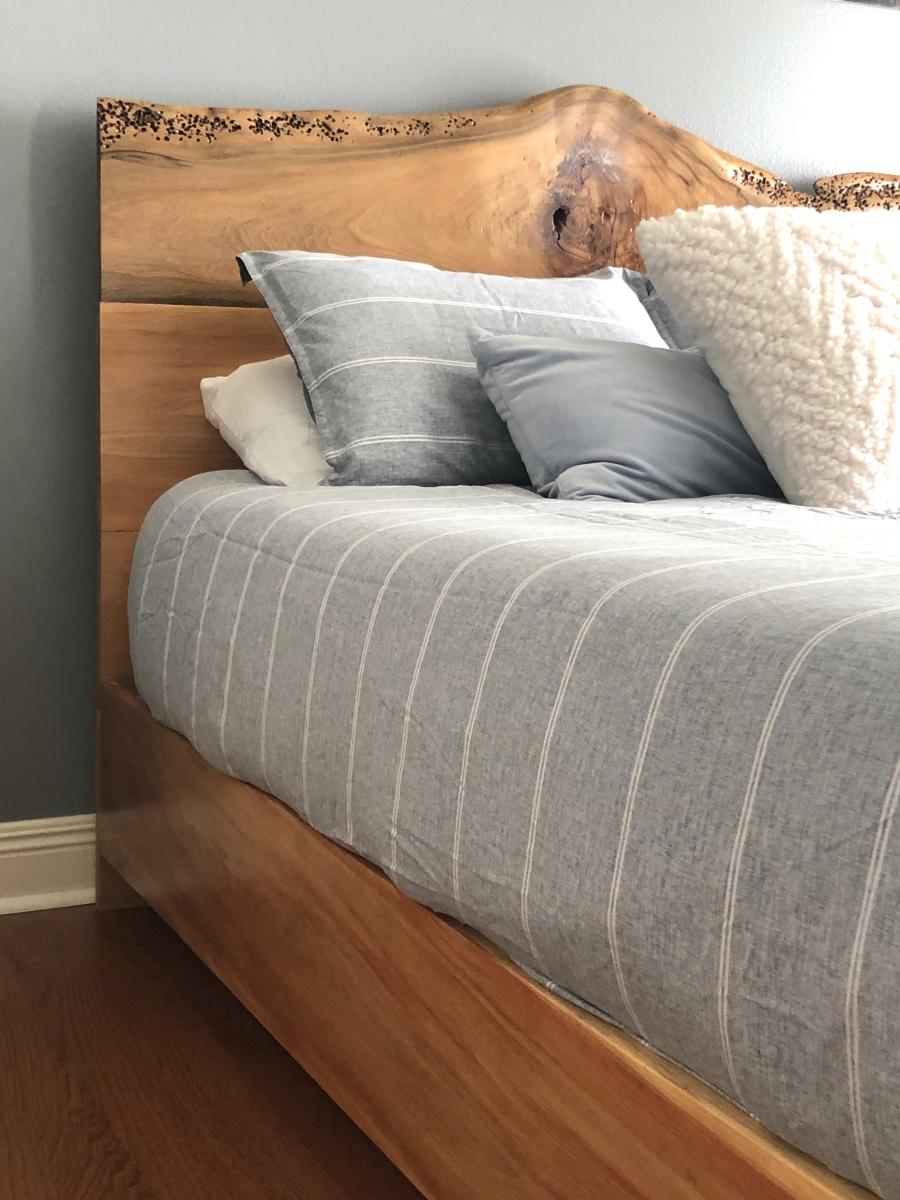
Live Edge Floating Bed
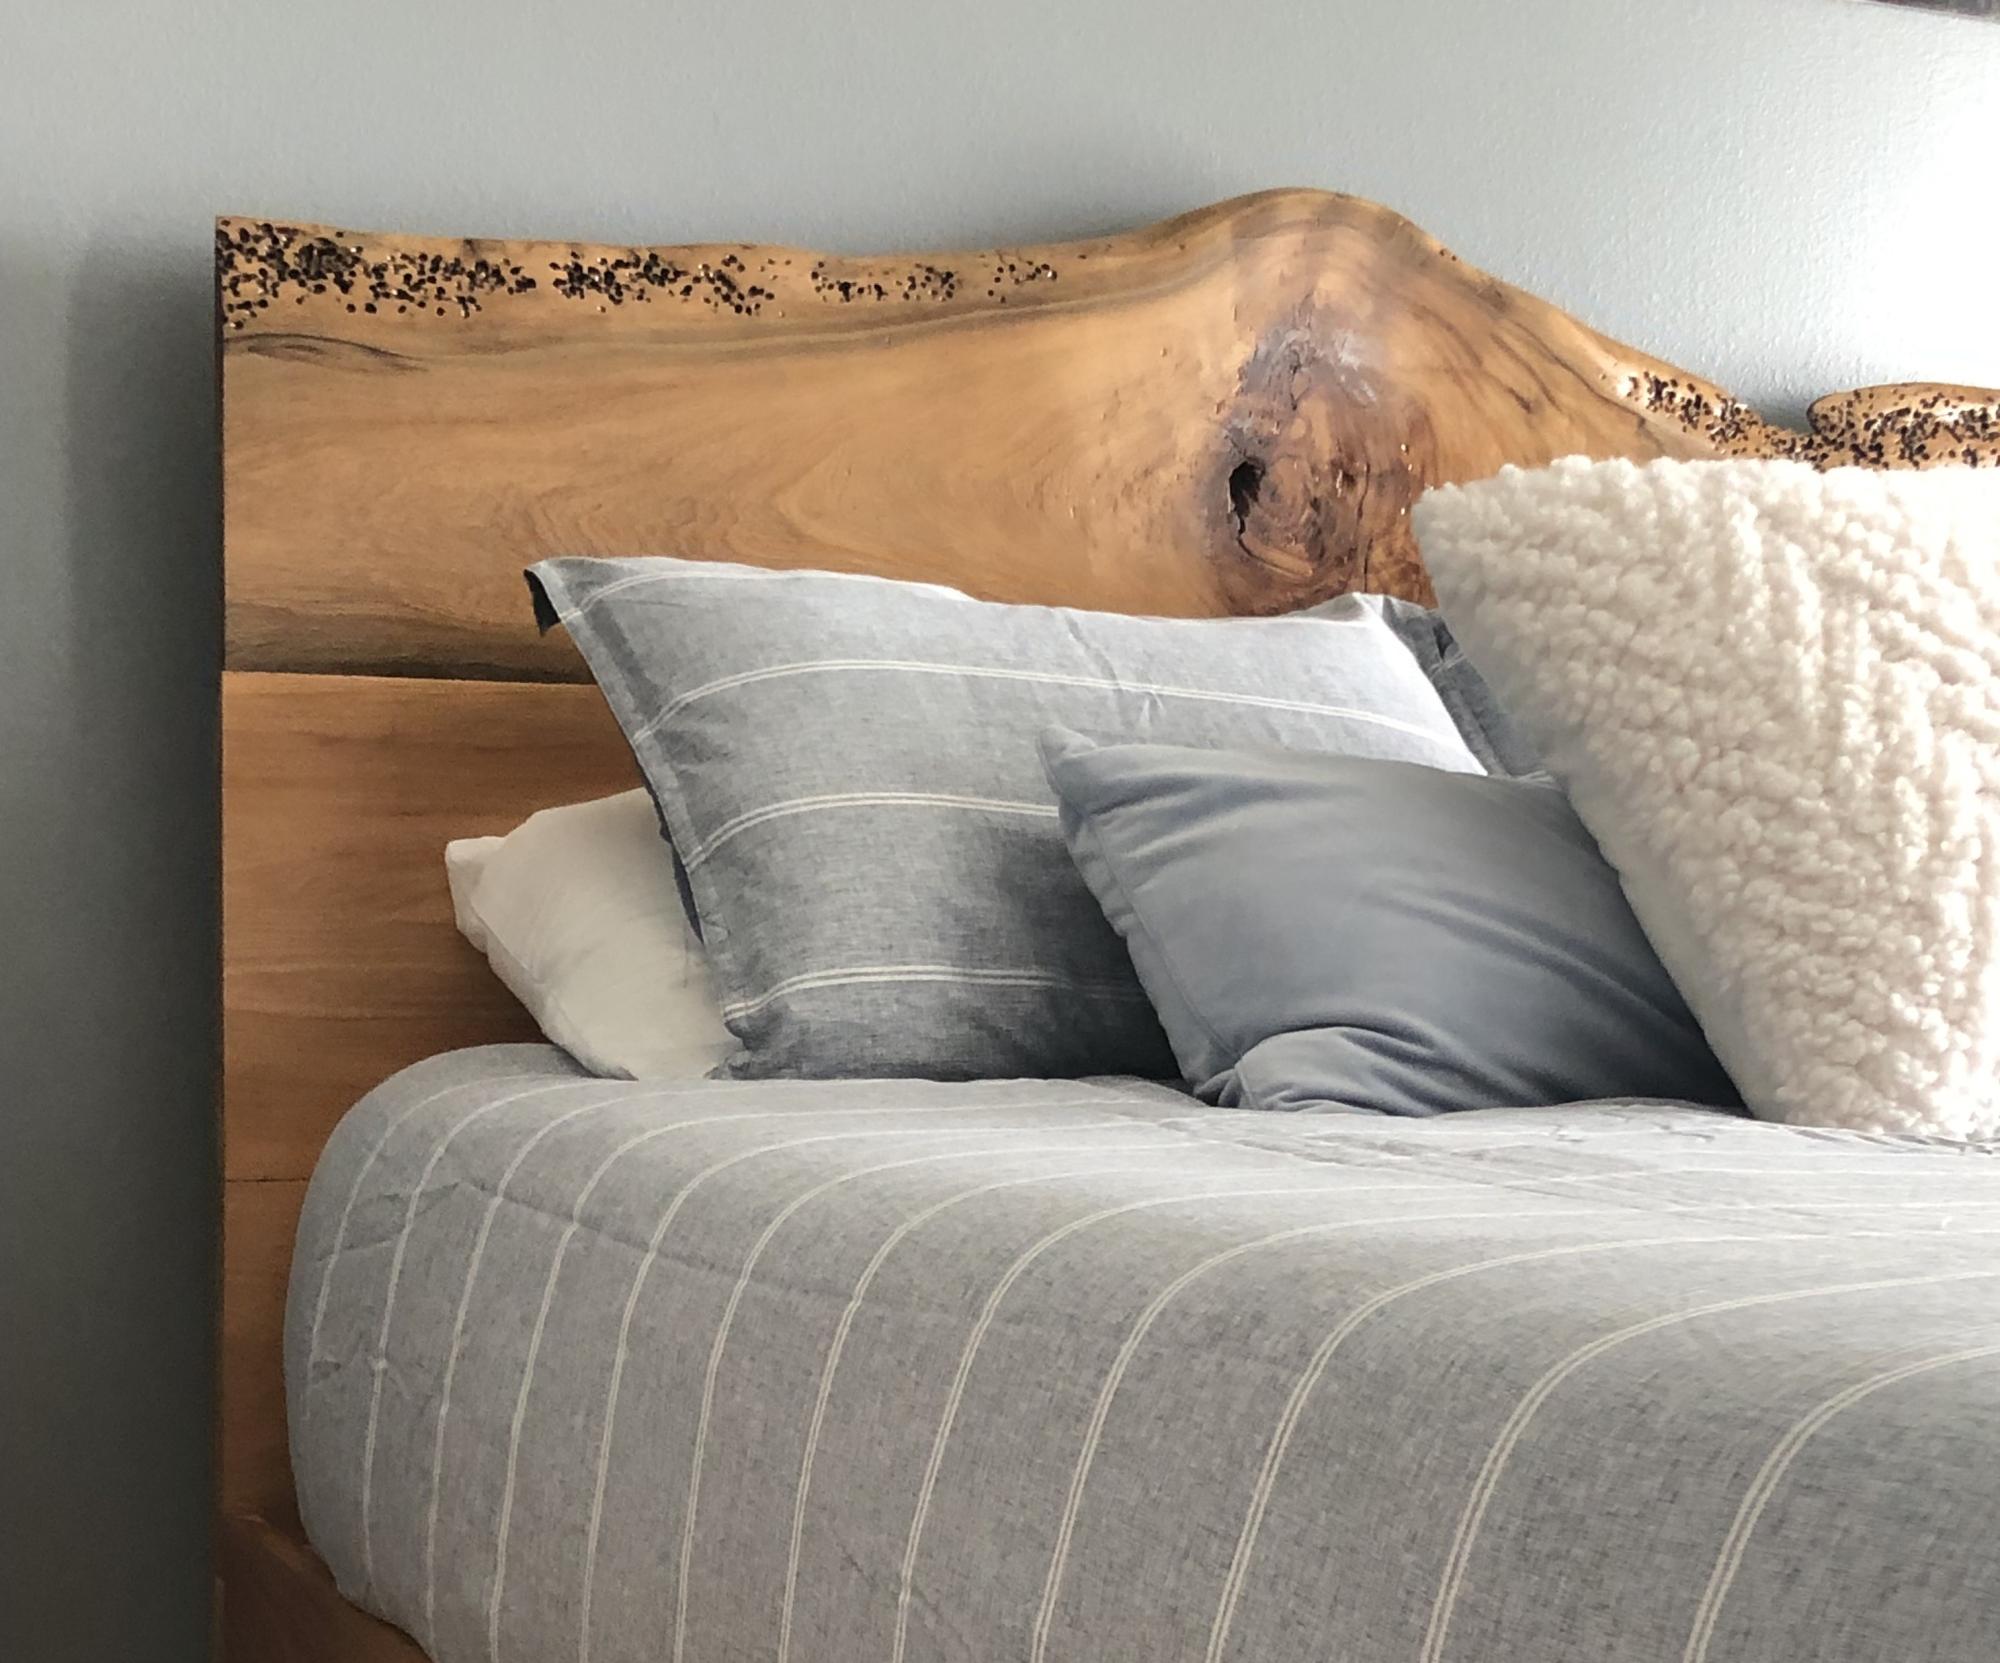
Older children moving out for college left the youngest without a bed. We decided to use your plan for a bed, but altered the headboard just a bit so that we could use live edge cypress. We love how it turned out, plus we were able to use locally sourced cypress!
Kathleen R

Built from Plan(s)
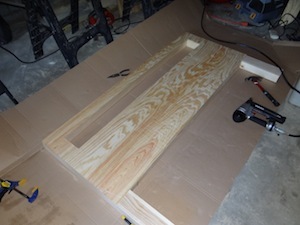
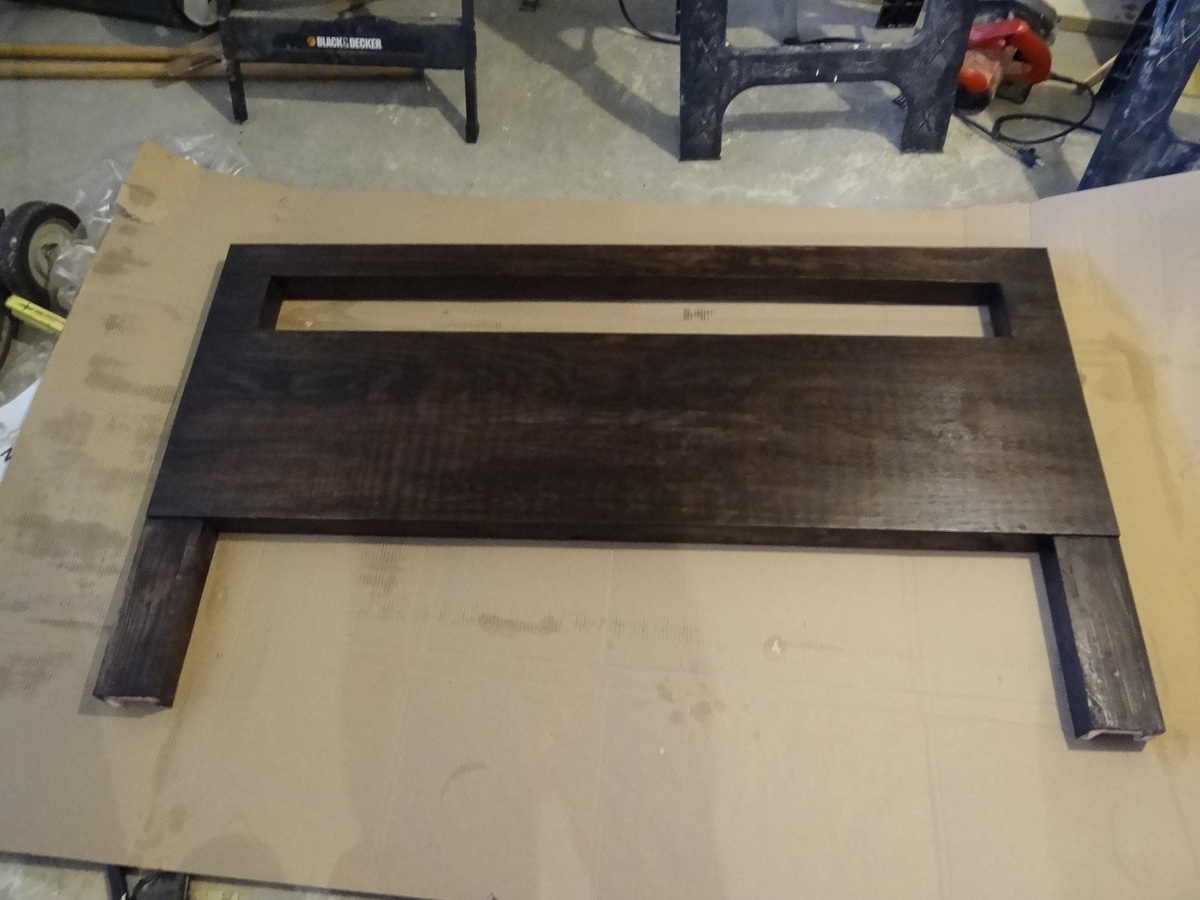
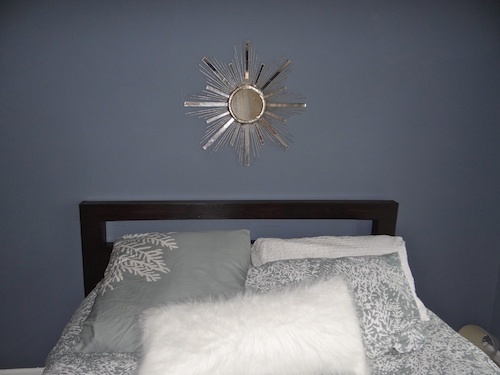
Modern Cutout Headboard
I was so thrilled to see this cut out, modern headboard included in Ana's plans, since I had been lusting over the expensive West Elm version for months. It was really easy, and I'm thrilled with the results.
Built from Plan(s)
Estimated Cost
$60
Estimated Time Investment
Day Project (6-9 Hours)
Finish Used
Water based stain and poly
Recommended Skill Level
Intermediate
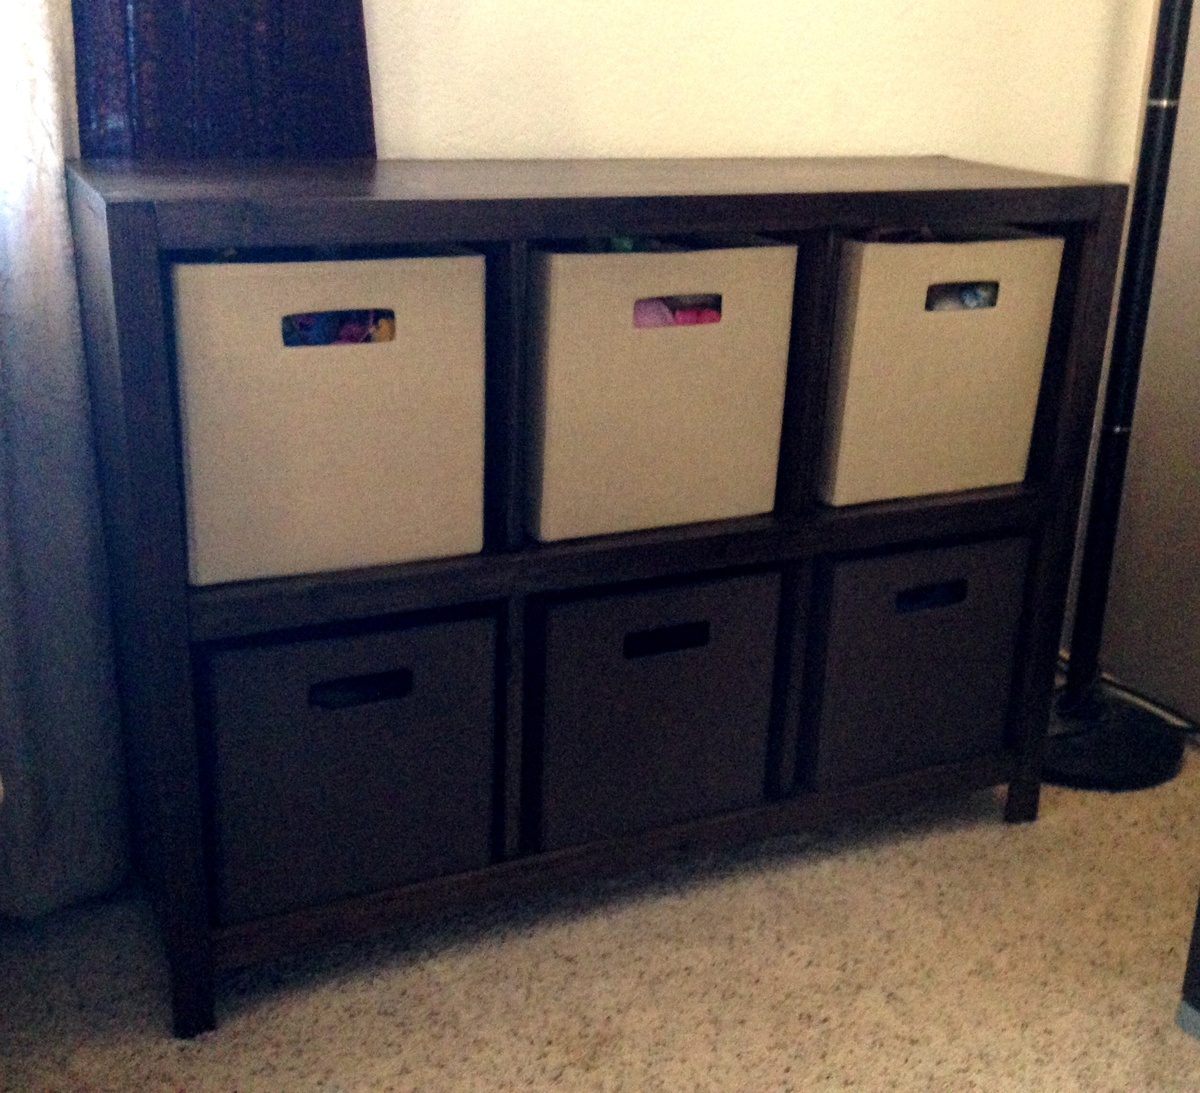
Cube Storage Shelf

This is another piece for my living room to go along with the console table I've already finished. My hope is to replace all of the furniture in the living room with matching pieces to finally have a house that doesn't look like it was decorated through the Salvation Army.
This one has the specific purpose of a toy box for our two year old. Now she has a place to store her toys that she keeps in the living room instead of just piling them up in that corner. It's based on the 6 cube bookshelf design and finished with three coats of Varathane's Kona poly blend over regular pine.
Built from Plan(s)
Estimated Cost
$50
Estimated Time Investment
Day Project (6-9 Hours)
Finish Used
Varathane's Kona polyblend
Recommended Skill Level
Starter Project