Adirondack Chair
Followed Ana’s plans and turned out great. Stained it after it was assembled but would recommend doing that before assembly. Very comfy.
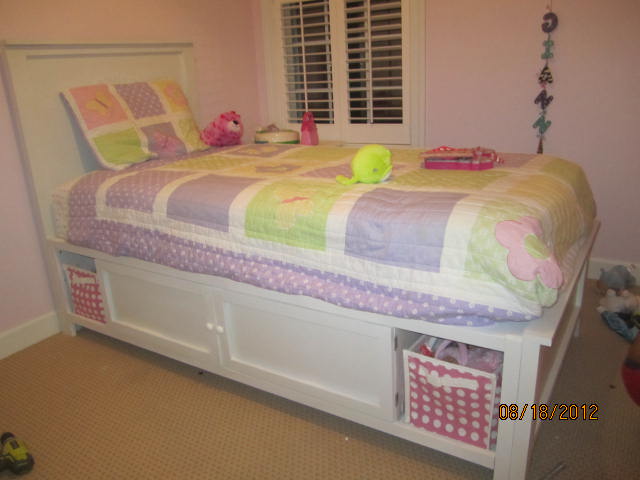
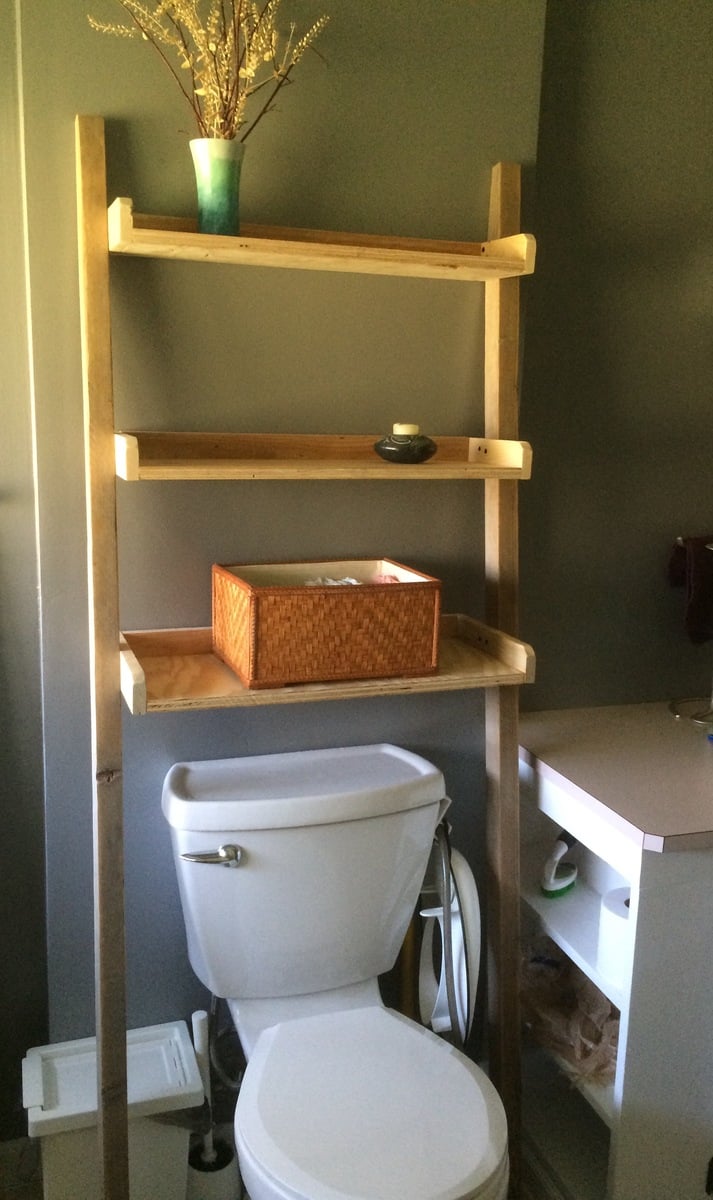
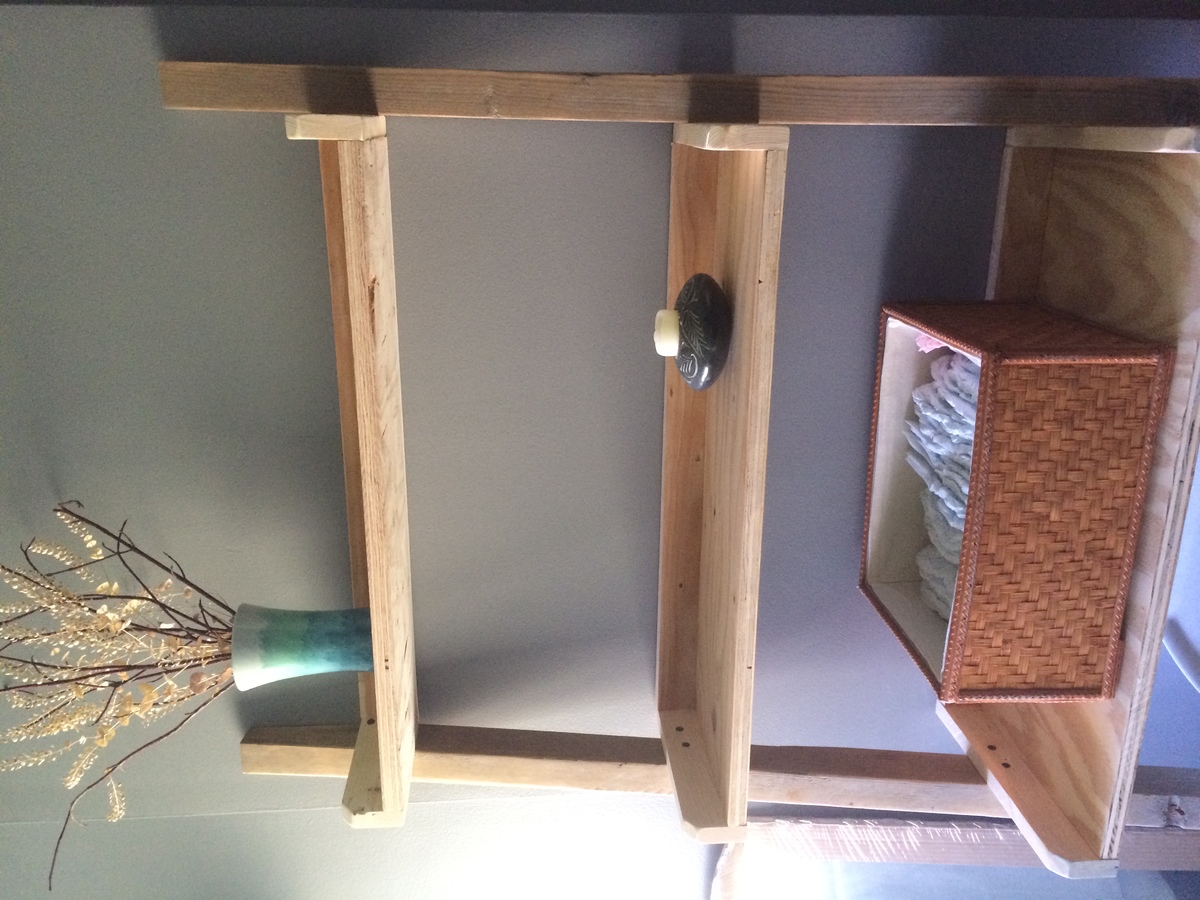
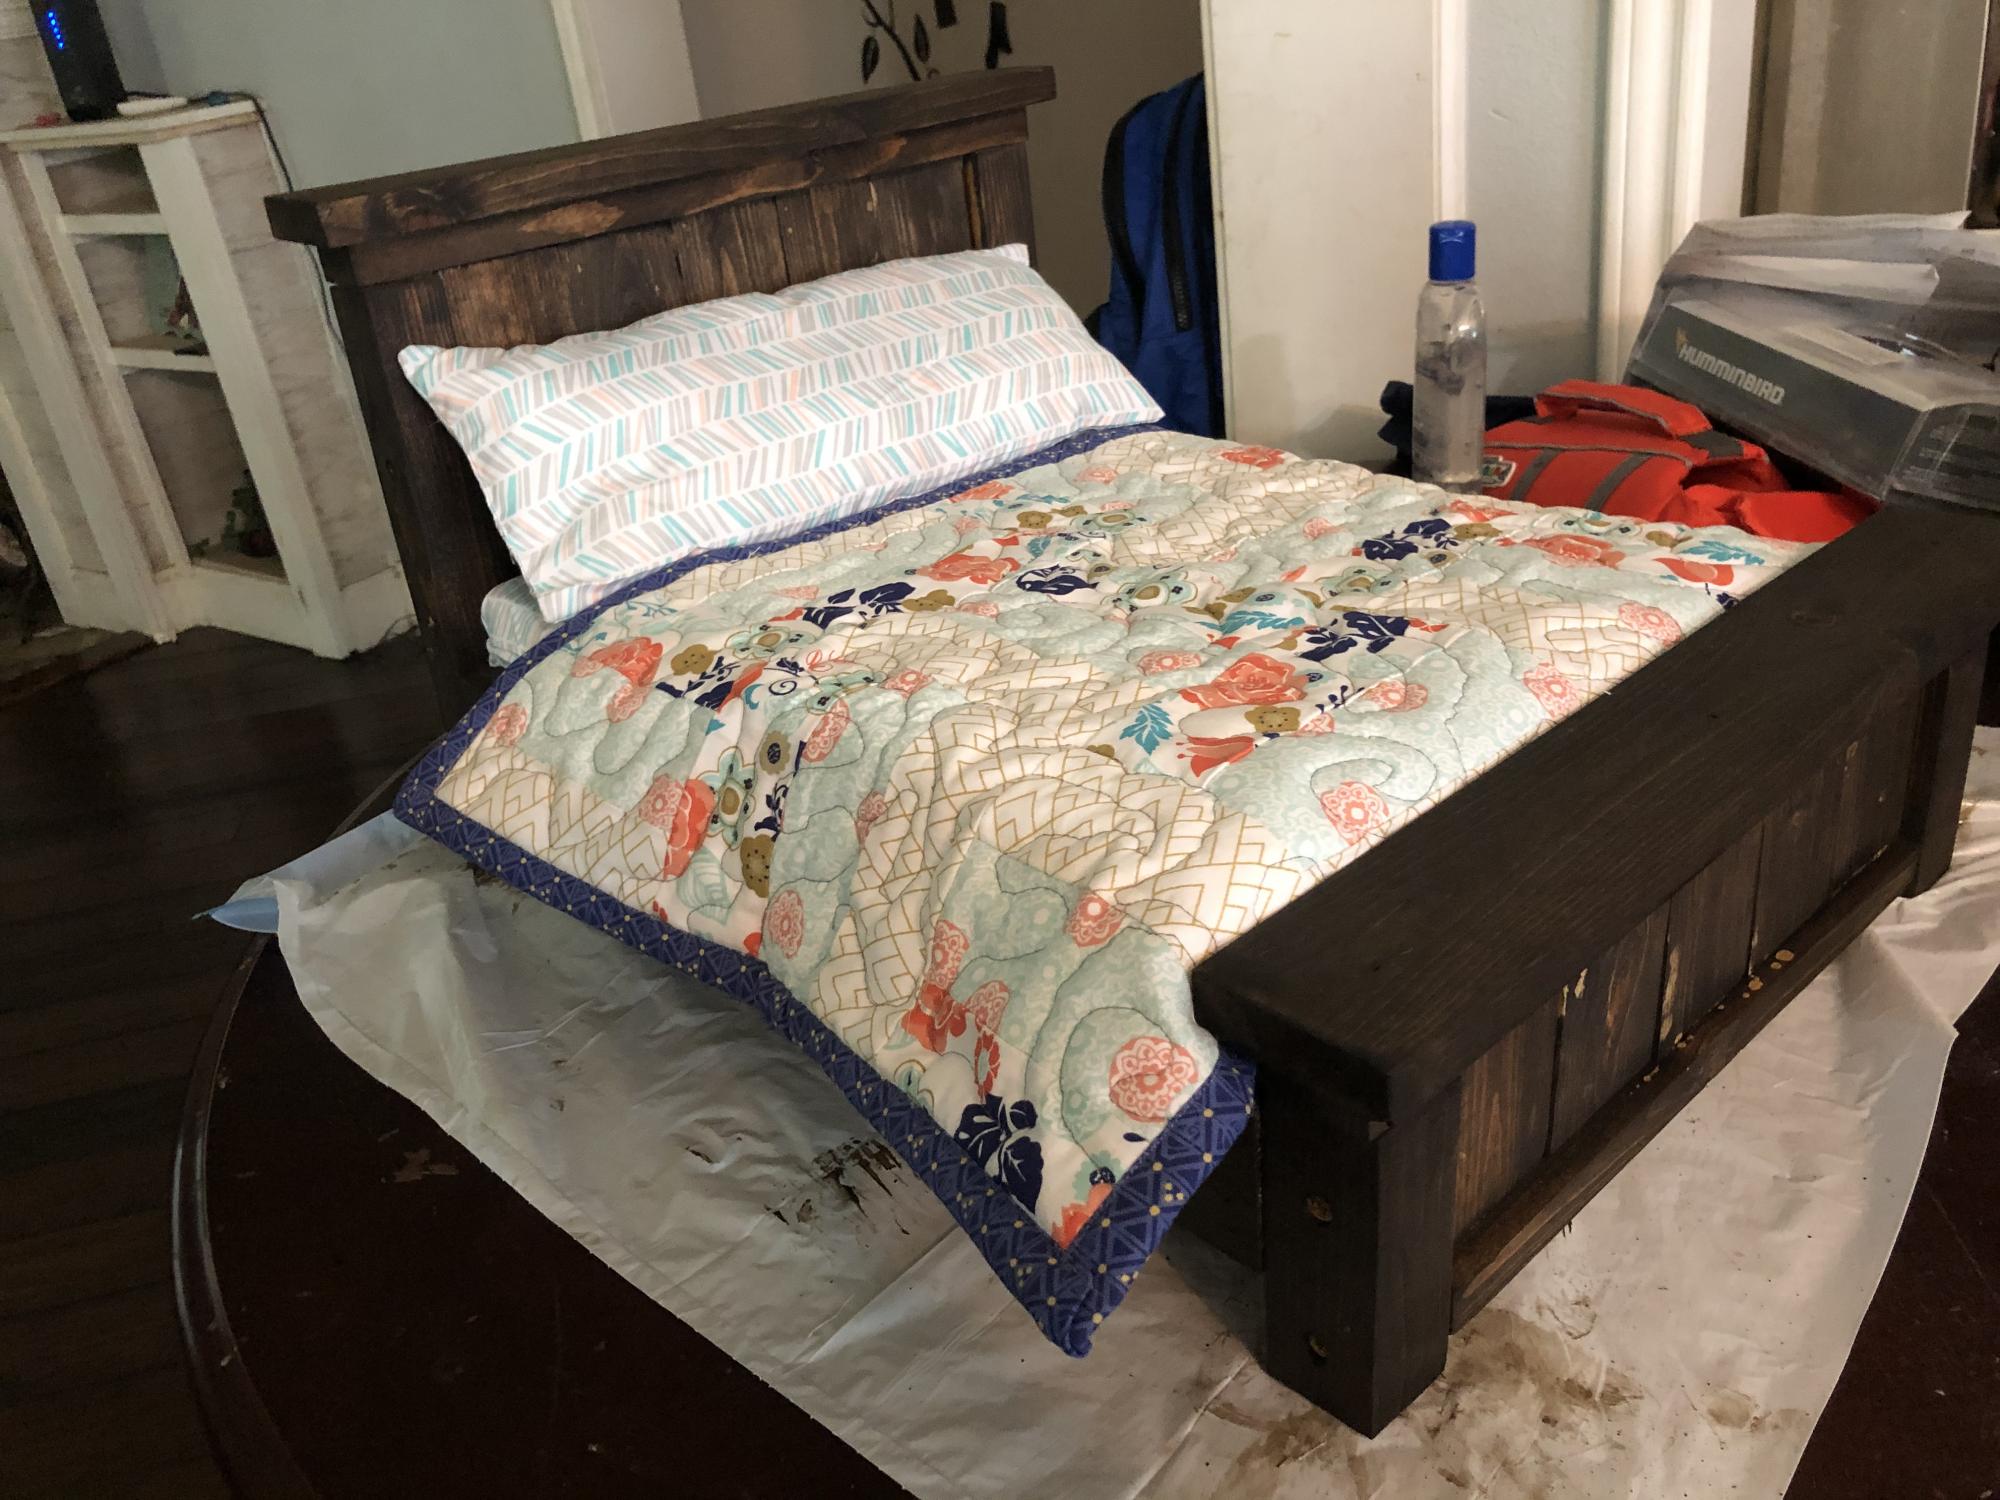
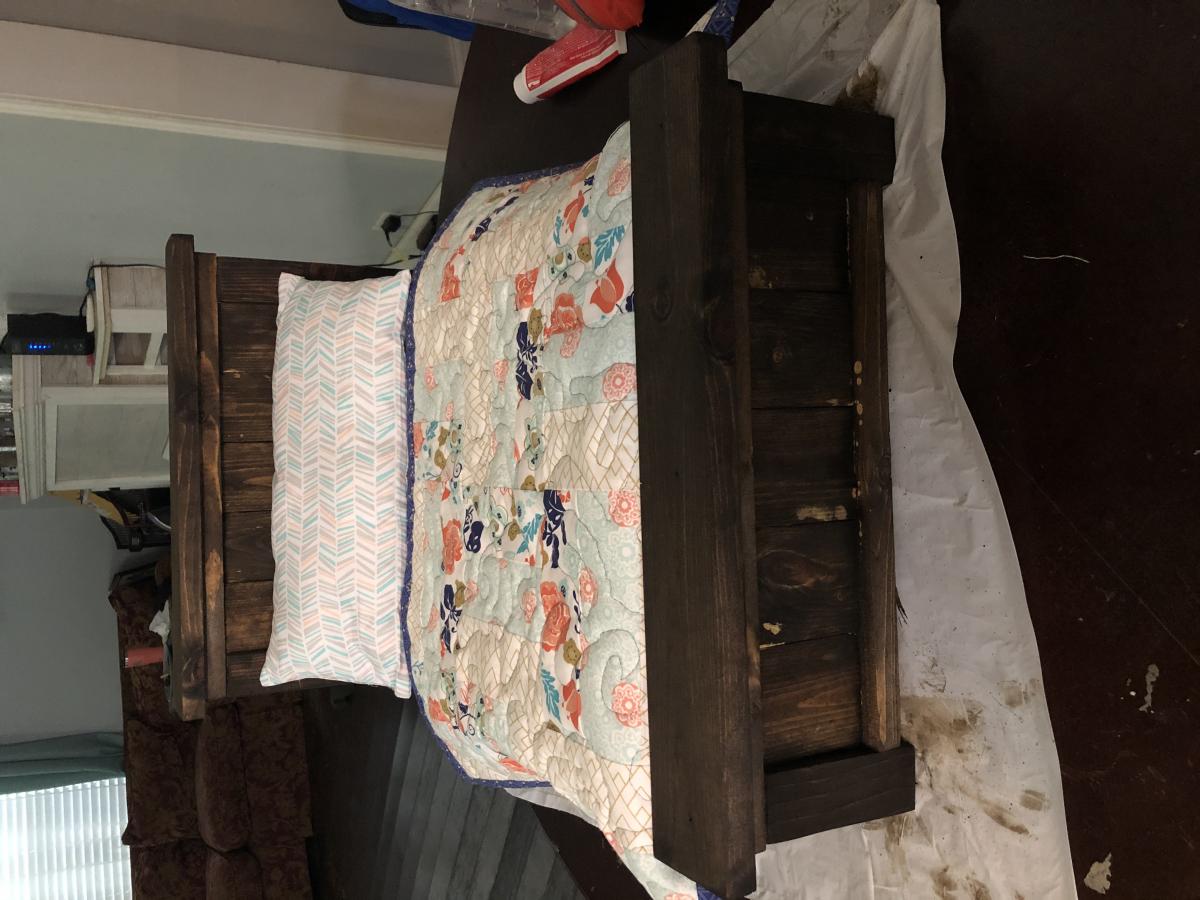
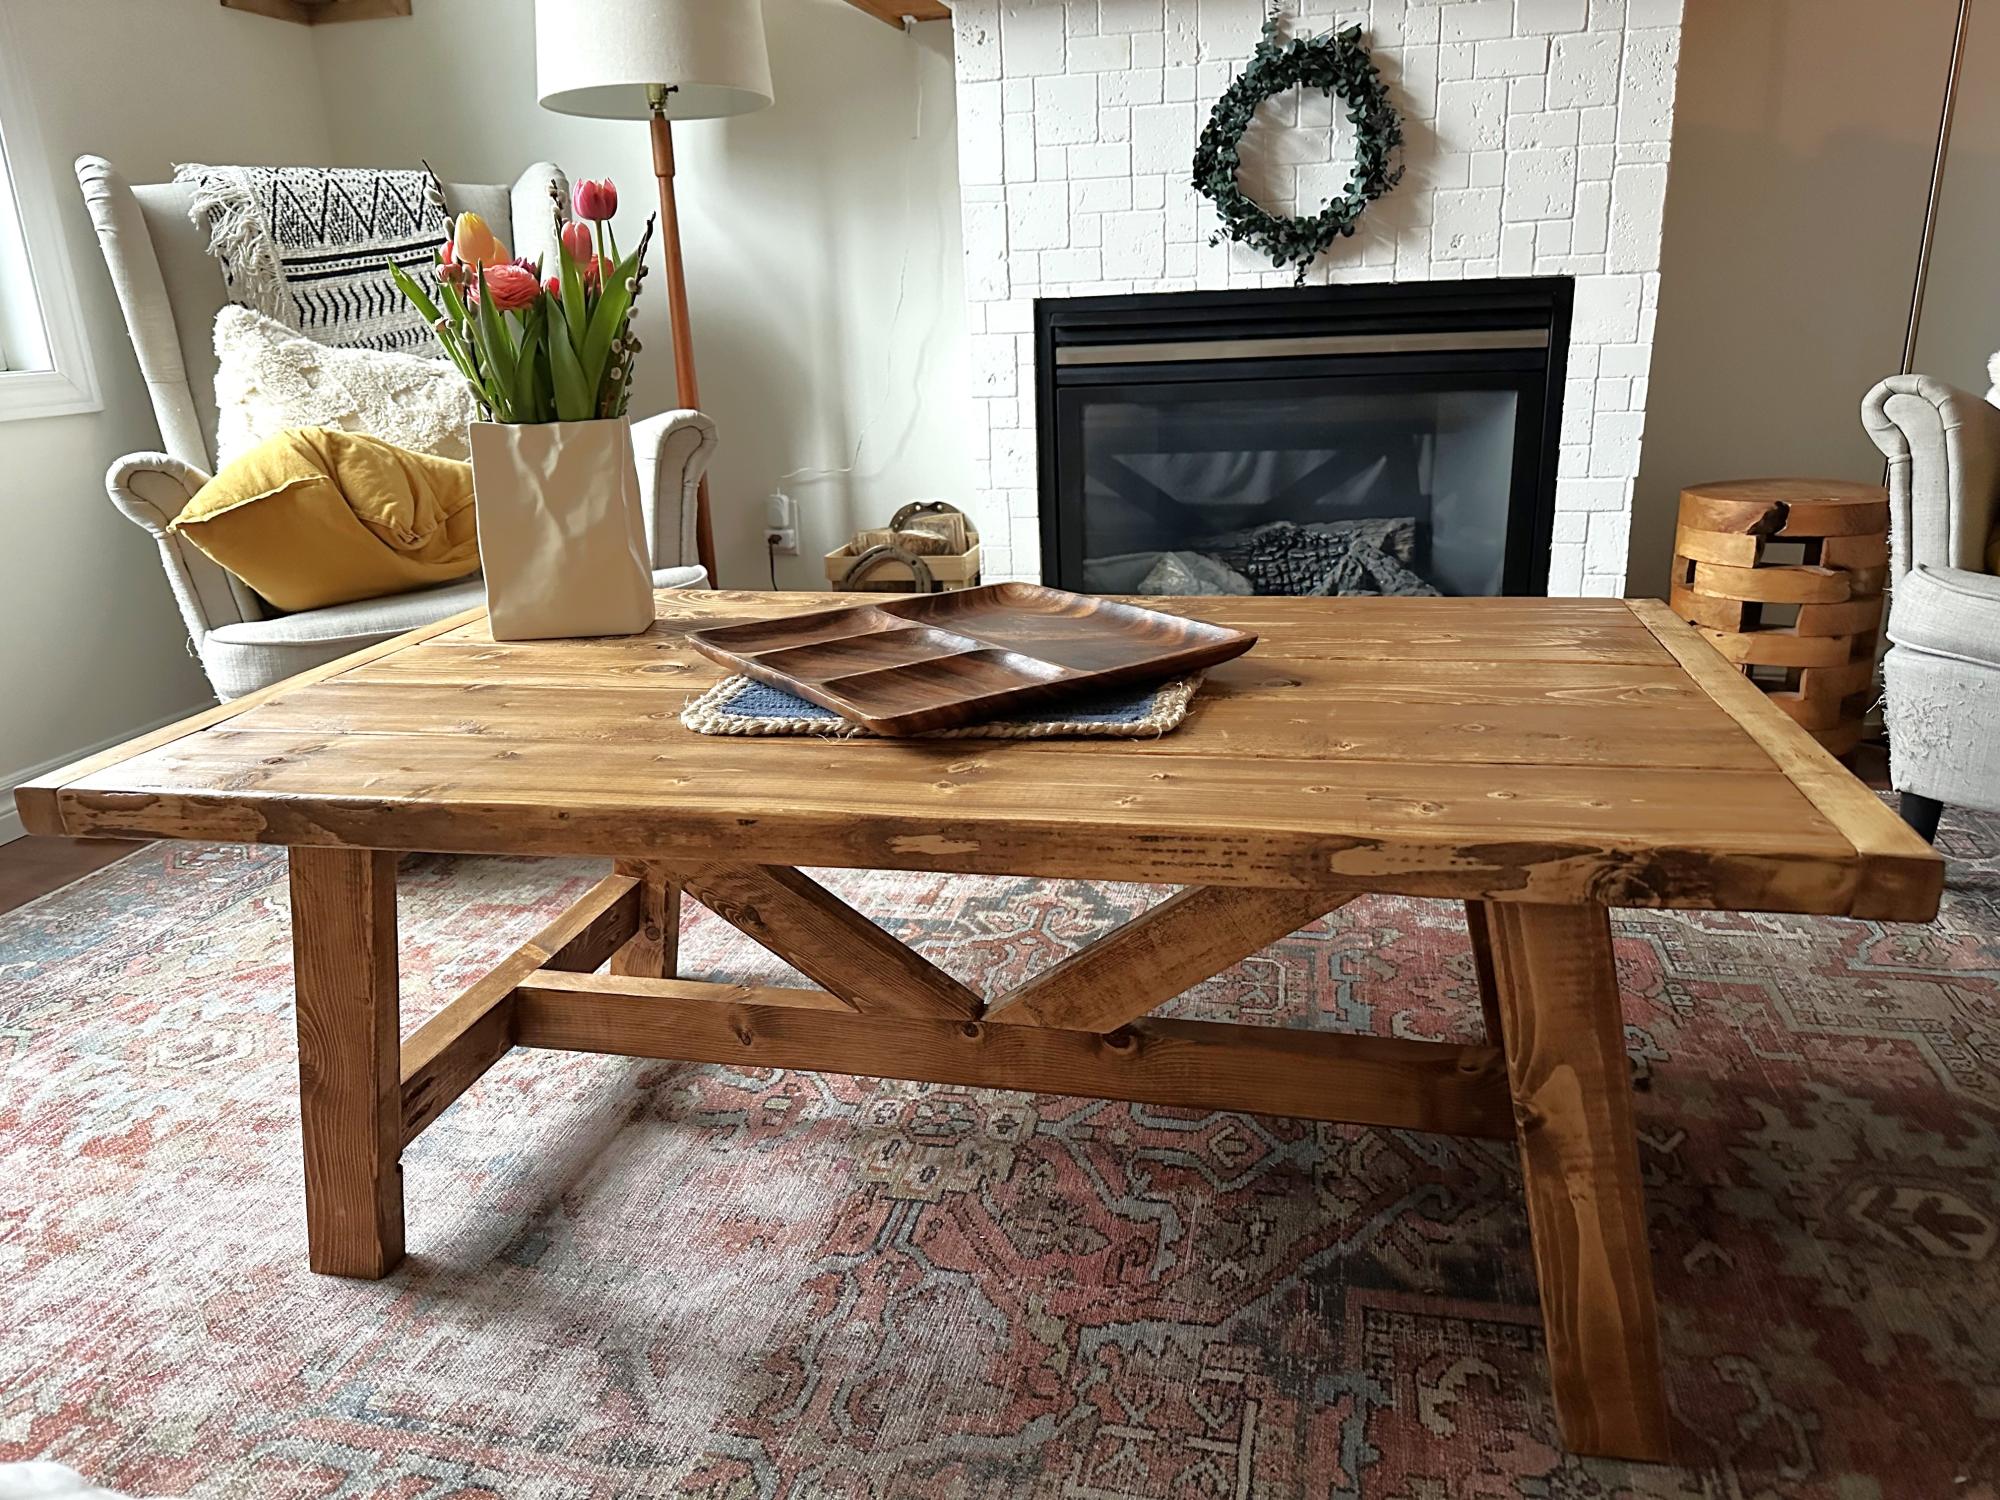
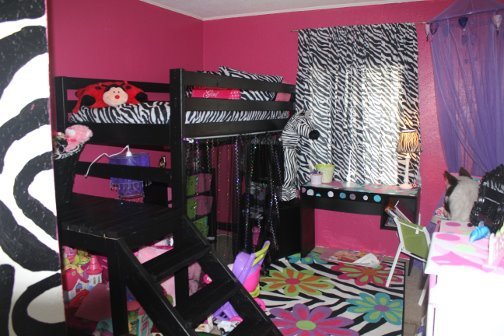
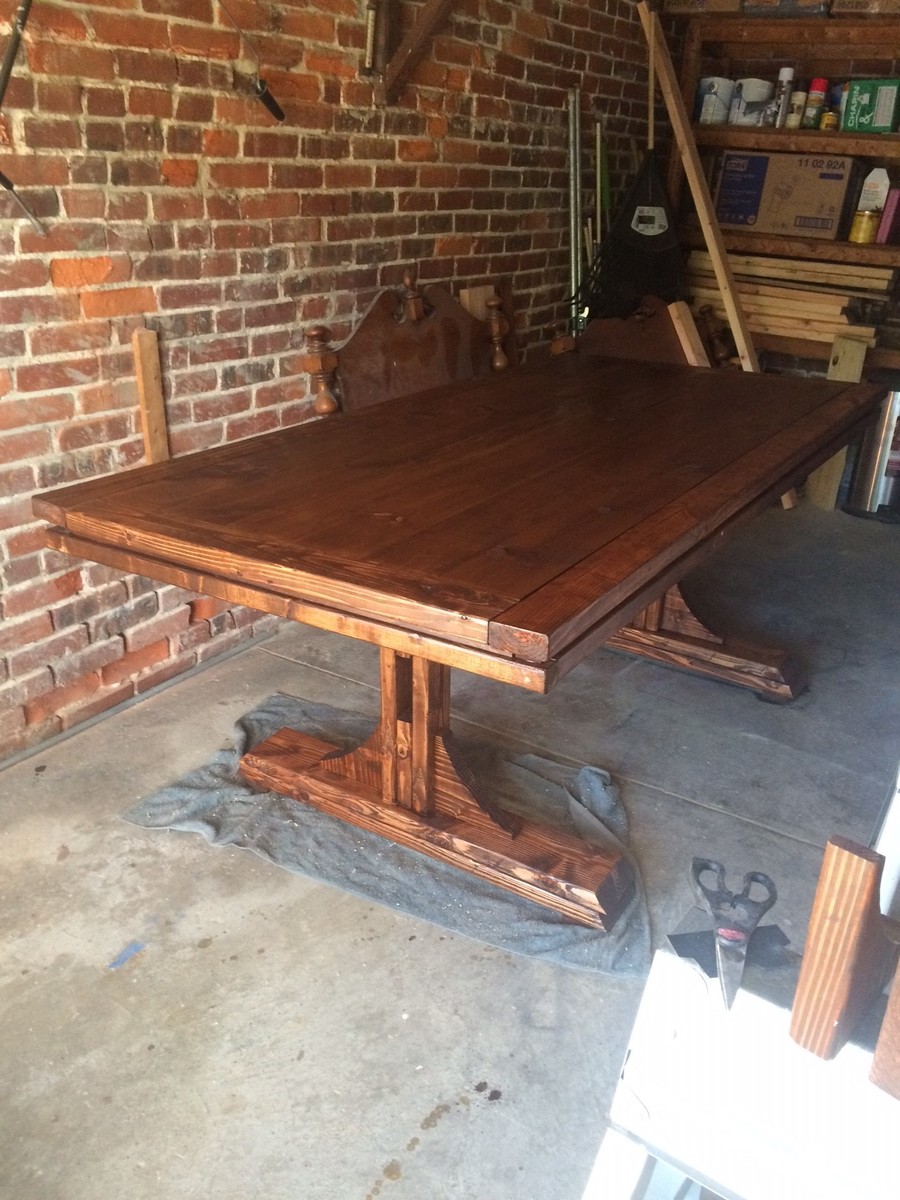
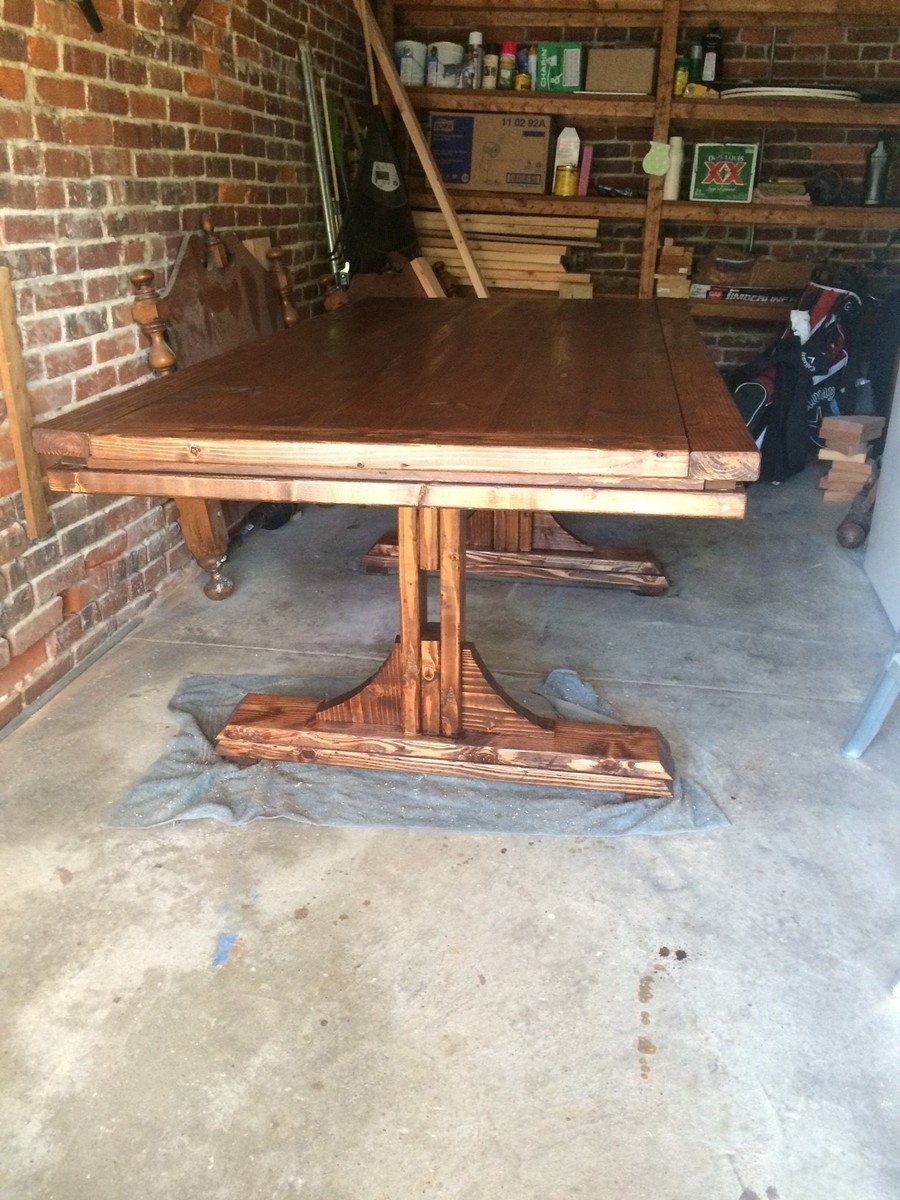
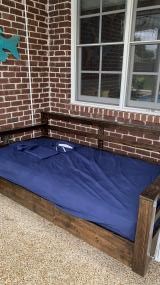
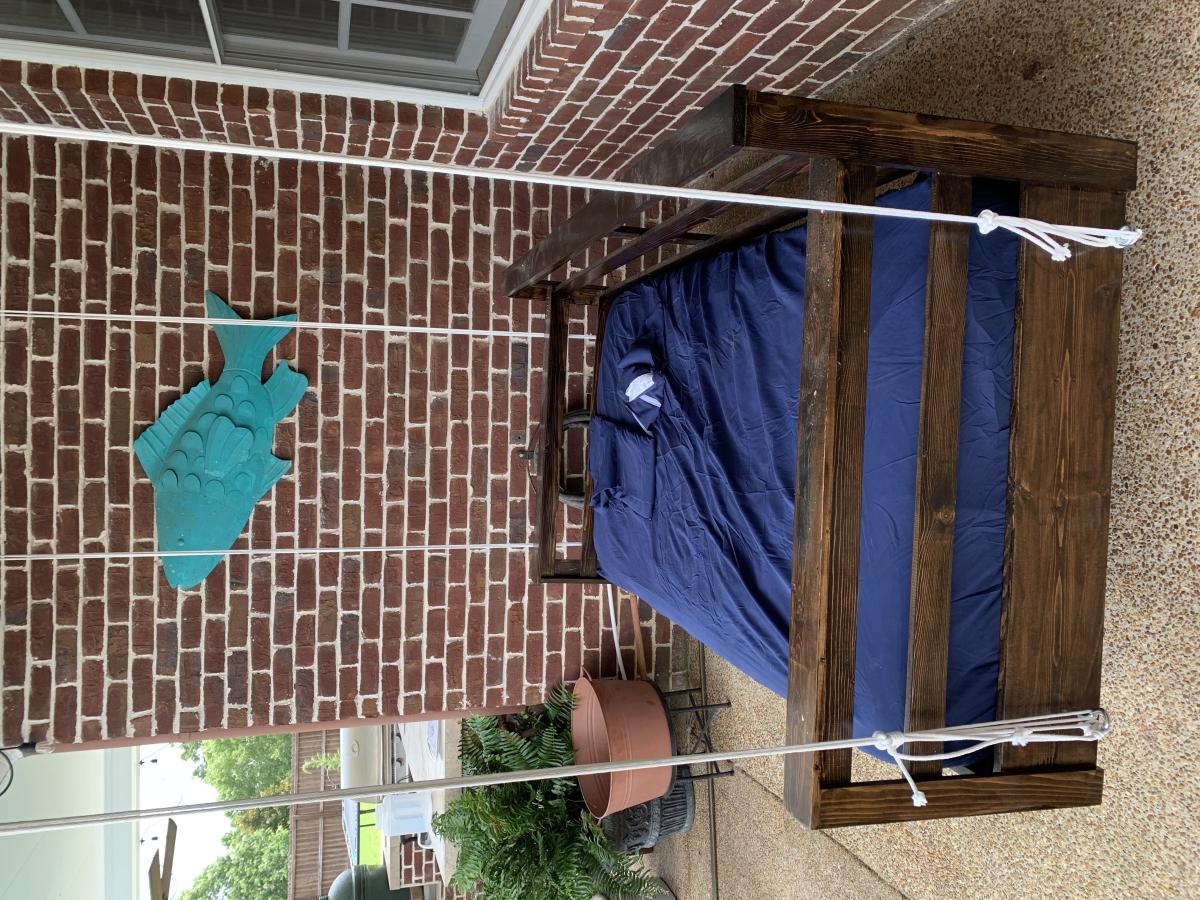
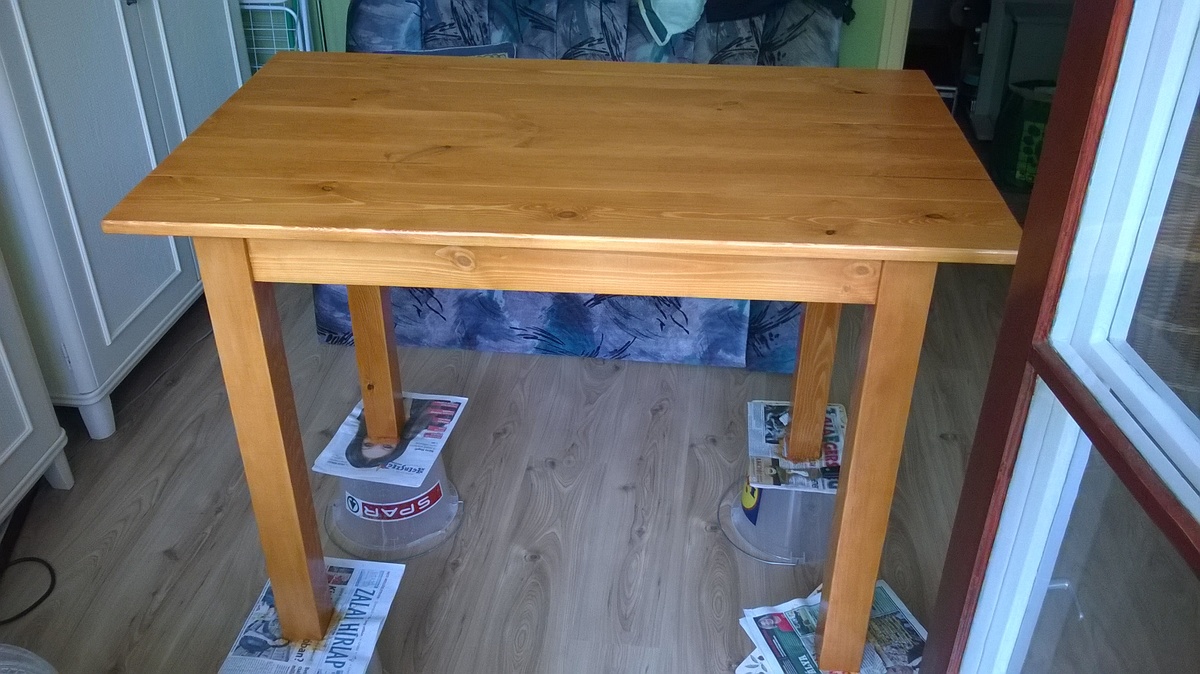
I think I Iove this bed more than my little girl. It's really a beautiful bed with lots of storage. I put magnetic closures on the insides of the cabinets to hold them closed. I also put the same applique on the headboard as Ana. I looked for a different one, but it's the girliest we could find at the time and my little princess loved it. It's a very sturdy bed. I put a week long project, but again, as I've stated before on other posts, it would probably not take nearly as long if you have help with the building or especially with the kids! When you have to stop every 5 minutes and take care of kids and home, it takes a little longer. All the building mommies out there know exactly what I'm talking about! Thank you so much, Ana, for all you do and for all of the empowerment and motivation.
I've been collecting small flat rocks off the road every time I take the dog for a walk. Unfortunately my grout cracked, I probably used the wrong type. Anyone who can tell me what I should have used instead? Suggestions very welcome, as I might try this again.
Mon, 06/09/2014 - 14:28
I love this idea! What kind of grout did you use? I would imagine that for such large gaps between the rocks, you'd have to use a sanded grout (most state whether they're for indoor/outdoor use, but I've only seen ones that say both). But it could have cracked because the wood underneath expanded or contracted or the grout wasn't the right consistency.. Love, love, love!
In reply to Too cute! by Lady Goats
Wed, 06/18/2014 - 09:30
Thank you for your comment on my birdhouse! I talked to a contractor who suggested that my grout was too watery when I started. I also used Polyblend non-sanded grout. I may use sanded next time. Trying to decide if I should give it another go, I kind of want to!
This leaning bathroom ladder was the perfect final touch to our budget bathroom re-do.
I used all reclaimed wood - old barn wood, pallet, and scraps - and had the nails/screws on hand. The only cost will be for stain, which the jury is still out on. Likely I will use the Danish oil in medium walnut. Loved doing this project and the result!
Fri, 09/09/2016 - 11:01
I posted this brag post before registering with a user ID. I'm not sure how to "claim" my (first ever!) brag post. Anyone know if this can be done?
Fri, 09/09/2016 - 16:44
Thanks for adding! We fixed it. Great job, love that most of the project is reclaimed!
Followed the Farmhouse Doll Bed build! It worked out great! It’s the perfect size for my tiny pup. Cost and time to finish includes everything you see here. The bed frame, the sheets, pillow, and mini quilt all made by hand.
I saw the Truss Coffee table and HAD to make it!
I couldn’t find 2x3 at my hardware store so I ripped 2x6’s for the base. I also ripped 2x4 for the top end pieces. I used the color Provincial to stain and covered it in Polyurethane. I just love it.
Mélanie S.
I love the legs on Crate&Barrel's Boardwalk Bench, but I was on a tight budget (under $10), so I needed to make many modifications so that I could use the random pieces of wood I had accumulated from my local deconstruction warehouse, including free wood louvers for the slatted shoe shelves. If you'd like to make your own, more photos of my process are on my little blog: http://sunnysideup-stairs.blogspot.com/2014/05/boardwalk-shoe-bench.html
Tue, 06/10/2014 - 17:06
Great use of materials! The lines are elegant, it's a wonderful build! (Also, I love the floor!)
:)
Joanne
This is 10 feet long and 5 1/2 feet tall. Made using a Kreg Jig.
Our two boys are really starting to get into Legos so we knew we needed a place for them to play (especially after repeatedly stepping on Legos--ouch!). My husband designed this simple plan after looking at some expensive designs online. He cut a small notch out of the top so legos can be pushed into the storage container. We just used a simple under bed storage box, which is great because it is large and holds a ton of legos.
This was my first ever project. I initially intended to use it for office storage but it ended up taking its place in the kitchen - and proving most useful for storage there too!
We altered our plans as my dining room could only accomodate a 7 ft table! This was out first DIY that was this large of an undertaking and we love the way it came out. If we can do this as woodworking novices you can definately do it!
Utilized your plans for this porch bed swing! Looks great on the porch. Couldn’t find anything solid in the ceiling to hang it from so I installed my own joists with rafter hangers attached to the walls. Should hold long term.
Mom's Fancy Farmhouse in California King, Glazed.
I used the headboard measurements from the original plan, and the width/length measurements from the California King plan. My first plan was to distress (above picture) and I loved it, but when I brought it downstairs it didnt really match... So I repainted and Glazed :) Not to bad for buying my first "power tool" less than a month ago!!
I'm homemade woodworker. This is my first job!
Thu, 06/19/2014 - 21:49
Very nice looking! I really like the blonde stain.
My wife found this post on Pinterest and asked if i could build it. The hardest part was cuting the angles wit the jig saw because i can never get it to cut square and i have a little OCD about that sometimes. I ended up using my table saw a little. I would not recommened that though. If i had acess to a band saw stand that would have ben perfect.
I loved this project so much!! The best part of it for me was I didn't spend any money! I literally used scrap boards I had from rehab projects I had completed around my little cozy cottage. Some of the boards were already painted in Polar Bear by Behr in gloss finish. The other boards are unfinished common boards. Including this room I finished 2 weeks ago!
An expansion of the 2x4 potting bench.
I didn't use any plans but the Outdoor Ottoman comes really close. Needed an end table to go with our Outdoor Sectional that my husband and I built. While he was at a ballgame I whipped this up. Still have to sand and stain this as well as the sectional, but will probably do it as a winter project. We bought the 1x4s a while ago when we bought the 2x4s for the sectional so I wasn't exactly sure of the cost. I think I used 2 1/2 pieces of 8' lengths. Who would have thought a couple of years ago that so many of us would have attempted to build furniture and then even without a plan now and then?! Ana rocks! :)
This is our first build. Instructions were easy to follow but we didn't go much on the bottom center drawer runners!
I love the second layer of slide out drawers we use for the printer , paper and electronic gadgets!
Wed, 06/25/2014 - 05:37
Love this. What great mods and you even tackled drawers for a first build?! I'm too chicken and still haven't tried. Especially love how you used slide outs in the middle. Clever!