Community Brag Posts

Wishing Well Planter

Wishing well back yard art.
Jwrobel904
Built from Plan(s)
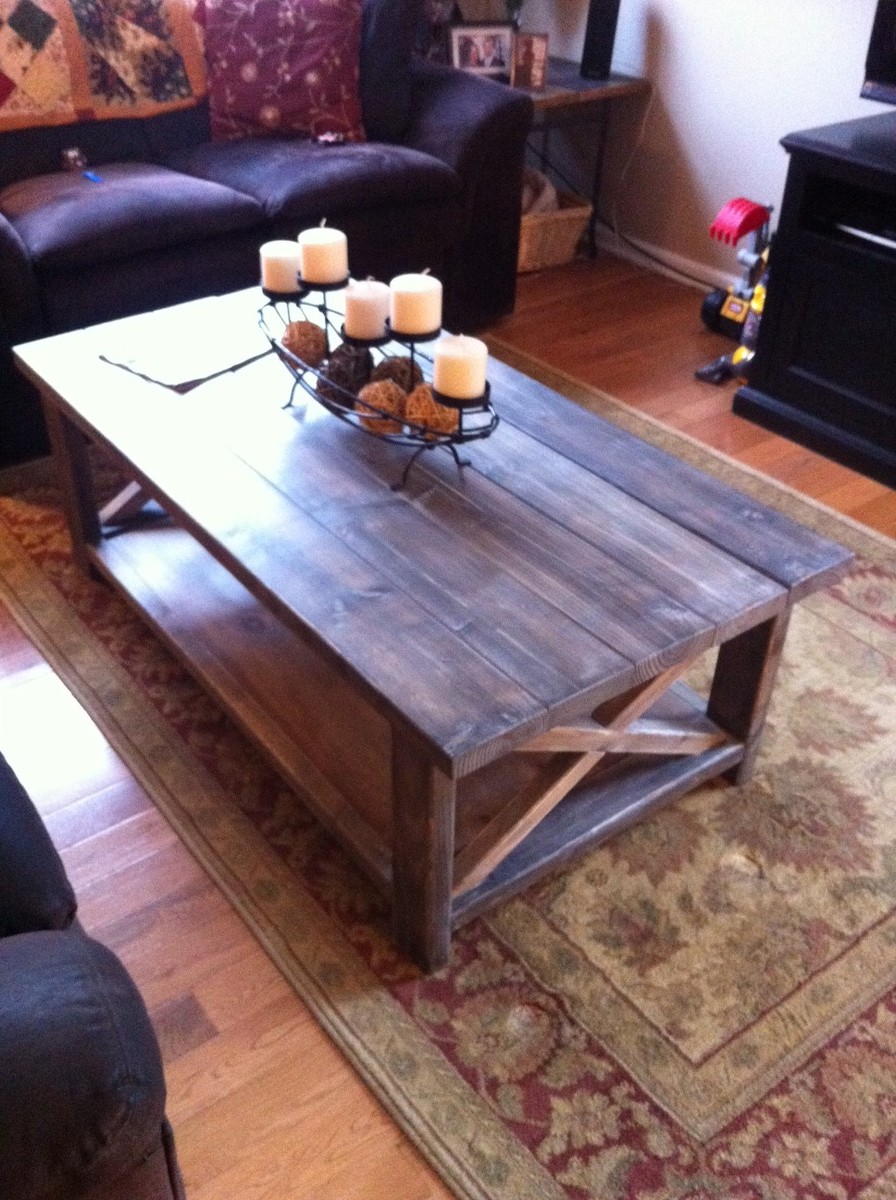
X Coffee Table
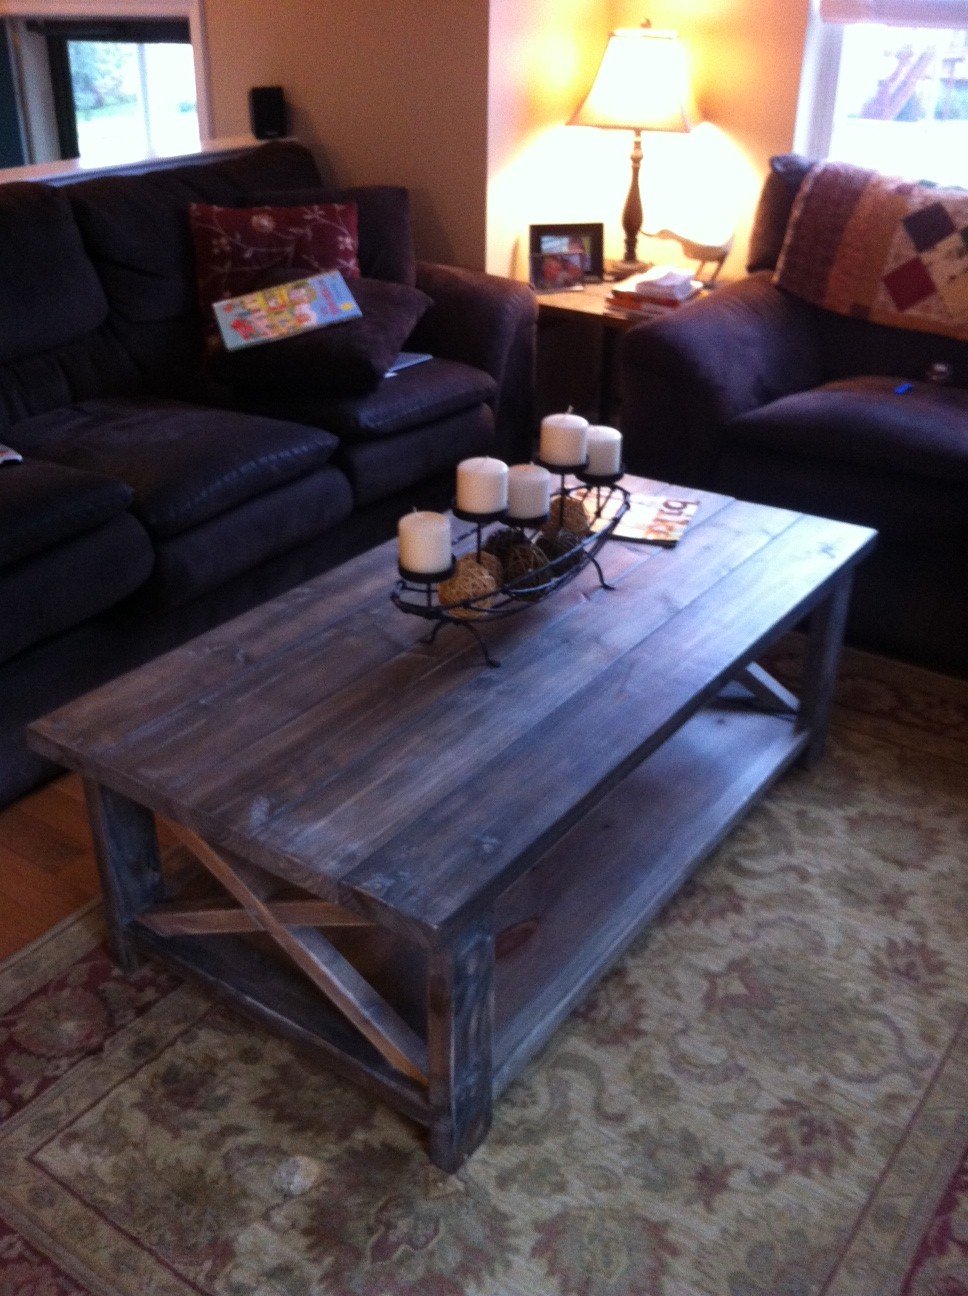
This was the best piece I have made so far, I had some trouble getting the angles right with the x's but in the end it worked out great and everyone can't believe its just plain old wood! Keep up the great work!
Moving on to the end tables!

Built from Plan(s)
Estimated Cost
$55
Estimated Time Investment
Day Project (6-9 Hours)
Finish Used
I had a great time "experimenting" with the distressed finish too. I recommend testing it on scrap boards first! I finished it with a coat of polyurethene and in the end the color looked fine but it did change it from what it was before the coat.
Recommended Skill Level
Intermediate
Comments

Wed, 09/26/2012 - 22:46
Fantastic work! It looks
Fantastic work! It looks gorgeous. What kind of poly did you use?
X-Side Table
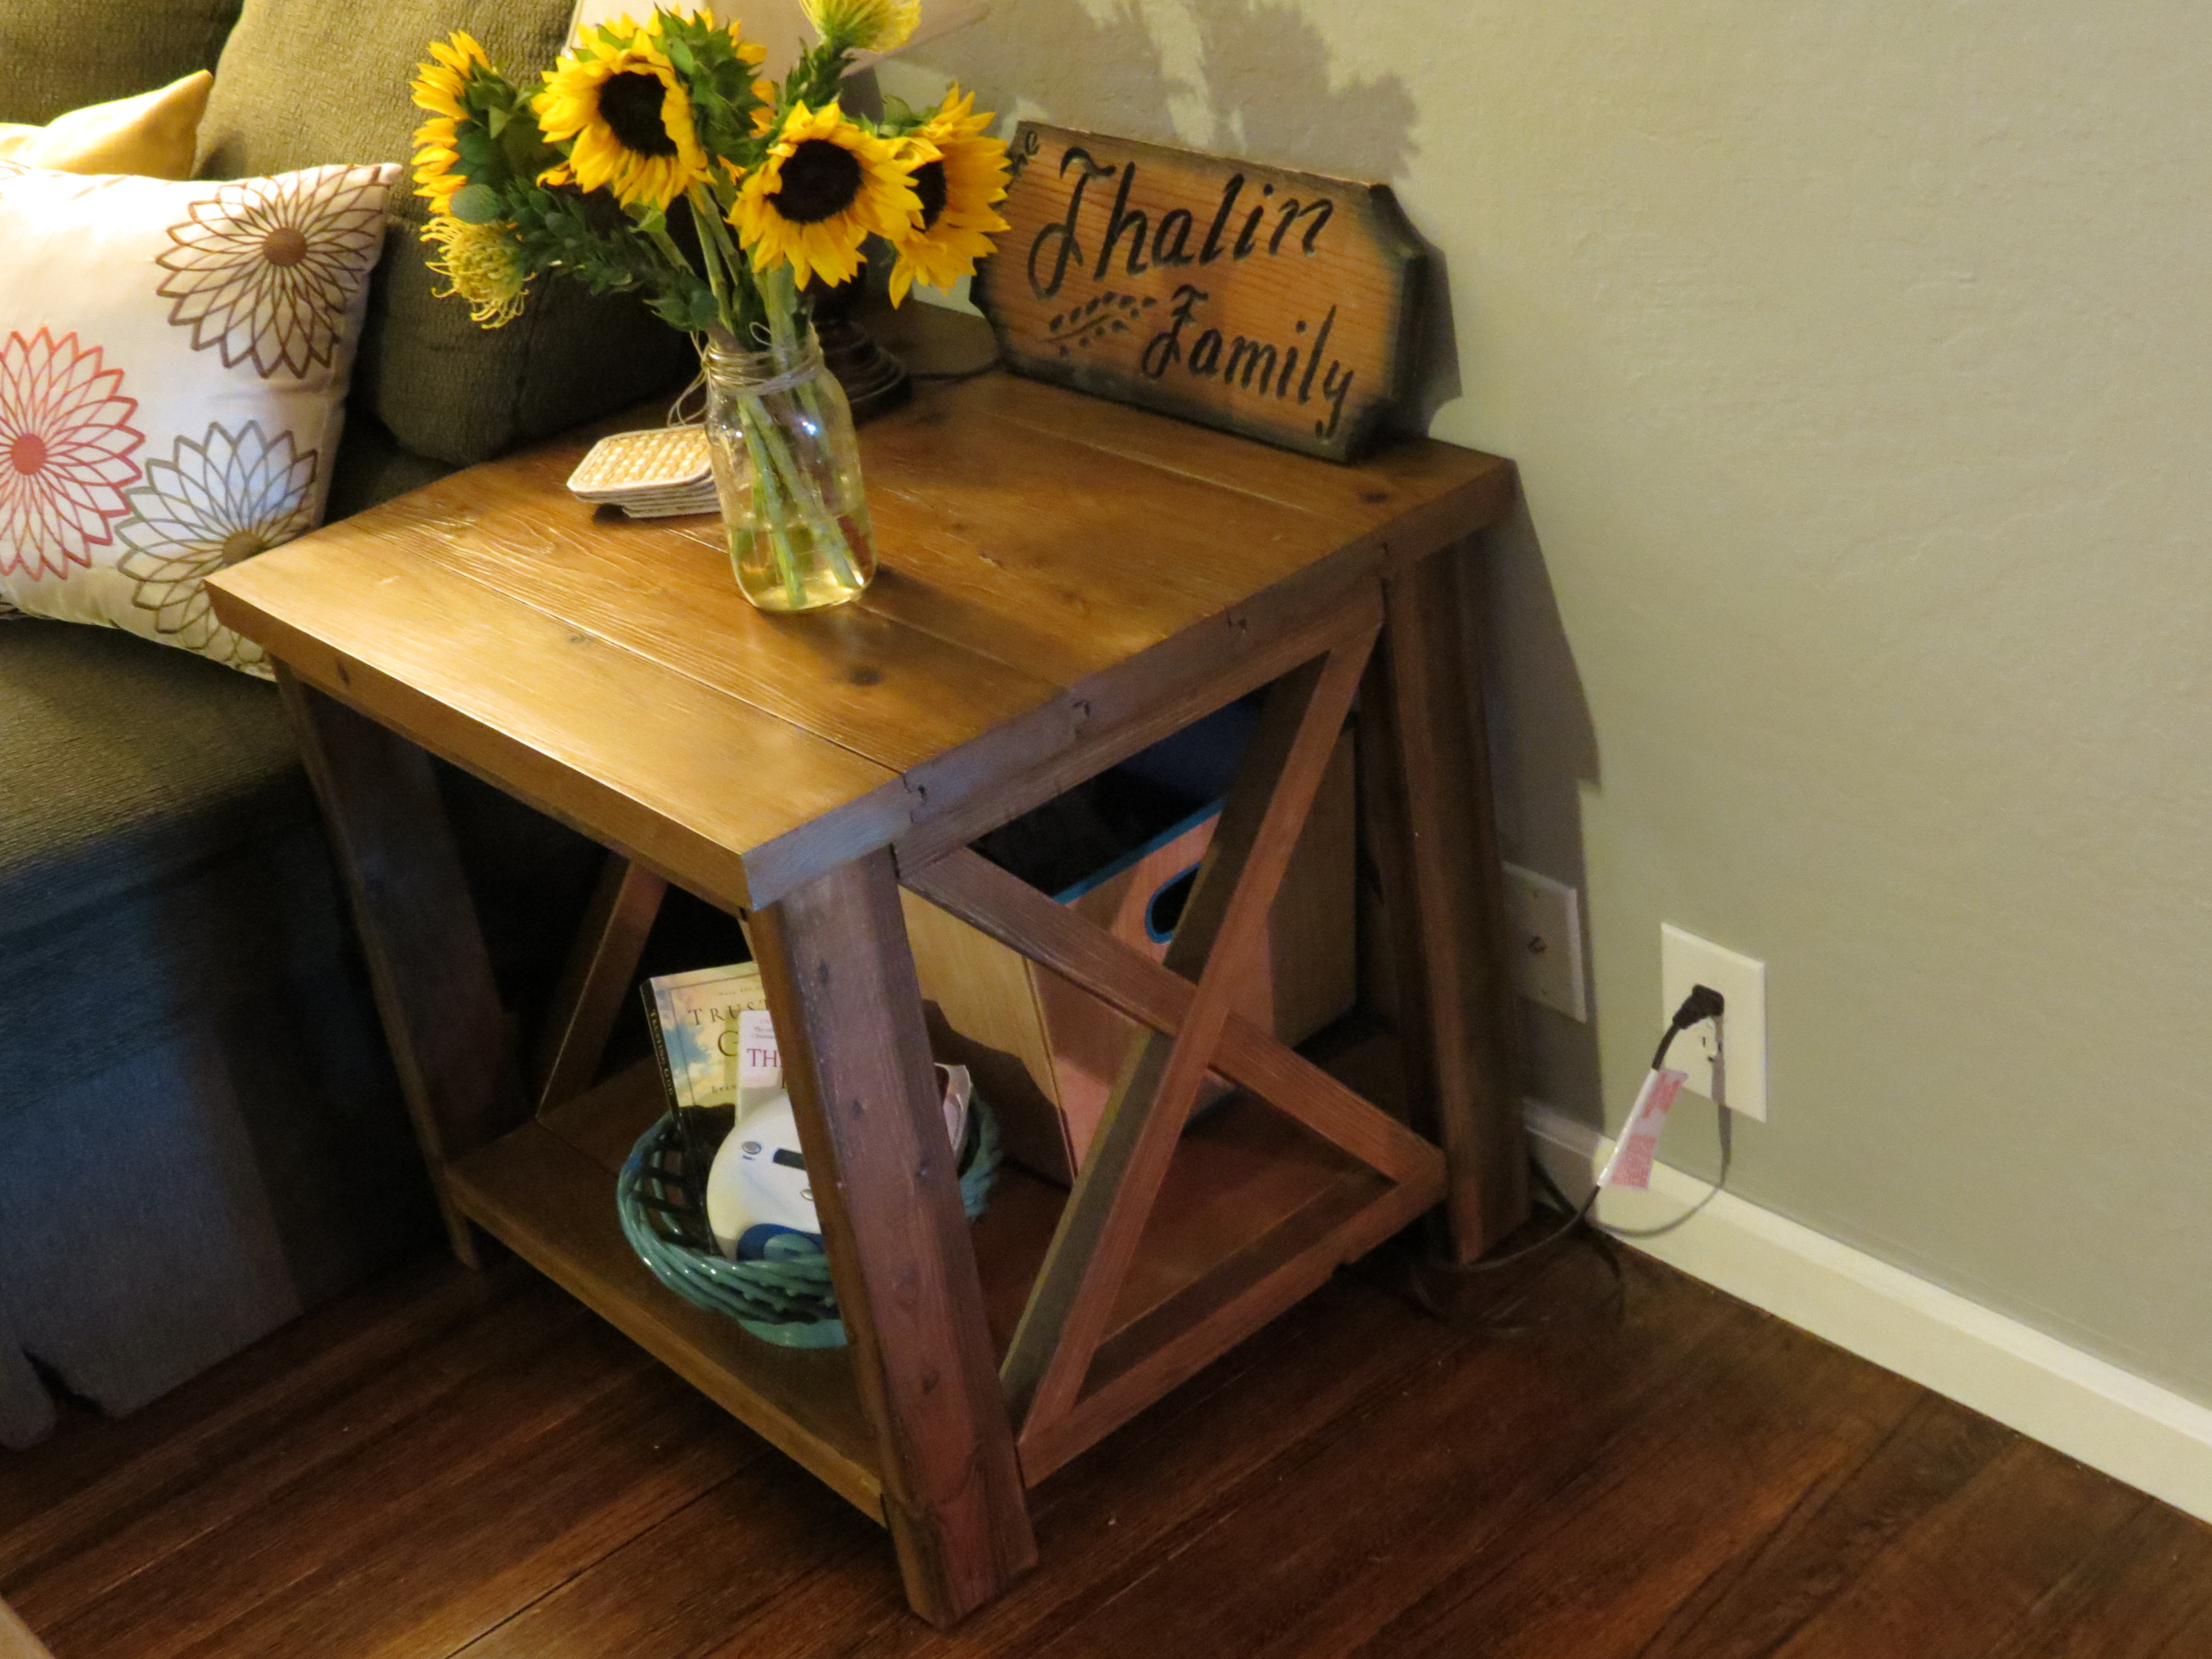
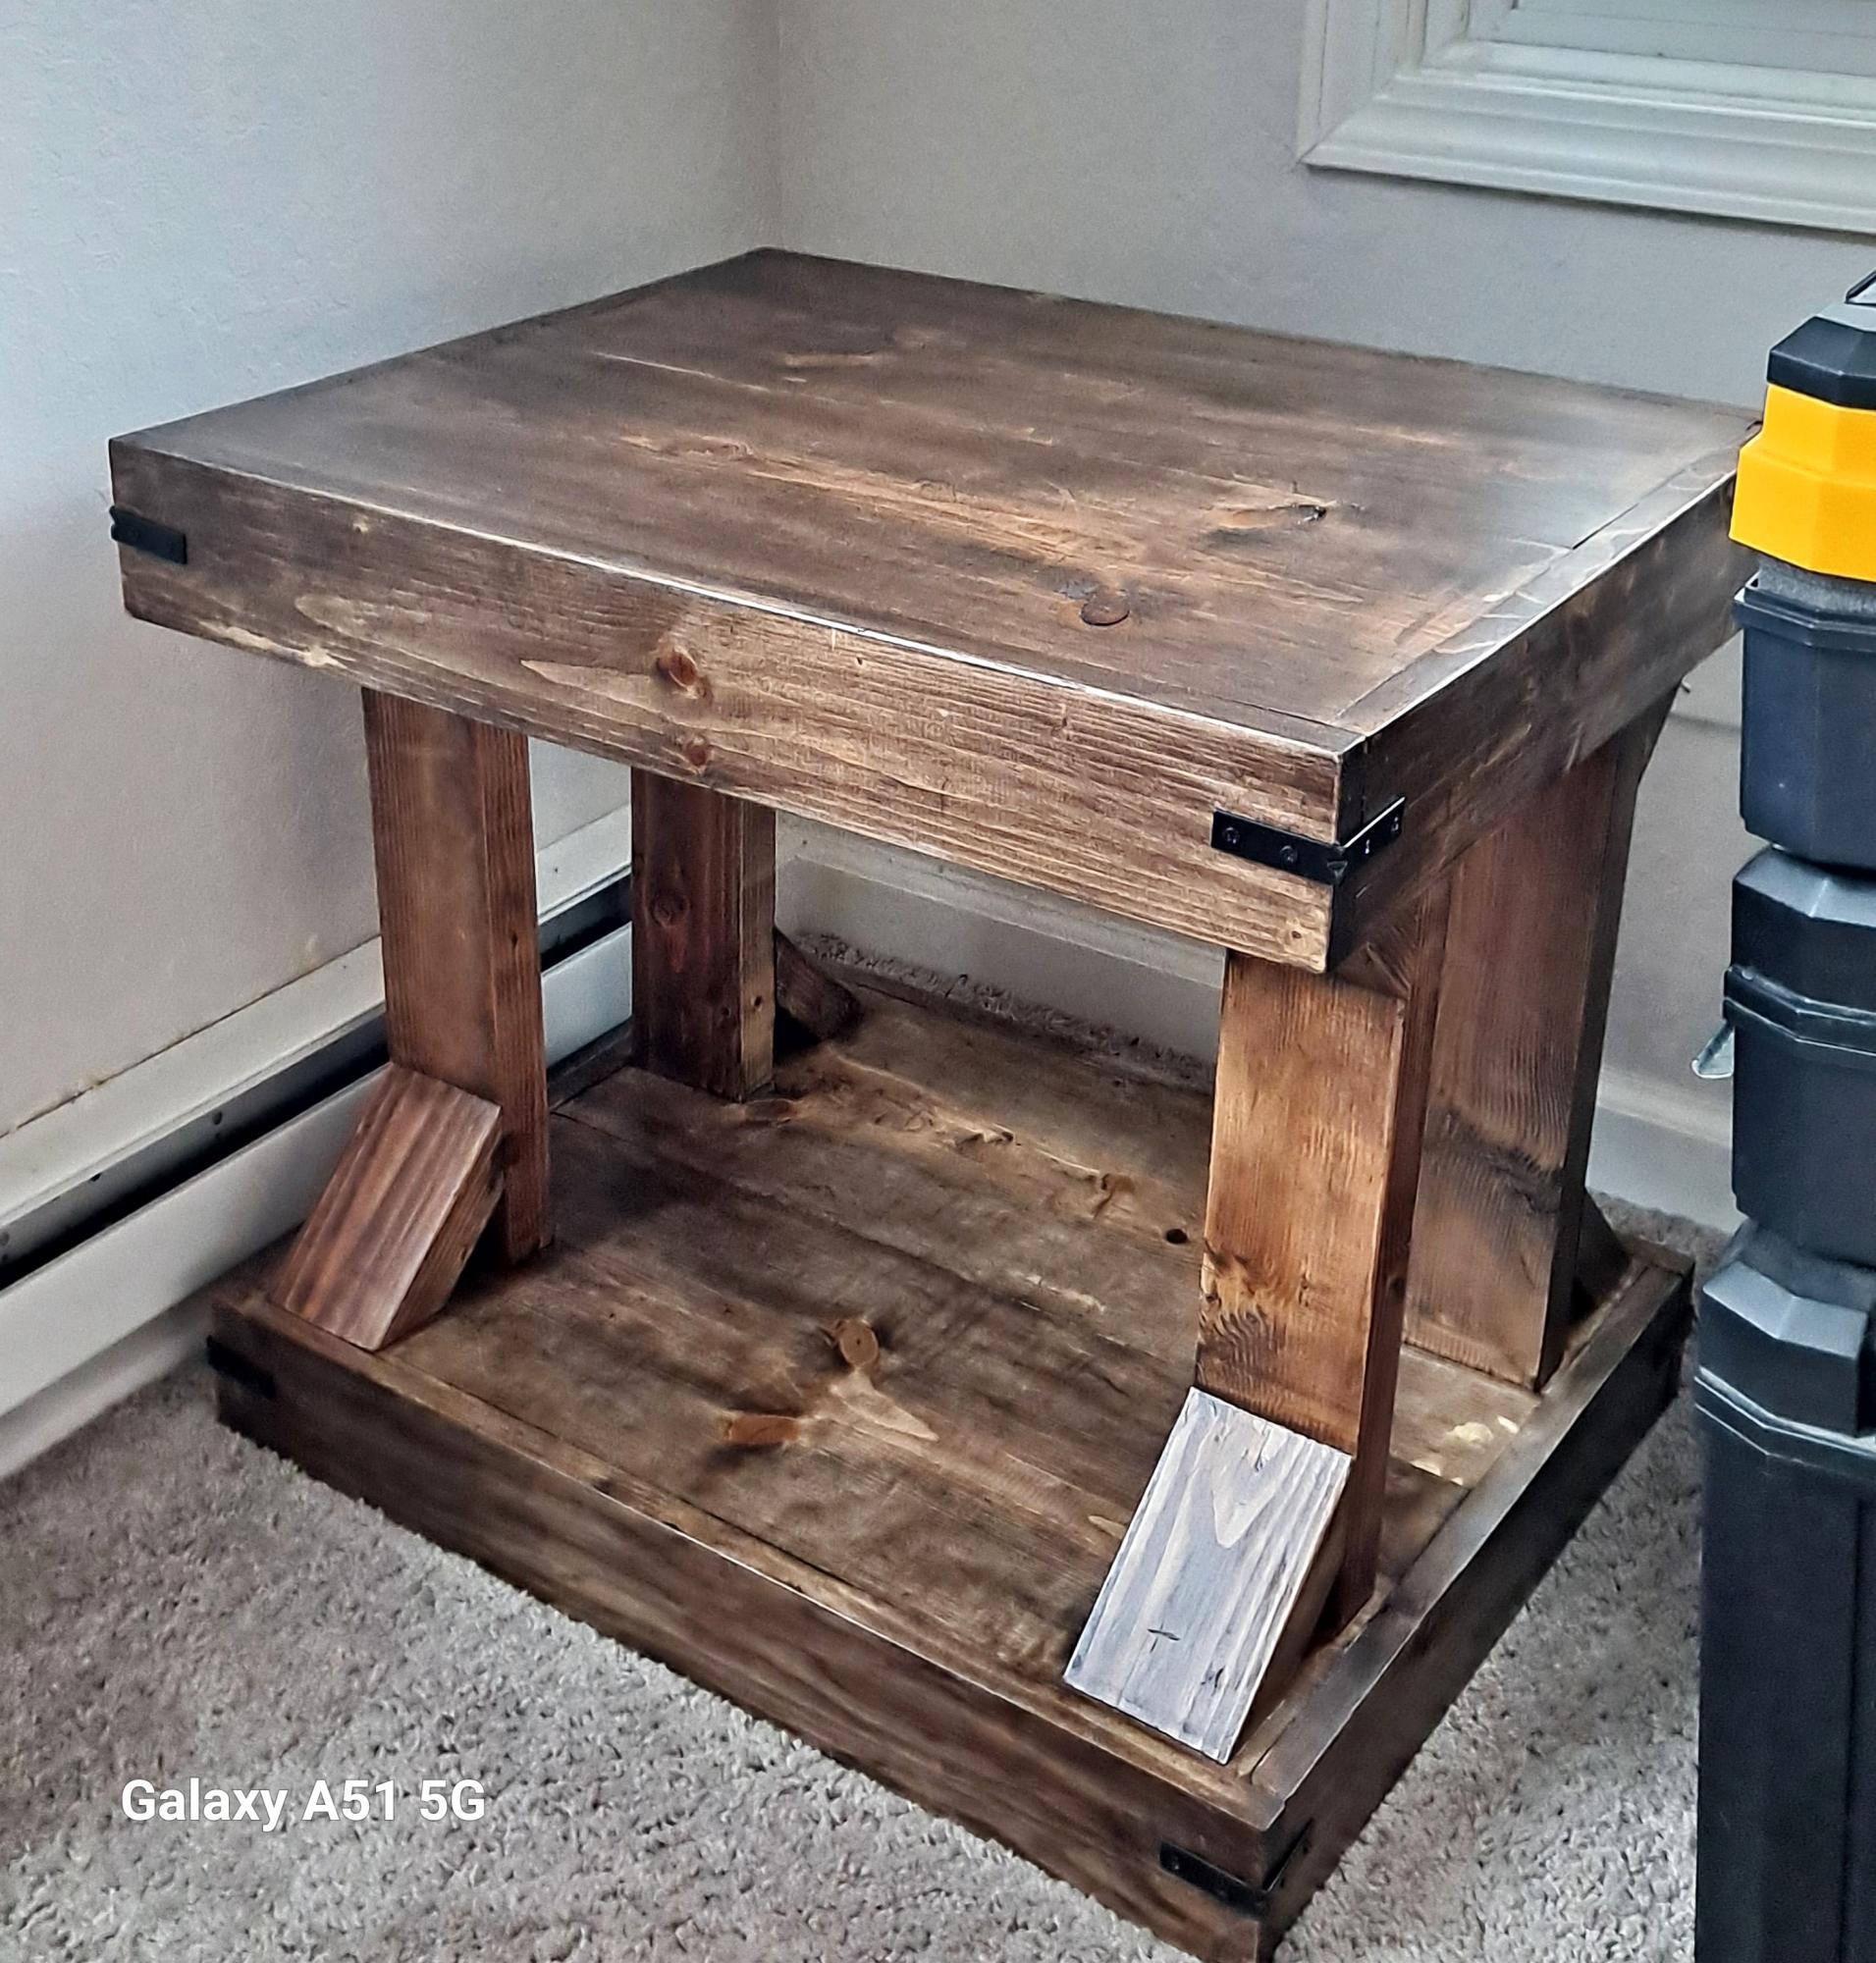
This was my first project from Ana's site and I have to say I was quite pleased how it turned out. This is a very sturdy/heavy duty end table that I am sure will last a very long time. I made mine essentially straight from the plans except changed the X's a little bit to compensate for my limited miter saw.
Built from Plan(s)
Estimated Time Investment
Weekend Project (10-20 Hours)
Finish Used
Steel wool in vinegar as an oxidation stain finished with Vermont Natural Satin PolyWhey.
Recommended Skill Level
Beginner
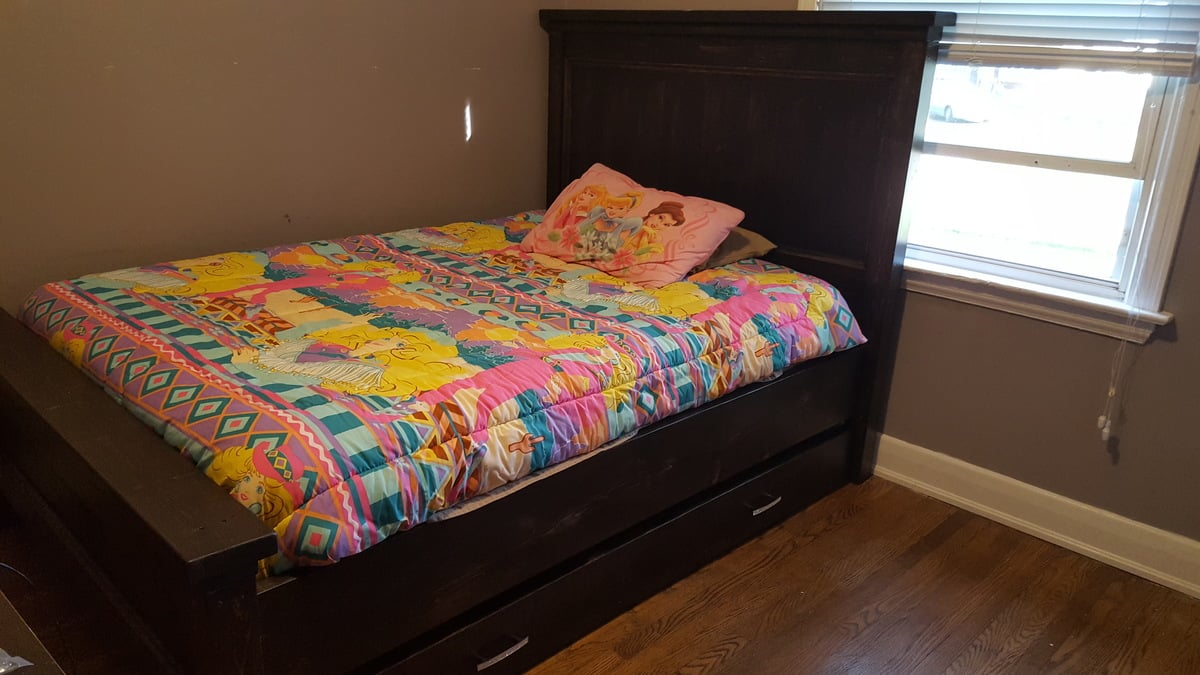
Double Farmhouse Bed with Trundle
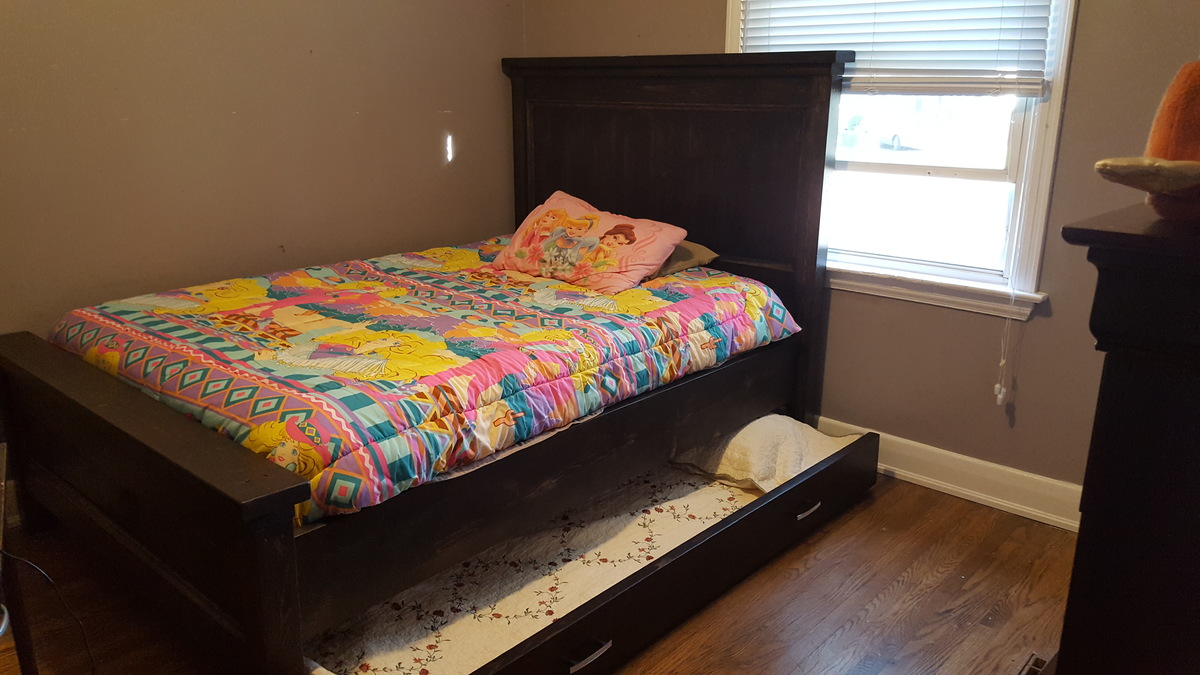
This was the first Farmhouse bed I have ever built! I am totally in love with it! I found the plans very easy to understand and follow. I used the Twin Farmhouse bed and adapted it for a double and also added some trim details in the head and foot boards. I also changed the way I attached my bed frame as I wanted to be able to take apart easily if ever needed. So I used 2 by 10s and attached them to my posts. I also made a trundle for underneath it. Finally totally complete!! Love the way it turned out.
Built from Plan(s)
Estimated Cost
300
Estimated Time Investment
Week Long Project (20 Hours or More)
Finish Used
Rustoleum Triple Thick, Expresso. Rustoleum Triple thick Clear Coat.
Recommended Skill Level
Intermediate
Comments

Thu, 10/06/2016 - 10:10
Great job! Glad the plans
Great job! Glad the plans were helfpful! Love the trundle.
Outdoor rolling bar top

We had some leftover granite from an outdoor kitchen build and wanted to maximize the use of it. We loved the look of a rustic table from Pottery Barn and set out to find something that was asking the same aesthetic. I came across the Jilly and Mia workbench console and thought it would work great with some minor modifications. I shortened the overall length and height, went with some heavy duty casters to support the weight of the granite, and reinforced the cross beams that would support the 3/4" plywood sheet and granite. I went with cedar for this build since it was outdoors and I'll finish it with a clear sealant.

Built from Plan(s)
Estimated Cost
$300
Estimated Time Investment
Day Project (6-9 Hours)
Recommended Skill Level
Intermediate
Comments
Vertical Flower Garden

Armoire
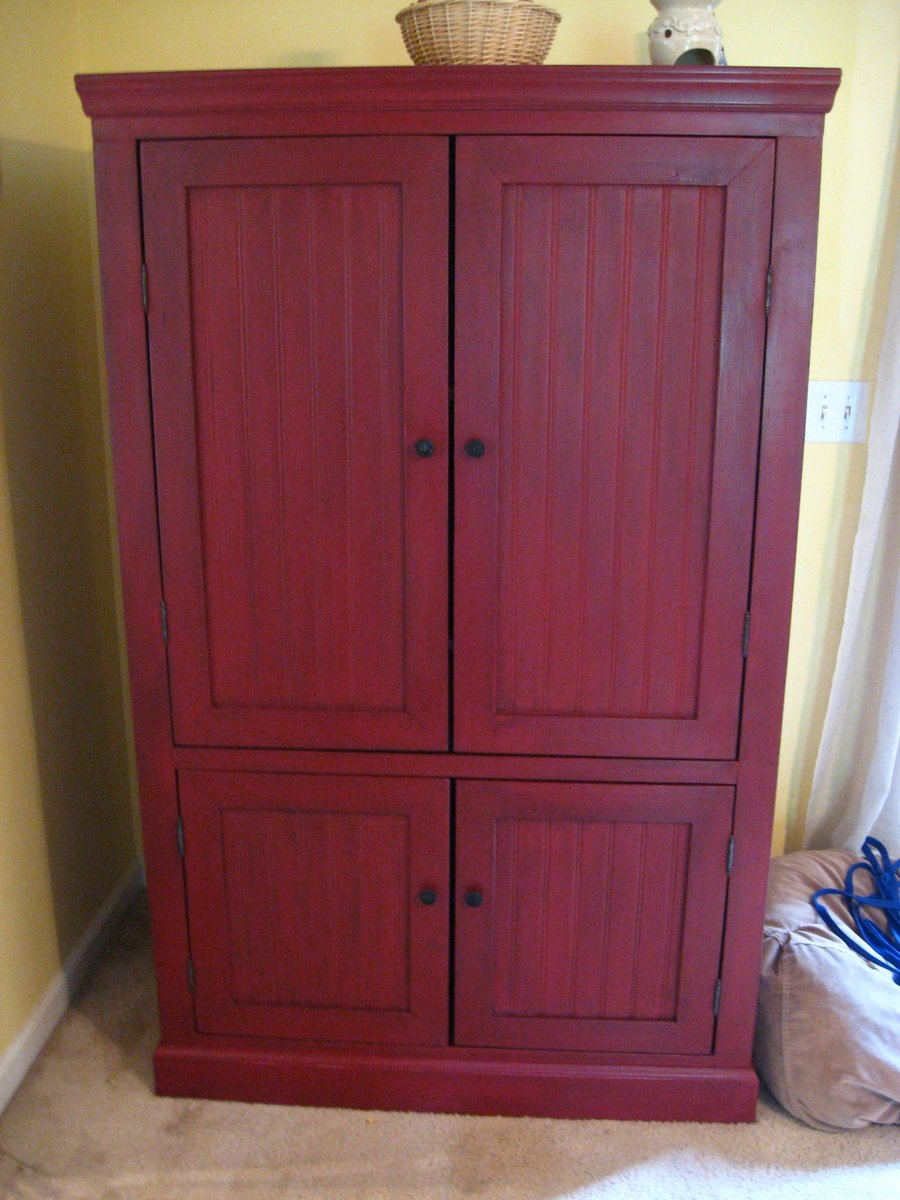
This was the nursery armoire design we used. My husband modified it slightly. Beautiful isn't it.
Estimated Cost
$150-$175
Estimated Time Investment
Week Long Project (20 Hours or More)
Finish Used
paint color is valspar cabin red, with antique glaze over it.
Recommended Skill Level
Intermediate
Comments
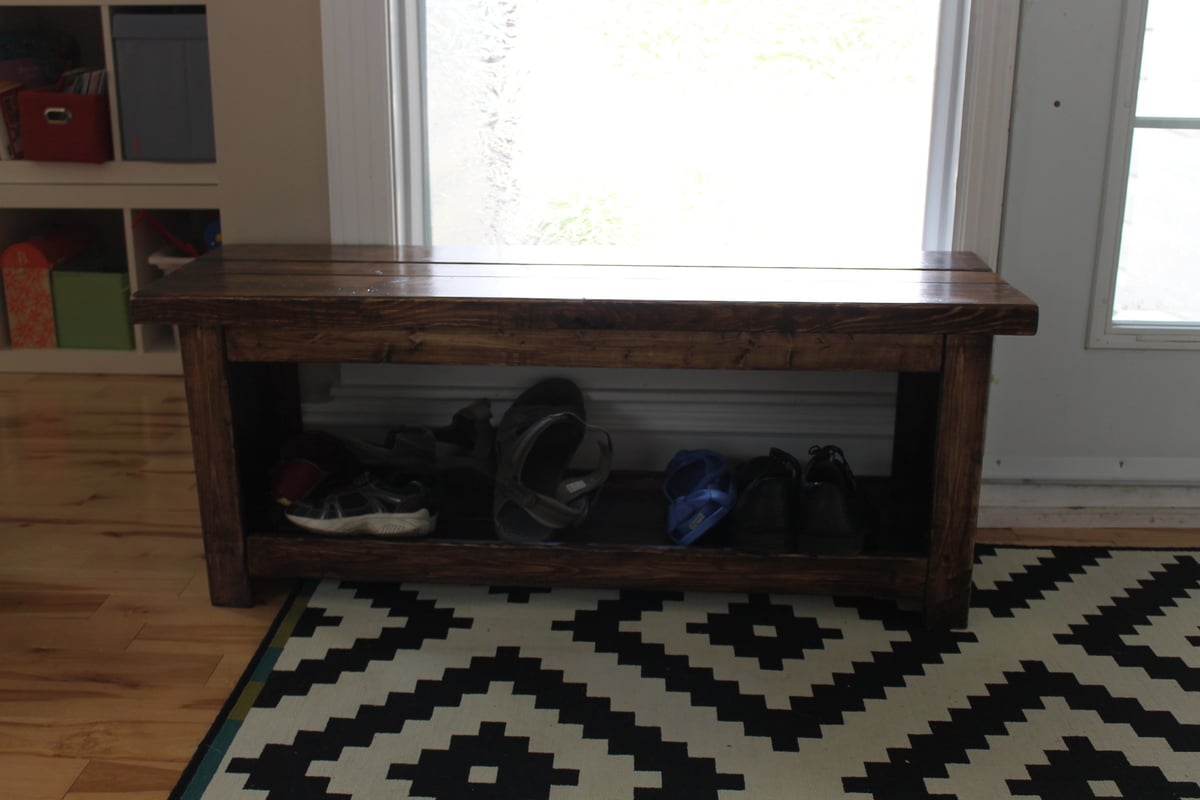
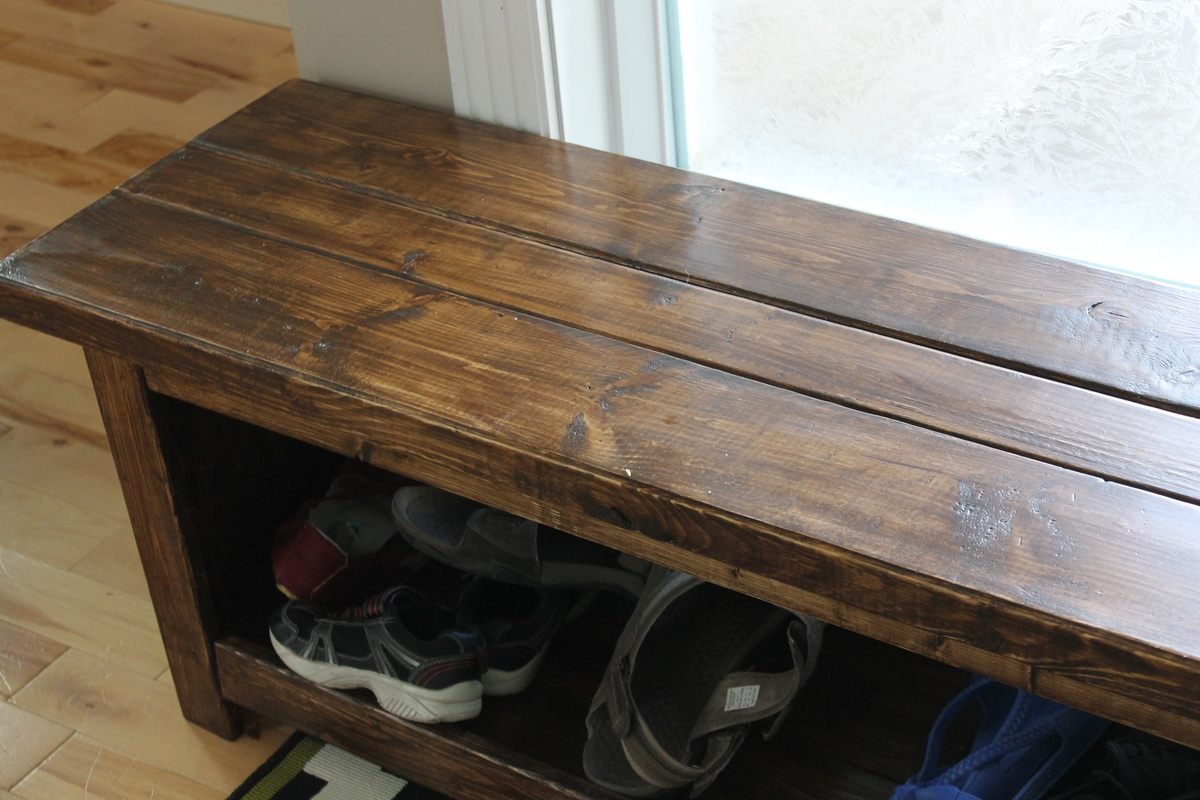
Spa bench
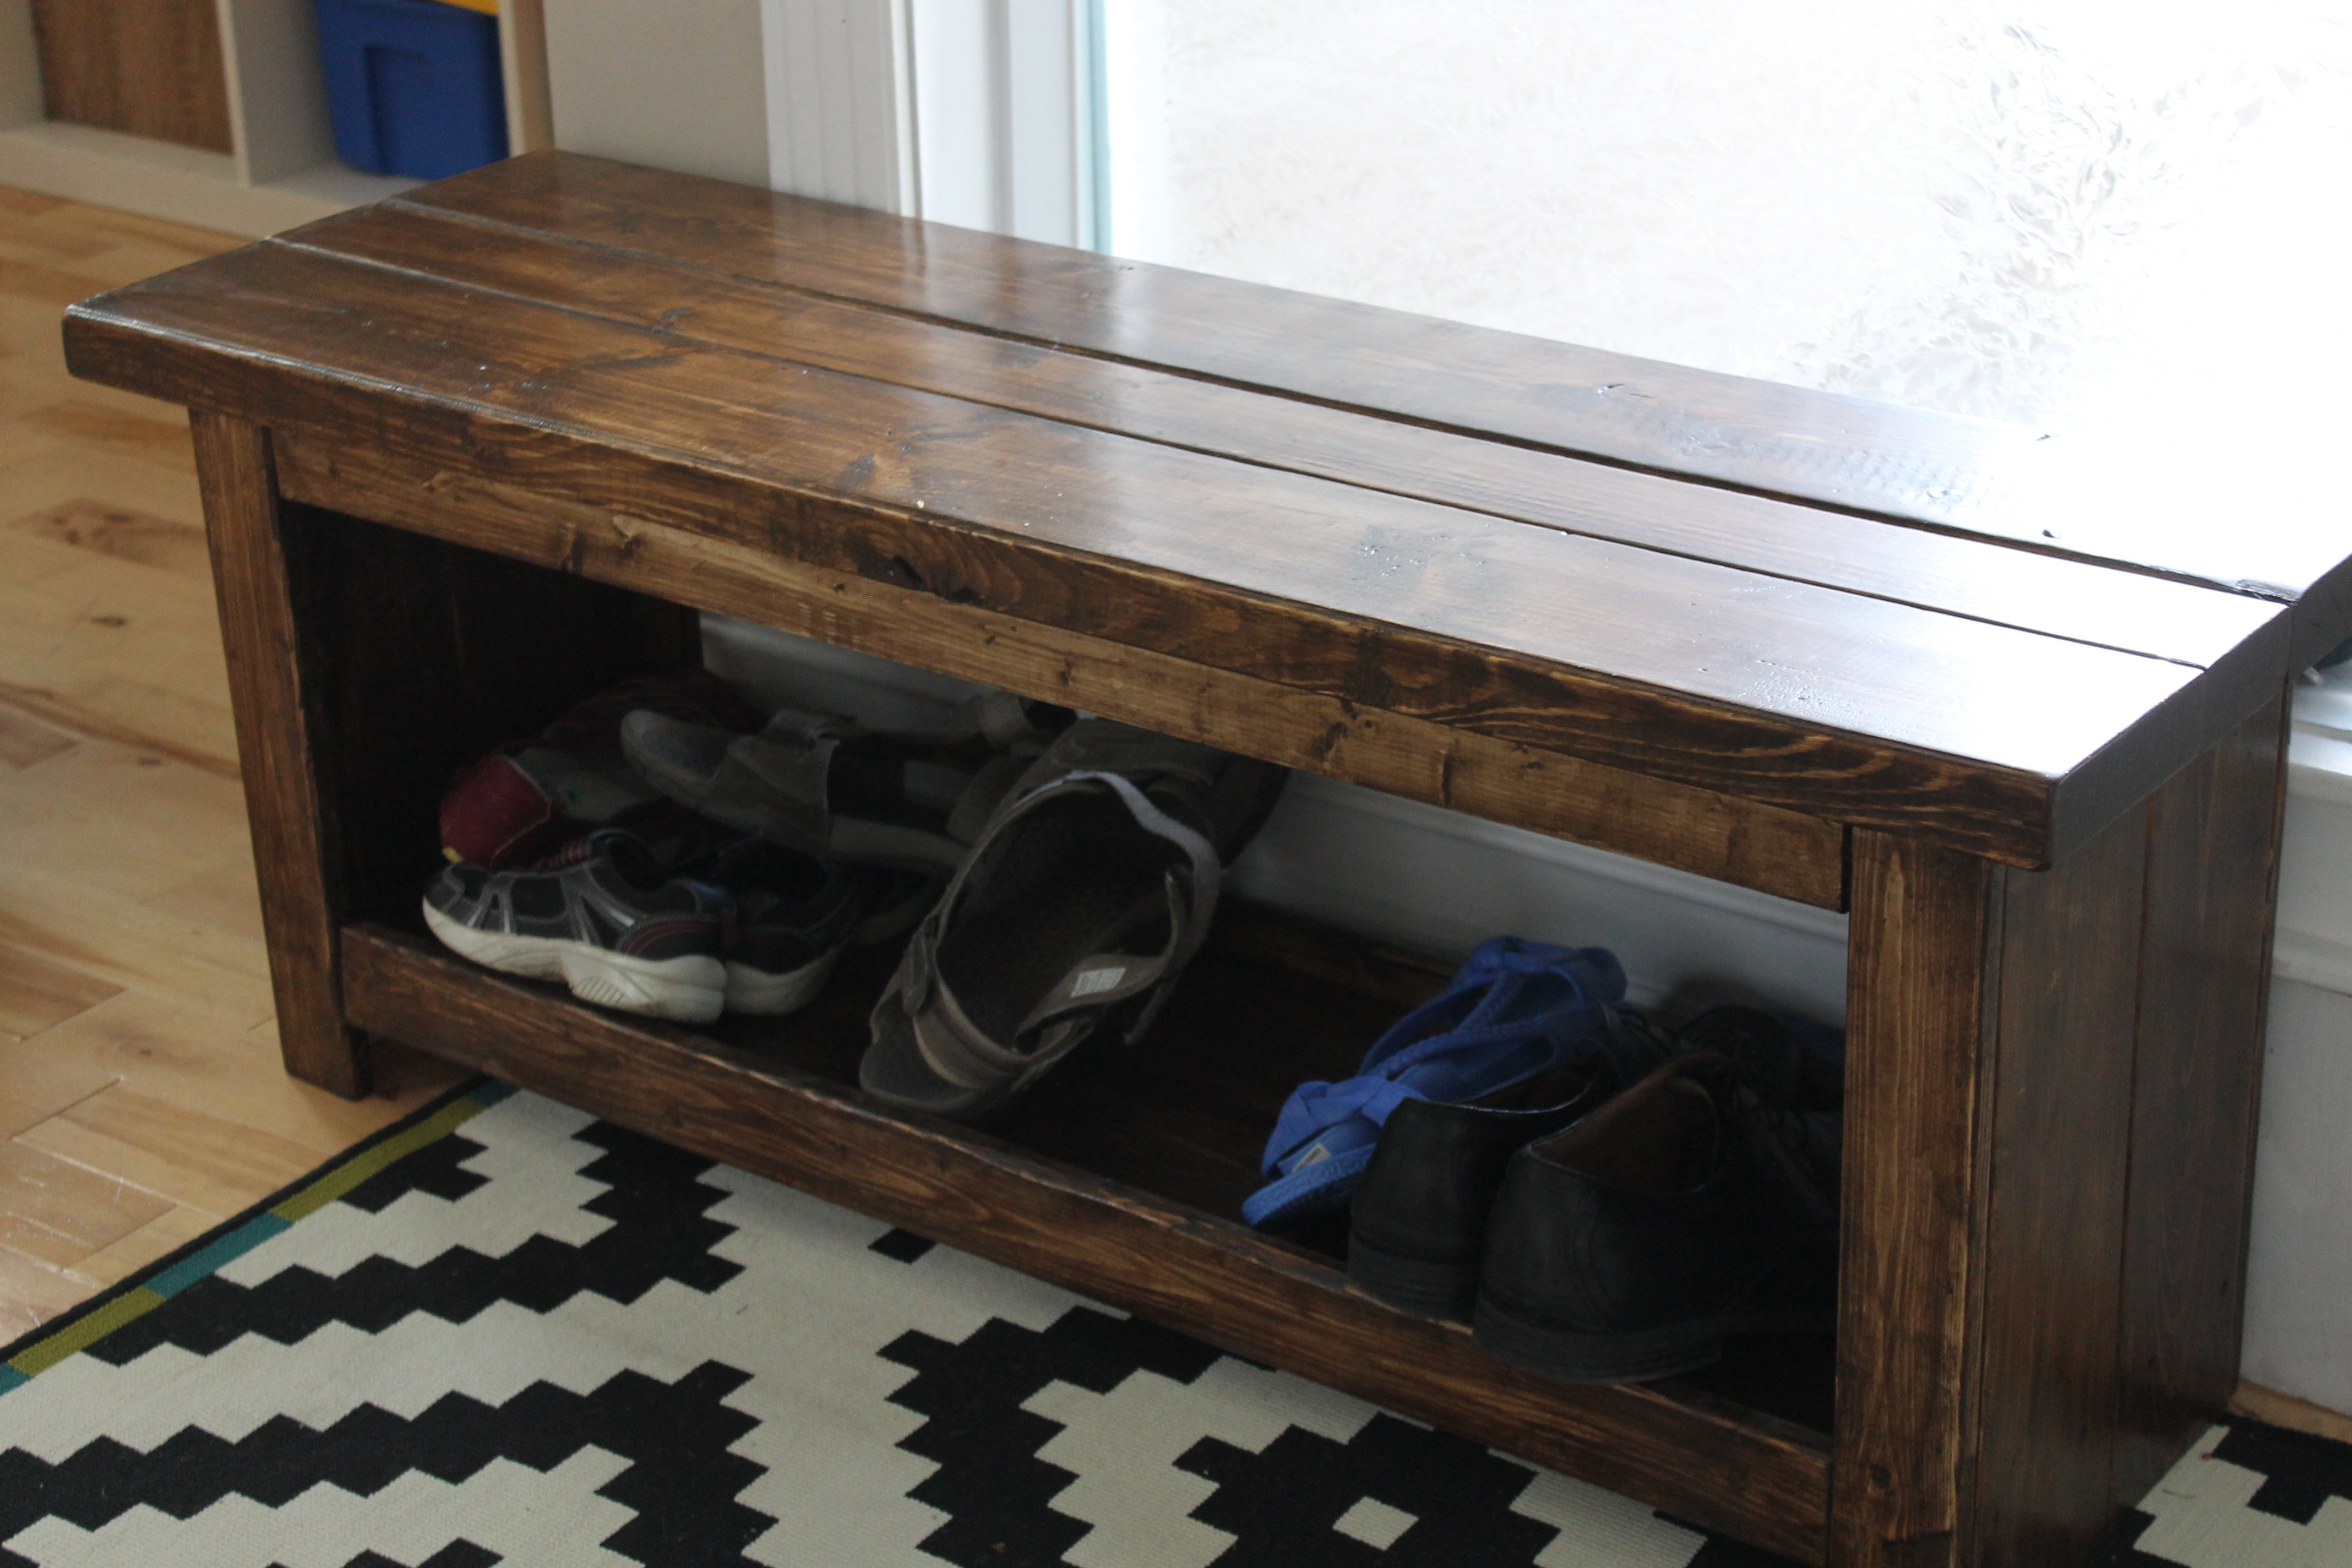
I had left over wood from previus projects and needed an entry bench. The closest i made my plan inspired by the spa bench.
Built from Plan(s)
Estimated Cost
20$
Estimated Time Investment
An Hour or Two (0-2 Hours)
Finish Used
One coat of dark walnut varathane wood stain applied with an old t-shirt. Followed by 2 coats of varathane satin professional finish. I sanded between the finised coats.
Recommended Skill Level
Starter Project
Comments
Tue, 03/06/2018 - 19:18
Love! Sides?
This is exactly how I was hoping to modify this! What did you use for the sides? Is the top 2 x 6? Thank you in advance!
Tue, 03/06/2018 - 19:20
LOVE! Sides?
This is exactly what I wanted to do! What did you use for the sides? Is the top 2 x 6s?
In reply to LOVE! Sides? by andimat
Tue, 03/06/2018 - 20:37
I believe the top is two 2x6s
I believe the top is two 2x6s, with a 2x4 in the middle. The legs look to be two 2x6s, and there appears to be a 1x3 fascia around the entire front (legs, bottom, and skirt) which makes the legs look thicker than they are.
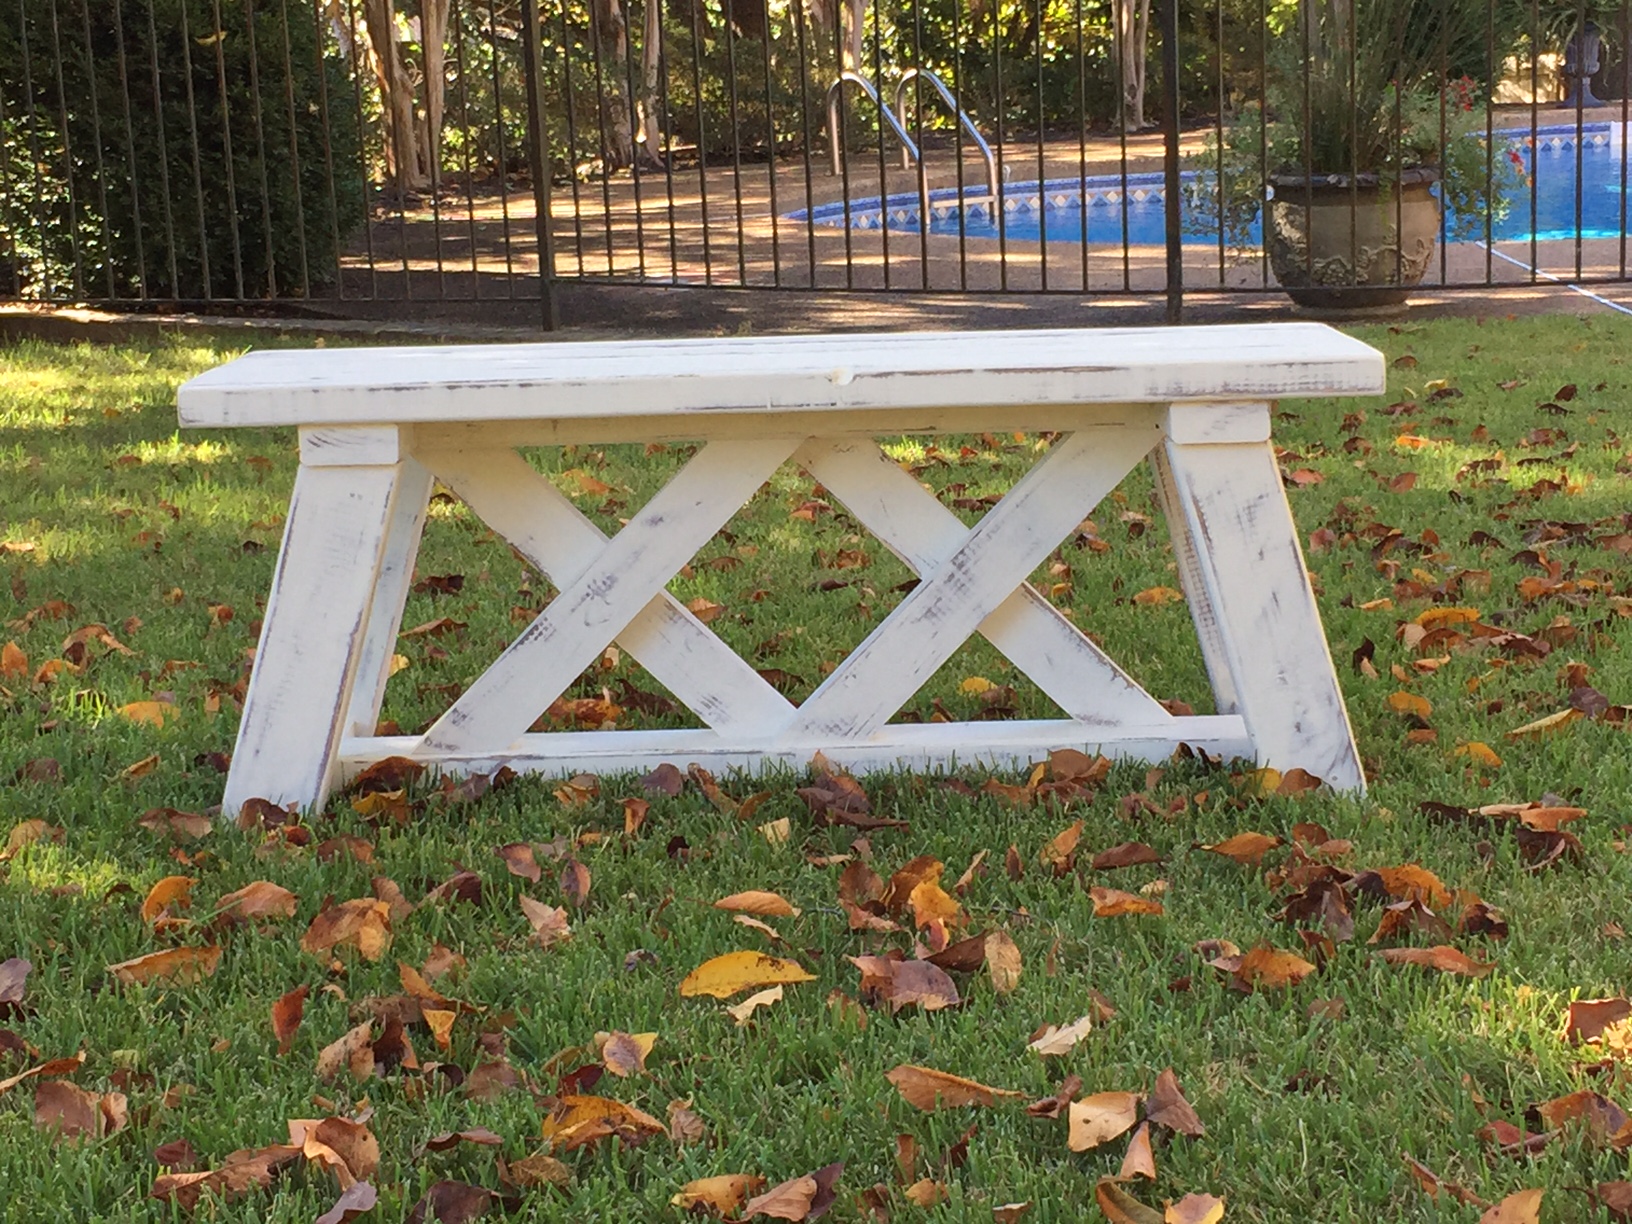
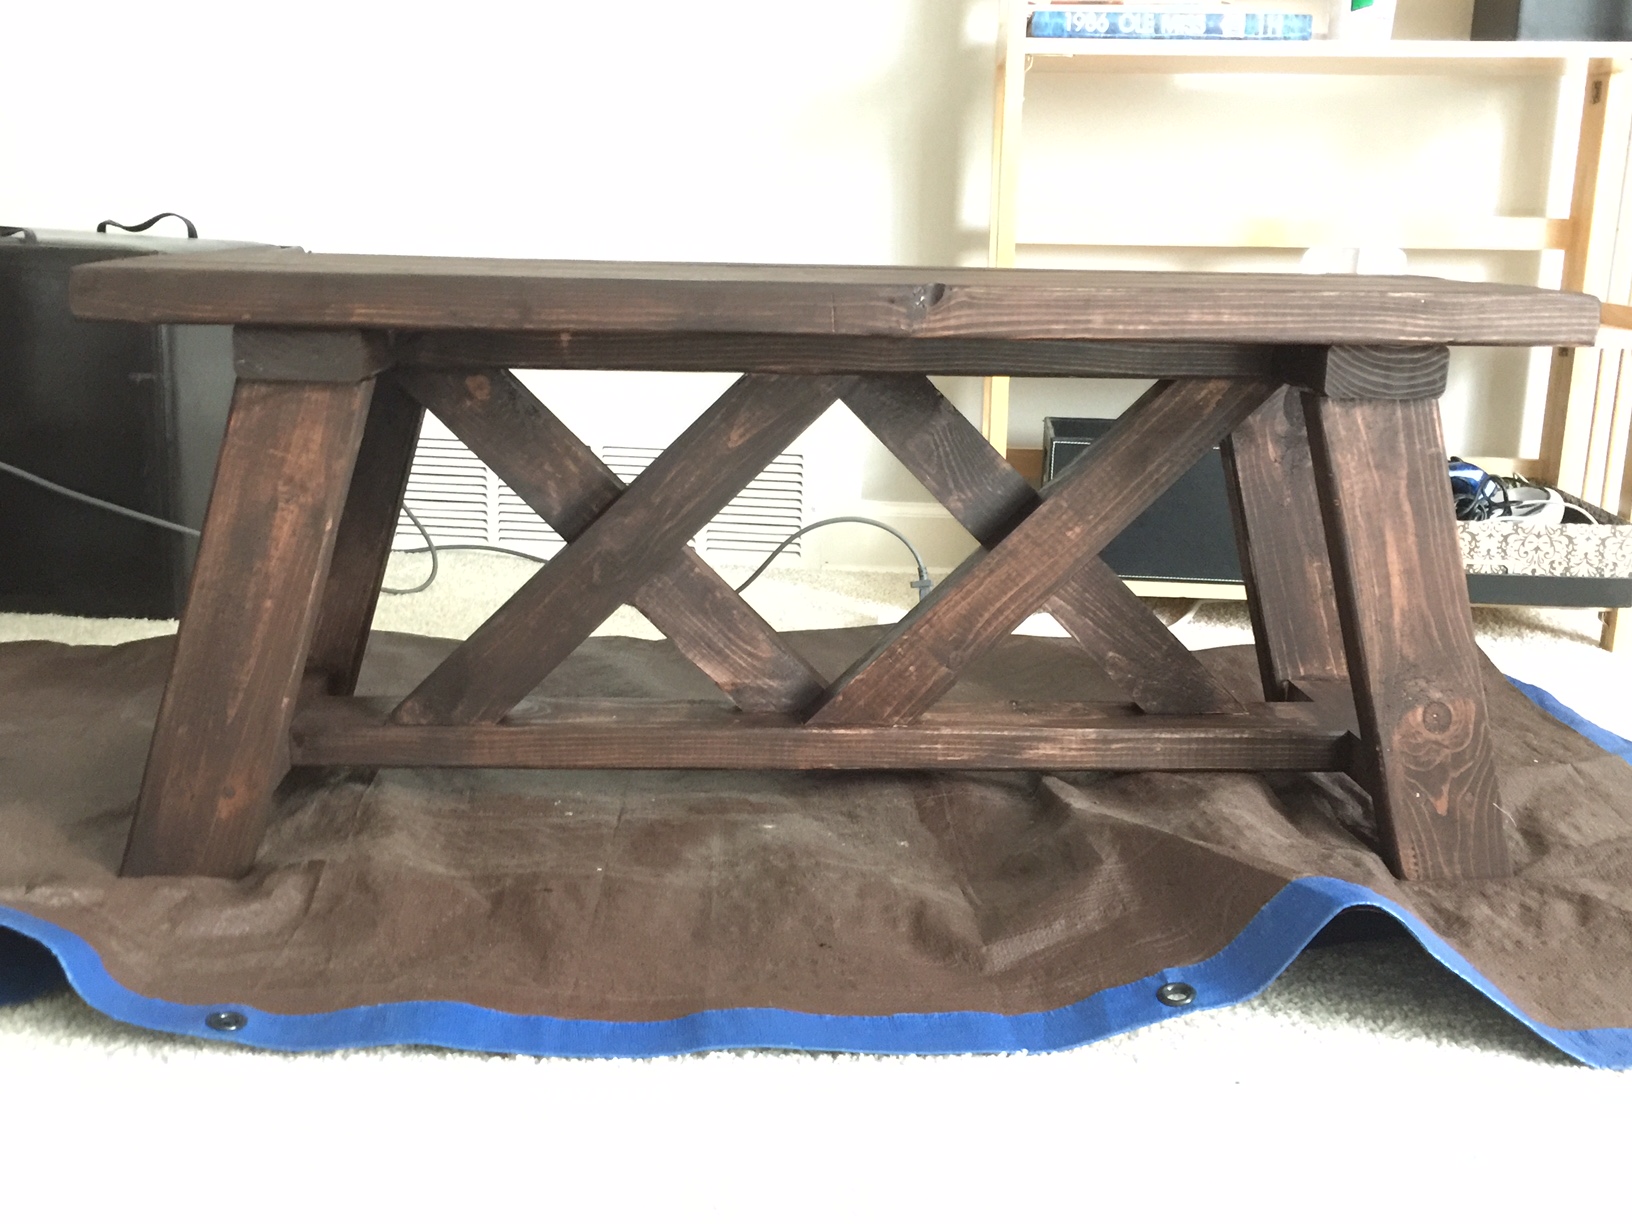
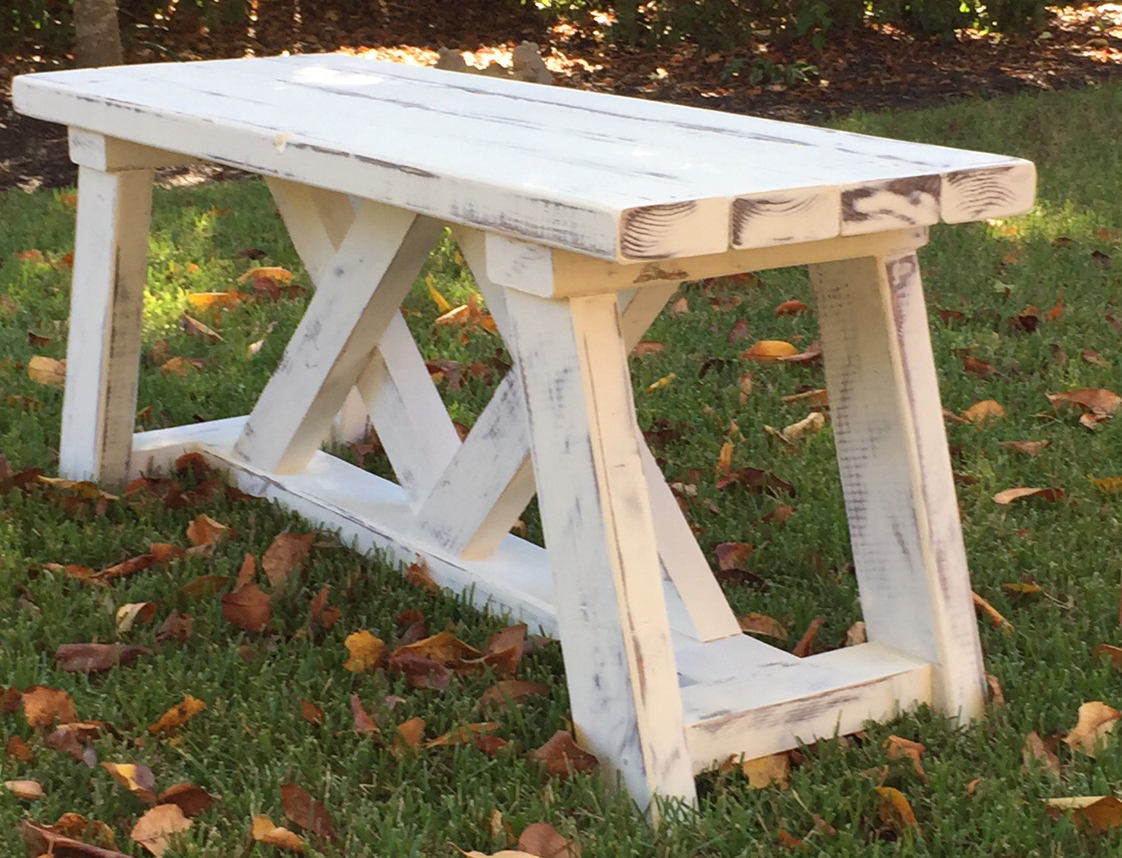
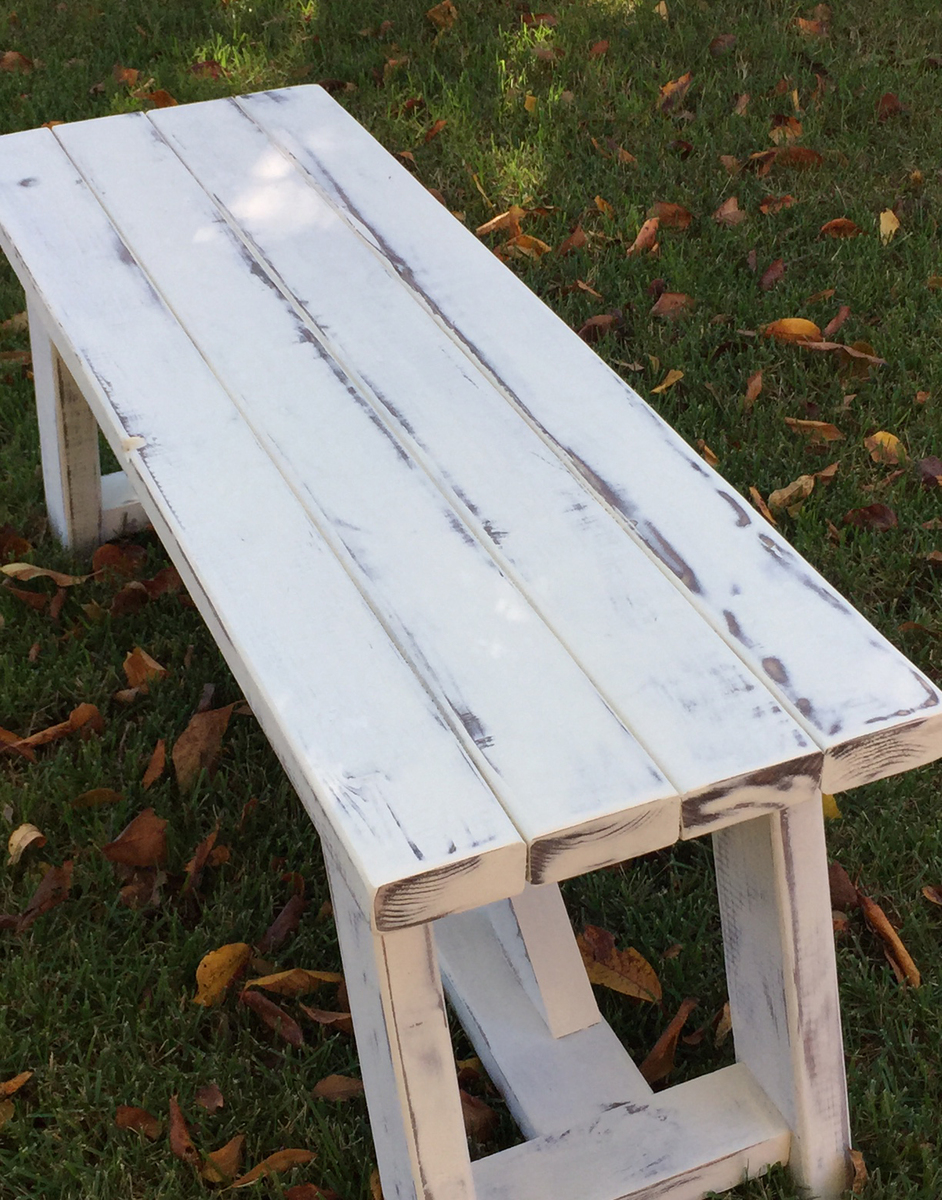
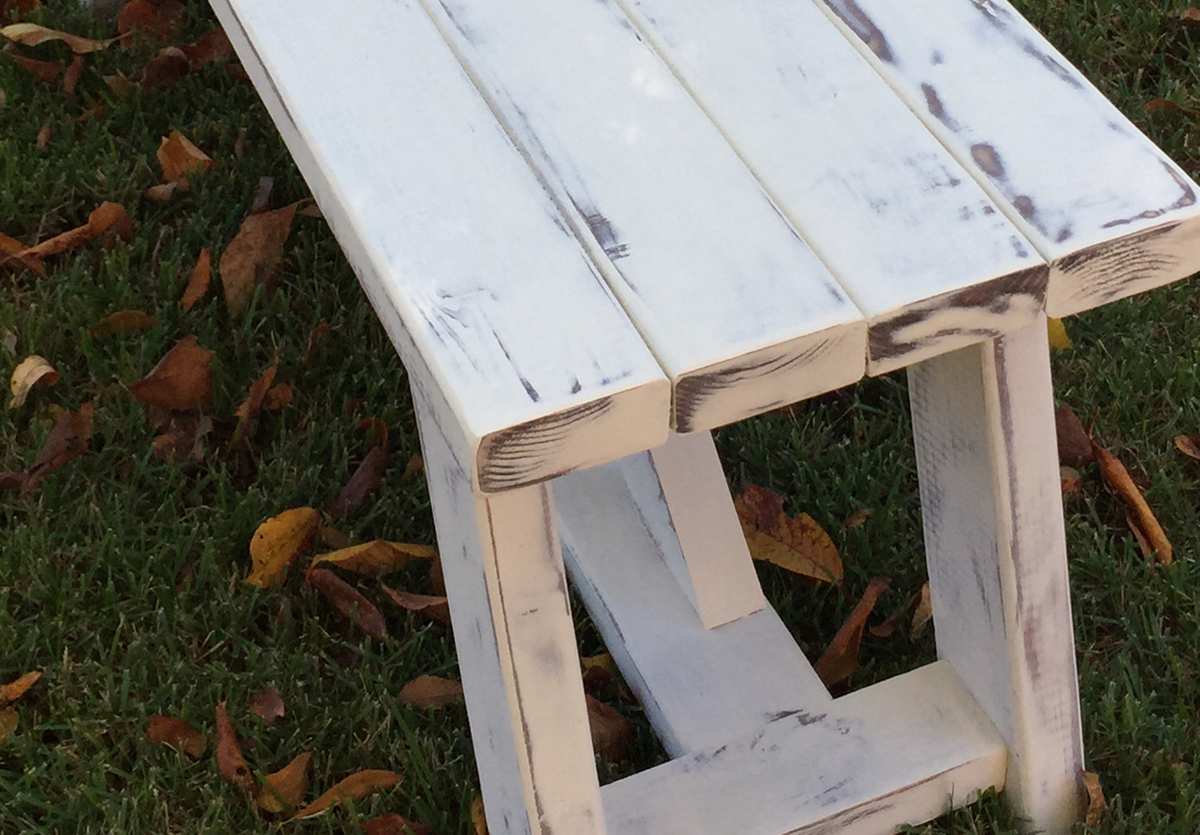
Double X Bench
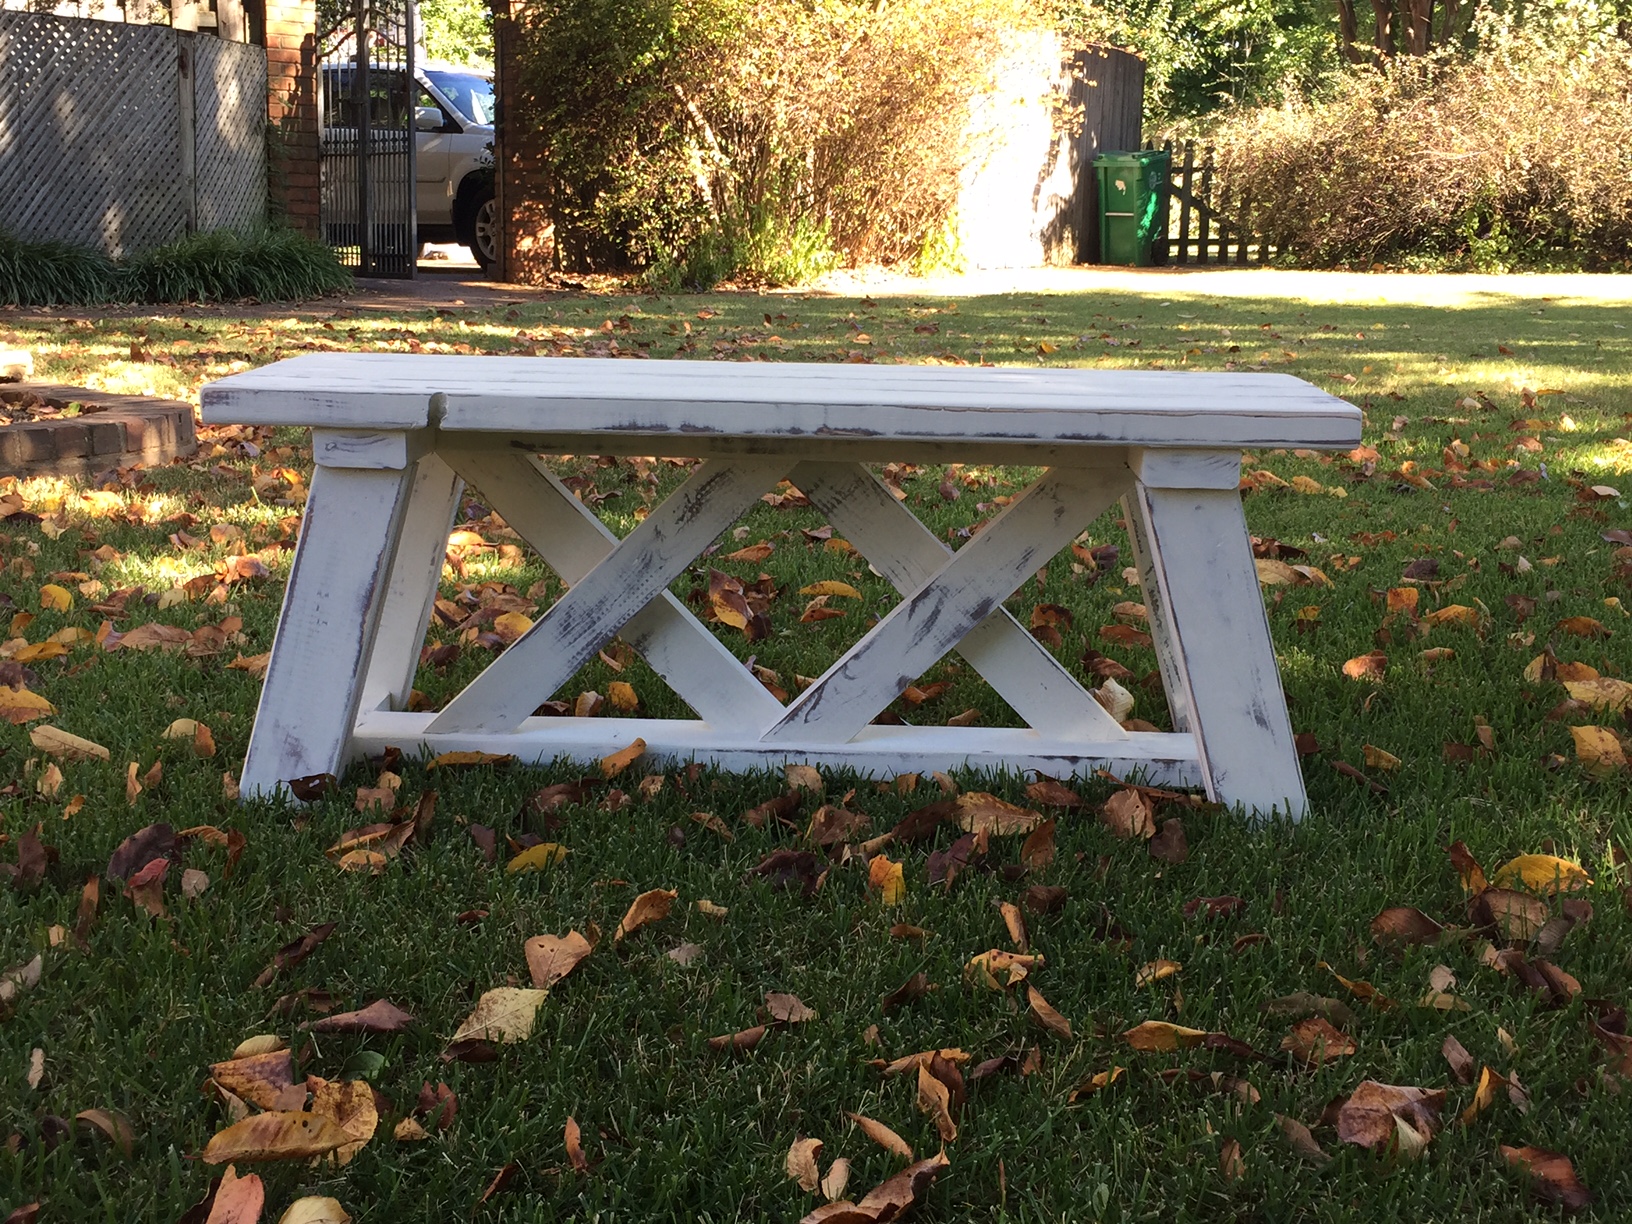
This was the second double x bench that I made. It was very simple to make. It took me around 3 hours to build it and another 2 hours to sand, stain and paint it (this does not include the 1 hour between coats that I allowed them to dry). I used Annie Sloan Old White Chalk Paint and General Finishes Java Gel stain. Annie Sloan Chalk paint does NOT need a topcoat if it is being used outside.
Built from Plan(s)
Estimated Cost
$15 - i already had the stain, paint and screws.
Estimated Time Investment
Afternoon Project (3-6 Hours)
Finish Used
Annie Sloan Old White Chalk Paint
General Finishes Java Gel
General Finishes Java Gel
Recommended Skill Level
Beginner
Comments
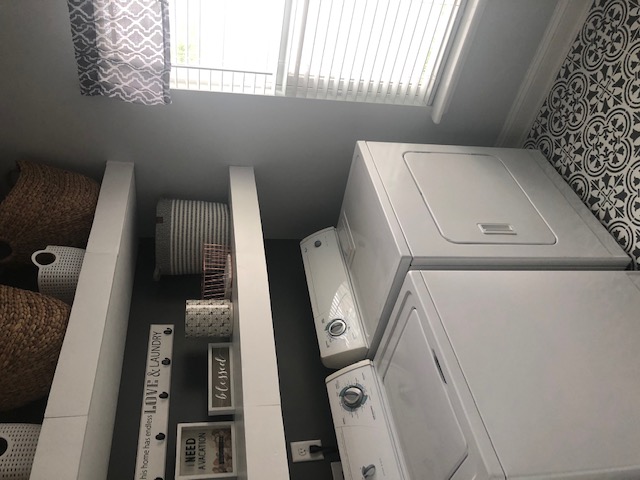
Laundry Room Makeover w/Drying Racks
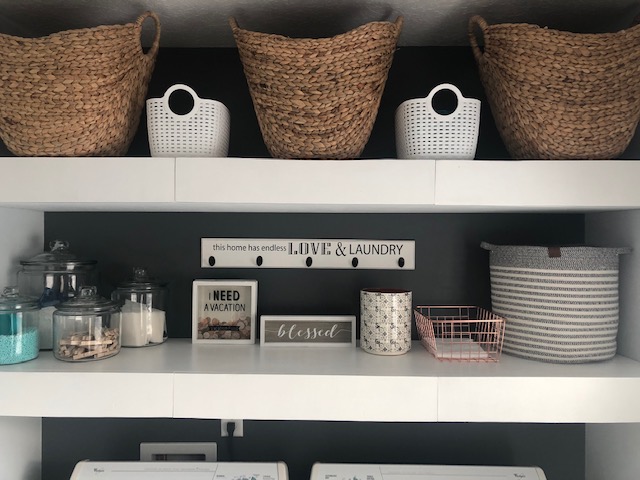
Shelves added the right touch. Laundry room complete!

Built from Plan(s)
Estimated Cost
$125 Total
Estimated Time Investment
Afternoon Project (3-6 Hours)
Recommended Skill Level
Intermediate
Farmhouse Side Table -First Class Project
Modern farmhouse side table. I chose this as my first project for woodworking class!
Mary Healy
Built from Plan(s)
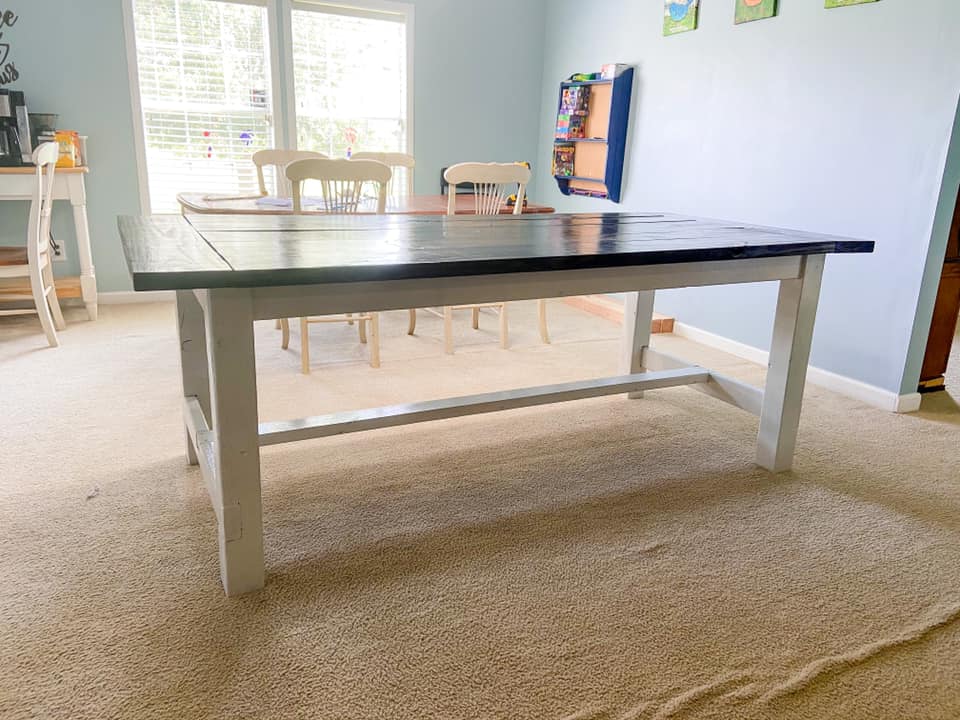
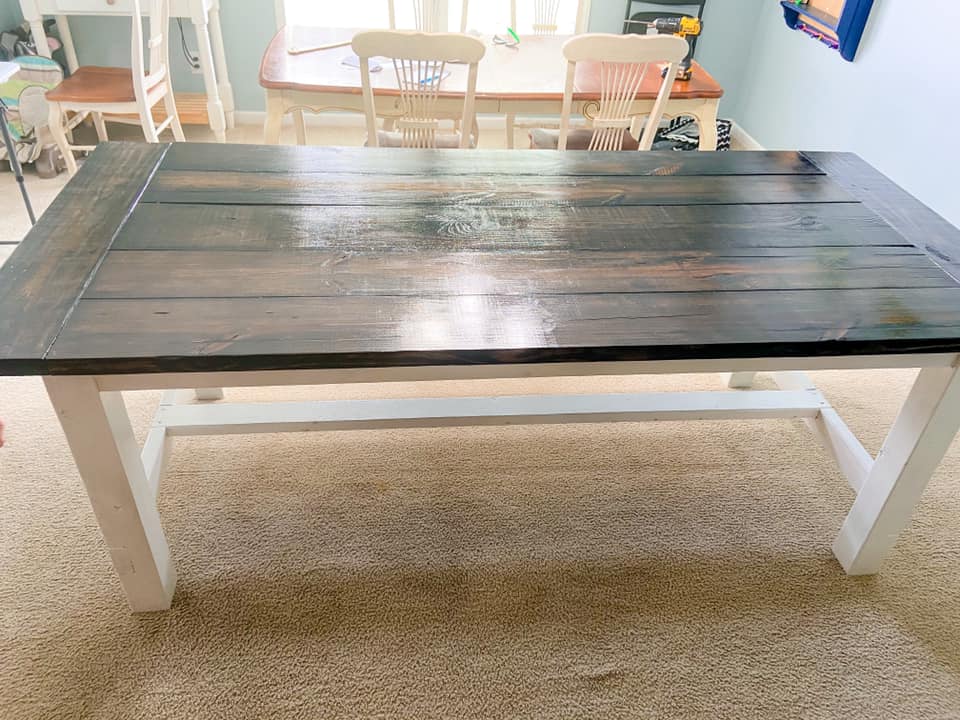
Farmhouse table
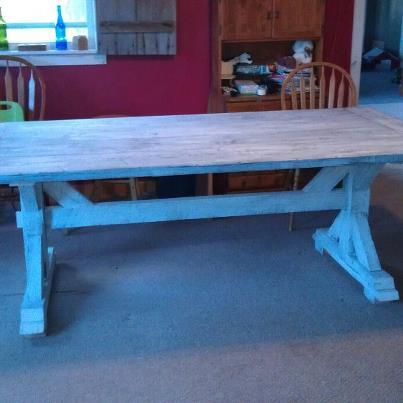
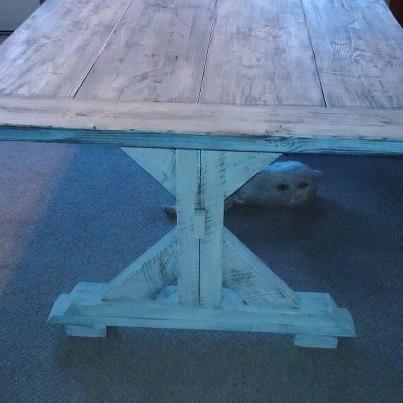
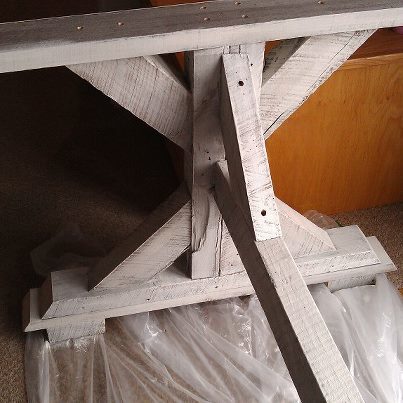
This is my take on the farmhouse table featured here on this site. The cut list was modified since I used reclaimed pallet material for my table base. I also used 2x12's for the top since I wanted mine a little bigger then the one on here. I took the extra time and effort to also add breadboard ends just to add the finishing touch to the top. The finish I used was simply whitewash for the base, the top was a combination of oxidation, black wash, white wash and distressing with misc. tools from the garage. We had fun (my husband helped)

Built from Plan(s)
Estimated Cost
$60
Estimated Time Investment
Week Long Project (20 Hours or More)
Finish Used
white wash for base, distressing then black wash and white wash for top. Because I wanted the top to look like it matched the base (mixing wood types adds a challenge) we took time to really distress the top using multiple tools: like a belt sander, chains, planers, and hammers and really added character. After this I oxidized with the vinegar and steel wool mixture and let that dry. Then I went back and used a very diluted black wash to really darken the wood. After that dried I did a white wash and lightly added white to acheive the look I wanted. After that dried I sanded to distress some more and love the results. Practice on scrap material to see what you like most.
Recommended Skill Level
Intermediate
Comments
Wed, 02/19/2014 - 14:11
Fantastic
What a beautiful table. I would love to make one but can you please tell me how you attached the end panels of wood at right angles to the others and then how you attached the table top to the bases as I see no signs of nails or screws? Many thanks
Fancy X Farmhouse Table
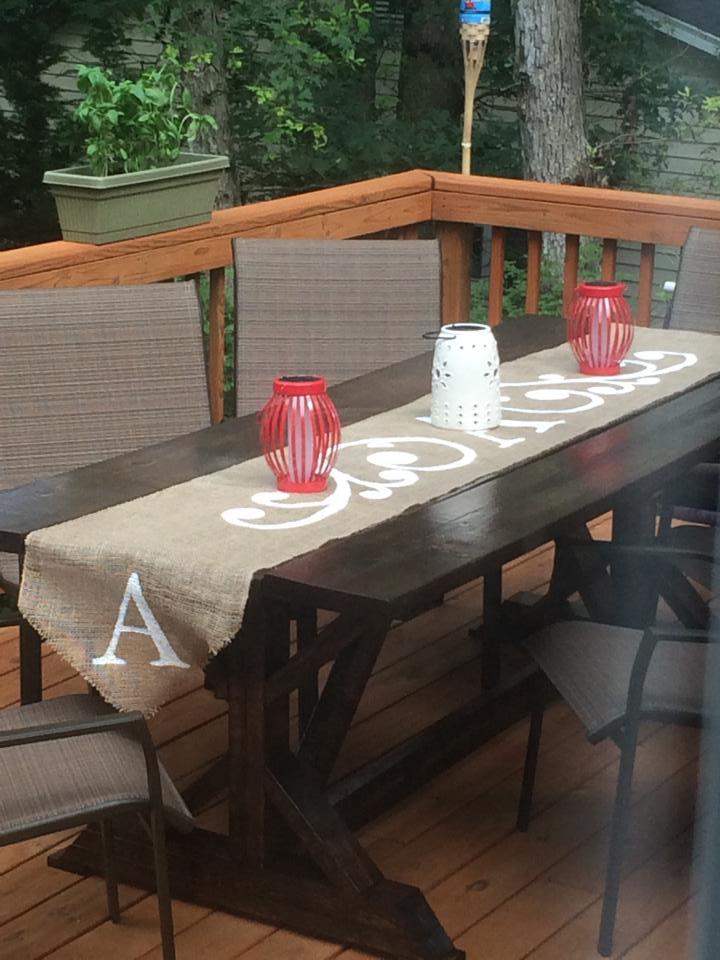
My husband built the table and it was the first time he has built ANYTHING! I stained and varnished it and made the runner. We are so happy with it!
Built from Plan(s)
Estimated Cost
$100
Estimated Time Investment
Weekend Project (10-20 Hours)
Finish Used
rustoleum dark walnut
spar varnish
spar varnish
Recommended Skill Level
Beginner
Faux Fireplace
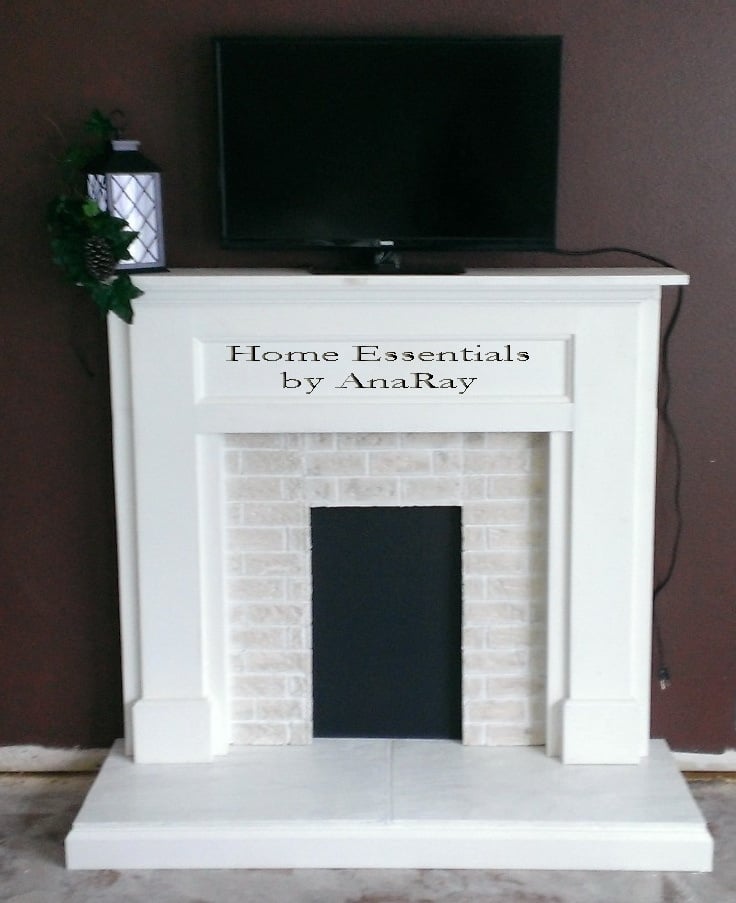
A couple of years ago I used Ana White’s plan for a faux fireplace, the grandchildren always love hanging their stocking on it for Christmas. But I always wanted to dress it up a bit. I didn’t even attach it to the wall. It was plain, it really needed something.
Look what I did to it.
I added a hearth and faux bricks.
Built from Plan(s)
Estimated Time Investment
Day Project (6-9 Hours)
Finish Used
I used Oyster White paint and Rust-Oleum Stone in Cream for the bricks.
Recommended Skill Level
Intermediate
Farmhouse table
Wife asked me to find a farmhouse table to make for our house. I was super nervous and had zero confidence going into this project. However, I decided to give it a try. I am super happy with how this project turned out. I modified the plans to have 30" 4x4 legs rather than the 29" the plans call for. This was to accommodate the set of barstools we have currently at our house. We can get 8+ around this wonderful table, and are super excited to keep building!
Built from Plan(s)
Estimated Cost
$100-120
Estimated Time Investment
Day Project (6-9 Hours)
Finish Used
Minwax wood finisher - Dark Walnut - Applied with natural bristle brush and t-shirt to wipe excess
Minwax polyurethane - Fast Drying - Applied with natural bristle brush
Minwax polyurethane - Fast Drying - Applied with natural bristle brush
Recommended Skill Level
Intermediate
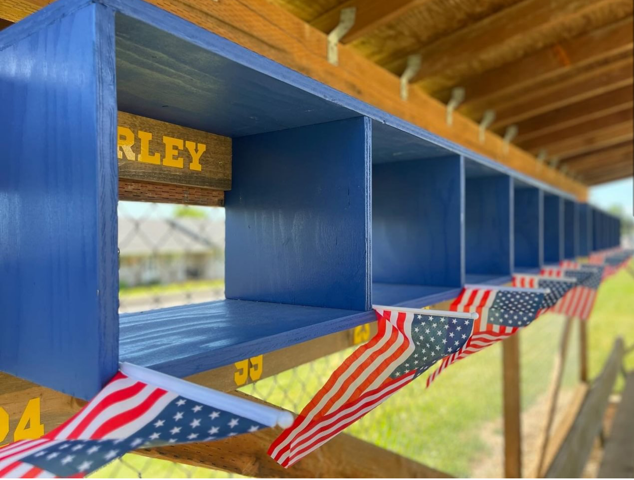
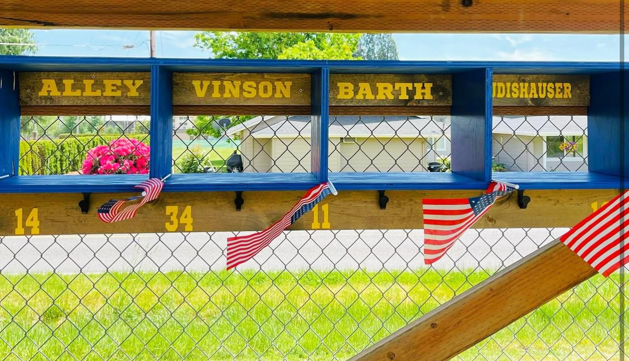
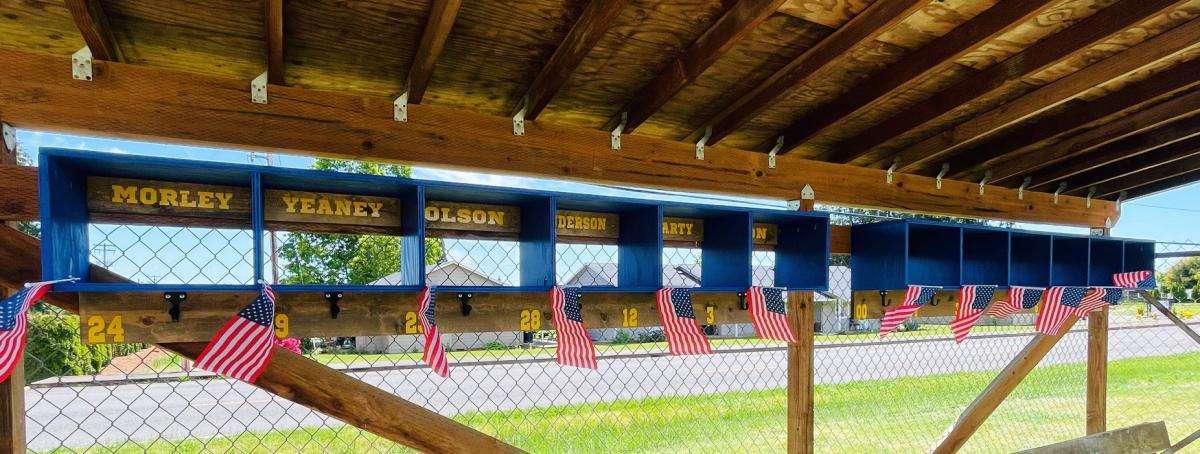
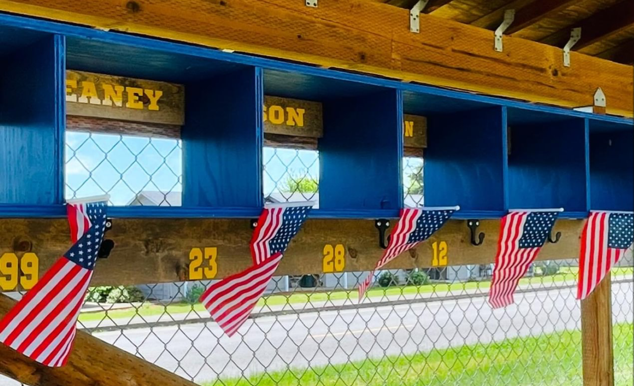
DIY Dugout Shelf
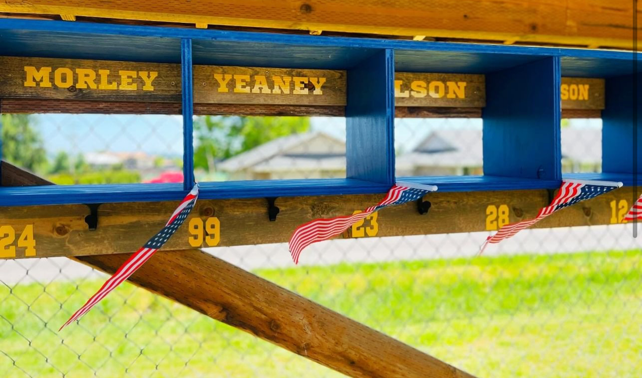
I wanted to build something to keep my sons dugout organized. I took helmet and bag measurements and used Ana's free design tool to make 2 units to fit. He has 12 players on his team an it all worked out great and was a the perfect fit and solution! Each unit is 96" long, I had my local lumberyard rip 2 sheets of 3/4" outdoor rated plywood to 11.25" strips and then I made my cross cuts based on Ana's design drawings. It was built and painted in a couple of evenings and then we added the numbers and names to take it to the next level, can't wait to surprise the boys with it at practice tonight!
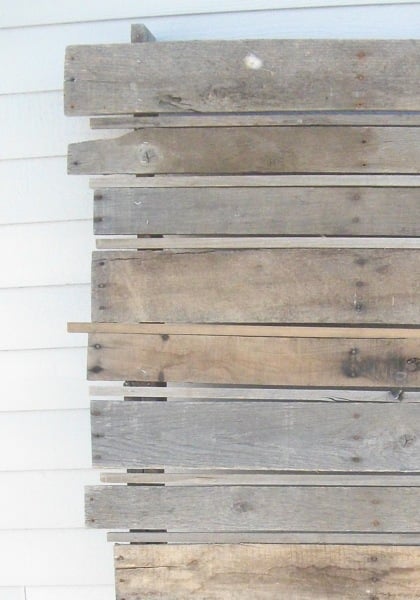
Pallet Back Drop
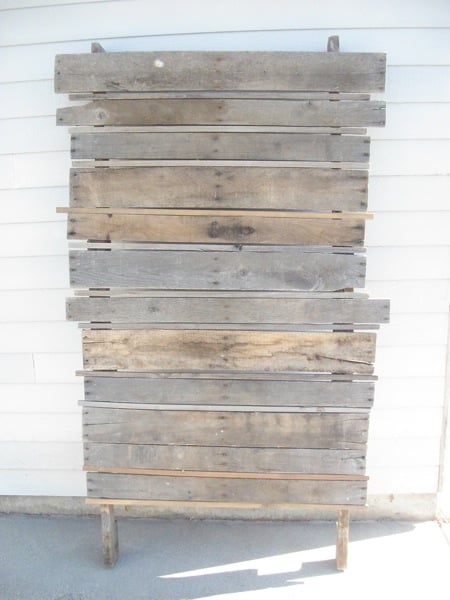
I've been building furniture now with help and inspiration from Ana's site for about two years and in that time I've snapped many pictures of my projects. I was always missing something and I couldn't quite figure out what that was and how I can change it. Some of you have seen my pictures on here and always, there is the light blue back ground of my exterior garage wall.
I recently teamed up with a local photographer and she helped inspire me to jazz up my pictures by adding props and she suggested that I make a back drop to shoot my projects in front of. I had no idea how I was going to do it but with some brainstorming with her, I came up with a pallet backdrop.
Easy enough right? It really is! All you have to do is use a reciprocating saw (like a Saws-All) and put your blade between the top boards and the boards they are connected to to cut the nails. I recommend cutting them instead of trying to pry the boards off because a lot of pallets are constructed using a twisted nail and they are very hard to pull out. I ended up breaking many boards in the process!
I also added some neat trim boards that we had lying around that were also weathered and it gave the backdrop a little more dimension. The object wasn't to make it perfect so I purposely cut the trim boards at different lengths and then nailed everything to the repurposed 2x4 boards that you just separated from the top boards.
Estimated Cost
FREE!!!
Estimated Time Investment
An Hour or Two (0-2 Hours)
Finish Used
None! Isn't nature wonderful?!!
Recommended Skill Level
Starter Project
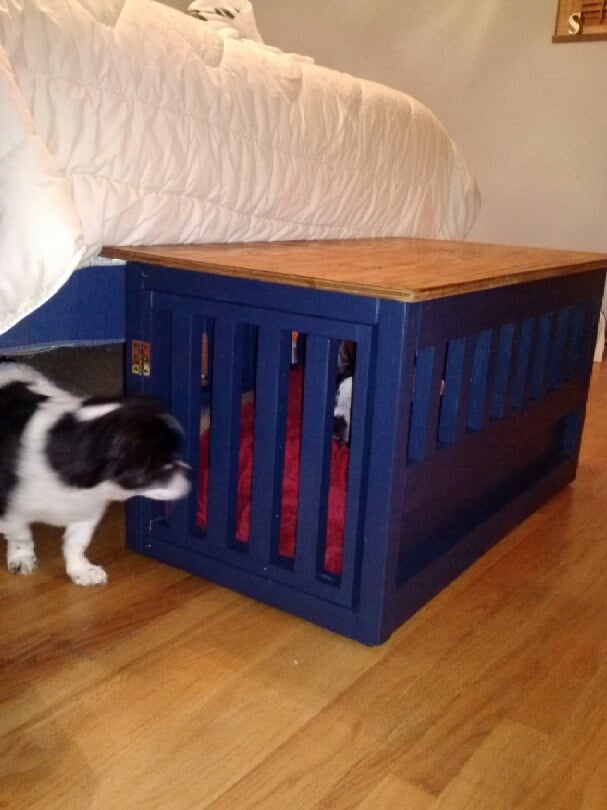
Dog crate/bench

We wanted a bench at the foot of the bed to help our squatty dog Kirby get up and down from our elevated bed. When we saw the plans for the dog crate we decided that we could make a crate for our Boston Terrier Petey who needs to be confined overnight AND put a reinforced top on it to provide seating space. We knew it could not be taller than 18" (the same as our living room couches) so Kirby could jump on and off comfortably, and that we didn't need to make it as big as Ana's plan since Petey is half the size of Ana's lab. Our crate/bench is narrower. Every bit of this piece was made with wood either repurposed from an old playhouse or scraps from the cedar pergola we built in May. We had the hinges and the screws on hand already. We drilled holes in the lid to tie a cushion on top eventually. The lid comes off completely for ease of changing out dog bedding. Petey loves sleeping inside and will go in for naps even during the day when he has the run of the house. Kirby and our other dog also like to nap in there. You can just see the white of Petey's blaze in the pic where Kirby is peeking in.

Built from Plan(s)
Estimated Cost
$20
Estimated Time Investment
Weekend Project (10-20 Hours)
Finish Used
One coat primer, two coats of Valspar in Indigo. Lid has 3 coats of Minwax Golden Oak.
Recommended Skill Level
Starter Project
Comments
Thu, 07/10/2014 - 07:22
Your pups look so happy with
Your pups look so happy with their new crate/bench! It looks nice and sturdy. :) Do Kirby's nails scratch the top at all as he jumps on an off? Just curious what you used as a clear coat, if anything. My little dog gives me the hardest time about cutting her nails so they're probably a little longer than they should be at times until I get her to the groomer.
This is a great, creative solution to all your needs. :)
Thu, 07/10/2014 - 19:51
Thanks and protective finish
Yes, they are very happy and spoiled! Kirby's nails have not scratched the top yet but since we know they probably will eventually, we plan to put a thin pillow on the top. I won't get around to making it until the fall. We might put a clear protective poly coat but haven't yet.
I started using a Dremel on my 2 Boston Terrier's nails when they were very, very young so they are calm and resigned when it's nail time. That they get Cheerios as a treat afterwards doesn't hurt! However when Kirby was a puppy he was going back and forth between my ex-husband's and my house and my ex didn't start Dremeling early so Kirby won't let us sand his nails down and a groomer has to do them. I hate that we have to spend money on something that could be taken care of a couple times a month at home but if dogs are not conditioned to be held upright, tolerant of having their paws held tightly for the sanding, or terrified of the noise, it's not going to be acceptable to them when full grown. Kirby goes full Tasmanian Devil throwing a fit whenever he sees the Dremel case out so we don't even try anymore.
The bench is great and I am so happy Petey loves it so much. He is congenitally deaf and a real pill sometimes so it is a relief that he has taken to it.
Easy & Fast Garage Shelving - Weekend Fun for 12yr Old!
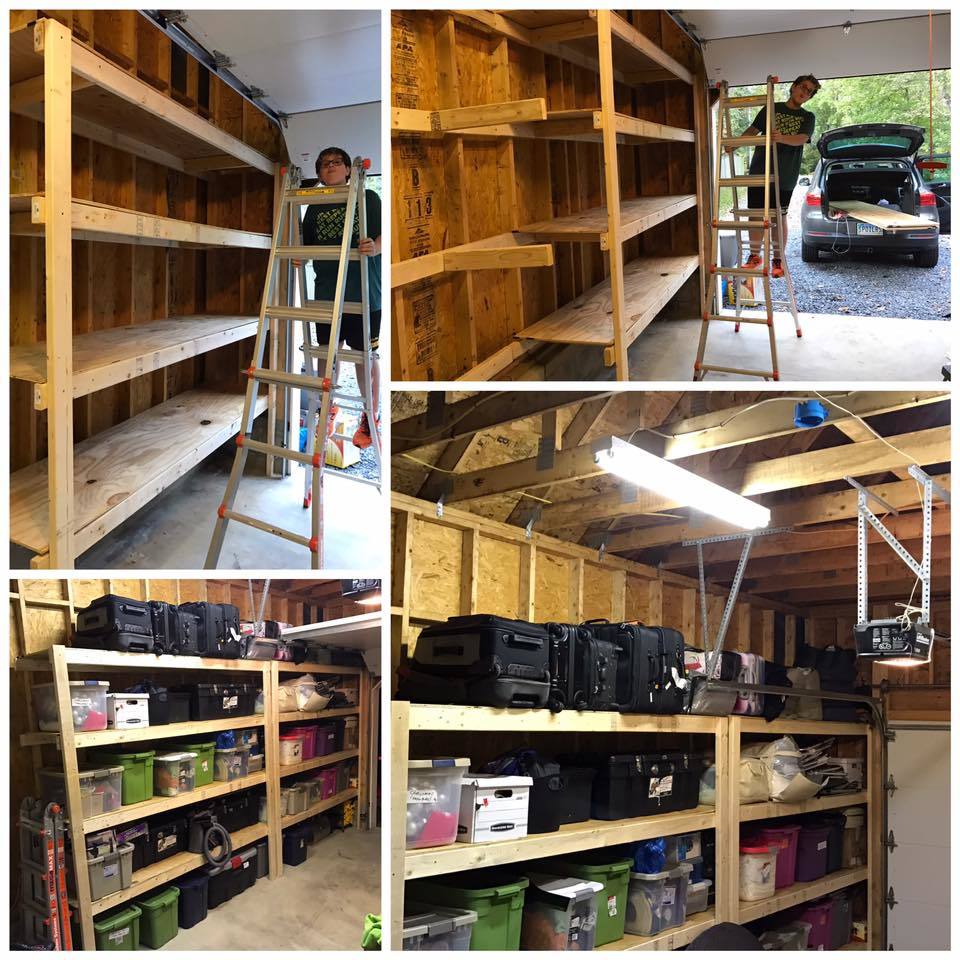
Thanks for fantastic plans Ana!! My 12yr old son and I knocked these out in an afternoon.
He learned new skills and we got a key project done. The best thing was his statement of "these are awesome!!"
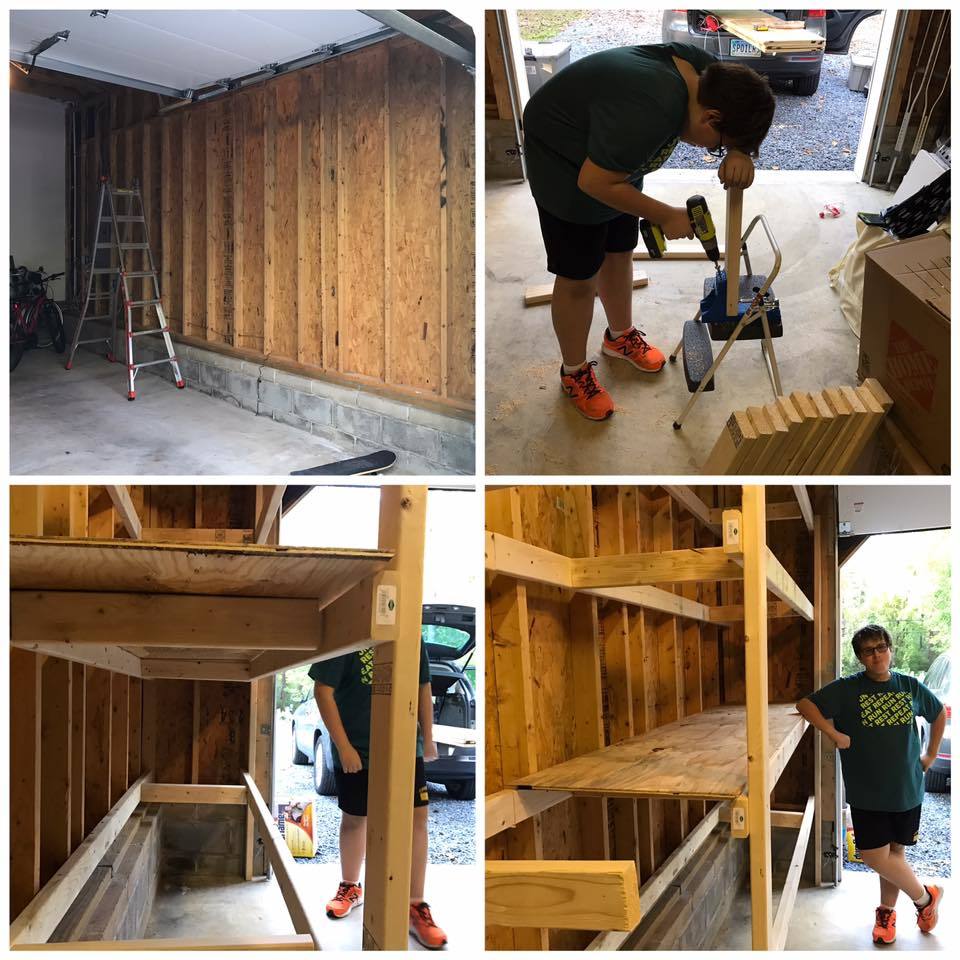
Built from Plan(s)
Estimated Cost
$156 from Home Depot
Estimated Time Investment
Afternoon Project (3-6 Hours)
Recommended Skill Level
Beginner