DIY Truck Shell

This project was made for my first grandson Landon. All parts were cut from pine. I used the DIY Truck plans for dimensions and made parts to customize the piece.

Built from Plan(s)
This project was made for my first grandson Landon. All parts were cut from pine. I used the DIY Truck plans for dimensions and made parts to customize the piece.
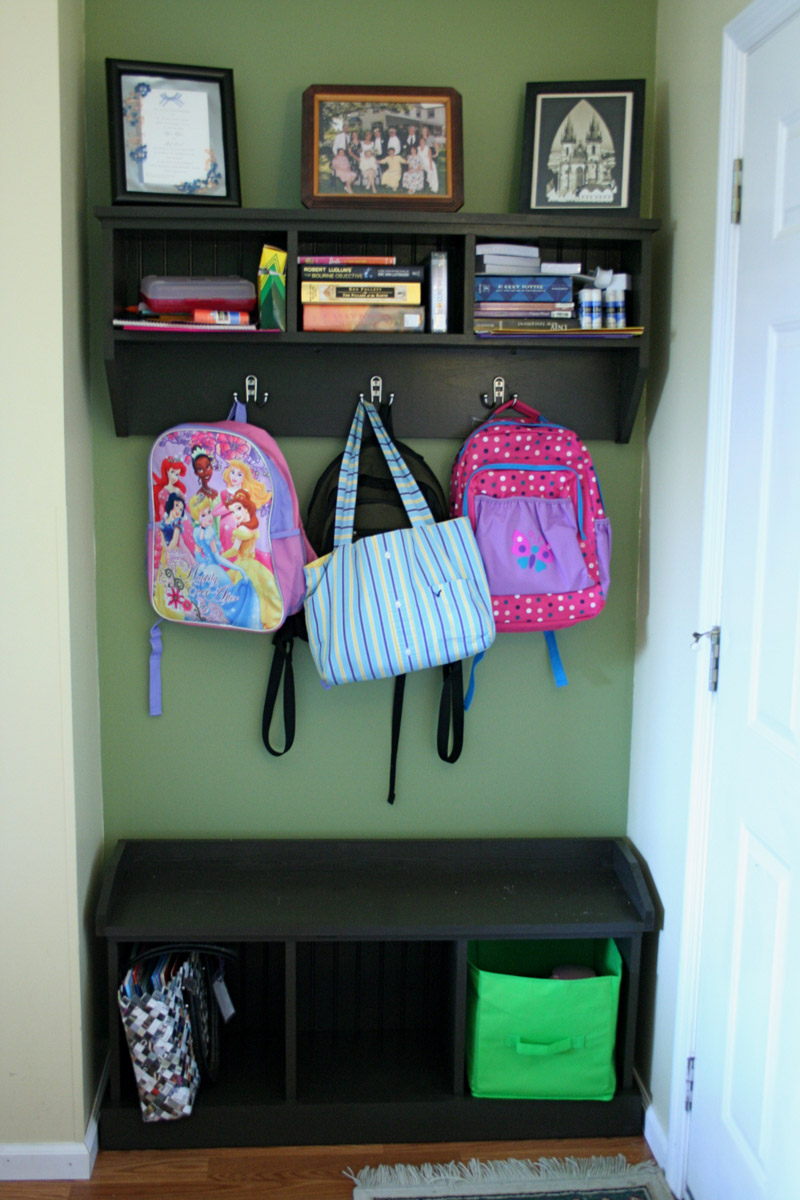
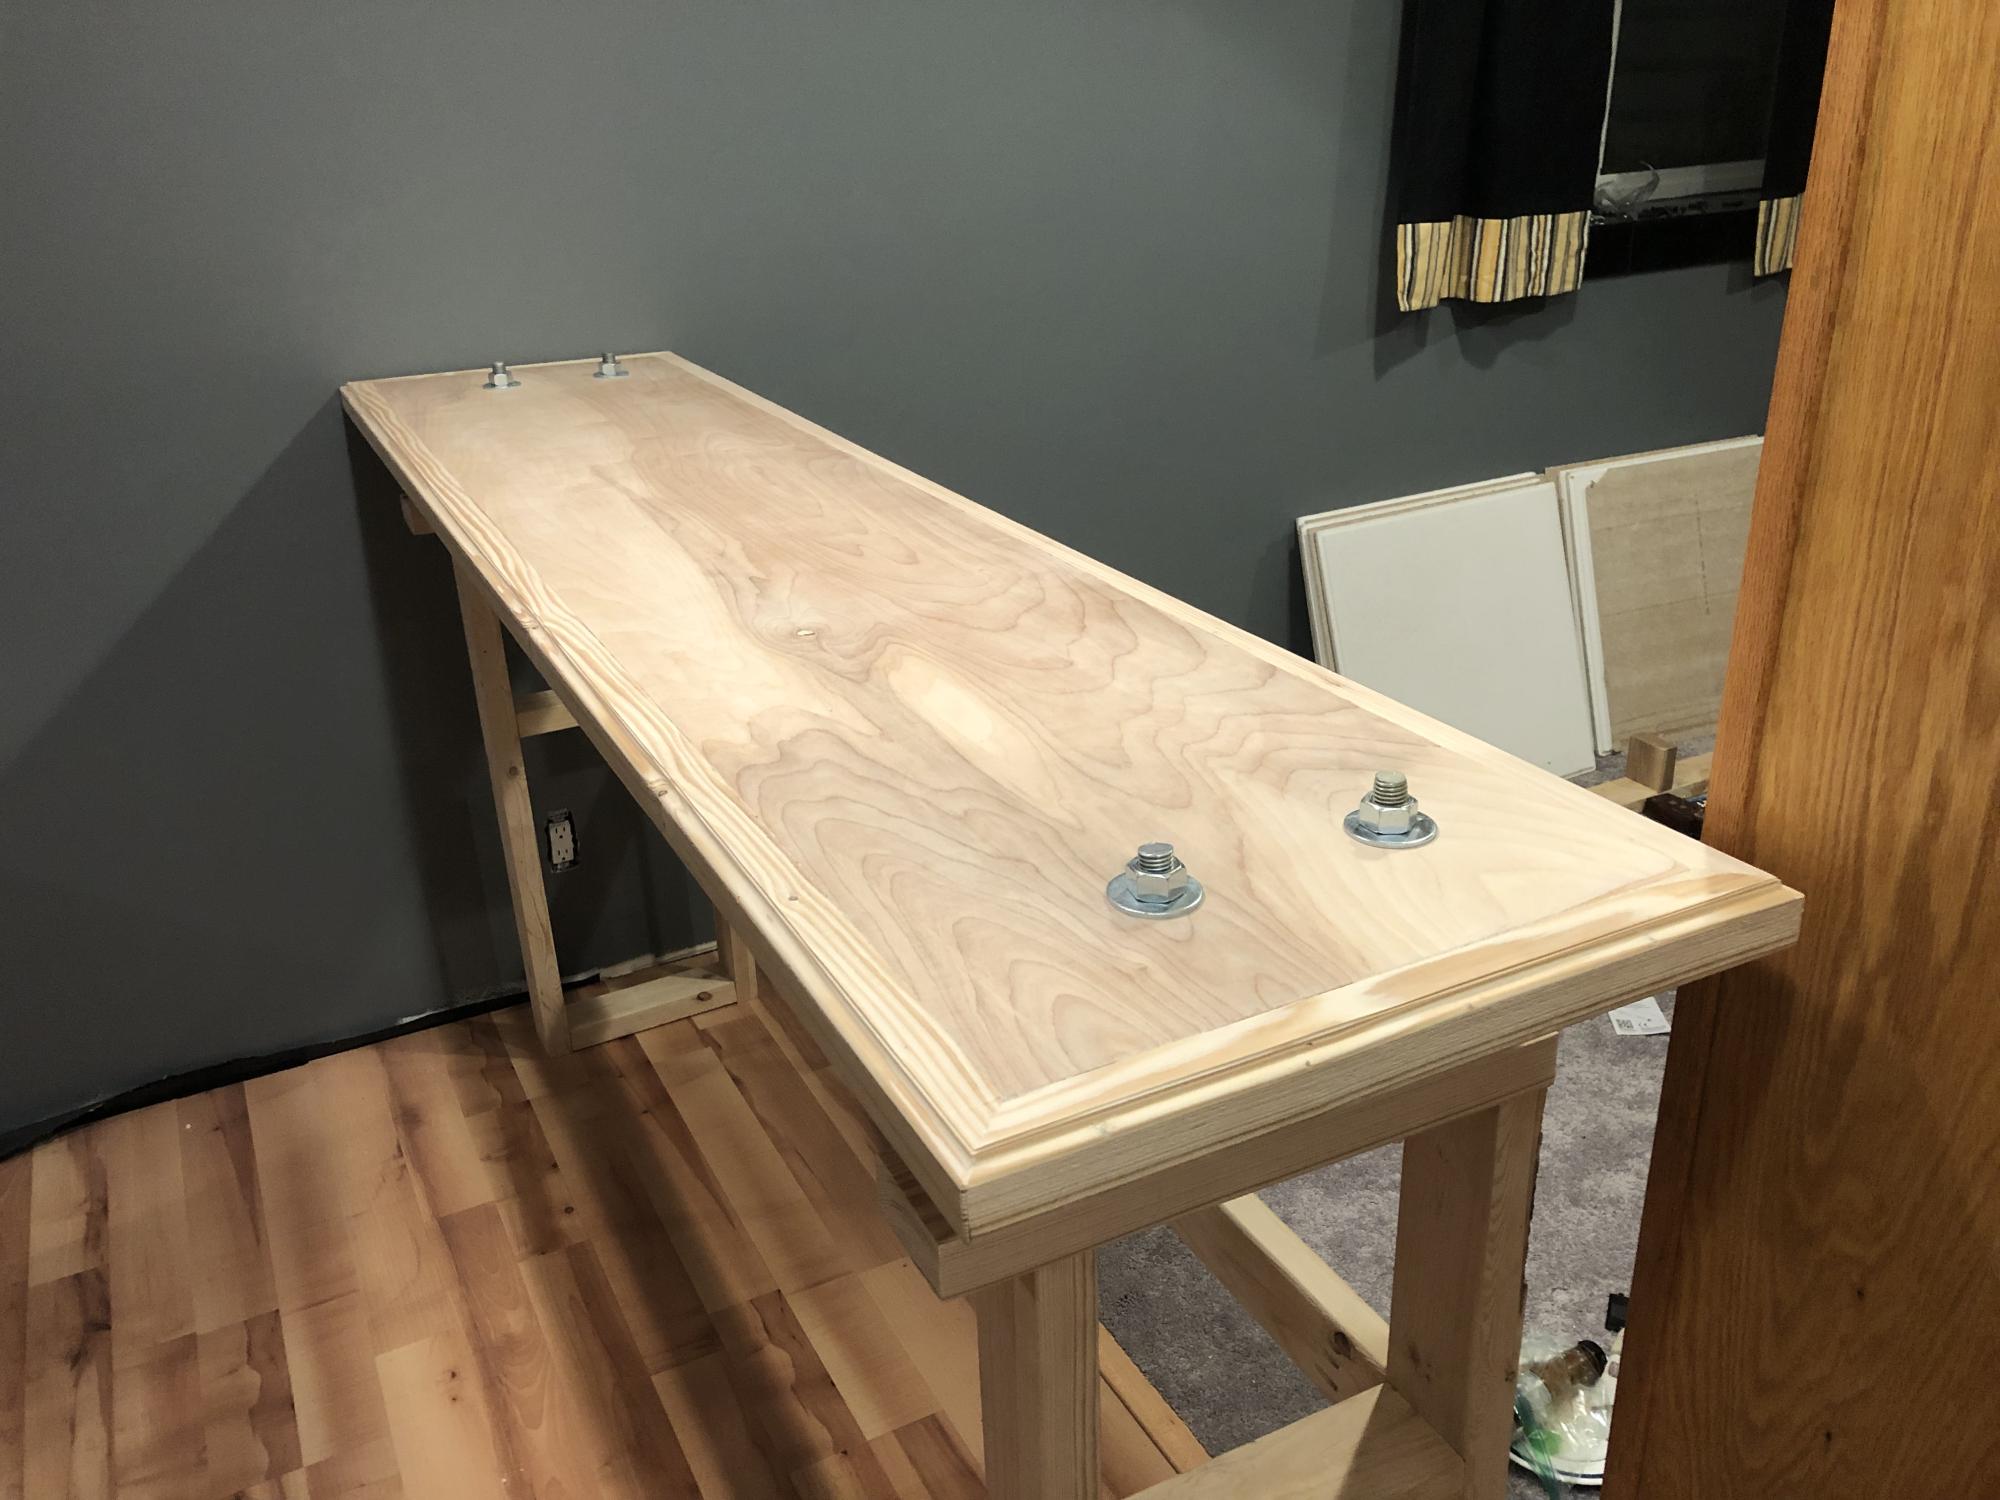
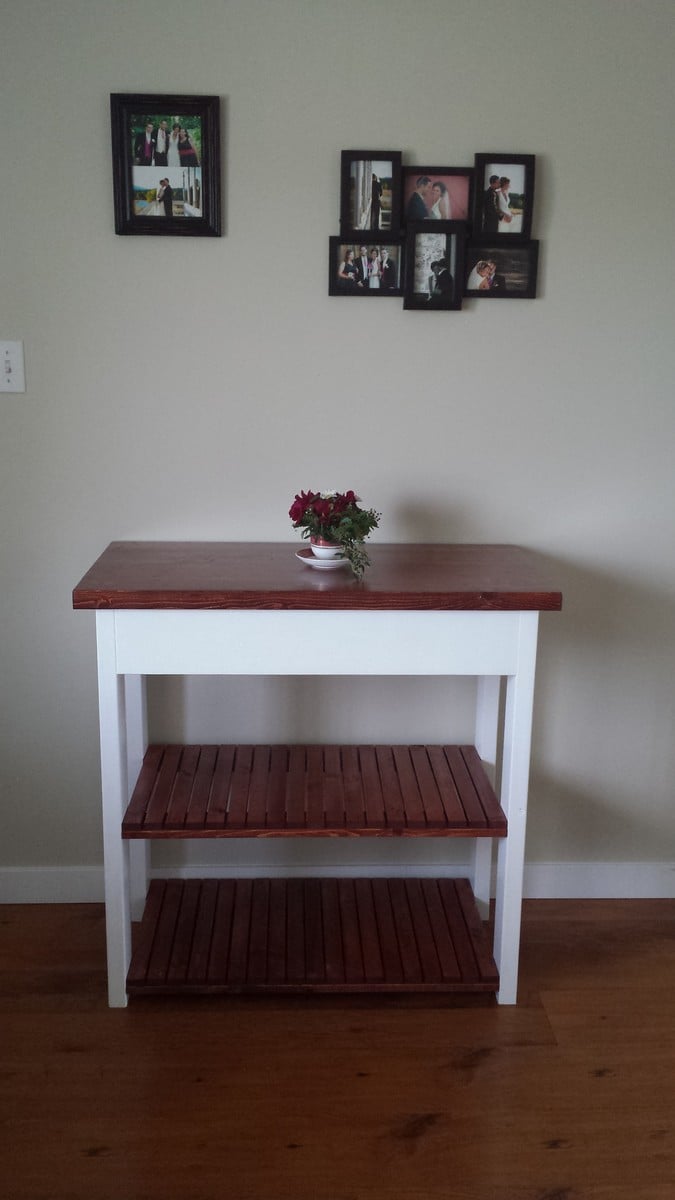
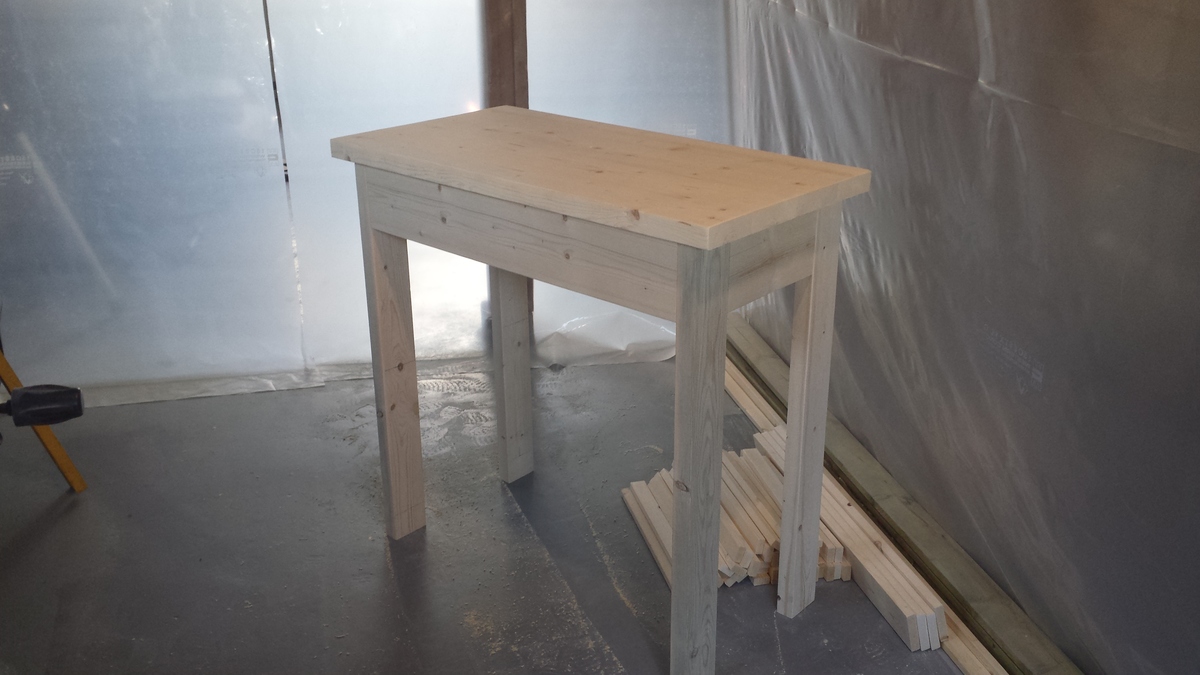
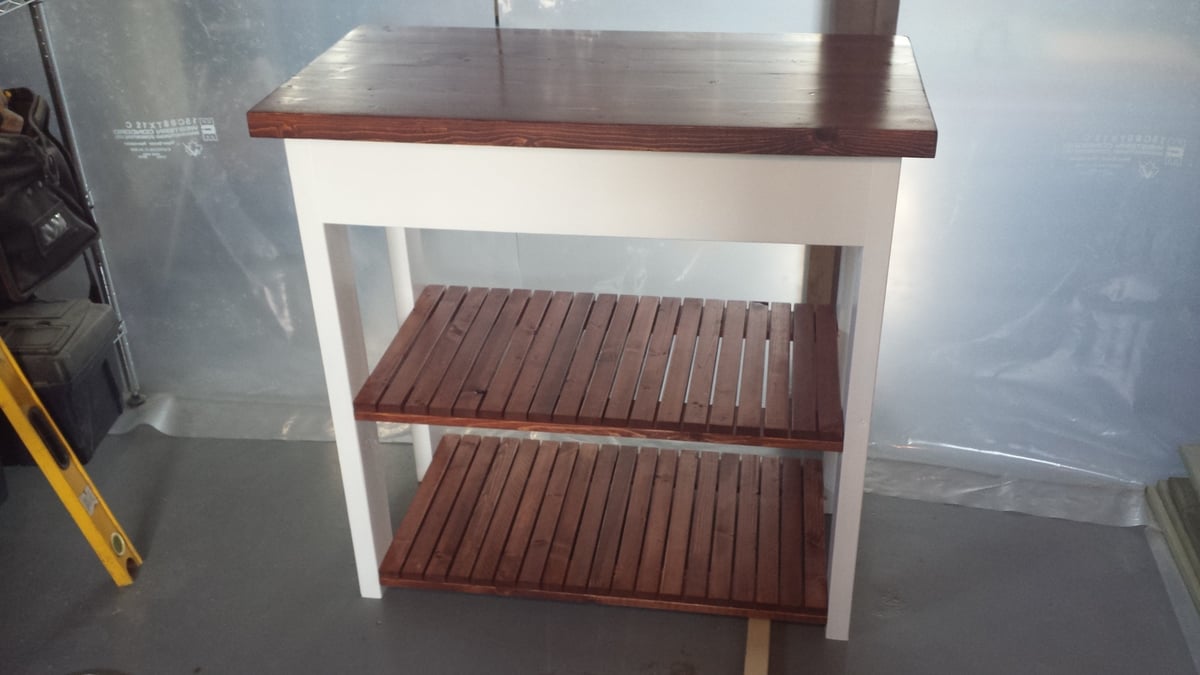
We cut this plan down by 8" in length to fit in a nook behind our front door. The opening was 44.5" and we cut our longest piece to 42" to make sure we had clearance for baseboards and door trim. We finished both items in an afternoon, even with adjusting measurements and having kids ages 5 and 2 "helping".
This was a bit daunting as my first woodworking project, but after a few mistakes (and taking it slow), I'm pretty proud of it!

Mon, 07/01/2013 - 16:07
Congrats - You did great on your first project! Looks super! Love the gray finish. Before you know it, instead of going to a store to look at furniture, you'll be "shopping" Ana's plans first to find just what you want. I'm so hooked on this site - since becoming a reader I haven't bought a single piece of "furniture store" furniture! :)
In reply to Looks great! by JoanneS
Mon, 07/01/2013 - 21:14
Thanks!
I think I've already picked out my next project ;)
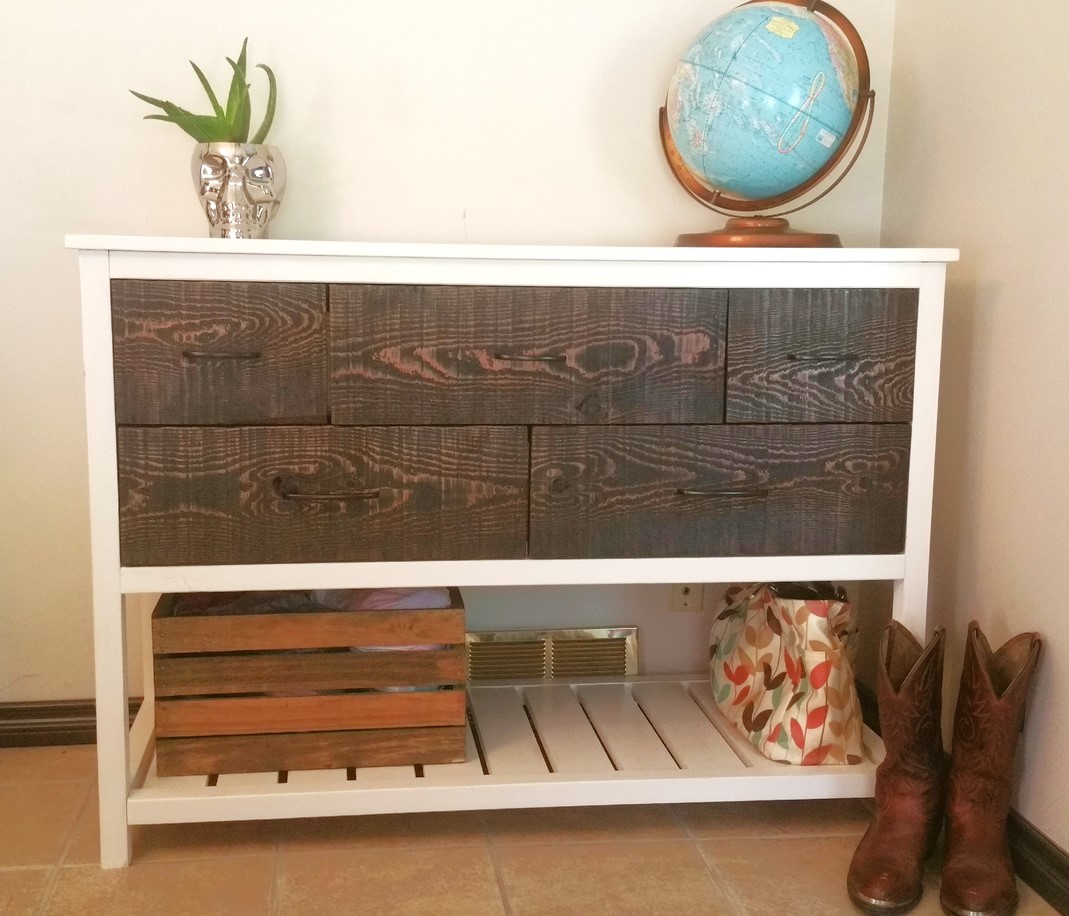
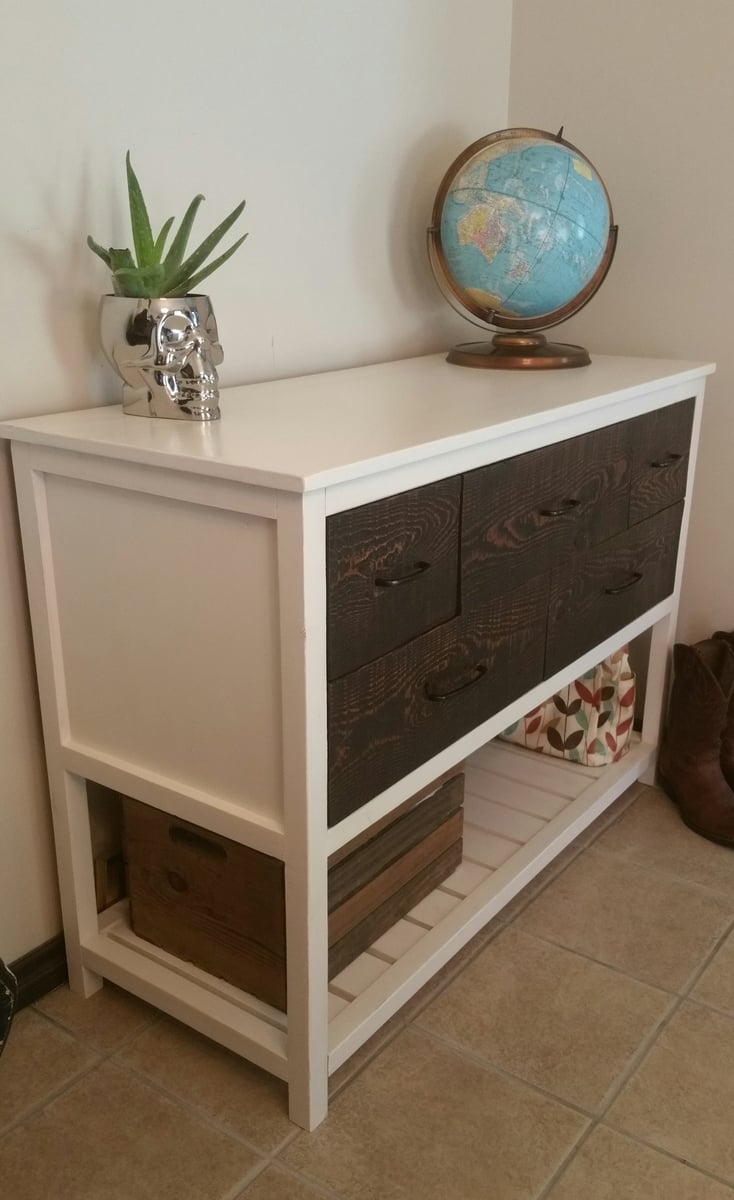
We just used pine from the framing and craft sections of Home Depot. The drawer fronts are cut from rough cut lumber from a lumber yard in town. I'd say it cost around $120 to make (Paint, lumber, screws, etc). We used thinner particle board for the backing (instead of the size listed in instructions) and hammered and glued the drawer bottoms on. Also, we used pocket holes to make the drawer frames instead of using glue and nails. We made it 2" taller than the plans said. Bought drawer handles from the Habitat For Humanity Re-Store for $1 each and spray painted with Krylon's Oil Rubbed Bronze in satin. Took us about 15 hours start to finish, but over the course of a couple of weeks as we had time to work on it. Wait time between coats of paint and poly, etc. Very happy with how it turned out and plans were straightforward and easy to follow!
I need more seating in mu basement so I belt the sofa/bar. I used Ana’s plans of her outside bar table. Thank you


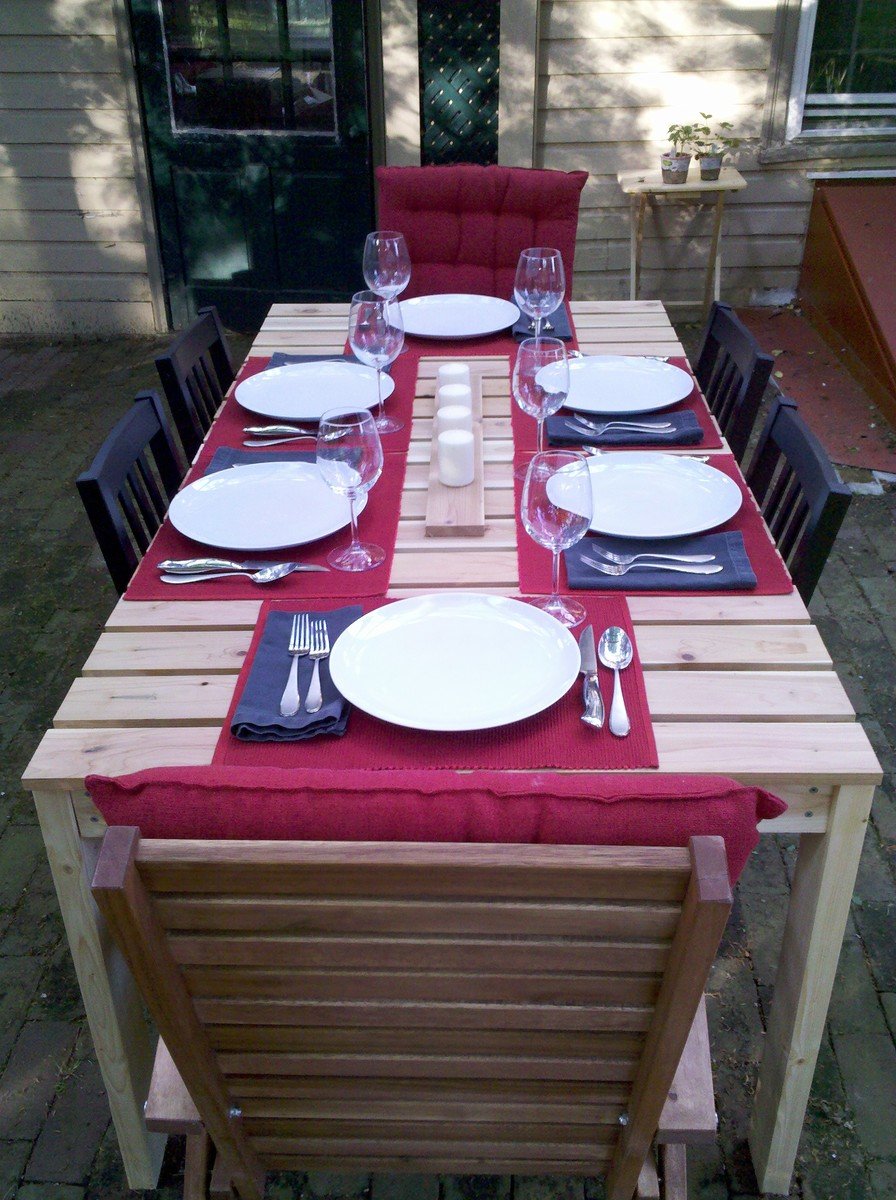
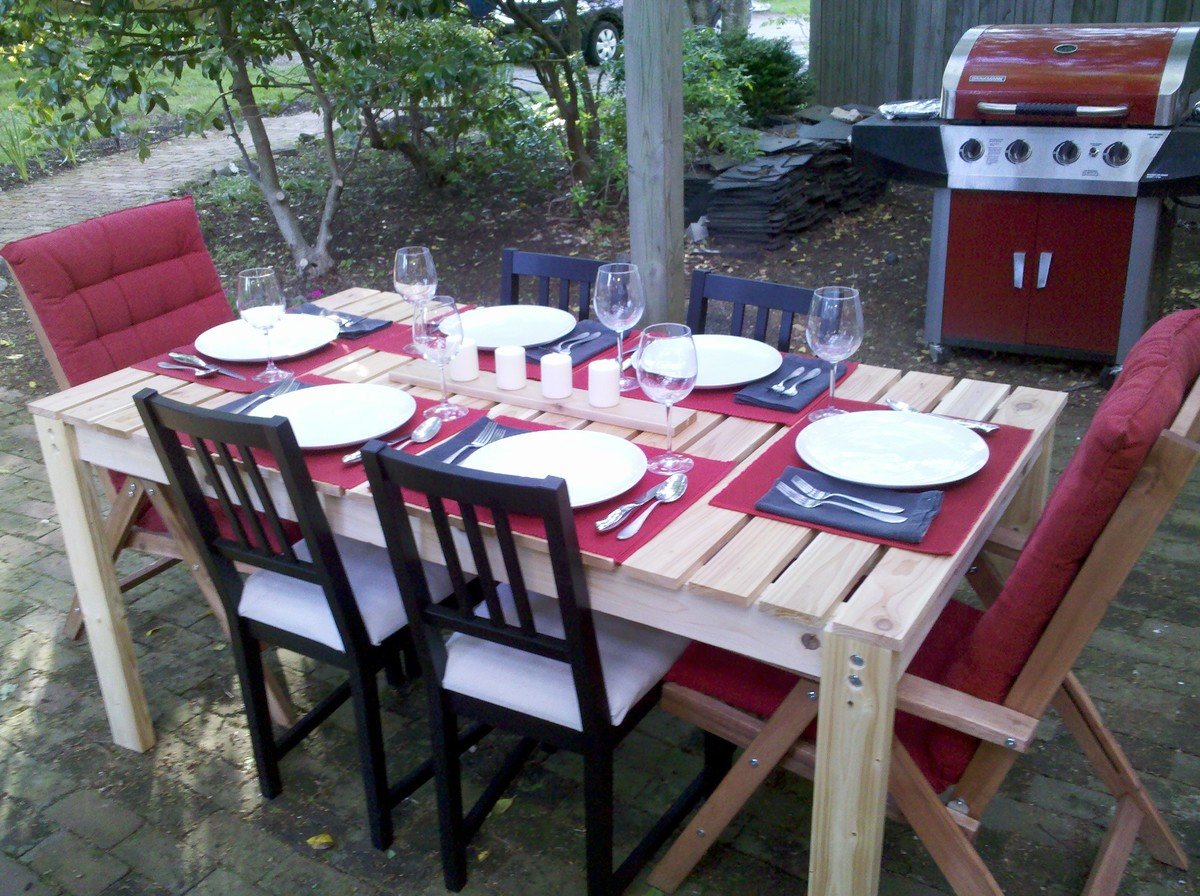
We needed an outdoor table for our patio, and this one fit the bill!
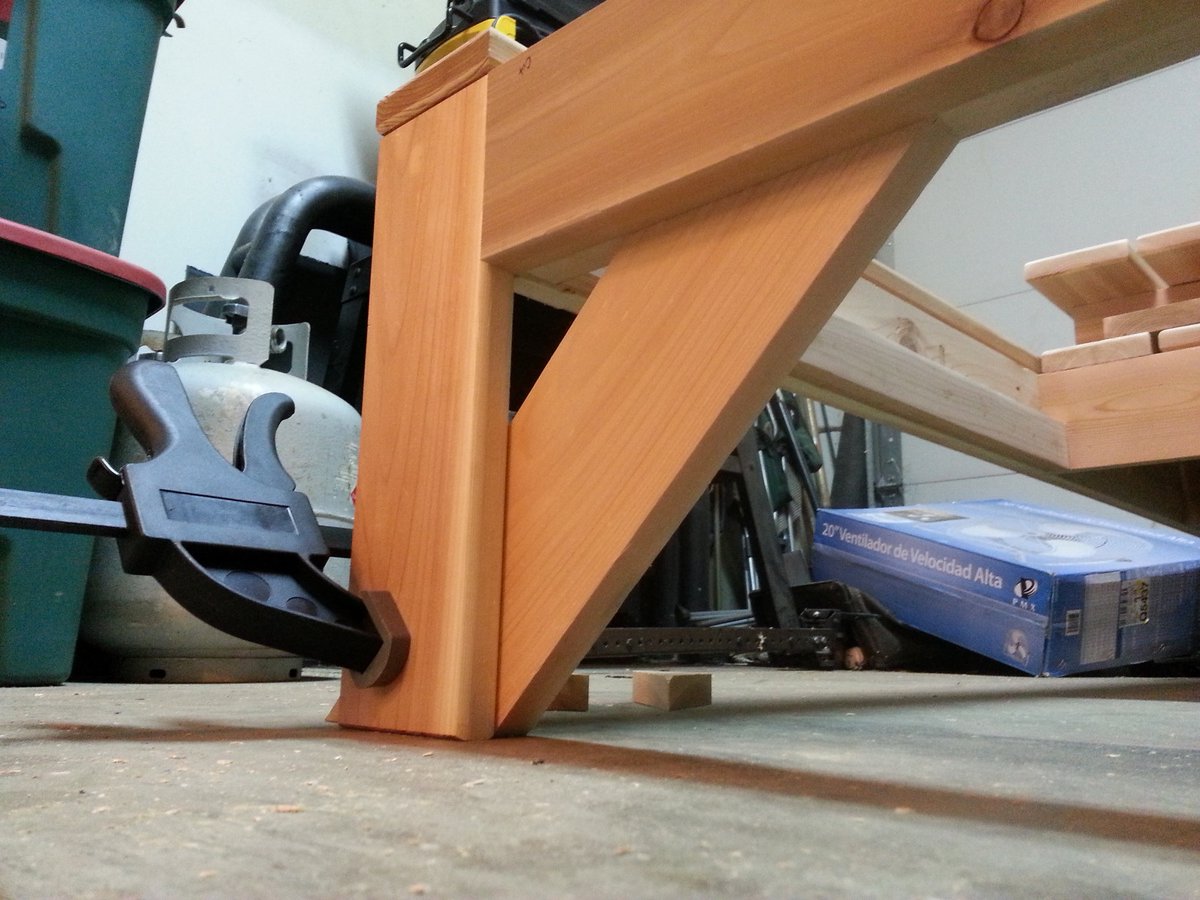
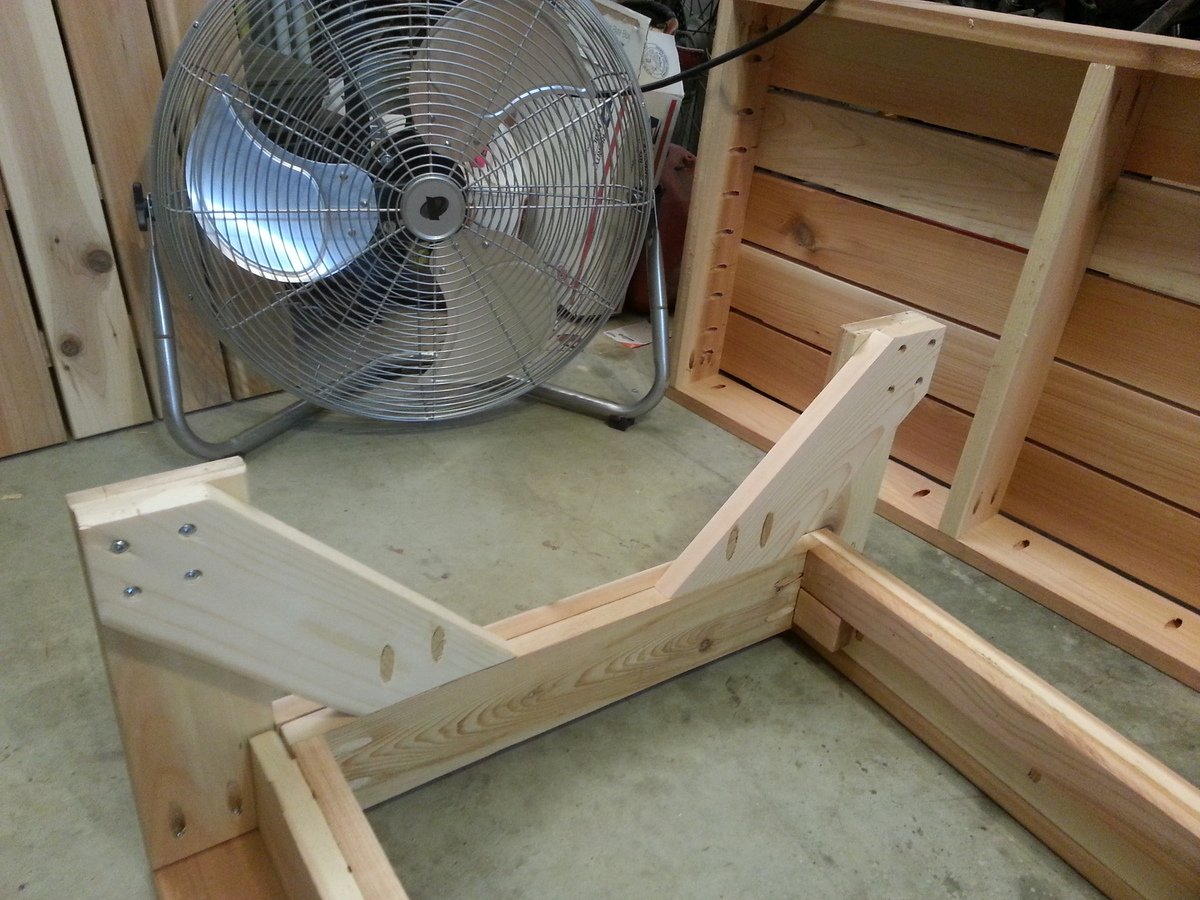
I loved the photos that others have put out of their own tables, but I was concerned about eating off of a table that was stained and varnished with petrochemicals. In order to avoid the toxic finish, I built the top and stretchers out of cedar wood, which I sanded down to 220 grit, and gave a light coat of tung oil finish. The legs are untreated 2x4s that I sanded down and gave a heavy coat of tung (e.g. seven applications.)
To ensure the legs remain in good condition, I intend to foot them with sheet metal casings when I remove them at the end of the season.
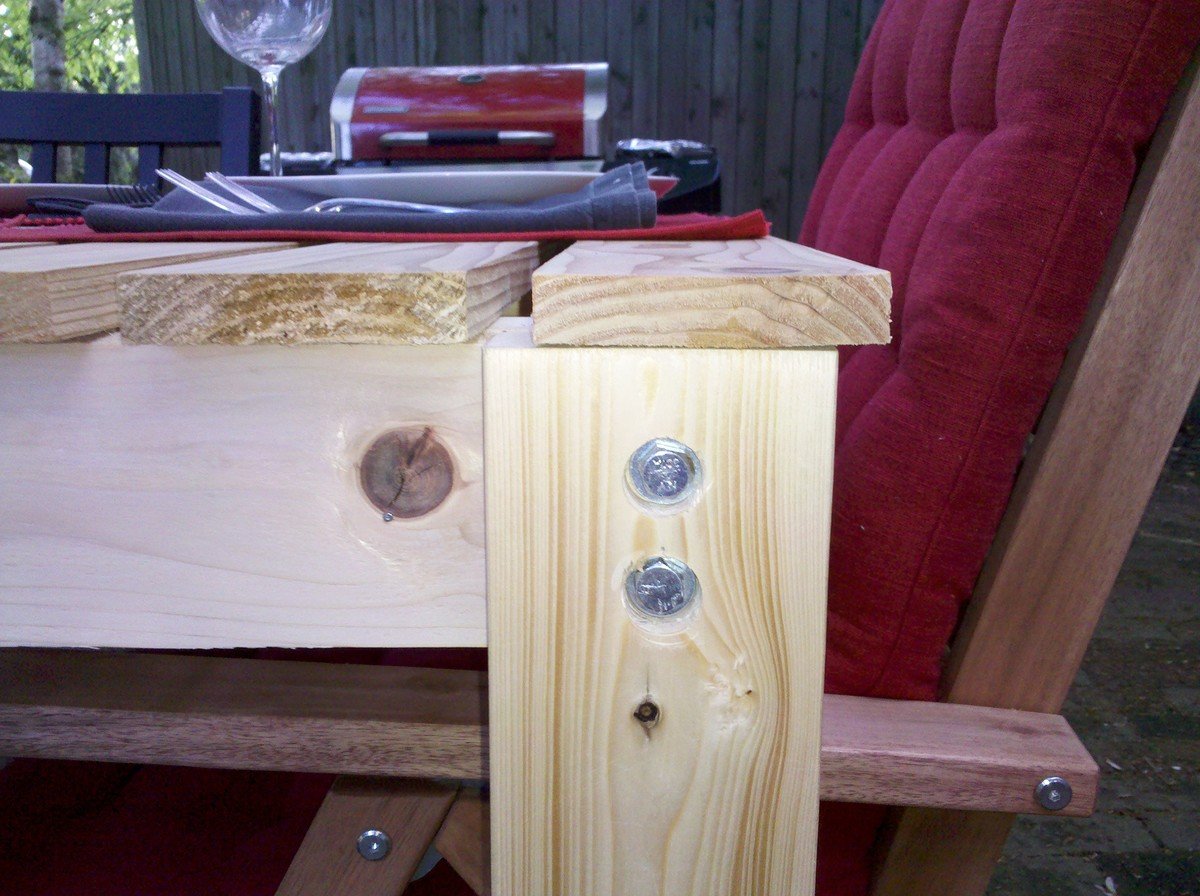
I also took Ana's advice, and attached the legs using bolts, so that I can disassemble the table and throw it in the garage over the winter. There's a close-up of how I inset the bolt-heads with a spade-bit below.
Great simple plans, easy to follow.
I made a few modifications to this plan, as I was building this for my sister who wanted it a bit smaller, I used the Kreg jig to attach the side rails and shelves. However In the future I think I will be mortising the joints as the extra work is worth it in the long run to provide the extra strength.
The top is made from joined 2x6's, I used my custom made skill saw table saw to rip them so I got perfectly close joints with no gaps.
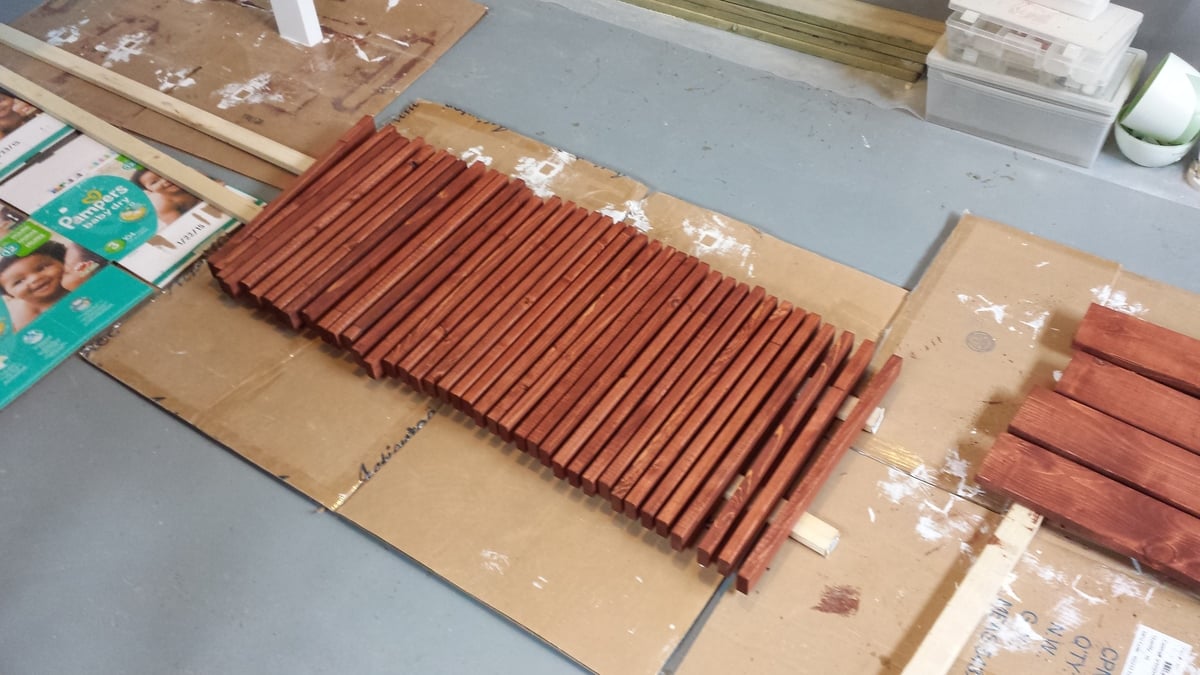
The slats for the shelves were a huge pain to finish, I opted to stain and urethane them before assembly. It took a bit more time but I think the finish came out much nicer than if I would have done it after assembly.

Fun and quick. Used a Kreg jig for this project, and finished with Amy Howard paint, along with the wax.
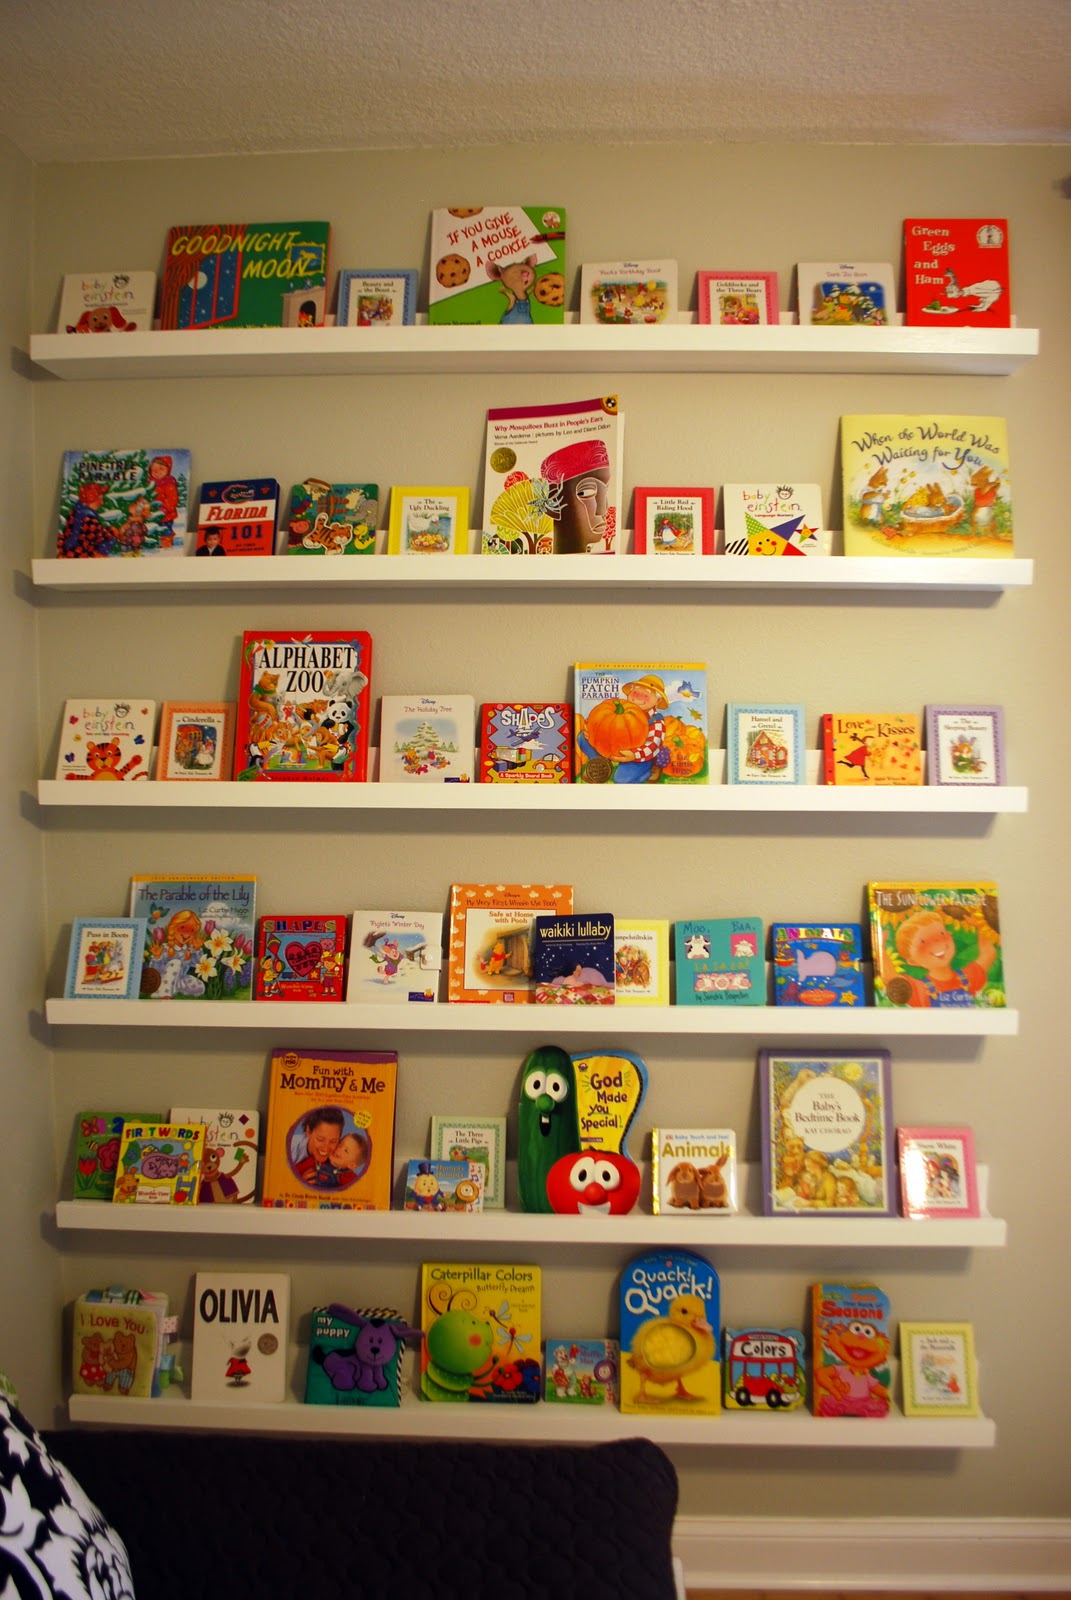
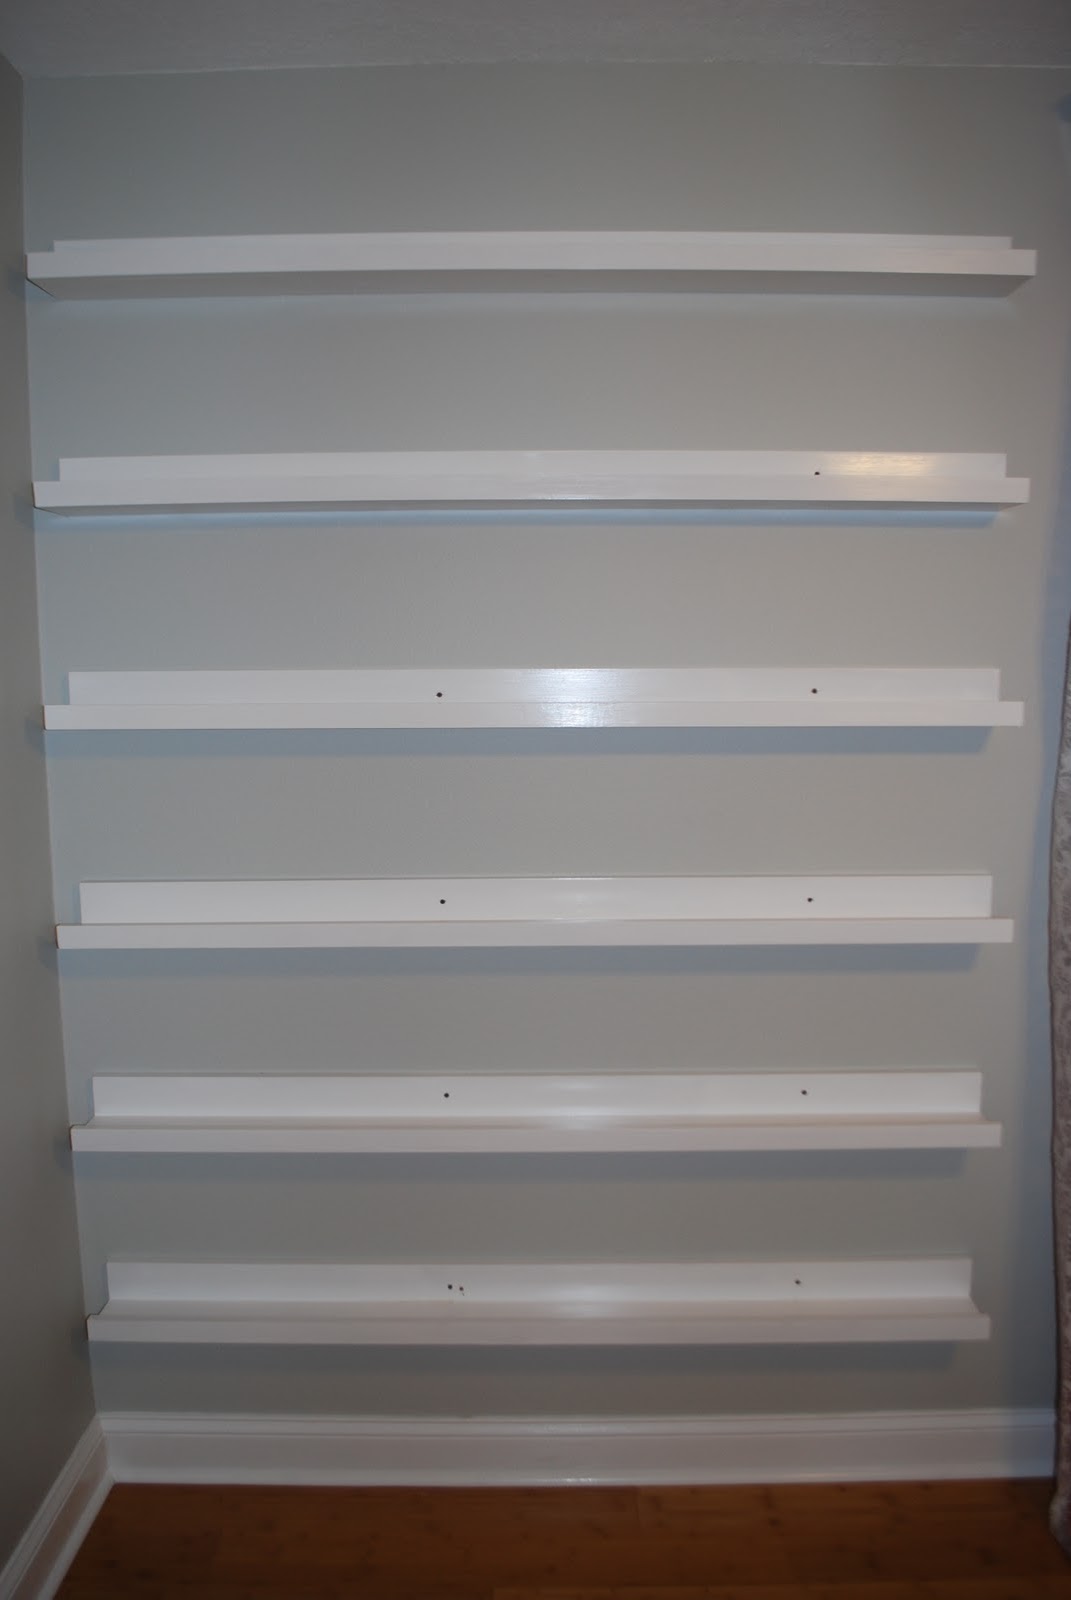
I built these bookshelves with the help of my husband for our daughter's nursery. They were so simple to build, the finishing work is what took the most amount of time. They're very sturdy, and we get tons and tons of compliments on the 'feel' that they add to the nursery!
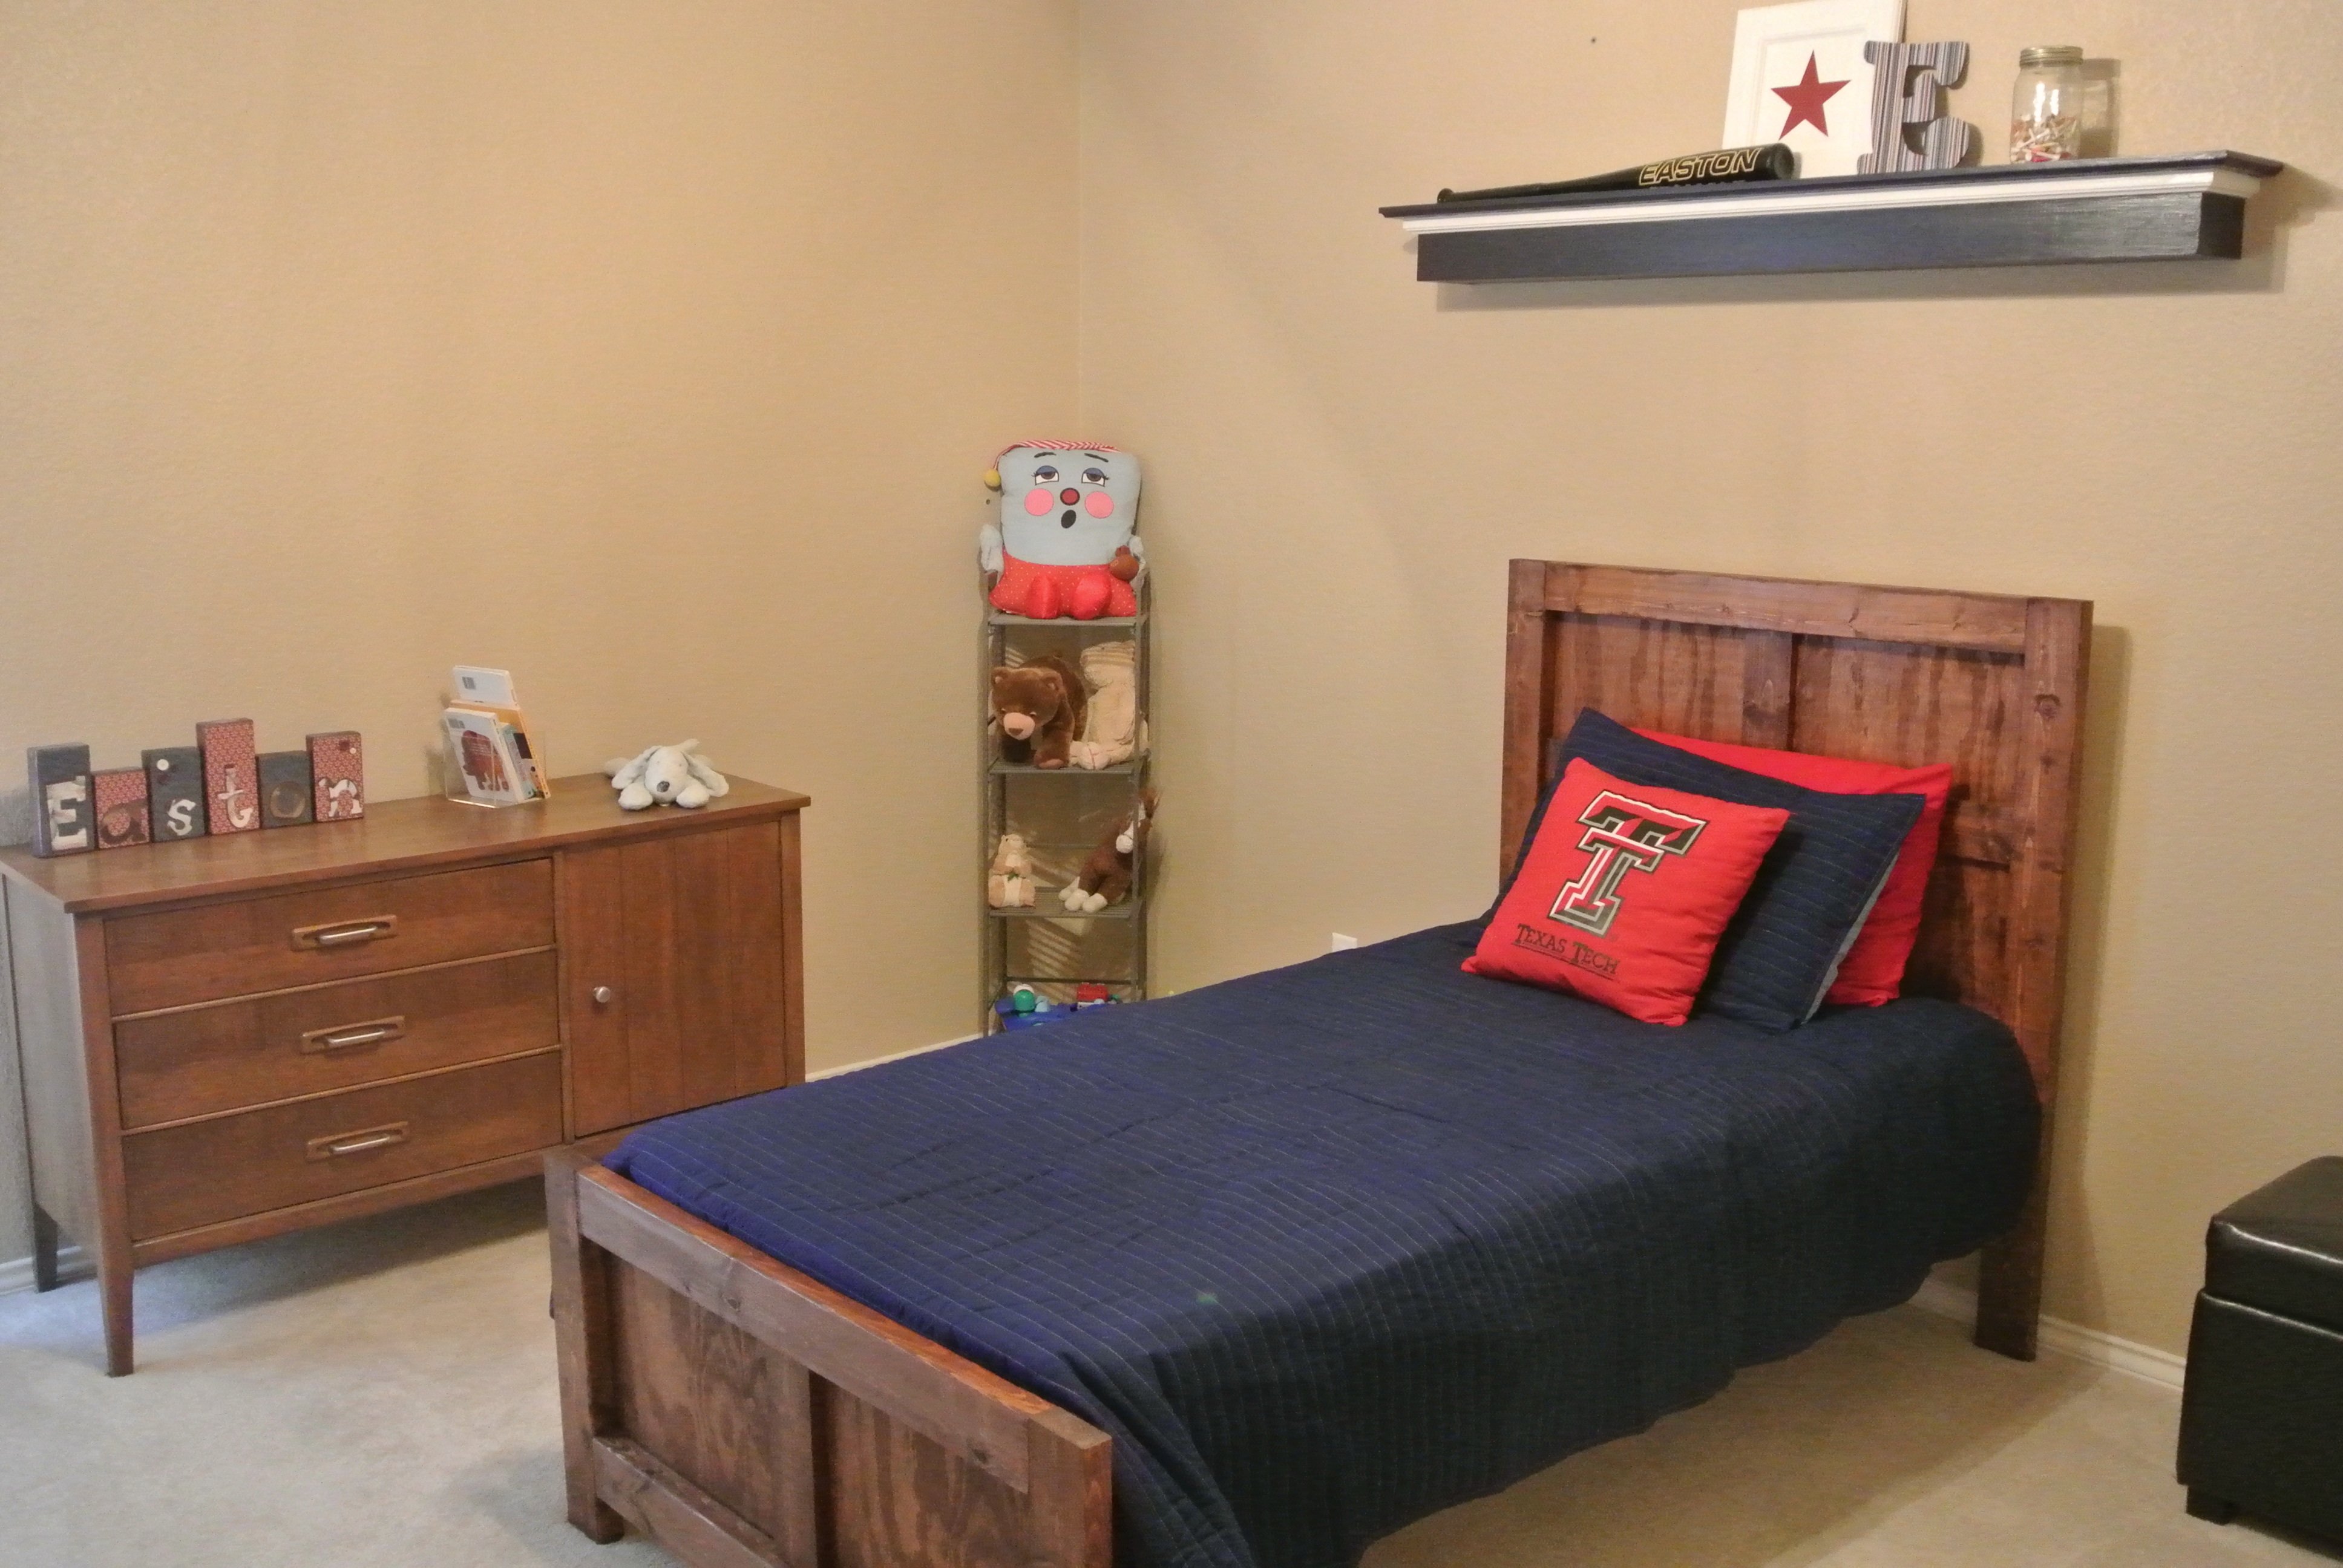
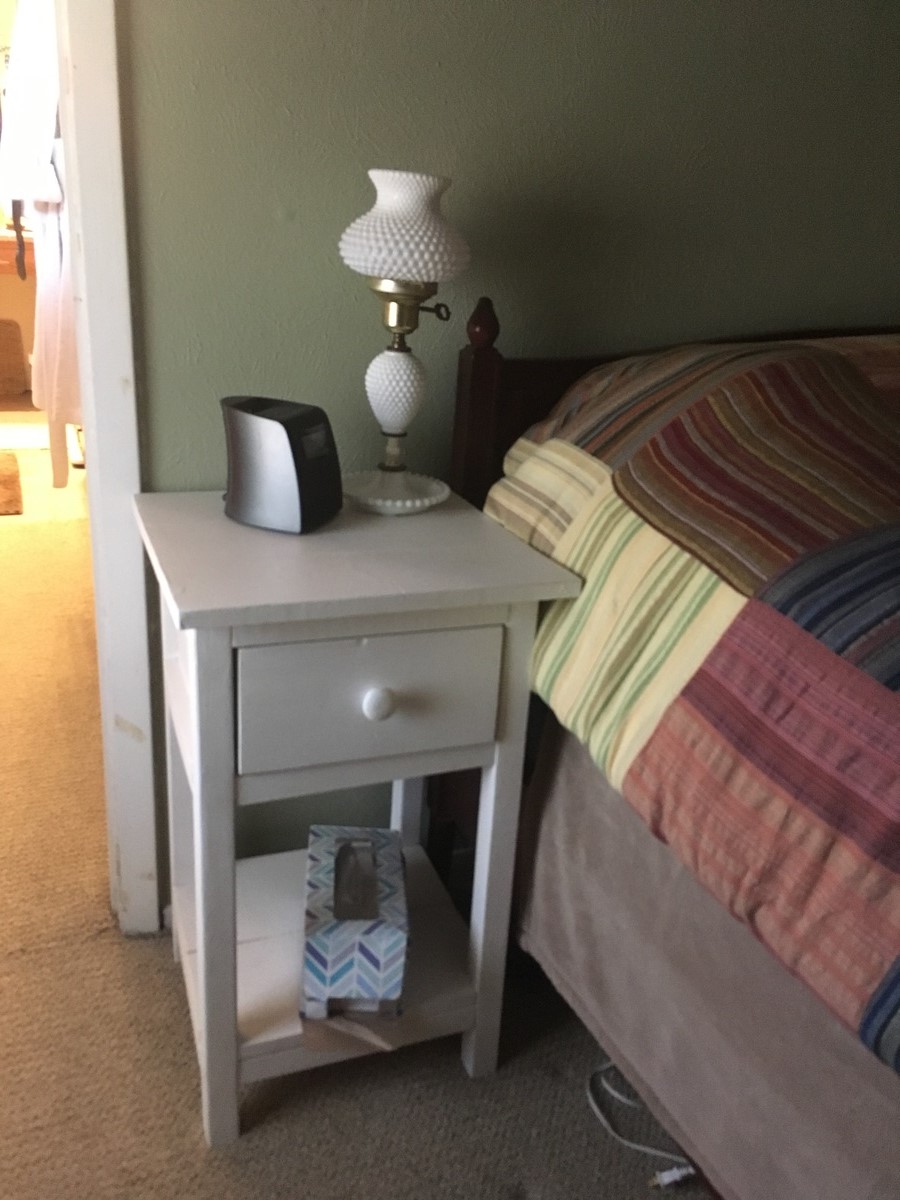
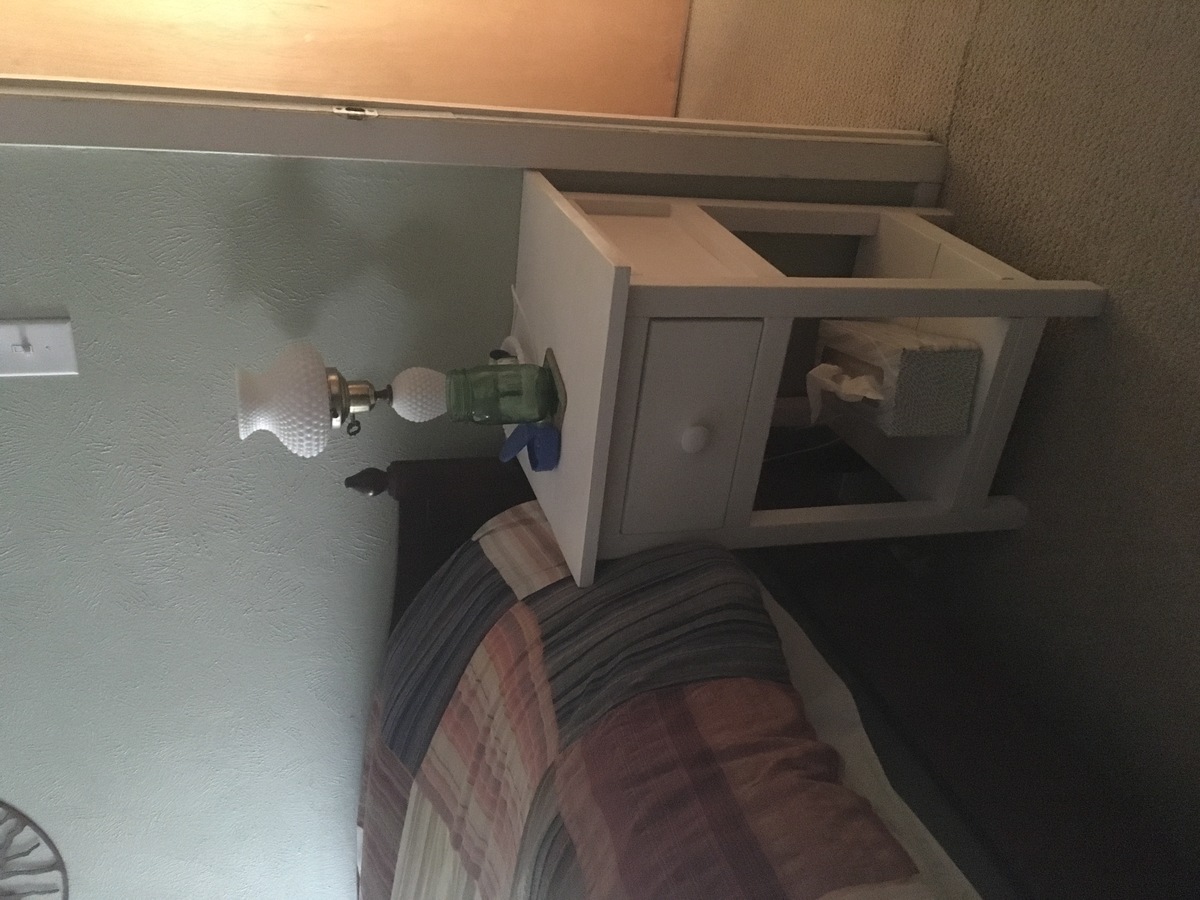
I couldn't believe how much twin beds cost in stores and couldn't find anything I liked for my son under $350. I have already made a few other things from Ana White, so I was excited to see this "knock-off!" I followed the plans exactly and didn't want his bed to be too high, so there is so box spring.
I have recently discovered how much fun it is to make things, so I couldn't wait to build my son his "big boy bed!" He loves it! He's happy so this momma's happy, too!

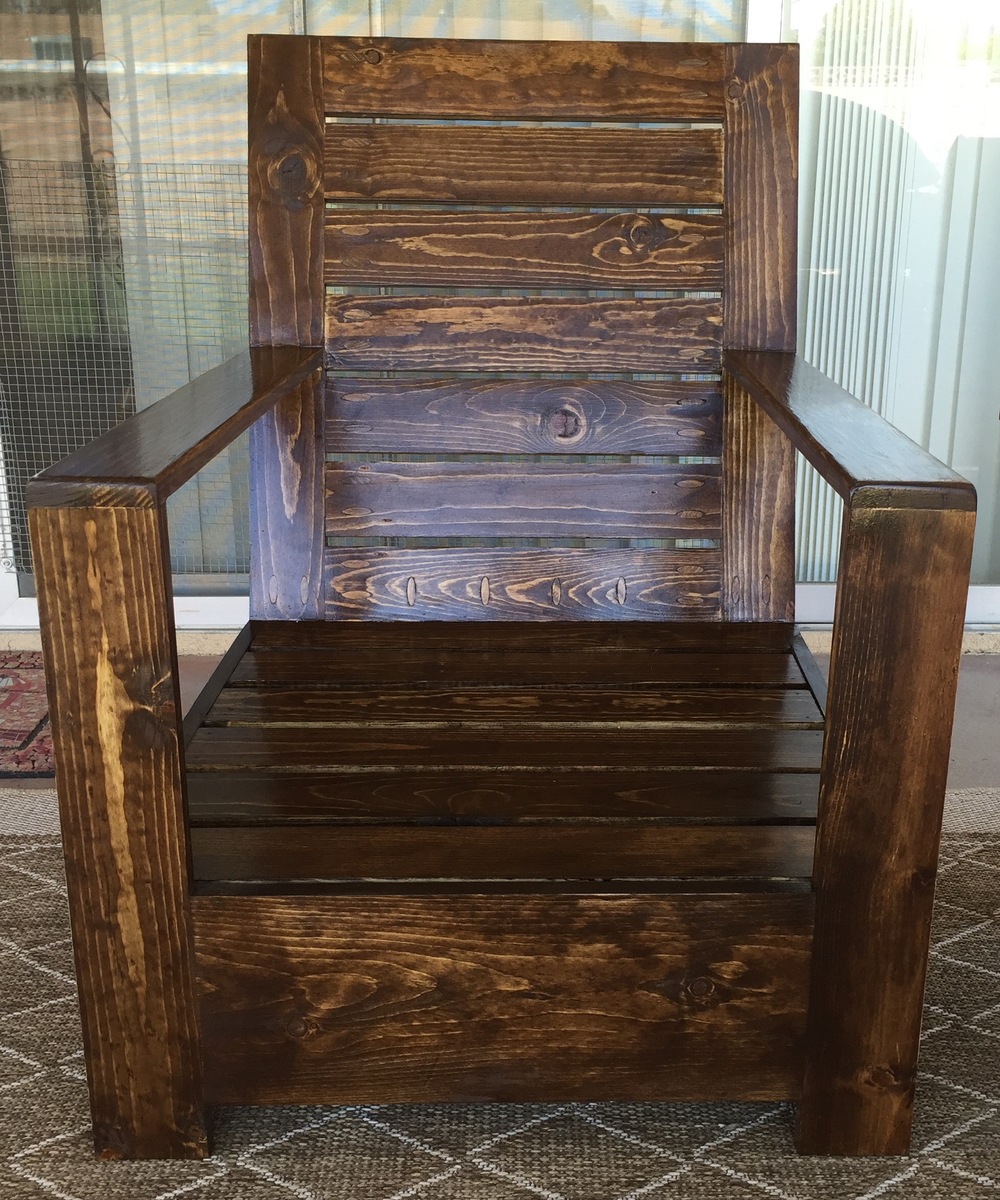
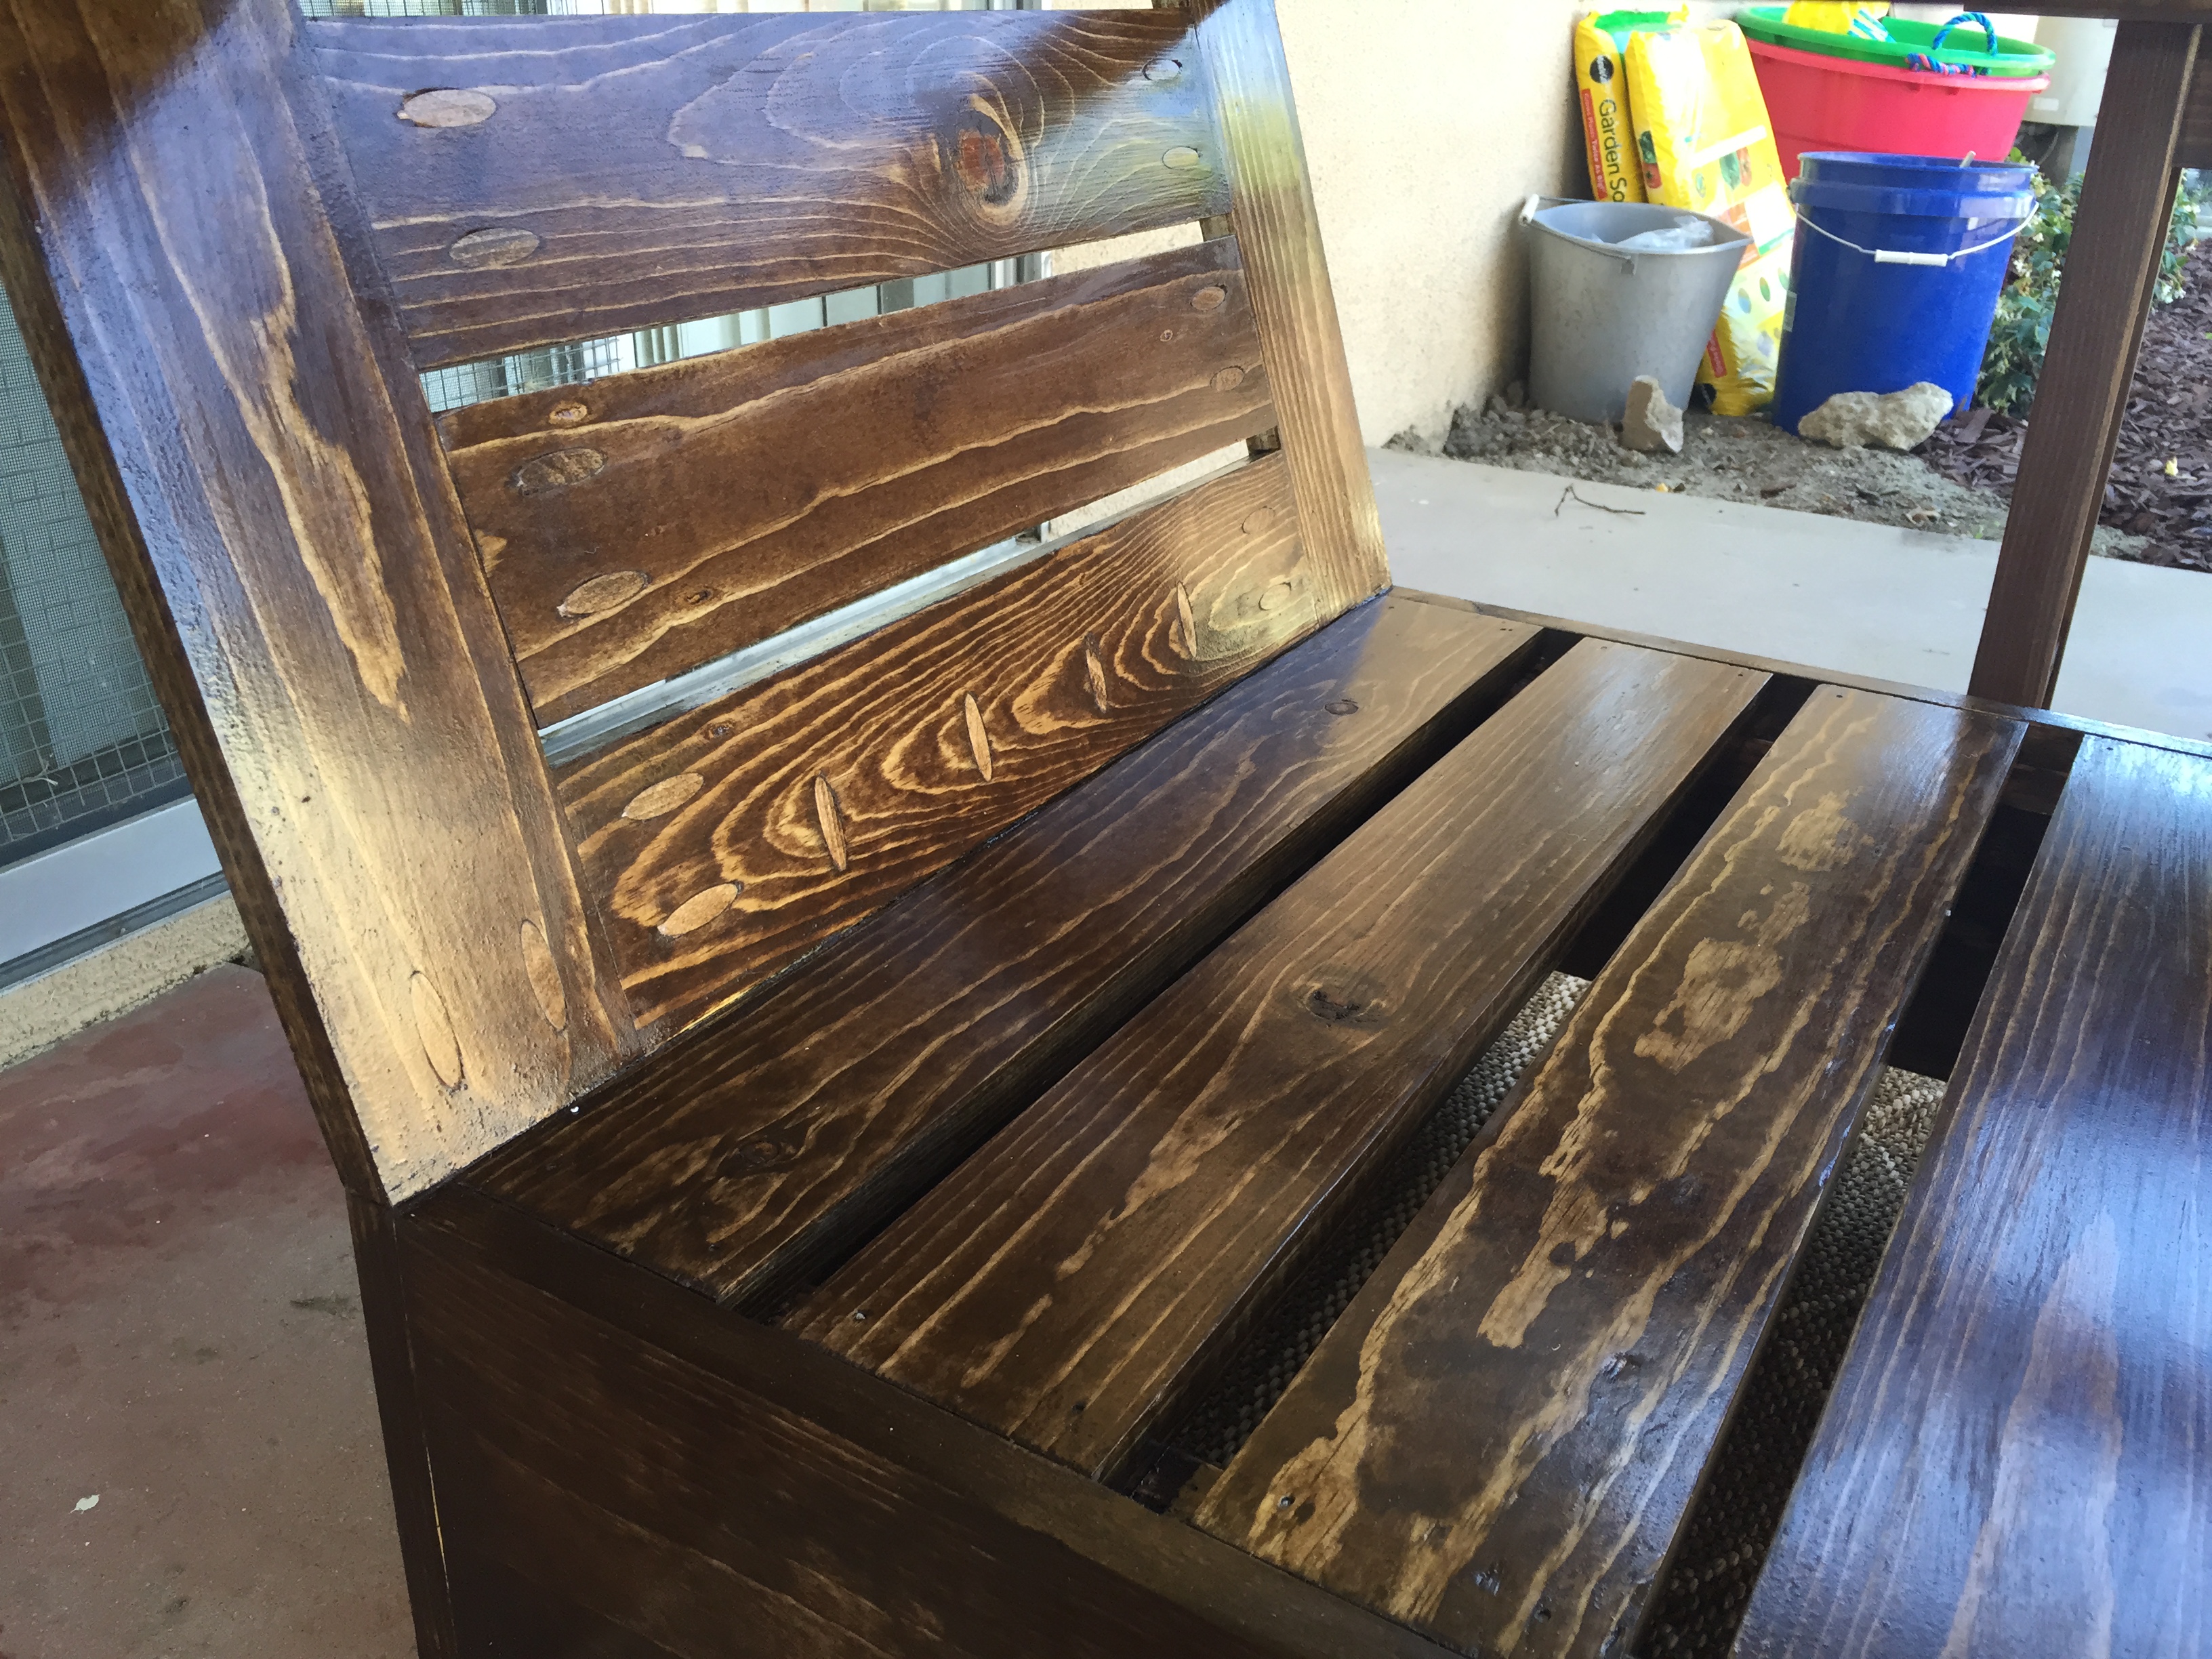
I modified the plans just a tiny bit to make the dimensions match the cushions I bought. I got my cushions from Lowes for $57 per set. The other modification I made came because of some of the comments I read on the plan's comment thread. Several people seemed to be worried about the strength of the back section as the back was beveled at a 15 degree angle meaning it wouldn't make a 90 degree joint. Because my biggest fear as a woodworker is having a piece of furniture fail, especially if it fails when someone else is using it, I wanted to make the chair as strong as possible. So, I lowered the lowest back slat so that it's bottom edge would make contact with the seat frame. I also beveled the seat slat at 15 degrees, in fact I built the entire back section and then beveled it all at once. This change allowed me to put pocket holes along the width of the chair. I alternated pocket holes in the seat frame and the back support section. Of course, it is all reinforced when you connect the back section to the arm rests, as well. So far, the chair is holding up quite nicely--as is my pride as a woodworker--and has not even come close to failing. Also, counter intuitively, I put all the pocket holes on the front of the back section. I figured the cushion would cover them, and then the back is left sleek and clean in case anyone wants to admire the chair from the back.

Mon, 06/29/2015 - 09:25
Very nice and they look so inviting. I have the same rug. Love it!

Mon, 06/29/2015 - 14:47
I've been wanting to build this set for so long. The cushions keep stopping me. Did you buy them recently from Lowes? Do you remember which ones they were?
Mon, 06/29/2015 - 21:00
Thanks, handyness! Yes, I bought them from Lowe's about a month ago. And they are still there because I always walk past them and debate if I should try to buy two and make a loveseat.
Mon, 06/29/2015 - 16:07
Your chairs are lovely! What a beautiful build, and love the finish too!
Sat, 11/28/2015 - 22:22
Hey,
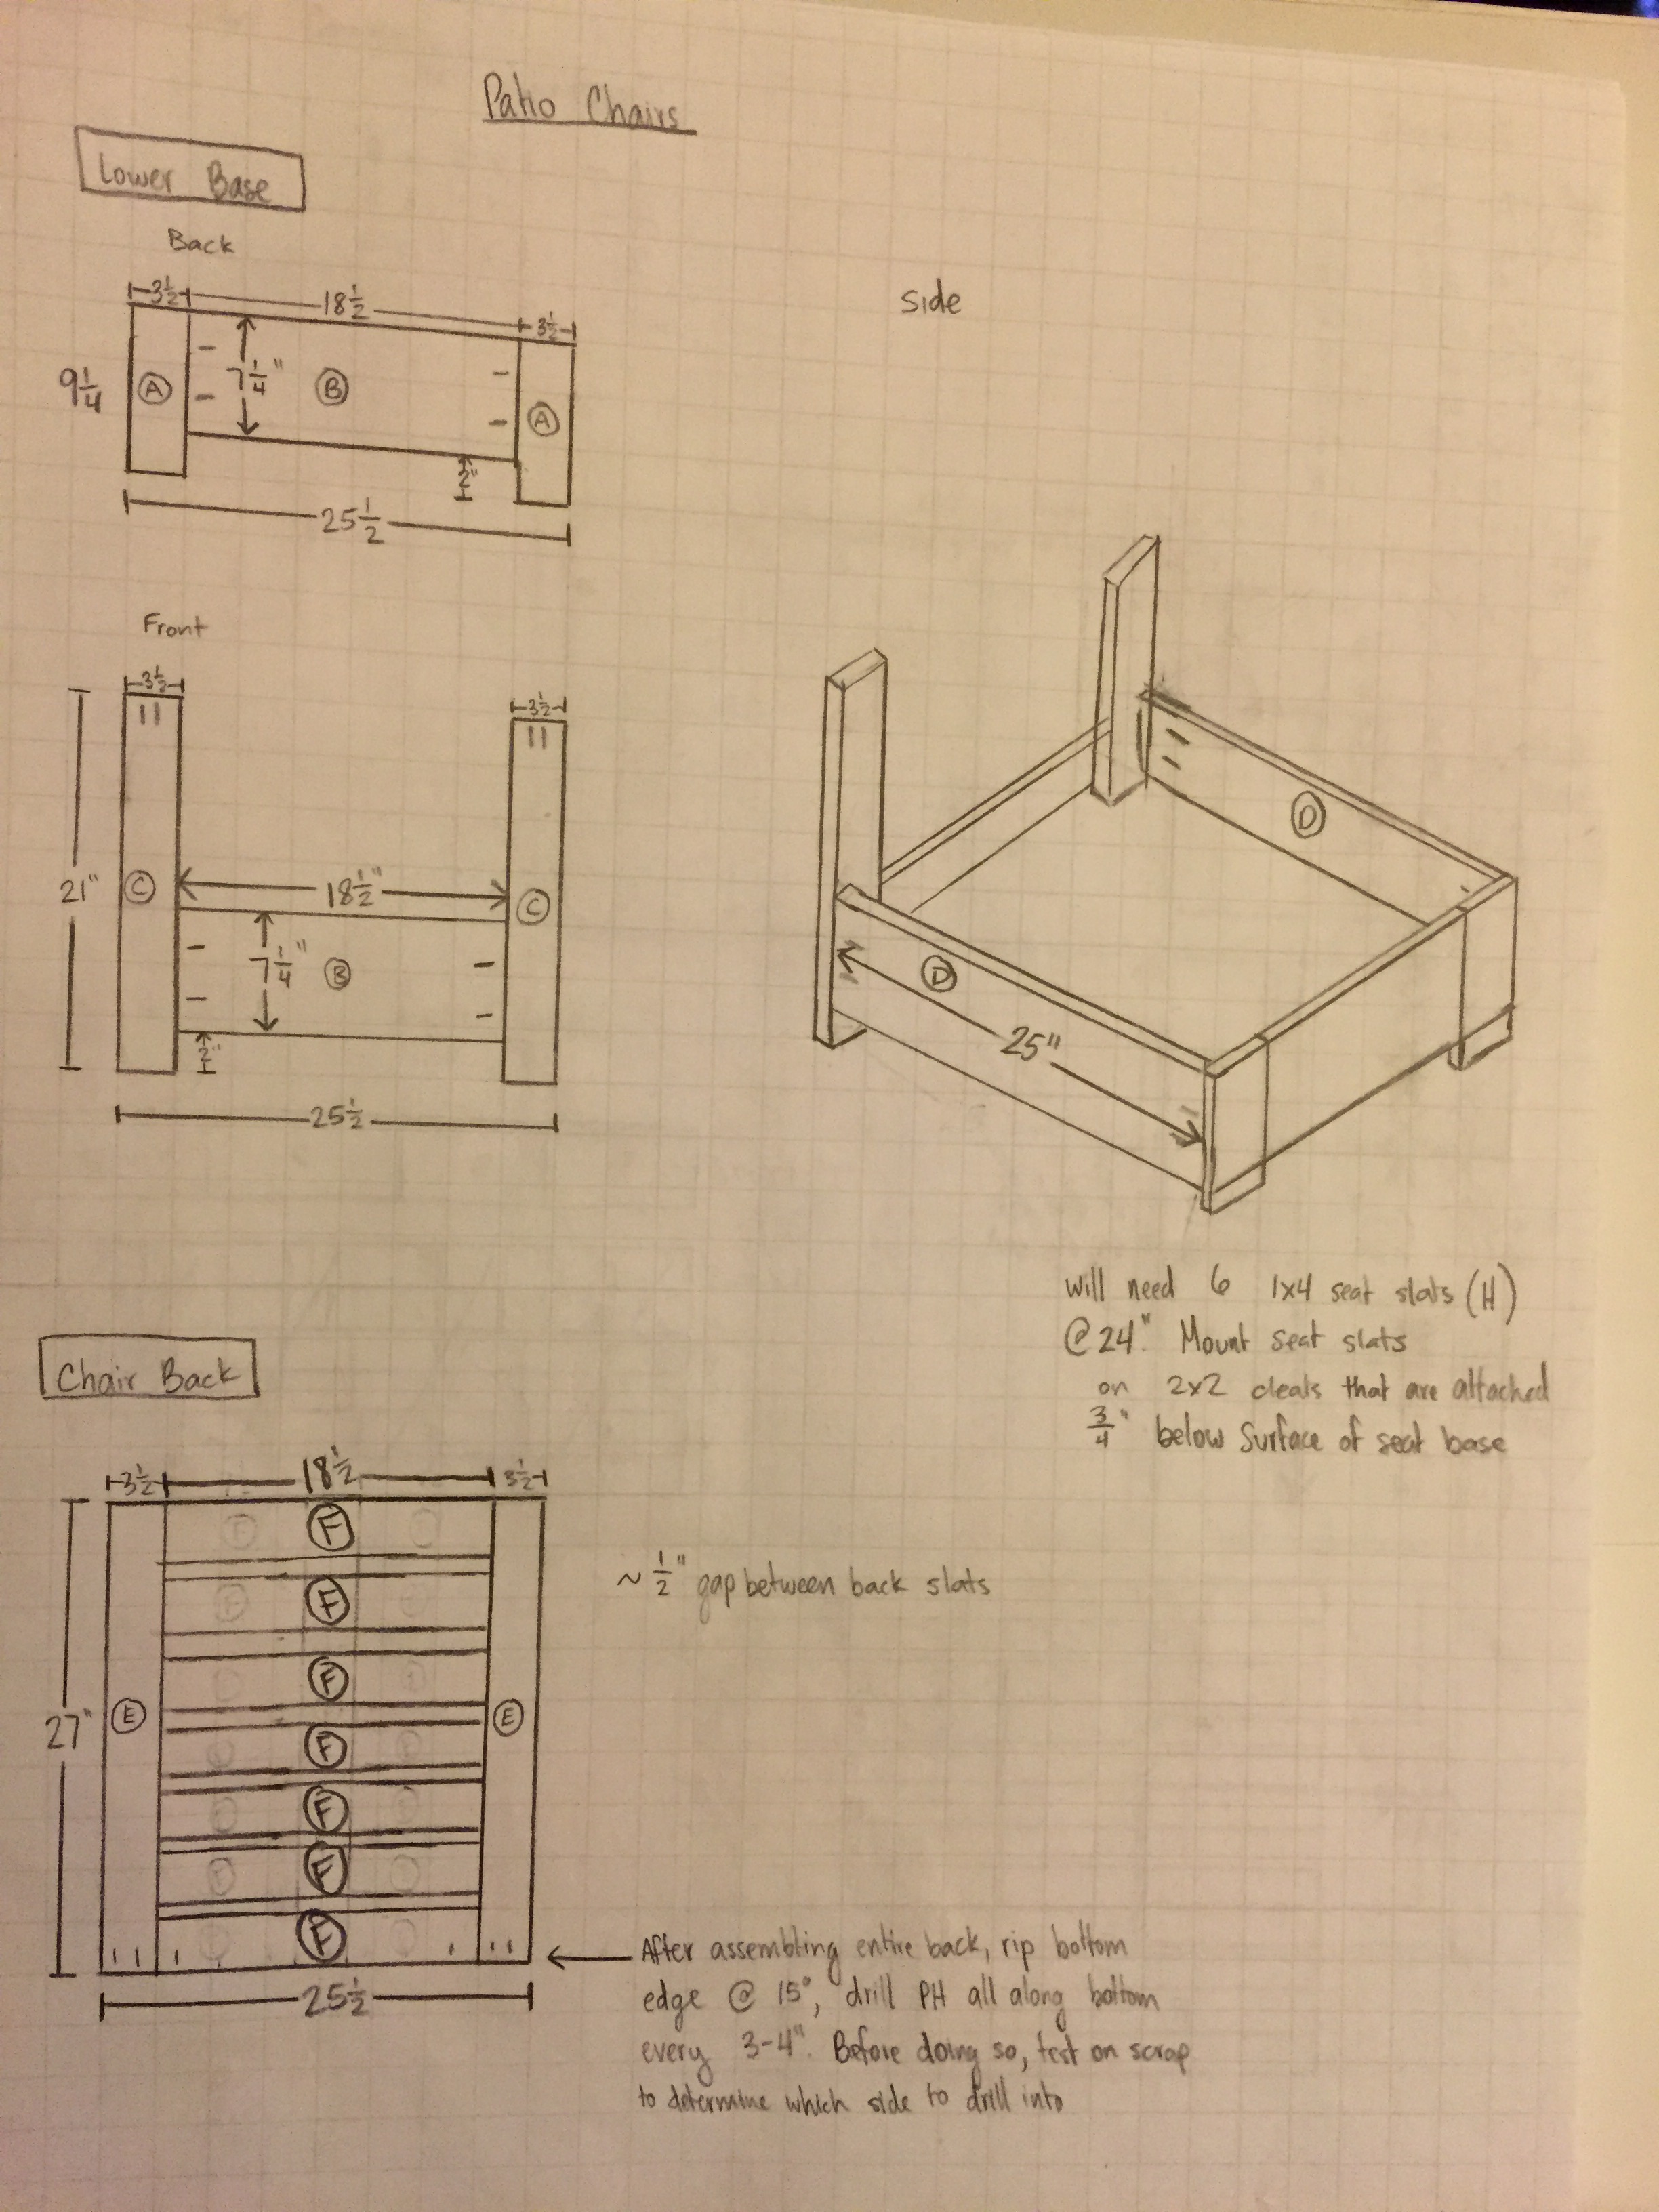
Sorry I didn't see this message until now (almost December). Anyway, I added a picture of the modified plans that I drew up. Hopefully you can make sense of them and read all of the measurements I used. Oh, and yes, the cushions are the Allen Roth ones from Lowes. Please let me know if you have other questions or can't read my plans.
Thanks!
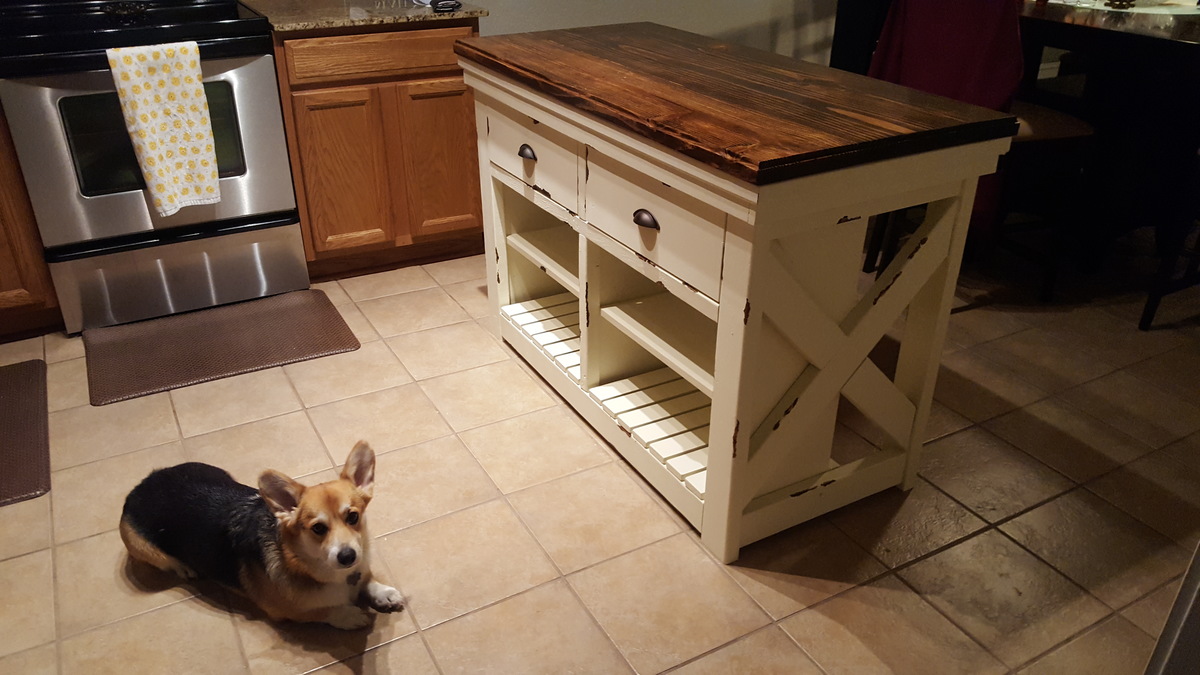
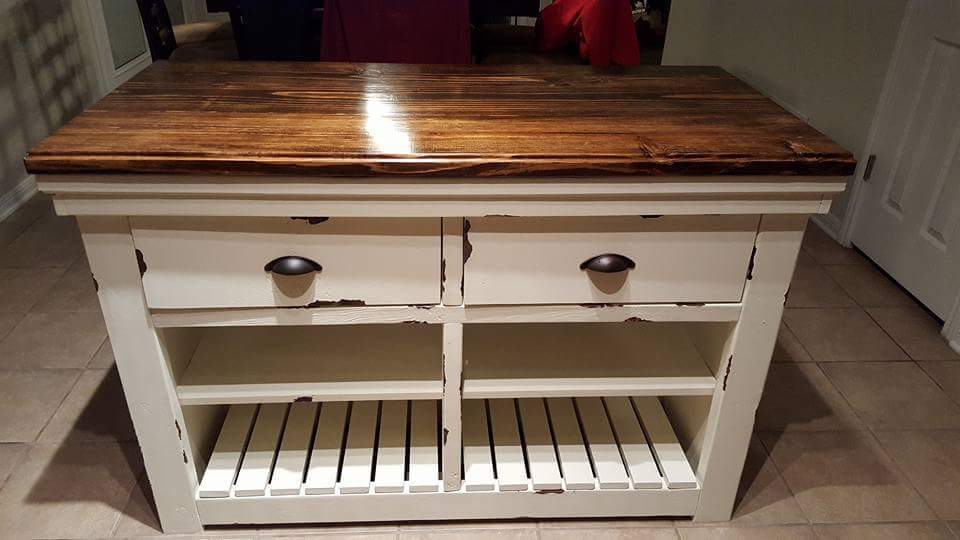
My wife didn't want casters installed, but she wanted the overall height to be similar to the dimensions in the plan. I used 2x4's to add a tiered layer on top of the island, underneath the countertop. Turned out great...thank you Ana White!
Made this for my niece for Christmas, she loves it!
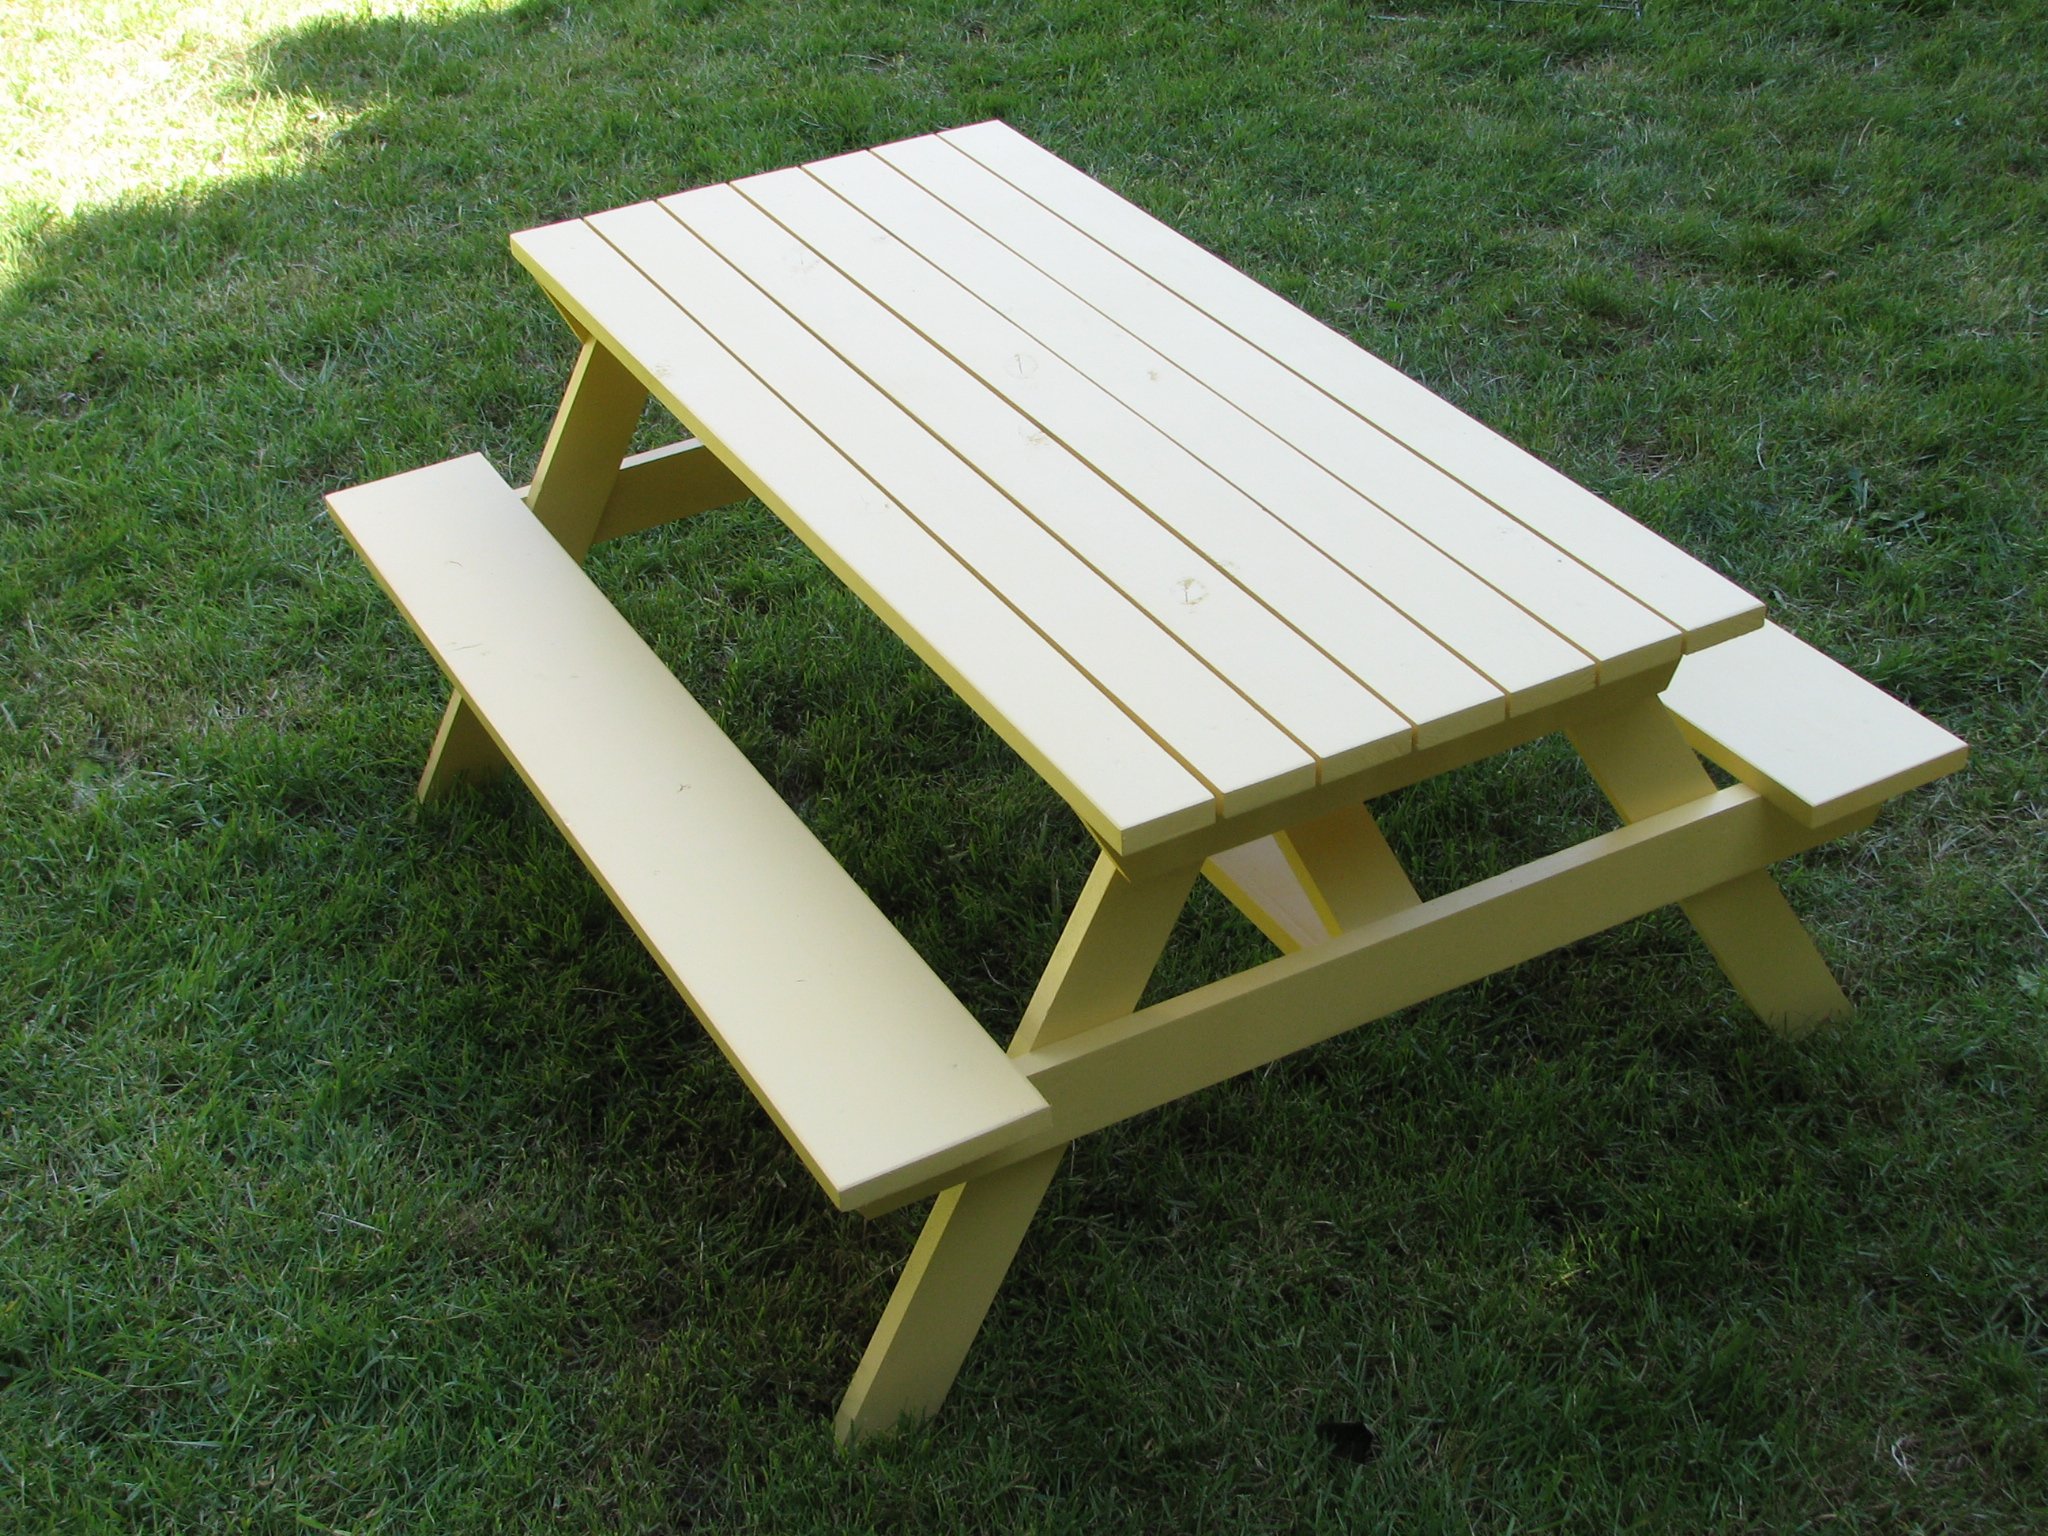
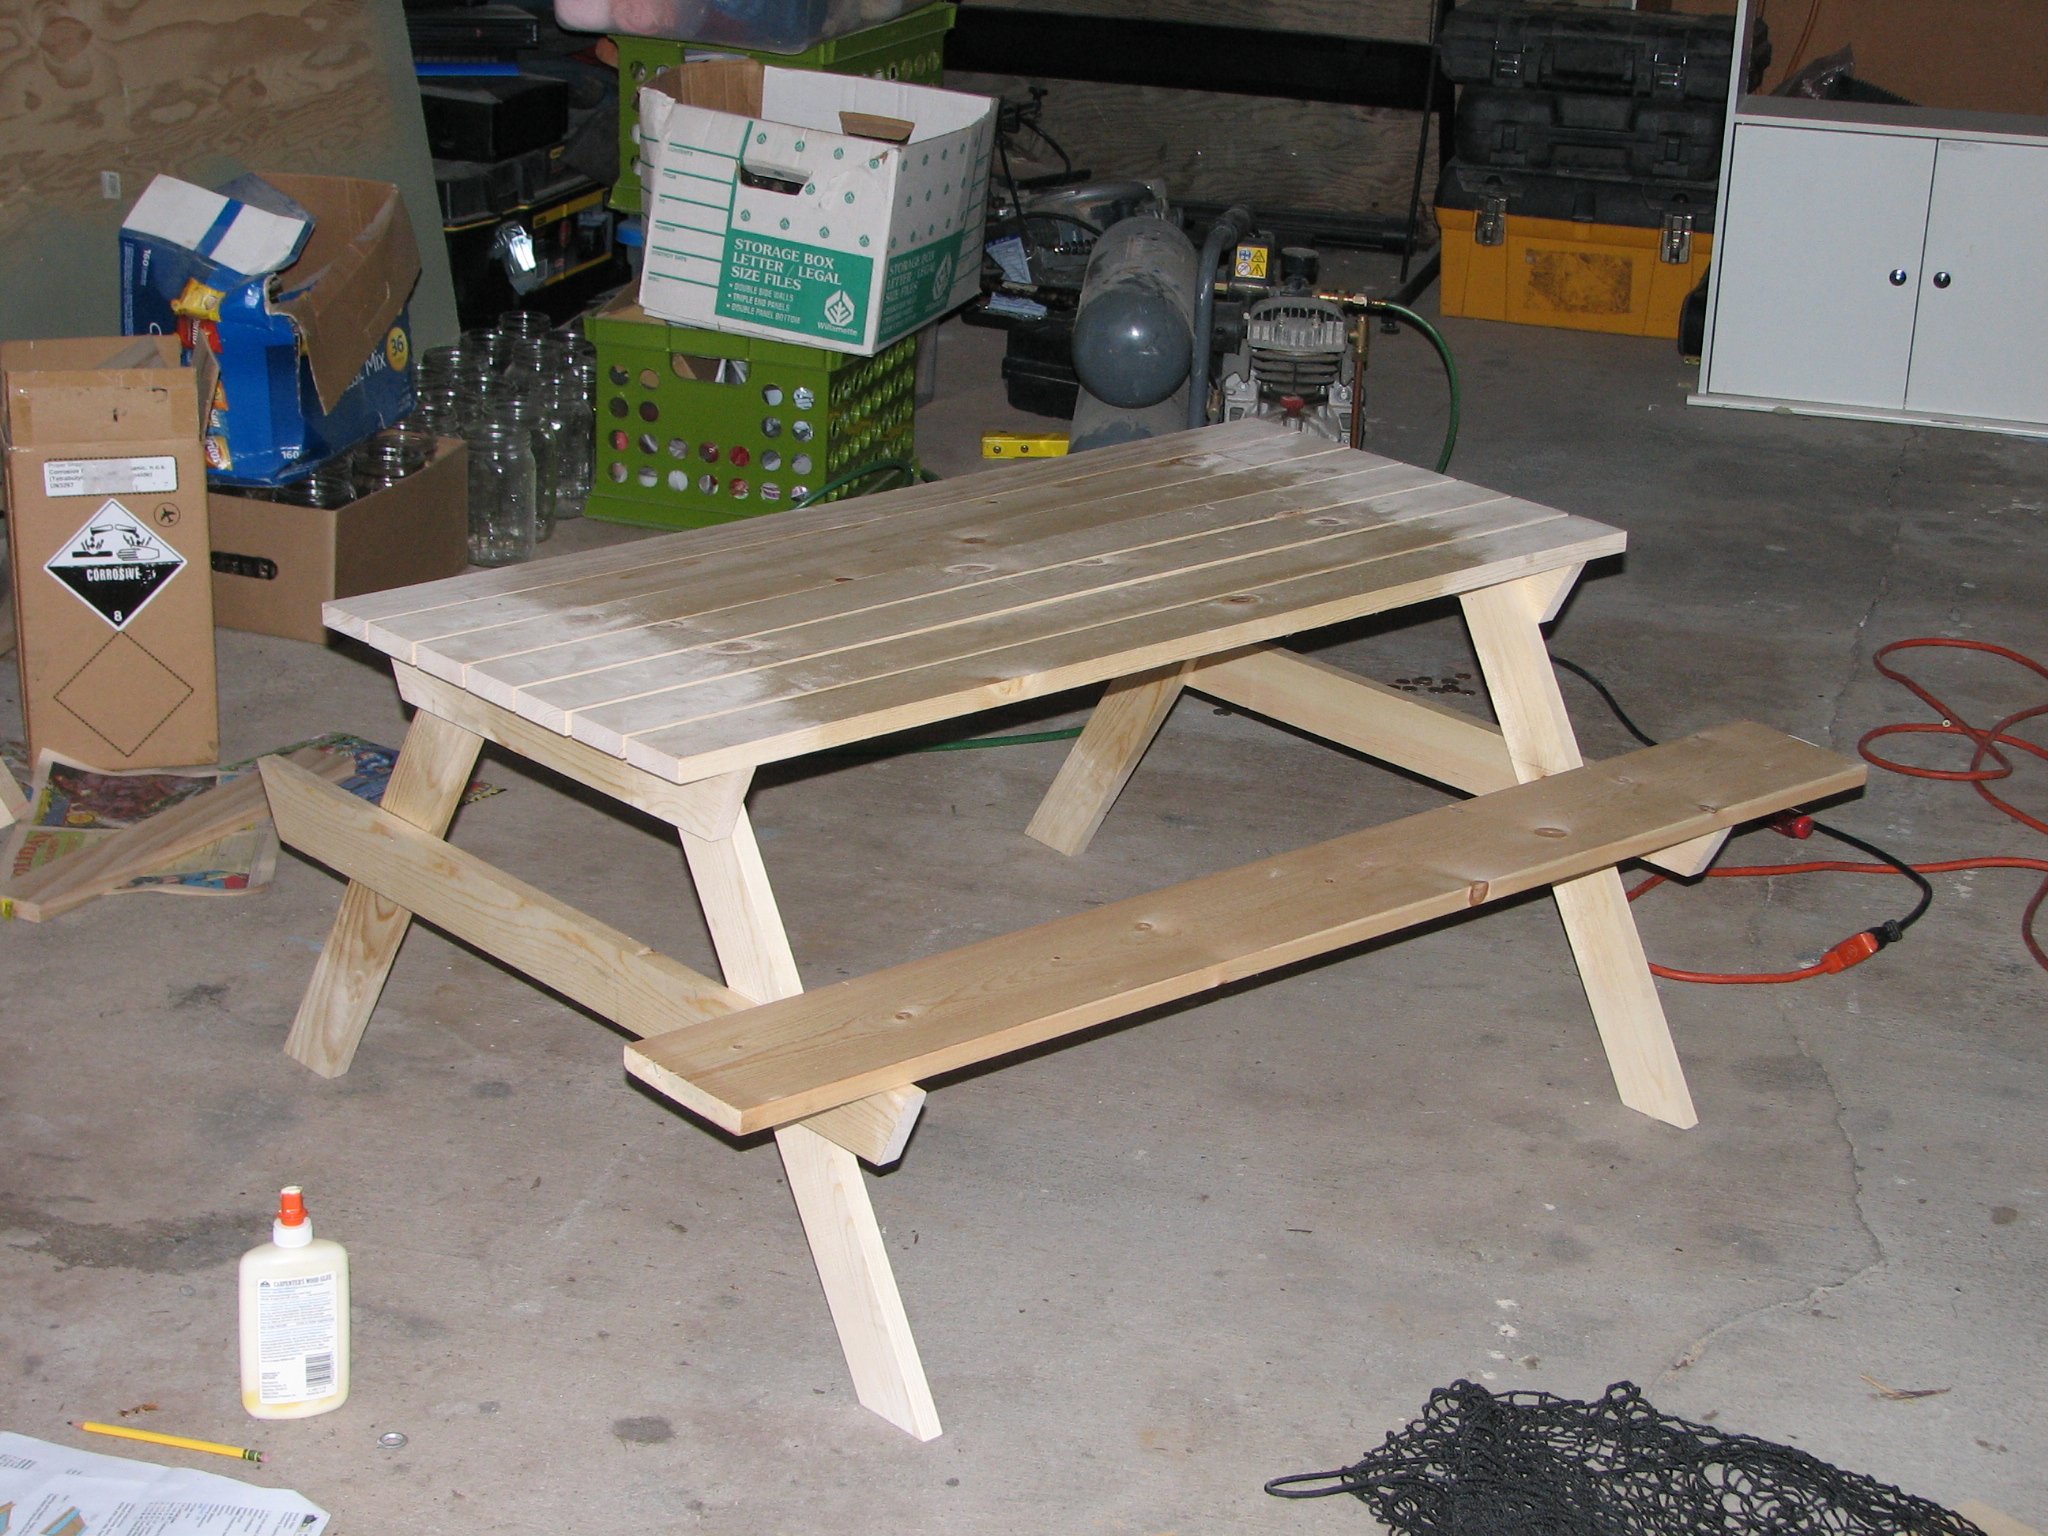
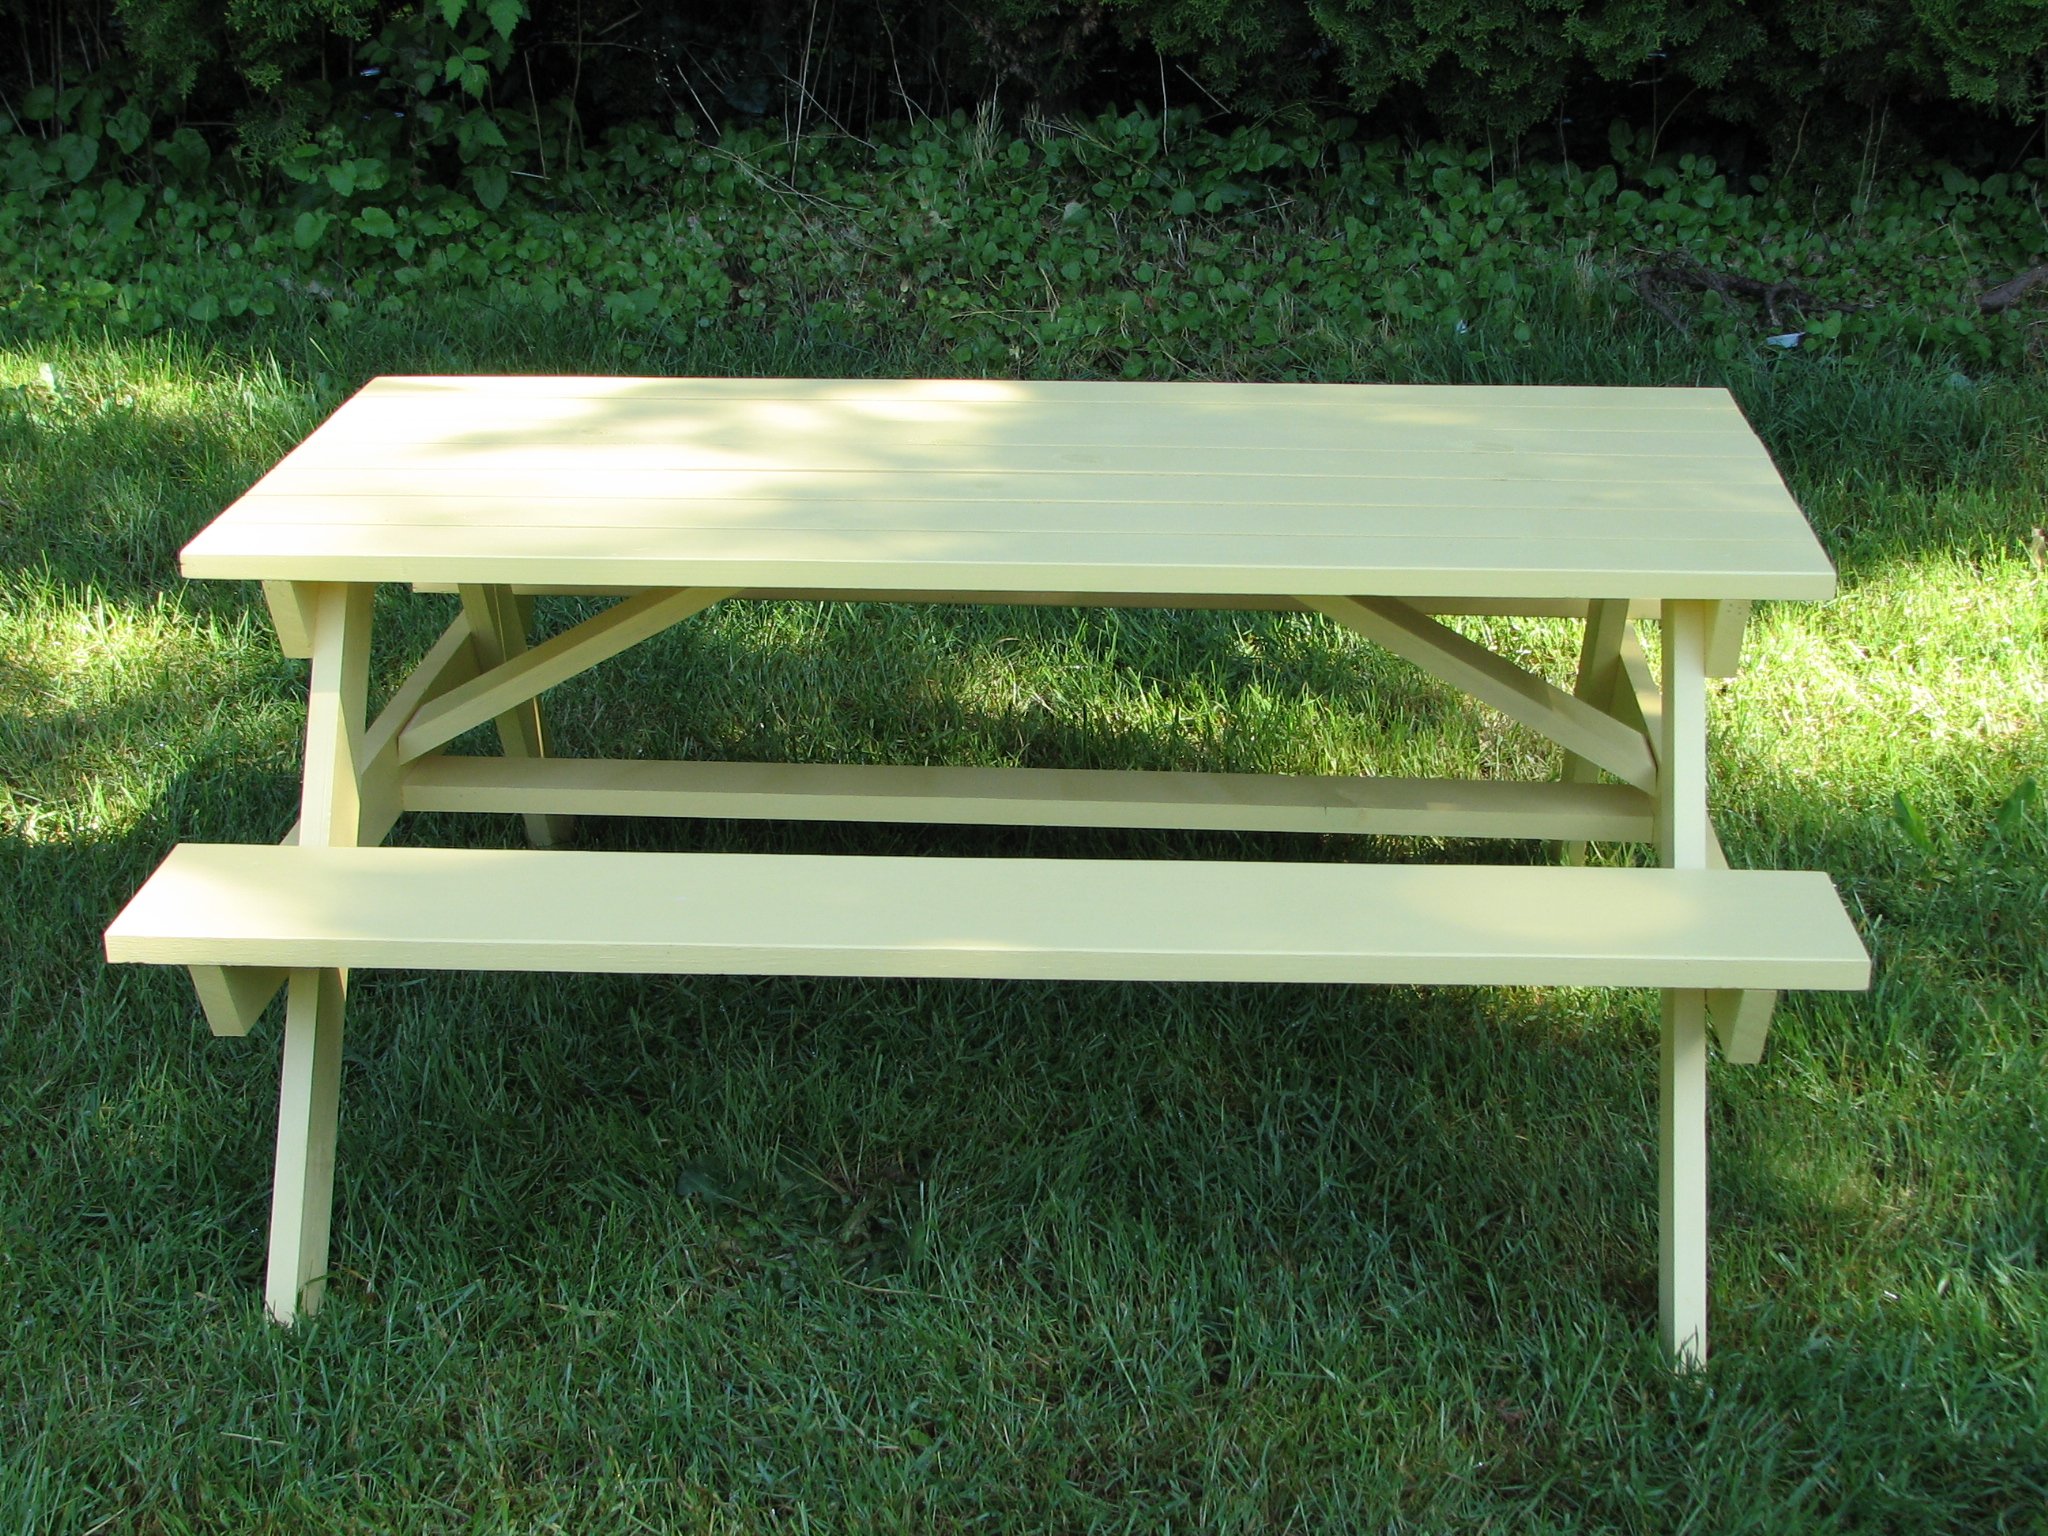
While out shopping with my 4 year old son we came across a picnic table that he absolutely adored. I had wanted to purchase a kids picnic table last summer but never got around to it. After checking out the price tag on this little gem I decided I would check out Ana White’s collection of plans before I spent $80!!! I made a few alterations in size and added extra support for those changes, but even with the added lumber I got it ½ off the $80 store price!!


I was inspired to build this table after taking Ana's Adirondack Chair Class at Home Depot. Living in Fairbanks, AK means that the pickings are slim and pricy for quality furniture.
I shortened the table length to 5' to fit my space and made the benches 4' long and lined the legs up so they would fit comfortably under the table. I also made the chairs based on Ana's Parsons chair pattern.

This bench is a shorter version of the farmhouse bench to go with our existing table. It measures 45" long, 14" wide, and 18" high. I used the leftover wood from building our Farmhouse bed so it cost next to nothing. I used leftover 1x4's for the seat and leftover 1x6 for the breadboard ends. I didn't have enough 2x4's to make the 4x4 legs, but decided that the bench was sturdy enough as is. I used my Kreg jig, so I did not notch out the legs as the plan resulting in 9" stretchers and aprons. I did add an extra 2x4 to the inside of the leg piece to add stability and a surface to screw the top to.

I made 14 personalized crayon blocks from Ana White's plan for Christmas presents. It was affordable, easy, and everyone loved them! I'm not sure who loved them more, the adults or the kids. I made them for preschool classmates, friends, nieces, and nephews.
I am a mom of a 1 year old and 3 year old so it's hard to estimate how much time it took me. I worked in half hour shifts during naptimes over a couple of weeks. It's totally doable!
Here are some tips:
- Buy pine wood with sharp edges. Some of my wood had slightly rounded edges and that made for bigger grooves on the sides. These were the ones that were harder to paint the letters.
- I followed the size dimensions for everything except the holes. I tried several times with Ana's plans, but the wood just kept cracking. I narrowed it down to just 26 crayon holes and spaced it about an inch from either end. This worked perfectly for me 14x!
- I tried many ways to drill the holes. My winning combination was to start each hole with a spade drill bit (drilled 75% through) and then finished it off with a regular spiral drill bit of the same size. I found it cracked way less on the backside if I didn't use the spade bit all the way through.
- I used a simple piece of sandpaper to lightly sand in the holes.
LETTERING
I have a Silhouette machine. I cut out the words/names on vinyl, weeded out the letters and stuck them on the wood as a stencil. I wrote their name on one side and "crayons" on the other. Then I rubbed clear kraft glue in the letters to "fill the gaps" so no paint would leak through. Then I painted over the glue and wood with acrylic craft store paint. Worked perfectly. Looks crisp. Some of the moms thought they were stickers. I finished with a matte clear spray finish.
What does NOT work:
-I tried the method of printing on paper, tracing with pencil, and then hand painting. Mine looked awful. Maybe I just don't have a steady enough hand.
-I tried using permanent marker instead of paint. Nope. It seeps into the wood and leaves you without crisp lines.
-I also tried cutting the letters on vinyl, sticking them on the wood then putting a clear coat on top. This was OK... but it didn't look as good as painted.
Hope this can help someone!


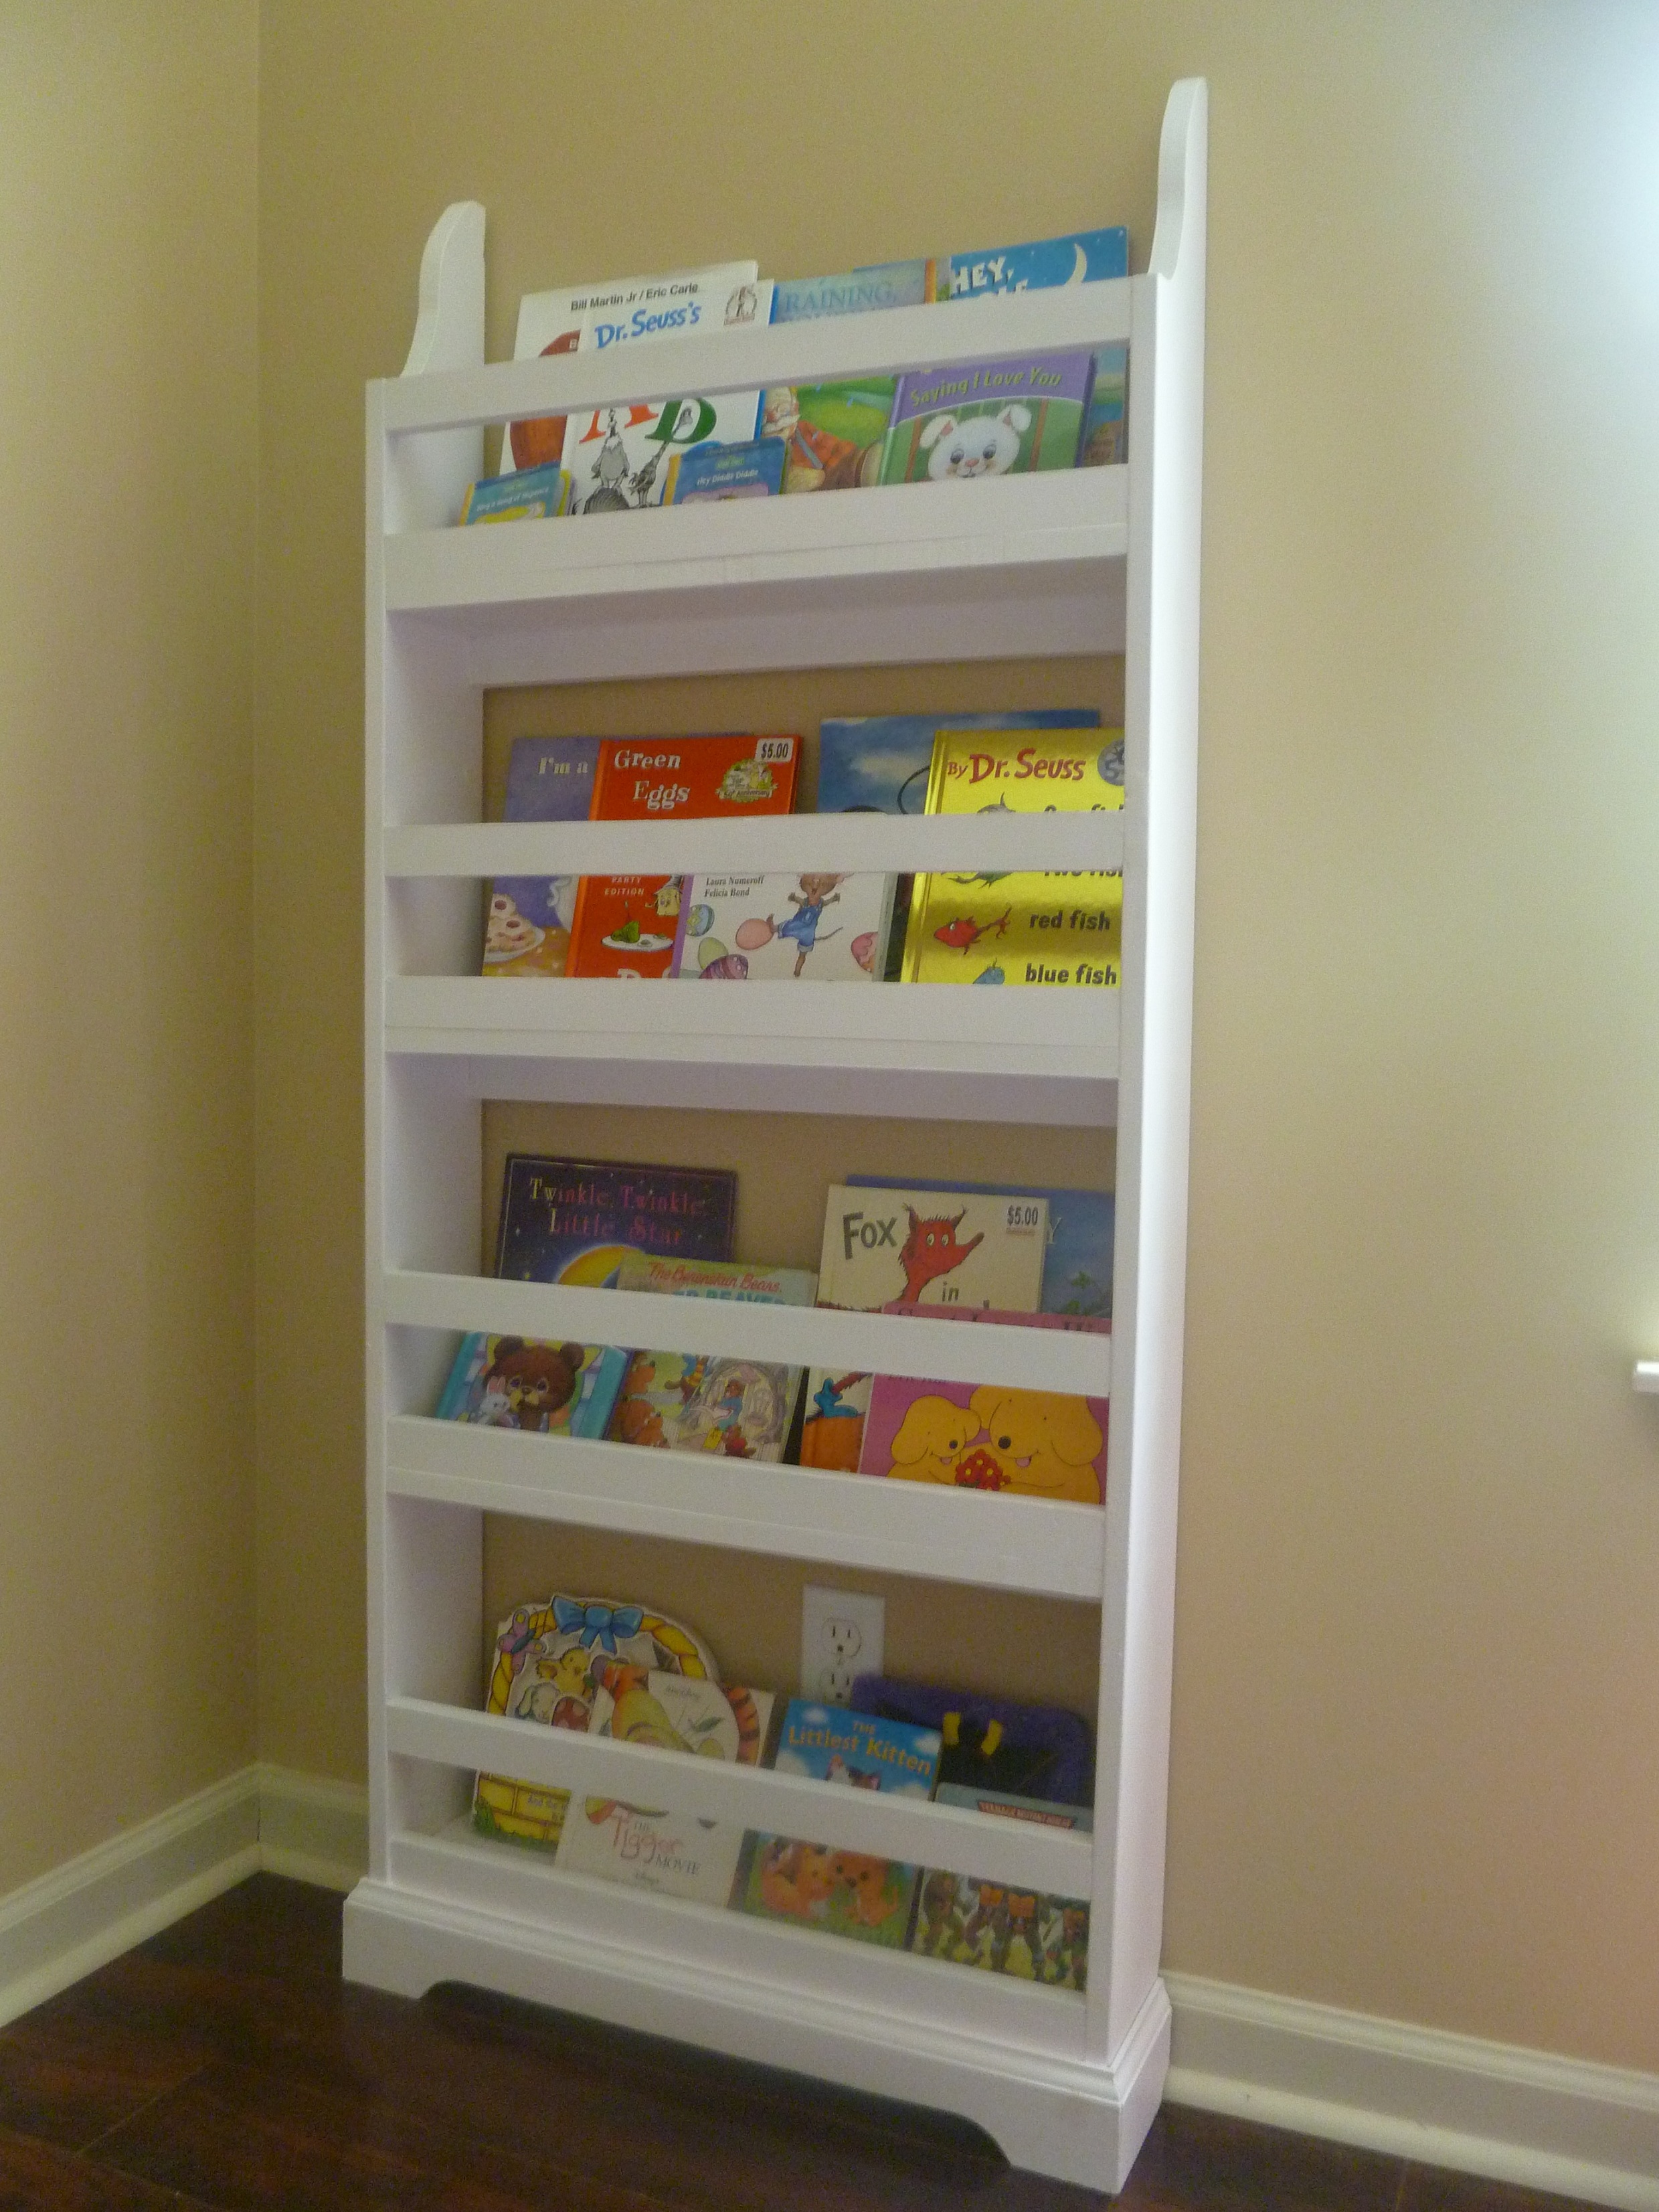
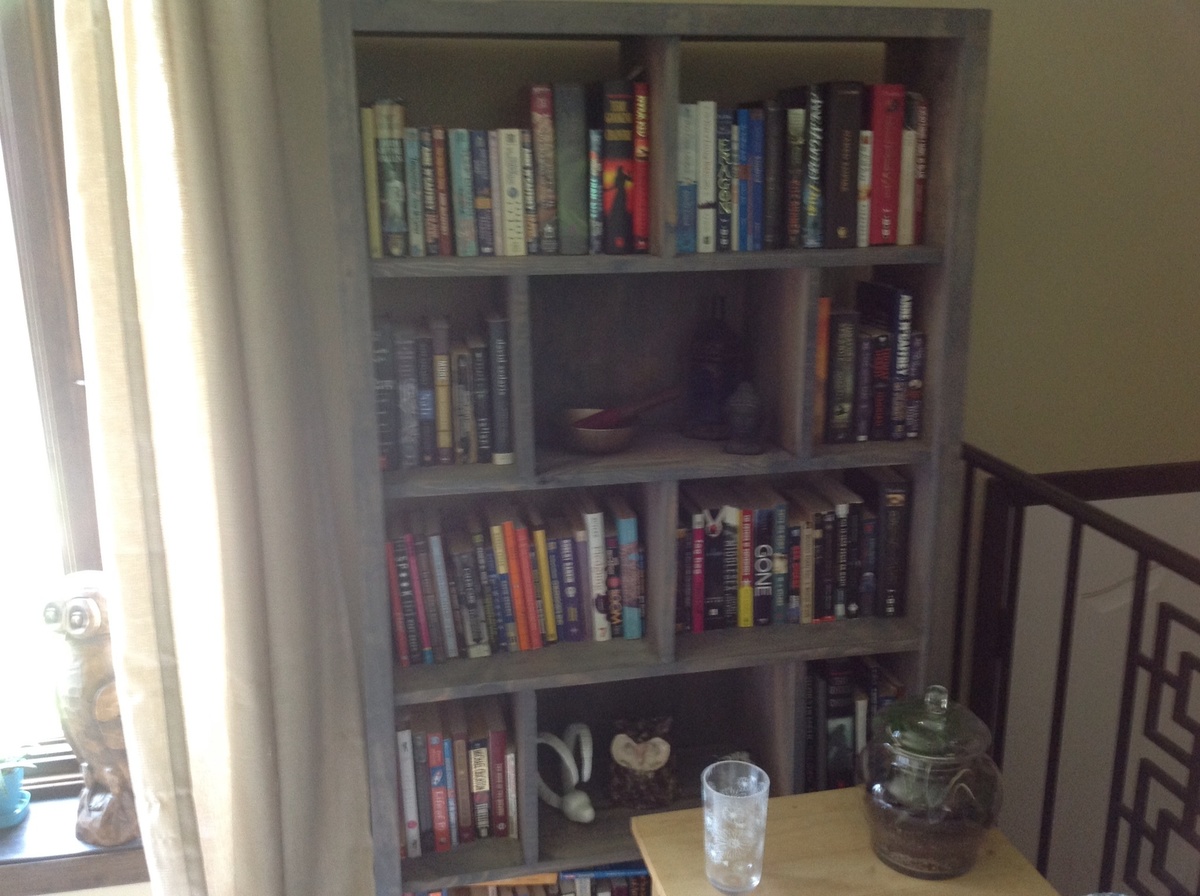
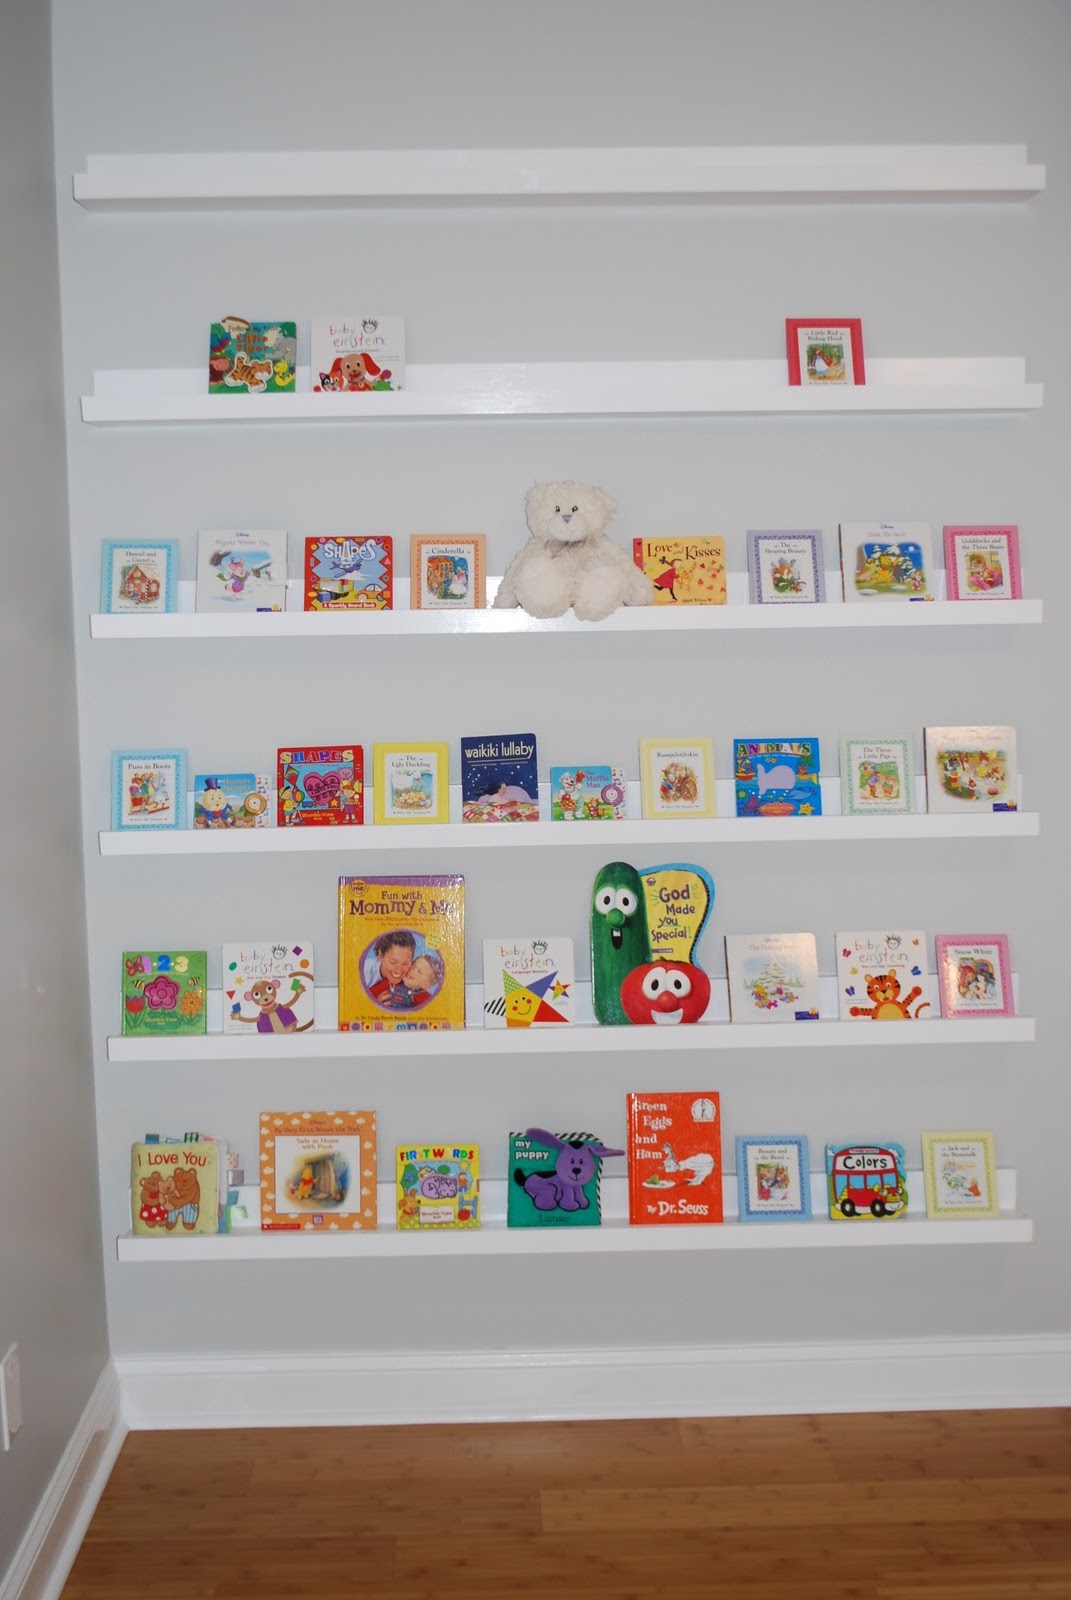
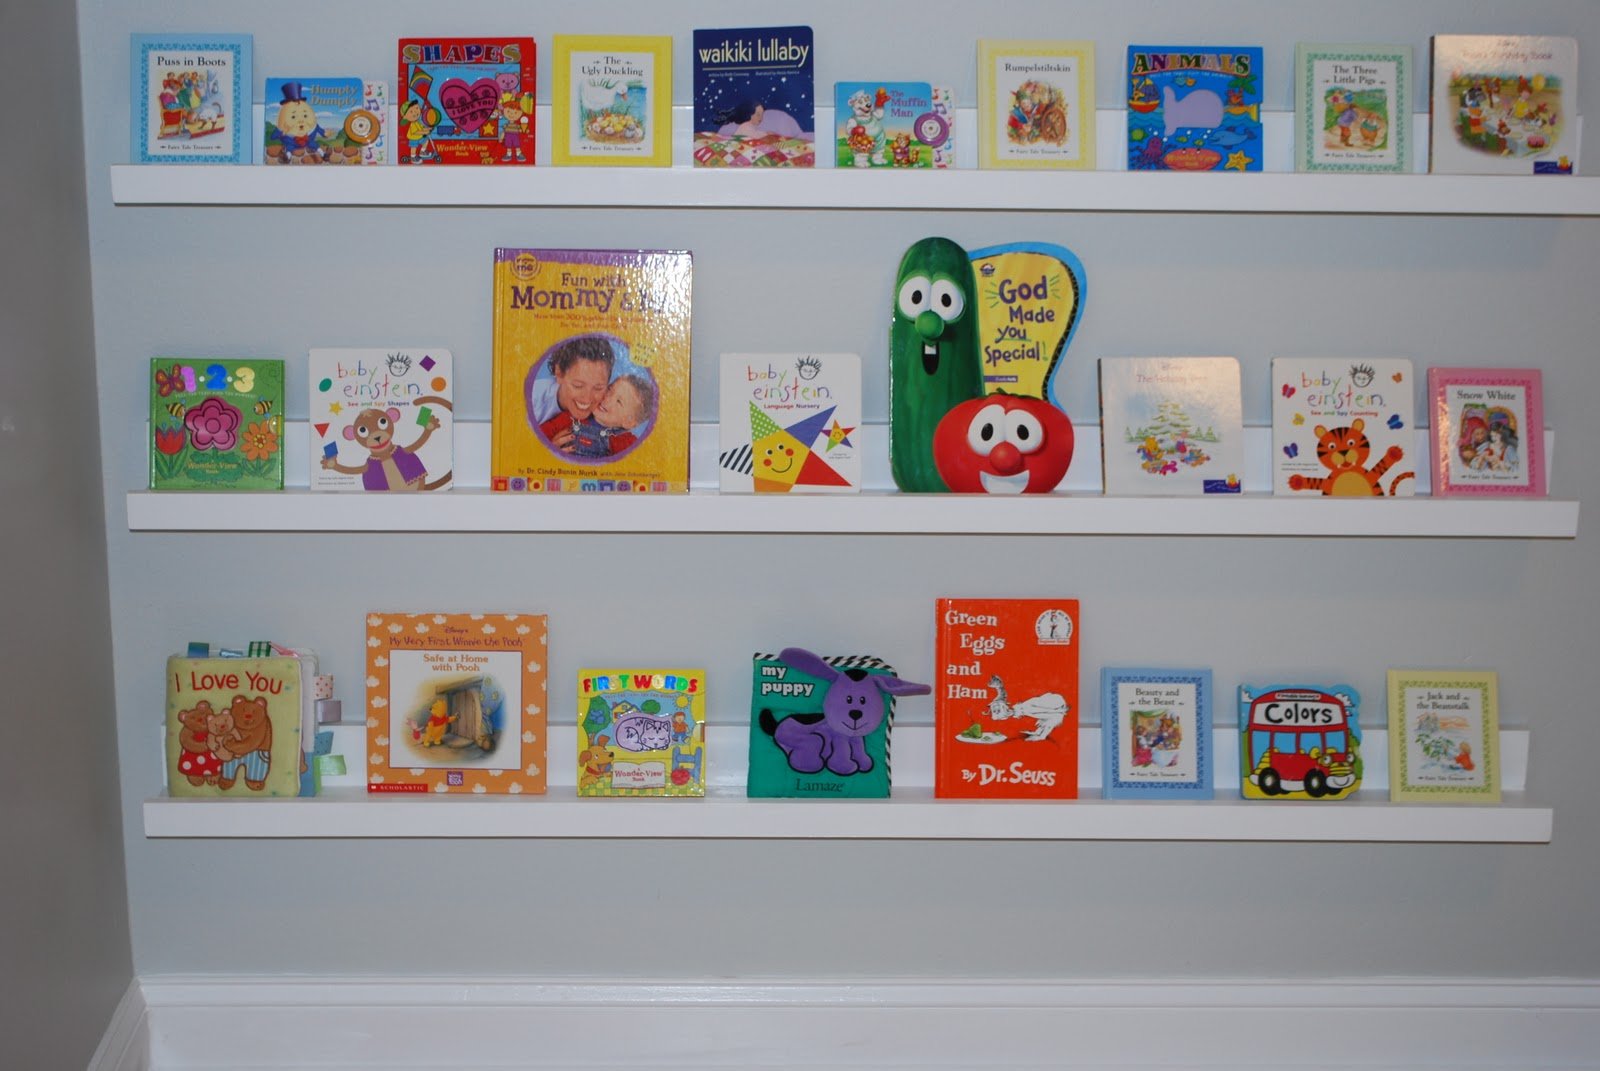
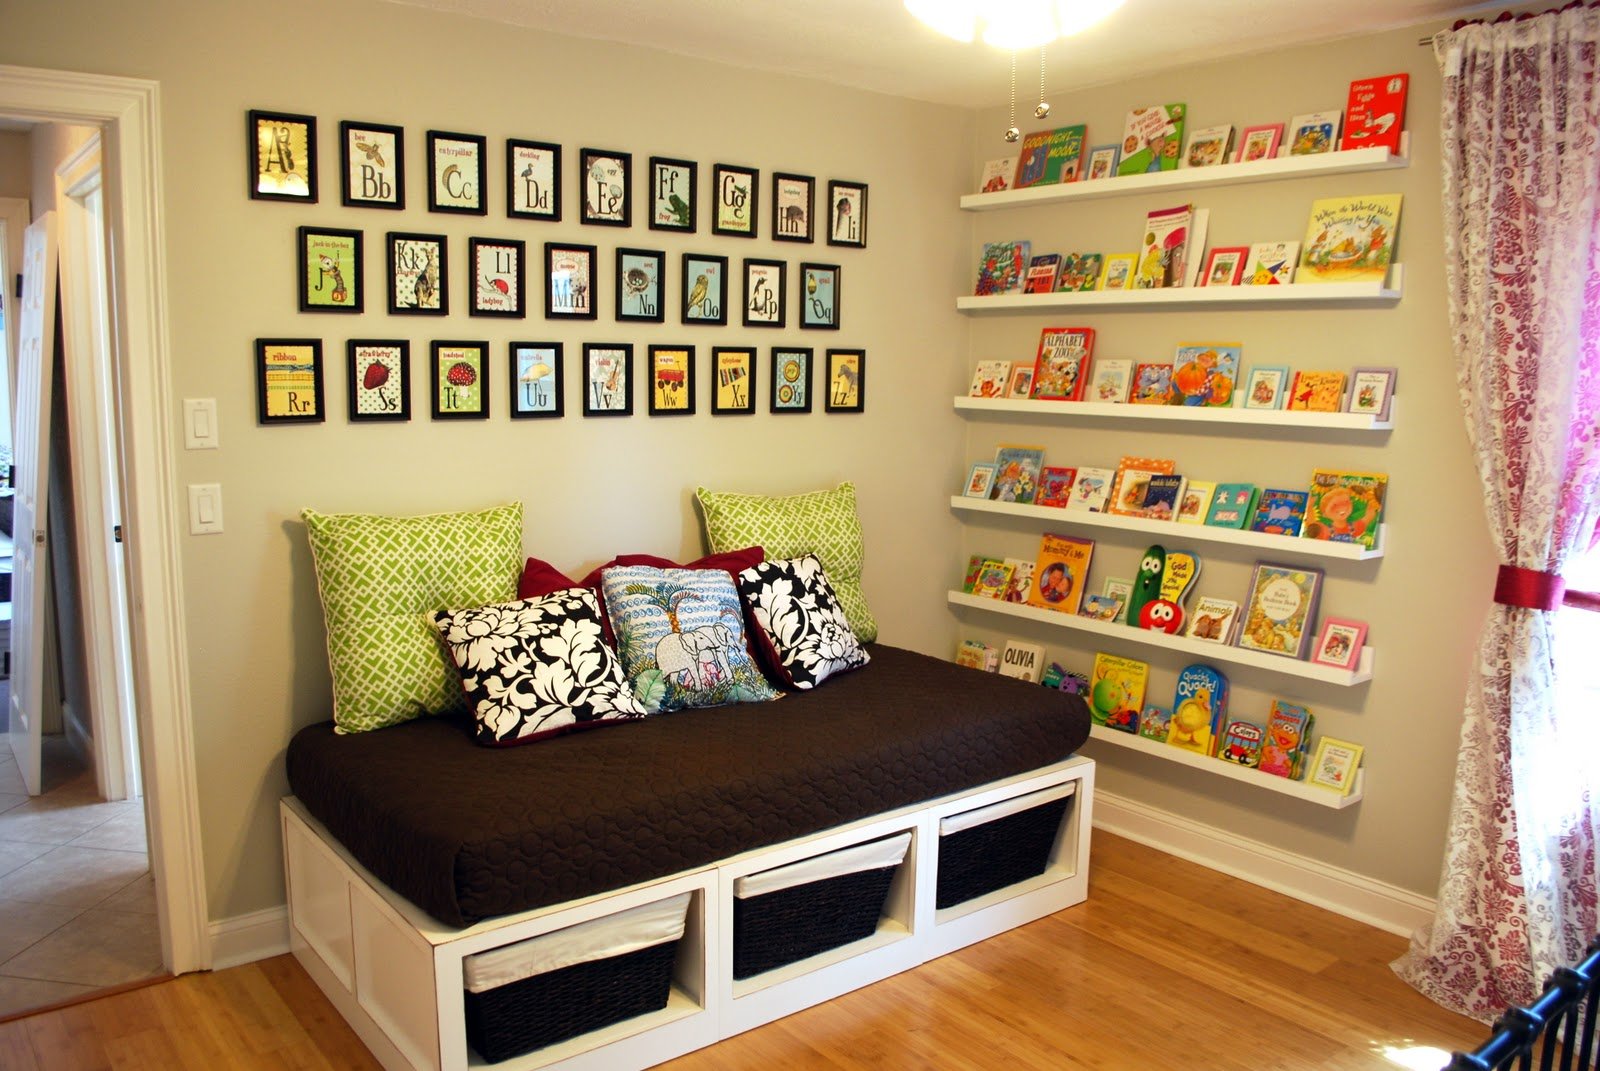
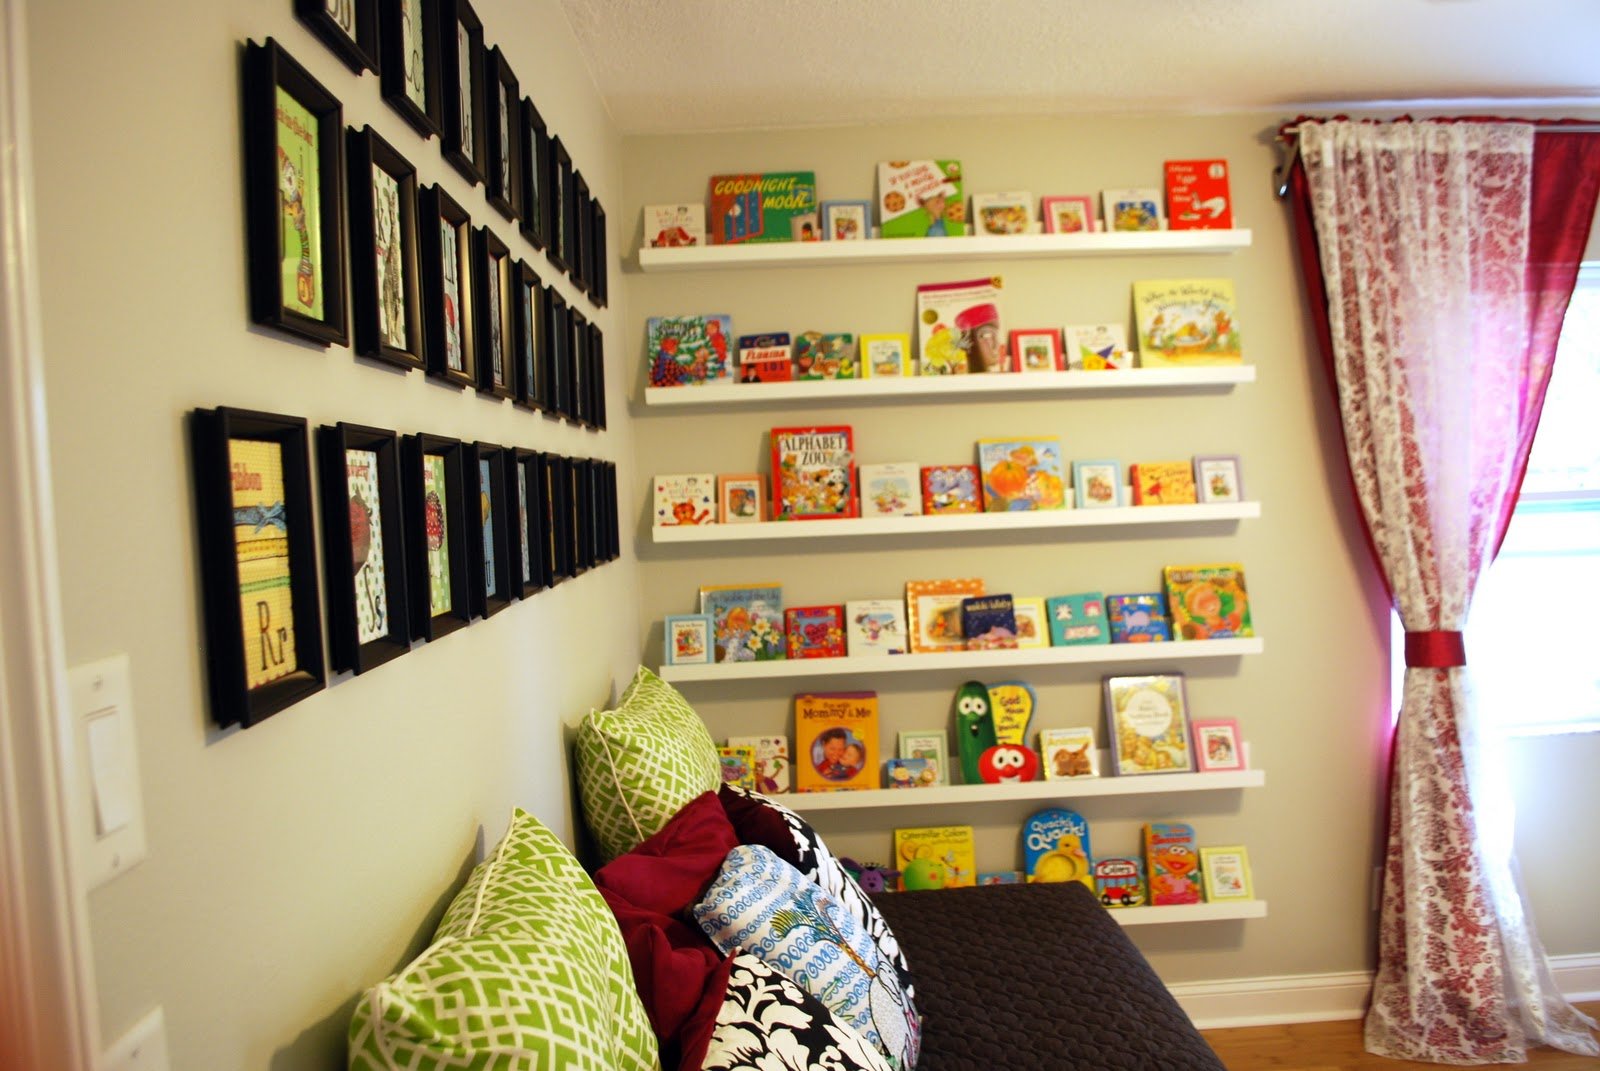
This plan was a breeze to put together (go out and buy some clamps if you don't have any!!) until I finished it, then looked at my wall and saw the baseboards. I really wanted it to be screwed/nailed into the wall, so it needed to be flush. That's where the nightmare being. Eventually (over a week later) I got that finished, however, and am loving my little one's new bookcase! I just can't decide where to put it now, in her bedroom or in her playroom. Maybe I'll make another and she'll have two! :D This plan was very simple to follow, and the materials weren't expensive, so I could definitely do that.

These are solid cedar. They also have several coats of polyurathane. They both got wet sanded and buffed for final coat. They were also modified with leg braces amd braces along side decking. Enjoy!
Wed, 07/10/2013 - 09:38
Sorry first pic got uploaded upside down some how ? Instagram acct is jrh413 for anyone who wants to follow. Thanks!
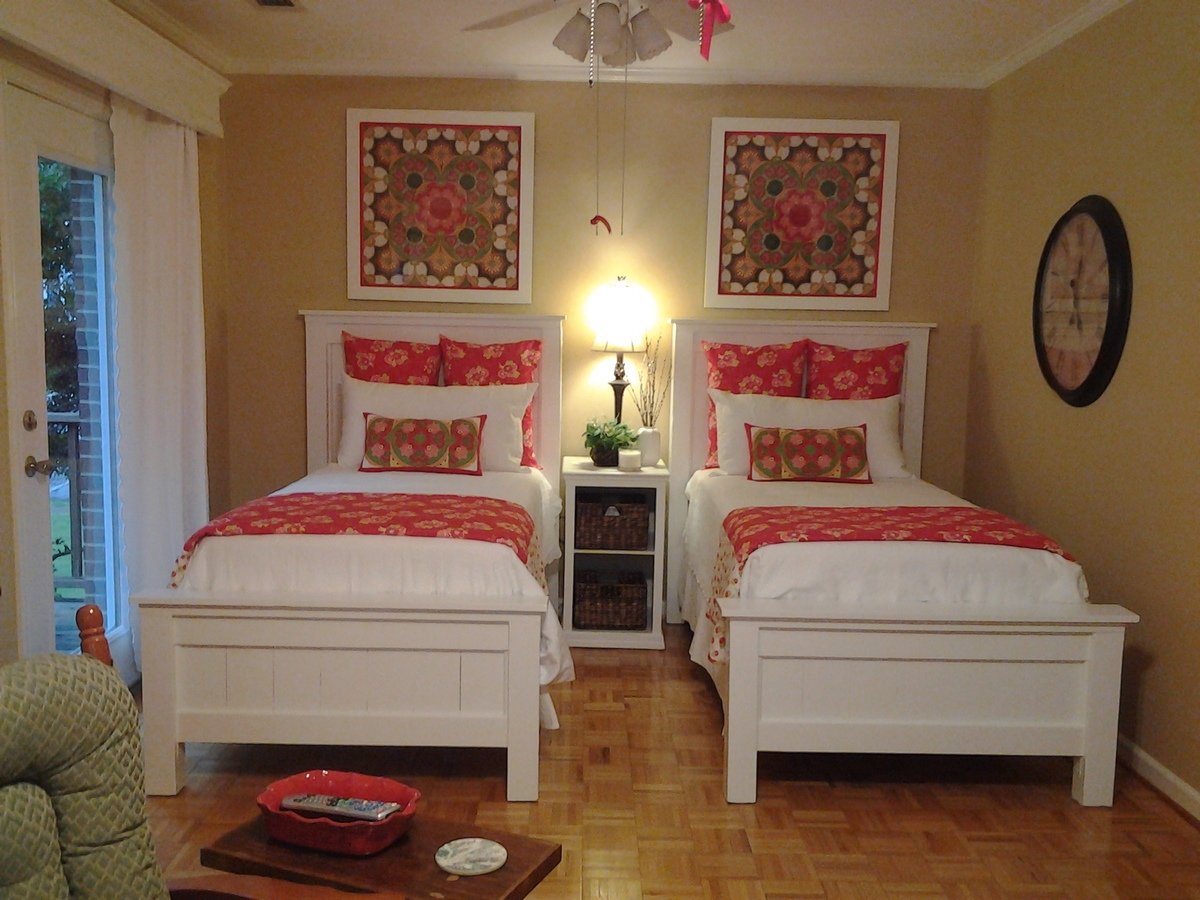
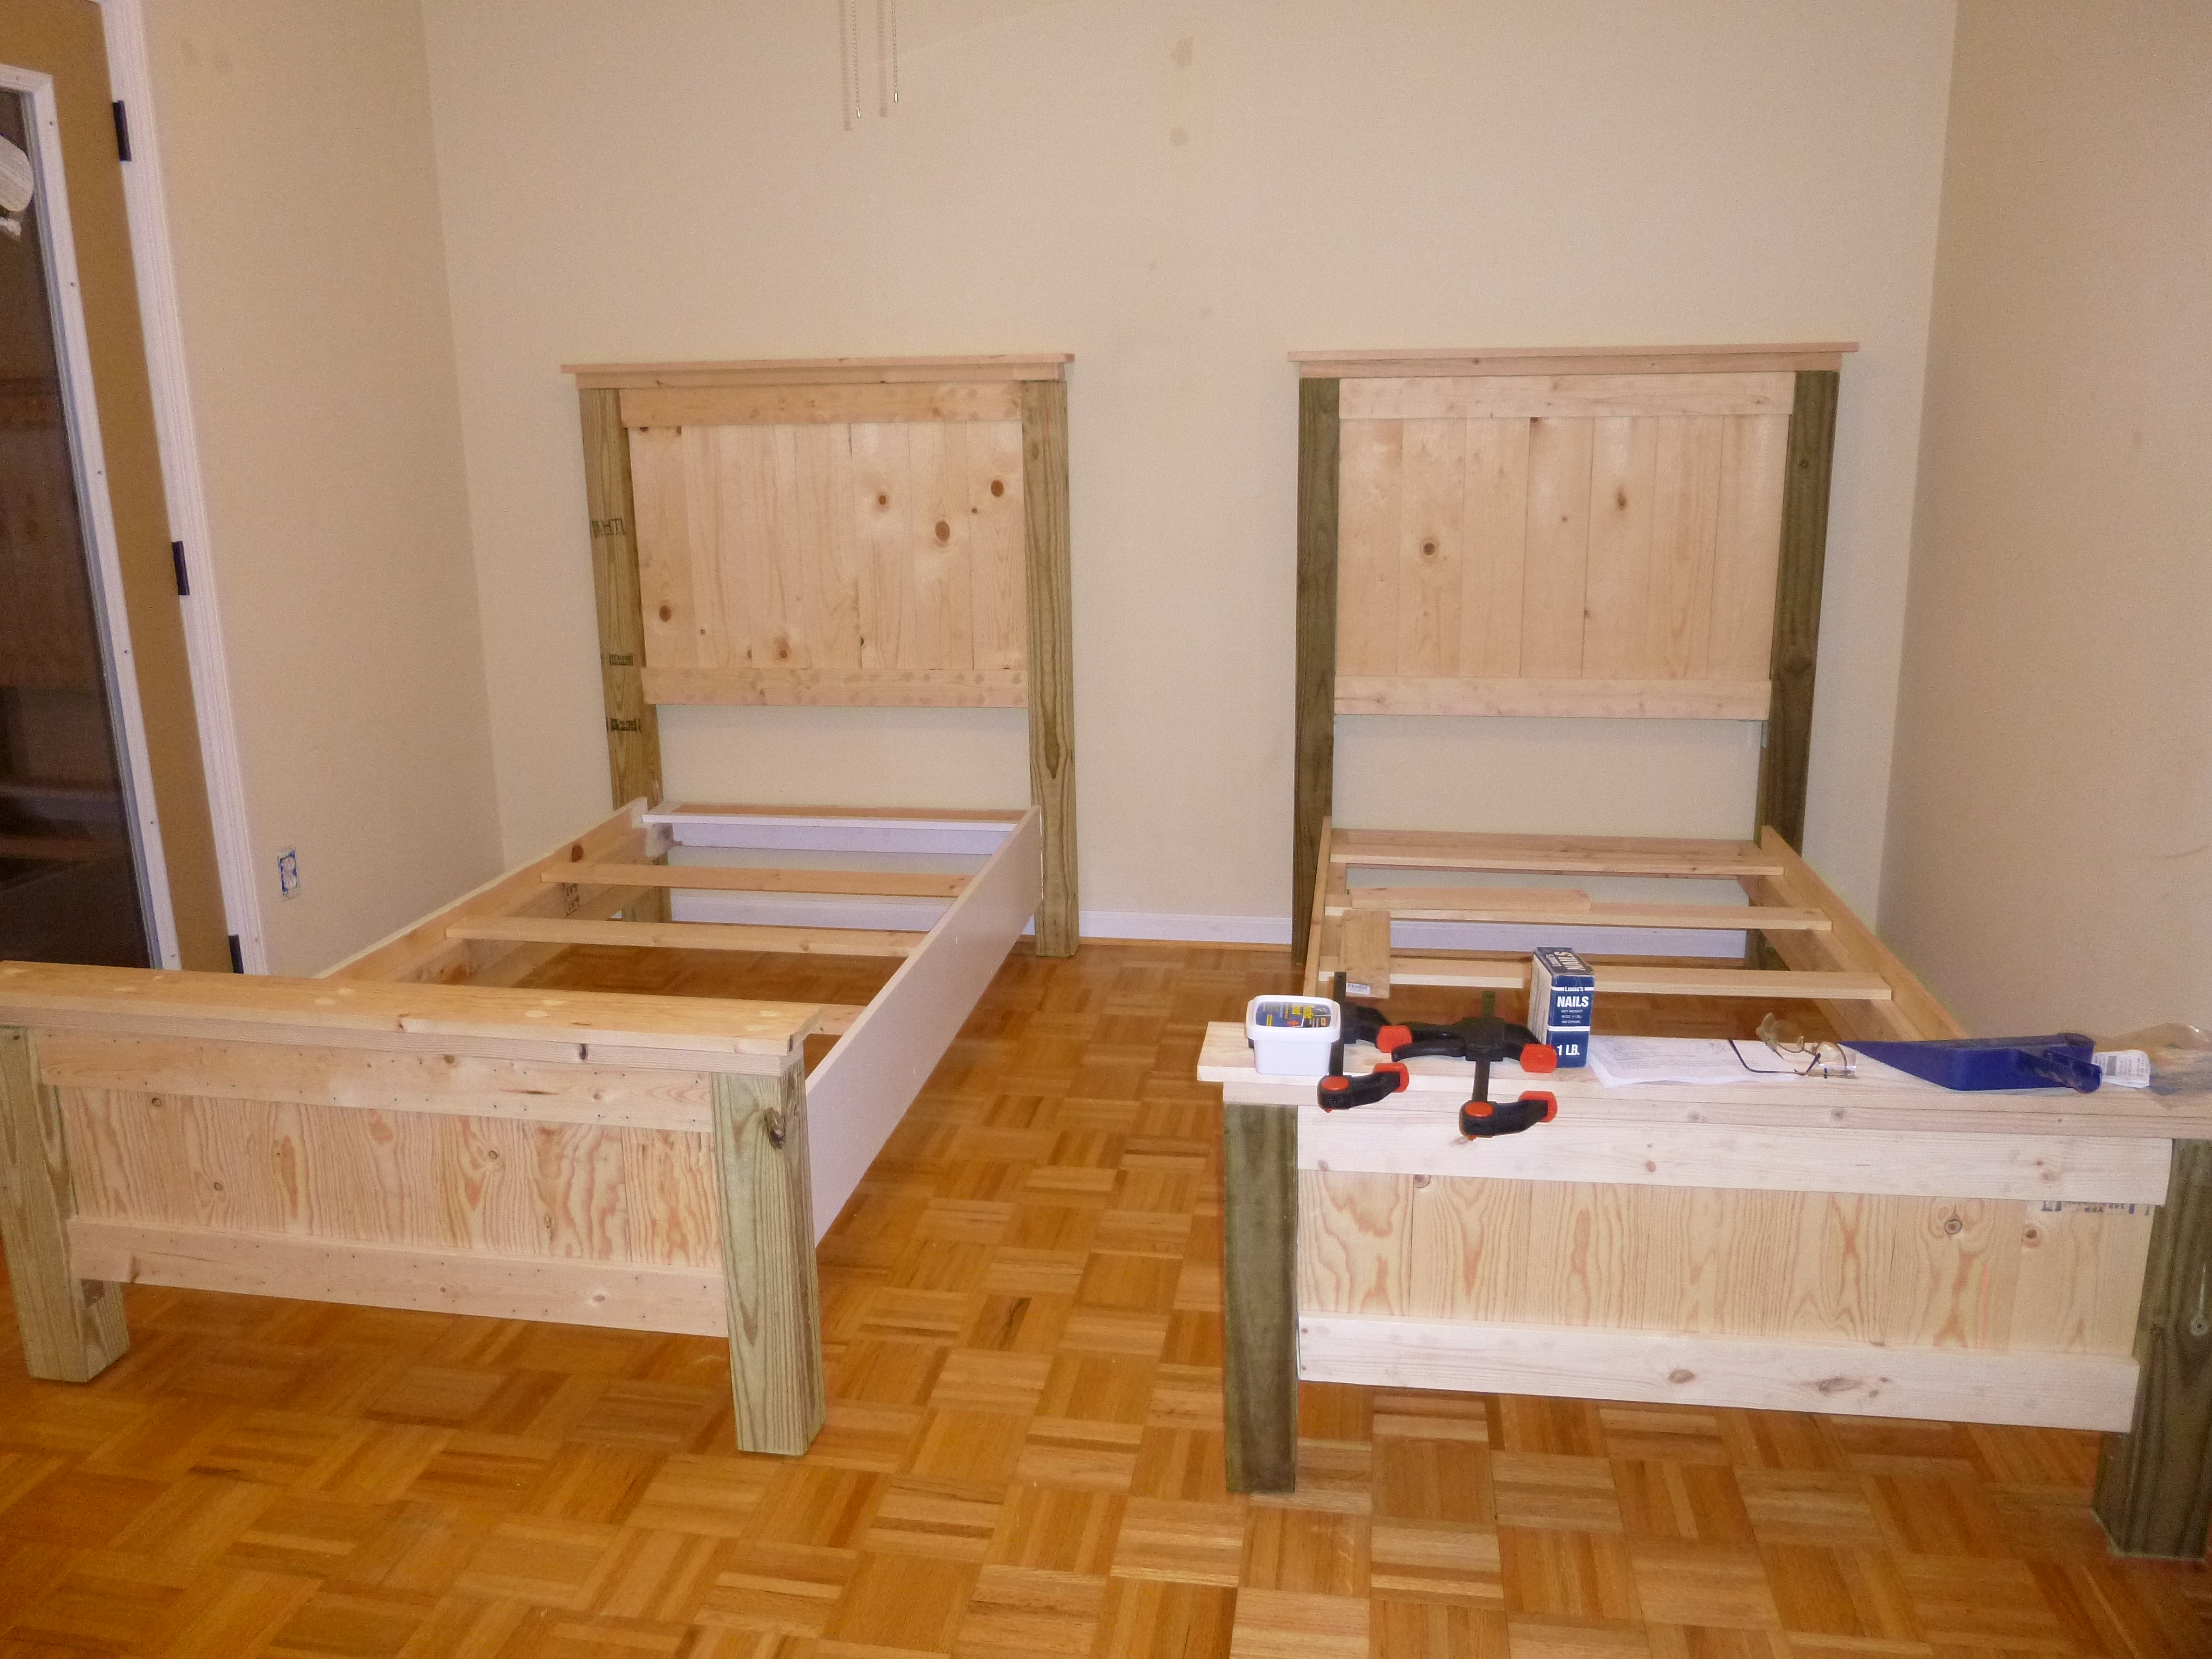
After accepting a job in a skilled nursing facility last April, our son move out of our house, taking with him all the furniture from his room. As a result, he virtually left my wife and me a blank canvas to do as we pleased. My wife wanted to put twin beds in the room, and as such, searched high and low for two adult twin beds, all to no avail. Then one day while looking on Anna White’s website, she saw plans for various types of beds, including adult size twin beds. She printed the plans for the beds and asked, “Can you make these?” I studied the plans for a moment, and said, sure. Because the plans were so detailed and easy to follow, I was able to construct both twin beds over the period of a weekend. For me, I found the shopping list and the cut order to be the most useful section of the plans.
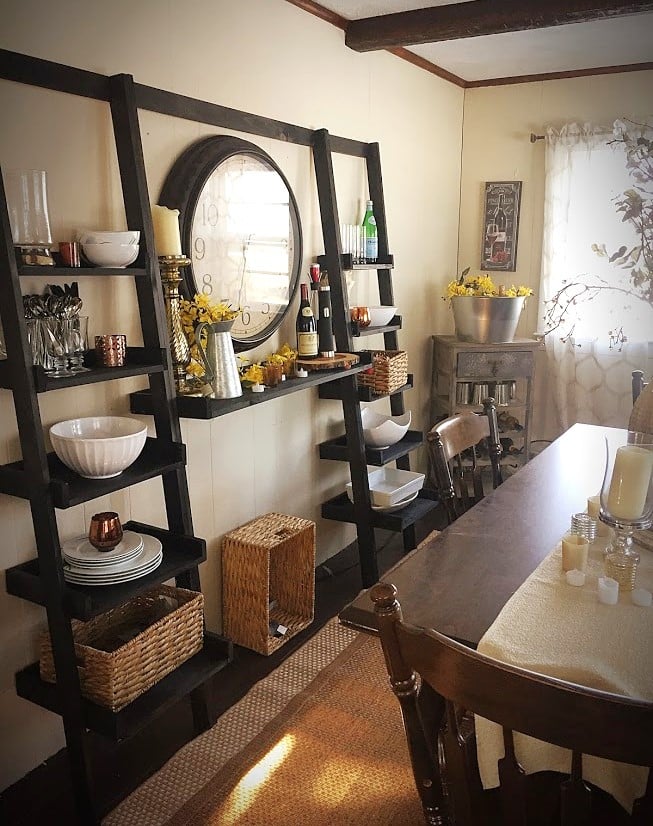
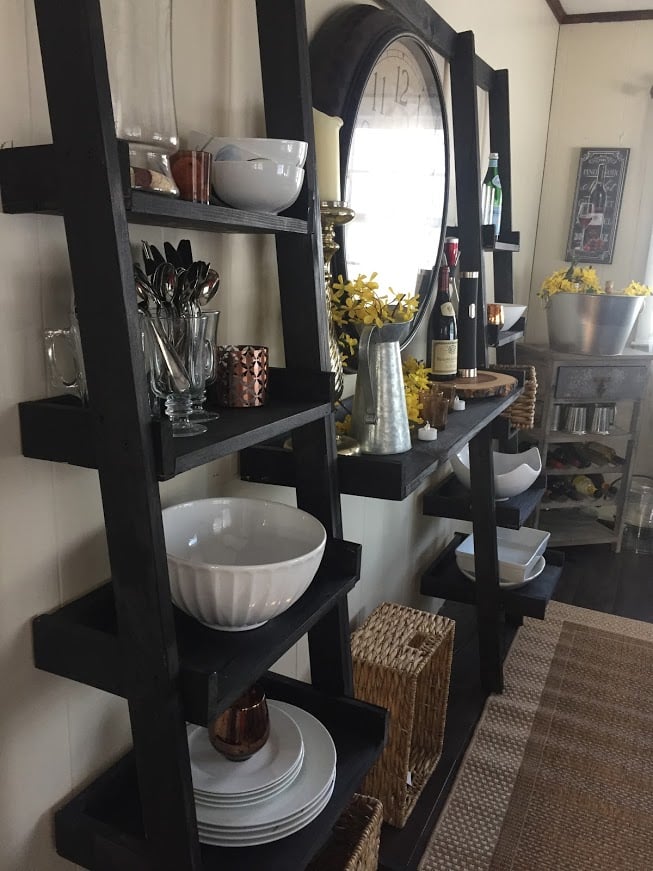
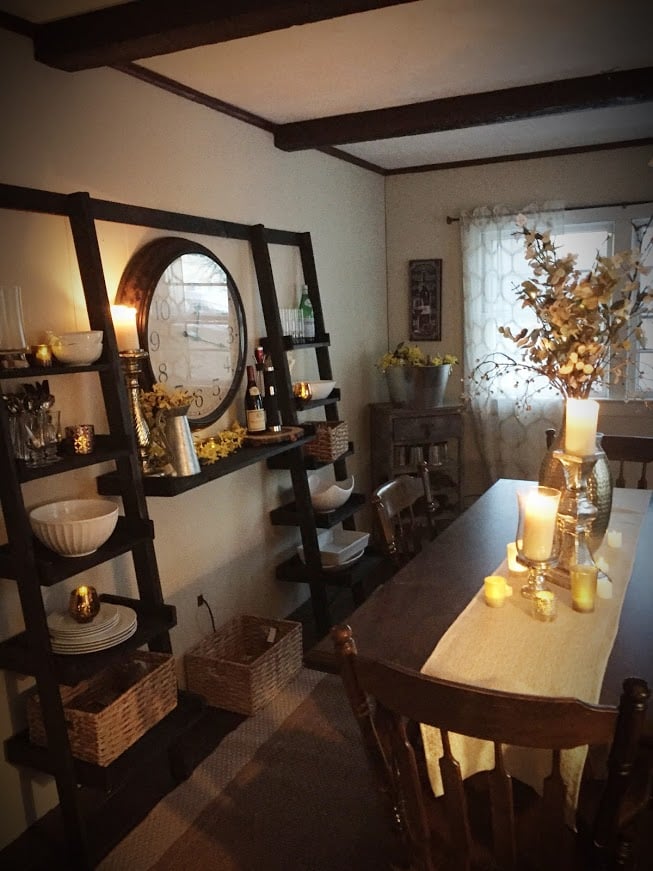
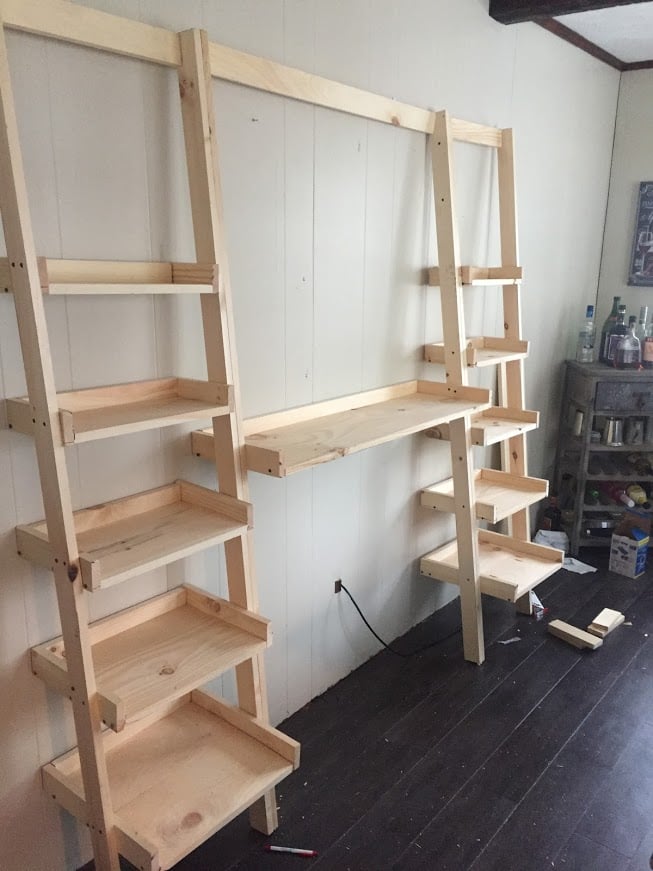
My dining room has no storage and I've been trying to find a place to store all of my bowls, serving dishes, etc; for some time now. I saw a leaning ladder shelf system at Crate and Barrel that I fell in love with but it was $500 which was out of the question. Last summer I built Ana's outdoor couches with absolutely zero experience and they came out great, so I decided to take a chance and try something else. This was my first time using a circular saw, and also my first time using a Kreg Jig! Honestly, halfway through this project I was concerned I bit of more than I could chew but I stayed calm and just kept following the plans. I'm so thrilled with how they came out! I ened up using a scrap piece of the 1 X 12 board for the "desk" piece to make the center a little bigger since I wanted it to serve as a serving board of sorts. I reenforced it with a support board since it was a little longer than the original plan called for. I am beyond thrilled with how this came out, I honestly like it better than the one I saw at C&B since it's custom to my space! This was so easy if I could do it, anyone can. My total cost came to about $130. Not too shabby for a knock off! I'm already on to my next project. I don't think I can buy "factory" furniture again now how much better cost and quality I can get doing it myself! Thanks Ana!

Comments
Ana White Admin
Mon, 12/27/2021 - 11:42
So adorable!
Love this, thank you for sharing!