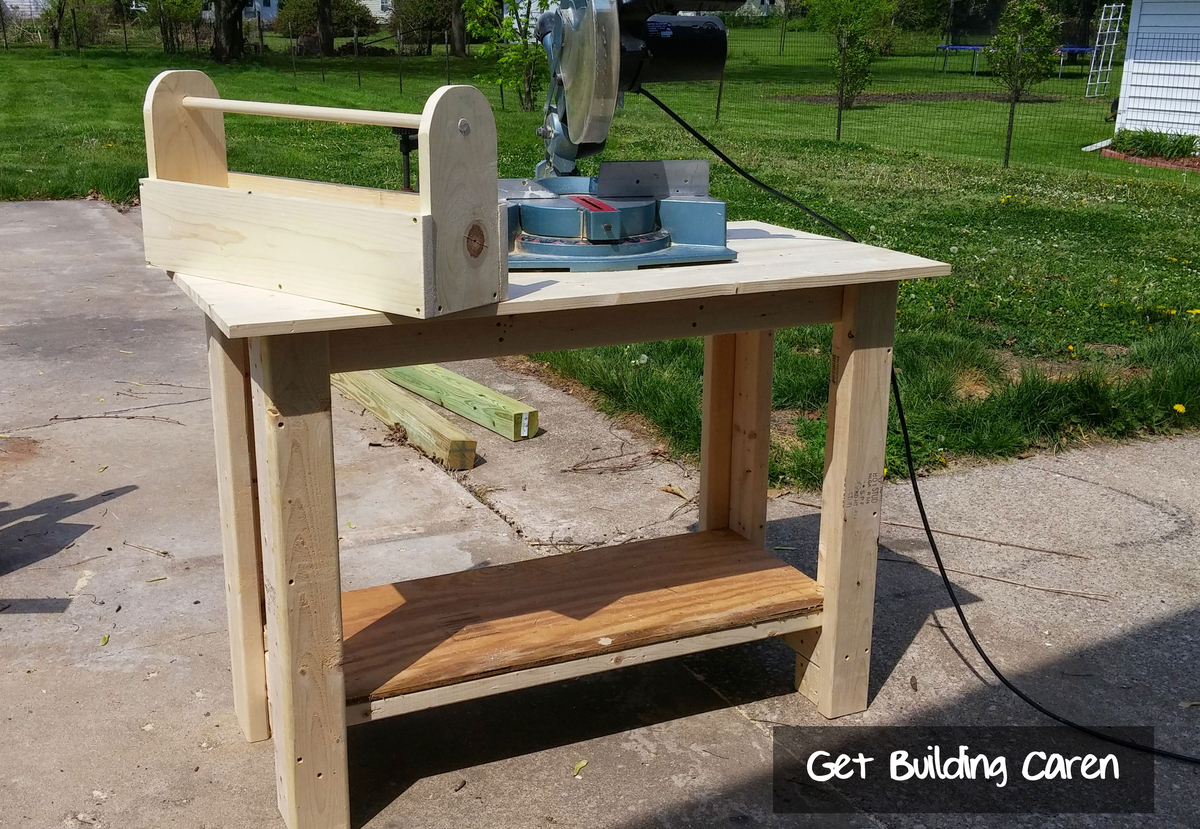
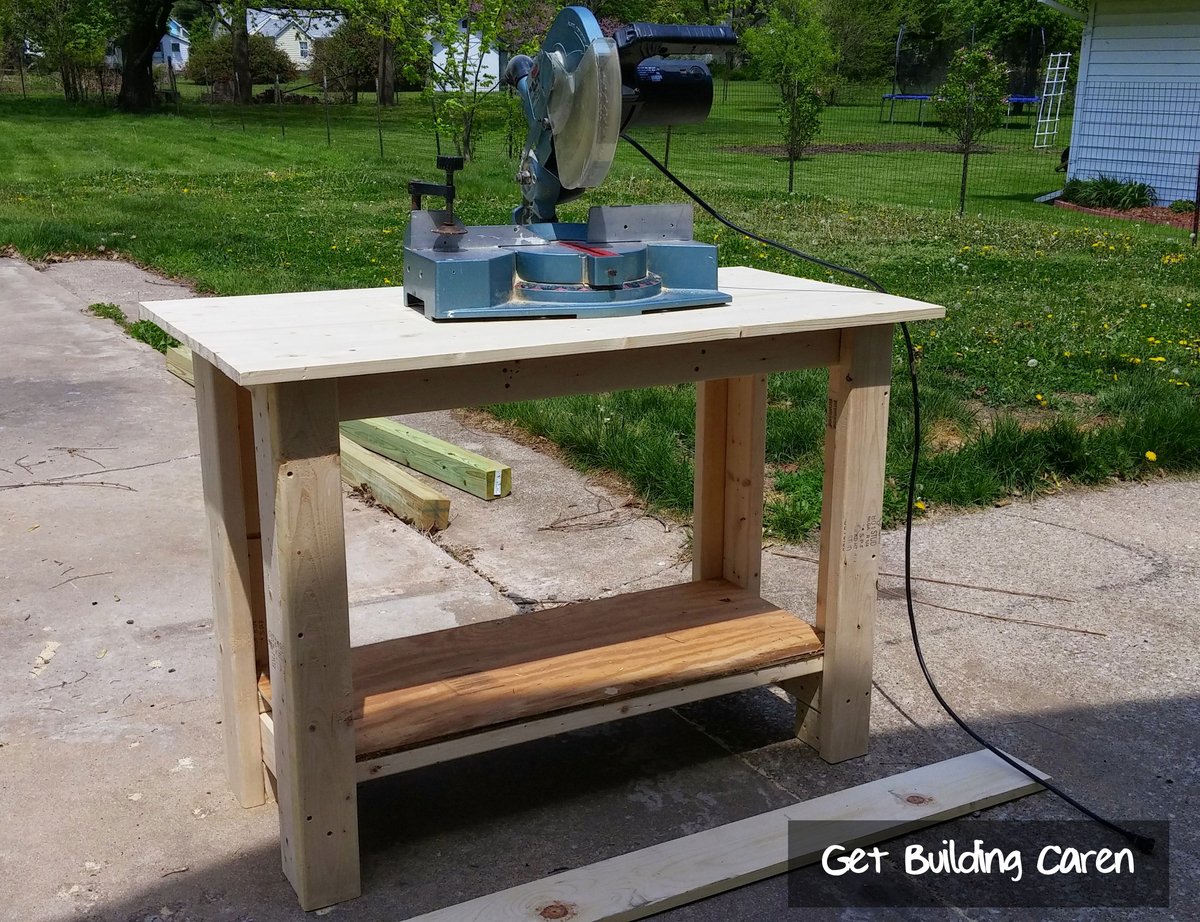
Community Brag Posts
Bunk beds based on the Simple Bed
I built the Simple Bed for one of our kids and now we wanted a bunk bed. I saw many plans for bunk beds based on the Simple Bed plans, but I didn't want the ladder on the side. I made some changes and designed the bed in 3D using Autodesk Inventor. It didn't turn out much different than I planned. It's super heavy, but very stable. My wife did a great job on the stain.
Comments
Mon, 06/04/2018 - 06:07
Staining process
The beds look amazing!
Did your wife stain the bed after it was assembled?
If so, how long did it take her to stain it?
Mon, 06/04/2018 - 06:08
Staining process
The beds look amazing!
Did your wife stain the bed after it was assembled?
If so, how long did it take her to stain it?
Mega work bench with miter station
When I was 8 months pregnant and going through my “nesting phase” I knew I needed to get my garage organized. Prior to building this, my tools were all over the place. To try to get it done before the baby came, I called my dad to help me out, and we built it together in just a couple days. It was a weekend I will never forget and I smile every time I walk into my shop knowing we did it together.
Comments
Modern Farmhouse Table
This was our first project. We followed Ana's directions basically word for word. It turned out beautifully! We like the look and easy care of the benches.
Modified Rectangular Planter
I modified the plan a little to make a rectangular 4 foot long planter and added a top.
Comments
Sun, 06/26/2016 - 18:25
Cedar boards
I know it's been 3 years, but do you recall how many cedar boards you bought? This is the exact size i need. Thanks.
Cedar picket shed
I poured a 3 1/2" concrete pad first then bolted the completed shed to it.
Shed was easy enough to make, the plans were well done. Spent about 25 total hours on shed, including staining. Hinges were very expensive ($20 a pair with latches), spent about $400 NOT INCLUDING gravel, sand, & concrete for the pad or clamps.
Comments
Mudroom Bench
We combined several ideas to create this built in mud room bench. I searched high and low for the design I wanted and loved Ana's hidden storage. It's perfect for off season stuff that would otherwise take up space in a closet. It's such a pretty, functional space that gets so much use.
White trim paint
Storage Daybed
Ana White storage daybed with baskets! Of all the projects I've done based on Ana's plans, this is my favorite. It was my first staining project EVER so I was terrified. I am so in love with how this turned out. The boxes were made using birch plywood and the trim was all pine. Lots of gorilla wood glue (I think it's the least drippy) and a mix of nails (using our new nail gun) and countersunk screws. I used screws for the plywood and nails for the trim. After sanding... and sanding... and sanding... :) Finish is two coats of Minwax Red Mahogony stain (conditioned it first) and then three coats of Minwax Fast Drying Polyurethane in semi-gloss. Did I mention how much I love this color????? I did my best to get all of the glue sanded out, but I did miss in a few spots (end of this cubby...) But I am still thrilled because you can hardly notice. I've used a miter saw before, but never MITERED corners like this and I am so proud of my self with how they came out! :) I used longer, narrow felt pads along the bottom of each bench (for on each). On the bed is the Katy 5-Piece Daybed Set from Amazon. I got the sweater-like throw on Overstock.com. Baskets from World Market! :)
For ME, prepping it with the wood conditioner first made all the difference in the world! It really evened out the wood grain variations and gave it a beautiful store-bought look.
I did a test on some scrap without conditioner and the wood grain was too prominent for me (and a lot of people like that look). I love the more muted grain look.
Craft Table
With some modifications, the Cubby bookcase Craft Table!
Particular things I changed to fit my needs:
Made it to fit next to the corner desktop so I could have one long cohesive workstation that looked more built-in. That meant drawers on the left instead of cubbies. I glued a tape measure on the front for material cutting.
And, the piece de resistance: A roll-out spool holder.
I am VERY happy with how this turned out. Thank you Ana!
Master Walk In Closet with Bookshelf Door
We used an unfinished attic space above our garage that was connected to our bedroom to make a walk-in closet with great shelving. This project took a lot of time but we are so happy with the results! There is a side for my husband and a side for me. Although it is hard to see we also incorporated a small door/bookshelf into the room to allow us access to attic storage space.
Comments
Best Workbench I have ever had!!!
I have been searching for a way to maintain some neatness in my garage. Search stopped the second I found these plans. I am able to fit everything I need while keeping the garage neat and full of open space! I would most definitely recommend this build for anyone looking to save space, build something that is practical, and is completely customizable. Also, it took a buddy of mine and myself a day of hanging out to get the project done to include breaks for pizza!
Modified Washer/Dryer Pedestal
When Ana hacked Sausha's washer/dryer pedestal, I knew I had to have my own version.
This laundry center measures 34"H x 49-1/2"W x 21"D and provides the perfect place for corralling and sorting Mt. Washmore, and also gives me the perfect height table to fold and stack.
Cabin Bench Swing
An afternoon project that went great. Kids love it.
Comments
Jewelry Box Retirement Gift
This jewelry box is a gift for a friend at work who is retiring. It is a variation of the Easy Jewelry Box, with the following modifications:
Hinged lift-up top with mirror
Overlay drawer fronts from ¼” craft wood (Gold stencil on top false drawer front, and drawer boxes are 1/8” shorter than the shelf from front to back, to ensure the fronts sit flat against the box front and drawer back doesn't touch the box back at all)
The bottom is 2 pieces thick, to allow space for the drawer overhang and attaching the bottom moulding.
Solid wood back (instead of plywood)
Top and bottom edged with mini stop moulding to make the overhangs, and added feet made from lattice
Removable drawer divider tray and 2 heights of removable dividers for the top, made from dentil, lattice and screen bead mouldings
I really took my time on this build to get everything just right with the build and the finish. Probably spent about 6 hours spread out over the last few weekends.
Comments
Wed, 04/22/2015 - 18:29
Thank you!
Hi Linda, thank you for the nice comment! This was a fun build, and I'm very glad to say the gift was a big hit! :)
Chair Build with Loveseat Modification
Built the 2 chairs according to the plans, and then modified it for a bench that's 48" (our cushions are 23.5 x 23.5). Worked really well!
Comments
Headboard with fold down table
I wanted my storage a little deeper so I used 2 X 6 instead of the 2X4s. I also added a footboard. It turned out great. I may put a tea stain on it and coat it with a polycrylic.
Comments
Raised Garden Beds
I made these last summer for my sister. And she didn't even use them yet! Very easy to make. She did want them taller, so that is the only modifacation I made. We're hoping the bunnies won't notice all the yummy veggies up this high :) I know, probably wishful thinking. Makes a great kid corral too.
Outdoor patio table
My family of 6 needed and outdoor table that would fit us all. The weather in Arizona is beautiful right now, so I decided to build this so we could enjoy it before it gets too hot. A big thank you to Ana White and the Shanty2chic sisters for this beautiful table.
Comments
handmadewithash
Tue, 04/07/2015 - 20:38
WOW you built two! Awesome
WOW you built two! Awesome awesome job! :)