Search Results

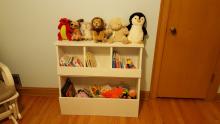
… help if you need it. Good luck! … Beginning with the bottom of the box measuring 1x4x10”, attach the two window box sides using glue and a nailgun. The angled end of the side should be facing the front of the window box, with the longer edge on top. … Now slide the other 1x4x11 1/2” …
Read More
Project Plan

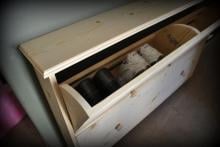
… tipping out. How about a couple of 1x2s? Screw and glue in place. … Box The box needs to be build around your bins, with a 1/8″ gap around the door … figure the exact measurement of the sides and cut. Build your box. … Dowels Now this is the tricky part. Not so much trick to do but …
Read More
Project Plan
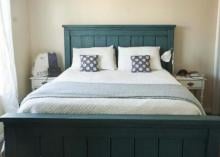
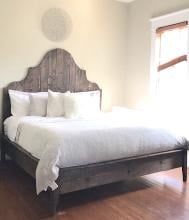
… spaced every 12″. You may need to add more if you are not using a box spring (standard maximum slat spacings is 6″), and you could possibly get away with less if you have a good box spring. Remember, king beds often have 2 box springs. After you have built the frame, attach the side rails to …
Read More
Project Plan

… that it’s not just the bed that she would have had to buy, but also a box spring. And Lydia’s entire bed costs about as much as a box spring alone would have been. Or a bed skirt. This bed does not require a box spring, but if you already have one, no worries. The box spring will …
Read More
Project Plan
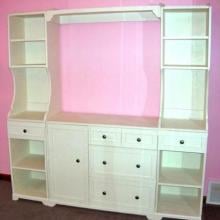
… make a mistake. Please do not attempt as a first project. … Build the Box. Begin by attaching the inner dividers together, as shown above. … (you won’t need many). Then fasten the Green and Pink boards to the box, usine 1 1/4″ screws and glue. Fasten the boards from underneath to … each other, on a level surface, with a heavy object on top. … Drawer Box. First cut your drawer bottom using a 1×16 @ 21″, and then trim the …
Read More
Project Plan
… FRAME You can click images for a larger view. Begin by building your box of 1x10s and the 1×8 for the front. Keep top edges flush (simply build the box upside down, with the 1×8 coming up shy 2″ on it’s end). Use 2″ screws and glue. Flip over and add the cleats. If you have a box spring, fasten the cleats flush with the bottom edge of the …
Read More
Project Plan
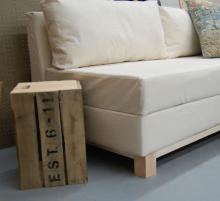
… x 6″ wide, and two at 73″ long and 6″ wide. Sew together to create a box cushion (see this post for details on sewing). Place the cushion … … Assembly Assembly will be easy. Start by screwing the storage box to the back, through the 2×10 back boards into the supports in the … way forward. … Pillows The pillows I sewed for this sofa are square box cushions measuring 36″ wide x 4″ deep x 18″ tall. Cut four pieces of …
Read More
Project Plan

… check the width between the support before building your drawer box! The finished drawer should be 1" smaller than the space. … Attach … the boards using glue and finishing nails. … Then assemble the drawer box. Start by attaching the drawer back (G) to the drawer bottom (F). … … Follow the directions on your drawer slides to install the drawer box. Make sure it sits back 3/4" from the face of the nightstand so your …
Read More
Project Plan