Search Results

… as well. Follow the same steps, but adjust cuts as shown. … Square Box Frame Coffee Table …
Read More
Project Plan
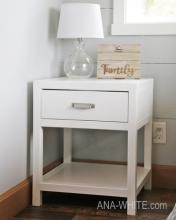
… Repeat for back (optional for bedside table). … Build drawer box with 3/4" pocket holes and 1-1/4" pocket holes screws. Attach … drawer bottom with 3/4" brad nails and glue, making sure drawer box is square. Install drawer in cabinet, attaching drawer slides to the 2x2 framing. … Position drawer face on drawer box with an even gap around all four sides. Attach with two 1-1/4" brad …
Read More
Project Plan
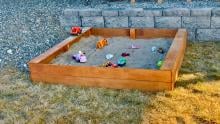
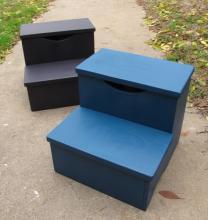
… Build the Box I used pocket holes, but you can also use 2″ wood screws countersunk and screwed together to build the box. NOTE: Top Measurement should be 26″ … Back Adjust for square then … a very slight downward angle to keep the baskets to the back of the box instead of sliding forward. If you choose to stack, make sure you …
Read More
Project Plan
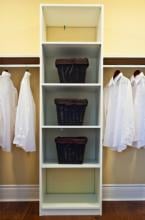
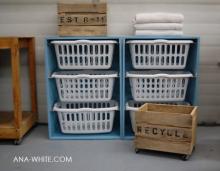
… with a drill. And I assembled a closet system from out of the box like this one and considered it a major accomplishment. And it … pants quite easy! I use baskets for socks and underwear. … Build the Box Mark the sides as shown in the diagram. Then either drill pocket … Use glue and adjust for square. … Back Attach the back to the box with finish nails and glue. Make sure you nail into all the shelves …
Read More
Project Plan
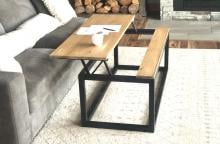
… steps to create the shorter X pieces. Attach with glue and screws. … Box Frame Coffee Table with Lift Top …
Read More
Project Plan

… the drawer slides as shown, to the 1x2 @ 10" long. … Build the drawer box to fit. The sides are the same length as the drawer slides (16"). … drawer slides require 1/2" clearance each. I attached the drawer box together with 1-1/4" brad nails and the bottom with 5/8" brad nails. … with 1-1/4" brad nails. … Set the 1x10 drawer face on the drawer box. Attach with 1/8" gap on sides and bottom with 1-1/4" brad nails. …
Read More
Project Plan
… draw the above pattern and carefully cut out using a jigsaw … Storage Box Cut a notch out of one of the storage box sides. Attach both storage box sides to the sides using 2″ screws and glue or 1 1/4″ pocket hole …
Read More
Project Plan
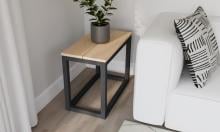
… with wood filler and sand off after dry. Finish the tabletop. … Box Frame Rectangle Side Table …
Read More
Project Plan
… protection. And glue, glue, glue. My favorite option is to screw the “box” together, and then use finish nails to add the frame. That way the … The above diagram shows the composition of the different pieces. The “box” is made of 3/4″ plywood or MDF, the trim is mostly 1x2s and a 1×3 … painting, but should match the A1 plywood for staining. … Build the box. Begin by attaching the centers, shown in pink, to the top. Then …
Read More
Project Plan