Search Results
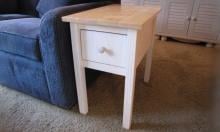
… you are building with drawers. Your drawer won't fit right if your box is not perfectly square, so take great care to check for square … the 1x10 on first, followed by the 1x3 side trim. … Fit the drawer box in the drawer, with the fronts of slides starting at the legs, and the bottom of the slides (the long flat part of the box members) attached 2" up from the side apron bottoms. Once you are …
Read More
Project Plan

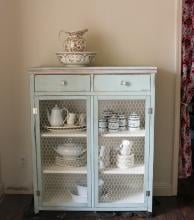
… … Drawer Case Start by cutting a ¾” by 1½“ notch out of both drawer box side panels as shown in #1. The 60 x 22 piece is the bottom of the … in the same process. #21 … Assemble Drawers The drawers are a simple box with a plywood bottom nailed on. #22 The top two drawers are an inch … dresser. Position the drawer glides so the front face of the drawer box is 1” back from the face of the dresser. After all the drawers are …
Read More
Project Plan
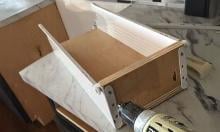
… end. Locate the holes about 5/8″ from the edge. Assemble the drawer box with the pocket screws. Face the screw holes to the outside of the box. The front of the drawer will be covered later and the other set of … plywood bottom on, making sure that the plywood doesn’t overhang the box as this will cause problems with the drawer slides. Following the …
Read More
Project Plan
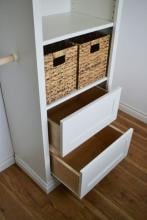
… to figure the drawer slide length I'll need and the overall drawer box dimensions. Overall, these drawers are going to be 14" deep (for 14" … face to give room for drawer side installation), and cut the drawer box pieces. Then on all the front and back pieces, we drilled pocket … and just attached with 1-1/4" pocket hole screws. There's one drawer box done!!! Because we are using bottom corner mount drawer slides, we …
Read More
Blog Post

… . . . and finally, it just came to me. Gift wrapping deserves a tool box. And twenty minutes later, we have a gift wrapping tool box! The pictures do not do it justice, everyone one (particularly the … anything else you can think of on the inside and the outside of the box. You can even dispense your ribbon through the peg board holes. We …
Read More
Project Plan
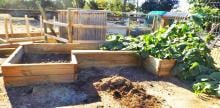
… going to do the easier one: 2’ sticking up from the back of your box. Start by aligning the 2” edge with the left side edge of your back panel. Align the line you marked with the top of the garden box so that 2’ stick out of the top. Have someone hold this, while you … spaced somewhat evenly. Now go to the other side of your garden box and align the edges similarly. Using your line level, make sure the …
Read More
Project Plan

… on the side. Awesome plans by Rogue Engineer. Simple DIY Wood Box Centerpiece - This simple wood box centerpiece is lovely and would be cherished by most anyone. For …
Read More
Blog Post
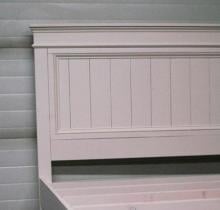
… buildup in this particular application. Slats are recommended (or a box spring) for those of you who live in a humid climate, but nothing … your final cuts. All corners are at 45 degree angles. Use a miter box or a miter saw to carefully make your cuts. I did not give … wipe clean. Prime and paint or stain as desired. For use without a box spring, you will need to add plywood on top of the bed frame or wood …
Read More
Project Plan
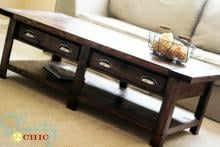
… to ensure the table is square. This is very important because if your box is not square, your drawers will not slide correctly. … Attach back … face still needs to be installed. … Drawer faces are nailed to drawer box with 1 ¼” finish nails and glue, with an even gap around all sides. … drawer hardware with the double thick face by drilling through drawer box with larger bit sized for screw head, and drilling through face of …
Read More
Project Plan
… to the back piece. That's all you do to make the drawer box! Now on to the cabinet. Since our cabinets have a face frame, … right or left, until your drawer slides just right. The drawer box then can just slide right in with the slides. Now on to the … just attach to the back of the drawer face, Position on the drawer box, And then clamp in place. Next, you can adjust the drawer …
Read More
Blog Post