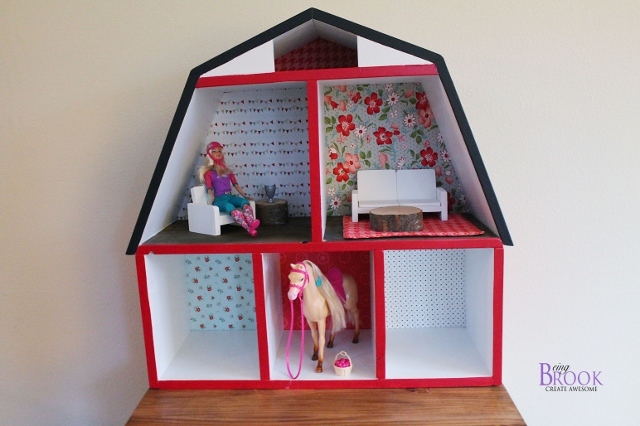


Free plans to build a barn dollhouse! This simple plan is big enough for horses on the bottom, dolls on top! Step by step instructions from Ana-White.com

Thank you everyone who tuned in this morning to watch me build a No Cuts Required Dress Up Center on Home and Family! I loved this project so much because there is NO CUT LIST - it's made up entirely of 48" long boards!!!!

It was a zip to put together (to be fair, Mark Steines actually put this one together for the live segment!) and everyone kept commenting on how cute it was. I tried on a crown and boa ... must admit .... there's still a wannabe princess in this Mama! I can see why the little girls love dress up so much! And if you have a prince - or super hero or fireman or pirate - this dress up center just needs a different color paint and some different letters!
If you missed this segment, or dress up centers aren't your little one's thing - I'm building a train trundle today on Home and Family that will air next week. Will definitely let you know when that segment goes live! You'll love love love how simple and functional it is!
And if trains or crowns and boas aren't on your little one's Christmas list - maybe horses and barns are? We have brand new plans today! A barn dollhouse, perfect for horses on the lower floor level and dolls upstairs!
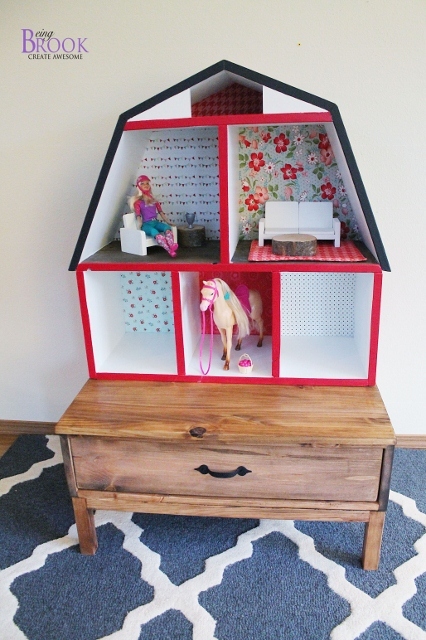
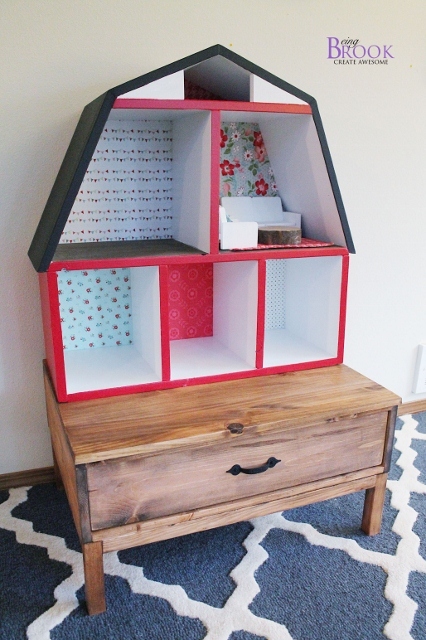
You recognize the play table base, right? Just in case you missed it, Tuesday's free plan was a drawer base for the Cubby Collection, that can also be used as a low play table! Perfect height for playing with a barn dollhouse!
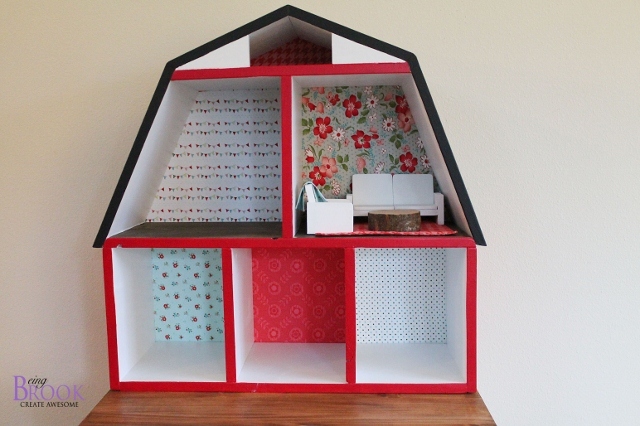
But the star of this show is definitely the barn dollhouse! My dear friend Brook from Being Brook asked me to come up with simple Barn Dollhouse Plans perfect for stables on the lower level and Barbies upstairs. I thought this was a brilliant idea, and could see the little girls in my own life playing endlessly with it!

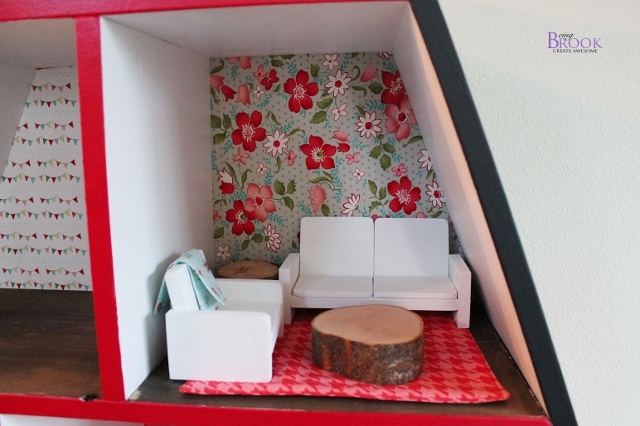
Brook did an amazing job building this and I absolutely adore the colors and wallpaper! You just can't buy toys like this ... this has to be handmade! By you!

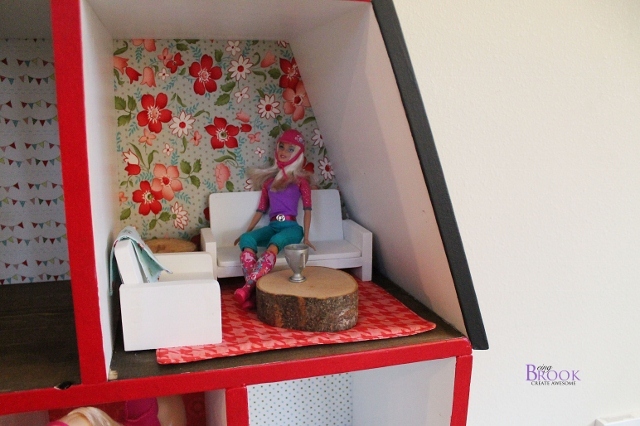
Love the little coffee table ... so West Elm if you will!!! Want to make the furniture and wallpaper your own barn dollhouse? Brook shares all the details on her Barn Dollhouse right here. Please take a second to click over and check it out for lots more photos, inspiration and building details! Thank you Brook!

PS - Have a barn themed room? We also have a very similar plan for a Barn bookshelf - a little taller and ideal for books and toy storage! Check it out here.
Preparation
2 - 1x12 @ 8 feet long
6” of 1x6 scraps
29 x 28 1/2” 1/4” plywood piece for back
1 1/4” pocket hole screws or 2” trim screws or 2” finish nails and glue
1 - 1x12 @ 27” (bottom)
2 - 1x12 @ 11 1/4” (sides)
2 - 1x12 @ 10 1/2” (stable dividers)
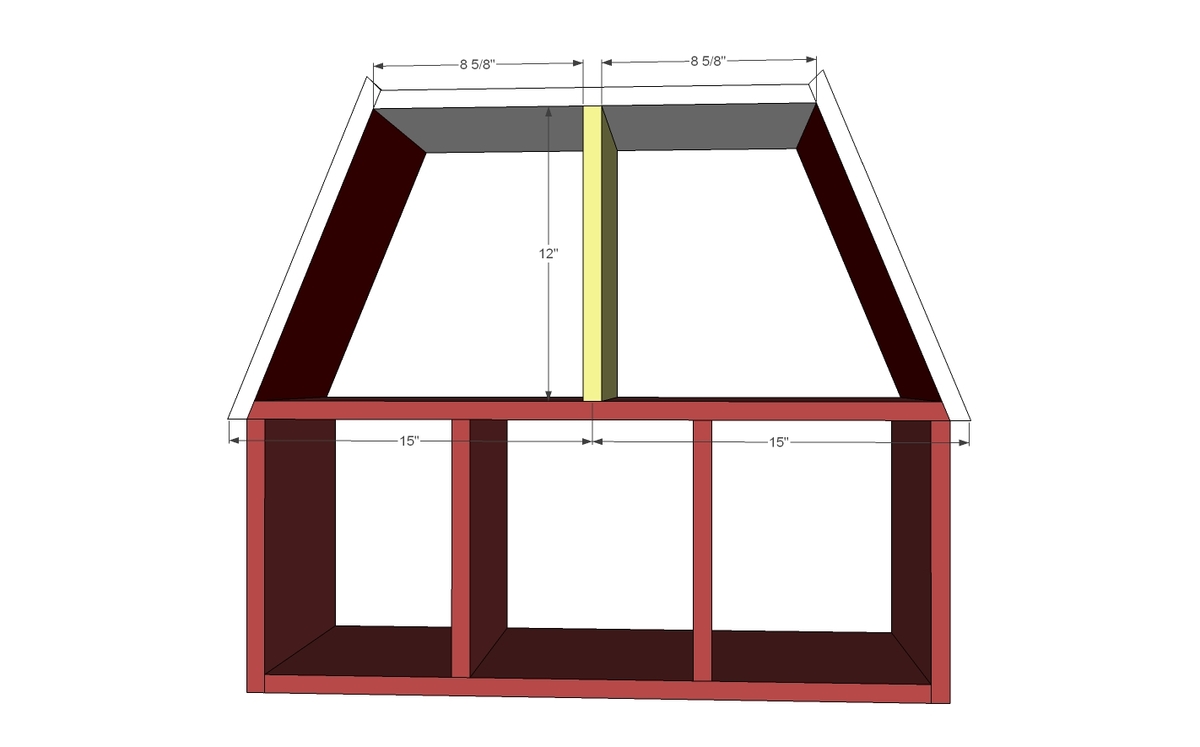
1 - 1x12 @ 28 1/2” - both ends beveled at 22 1/2 degrees off square, long point to long point, ends NOT parallel (middle floor)
2 - 1x12 @ 15 1/4” - both ends beveled at 22 1/2 degrees off square, long point to long point, ends NOT parallel (lower roof)
1 - 1x12 @ 18” - both ends beveled at 22 1/2 degrees off square, long point to long point, ends NOT parallel (loft floor)
1 - 1x12 @ 12” (upper floor divider)
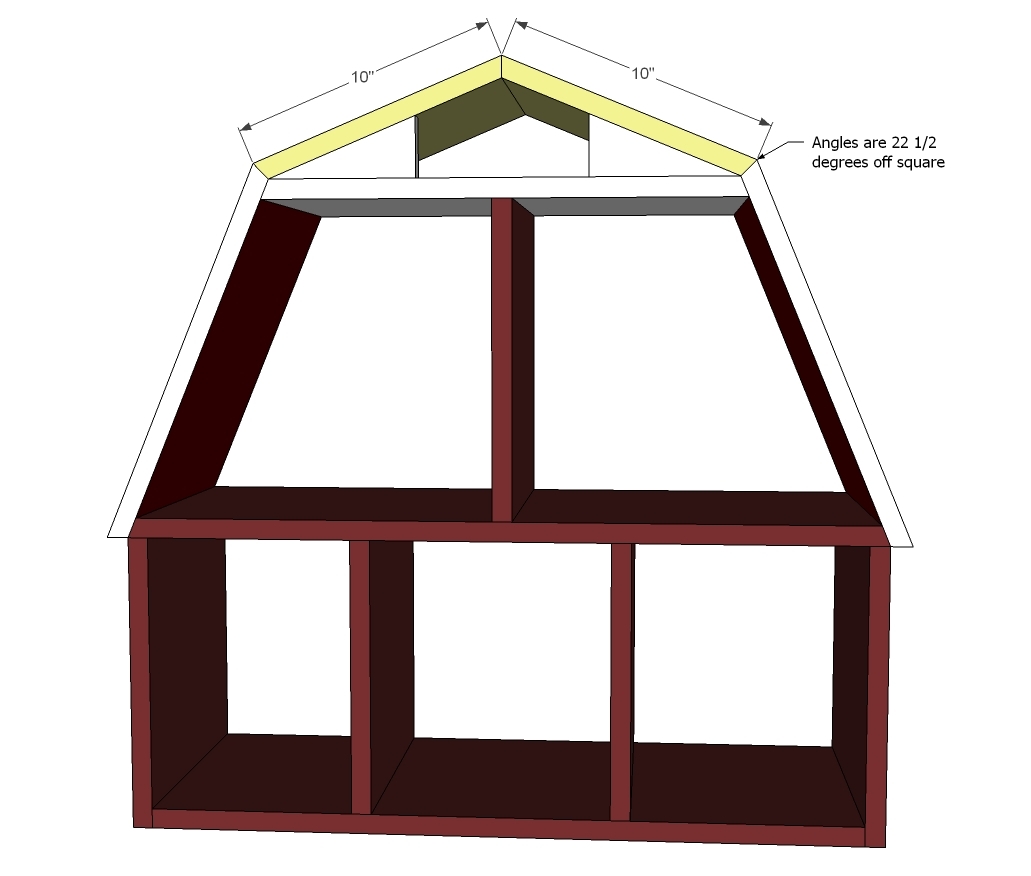
2 - 1x12 @ 10” - both ends beveled at 22 1/2 degrees off square, long point to long point, ends NOT parallel (upper roof)
2 - 1x6 @ 2 1/4” long point, cut at 22 1/2 degrees off square (optional loft siding)
Back plywood is 29” x 28 1/2” overall.


Please read through the entire plan and all comments before beginning this project. It is also advisable to review the Getting Started Section. Take all necessary precautions to build safely and smartly. Work on a clean level surface, free of imperfections or debris. Always use straight boards. Check for square after each step. Always predrill holes before attaching with screws. Use glue with finish nails for a stronger hold. Wipe excess glue off bare wood for stained projects, as dried glue will not take stain. Be safe, have fun, and ask for help if you need it. Good luck!
Instructions
Step 1
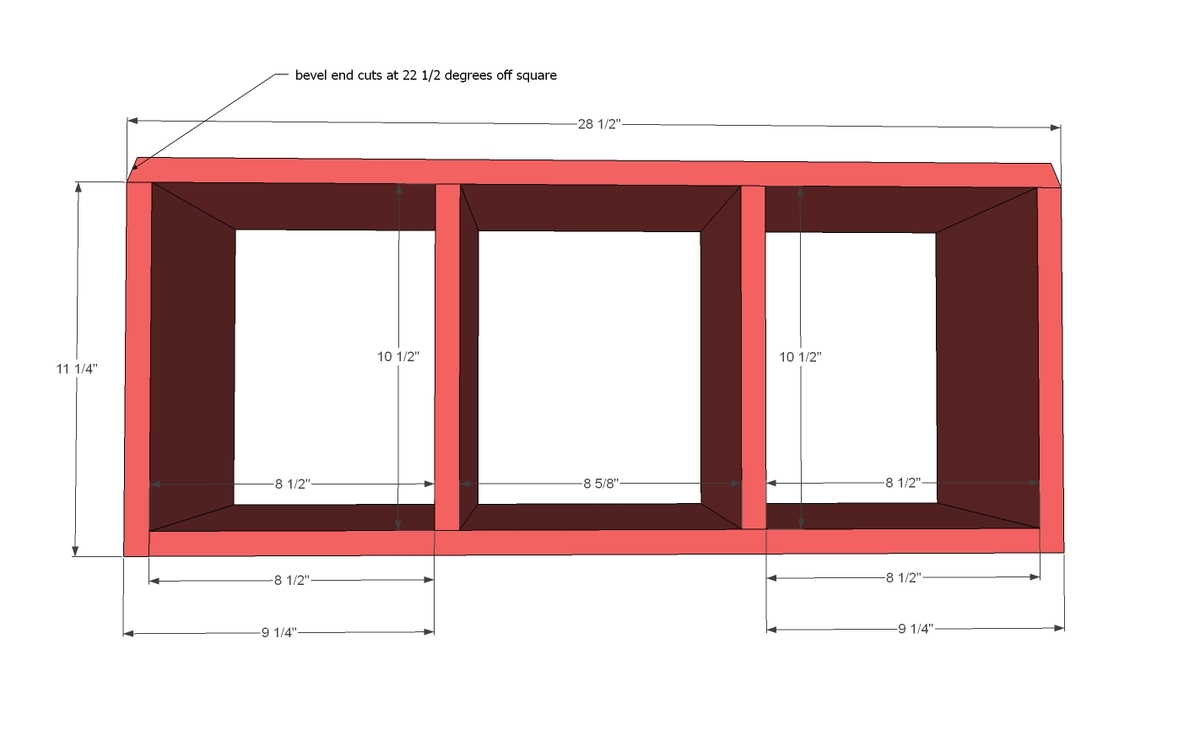
Start by just putting together a small bookshelf. The only difference is the top has beveled ends for the barn style roof.
NOTE: Dividers are optional! You could just add in 1x3s to make stables down there later too!
Step 2

It may be easier to dry fit the entire roof just to make sure everything fits and works first. Make sure you mark all joints first, then all you have to do is line up your marks with the other boards. If you have a nailer, those can be super handy in keeping things in place, or you can use clamps.
Step 3
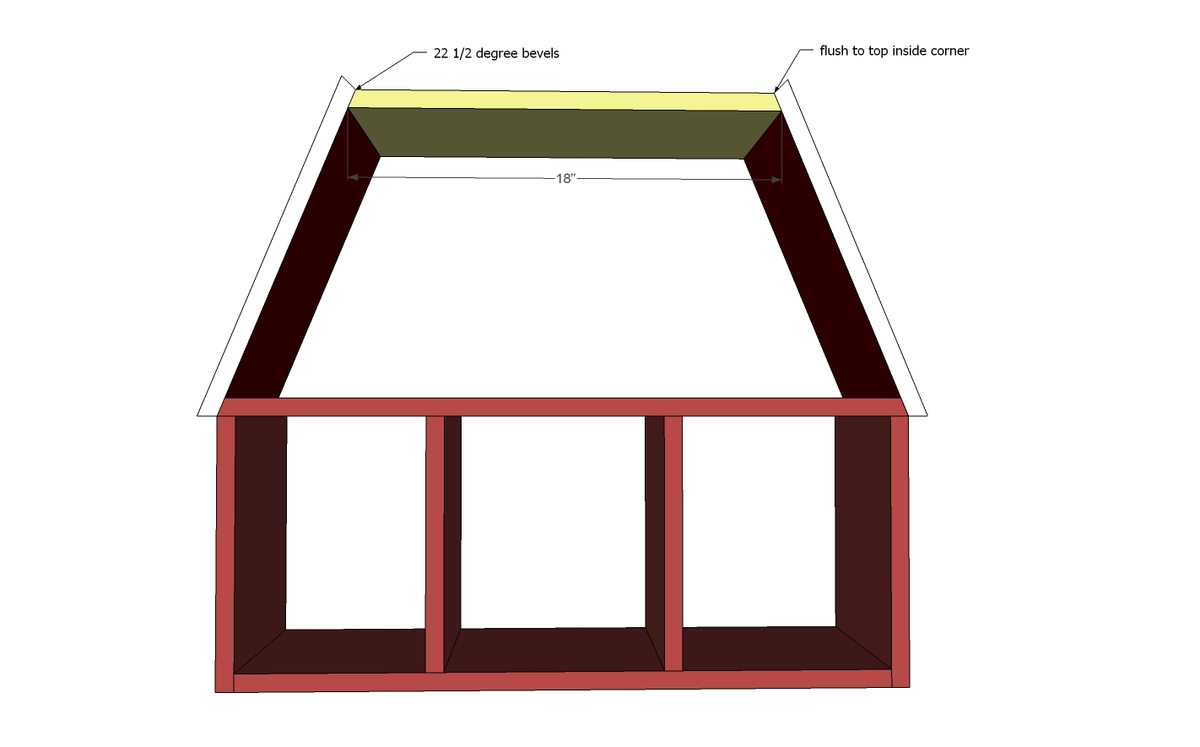
This will tie the two lower roofs in. Attach with screws or pocket hole screws.
Step 4
The center divider is optional.
Step 5

Step 6
Finally add the top roof - glue here is your friend! Nail to the pieces from step 5.
Step 7
Back
For the back, lay the project on the 1/4" plywood and trace. Cut out with a jigsaw and attach to back with 1 1/4" finish nails or screws and glue. Attach to all fixed shelves and dividers for the best joint.
It is always recommended to apply a test coat on a hidden area or scrap piece to ensure color evenness and adhesion. Use primer or wood conditioner as needed.
Comments
whitney_smith
Fri, 12/07/2012 - 06:08
I want one!
Love this Ana and Brook!!!!! If I had not just finished the airplane this would be great for my nephew. Maybe next year. ;)
And a train trundle??!! That might be just what I've been looking for. Will those go up Monday? :) :) :)
Angela @ Cotta… (not verified)
Fri, 12/07/2012 - 16:28
Home Improvement
This is PERFECT! My husband is wanting to make a dollhouse for my daughter for Christmas, so this is the perfect plan for her!! Thank you so much for sharing it!
Speaking of, this would be a perfect post to share at my Family Activities Christmas Linky party -- I hope you'll come link up! It closes tonight at midnight, so it's kind of last-minute, but I hope you join in: http://cottagemagpie.com/christmas-linky-parade-family-activities/
~Angela~