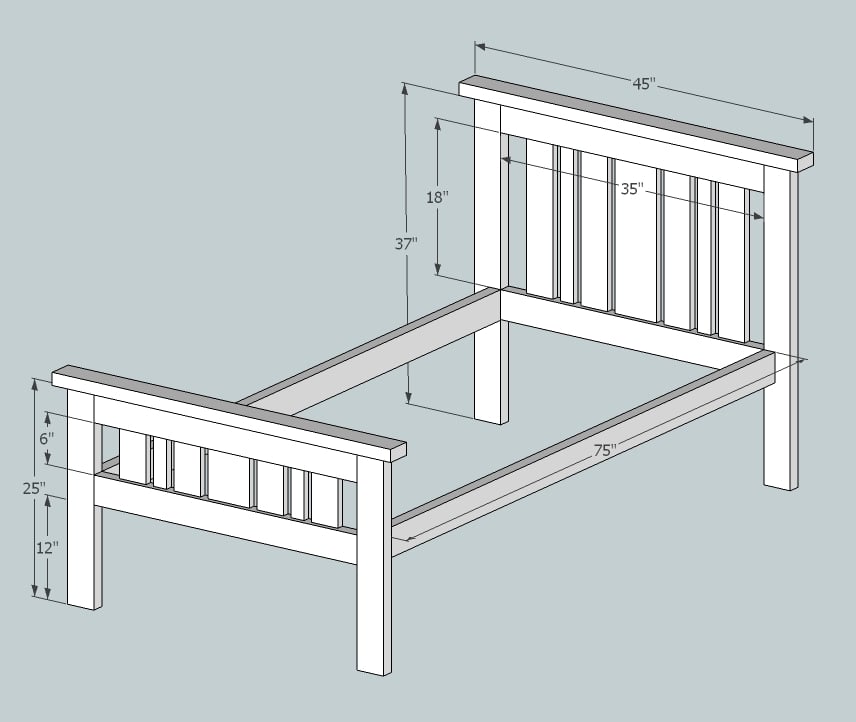
Easy starter project anyone can build. Simple 2x4 construction.
Preparation
(3) 2x4x8
(2) 2x6x8 (F or the Side Rails )
(2) 1x4x8
(1) 1x6x8
(4) 35" - 2x4
(2) 45" - 2x4
(2) 75" - 2x6
(1) 18" & 6" - 1x6
(4) 18" & 6" - 1x4
(2) 18" & 6"- 1x4 ( Ripped in half )
(9) 35" - Slats for Mattress Support ( Either 2x4 or 1x4)
Please read through the entire plan and all comments before beginning this project. It is also advisable to review the Getting Started Section. Take all necessary precautions to build safely and smartly. Work on a clean level surface, free of imperfections or debris. Always use straight boards. Check for square after each step. Always predrill holes before attaching with screws. Use glue with finish nails for a stronger hold. Wipe excess glue off bare wood for stained projects, as dried glue will not take stain. Be safe, have fun, and ask for help if you need it. Good luck!
It is always recommended to apply a test coat on a hidden area or scrap piece to ensure color evenness and adhesion. Use primer or wood conditioner as needed.


Comments
tjms81
Fri, 12/13/2013 - 10:38
Plans?
I need to make two of these. Are there any more detailed plans? I only see the general and finishing instructions. Maybe I am just not looking in the right spot as I am fairly new to this site. I can probably figure out the rest but I'm in a time crunch and was hoping for easier directions to follow. Also, is this bed designed for box springs as well as the mattress? Thanks.
tiffany2409
Fri, 11/14/2014 - 07:55
Where did this plan go??
I just purchased all of the wood to build this plan and I came home and the detailed plan is gone. Where is it?! This is extrememly upsetting...
MaryHelen
Mon, 01/05/2015 - 06:43
Looking for detailed plans
I am also looking for the plans for this bed, as well as a couple other projects that I bookmarked. They seem to have disappeared :(
In reply to Looking for detailed plans by MaryHelen
Ana White
Mon, 01/05/2015 - 11:00
This was not a plan provided
This was not a plan provided by Ana-White.com, we are sorry about your
disappointment. This should help
http://ana-white.com/2009/11/plan-by-request-simple-bed-twin-sized.html