


Here's a quick and fun project - a photo frame on the front, chess board on the back! You can make this photo frame chess board with just a couple tools with scrap wood pieces! Tutorial by ANA-WHITE.com

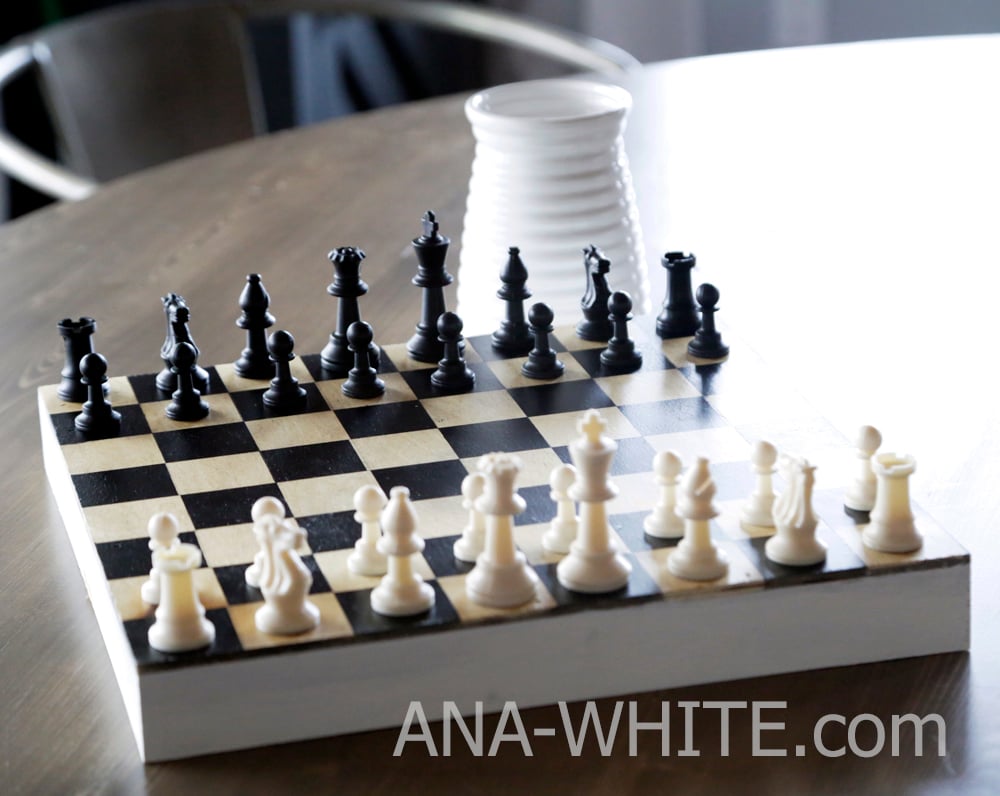
For the chess (and checkers) players out there - here's an inexpensive way to hide your chess game in plain sight!

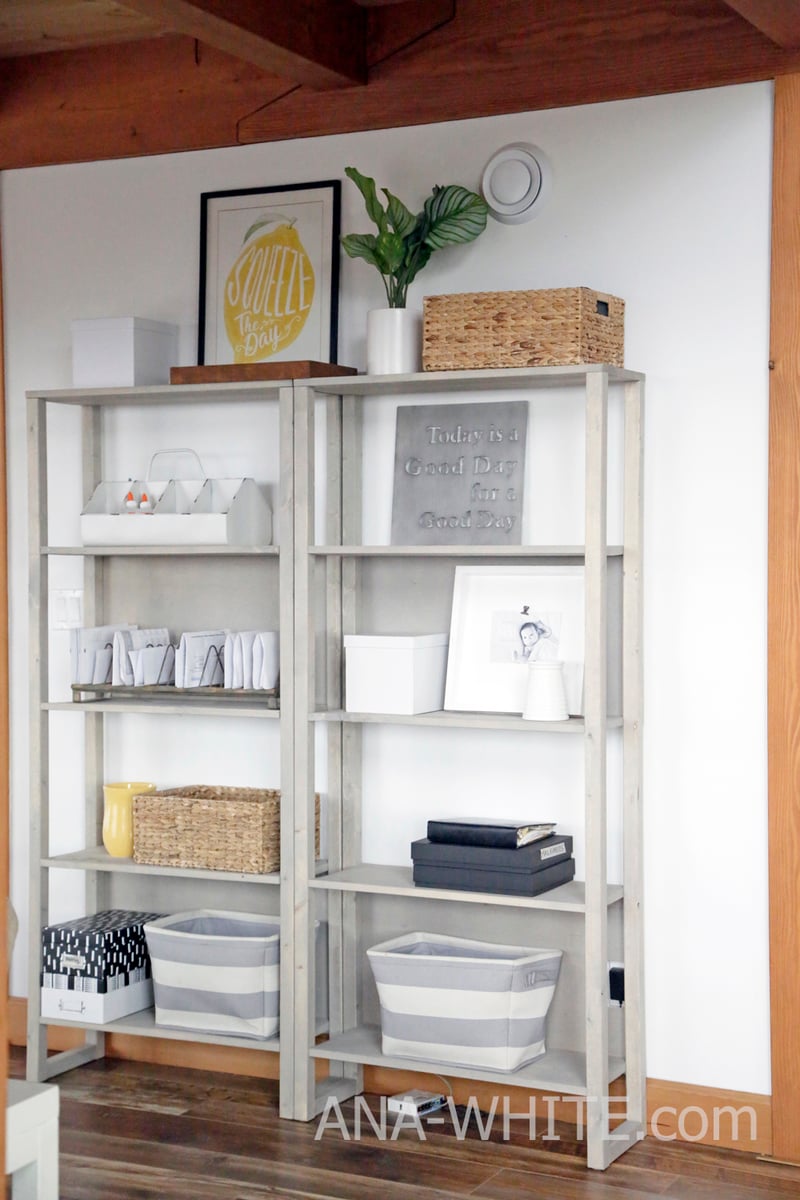
A few weeks back, we DIYed the industrial bookshelf - for just $30 a piece! We are loving how they turned out and they are still looking good!
I wanted to add a chess game set to the open bookshelves, but in a way where the chess set is hidden and blends right in.

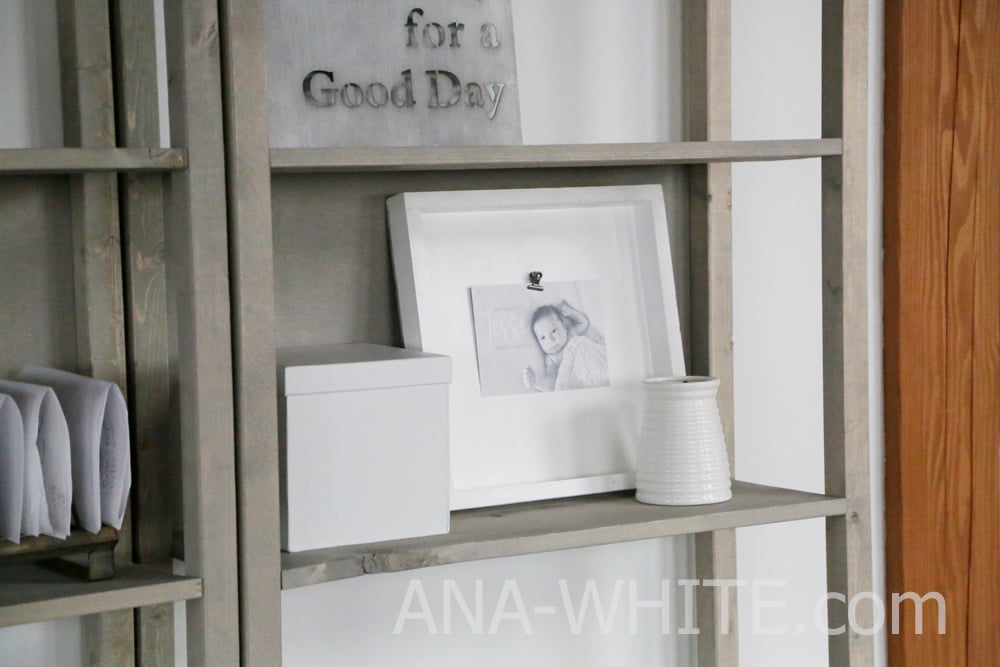
Can you see the chess set? It's right there - smack in the middle of the picture.
To be fair, you can't see it. It's actually on the back of the photo frame. And the chess pieces are in the white vase. Just flip the frame over and dump the pieces out -
And you are ready to play!
Here's why I love this Photo Frame Chess Board so much
- It's a beautiful, simple frame on the shelf - you could spend $20 on a wood frame this size easily
- The chess game is so accessible, you don't need to reach into a cabinet and pull out an ugly cardboard box and open it up
- It's so easy to put way - just dump the pieces into the base and place the frame back on the shelf
- I built it from scrap wood for free in about 15 minutes. It's such an easy DIY project
- And of course, it's just fun to suprise people with our hidden chess set!
This chess set would make a great gift too!
We built this photo frame chess board in this video - do watch if you are planning on building, there's lots of tips and tricks in it
And the free plans are below.
Please share if you build - you can tag me on Instagram #anawhite or share a brag post or post to our facebook page. Thanks so much, we appreciate you! Ana

Preparation
1 - 1x2 @ 5 feet
1 - 1/4" plywood @ 14" x 14"
1 - clipboard clip (available at most craft stores, smaller versions available in the scrapbooking section of craft stores)
painter's tape at least 1-3/4" wide
black spray paint
polyurethane
white paint
chess set (try these from Amazon - link is affiliate)
2 - 1x2 @ 12-1/2"
2 - 1x2 @ 14"
1 - 1/4" plywood @ 14" x 14"
Cut the 1x2 pieces with the compound miter saw.
Cut the plywood with a table saw.
A circular saw can also be used to cut all the pieces. Just clamp a straight edge to the piece you are cutting to use as a guide - getting good cuts is very important.


Instructions
Step 1
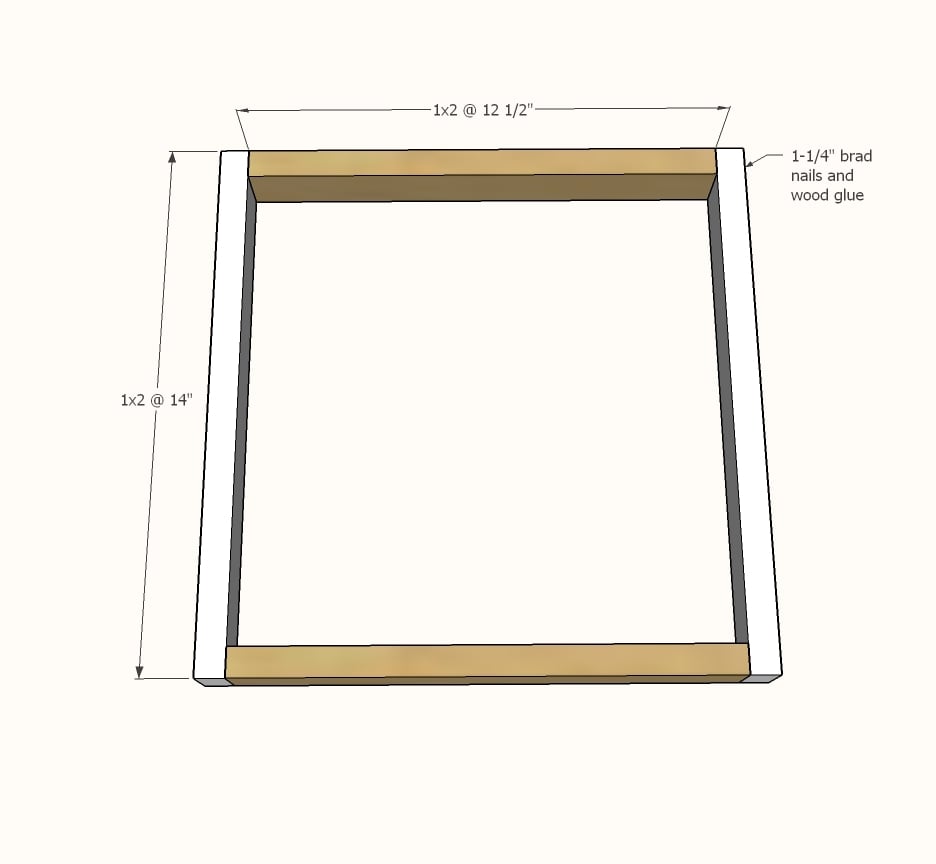
Nail together the 1x2 pieces to make a square. Use 1-1/4" brad nails and wood glue.
Step 2
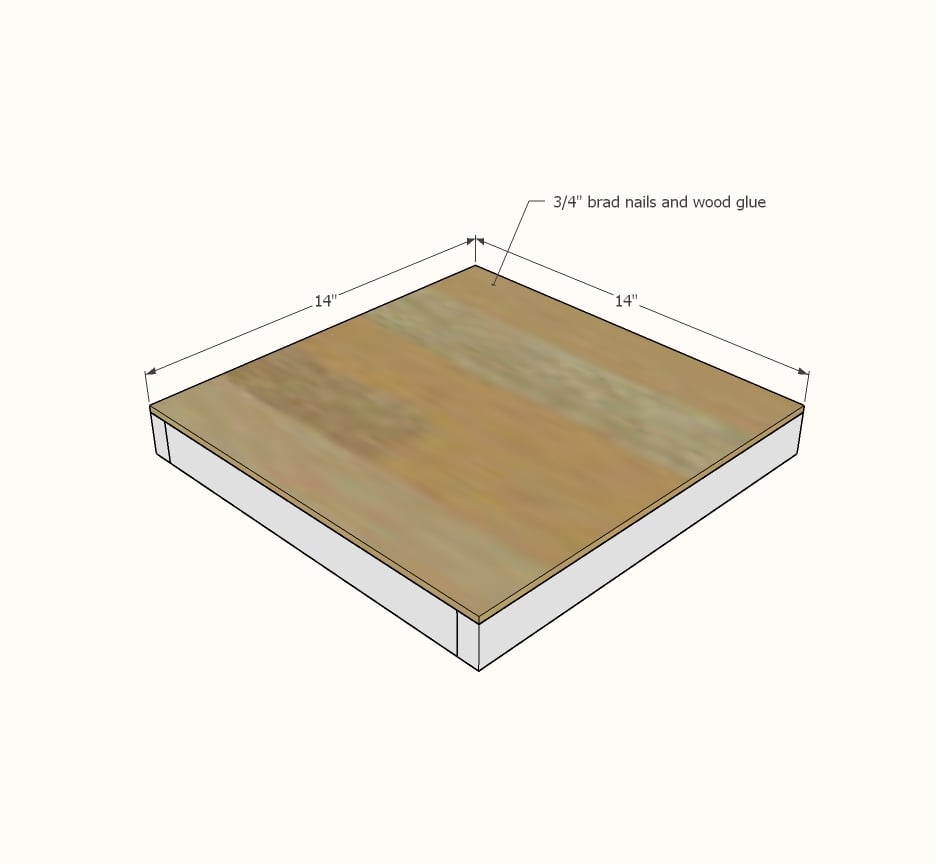
Glue and nail the 1/4" plywood on top of the 1x2 frame. Sand any rough edges. Fill all nail holes with wood filler.
Step 3
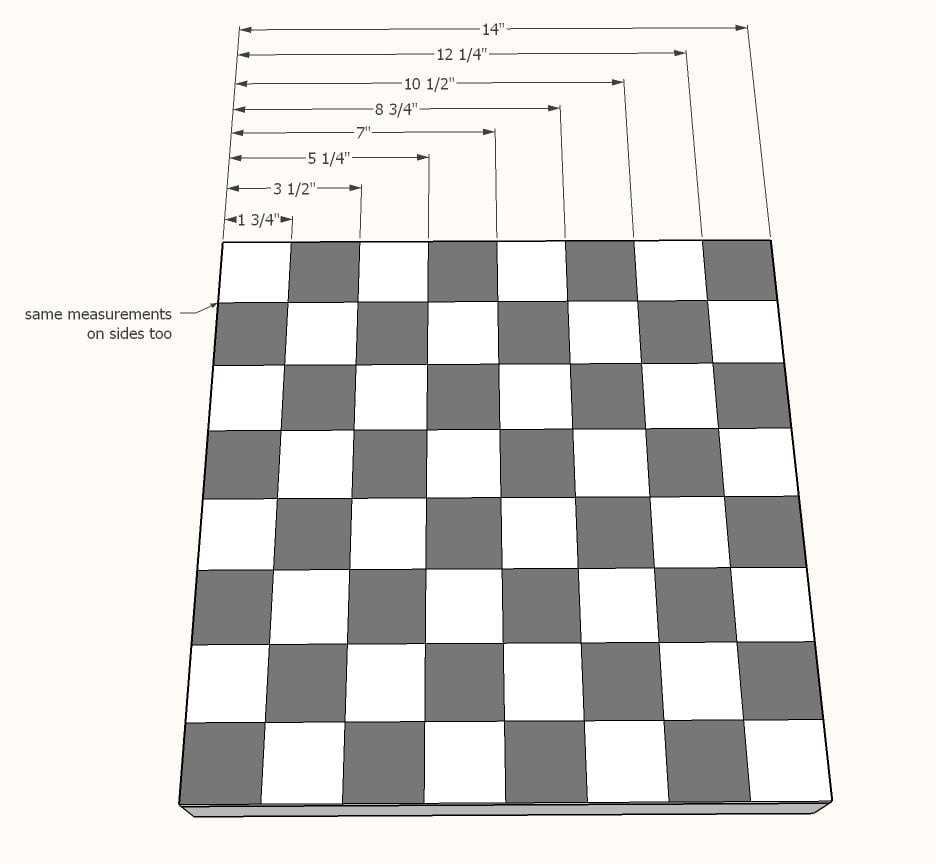
Mark out the chess grid and draw pencil lines.
Watch the video for details on how we taped and painted the chess board quickly and easily.
