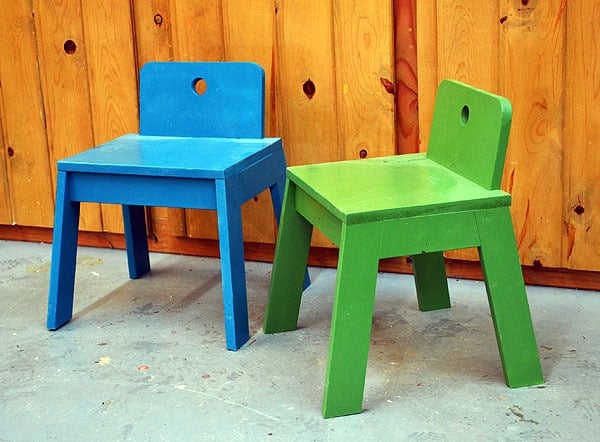


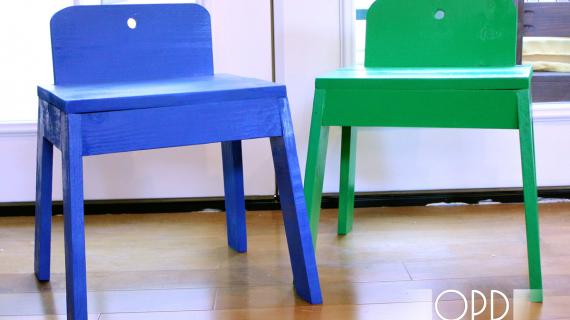
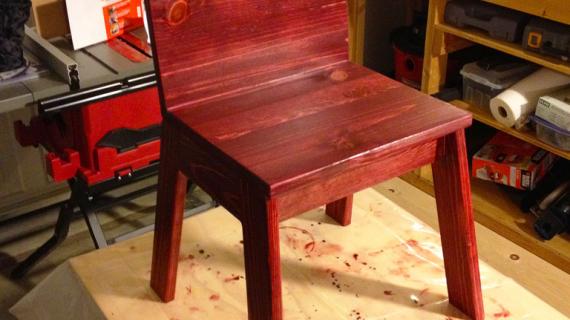
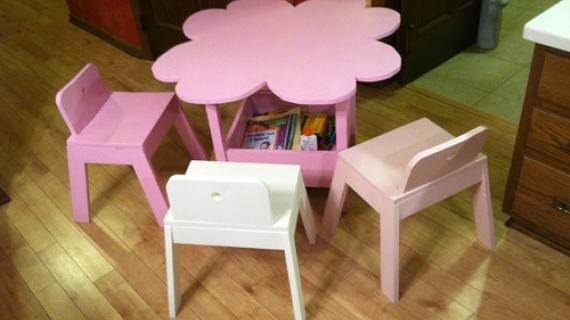
Build your own modern style kids chairs with splayed legs for durability! Free step by step woodworking plans from Ana-White.com
We had so much fun building these chairs!


Preparation
- 1 - 1x12 @ 2 feet long
- 1 - 1x3 @ 10 feet long
- 4 - 1x3 @ 13 1/2" (Long point to short point, ends are parallel, 10 degree miter, 5 degree bevel)
- 2 - 1x3 @ 7" (Long point to long point, both ends cut at 10 degree miter)
- 2 - 1x3 @ 12 1/2" (Short point to short point, both ends cut at 5 degree miter)
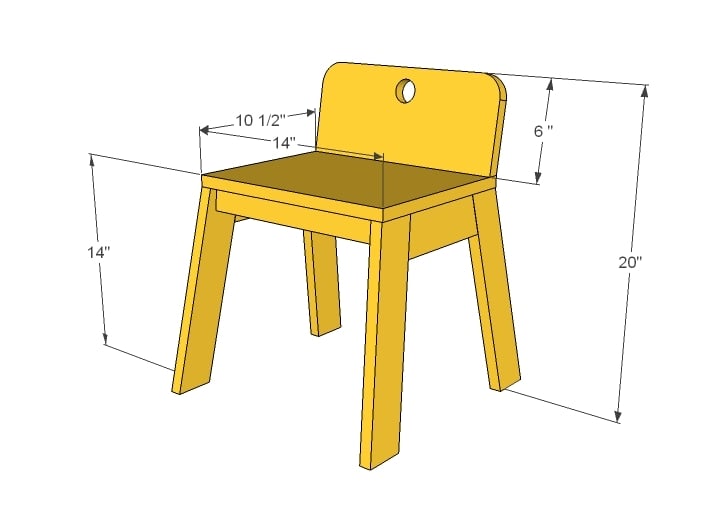
- 1 - 1x12 @ 14"
- 1 - 1x12 @ 6" (One end cut at 10 degree bevel)
The success of this chair is highly dependant on cutting very precise angles as outlined in the plan. You will need a miter saw that can cut a double bevel - meaning the saw is angled in two directions per cut. Once you set your saw for the legs, cut all the legs by sliding the board down for parallel cuts. Read through the plan and make sure you understand every cut first.


Please read through the entire plan and all comments before beginning this project. It is also advisable to review the Getting Started Section. Take all necessary precautions to build safely and smartly. Work on a clean level surface, free of imperfections or debris. Always use straight boards. Check for square after each step. Always predrill holes before attaching with screws. Use glue with finish nails for a stronger hold. Wipe excess glue off bare wood for stained projects, as dried glue will not take stain. Be safe, have fun, and ask for help if you need it. Good luck!
Instructions
Step 1
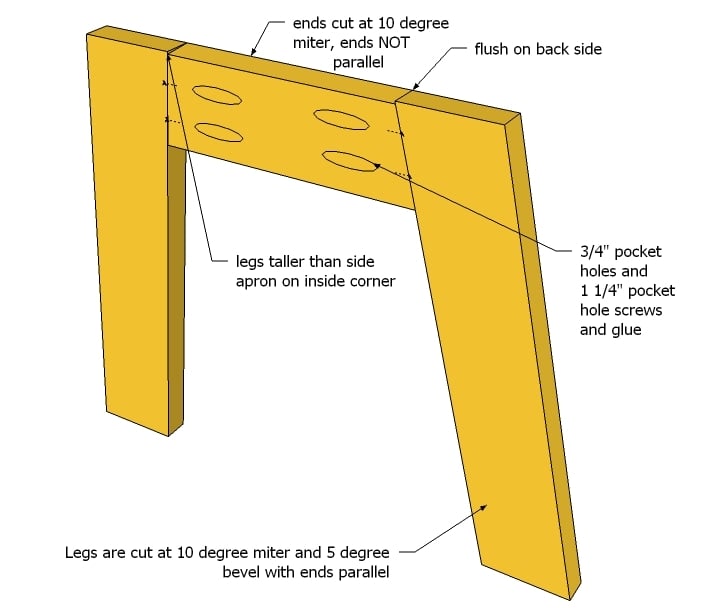
Set your saw at a 10 degree miter and a five degree bevel. Cut one end of a 1x3 board, as close as possible to the end of the board while still getting your angle cut. Slide the board down 13 1/2" (longest point to shortest point) and cut. This is one leg. Slide the board down 13 1/2" and cut, repeating until you have all four legs.
Then set your saw to a 10 degree miter and no bevel. Cut the end of the board. Flip the board, measure down the long point to long point side 7" and cut to get your side apron. You will need to flip and cut one more.
Now drill two pocket holes on each end of the aprons.
Lay legs down - you may have to flip and rotate - with the side apron in between, pocket holes facing upward. The legs are flush to the tops of the apron on the outside edge, but on the inside edge, the legs extend past the apron slightly. Attach with 1 1/4" pocket hole screws and glue. Build two leg sets for each chair.
Once you have completed this step successfully, the chair will be easy peasy.
TIP: You may wish to drill pocket holes along top edge of legs/side aprons for attaching seat in step 3.
Step 2

Set your saw for a 5 degree miter and cut front and back aprons. Drill pocket hols and attach, with the apron never extending above legs, flush on top.
TIP: You may wish to drill pocket holes along top edge of front back apron for attaching seat in step 3.
Step 3

Attach seat.
Step 4
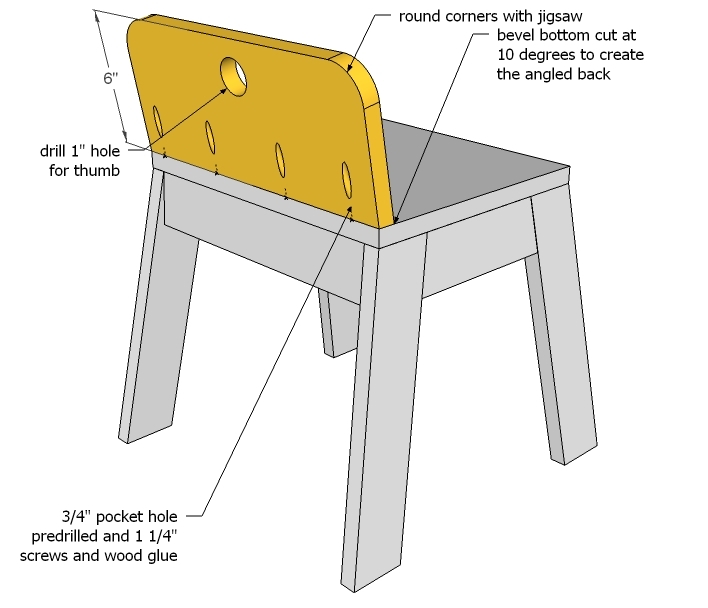
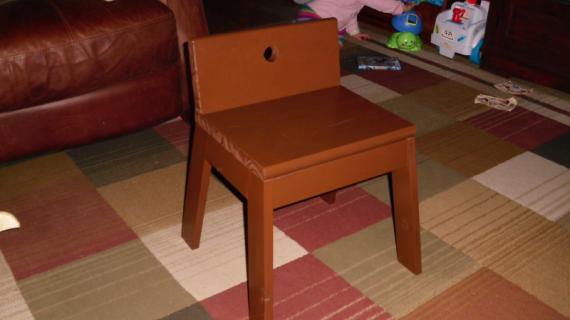
Set your saw for a 5 degree bevel and cut seat backs. Then round corners of seat back with jigsaw and drill thumb hole with 1" hole saw or drill bit. Sand all rough edges.
Attach seat back to seat with screws and glue.
It is always recommended to apply a test coat on a hidden area or scrap piece to ensure color evenness and adhesion. Use primer or wood conditioner as needed.


Comments
loniwolfe
Tue, 12/13/2011 - 14:56
Cute! Think I just found
Cute! Think I just found Maddie's desk chair!
annalea
Tue, 12/13/2011 - 16:08
Too cute . . .
But I'm dying over here, wondering when you're going to post some plans on how you build kitchen cabinets! I'll be patient . . . :o)
Ana White
Tue, 12/13/2011 - 17:42
Hi Annalea, thank you! We
Hi Annalea, thank you! We haven't been able to get much done on the Momplex because it's either snowing or blowing ... believe me when I say no one wants to be building kitchen cabinets more than me ... so I totally understand. But most important, we want Mom to have a quality home that was made right, with no one getting hurt, and not costing a ton of money, so we have to wait on the weather.
Thank you for following along and being patient.
Pam the Goatherd
Wed, 12/14/2011 - 11:44
This plan is definitely going
This plan is definitely going in my file of things to make for my future grandchildren! Hopefully by the time I have grandkids my hubby will have bought me a Kreg Jig! Otherwise I'll have to adapt.
Meanwhile, today I am putting the finishing touches on the pair of kitchen hutches I built by adapting the plans for Grace's Bookshelves. I'm hoping to get pictures posted in the next few days.
Thanks Ana!
Marilyn (not verified)
Tue, 12/27/2011 - 23:29
Love these plans
I think these r going to be next on my "to build" list. They could dble as stools.
Katie_Evans
Thu, 02/02/2012 - 17:50
Thumb Chair FYI
FYI, you may want to double up on the pocket hole screws that connect the chair back to the chair. One of my chair's chairback came loose a few weeks after using it. I am pretty sure my five year old son dropped it with the chair back taking the impact. I filled the holes when I finished it so I'll probably re-drill holes, but add reinforcement pocket holes in the front too.
Also....the Land of N0d catalog came last week and guess what was in there? The thumb chair for $65.00!!! Ana you are so good to us! :) Thank you so much for your plans.
mamalecia11
Thu, 02/16/2012 - 10:49
Confused?
Not sure how quickly I will get an answer but if you don't have a miter saw, just a table saw how would I cut the legs? I have read and reread the instructions and can't understand what I am supposed to do. I don't want to mess them up. HELP!! PLEASE!!
Donald LeBlanc (not verified)
Wed, 01/09/2013 - 17:30
Thumb chair
I just found this project so this reply is pretty late but you should be able to make those cuts on a table saw. You would set the blade angle to 5 degrees and use a miter gauge set to 10 degrees.
Guest (not verified)
Mon, 03/26/2012 - 21:35
These instructions are truly
These instructions are truly an answered prayer! Thanks so much, God bless!