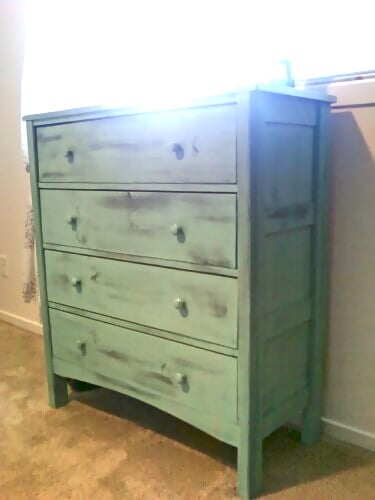
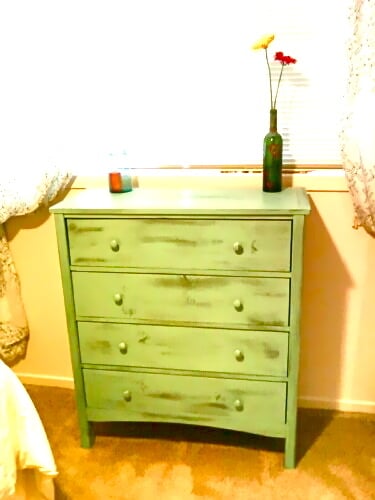
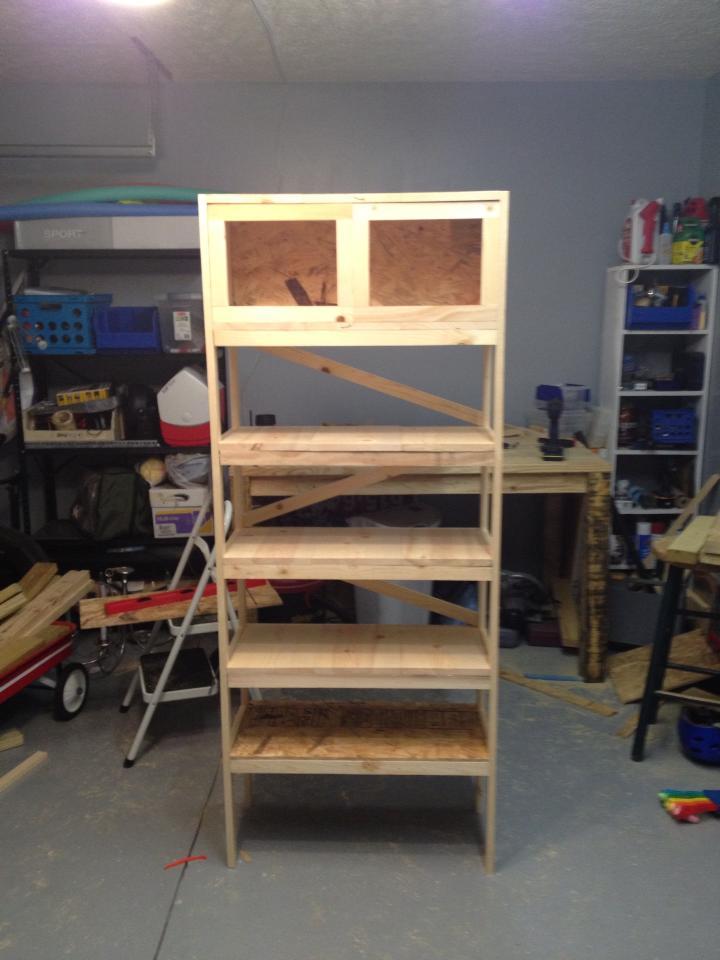
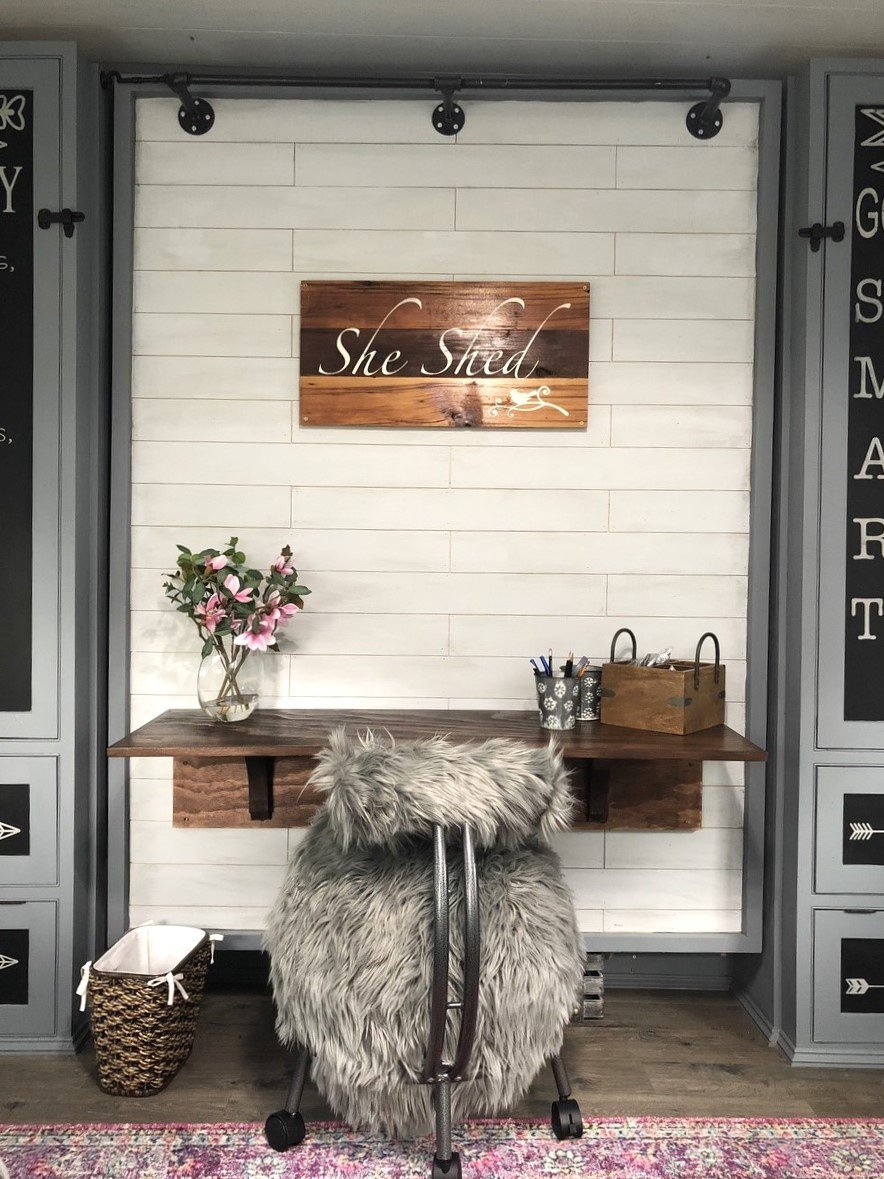
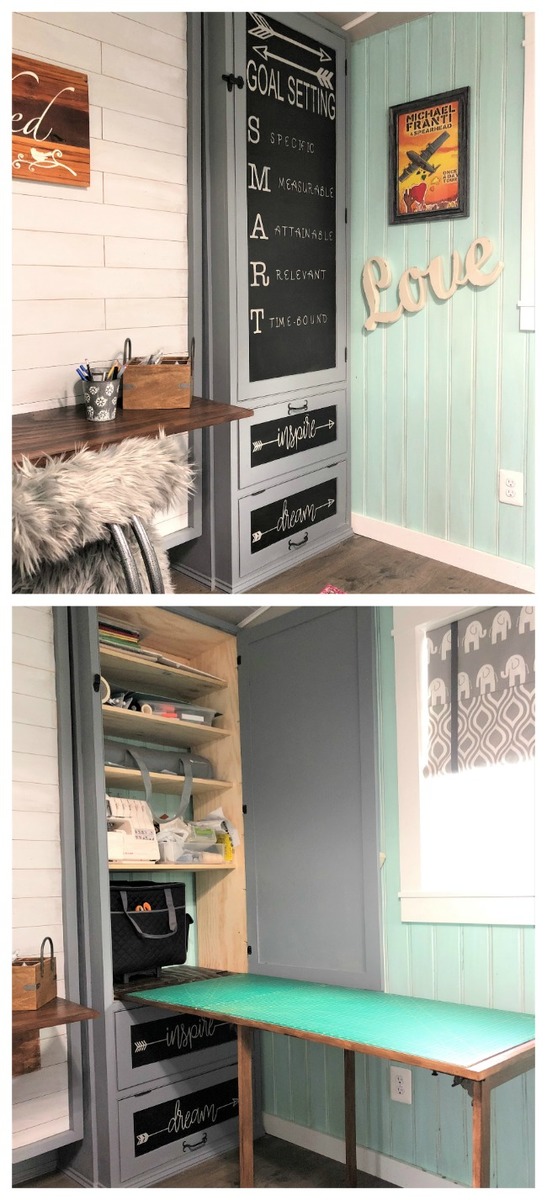
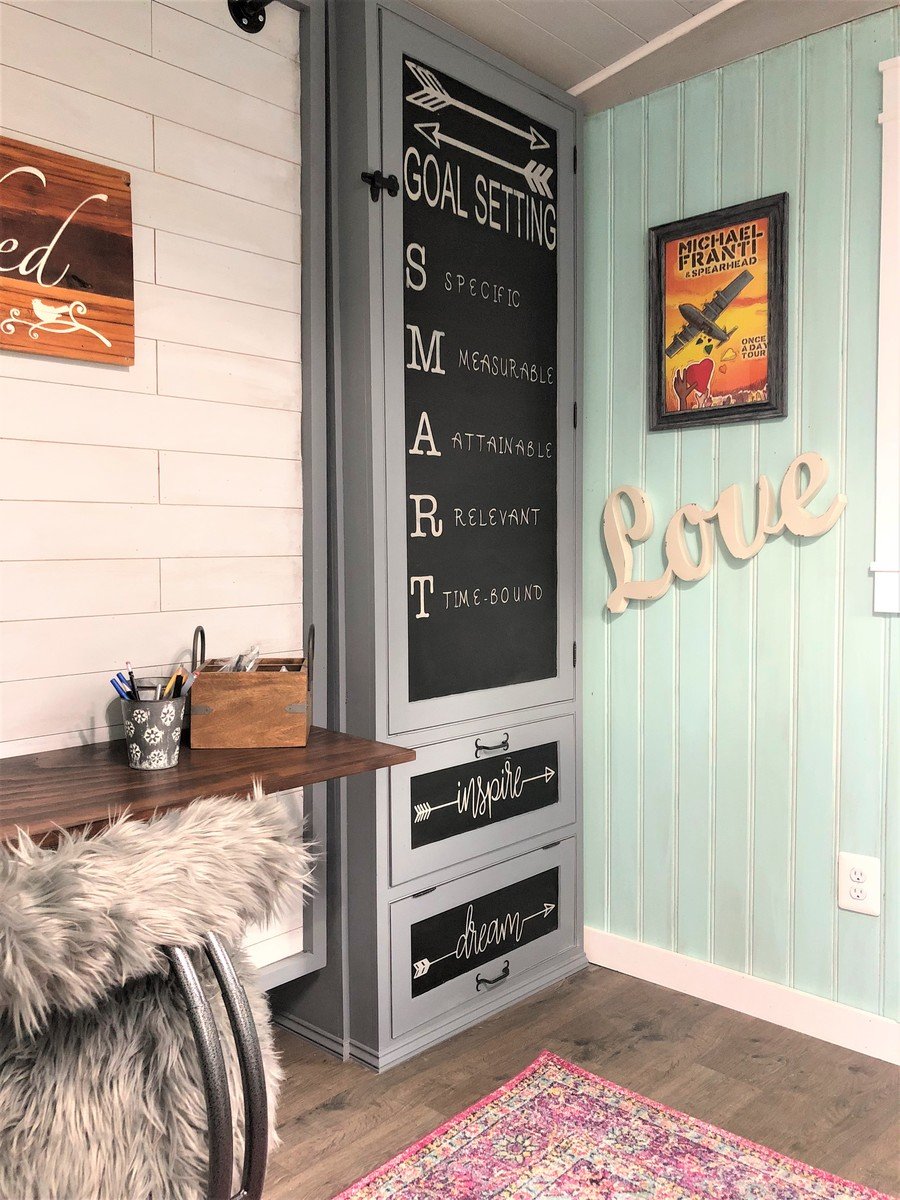
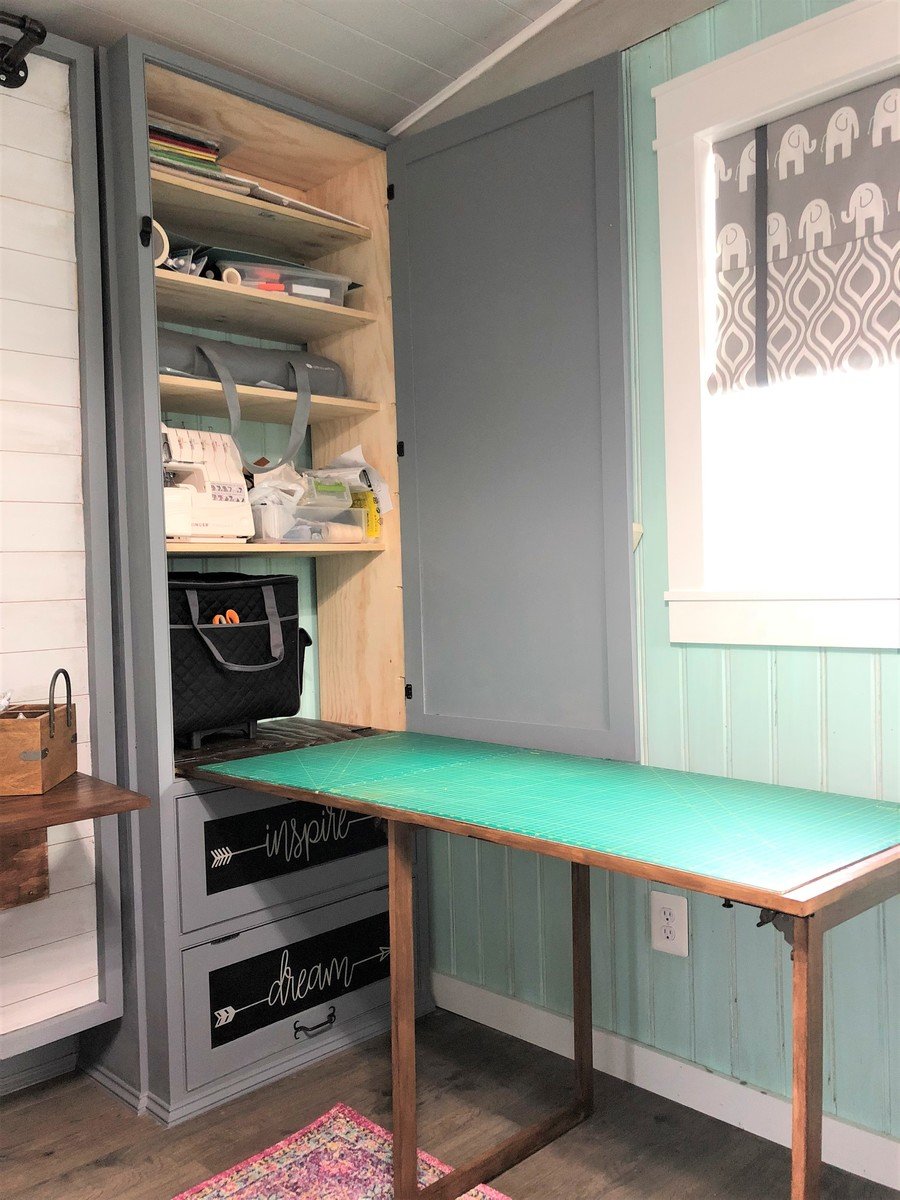
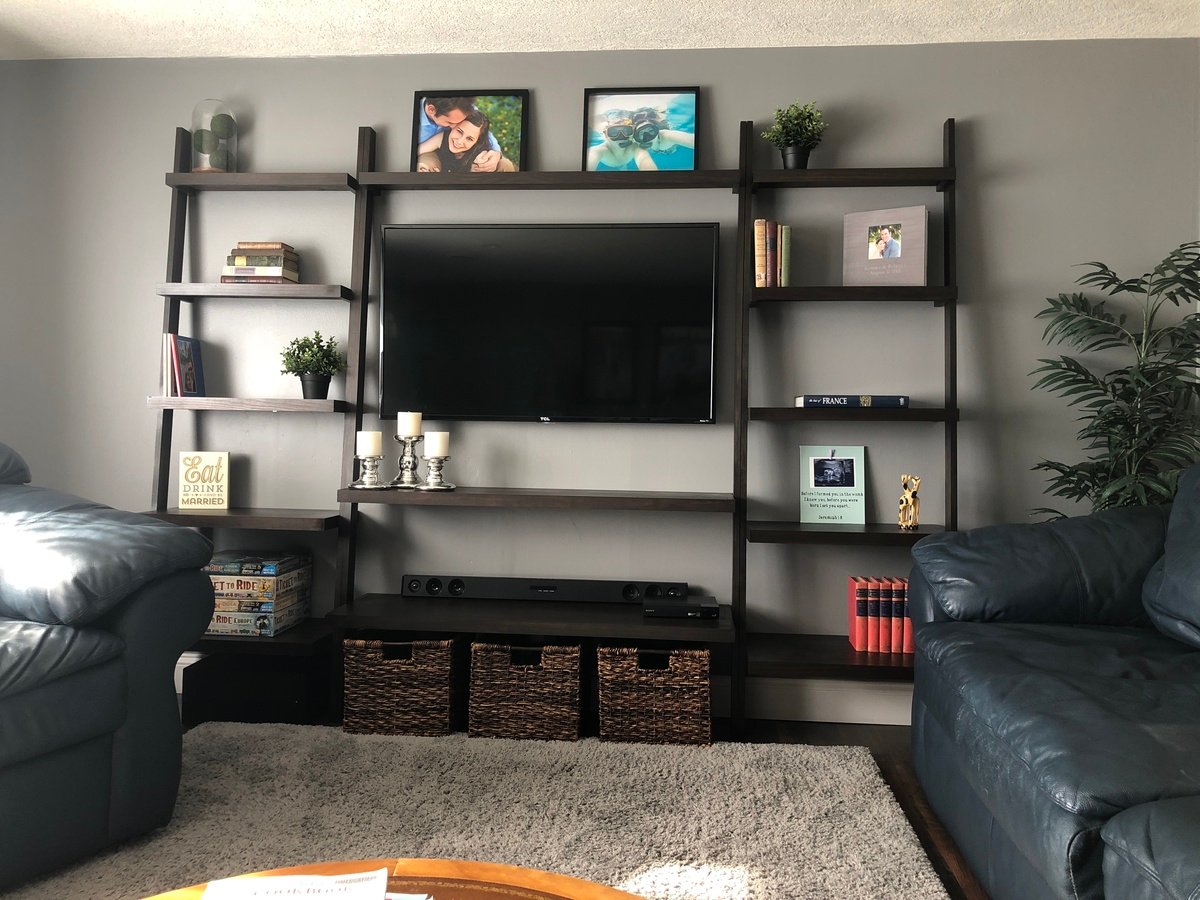
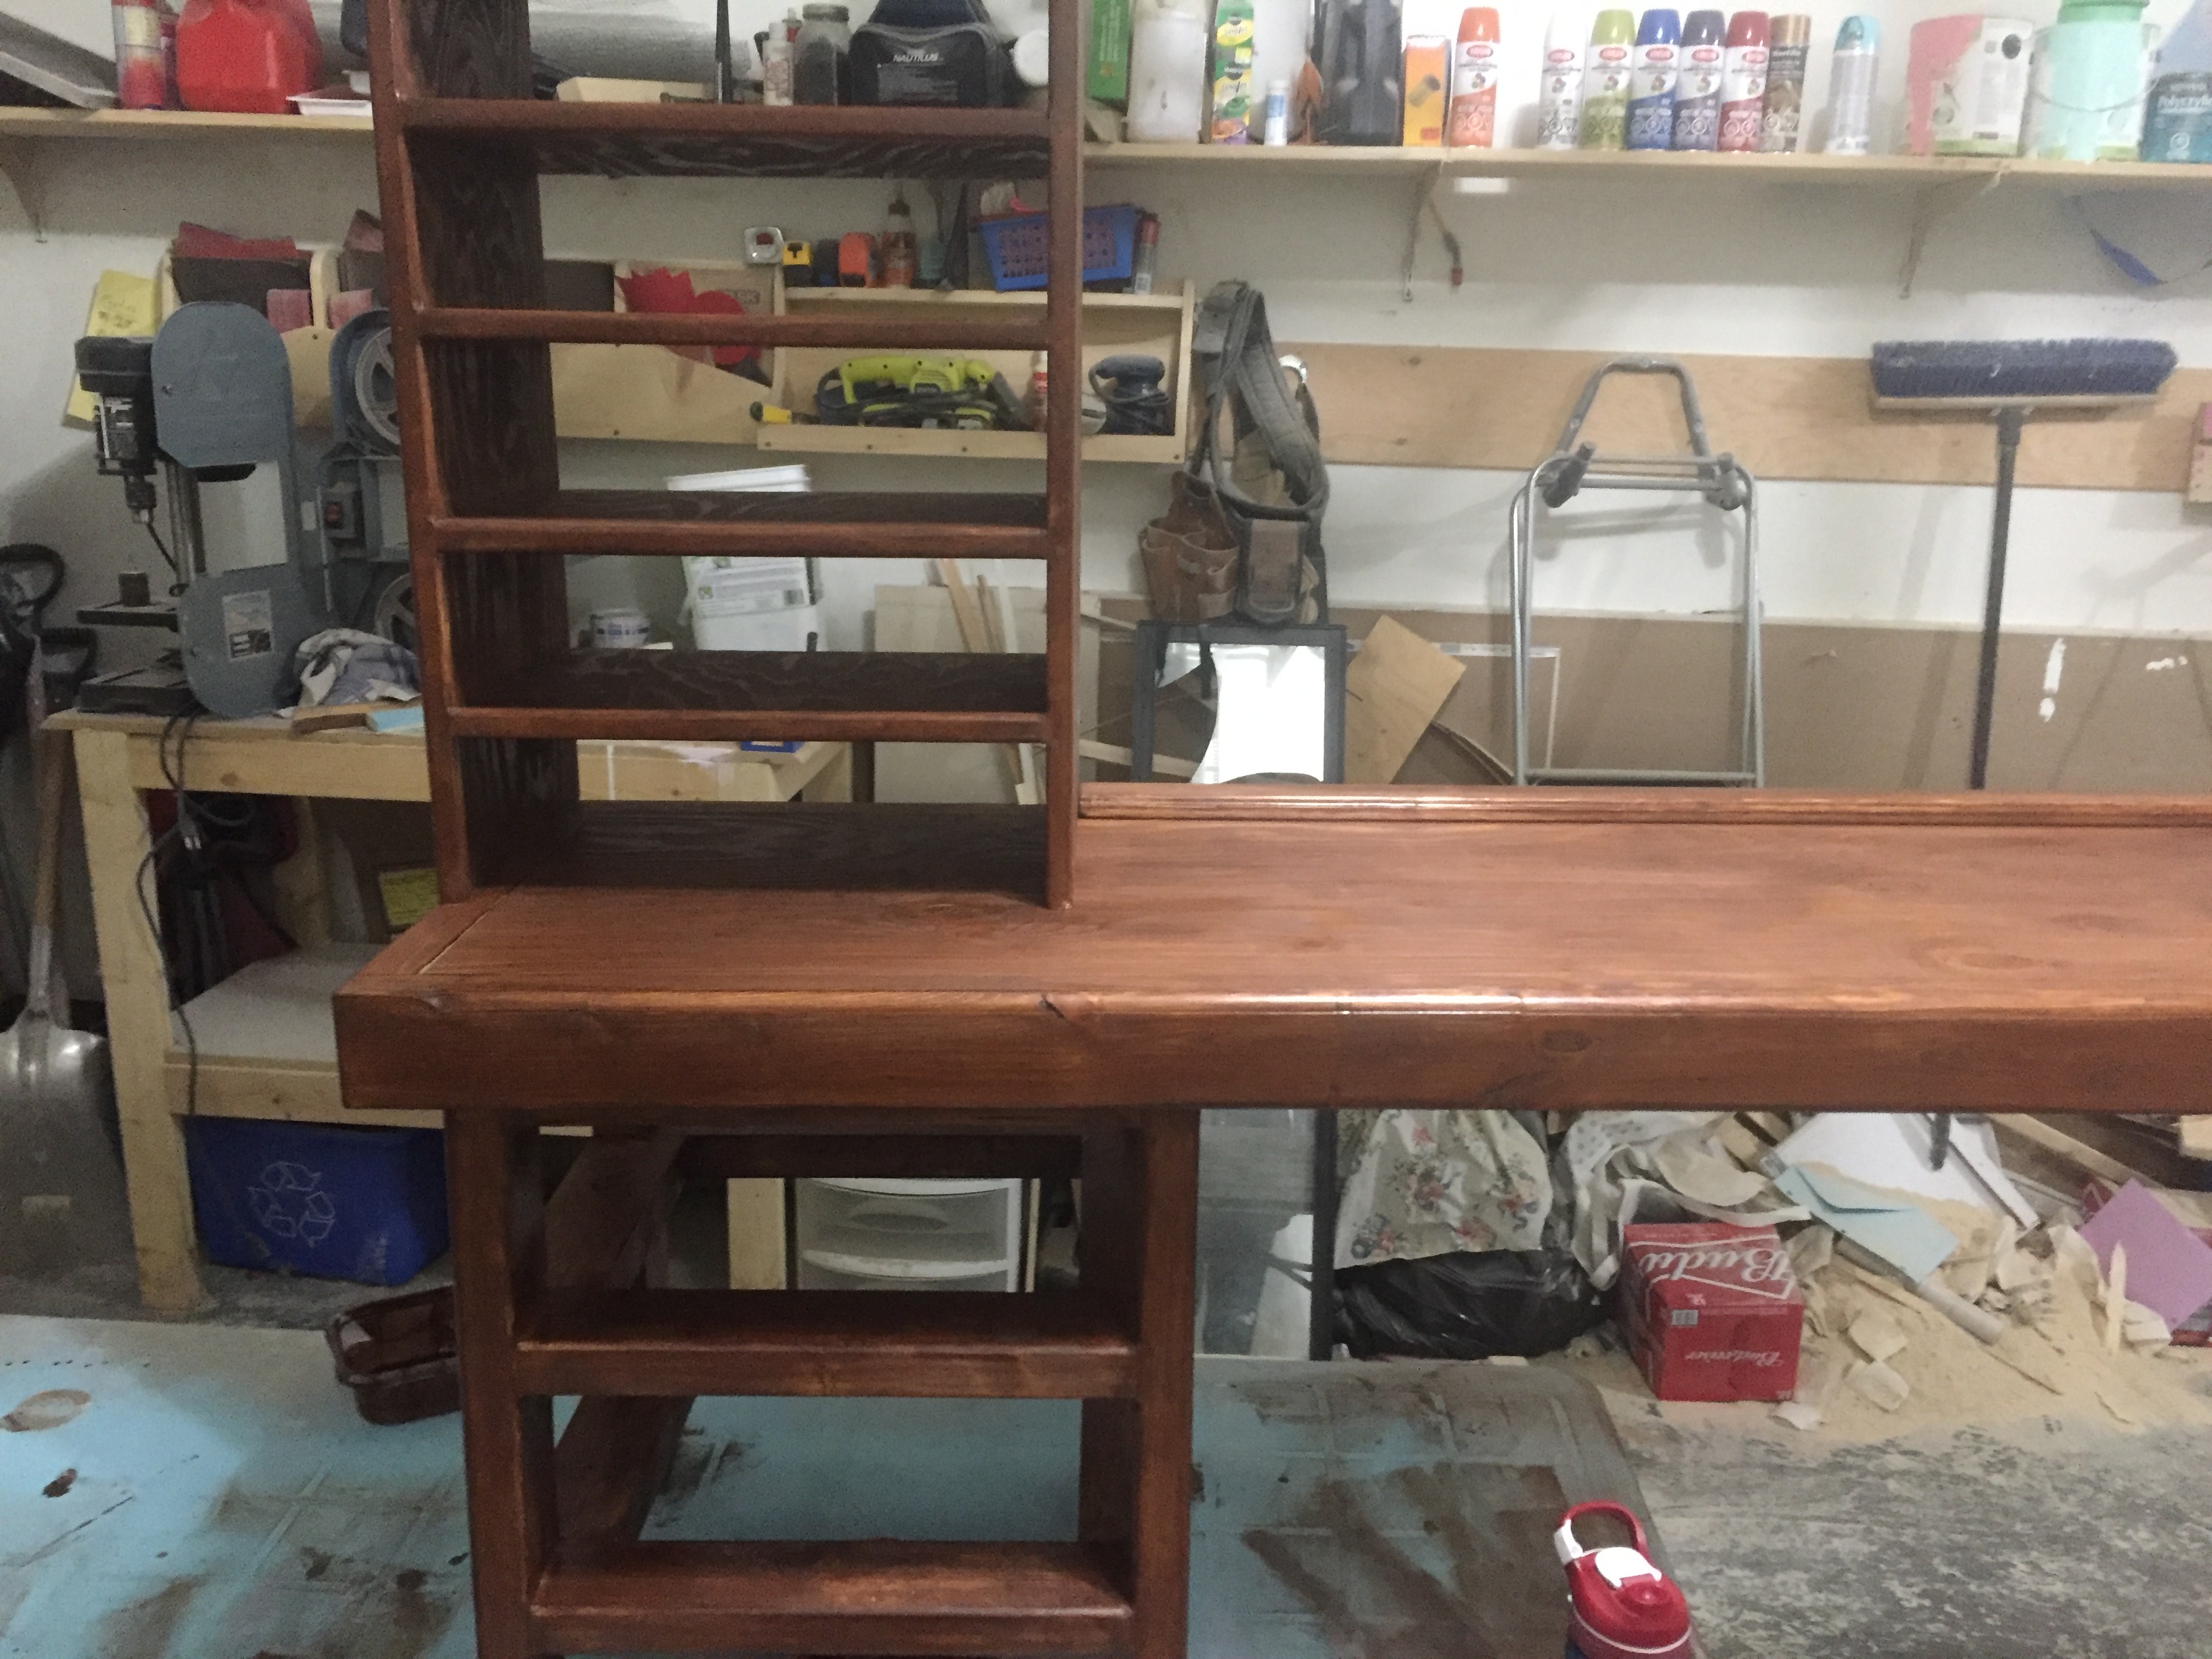
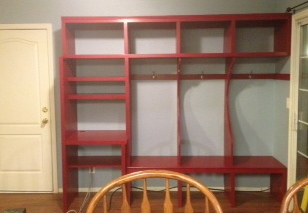
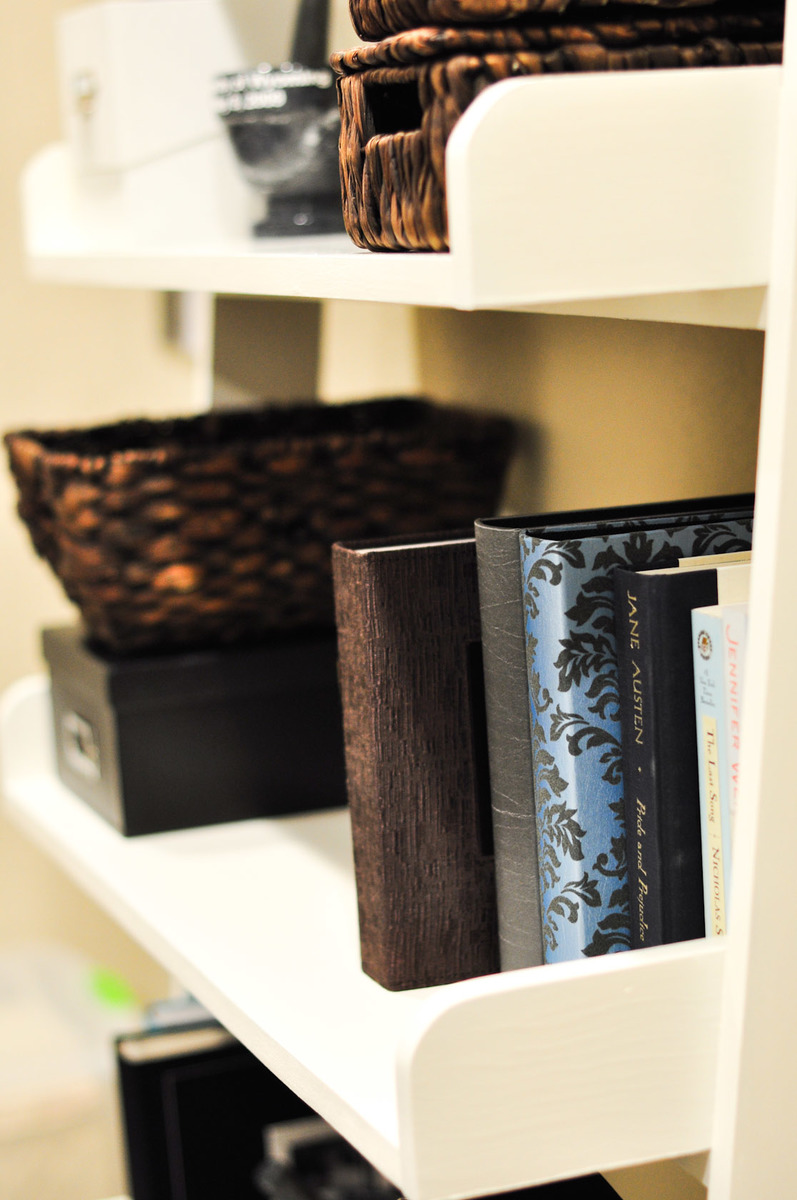
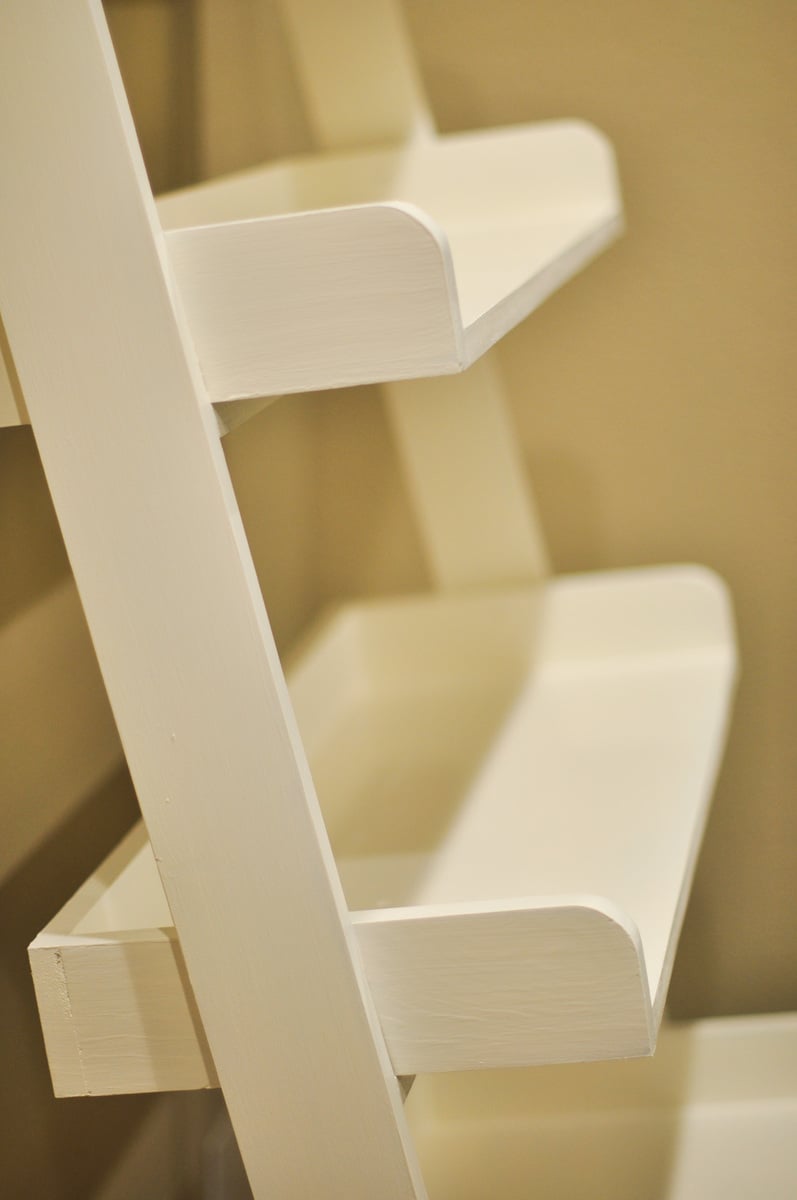
Community Brag Posts

Leaning Bookshelves

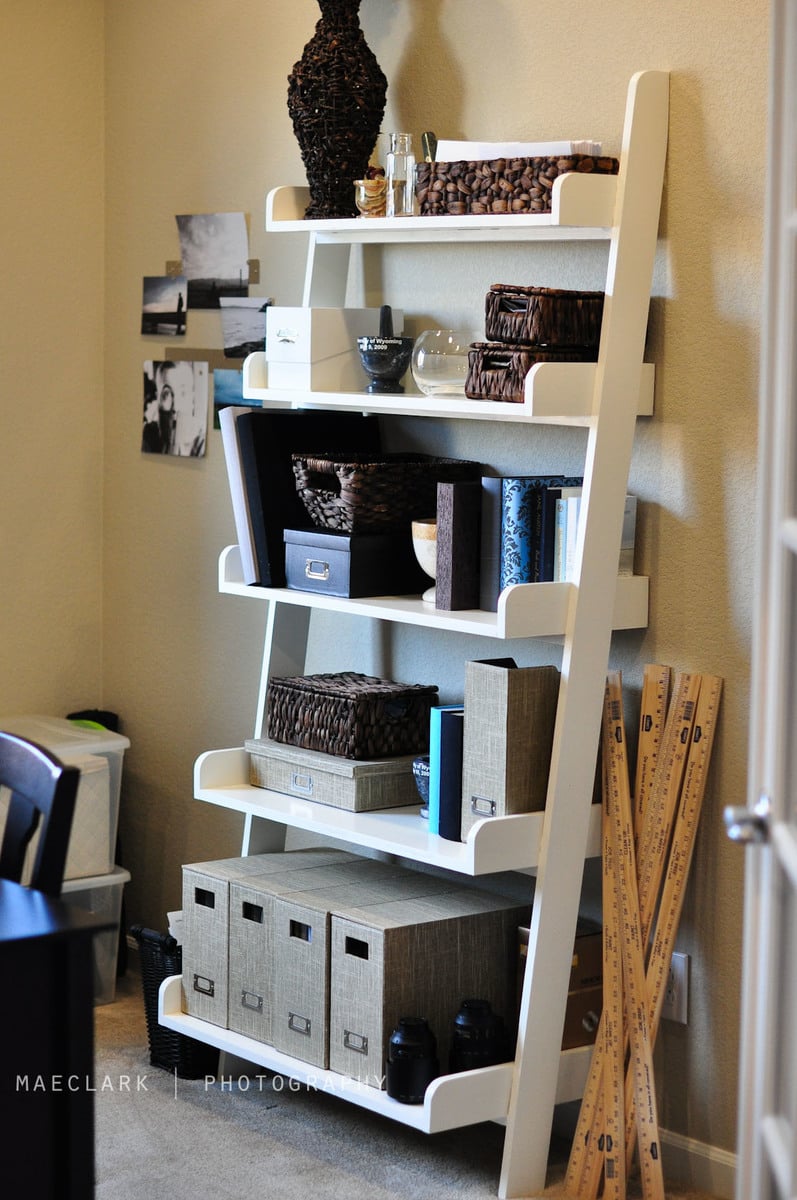
Built this over a relatively warm Saturday in January. Like most projects, the building wasn't bad but the finishing took forever :)

Estimated Cost
Built it so long ago I don't remember for certain, but less than $100 I'm sure
Estimated Time Investment
Day Project (6-9 Hours)
Finish Used
Mascarpone paint in Semi-Gloss; Benjamin Moore
Recommended Skill Level
Intermediate

Red Hen Home's Modified Providence Bench

This is a slightly modified version of the Providence Bench. I used 1x wood rather than 2x wood, so the legs are slightly longer to make the bench come out to the same height. Made this to match a planked-top table. More photos on my blog: http://redhenhome.blogspot.com/2013/07/the-other-solomon-table-bench.ht…

Built from Plan(s)
Estimated Cost
50
Estimated Time Investment
An Hour or Two (0-2 Hours)
Finish Used
Custom mix of Minwax Weathered Oak and Antique Walnut stain, followed by hand-rubbed polyurethane.
Recommended Skill Level
Beginner

Comments

JW

Thu, 09/12/2013 - 05:46

I like the planked top! Great job on the finish - it's rustic without being overdone. It's one of the things i love about pottery barn furniture.

What is the hand-rubbed polyurethane? Is that just the wipe-on stuff I keep seeing at the store? Was it easy to use?

Farmhouse table

Submitted by Camberjak on Tue, 06/30/2015 - 20:23

First large wood working project my husband and I completed. In love with Projects and plans by Ana white !

Built from Plan(s)
Estimated Cost
150 dollars
Estimated Time Investment
Weekend Project (10-20 Hours)
Finish Used
Minwax dark walnut and table top was pure white and sanded down and minwax dark walnut was rubbed on with a rag
Recommended Skill Level
Beginner

Comments

Quick basement shelves

Submitted by Panda on Thu, 01/18/2018 - 14:22

What a great project! This is my first Ana White project and definitely won't be my last!


I modified the garage plans to fit our basement. We have two beams the shelves needed to fit between, so I made the length 10' and bought 2x4s at 10'. Otherwise, I didn't do any modifications.


The wood was cut at the store for the lengths needed, making it super easy to come home and assemble! We secured the shelves to the basement supports and along the back wall. It's pretty secure and stable.


Overall this probably took a few hours (we took a break while constructing it). Next time I would make the shelves a bit deeper. 17" was fine, but a few more inches would have made the bins fit a bit better.


I am looking forward to making more!

Estimated Cost
$140
Estimated Time Investment
Afternoon Project (3-6 Hours)
Recommended Skill Level
Beginner

Bench

Had a small bench that the previous owners of our house left. It was all made from 1x. Wanted something a little beefier to match the bed I built. So came up with this bench. Made from all pine.

Comments

Beach Cottage Dresser

Again I'm sorry I have no plans, but what I do have is a great instructional video. Drawer slides are such a pain to install without the right tools. I'm sure you can find great dresser plans but the kicker is how you install the drawers. These inexpensive drawer slide mounting tools might save you from going insane. Check them out. http://youtu.be/vI3jgkhxxPE

Estimated Cost
$100-140
Estimated Time Investment
Weekend Project (10-20 Hours)
Finish Used
Martha Stewart Interior Semi Gloss
Recommended Skill Level
Advanced

Bathroom Towel rack

Submitted by sean1023 on Tue, 07/09/2013 - 20:10

I kind of came up with this on my own. I used 1 x 3 furring strips for the legs and stops for the shelves. I used 1 x 8 for the shelves. I wanted a semi distressed look so I painted white and then painted the blue very messy making sure I missed certain areas.

Estimated Time Investment
Afternoon Project (3-6 Hours)
Recommended Skill Level
Beginner

Cottage End Table in Oak

Submitted by JanMarie63 on Mon, 07/06/2015 - 06:48

I loved making this Ana White's Narrow Cottage End Table plan after seeing it here on a search. I made it for my mother's 83rd birthday. She asked for oak and a light stain (Rust Oleum's Summer Oak Stain). Used three coats of wipe on Poly and one coat of Johnson's paste wax on the top. I bought the blue knob at Cost Plus World Market. The project took me two days. Will difinitely make another one but in pine this time.

Estimated Cost
$40, plus scrap wood on hand
Estimated Time Investment
Weekend Project (10-20 Hours)
Finish Used
Rust Oleum Summer Oak Stain, Minwax Wipe-on Poly (3 coats), Johnson Paste wax final coat for table top.
Recommended Skill Level
Intermediate

Comments

She Shed - Guest Room, Craft Room, Office

Submitted by Chriss45 on Tue, 01/23/2018 - 08:18

I needed an office and also a guest room so i built a she shed and all the furniture.

Recommended Skill Level
Advanced

Comments

junesummer21

Thu, 01/25/2018 - 06:27

I love your murphy bed idea and would love to have plans for it. I too am looking for a guest bedroom and craft area and I know this would work in my space.

Chriss45

Mon, 02/05/2018 - 16:20

I didnt really have a plan when I was building my Murphy bed, I can do a sketchup plan for you if you would like. I used boat chair swivels instead of hinges and there is a YouTube video on how to do this. 

Chris

Nurserene62

Thu, 06/24/2021 - 23:11

Hi Chris! I would love to have a copy of the sketch up of this. I have a small she shed/guest cottage I would live to duplicate this in. Thanks in advance.

cgself12

Mon, 11/08/2021 - 14:18

Hi Chris!
I know I'm coming late to this party but I just found your shed and I adore it. You did an amazing job and I cannot express how impressed I am! I would also like a sketchup plan of both the murphy bed and the adjoining side cabinets. Great job!

Kim Daigle

Thu, 06/06/2019 - 10:59

I absolutely love everything about this she shed!!  I would be interested in a sketch up of the murphy bed as well as the cabinets next to it.  I would at least like to know what the dimensions of it all is.  You did an amazing job!  It's so beautiful!

mcocooper11

Tue, 06/25/2019 - 15:14

Me too!! I built a horizontal Murphy bed so I have that part done but I would like to see the plans for the cabinets on either side with the pull out desk!

so very cute!

Fancy X Farmhouse Table and Bench

Built this table and bench for my wife. She wanted to host Thanksgiving dinner and needed a bigger table. I used the 96” plan, building the bench first and the table second. 3 coats of Danish oil dark walnut, and 2 coats of poly. I get a lot of compliments about this table. The bench is remarkably comfortable and sturdy. And yes, my wife was very pleased, plus I finished on time for dinner.

Comments

BearWoodworks

Mon, 01/17/2022 - 13:49

Thank you. The set up gratitude goes to my wife. She inspires me to complete these builds. And thank you to Ana White for these awesome build plans. I’m running out of house for all the builds so far.

2x4 Garden Beds

Submitted by binah06 on Wed, 05/18/2011 - 09:37

My husband and I were inspired by Ana's plans, but needed to use up some wood we had laying around the garage because it was starting to bend and warp. We made the large box 2x6 ft and the smaller one is made from scrap and is about 15in x 2.5 ft.

Estimated Cost
free
Estimated Time Investment
An Hour or Two (0-2 Hours)
Finish Used
none
Recommended Skill Level
Starter Project

Bunk and loft beds

I designed and built these beds with the help of my husband and daughter. We spent about $350 on the materials and about 4 days in the Texas heat to build it. My kiddos absolutely love them, especially my 7yr. old. His is the loft bed with a ladder system and a bookshelf, and area to play underneath. The bunk bed is for my 18yr. old and my 14yr. old, so it had to be extra sturdy. We built everything out of 2x6s except the bookshelf. It was built from 1x12s and plywood.

Estimated Cost
350
Estimated Time Investment
Week Long Project (20 Hours or More)
Finish Used
Ebony stain
Recommended Skill Level
Intermediate

Comments

Queen size storage bed

We made this storage bed for our teenage daughter. She helped! She picked out the stain, comforter, and went through different plans with me to make it her own. She learned how to use a miter saw, sander, etc. and it was a great bonding experience. It's a few different plans, and we had to make modifications, but it is immensely better quality than store bought furniture we purchased a few years ago (it's falling apart!) and it has sentimental value. We are proud of the furniture, but even more proud of our daughter. :-)

Estimated Time Investment
Week Long Project (20 Hours or More)
Finish Used
Charcoal Grey
Recommended Skill Level
Beginner

An 'On Steroids' version of your idea

Submitted by Anonymous (not verified) on Mon, 01/24/2022 - 17:19

6 years into a complete rebuild of a neglected old farm house built in just 1948. Your website was found after looking for 'Modern Farmhouse' stair rails. The look plays off the original brick chimney stack & the Woodstove it serves. It has turned out to be quite the focal point, which was never it's purpose. Thanks for the inspiration!

Comments

Our First Project

Submitted by Simplyel on Fri, 05/20/2011 - 19:56

My dear husband built the bed and I painted it. He found that it was easy to make. Thank you Ana, we love it. We are waiting for our new mattress!

Estimated Cost
Less than $175.00
Estimated Time Investment
Weekend Project (10-20 Hours)
Finish Used
Latex White Paint. I want to distress it but he is not sure. Figure we will live with it for awhile and then decide.
Recommended Skill Level
Beginner

2 couches and tables

Submitted by Polysoup on Sun, 07/14/2013 - 07:40

I bought two sets of Restoration Hardware cushions on clearance and they worked out great. I had to adjust the measurements a little bit but that went pretty quickly. I came up with a plan for the tables to match the couches.

The tables are both 30x30. This way I can use them as 2 tables, one large table, ottomans or seating.

I LOVE the cushions. They are 6.5 inches thick and were dry 3 hrs after a rainstorm. There was no way I could have sewn something cheaper.

Thanks for the plans Ana!

Estimated Cost
$250 each (including cushions) Tables - $30 each
Estimated Time Investment
Week Long Project (20 Hours or More)
Finish Used
White Sherwin Williams paint (forget the exact name) and a stain for the cedar details
Recommended Skill Level
Intermediate

Comments

Blue Shocked Sideboard

Submitted by joshwgnr on Sun, 07/12/2015 - 08:17

One of the most rewarding, yet frustrating projects done to date.

A project completed over the course of several weeks challenging the limited tool set available.

In the end, the cost of new tools and frustration of assembly was all worth it!

Built from Plan(s)
Estimated Cost
Material Cost ~$600

Hardware, hinges, and slides add up quickly.
Estimated Time Investment
Week Long Project (20 Hours or More)
Finish Used
Espresso stain for exterior, Blue paint interior
Recommended Skill Level
Intermediate

Art Center / Work Dest

Girls table was too small, especially when they have friends over. We have a little nook that this will slide right into in the living/dining room. The bottom has drawers, they just were not completed when i took the pictures.

Estimated Cost
100
Estimated Time Investment
Weekend Project (10-20 Hours)
Finish Used
Minwax - American Chestnut
Recommended Skill Level
Beginner

First Furniture Build

Submitted by Jeffmb on Thu, 02/03/2022 - 14:23

My first indoor furniture project - the Rustic X coffee table. I added a lift top to store remotes etc and use as a laptop table. Fairly easy build I only had trouble aligning the "x's". I used of the shelf dimensional lumber but I might try this one again using different wood and a lighter finish.

Built from Plan(s)

Comments

Our First Project: A CA Mudroom

Submitted by jcablopez on Tue, 07/16/2013 - 11:28

I've been looking for a storage solution for the area next to the driveway we use as our main entrance. The area opens to the kitchen, dining, and living rooms. We had a computer desk here, but it just ended up piled with junk all the time and backpacks and jackets ended up on the floor.

I fell in love with the smiling mud room plans as soon as I saw them, but it took a while to convince my husband we should try to build it. I used the Smiling Mud Room plans and modified to add the computer desk section since we couldn't move our internet cable. It didn't have to be really big since we don't use the desktop computer very often.

I still need to find baskets for the shelves and I'm planning to make a fabric skirt to cover the computer and cords. My kids already got out their old backpacks to test it out, so hopefully they'll use it!

We bought the Kreg jig as recommended and now my husband is planning lots of new projects just so he can use it.

Built from Plan(s)
Estimated Time Investment
Weekend Project (10-20 Hours)
Finish Used
I used a tinted primer and Valspar Signature semi-gloss paint in Posh Red. It took 1 coat of primer and 2 coats of paint. The plywood took the paint better than the pine, so some of the trim got 3 coats.
Recommended Skill Level
Intermediate