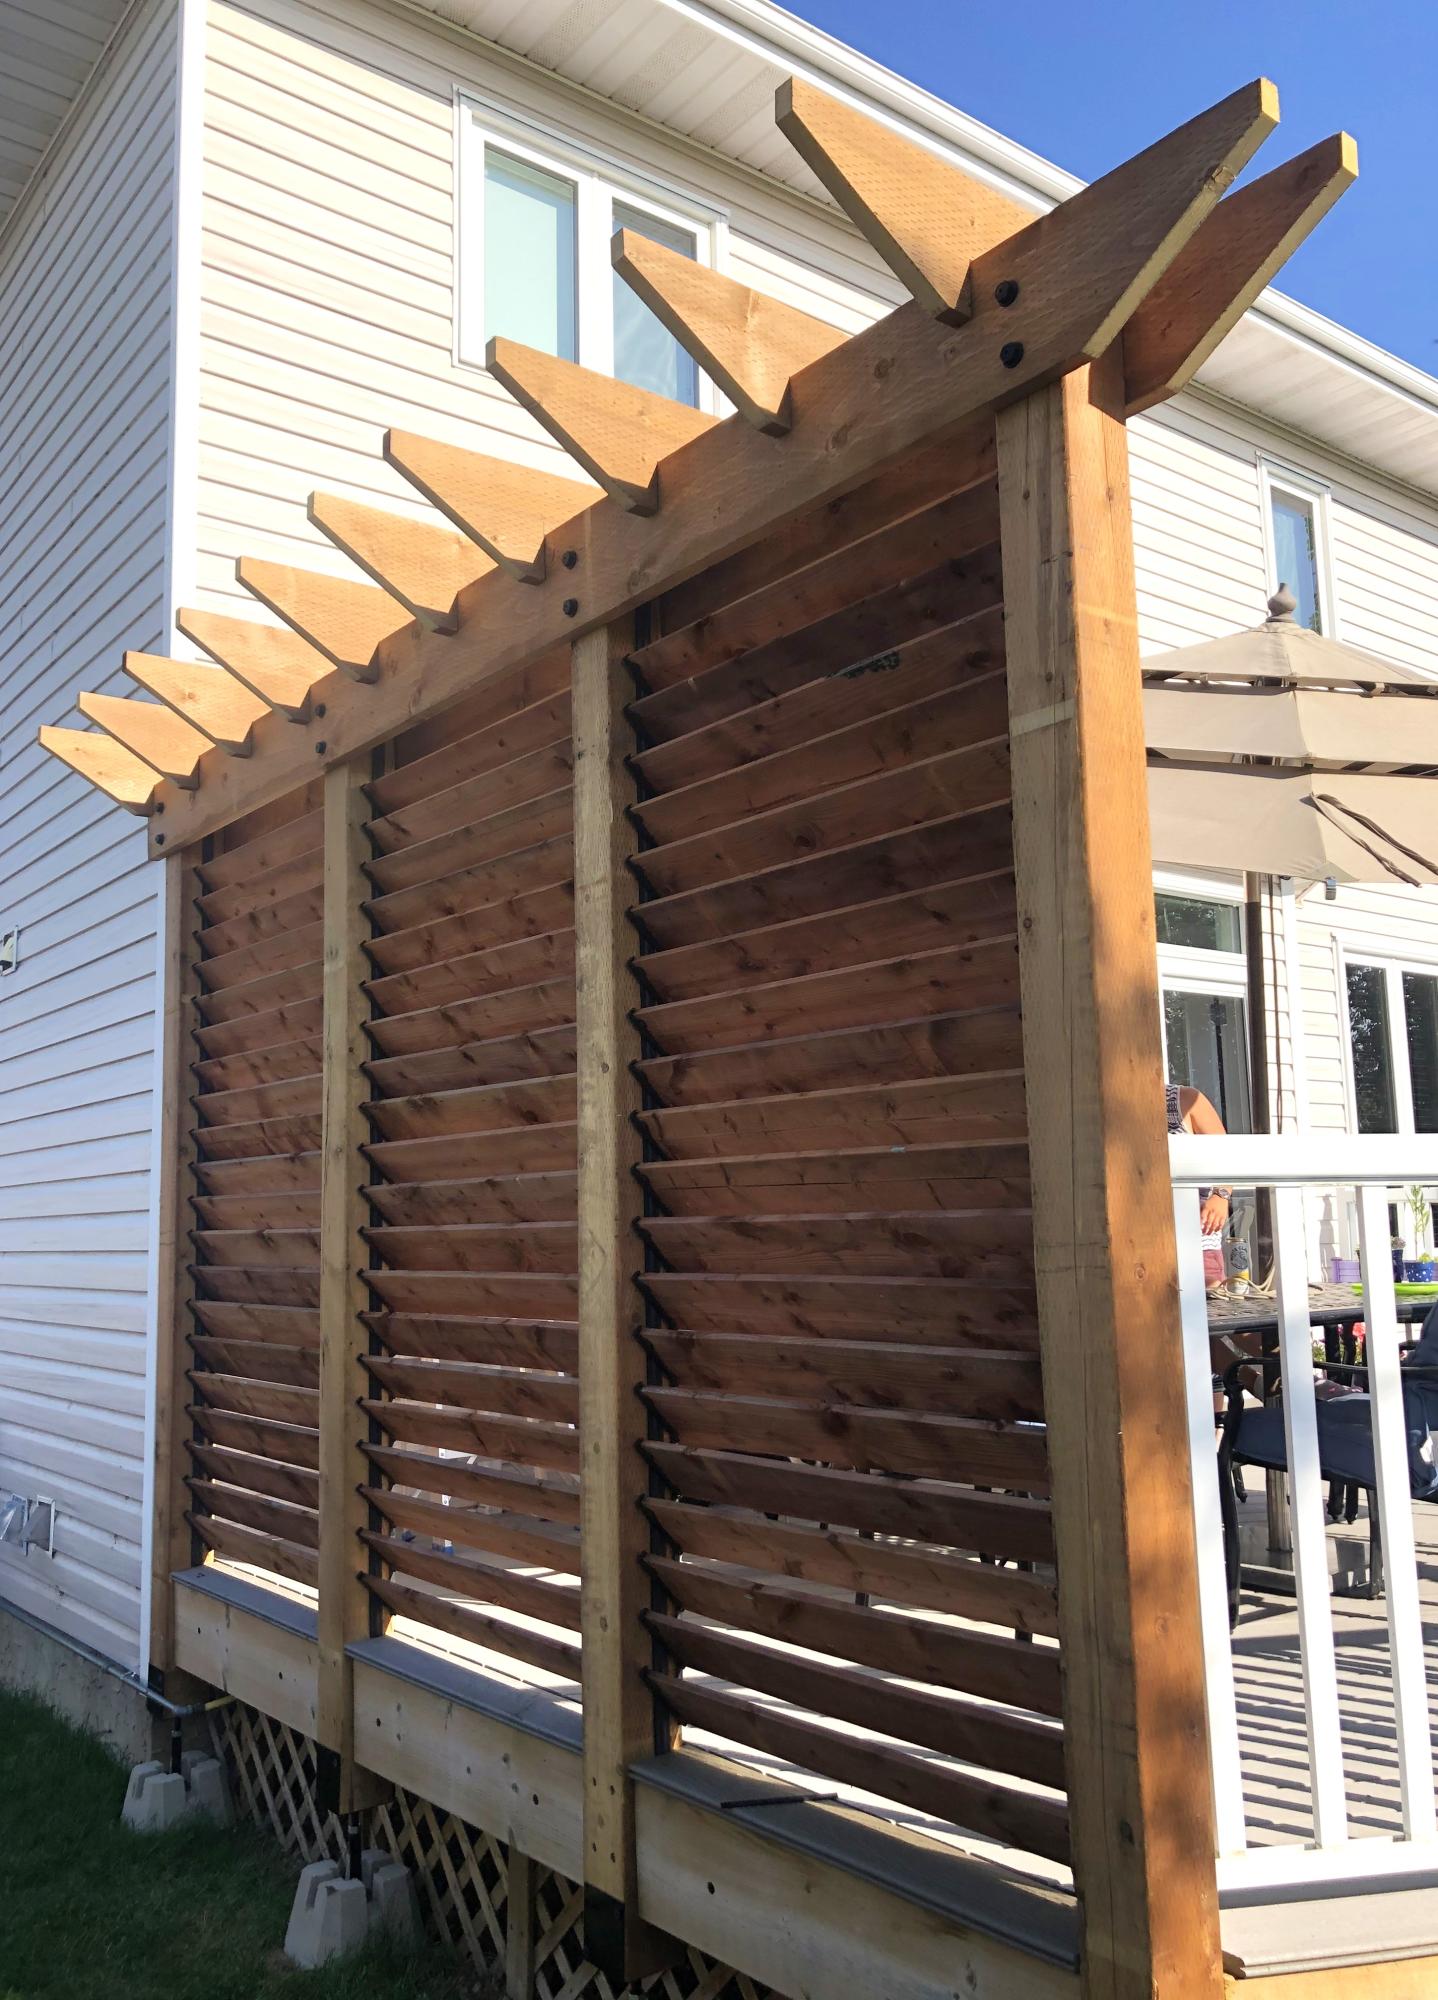
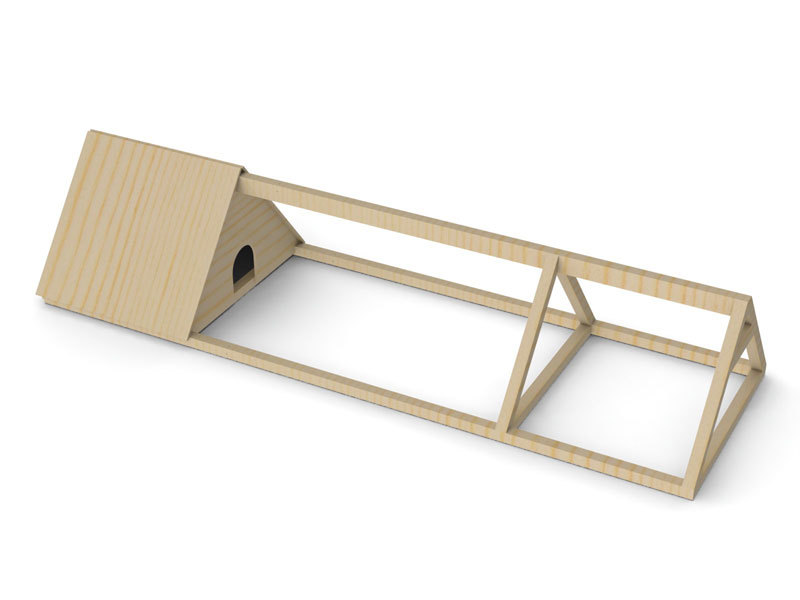
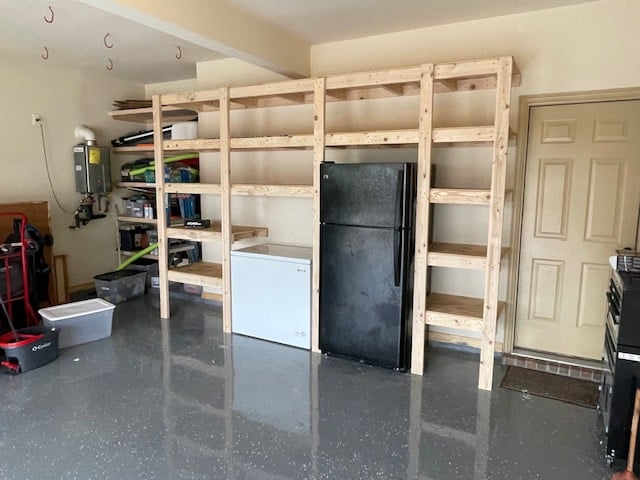
DIY Barn Style Greenhouse

I’ve built the greenhouse for your plans, but I love it.
Built from Plan(s)
I’ve built the greenhouse for your plans, but I love it.

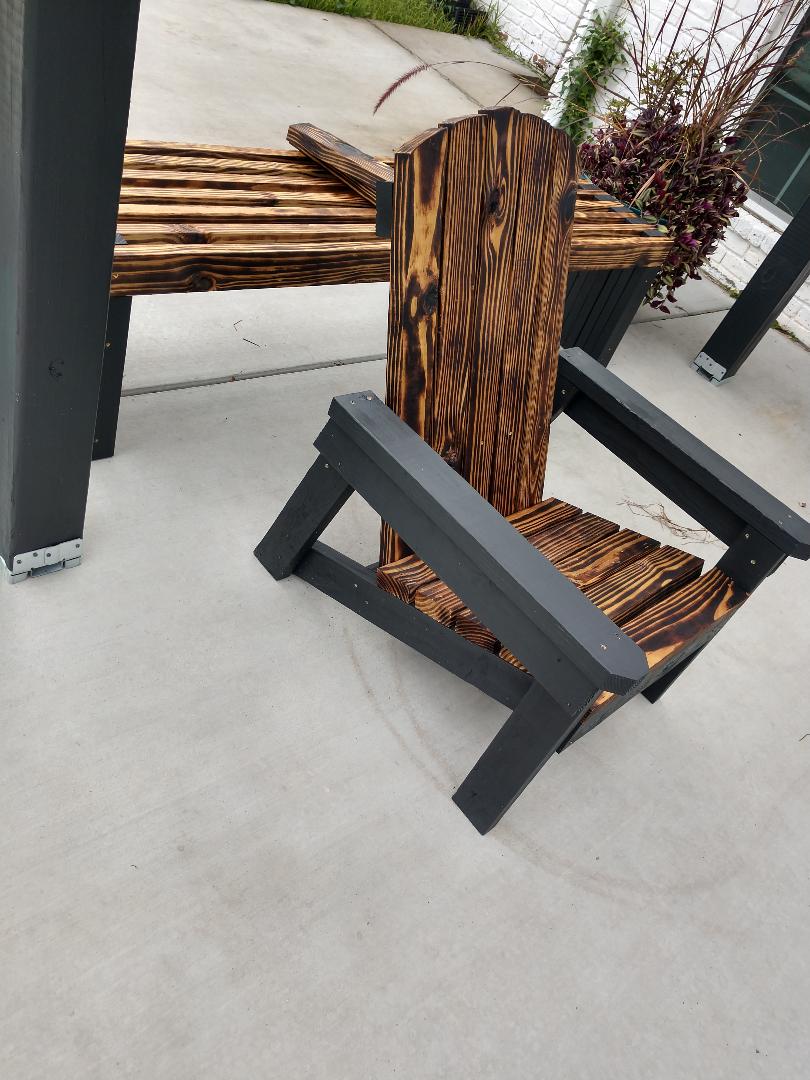
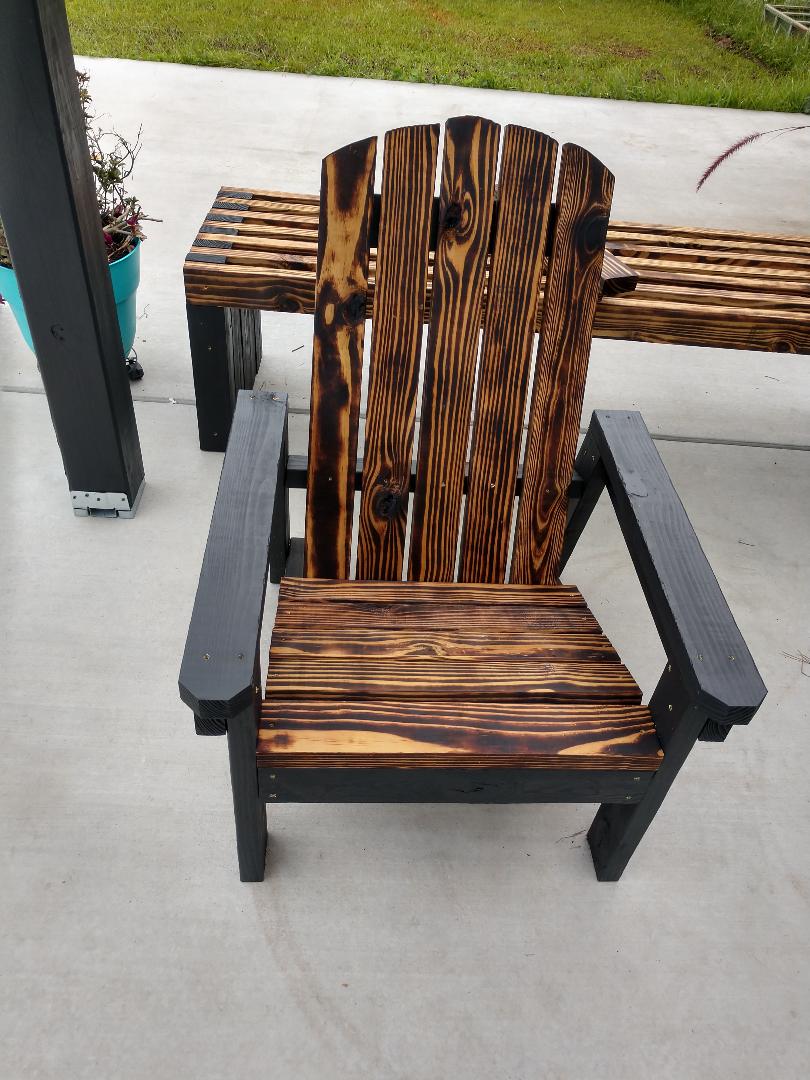
Very easy instructions. I love the way they turned out. I used all 2x4's that I had left over from another project. I burned the top pieces and painted all other pieces. Love your easy instructions. My first time making furniture.
Thanks
Yvette


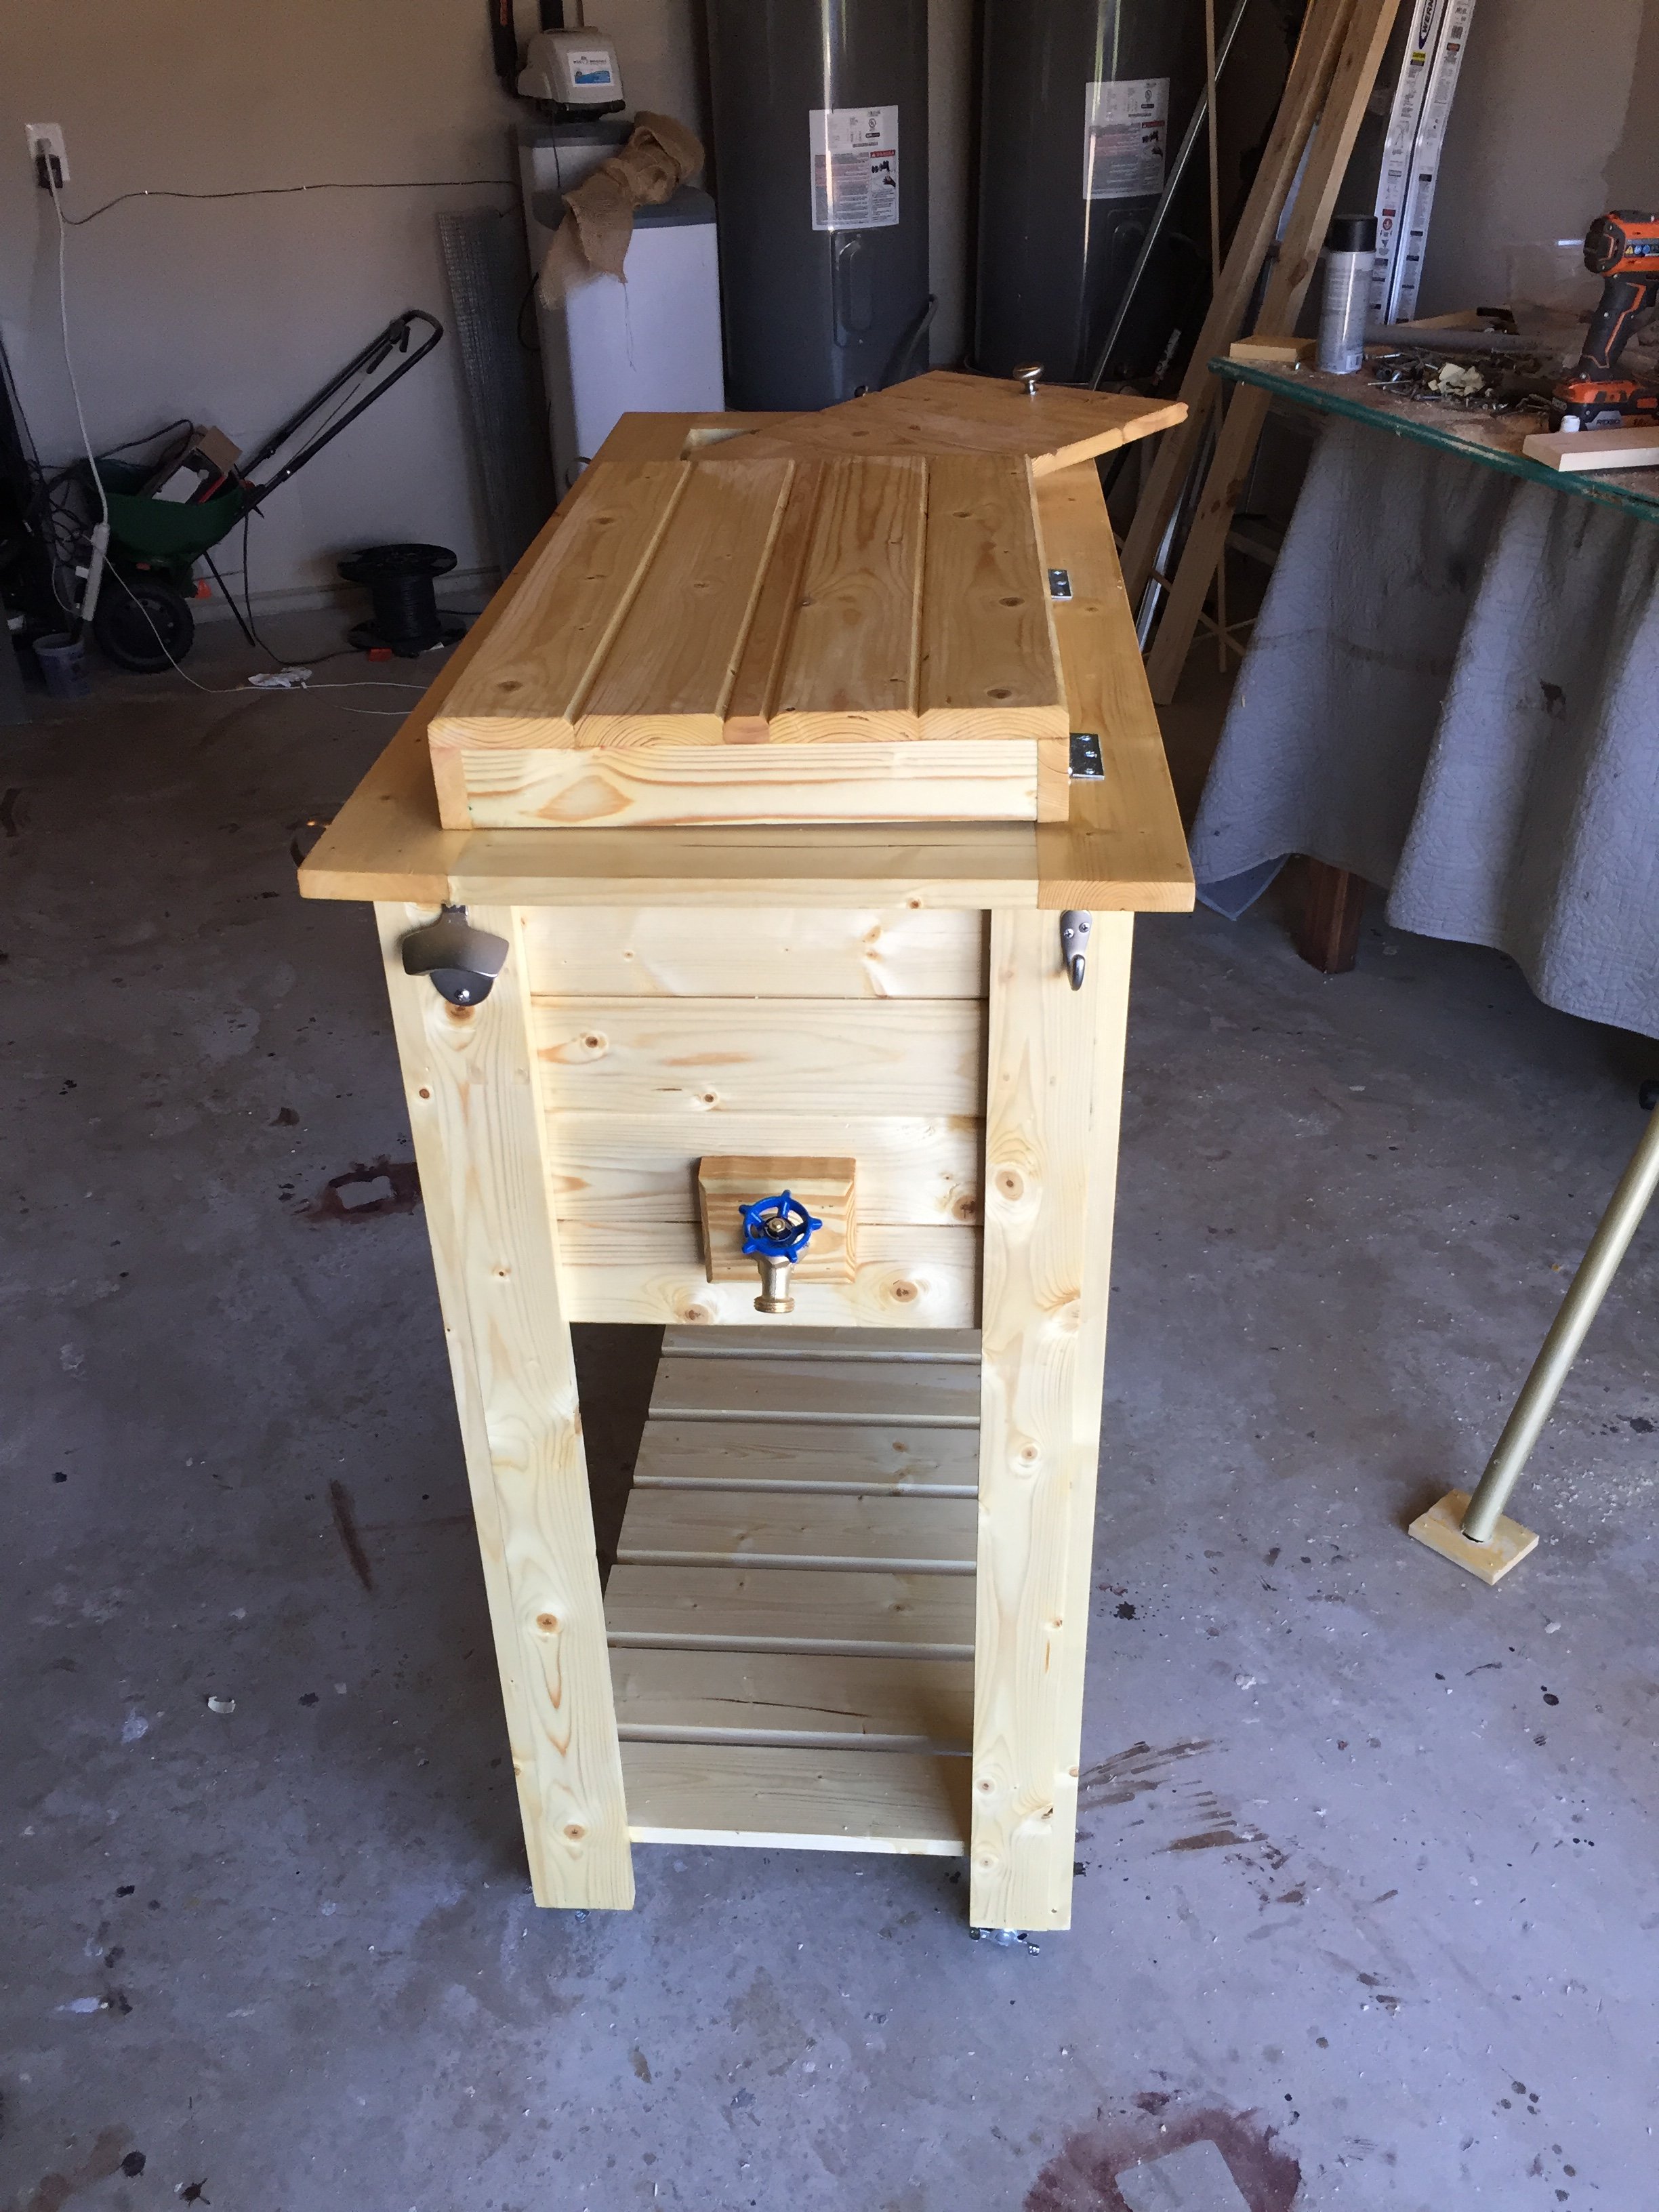
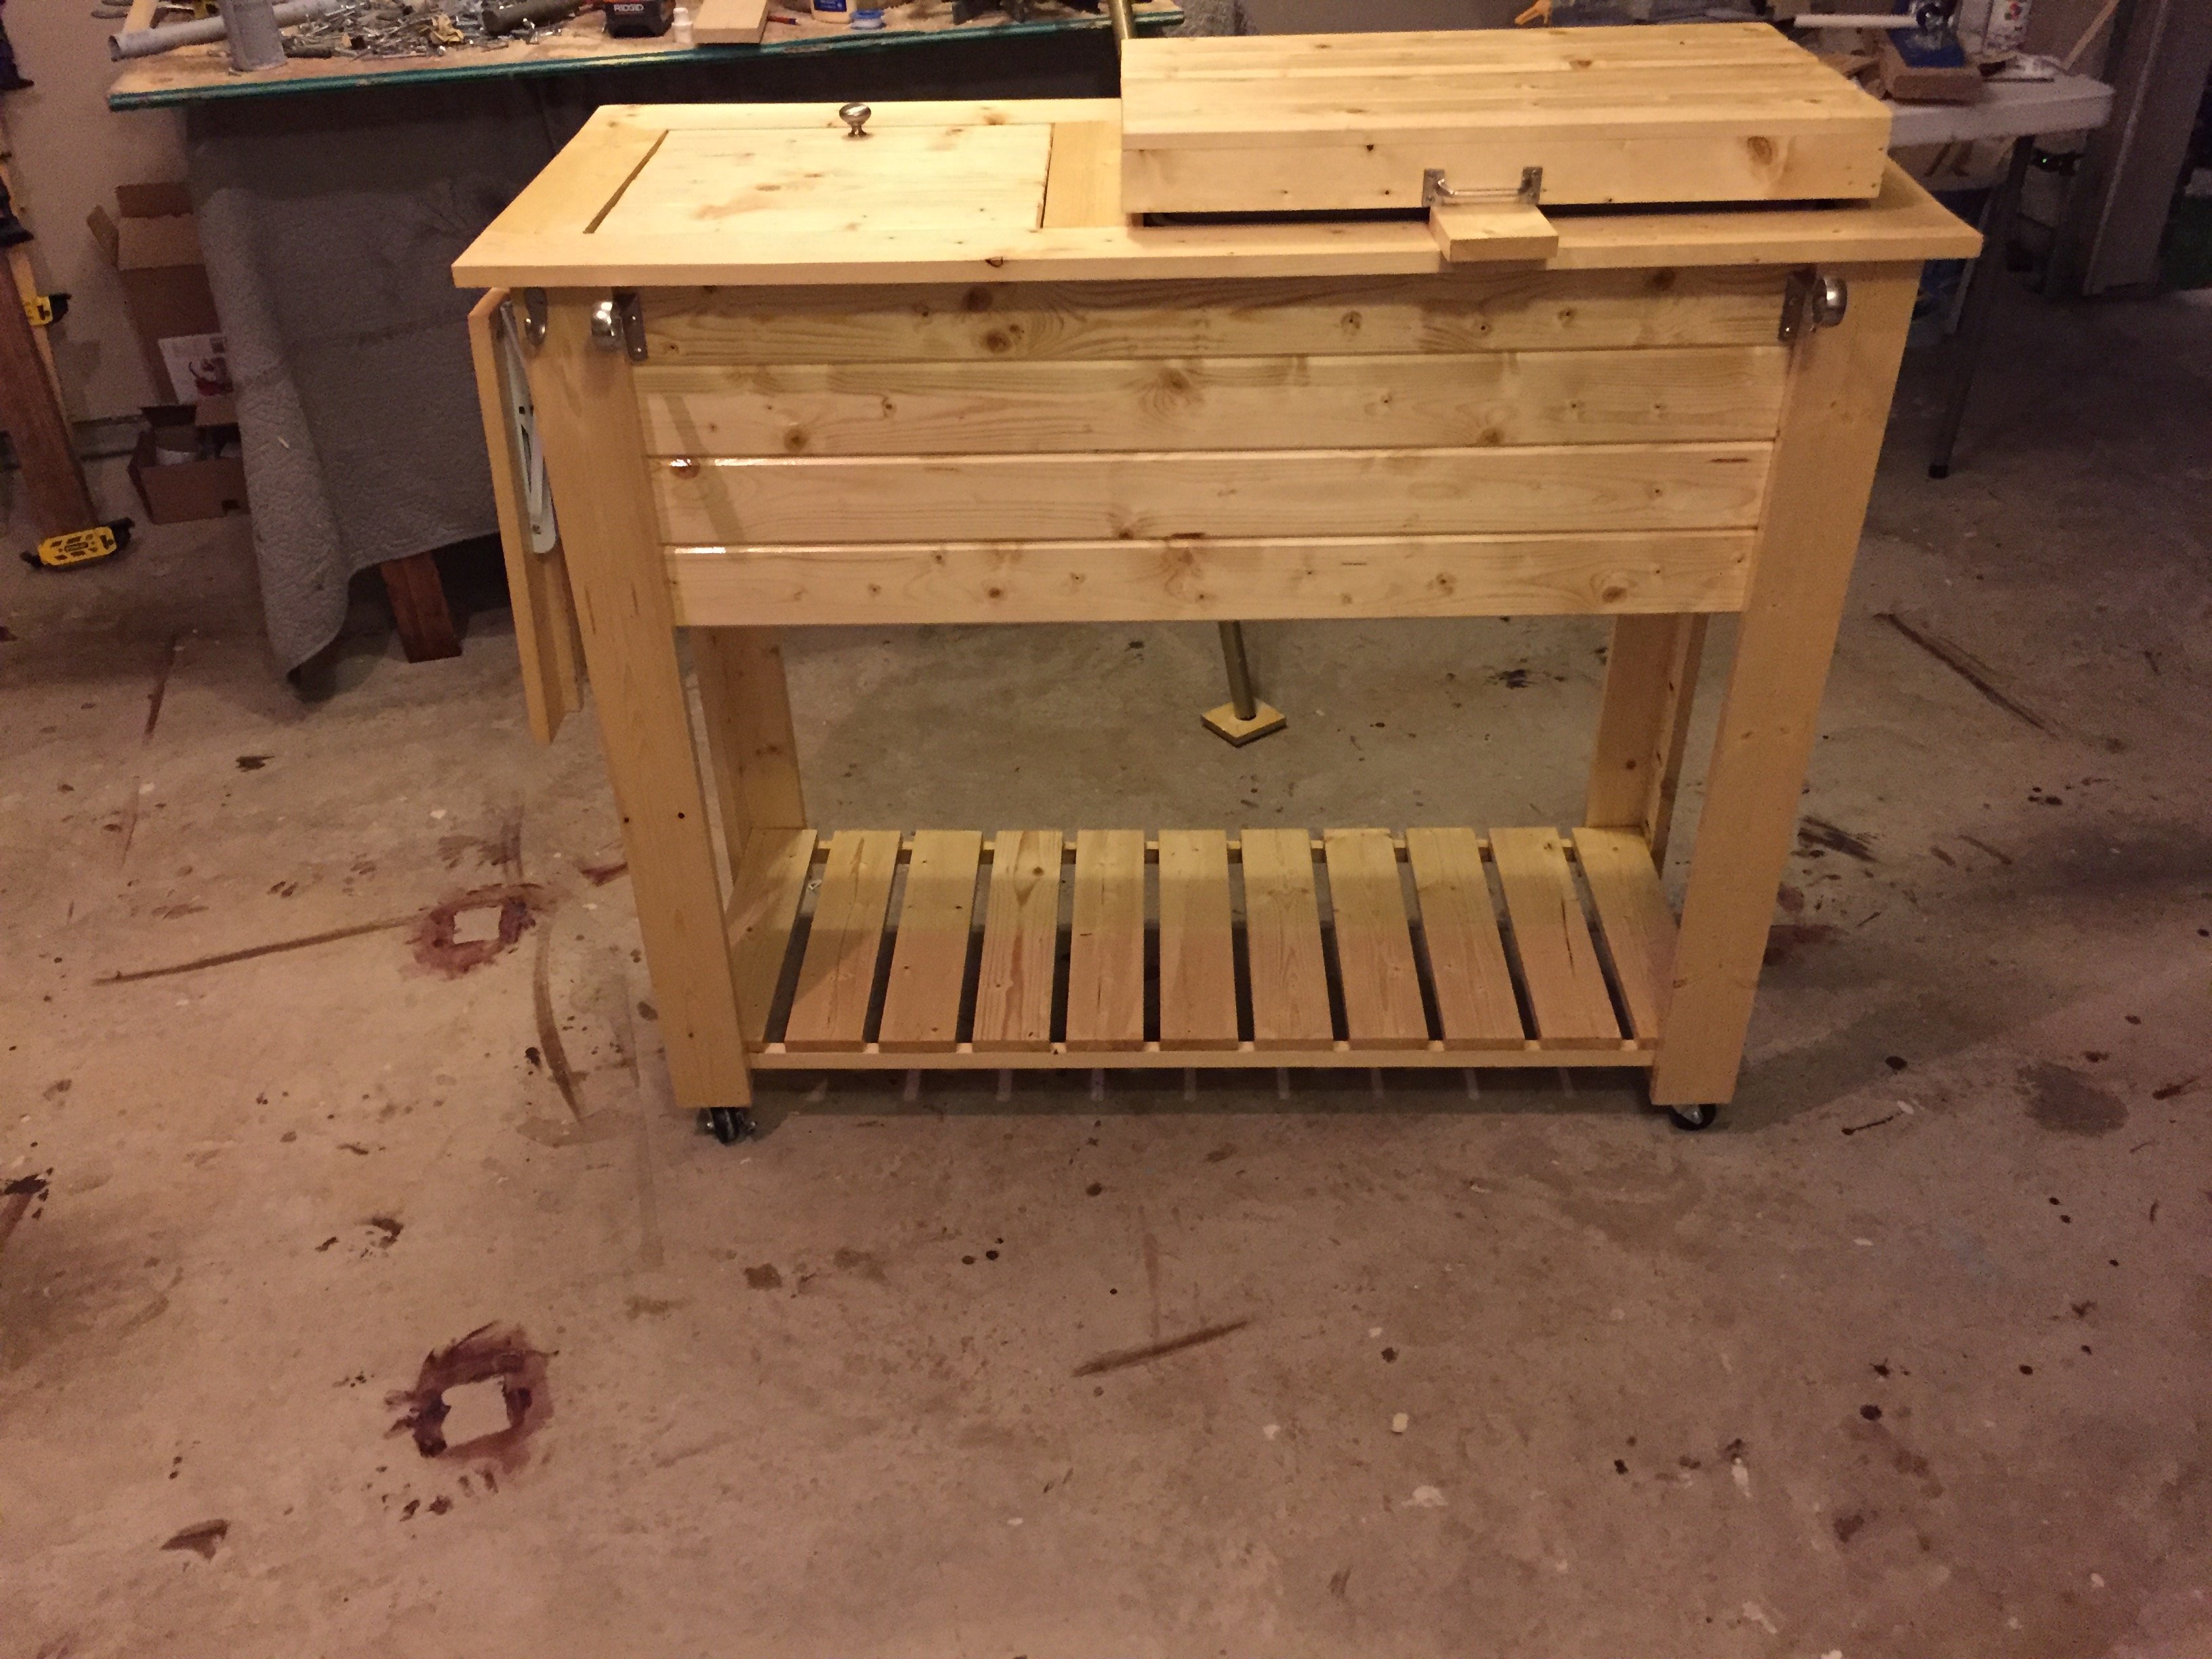
Great project! I'm new to wood working and have been looking for simple but challenging builds. Needless to say this fit the bill... This grill cart was a great starter build and ultimately became a Father's Day gift! My Pops loved it!
I did add a couple of custom pieces: a foldable table top extension and towel bar... things Dad will undoubtedly need as he's an outdoorsman who loves to BBQ!
Thanks for the idea/design plans!


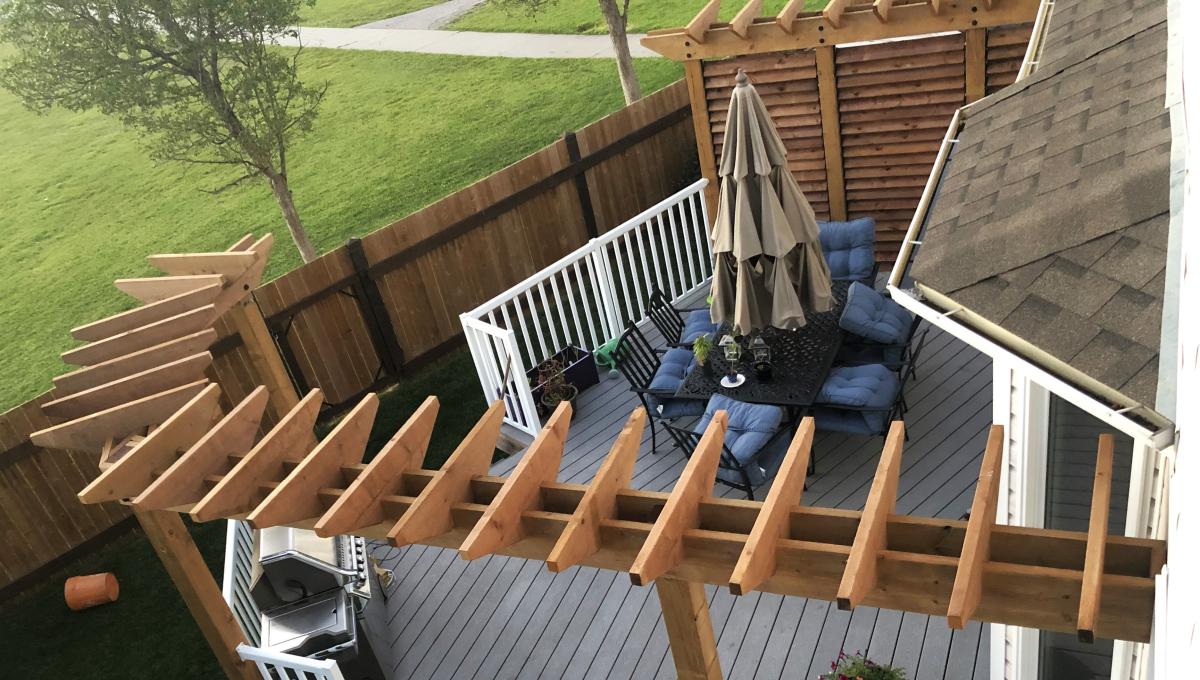
DIY Greenhouse by Trenton Kirby on Facebook!
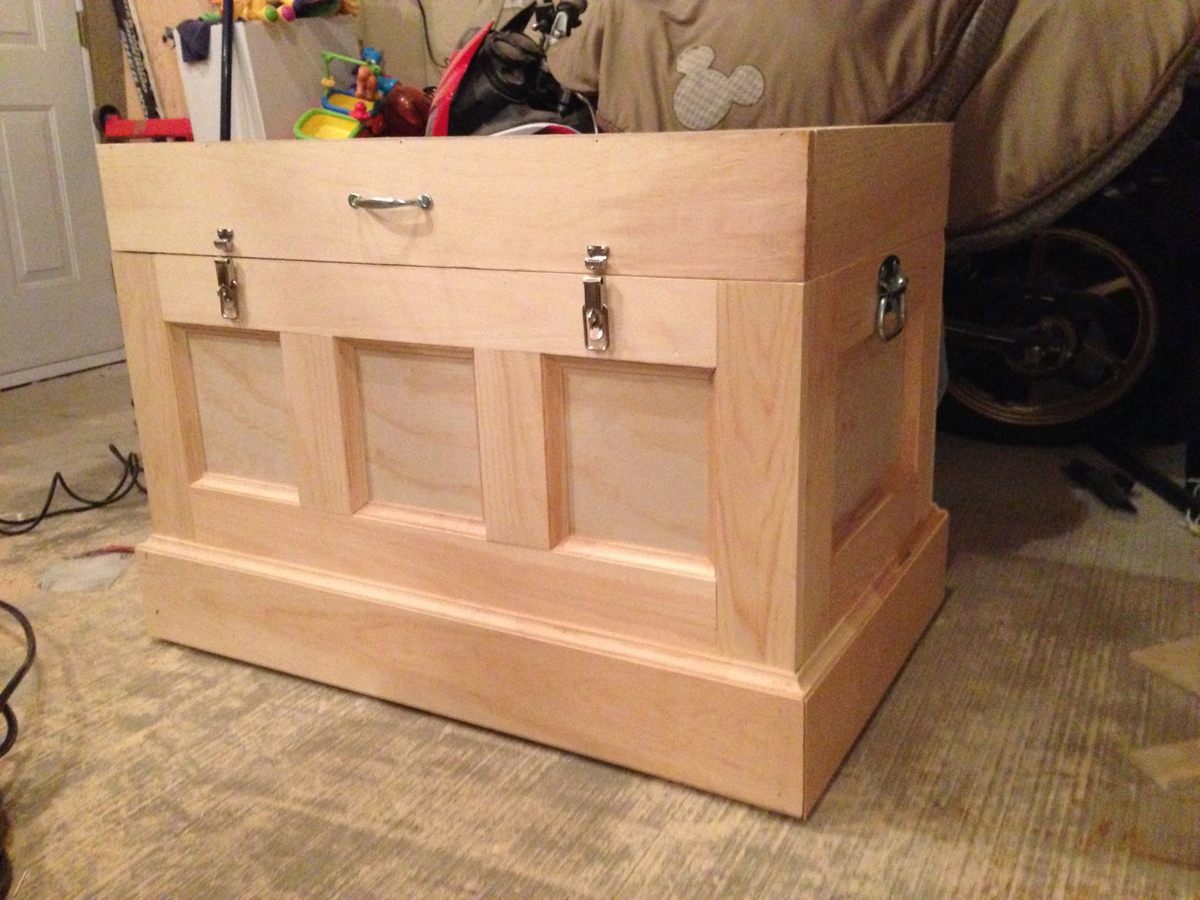
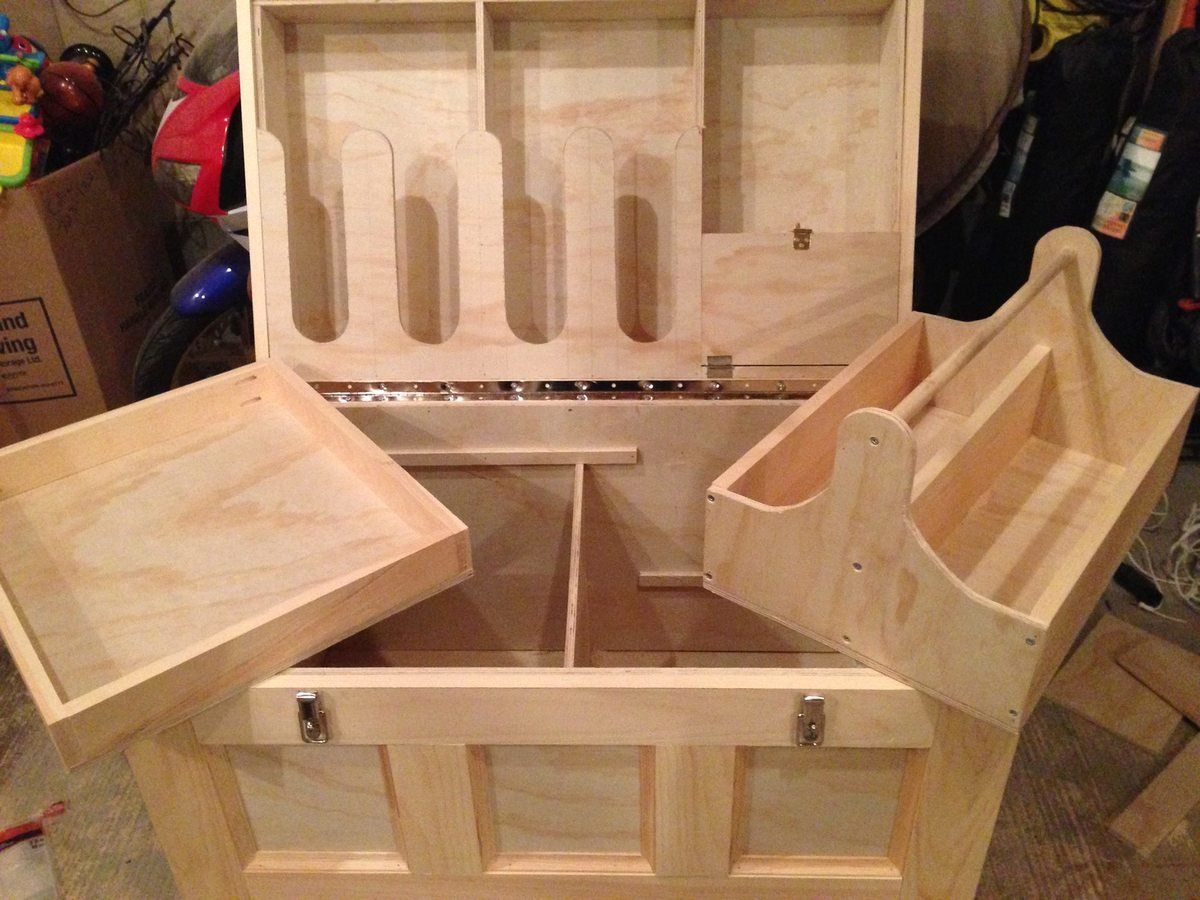
I made this box for my wifes christmas present. She has been riding horses for sometime and is planning on doing some shows. I built this box from Mimi's storage bench design, made it bigger, added a deeper box top and created the rest from looking at pictures online. Its all made of pine plywood and pine boards to keep it light. I added 4 castors to the bottom to make it easily moveable and hid them with the moulding around the bottom. Still has to be sanded and stained before it hits the barn. Its 39W X 24D X 29H. I used a piano hinge and routered the back to set the hing in. Added cove moulding around the bottom and to all the boxes around the front and side. Used a lot of pocket holes and finsh nails. Took me longer than it could have, because I planned everything as I went. I will add more pictures when its finsihed. I would rate it intermediate to advanced depending on your skills with certain tools.


Wed, 12/31/2014 - 09:02
Wow - that's a lot of work and well done. Great job! I'm sure your wife adores it.

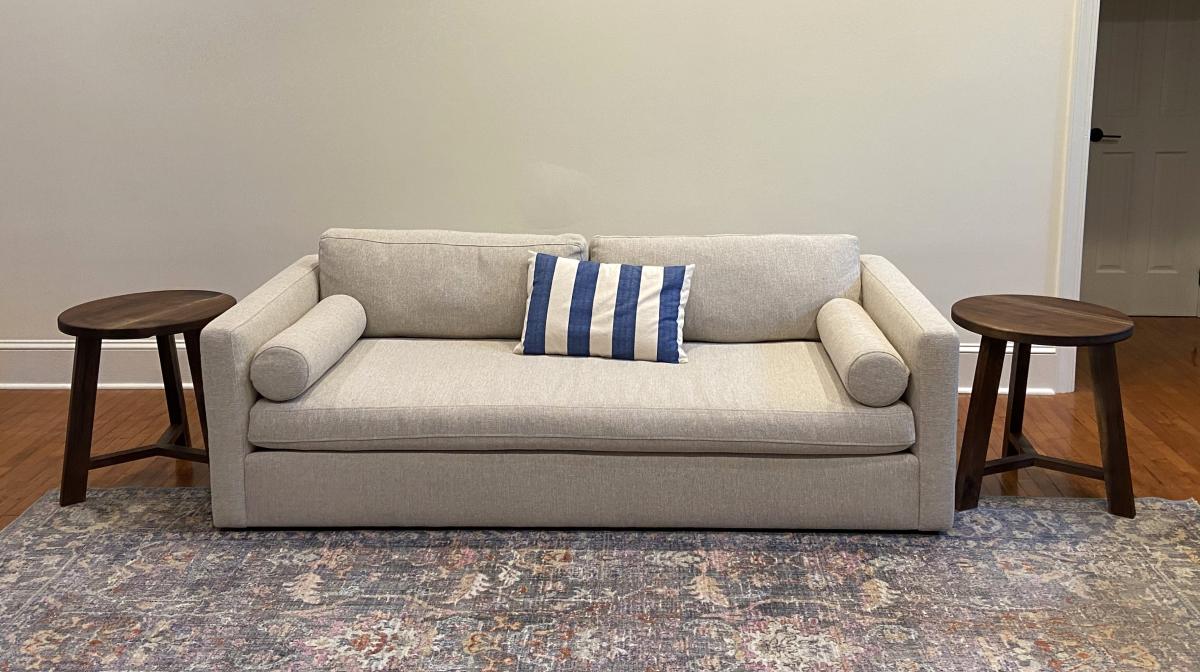
This is one of my favorite pieces because the white contrasts perfectly with the walnut hardwood. The base of the table is all standard 2x4 and 4x4s, and the tabletop is 100% walnut.
Thu, 07/25/2019 - 09:32
Would you be able to provide the dimensions of the top of the table? Also, how tall are the stools? Thank you!
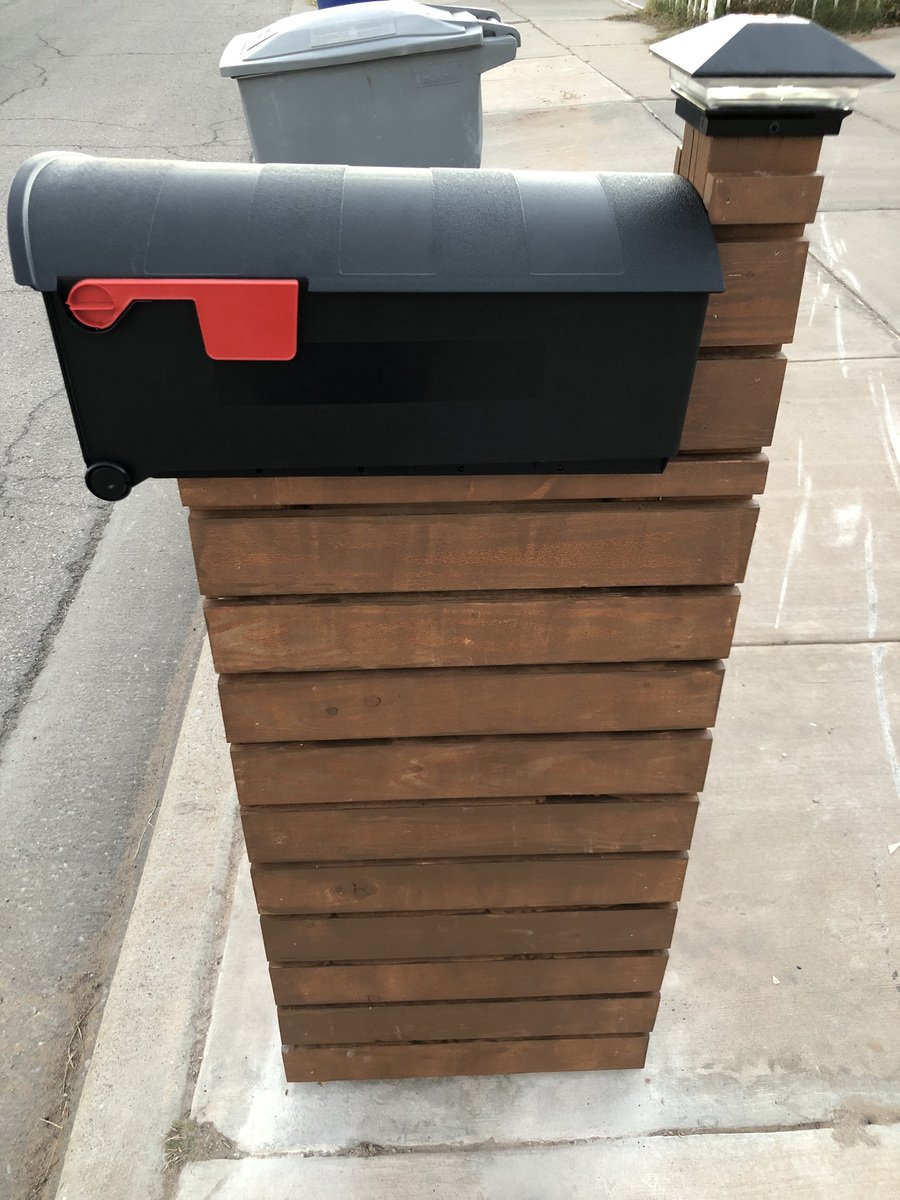
my mailbox was hit by a vehicle so I decided I wanted to do something creative/different but also didn't want to spend much money as it may just get taken out again in the future :)
this is a good project to get kids to help you with
instead of cutting into the concrete easement, I installed 2 post bases & locked them with sleeve anchors. They're sturdy enough but will give if hit again. drilling the holes for the sleeve anchors was the hardest part of the project.
I used a left over 4x4x8 for the posts, scrap 1x4s, 1x2s up the sides (1/2" gap between boards), and a 2x4 scrap to attach the mailbox. I eyeballed the width between posts using the mailbox itself. I left over stain from another project (almost bought a quart of oops paint at HD)
I figure the total cost would have been about $100
It's a super easy project that took about 4hrs. I've already had a couple of neighbors come by to take measurements to try something similar.
FYI: USPS guildlines for installing a curbside mailbox: https://www.usps.com/manage/mailboxes.htm
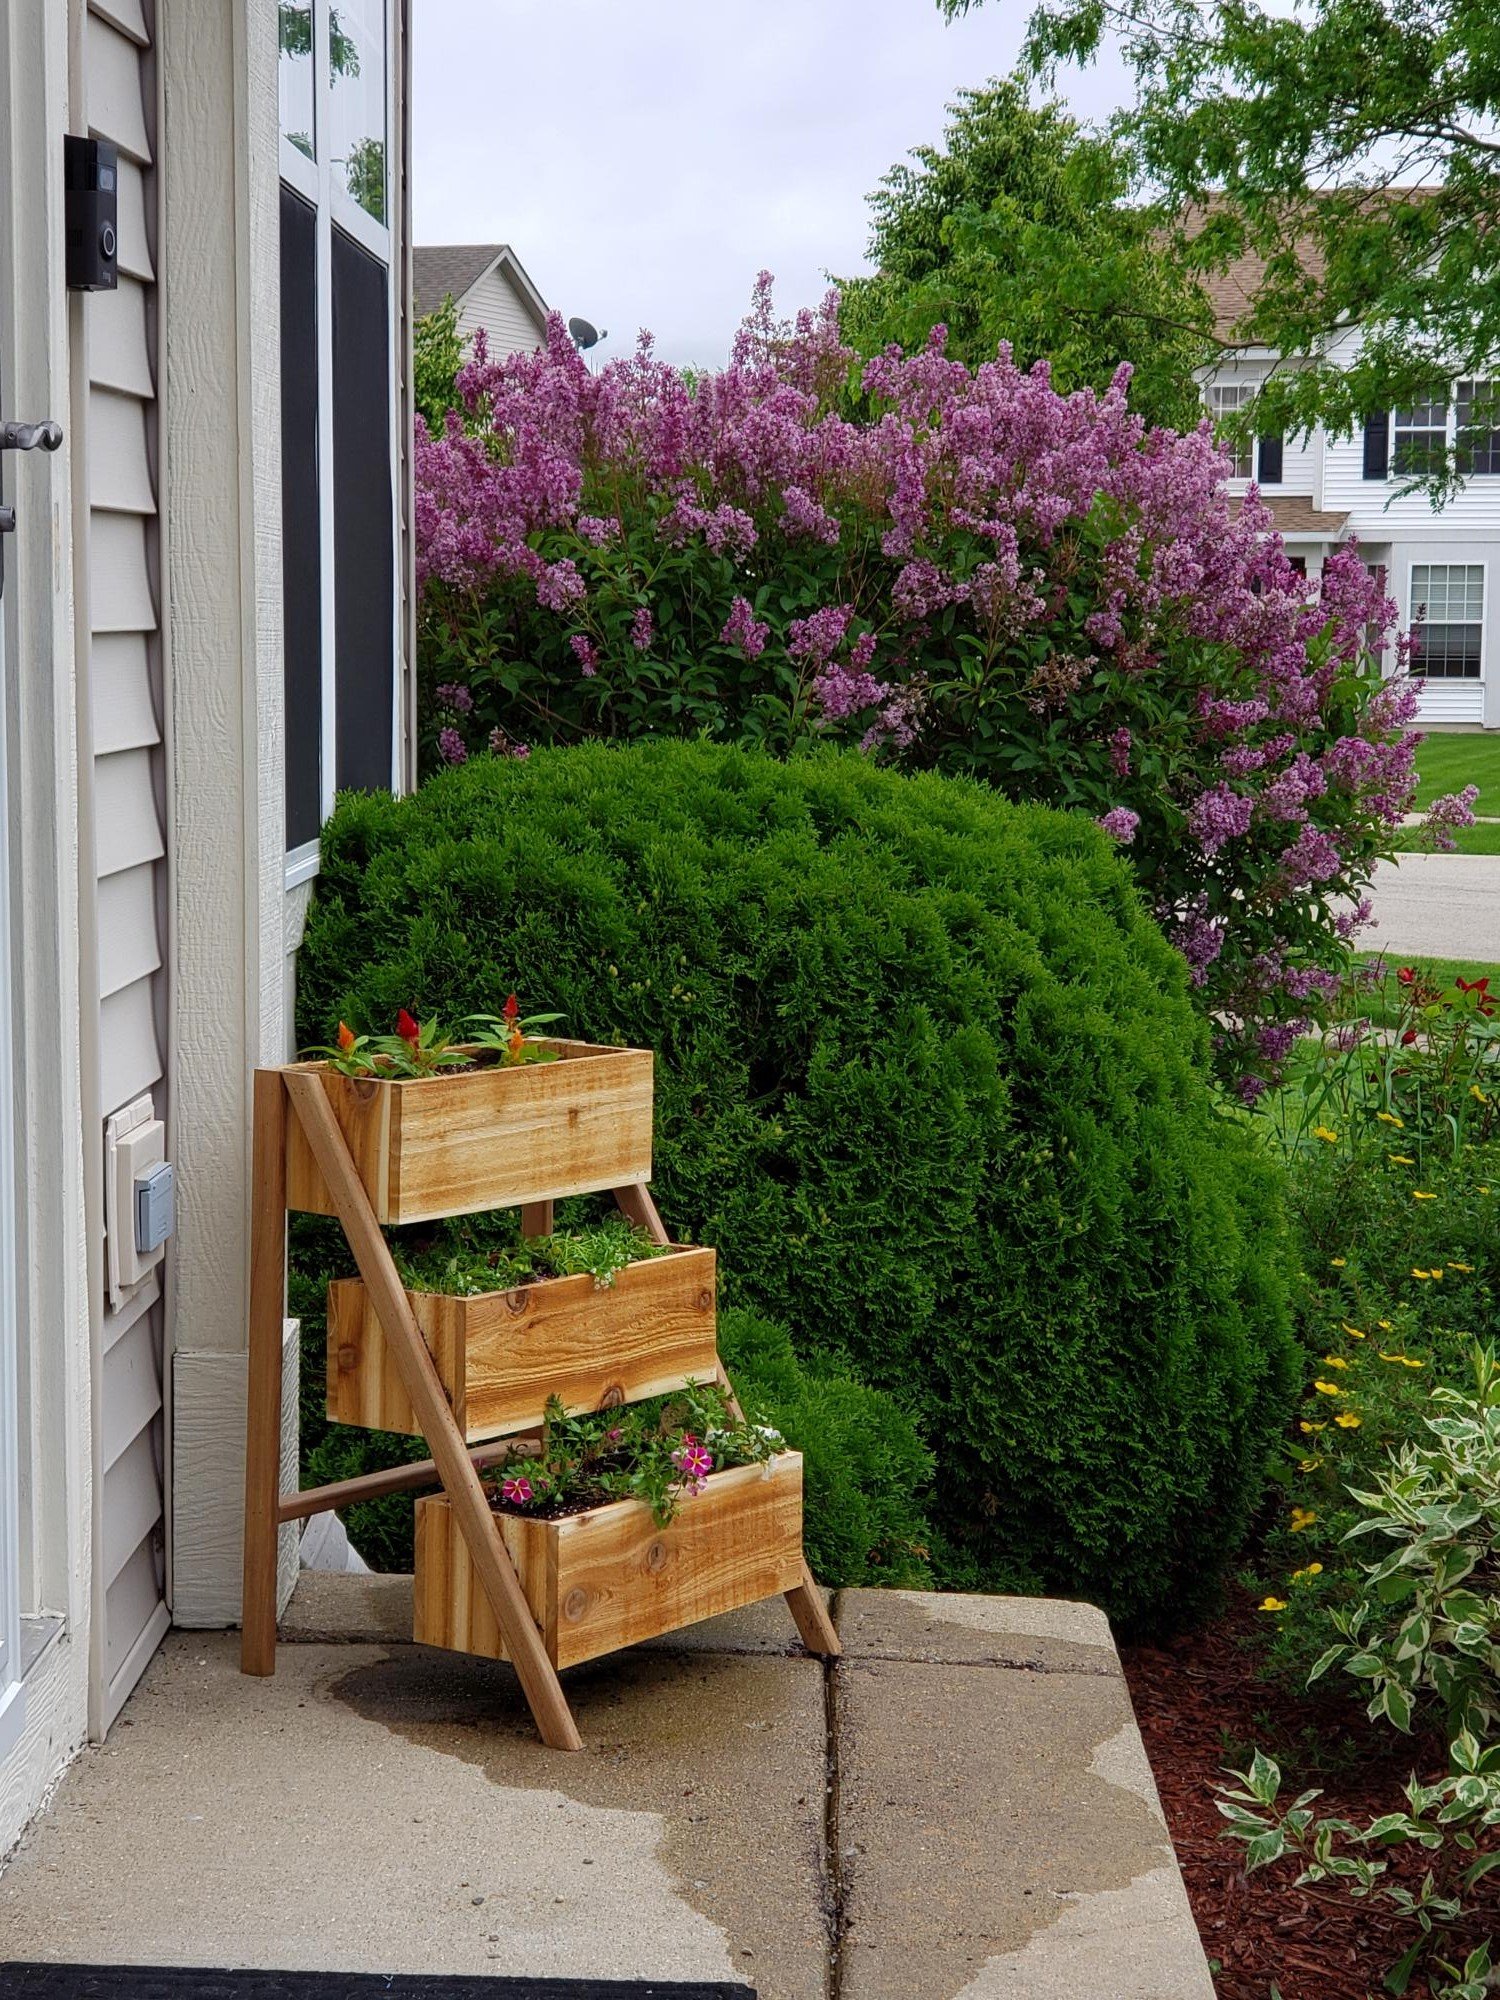
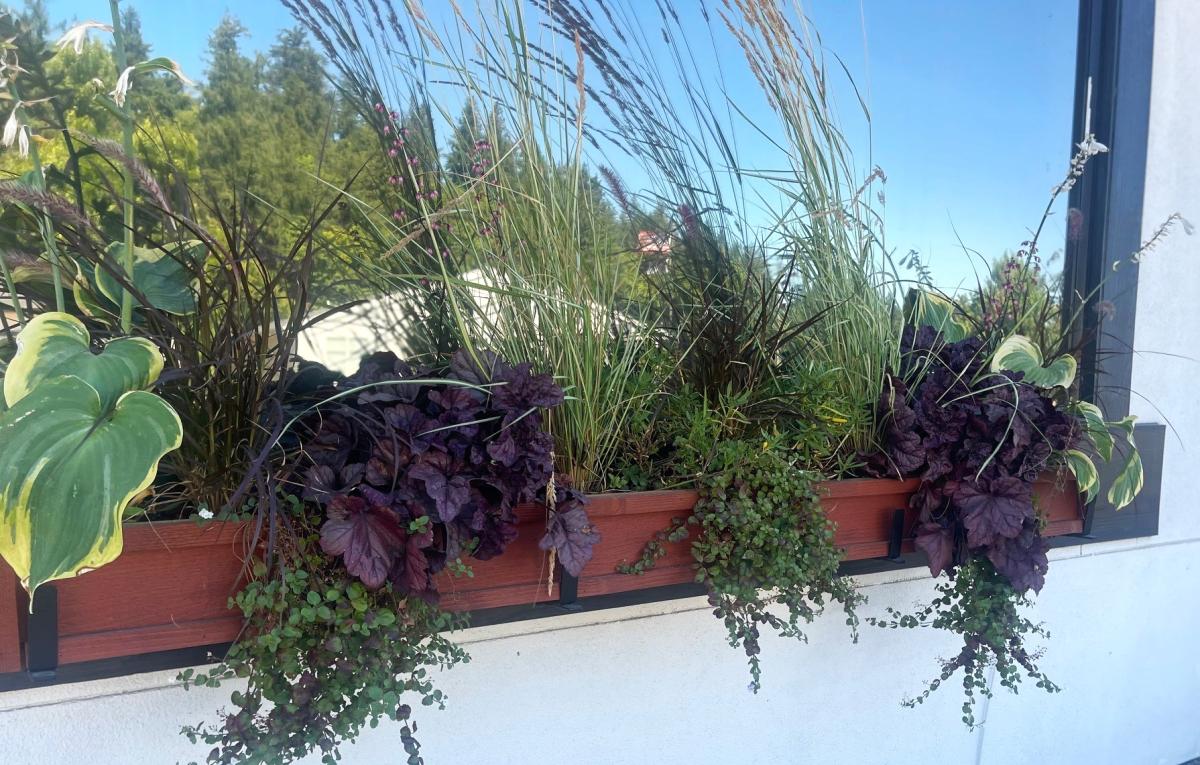
Great planter plan. very easy to build

Love these plans! Made a modification and added backs to the chairs. Also, built ottomans to match the chairs which can also be used as additional seating.
Many compliments on the set. Thanks Ana!

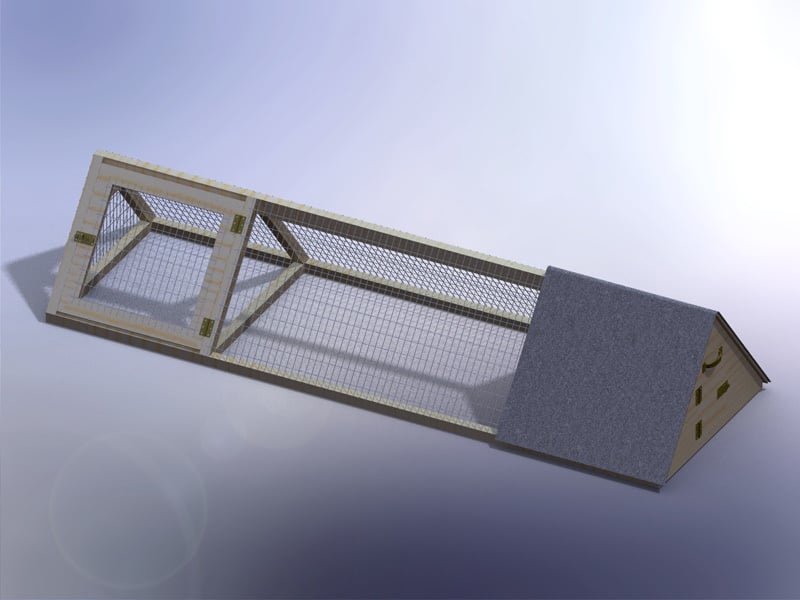
This is a rabbit hutch I created for my kids 5 rabbits. The thing that makes this hutch really nice is if you have a large lawn you can just move the hutch a little bit every day and the lawn gets mowed, fertilized and you don't have to worry about cleaning up all the rabbit droppings. I also mounted a rabbit feeder on the inside of the house door to keep the food dry, which has worked really well.
Here is a short blog of all the steps in its construction:
http://design.medeek.com/gallery/RH3080_COPALIS_2013/RH3080_COPALIS_201…


Sun, 05/05/2013 - 01:52
I apologize I haven't got the completed planset up for this project yet but I will try to get it up in the next couple of weeks as well as a very complete materials list. You will need to go to a farm/feed store to get the correct 1"x2" wire and 1/2"x1" wire for the floor. Do not go to Home Depot and use the cow wire they have or the hardware cloth for the floor, neither of which are the correct choice. Home Depot has the lumber but not the wire. If you have any questions or even improvements to my design I would be interested in hearing from you.
Sun, 09/13/2015 - 19:18
Finally got around to uploading the plans. I still need to create a material list for this plan but the basics are there now. We've had rabbits in it for about a year but recently we've tried some guinea pigs and it works great for that as well. The guinea pigs can pretty much live off just the grass and dandelions but you do need to move it daily to give them plenty to eat.
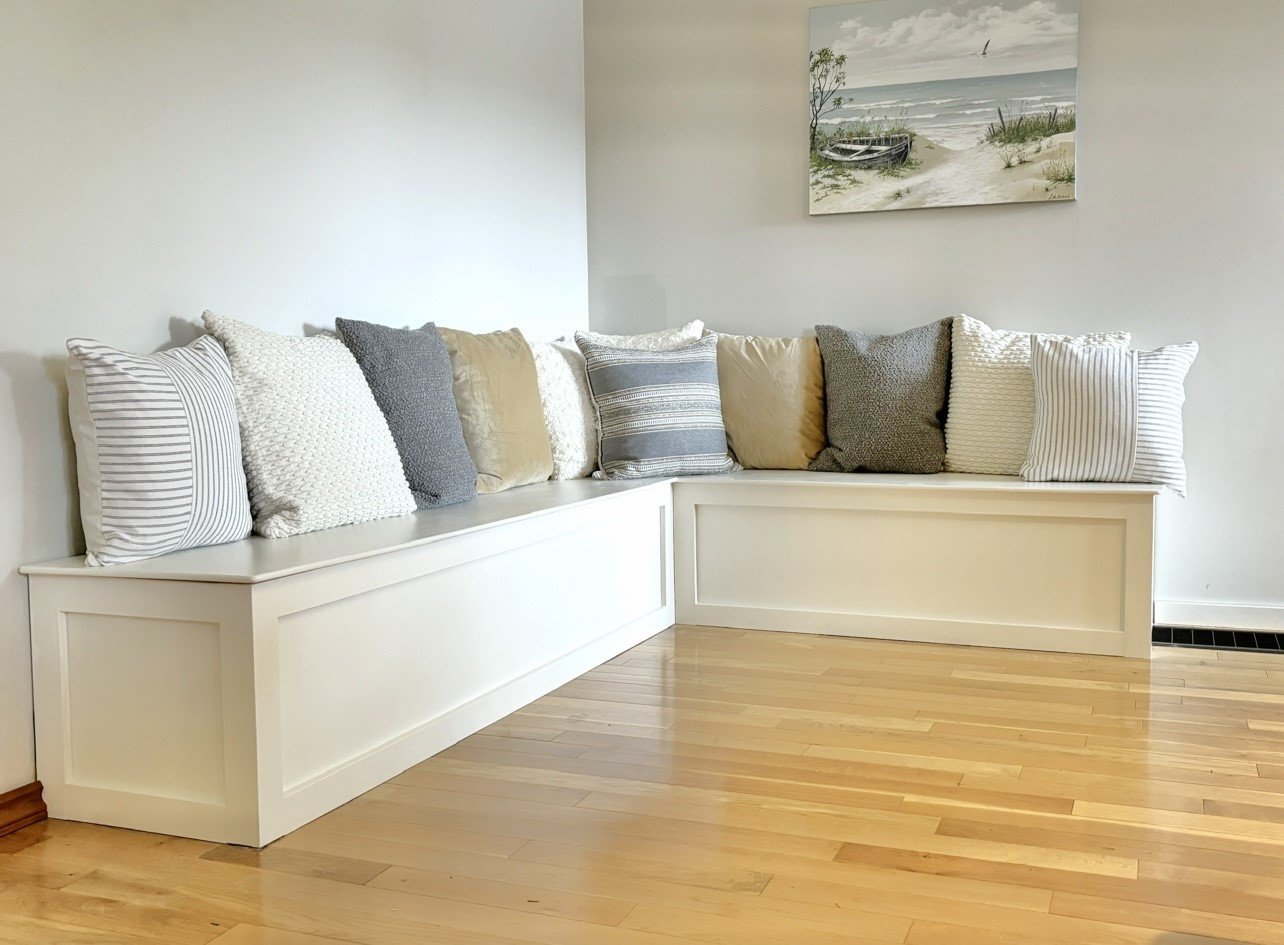
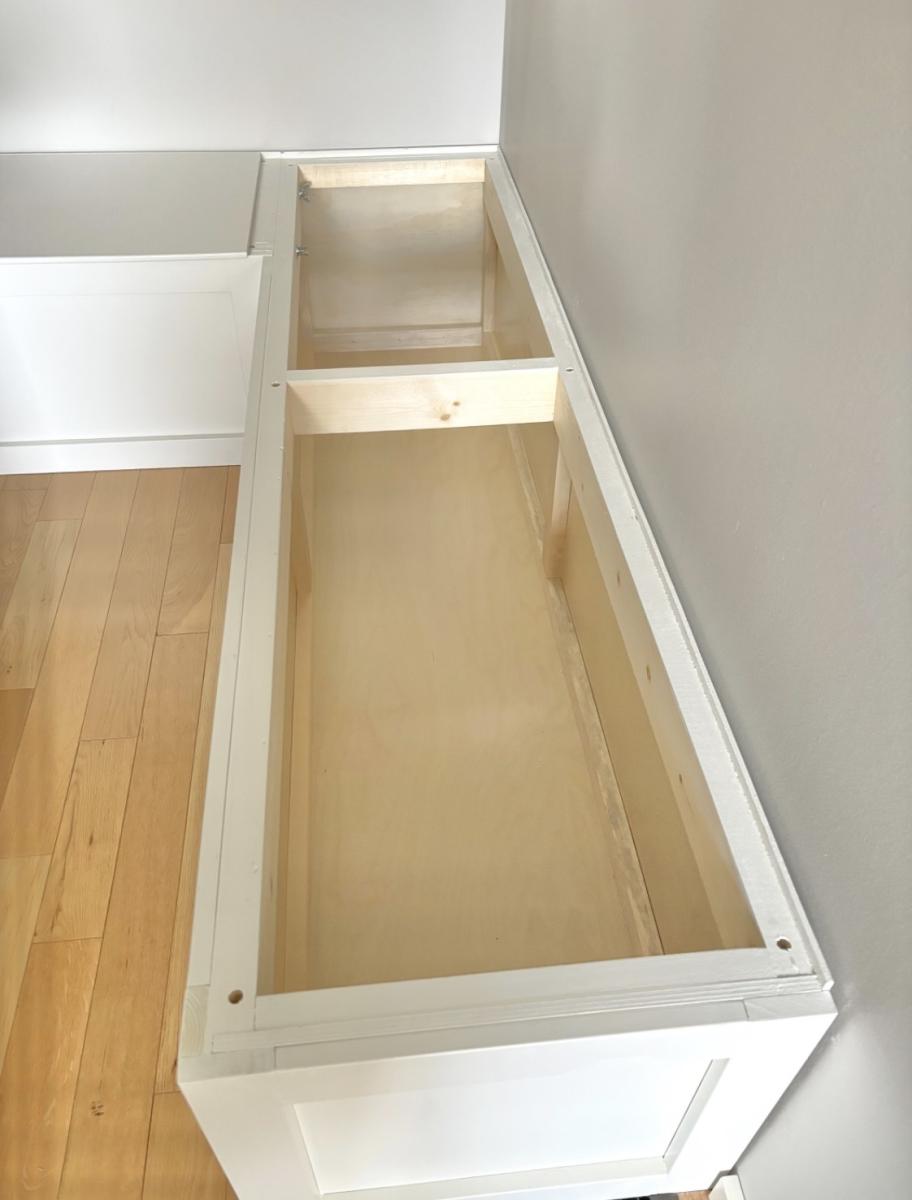
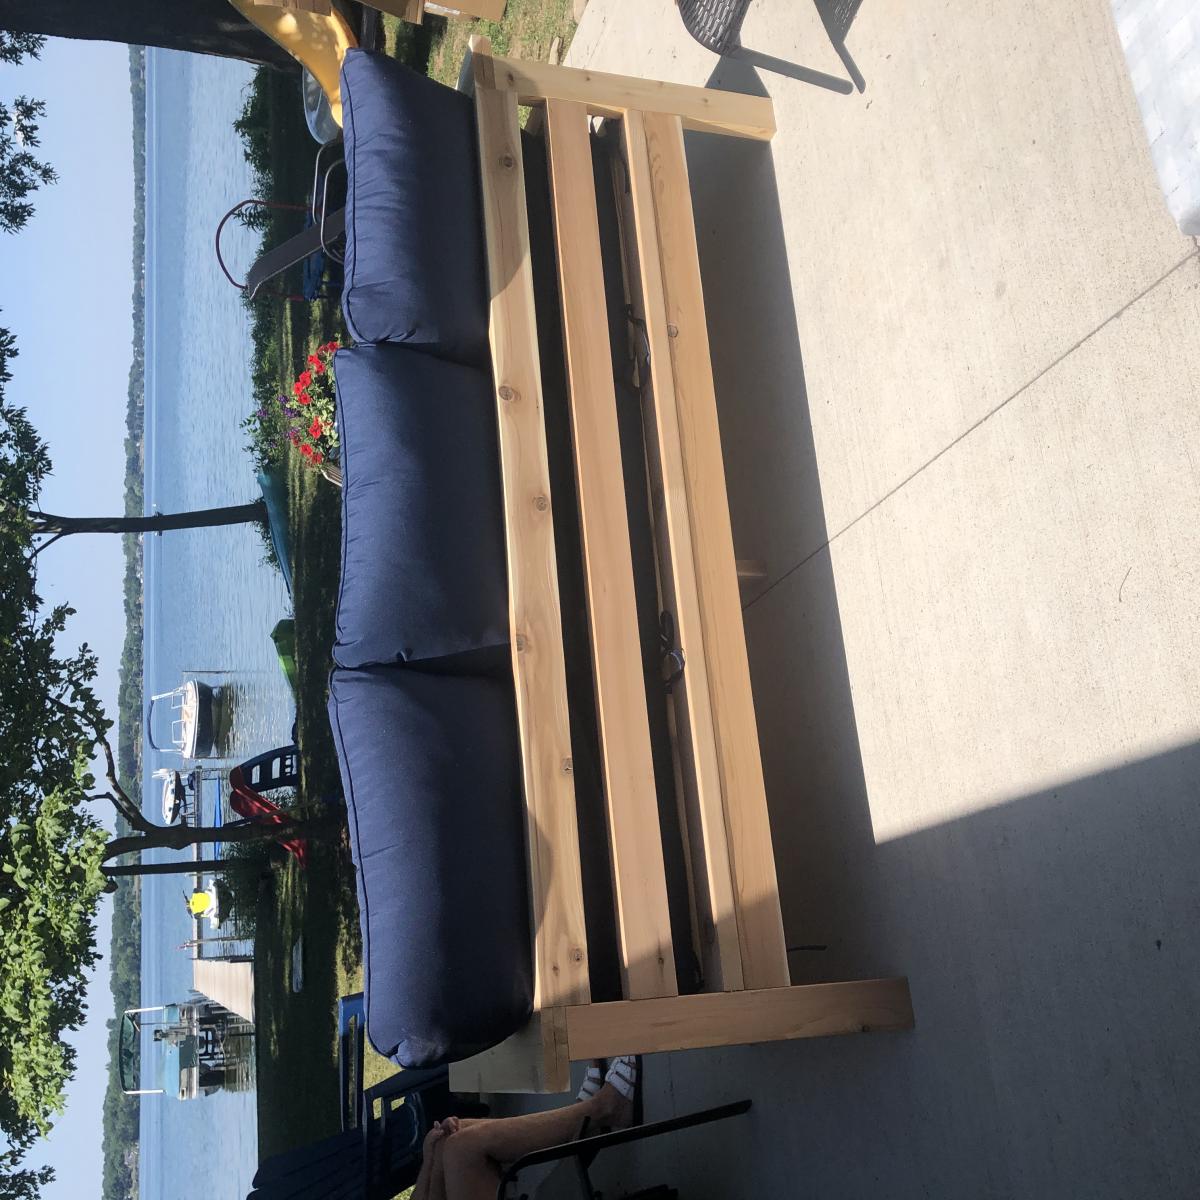
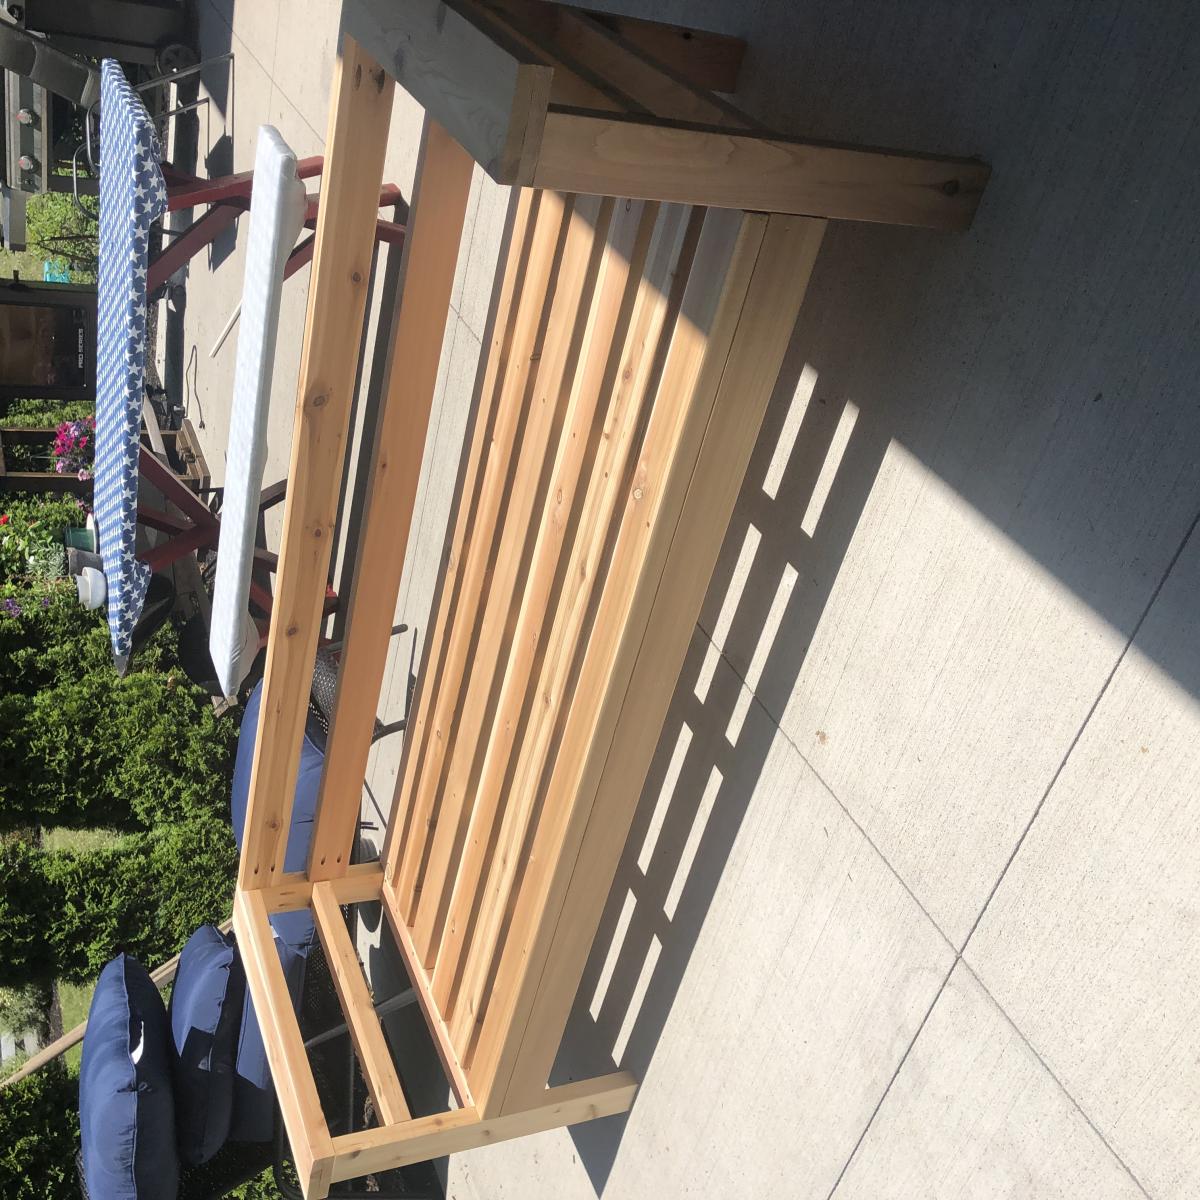
This is my banquette bench I made over the past few weeks after I saw your pictures and plans on your website. I absolutely love it. I am refinishing a table and chairs to use with it. Now I have room for lots of guest. Thank you for your great ideas.
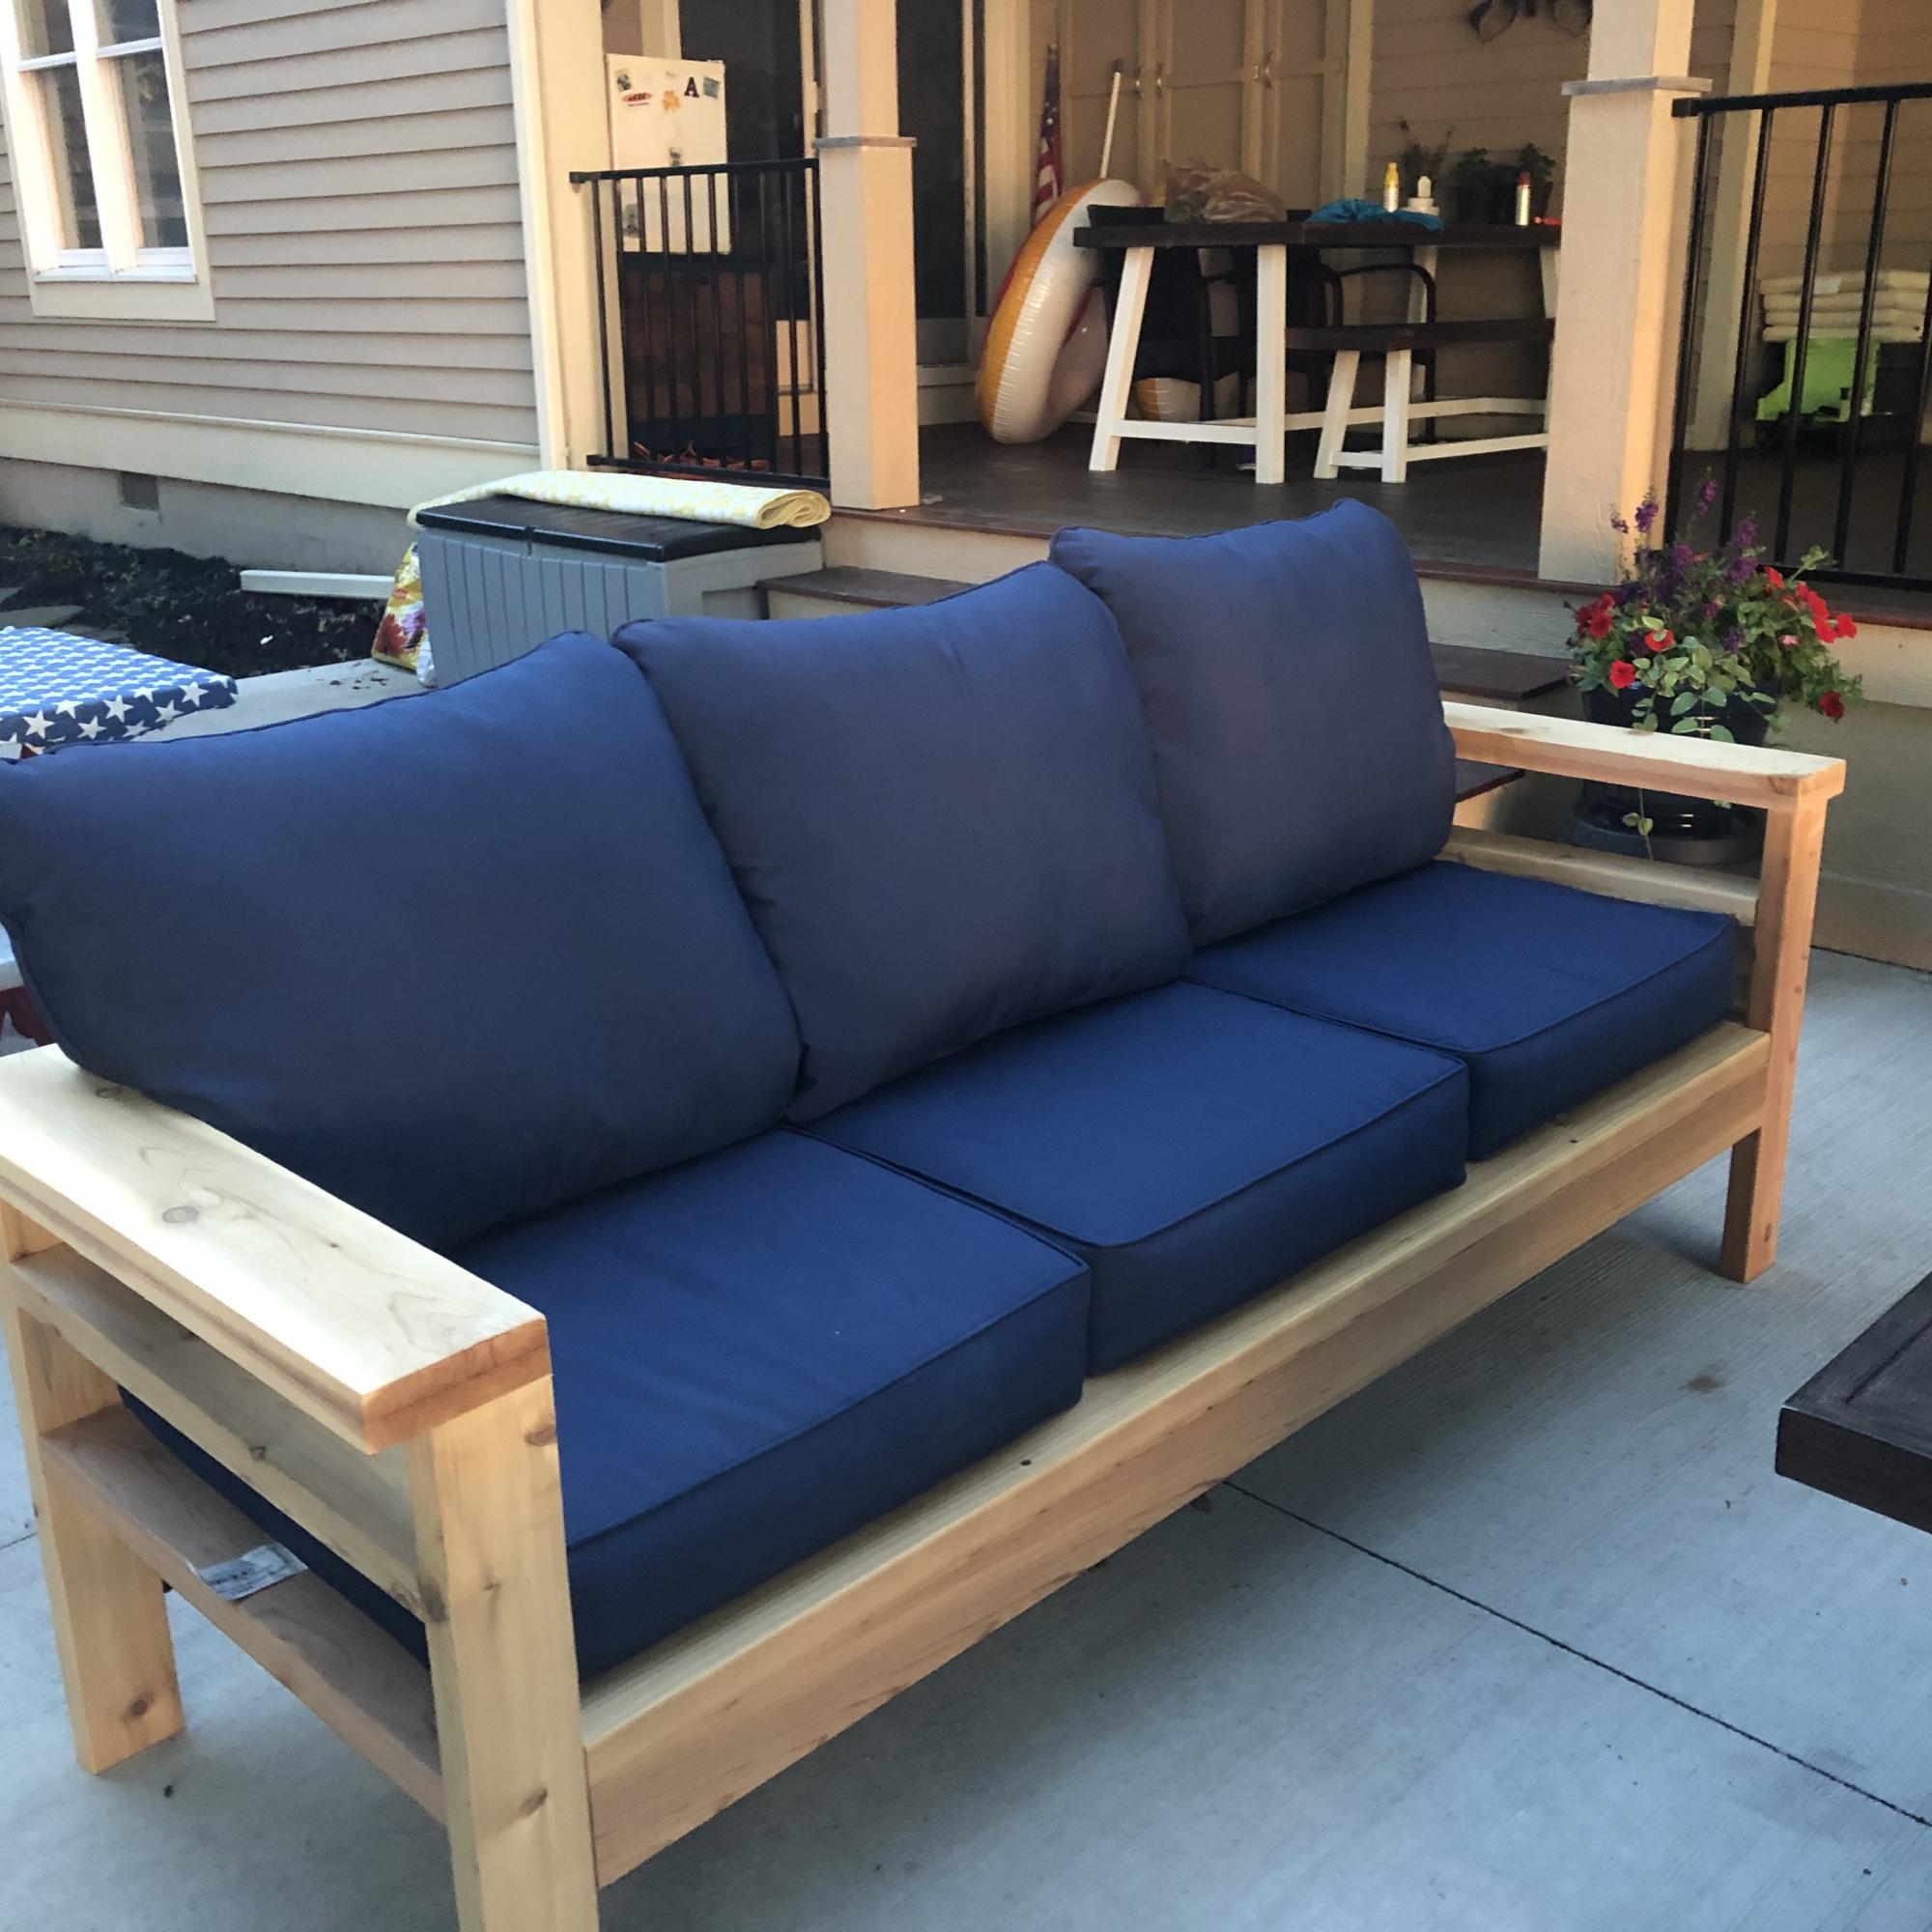
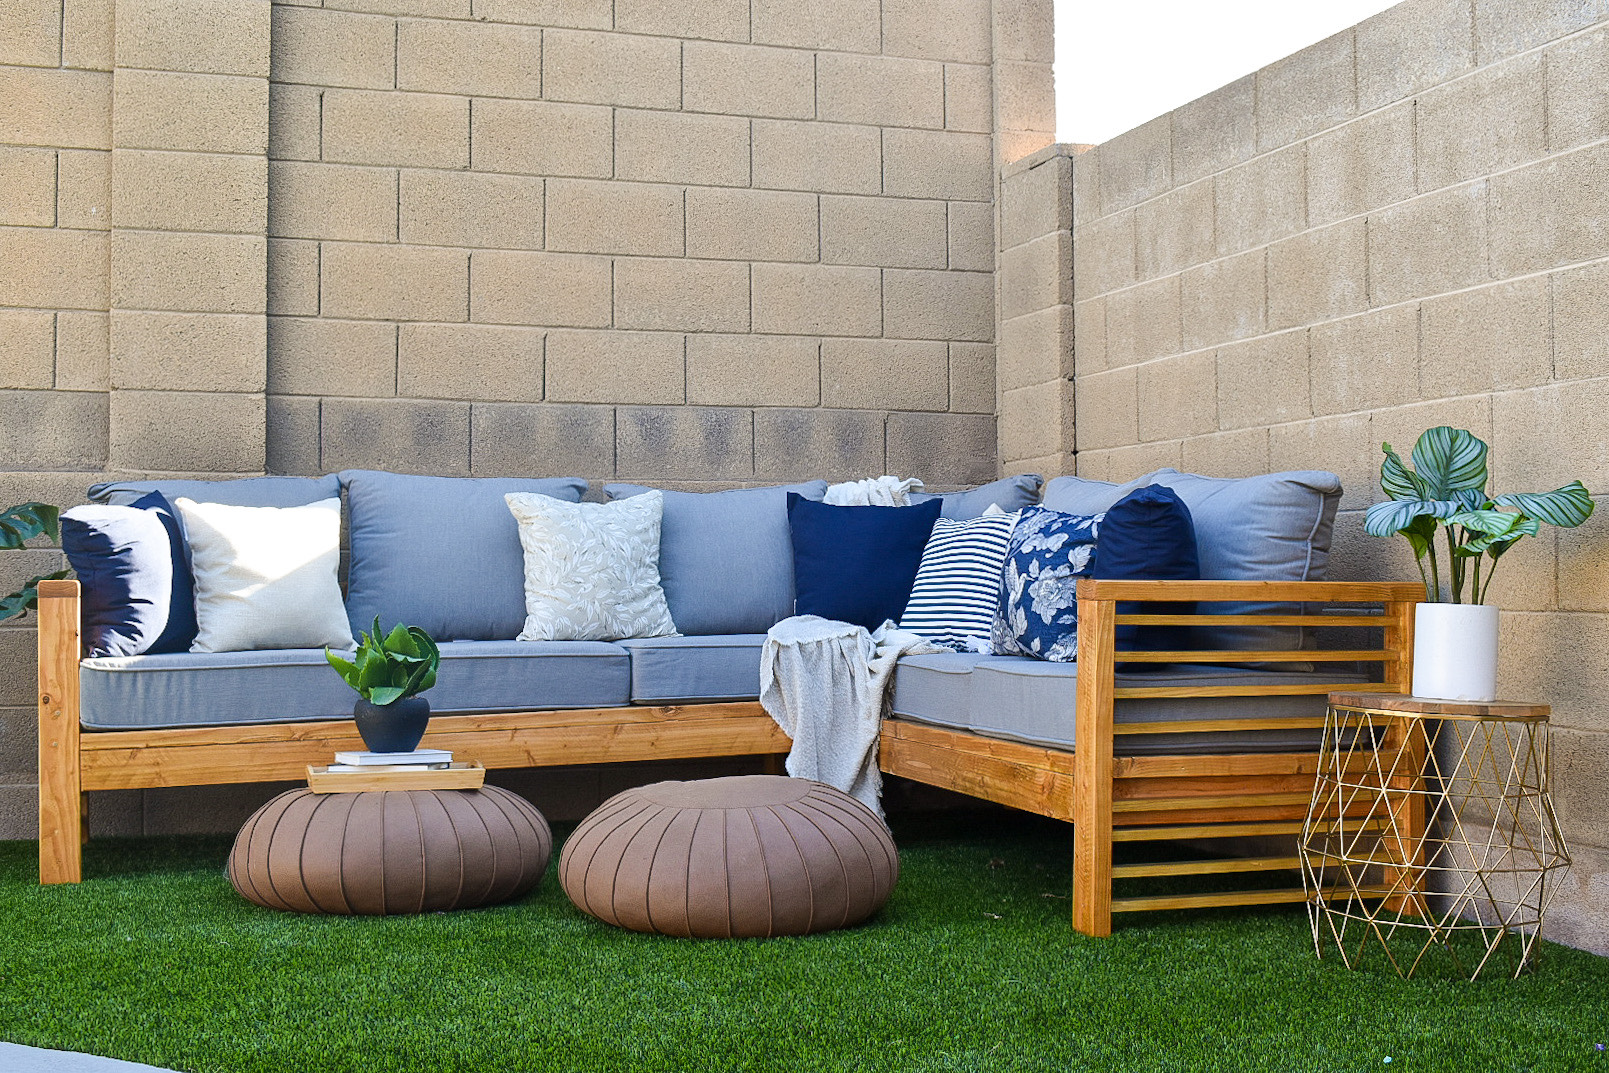
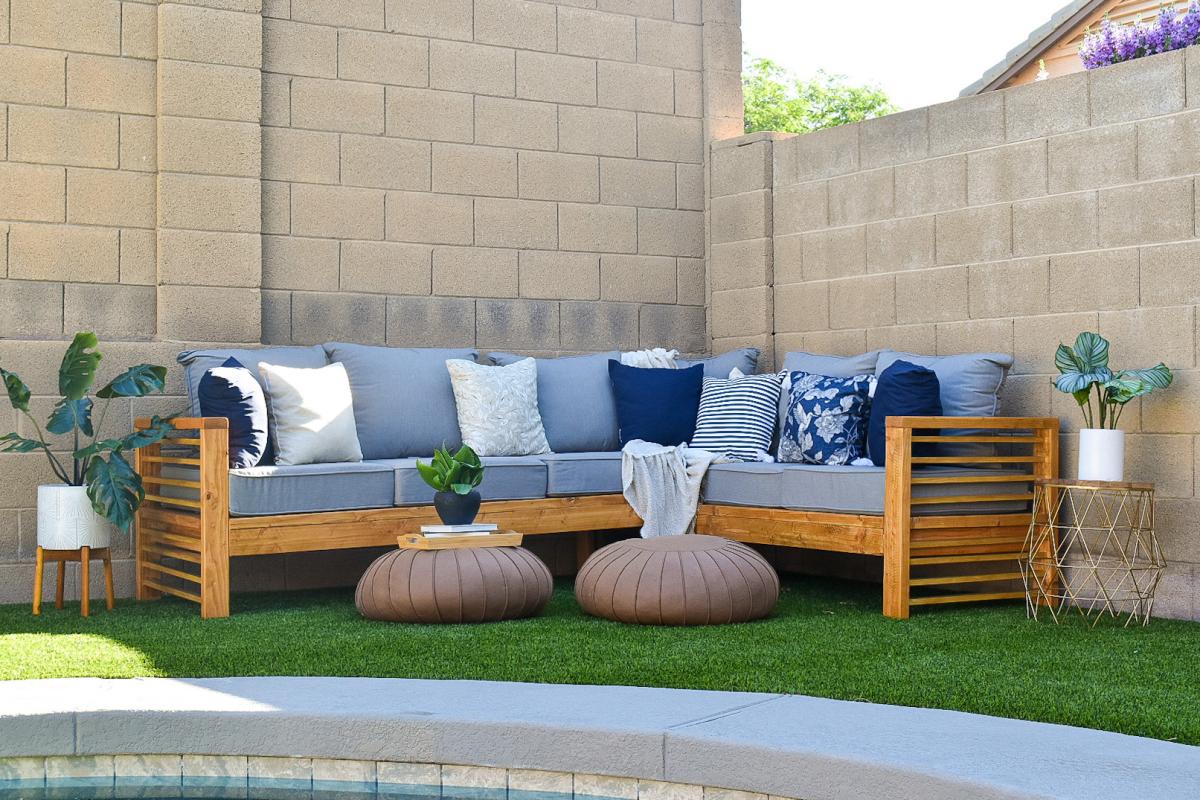
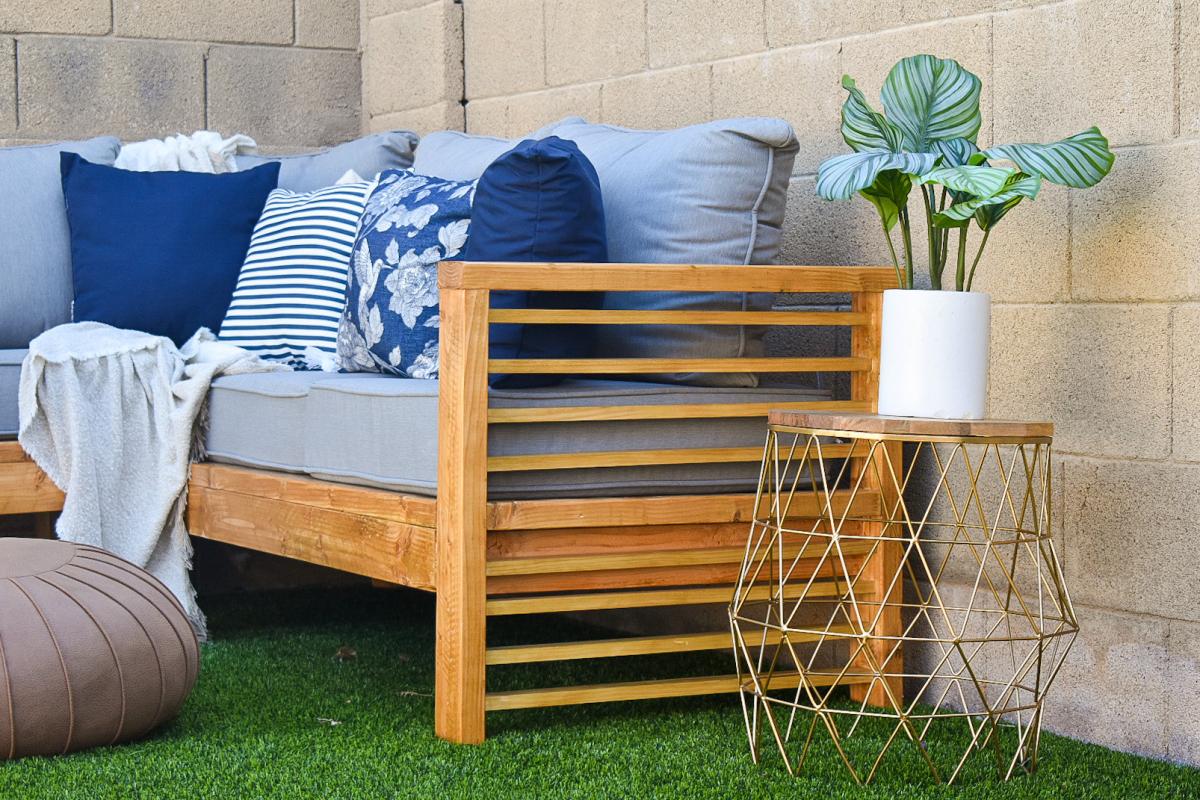
I used cedar and added the extra boards so the cushions would stay put. We also made the arms 2x6 boards so we wouldn’t need end tables for the couch. The plans were super easy to follow. I mostly used pocket holes so the screws wouldn’t be visible. Love how it came out! Thank you for the plans, Ana!!


My dog loves to people watch all day while I'm at work and she needed a new bed so I took the plans for the lower platform and modified them so it would stand alone. Took the platform and put it on the bottom so that her bed would sit inside instead of on top where she could more easily fall off.
I tried building without PH screws at first and all I ended up with was a lot of cracked and wasted lumber. Got the PH jig and finished the whole build myself in 2 hours. Sanding, staining, and sealing tomorrow but I'm just so excited about it I had to post now!

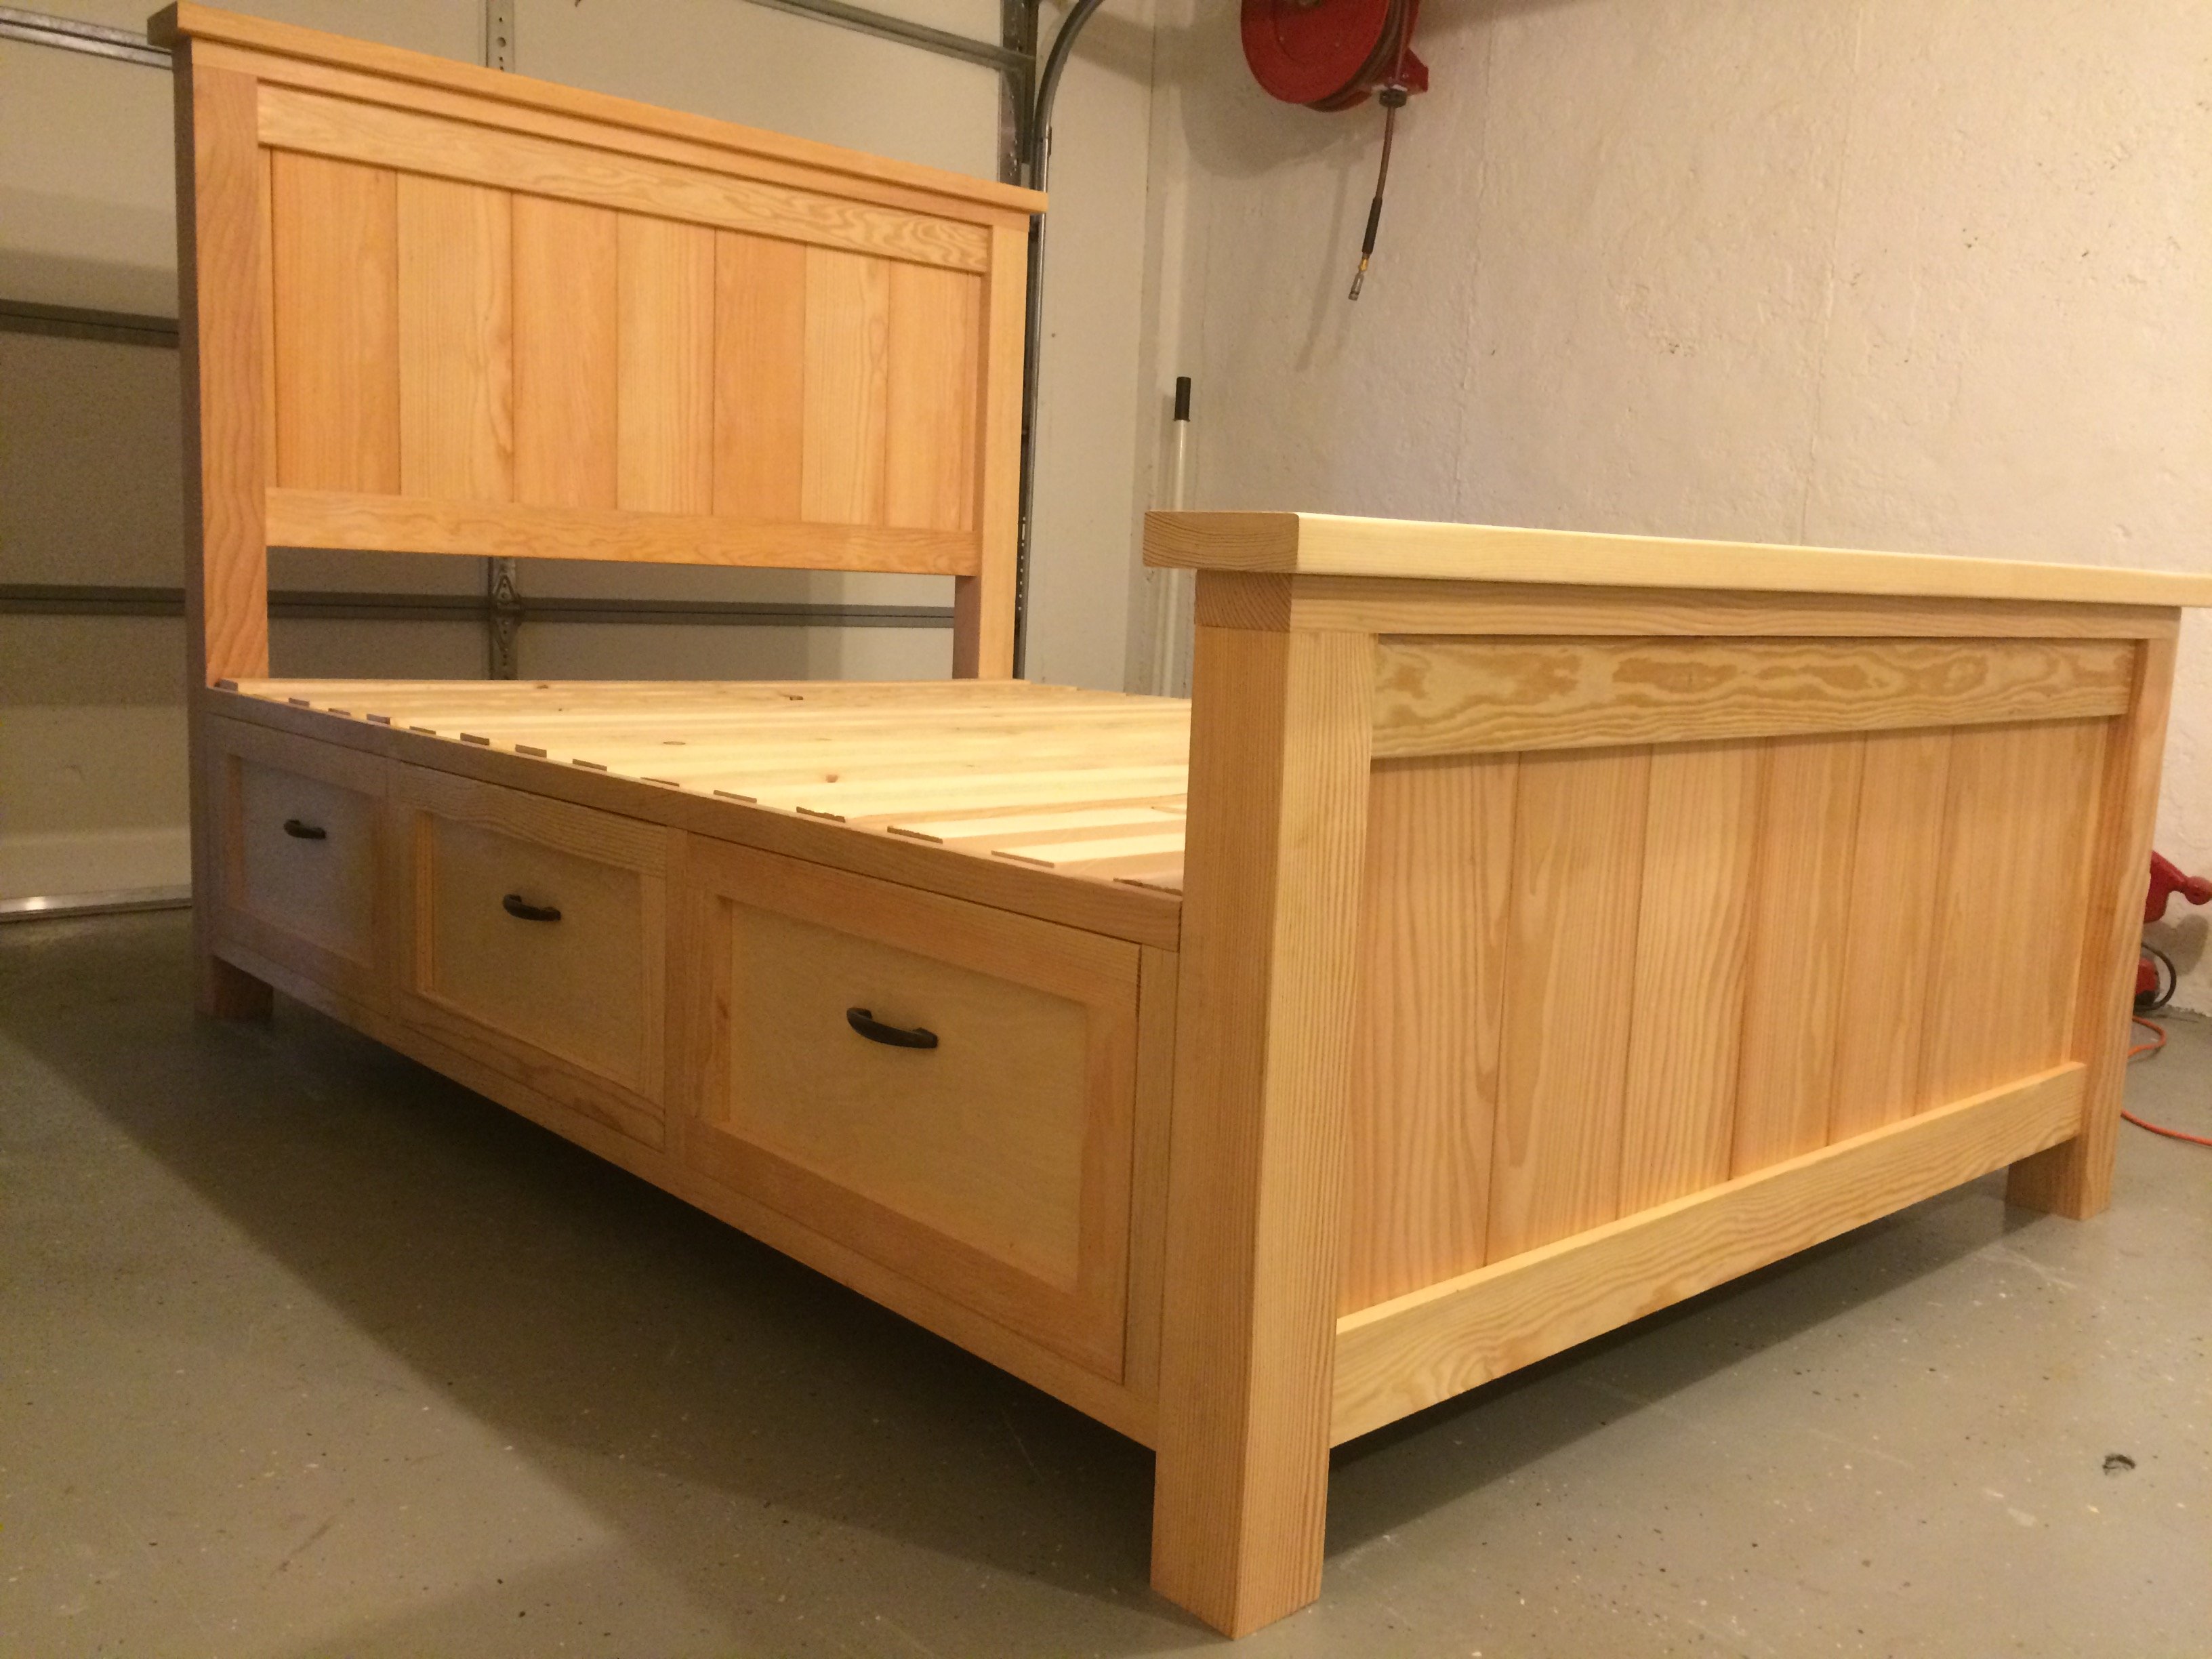
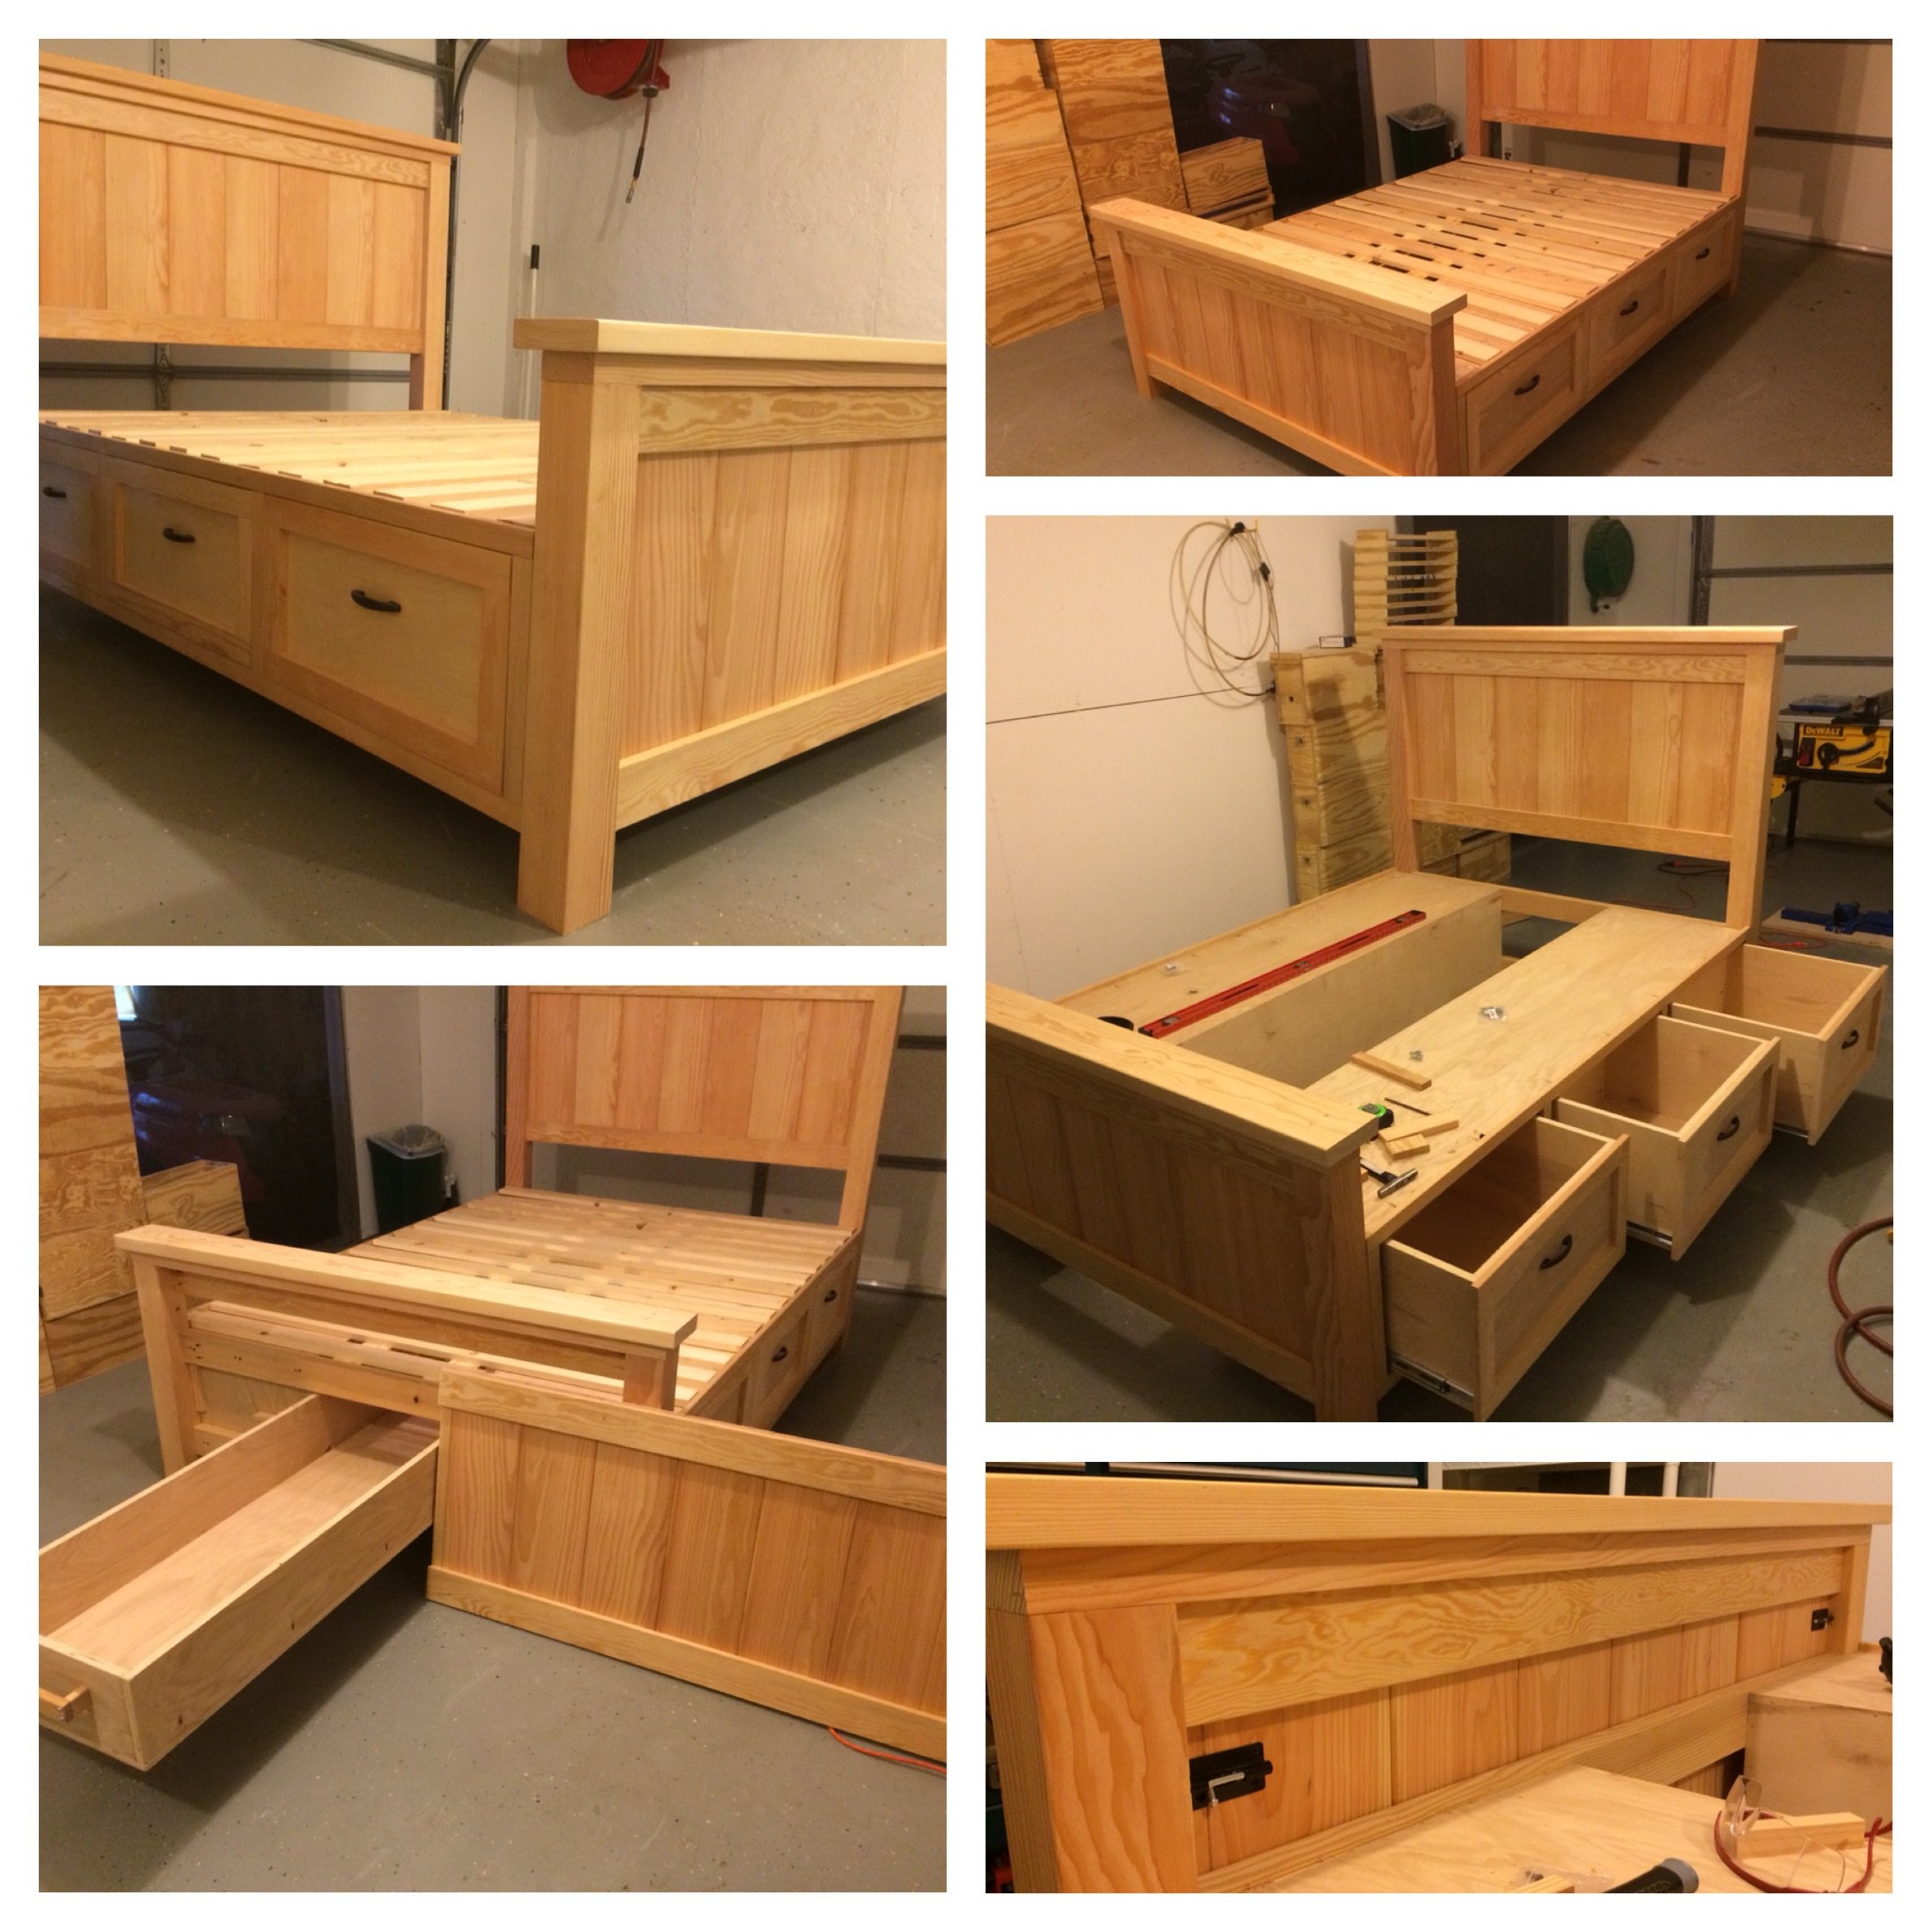
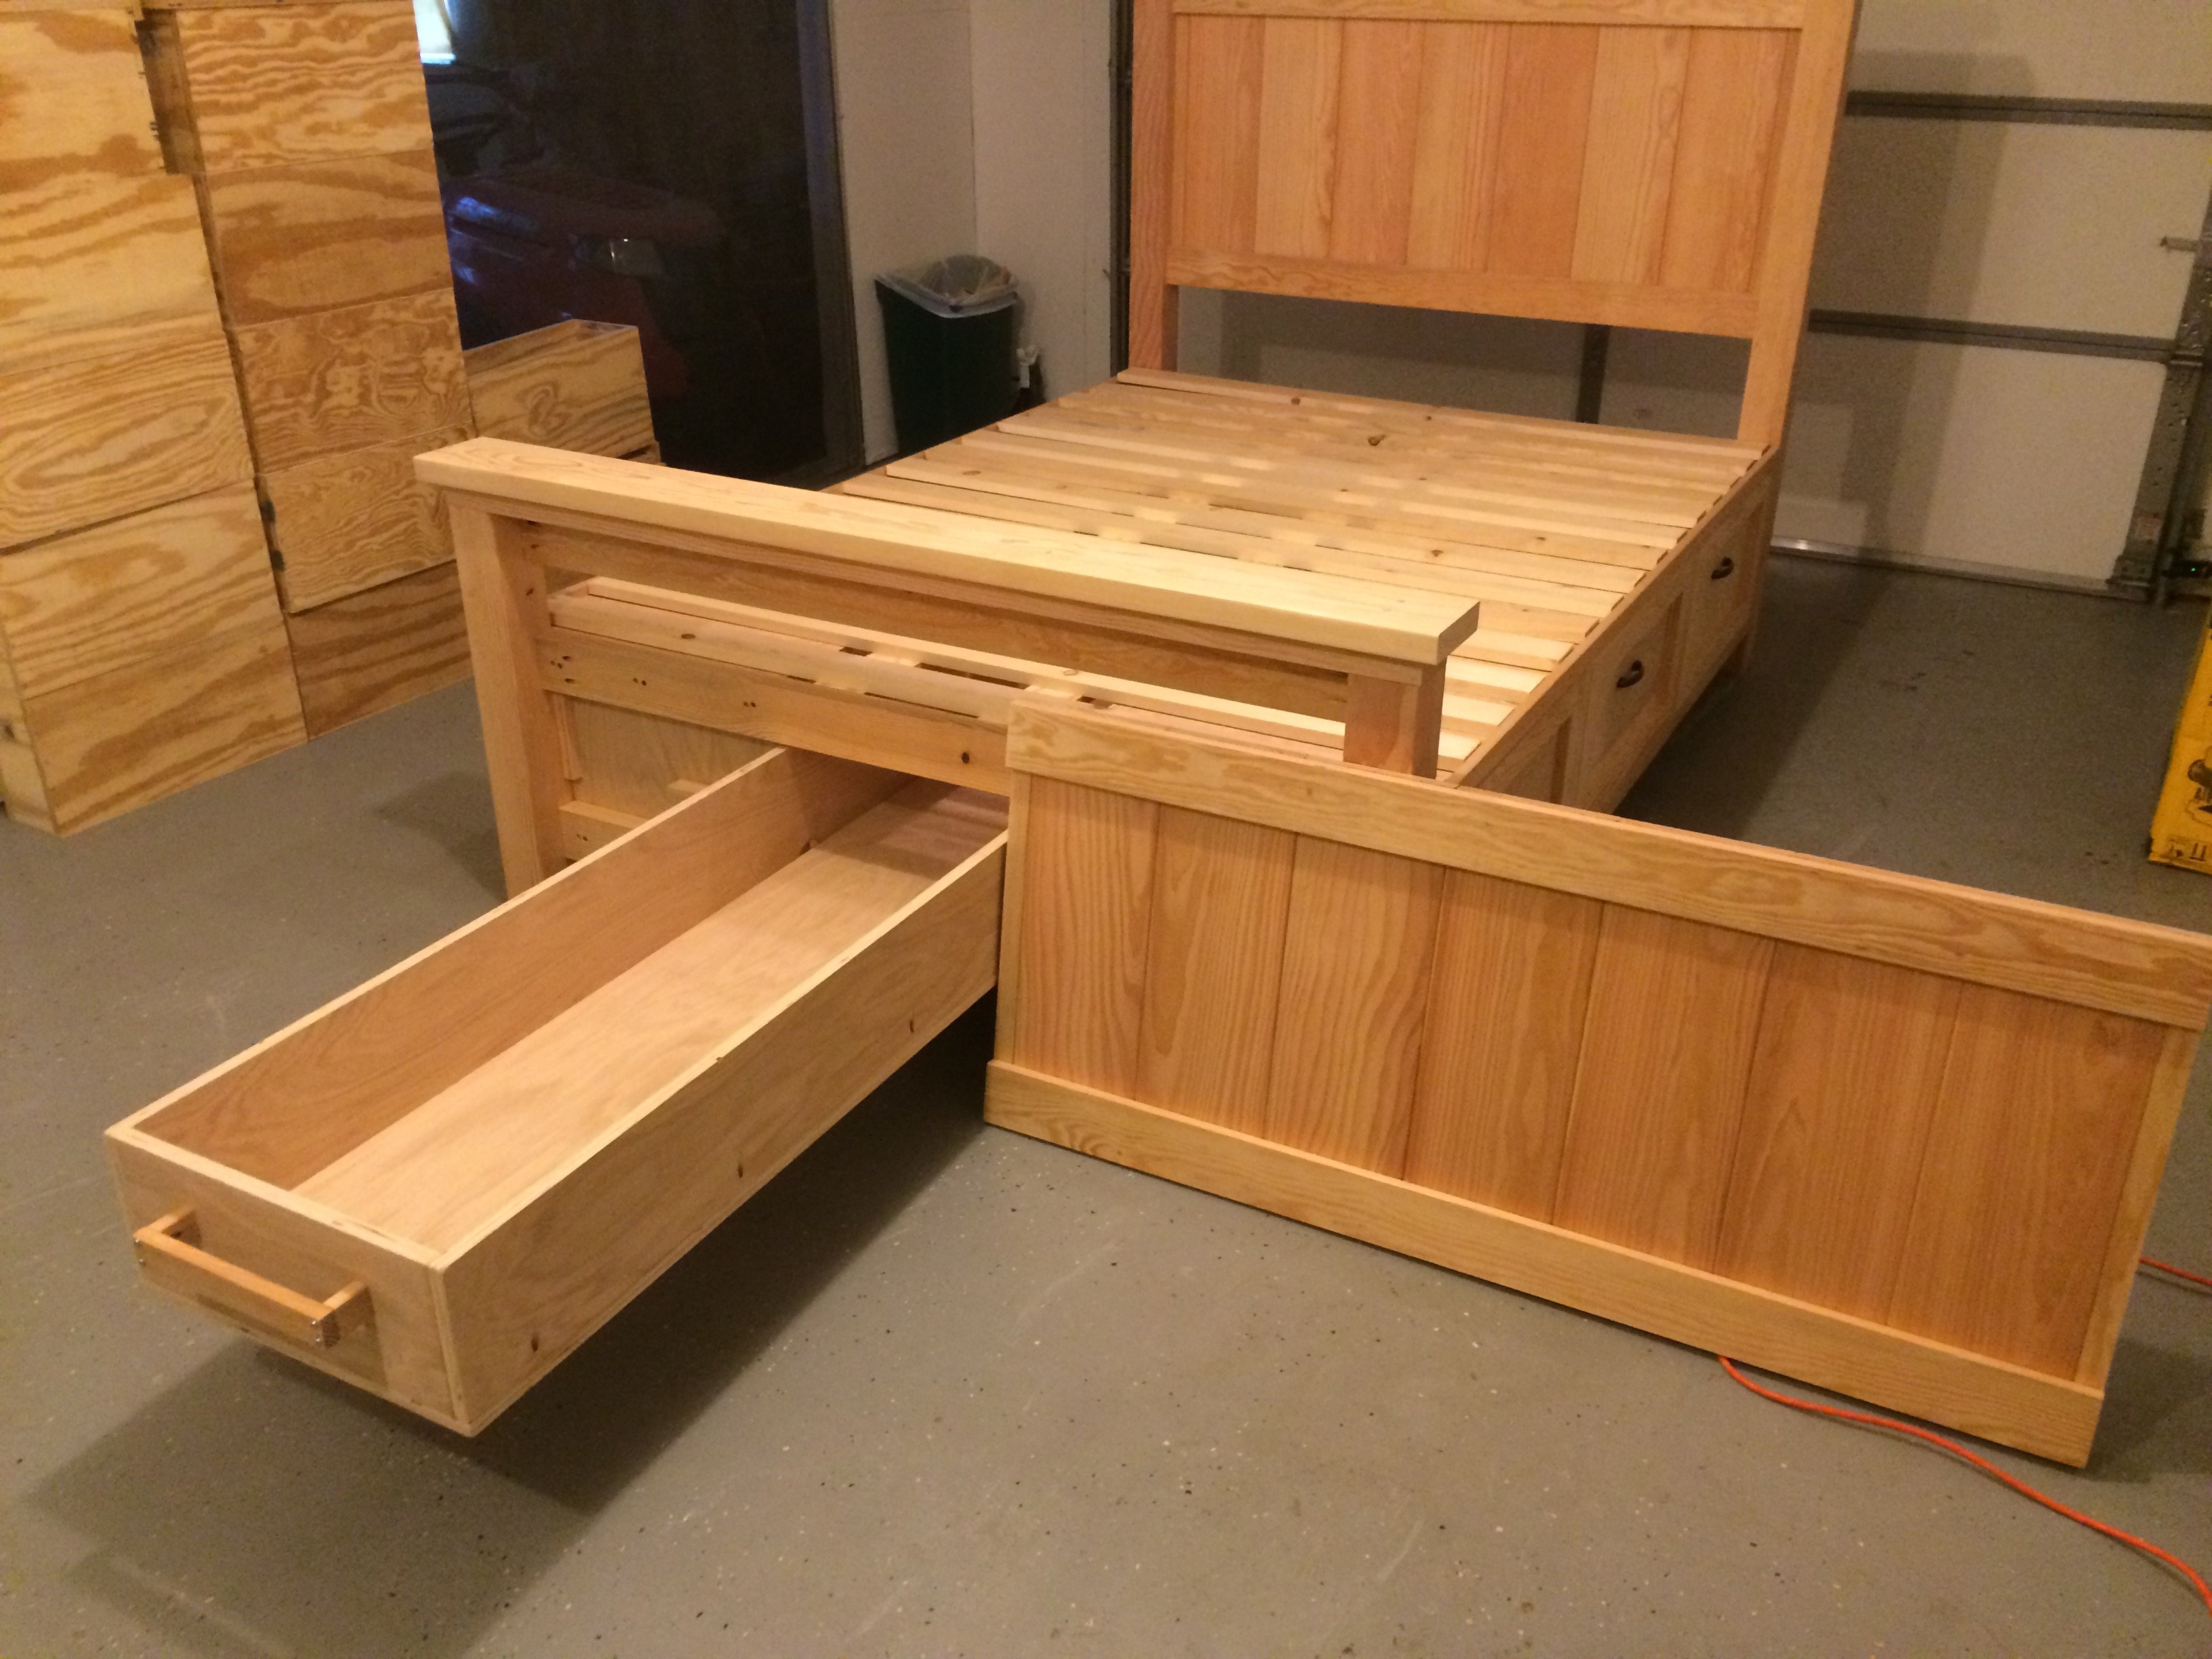
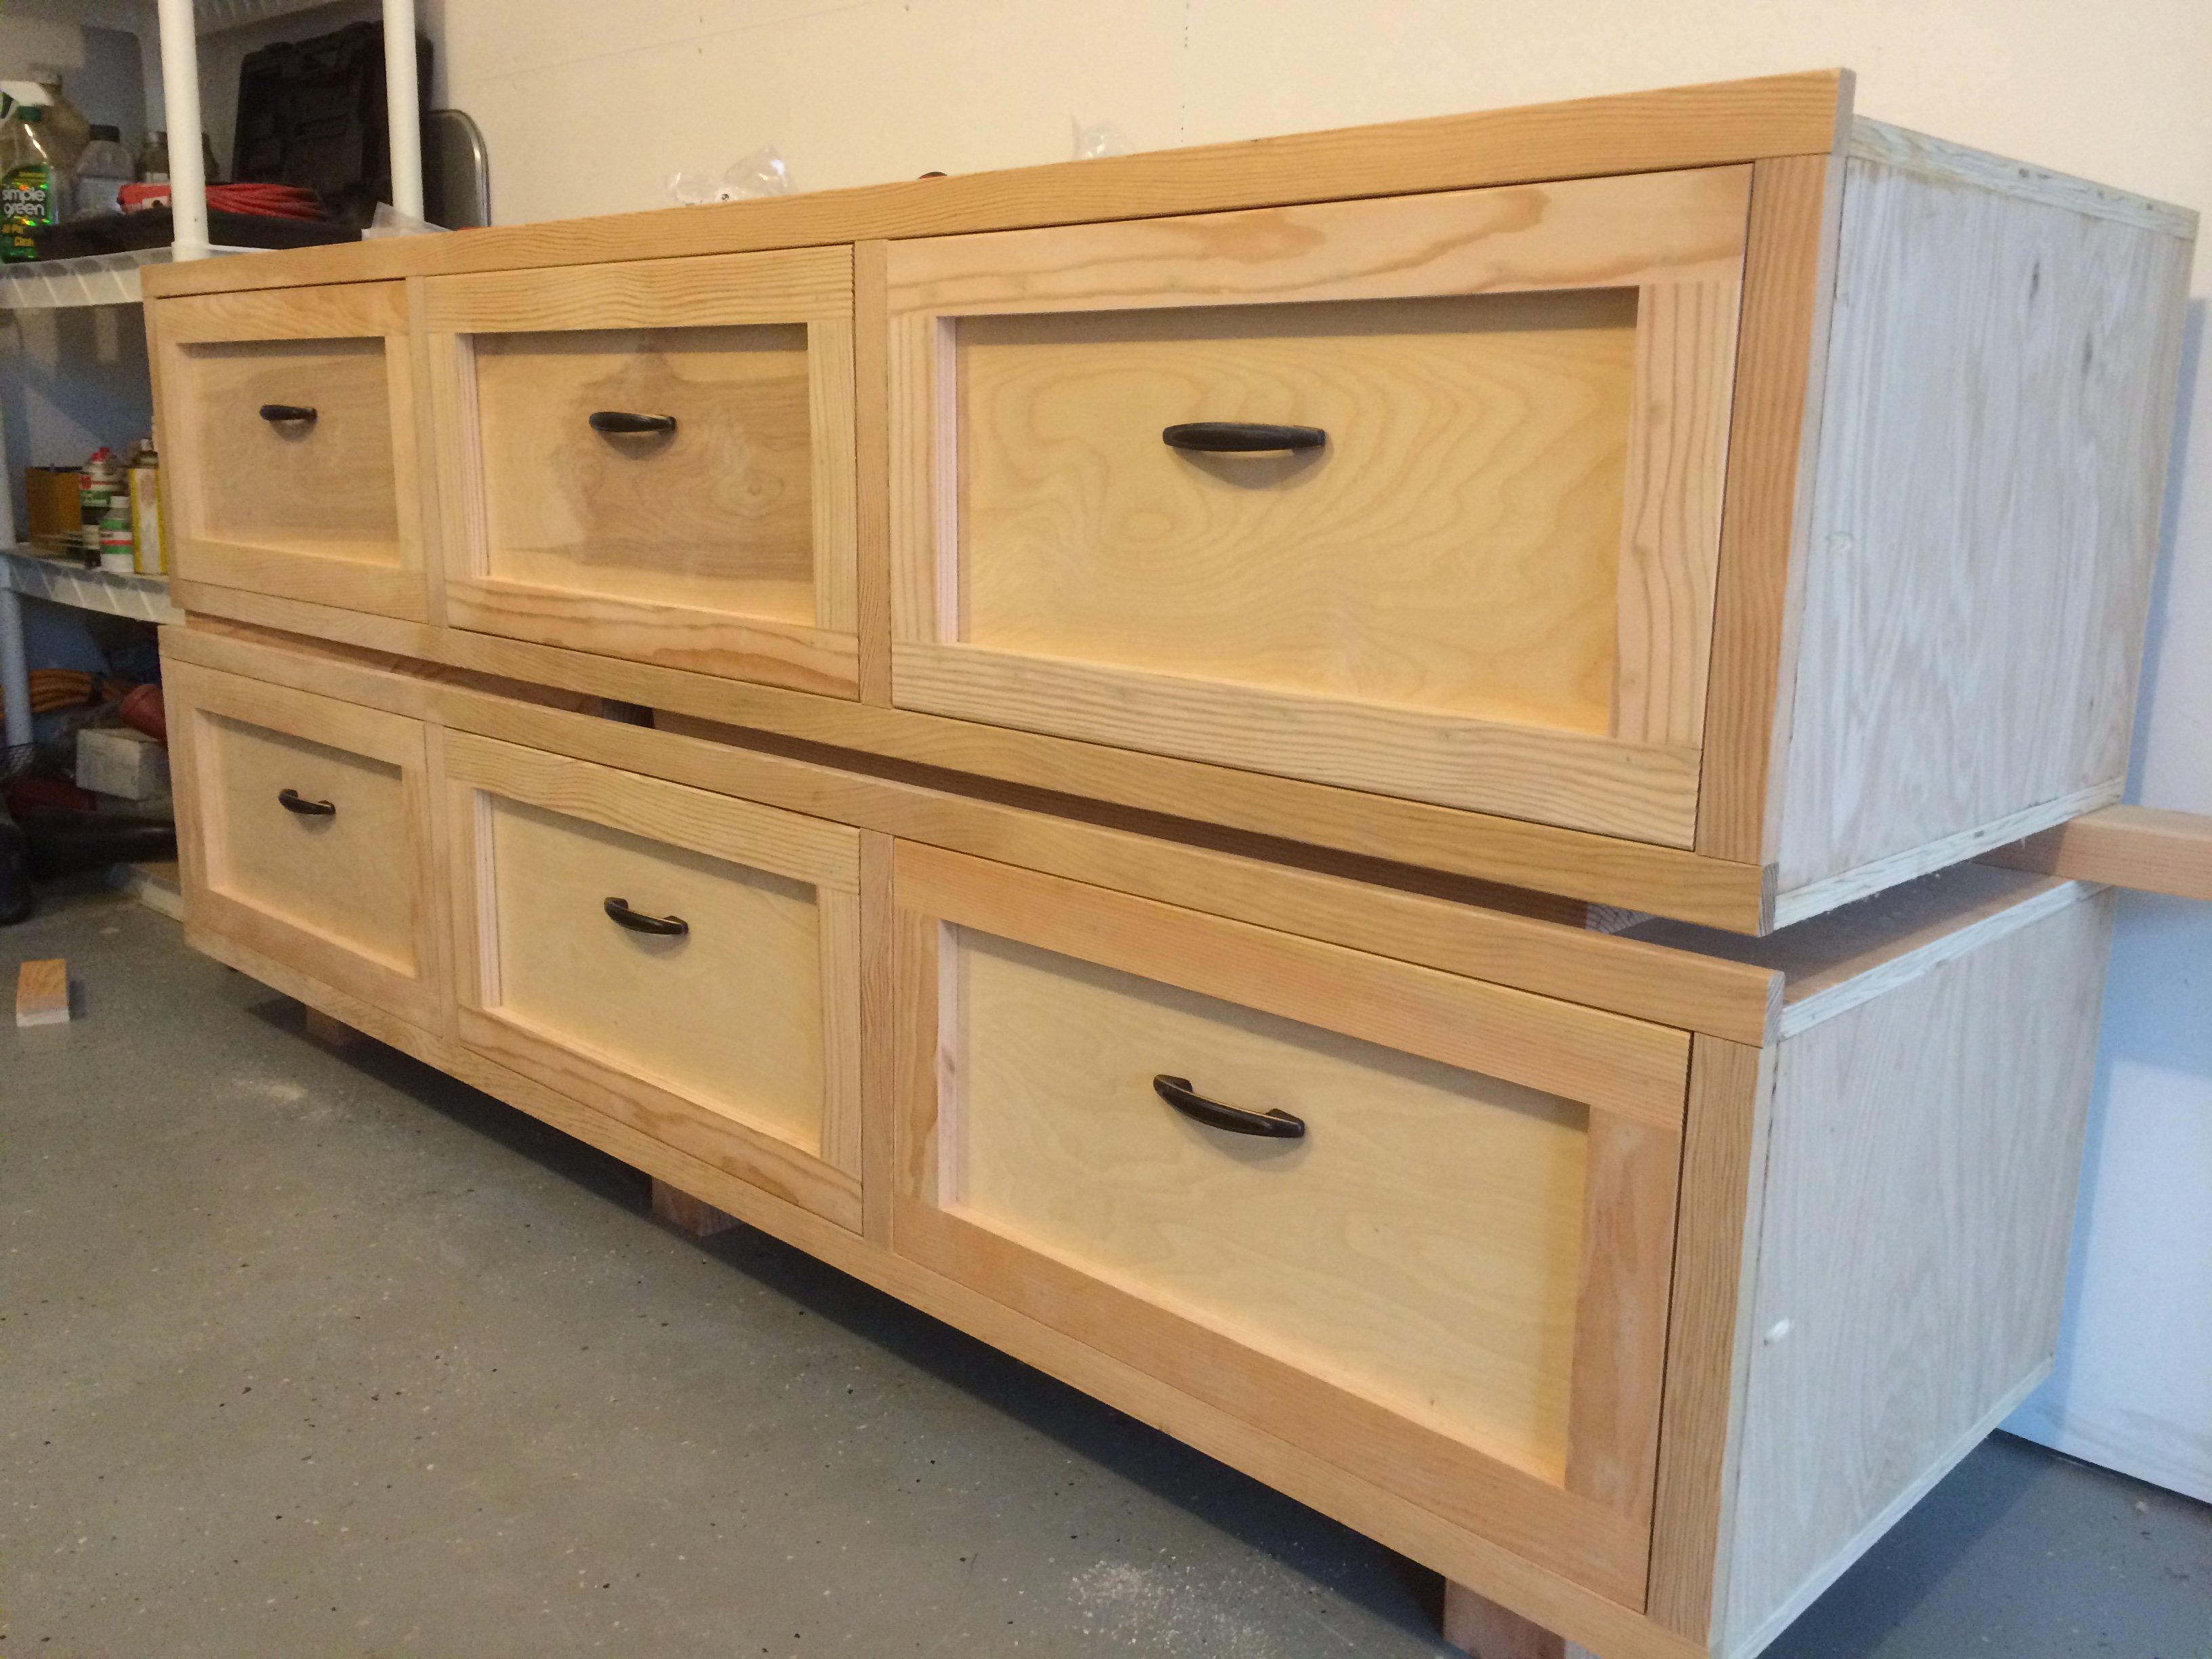
Ana, thanks for these plans! They inspired me to make my first bed build. I also want to thank all of you that added brag posts! They gave me ideas for some of the modifications that I made. I did this build by mixing your Queen Farmhouse and Queen Farmhouse Storage bed plans. I also added a number of modifications to suit my own preferences. The drawer boxes I changed by building a faceplate (I didn't want the plywood ends exposed), and by increasing in depth to maximize some additional storage. Since I increased the drawer sizes, I went with the euro roller bearing slides. I increased the foot-board height to be slightly higher than the mattress. I also designed the footboard to have a removable inner section with hidden latches on the inside. I did this because I wanted to make use of the "dead space" between the drawer boxes. I then used this space to house a hidden drawer, that is approx six feet deep (I couldn't help myself-I love hidden drawers  ). Because I added the hidden drawer, I changed the opptional center support to 4X4 blockes that were pocket screwed under the center of the boxes. I ended up using birch plywood and fir for this build. For my first bed build I'm fairly happy with how it came out. Thanks again!


Thu, 12/11/2014 - 07:41
This is your first build and you did all of those awesome modifications?! Really impressive and it looks perfect! Congrats and welcome to the community!

In reply to Seriously?! by spiceylg
Sun, 12/14/2014 - 06:03
Thanks for the compliments! It was a fun learning experience. Making all the modifications definitely slowed down the build, but also made it more rewarding!
Fri, 12/12/2014 - 13:18
I just started my bed (mostly out of Baltic Birch) and am wondering where you were able to find such nice 4x4s. Your bed is gorgeous! No luck here. I bought redwood, but really wanted fir for the sharper edges. It's my first project, too. I also bought same drawer slides, but the soft close. Didn't want the slam. I figure building it will be the easy part compared to procuring nice 4x4s! Hope you can help!
Sun, 12/14/2014 - 06:01
Thanks! The 4x4s I found at a place called Better Living Building Supply. They had a pretty nice assortment of fir, including the 4x4s, so that is why I chose it for the build. Finding the 4x4s slowed down my start on the build. Our local Lowes only had them in treated pine.
Sat, 09/05/2015 - 20:47
Thank you for the pictures, the bed turned out Awesome. I was wondering about the latching system for the foot of the bed. Do you think a piano hinge on the lower would work too? Also on the center drawer did you use rollers or is it just friction? Can't wait to start the build.
Thanks

Mon, 02/15/2016 - 14:11
This is excellent!!! I really like this, so much in fact that the wife is going to have to get used to it too. lol But really, GREAT work! Any chance you could post a pic and or comment about how you attached that removeable end? i think this is the best part! Cheers!
Wed, 10/24/2018 - 23:21
How can I get / purchase the plans for the construction of the bed ?
Tue, 12/10/2019 - 08:42
Beekeeper, Awesome build!!! Have you posted your altered plans anywhere? I'm very interested in your build, I was wondering about some aspects of it and how you approached it. Plans would clear it up instead of bothering you with all my questions.

Mon, 11/16/2020 - 15:42
Bed turned out awesome. I was wondering if you have the plans for the bed with a list of supplies it took to make this bed. I so want this bed it's just what we are needing
Great job

We are used to seeing our grandson every weekend but during the 2020 COVID quarantine we were unable to do so. Instead, we filled our time building him a swing set for our backyard. He loved it!! We are going to add more to the swing side but the hardware I want isn't available right now (apparently there is a lot of swing set building going on during this time). I look forward to many years of playing on this with our grandson and hopefully additional grandkids in the future... Our cost was pretty high mainly because our first round of lumber came from a local lumberyard that was willing to deliver within a few days (big box was going to take several weeks) and they had what is supposed to be higher end lumber (not sure I am convinced of that)....also, i chose some pretty expensive hardware (brackets) just for the added security.....


I used the End Table plans modified slightly. I cut all of the boards from a 10’ walnut slab. My wife Julie, and I finished them with Danish Oil. A great project; ready to start the next one!!
Stephen Russell


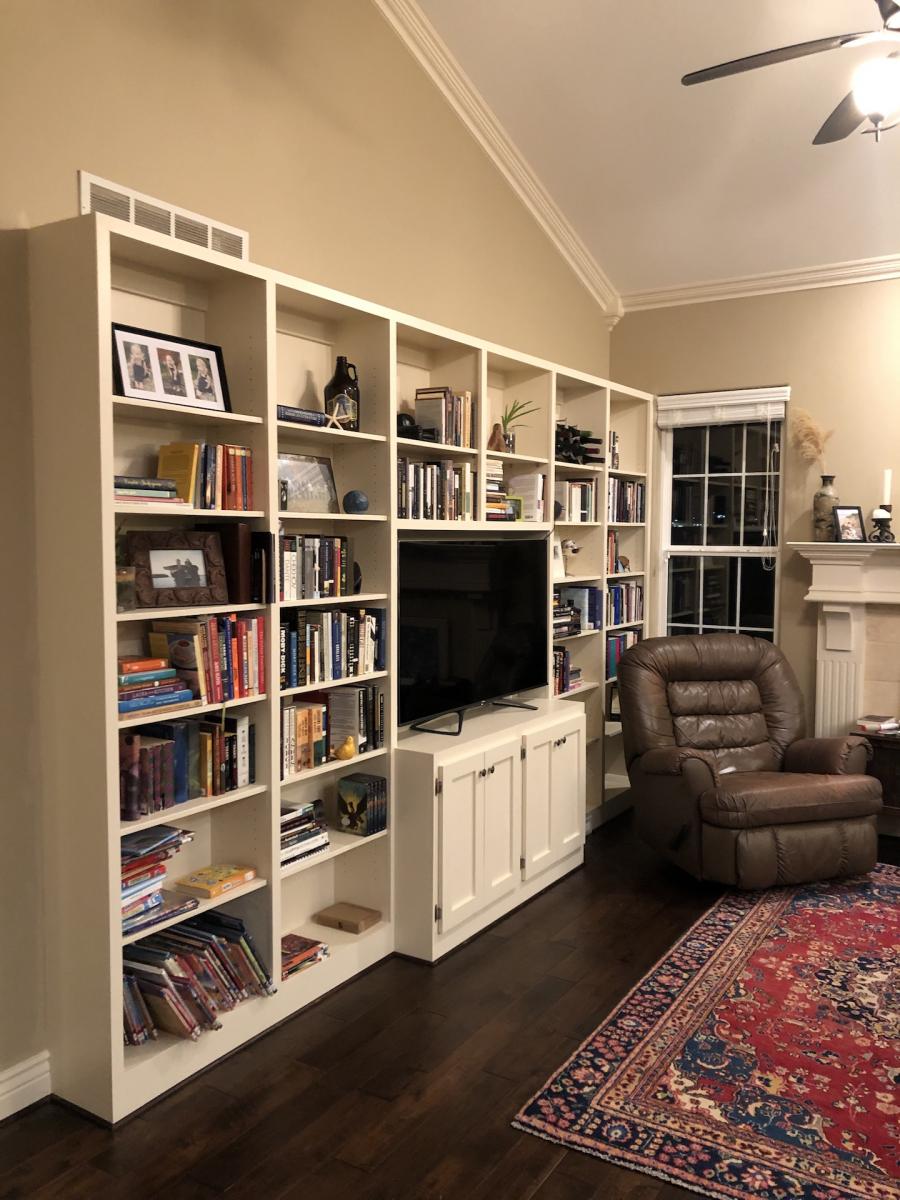
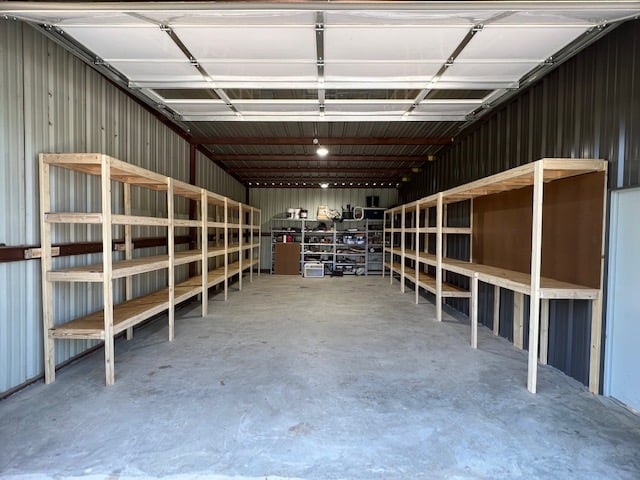
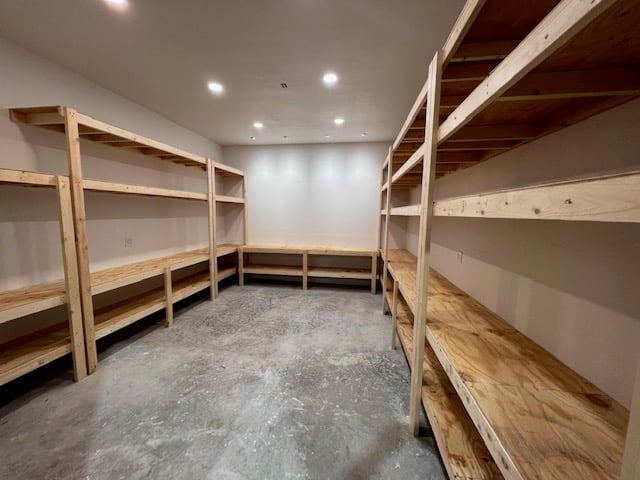
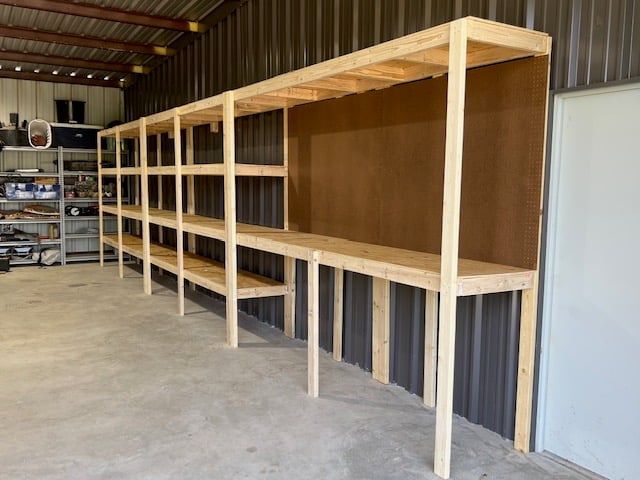
I built this project in 6 separate pieces before installing it in our home. I pulled the baseboard and attached it to the wall to give it a built-in feel. For the majority of the project, I used 3/4" plywood with the exception if 1/4" plywood for the back of the shelves as well as the centers of the cabinet doors. For the trim, I used select pine boards. I had to work around an airconditioning vent that was in the floor. I was able to divert it to run out the bottom of the bookcase.
This build is loosely based on the Willy Bookcase. I actually found another brag post on the Willy Bookcase that was immensely helpful in constructing my project. I'm so grateful for the brag boards! Instead of fixing all of the shelves like the Willy, I used a Kreg shelf pin jig to make the shelves adjustable. The shelf that lines up with the TV is fixed for stability.
The estimate below covers all of the wood, paint, screws, hardware, etc. For fun, I'm including an in progress photo to illustrate the process. Thanks for looking!
Also, a note - this is a relatively easy project, however, I listed it as "intermediate" because of the cabinet doors. They definitely made it more complicated!