Community Brag Posts

8x12 Shed

Submitted by Anonymous (not verified) on Tue, 06/13/2023 - 03:26

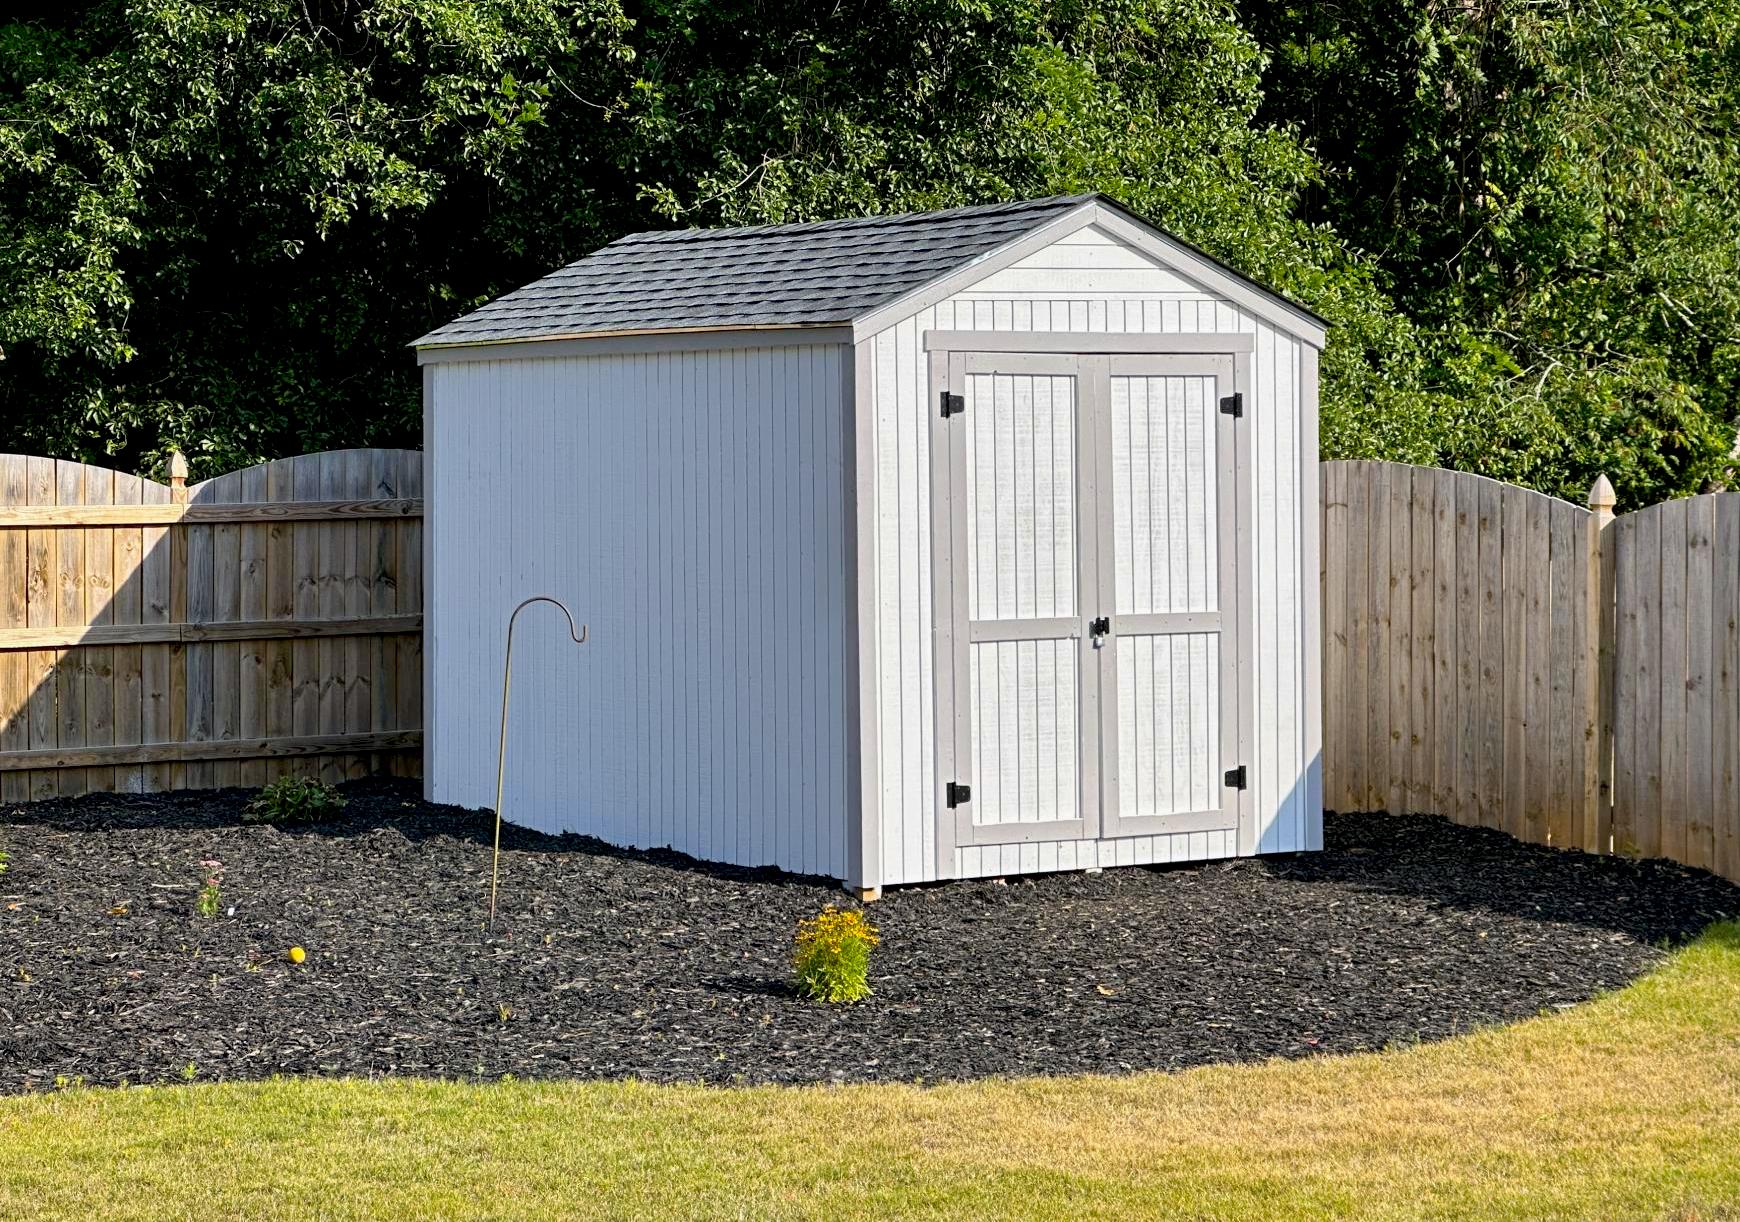
My new garden shed built from your premium plans! I'm 62, never built a shed before, and worked mostly alone. My sons helped with some of the wall and roof sheathing. In the end, I did everything except for the shingling. I painted it to match my house main color and trim.

The video is very helpful - I watched it several times. My major change to the plans was using Simpson Strong Ties and hurricane ties to secure the rafters to the ridge pole and the top plates. Otherwise, I used all other methods. I recommend cutting the front wall sheathing before cutting the panels for the doors. I do not have a trim saw and thought my standard circular saw was too heavy for me to make the cuts like Jacob did.

Built from Plan(s)

Comments

Seasonal And Holiday

Rustic Modern 2x6 Platform Bed

I recently moved to Boulder, CO and finally have a garage where I can actually work on projects. Since I moved here with practivally nothing, I decided I should build my own bed. This is probably one of the most ambitious wood working projects I've attempted. I also tend to be slightly anal, so I've probably spent way more time on this project than most people have or will.

After reading the plans and other Brag Posts, I felt I was ready to start. I ordered the Kreg Screws, and a few other supplies I would need for the Project on Amazon and was off to the races. Several trips to Home depot to get various pieces of wood, (since I wasn't going to fit it all in my Subaru in one go), I finally had most of the lumber for the bed frame. Let me tell you, it's not easy getting straight pieces of lumber (as mentioned before, I'm a little anal). I decided to go with oversized lumber, since I would have more usable leftover pieces for other projects.

I spent several hours after work during the week, and several more on the weekend, sanding down all the lumber with 60 Grit, then applied the first coat of Stain, to raise the grain. I was out of town for the weekend, and let the stained wood sit in my garage while gone. When I got back, I noticed a lot of marks which I didn't notice before staining. Some of these were from the belt sander I used to knock down really rough parts of some of the lumber. But most of the marks were because I put too much pressure on my random orbital sander.

Lesson learnt: Sanding takes time, and patience! DO NOT press down hard on the sander, if you don't want marks on your wood. These marks will be significantly more prominant after staining.

I decided to sand everything again, 60 grit, then 100, then 150. I gotta say, the wood feels so much nicer to touch and I'm glad I decided to re-sand. I spent a few hours after work to get most of the head board pieces done, but noticed that the 2x4 had warped beyond repair... I'm going to get the upper and lower 2x6 pieces ready to assemble with my kreg jig this weekend, and then decide if I want to add a 2x4 in the middle like the plans call for.

I decided to go with just 2x6s for the headboard, I used the Kreg Jig to put it all together, I also attached 4 supports made of some scrap Plywood I got from my neighbor for the headboard.

I stained it all with a Staining pad twice, then applied 3 coats of Poly with a brush. I didn't sand between coats since I was applying very thing coats and I had already sanded everything down with 150 grit. 

Estimated Cost
$100-150
Estimated Time Investment
Week Long Project (20 Hours or More)
Finish Used
Stain: Minwax Oil based Dark Walnut - 2 coats with a staining pad
Varnish: Satin Water based Indor Polyurethane by Varathane - 3 coats with a brush.

http://www.homedepot.com/p/Minwax-1-qt-Wood-Finish-Dark-Walnut-Oil-Based-Interior-Stain-70012/100376185

http://www.homedepot.com/p/Varathane-1-qt-Clear-Satin-Water-Based-Indoor-Polyurethane-200241H/100169146
Recommended Skill Level
Intermediate

Comments

username.

Fri, 03/02/2018 - 19:17

Sick job dude! What stain is that? I like the color of it and might use it for mine. Did you notice a stain odor at all after applying the stain and covering it with the poly? 

Outdoor side table

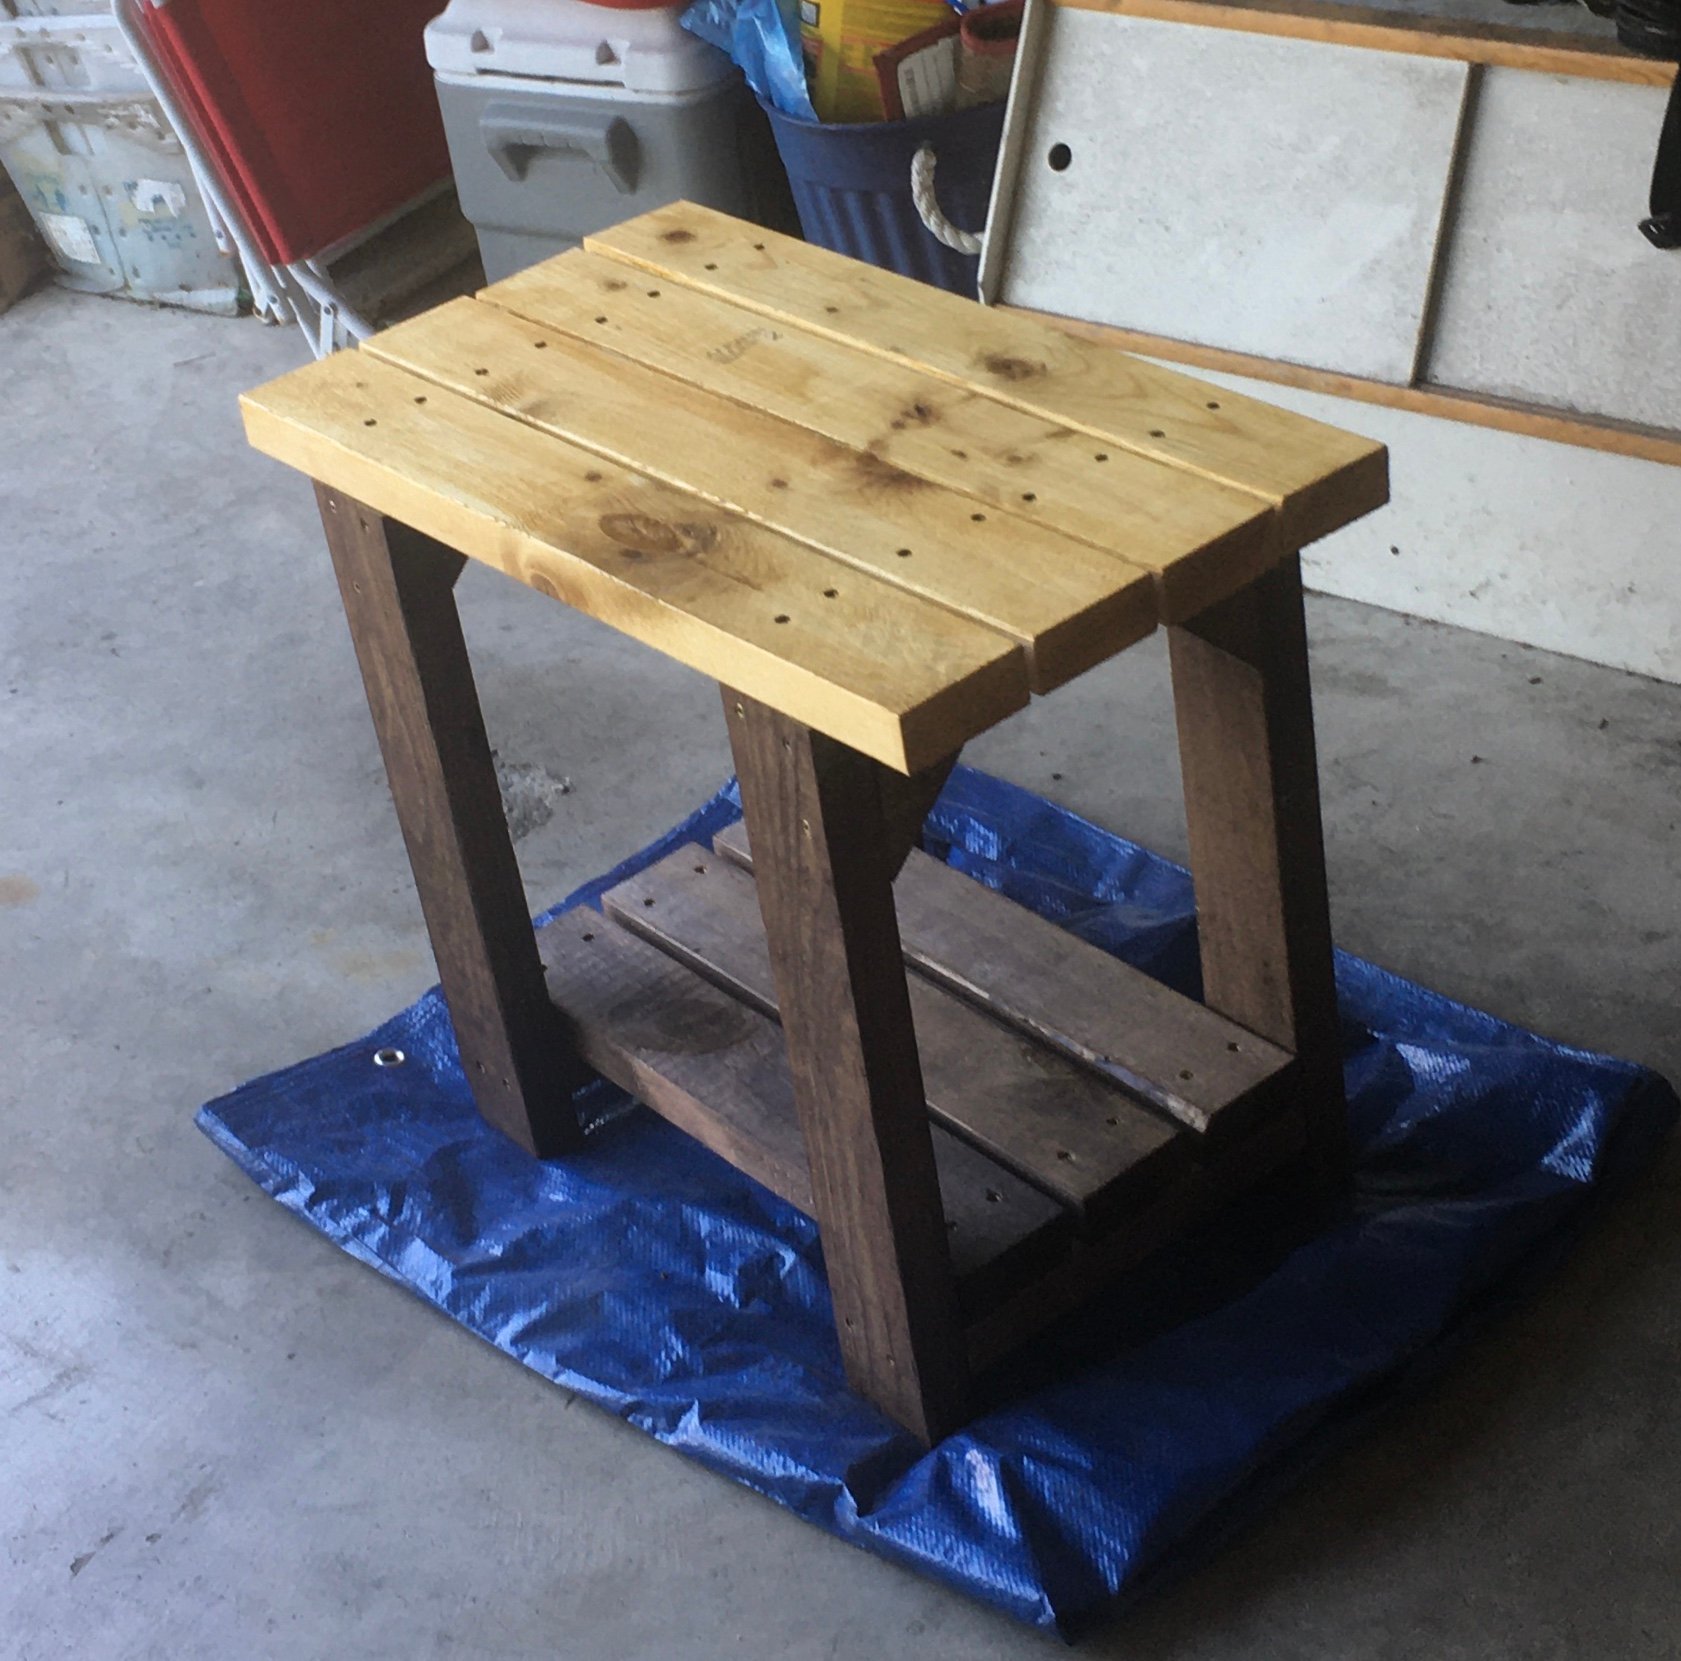
Keeping budget with wood projects, made side table for outdoor fire pit area.

Estimated Cost
$25
Estimated Time Investment
An Hour or Two (0-2 Hours)
Finish Used
Legs and braces=rosewood stain
Top=honey pine
Recommended Skill Level
Starter Project

Cat Tree/Condo

Submitted by Joni on Sat, 05/11/2013 - 07:22

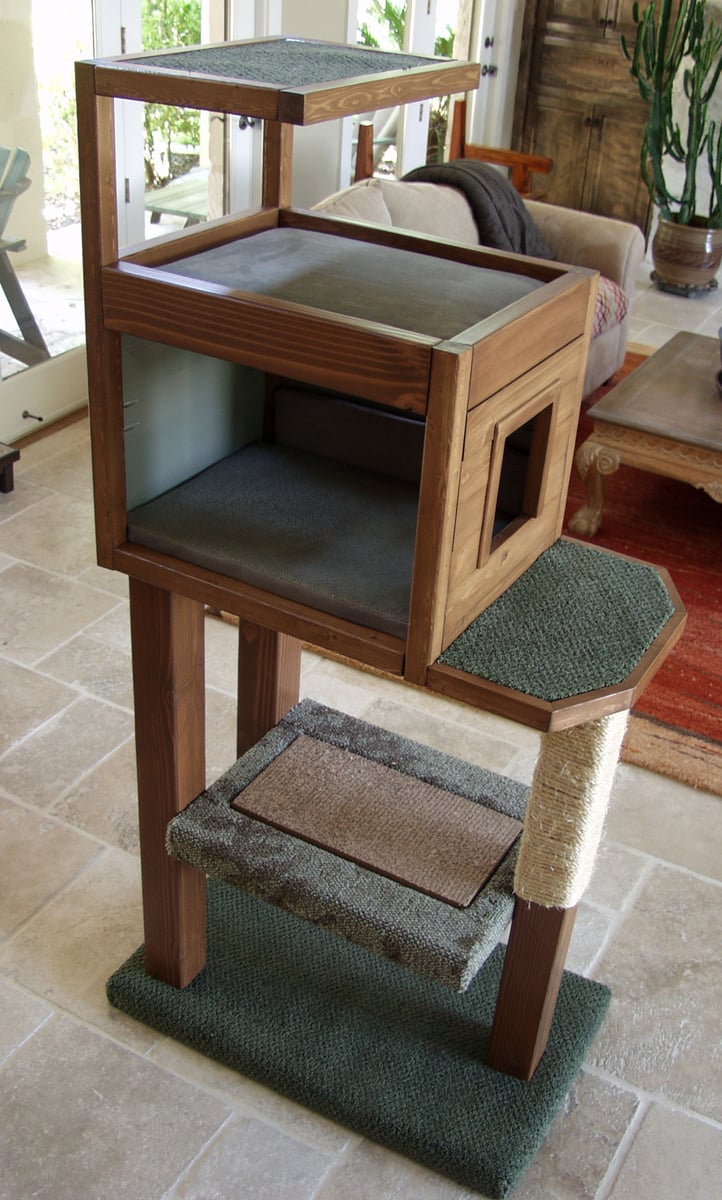
I always wanted a cabin-type cat tree where my cats could crawl in and feel safe, but still have a great view of the birds out of a window. I tried to draw my vision on paper, but that had a hideous result. Learning Google SketchUp (at least the basics) was an absolute necessity. I could never have built this without drawing it in 3D first, and seeing how the boards would connect, etc.

For the scratch pad, I built a frame out of 2x4s on top of plywood, covered it with carpet, and dropped the standard size scratch pad in place. This is the cat's favorite feature. I put barn doors on the window with tiny hinges so that I can close for added privacy. The tree sits against a window so that the back side is totally open. I made cozy zippered cushions for the platforms (that can be taken off and washed). I covered the carpeted areas with spare carpeting.

Estimated Cost
Approx. $30 for can of paint, varnish and a 4x4 (all other was scrap material)
Estimated Time Investment
Weekend Project (10-20 Hours)
Finish Used
Combination of Minwax Water-based stains: 6 parts Colonial Pine: 1 part American Walnut, followed 3-4 coats Minwax Polycrylic
Recommended Skill Level
Intermediate

Comments

bhoppy

Fri, 07/12/2013 - 09:36

Would you mind sharing your dimensions for this? It is absolutely beautiful!

Jodi W

Sun, 08/25/2013 - 08:10

Do you have the plans somewhere? I really want to build this (even got the okay from the hubby!) but I don't think I could do it without some serious guidelines...

Joni

Fri, 08/30/2013 - 15:55

First, sorry for the late notice; I just happened to look and saw the comments/questions.

I don't have plans...all I have is a google sketchup diagram that I created as a guideline for my construction (which is included in the photos), which is not to scale. Actual measurements are:

* Base (green carpeted base): 33.5" x 19"
* 4x4 legs: 35" tall
* 'Mezzanine' scratch pad level: 22" x 17.5"
* Mid-level base: 18" x 32"
* Enclosed cabin: 18.25" x 22.5" x 17" high
* Highest point: 56"

This has turned out to be a fantastic hit with the cats. They use all 5 levels, but the scratch pad and cabin are their favorite spots. If you need anything else or additional pics, please contact me.

Jodi W

Fri, 08/30/2013 - 18:15

Thanks for the dimensions, Joni! I'm trying to learn SketchUp so I can draw up my own plans, also. If I can't figure it out, I'll hand it off to my 12 year old, who is a pro at it (go figure). I know my cats will love it if I can manage to get it built!

Joni

Thu, 10/31/2013 - 14:30

Bhoppy -- I looked at your cat tree on facebook. It's awesome! The sturdiness of it shocked me too. And I was initially worried that my cats might knock it down!!

The worst part of building it was getting that lower scratch pad level on straight with the 3 posts. I'd never want to do that again!
Thanks for sharing, Joni

gregmasciola

Fri, 01/02/2015 - 01:18

Funny, almost every time I'm looking for ideas or inspiration when I want to build something, I end up back on this site. I was searching for pictures of cat trees and this was the only one that made me say "Holy crap, that's EXACTLY what I want!" My cat will love it!

M0710NM4N

Mon, 04/27/2020 - 20:41

Not sure if anyone is still around to see this, but I fell in love with this tree the second I saw it. Wondering if anyone created a detailed plan and might have it handy or possibly a detailed sketchup and wouldn't mind sharing the save file?

In the event nobody has either... I'm planning on having someone else build this for me as I don't have the tools nor skill to do it myself. I have a few questions:

1. The tree base/platform, what's a good recommended thickness?
2. The platform for the scratchpad... is there any certain reason it's so much thicker compared to the other platforms?

Thanks.

whiteroses9

Sun, 09/12/2021 - 11:51

Reverse engineering this project, using just 2x4s. None of the photos show the undersides. How are the plywood pillow bases attached for the top and bottom of the cabin? and the base of the top viewing platform?

Cottage bedroom bookcase

Submitted by yhaas on Thu, 10/29/2015 - 20:42

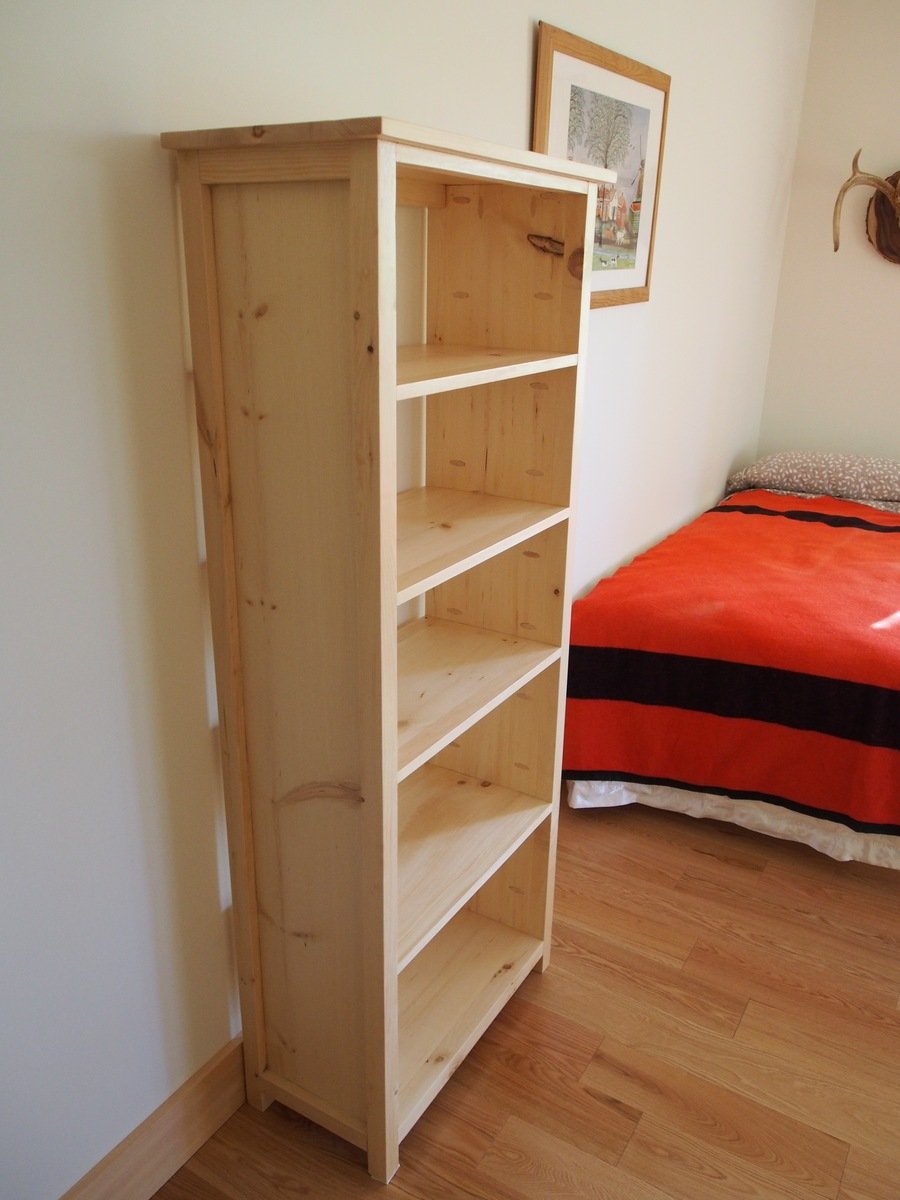
I used 1 x 10s to make the bookcase a little shallower, and left the back open. Thanks for the great plan.

Built from Plan(s)
Estimated Cost
$100
Estimated Time Investment
Weekend Project (10-20 Hours)
Finish Used
Varathane diamond finish water-based polyurethane, satin.
Recommended Skill Level
Beginner

Small Cedar Woodshed

Spaced out the boards to allow airflow; did a sliding barn door and metal roof. Thanks for the plans!

Comments

Seasonal And Holiday

Raised flower planter beds

Submitted by stcarroll on Fri, 08/26/2011 - 10:36

We bought a house with a death trap for a back step. Until we get to re-doing the entire back patio area I needed a temporary solution to keeping the kids from toddling off the back 'ledge'. I modified Ana's plans to make a nice border around the step so kids can't fall off when they are coming and going from the backyard. We had left over cedar fence slats from when we did our fence last spring...PERFECT and FREE!!!!!

Estimated Cost
Free!!!!
Estimated Time Investment
An Hour or Two (0-2 Hours)
Recommended Skill Level
Beginner

Comments

Sandie

Fri, 08/26/2011 - 14:56

This is a really good idea - much better than spending $ on a banister or rail that you will need to remove later! Good parenting, too!

Sunny Cupcake Play Kitchen!

My friend and I built this out of white pine, using plans from here. We threw our own changes and special touches on it and used the fridge plans to build a pantry also. We painted it yellow, and used vintage inspired and cupcake fabric prints. I also found a miniature ice cream parlor set on Craigslist. I painted to table top and we upholstered the seats with the same cupcake fabric. A few kitchen accessory kits and VIOLA! My girls LOVE this and it cost under $200 to build. I would recommend building over buying ANYTIME you can! Thank you Ana White and my friend for making my girls' Christmas the best yet!

Estimated Cost
$200
Estimated Time Investment
Week Long Project (20 Hours or More)
Finish Used
Olympic One Paint+Primer in Golden Slumber. Semi-gloss.
Recommended Skill Level
Beginner

Comments

linzi_sparxxx

Wed, 03/07/2012 - 15:14

They stood there, one staring at the kitchen, one staring at the table set, for like 15 seconds with their jaws dropped. It was priceless. I had so much fun, and it's really so easy to do. As long as you have the tools!

linzi_sparxxx

Fri, 03/09/2012 - 07:55

Thank you! I absolutely love this kitchen. I recommend building over the cheaply mass produced ones you can buy at Walmart and Kmart. I'd like to see some pictures of yours too!

Momofmarlee

Tue, 12/03/2013 - 19:45

Hello, I am about to start building this project for my little girl. I am so excited! I was wondering how you did the knobs for the oven and stove. I love them. Do they turn? Did you find an already round piece of wood or did you have to cut it that way? I love love love your kitchen. So creative and so many great ideas! Lots of love went into that I can tell. Thank you for your help!

Tsu Dho Nimh

Wed, 12/04/2013 - 03:03

The knobs look like those "mushroom" cabinert pulls with a line painted on them for the temperature. They seem to have a round settings dial painted behind them.

If you want them to turn, just don't tighten the bolt completely.

Outdoor Canopy Daybed - First Project!

Submitted by Anonymous (not verified) on Fri, 07/28/2023 - 14:16

This was the first time I ever built anything - before this is hardly used a drill. It was big for a first build, and I did it entirely alone aside from a few text messages with questions. I added a couple little end tables to it for a book and a drink, and it’s now my favourite outside summer spot.

Facebook user @robyn.marie.3572

Built from Plan(s)

Rustic hall tree with alterations

Submitted by Anonymous (not verified) on Wed, 02/19/2020 - 11:36

A few alterations I made to your original design plans:
1. I went with 1/2” plywood and bead board for the back. This gave it a little more stability and a complimentary design element to match other pieces I’ve built.
2. I used 2x3’s instead of 2x2’s since the selection was much better at the lumber store.
3. For the bench top I used a black walnut slab cut to size finished with a danish oil and satin poly top coat.
4. Instead of the X, I enclosed the sides and used a pair of parallel 2x3’s backed with poplar boards cut to size.

Thanks! I hope you enjoy.
Chad Cote

Built from Plan(s)
Estimated Cost
$150
Estimated Time Investment
Weekend Project (10-20 Hours)
Finish Used
Watco walnut danish oil
General Finishes satin top coat
General Finishes Antique White milk paint
Recommended Skill Level
Intermediate

Comments

Rustic Console - my first project

Submitted by loulie on Thu, 05/15/2014 - 09:51

Rustic console -first project..plan on adding X to ends

Estimated Time Investment
Weekend Project (10-20 Hours)
Finish Used
Top is the infamous steel wool vinegar solution with wipe on poly
Left the shelves as is since the wood was so pretty
The rest is a combo of vinegar stain, then a custom mix of gray paint wash and emerald green...♥love it!.
Recommended Skill Level
Beginner

Comments

A's Full Size Loft Bed

Submitted by Hulsberg on Sun, 08/12/2012 - 14:58

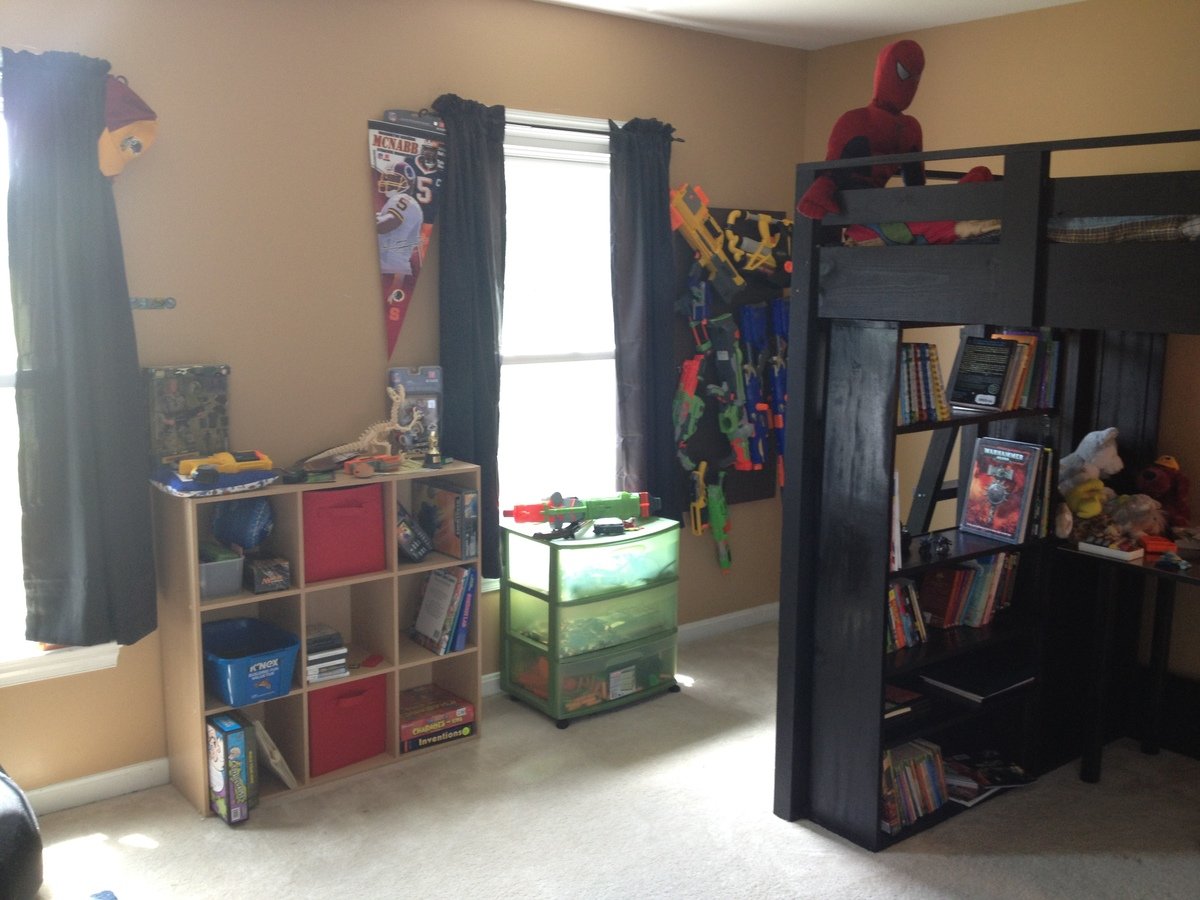
My son needed more room in his bedroom...and to be rid of the very girly furniture he inherited when he moved into his "big boy-ish" bedroom. At 10 yrs old, it was high time he got a bed that wasn't pink-tinged, white washed pine with 4 posters and enough curlicues to choke a forest. He also needed a desk which I couldn't really fit in his room with the armoire and chest of drawers that came with the Queen sized bed.

So off to Ikea we went and I saw a black loft bed for $300, but it was really, really high which meant I would have to cut it down and it was not sturdy at all. I looked at PB and saw the $1800 bed. Um, no - that wasn't happening. So, off to Ana-White I went and I'm so happy I did!

I built the full sized version of these plans and, to keep costs down, used wood I had on hand. This meant I had to work a bit at the cuts, but it all worked out.

Mods:
1) I modified the railings to have the ladder at the end of the bed to keep away from the ceiling fan.

2) Because I put the ladder at the end of the bed, I got very nervous about having a soon-to-be teen climbing on to a ladder secured to a 1x10 that was only connected to the side railings with glue and screws. So I sandwiched extra 1x3s over the bottom rails and attached them to the top railing.

3) I was very nervous about making sure that the bed was adequately supported so I put a 2x4 down the center instead of the 1x2.

4) I went a wee-bit overboard screwing things together to the point where it's a bit embarrassing and now I have to paint over the screw heads.

5) I made the ladder treads with 2x4's, modifying the inside spacer board cut lengths.

Because I had quite a bit of lumber on hand, the bed only ended up costing me about $90.

For the bookcase, I did end up buying the 1x12s and the adjustable shelf railings. I made the book shelf the entire width of of the bed and split the two sections based on width of the 1x24 board I bought for the desk. I only put the backer board up half way so that the daylight could get underneath the bed and make it not so cave-like.

The book case cost me about $70.

The desk was the easiest...but most costly item. A 1x6x24, 4 table legs and the table leg mounts ran me about $80. The plexiglass top that I had cut for the top cost me about $80.

Time wise, this would have taken me a lot less time than the 4 months it took - but I worked on it as I could and when I could, by myself. I got some friends to help me bring it upstairs and put it back together, but it was mostly done when I could fit in some time.

My son LOVES this and it really does give him so much room!!! Thanks Ana - I really appreciate it!
Built from Plan(s)
Estimated Cost
with paint, screws and bookcase hardware, about $450
Estimated Time Investment
Week Long Project (20 Hours or More)
Finish Used
gloss spray paint / primer in one.
Recommended Skill Level
Beginner

Comments

Jennifer P (not verified)

Fri, 01/18/2013 - 07:38

Hi!

To modify this to be full sized, I just added 15" to the width of the bed. Ana said this in the plans:

Cutting Instructions:

Converting to Full Size This bed can easily be converted to full size. You will simply need to add 15″ to all boards that run parallel to the ends. This includes the planks, end top pieces and the slats. Shopping list will need to be adjusted as well.

So I modified the cuts to the head and foot board parts and the full size mattress fits perfectly.

For the shelving underneath, I just looked at some of Ana's other plans for shelves and winged it.

Simple Composting Toilet Outhouse

Submitted by Emillie on Thu, 06/18/2020 - 13:36

We built this composting toilet as one of the first things we did on our piece of vacant land. (How can you build anything else without somewhere to go when nature calls?)

An eco-friendly design was important to us, so we used cedar fencing instead of plywood. Otherwise, we followed Ana White's simple outhouse plans. It came out perfectly! It even has a rain barrel for hand washing.

Estimated Cost
800
Estimated Time Investment
Weekend Project (10-20 Hours)
Finish Used
We stained the outside with a semi-transparent stain and varnished the inside with an outdoor varnish.
Recommended Skill Level
Beginner

King Farmhouse Bed

Submitted by Anonymous (not verified) on Tue, 10/01/2019 - 21:30

Fun weekend project to build together. We are loving the fresh look to our master bedroom.

Estimated Cost
350
Estimated Time Investment
Weekend Project (10-20 Hours)
Finish Used
General Finishes Snow White milk paint with Satin Topcoat
Recommended Skill Level
Intermediate

Comments

Square Picnic Table using Deck Boards

Submitted by Anonymous (not verified) on Fri, 07/07/2023 - 11:32

I used deck boards instead of 2x6 for the top and seats; this lightened the table overall while negating the need to sand and finish the boards.

I also used a cedar-tone treated board so staining wasn't necessary.

Kelly S.

Built from Plan(s)
Seasonal And Holiday

Hand made vanity mirror/door

Initially I was simply going to replace the old medicine cabinet with a mirror but my husband insisted that he needed a medicine cabinet. So I built the cabinet. Then I built the mirror. I wanted the mirror to stand upright but the width of the hole left behind by the old cabinet was too wide. I then tried to have the right side of the cabinet remain open but then realized that the door would not open because of the height of the faucet. In the end I had no choice but to make the door horizontal.

Though it's not what I wanted and it is not centered like I would I liked it to be I think it still turned out fine. And the mirror looks fantastic! Better than the pics show.

Most of the wood used were scraps from other projects. Including the trim. The one thing I bought for the project was a mirror that turned out to be the wrong size. It was too large and I did not want to cut it so I used the mirror from the old medicine cabinet. It did have hole where the door handle was which I tried to fill. Now I just try not to look at it. lol

Built from Plan(s)
Estimated Cost
$20 for cabinet hardware
Estimated Time Investment
Day Project (6-9 Hours)
Finish Used
Minwax 1-qt. PolyShades Espresso Satin Stain and Polyurethane. I applied it with a sock like I did the vanity but then I did the last coat with a high density sponge (on a stick). A total of 3 or 4 coats. Lost count...
Recommended Skill Level
Beginner

Wood Storage Box

Submitted by Joni on Sun, 03/18/2012 - 10:42

My wood scraps were definitely getting out of control, and I needed something to store the wood vertically. I had some spare wood (free from Craigslist), so I put together a wood storage bin. All in all, the project cost me the price of some Kreg screws.

Estimated Cost
Free!
Estimated Time Investment
Afternoon Project (3-6 Hours)
Recommended Skill Level
Beginner

Comments

hoffer5353

Wed, 06/06/2012 - 13:21

I have been struggling to organize my space because my lumber is on one of my work spaces. I have the perfect space for that, thanks for the great post!

Outdoor Pergola with Seating Built-in!

Submitted by Anonymous (not verified) on Sun, 08/27/2023 - 12:14

Pergola outdoor room plans modified to make side seating instead of side tables. Left sides open. Added cute crochet swing bench. Anchored to concrete slab with iron plates and added decorative wood ties that match footing. I've gotten so many compliments and no one believes I made this!

Kristen P.

Built from Plan(s)

Comments

Seasonal And Holiday

Raised Cedar Beds

THANK YOU Ana's your plans are a life saver and pocket book saver as well. You make your plans so easy to follow and use. For my project I used the cedar fence pickets and redwood 2" x 2" stakes that where on sale at the orange box store for "6 pack bundle" for only $.50 each. All I can say is SCORE! ;') Since we live in Arizona I treated all the lumber with a outdoor weather proofing wood finish (Cedar Color), lined all the interior beds (only the Wood Sides) with 4 mil plastic to keep the cedar from absorbing all the water and wired mesh on the bottom of the garden prior to adding dirt. This keeps my local rabbits/other creatures from eating my roots from the bottom up. And I have my dog from the top side. We are already a 100 degrees here and we needed to get our seedlings in a garden asap. Thanks Again for the Plans, Ana! I will be making more of these garden boxes to come.

Estimated Cost
$15
Estimated Time Investment
An Hour or Two (0-2 Hours)
Finish Used
Behr Premium Transparent Weather Proofing Wood Finish (Cedar Color)
Recommended Skill Level
Starter Project

Comments

Mariel

Thu, 08/08/2013 - 09:39

Love this! We are new to Phoenix - originally from the Midwest - and I really would like to add some raised beds to our backyard. I appreciate your comments on how you adapted these for the desert! May I ask what side of your house they are on? I'm thinking to put mine on the east side so they get morning sun, but not the scorching afternoon rays. Thanks for your AZ advice!

Seasonal And Holiday