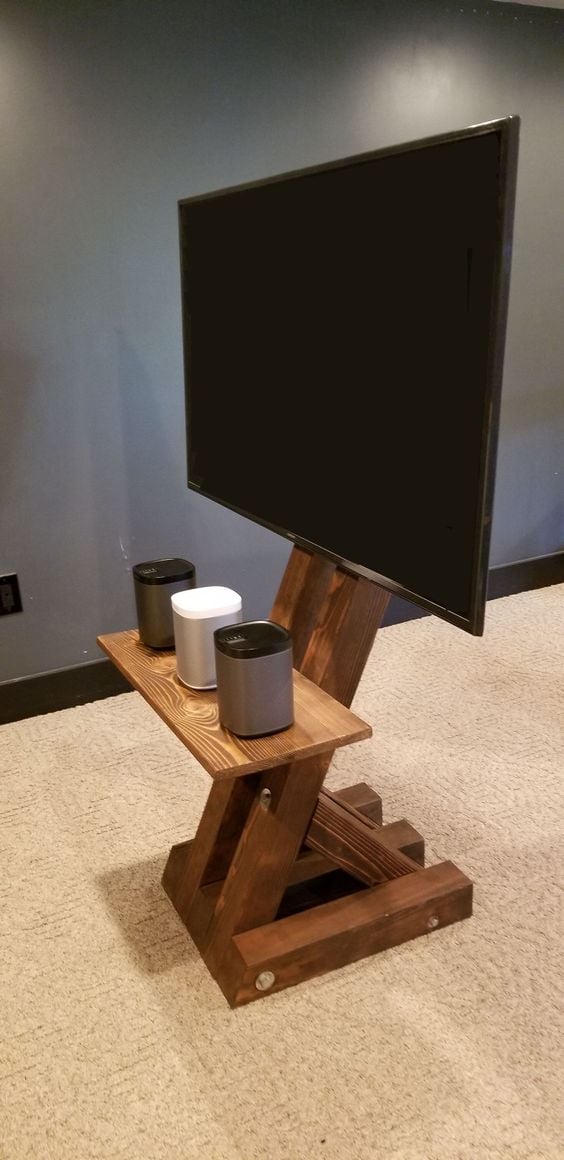
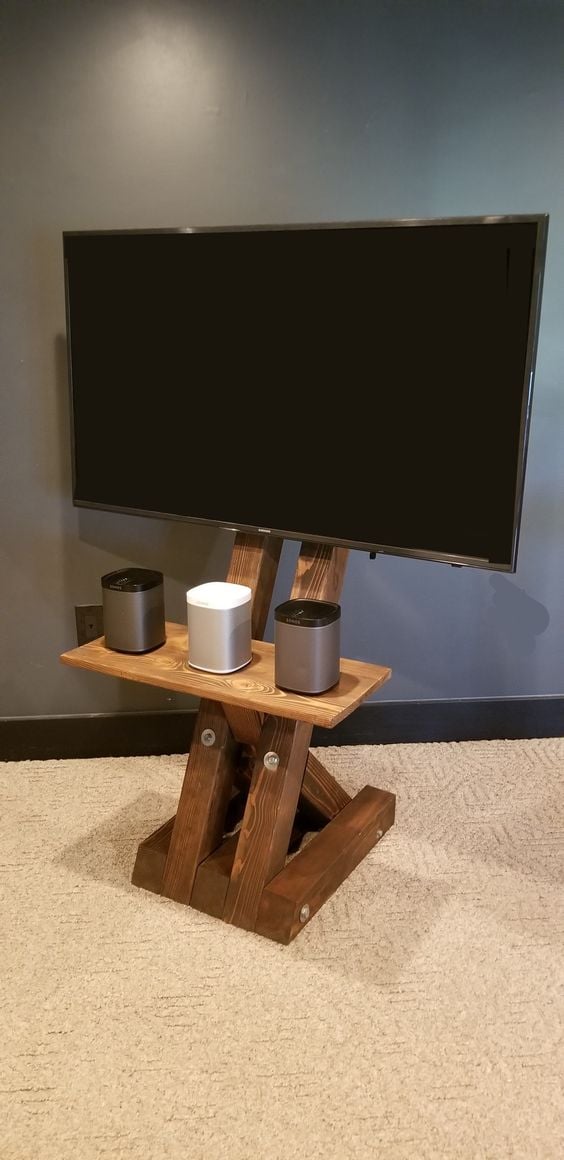
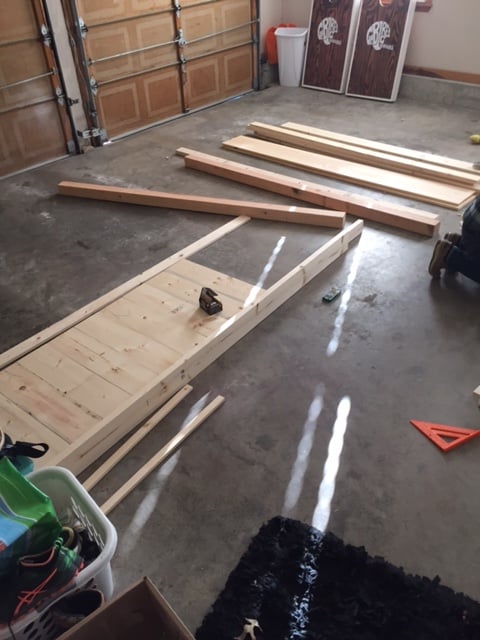
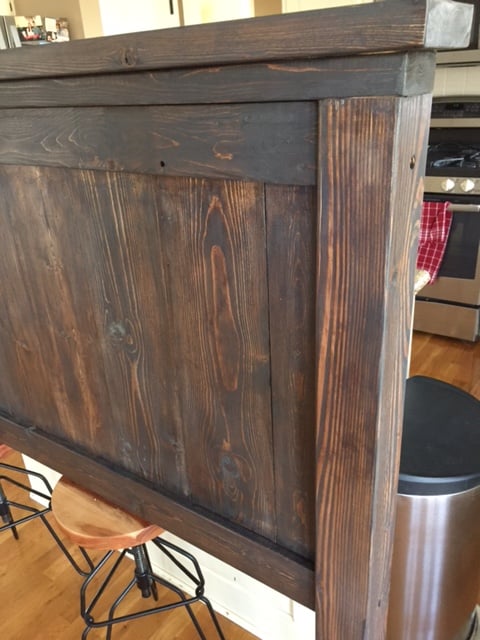
Modified 6 cube, we call it Console Doce
I built this for a friend of mine - also a client - built it to her needs and come out with a really cool bookshelf/tv console!
This was my first project building something from this site. I absolutely love it! We didnt add the X's because the miter saw was at my dad's house, which I was kind of sad about, but I think it still looks good. Not too bad for mine and my husbands first build!
The Gíaffe Free Standing TV Mount. Handcrafted and engineered to use its center mass to deliver strength and balance for tv sizes 30-60". Display your television without detracting from your home's decor. The Gíaffe Free Standing TV Mount is the perfect solution and its rich finish will be perfect for any house/office room.
Wed, 03/11/2020 - 07:16
I absolutely love this!! Are there plans available?
I modified the plans slightly to go taller so it could fit a standard propane tank. I also added a hinged lid based on an image I found on Pinterest that did something very similar. I still need to sand and stain it next weekend.
Like others, I had a little trouble keeping the fence planks from splitting when screwing them to the 2x2 legs, since there was about an 1/8” gap between. I tried to find some scrap to fill in the gap and didn’t overtighten the screws. The lid was made entirely of 1x3”.
Ana I came across your open bottom garage bench design and really liked the concept. Inspired by your design I put this together in our laundry/mudroom and am really pleased with the result. As you described, being able to clean under it is a huge benefit and the whole bench was less than $200 even with the solid oak boards I joined and edge routed for the top. Thanks for the inspiration and all of your project posts.
Fri, 12/02/2022 - 08:34
WOW, this is gorgeous! Absolutely love the color choice the oak top and the hardware, bravo!
I made the 4 chairs to complete the dining suite. The table was made from the X based pedestal table plan.
The timber was all cut from 200mm x 50mm pine sleepers and finished with Cabots clear finish.
Mon, 03/06/2023 - 13:35
What a beautiful set! Thank you so much for sharing your amazing work:)
Built the nested grill station just in time for the 4th. So much fun building this, thanks Ana so much for the inspiration! Chris
I had to convert all the measurements from inches to mm, but it was worth the brain drain. I didn't add the garden, but extended out the chicken coop. I am thrilled with the results! Thank you!
Fri, 12/03/2021 - 07:39
WOW, definitely worth the extra effort, just beautiful! I wish we could offer metric plans, may need to figure that out.
Wed, 03/23/2022 - 20:32
Did you change out the 2x4 and 2x6 on the lower half?
This little girls room needed a little happy birthday! I planked the wall with birch veneer, made simple box frames for the beds and desk, and attached them to walls with heavy duty cable. Then my friend added her designer touch, and made it cozy and girl CHIC!
Our local Habitat for Humanity puts on an annual event where they get folks to restore discarded or worn down furniture and sell them at auction. My wife and I participated last year and this year I was asked to build 4 dog houses and then they were going to let local designers/decorators finish them out.
I figured it would be easy to find a good dog house plan, but I was wrong so I had to come up with my own designs. I did not want to use plywood becauase I wanted them to look good. So I used 1x4's and 1x6's. I built them all just a little bit different, but the same basic design on all 3. Since I am not very good with circular cuts, did not do any fancy 1/2 circle doorways!
There are "after" pictures on the Blog. Thanks for looking!
I am loving my new garage shelves. They were my first woodworking project and very easy to do! I left the bottom right side open to fit my outdoor table and chairs in the winter (I live in Michigan). I also used thicker plywood than plan because my shelves are a bit deeper.
Used Ana's plan for chairs, coffee table, sofa and lounger. Stained and clear coated. Wife is happy. What can be better!
I used the trestle table and benches plans to make a cedar picnic table...
by Joe
I wanted to build a small shower bench. I used the Providence Bench Plans and just made it a bit smaller with a few adjustments. This bench is 35" long and 18" tall. I did not use the cross supports on the bottom because it was so short. Also, you will see that I turned the bottom stretcher and side supports flat/horizontal. I put the screws for the seat boards through the top down just because this was the easiest way for me to do it. The plans did not show in detail how to attach the seat boards from the underside. It just said "finally, the seat boards." I guess they probably used a pocket jig. I bought a pocket jig and used it in the couple of places, but this was my first time using it. I used brown, coated decking screws in the places I did not use the pocket screws. This was my first attempt at building anything and my first time to use a pocket jig. I used a natural wood stain and Behr Weather-Proofing since it will be in a wet area.
This was our first ana white build. Bed build took one Saturday - to finish up took another week or so working nights - most of our time spent on getting the color we wanted and sanding and finishing. Building the 2x4 frame took more time than anticipated as well. We are super happy with how it turned out.
First furniture project, first Kreg jig use.
Heavily adapted storage sofa plans. Used existing day bed mattresses. Made all wood surfaces finished with nice cladding, and all fabric portions removable and washable.
Added arms, and a back ledge. Ledge is hinged to allow access to wall behind so I can get to the outlets.
Lots of work, but it is AWESOME. Thanks for the inspiration Ana!
Sun, 01/22/2017 - 13:37
This is almost exactly what I want to do! I have a dog who loves to rub on furniture and I don't want upholstery. Why did you make the back thicker? Is it just for added shelf space along the back? Thanks for posting the pictures. Very inspiring!
Mon, 02/20/2017 - 07:18
Sorry for the delay in seeing your question. I haven't signed on to this site for a while. You are correct thinking that I wanted to have shelf space along the back. The sectional is the entire width of the wall and I knew that I would not be able to have end tables. I wanted a way to have a lamp and a place to put drinks, etc. As it turns out the arms of the sectional are great for holding my beverage. The shelf holds my lamp and some baskets with general stuff like the remotes inside. Thank you for the compliment.
Wed, 01/18/2023 - 09:28
Hi! I know this is a very old post but I would love try to make something similar to what you did in your storage sofa modifications - especially the wider frame and armrests. Any chance you wrote down your plans or have more pictures of your build? I also would love to understand how you made your upholstery/fabric removable. Did you follow any plan for making the cushions? Thanks in advance!
We made some modifications to the greenhouse to include a bench with three levels, a working bench and a square foot garden. We also put it on concrete to keep all the weeds out from the bottom as well.
First ever wood project. Under $200 in materials! Less than a weekend of work (for two people). Beautiful results!!!!! Built from plans on Ana-White.com The only change we made to the build was adding some additional support legs in the middle of the bed.
I wanted a large chest to store toys, books or blankets. I wanted it to be cheap to build and be rustic. This project turned out perfectly! I used 2" and 4"-wide furring strips and rope for the hinges and handles. I used 1/4" plywood for the bottom and made a groove with the router for it to slide into while assembling. I helped 16 girls make these who had no previous experience and they loved it!
Fri, 12/27/2013 - 06:21
Can you provide a lumber list for this? I know you said you used 2x4 but the lumber I see in the photo doesn't look like 2x4.
Thanks,
Ben
In reply to Lumber list by benjaminrogers
Fri, 12/27/2013 - 07:17
Hi Ben!
I used 1x4's and 1x2's. I have a shopping list and cutting list on my blog. I can't post the link here but you can click on the link where it says "Blog Link" under "About This Project"
Let me know if you have any other questions!
Fri, 12/27/2013 - 07:22
Thank you so much! Somehow I missed the link!
Ben
After looking at some terribly overpriced particle board vanities, I found the lovely Rustic Farmhouse Double Bath Vanity plans and decided to go for it. I think this vanity turned out much better than anything I could have bought with the same amount of money, and it will last much longer too!! Thanks Ana!!
Thu, 05/04/2023 - 10:26
Absolutely stunning, thank you for sharing your beautiful createion!
I've made another record cabinet, this time with a nice dark walnut stain. To see more details and plans visit my blog.
http://www.woodworkingfourdummies.com/
Cheers,
Ian
Comments
ehansen25
Mon, 07/15/2013 - 08:16
Sagging
This is exactly what I want to make with this plan, but are you worried about sagging in the middle. Did you put extra support underneath?
In reply to Sagging by ehansen25
tracysmith
Tue, 07/16/2013 - 08:36
I did actually add two
I did actually add two supports to the bottom with scrap 2x2's. I knew that this piece would house lots of books, a tv and possibly have a couple of little girls climbing on it. :-)
ehansen25
Thu, 07/18/2013 - 09:27
Stupid Question
Sorry it's me again, my husband and I have decided to use your model for our cube shevles and I just want to verify to get the new dimensions you just doubled the legths for the top, the shelves and and the side shelf trim correct? We are new builders and just want to get everything as close to right as we can! Thanks!
tracysmith
Thu, 07/18/2013 - 14:04
Not a problem at all, I don't
Not a problem at all, I don't mind answering questions. Yes, I just doubled the length of the original plan. If you click on my picture, my user info should come up and you can email me and I'd be happy to talk to you in a more direct fashion about this project and if I still have it on my computer in the form of a sketch up file, I will share more details with you. Maybe even a cut list and shopping list. I build everything in sketch up first. :-)
If you have any troubles contacting me, let me know and I will just get you my email on here. :-)
Vmc107
Fri, 07/19/2013 - 07:13
what ive been looking for!
This is exactly what ive been looking for toy storage in my living room! Is it possible to take off the tiny legs, and just keep the entire thing on the floor? I was looking to add some cushions on the top for seating as well. Will it be able to support the weight?