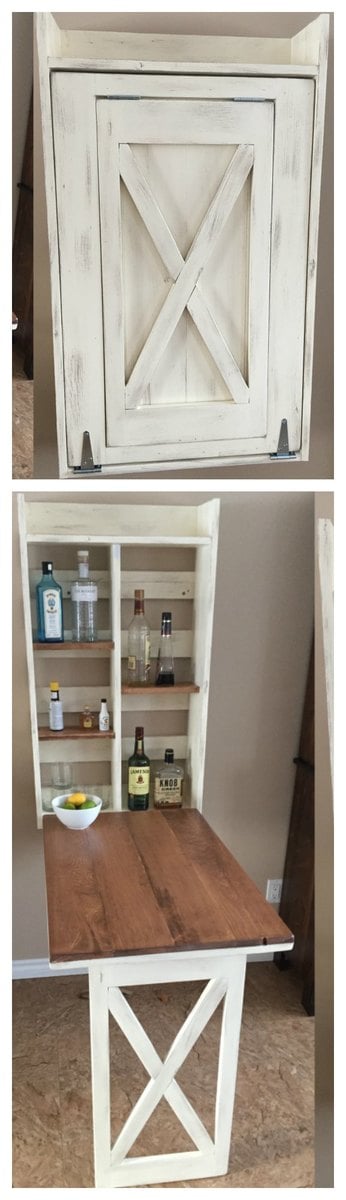
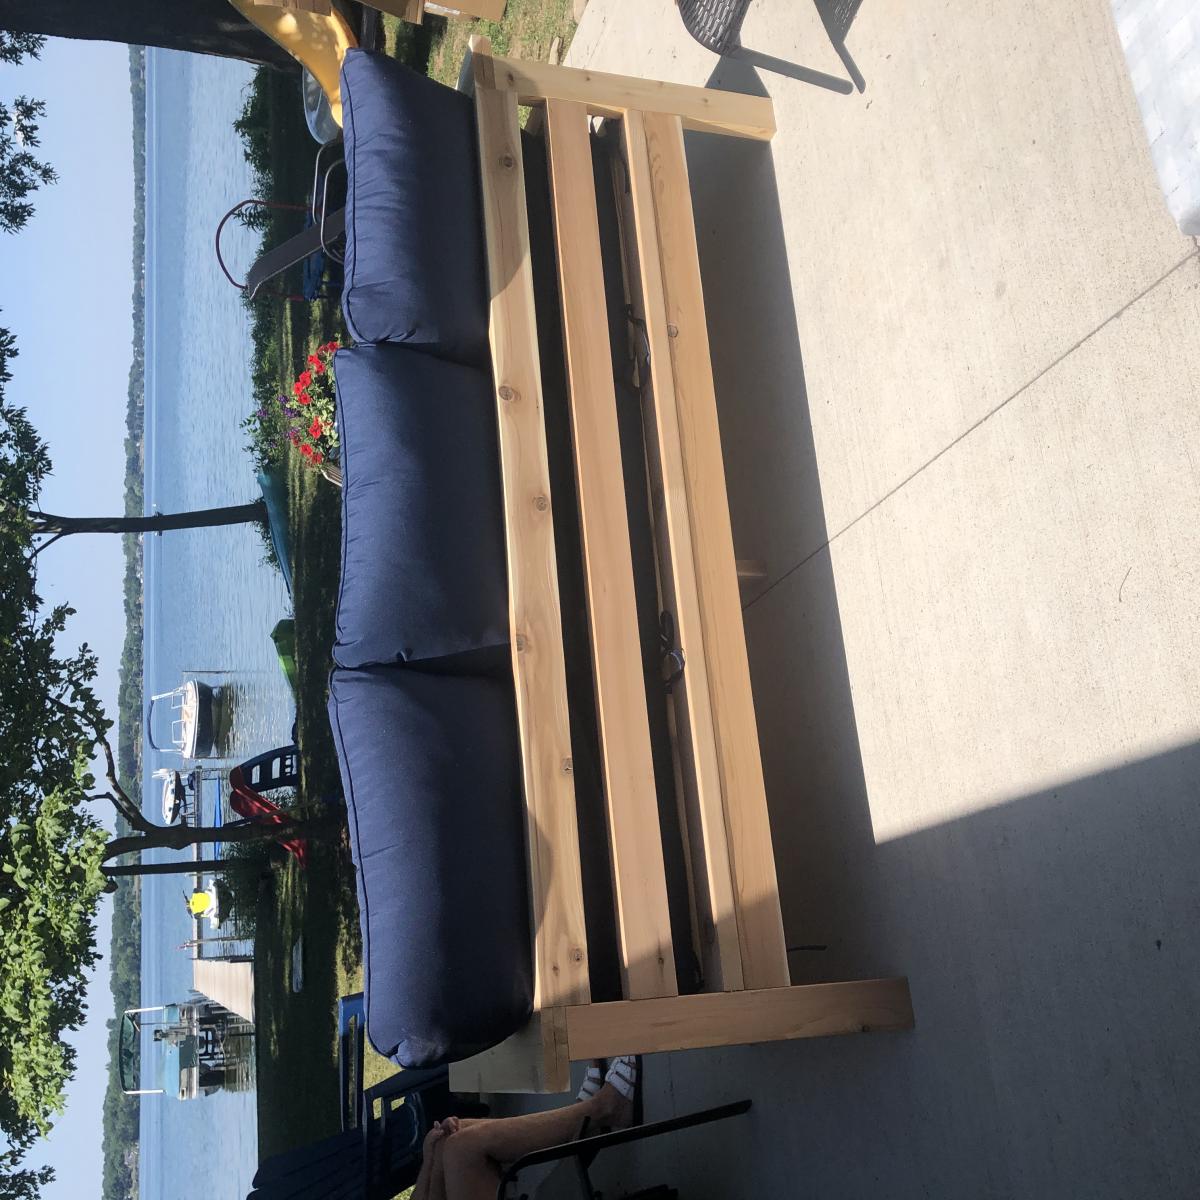
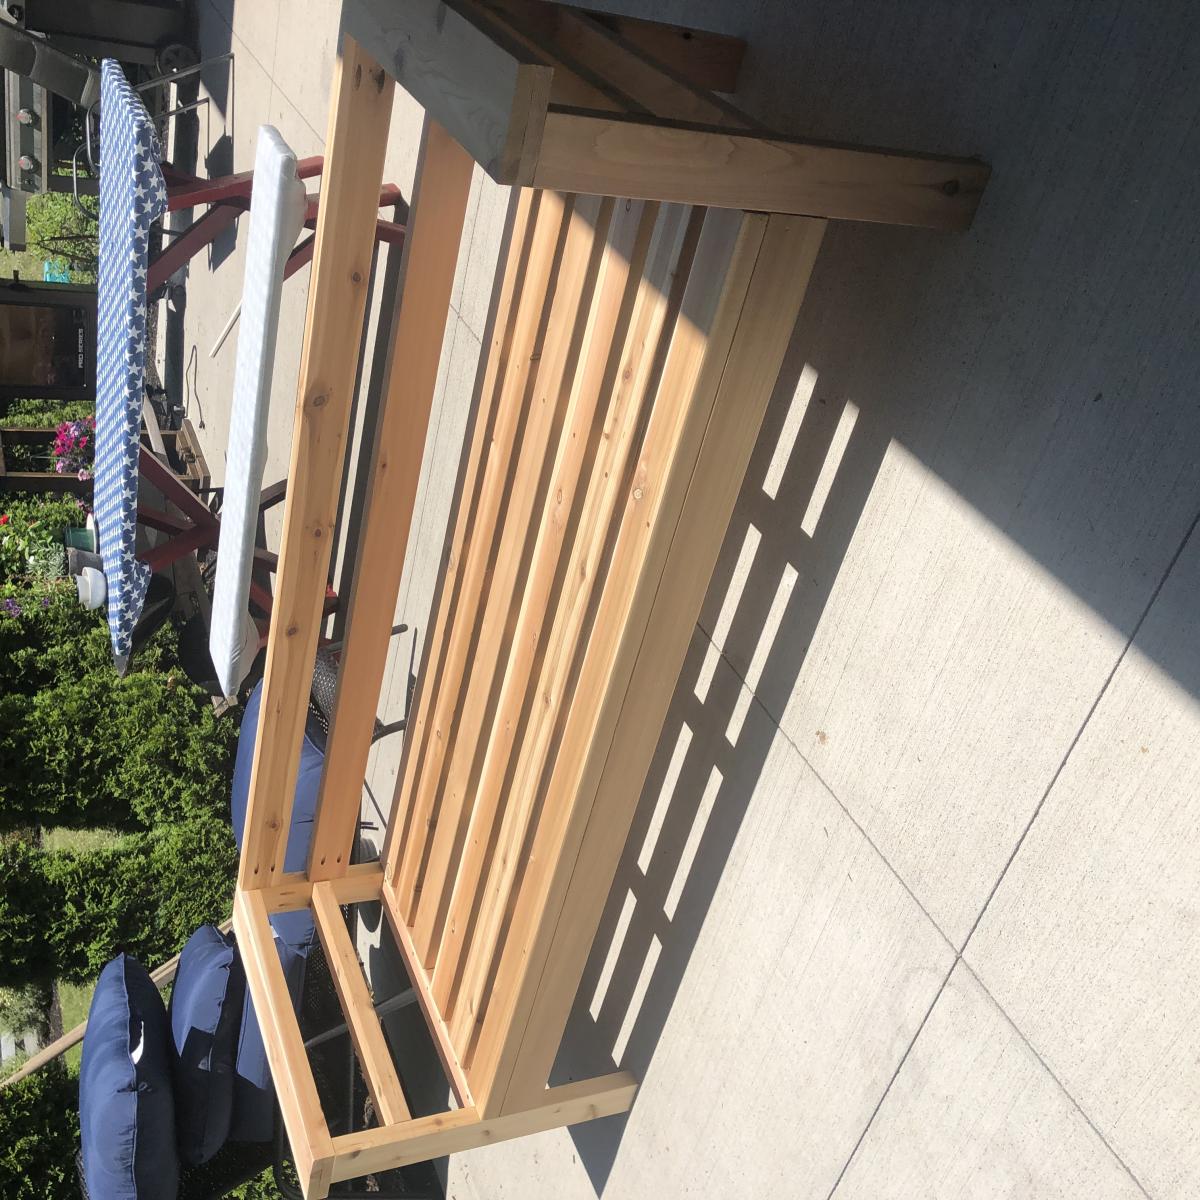
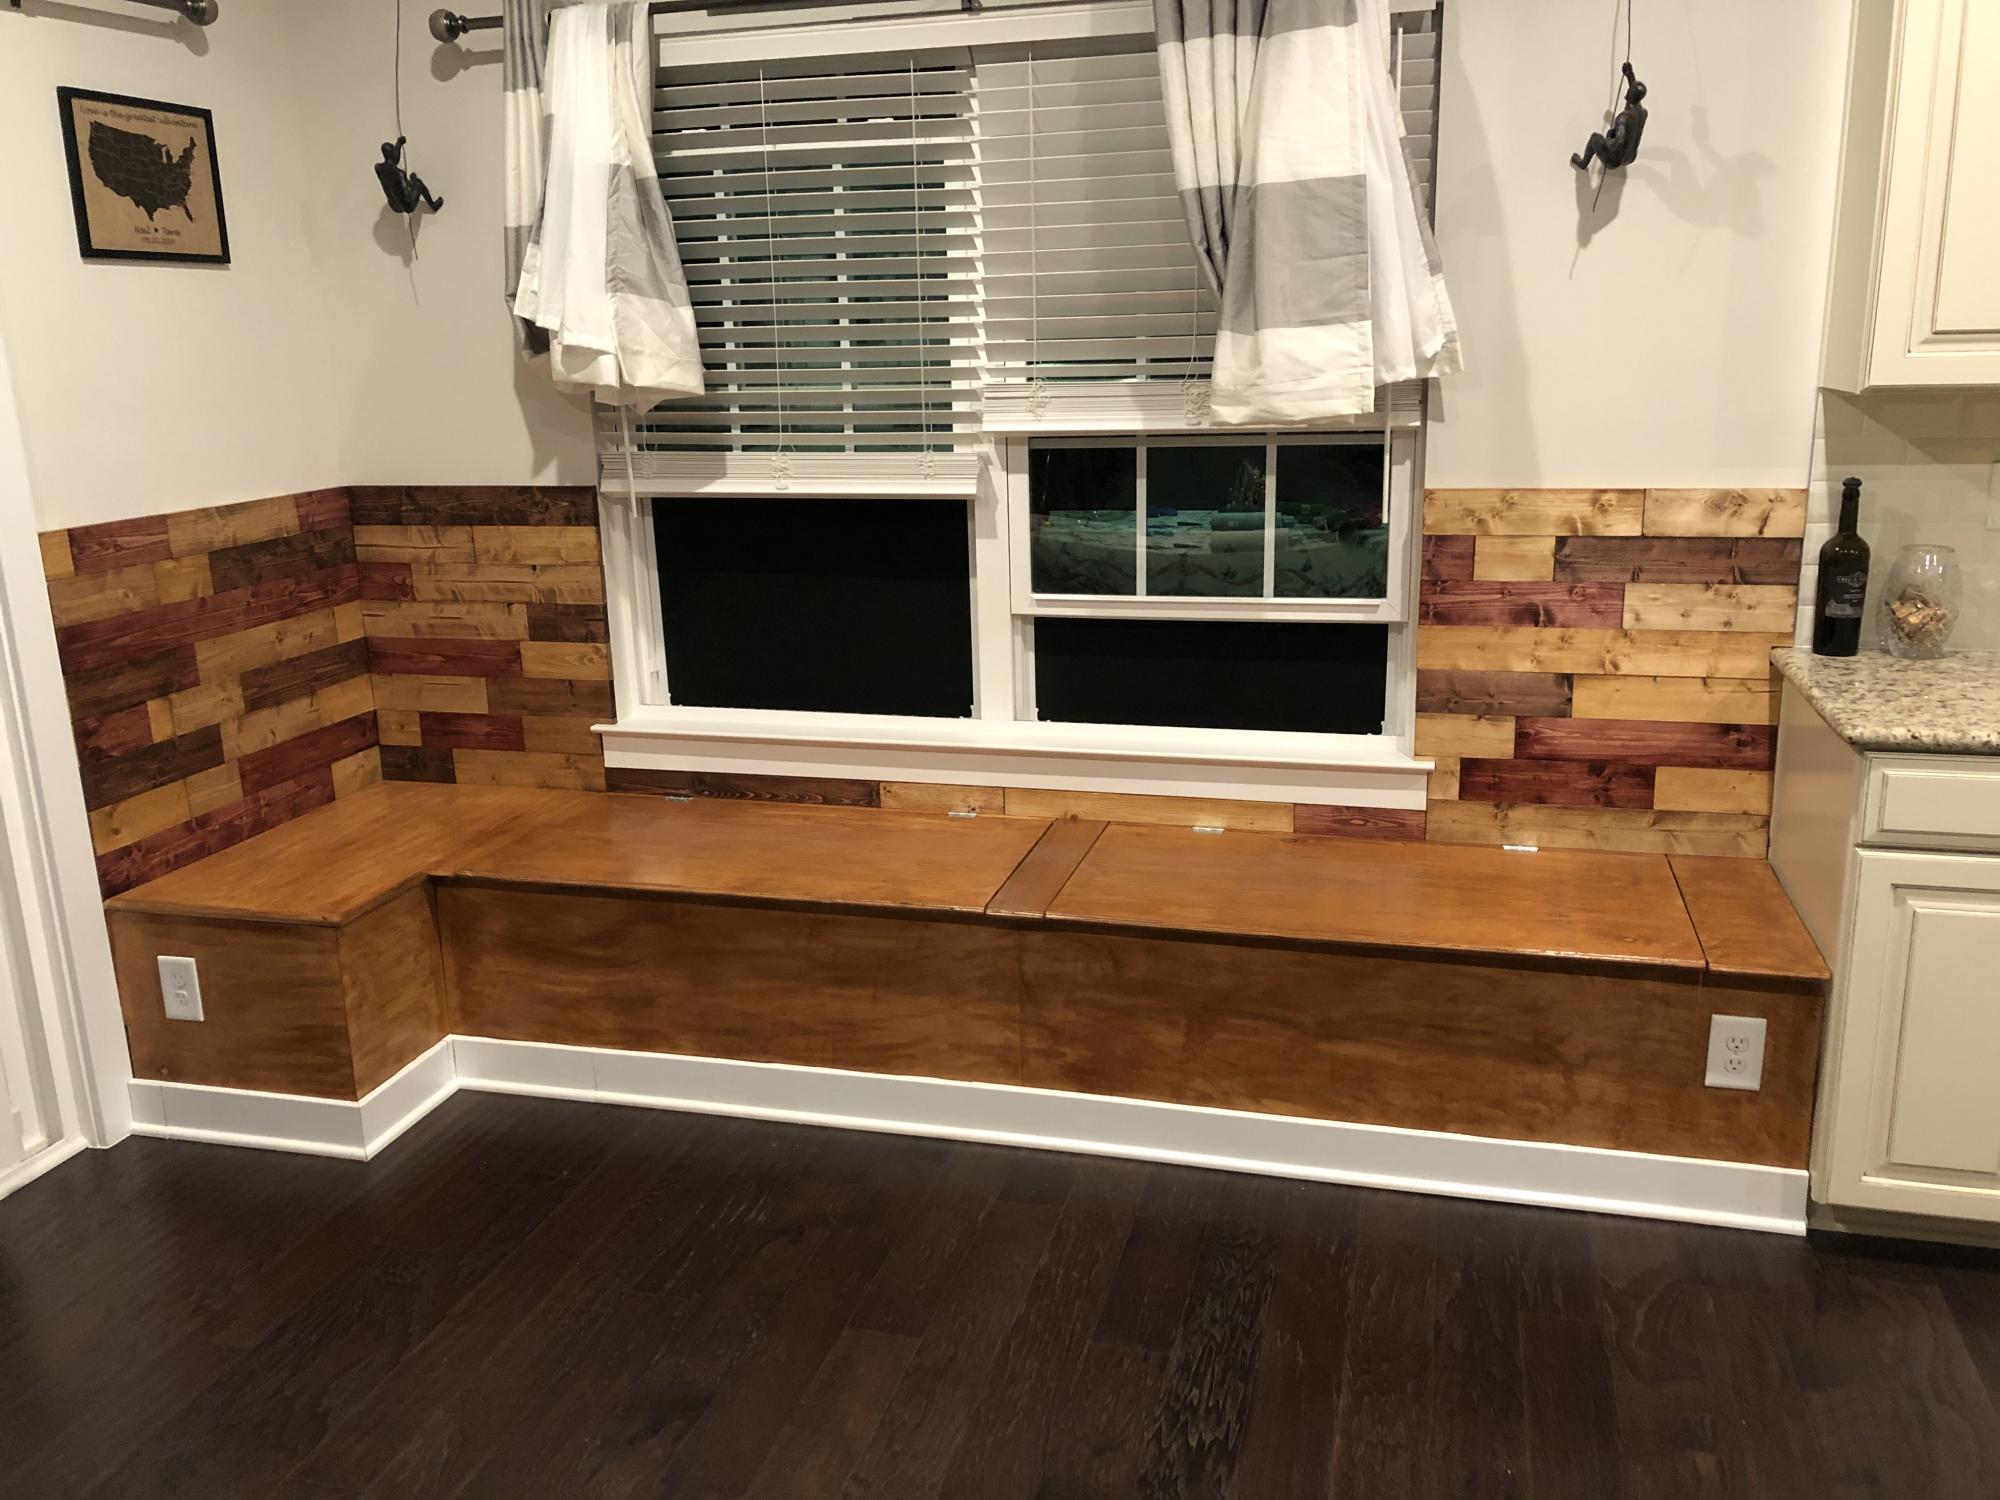
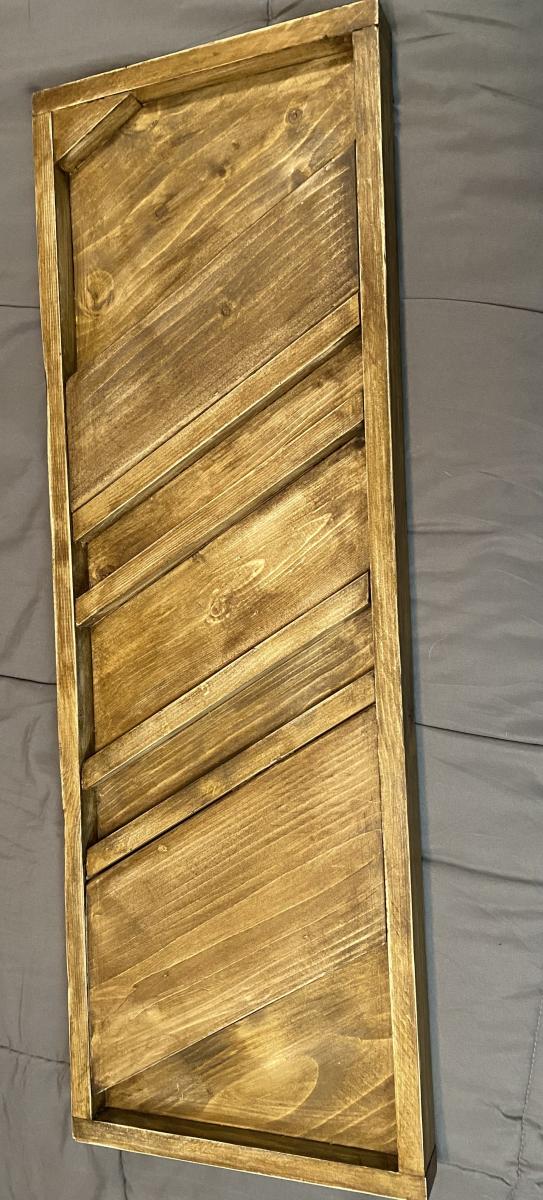
Drop down murphy bar
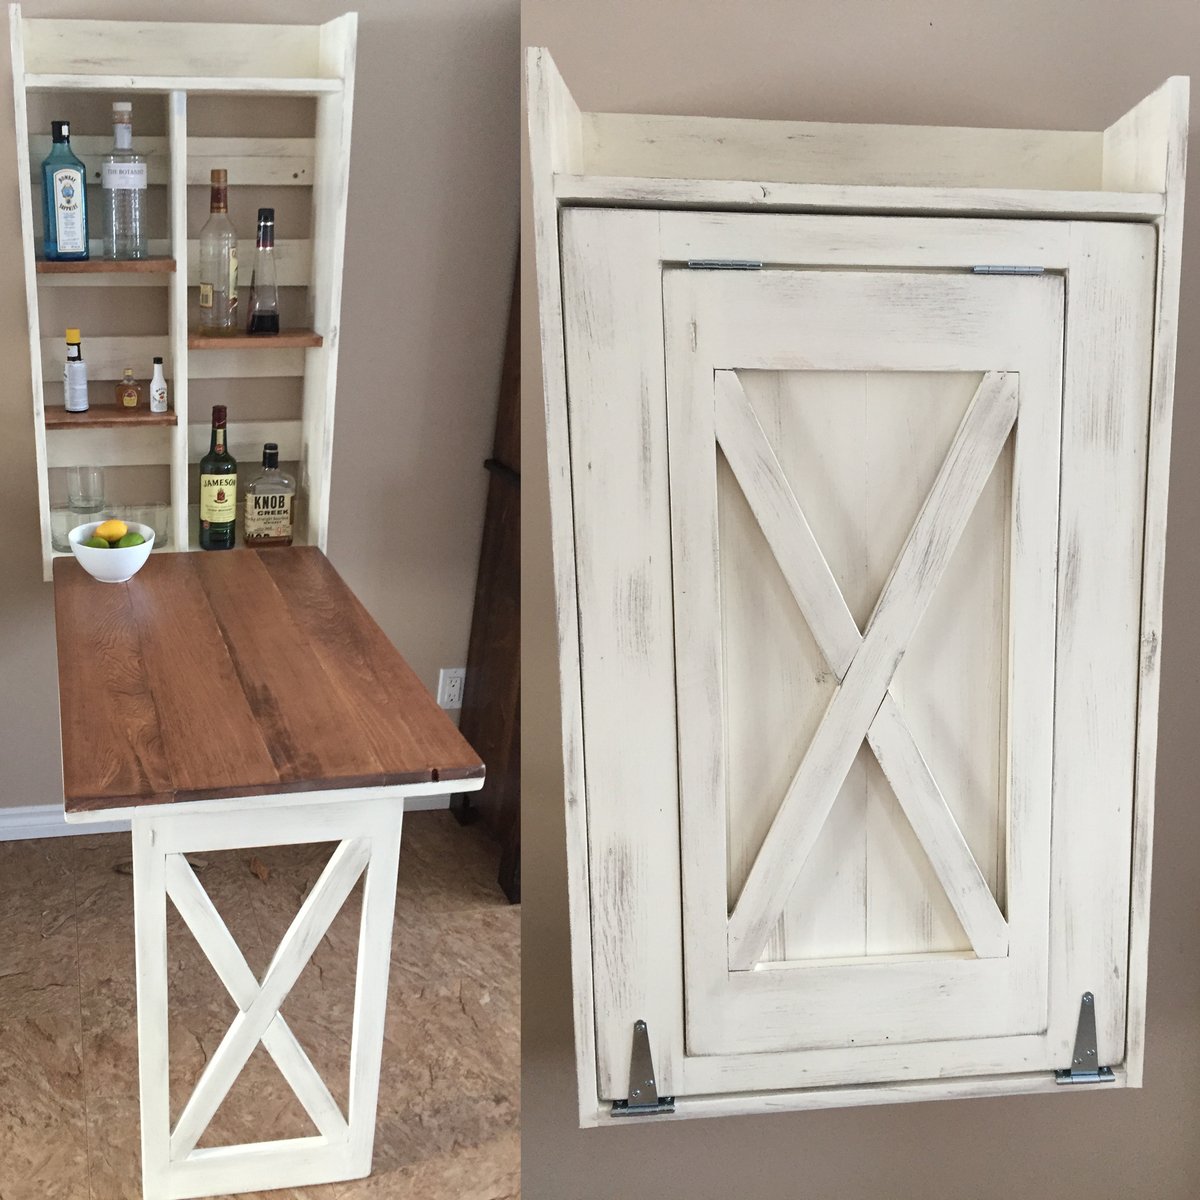
My attempt at the murphy bar featured on this site. Still have to add the sash locks. Added pallet crossmembers at the back, an x in the leg, and a french cleat to mount to the wall.
Built from Plan(s)
Estimated Cost
$45
Estimated Time Investment
Day Project (6-9 Hours)
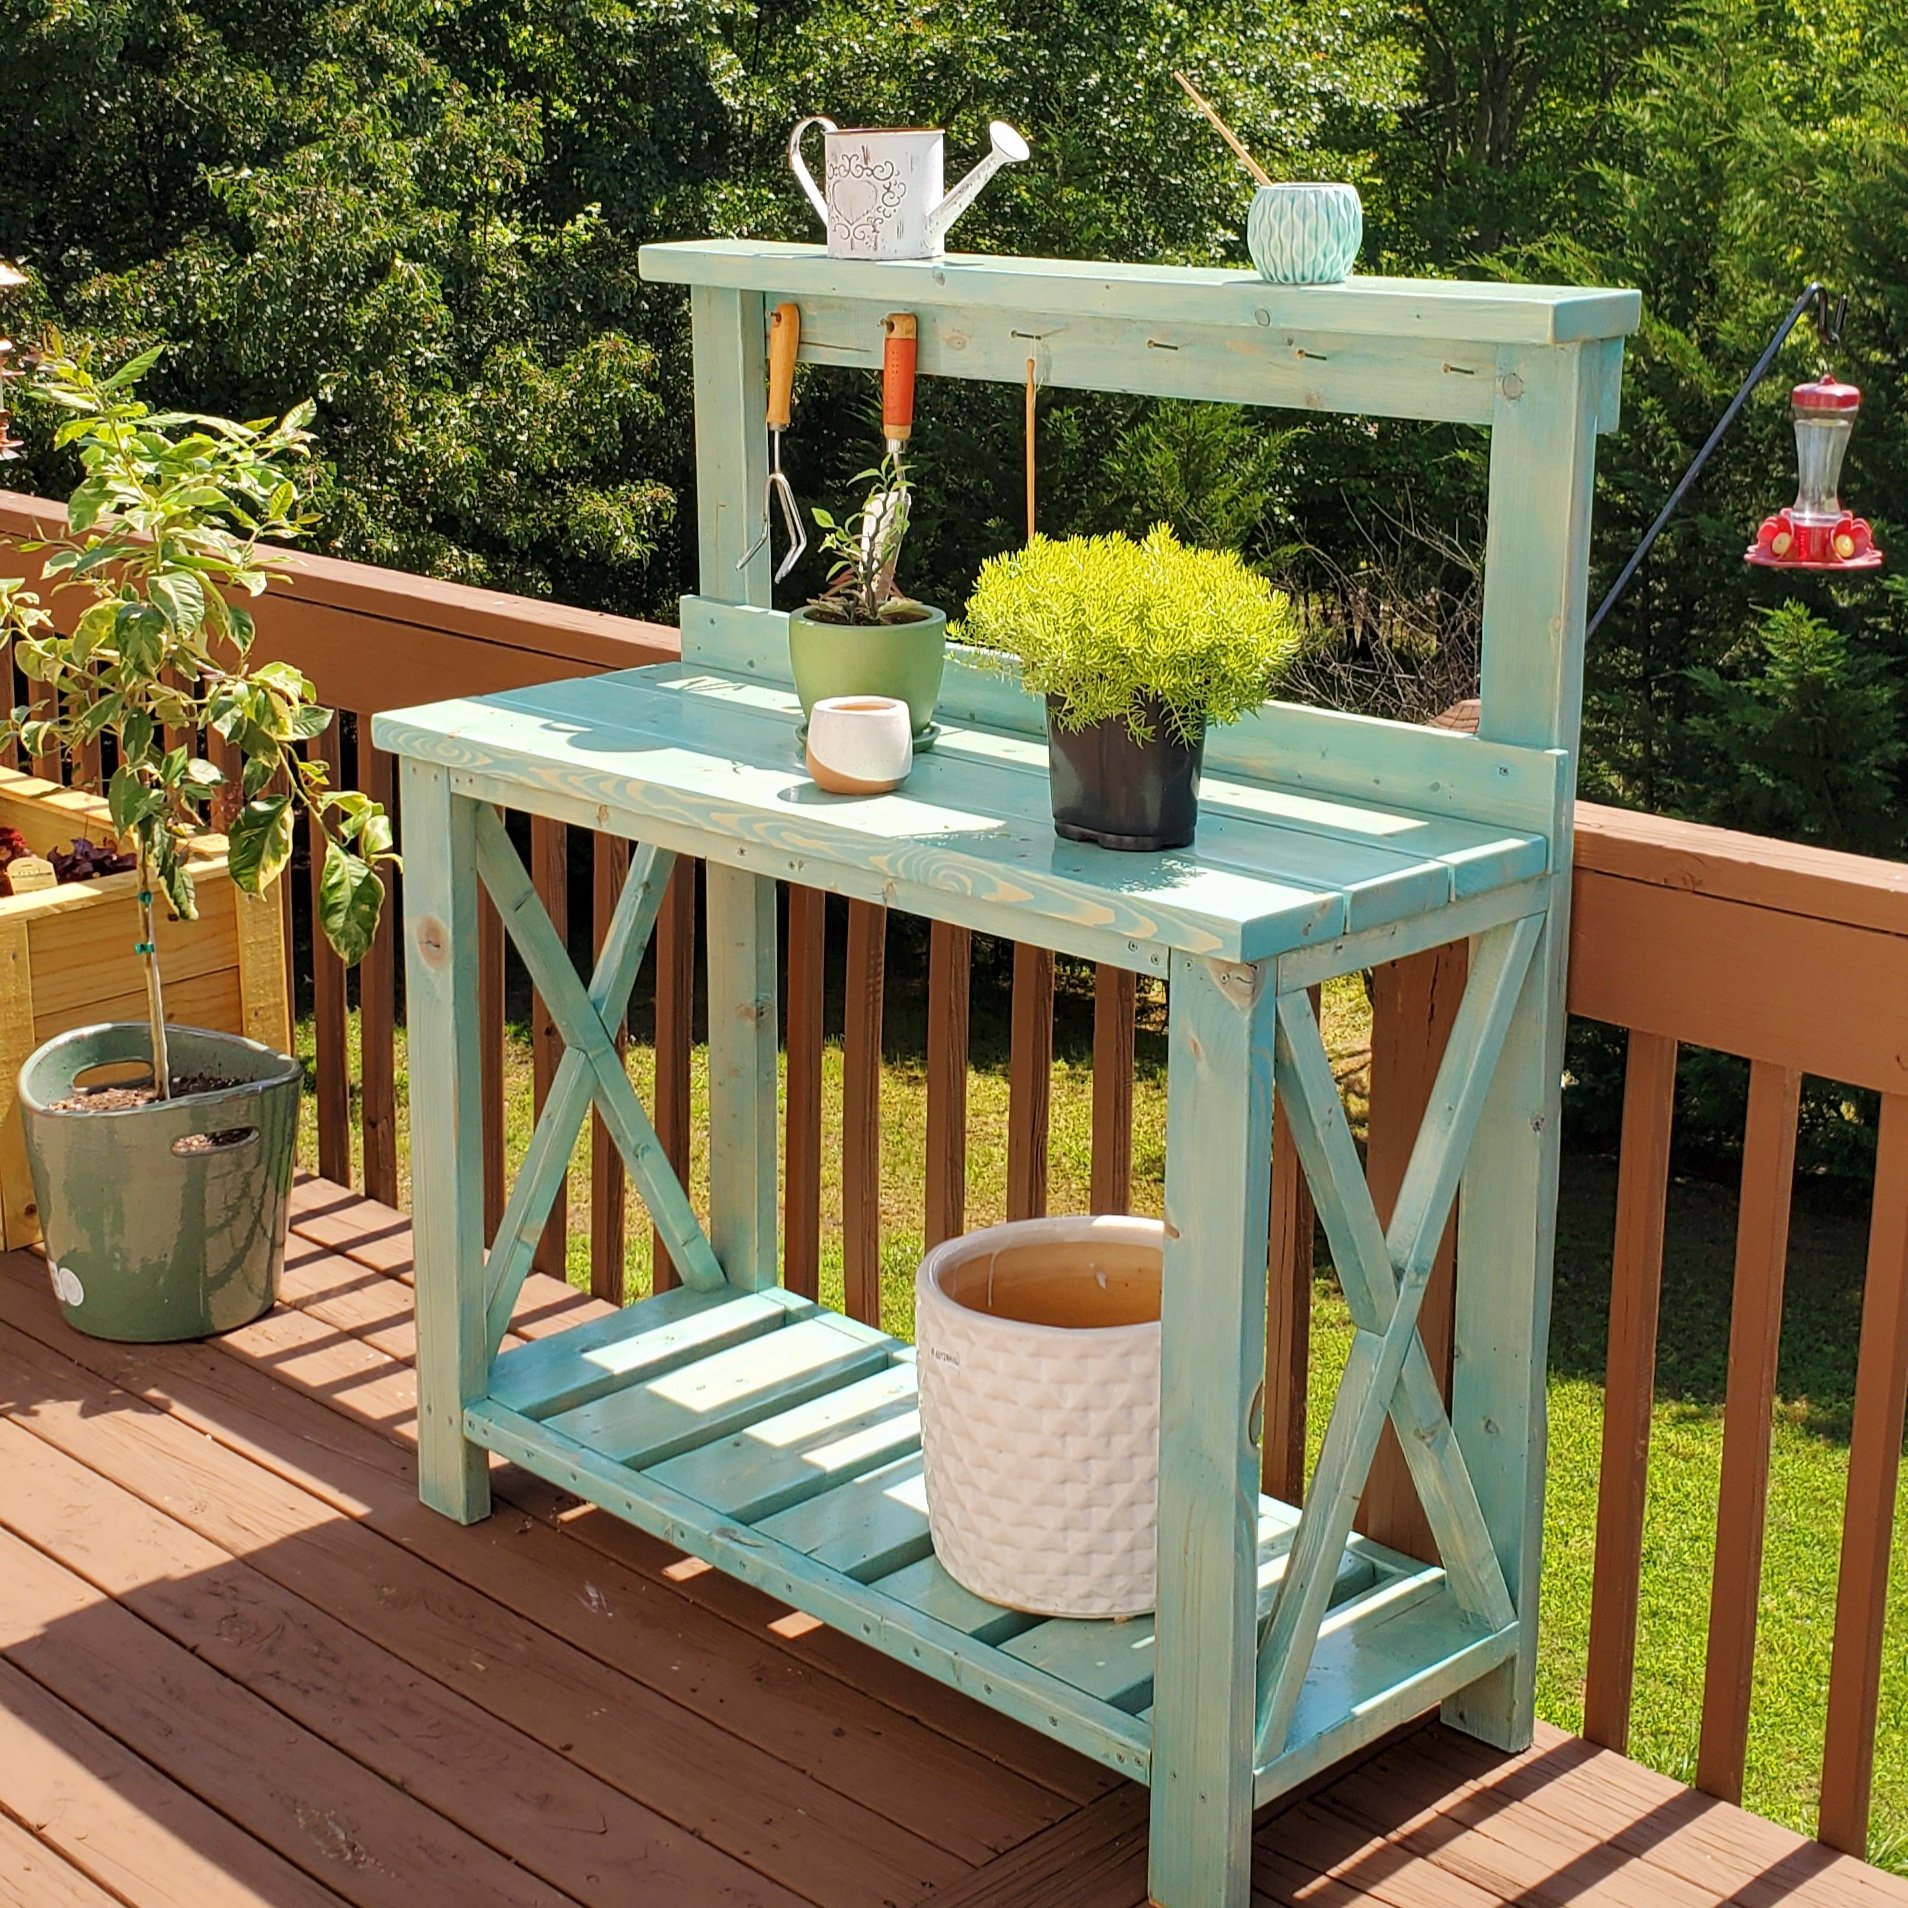
Finish Used
Special Walnut Minwax on the bar top and shelves, crisp linen matte latex and dry brushed casual gray for accents/aging. 2 coats of polycrylic for protection. If built again would pre stain and base coat all the wood before build time, then assemble, add accent brushing and spray the polycrylic.
Recommended Skill Level
Beginner


Comments
zannej
Tue, 12/31/2019 - 11:49
Material & cut list for modifications including the X?
This looks awesome! I want to help my friend build this for his kitchen. I've looked at the plans in the link & I'm wondering what modifications you made for the X pattern-- how much did it alter the material & cut list?
Would you please share your material & cut list for this?
boneill
Mon, 07/06/2020 - 20:24
Looks so good . Great job
Looks so good . Great job
bamasbabies48
Fri, 08/14/2020 - 09:28
I don't understand why I…
I don't understand why I cannot find the material list or the instructions for this every link takes me back to the pictures
Dee.Red
Mon, 10/12/2020 - 10:22
Drop down table
Drop down table
Whavereend
Wed, 12/08/2021 - 00:27
It is perfect wall…
It is perfect wall management which is used it in small space
melanieoshea87
Sun, 01/29/2023 - 13:16
Are there plans for this? I…
Are there plans for this? I'd love to make this. Thanks