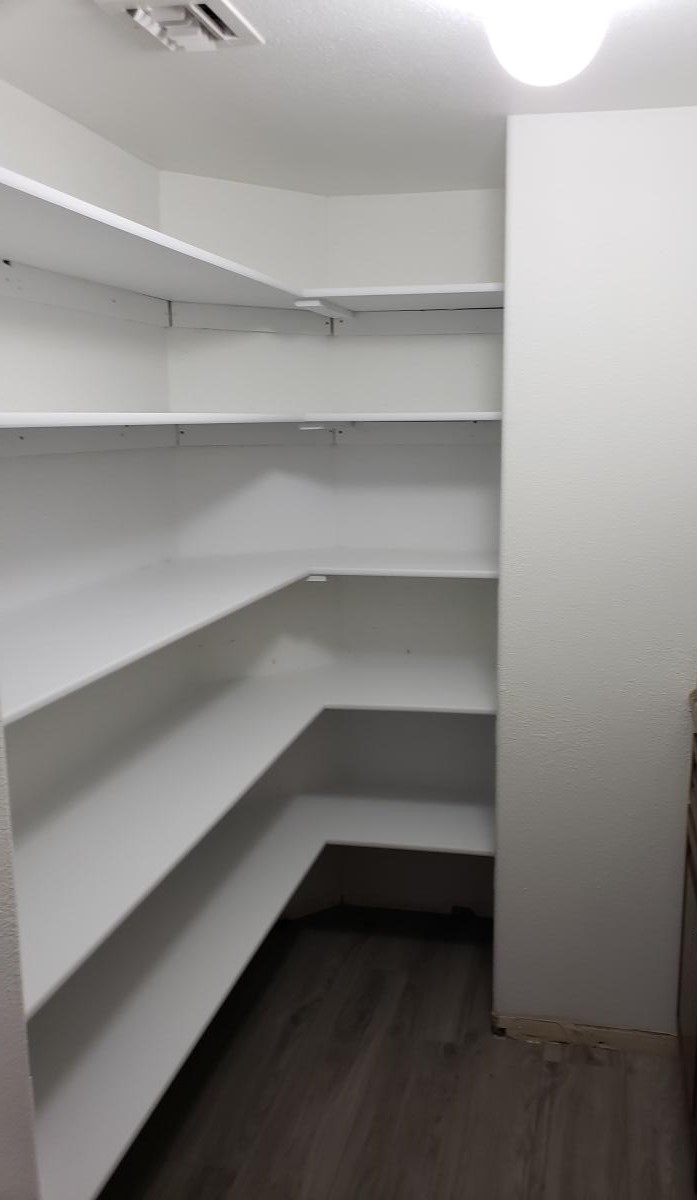
Pantry Shelves
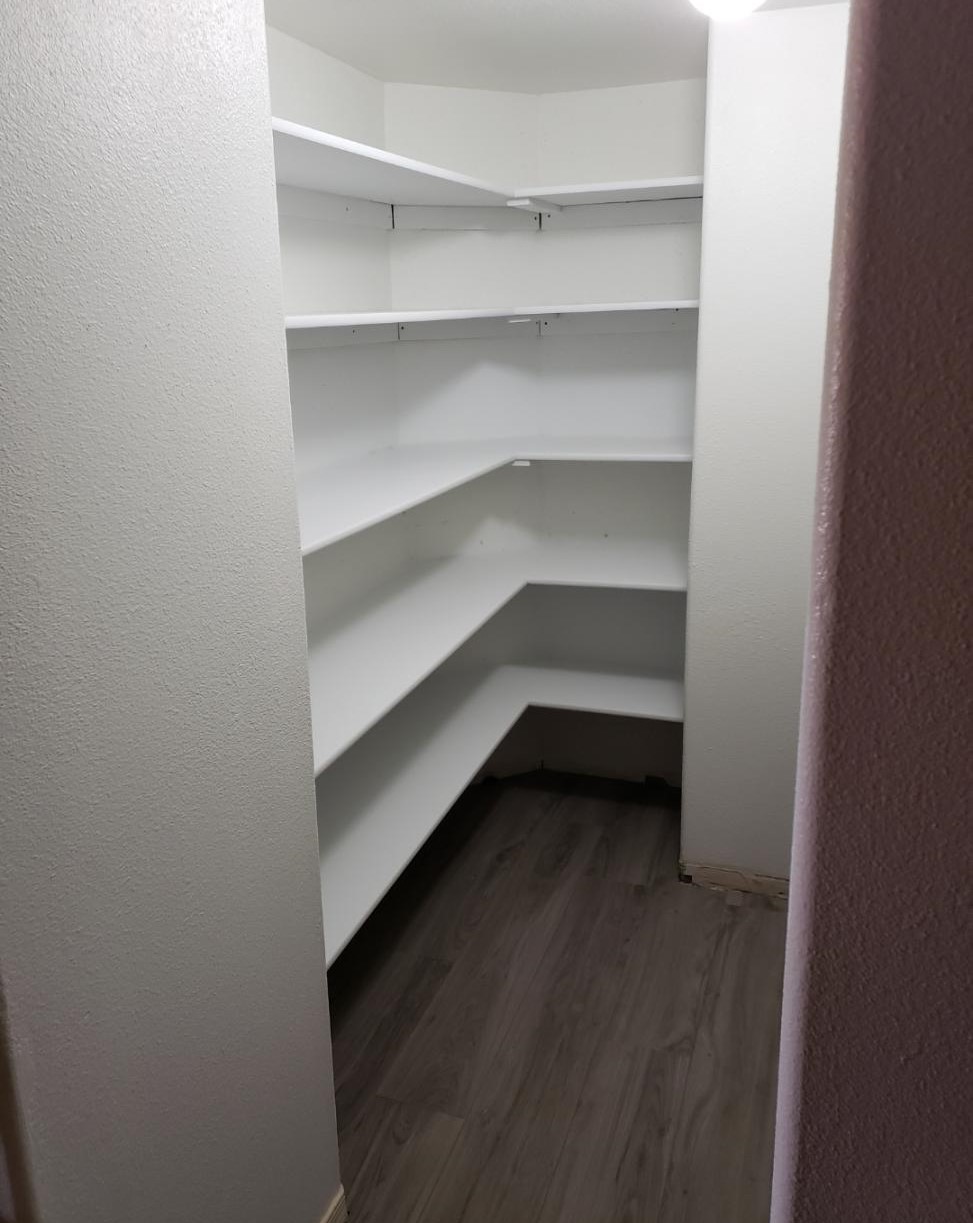
We enclosed an unused wet bar and then I built the shelves to make it into a pantry.
Built from Plan(s)
We enclosed an unused wet bar and then I built the shelves to make it into a pantry.
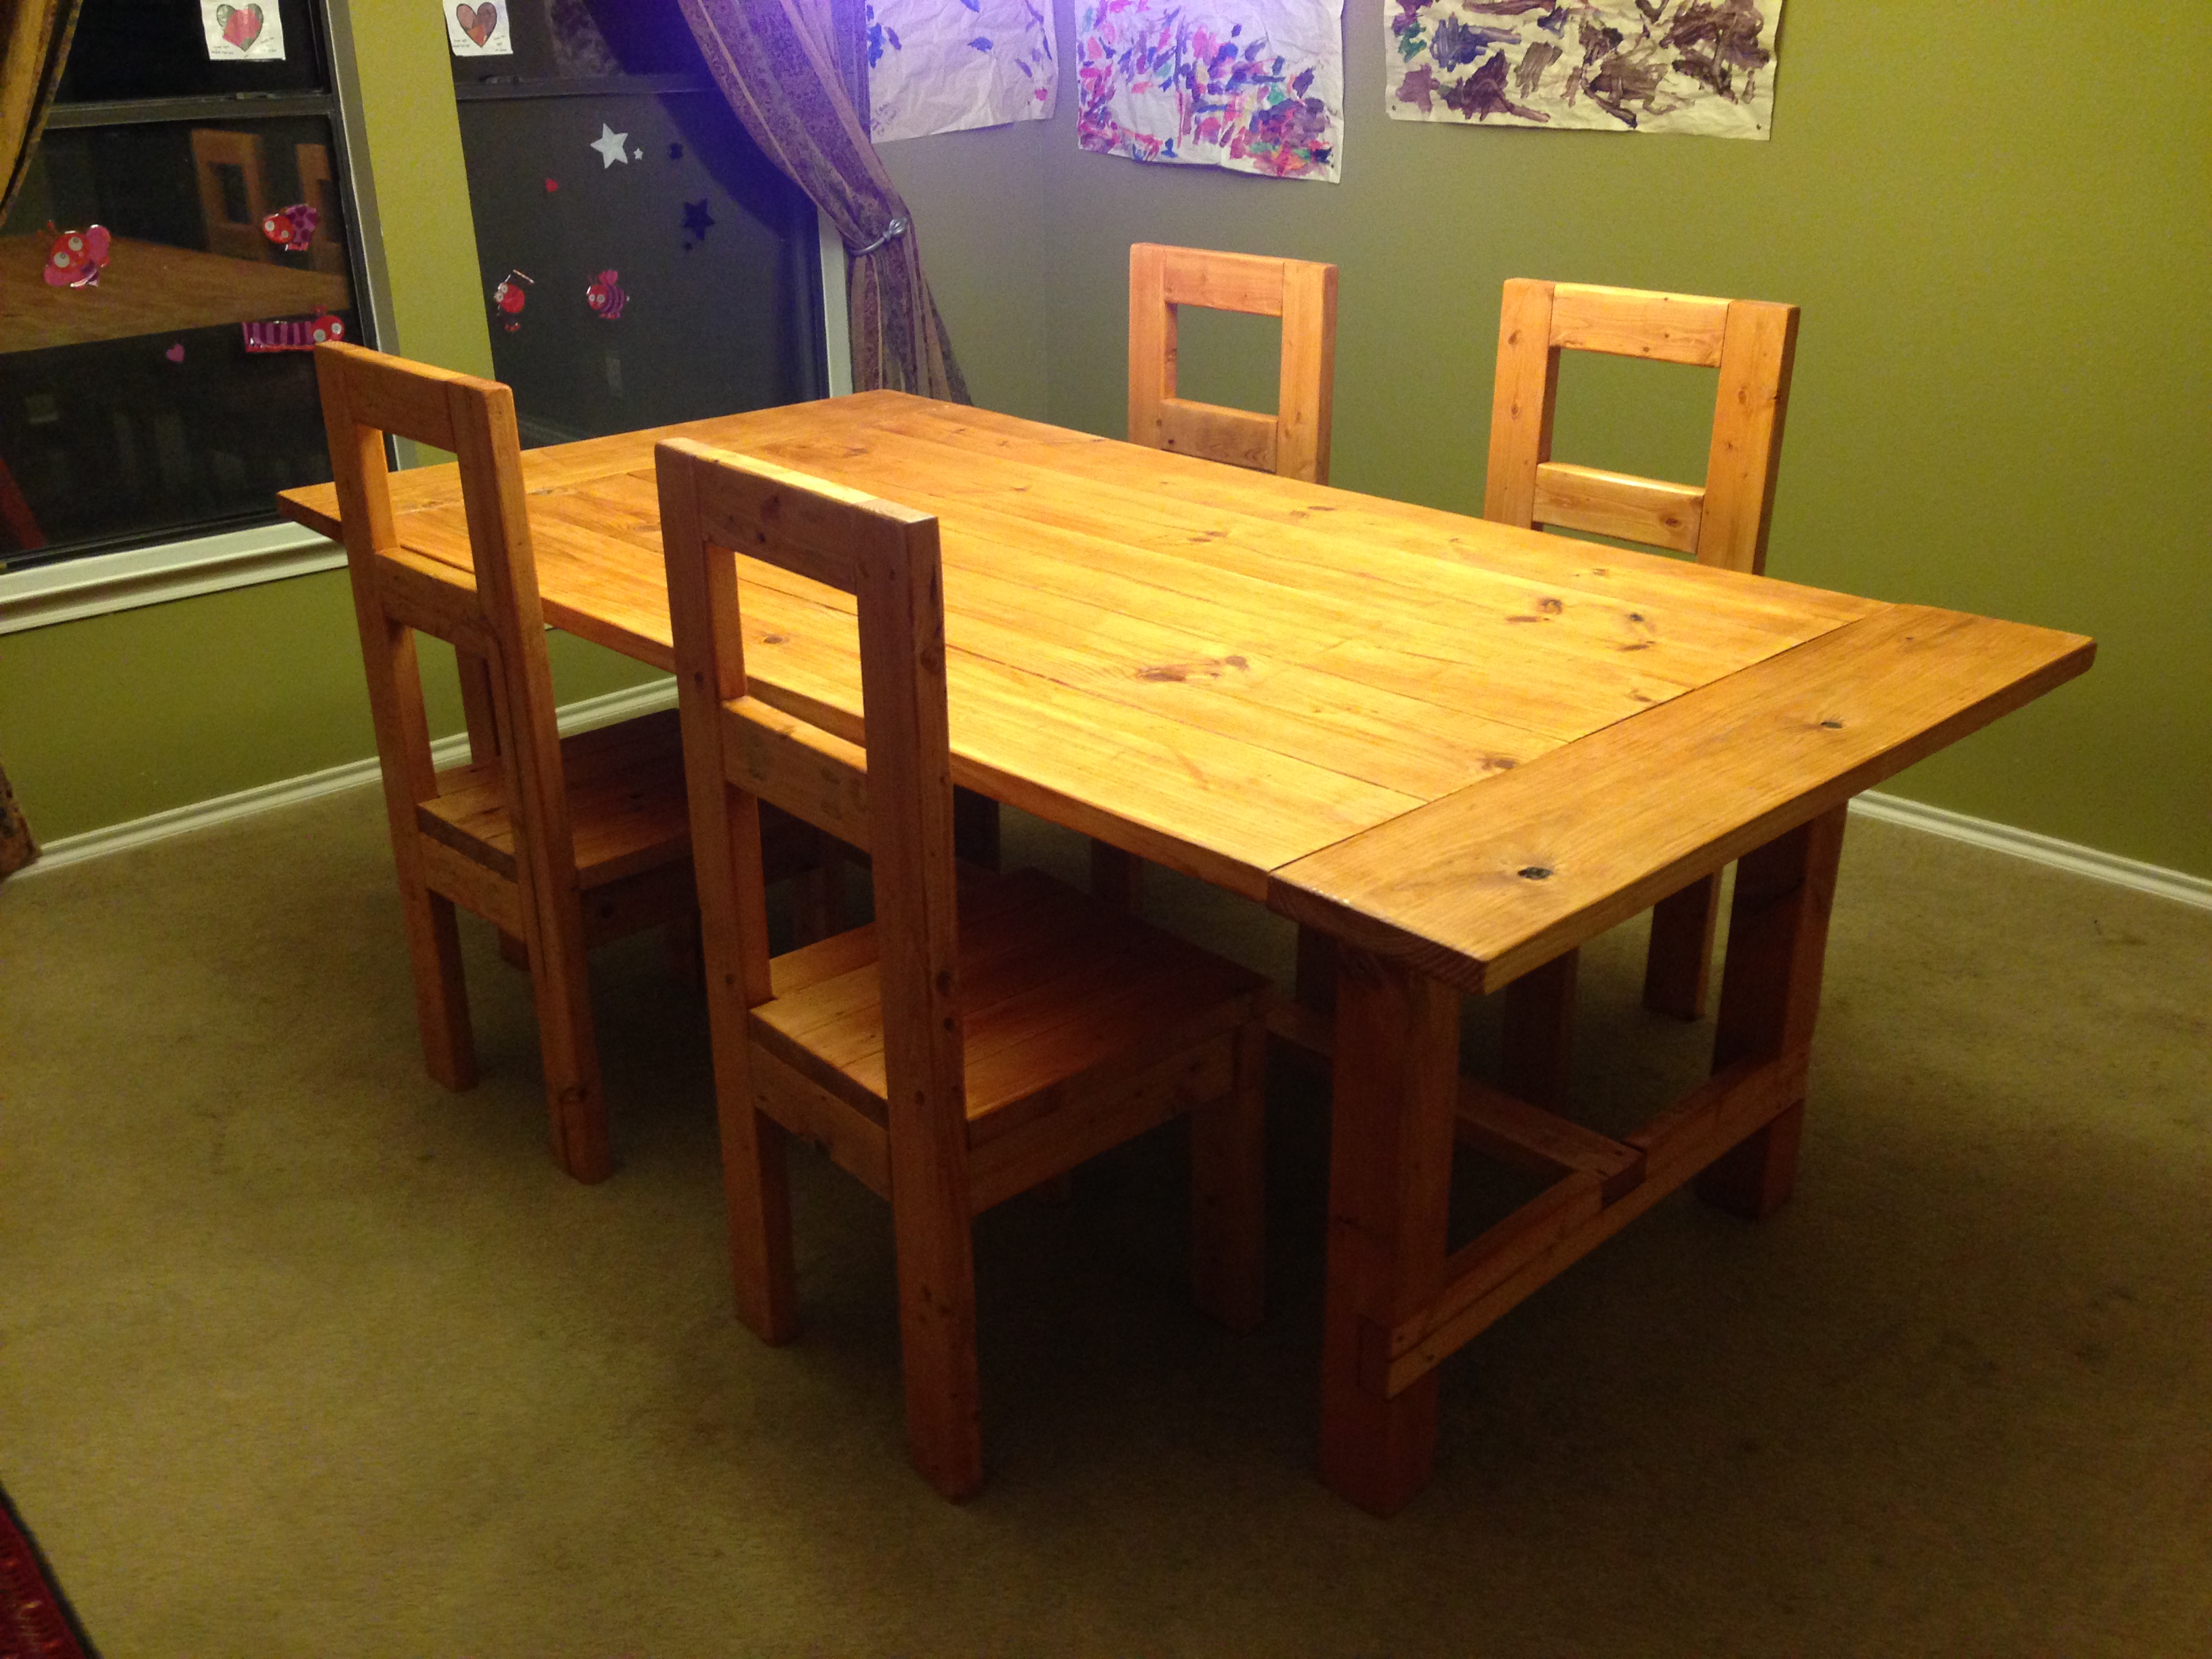
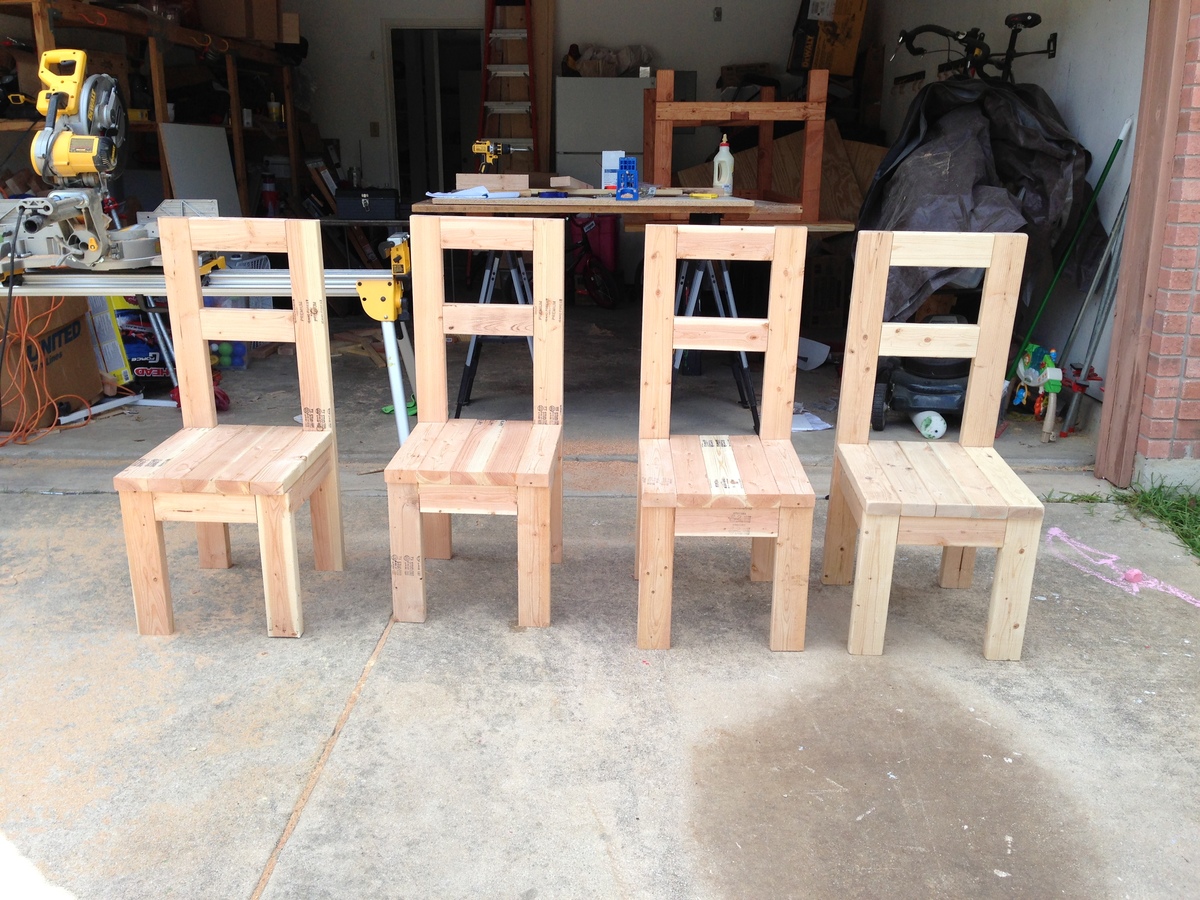
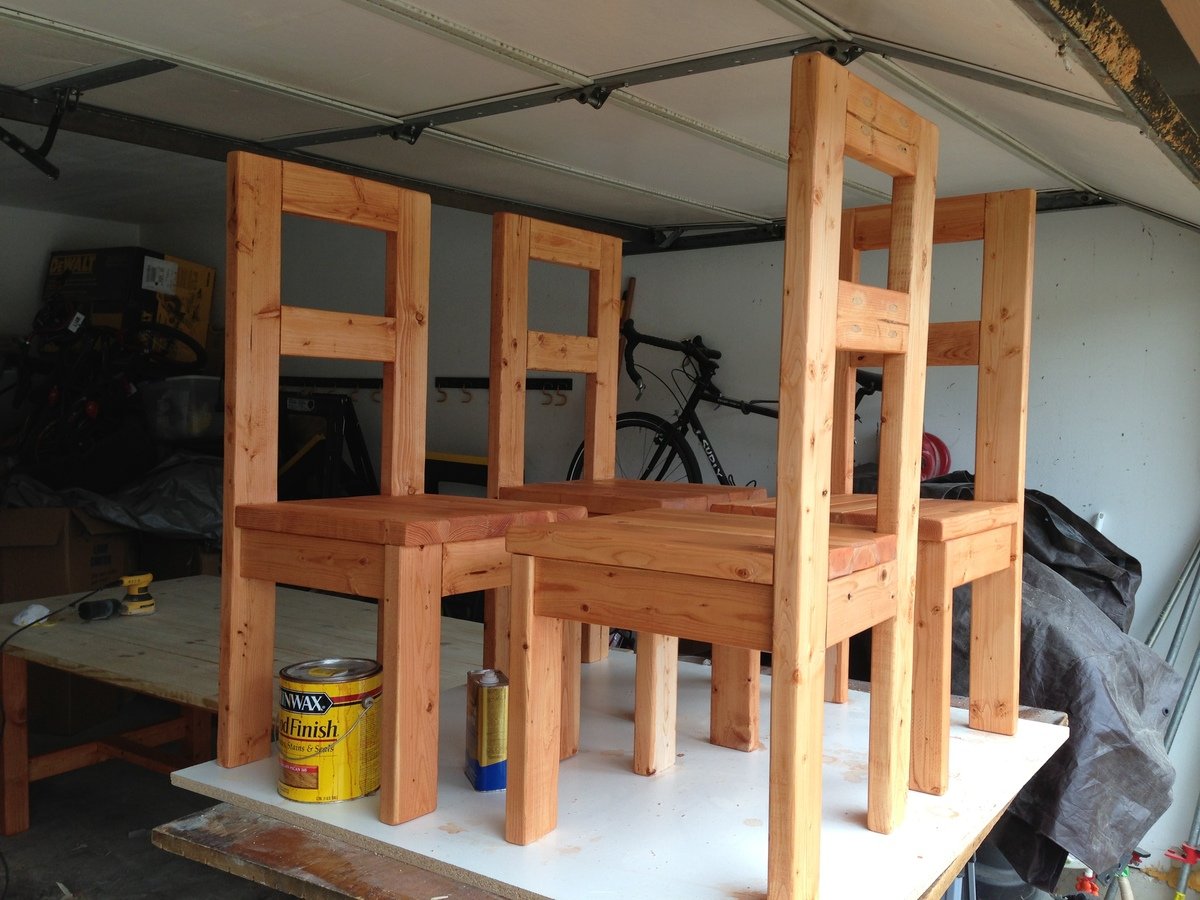
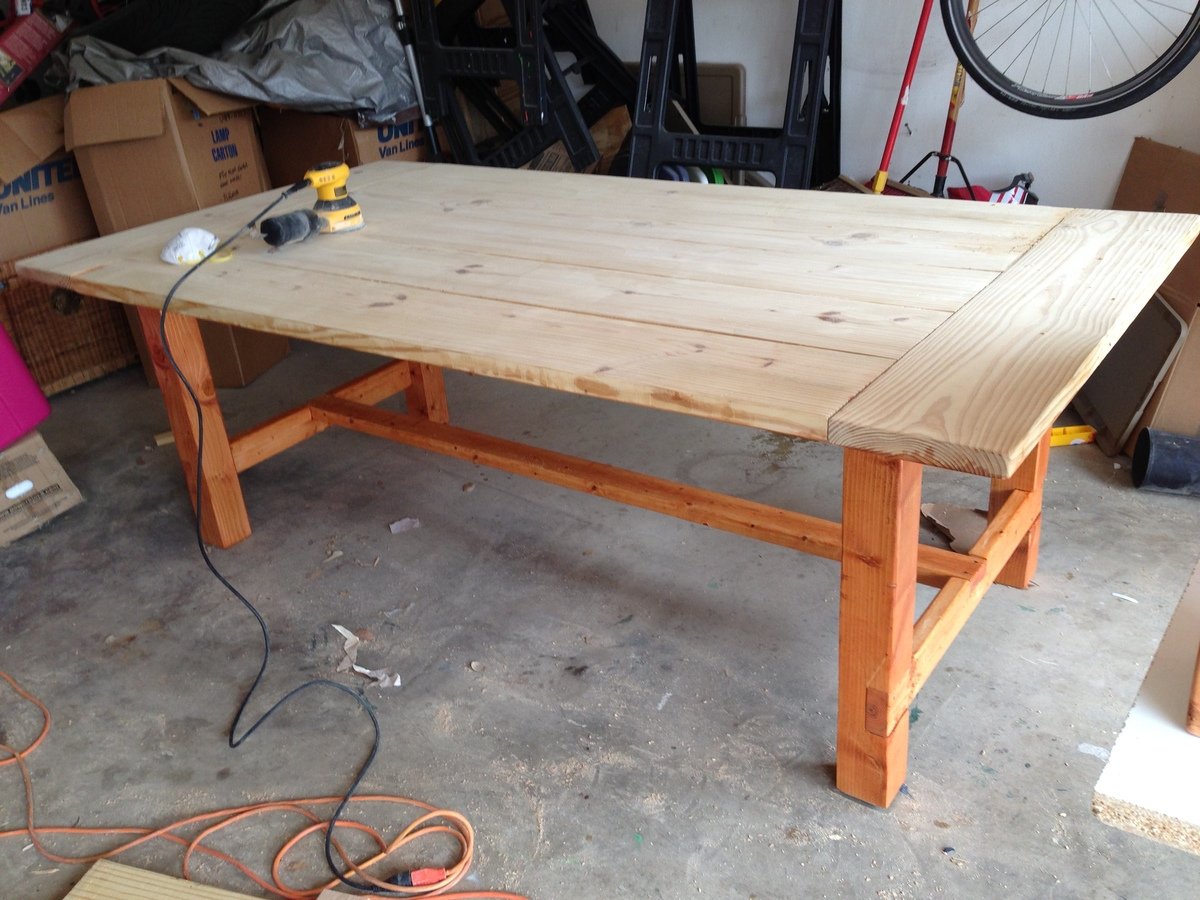
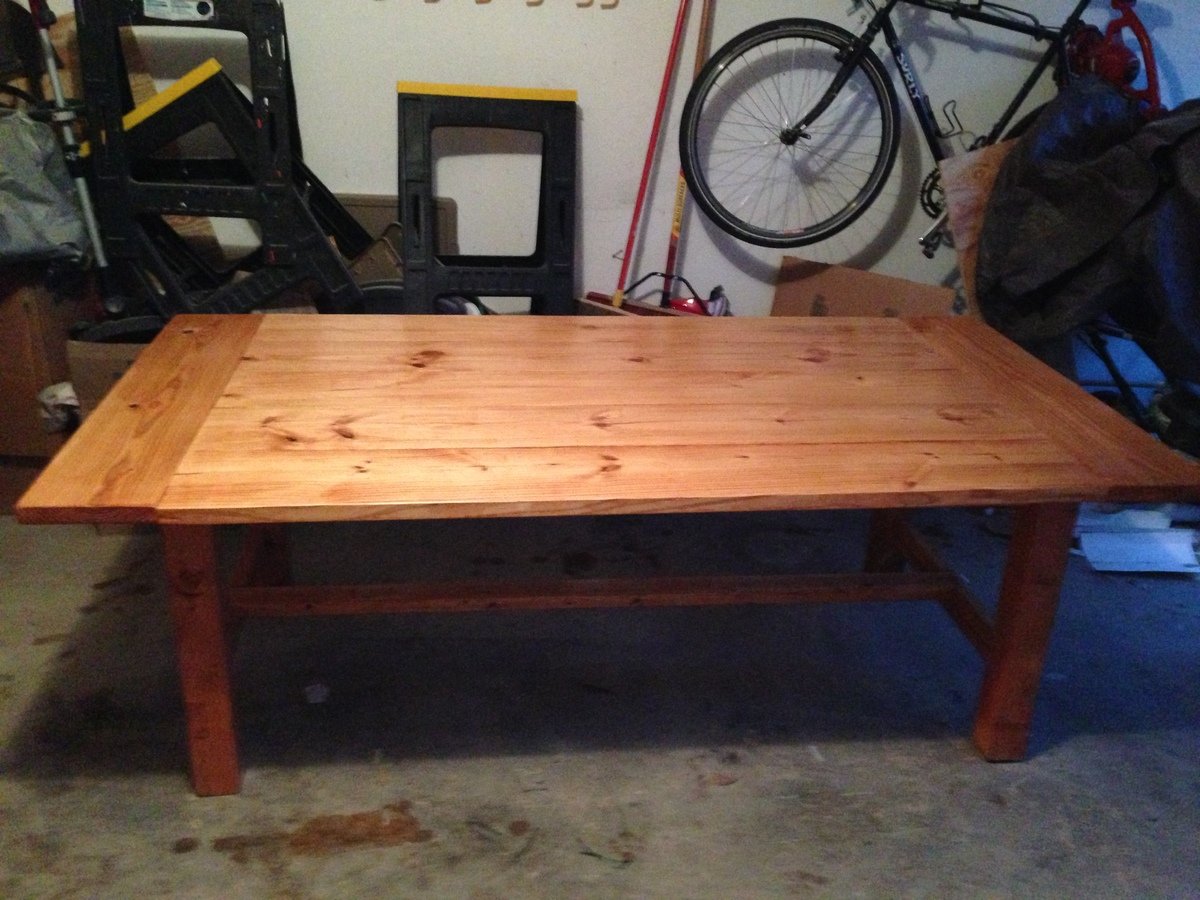
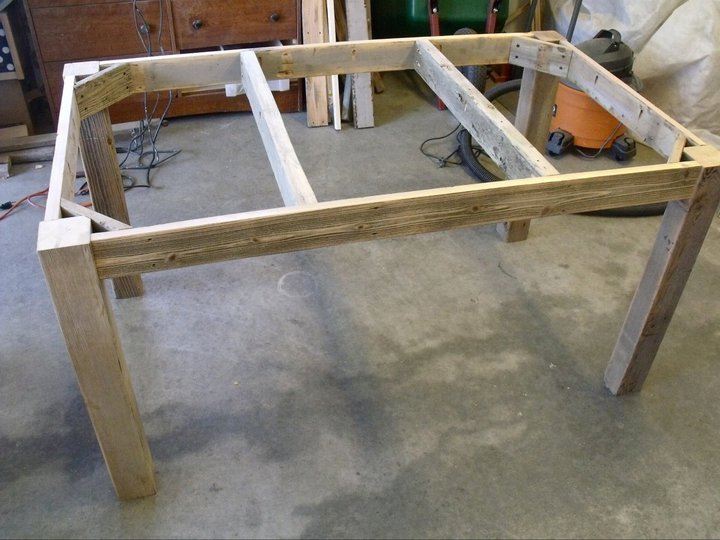
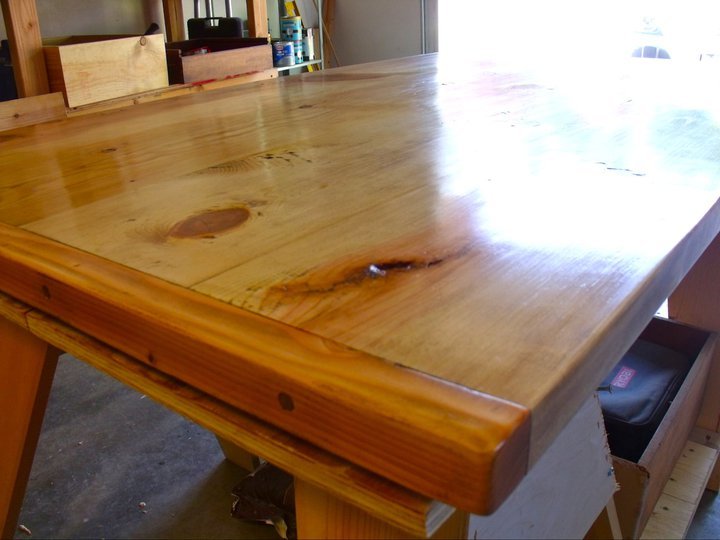
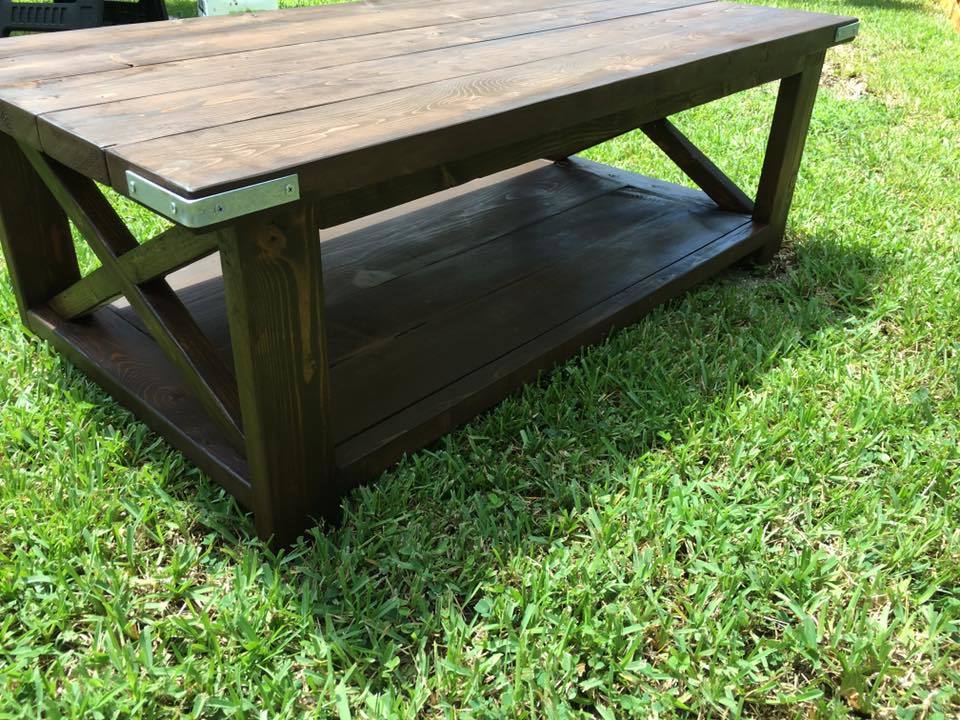
Modern Farmhouse Dining Room Table (with pocket hole) and 2x4 chairs with plans reposted from morelikehome.net.
Surfed the site for the right plans and dove right in. Thank you for the inspiration all!
Mon, 09/10/2018 - 11:05
I have clicked on the link the plans are not there.

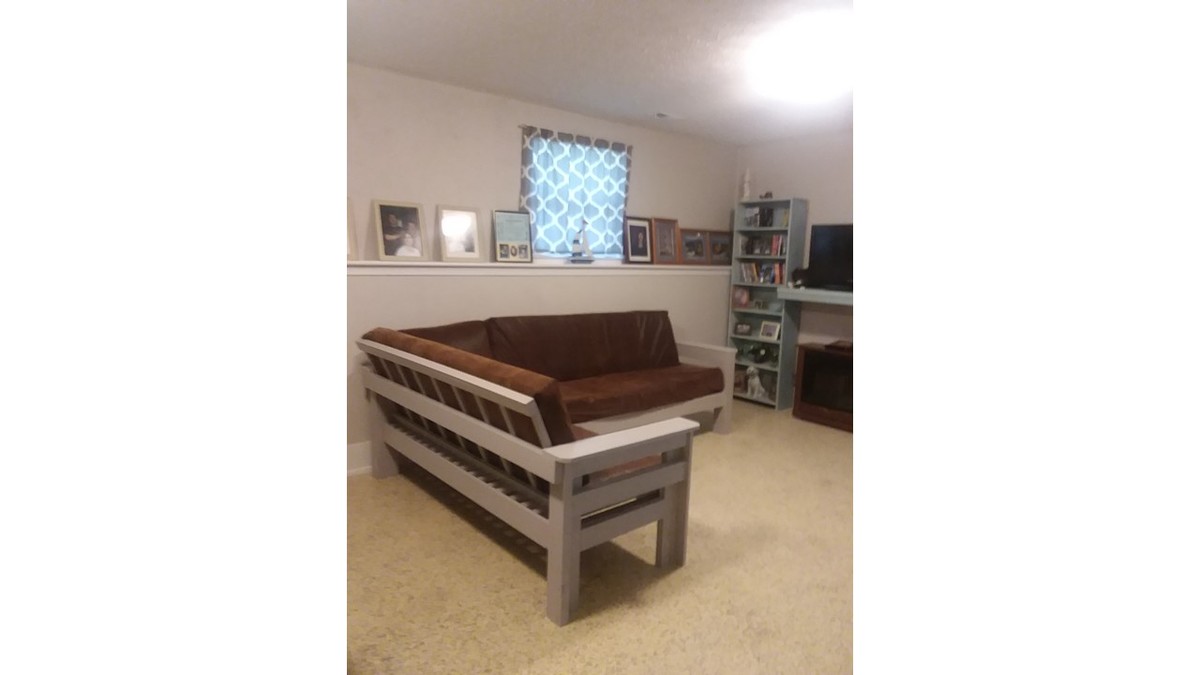
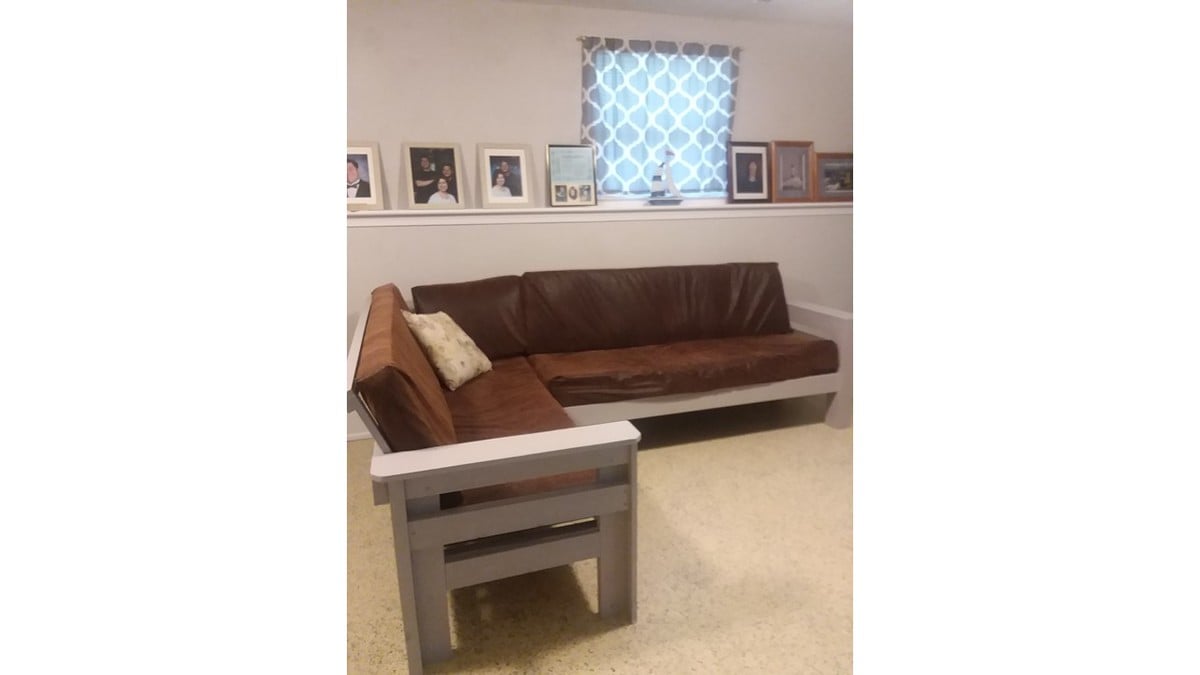
This project evolved from us purchasing the wrong foam to go under 4 area rugs. After it didn’t work for the first rug, we had 3 more rolls of the stuff that we couldn’t take back to the store (we had waited too long to do a return). I originally had intended to buy an inexpensive sectional sofa for the downstairs family room, but with all this foam staring at me, I decided to put it to use and make sofa cushions. There was enough foam to do a whole sectional!
The sofa frame is based on Ana’s Outdoor 2x4 Sectional sofa. I adjusted the size, because the fabric I wanted to use was 54” wide, and that would fit nicely around a 22” deep x 4” thick cushion. Each cushion is 11 layers of the foam (seat cushions: 67 x 22 x 4, backs: 67 x 18 x 4). That length for the cushions fit exactly into the 8 yards of fabric available on the bolt. The next week I ended up going back for some more fabric for the corner cushion and an ottoman that's in work.
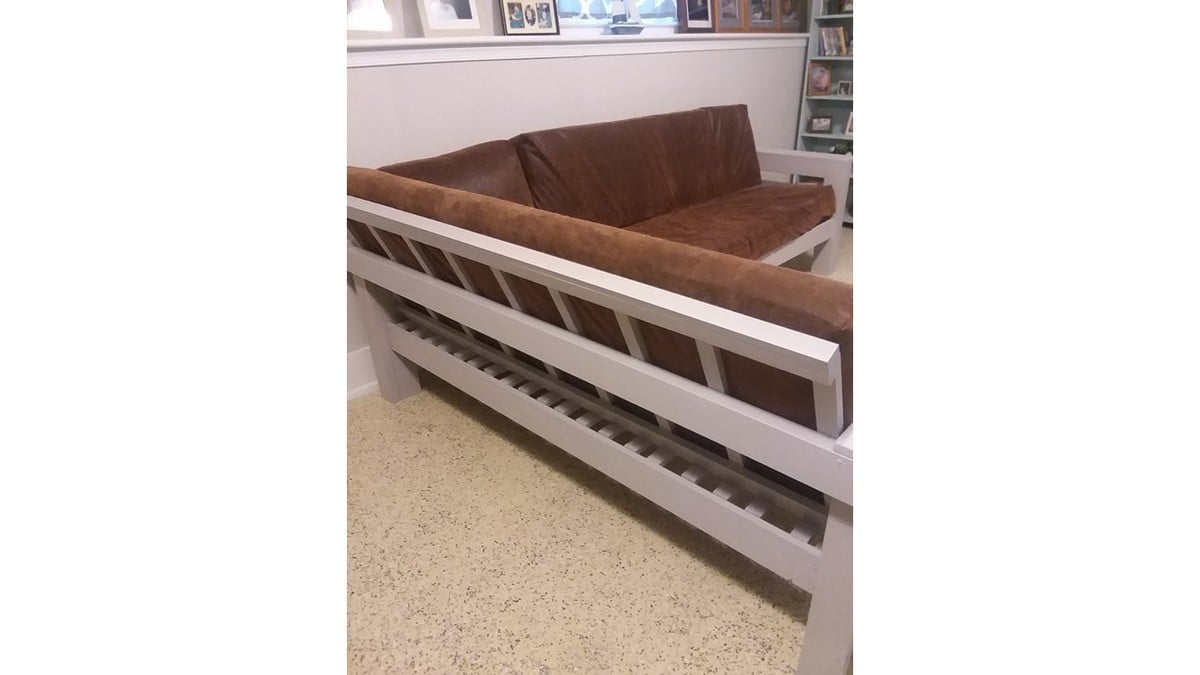
I had the frame assembled and was ready to add the final upper back pieces, when Hubby suggested we give it a slanted back. That required a little re-engineering and a couple of extra boards on the back and armless end. Instead of using 2x4s the full length for the seat, I had used some 1x2 furring strips reclaimed from another project. Also used some of those for the upright pieces for the backs. Added some 1x6 to top the arms and ½ x 3 ½” craft boards to the front to hide the cut 2x4 ends.
The cushions are covered in a polyester faux tooled suede (fabric from Hobby Lobby). The cushion covers are slightly loose on purpose, to give the nice worn squishy look that a real soft leather sofa cushion would have.
It’s surprisingly comfy and we love the look!


Tue, 06/05/2018 - 14:47
You are so resourceful! Love how this turned out! Thanks so much for sharing such detailed instructions, much appreciated!
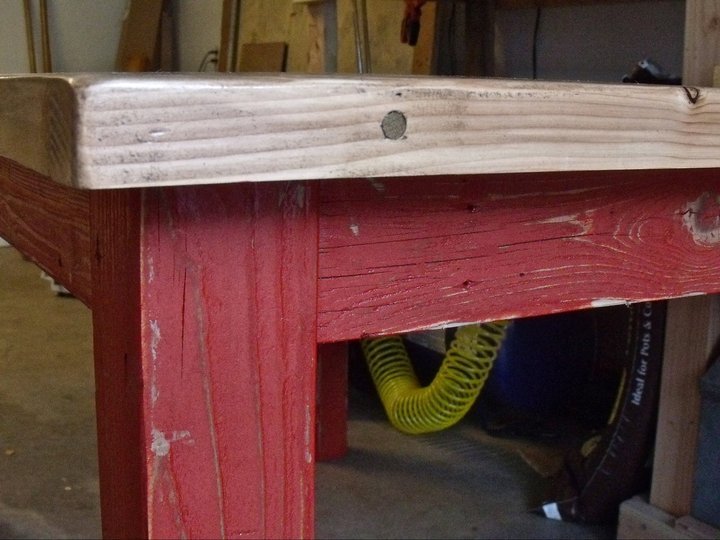
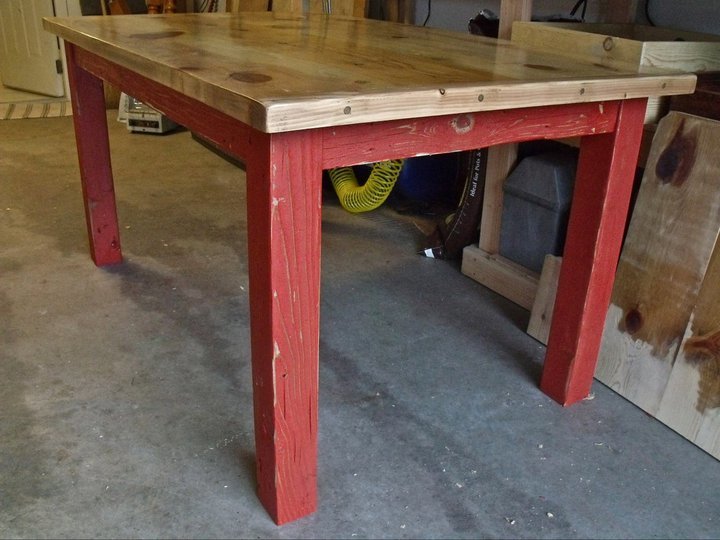
I got all the wood from the dump. The best way to get a good glue up for the table top is joint the sides flat, and then hand plane the top for a smooth surface. Gorgeous table for nothing.
Mon, 10/07/2013 - 08:55
What did you do when you went to the dump to get the wood? I like the idea.
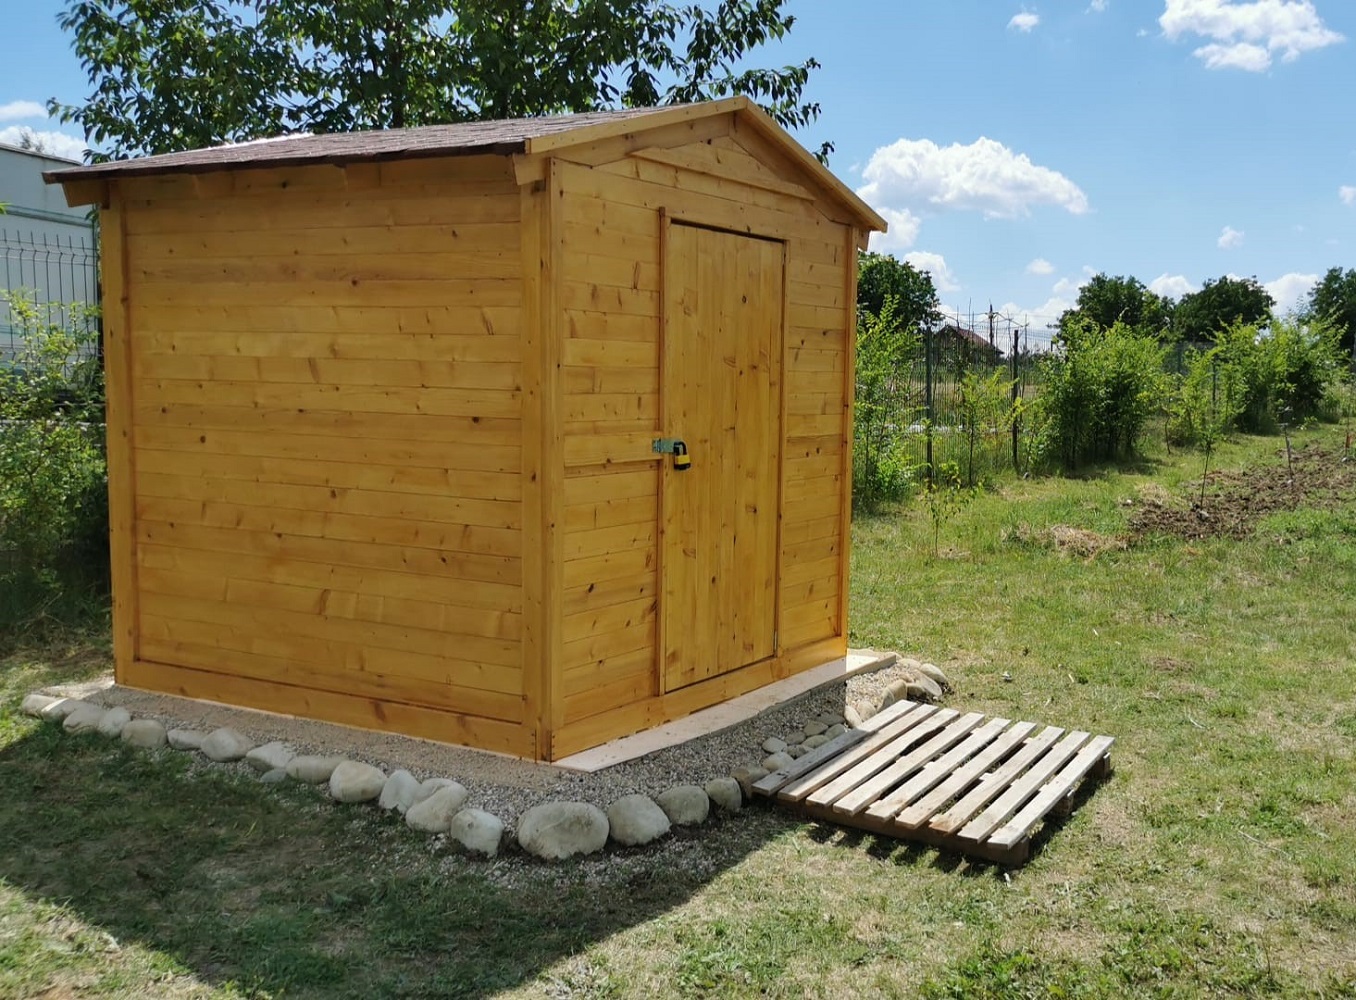
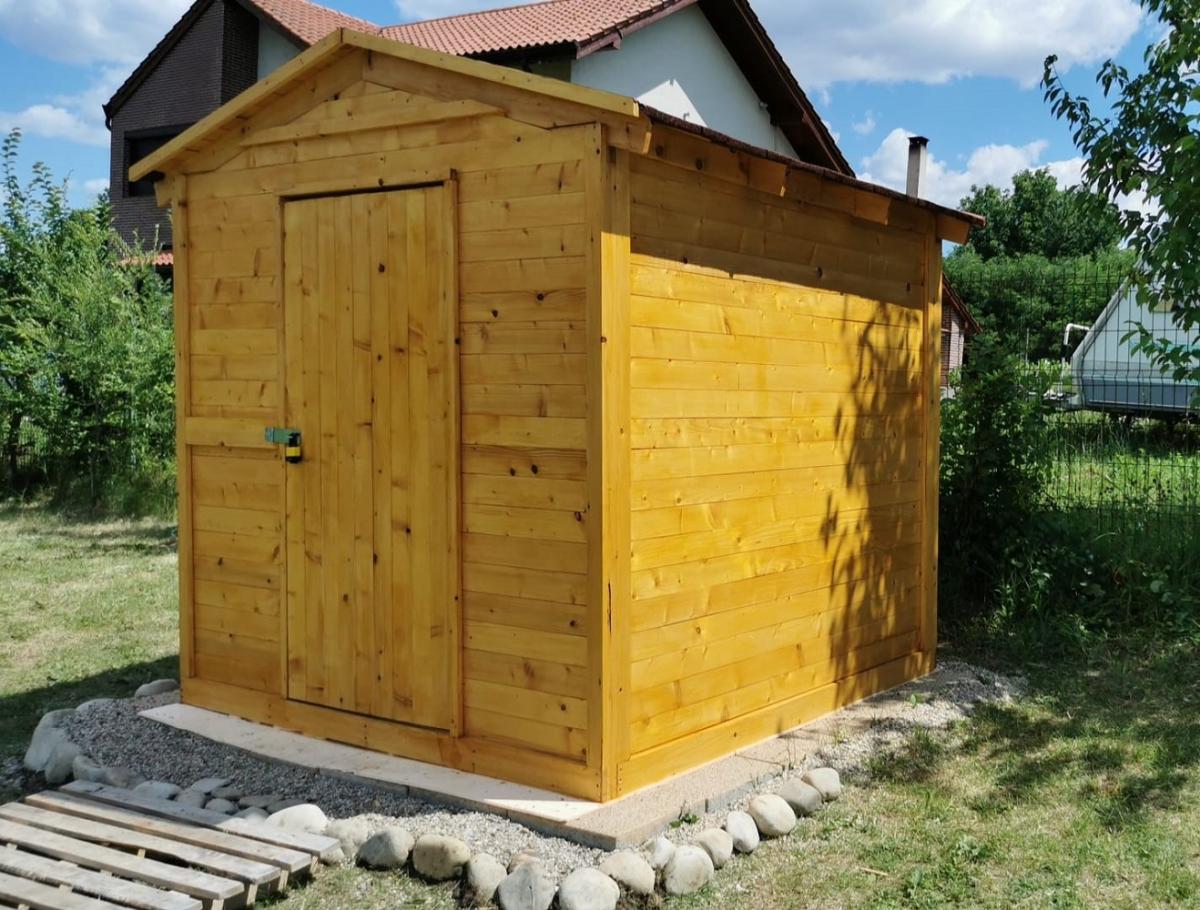
Our last project was building a tiny garden tools storage shed. We used only 1 x 4 boards. We don't have any plans, but you can watch the entire building process on our YouTube channel. We are very proud of the way the project turned out.
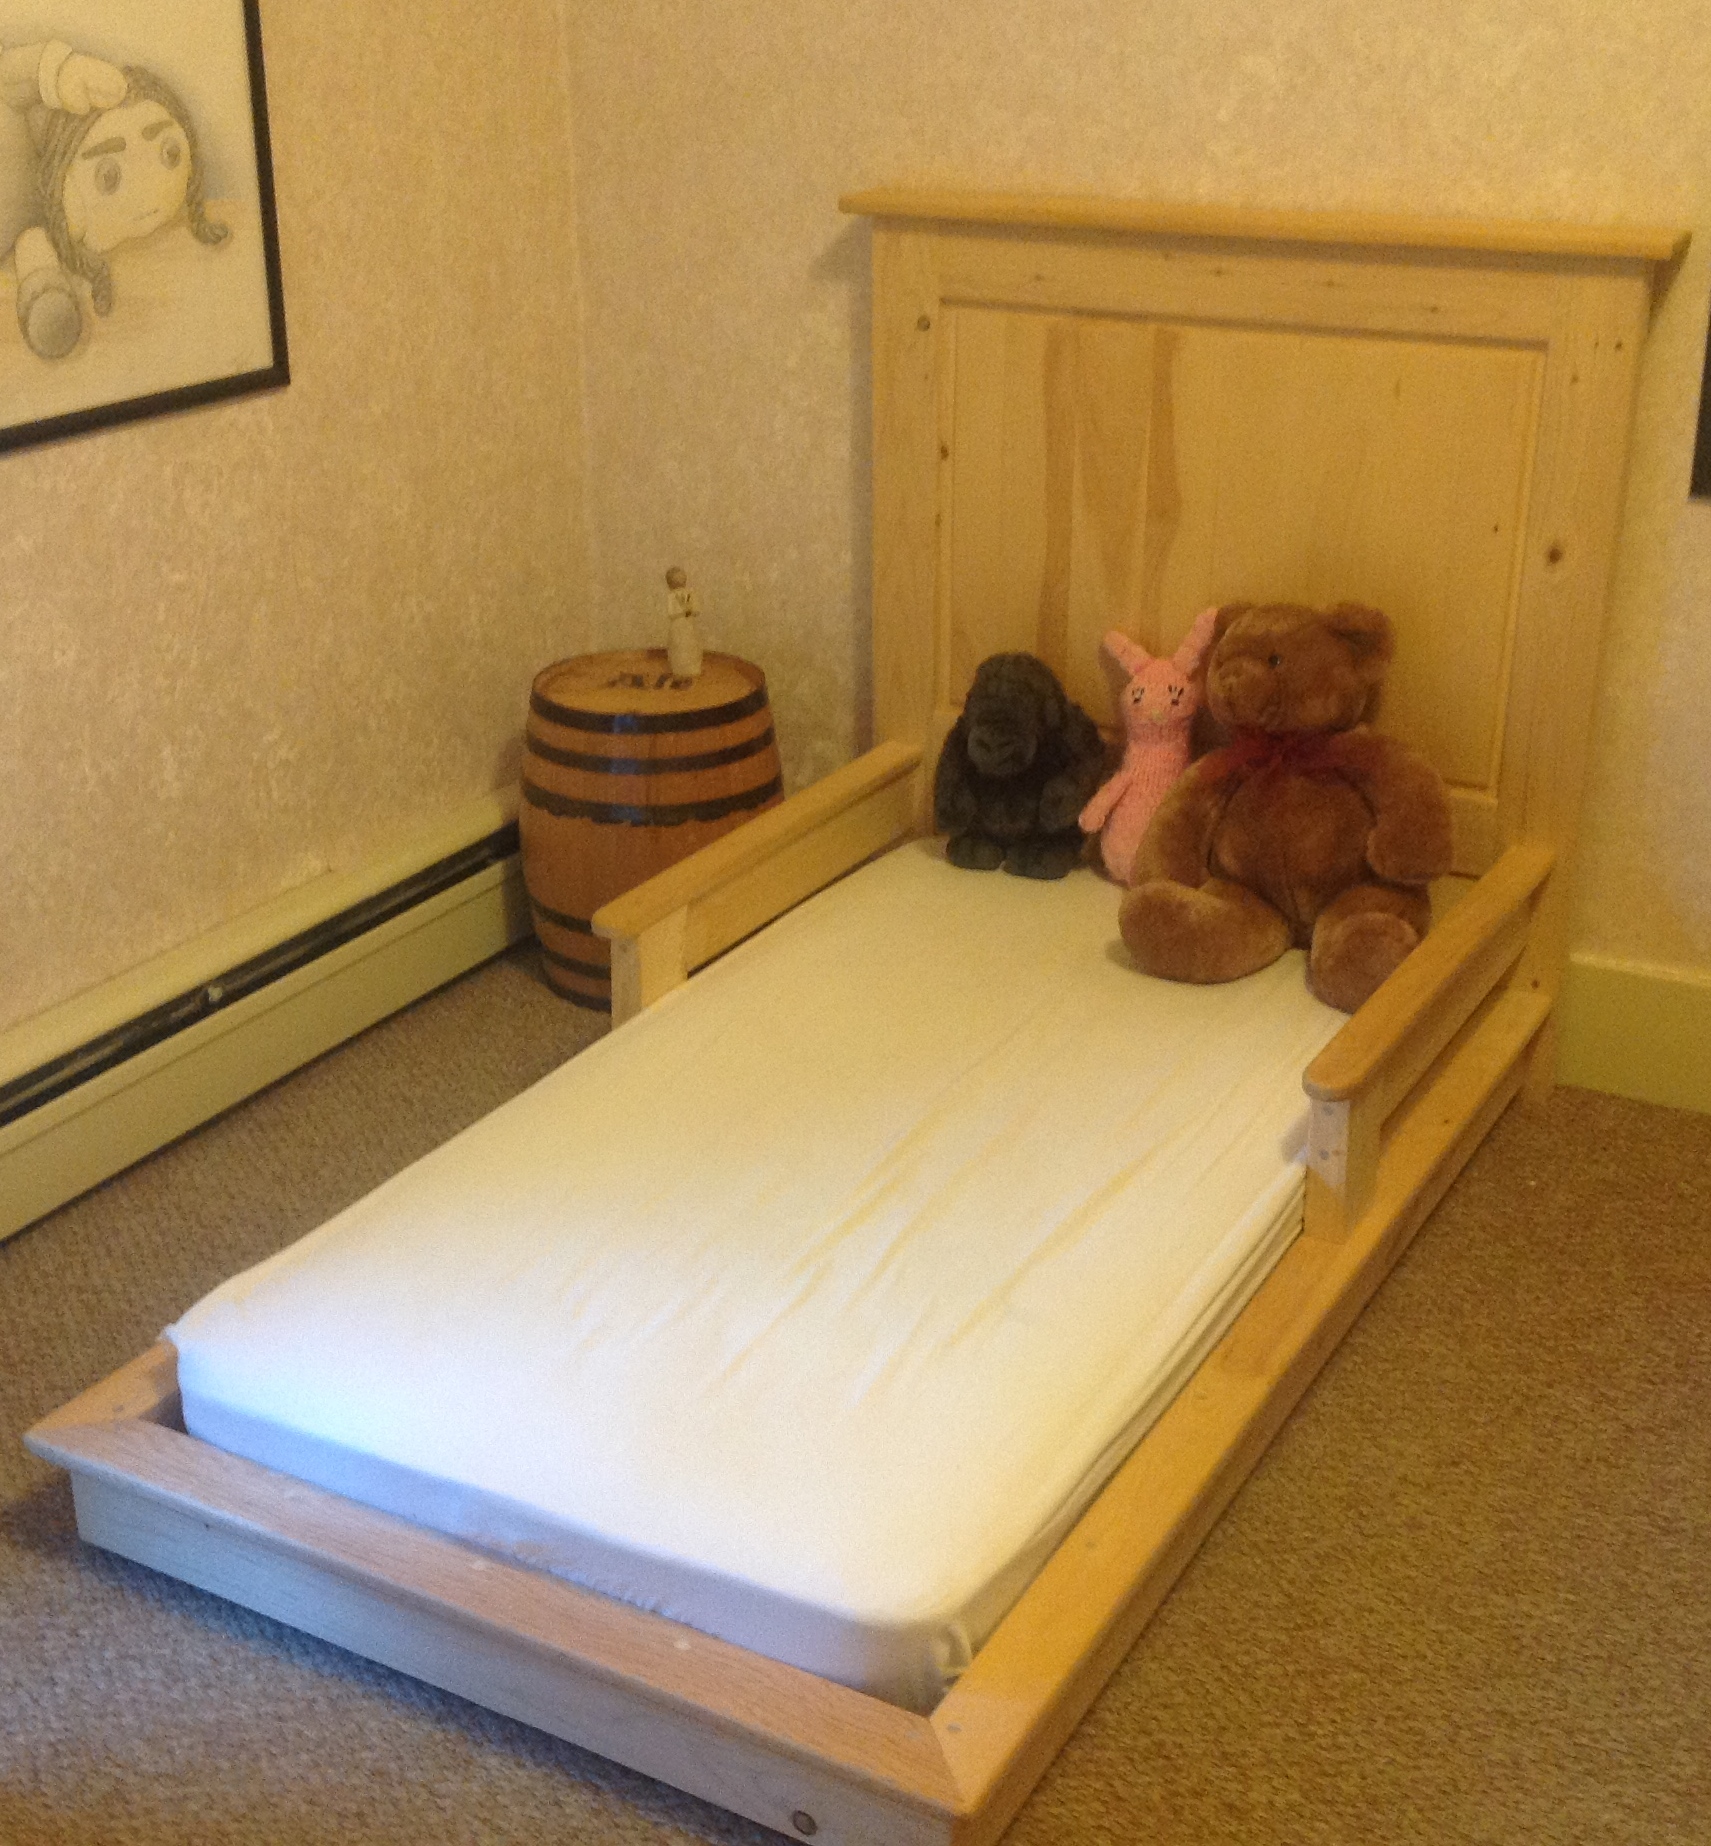
We reworked the plans for the pottery barn inspired bed into a toddler sized version. Arms were added near the head to prevent our child falling out in the first year. They ended up being something of a hazard in those early days, as our child kept hitting her head. If we were to recreate it, we would make the arms go up higher or without the finished top. The bed also was not lifted off the ground in as great of a proportion to the original.
The pine is left untreated and unfinished. The only glue used was homemade milk glue.
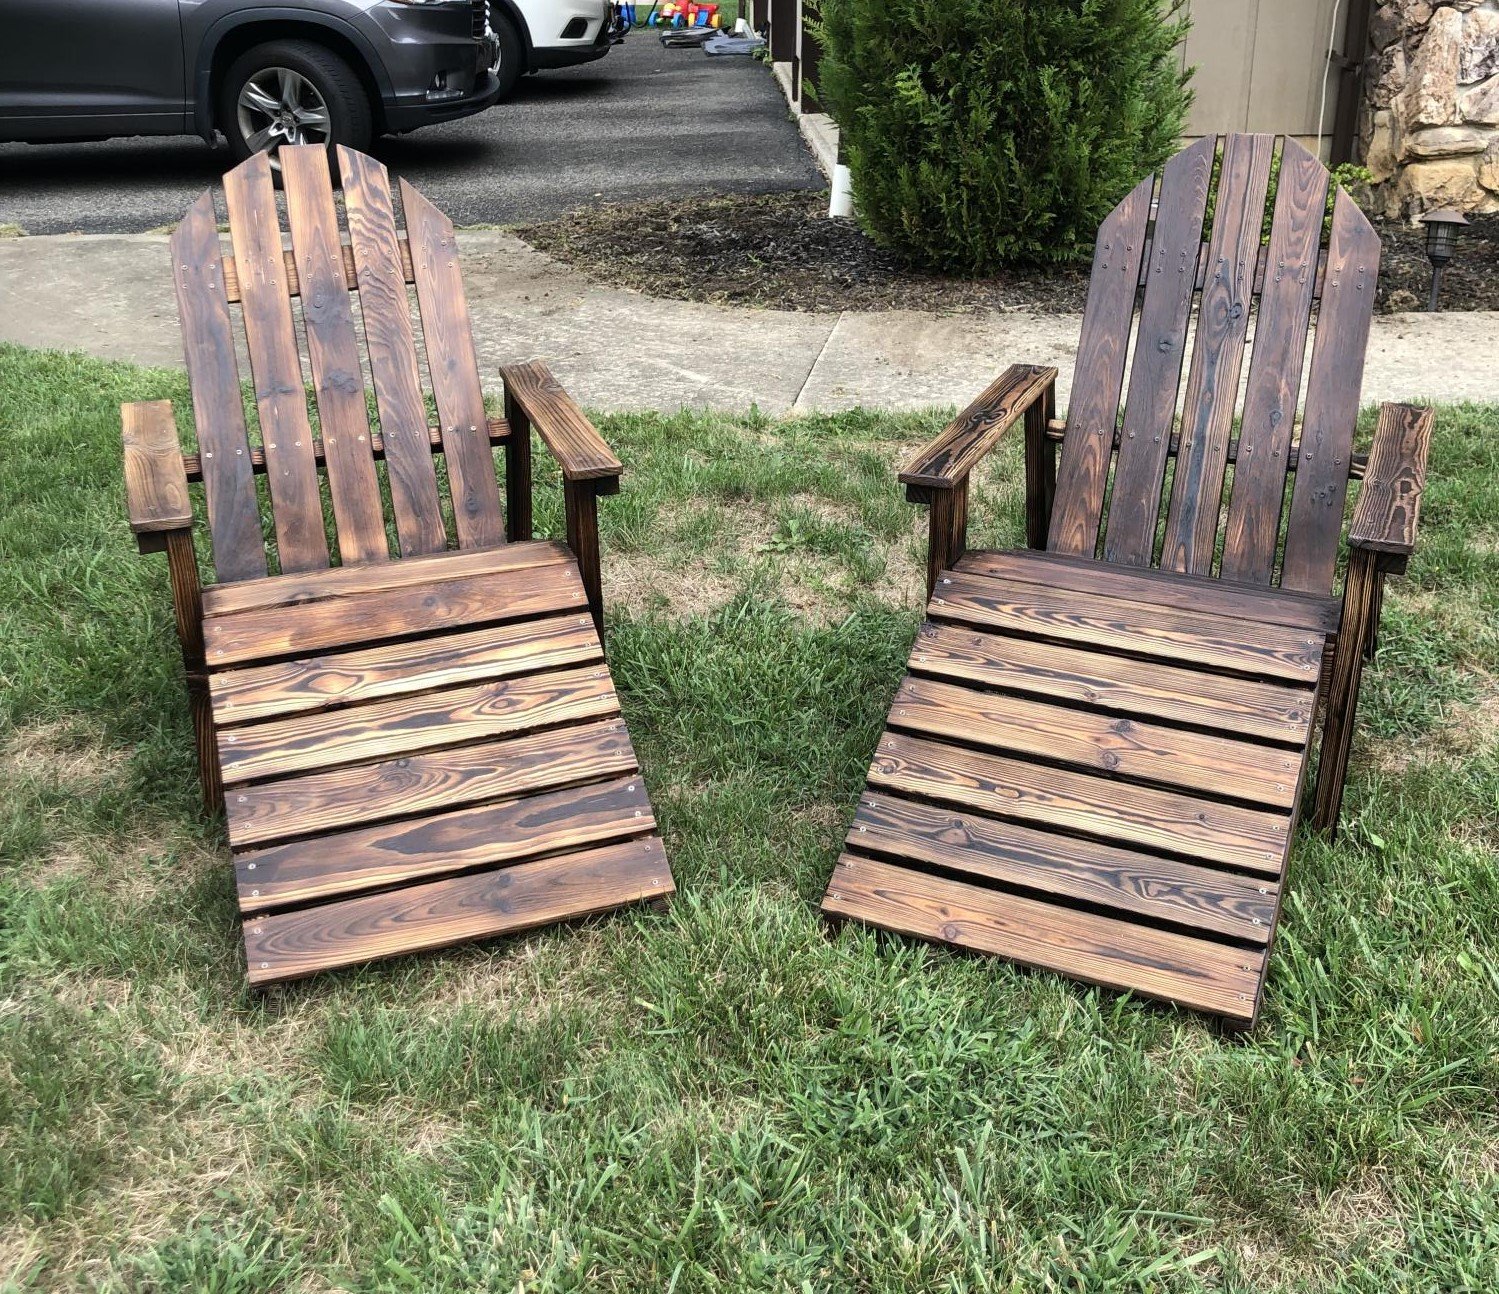
Plans were super easy to follow. I finished the chairs by using the Shou Sugi Ban technique. I burned the chairs and stools completely, than wire brushed them. I repeated the process a second time. I finished by adding a coat of poly which I believe gave the chairs a little more depth. They are so comfortable and plans were perfect. Thank you Ana!
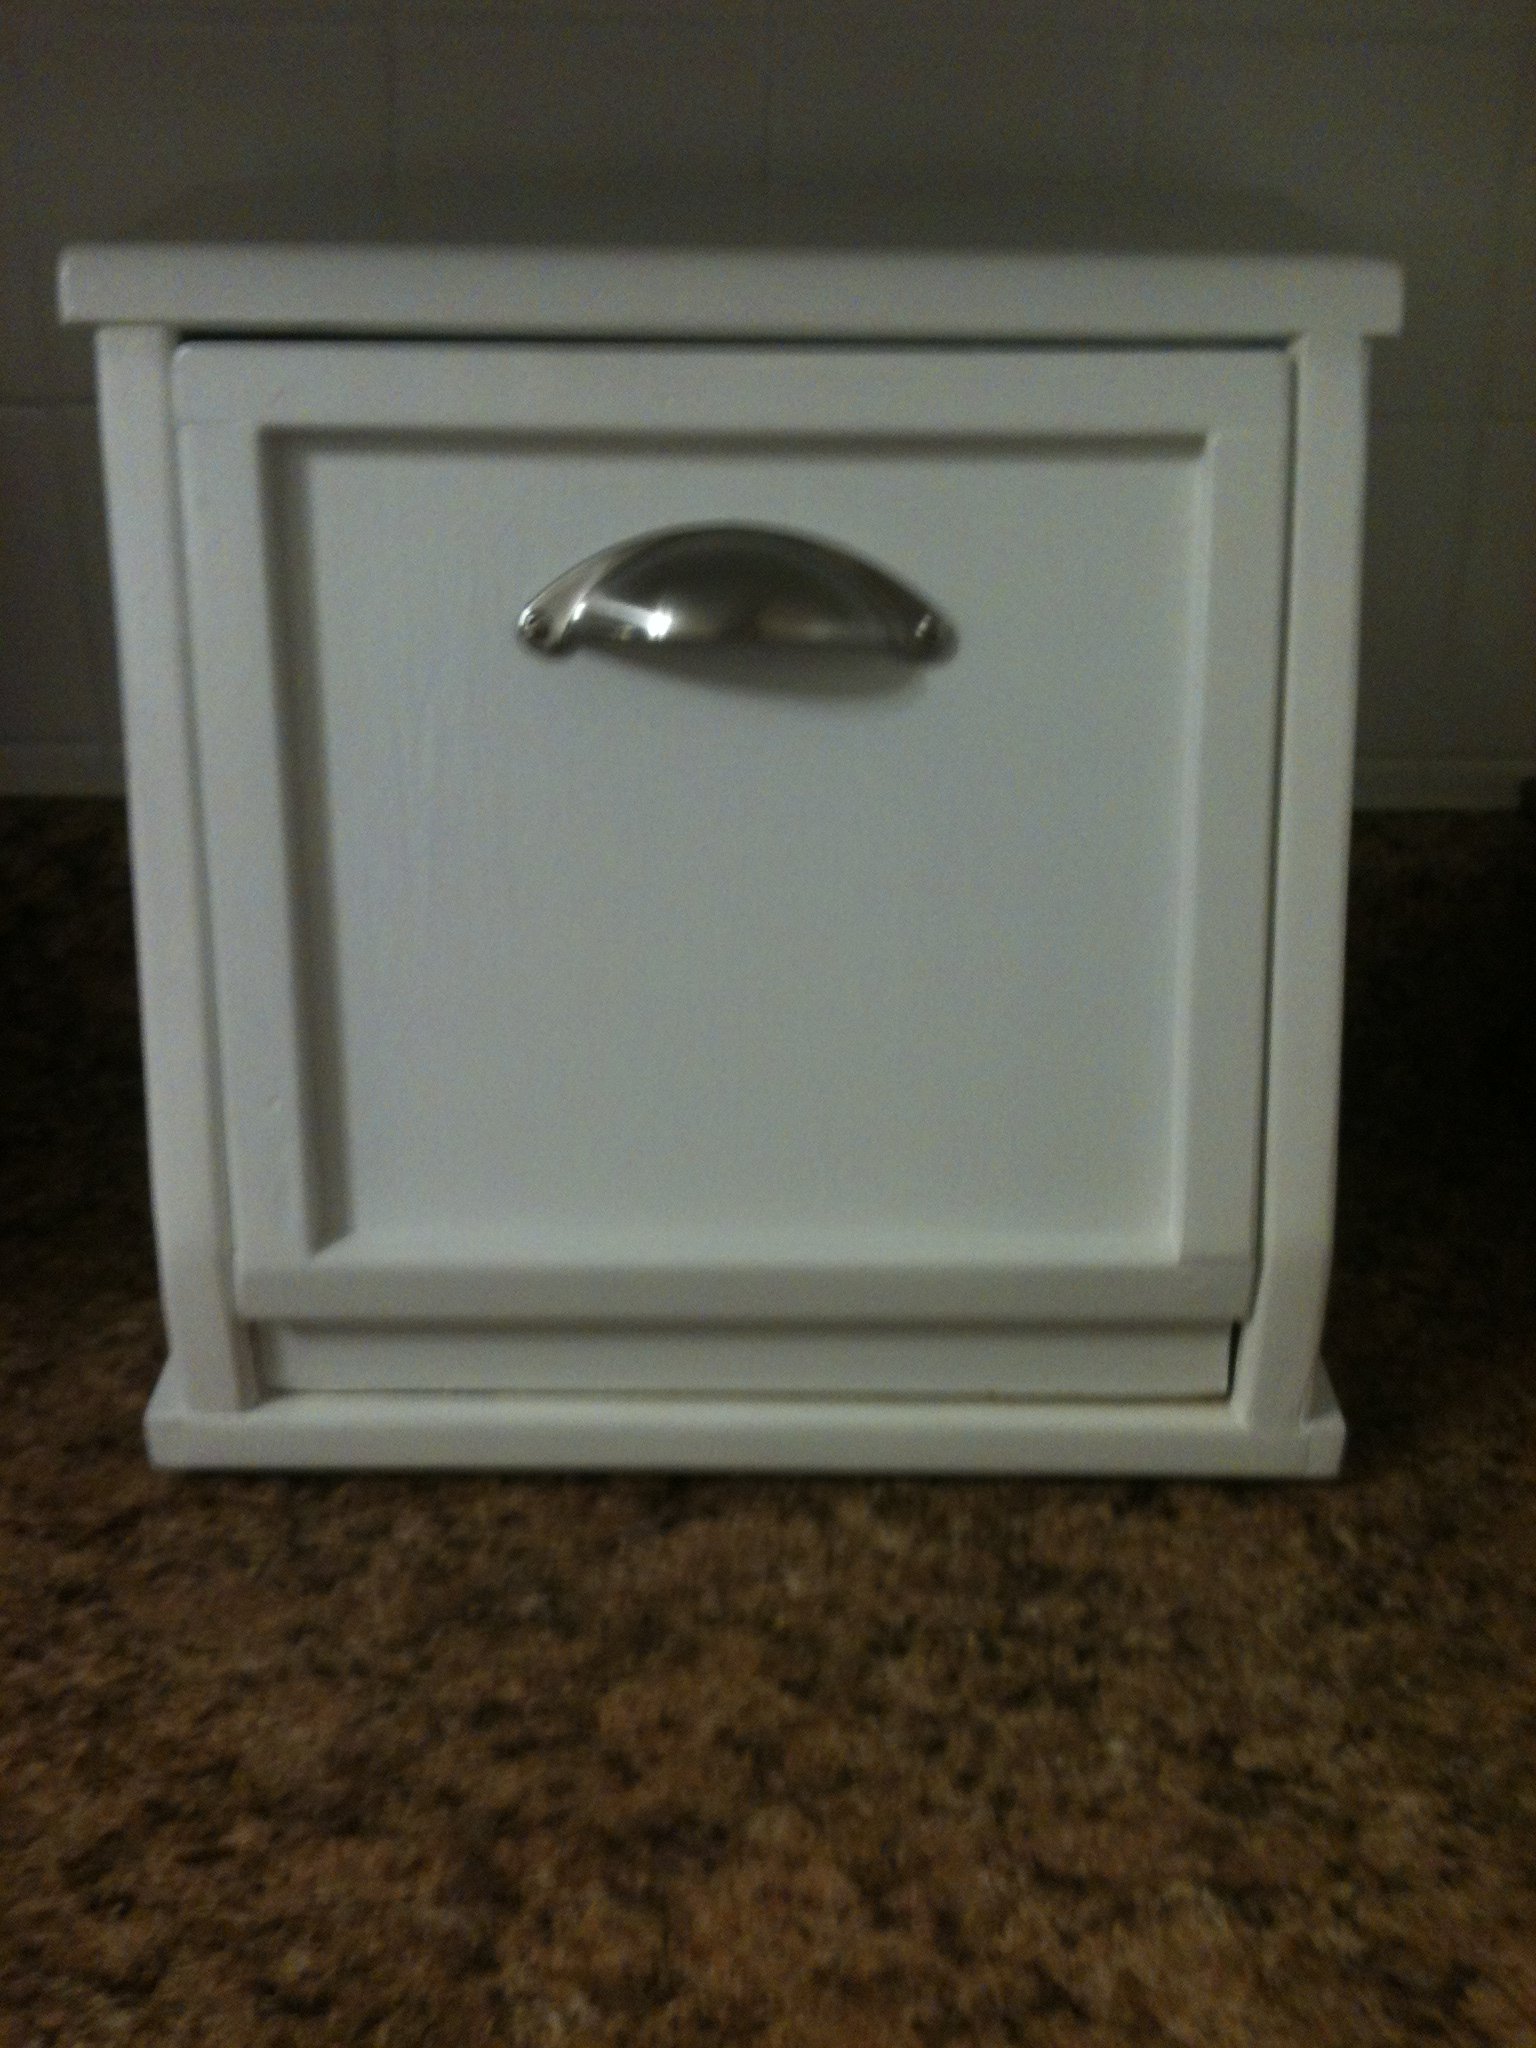
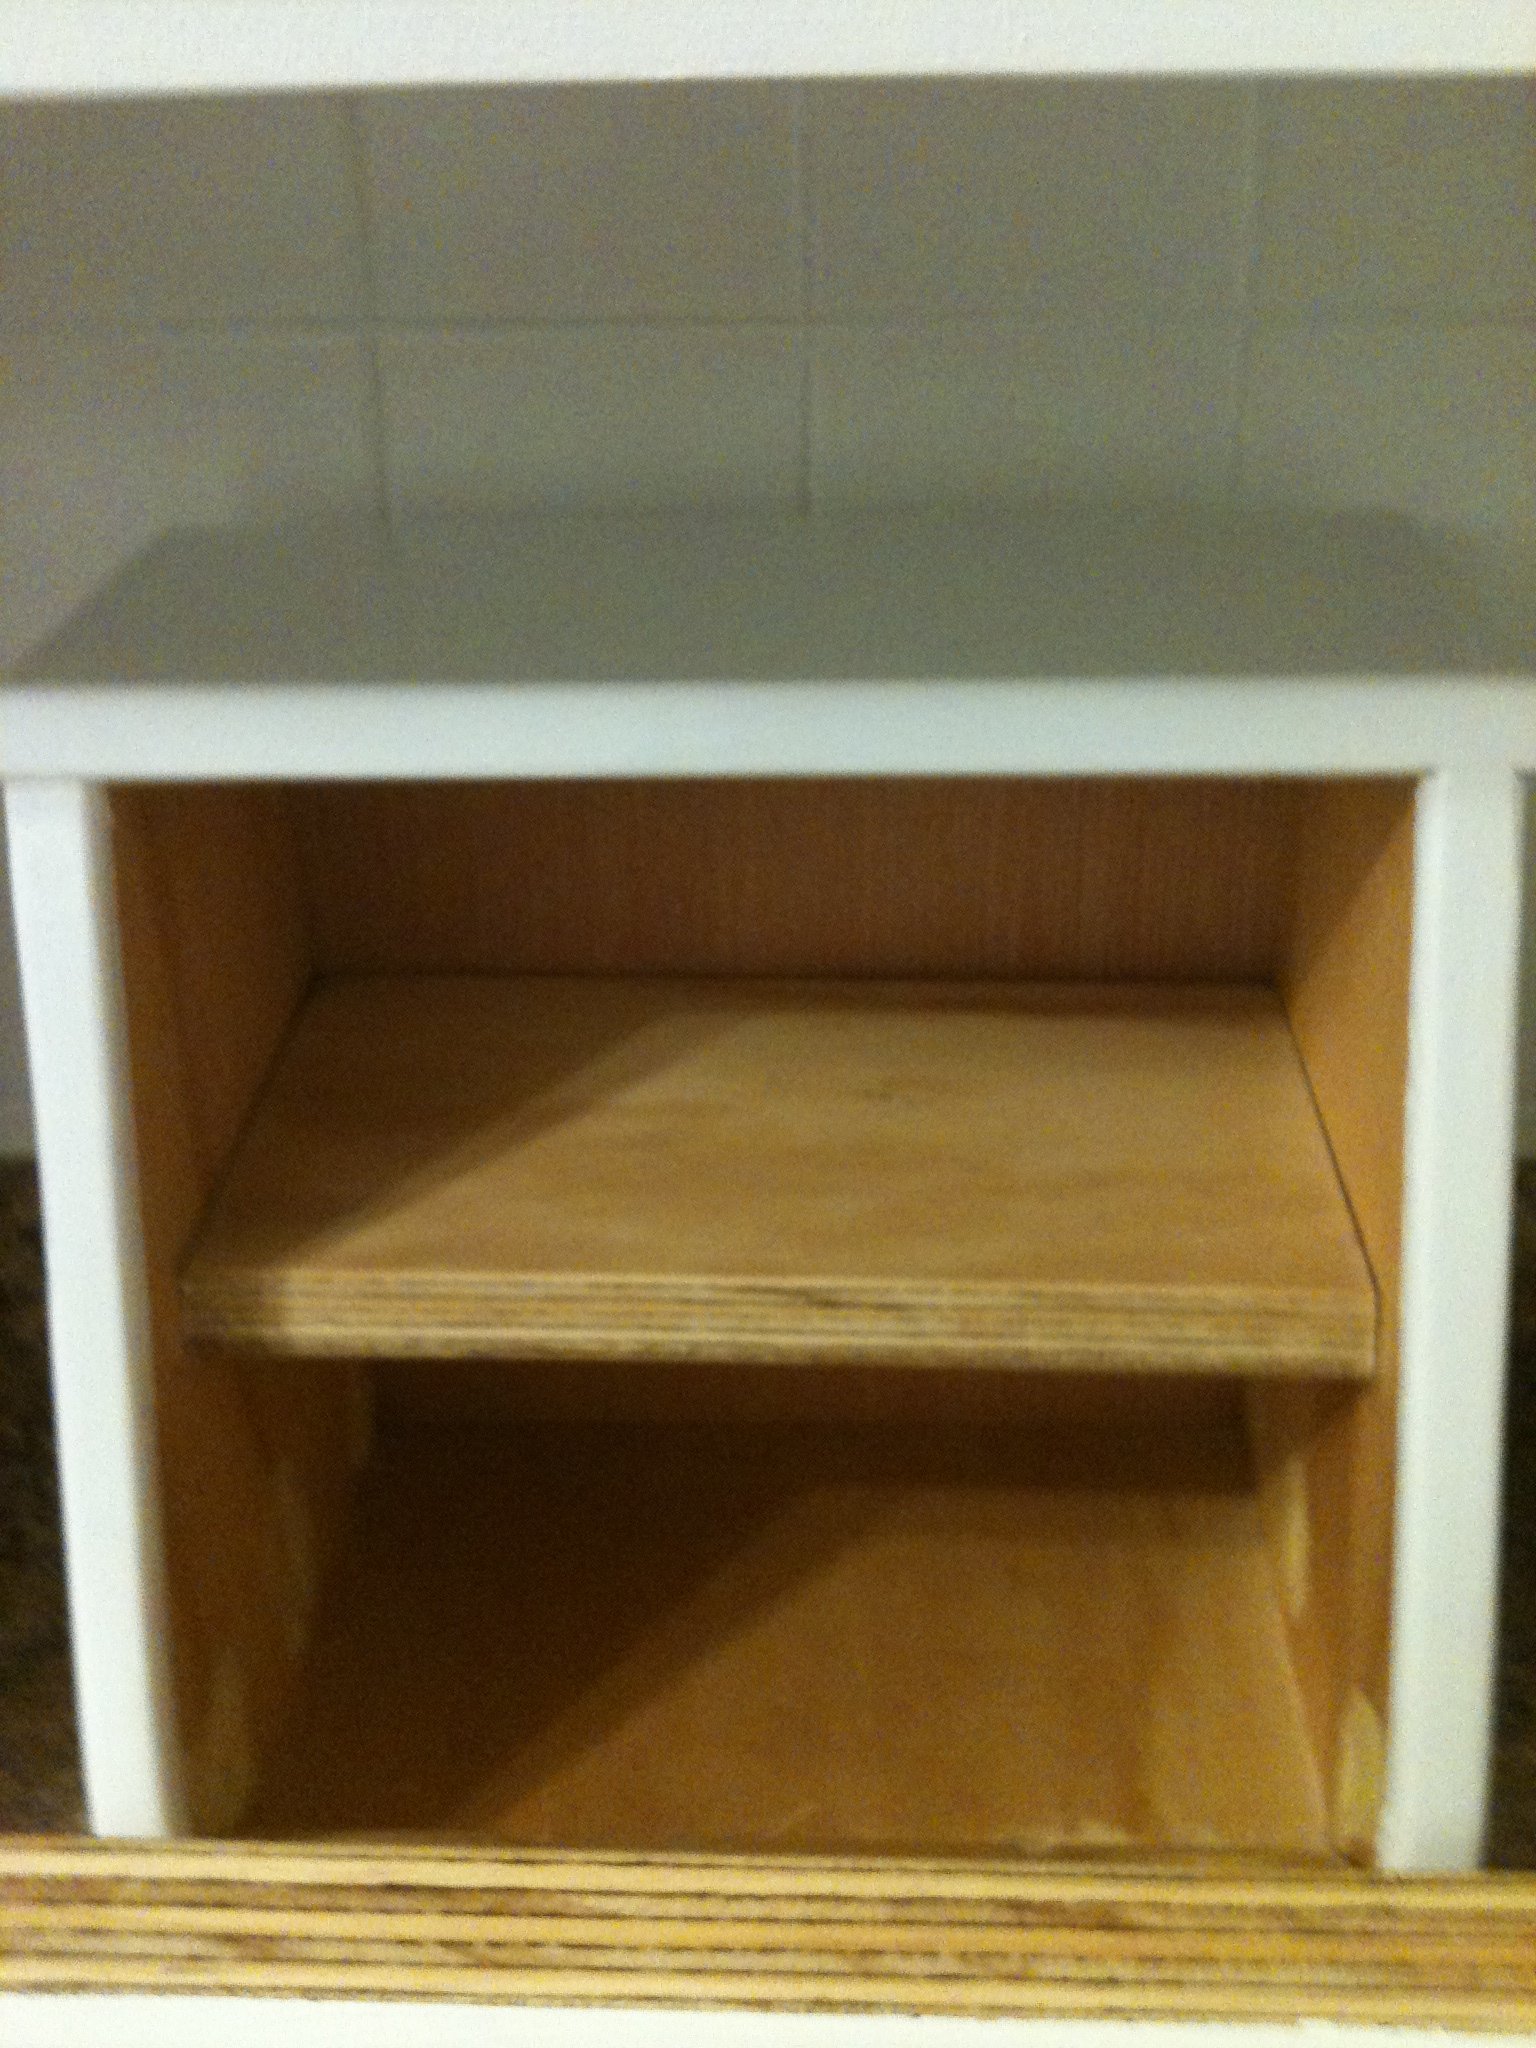
I started baking my own bread a few months ago, and storage was an issue. My husband decided to build me an old fashioned bread box and set out designing one on his own to fit in our small galley kitchen. I love it. It is a double decker, so I can fit two loaves in it just fine. The inside is coated with a food-grade sealer.


Sun, 12/04/2011 - 02:32
That is a great idea indeed and I love how it has a shelf inside.

Wed, 12/07/2011 - 03:49
This is an awesome idea, can't wait to make one for my kitchen. Beautiful job! Thanks for sharing this!
Sat, 06/30/2012 - 07:05
Just what I'm looking for! Do you have a pattern or measurements on this project? Thanks!
Tue, 08/20/2013 - 10:40
Please, let me know if there are plans/measurements somewhere. Love this!!
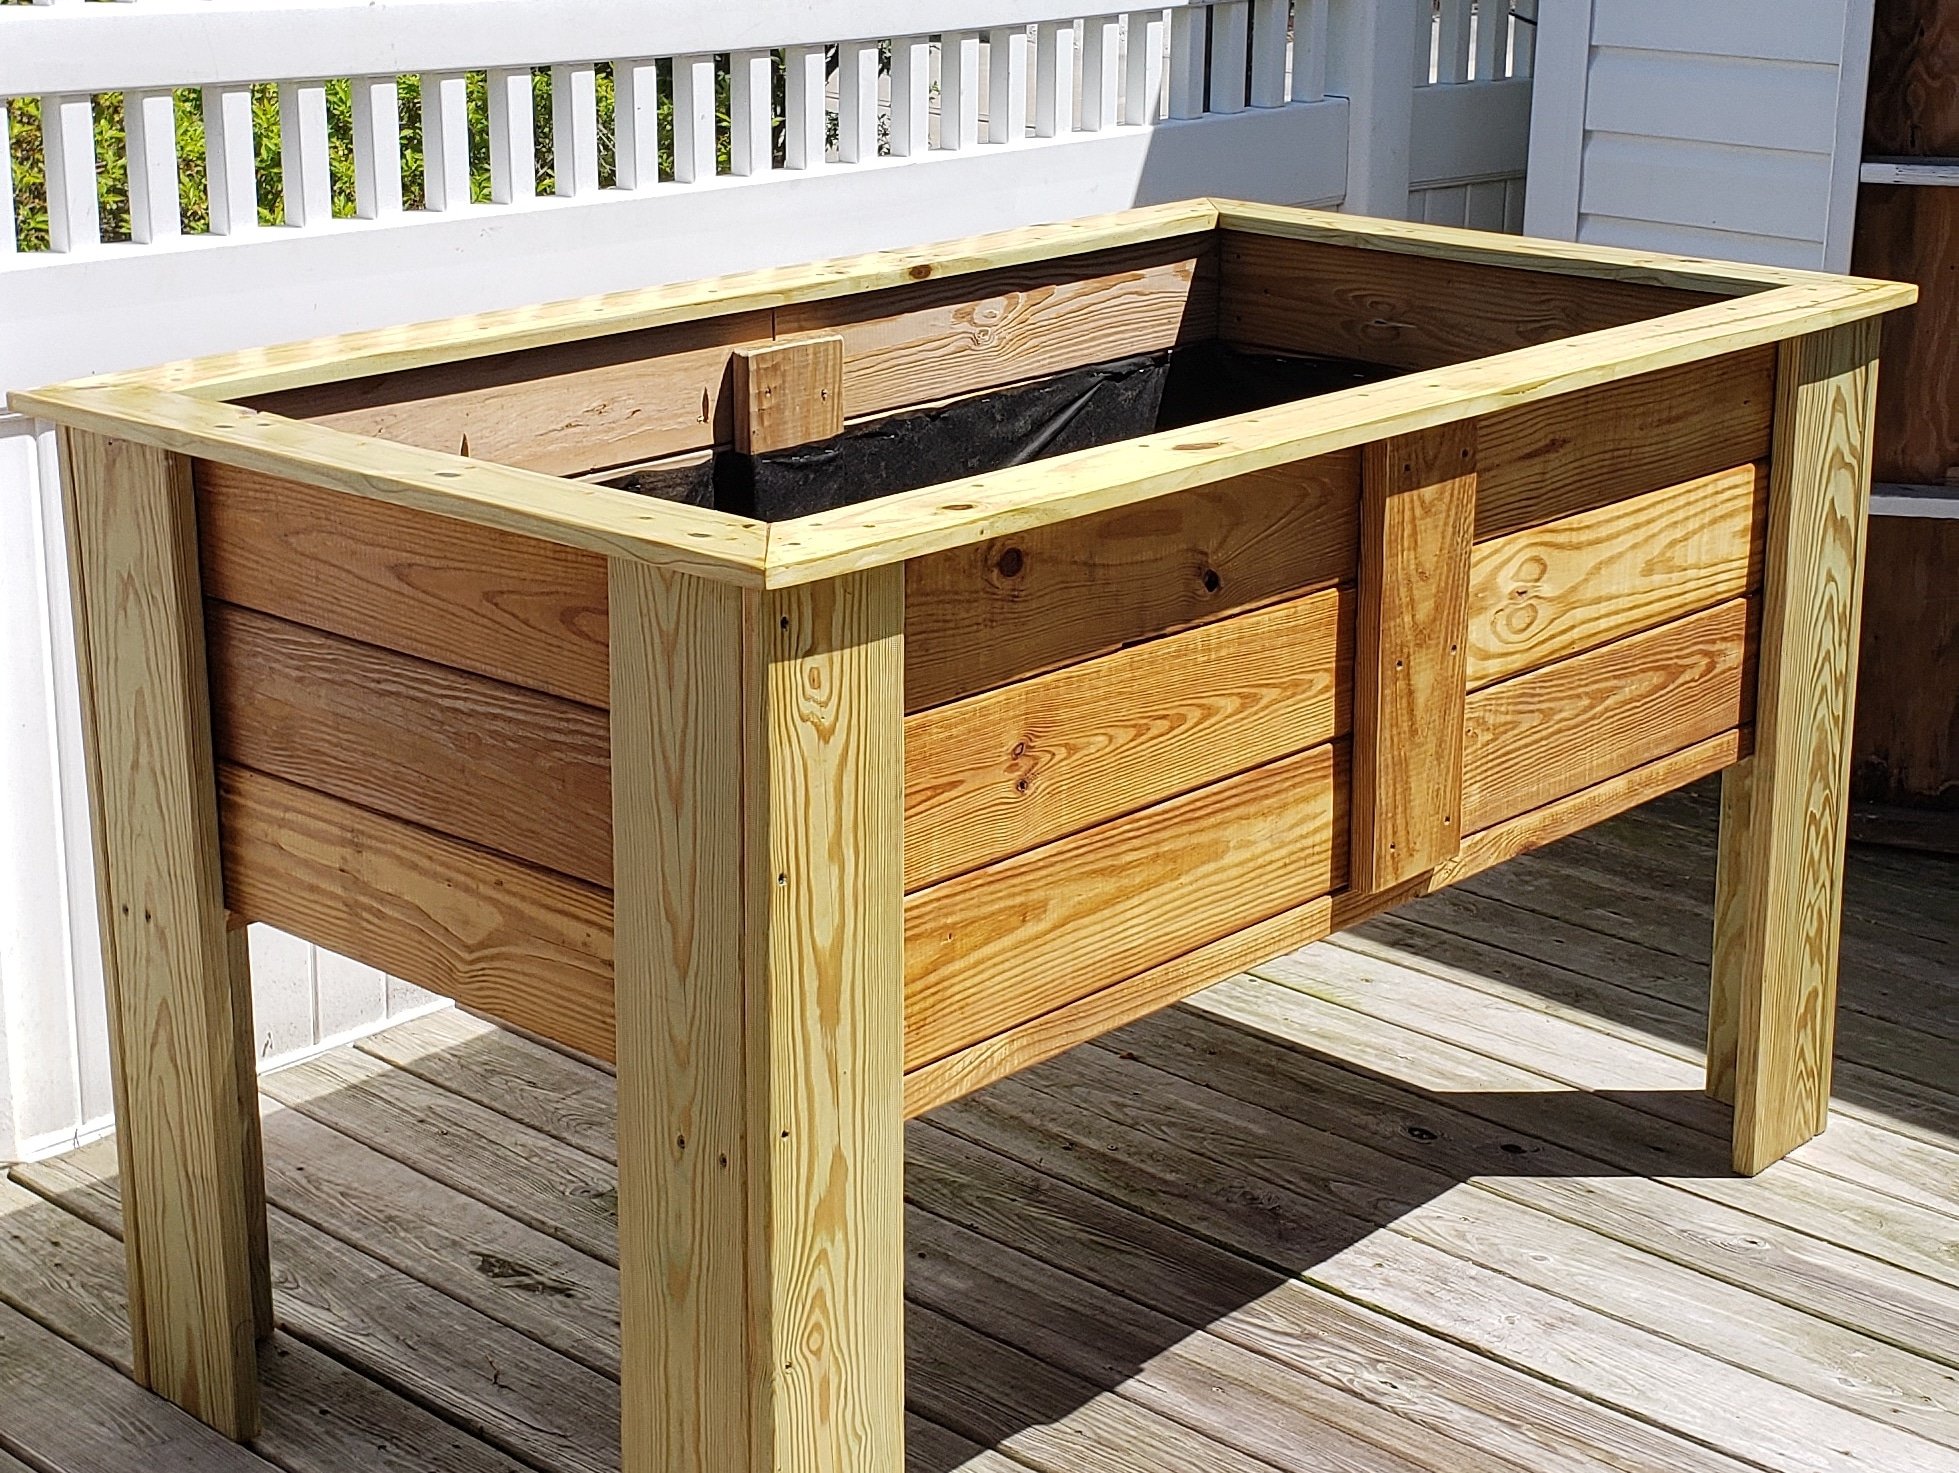
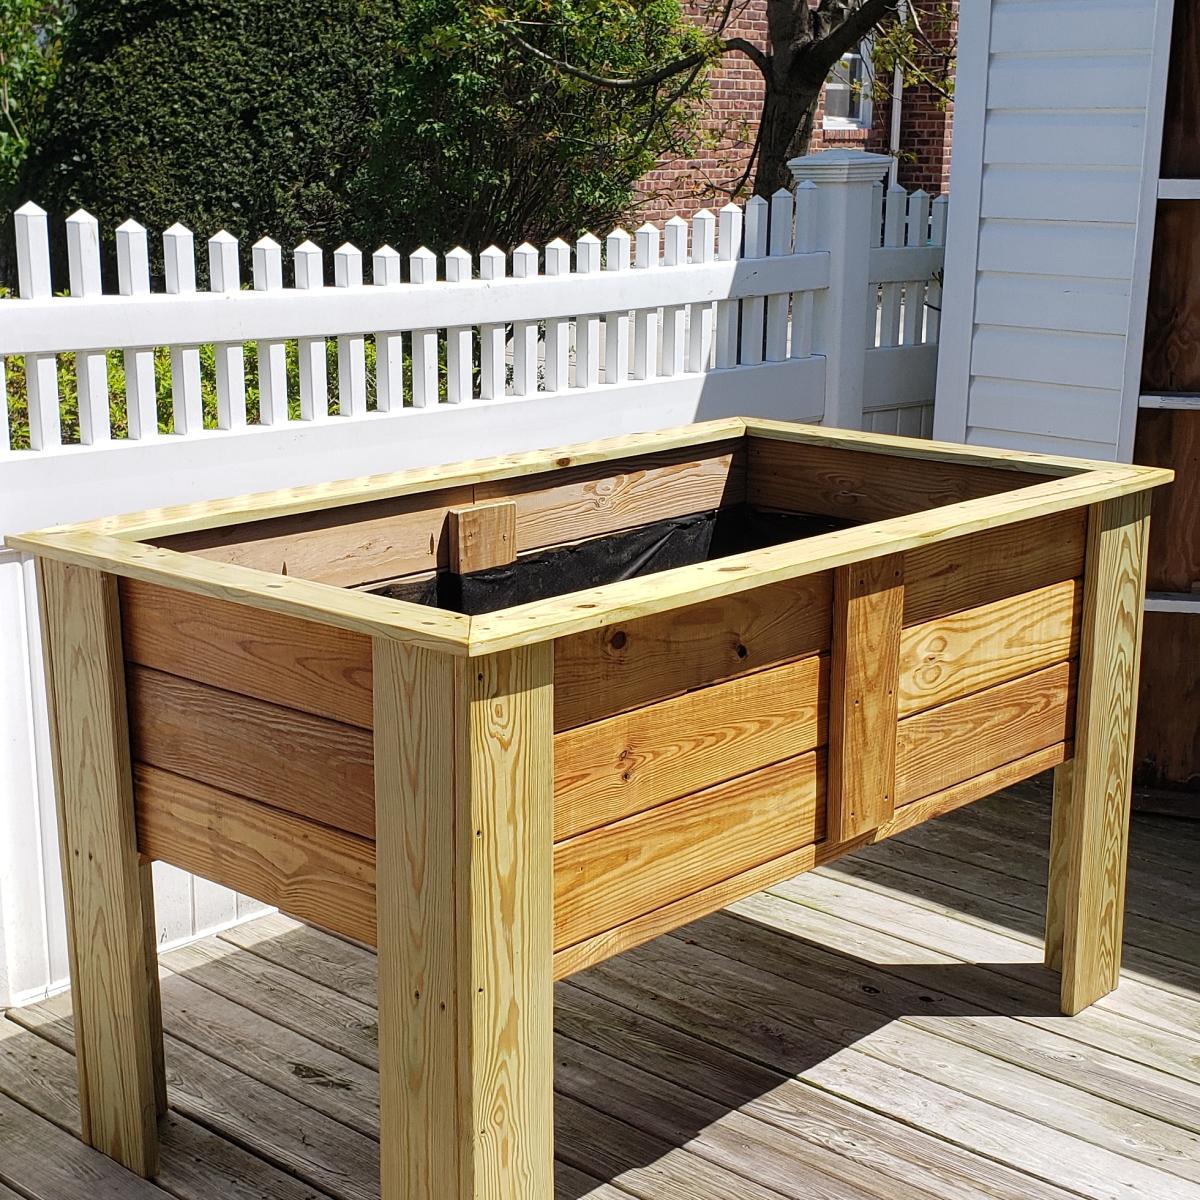
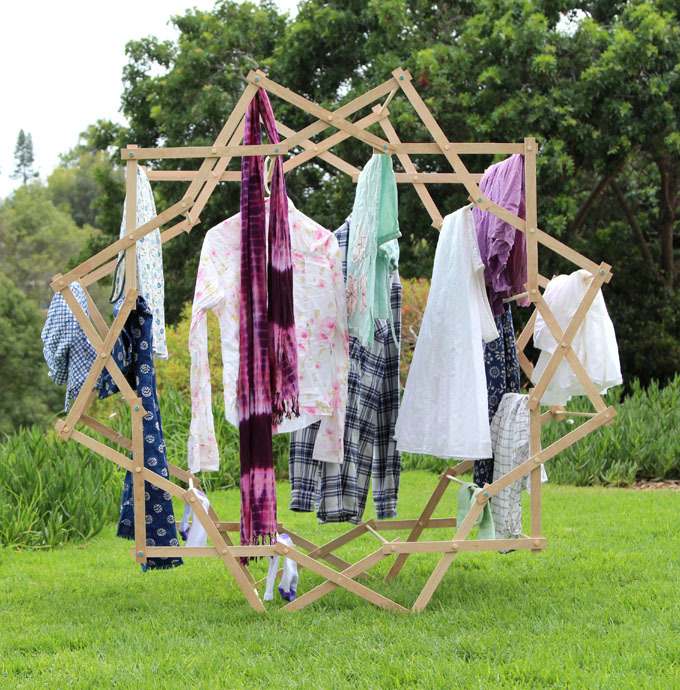
A friend of mine has issues with her knees but loves gardening so I built this to allow her to continue gardening. She loved it.
I didnt follow any particular set of plans I watched several you tube videos and combined different ideas from the videos to develop my own plan.
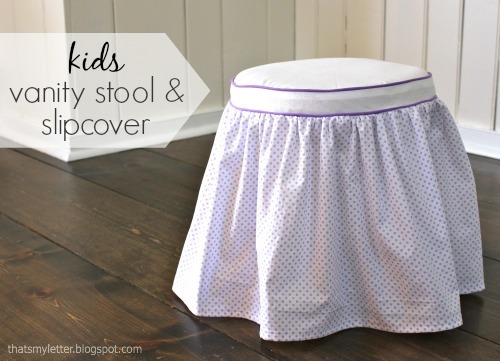
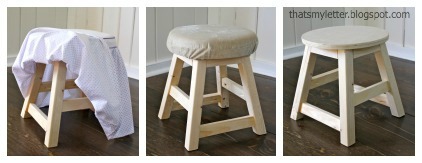
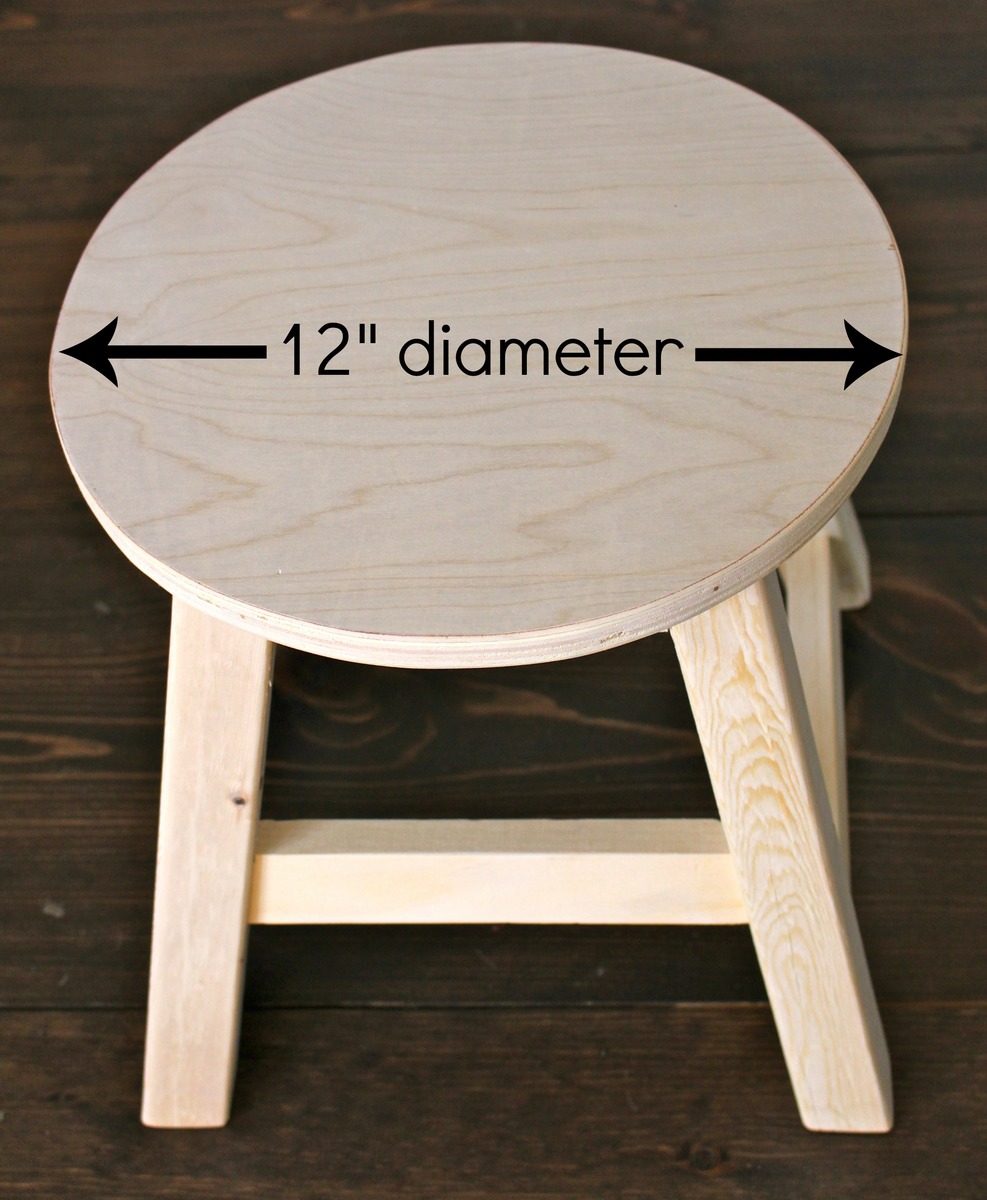
I used all scraps to construct the stool modifying the leg height to 12 1/2" and the seat to a 12" diameter to fit properly at the kids vanity. See the complete details on the slipcover in my blog post link.


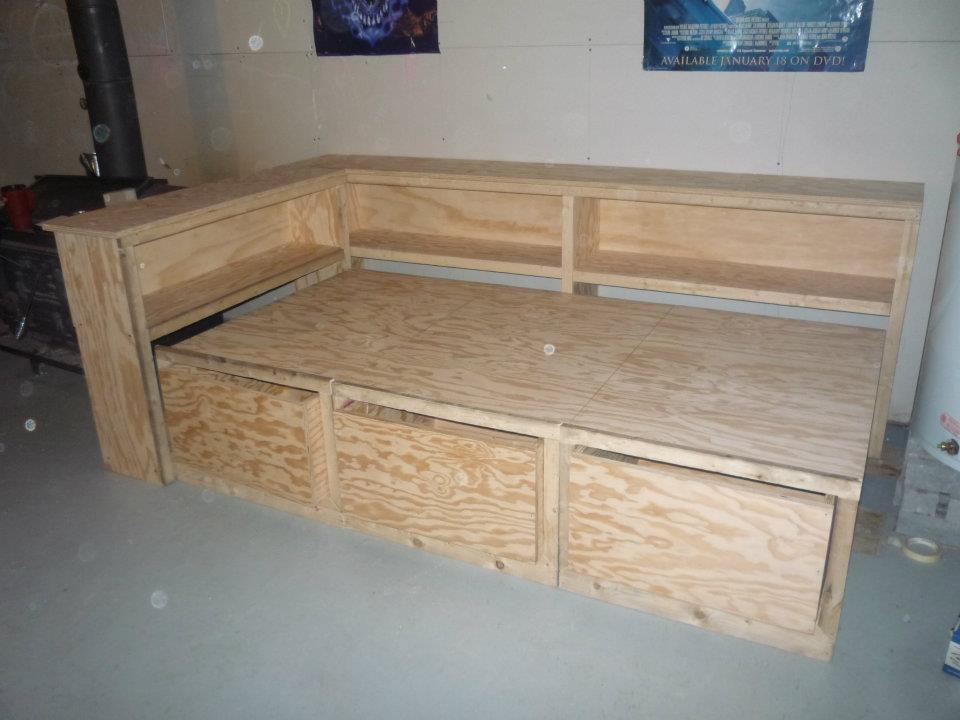
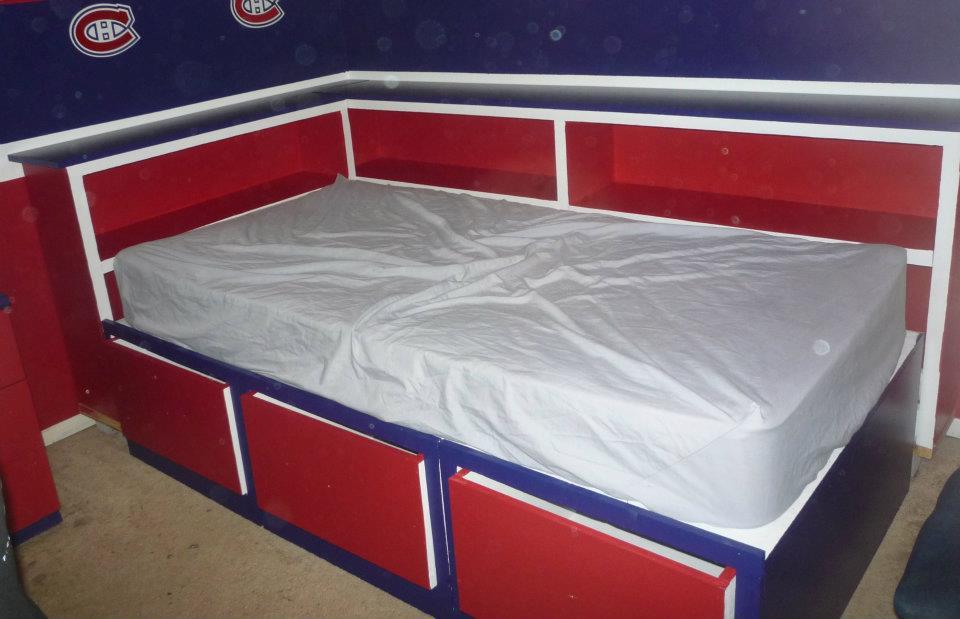
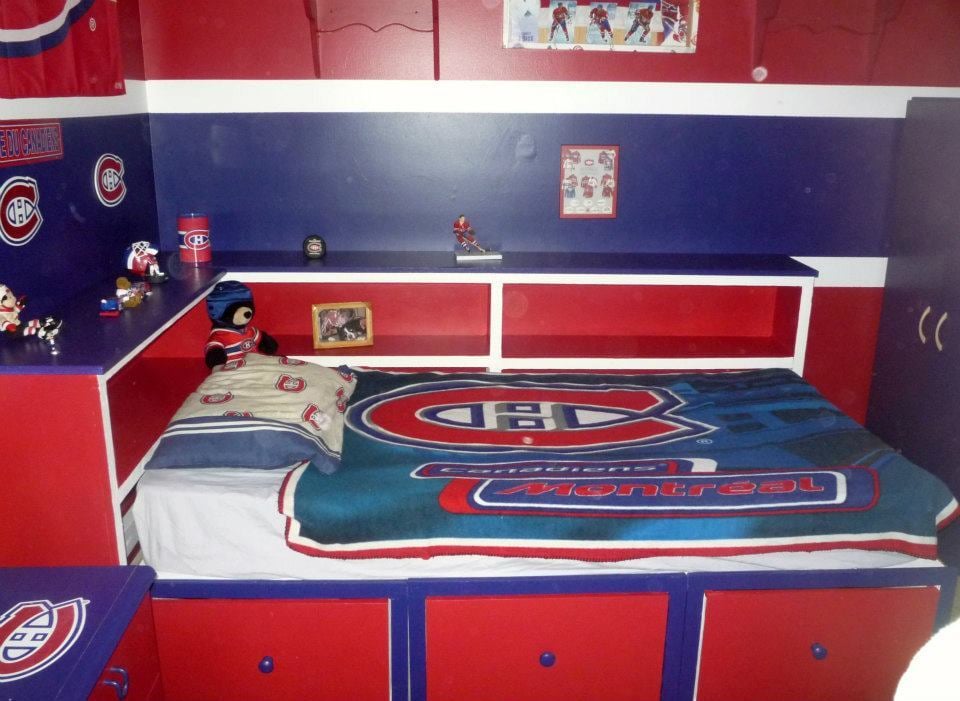
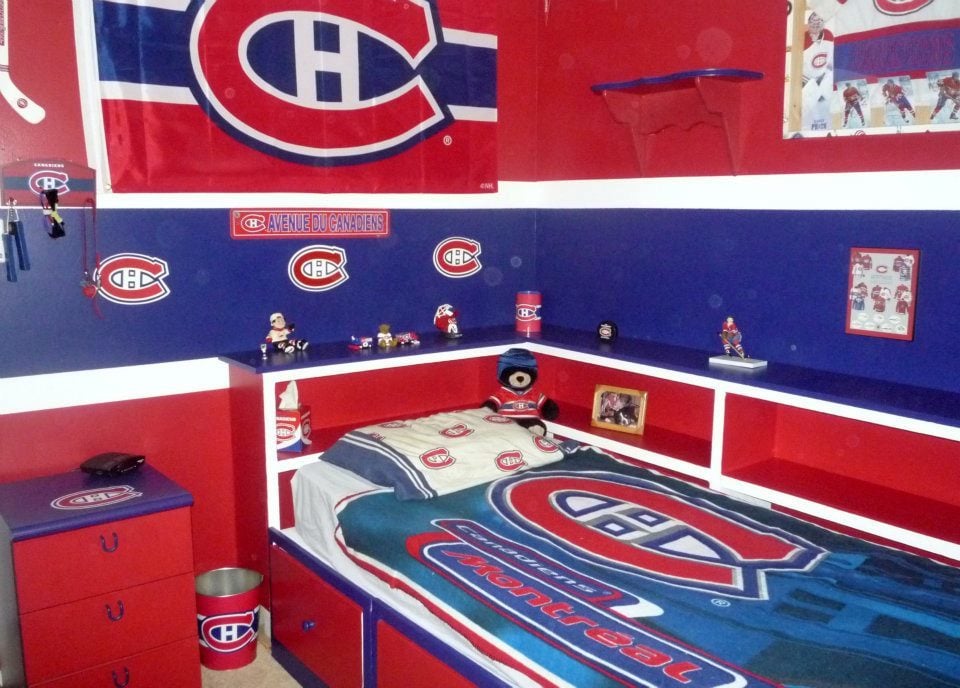
Our nephew Nathan really wanted a captain's bed like his friend. We built him one even better for Christmas this year. I couldn't find one plan with everything we wanted to I used the plans for the Storage Daybed for the base, and used the plans for the Cozy Corner twin bed collection wide bookcase unit. We combined both the headboard and sideboard into one unit (by extending the top to the short end) giving him an L shaped headboard for all his hockey stuff :) The only thing we messed up on was the height of the bookcase. He wanted it higher so it's on blocks for now to raise it. My sister did all the final painting to match his room and it looks AWESOME!!!
Steve had everything cut at work and we put it together in one 12 hour day! Nathan LOVES his new bed. Thank you Ana!

Fri, 01/06/2012 - 16:52
That is one nice, cool looking bed. Interesting colors, is it his school colors? I've never thought of painting plywood, you've given me some ideas.
Fri, 01/06/2012 - 21:24
The colors are the official Montreal Canadiens hockey team's colors, My son is a HUGE fan! Nathan LOVES his bed. and it is very solid.
Fri, 01/06/2012 - 20:29
Ummm... The bookcases were too short because you didn't take the mattress height into account. Looks really good though.
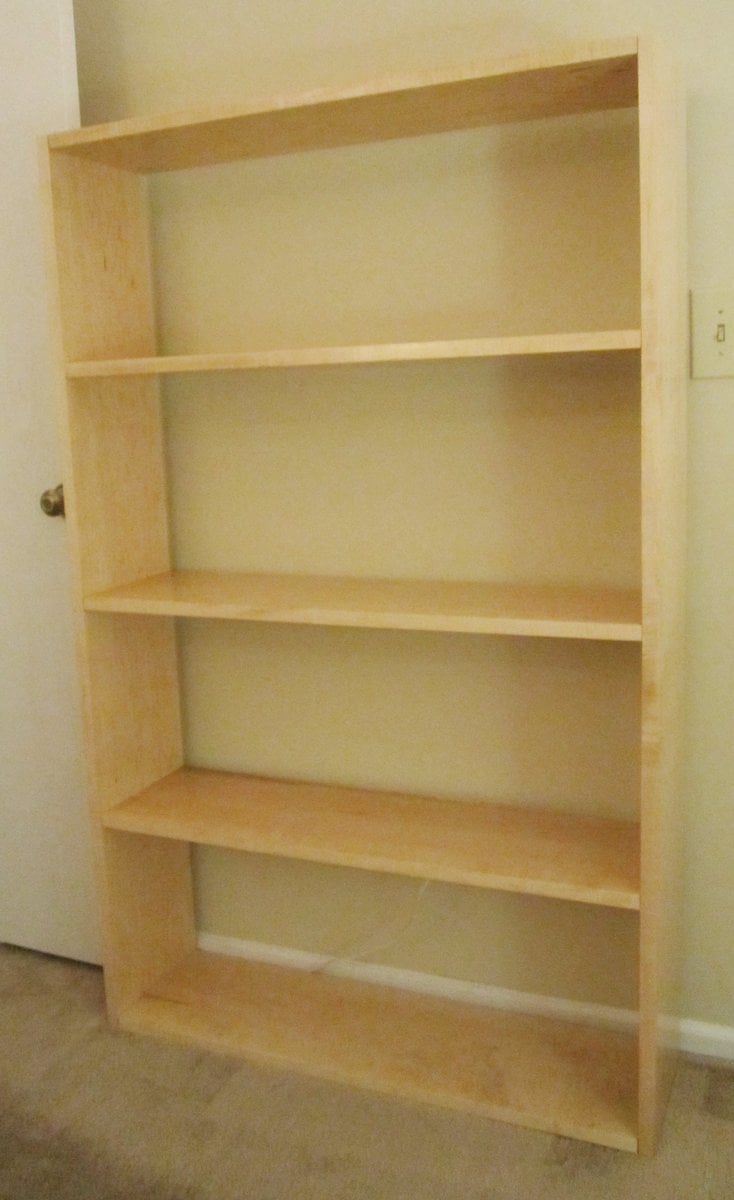
I made this bookcase out of solid hard maple lumber. The project was more expensive because I chose to use this wood. It also took more time because I had to do a lot of sanding in order to finish it with shellac and paste wax, but I think it was worth it. I altered the plans and made the bookcase 5' tall instead of 6' as it would have been a little large for the room I put it in otherwise. I used a kreg jig to create pocket holes on the undersides of the shelves so that I did not have to drill and make holes on the sides of the bookcase. I also used L and T brackets on the back to hold the whole thing together.

Tue, 01/24/2012 - 10:12
I really like this. I made a similar set a while back out of pine, because I needed a lot of book storage in a hurry, but nothing near this nice.
How is the side to side stability? I found a need to put bracing along the back, which also served to keep my books from falling off when the cats push up against them.
Tue, 01/24/2012 - 10:46
The side to side stability is pretty good. It'll rock a little bit, but it's really quite sturdy. The L and T brackets in the back helped significantly with the stability.
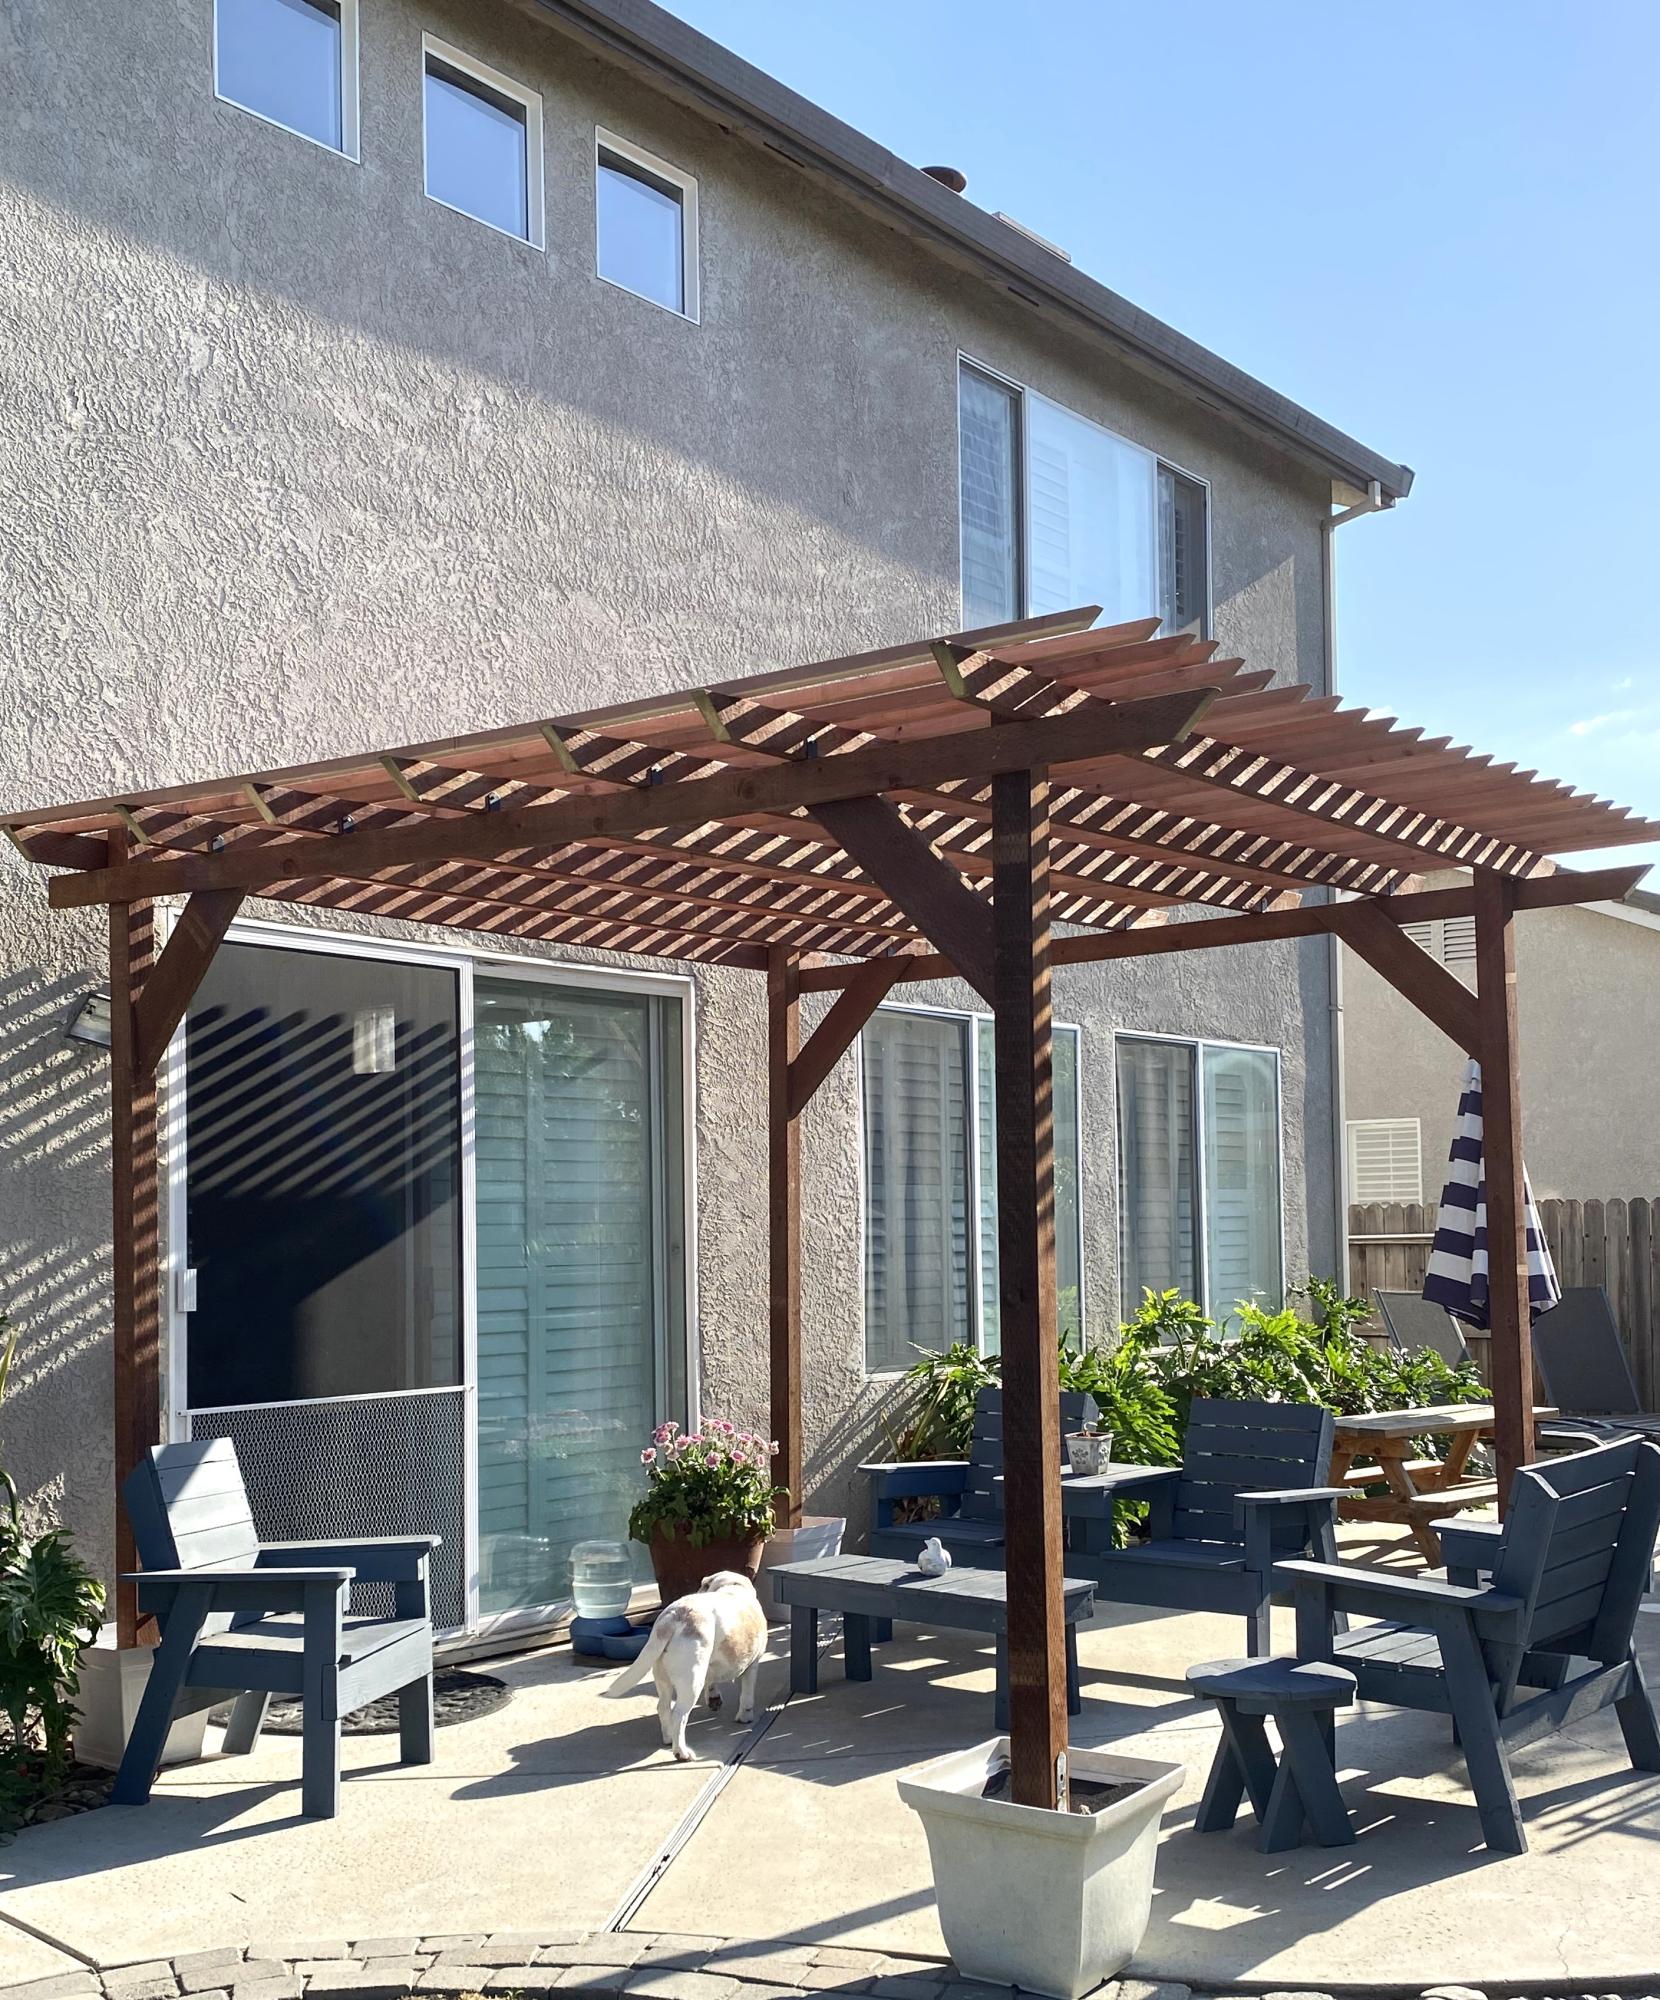
I built this pergola in 3 days and added mason jar solar lights.
Vonda Jones

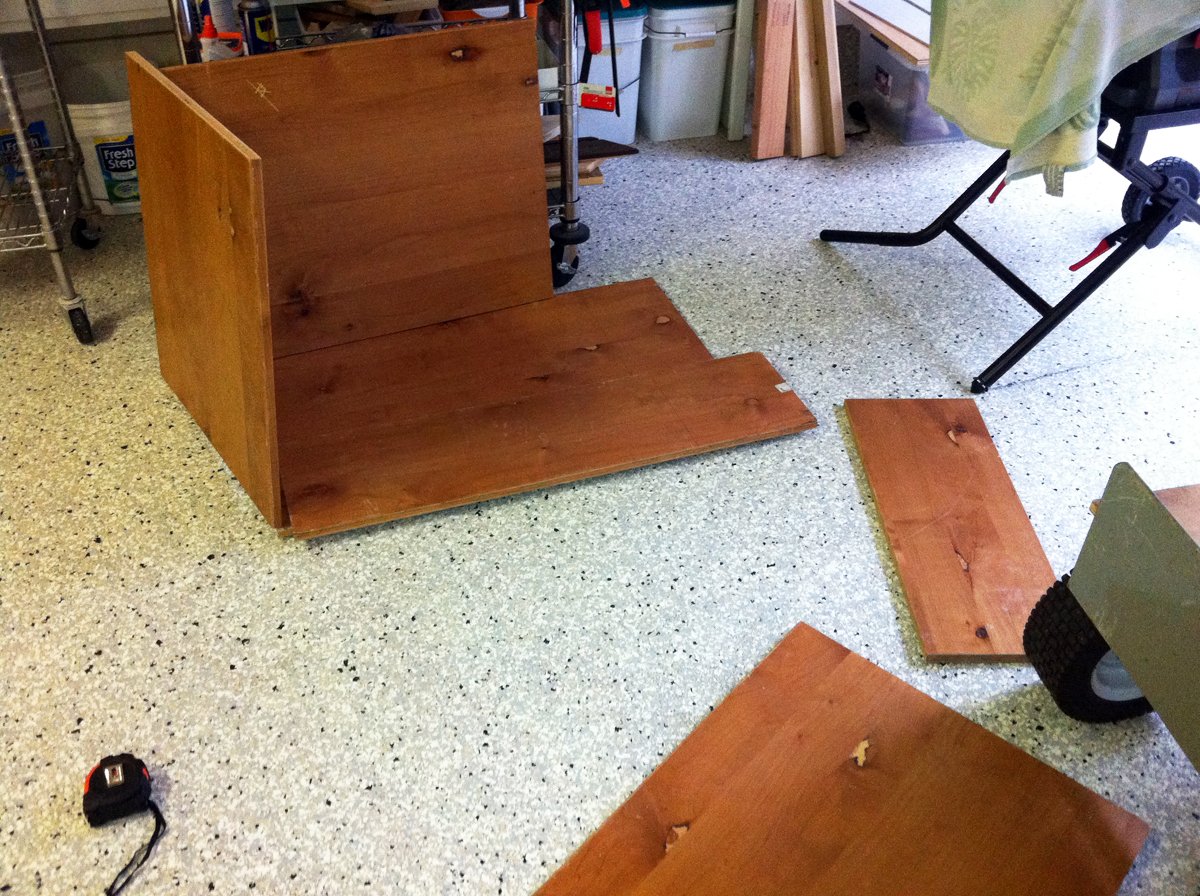
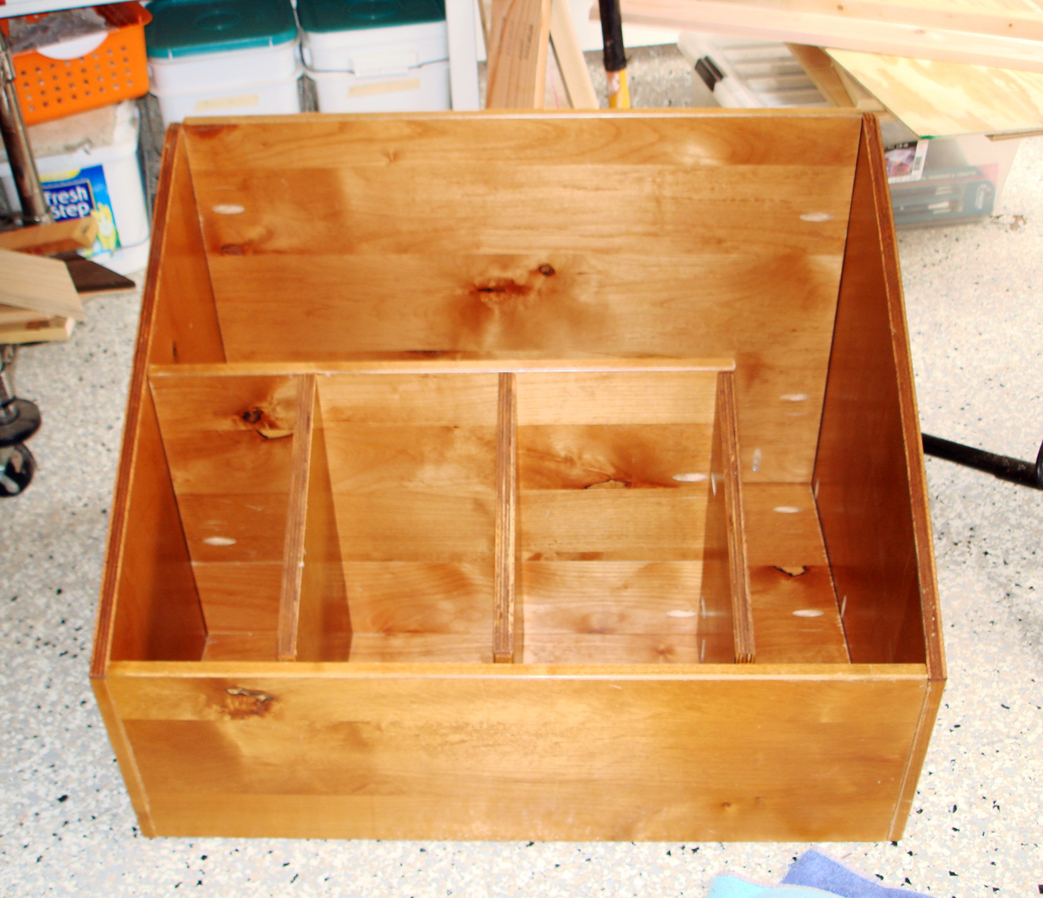
My wood scraps were definitely getting out of control, and I needed something to store the wood vertically. I had some spare wood (free from Craigslist), so I put together a wood storage bin. All in all, the project cost me the price of some Kreg screws.


Mon, 03/19/2012 - 20:13
Love it! I'm building some crates from pallet wood to store my scraps in. Your box turned out very nice.

Wed, 06/06/2012 - 13:21
I have been struggling to organize my space because my lumber is on one of my work spaces. I have the perfect space for that, thanks for the great post!
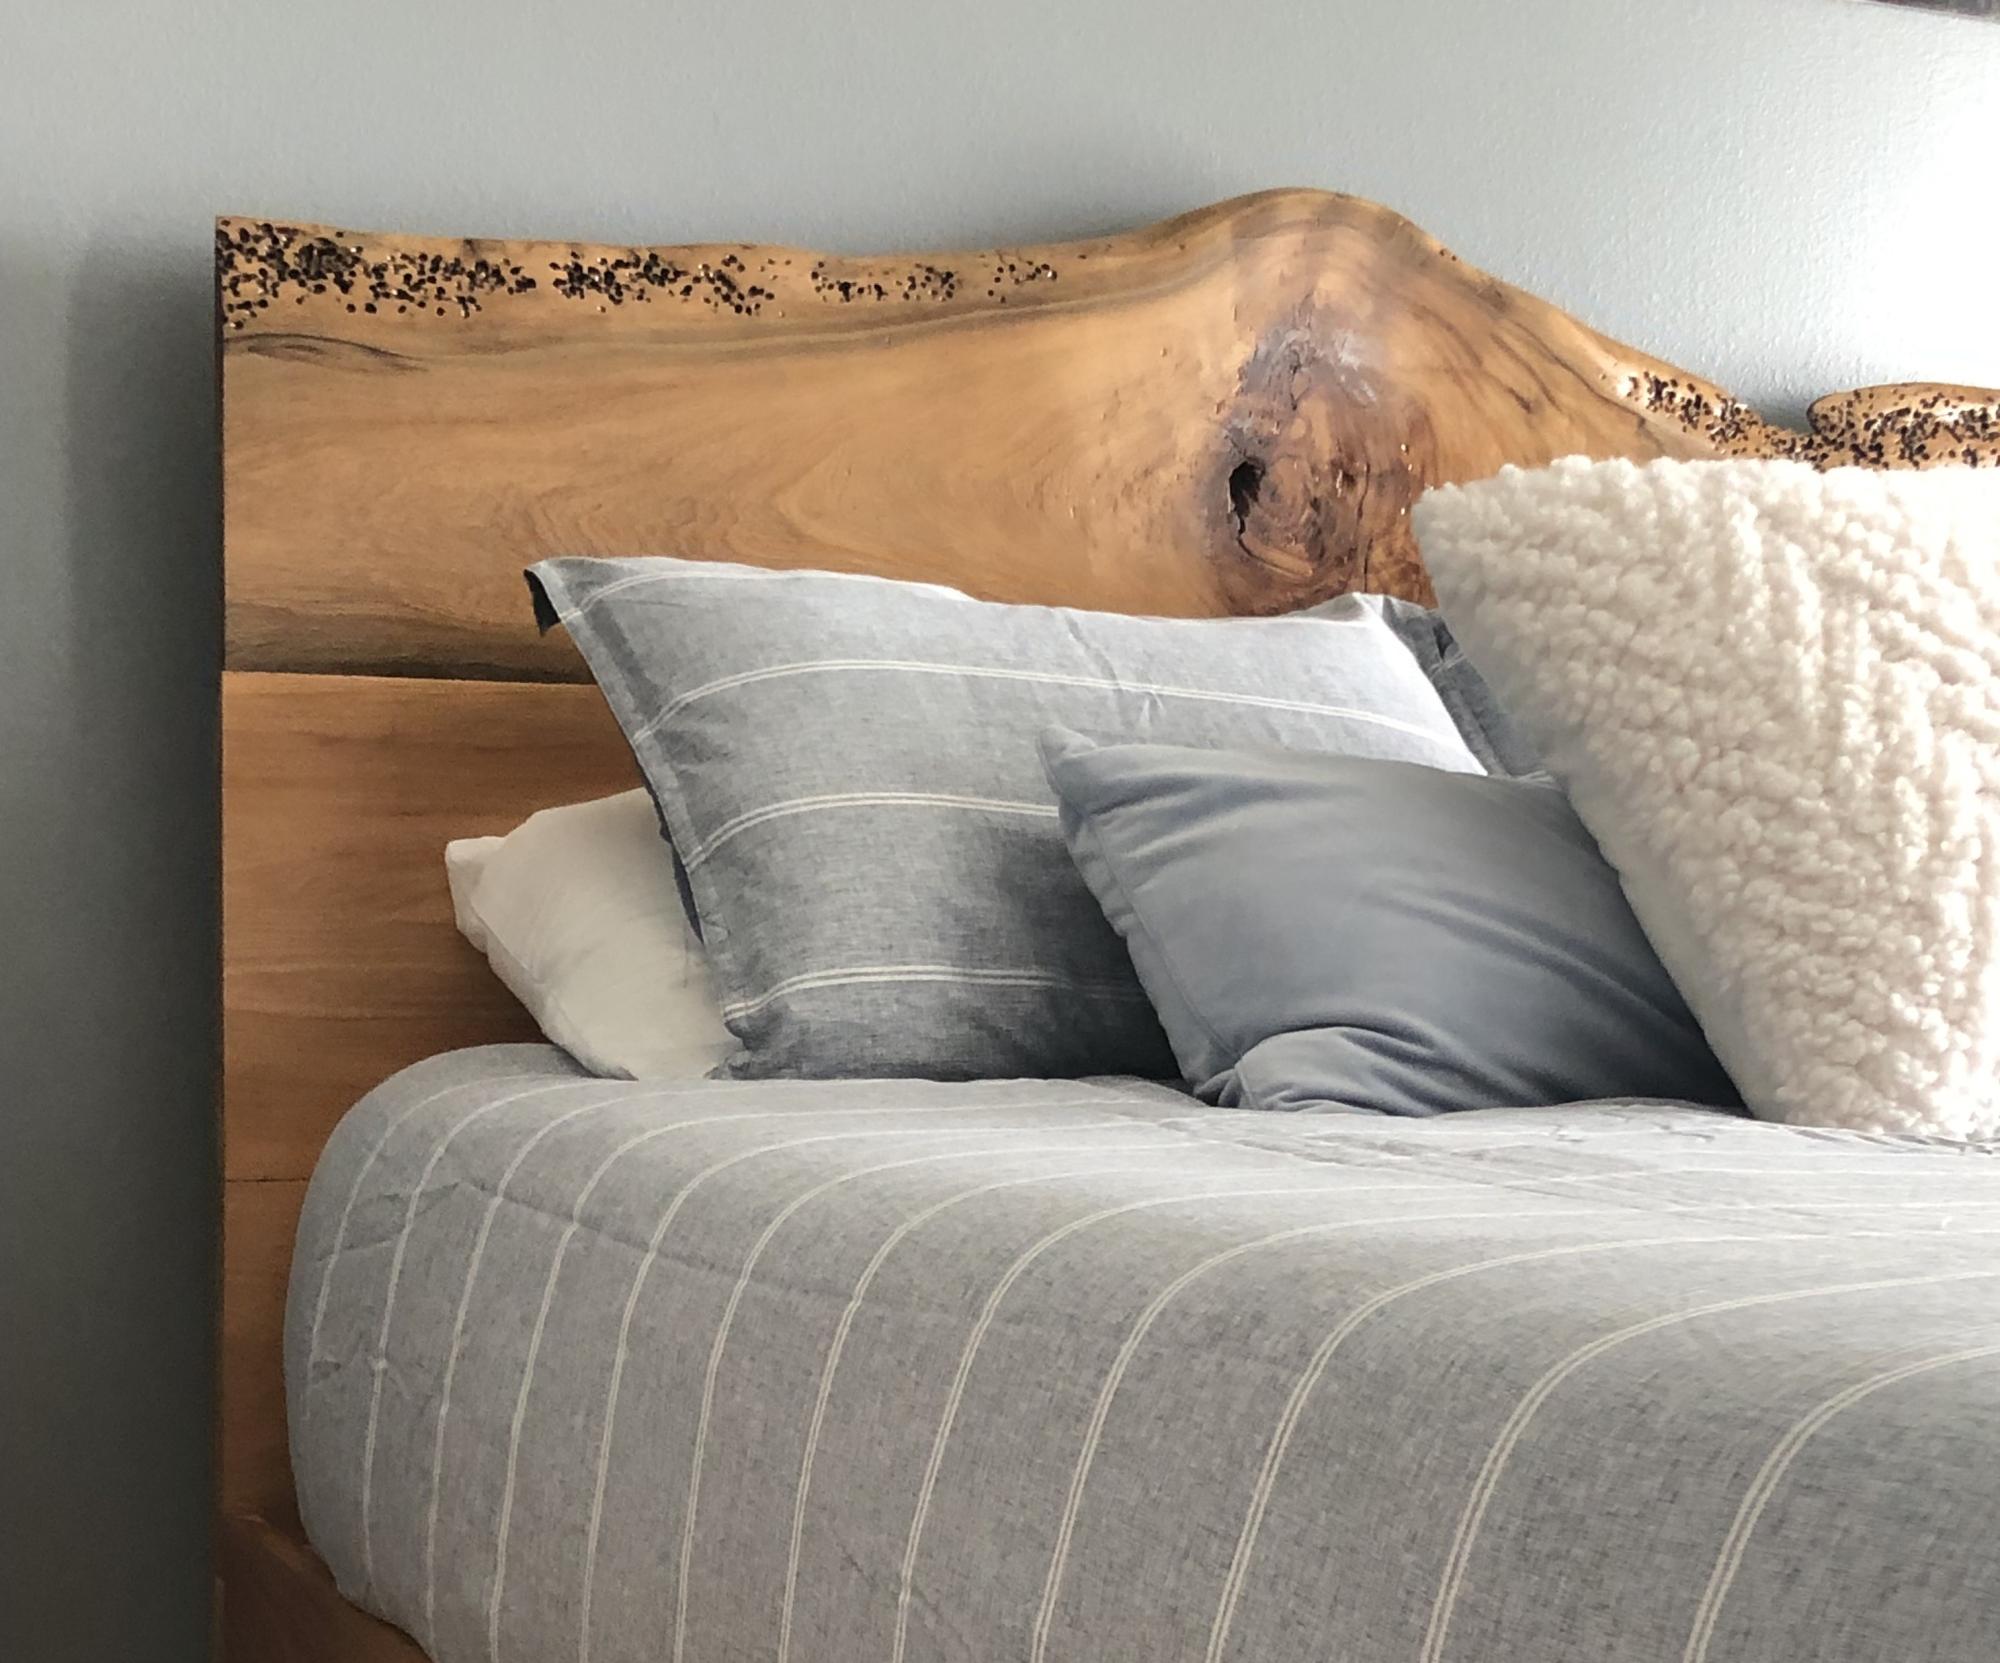
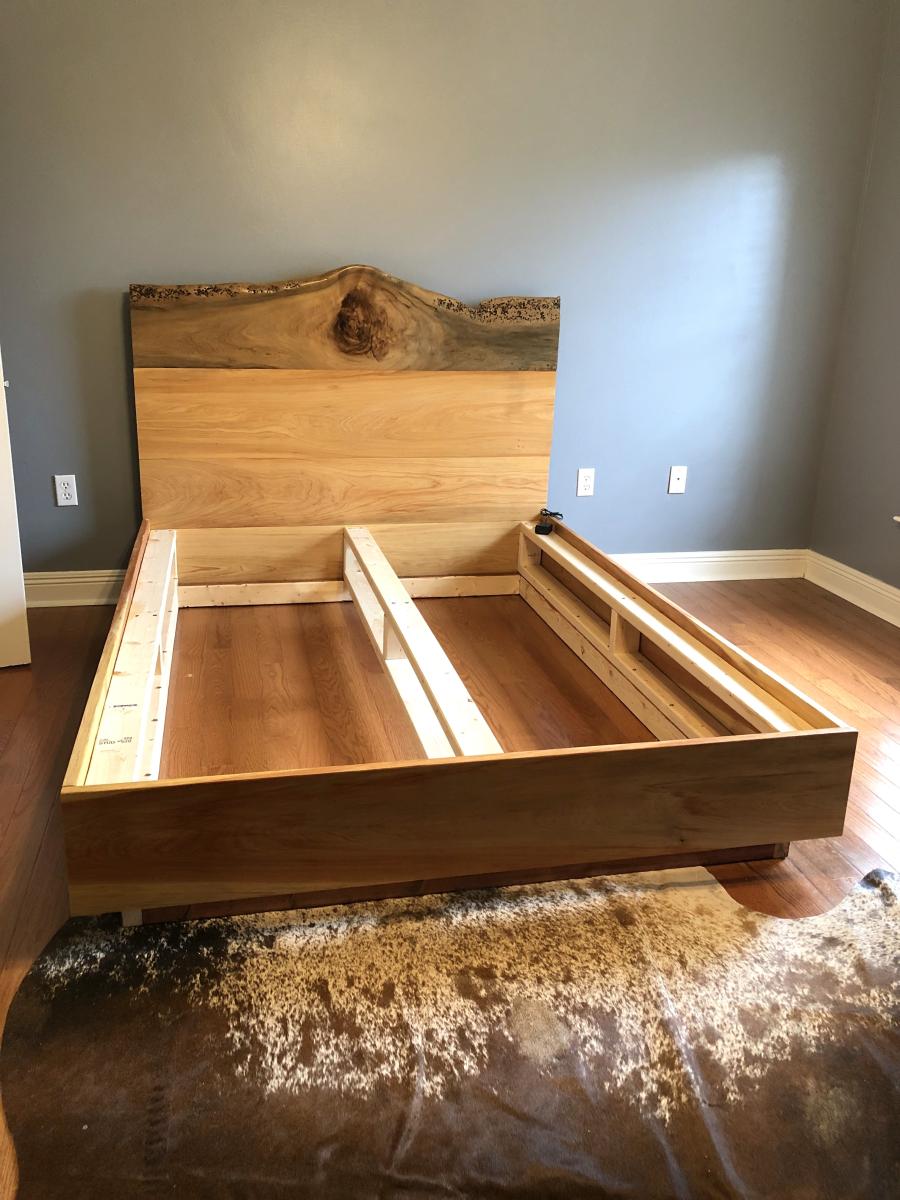
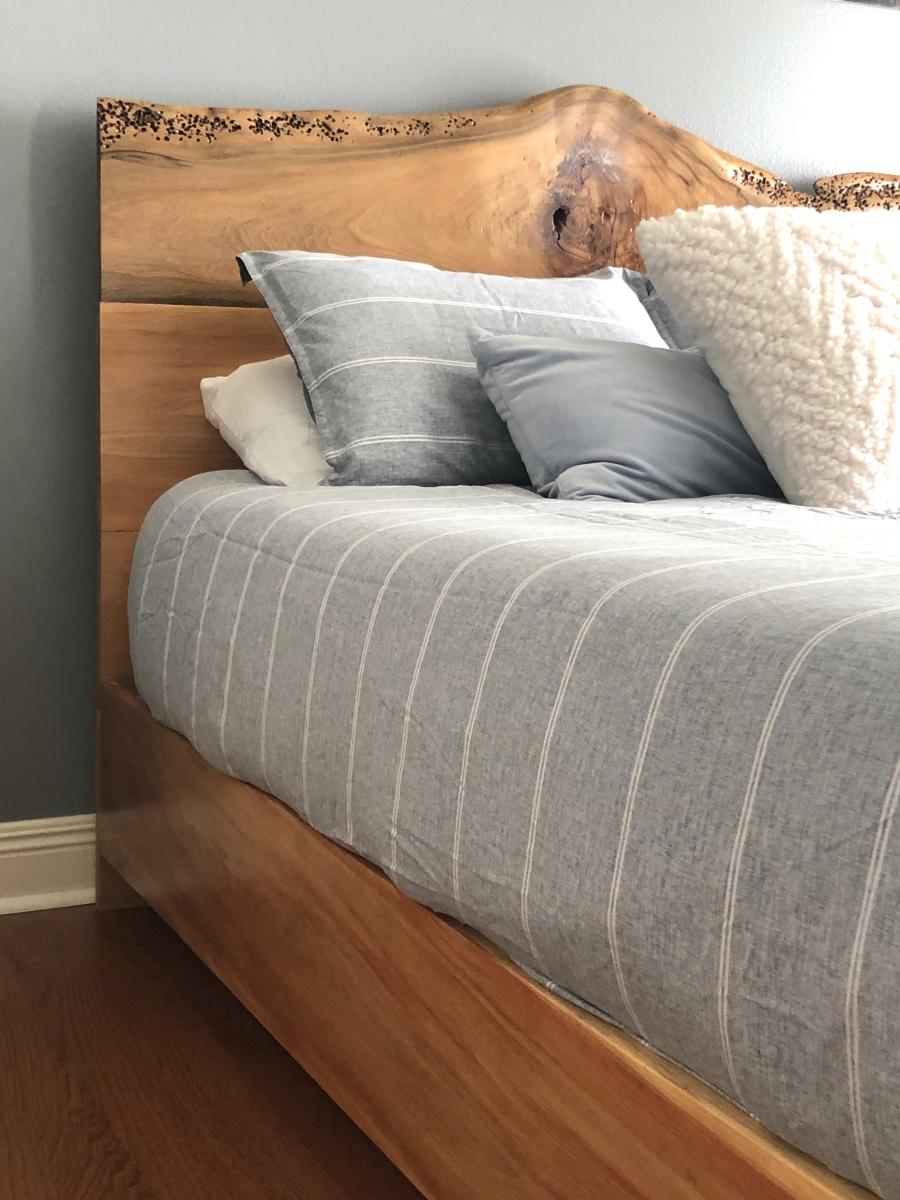
Older children moving out for college left the youngest without a bed. We decided to use your plan for a bed, but altered the headboard just a bit so that we could use live edge cypress. We love how it turned out, plus we were able to use locally sourced cypress!
Kathleen R

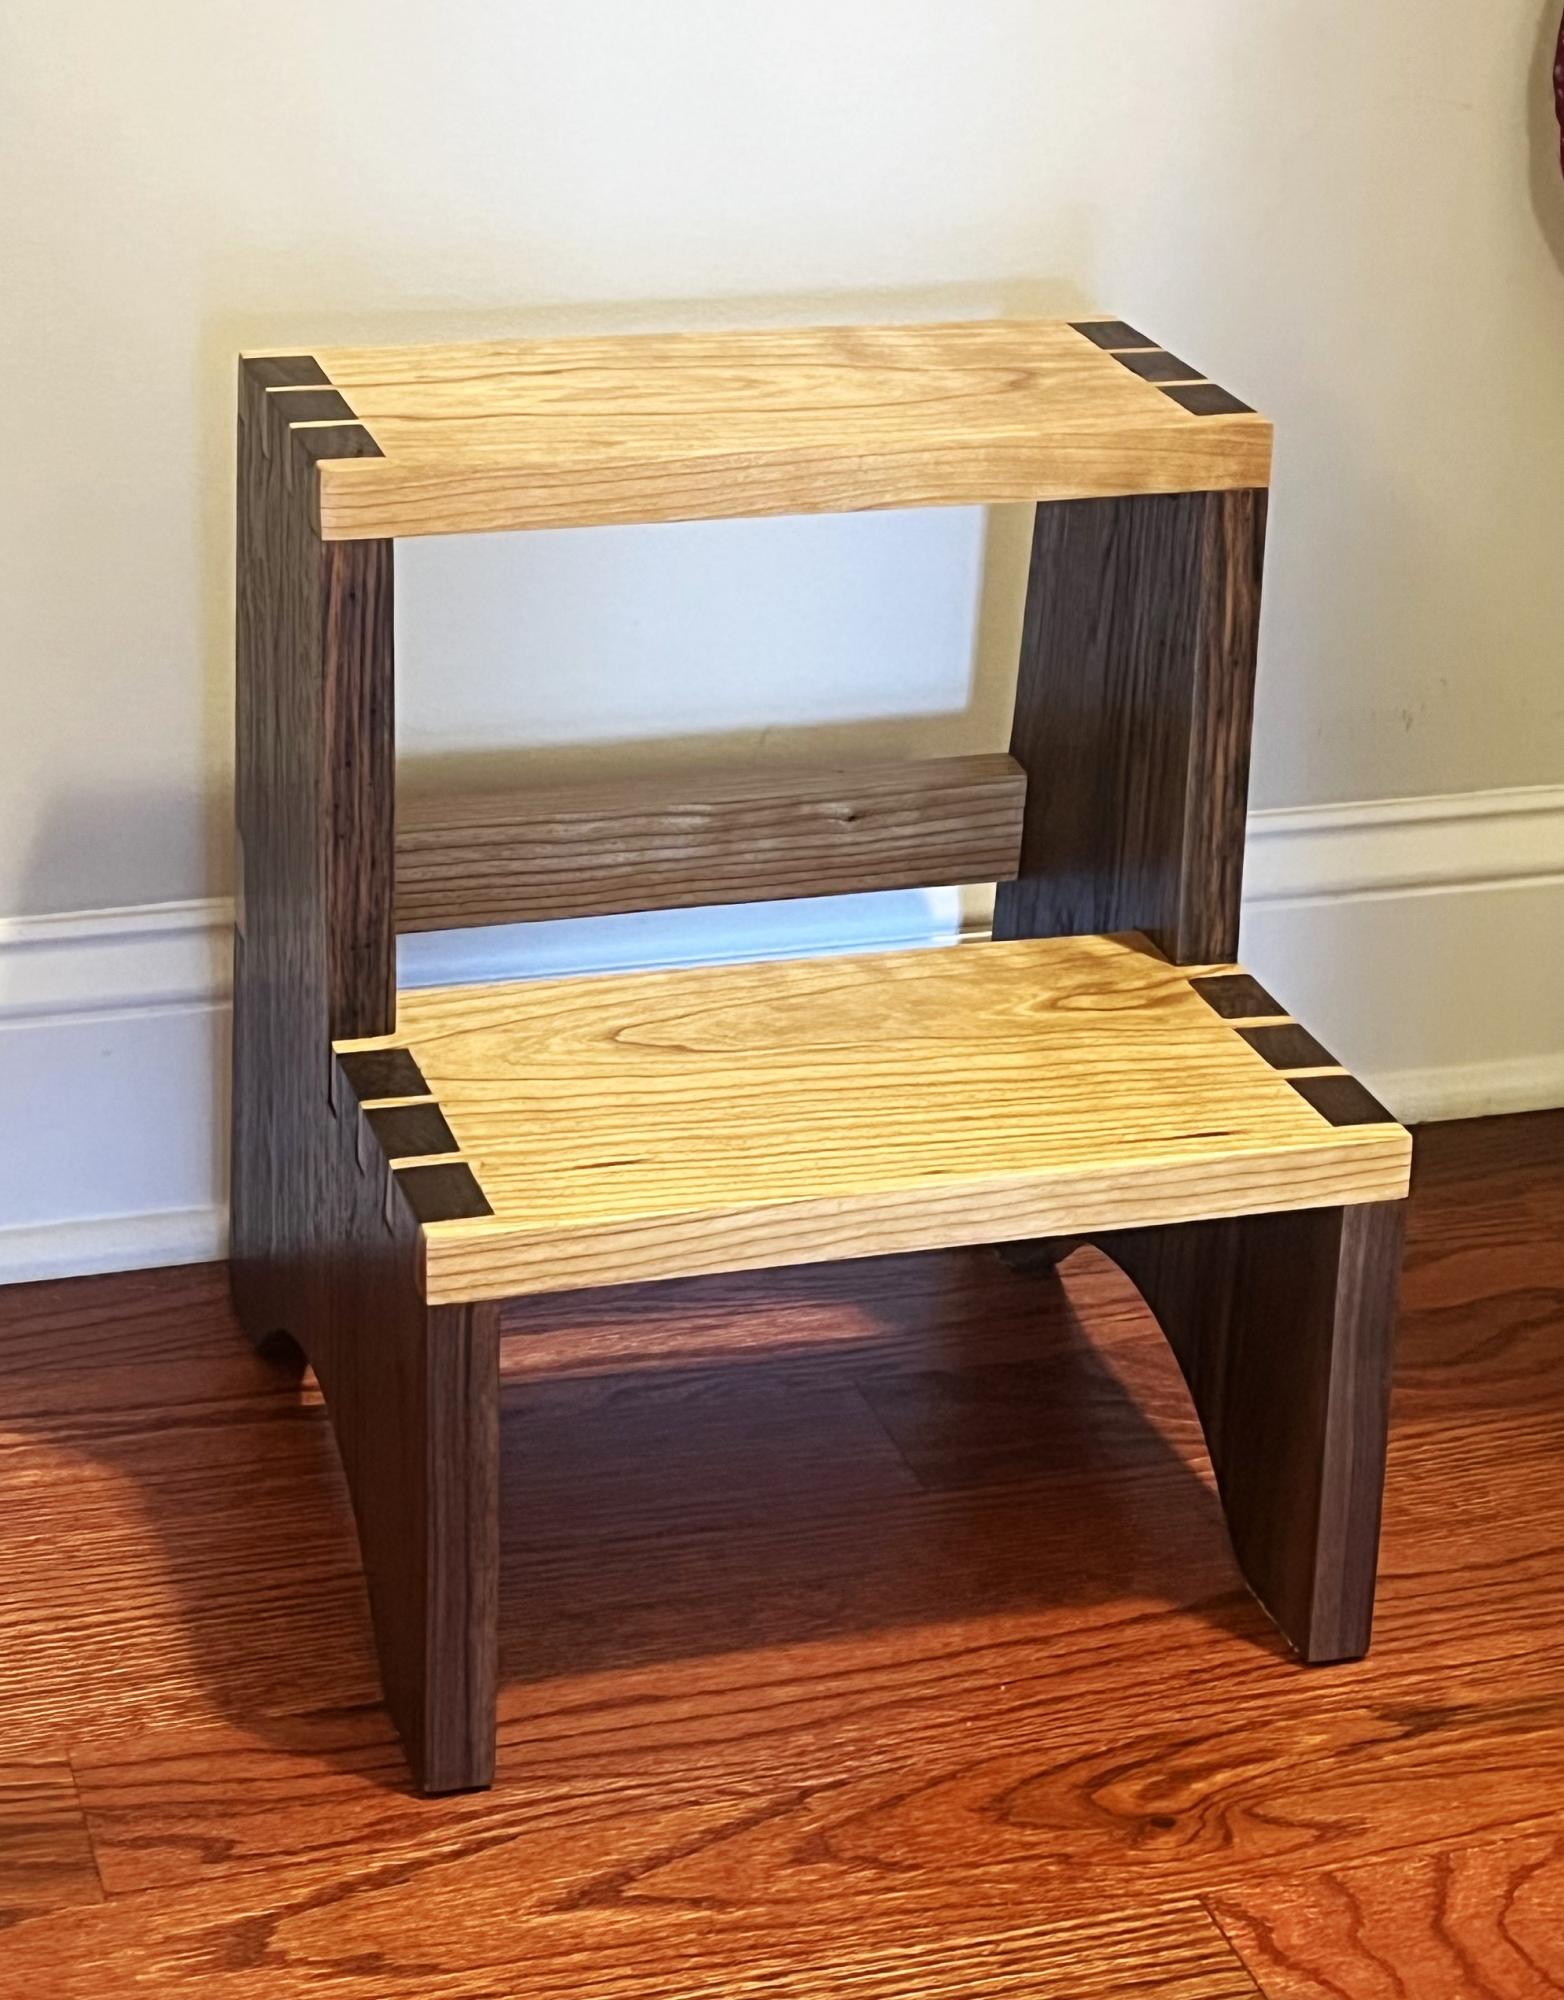
I’m going to make a step stool for the son of good friends in Florida. The design I liked had dovetail joints, which I’ve never cut before. So I made this stool for my wife as a prototype. Walnut sides with Cherry for the steps. 12.5” front to back, 14” tall, and just about a foot side to side.
Mark Johnson
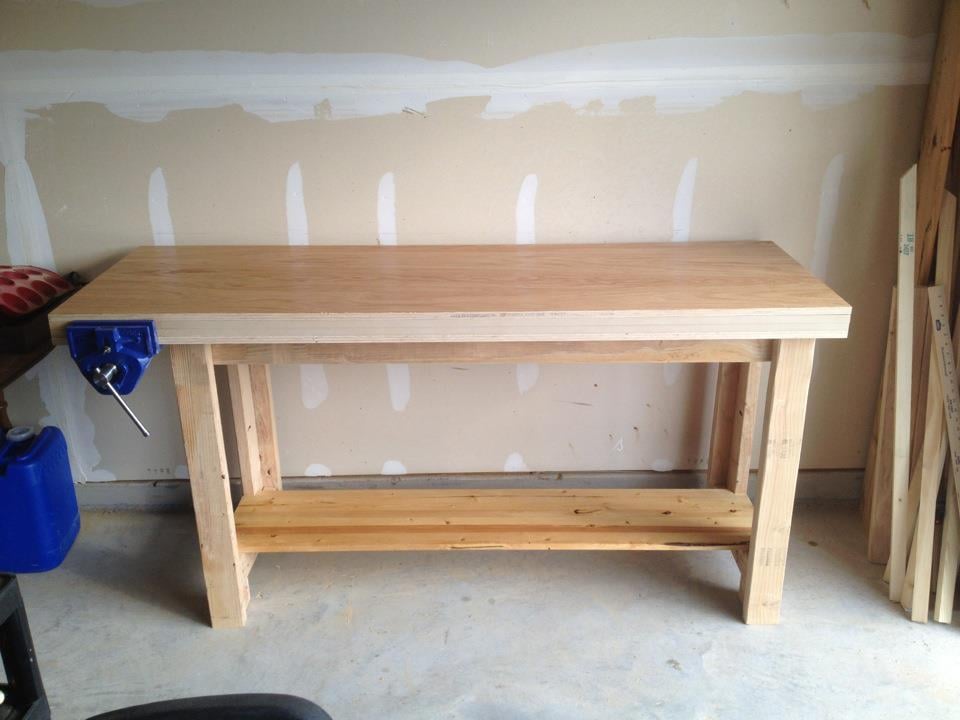
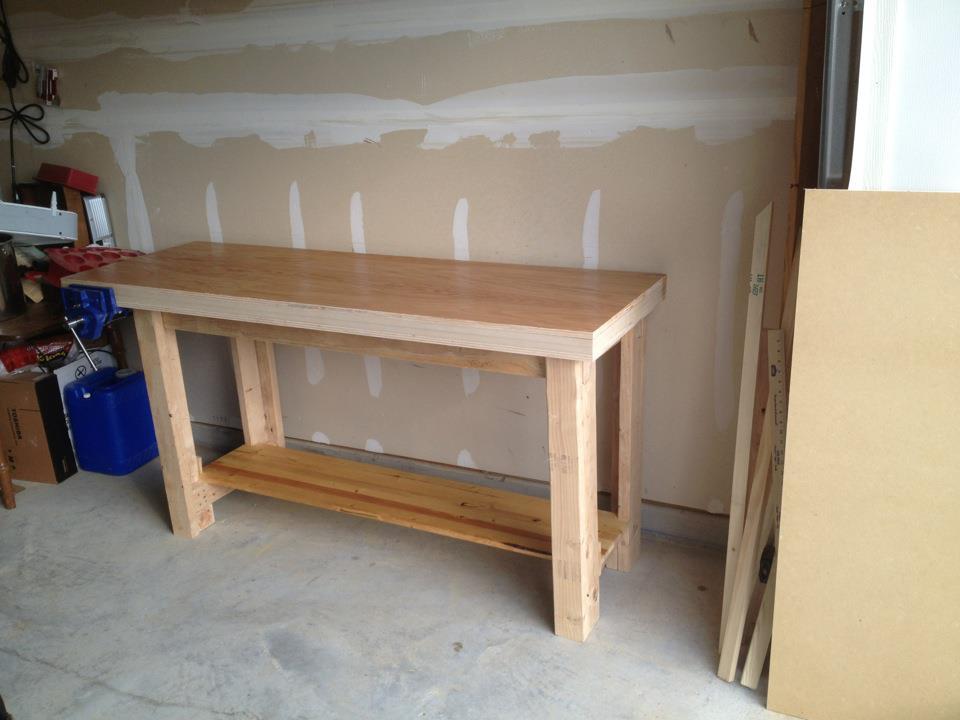
Used the sturdy work bench plans for the base. The base is 60" x 20". The top is 6'x2'. I wanted 2" overhang all around to accomodate clamping. I used 3/4" oak plywood for the benchtop. It's stacked as follows, oak plywood, 3/4" mdf x 2, oak plywood for a massive 3" thick top. I used pocket holes to join the legs and on a few of the other joints including to attach the top. The benchtop layers are screwed together with 2.5" wood screws with countersinks for the heads. I would have put a full shelf in but that's the piece of wood I had so I used it. I bought the 7" undermount woodworkers vise online for around $70. It's mounted with 2.5" lag screws and washers. I did not use exact 2x4's for the base, I used the standard 2x4's (which are actually 1.5" by 3.5"). The bench is pretty sturdy as is but with the massive top/vise and not using standard 2x4's it is not as solid as I would like. It's fine for now but eventually I going to install some threaded rods through the legs length and width to pull it together rock solid. I put some tung oil on the top and later i'll put some wax paste over that. I'm going to seal the edges with shellac or maybe just leave as is. Eventually put some bench dog holes in the top for my vise. I did this all with a cordless drill/bits, kreg jig, circular saw with homemade fence, rulers, squares, random orbit sander etc. Took about two weeks time, working mostly on weekends. The bench alone is around $130, all bought from a "big box" store. Be ready to spend more $$ on tools if you don't have them. This is my 2nd project.
I made this in 1 day from the plans here on Ana White what a fun project it was and fairly simple to build
for such a beautiful piece..www.facebook.com/groups/ozaofwc/

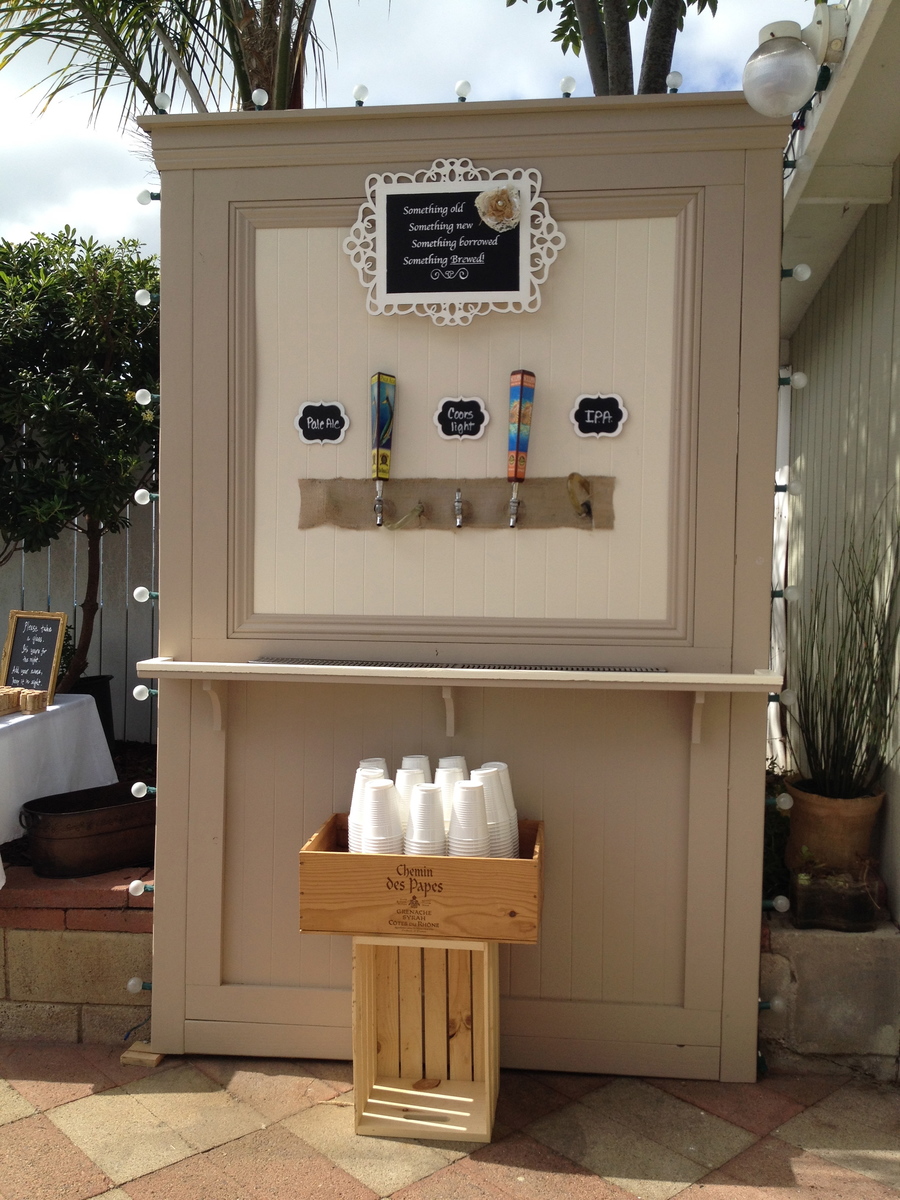
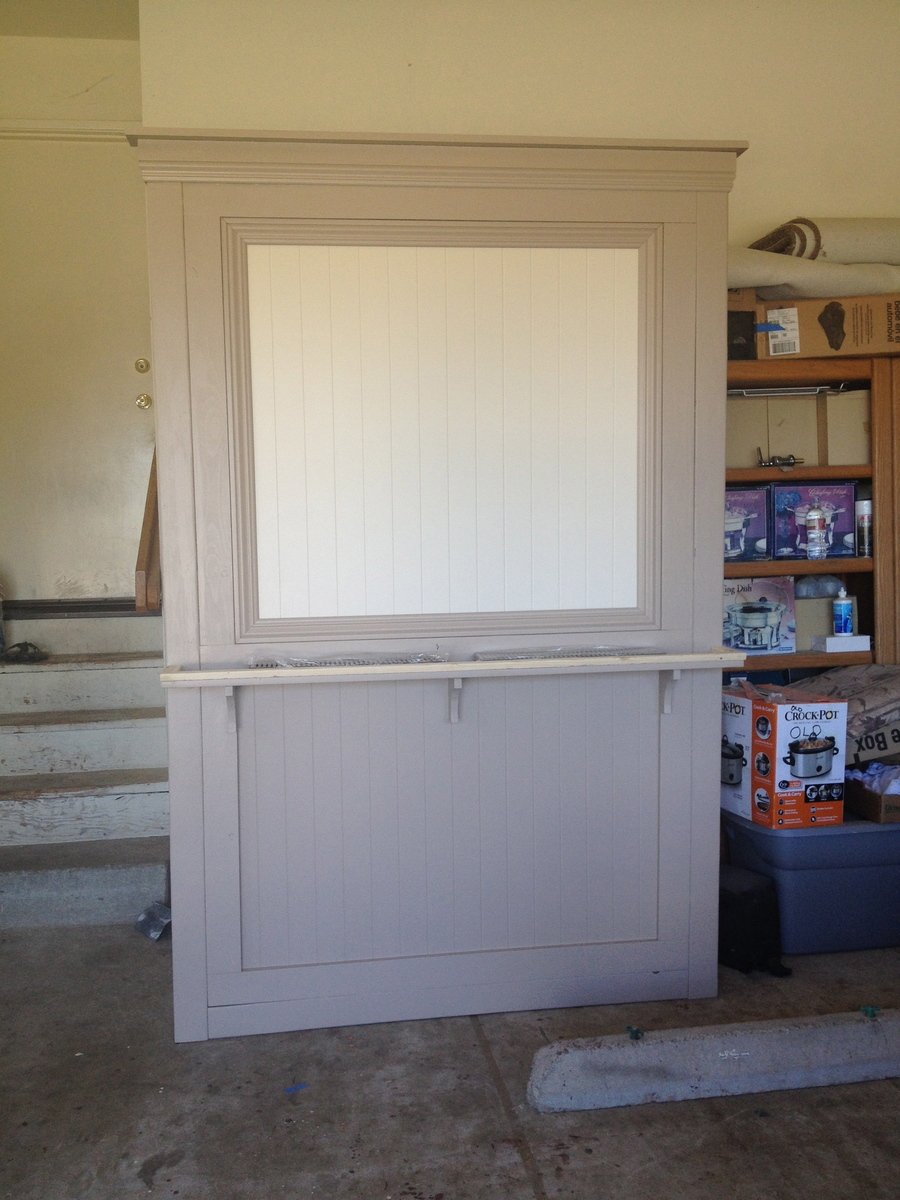
My cousin recently got married and wanted a beer wall at her wedding. I quickly searched Ana's site for the perfect plan and chose the Tall Panel Headboard for my starting point. With a few modifications it became a beer wall in no time at all. I love how Ana's plans can be easily modified to make a totally different project.
No fancy wood was used here. Just regular wood from the big box store. A jockey box was attached to the back side of the wall. It worked awesome!
Since I discovered this site in January, I've made close to 30 items from her plans. I'm ridiculously addicted and not just with Ana's site but also with her blog friends. For Valentine's Day I asked for a Air Strike gun and got it. It was better than jewelry and chocolates! I'm well on my way to collecting my own tools and learning how to save money by making it myself. Oh, and I can't even begin to tell you how impressed everyone is with my finished products.
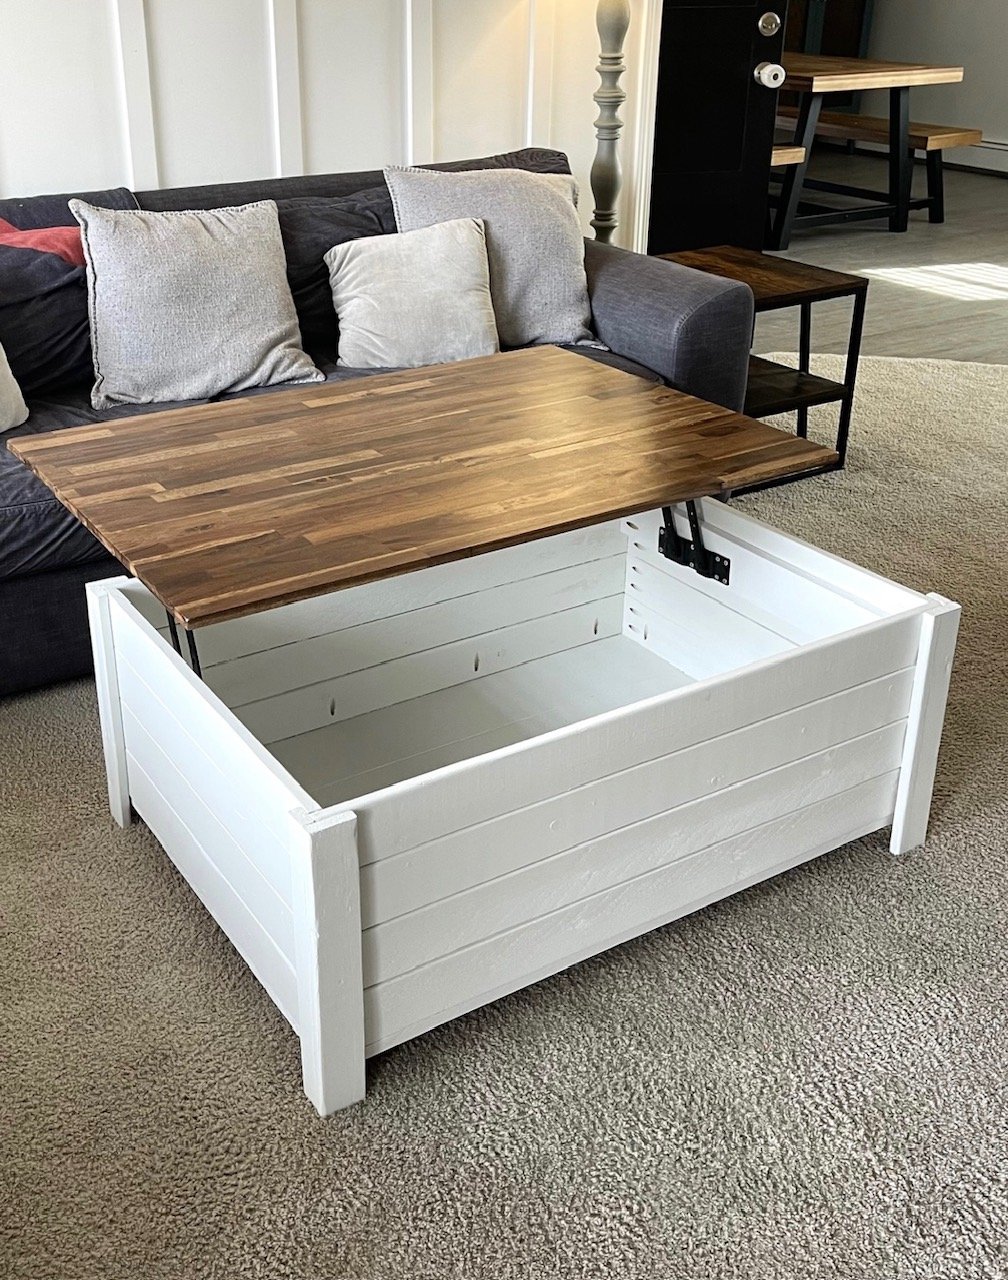
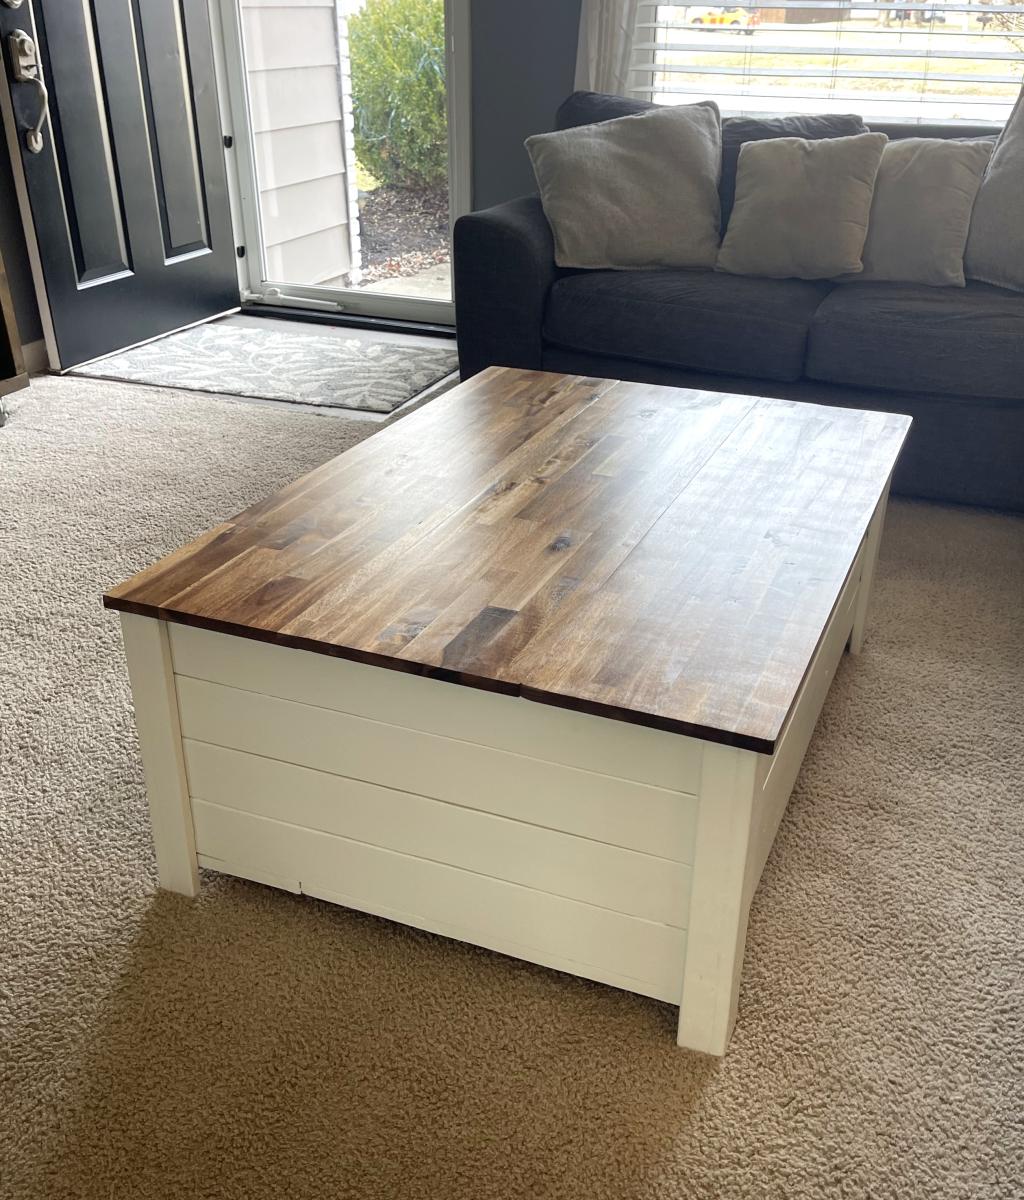
Made a few adjustments to the measurements and top… pretty happy with the way it turned out!

Comments
Ana White Admin
Wed, 12/29/2021 - 12:12
Awesome solution!
So much storage and it looks great! Thanks for sharing.