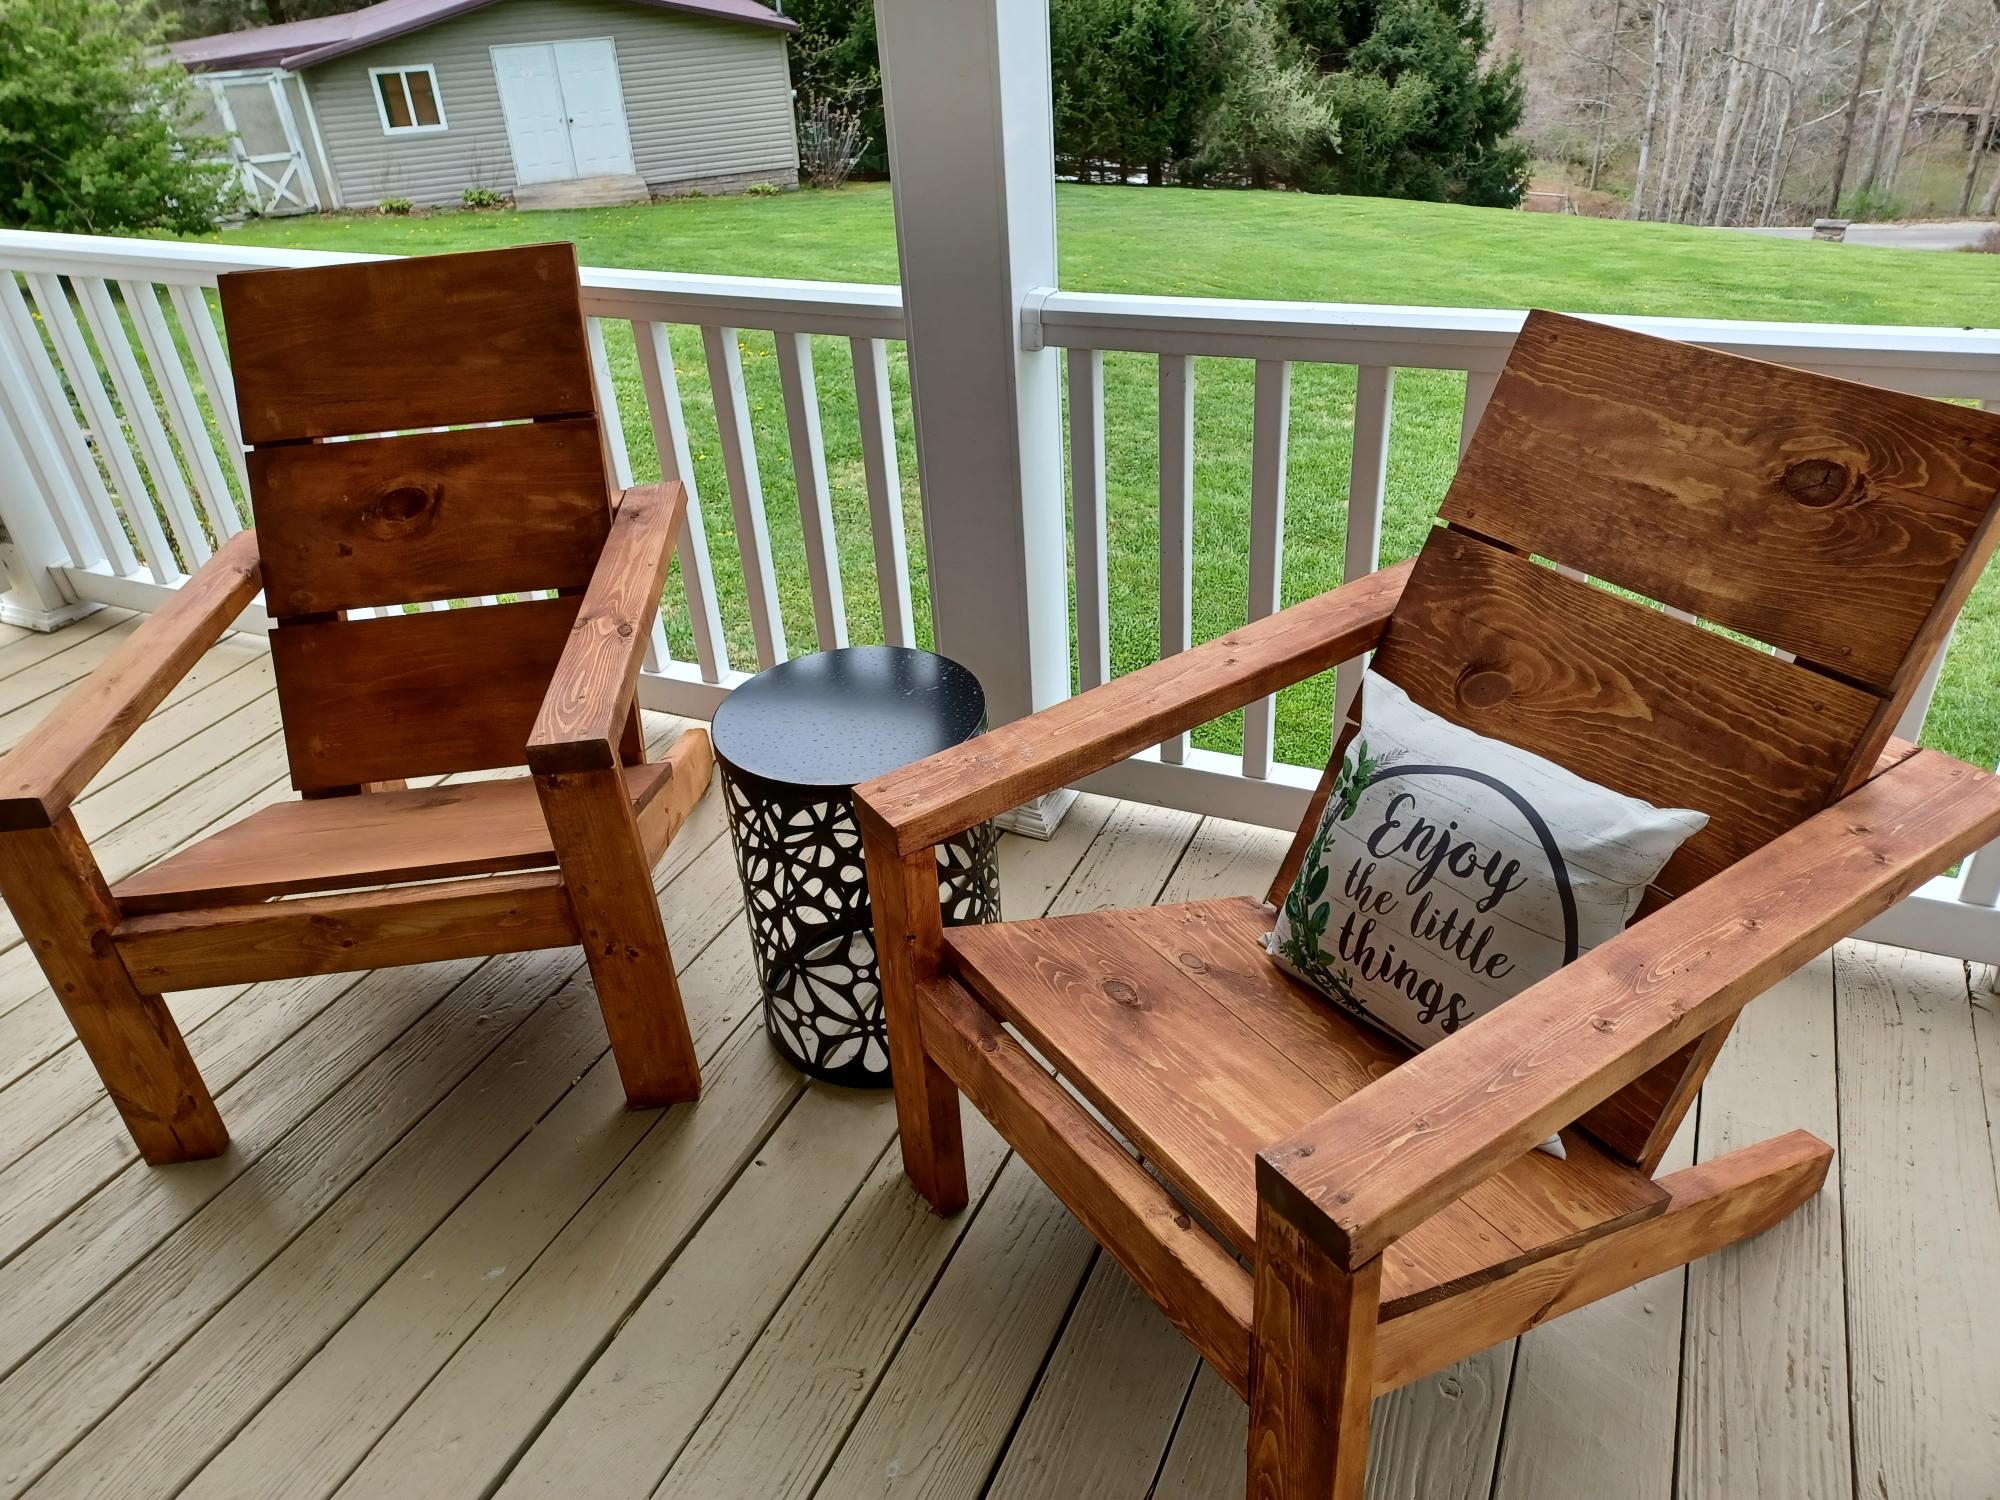
Outdoor Sectional
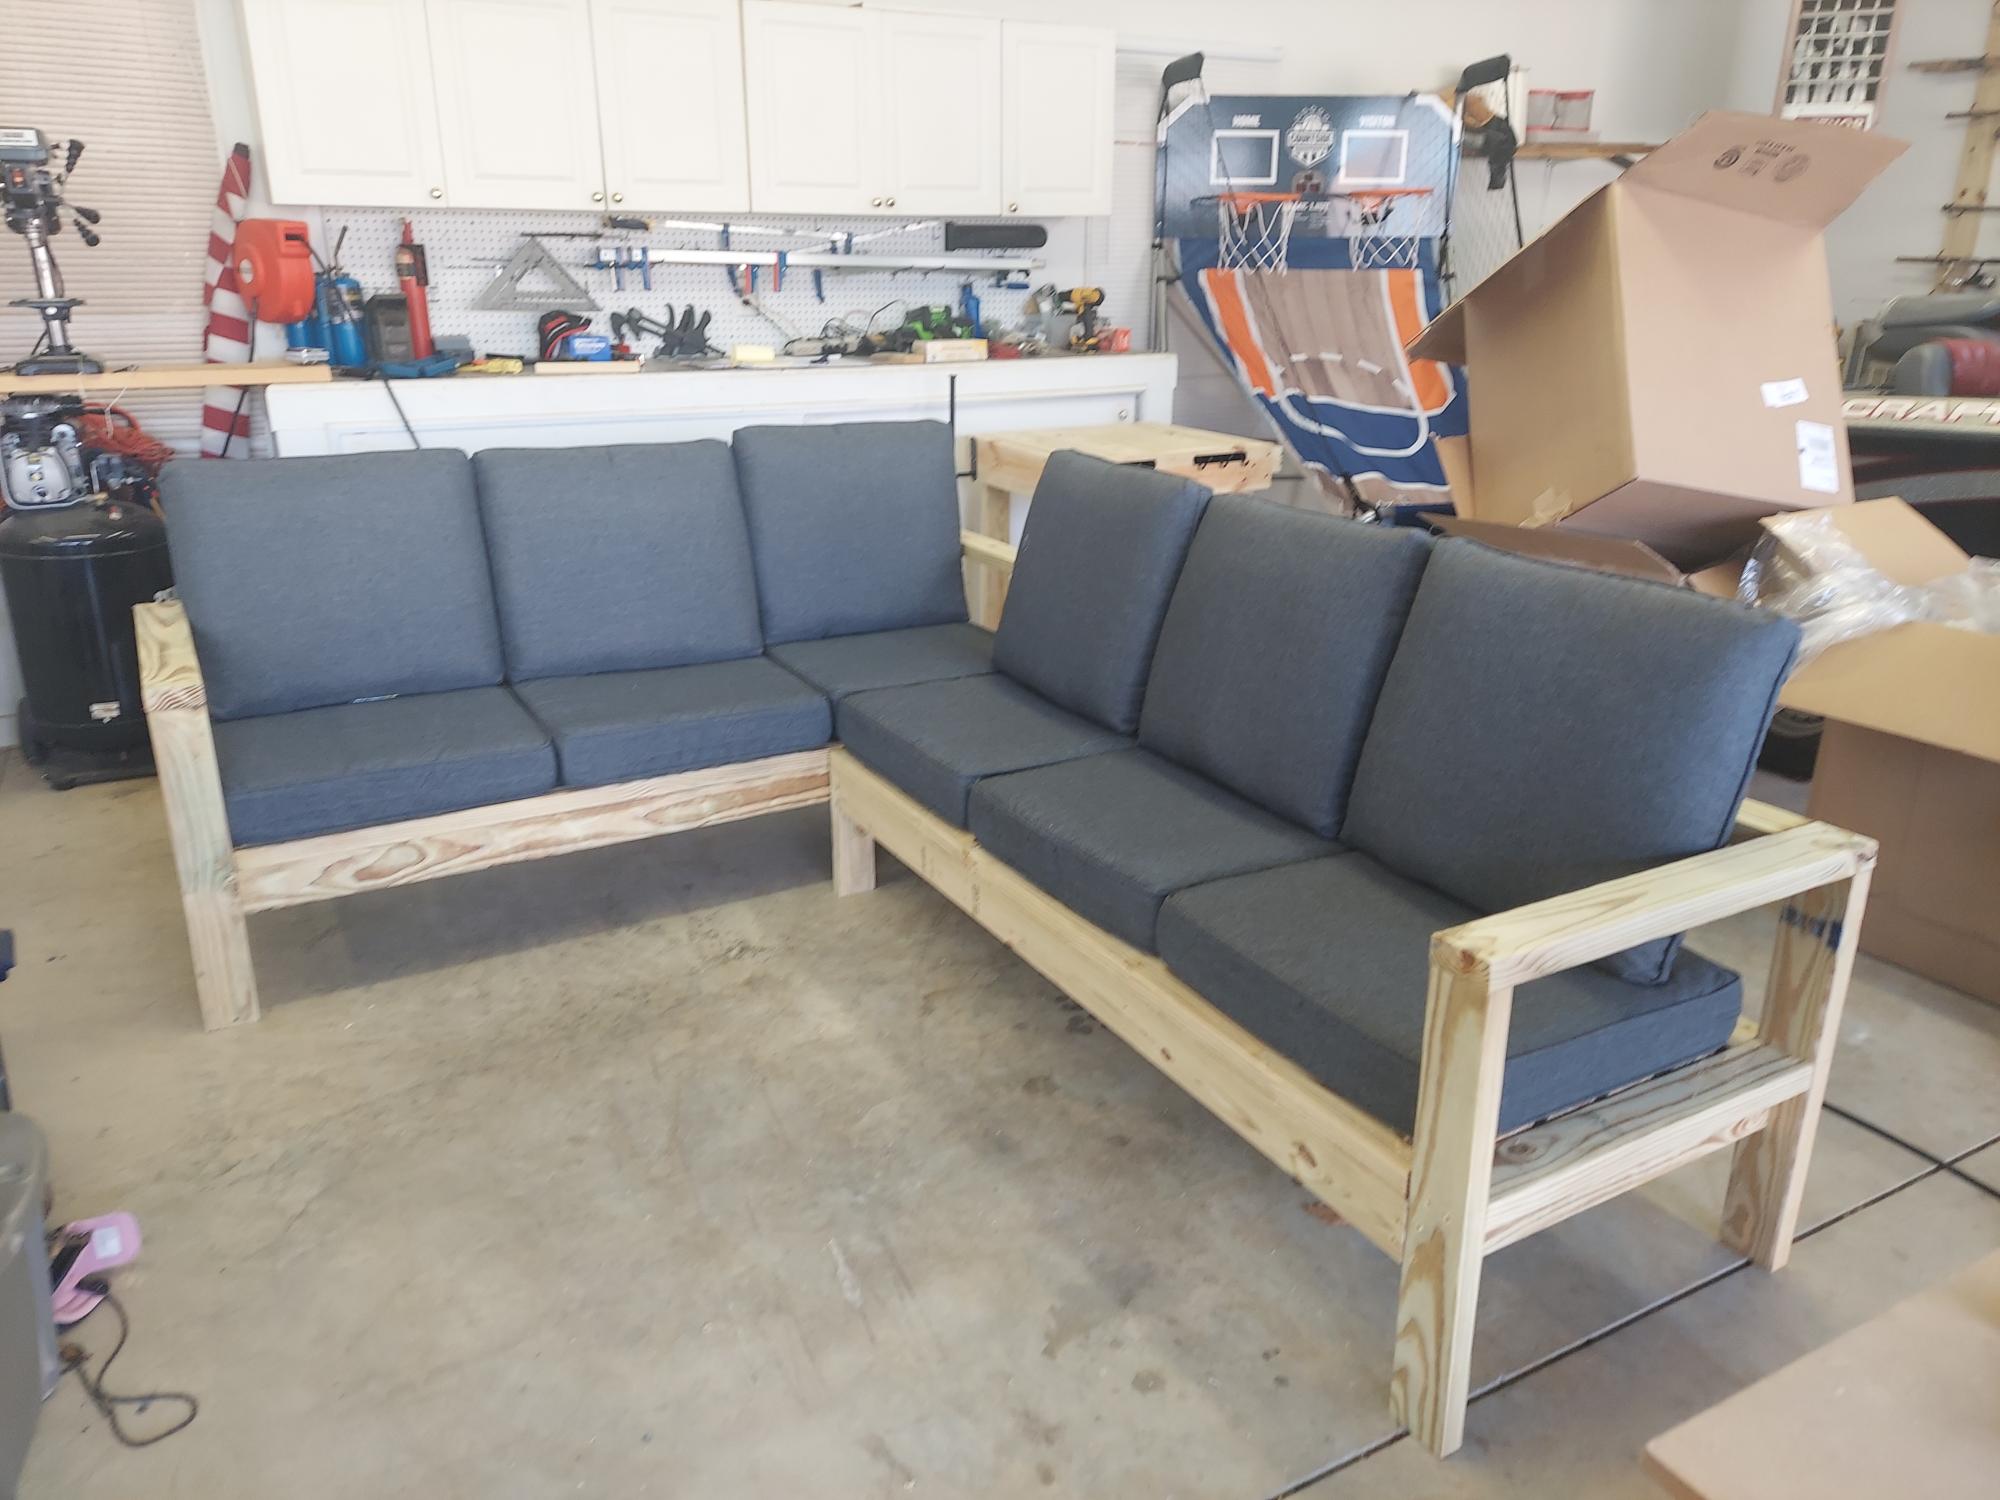
Built this for my daughter in law for Christmas. Turned out awesome. Plans and directions were great!
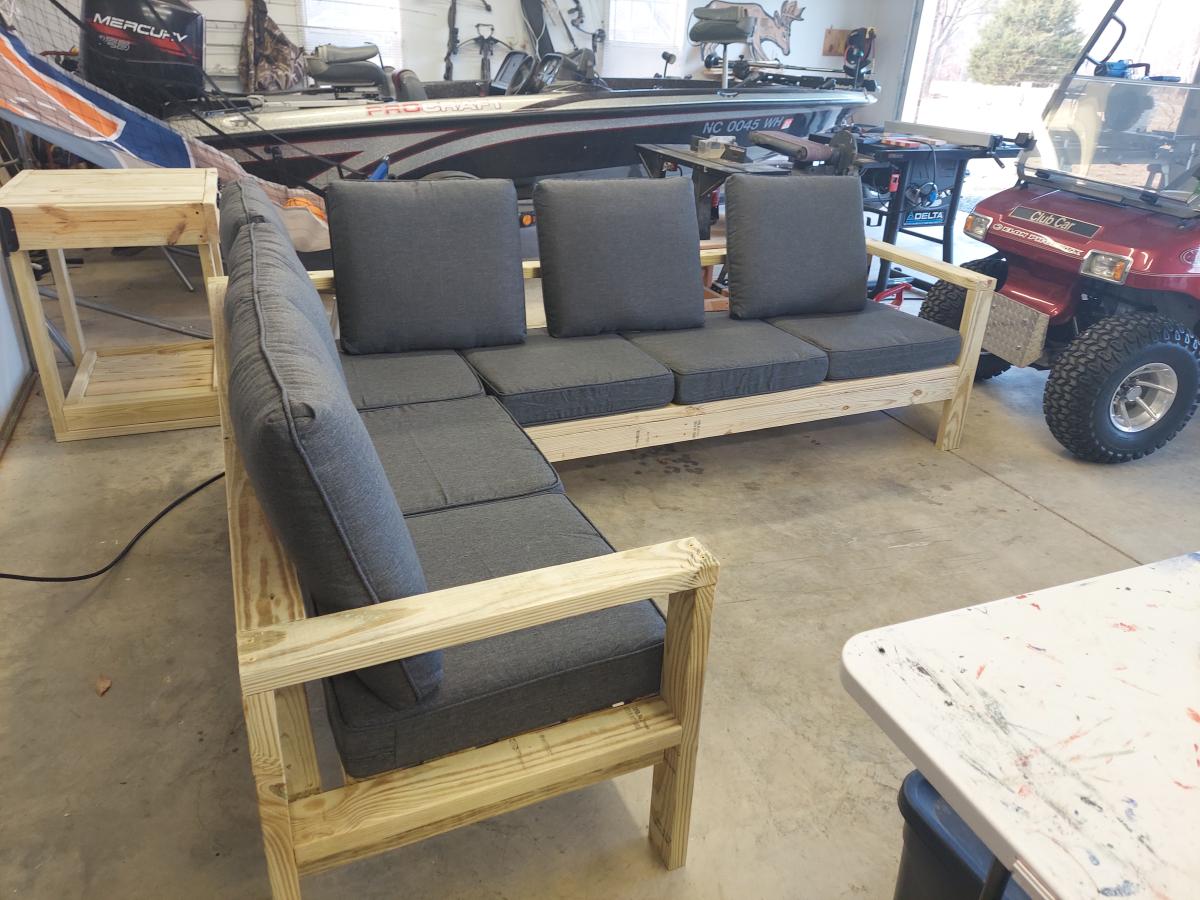
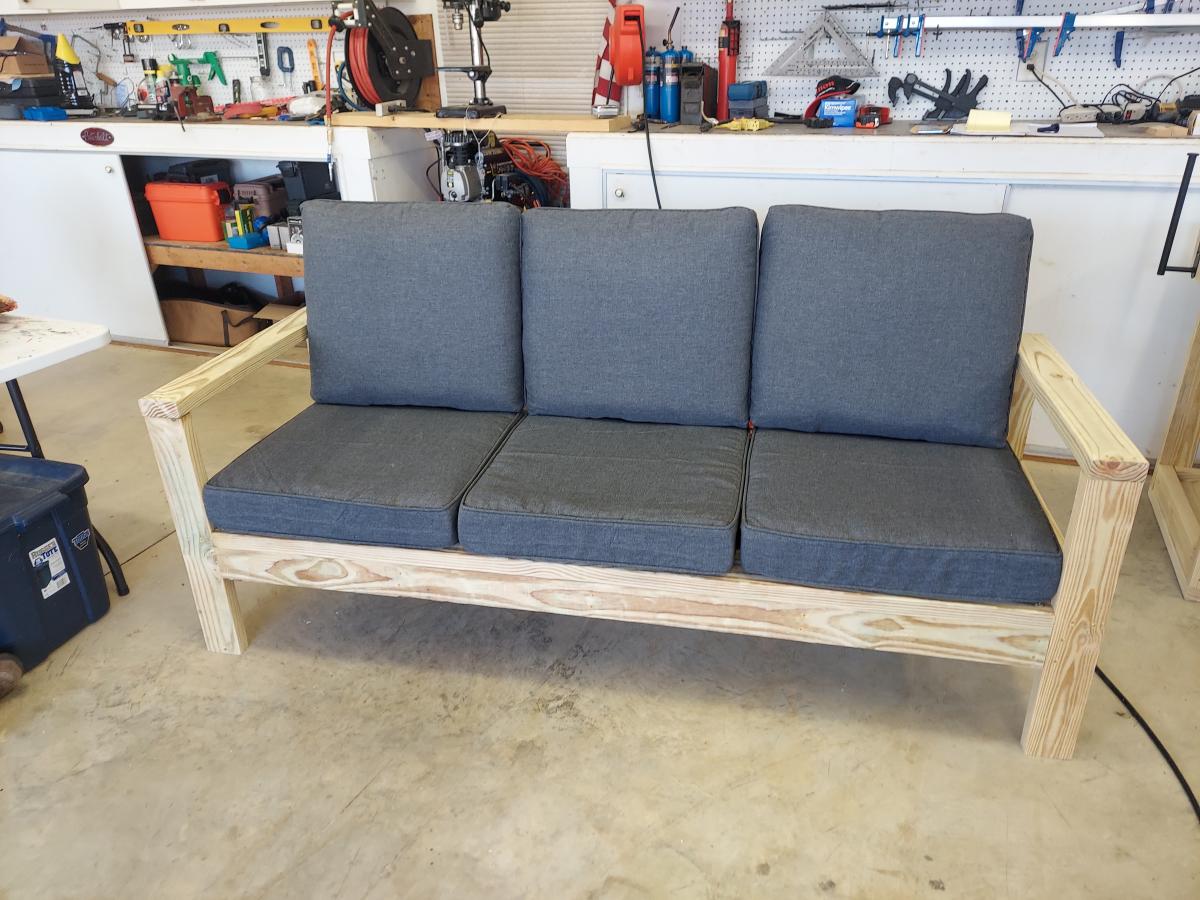
Built from Plan(s)
Built this for my daughter in law for Christmas. Turned out awesome. Plans and directions were great!
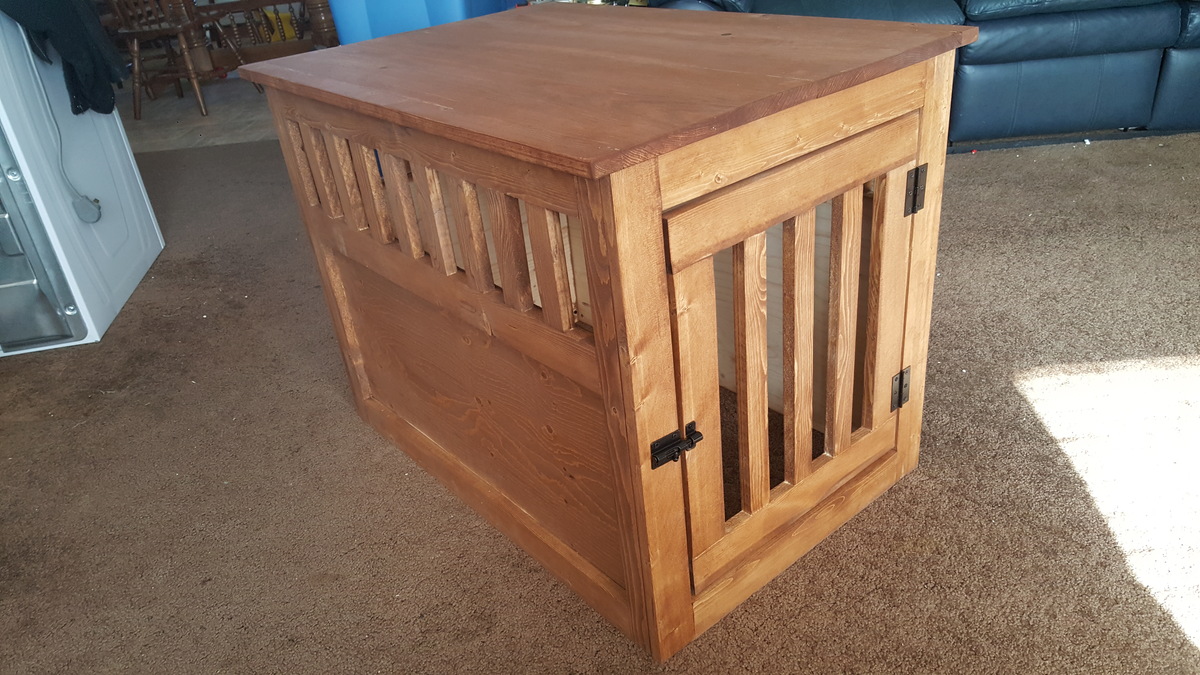
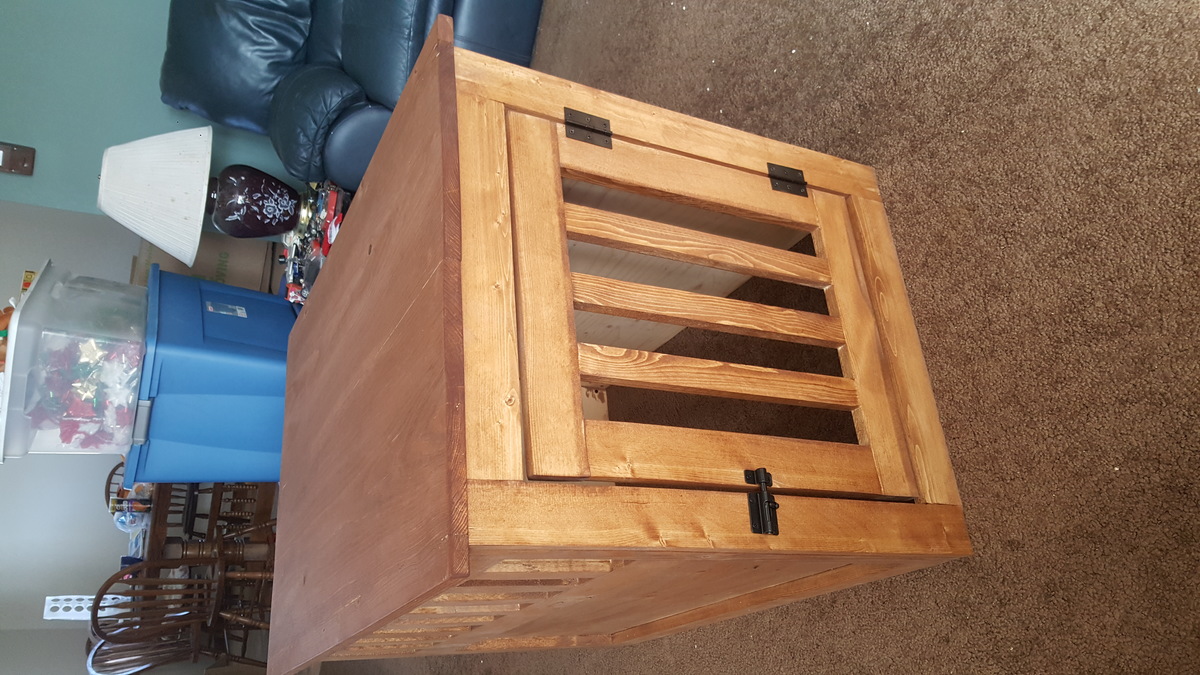
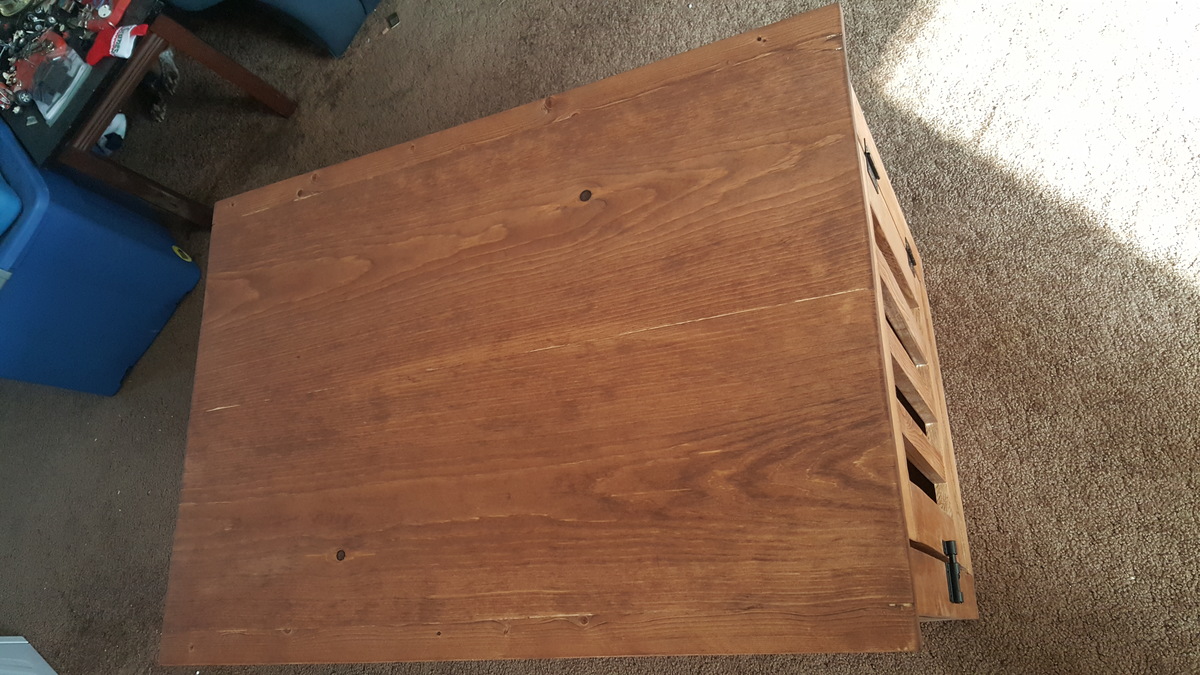
This project was really pretty easy. The hardest part was holding the pieces just right so they ended up where we wanted once the kreg jig hole screws went in. Also, we had to be sure not to overtighten the screws and cause splitting.
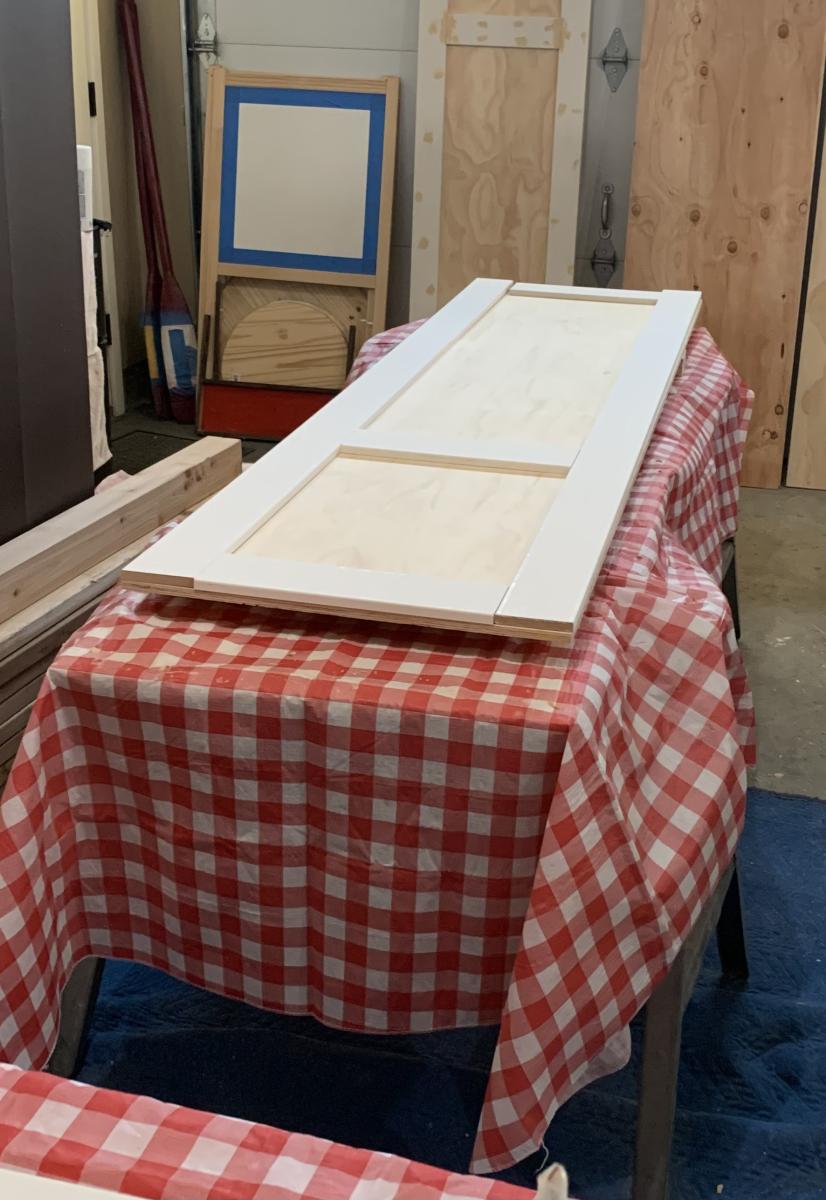
We did have to make two adjustments to the plans. I think the first was a typo...where it says 2 - 1x2 @ 15 3/4" (door sides) they should actually be 1x3 based on the images.
The second adjustment was the plywood for the back 17 3/4" x 21" ended up too wide for the end to fit on, so we made it 17 3/4" x 20"
Sun, 12/24/2017 - 17:17
This was my first wood working Project! I learned alot about what to do and not to do for future projects. We are excited about how it turned out!
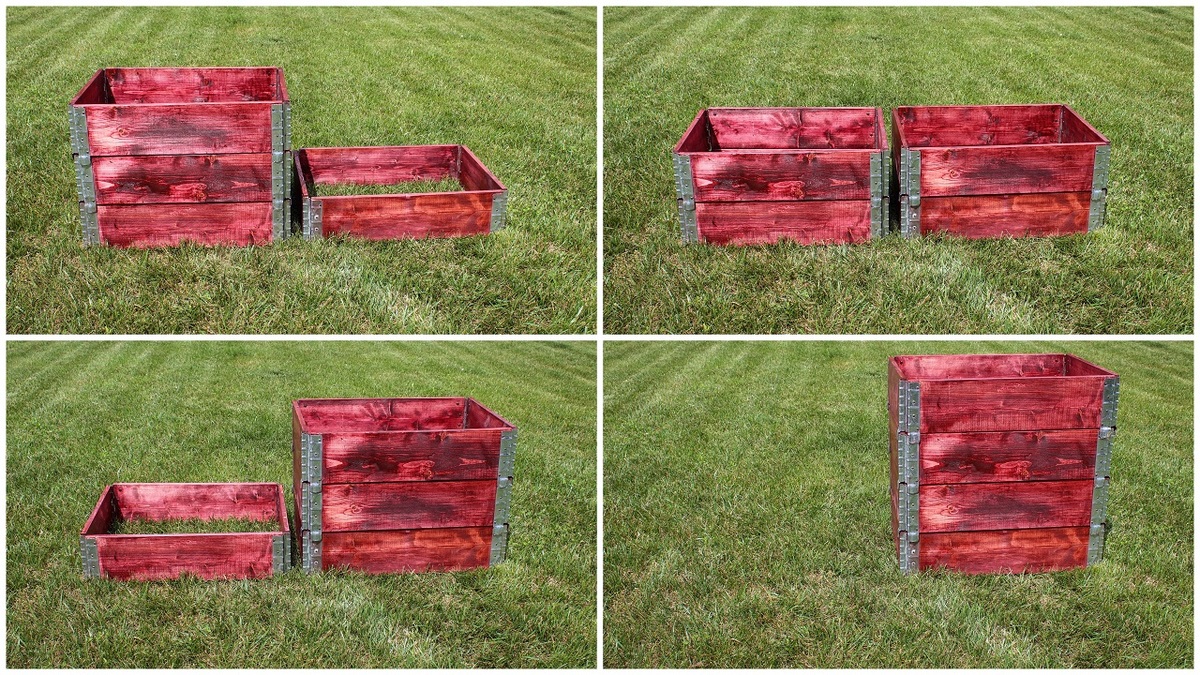
Build Instructions:
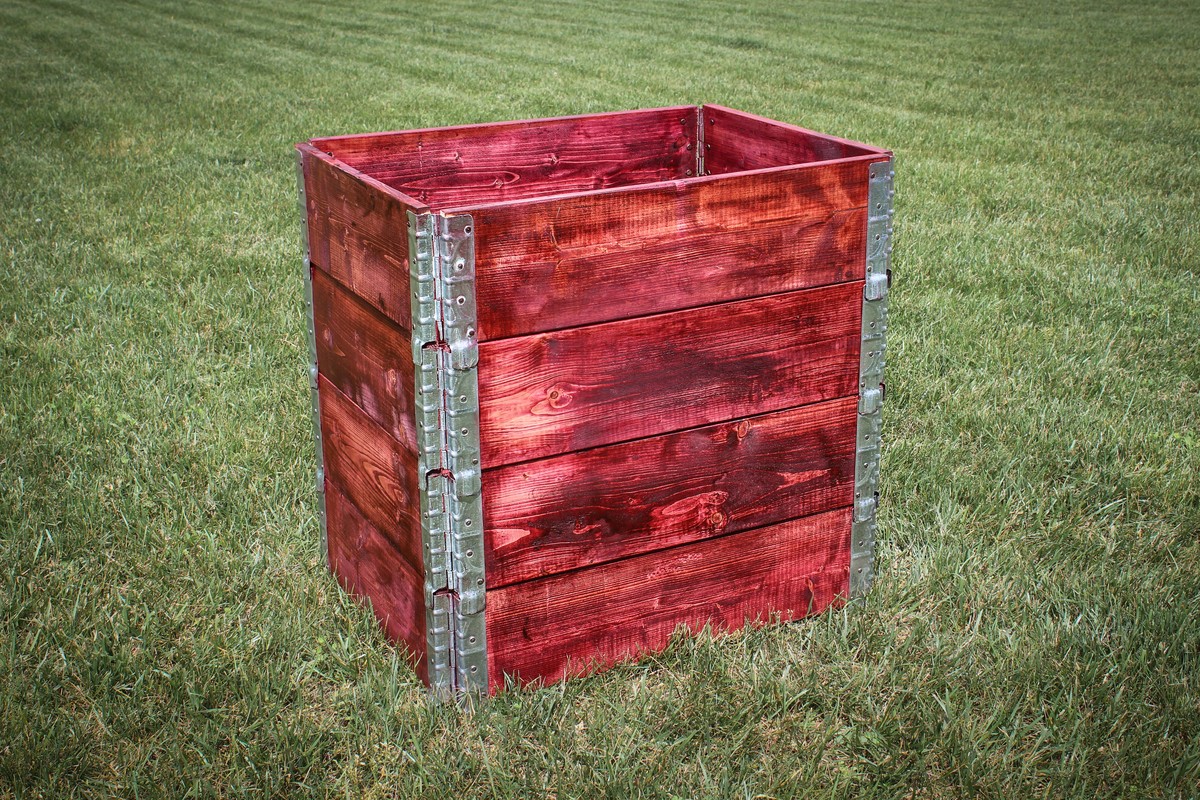
http://www.instructables.com/id/Simple-Stackable-Compost-Bin-from-Palle…
How it works:
https://www.youtube.com/watch?v=Tgtd88kKIn0
With one single unit as opposed to two or three bins, the space needed for composting is minimized. Each tier stacks on top of the other, latching together to make the bin. This setup makes it easy to turn and rotate the compost, since moving the collars is simple. Just remove the top collar and place in a new location adjacent to the original bin location. Turn the compost into the new location and stack the collars until finished. This is a great alternative to having multiple compost bins next to each other.
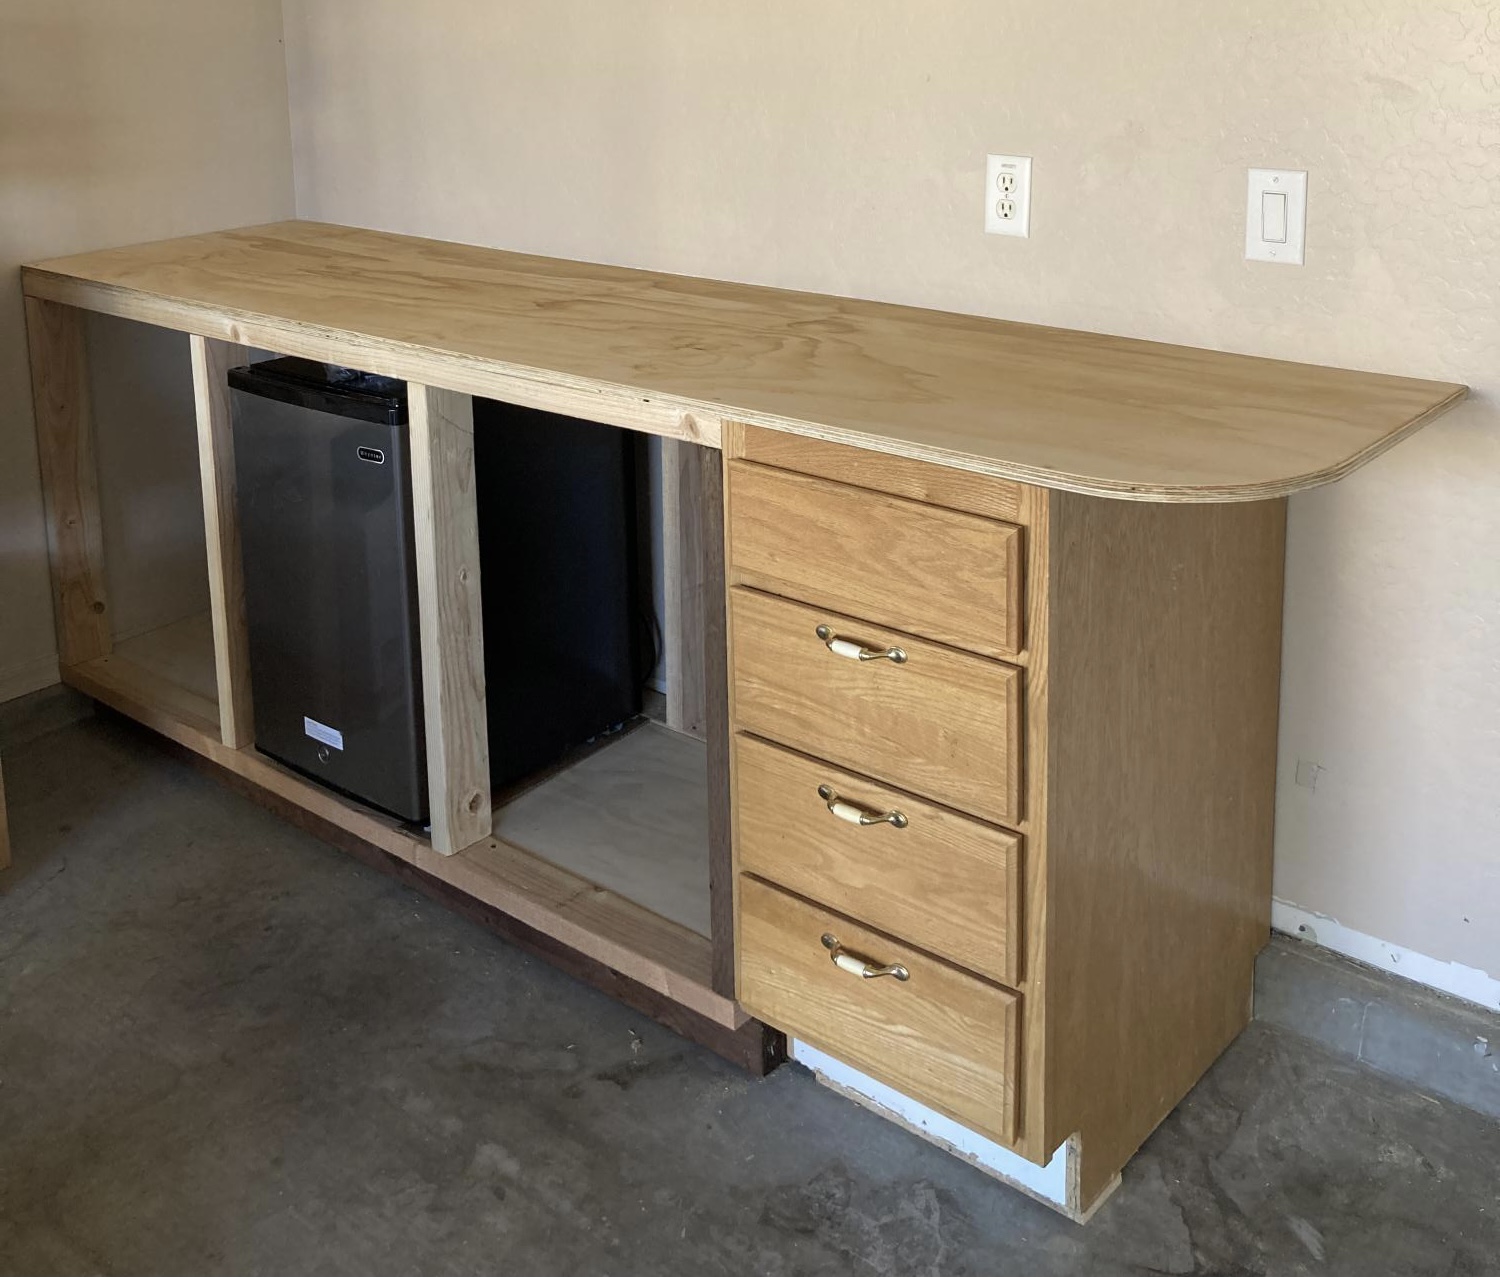
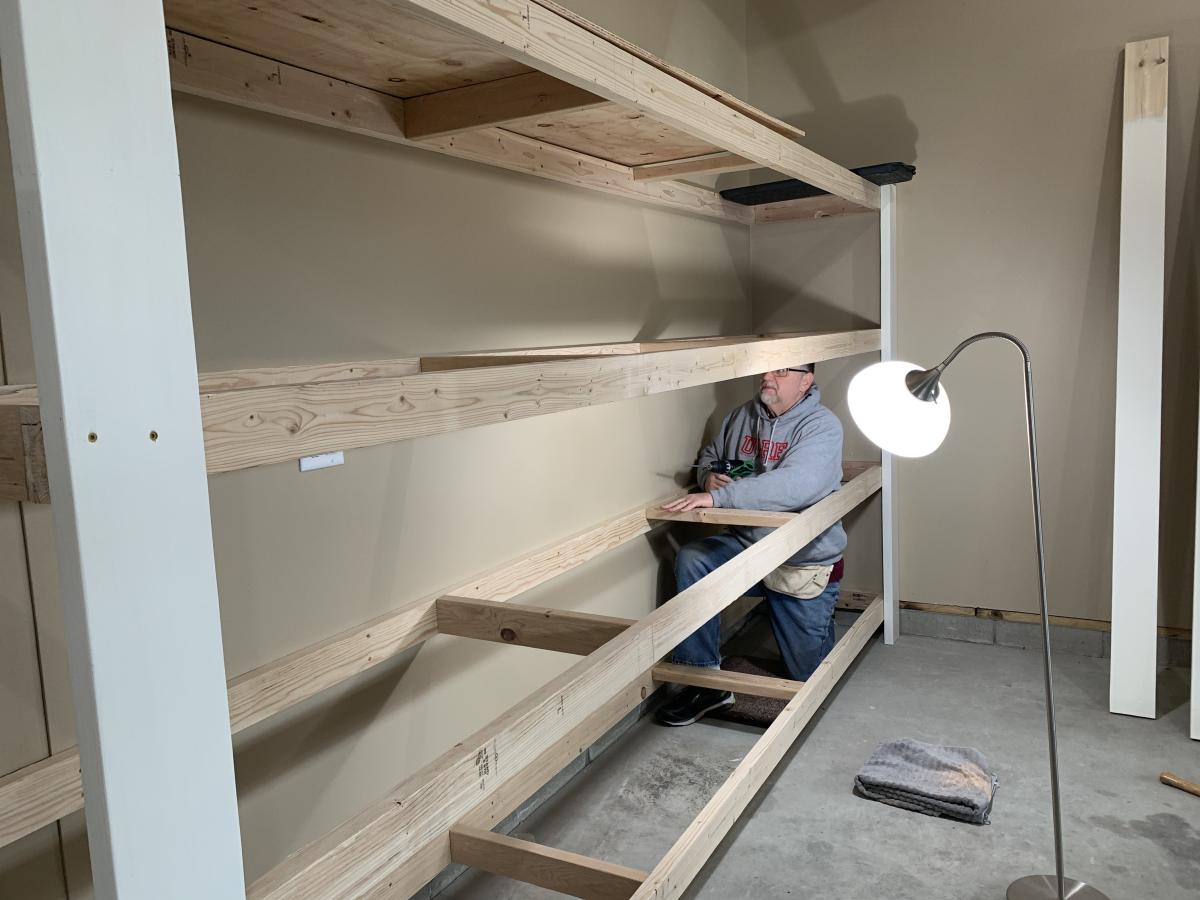
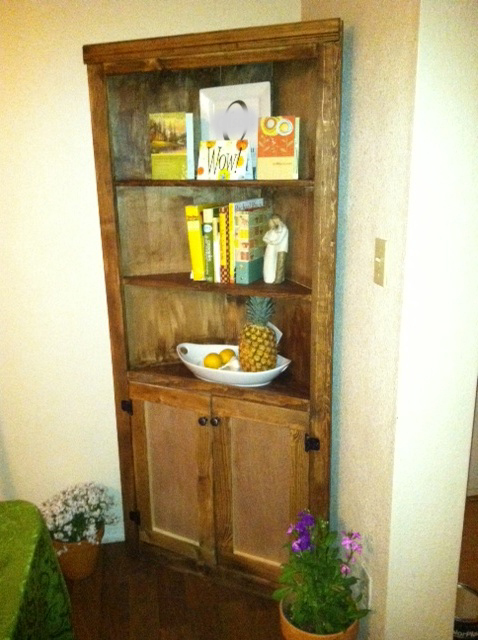
Had to tweak the pony wall plans a bit because the garage floor had a 2” x 3 1:2” cement retainer. I also wanted to incorporate an end cabinet I already had, so I shortened up the base to 69” and tied it together with the top.
The bench plans were super helpful!!
Wed, 12/29/2021 - 10:43
Looks fantastic and functional too! Thanks for sharing.
Thank you Ana for the plan my husband loves it. So functional yet requires very little space. I made it a littlest wider- 38 inches overall width and 83 inches overall height.

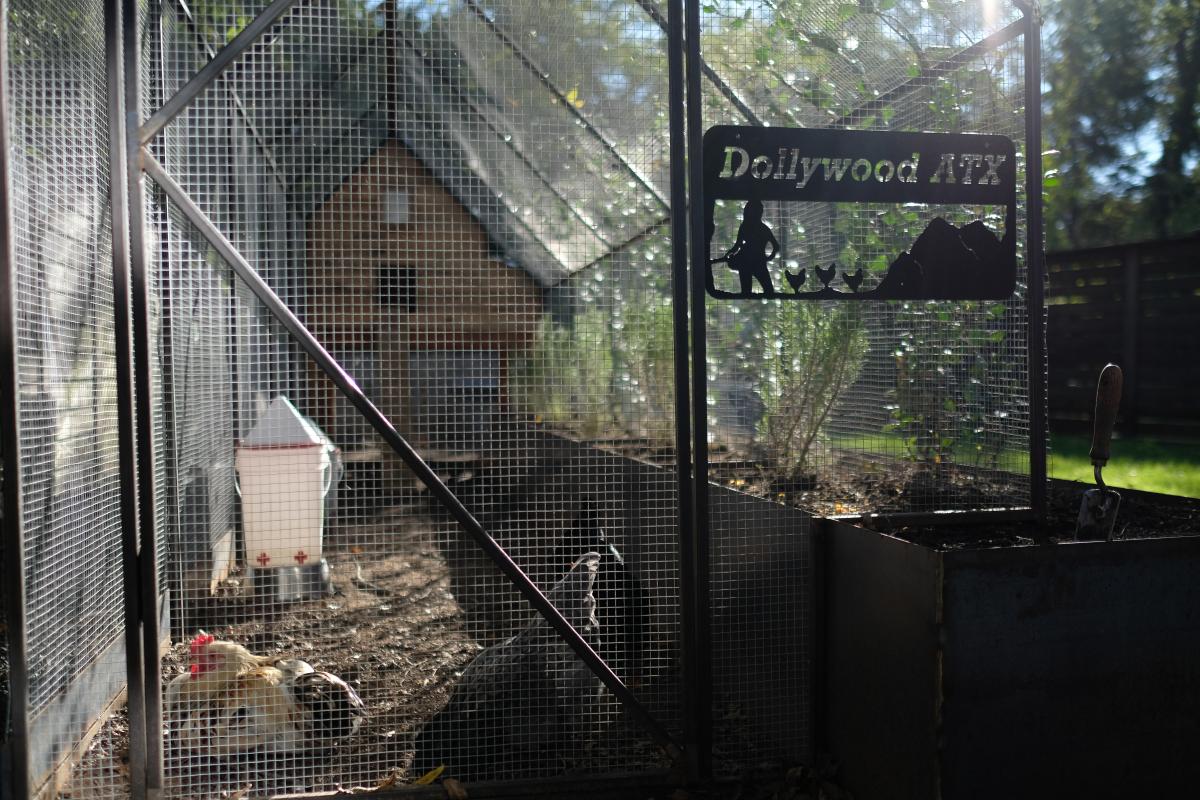
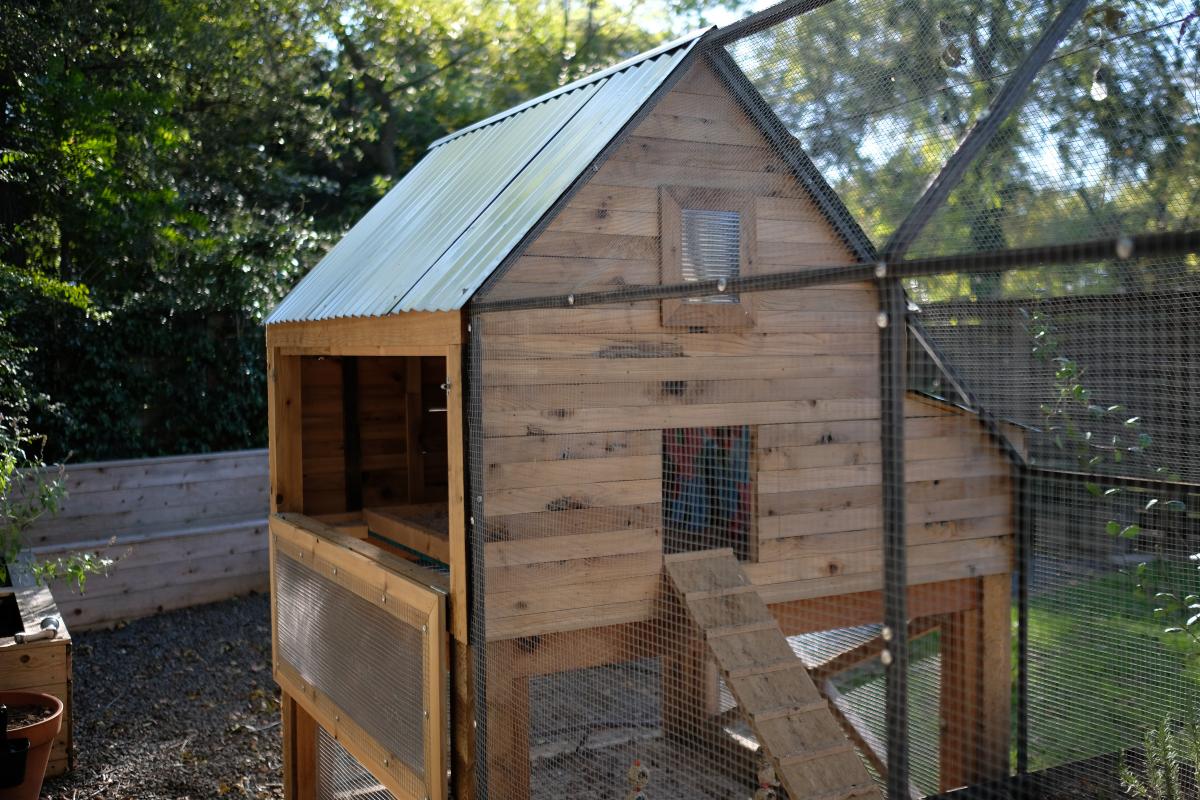
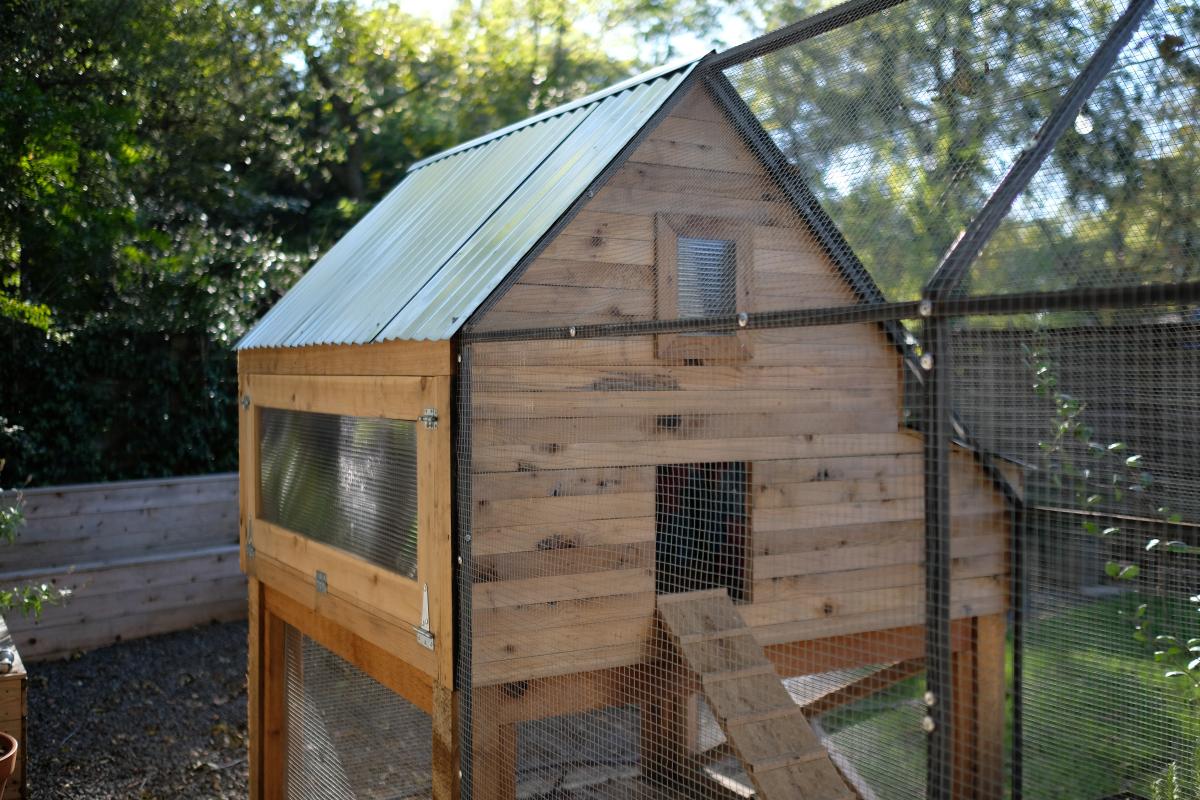
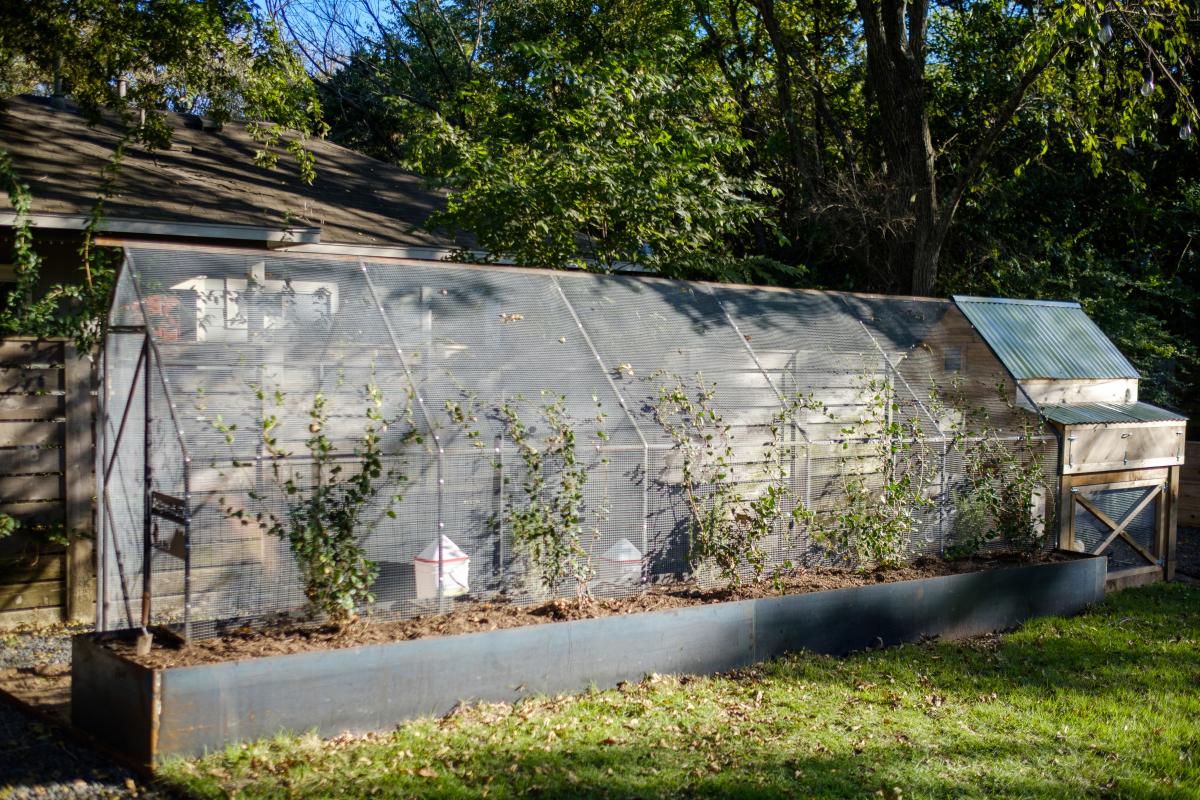
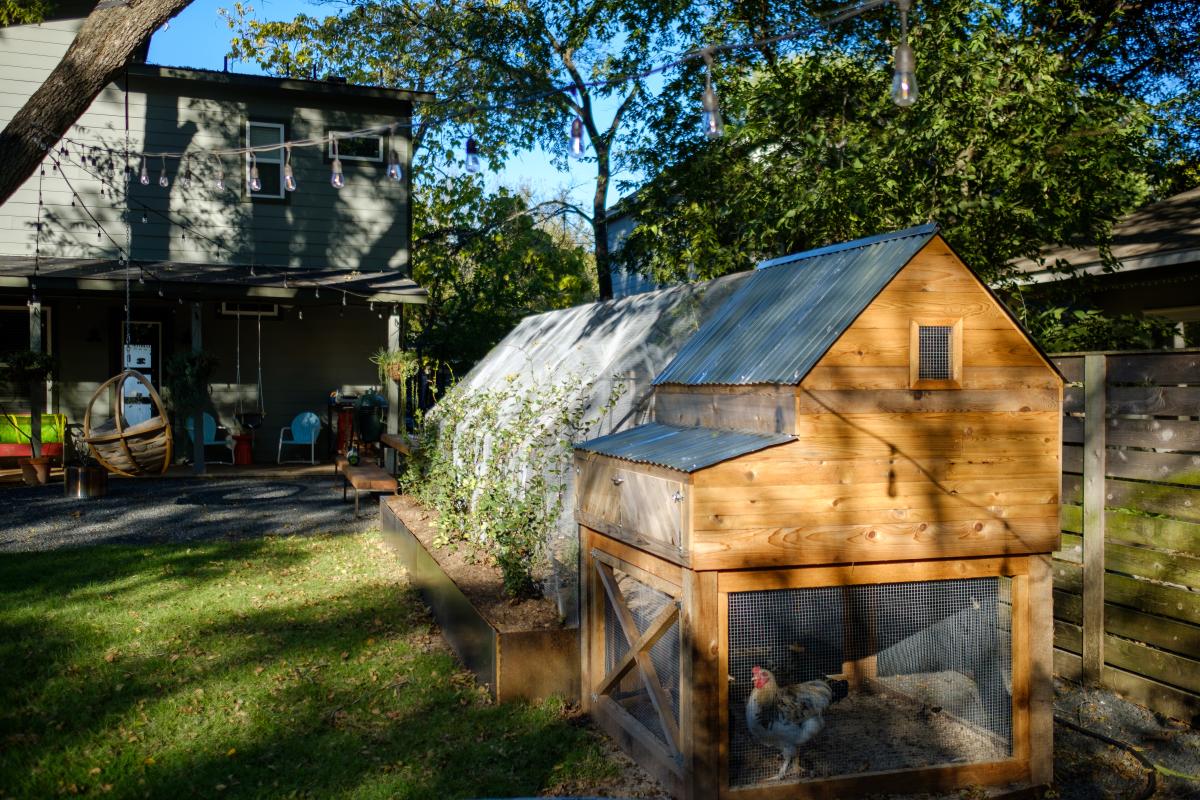
When we became accidental chicken owners, we had to build a coop fast. I found the plans for Ana’s replica of the Williams Sonoma chicken coop and got to work. They were very easy to follow and easy to modify to fit our own needs and aesthetic. We decided to enlarge the coop and remove the planter in the original plans to accommodate more chickens while keeping the original footprint. Instead of plywood, we used cedar reclaimed from an old fence we had recently replaced. We also enlarged the rear door to make clean-out as easy as possible. I cut pieces of polycarbonate to fit inside the door and windows to winterize the coop when temps drop below freezing. The run is designed to follow the shape of the coop and is large enough to give our 5 chickens plenty of space to roam when they aren’t free ranging in the yard. The planter box runs the length of the chicken run, providing plants to munch on inside and shady vines that will eventually cover the outside.
Sat, 01/01/2022 - 12:14
This is so awesome, I love the raised beds and chicken run too!
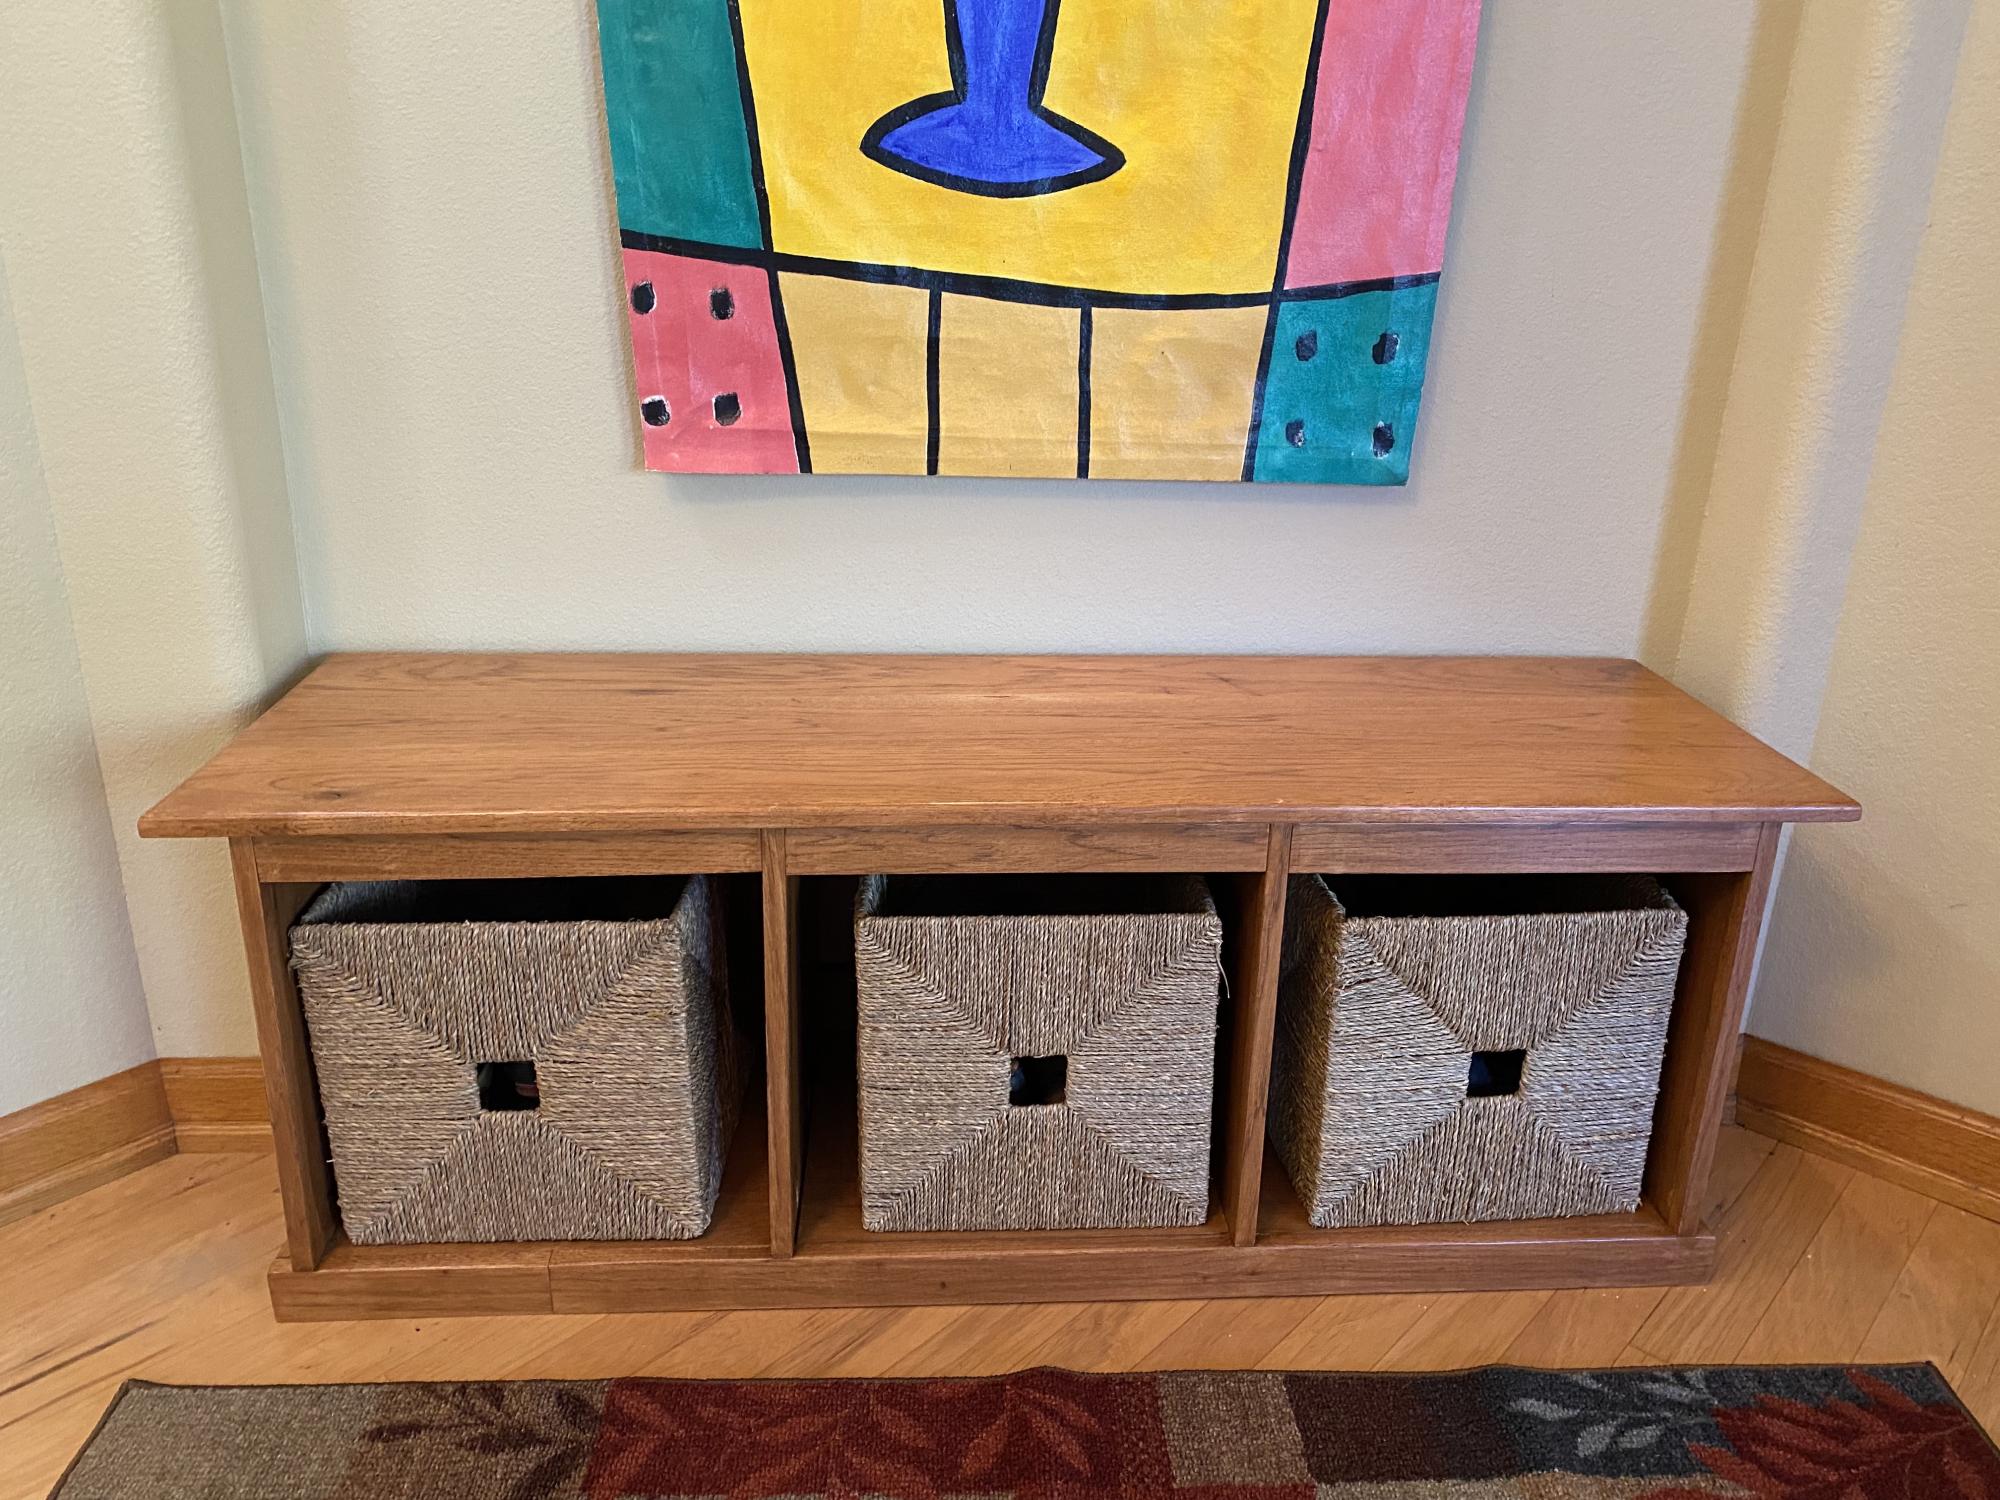
First large wood working project my husband and I completed. In love with Projects and plans by Ana white !
Thu, 07/16/2015 - 20:17
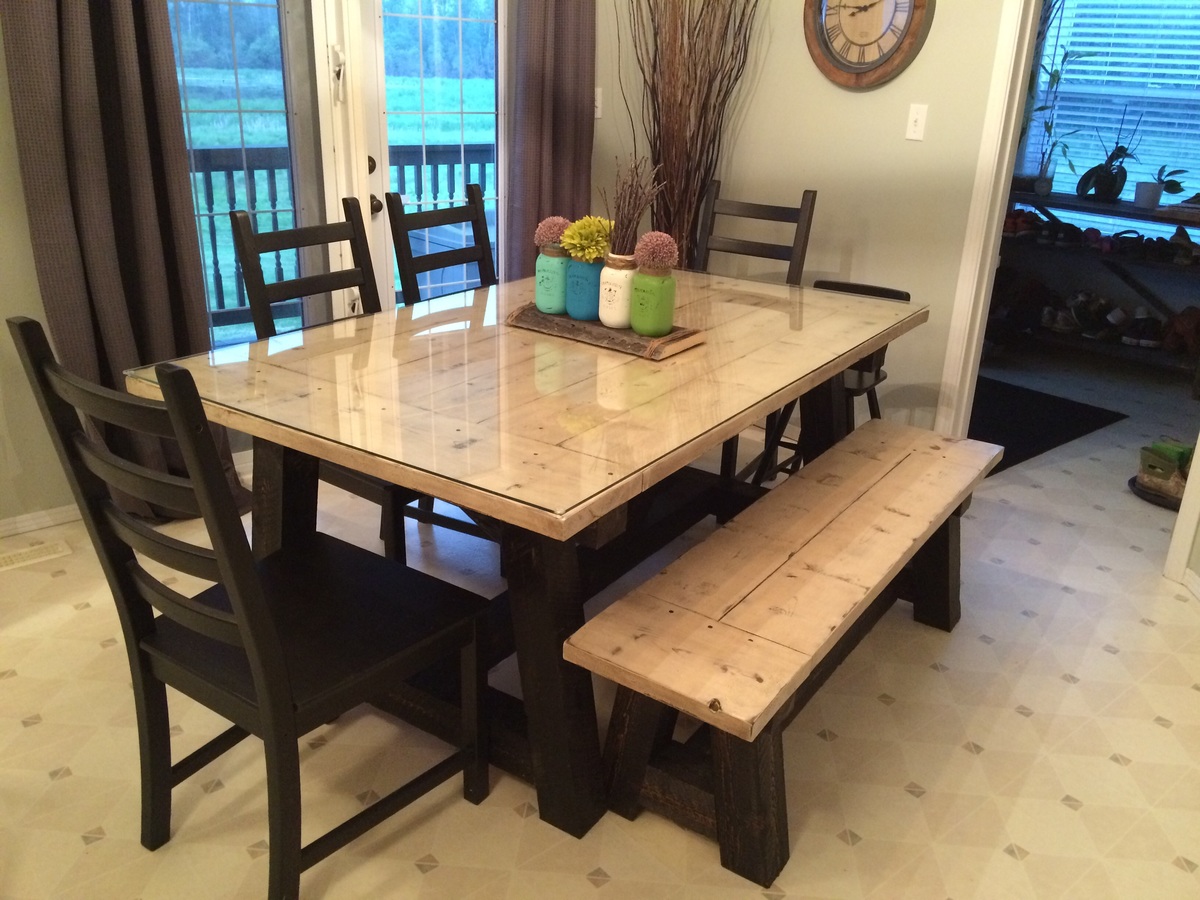
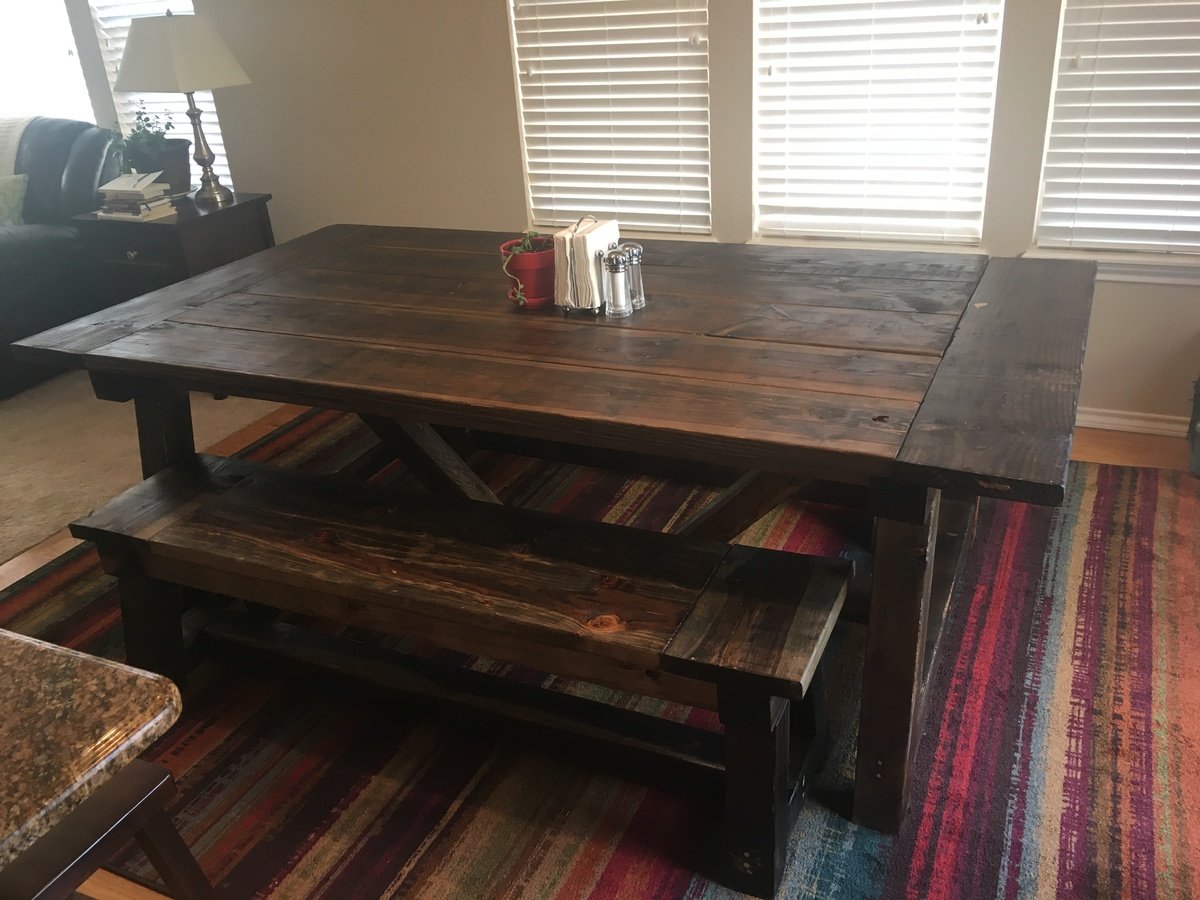
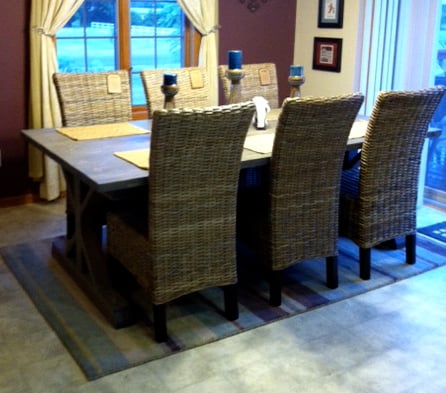
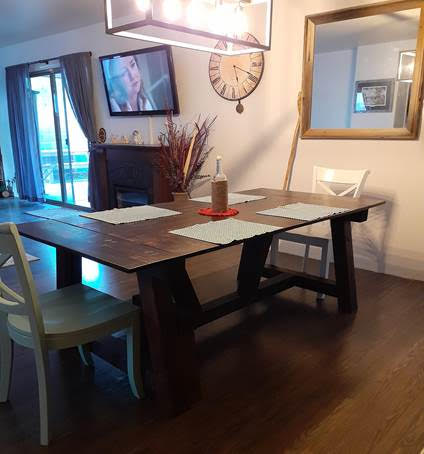
Yes that is glass on the table top. Don't have to stress about spills with my two small kids
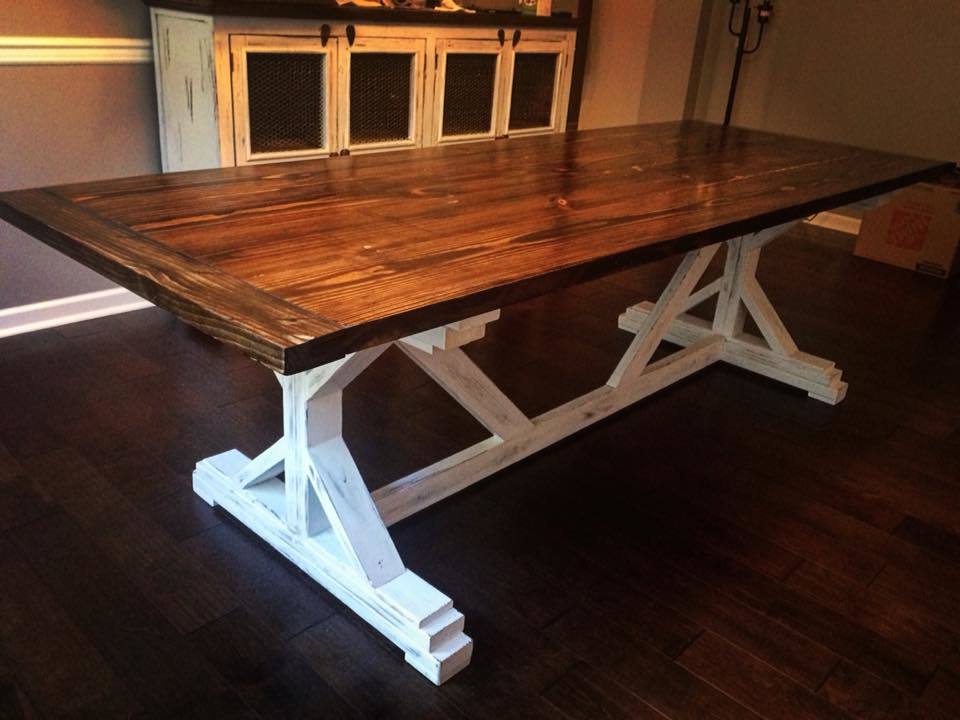
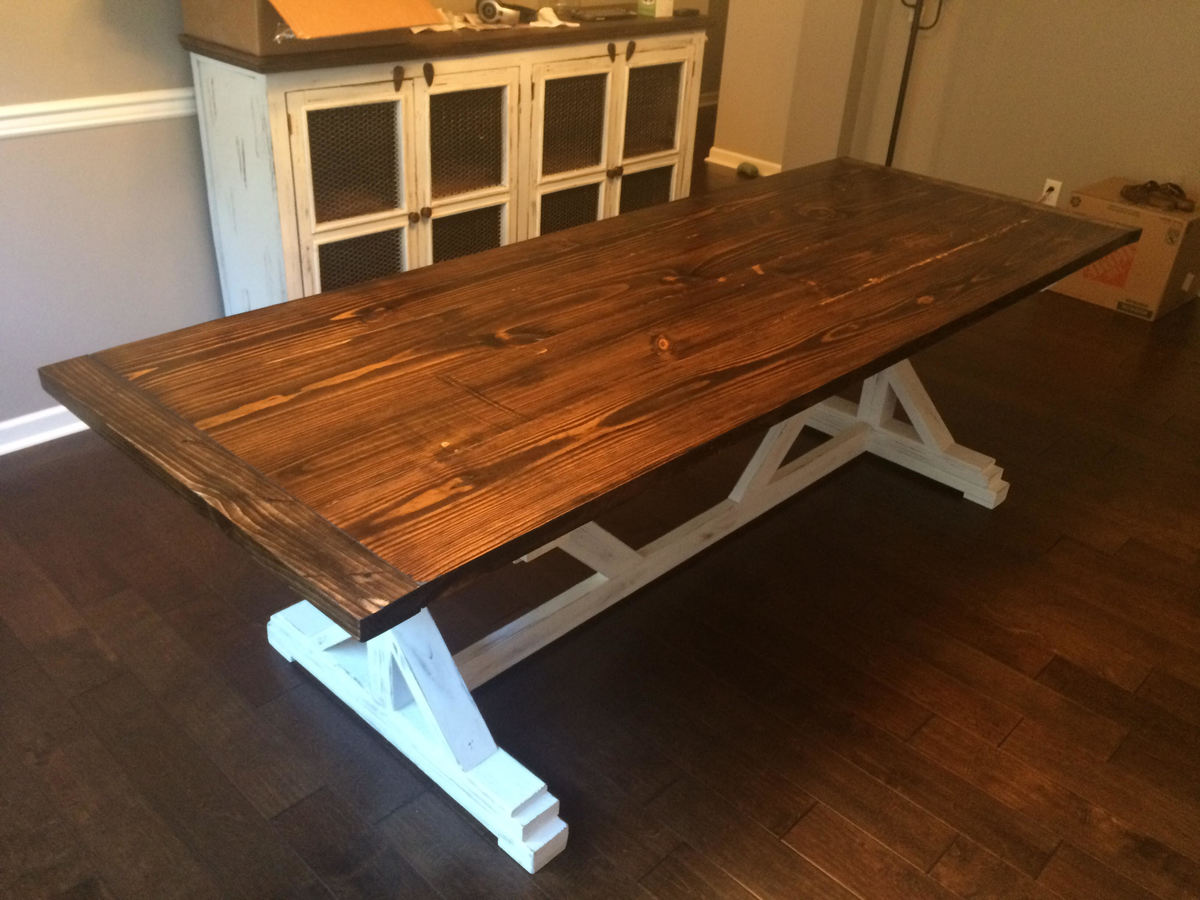
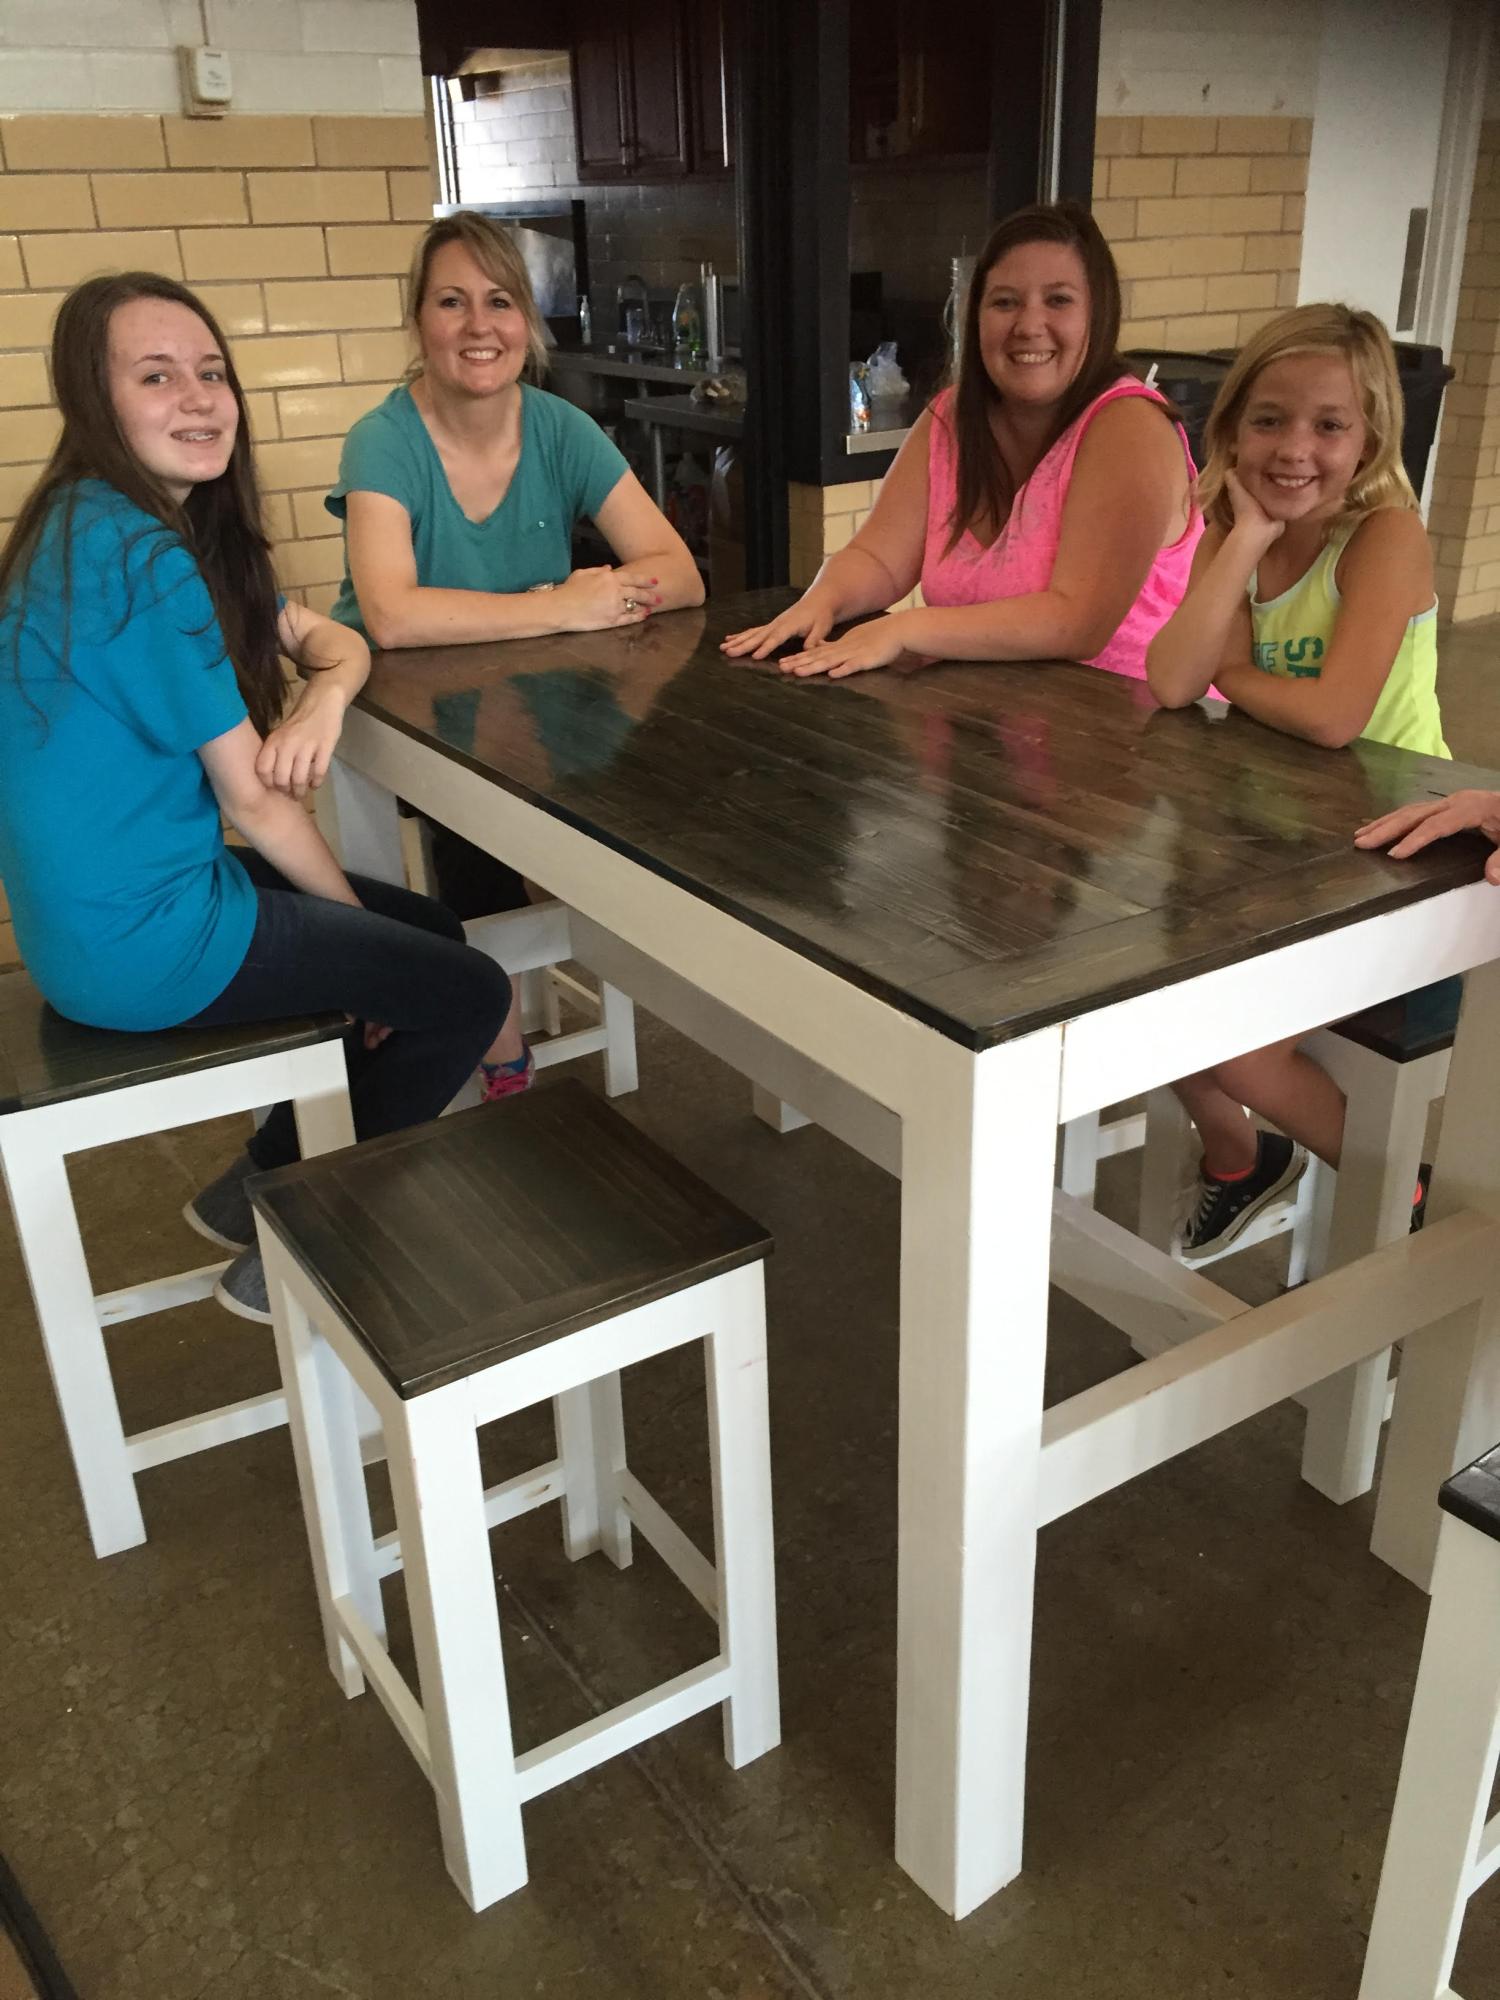
Thanks for the joy of this project! Our family of 5 just got a new kitchen table, and everyone pitched in to build it.
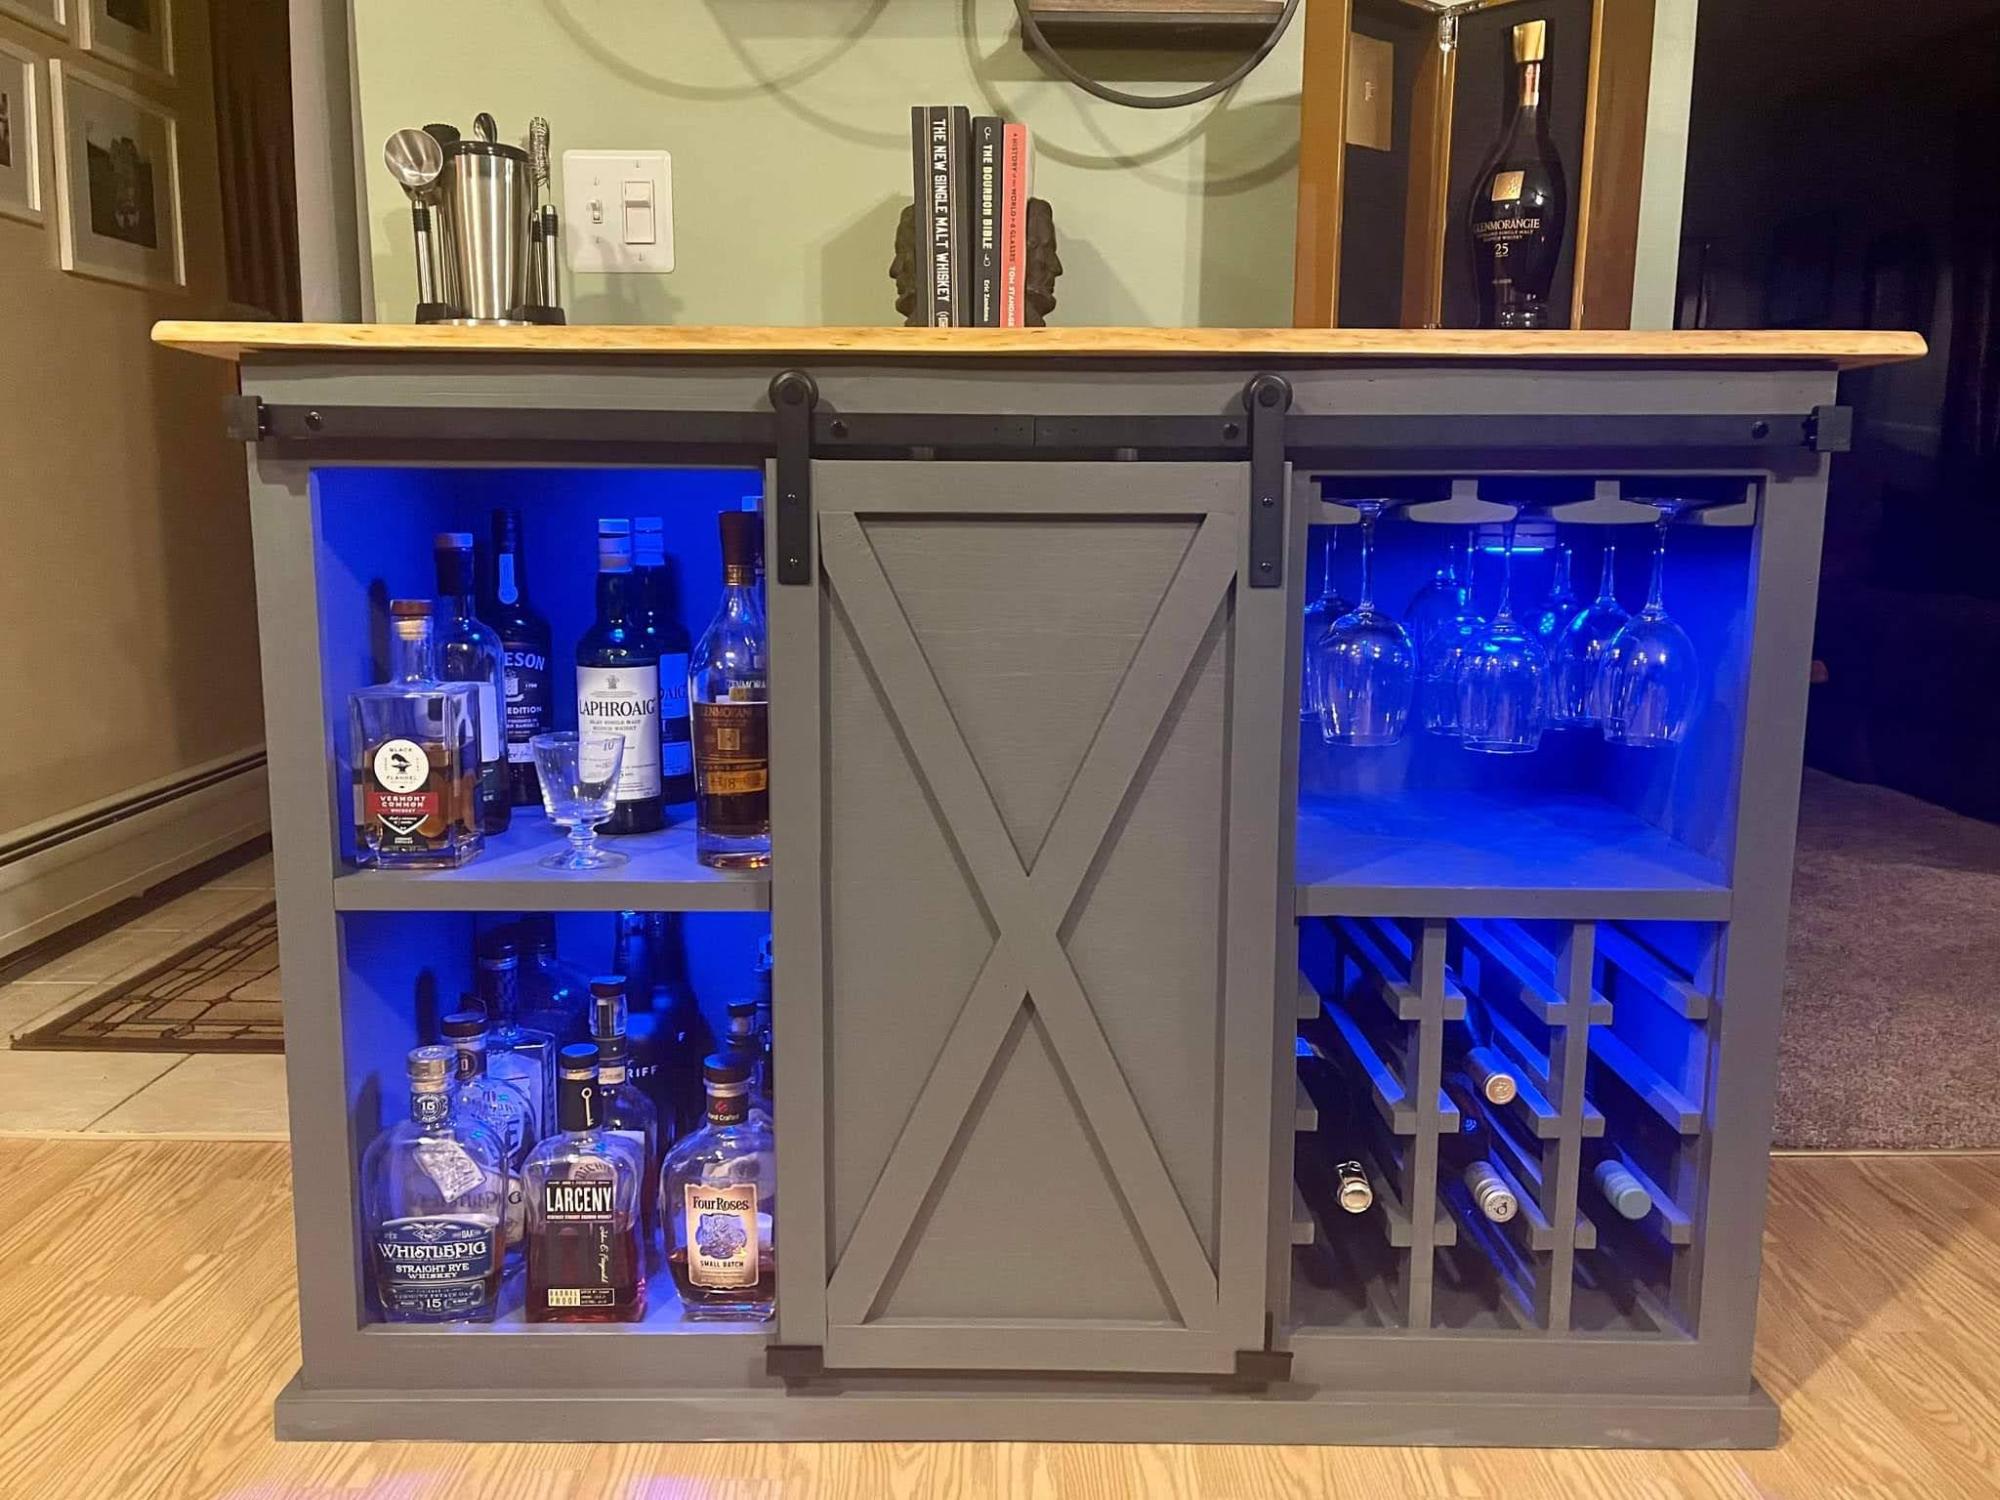
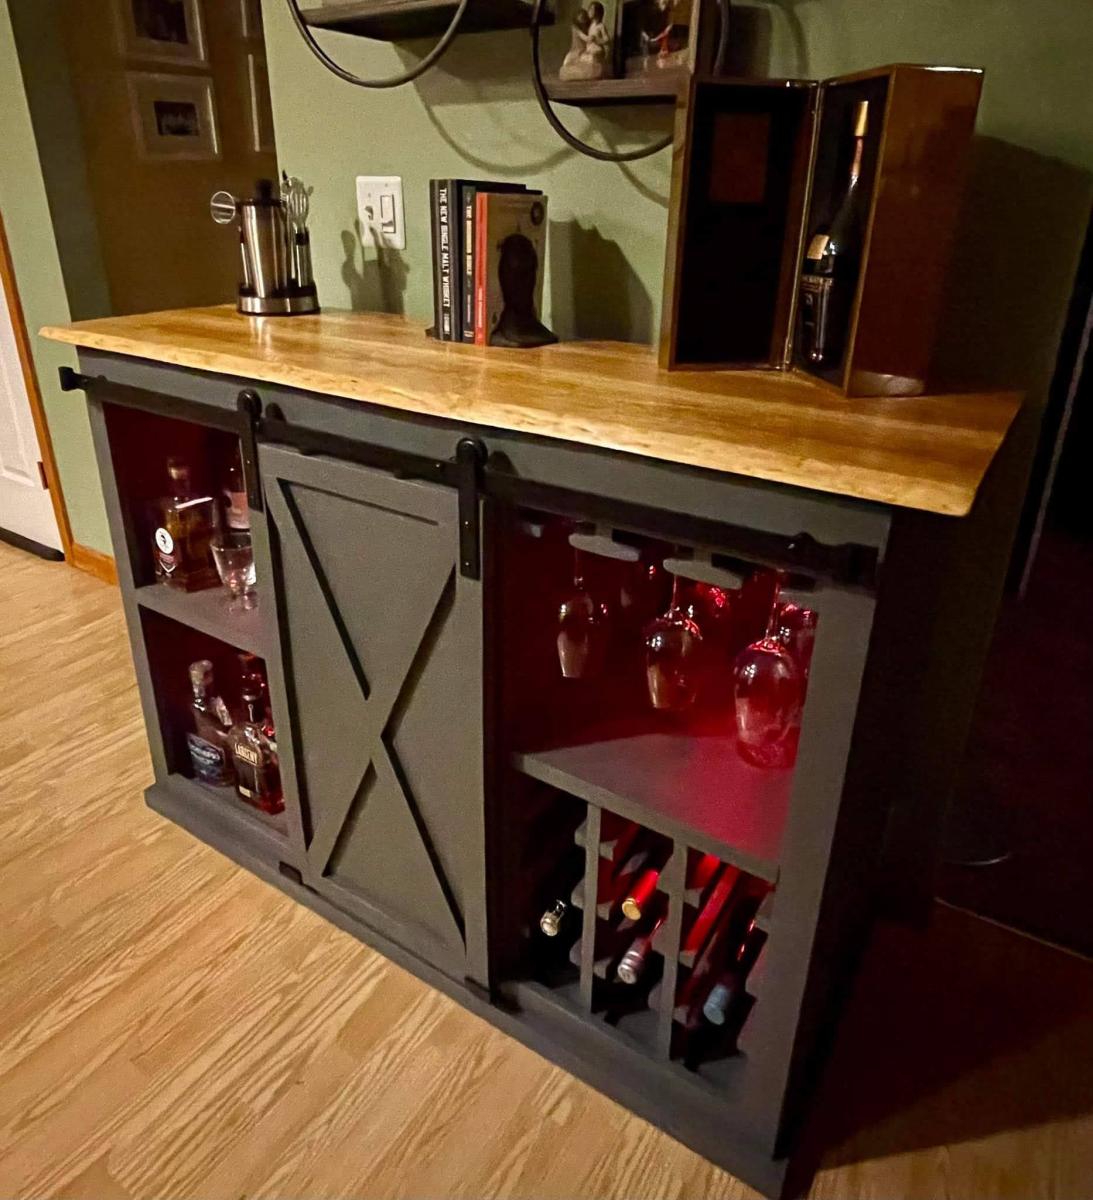
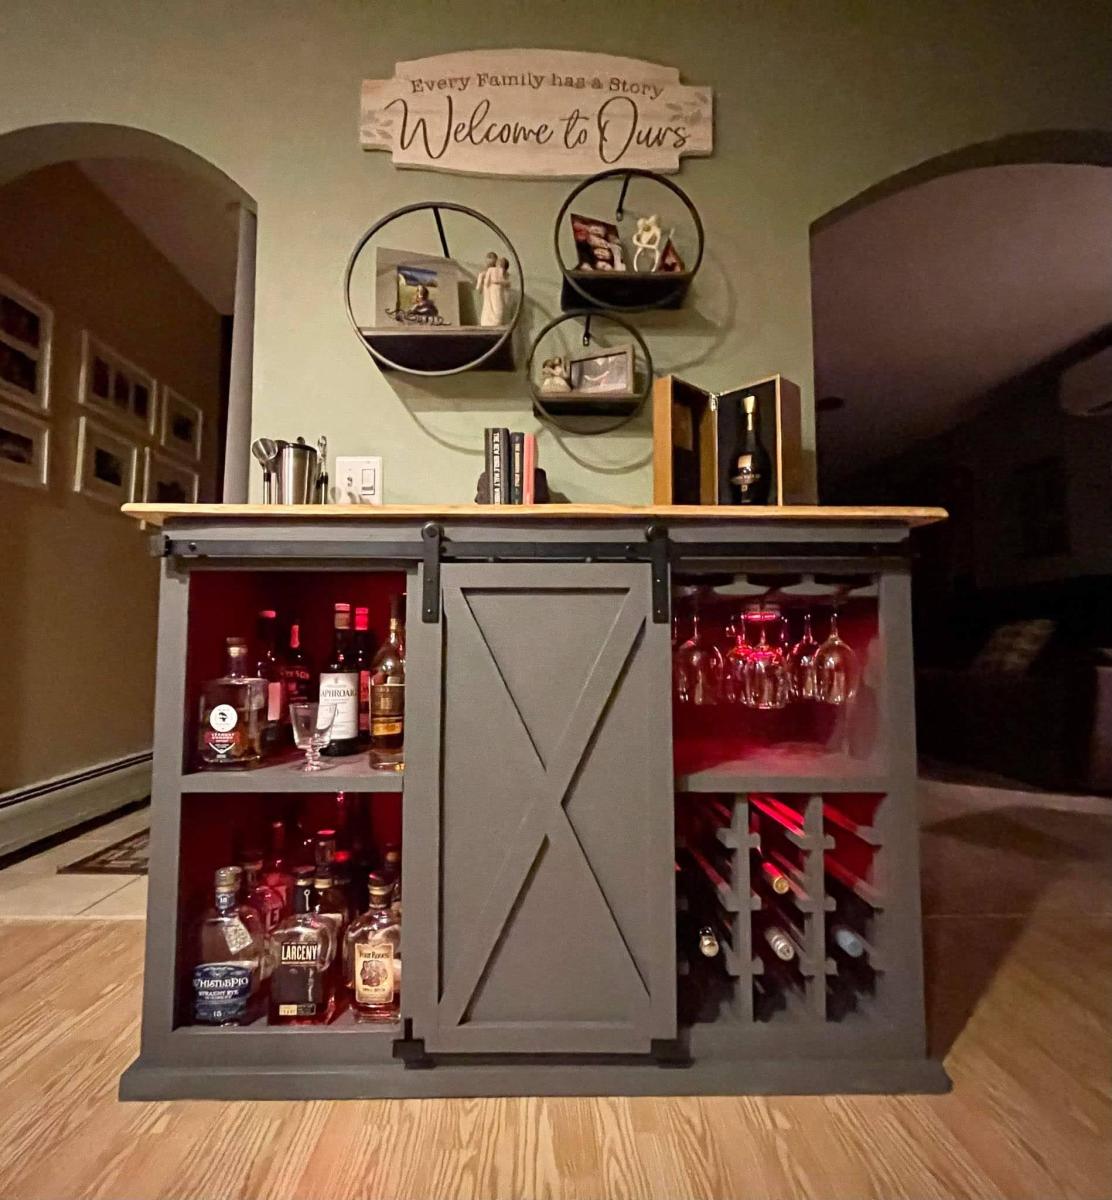
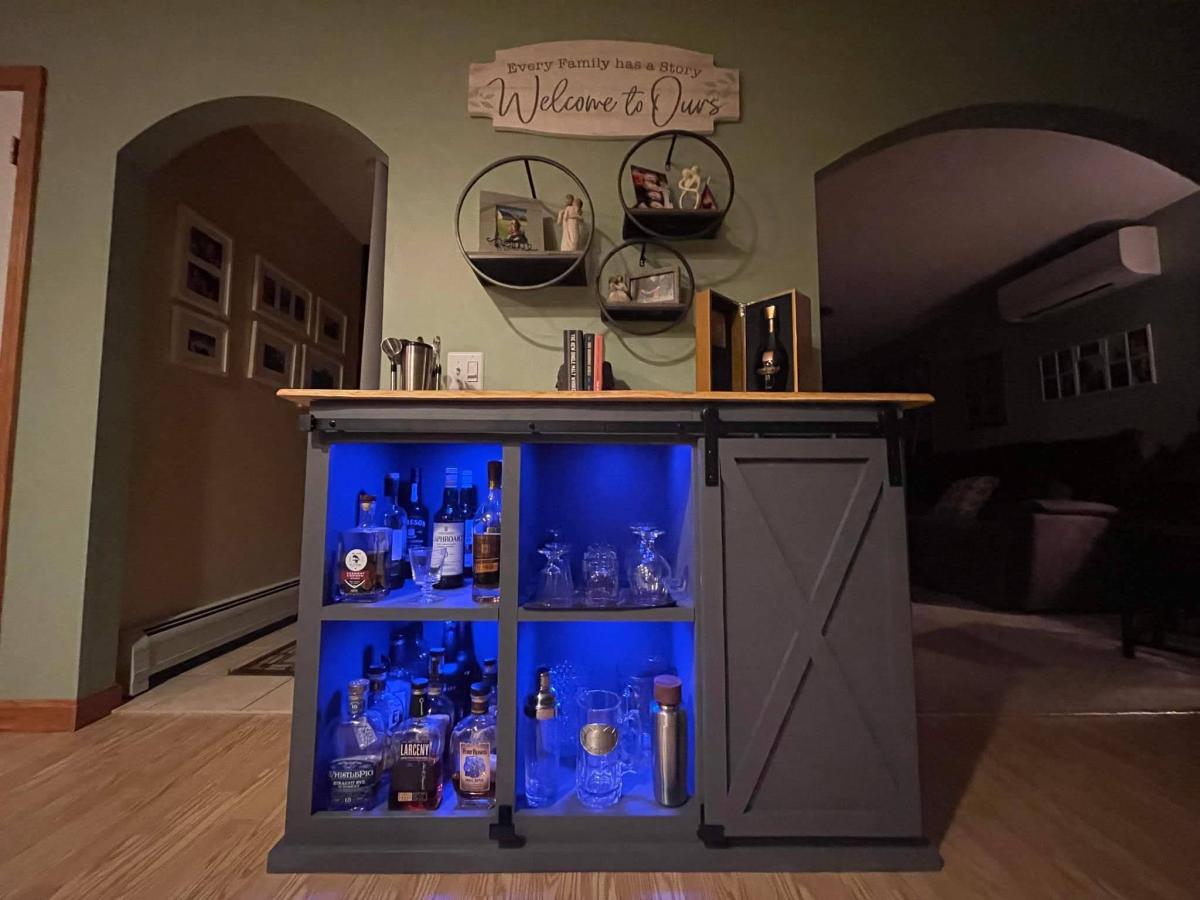
Whiskey on the left, Wine rack & glass holders on the right with storage in the middle. Frame built mostly with Pine, painted with Peppercorn Grey. Cherry tabletop with live edge. Finished with boiled linseed oil and semi-gloss polyurethane. A whiskey Bar should be fun! Stick on lights in each bay battery powered, comes with remote with many color options.


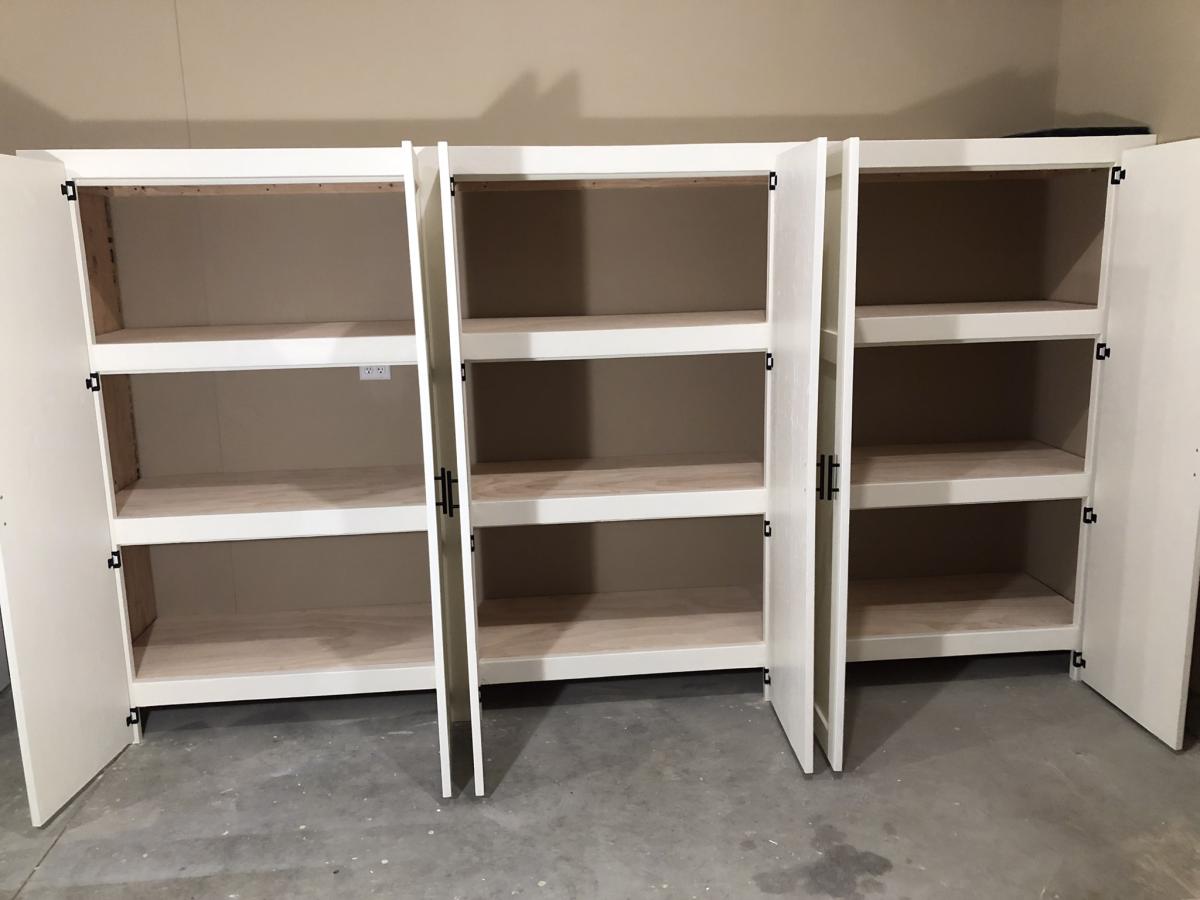
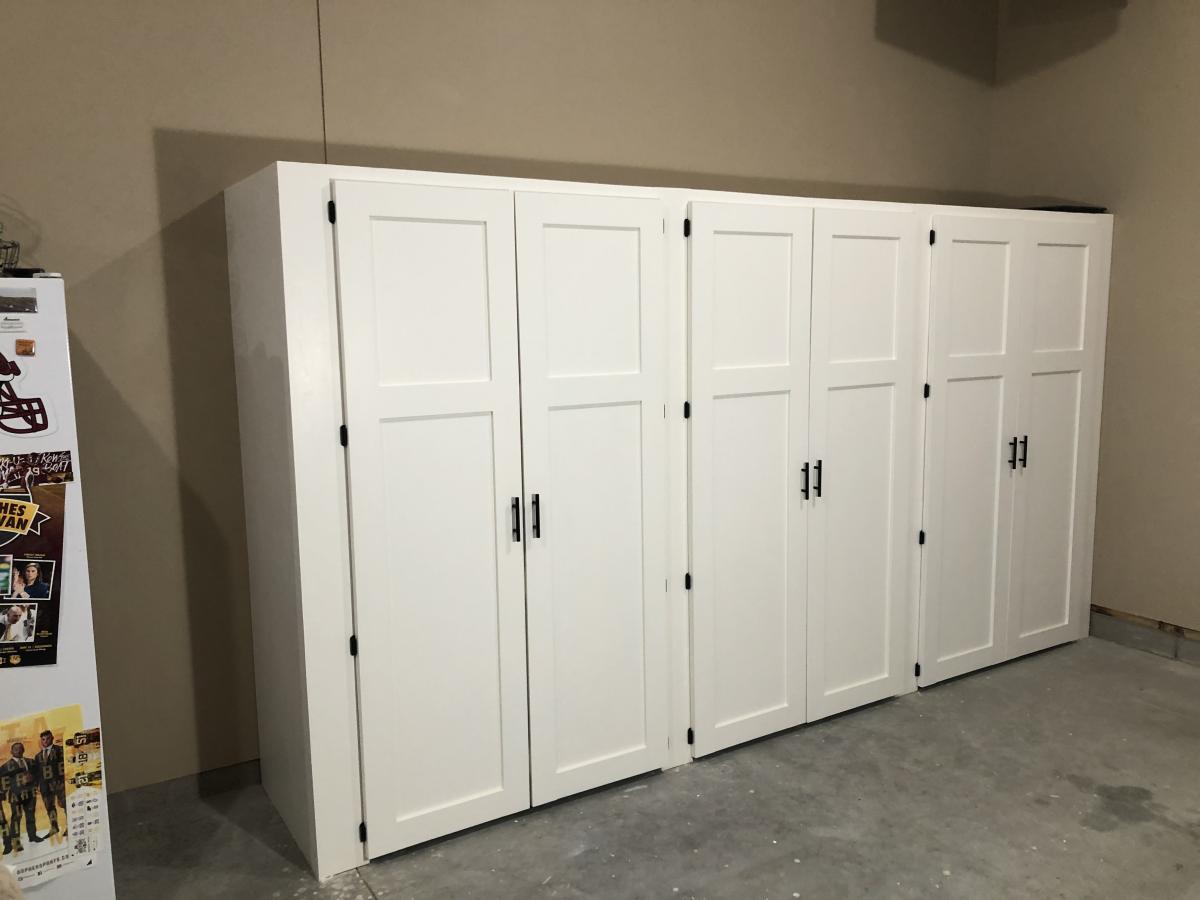
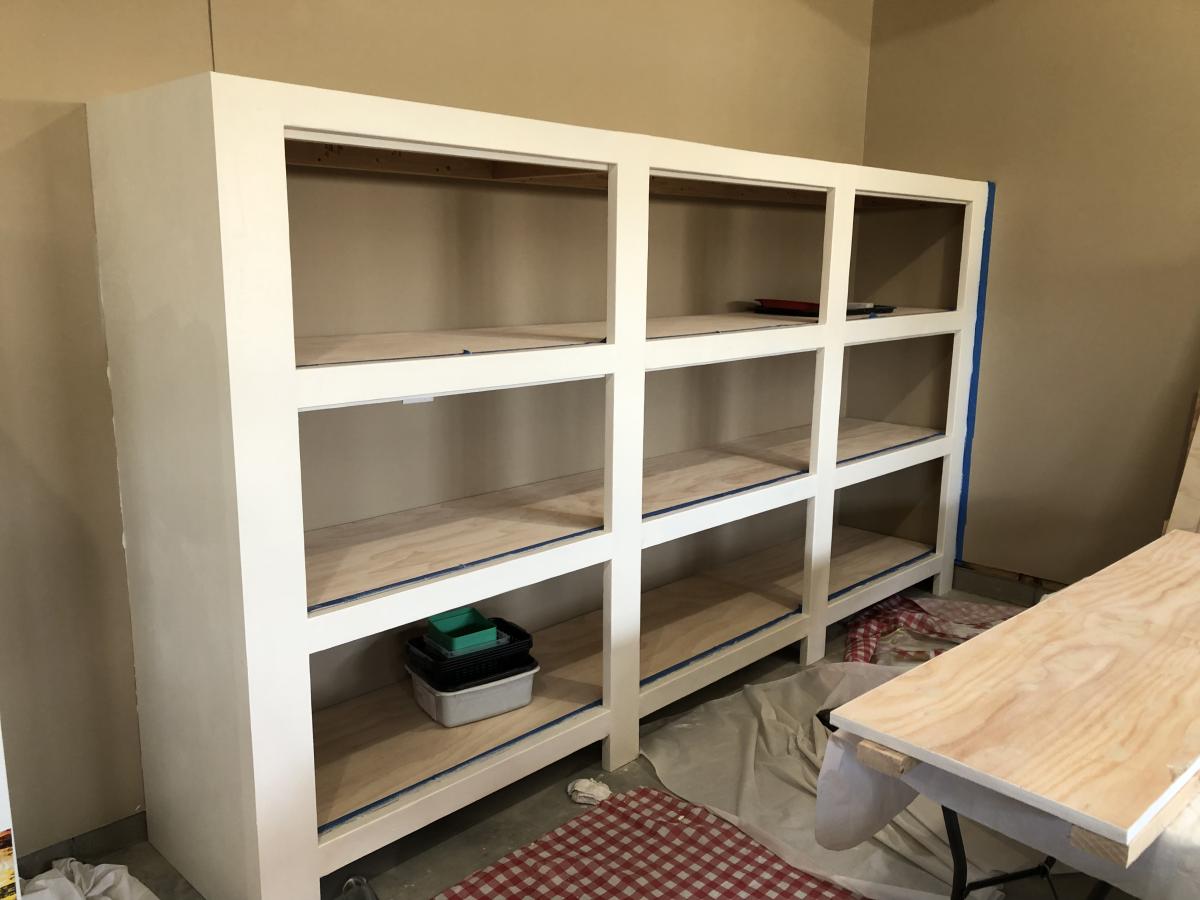
Thank you so much for the two videos we watched of you and your husband explaining and demonstrating how to build garage shelves. We used your plans as a guide. We chose to add shaker style doors to create cabinet shelves. We absolutely love them. We are not handy as you can see we had a living room lamp for a work light and a lifetime table as a work bench. Thank you!
The Paulsons
I modified these plans a little. I added some tongue and groove breadboard ends, and used Rockler table top fasteners to attach the top. I worked on it in my spare time after work a couple days a week for about a month. I'm happy with the overall outcome!
I recently made the end table and console table from the "Rustic X" collection and those were my very first wood projects that I have EVER done. I think I am addicted now! I have had NO experience in working miter saws, kreg jigs and barely drills before this. If I can do it, anyone can do it :)
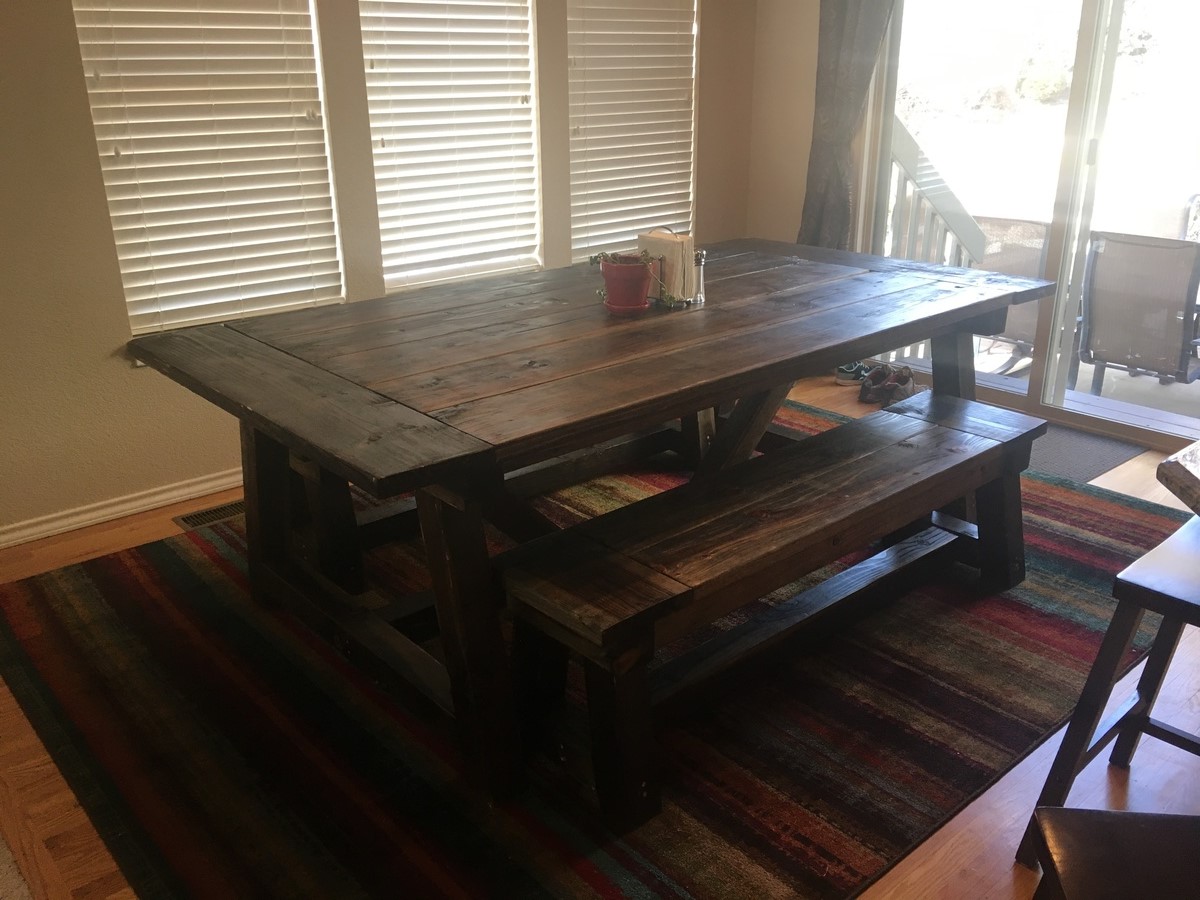
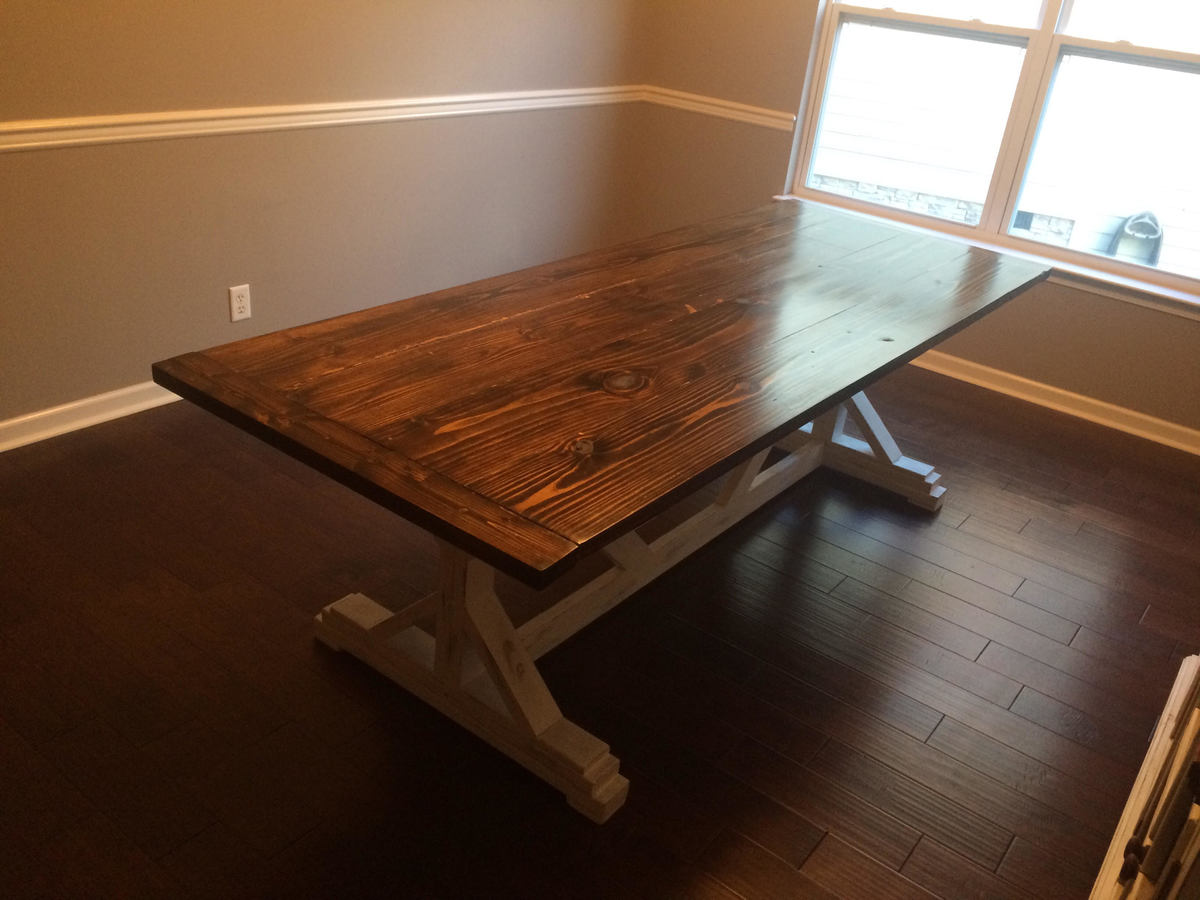
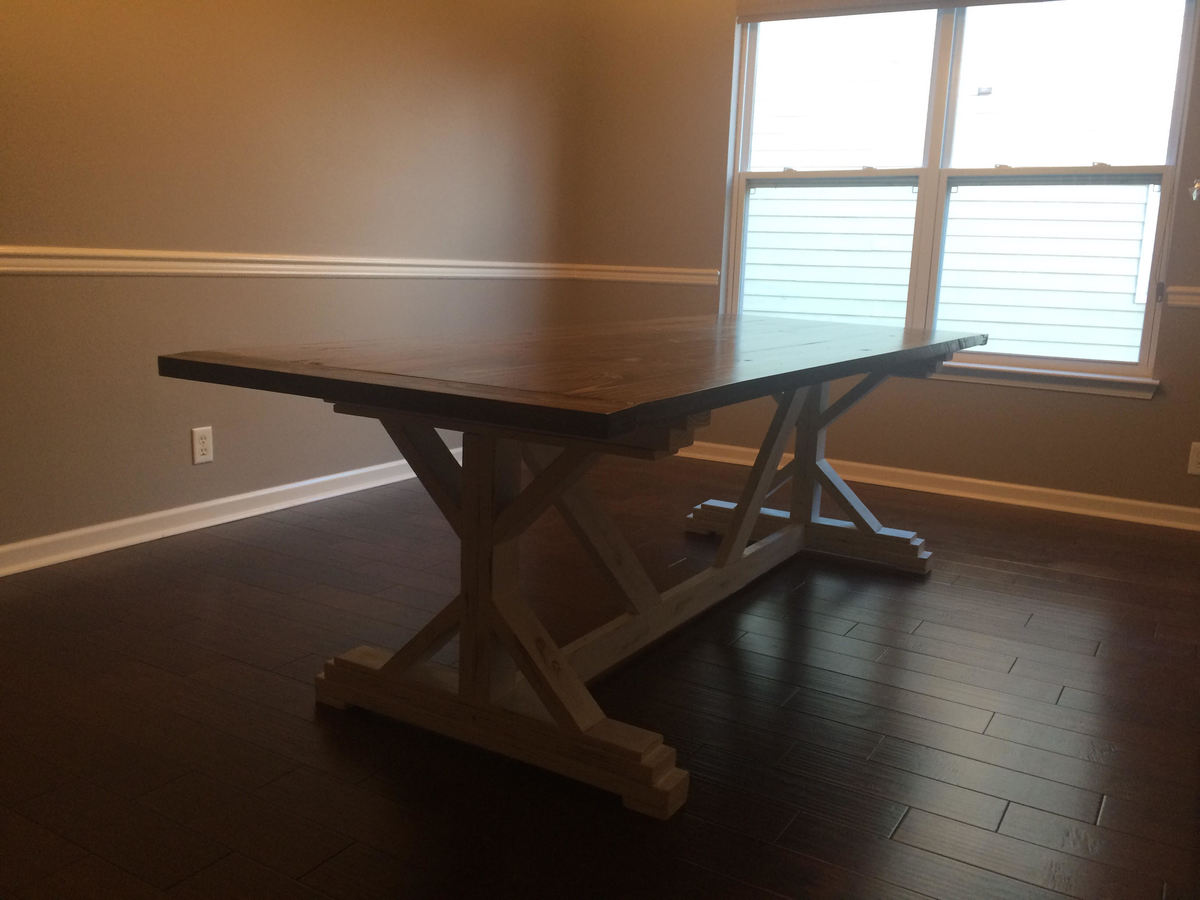
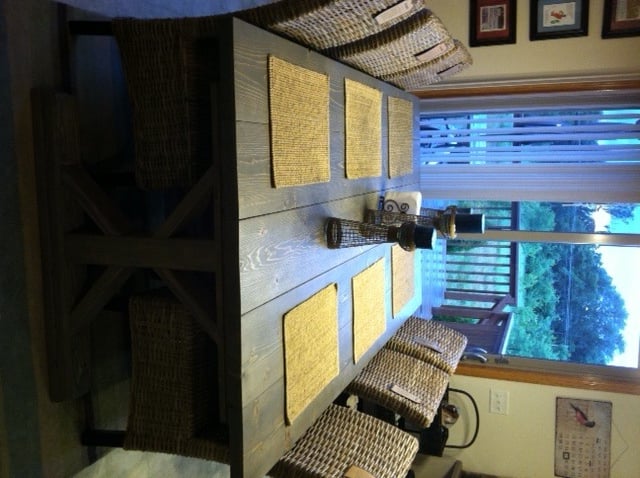
My husband and I made this table over a weekend and I am very excited about how it turned out. I was inspired by the color and size (and chairs!) of Sawgrasshomegirl "weathered grey fancy x farmhouse table with extensions" and I used the classic minwax stain. Thank you so much to Anna White and Sawgrasshomegirl for their plans, ideas, and inspiration!
Built this for my daughter and my grandkids. Love your site. Have built many projects from your plans.
by Donny
Love my table, I’m still working on the benches.
by Melonie
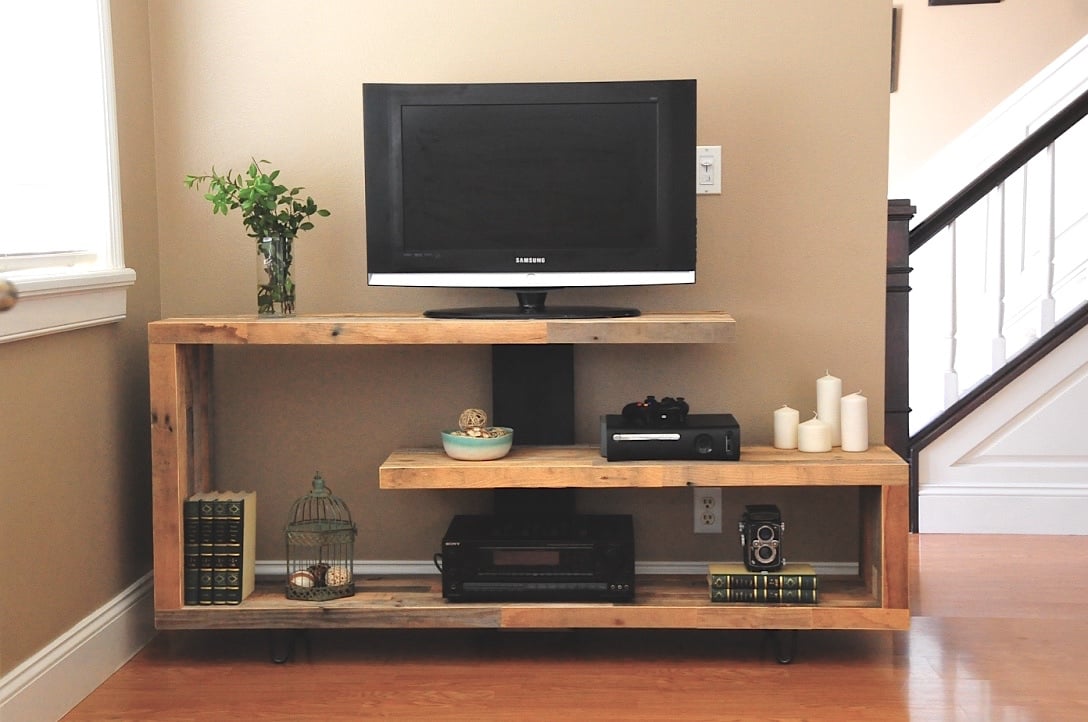
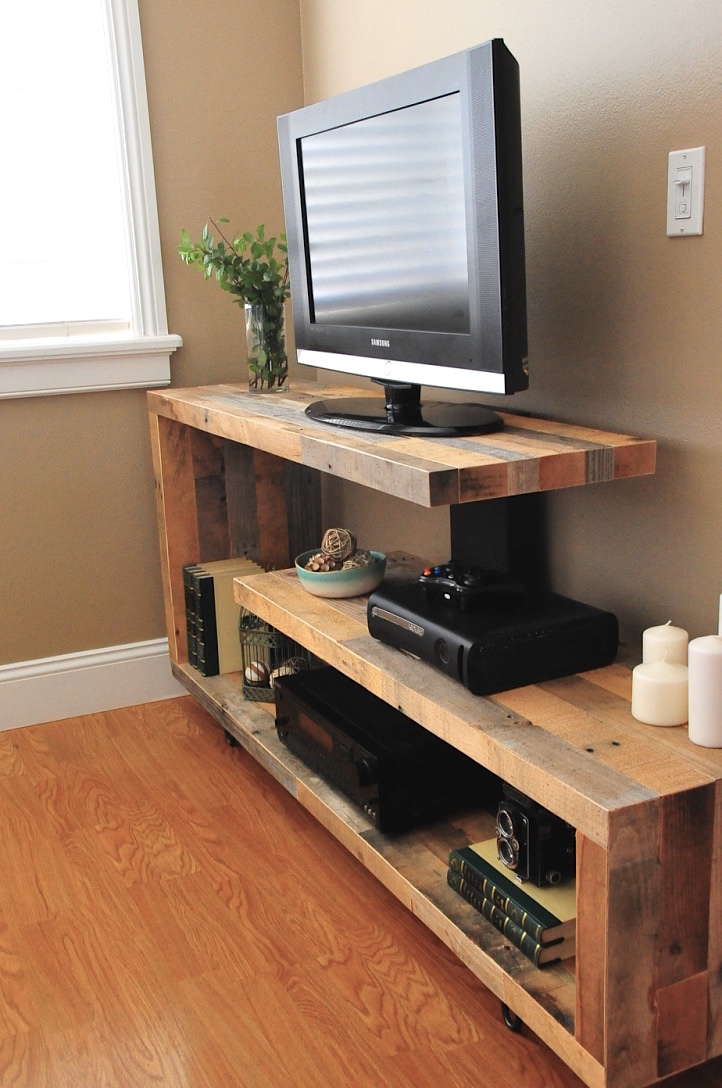
Just finished up this unique TV console. Built from reclaimed pallet wood.
Mon, 12/02/2019 - 22:10
Hi there Im new to site and also have the issue of not seeing the plans for this Rustic Modern TV Console. Are they available and Im doing something wrong or??
Sat, 06/27/2020 - 05:03
I am logged in and I do not see the plans for the "Rustic Modern TV Console"
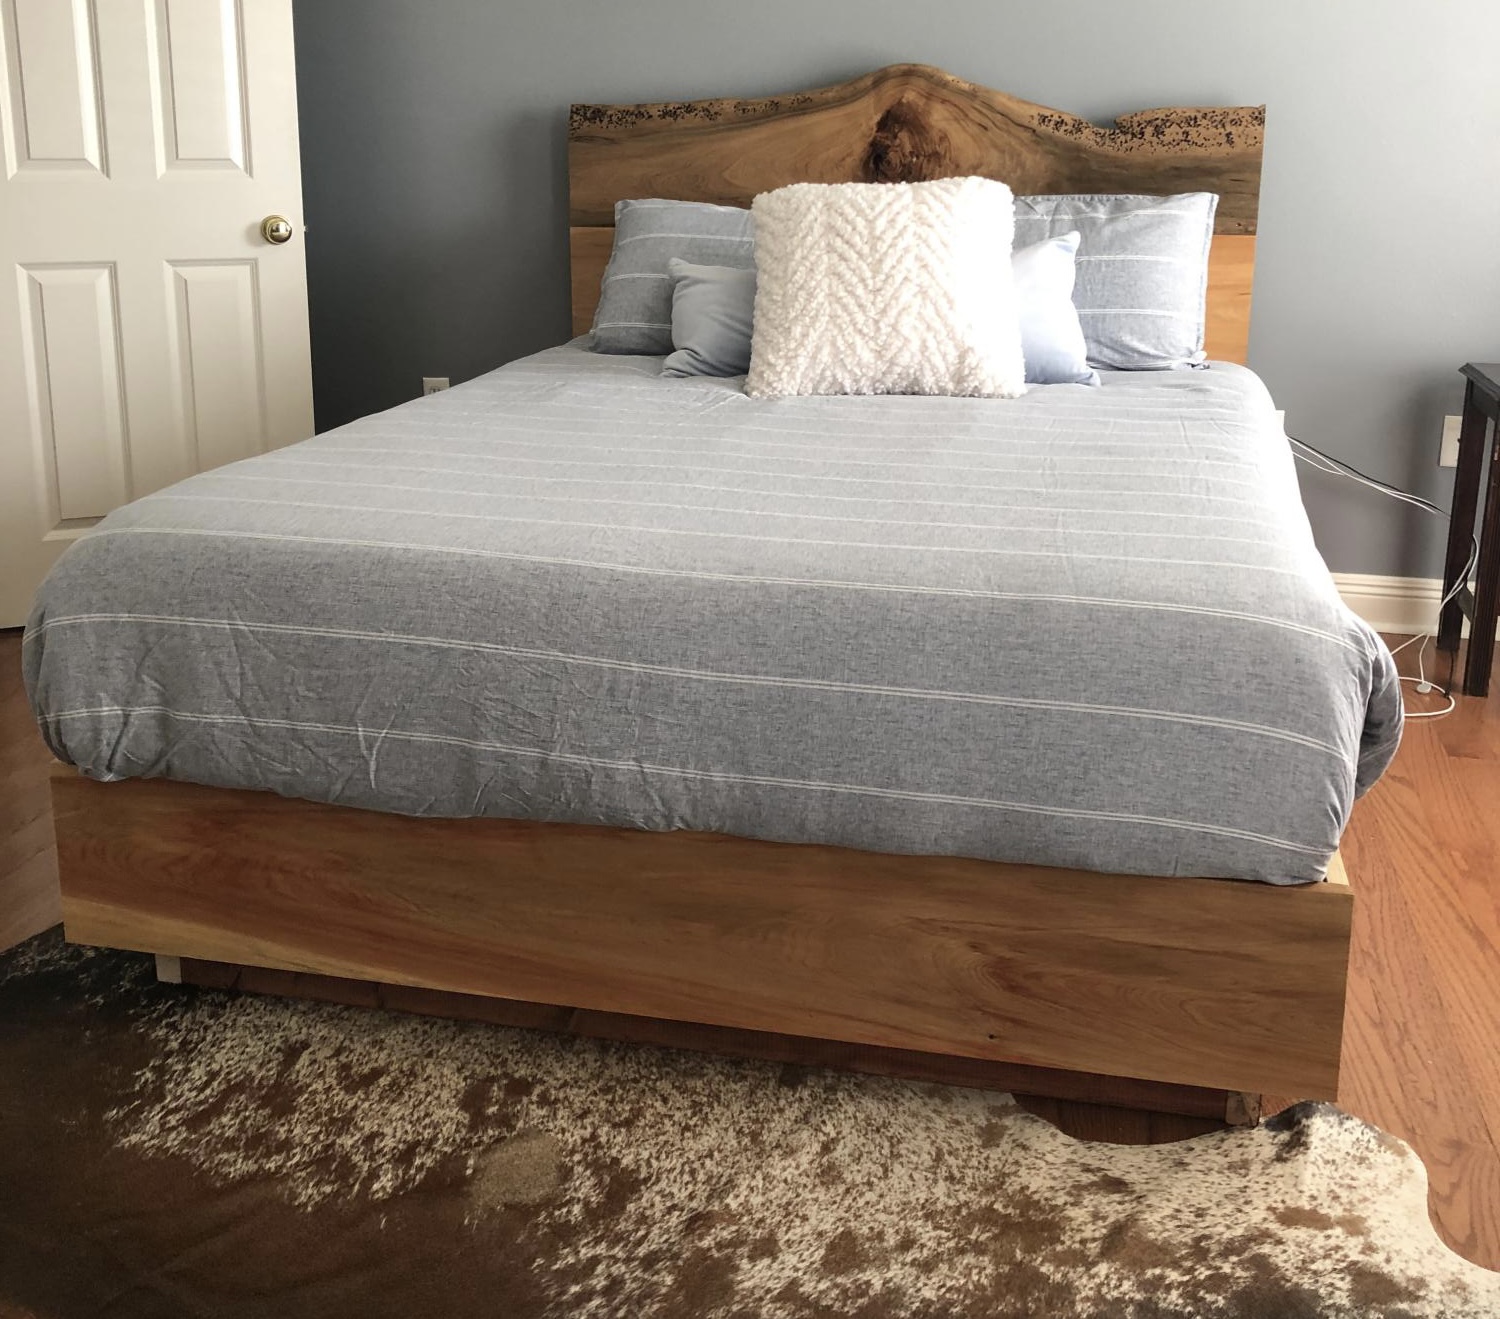
My son needed a new bed and he was interested in a live edge Cypress headboard. We were able to make this one!
Was easy to make
Thu, 01/02/2020 - 13:02
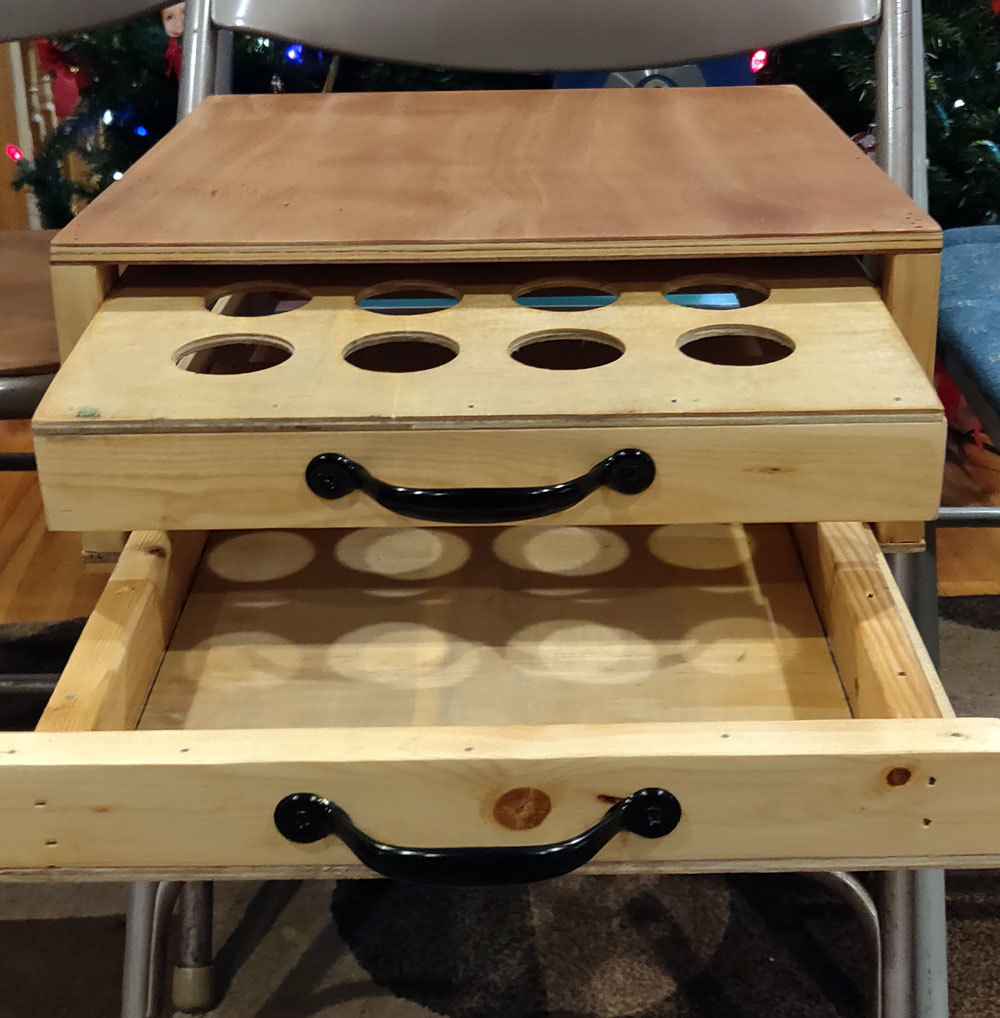
Looks great! We were hoping to add a drawer as well but I’m not really sure where to start. What adjustments did you make to create the open drawer? Can you post a photo of the side of the drawer? Thank you!

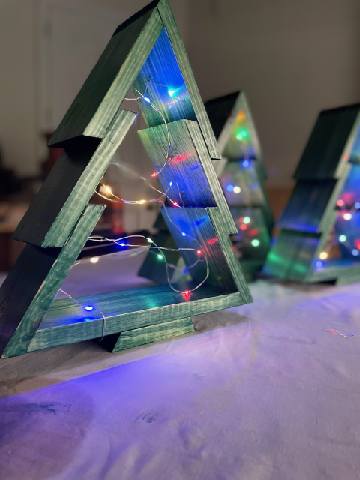
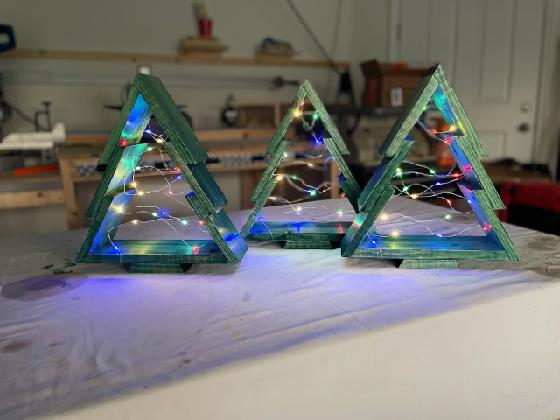
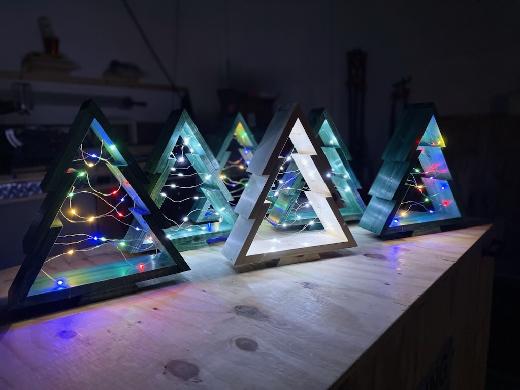
Adding the fairy lights to these tree's turned out to be a great idea. I think they turned out really good.
#Todays_Spare_Time


Comments
Ana White Admin
Thu, 12/16/2021 - 16:07
Awesome gift!
WOW, that is amazing, thank you for sharing!