Community Brag Posts

1-Board Trinket Box from Cedar Fence Picket
Submitted by JoanneS on Fri, 08/16/2013 - 15:30

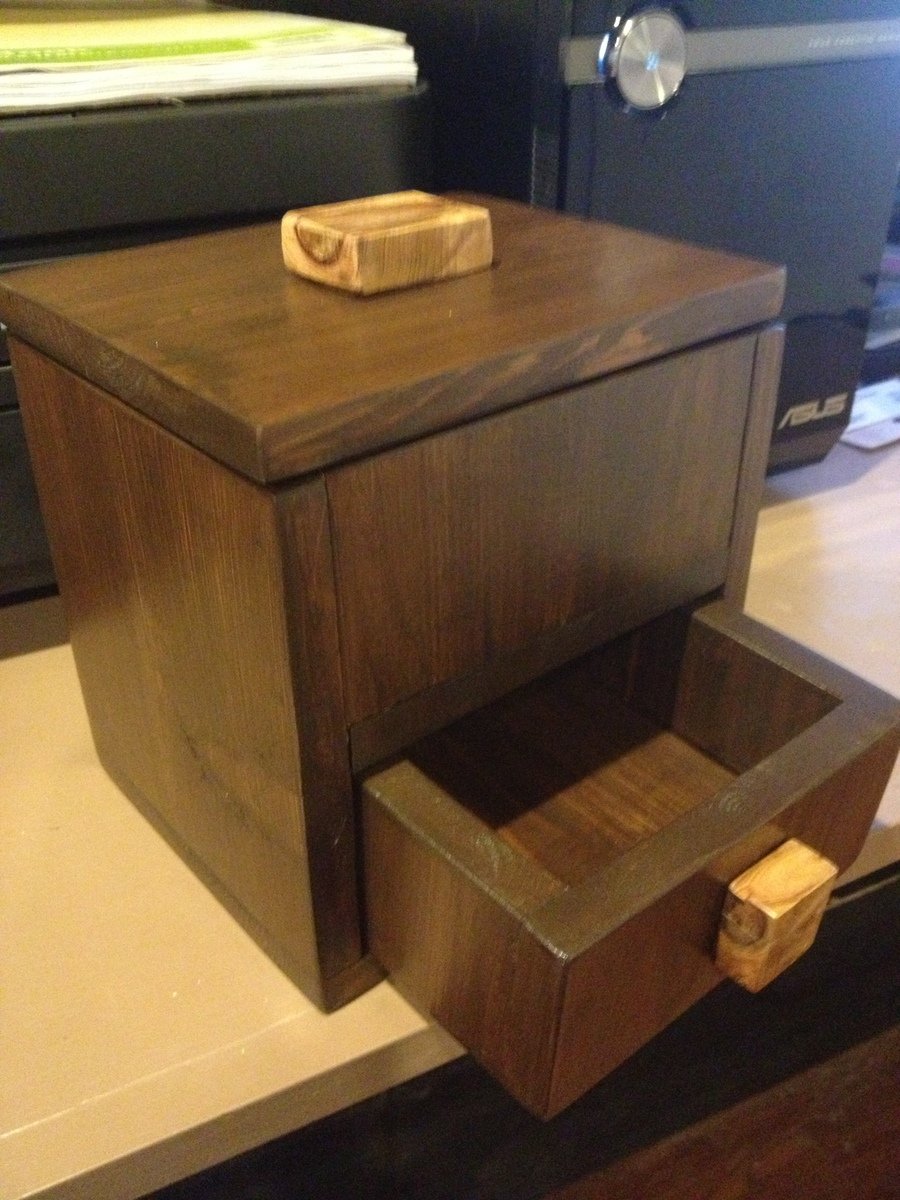
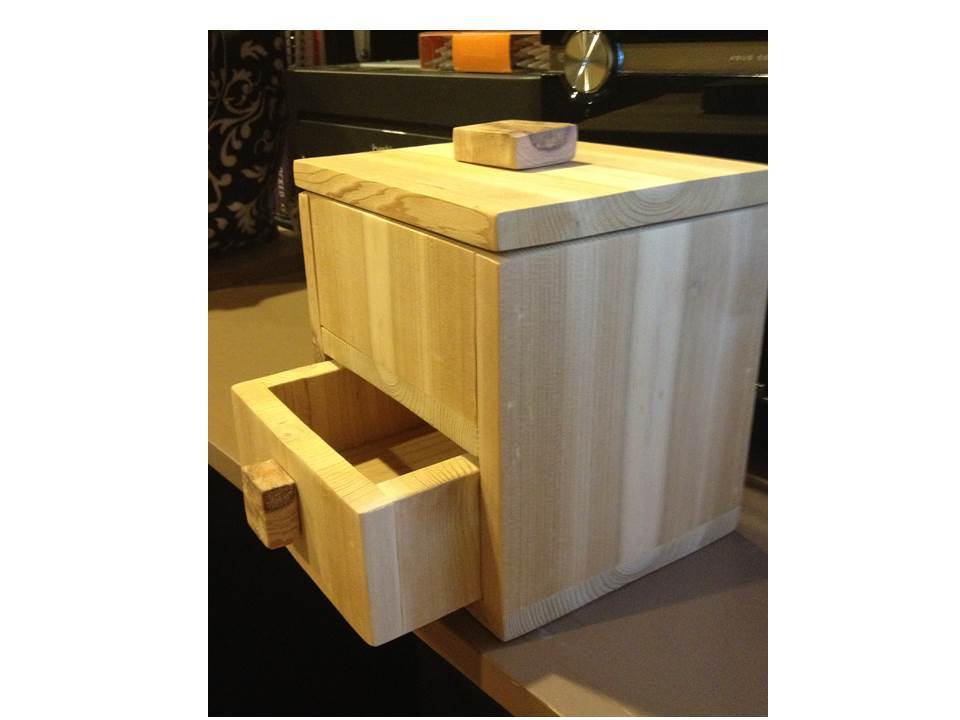
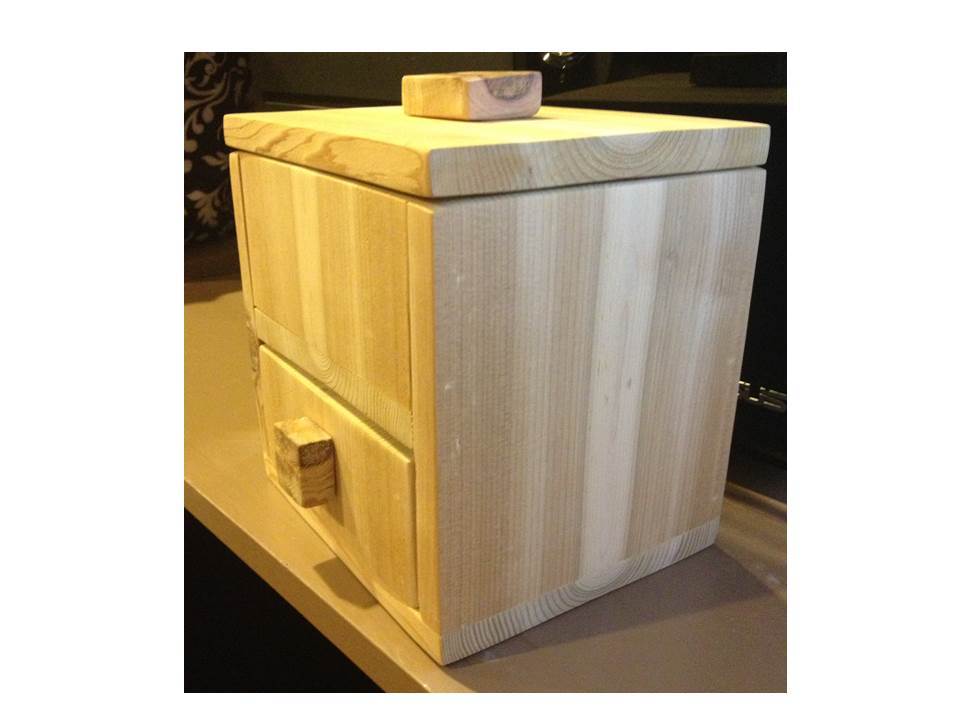
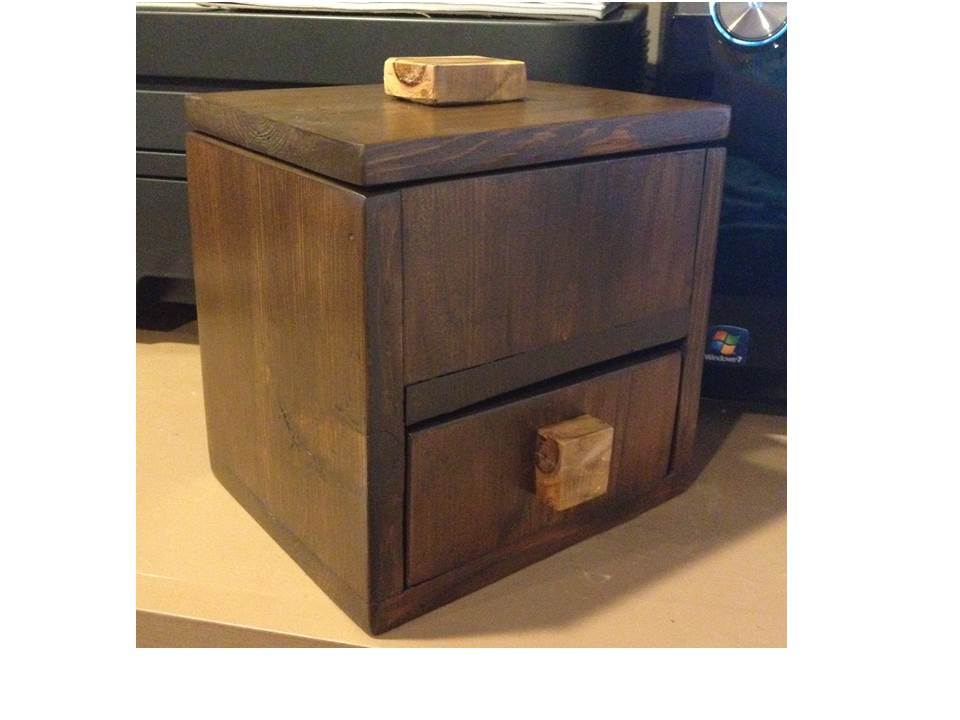
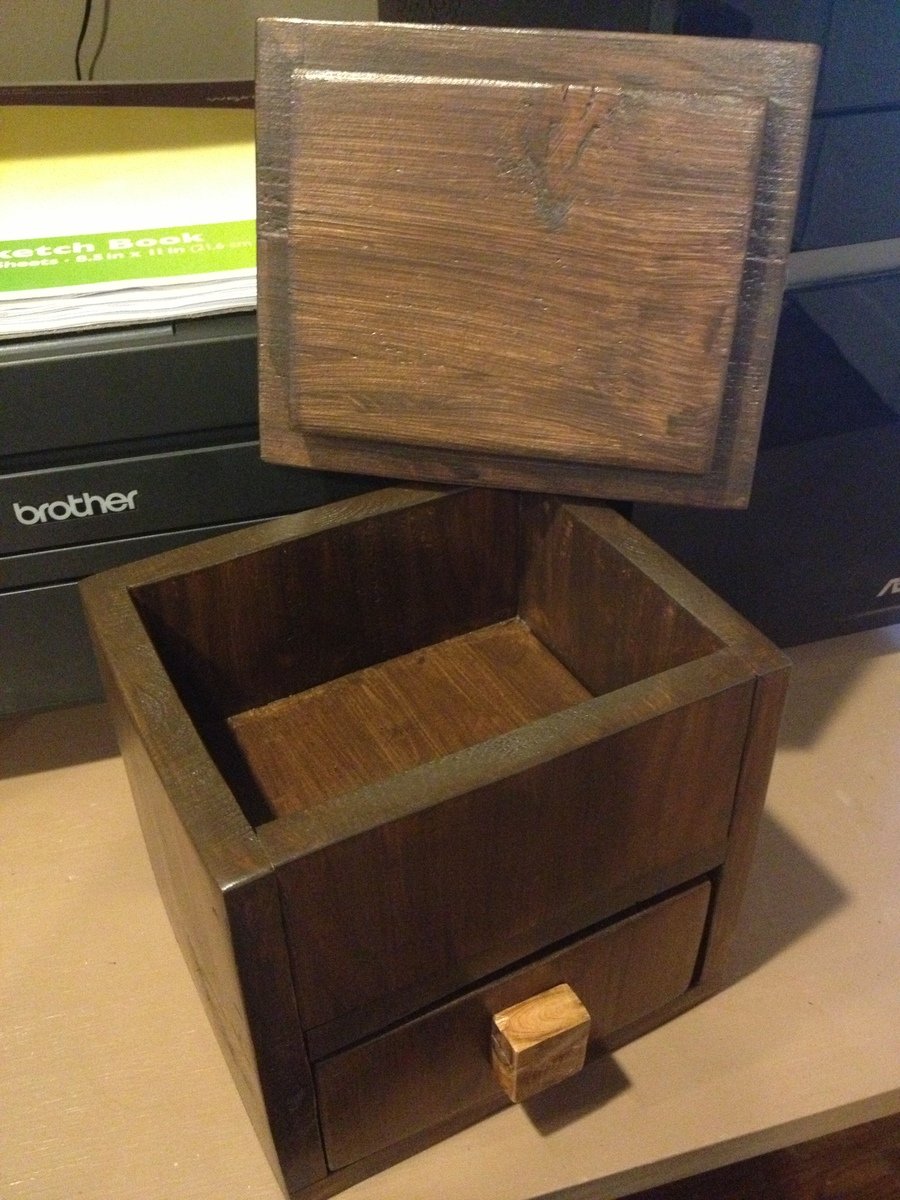
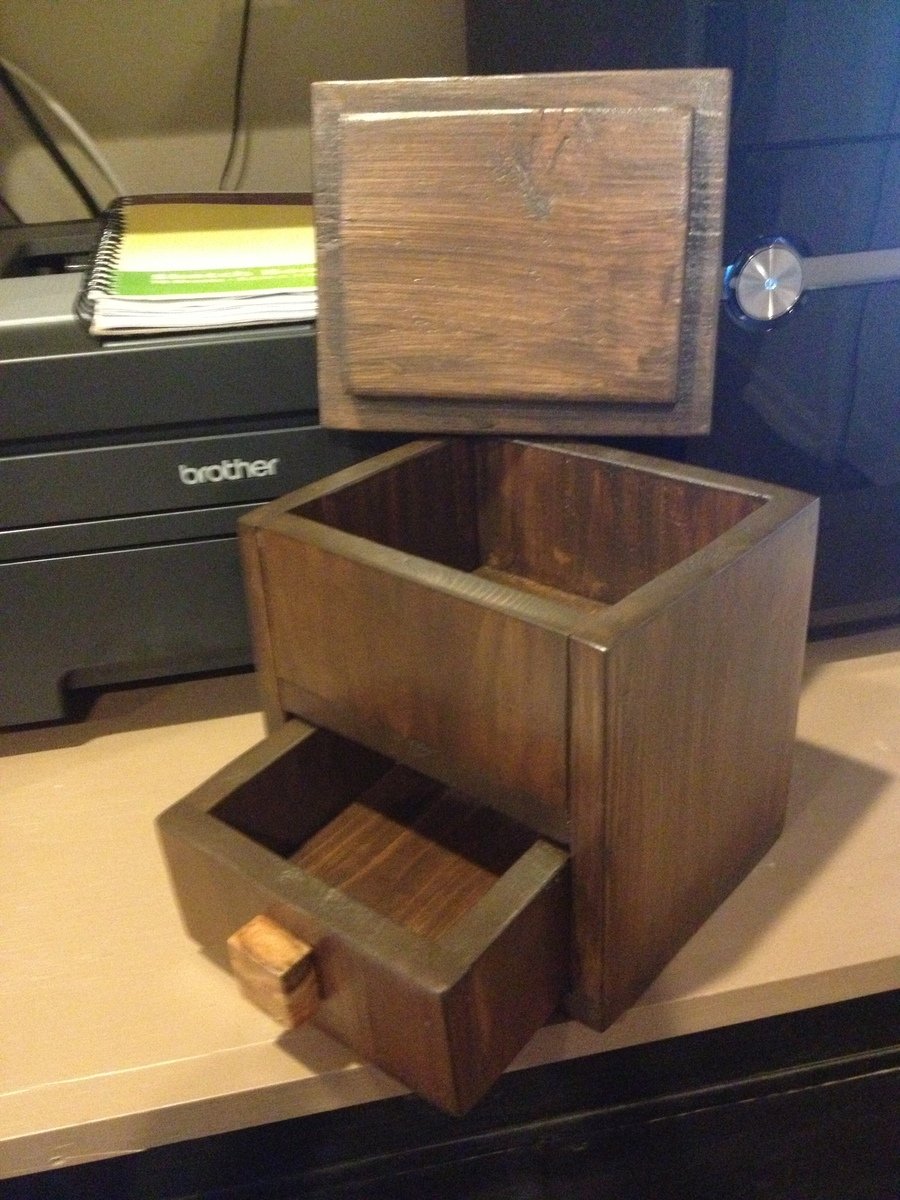
I built this as the prototype for the 1-Board Cedar Trinket Box plan. My goal had been to create something that would make a nice gift, only use 1 cedar fence picket (about $3 in wood), didn't require any special cutting or ripping, and could be made with just your miter saw and brad nailer (you could use regular nails and hammer too, but I love my nailgun!) Also highly recommend using a palm sander for this. (Love my power tools!)

As I was building I discovered the beauty of cedar, the imperfections of cedar fence boards, and the value of prototyping. I added some tweaks to the plan to identify the places where you should build the first part, then measure, then cut the next part.

This took about 2 1/2 hrs to build, which included a whole lot of sanding. I started with 80-grit, then 220 grit to get the board surfaces smooth. After the prototype was assembled and I noticed how much cupping there was in my fence board, I broke out the 60-grit and went over all the high spots to smooth them down. Next time I'll be much more careful to choose a board without much of a cup. It did give some real interesting grain patterns though, so it all worked out in the end.

For pulls I cut a couple of interesting looking knots from my cedar board and glued them on. The next one I'd like to try some strips of leather or maybe a rope knot for pulls.
Estimated Cost
$3 in wood + finishing materials
Estimated Time Investment
Afternoon Project (3-6 Hours)
Finish Used
I started to leave this one natural, but after trying the tutorial for the Walnut Minwax Express Color on cedar, I had to use that finish on this piece. I'm loving the walnut color! Topcoat is 1 coat of Minwax Oil Modified water based poly in satin.
Recommended Skill Level
Beginner

Comments

yurra-bazain

Fri, 08/16/2013 - 17:44

Joanne, I am so blessed to see how creative you are every day, how you approach your builds with others in mind, and how you work with the situations you encounter and turn things into functional and beautiful pieces! =D Thank you for sharing your creativity with passion and drive!

JoanneS

Sat, 08/17/2013 - 05:10

Thank you so much for your kind comments! I have gained so much from the experience of participating on this site, I am hoping sharing this might be helpful to fellow readers/builders. Building, and sharing it here brings me joy, and I want to share that!

Famhouse Table

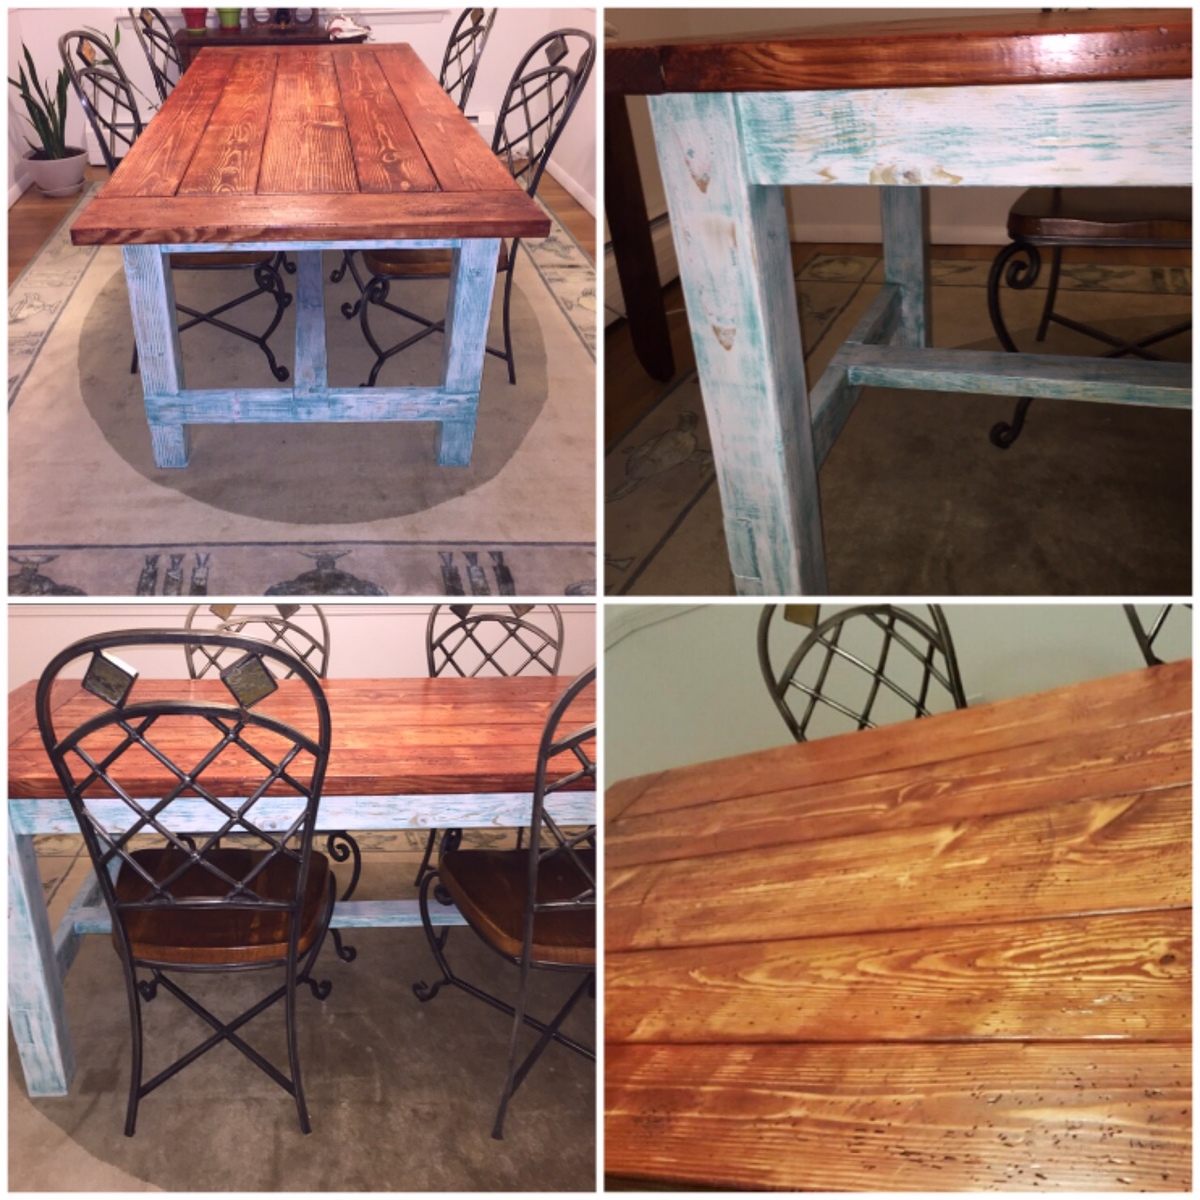
This is my 2nd built and it was a fun one.  I built this table for a friend of mine and she wanted a different look to the table.  She picked Patina Green and Snow White paint for the base and legs.  First I applied the white paint, let it dry and then applied a very small amount of the patina green and dry brushed it in.  After it dried I used my sander to blend it in and have some of the wood grain to show.  On the table top, I applied the stain and let it dry over night and then sanded down (lightly) so the grain would pop.  She loved the different colors and look of the table.  She had the perfect chairs to match the rustic look.  Excellent project!

Estimated Cost
$100 wood materials, $75 for wood conditioner, milk paint, stain and top coat.
Estimated Time Investment
Week Long Project (20 Hours or More)
Finish Used
General Finishes Wood Stain, Water Based, Antique Cherry Stain, HP Polyurethane Top Coat, Semi-Gloss
Recommended Skill Level
Starter Project

Side table

Submitted by jarsofclay on Tue, 08/28/2018 - 10:29

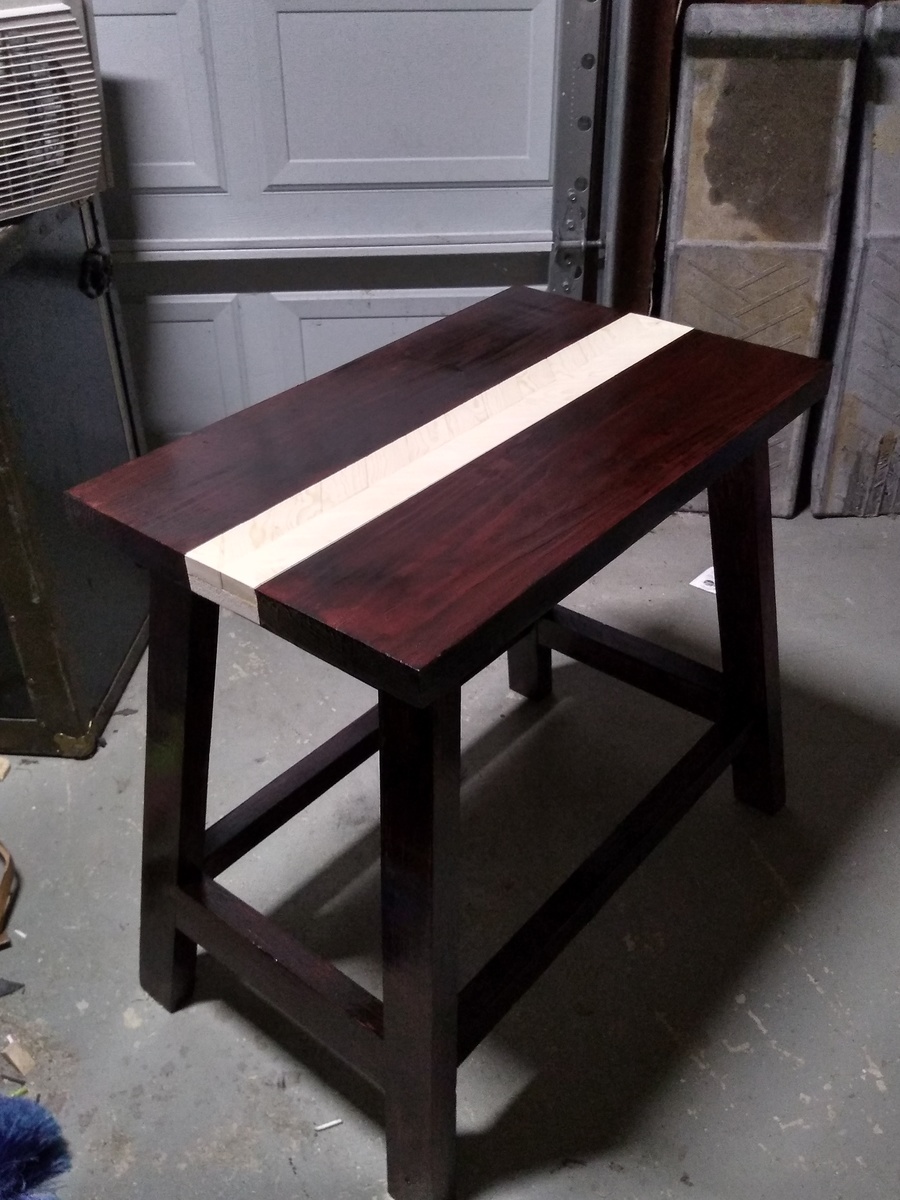
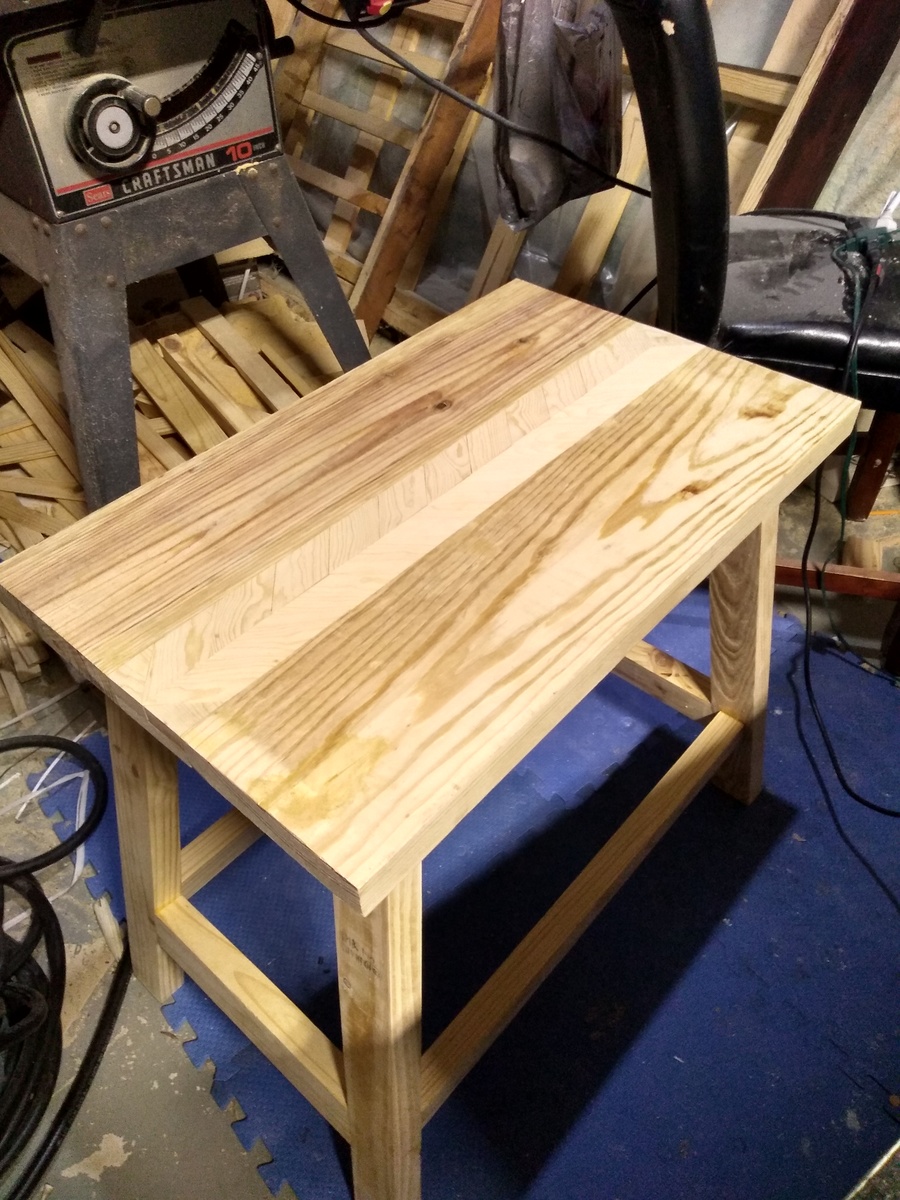
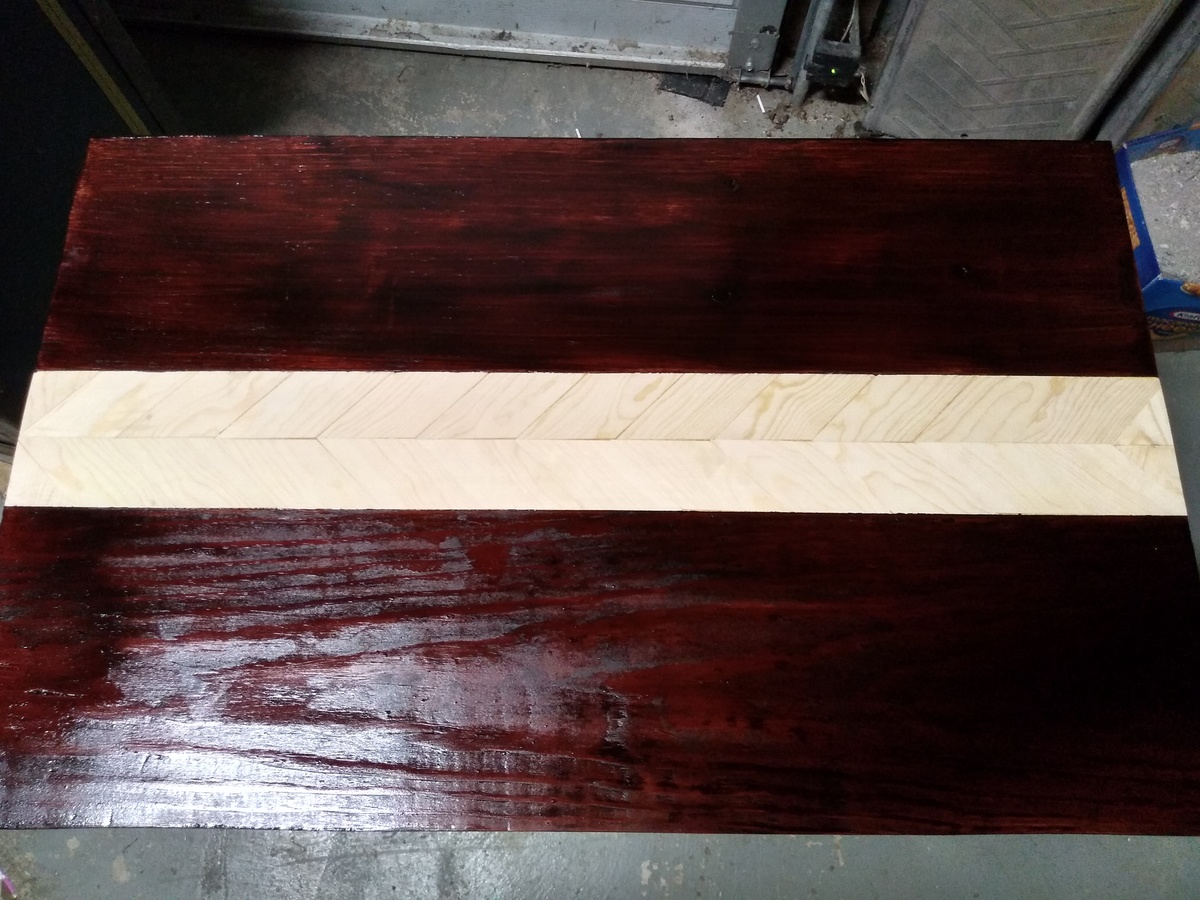
I made this side table after the truss end table plans. I added my own flair to it and made the center in a herringbone design.  slight modification to the plan to my desire.

Built from Plan(s)
Estimated Time Investment
Weekend Project (10-20 Hours)
Finish Used
Mahagany
Recommended Skill Level
Beginner

Greenhouse

Submitted by Anonymous (not verified) on Wed, 06/01/2022 - 06:08

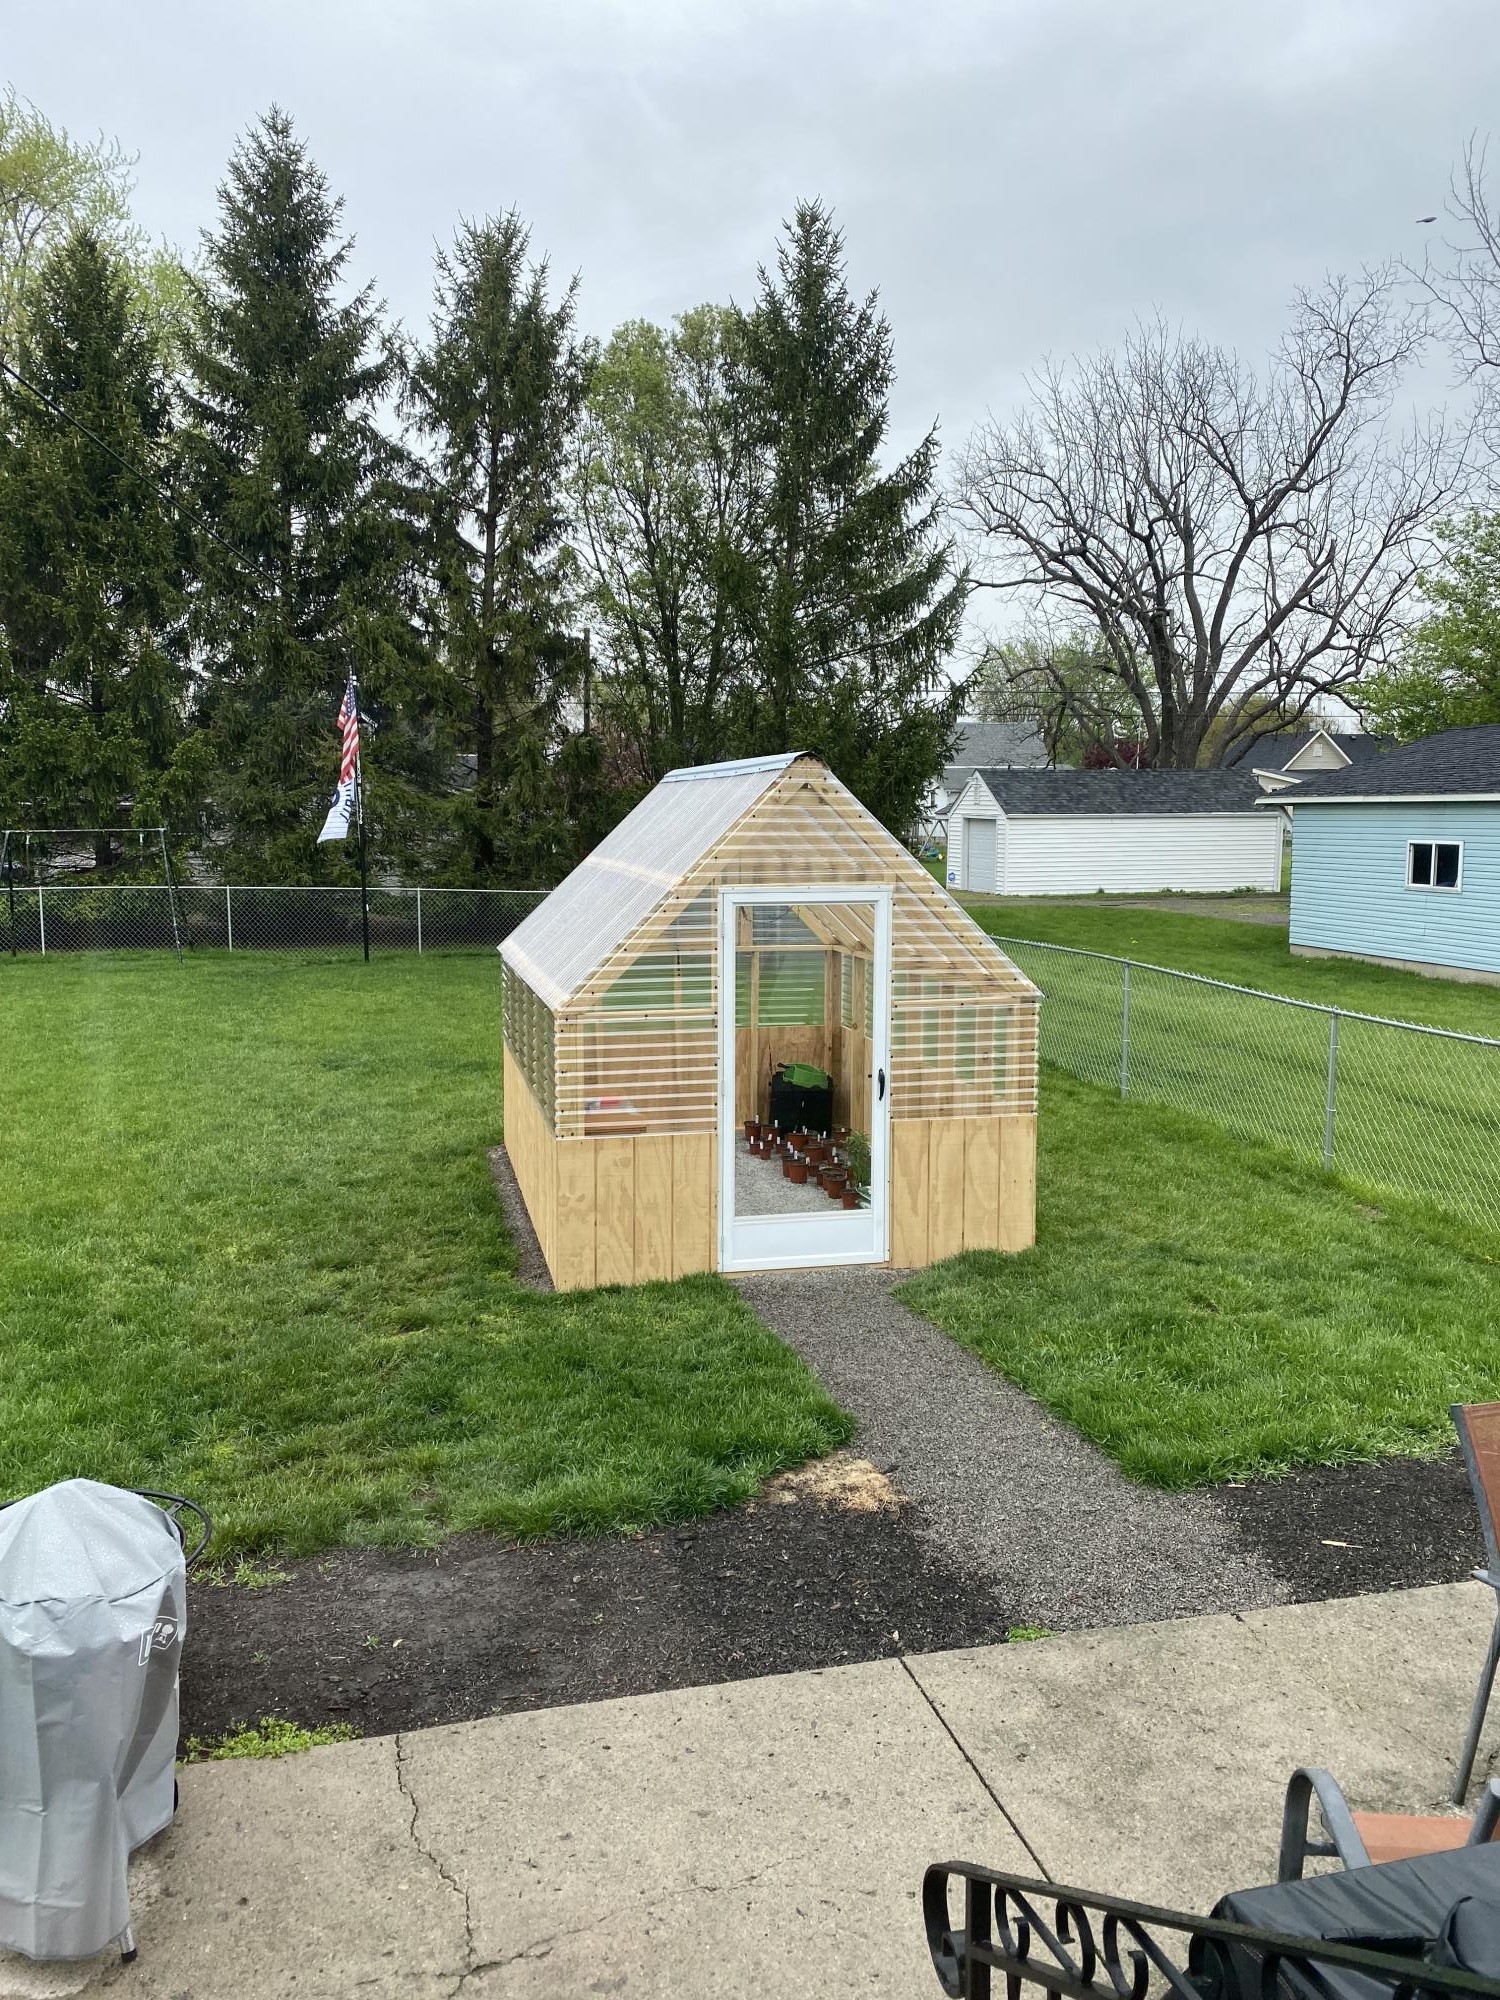
I am so in love with my greenhouse, it is amazing the plans were perfect and it went up without any problems, your designs are amazing and beautiful. We are going to do the chairs next!!!

Built from Plan(s)

Comments

Rustic Garden Bench

Submitted by jazberg on Fri, 07/15/2011 - 13:29

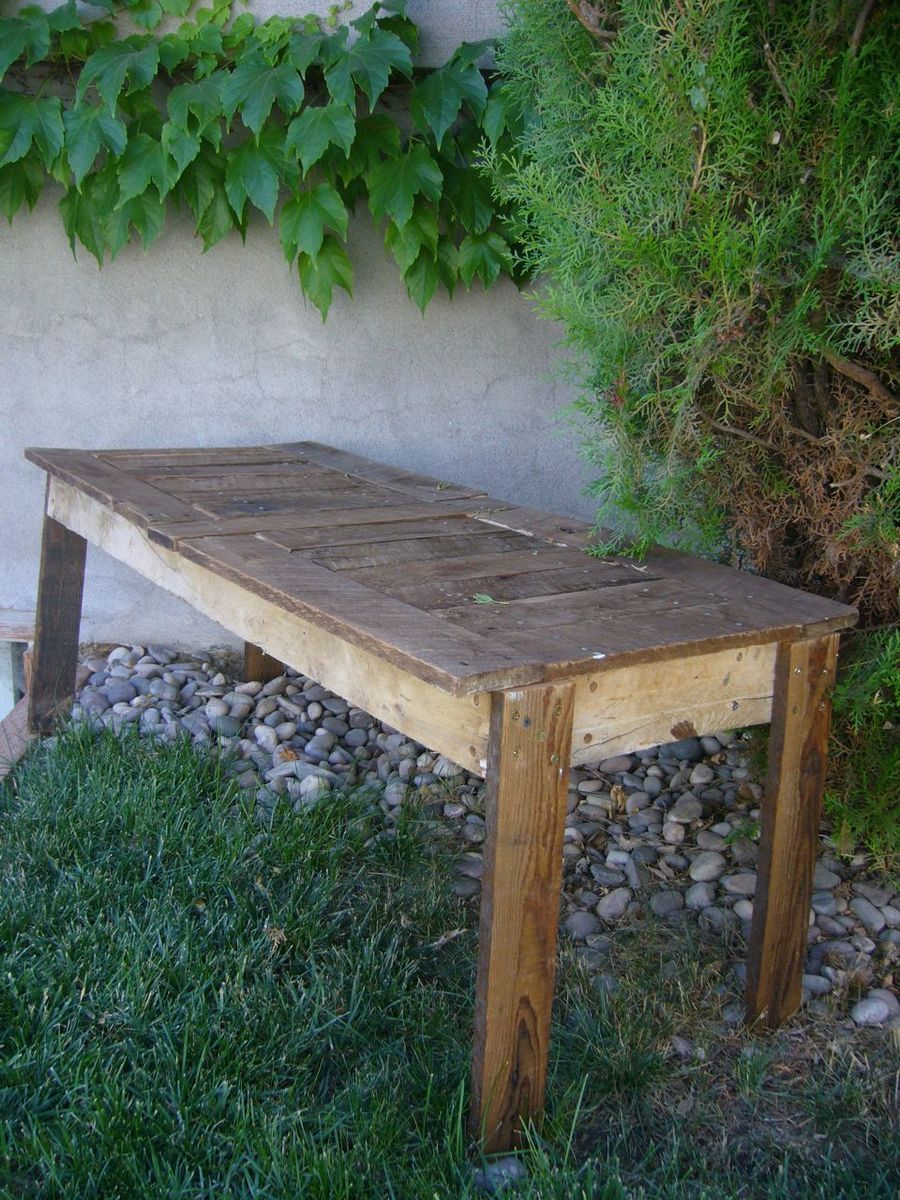
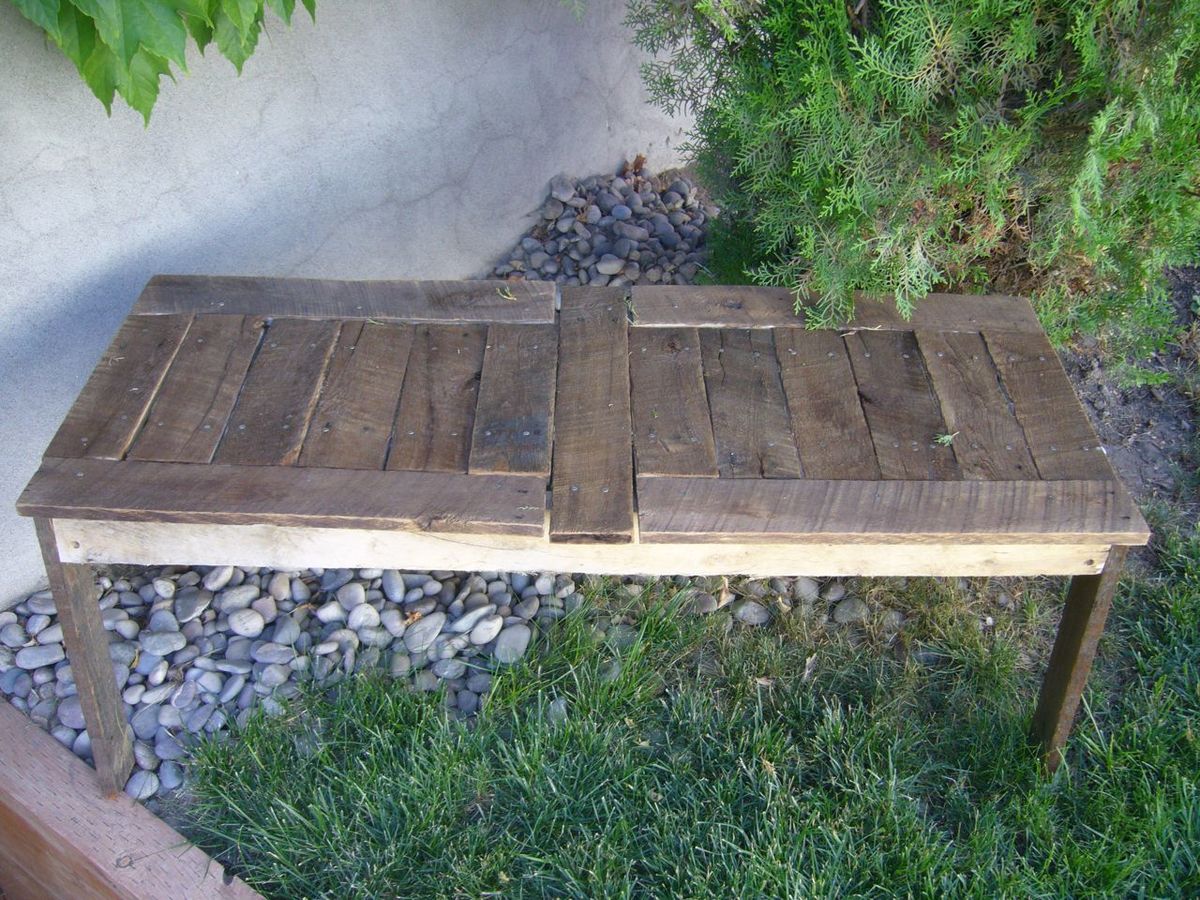
The side of our house needed some character, and this pallet wood bench was the perfect solution. Very rustic, very worn, very out of square and poorly measured, yet cute, sturdy, rich and perfect. The weathered rough sawn oak pallet that we made this out of was so heavy it took two to carry out of the weeds it was found in. The bench probably weighs 100 pounds. The hardest part? Getting the 100 year old pallet apart. Bring all your muscles (or a saws all!). Perfect for decoration and if need be a quiet spot to sit and think.

Built from Plan(s)
Estimated Cost
Free! Yeah for free furniture!
Estimated Time Investment
Afternoon Project (3-6 Hours)
Finish Used
Stain. Lightly sanded (no short shorts on this bench!)
Recommended Skill Level
Intermediate

Rustic Wood Cooler

Submitted by Robinwood on Mon, 08/19/2013 - 21:47

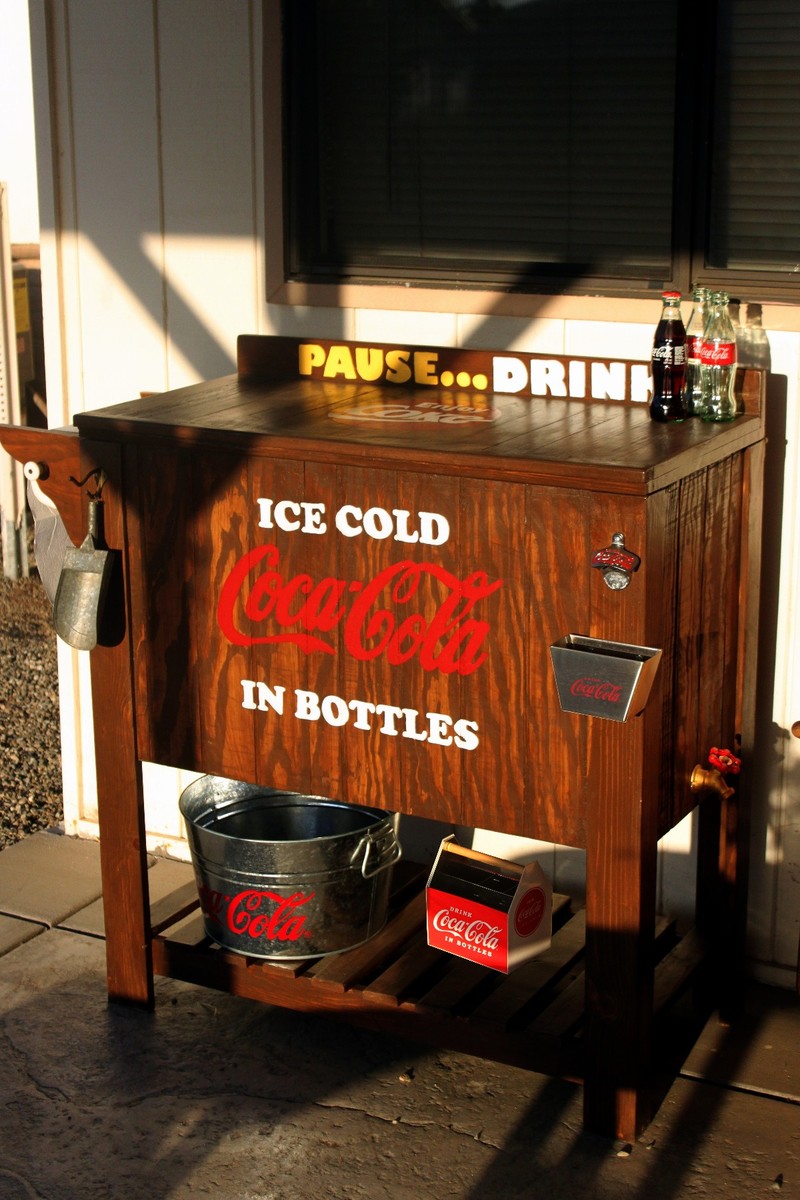
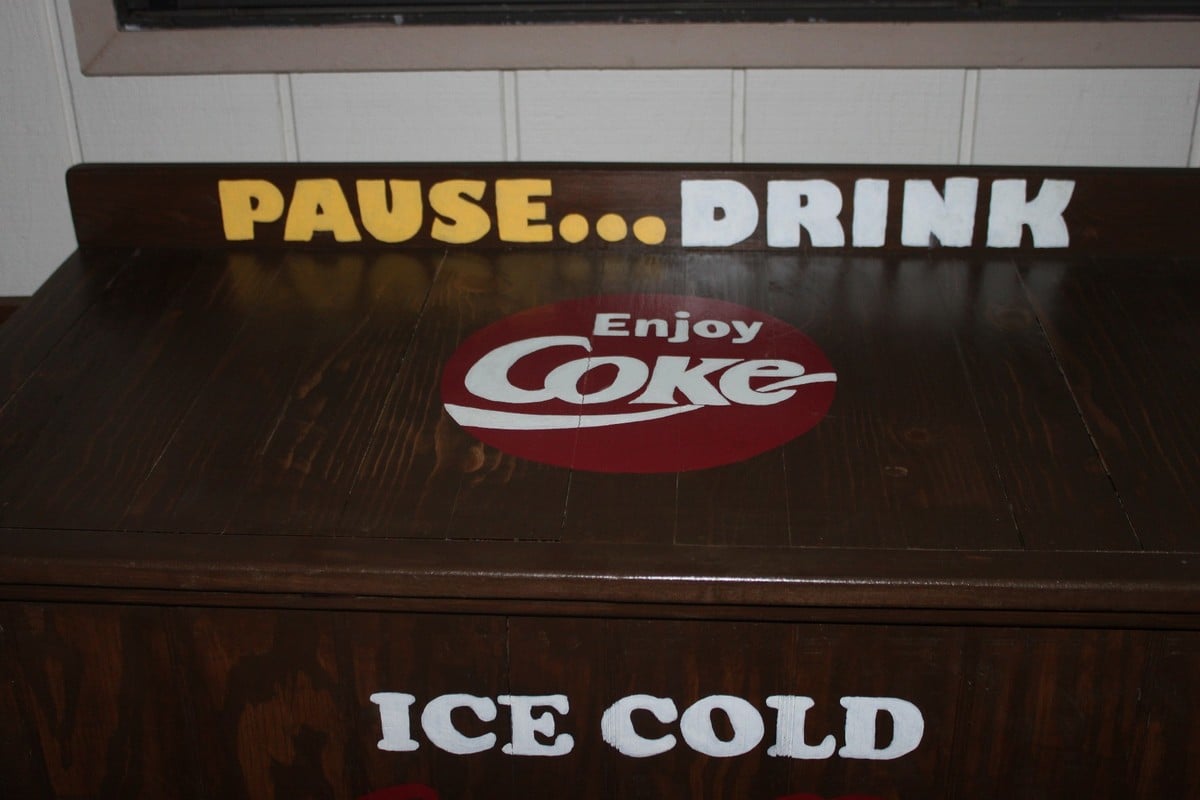
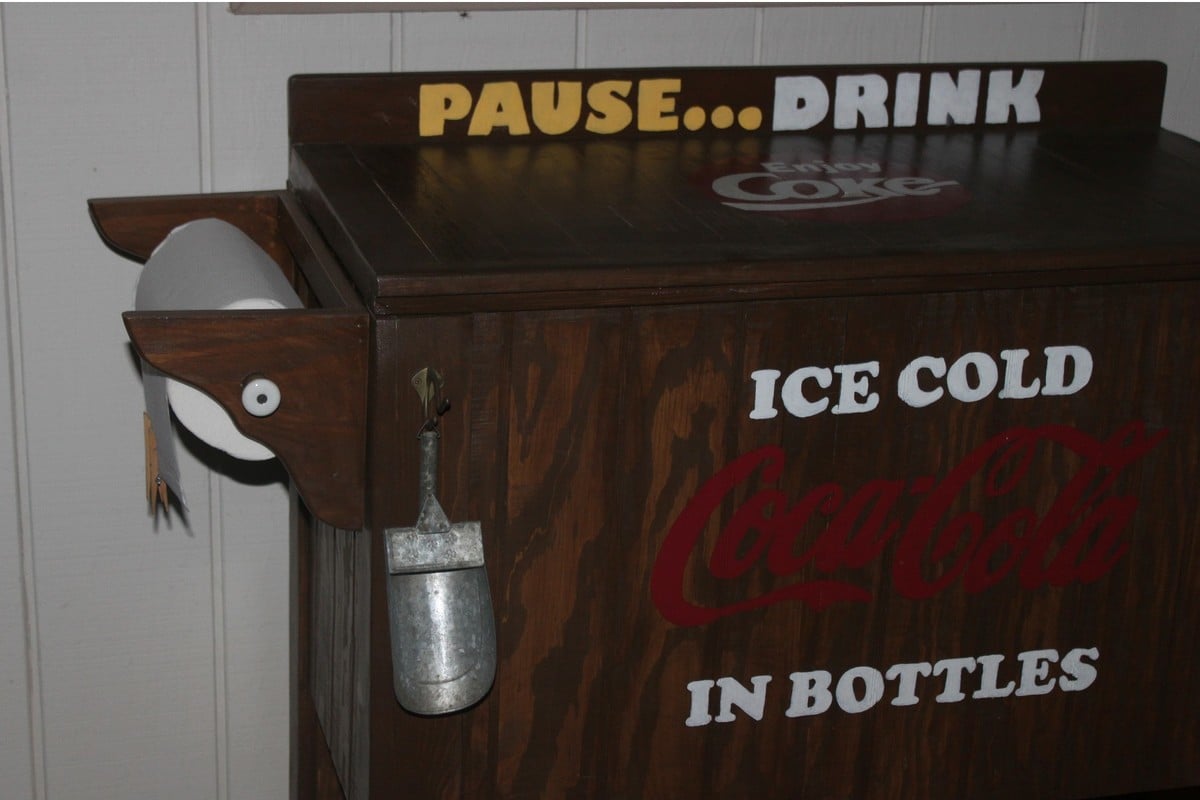
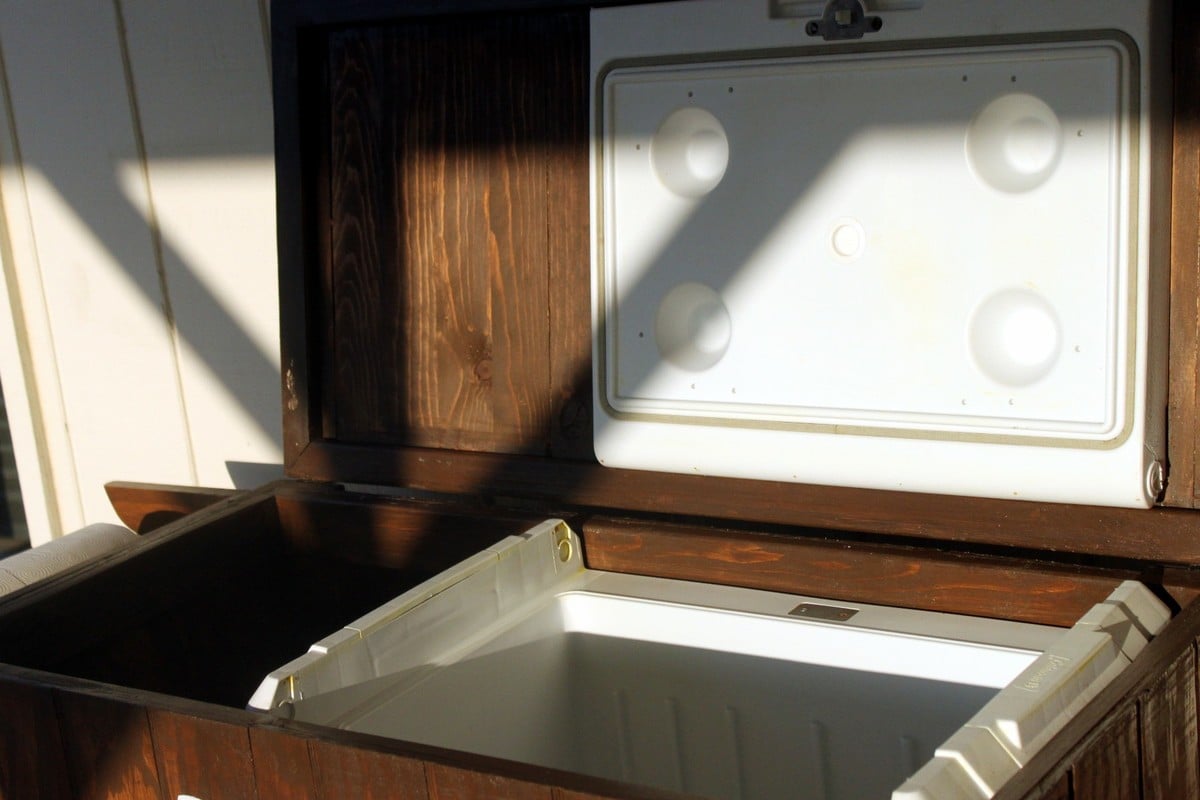
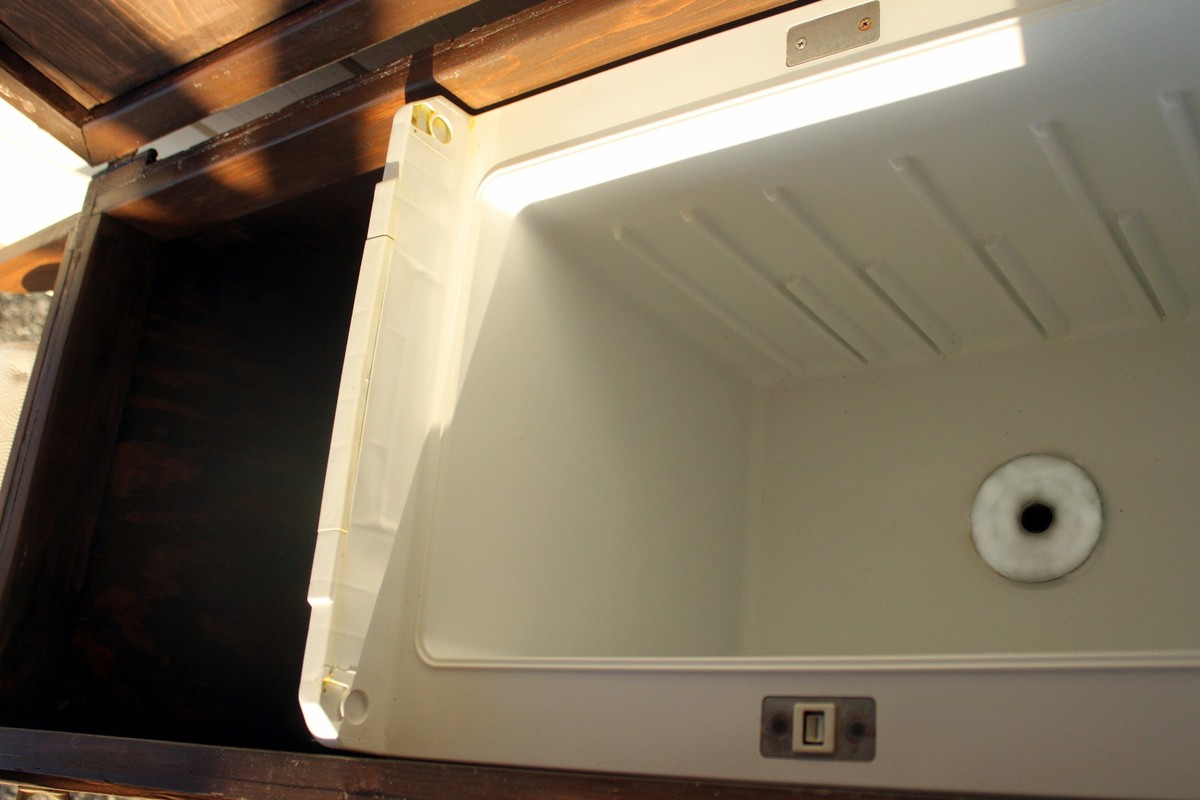
I went with my own measurements to accommodate my old cooler and leave a little room for storing extra water or whatever. As you can tell, I'm a Coca Cola nut...so I had to go with the Coke theme.

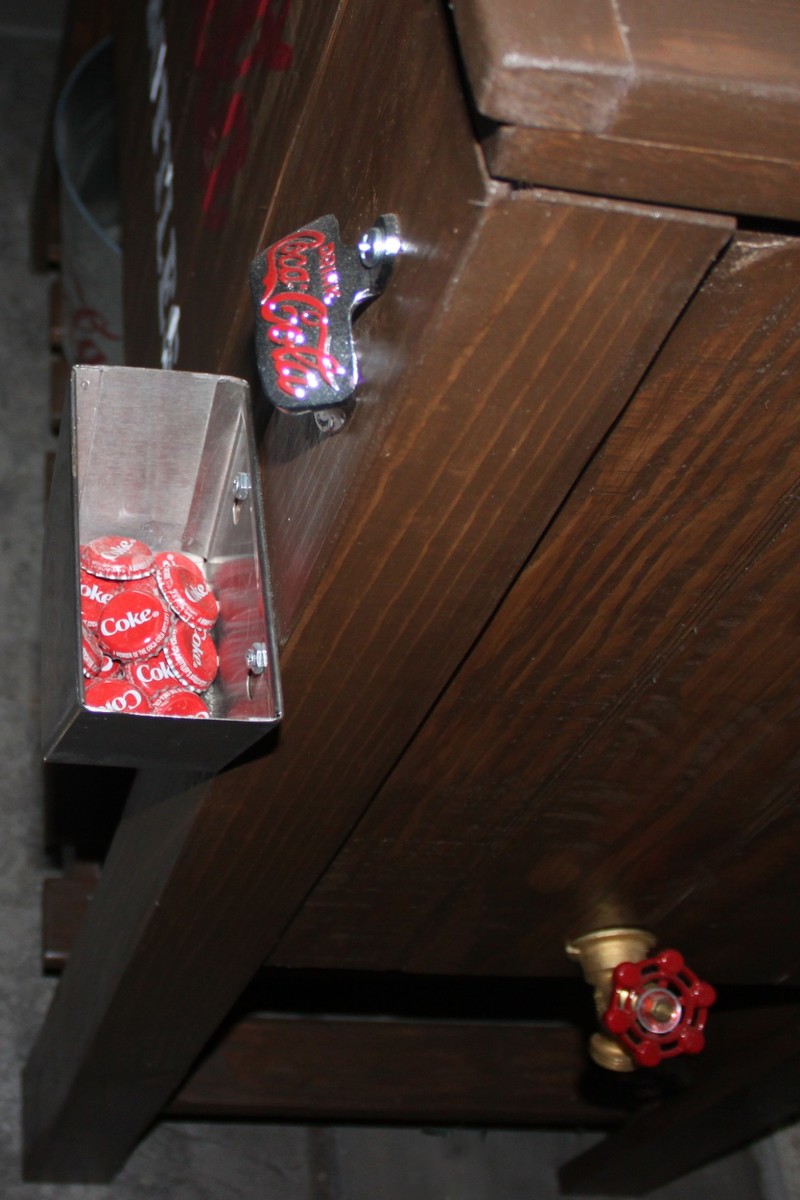
The cooler I used was actually a battery powered car cooler, so it didn't already have a drain. I just drilled through the bottom; added a drain and then ran some pipe over to a faucet at the end.

I glued some coke lids that I had been saving in the bottom of the "cap catcher" (not sure exactly what it's called), for special effects.

Because I'm always looking for a paper towel (I hate having wet hands); I added a paper towel holder on the end, instead of a shelf.

This was made entirely from scrap wood from other projects, so except for the faucet and of course my coke accessories, it didn't cost me anything and that's always a plus.

My husband loves it - every time he sees me looking at this site on the computer, he wants to know what I'm planning to build now.

Recommended Skill Level
Beginner

Oliver's Toy Box

Submitted by jswsks on Tue, 09/22/2015 - 14:20

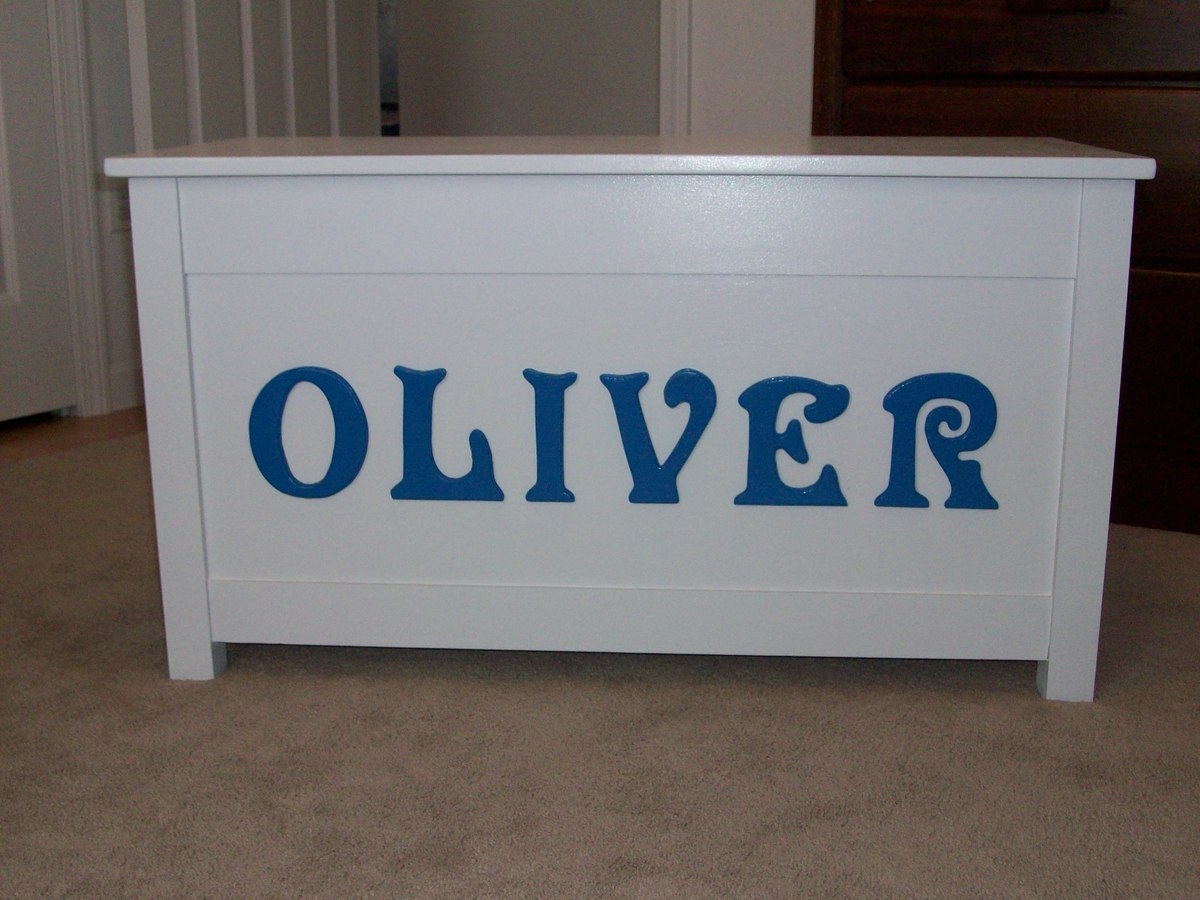
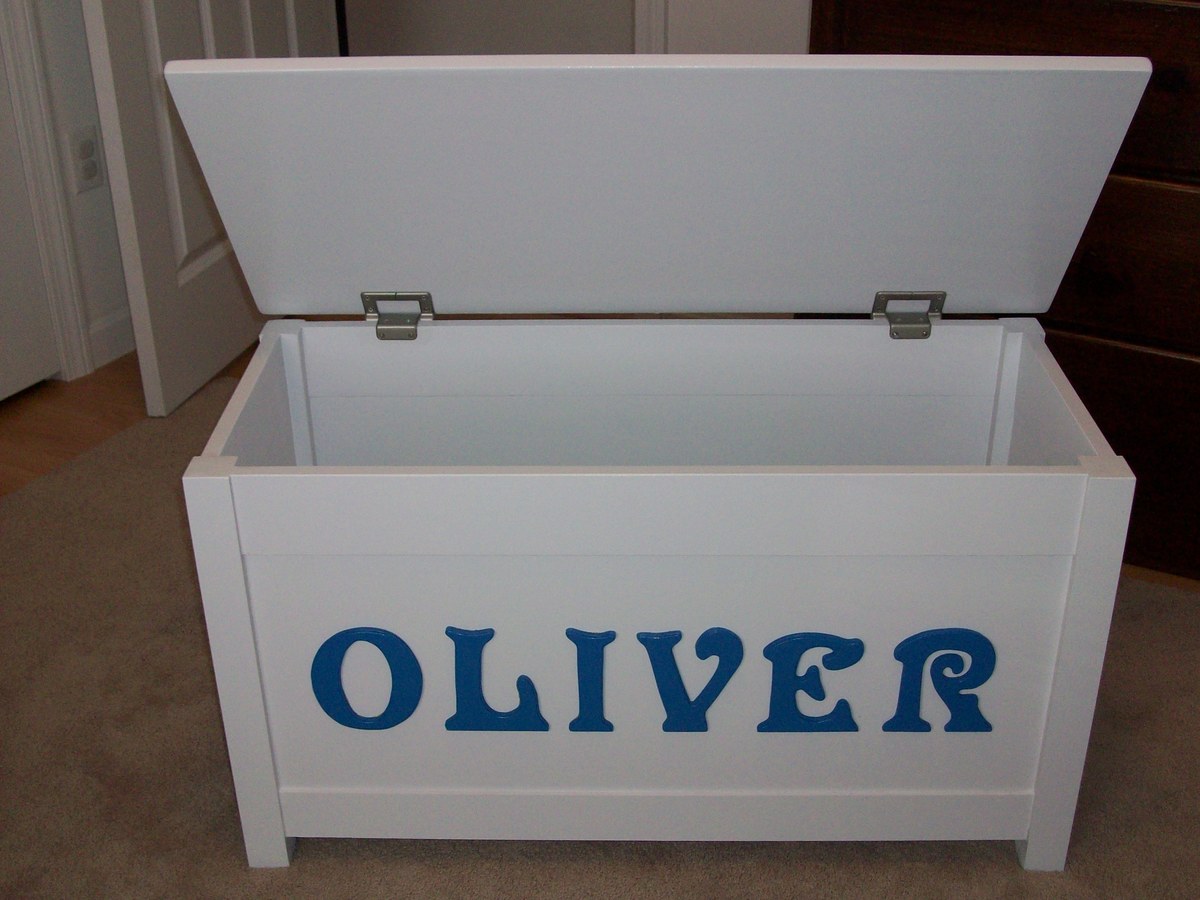
I found these plans and told my husband he had to make it for our grandson's 2nd Christmas.  So.....he did!  I was so happy with the outcome.  We didnt put in the groove on the front & we used the Rockler torsion hinges.  I chose the letters and painted them for his name.                    We are now beginning a new one for our new Granddaughter for this Christmas!  

It gets lots of use and will be a treasured gift from Grammy & Grampy for years to come!  

Built from Plan(s)
Estimated Cost
$250.
Estimated Time Investment
Week Long Project (20 Hours or More)
Finish Used
Glossy white paint
Recommended Skill Level
Intermediate

Comments

mtrainerjr

Sun, 07/31/2016 - 14:51

Which Rockler hinges did you go with, as far as the inch-pound?  I'm not sure if I need the 40 inch-pound or the 60 inch pound.  Thanks in advance.

Farmhouse bed

Submitted by Randinef on Sat, 09/22/2018 - 07:28

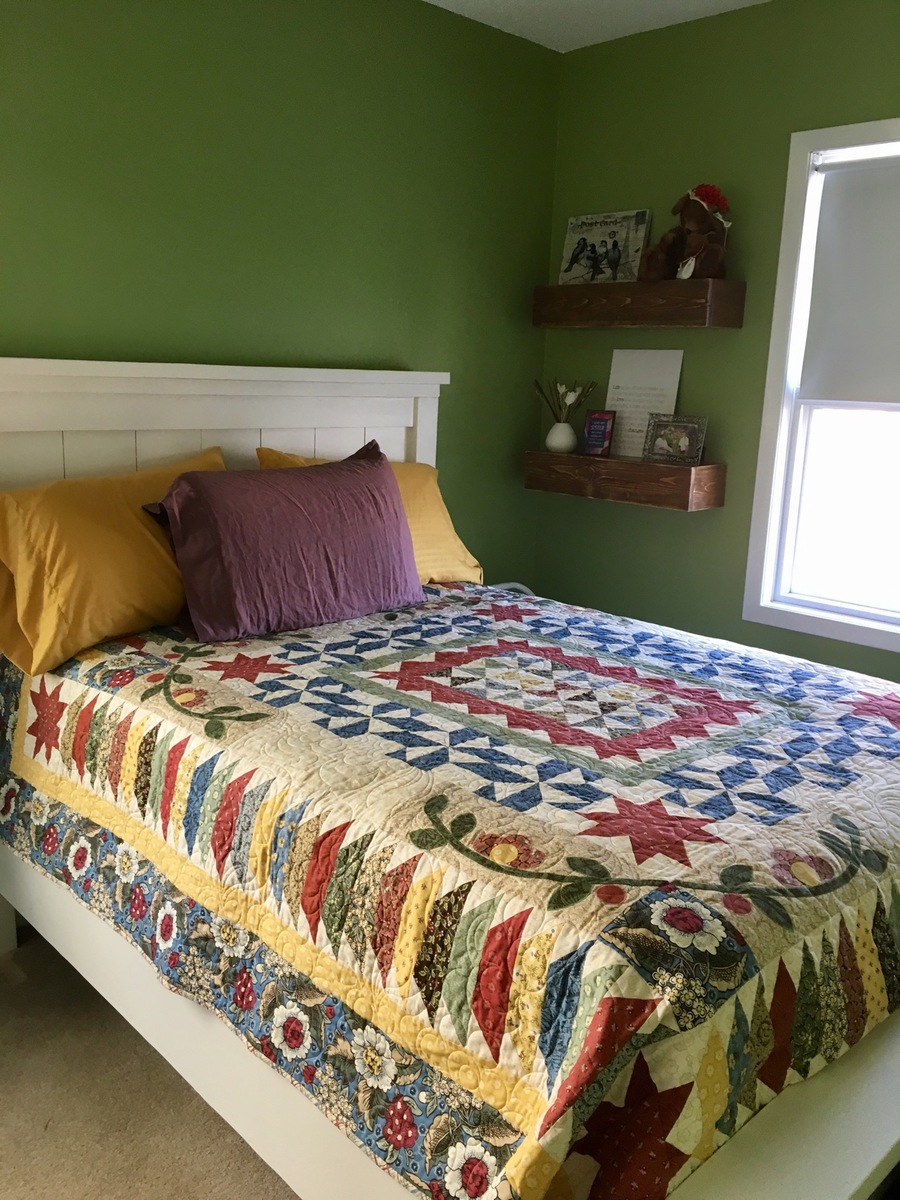
Thanks for the great plans. Love this bed.  Next project, a nightstand.

Built from Plan(s)
Estimated Cost
150$
Estimated Time Investment
Weekend Project (10-20 Hours)
Finish Used
Dulux melamine paint
Recommended Skill Level
Beginner

Outdoor Bar Table and Stool

Submitted by Titus2000 on Thu, 06/09/2022 - 14:38

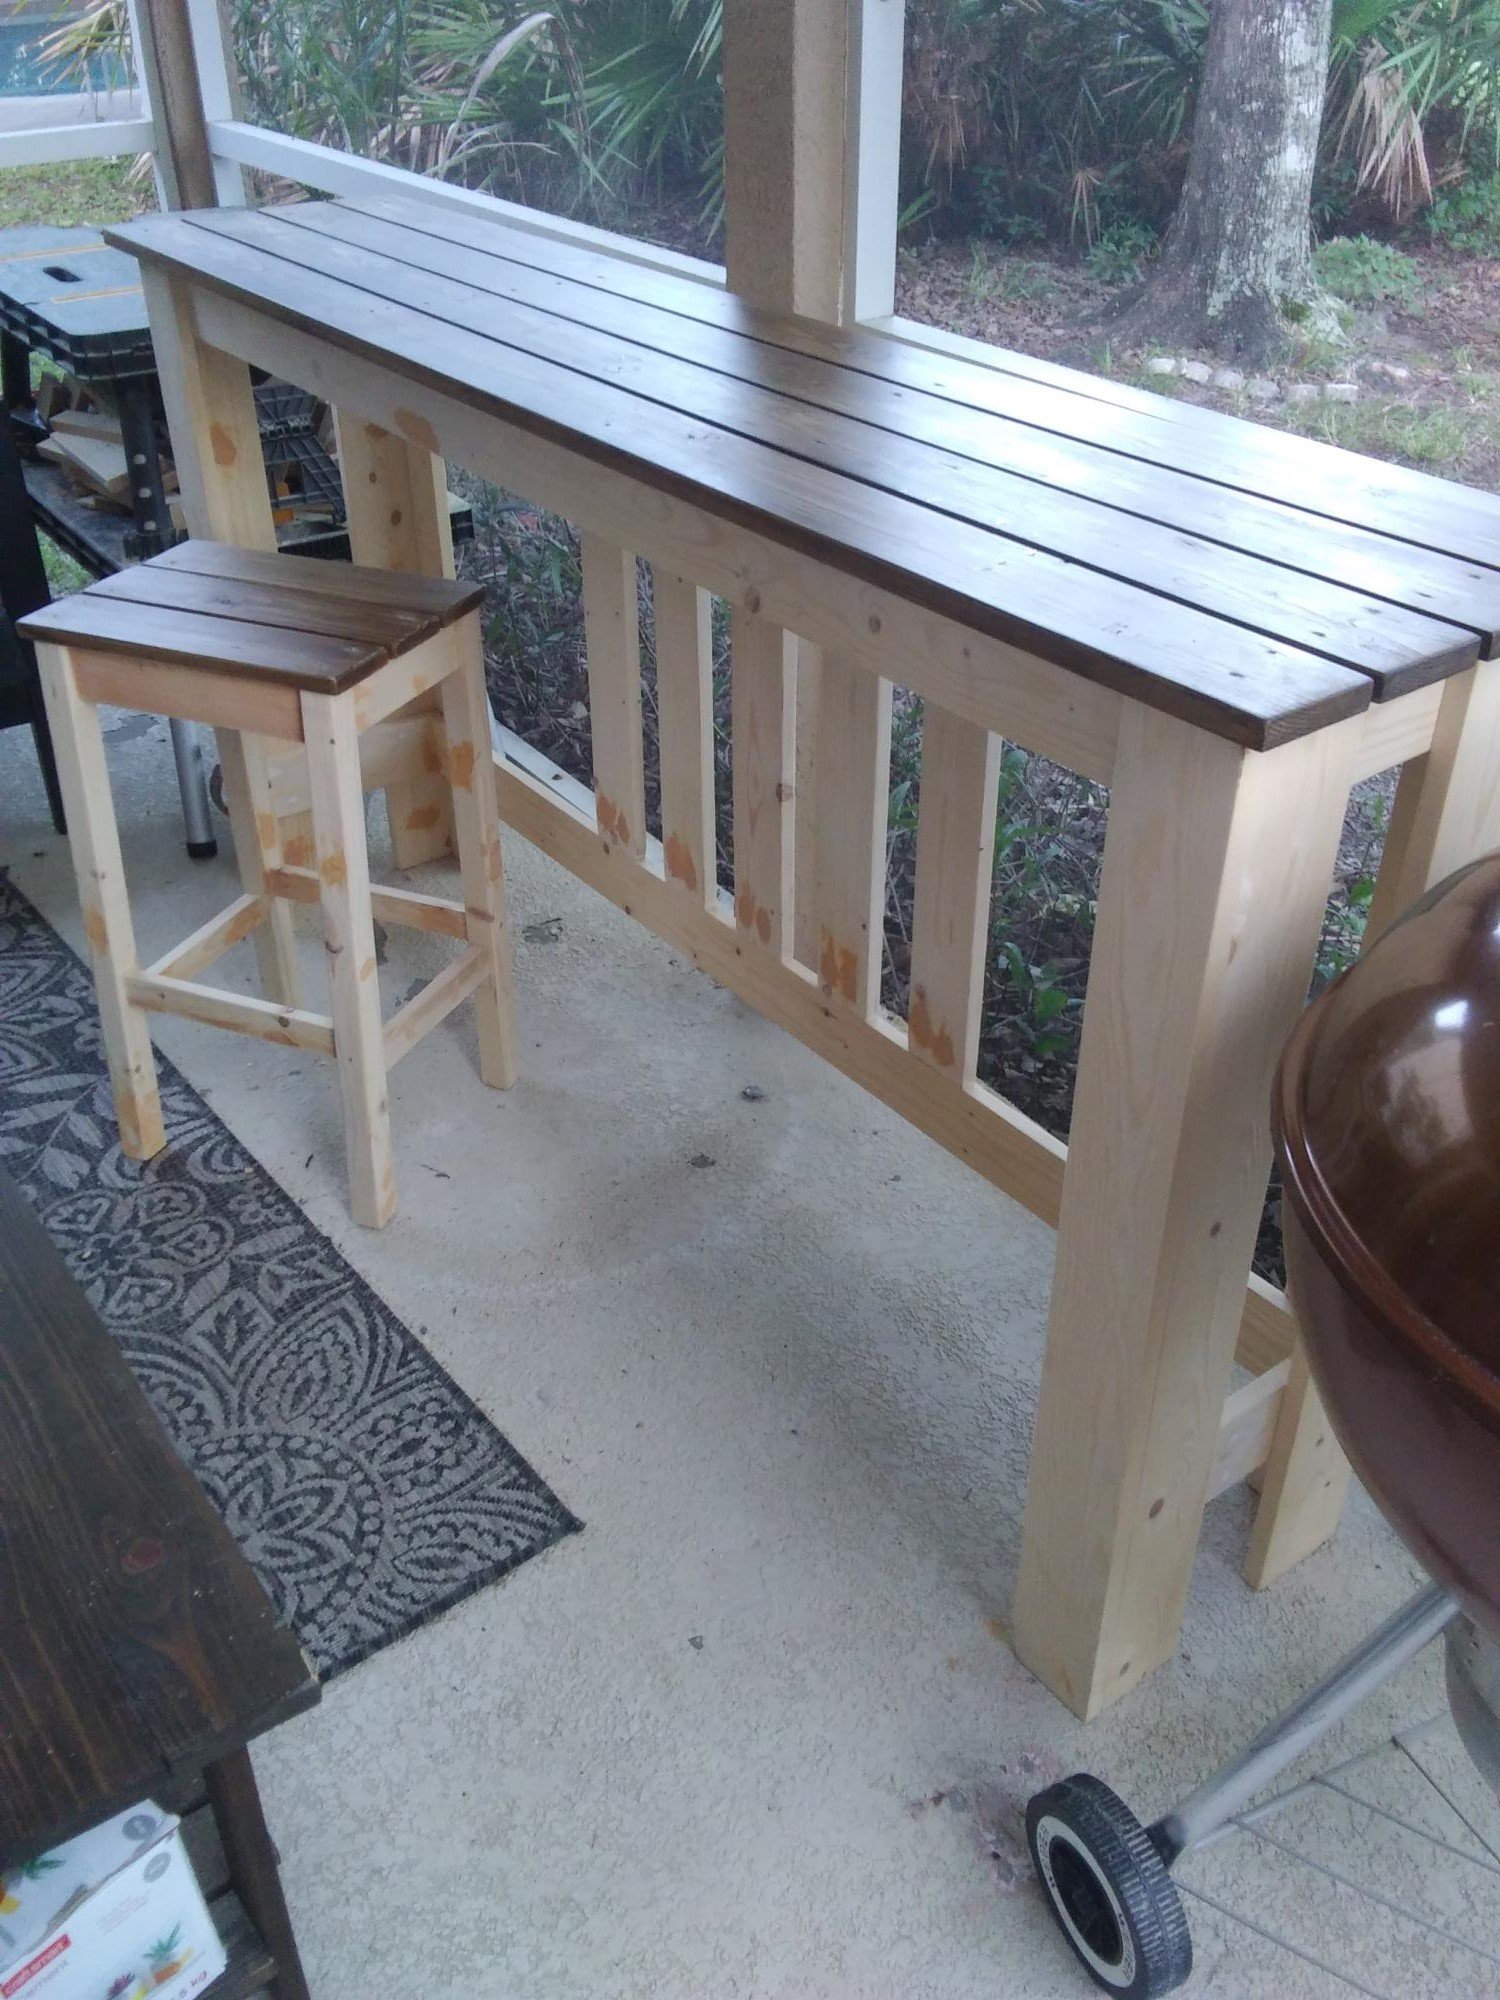
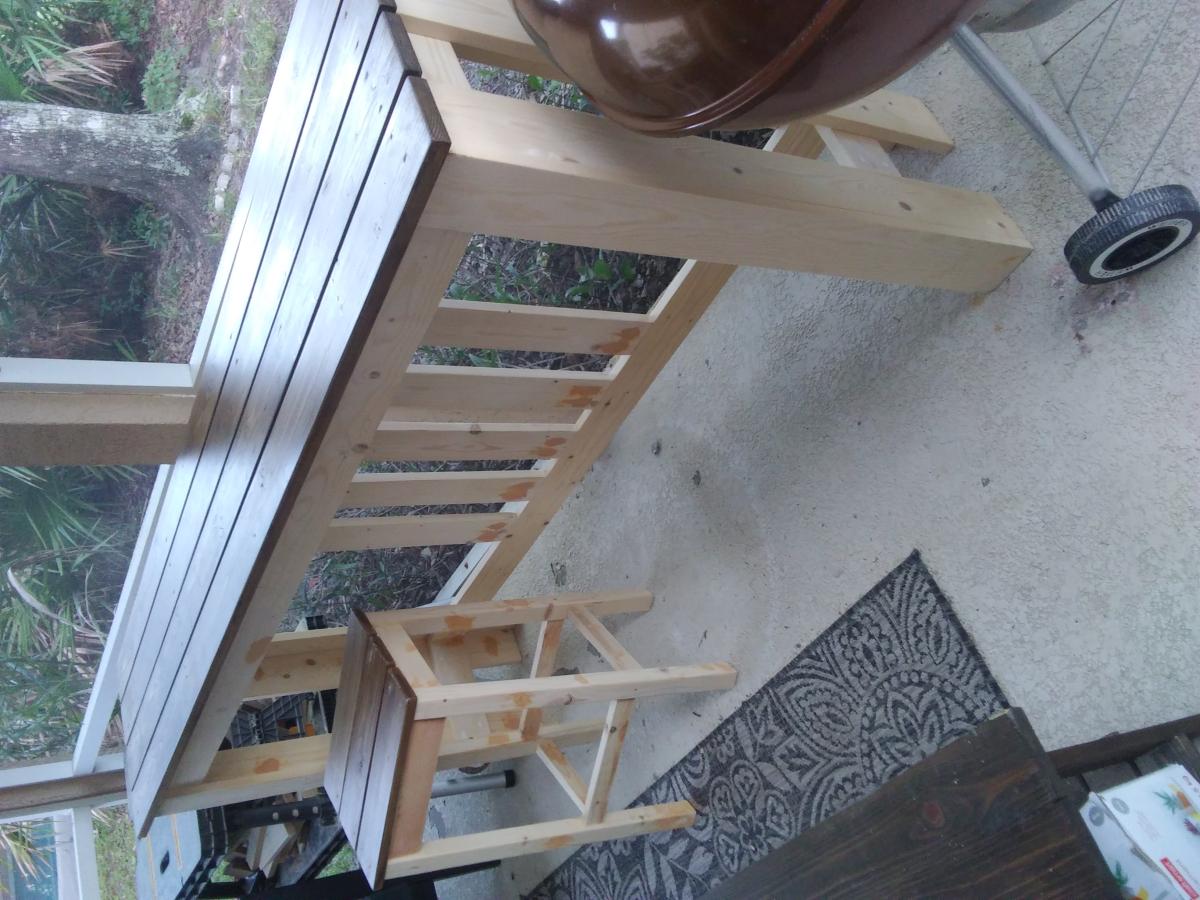
I love this bar table! I needed something long and narrow for our small patio - just deep enough to fit a plate and a drink, or a laptop, and long enough to fit three stools, so I modified Ana's dimensions. Also, living in Florida, we occasionally need to bring our furniture inside for hurricanes, so I made it a lighter by using 1x3s and 1x4s instead of 2x or 4x4s. I still need to paint the bottoms a cream color and build two more stools, but I already use it a lot. Thanks Ana! (The photo was upright on my computer, but I didn't see how to rotate it once it was uploaded)

Comments

Bathroom shelf

I needed a little shelf on our bathroom wall and I had lots of scraps hanging around. I made this loosely based on one of Ana's plans. I built it around the size of the baskets I purchased at Homegoods and the size of the four towels.

Built from Plan(s)
Estimated Cost
$10
Estimated Time Investment
An Hour or Two (0-2 Hours)
Finish Used
There is some blues in the tile work, so I decided to paint it blue (left over paint). I then distressed the edges with sandpaper and finally used Valspar antiquing glaze over the top. My new favorite top coat is wax, so I finished it off with one rubbing.
Recommended Skill Level
Beginner

Comments

Loft Bed for Renee's Room

This is the 2nd of two loft beds I have built using Ana's plans - they came out great and my girls love them! I did make some modifications to each, as the girls have different needs. It was a great project and I would like to thank Ana for the concise plans, cut lists, ideas, etc. You made it so easy!

If you are interested in seeing more about this project feel free to visit my blog at www.mothersmusings.net. See you there!

Estimated Cost
$150.00
Estimated Time Investment
Week Long Project (20 Hours or More)
Finish Used
I must say, if I had it to do again I might have upgraded on the wood, but I got the cheapest pine I could find. This led to using A LOT of wood filler and sand paper - and probably took me about twice the time it would have taken had I used prime wood. I used an oil based primer to make sure the knots stayed covered, and 2 coats of Behr high gloss white paint for the finish. Extra work...yes - but ultimately I think I cut my cost in half.
Recommended Skill Level
Beginner

Taylors console

Submitted by DWeen on Mon, 09/28/2015 - 16:30

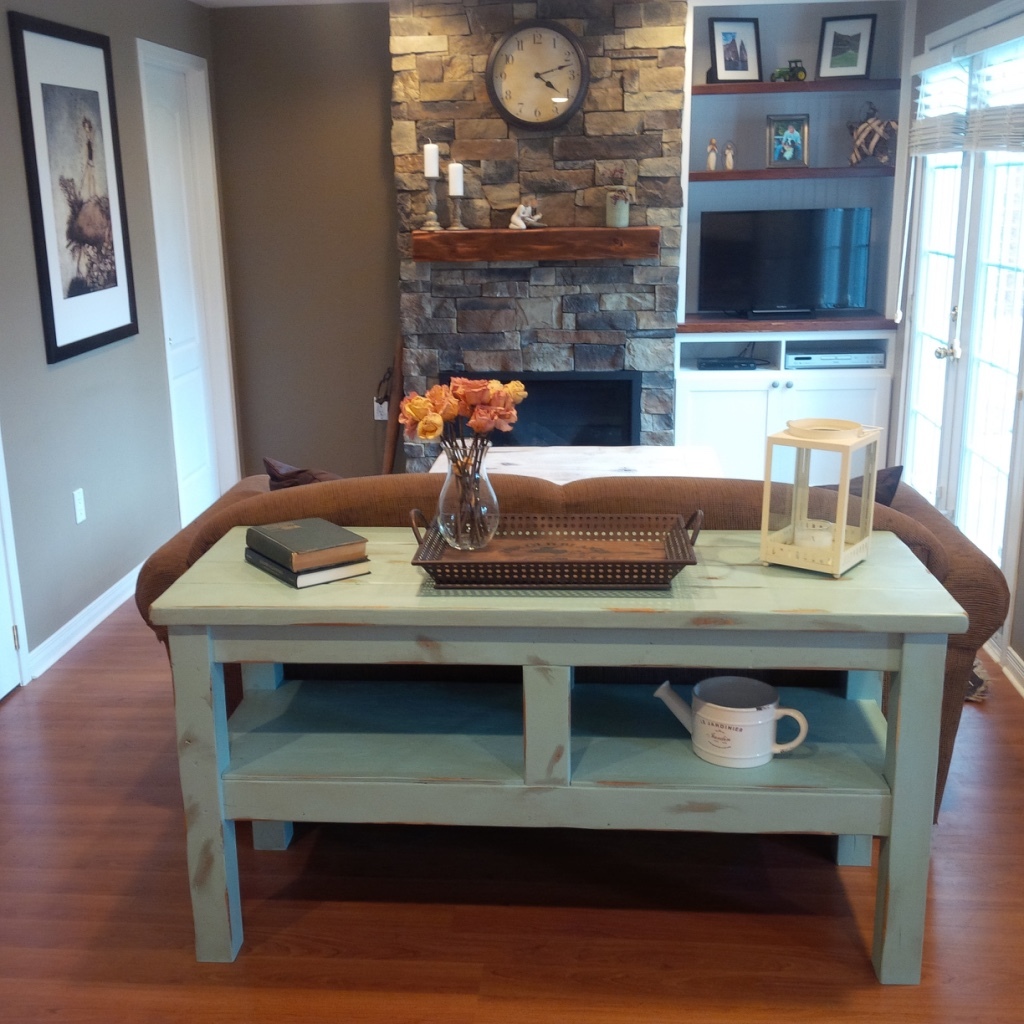
Our recent Taylors Console project. A nice, easy project. We're very pleased with how it turned out!

Built from Plan(s)
Estimated Time Investment
Weekend Project (10-20 Hours)
Finish Used
Behr 'Lap Pool Blue'
Recommended Skill Level
Beginner

Rustic Lift Top Coffee Table, with storage

Submitted by Anonymous (not verified) on Sun, 10/14/2018 - 12:57

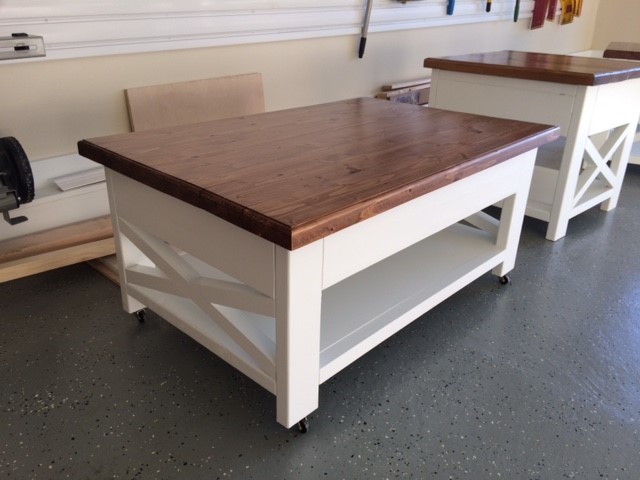
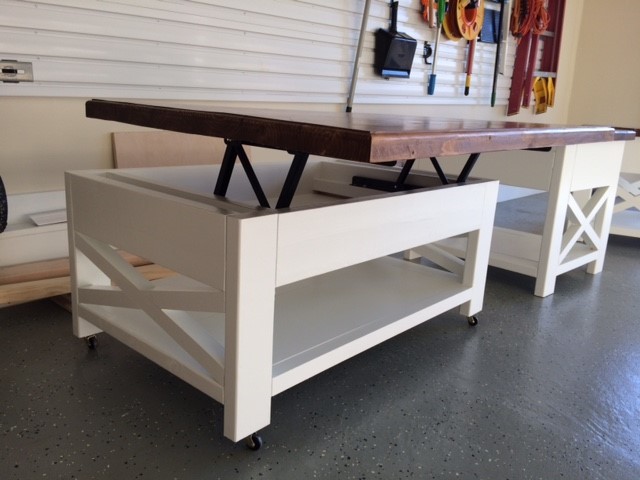
I used the Rustic Coffee Table Plans from ana-white.com, but purchased lift top hinges and added 2" x 6" around the perimeter, which provided storage inside when the top is lifted.

Estimated Time Investment
Weekend Project (10-20 Hours)
Recommended Skill Level
Intermediate

Comments

Sawhorse desk

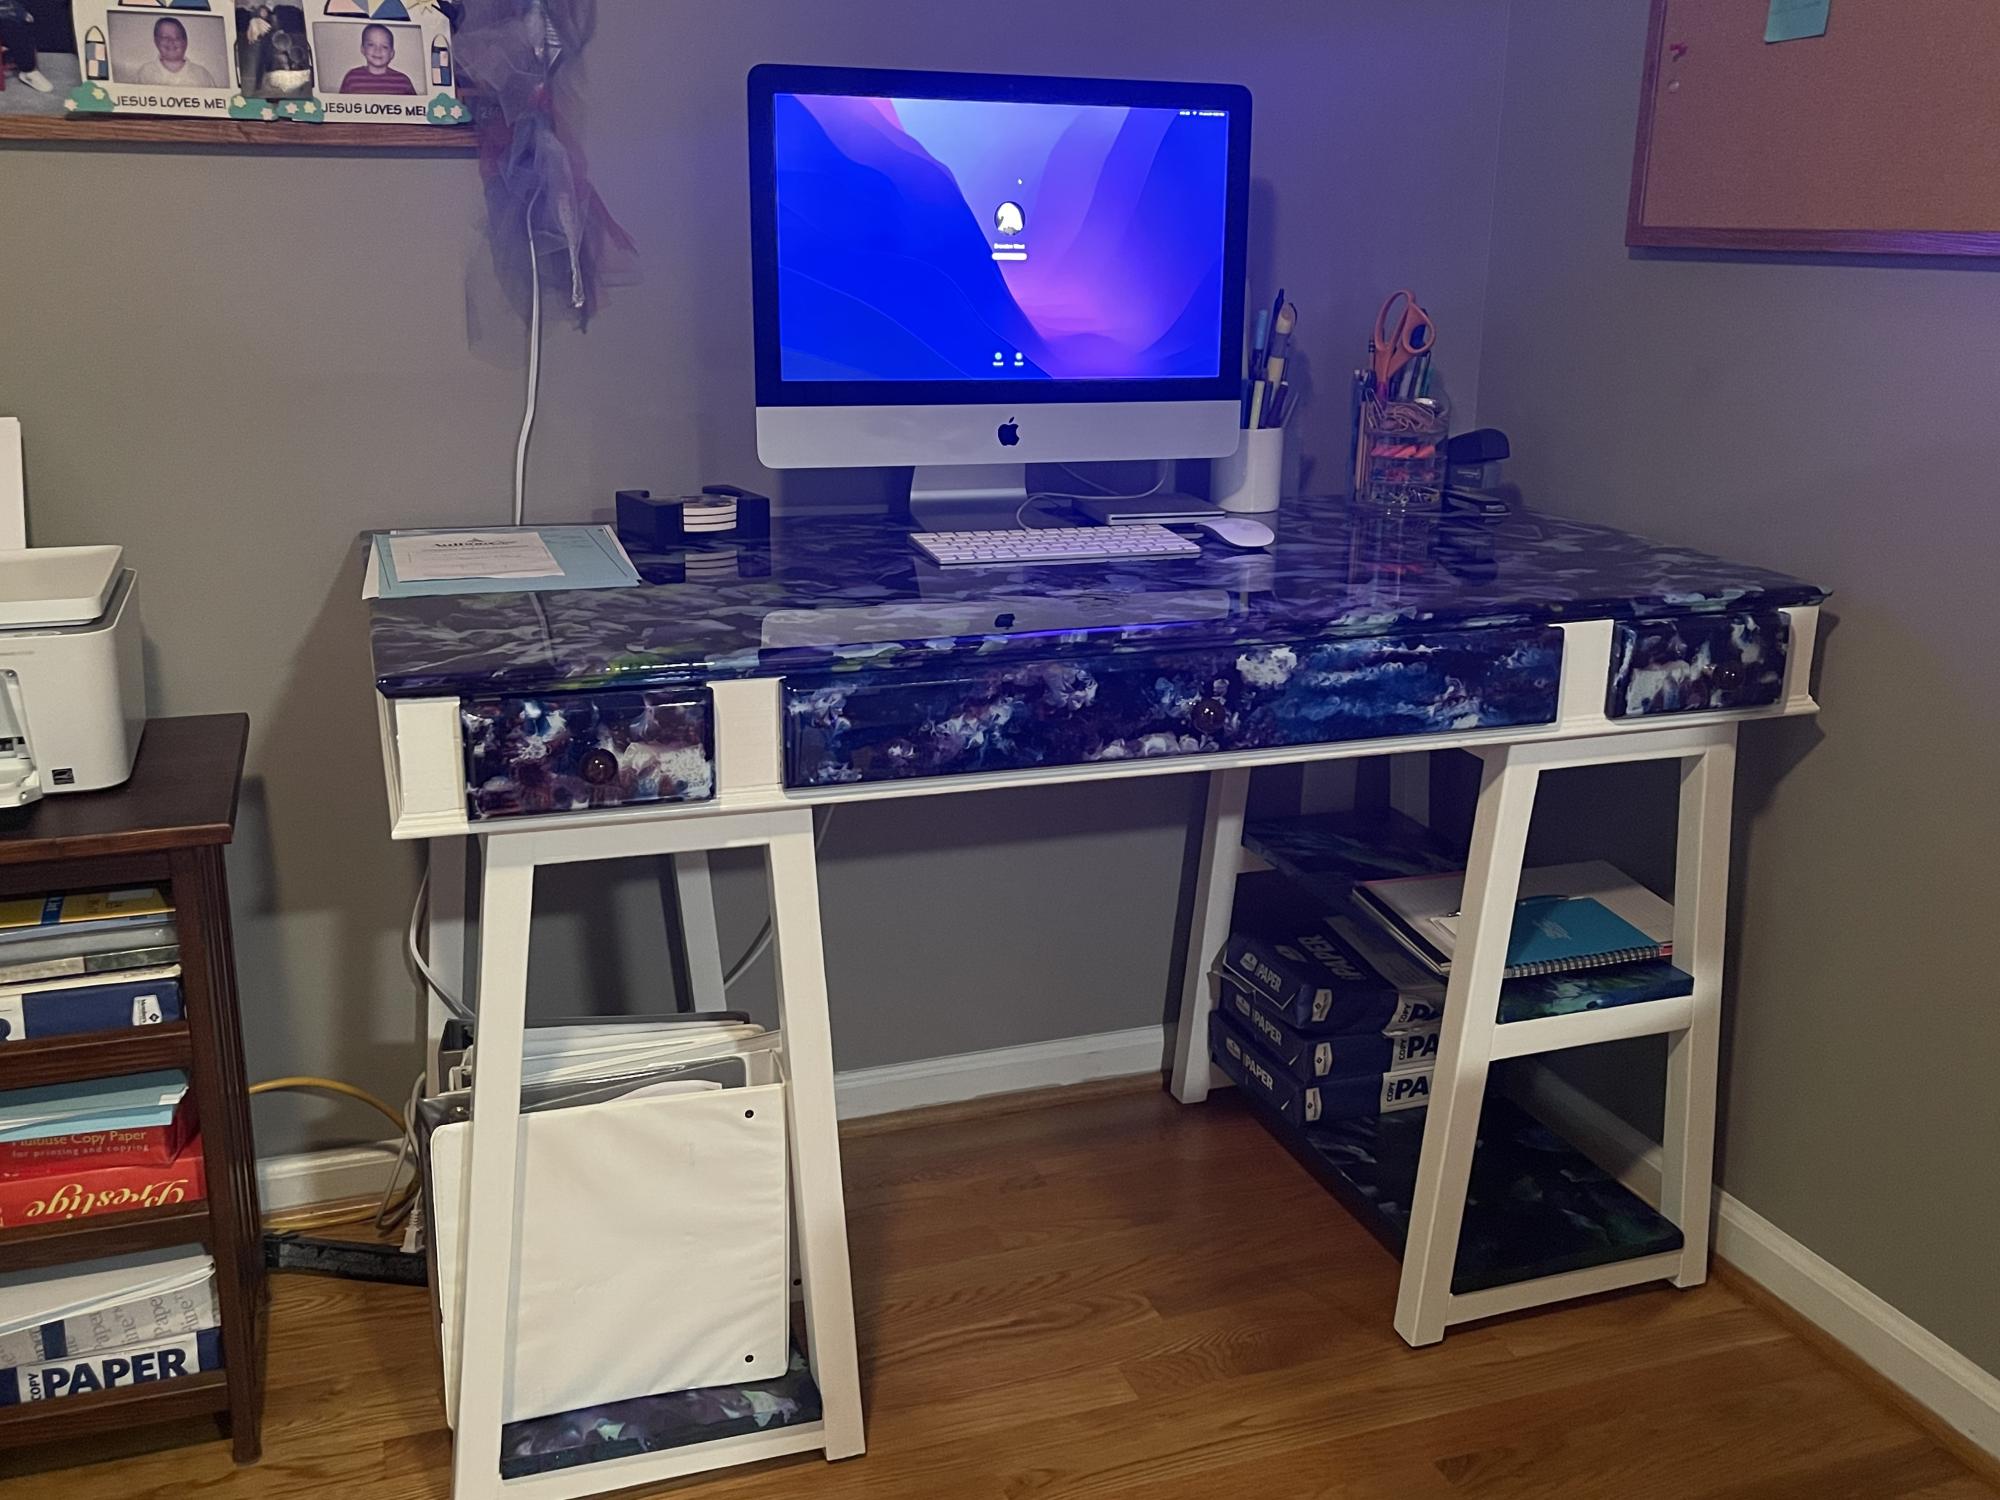
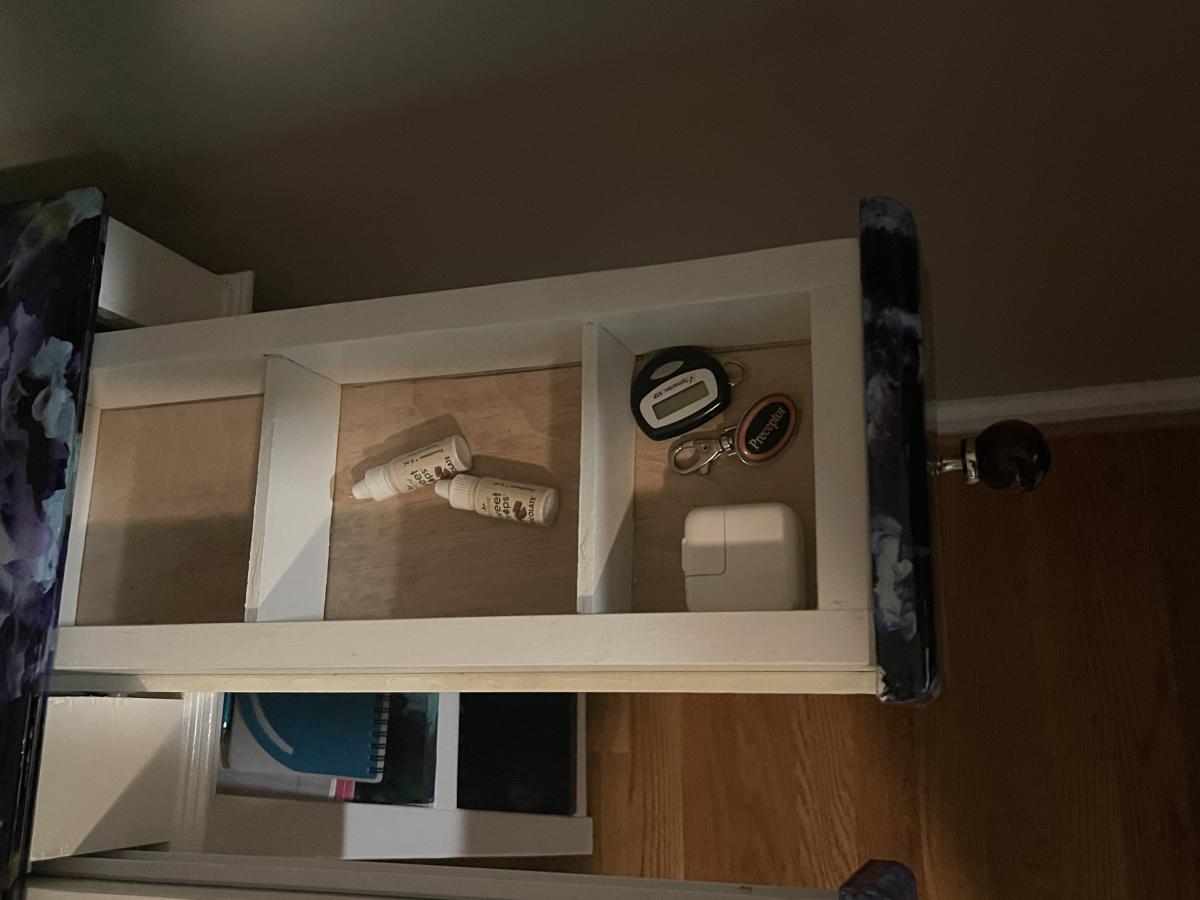
Submitted by Anonymous (not verified) on Fri, 06/24/2022 - 15:14

Sawhorse desk with drawers. Table top and shelves with dragon spit, table top with epoxy.

Comments

Farmhouse Table

Submitted by DSalvagni on Fri, 08/23/2013 - 09:34

This is my version of the Farmhouse table. I got all my wood at lowes. I notched the legs to recive the stretchers. One thing that I did not take into account is that the posts have rounded edges from the mill so that when I put the stretchers in the legs there were gaps.

Estimated Time Investment
Week Long Project (20 Hours or More)
Finish Used
Sherwin-Willams Antique White
Minwax Early American Stain
Recommended Skill Level
Beginner

Comments

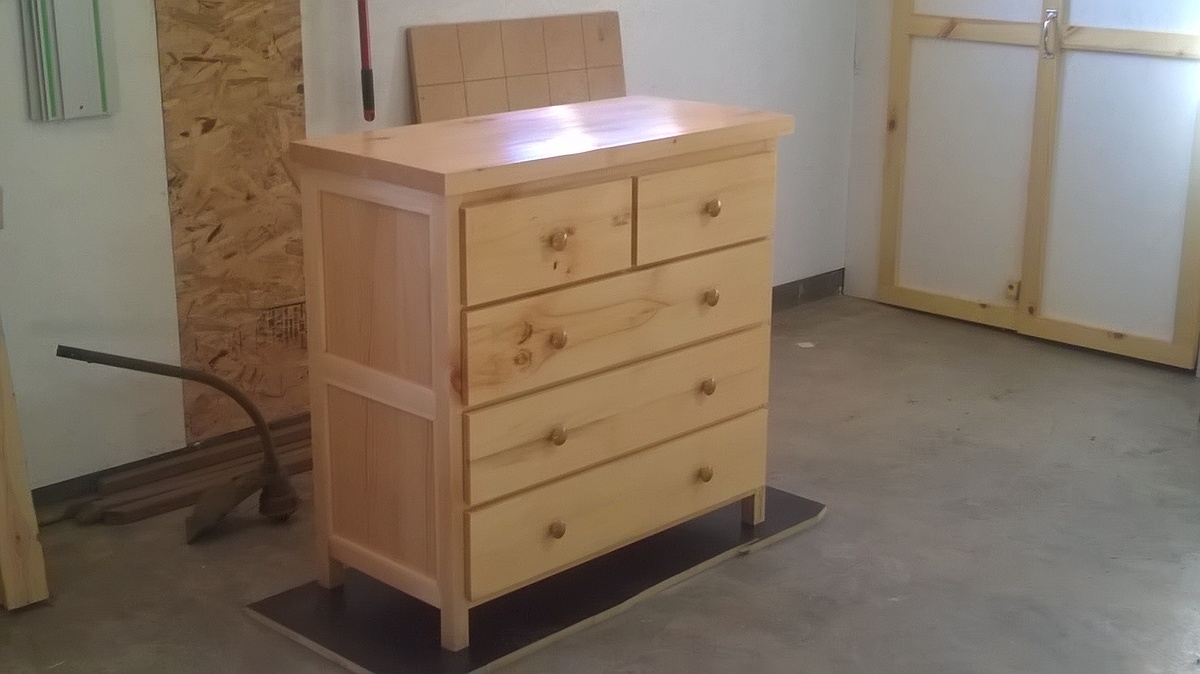
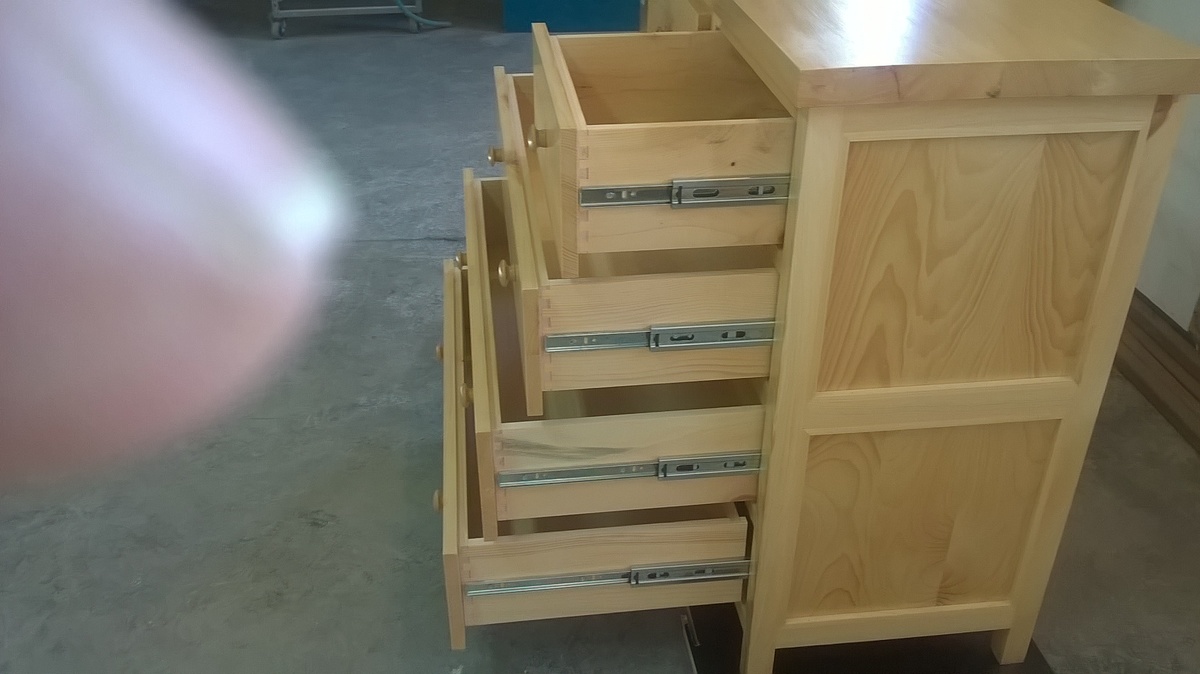
Northern Wisconsin White Pine Bed and Dresser

In need of outfitting the spare bedroom for overnight guests I came upon this site and found the storage bed plan we liked.  After building the bed of course a dresser was in order.  My sawyer has some northern white pine that came from the Wisconsin Northern State Fair grounds in Chippewa Falls.  Having never worked with white pine before I found it rewarng and was happy with the finished product.  Hope our guest enjoy it as much I had building it
Estimated Time Investment
Week Long Project (20 Hours or More)
Finish Used
A self leveling poly finish by General Finish.
Recommended Skill Level
Intermediate

first time builder

Submitted by Anonymous (not verified) on Thu, 10/18/2018 - 06:15

Thank you for these plans - they were great for a first time build. Definitley learned a lot building this...and now on to the next project!

Estimated Cost
I also built one bench - total cost with stain and some other materials about $100
Estimated Time Investment
Day Project (6-9 Hours)
Finish Used
Varathane Golden Oak (One Coat/One Hour dry)
Recommended Skill Level
Beginner

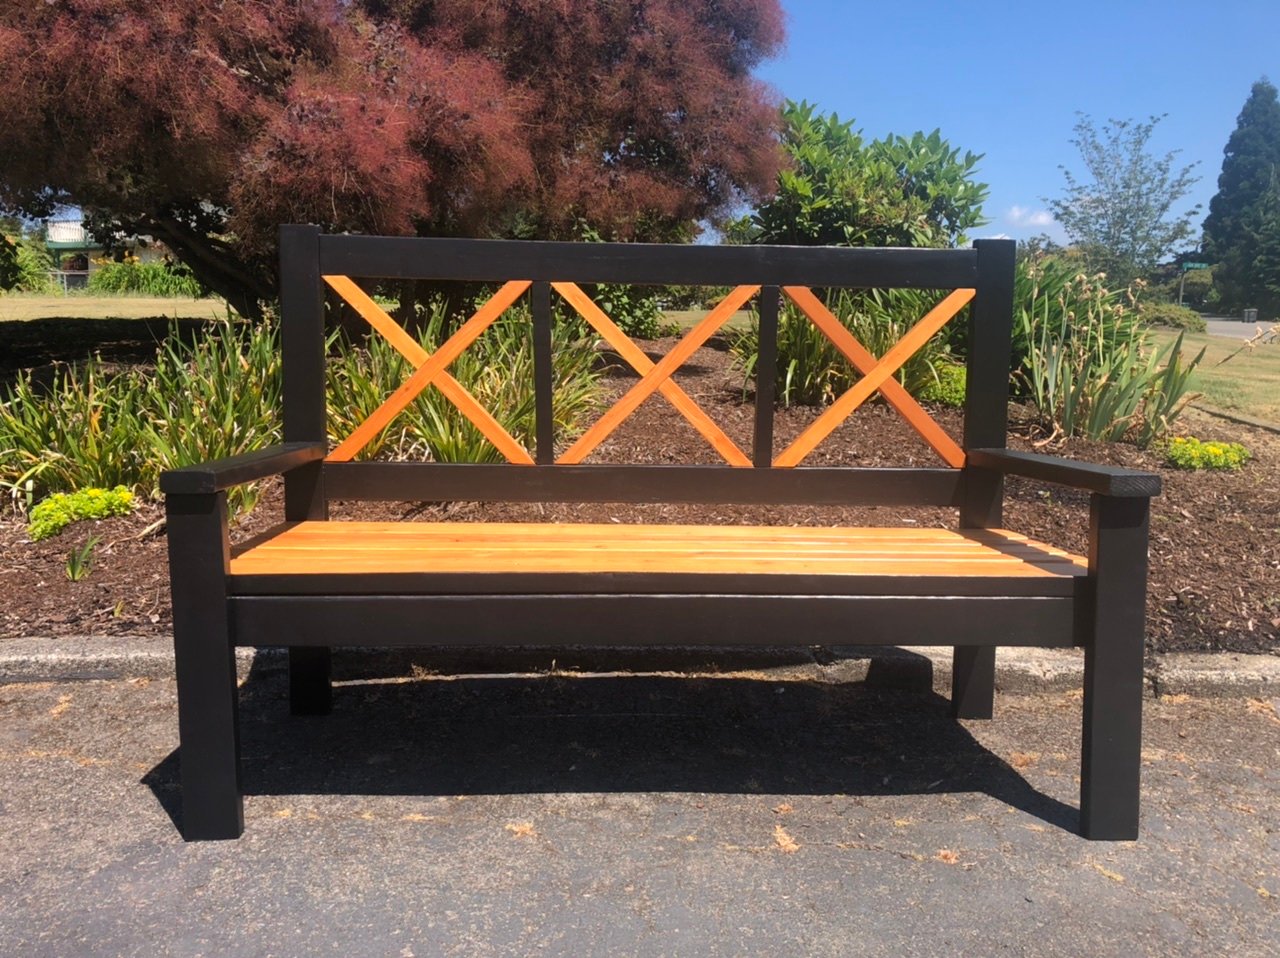
X-back bench

Submitted by Anonymous (not verified) on Sat, 07/02/2022 - 21:40

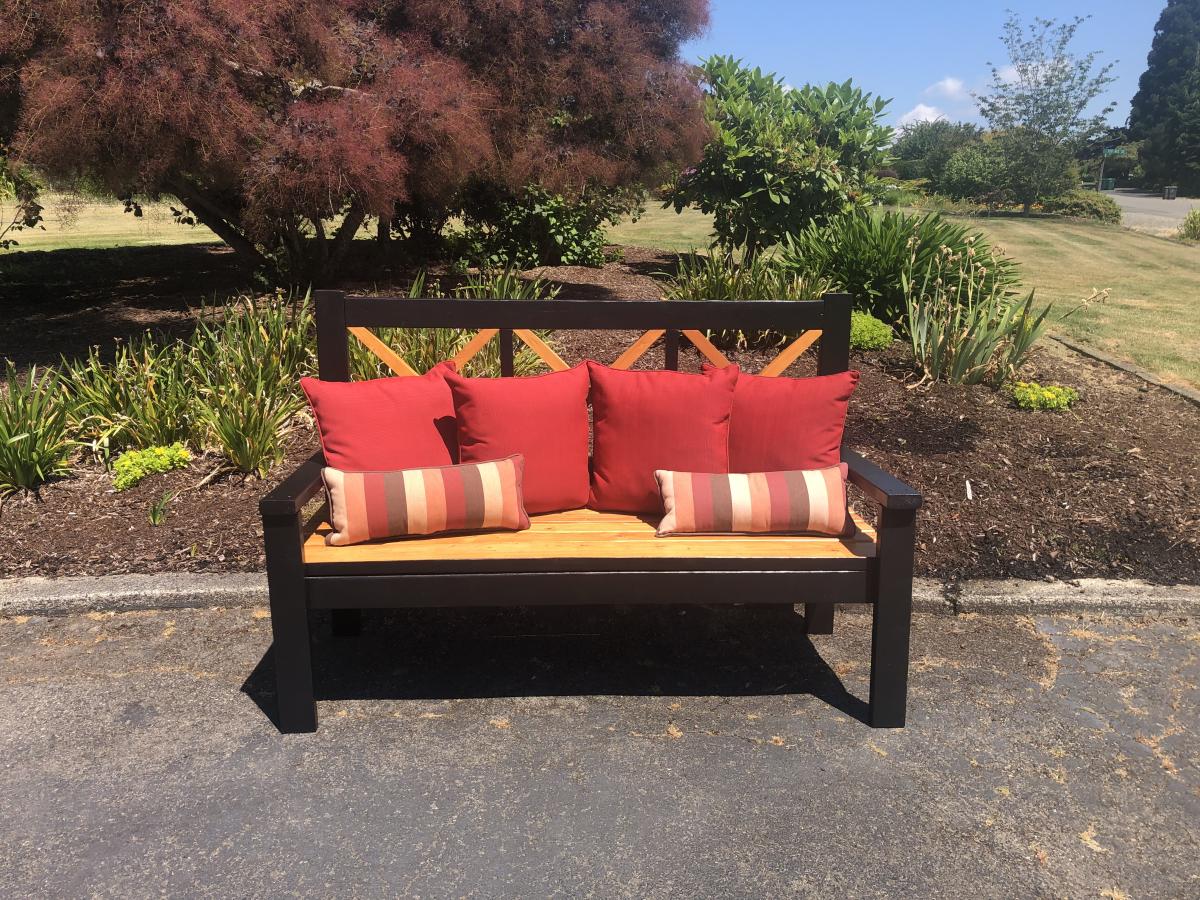
Really enjoyed making this bench. The X’s were a bit challenging but learned alot. Thanks for the plans Ana!

Comments

Seasonal And Holiday

Queen Farmhouse Bed with Arch

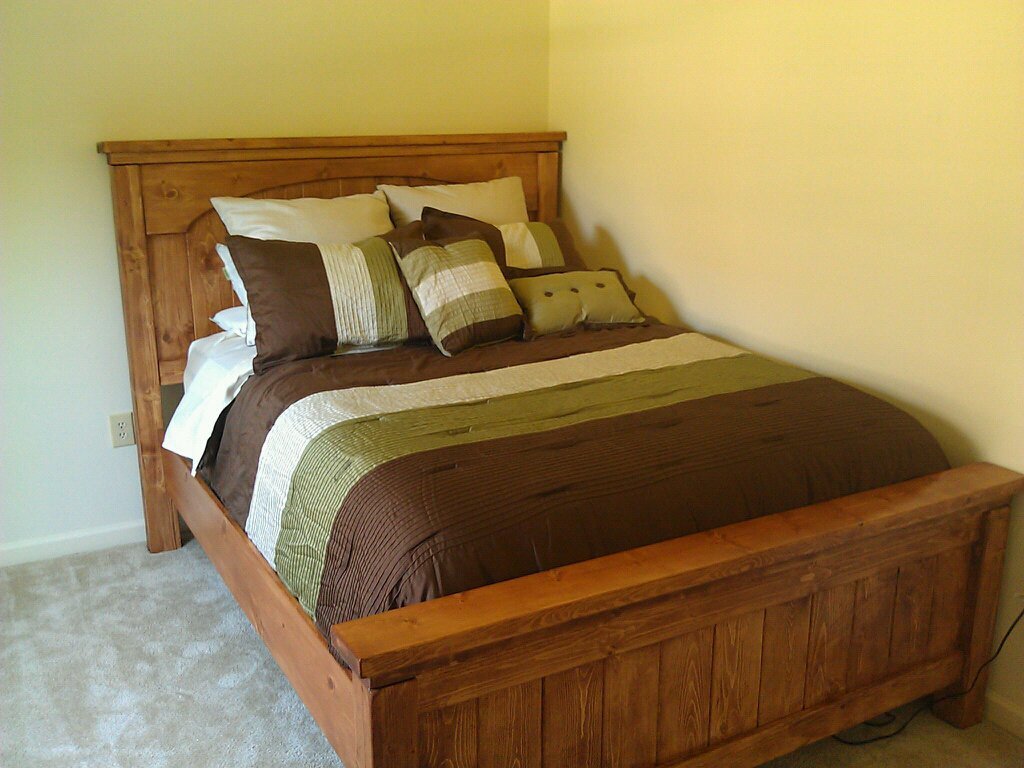
Submitted by perchik on Fri, 07/29/2011 - 11:34

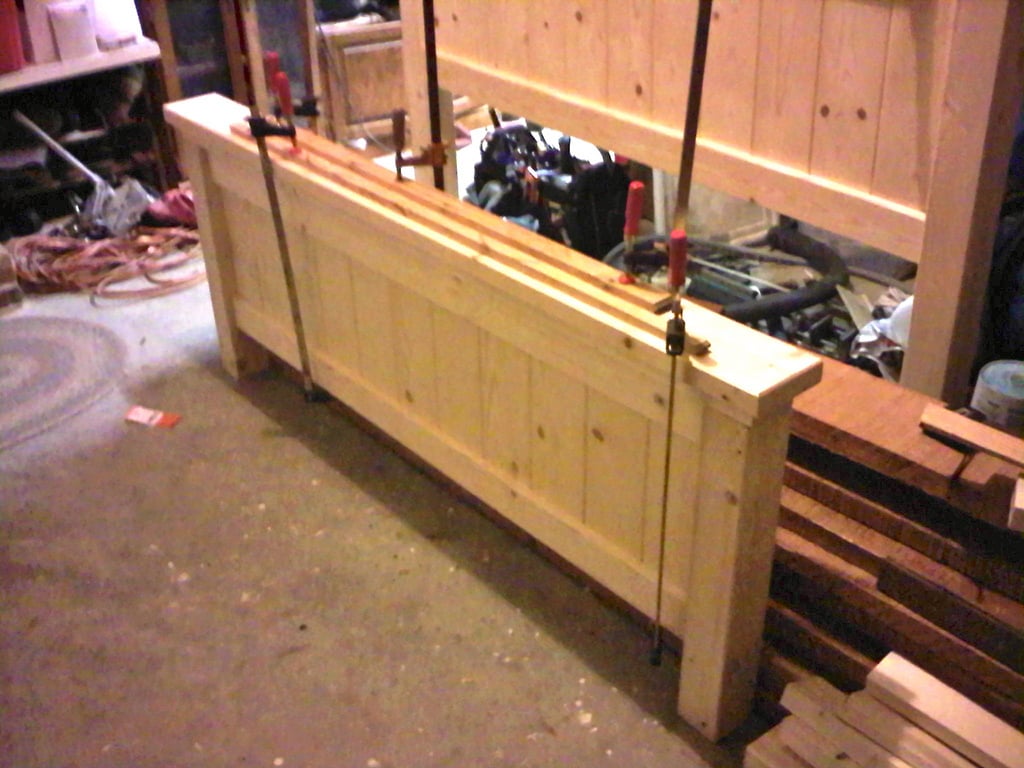
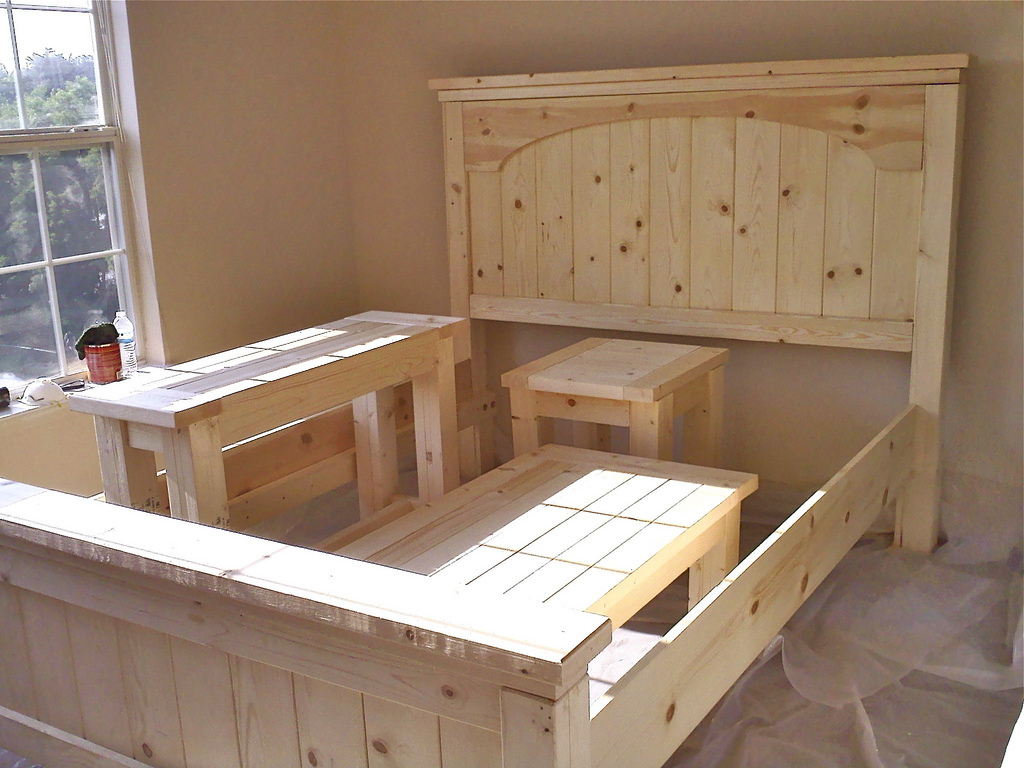
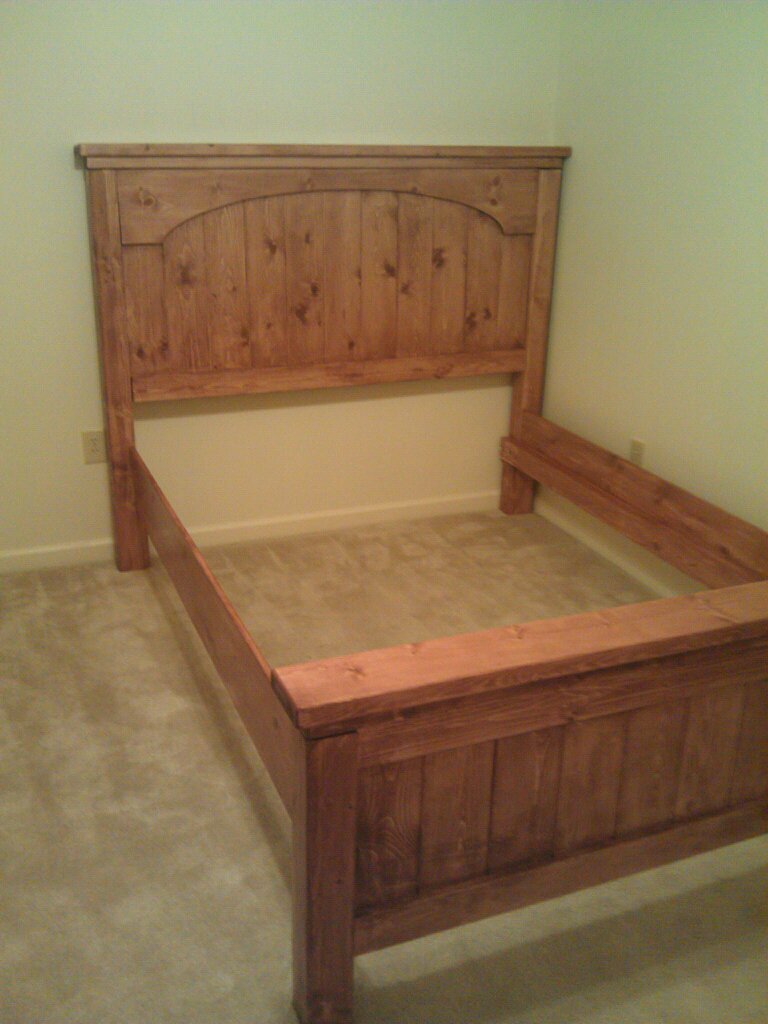
I build the Farmhouse Bed with Arch in queen Size. I built this over the course of a couple days and then finished it slowly over a month. I did modify the bed to have a 6 inch taller footboard. Also, the mattress I have has a low profile box spring that's only 4 inches tall. The mattress itself is about 10 inches tall.

Additionally I changed the plans a little bit to make it modular. The legs of the headboard are mounted on with bolts and the side rails are also bolted on. This allows me to take it apart and move it fairly easily. The other modification I made was because I couldn't find untreated 4x4s. I ended up using two 2x4s with a 1x4 in the middle. Cut everything separately and then glued/nail-gunned the leg together.
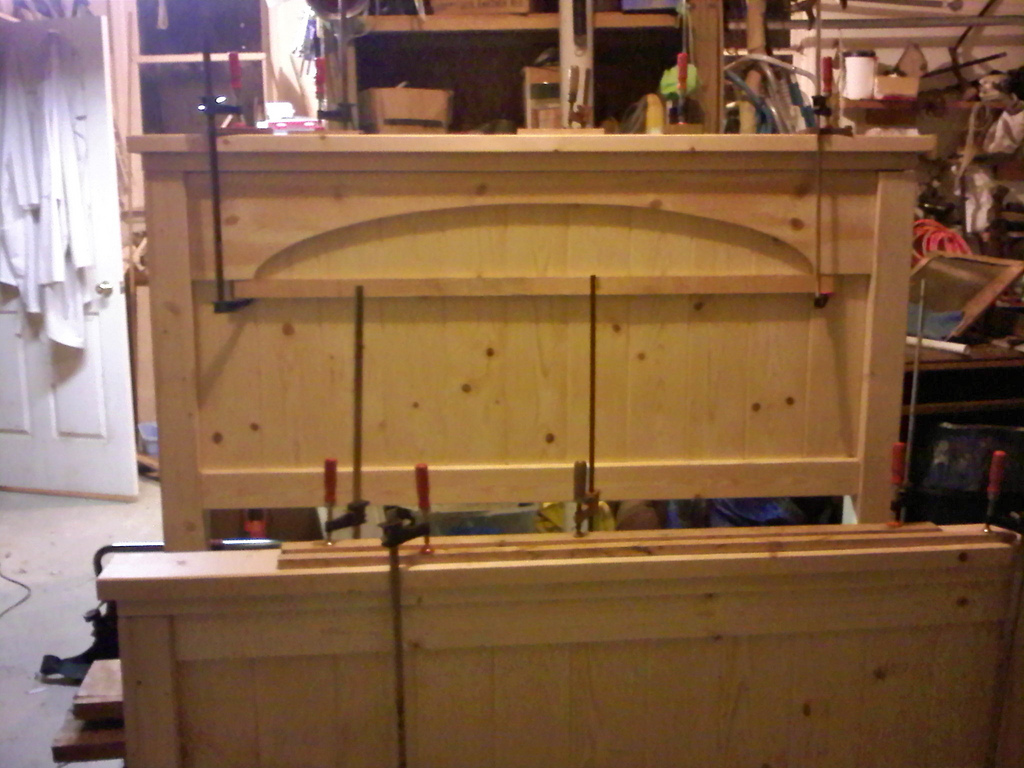
Also in the extra pictures you can see the set of Tryde tables I made at the same time. That post will come once I get a finish on them.

Built from Plan(s)
Estimated Cost
120$
Estimated Time Investment
Weekend Project (10-20 Hours)
Finish Used
I sanded it with 80grit, 120grit and then 220grit sandpaper. Then I applied MiniWax PreStain Conditioner before staining. I used one coat of Cabot Oil Based "Autumn Harvest" stain [this was one of the colors they have to mix at the store for you.] After that I applied two coats of High-gloss Polyeurathane.
Recommended Skill Level
Beginner

Comments

benfoldsfivealive

Fri, 07/29/2011 - 14:14

Are you kidding? That's a lot of stuff you just built, and it ALL looks amazing!! I am really loving the autumn harvest stain. :)

Patrick (not verified)

Fri, 07/29/2011 - 20:05

Thanks! Everything was built in a week but I did have the advantage of a nailgun and lots of time.

chris.allen5 (not verified)

Thu, 11/10/2011 - 19:56

how did you mount the side rails to the foot board?

Bristol Lounge Chairs and Love Seat

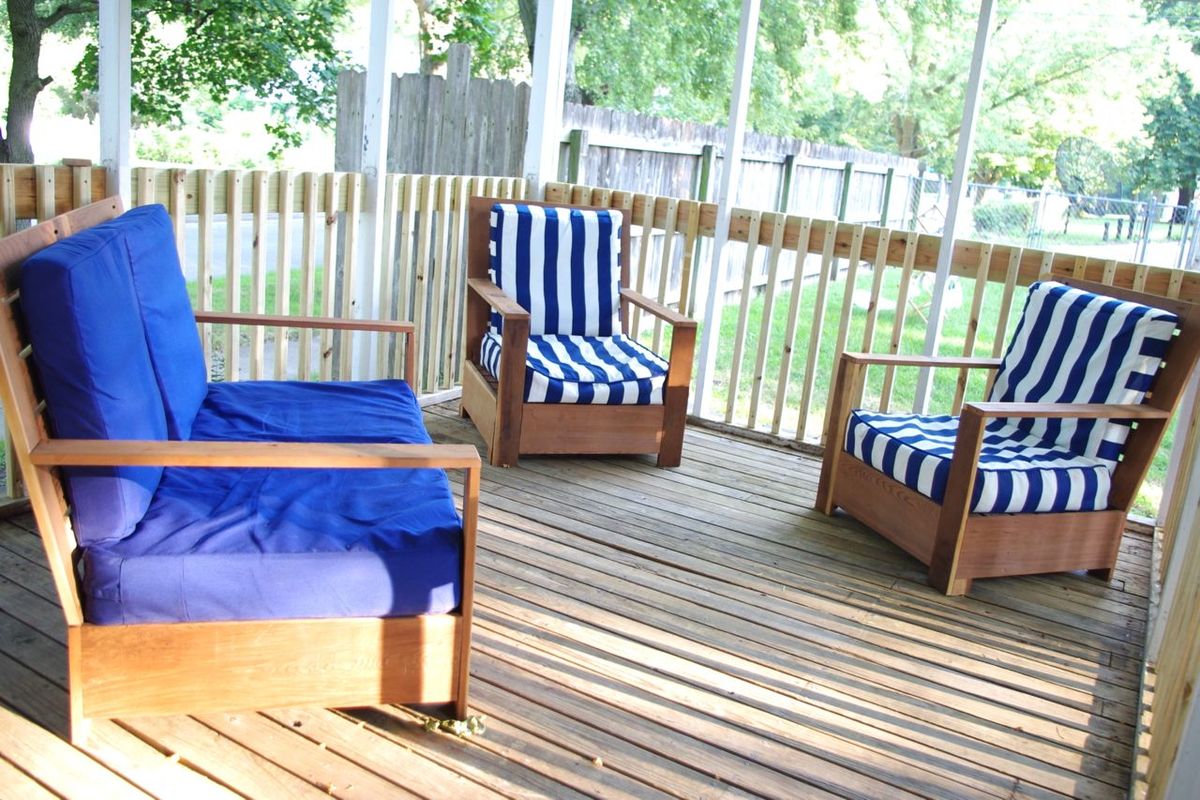
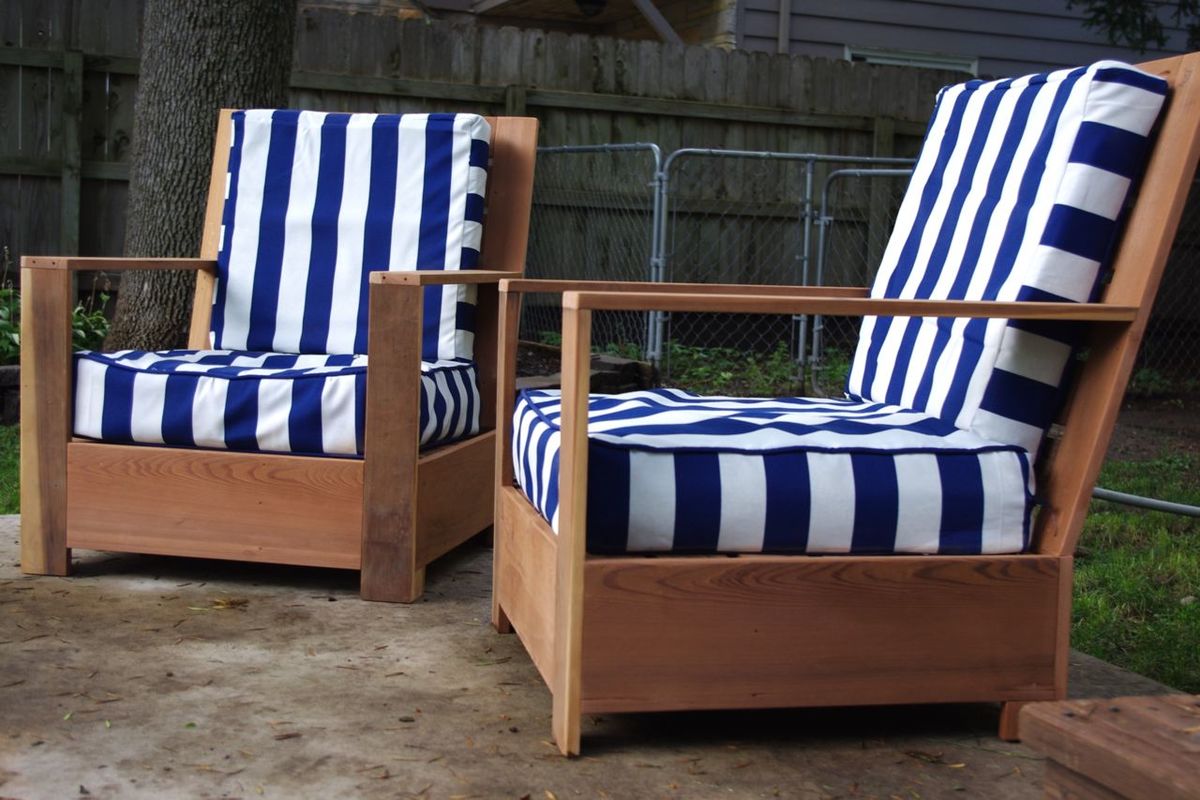
I loved this lounge chair when I saw it posted. After contemplating them for awhile they became my first building project.

Unfortunately, the cushions from the original design were to expensive for my budget. I resized the lounge chairs to fit cushions I found at my local big box store.

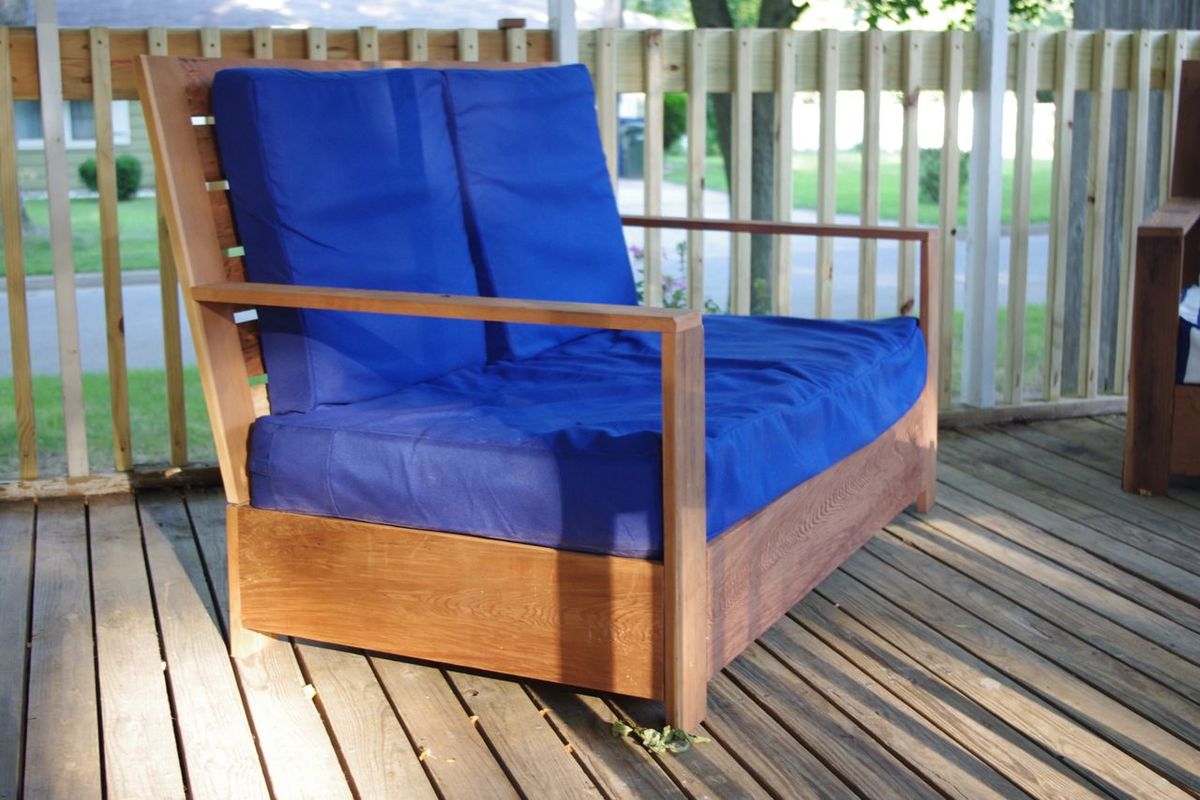
A couple of weeks later I made the loveseat using these plans: http://www.oldpaintdesign.com/2012/03/05/bristol-outdoor-loveseat/. The also resized the loveseat and made it to fit the same back cushions as the chairs and a crib mattress for the seat. I also added three more cleats to add sturdiness to the seat.

I was able to use cedar that I reclaimed from an old sauna in our basement. So, the wood was free to me!

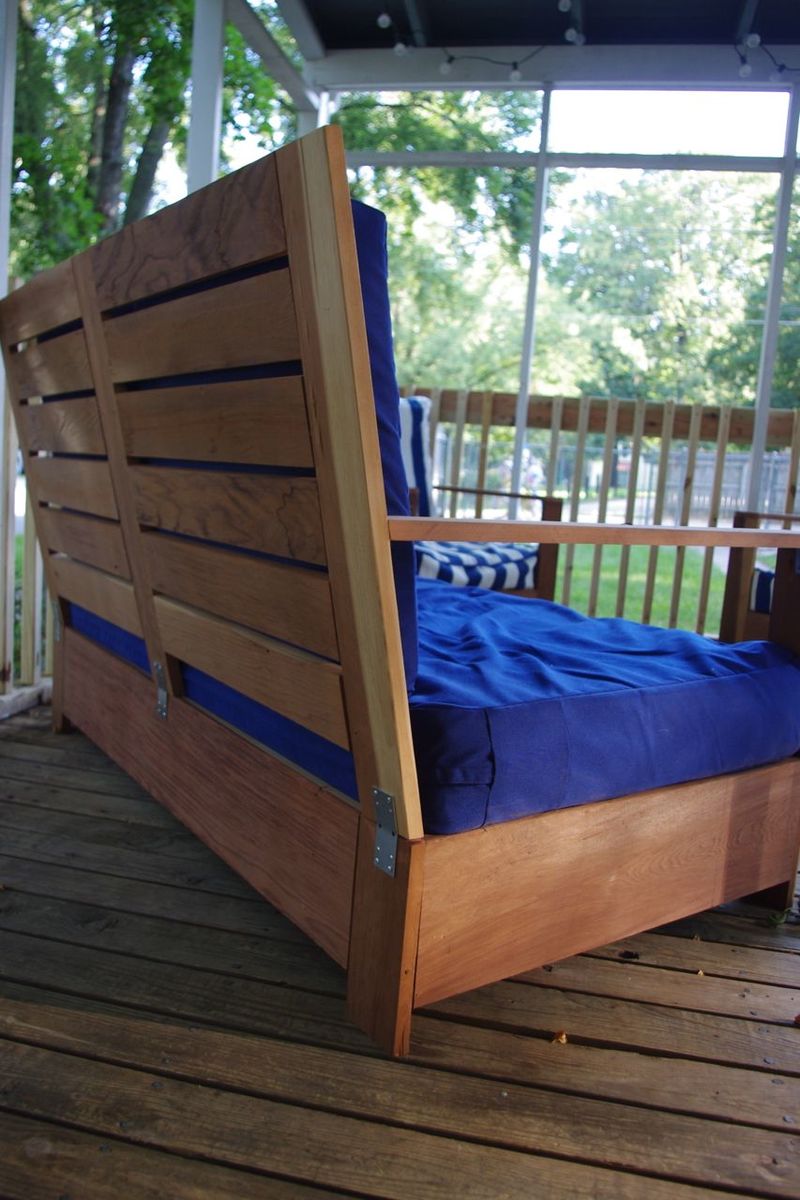
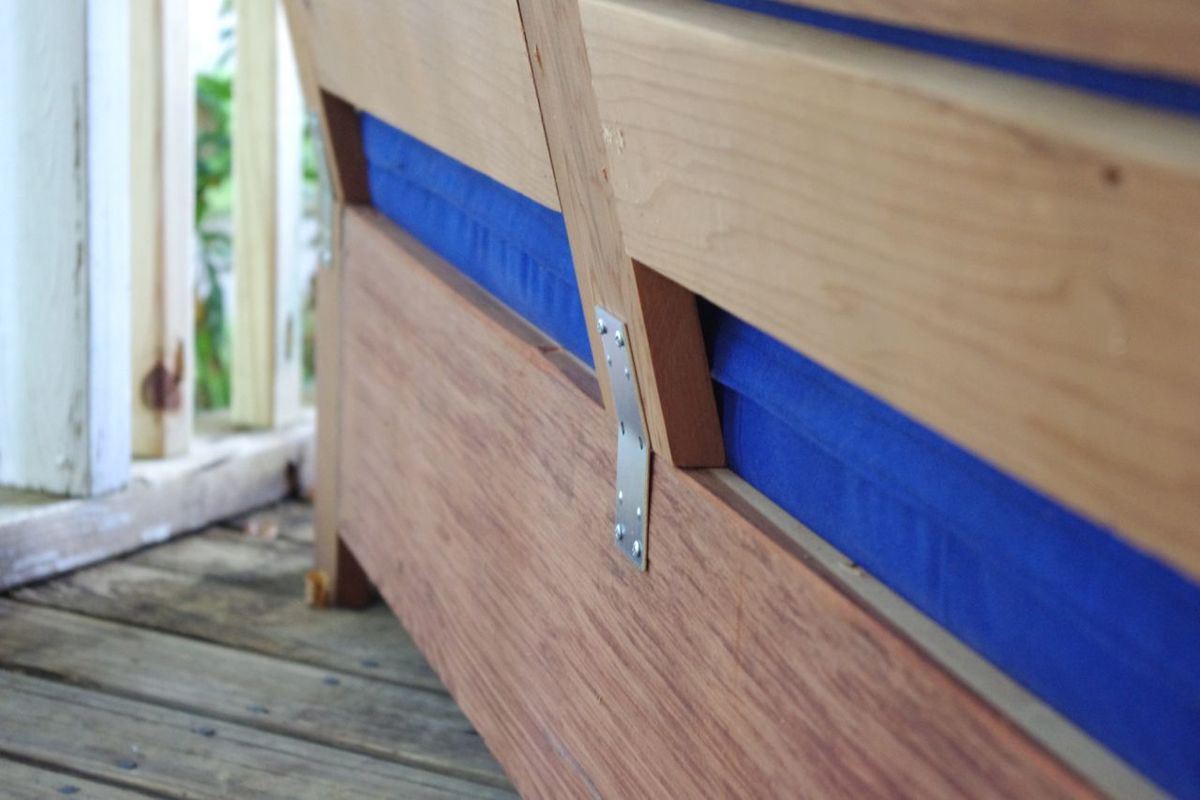
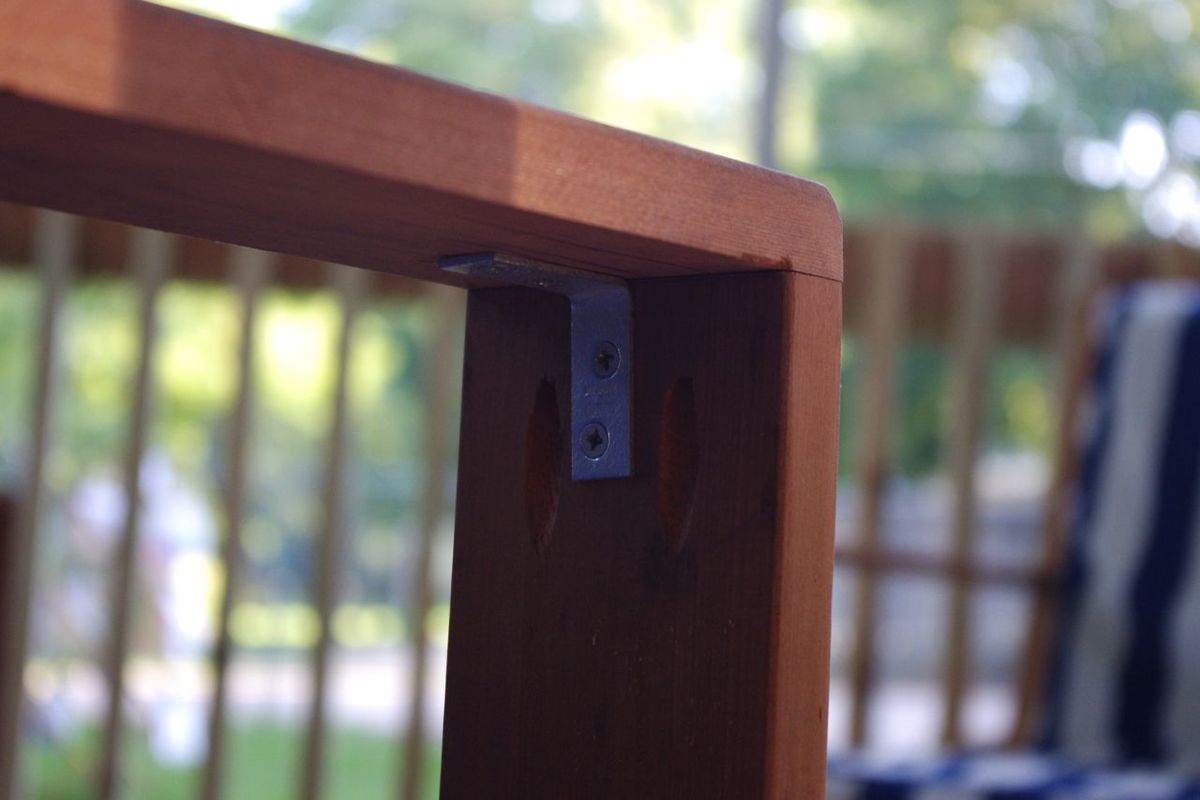
After using the chairs and loveseat a couple of times two of the arms popped off the front. As a result, I added some extra sturdiness to both the arms and to the angled back.

To the arms I added "L" brackets. For each back I added "mending braces".

I'll be adding more information about the modified dimensions and cut list I used on my blog: http://amilliontinylittlethings.blogspot.com/2013/08/bristol-lounge-cha….

I'm very happy with the furniture! Thank you Ana White and guest poster, Shane, for inspiring me into this new hobby!

Built from Plan(s)
Estimated Cost
$200
Estimated Time Investment
Week Long Project (20 Hours or More)
Finish Used
I haven't finished the chairs yet. Will likely just use a waterproofing sealer.
Recommended Skill Level
Beginner

Twin Farmhouse Beds

Submitted by lmshaffer on Thu, 10/08/2015 - 09:05

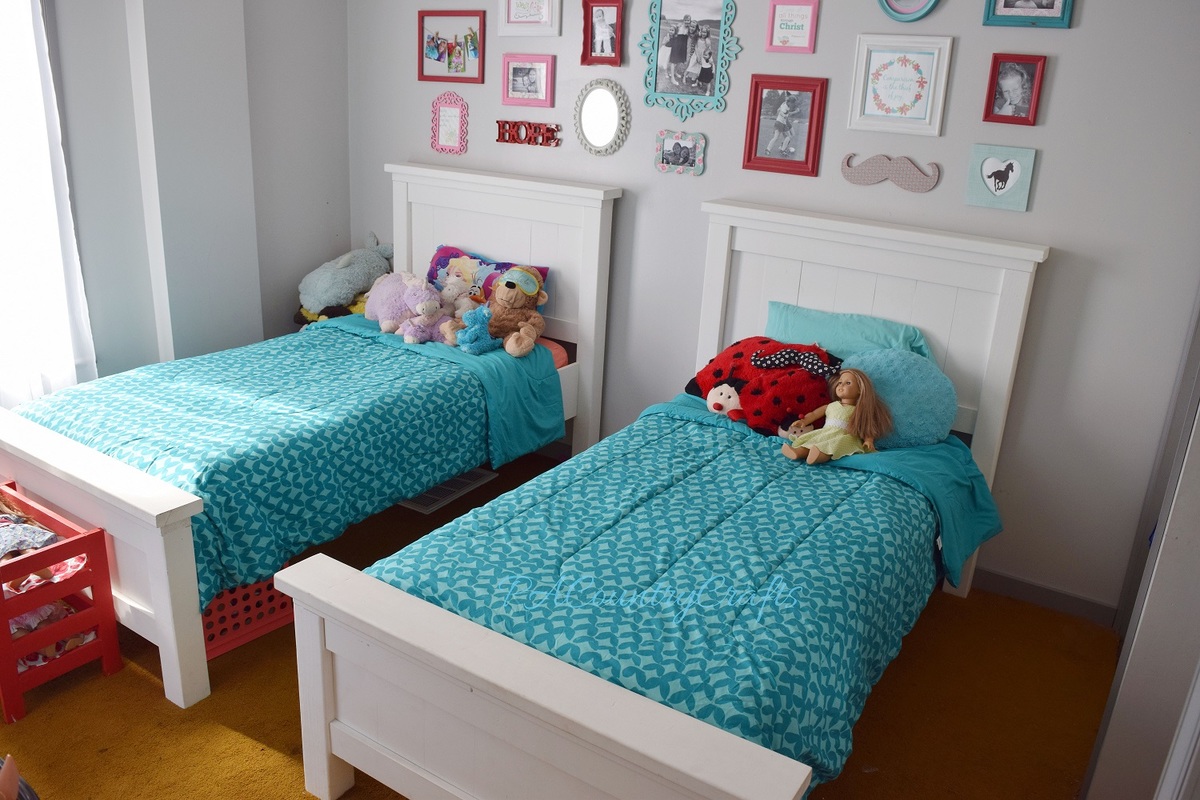
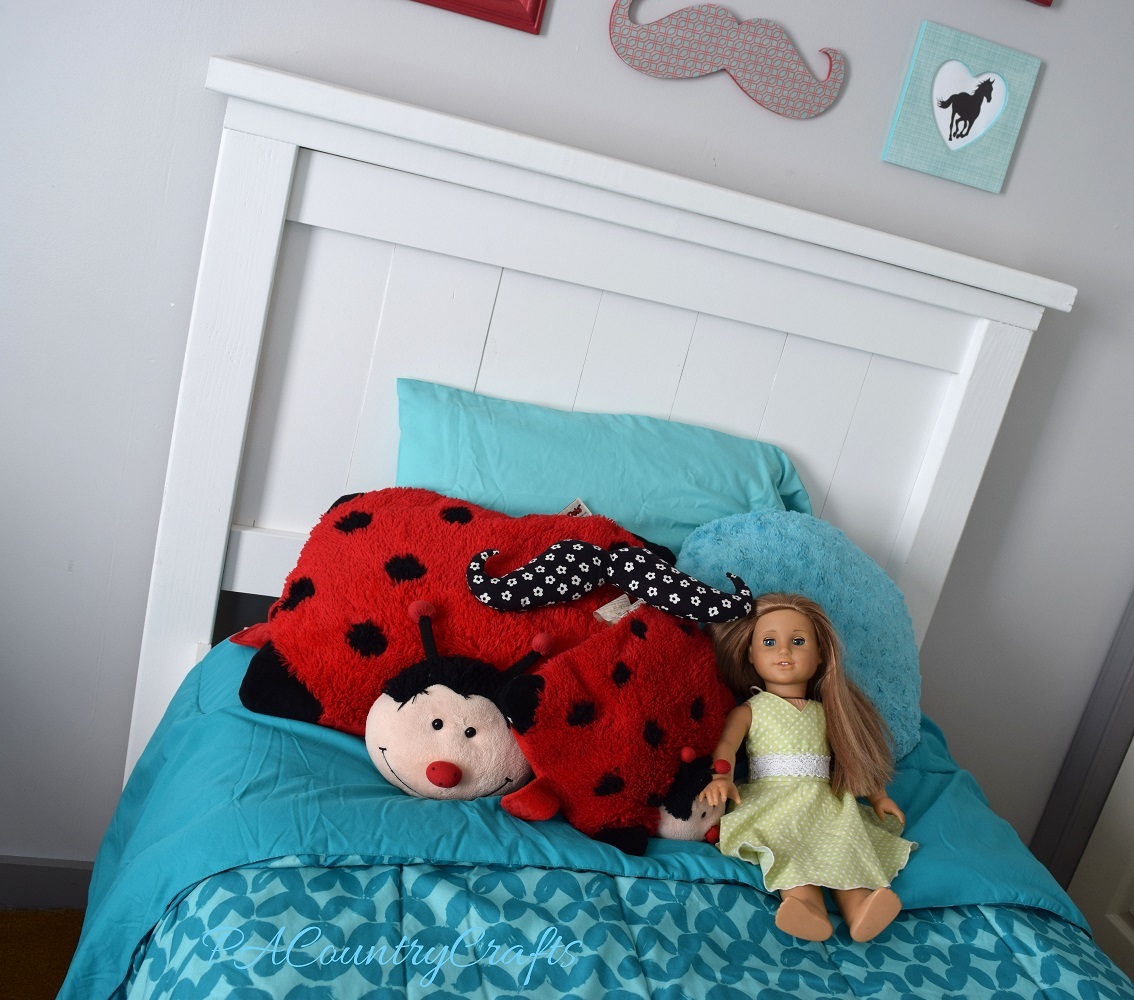
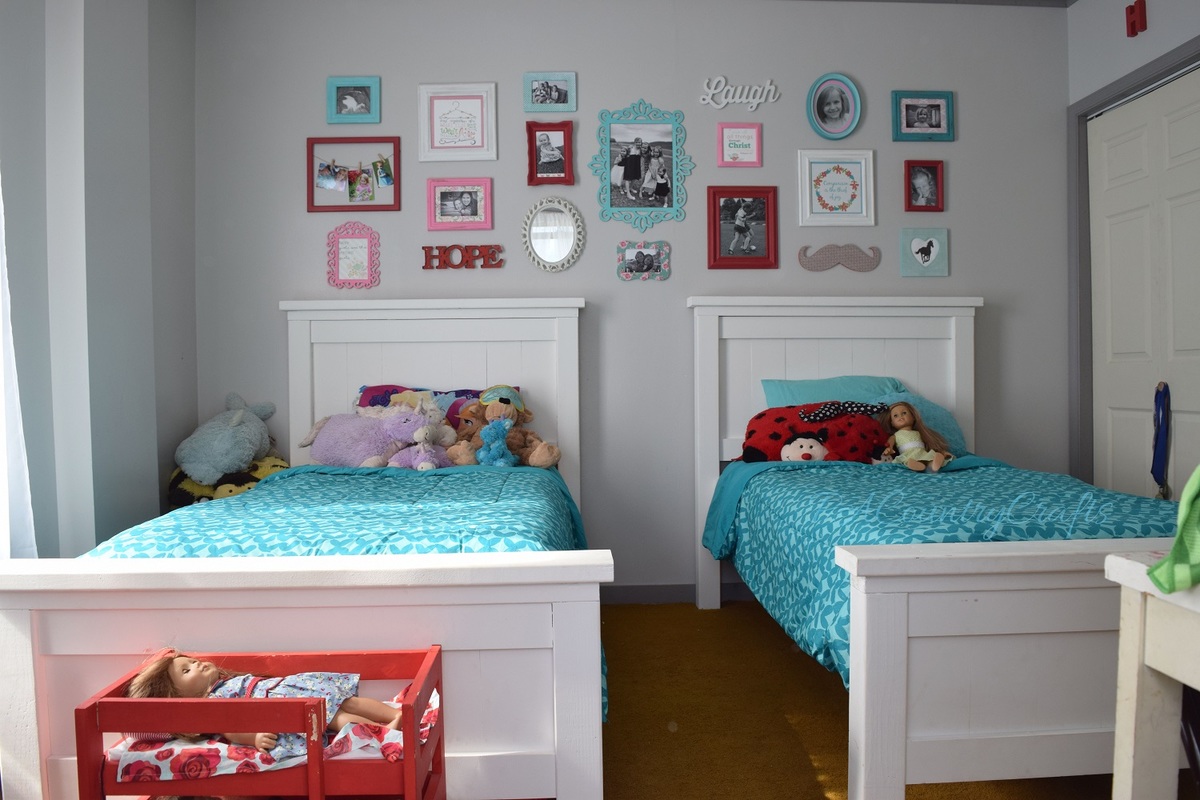
We made the headboards 7" shorter because the collage wall was already on the wall. Also, we used plywood instead of slats for support for the mattresses. Oh, and we had to trim the side rails to 75". Overall, it was a quick and simple project!

Built from Plan(s)
Estimated Cost
$150 each
Estimated Time Investment
Weekend Project (10-20 Hours)
Finish Used
white acrylic paint applied with a cantankerous paint sprayer
Recommended Skill Level
Intermediate