Community Brag Posts

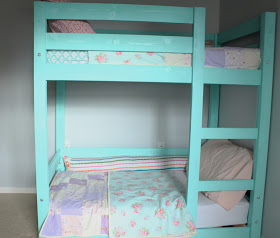
Toddler Bunk Beds
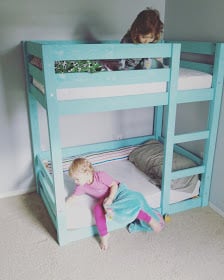
Modified the classic bunk bed plans to fit crib size matresses for our 1.5 & 2 year old girls, loved how my toddler bunk beds turned out!
Built from Plan(s)
Estimated Cost
$200
Estimated Time Investment
Day Project (6-9 Hours)
Finish Used
Behr 'Rainwater' paint in satin
Recommended Skill Level
Intermediate
Comments
Mon, 08/01/2016 - 17:27
measurements
Hi,
Could you email me the change in measurements you used for the crib mattress?
It would help me out so much. I want to build a similar one for my boys.
Thank you.
Danielle S.
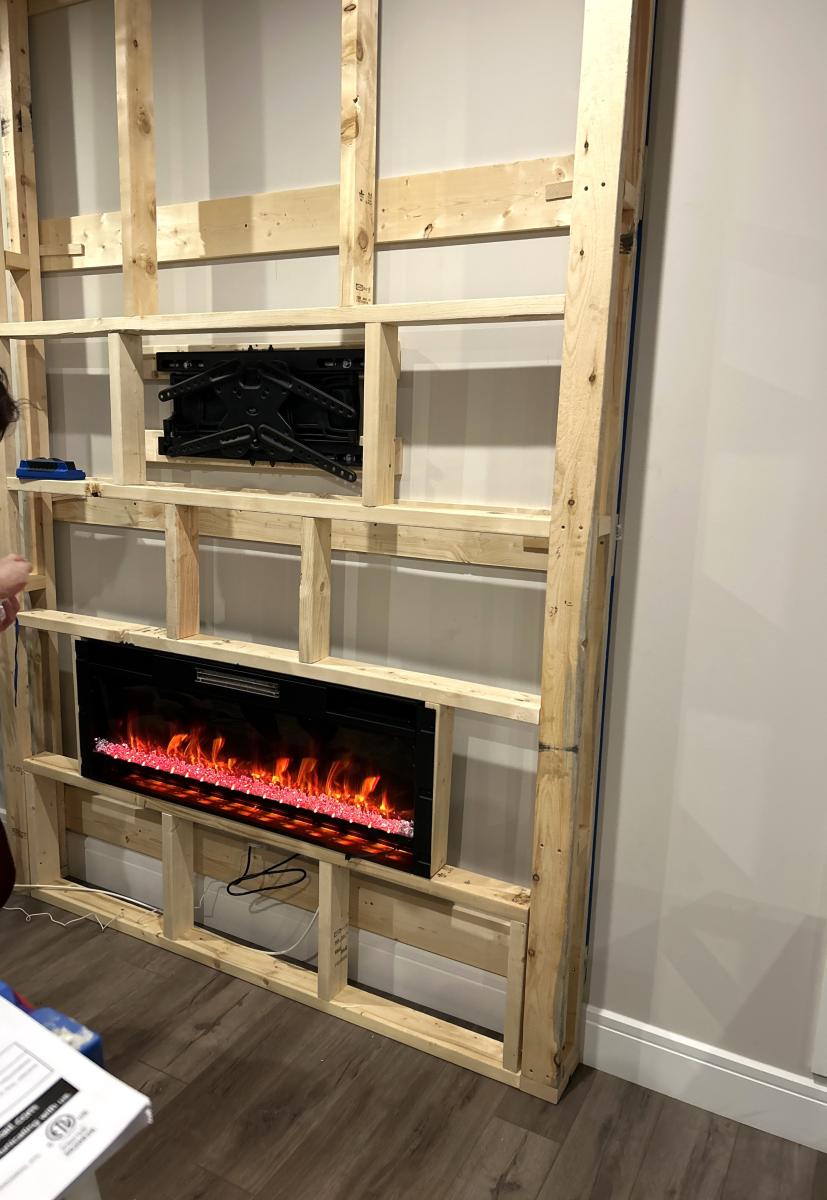
Shiplap Fireplace Wall
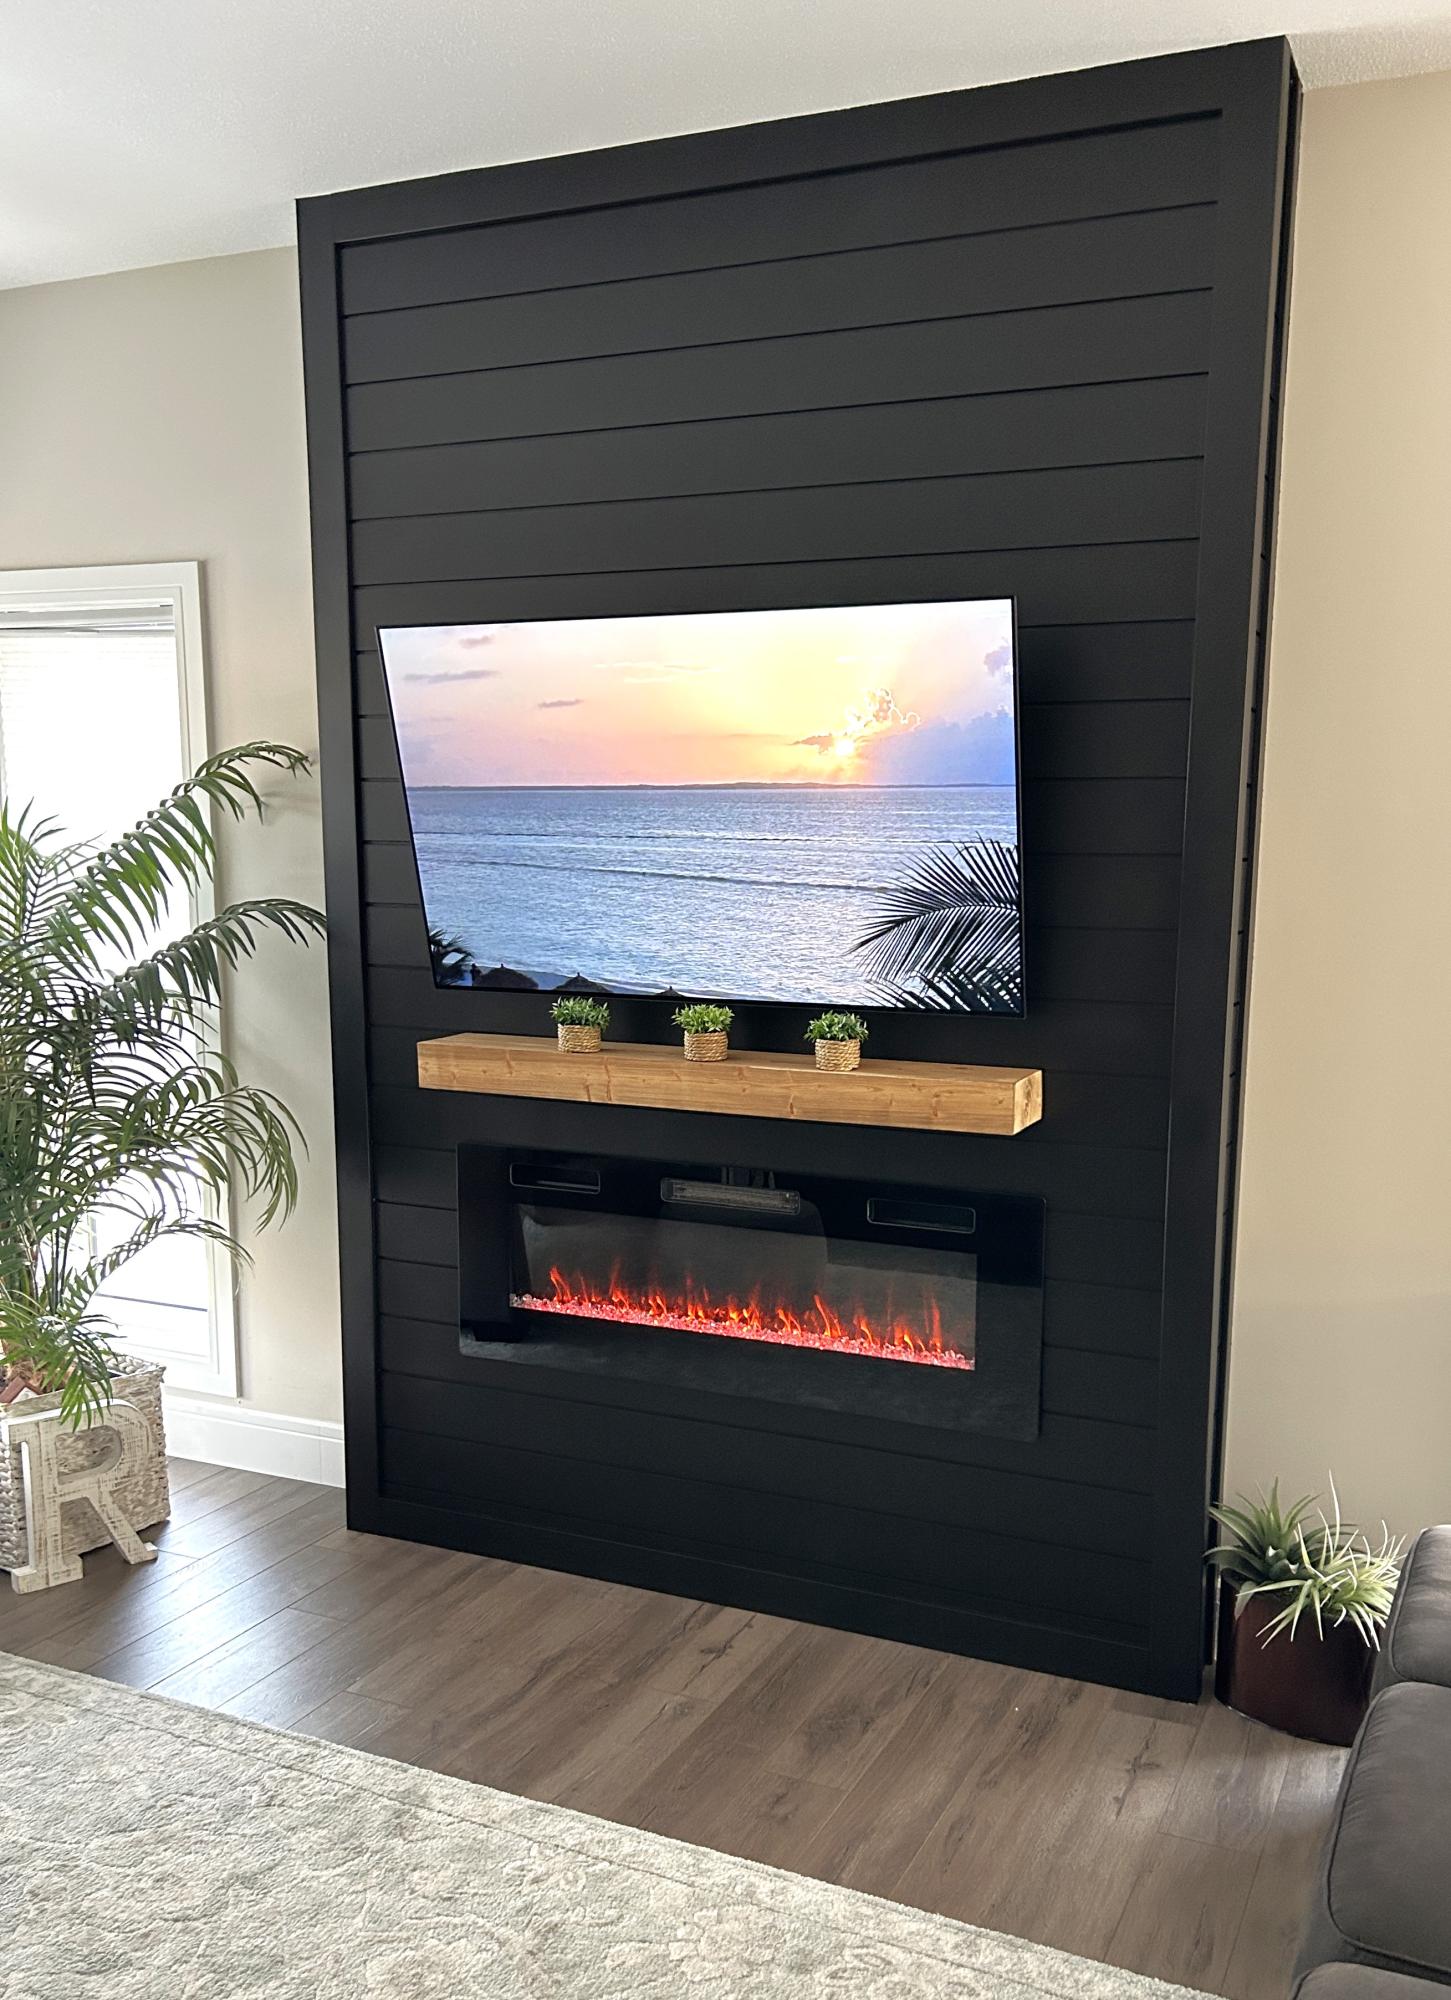
Livingroom mantle and fireplace.
Todd Richards
Built from Plan(s)
Seasonal And Holiday
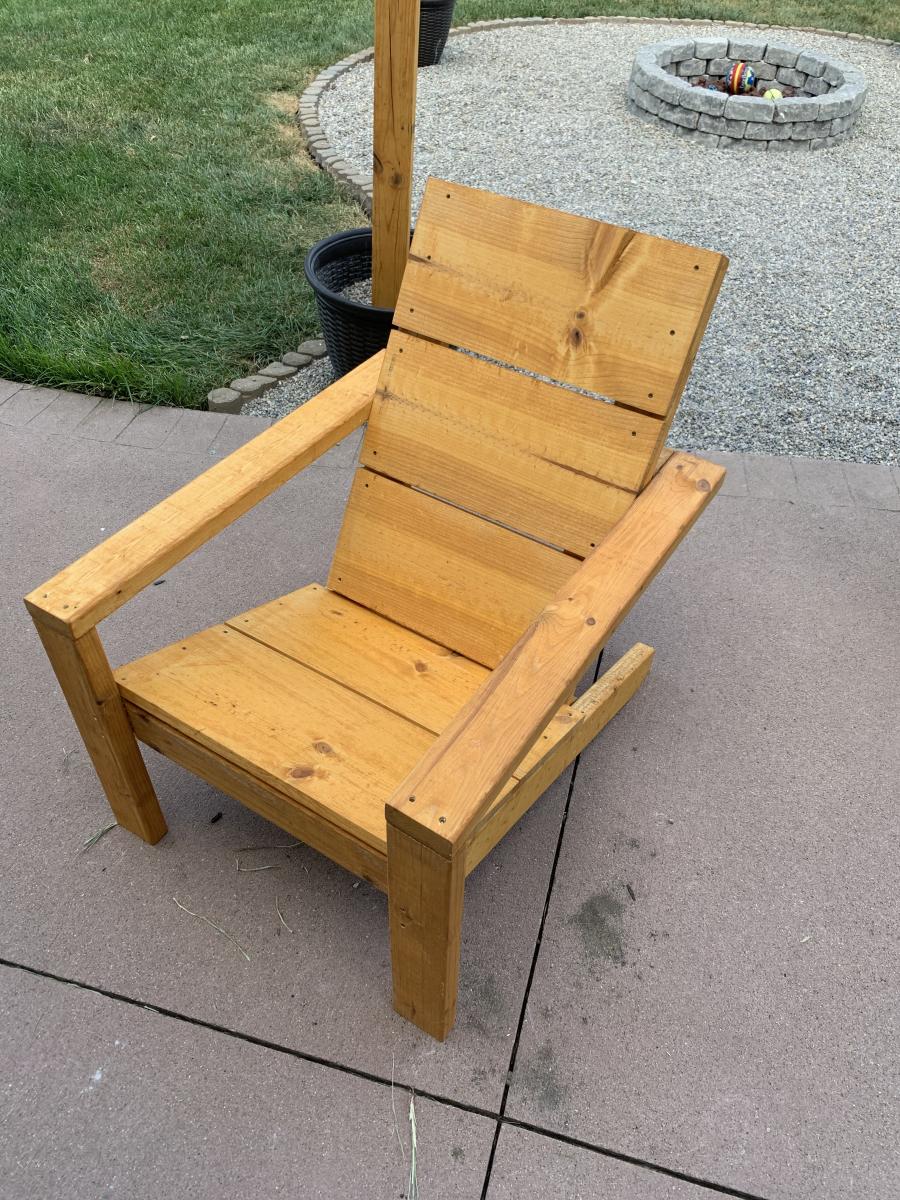
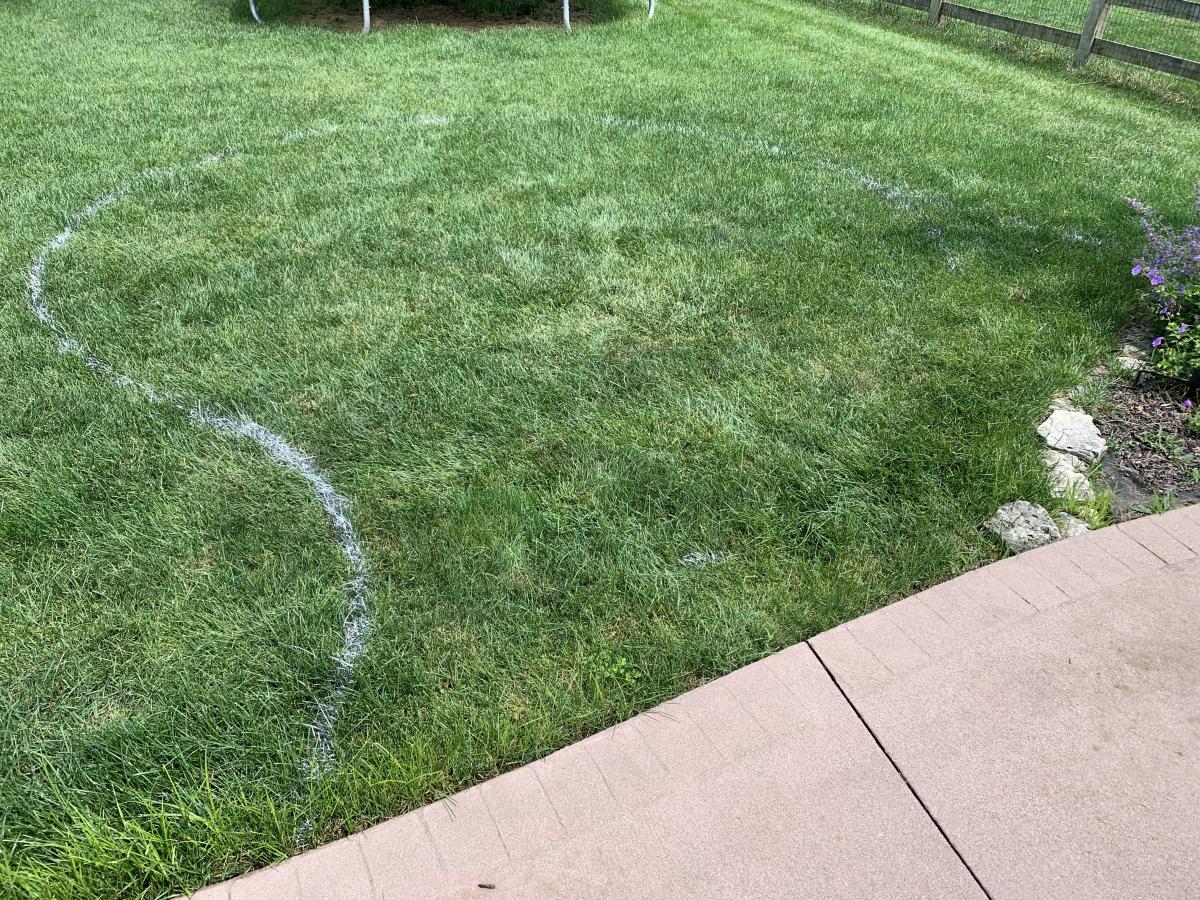
Adirondack Chairs for new Fire Pit area
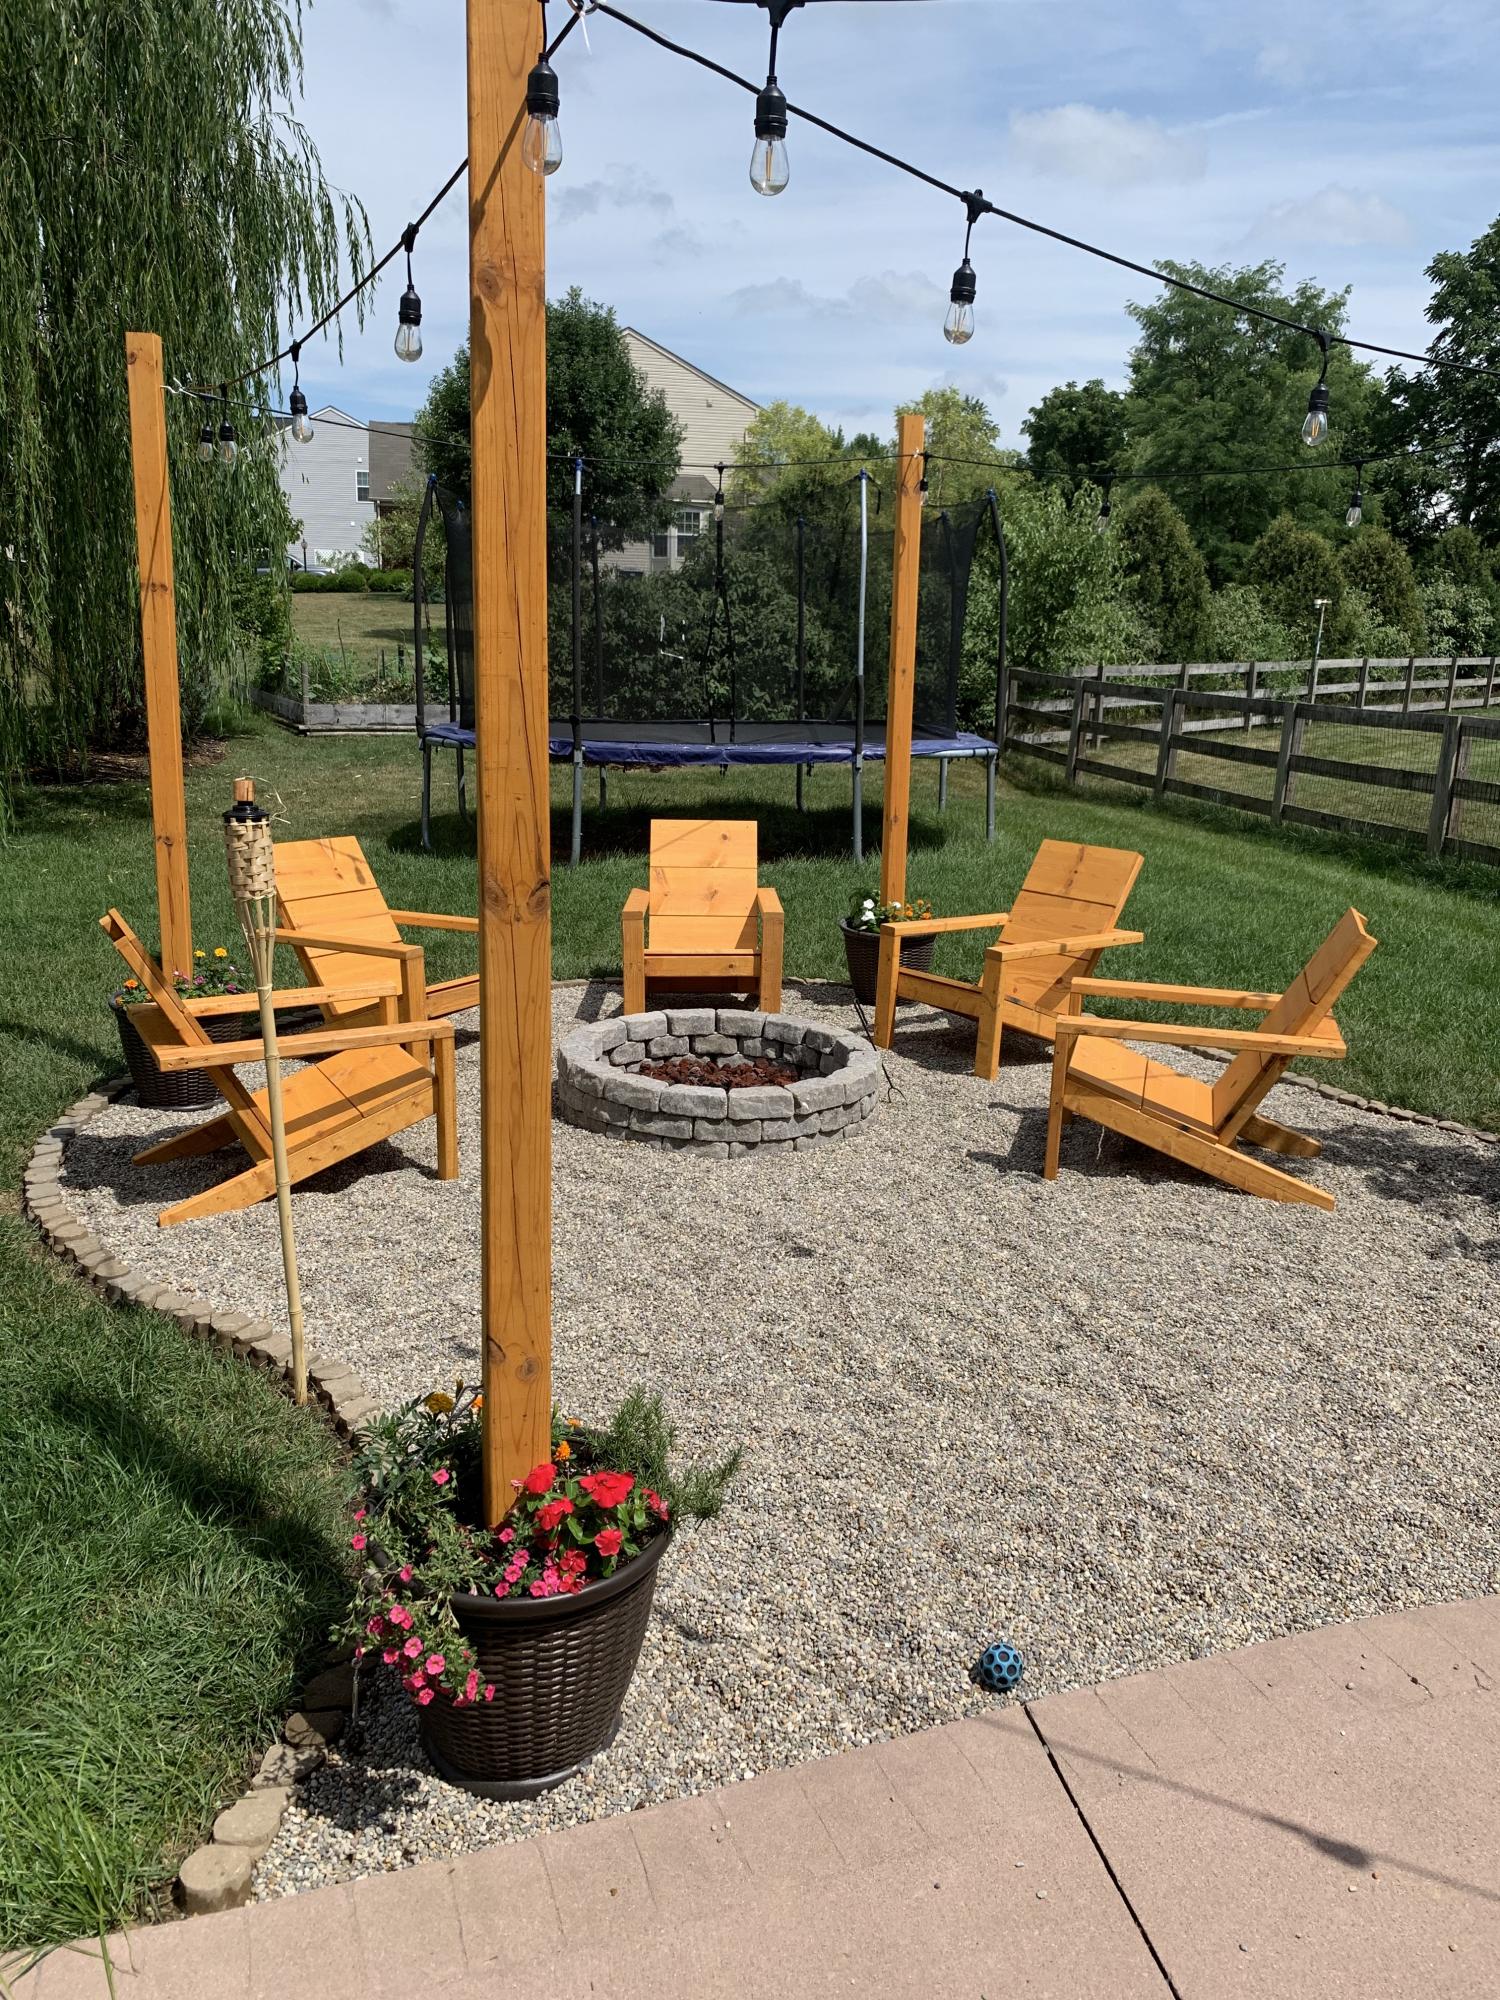
We've been talking about adding a fire pit and seating area for awhile. Our oldest daughter's graduation party combined with extra available time due to Corona presented a perfect opportunity to try something new. I've never built anything like this and have very limited experience with woodworking but I came across these chair plans when searching for chairs to buy. Not too bad for a first project! Started digging up sod about a month before the Grad Party. Worked on it a couple hours a day and maybe 3 full weekend days. Came out great and is a wonderful addition to our backyard.
Built from Plan(s)
Estimated Cost
$900
Estimated Time Investment
Week Long Project (20 Hours or More)
Finish Used
1 thin coat of Thompson Timber Oil (Cedar Semi-Transparent) applied before assembling each chair. Used about 2/3 gallon for all 5 chairs and light posts.
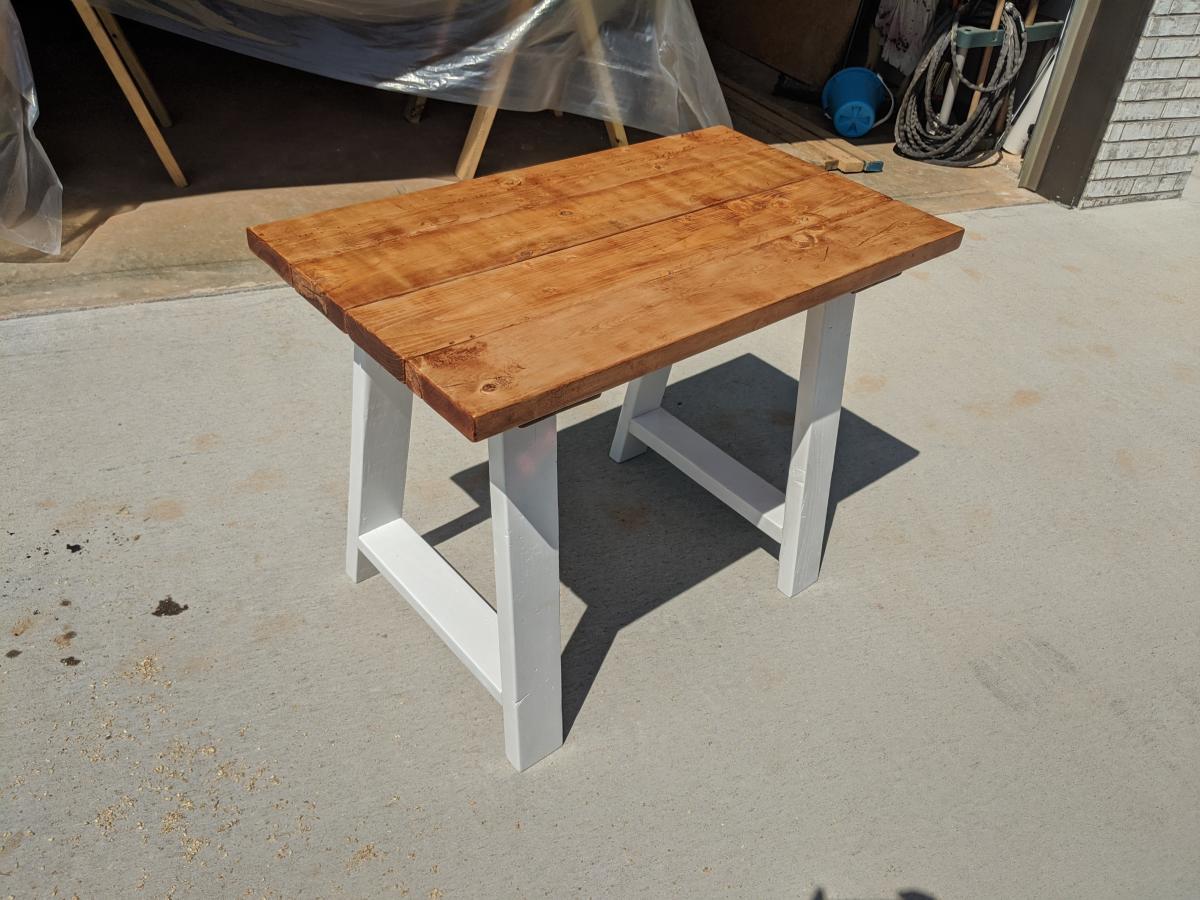
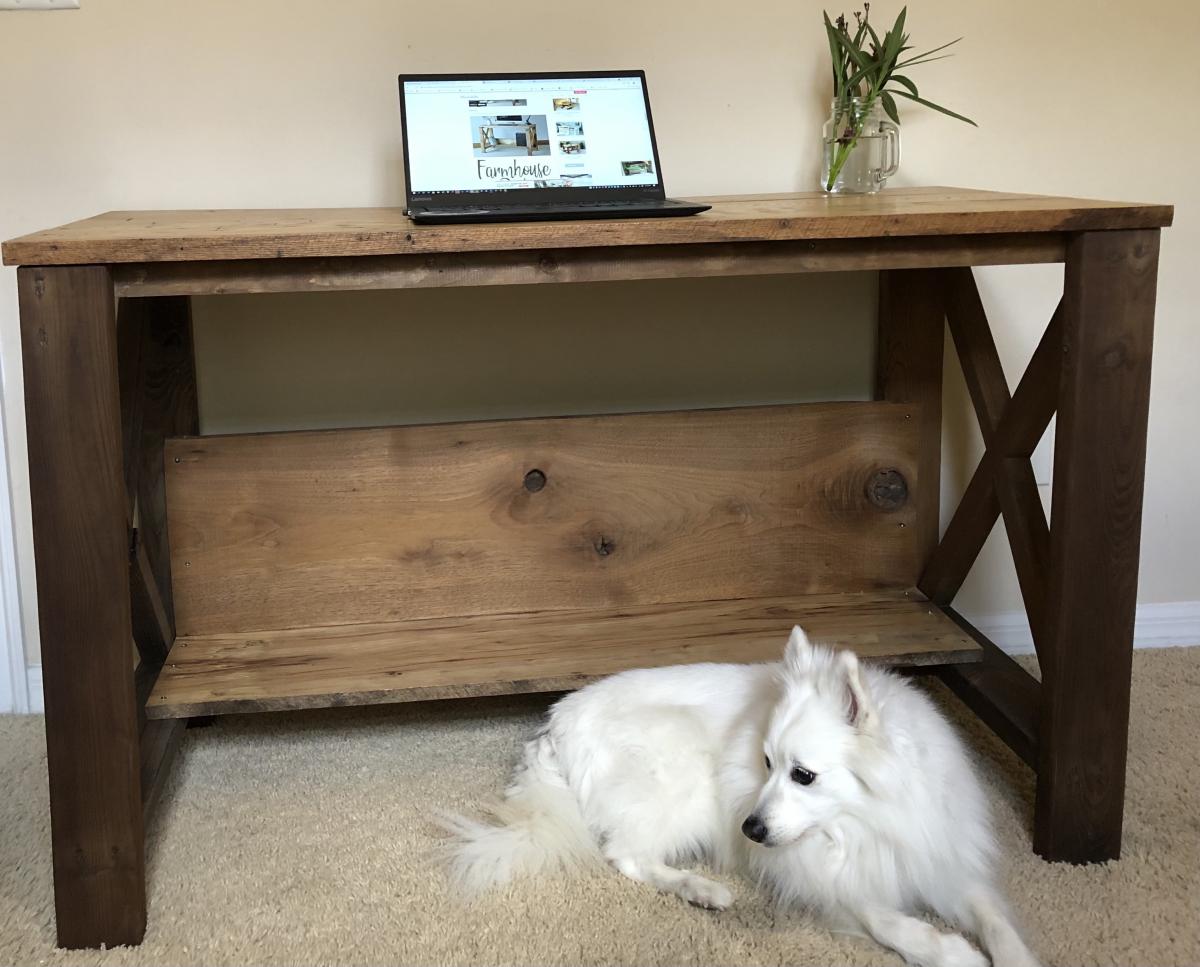
Simple Small Trestle Desk
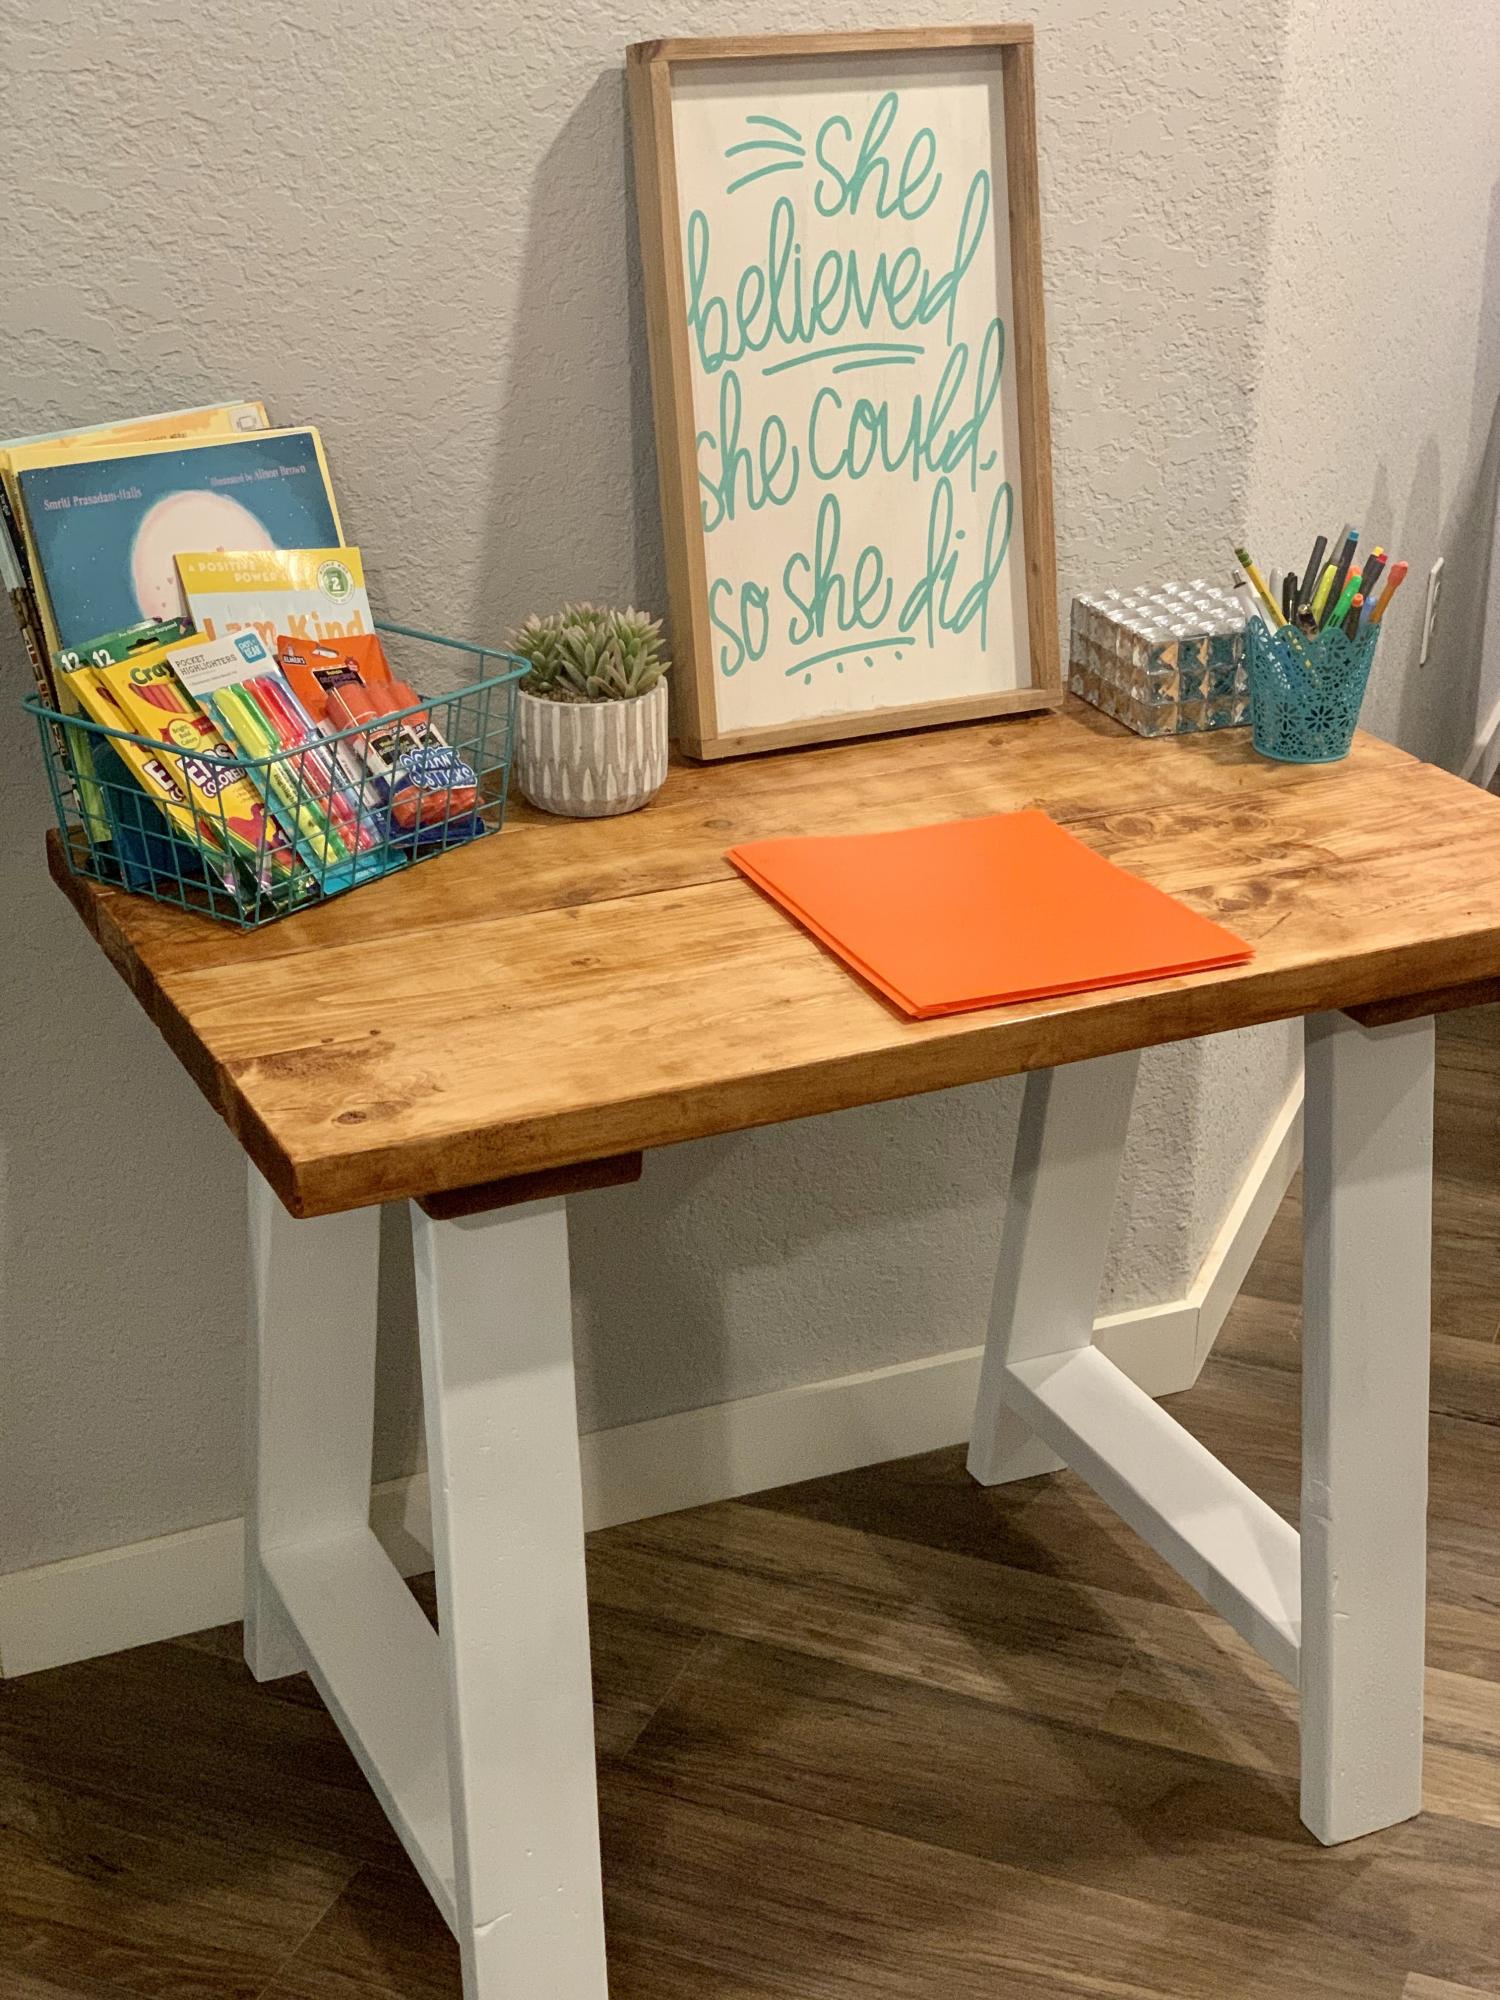
Made this desk for someone who's kid had to do virtual classes due to COVID-19. Quick and easy plans.
Built from Plan(s)
Recommended Skill Level
Beginner
Poolside Towel Cabinet from Benchmark Cabinet Plan

My father and I made this awesome poolside towel cabinet using the Benchmark Cabinet plans. A super easy 1 day build and it looks amazing on the patio. Bring on the pool weather!

Built from Plan(s)
Estimated Cost
$60
Estimated Time Investment
Day Project (6-9 Hours)
Finish Used
Chalk paint/Poly topcoat
Recommended Skill Level
Beginner
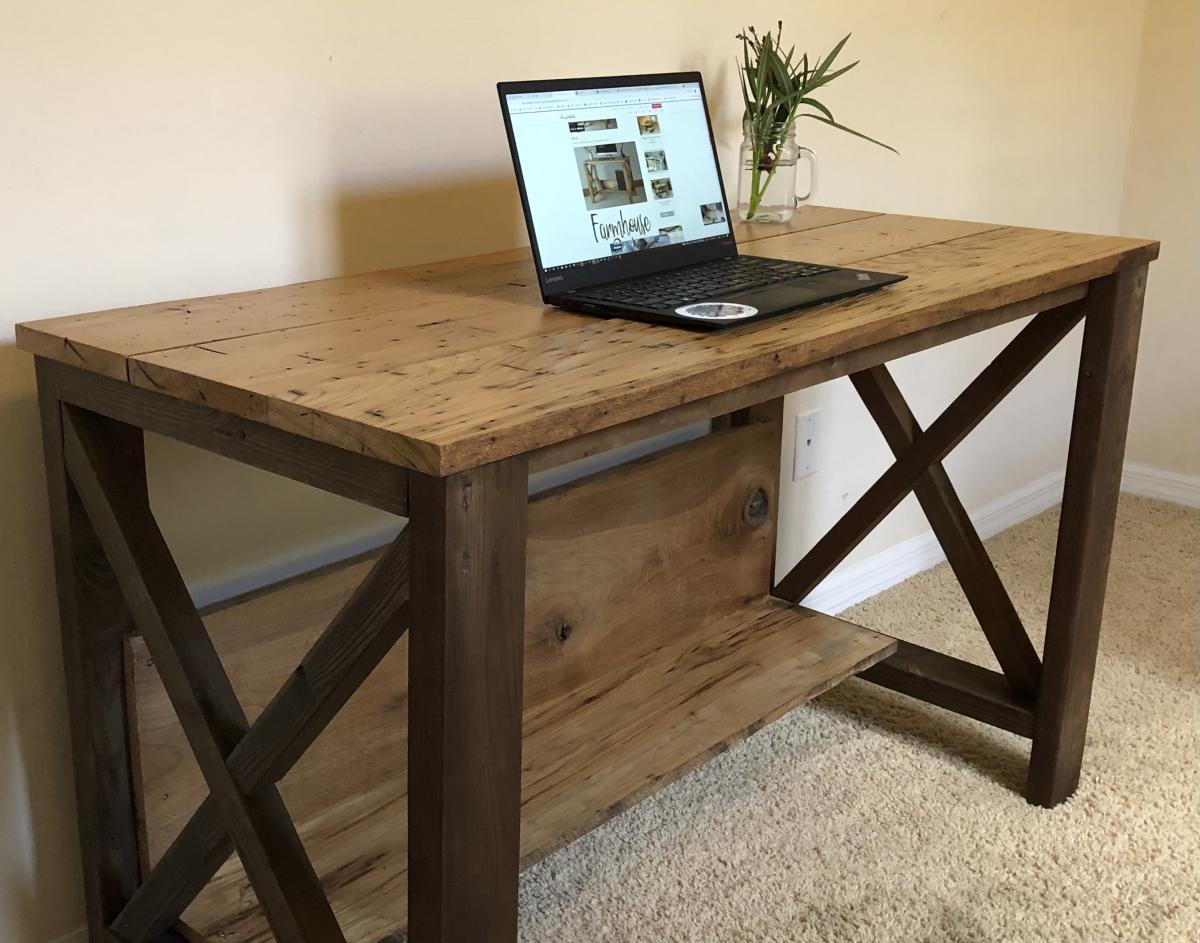
Farmhouse Desk with Wormy Chestnut
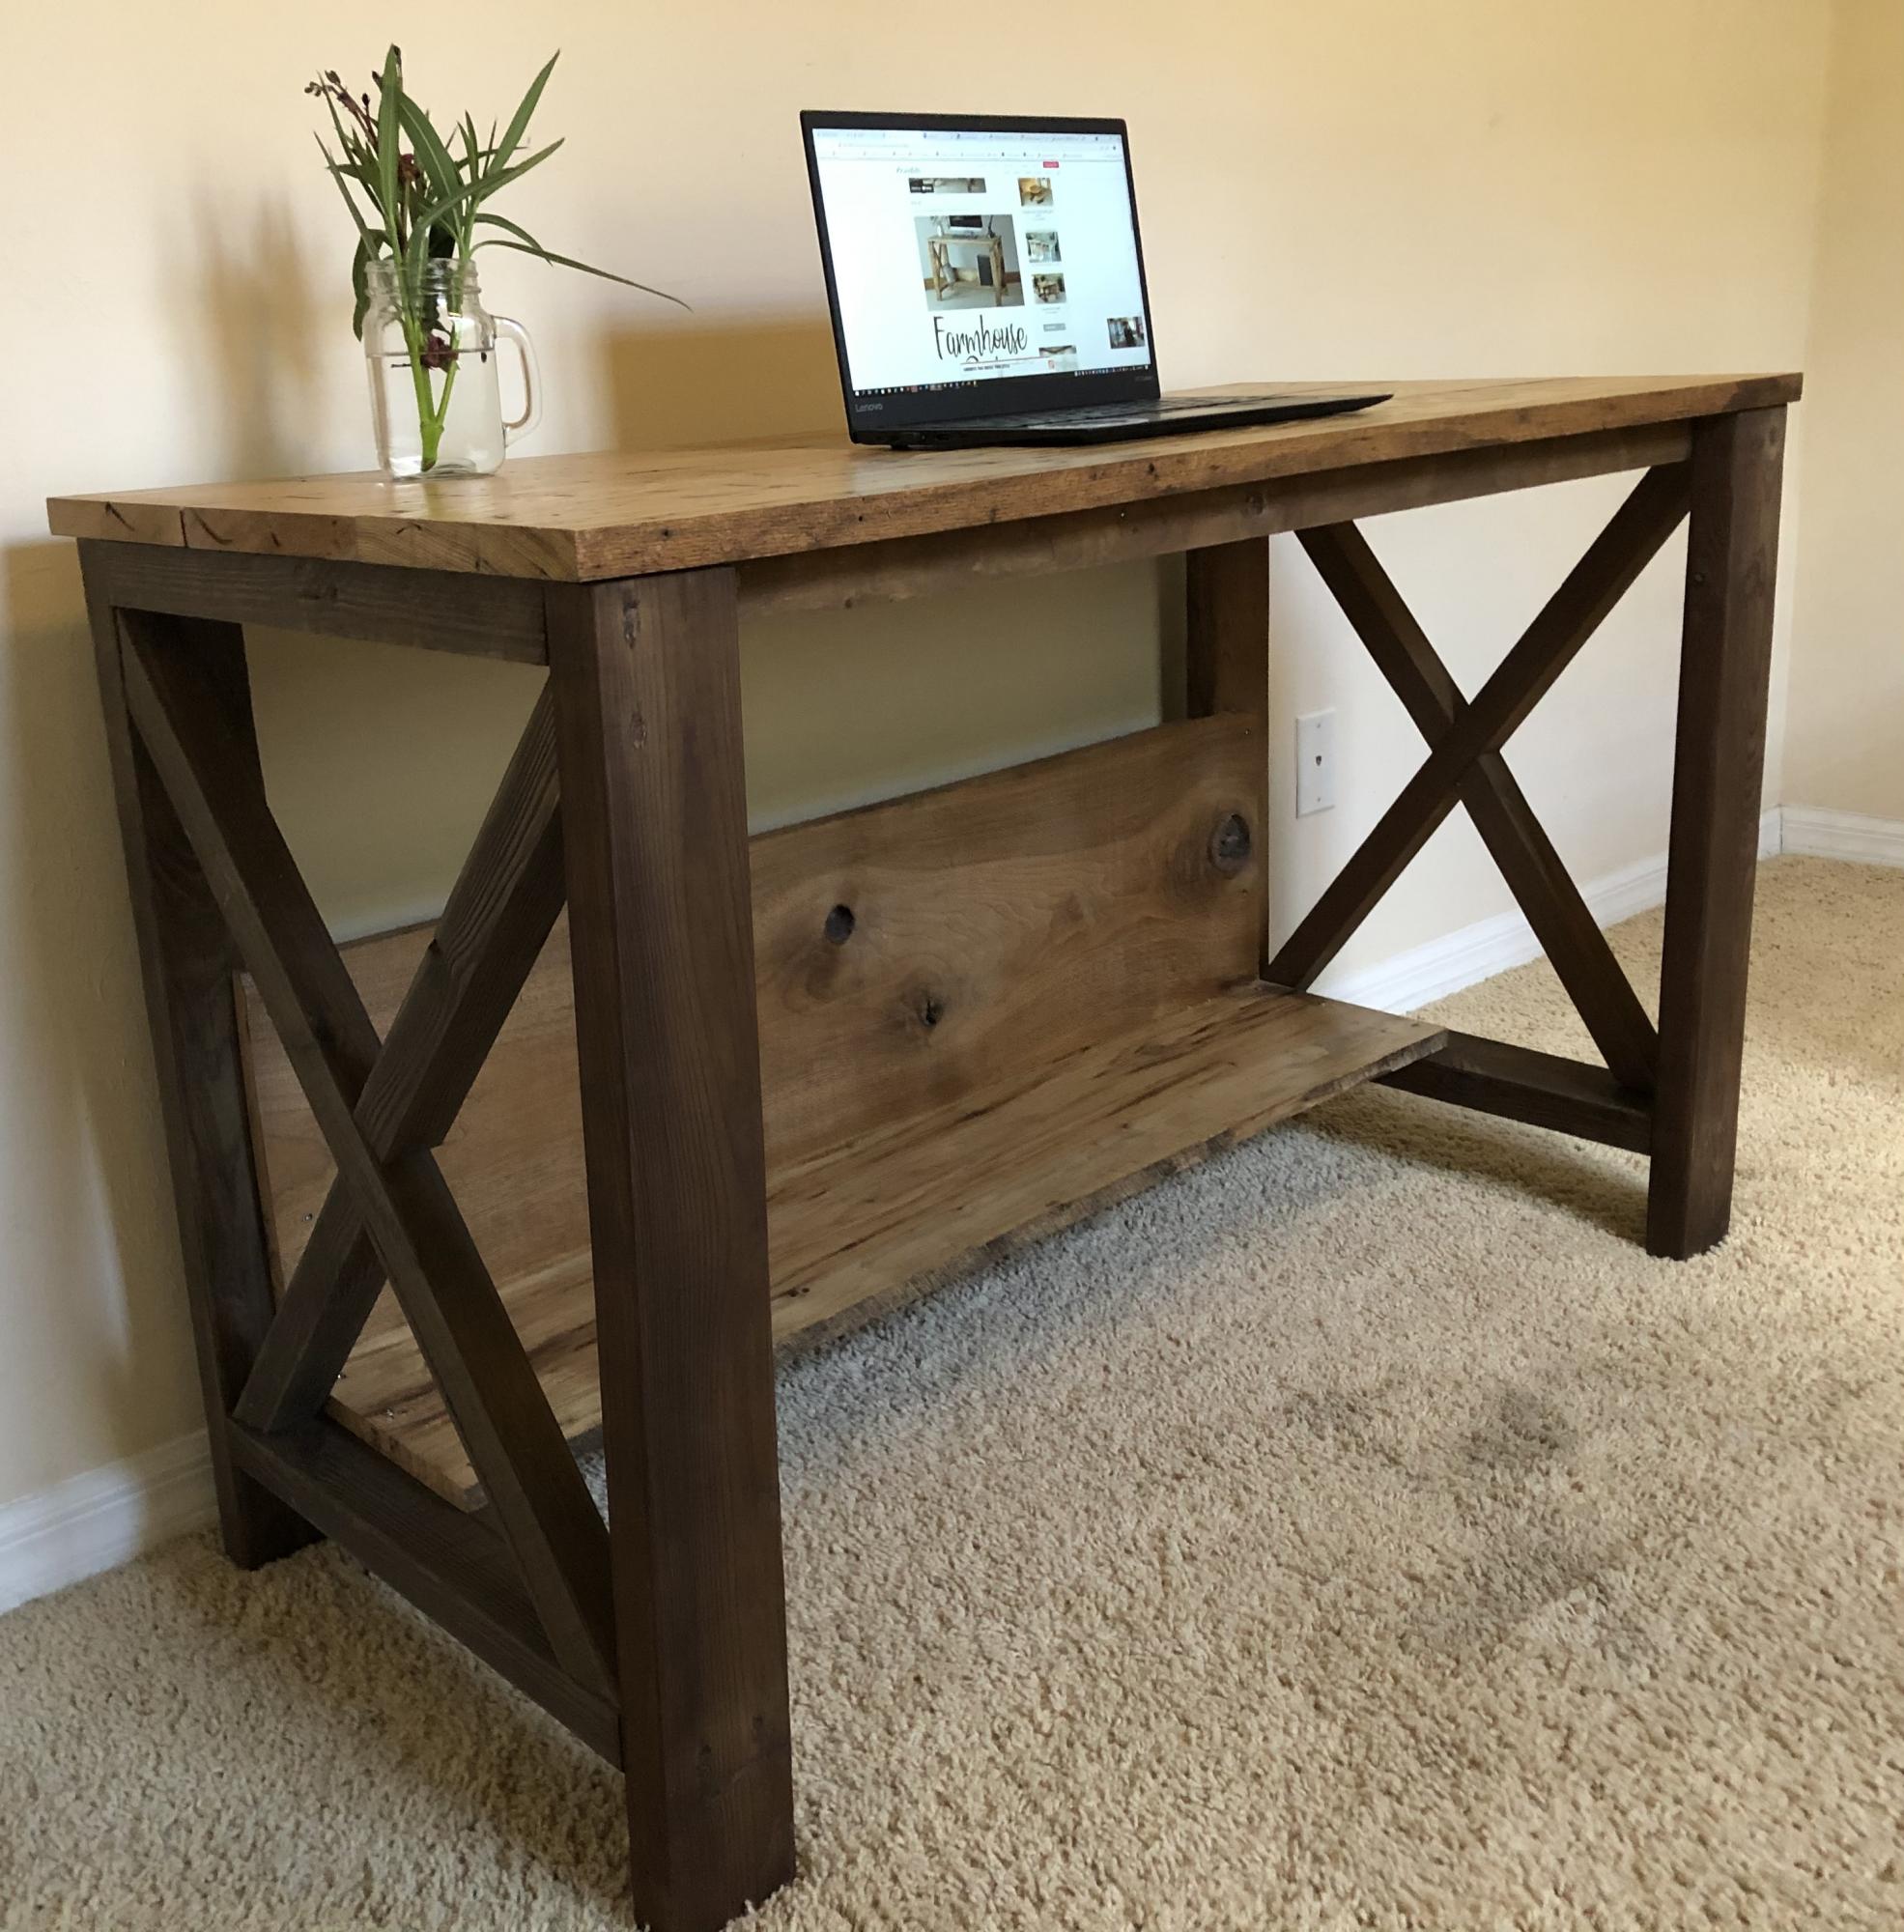
I just completed my first build (#AnaWhiteFarmhouseDesk). It has a ton of mistakes, but they are my mistakes to learn from.
1. Measure twice cut once not measure once cuss twice.
2. Cutting 2x4s in half does not make a store bought 2x2. Which is really 1 1/2 x 1 1/2. Who determined that we would measure wood (used in carpentry which requires very precise measurements) and just round up? Awwe, they'll figure it out!
3. Steelwool & vinegar stain with a black tea conditioner provide a beautiful aged wood appearance, but when using different types of wood it is nearly impossible to match (maybe even store bought stains are like that, too.)
4. When your 95 yr old grandfather (how freakin' cool is it that I have a 95 yr old grandfather... With a planer no less) tells you to catch the "wormy Chestnut planks" on the other side (okay... I'm bragging about getting my hands on wormy Chestnut for my desk top) remember to bring you own PPE because at 95 he doesn't require ear protection and doesn't give a frog's fat a$# if sawdust shoots in your eyes & nose... What's the problem???? He never had a new pair of shoes until he was in the military serving in world war 2 so what's a little sawdust?
5. Sometimes you just need to ask for help from your trusty uncle! Thanks to my uncle Nathan (Lord do I love this man!) I finally, with his help, completed the build by assembling the desk top yesterday. I was so afraid of screwing up my gold desk top (aka wormy Chestnut)
6. Mistakes... Do not fear them, but rather embrace them because that is life's playground where learning happens.
7. Learn from others. Thank you Ana White, Woodworking for beginners members FB group and YouTube!
Built from Plan(s)
Finish Used
Steelwool & vinegar stain with a black tea conditioner provide a beautiful aged wood appearance for the body.
Desktop and shelf hardwoods were given a few layers of had rubbed poly.
Desktop and shelf hardwoods were given a few layers of had rubbed poly.
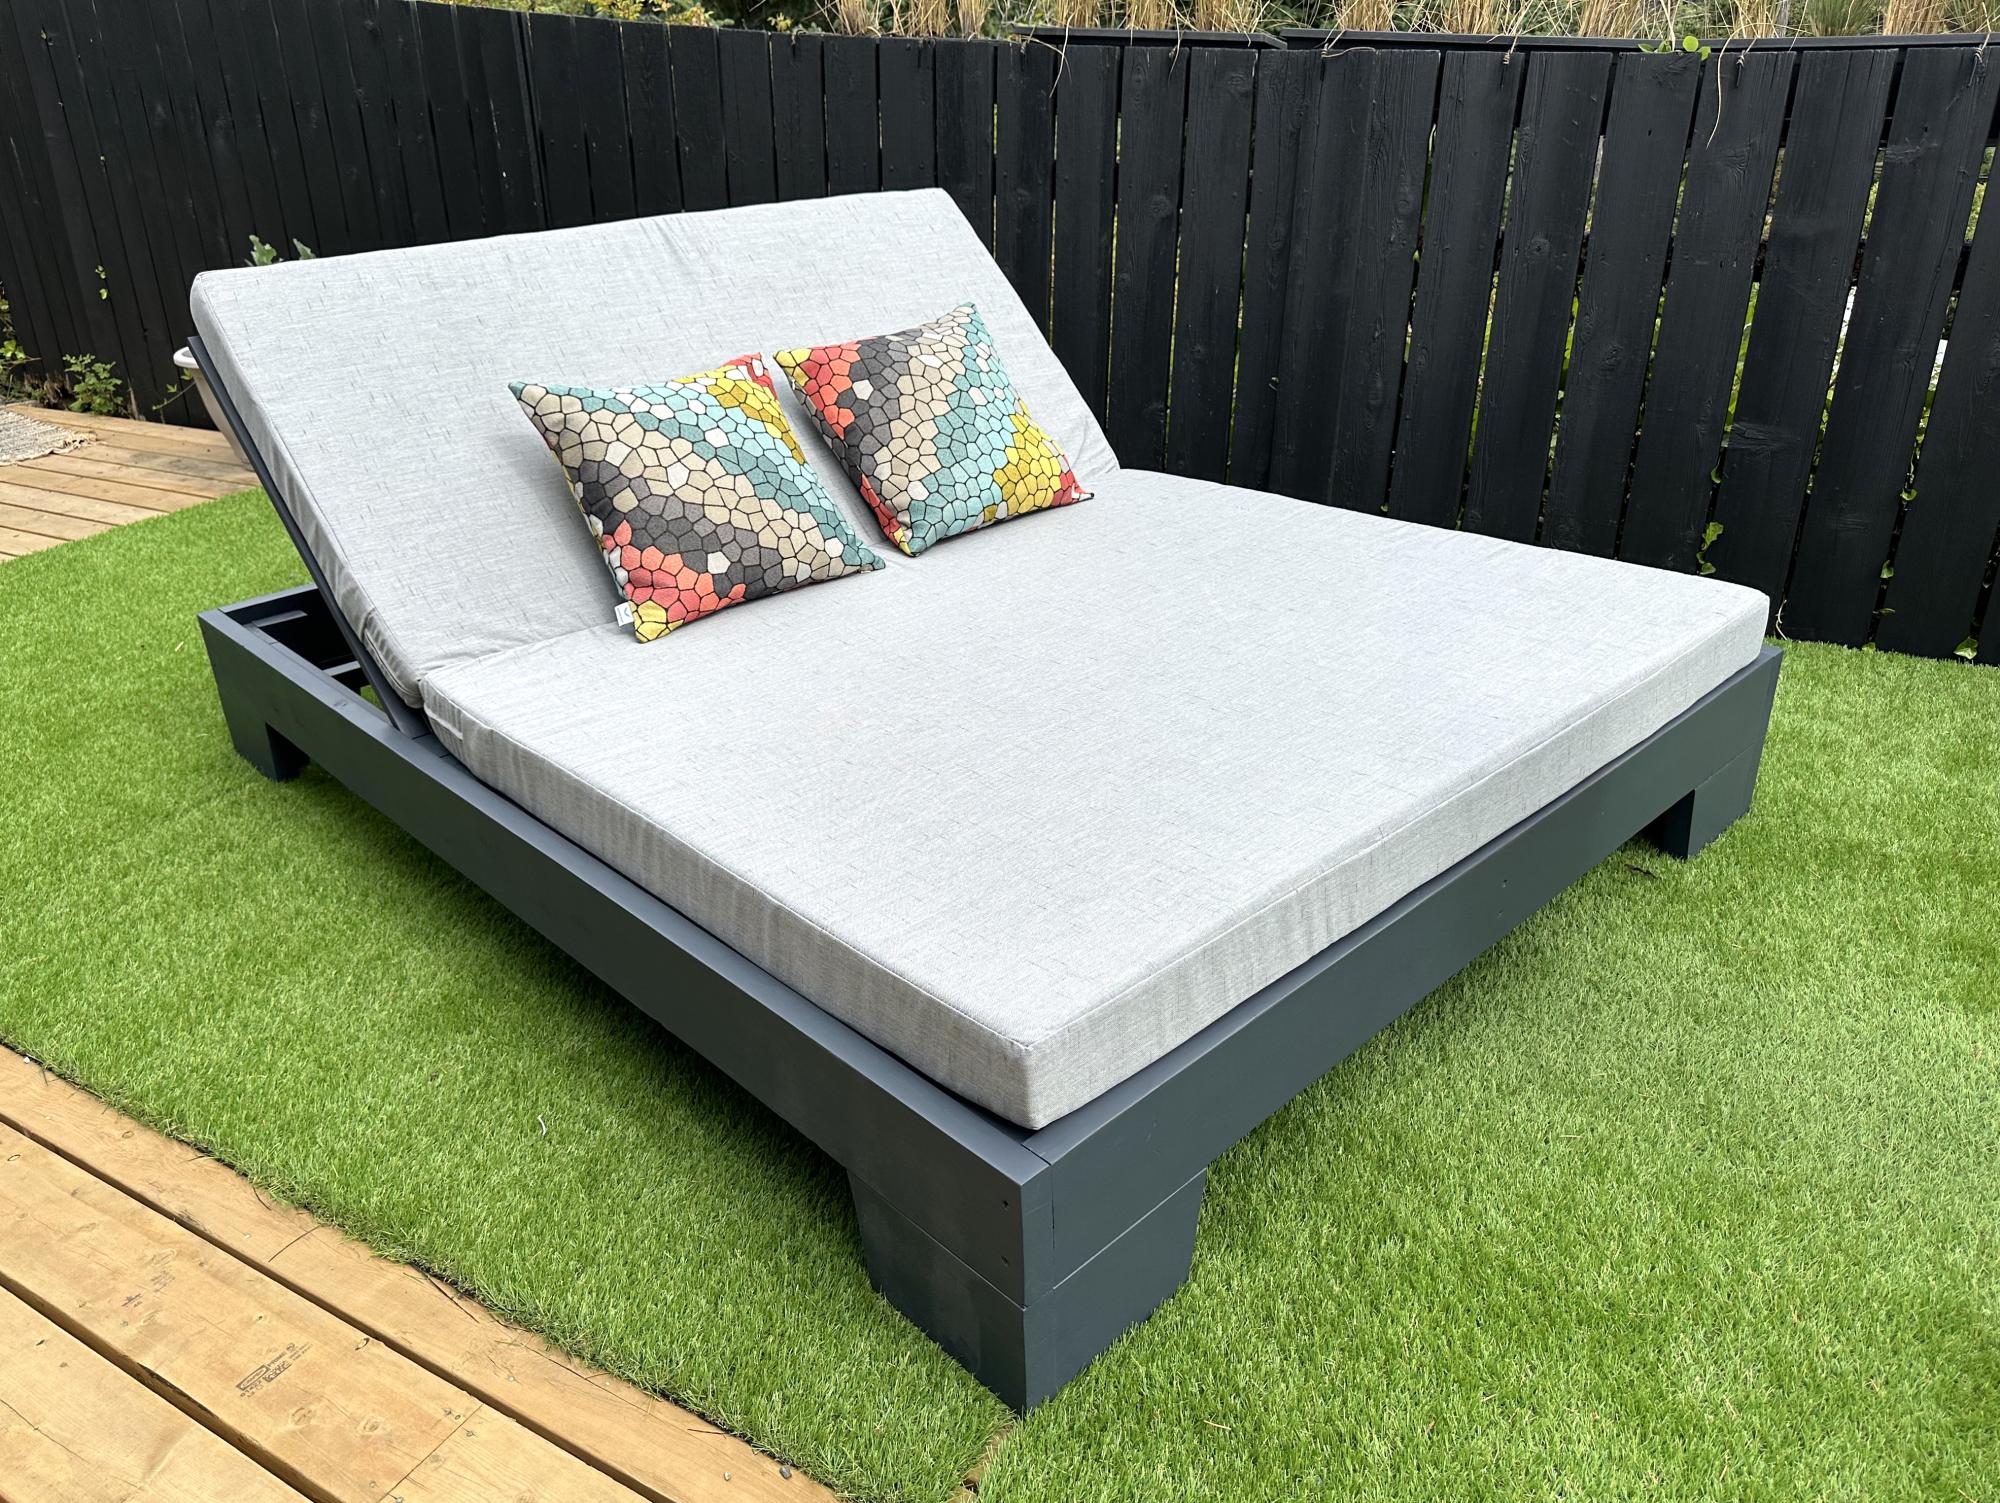
L Shaped Patio Couch

One day project with hubby! Wanted a wood set, but couldn’t find a reasonable price. Bought tools, wood, supplies, and cushions for under the cost of one online!
Built from Plan(s)
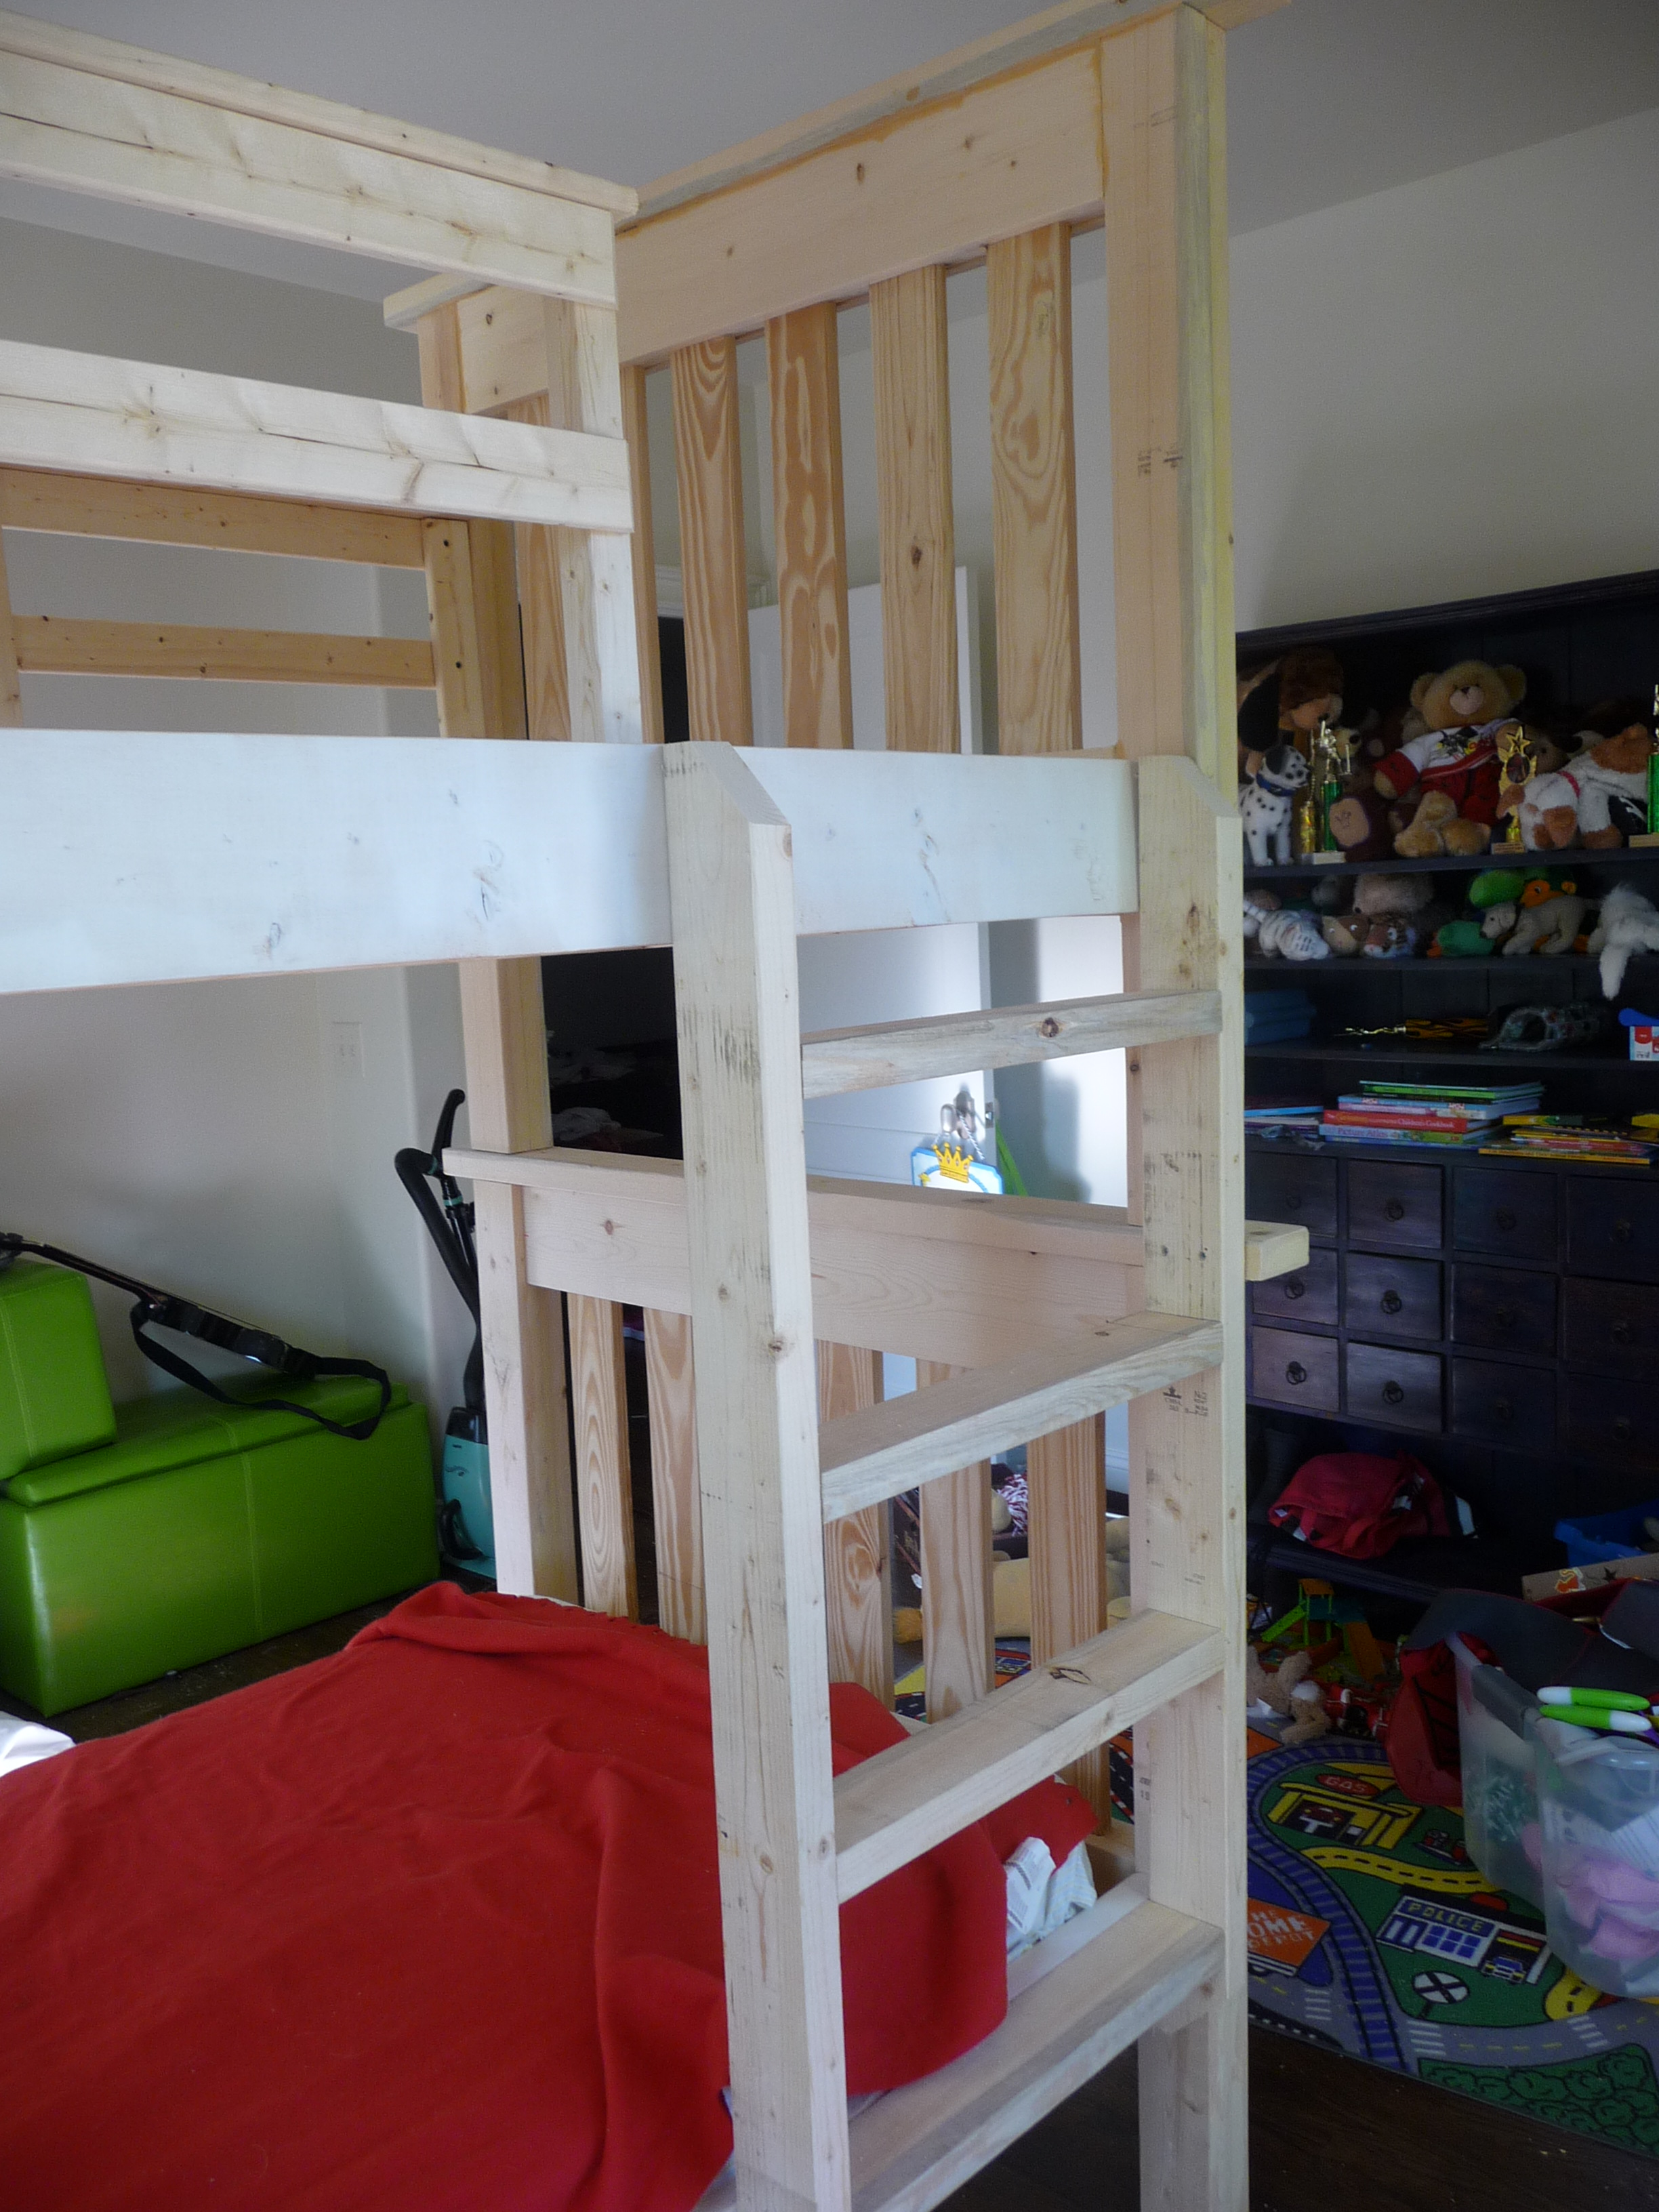
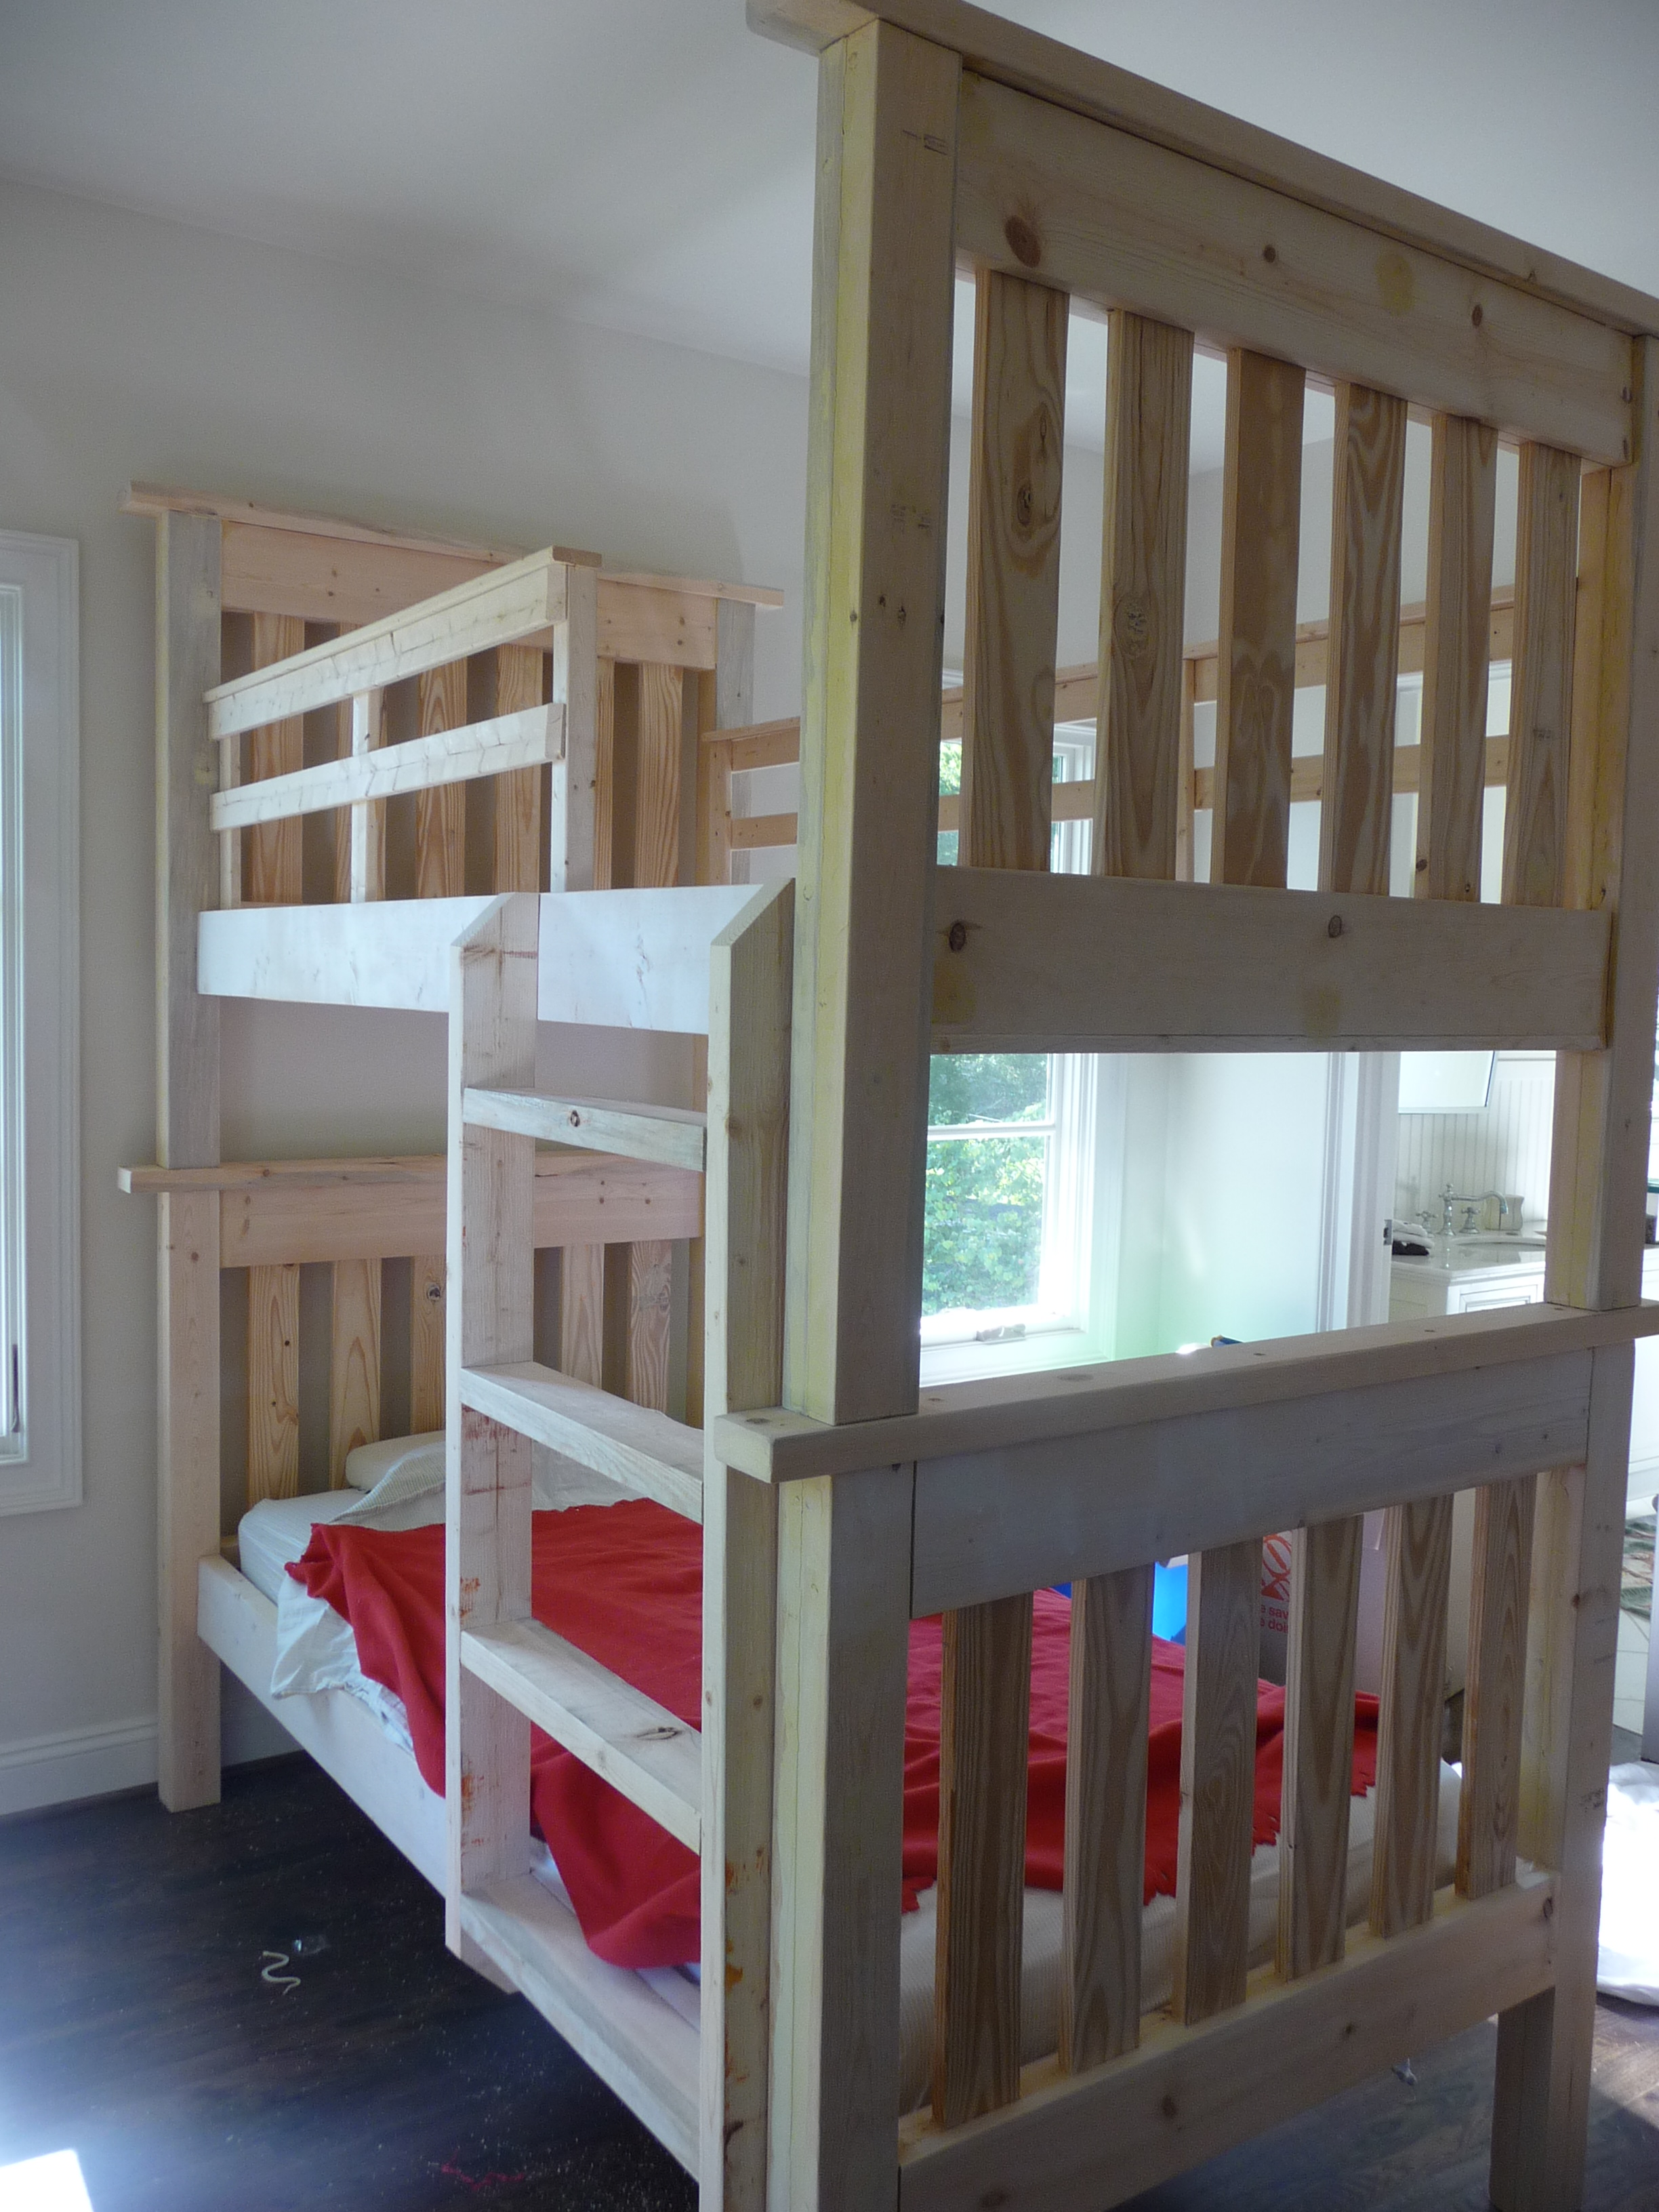
Simple Bunk Beds - My First "Ana" Project!!
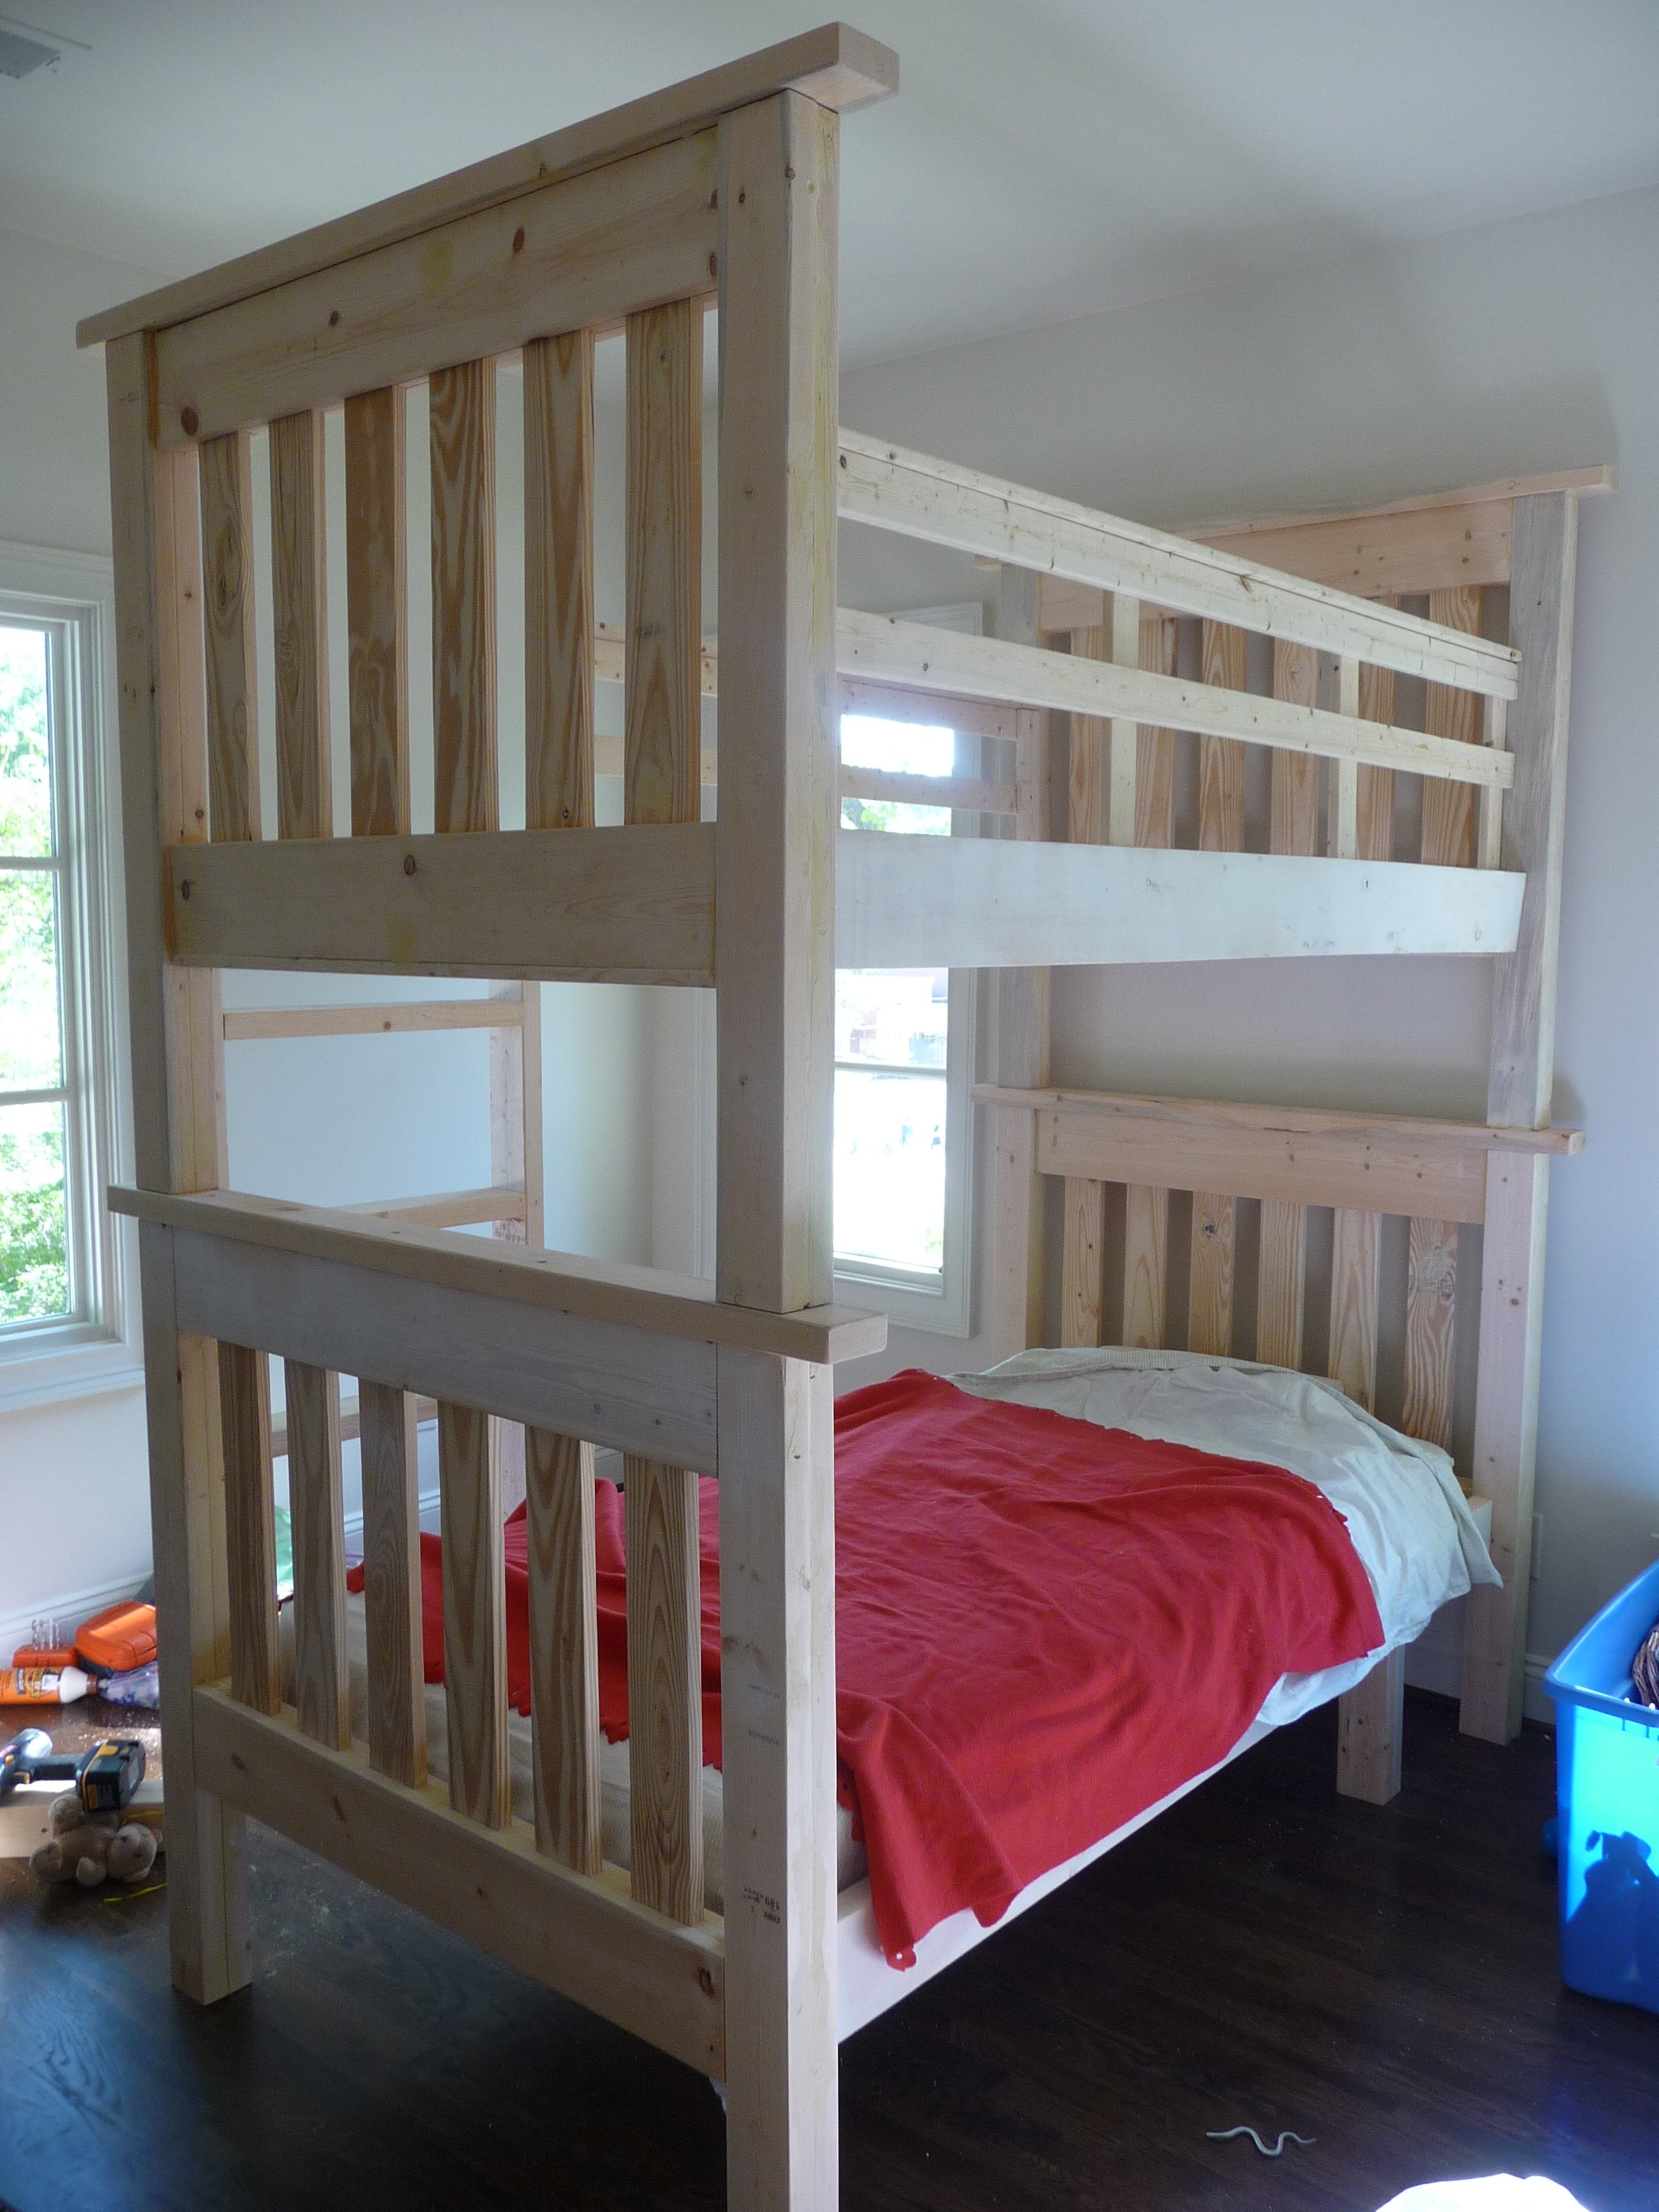
I made the bunk beds from the simple bed plan, following tips from others who turned them into bunks. Instead of headboards on bottom and footboards on top, I used all headboards to add height, and made the posts a little longer so that an adult can sit up on the bottom bunk to read during bedtime. (the room has 9' ceilings) I used 2x4s glued and screwed together, as I could not find 4x4 non-pt posts. I made the ladder out of scrap 2x4s and the railings from scrap 1x3s. I did as suggested and attached the bottom header to the bottom of the top bed, which made it easy to attach. This bed is super sturdy! It will be painted one of these days!!
Built from Plan(s)
Estimated Cost
$200
Estimated Time Investment
Weekend Project (10-20 Hours)
Finish Used
None yet - will be painted!
Recommended Skill Level
Intermediate
An 'On Steroids' version of your idea
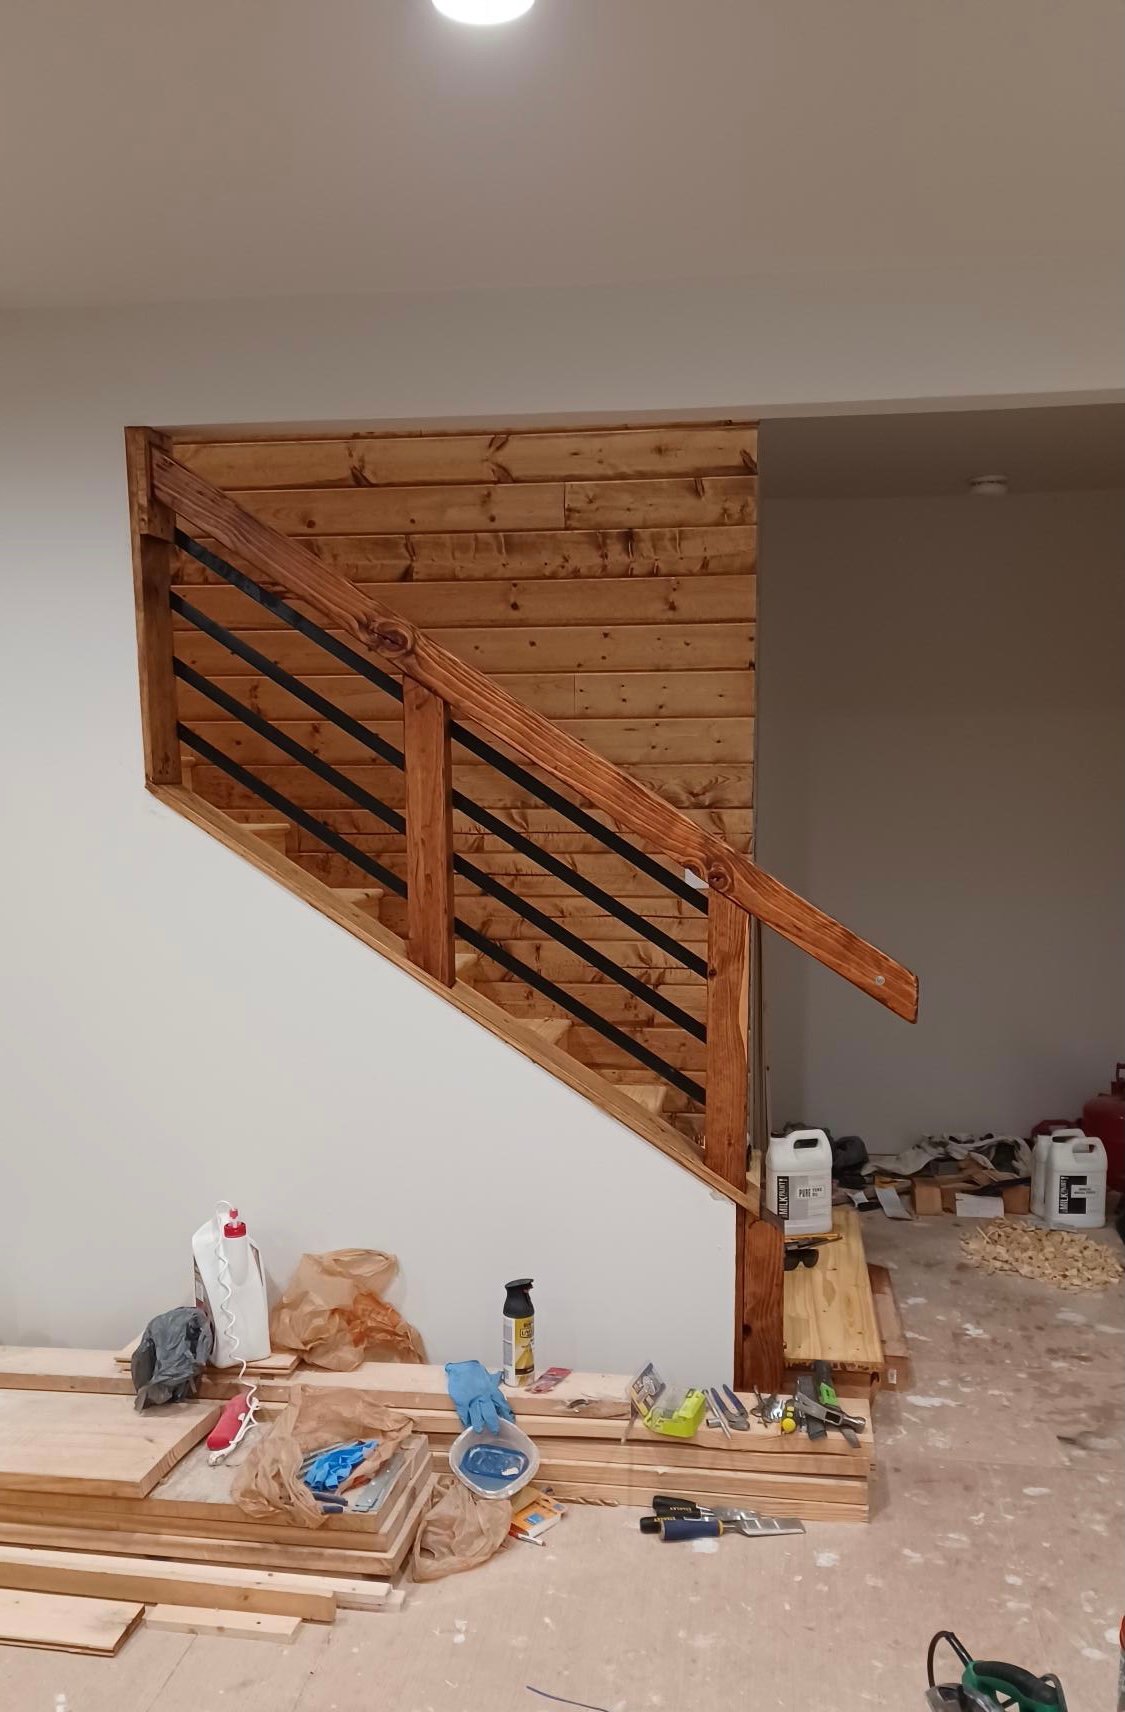
6 years into a complete rebuild of a neglected old farm house built in just 1948. Your website was found after looking for 'Modern Farmhouse' stair rails. The look plays off the original brick chimney stack & the Woodstove it serves. It has turned out to be quite the focal point, which was never it's purpose. Thanks for the inspiration!
Built from Plan(s)
Comments
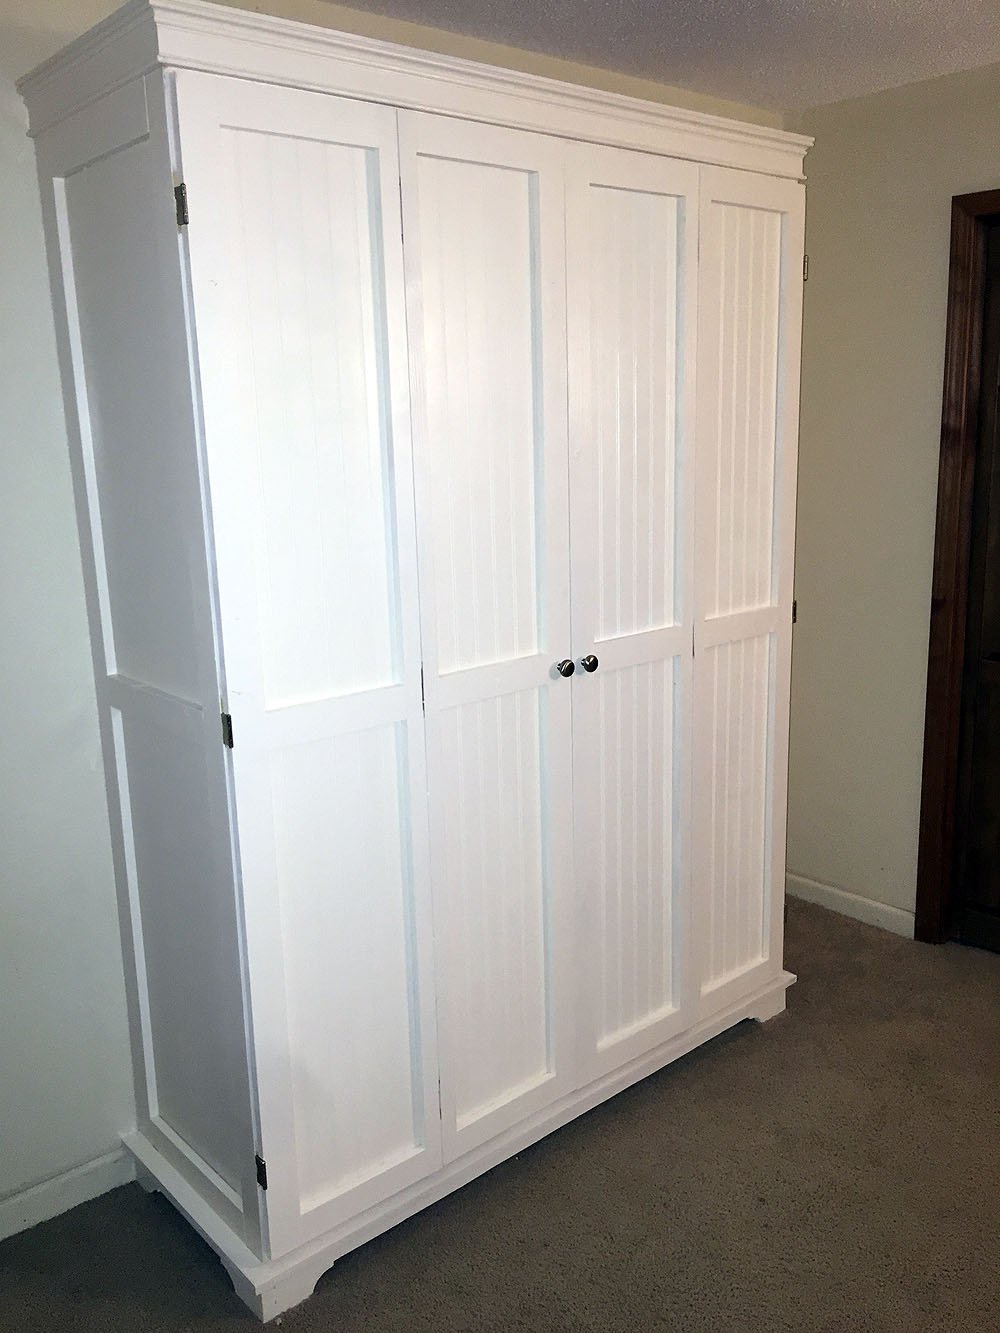
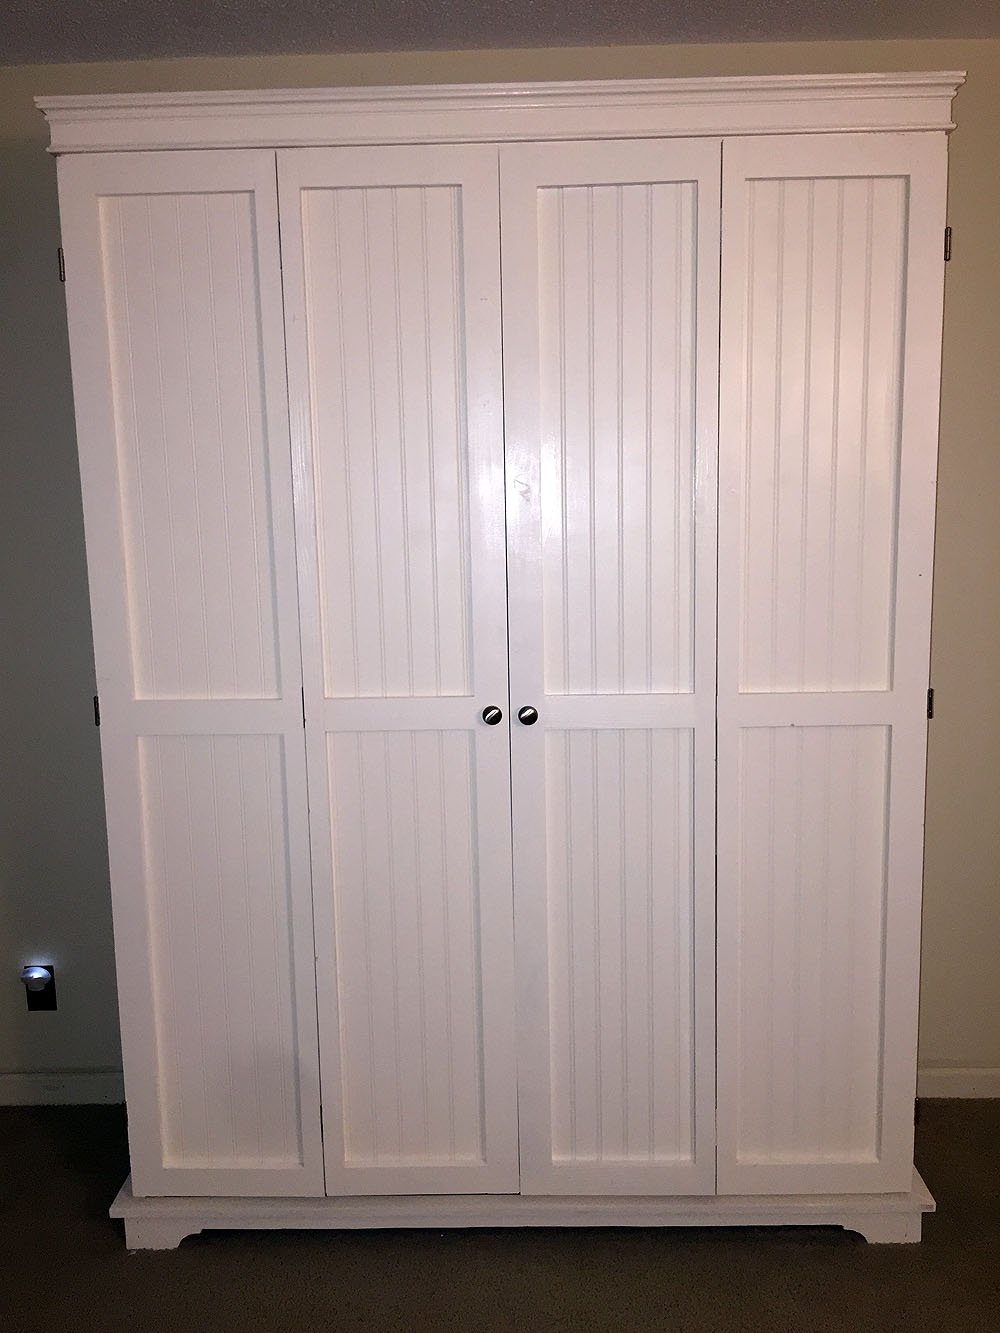
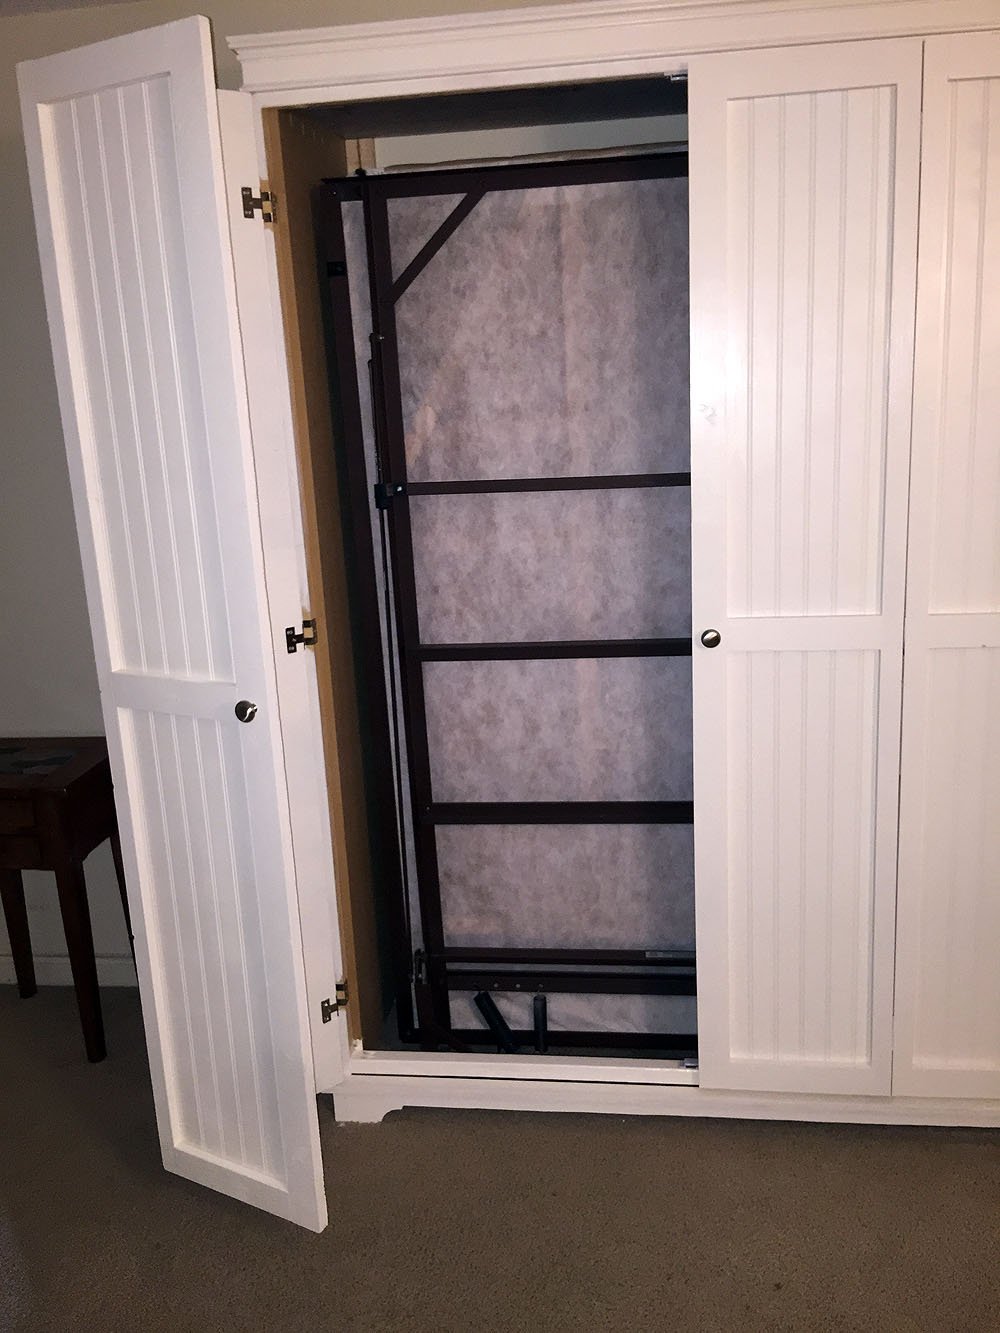
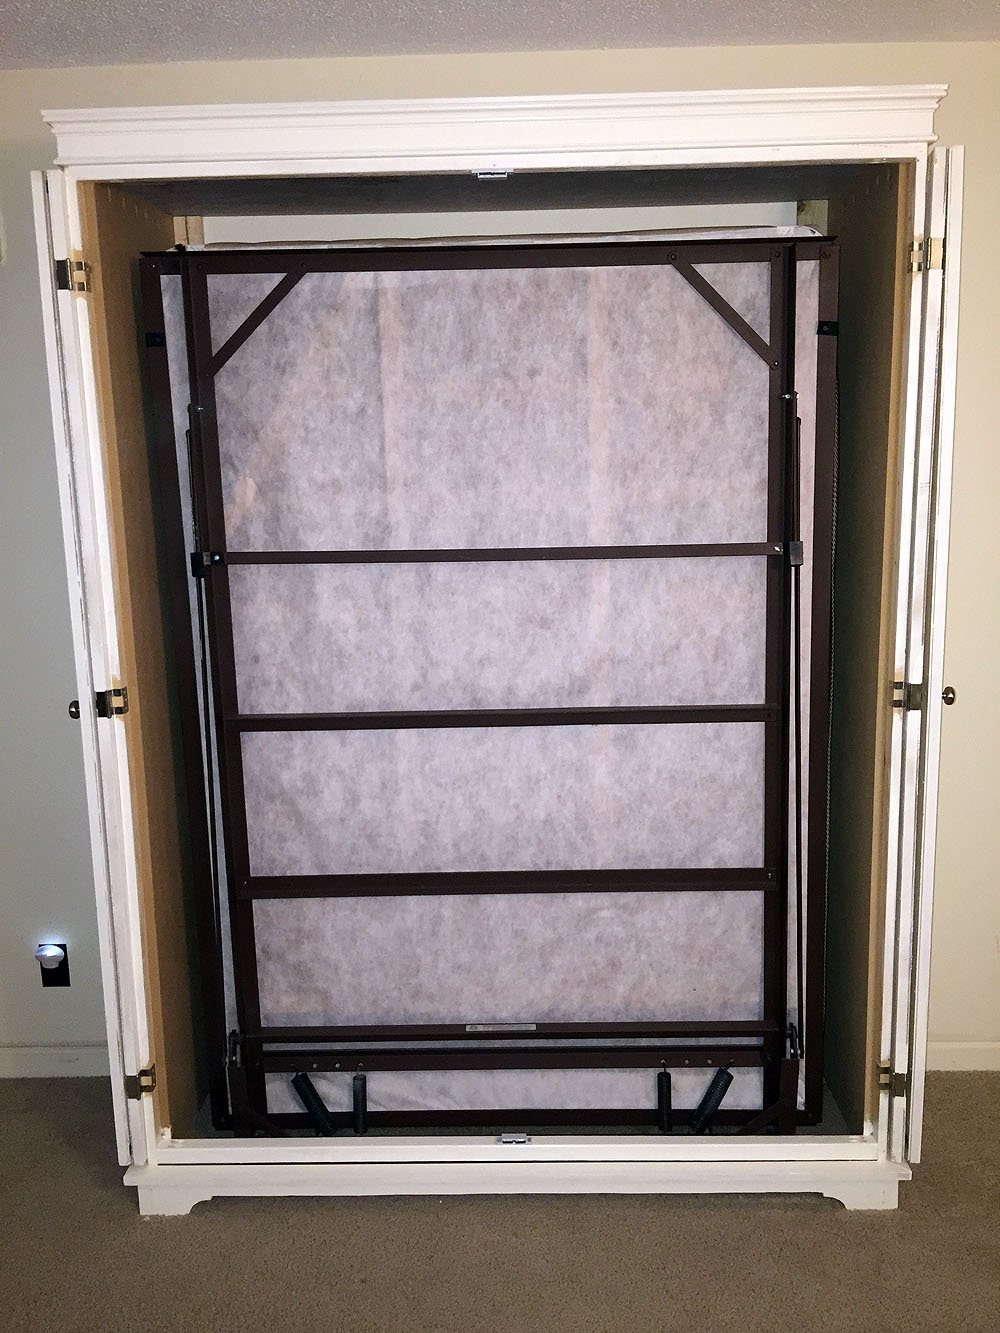
Murphy Bed Cabinet
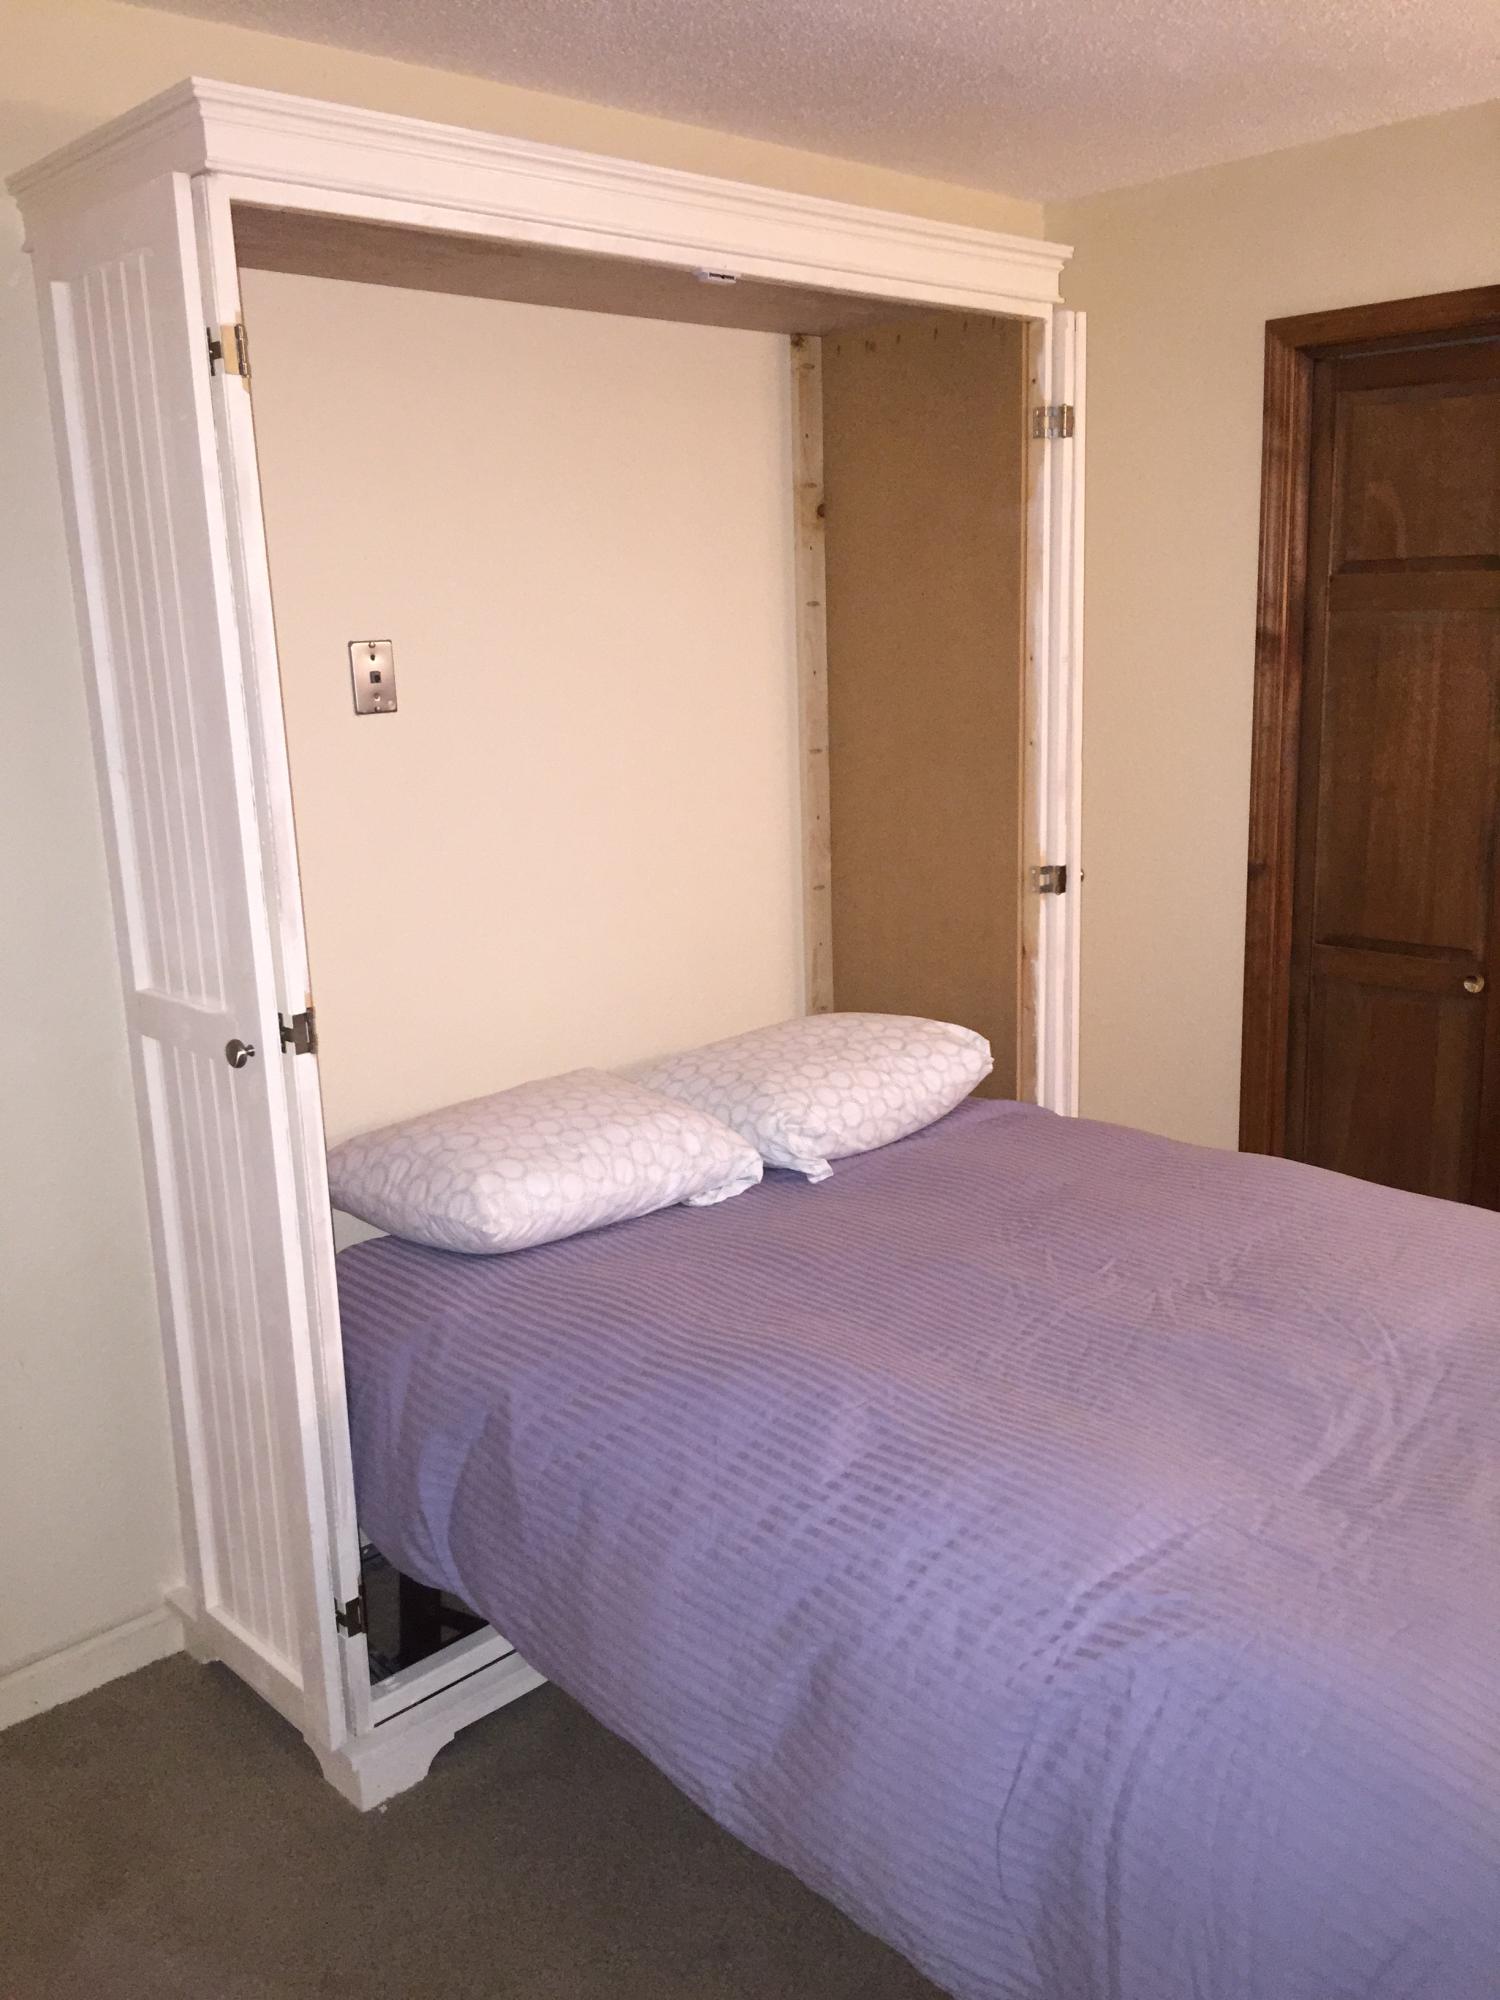
I made this cabinet to house my murphy bed. I used the Toy or TV Armoire plans as a start and adjusted the measurements as needed.

Built from Plan(s)
Estimated Cost
$250
Estimated Time Investment
Weekend Project (10-20 Hours)
Finish Used
Painted White
Recommended Skill Level
Beginner
Comments
Tue, 06/02/2020 - 16:22
Door question
Do you have plans or details about the door materials/ hinges?
Thu, 12/03/2015 - 07:30
Murphy Hardware
This was an actual "original murphy bed" that i found on craigslist for $100
Wed, 02/02/2022 - 02:55
Awesome! What style hinges…
Awesome! What style hinges did you use to make the doors fold back flush with the sides?
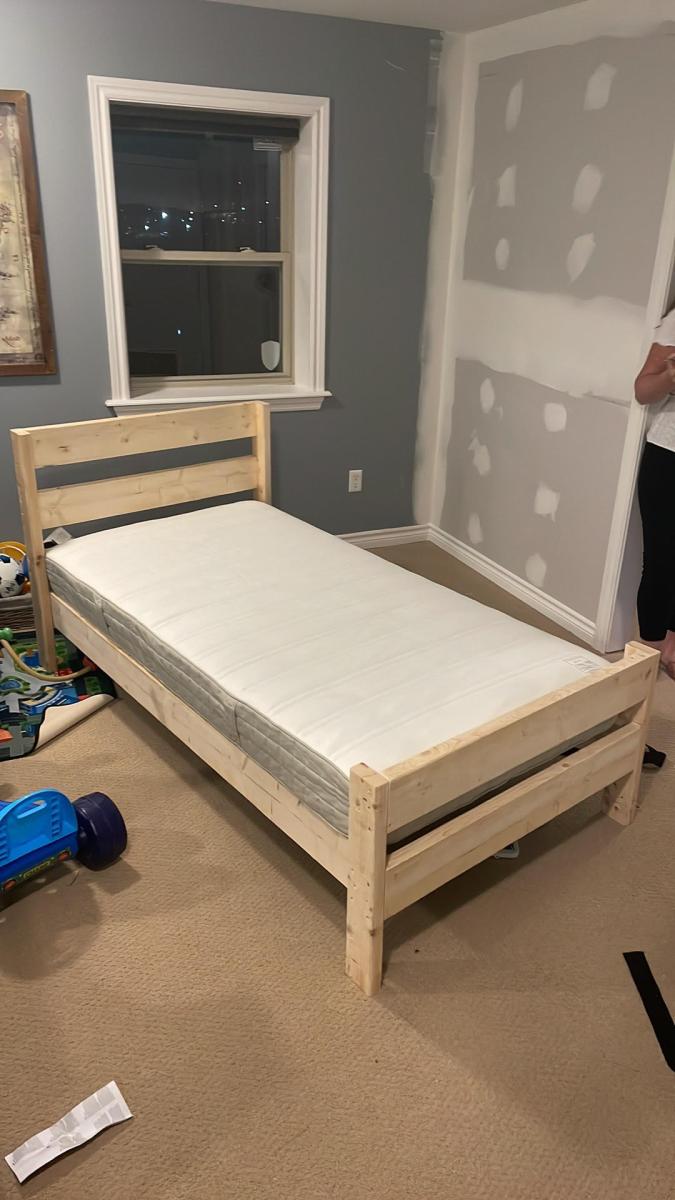
Essential Twin Bed Frame
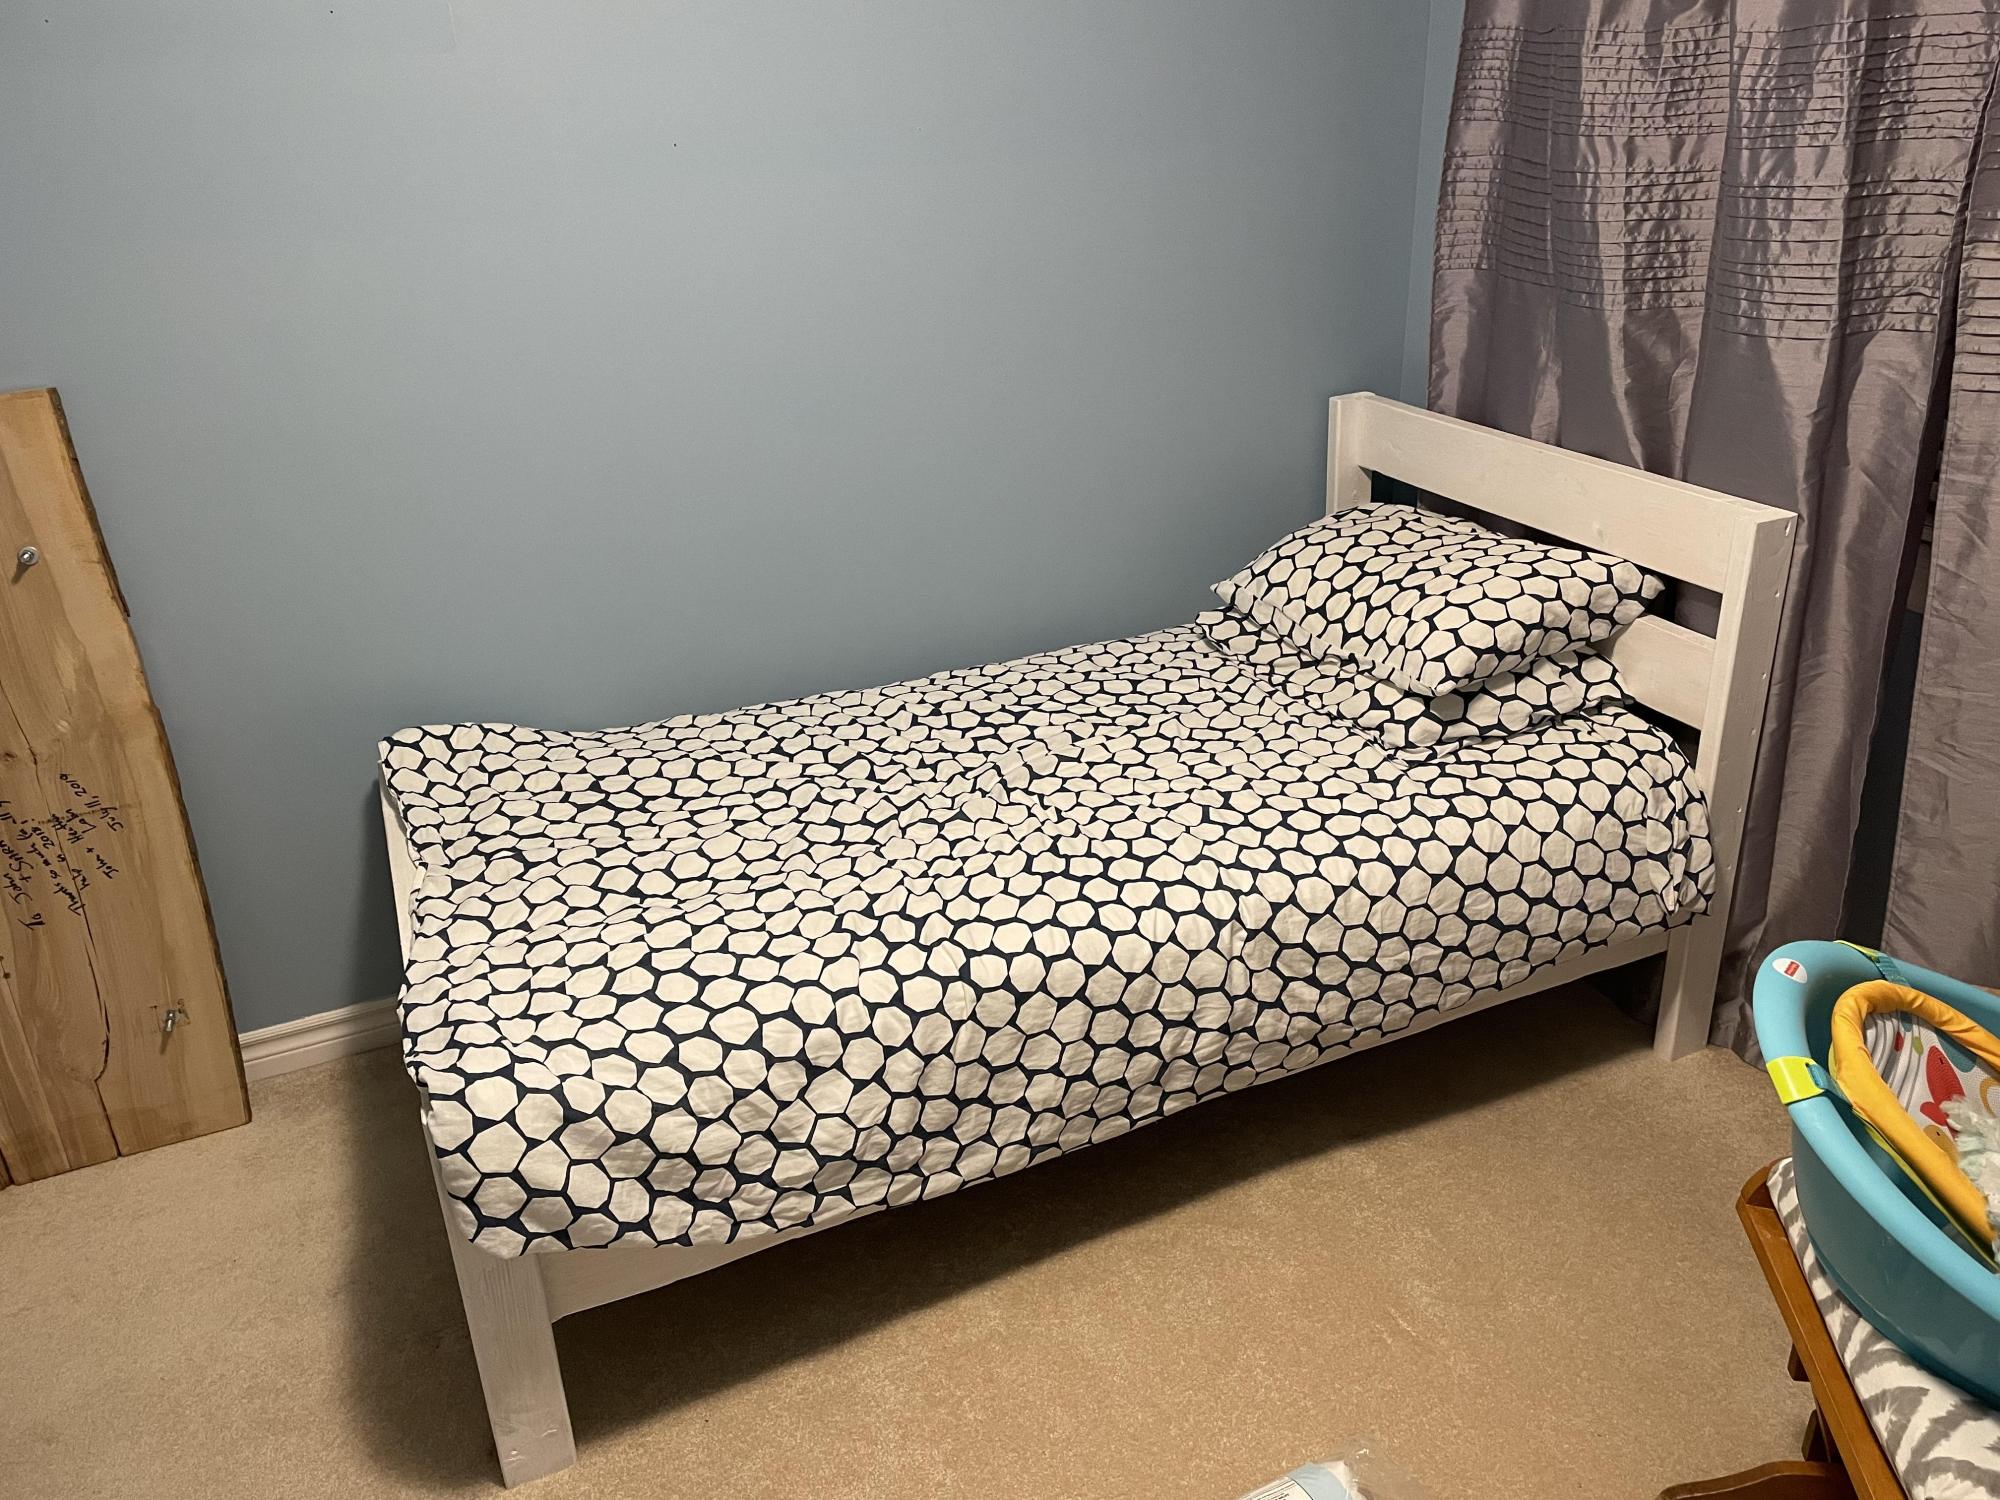
I’m not a handy man, but when I saw the high prices for shoddy twin bed frames in stores, I decided to do my own using your plans. This is our 3 year olds first real bed and he loves it :)
Submitted via email user John from Nova Scotia
Built from Plan(s)
DIY PB William Vanity Sink Base
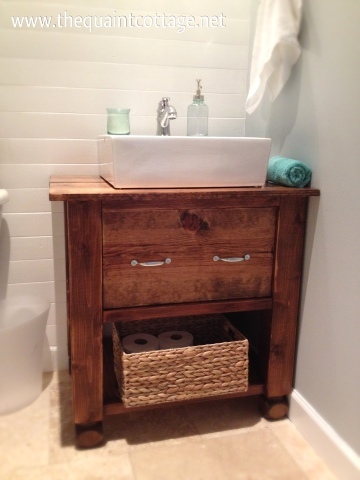
I found the William Vanity on Pottery Barn and loved the look, just not the price. I recreated it with a top sink and a drawer for a fraction of the cost.
Estimated Cost
$70-$100 for wood, stain, screws, etc.
Estimated Time Investment
An Hour or Two (0-2 Hours)
Finish Used
Stained with Early American Stain and water resistant grade poly
Recommended Skill Level
Beginner
Comments
Mon, 01/30/2017 - 12:33
Need Instructions
The link to the instructions for this vanity is no longer valid. Would really love to get the instructions for the vanity.
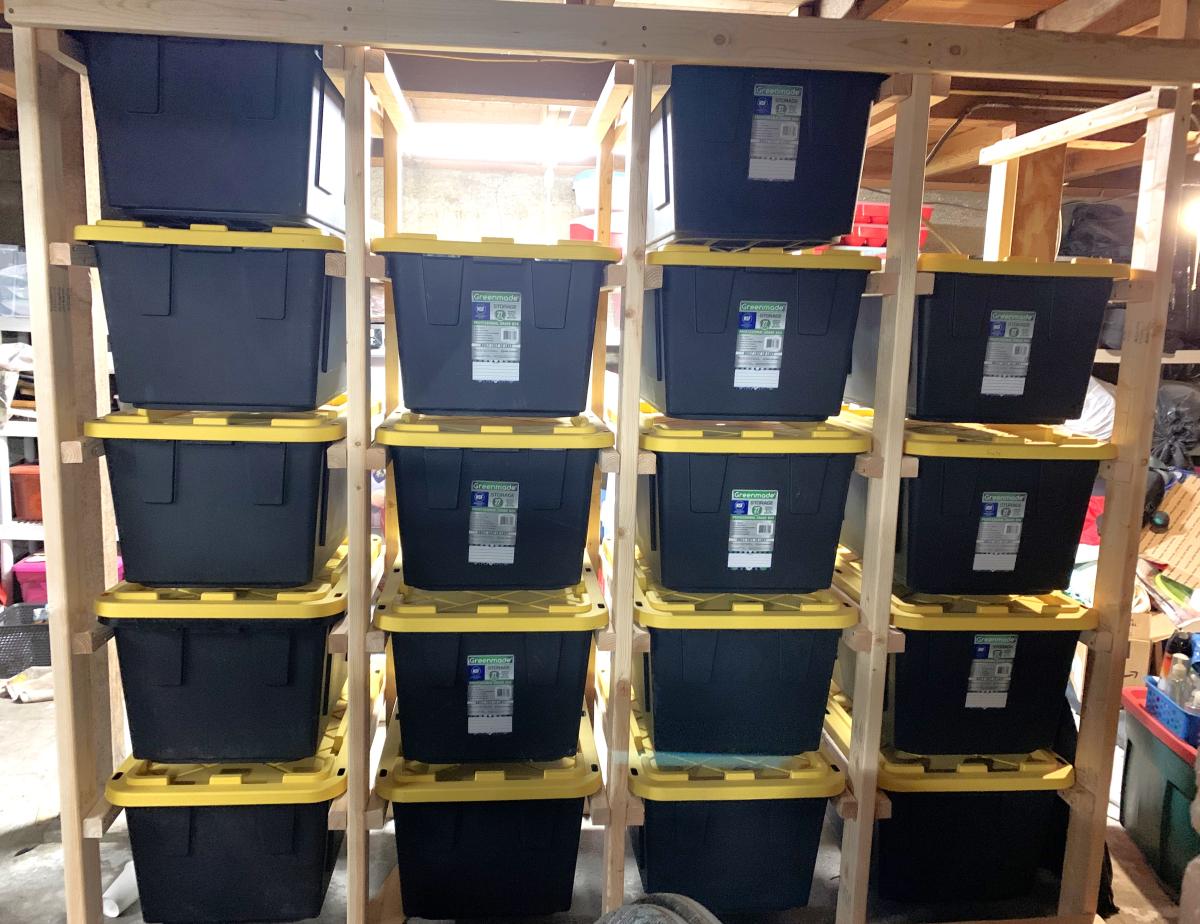
Ladder Tote Storage
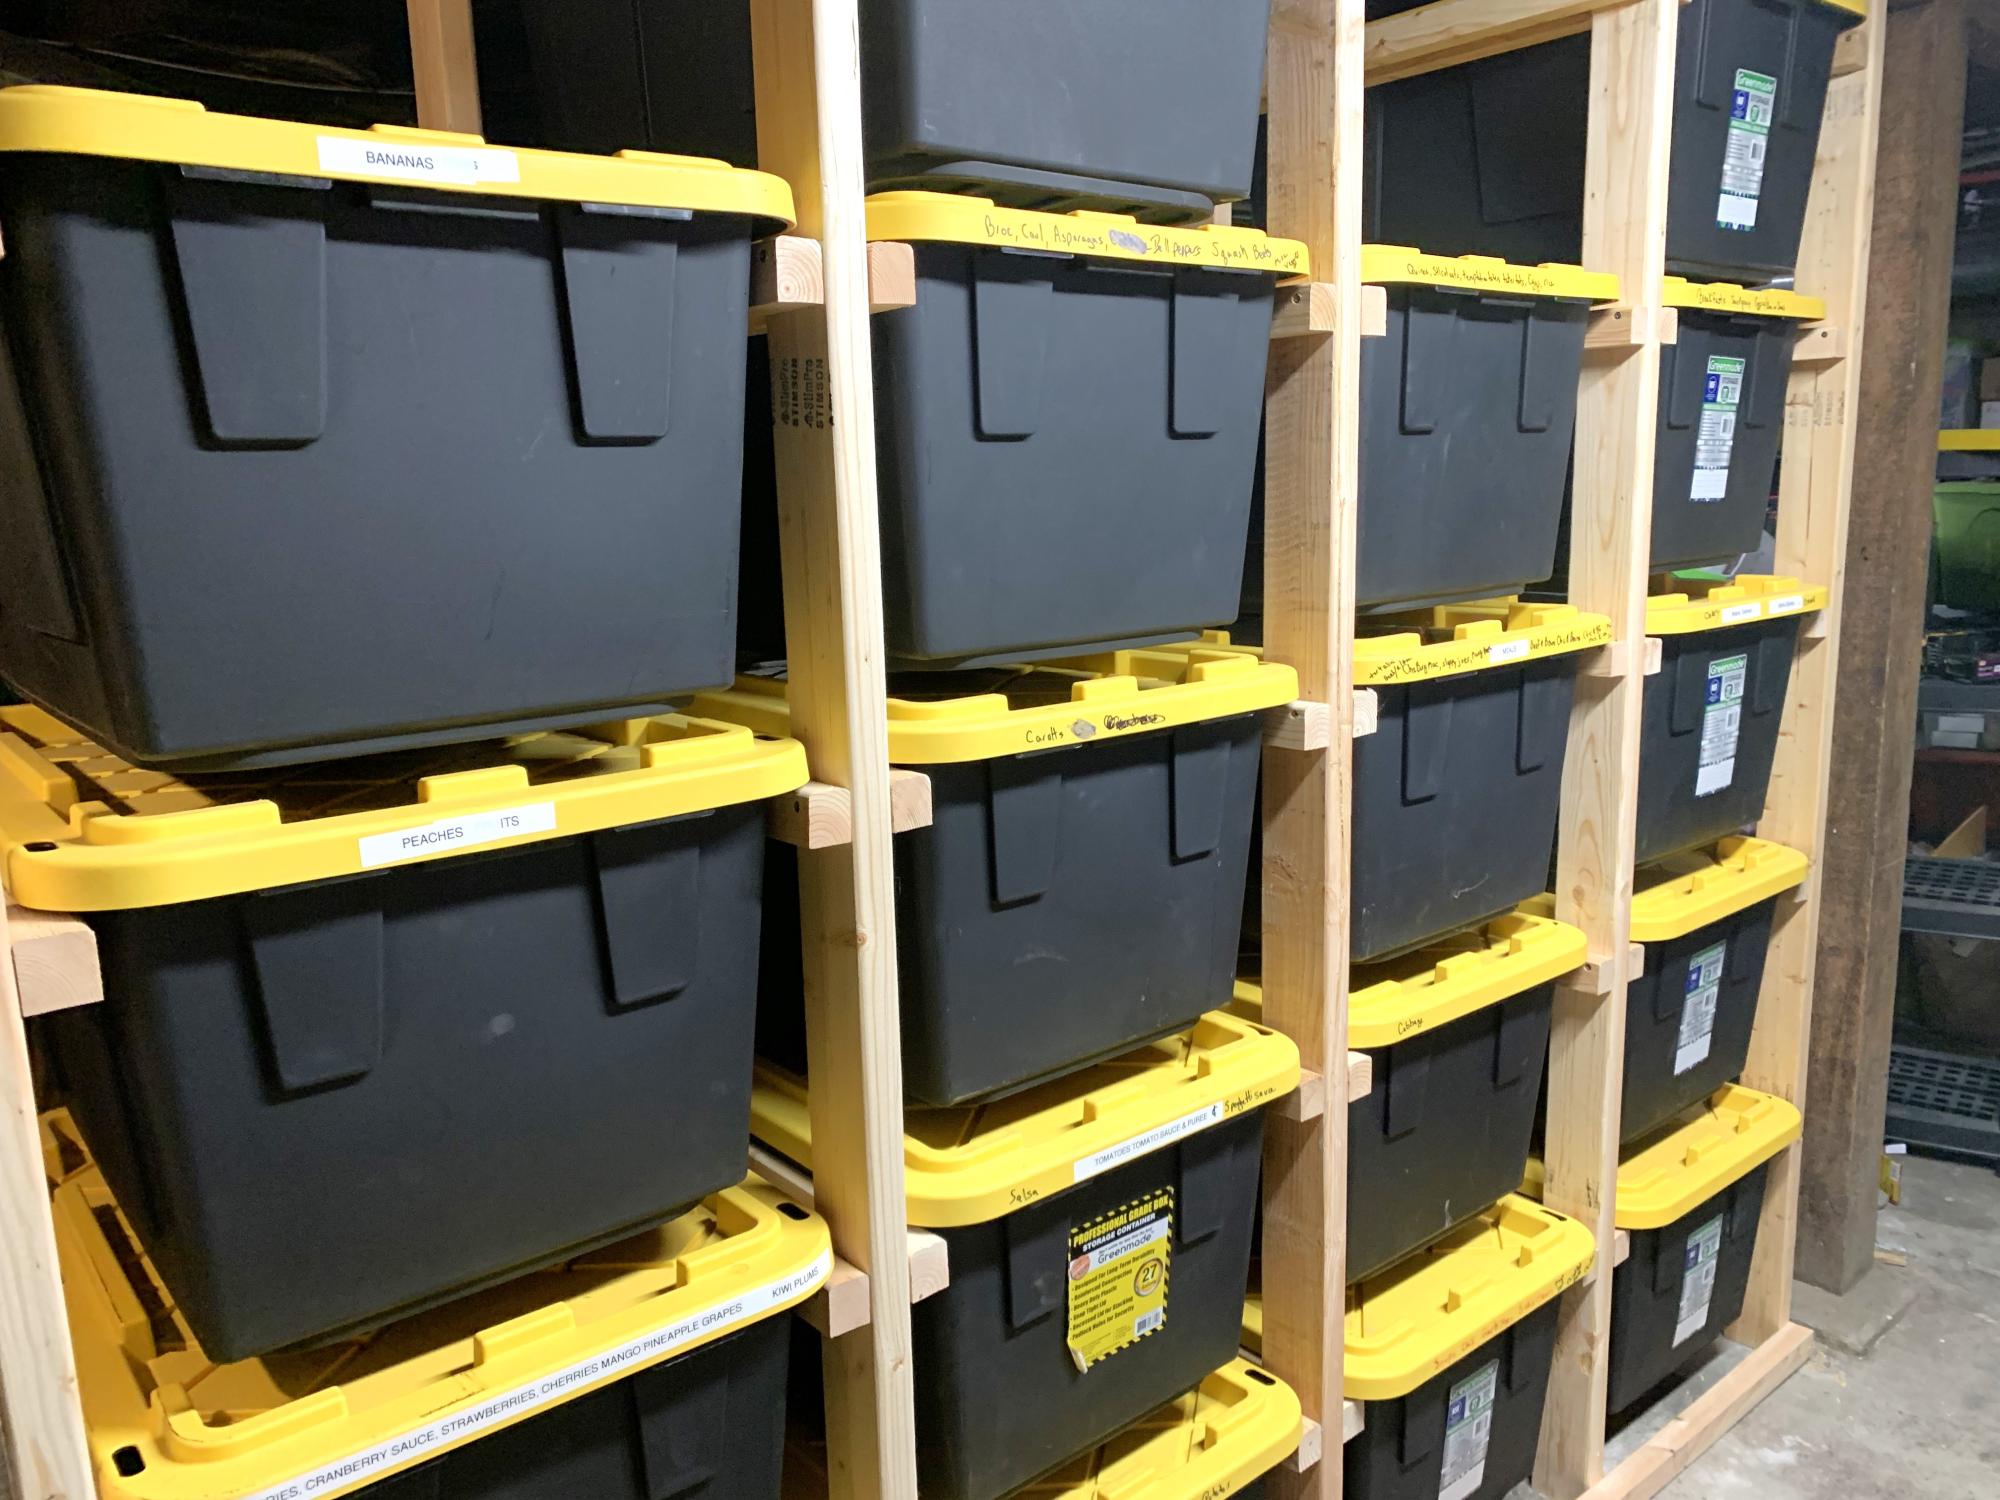
storage for totes - can be made to accommodate any size totes - just adjust the measurements basically it is "ladders " 2x4s for legs 2x2s for "runs" 2x4s across the bottom & top this is in a basement with short ceilings so if you have a taller space you can go taller or you can go shorter.
Built from Plan(s)
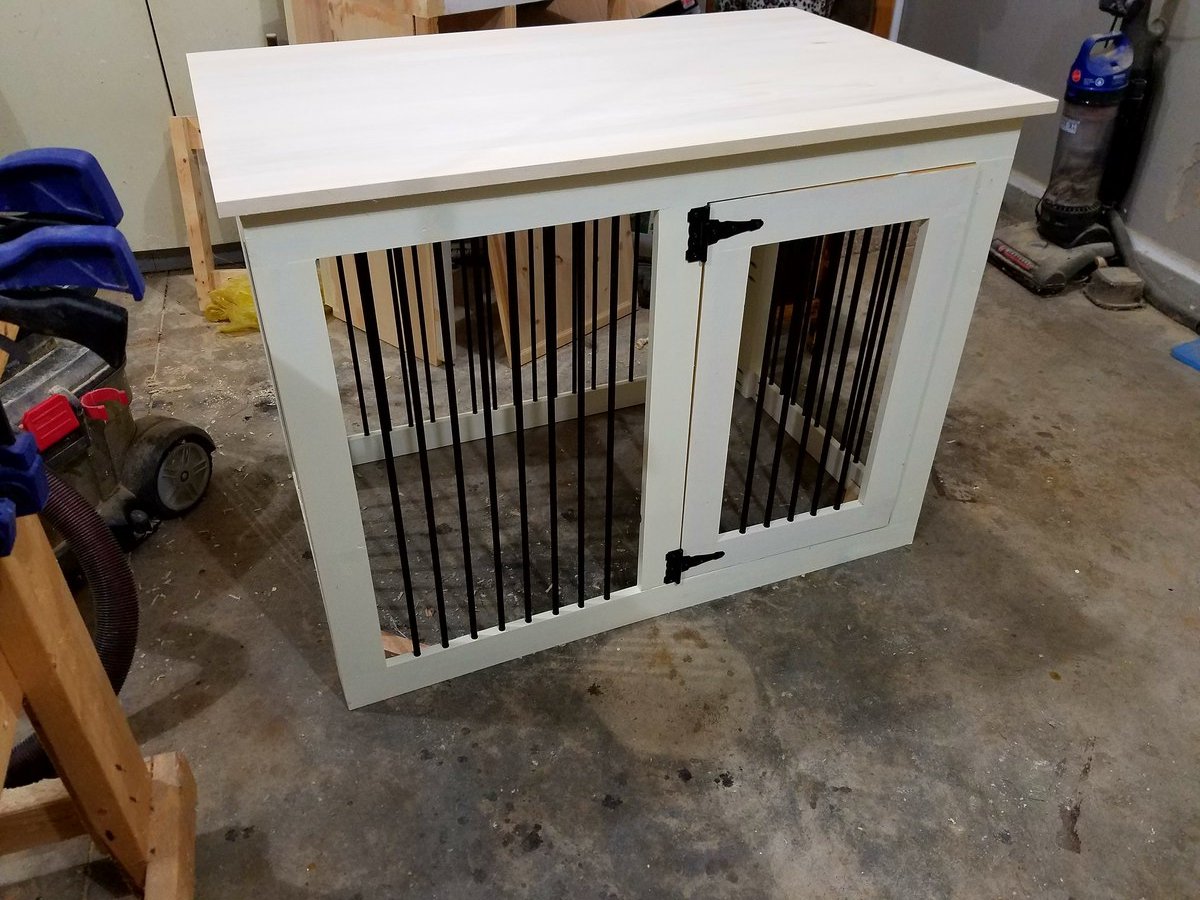
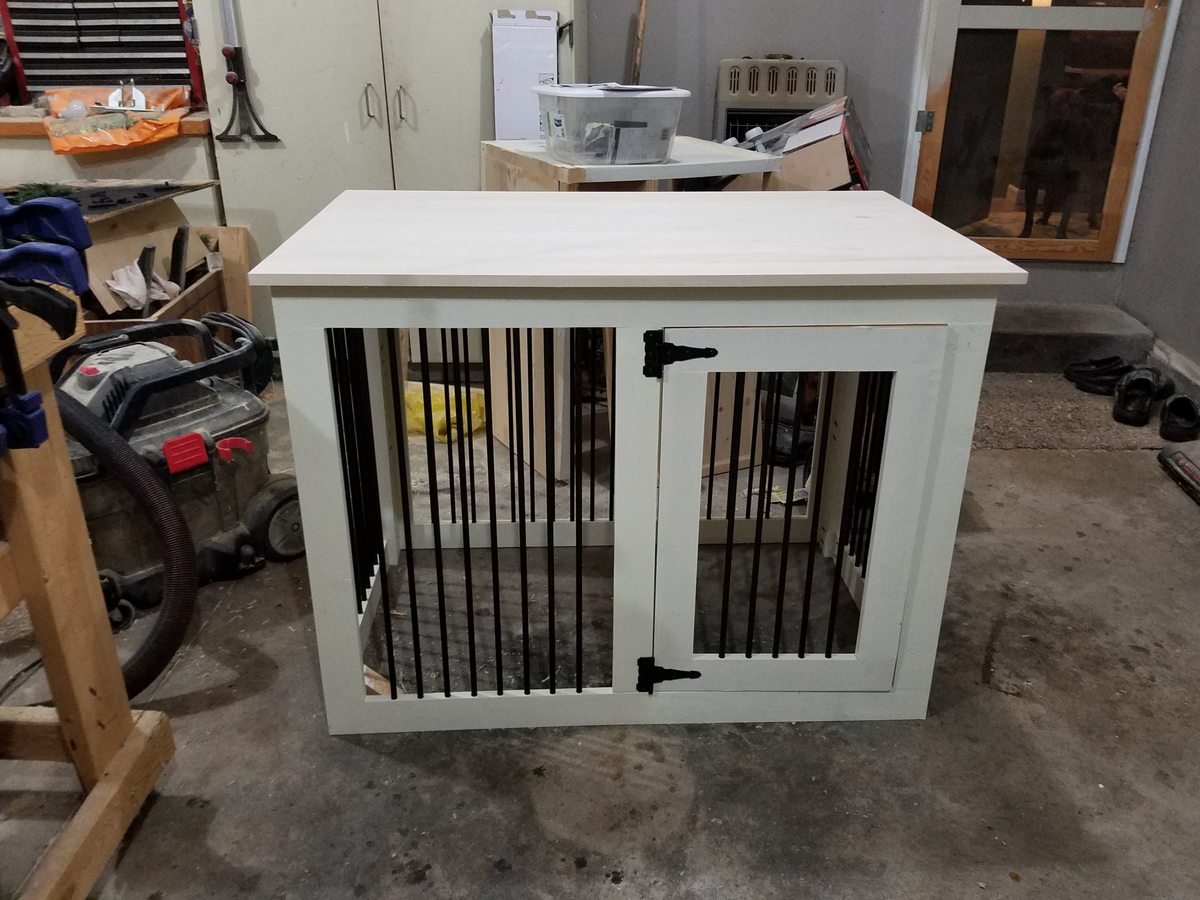
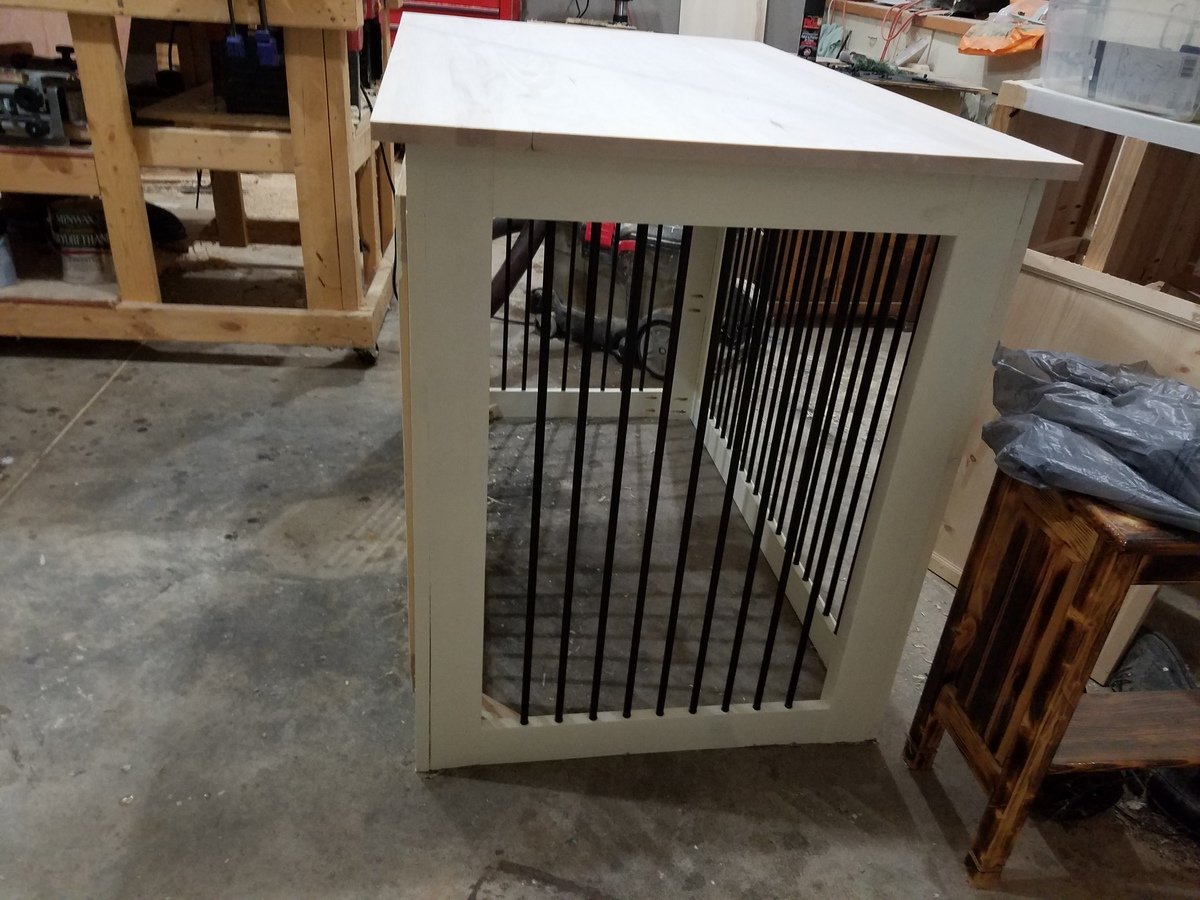
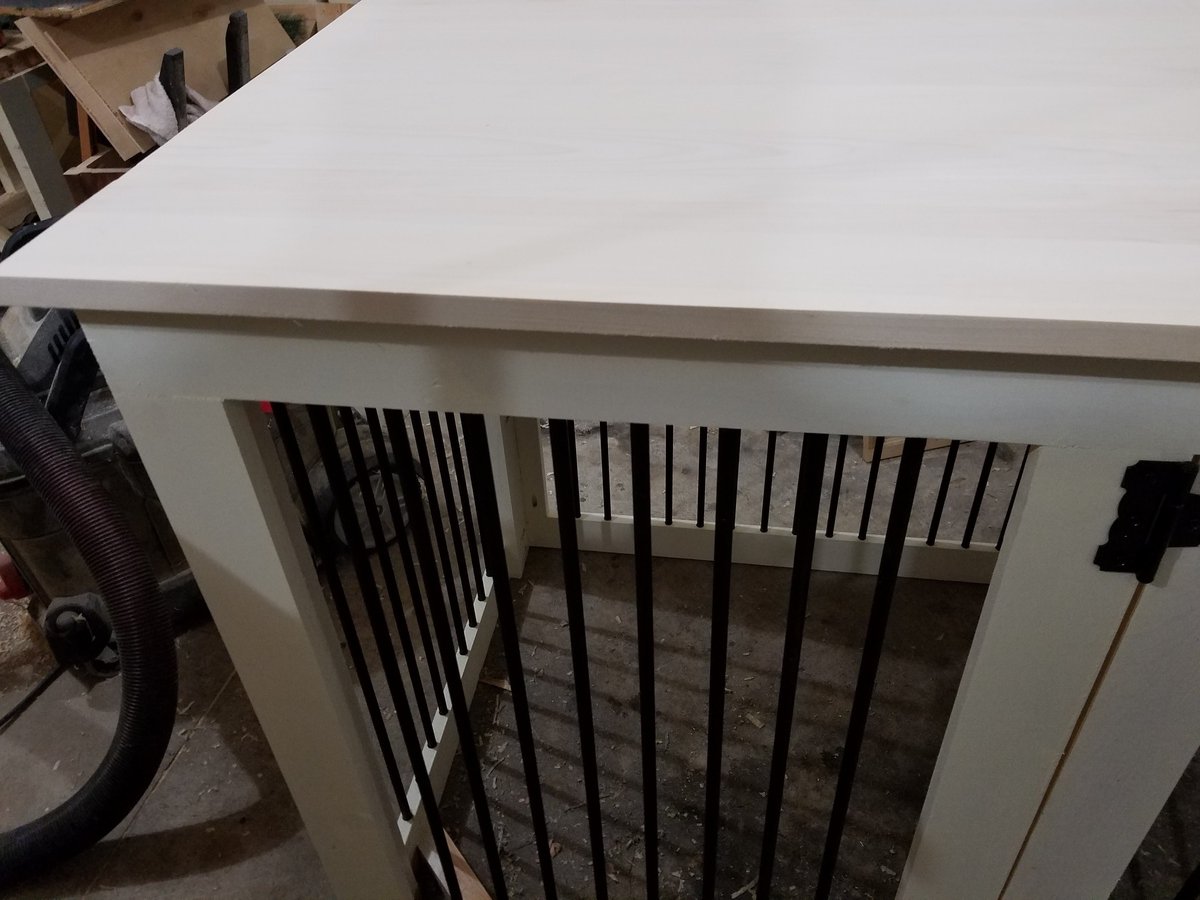
dog kennel by R&L Custom Creation of West Michigan
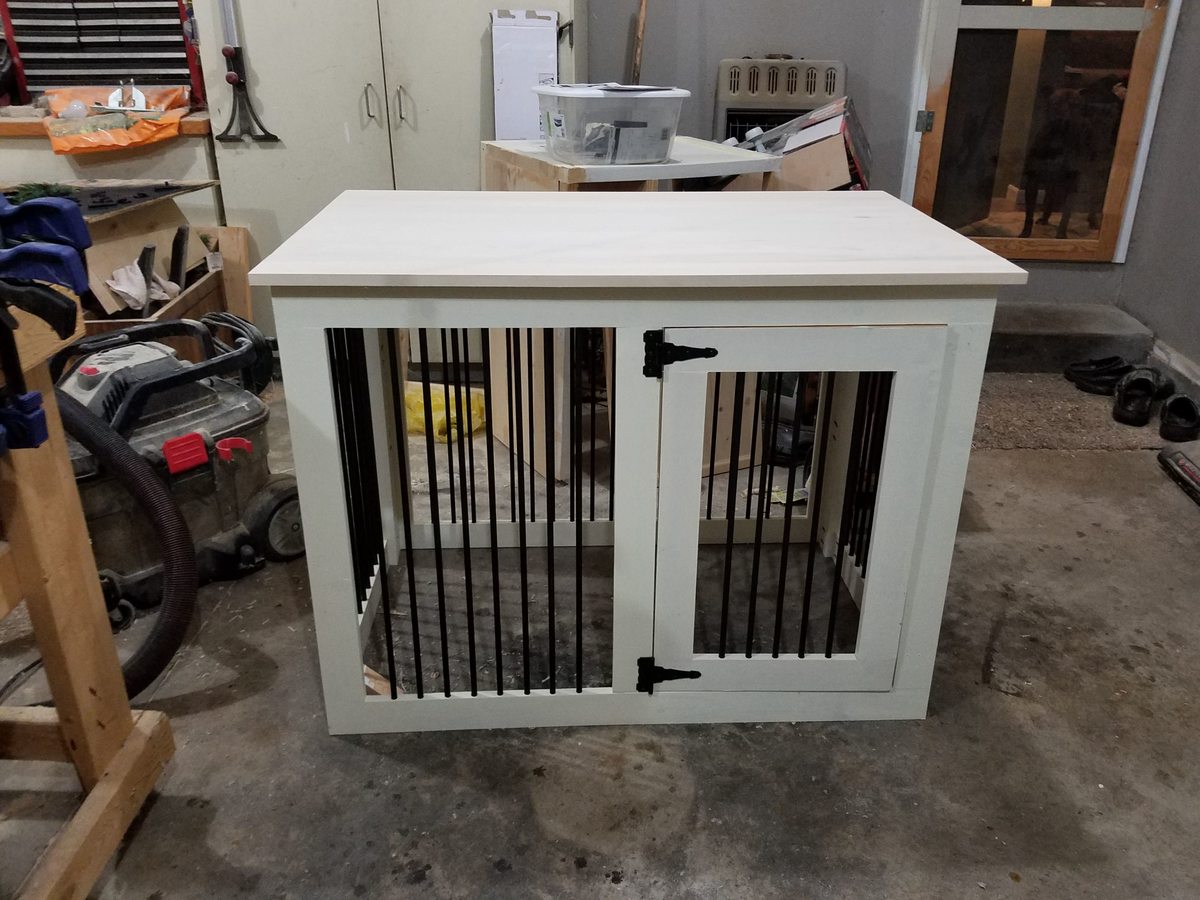
When your dog needs a home add gorgeous as your own
Estimated Cost
250.00
Estimated Time Investment
Week Long Project (20 Hours or More)
Finish Used
Gilded endive paint
Recommended Skill Level
Advanced
Comments
Sat, 10/08/2016 - 07:47
great project
i loved doing this project, but it is not for the beginner. I used a drill press to drill out 5/8 holes for the solid steel dowels. if you would like more information please email me @ [email protected]
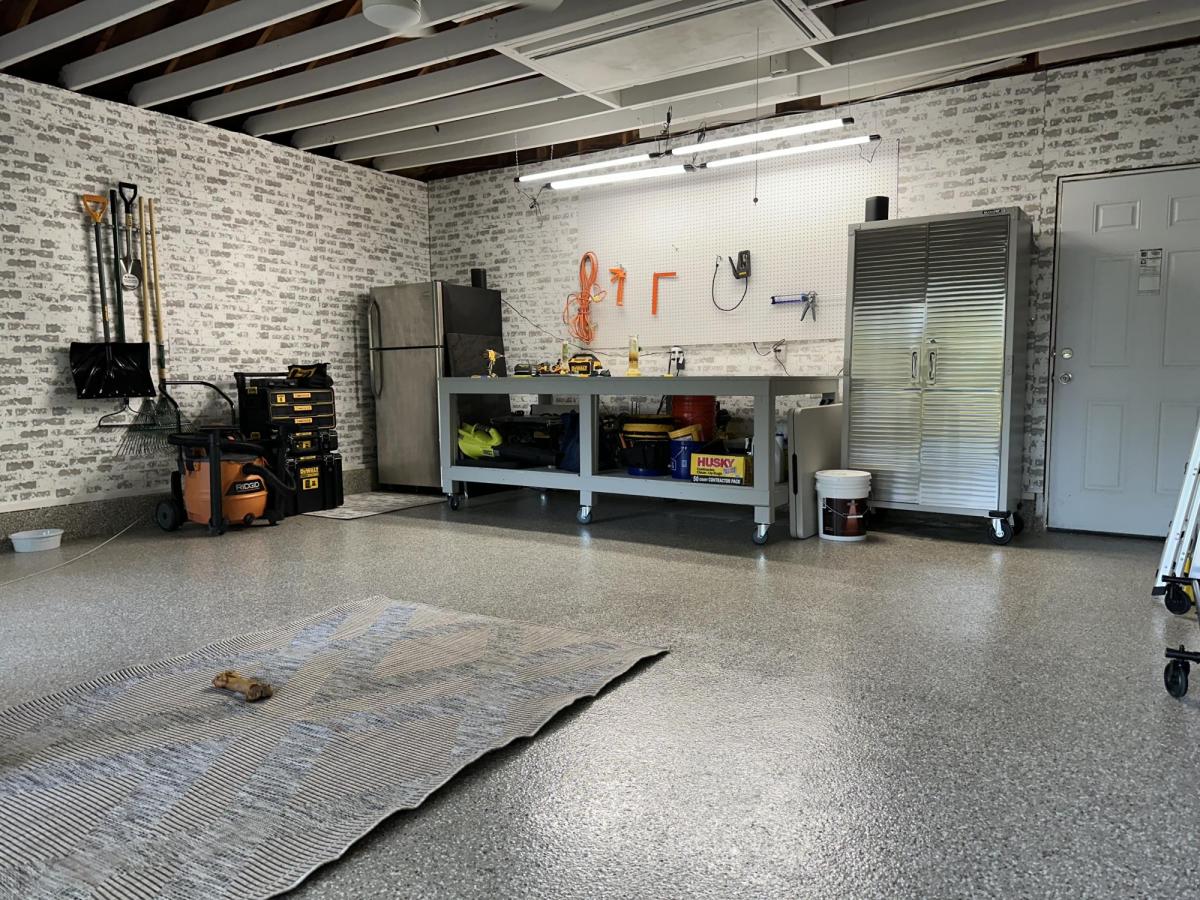
Workbench 4x8 + Adjustable Countertop Shelf
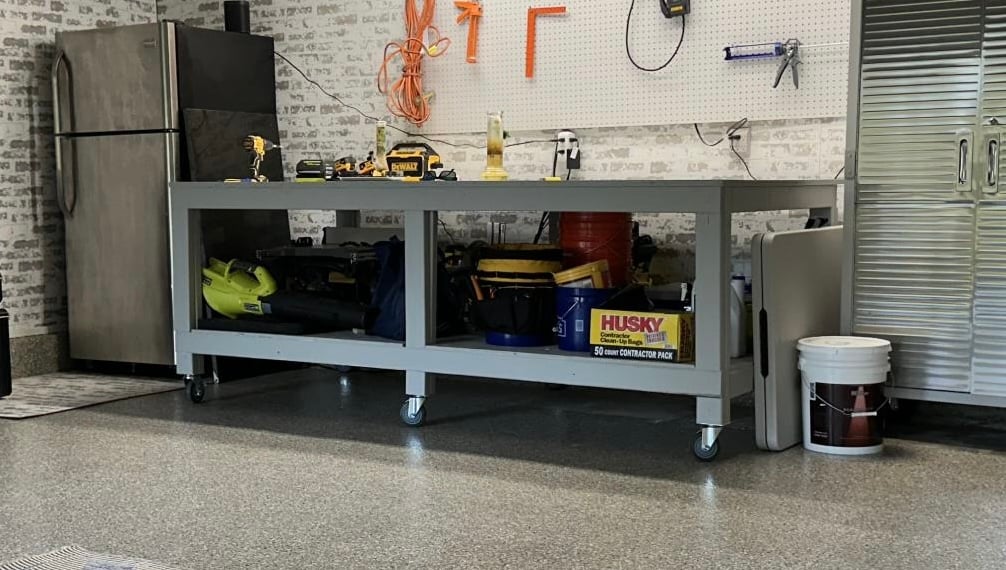
This took 2 hours to build with your supply list and plans. Then the next day we painted it.
We love it!
*Also included is an adjustable countertop shelf - "Found the plan yesterday and spent a little time today to make it happen and couldn't be happier with the end product! Hope you dig" - Freddiewah, Niki and Wilson
Built from Plan(s)
Plate Rack

I was browsing Etsy for a plate rack and my Hubby said that he could just make me one. So I knew just where to go for the plans! He added crown moulding to the top, bead board to the back and painted it to match our cabinets. I love it! I use it to display his late mother’s Currier and Ives Plate collection. Thanks Ana!
Estimated Cost
$65
Estimated Time Investment
Weekend Project (10-20 Hours)
Finish Used
She twin Williams custom blended paint color
Recommended Skill Level
Beginner
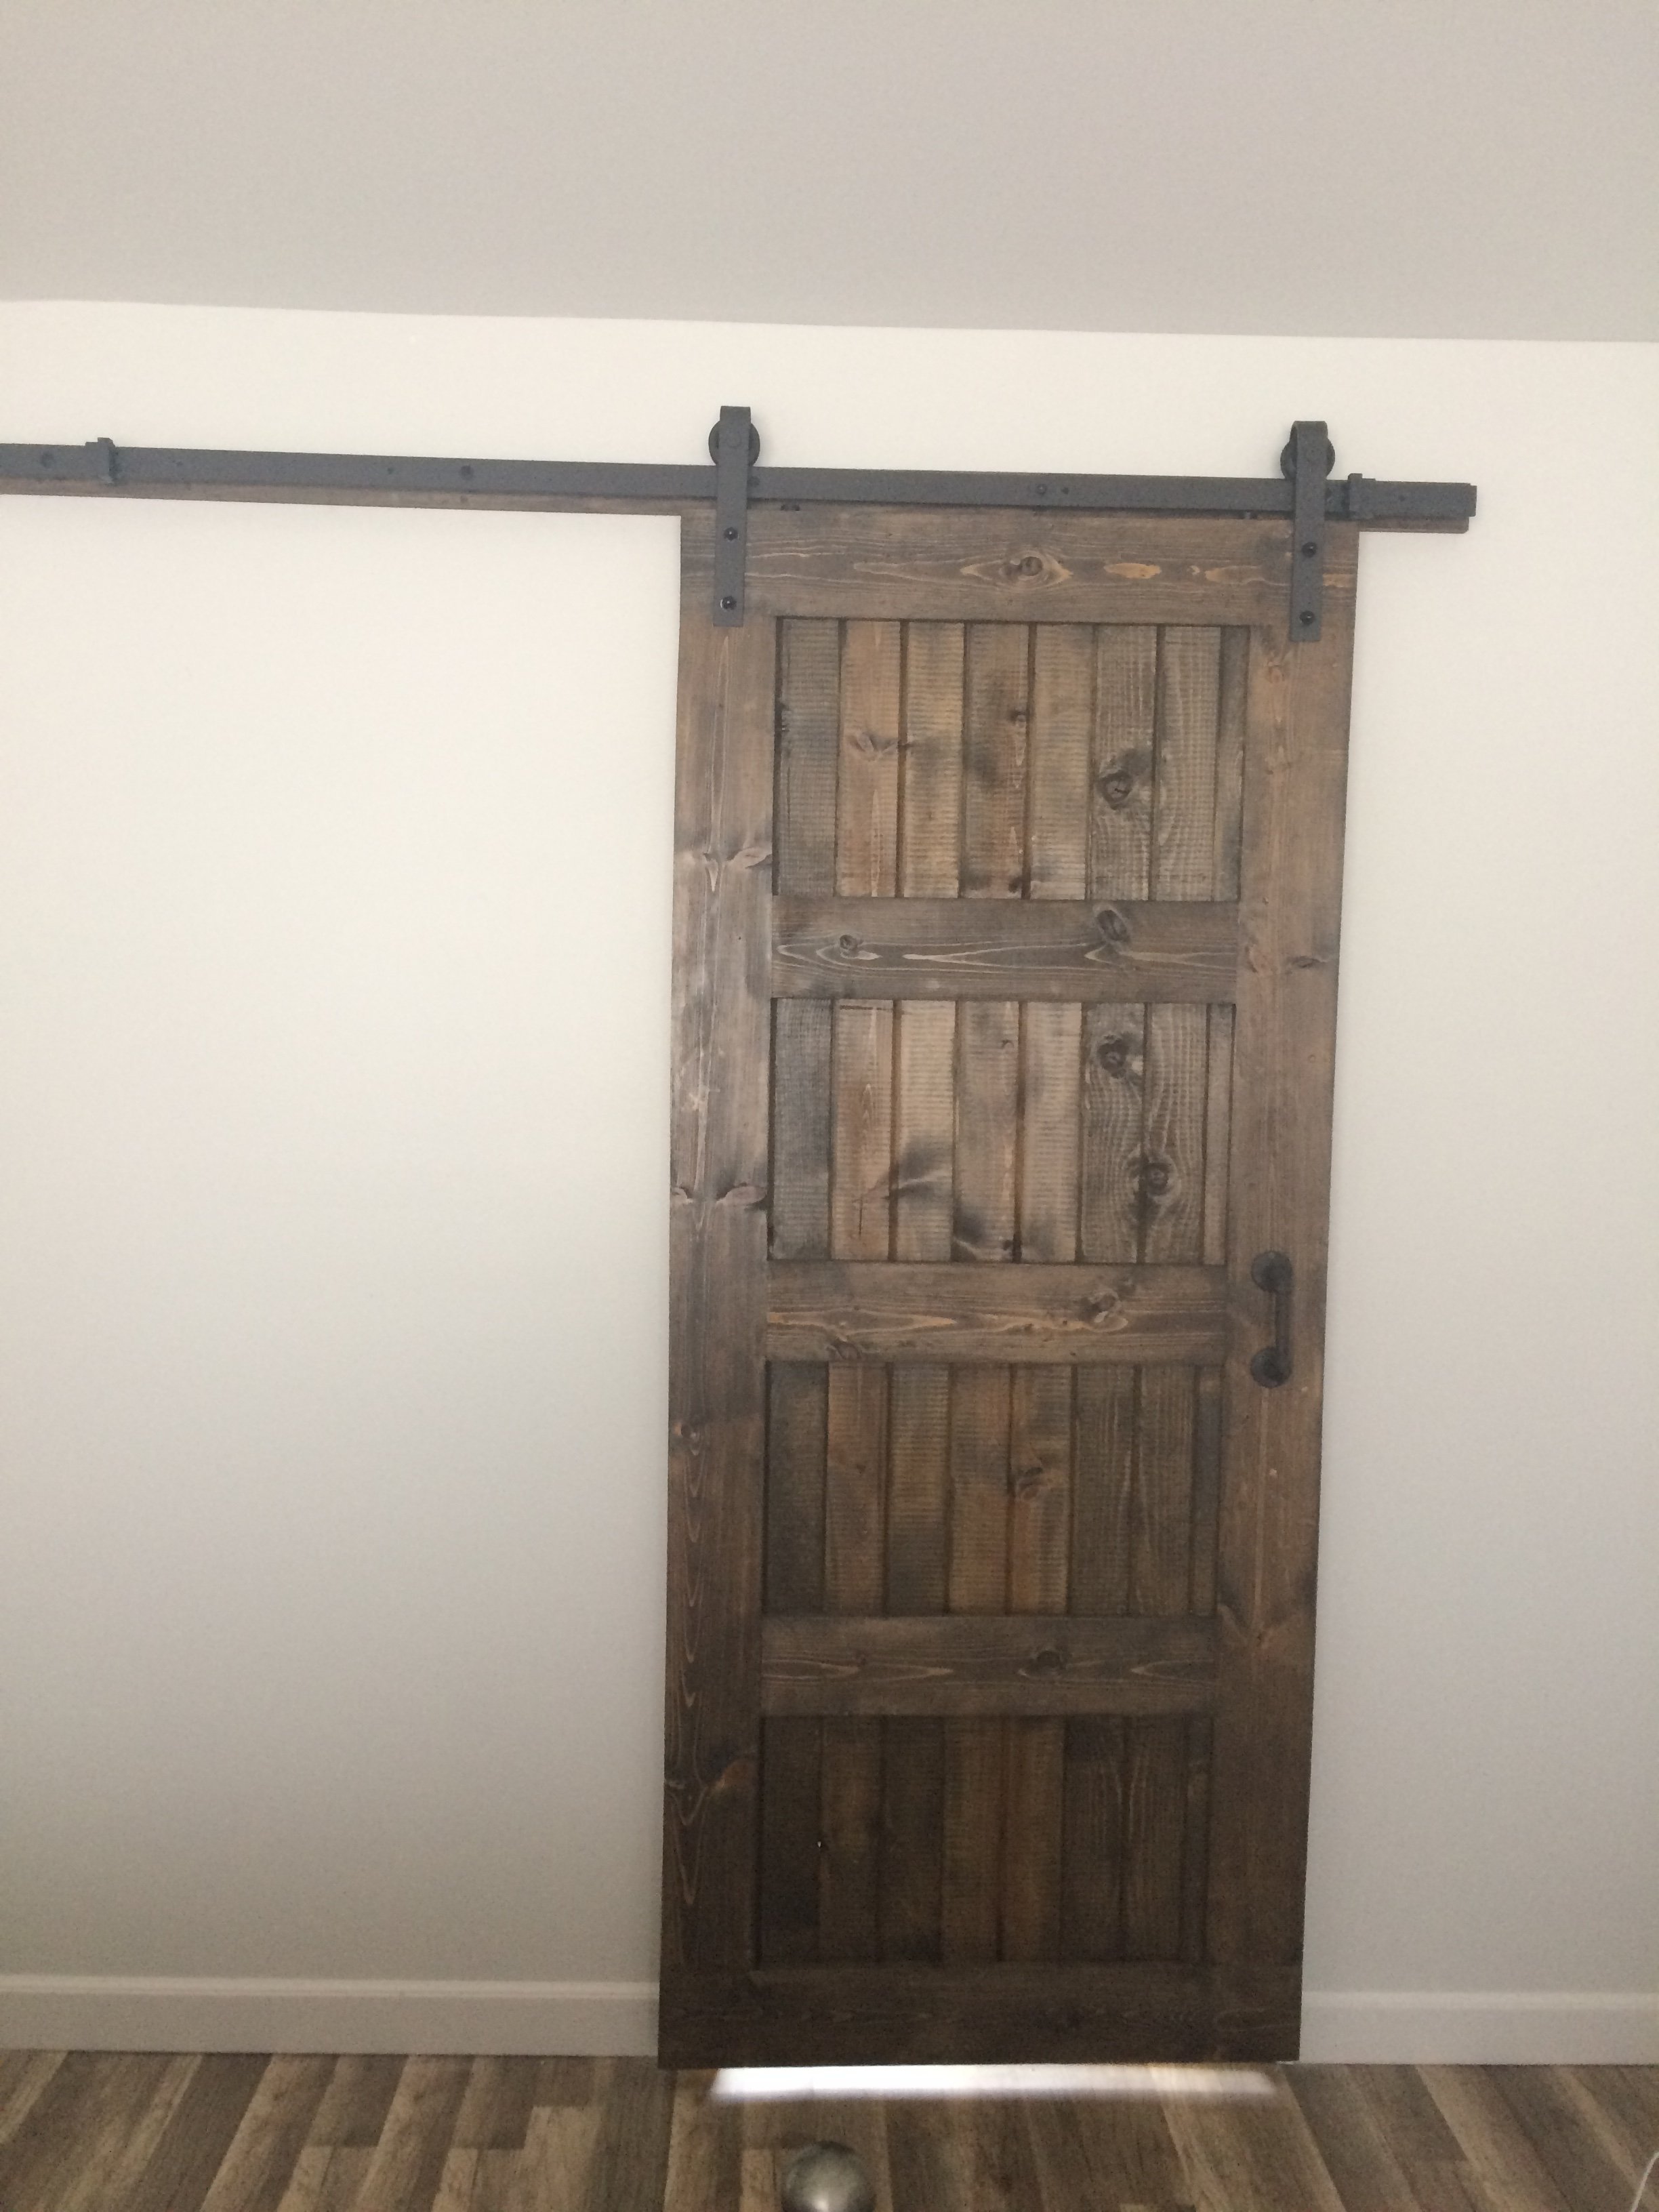
Master Bath Barn Door
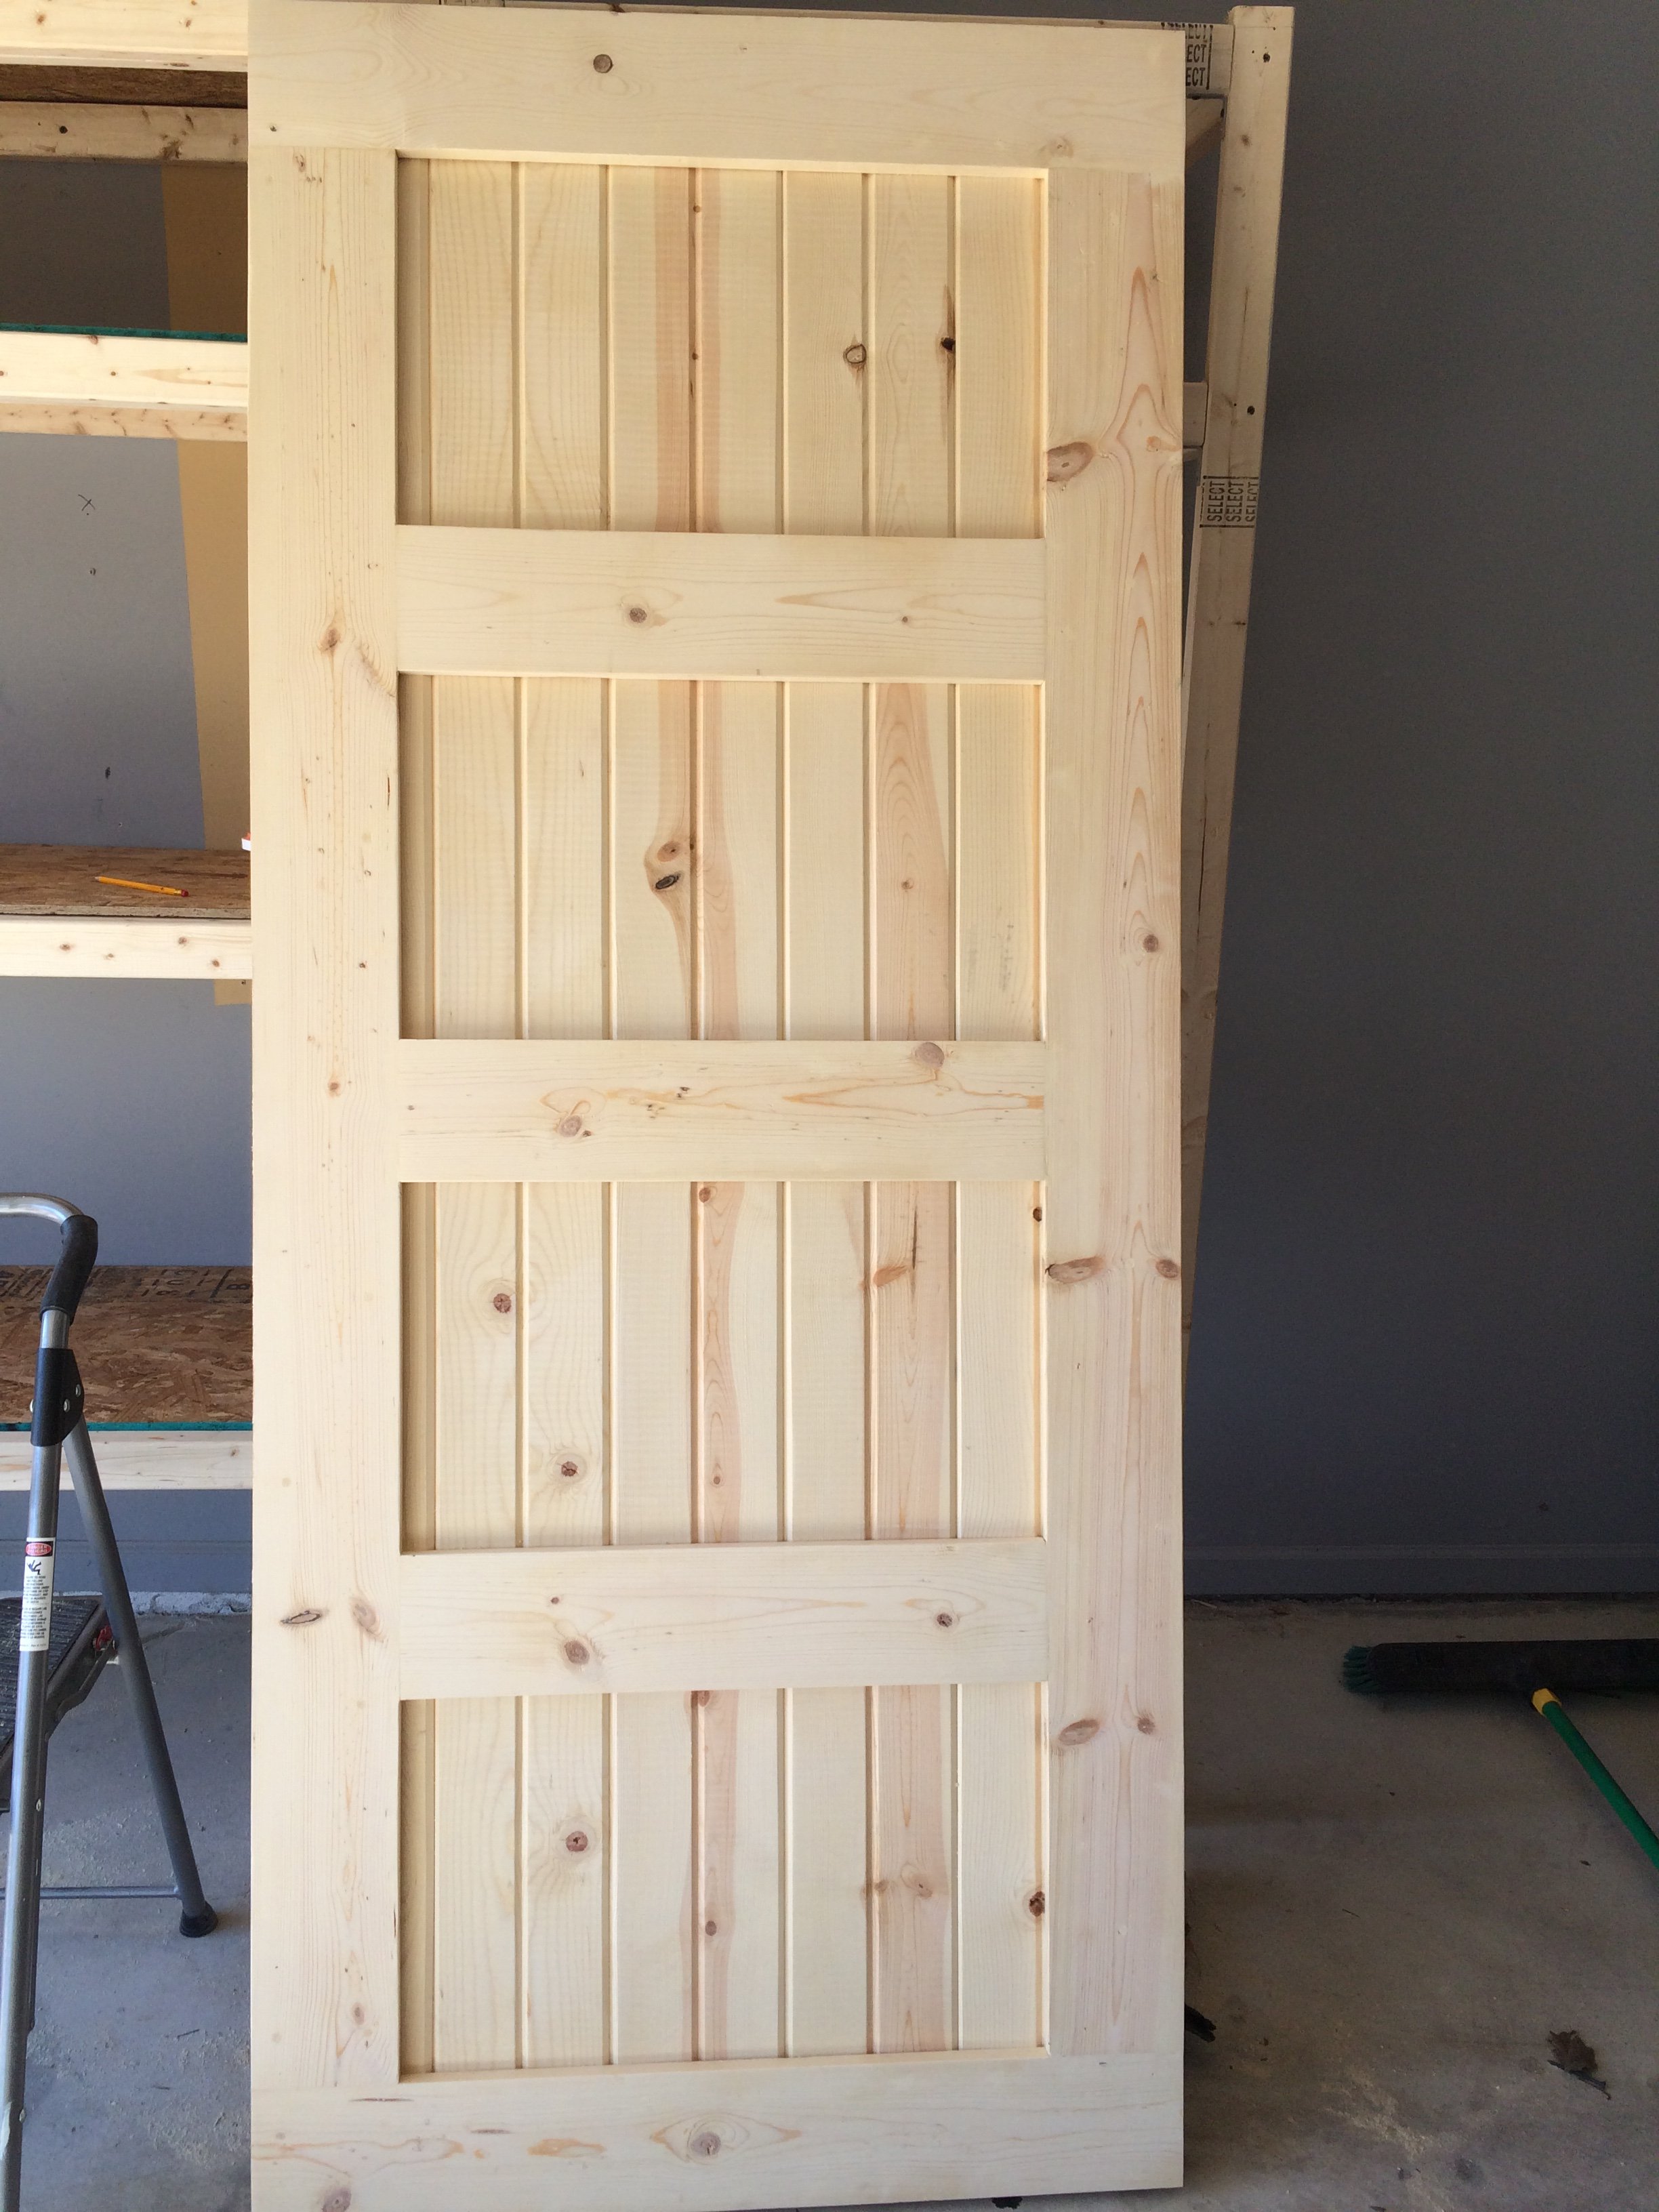
Created this door with pine wood tongue and groove lumber and pine wood planks. Purchase barn door hardware / track from Jet.com and door handles from Hobby Lobby.
This replaced my Master bath door and I think came out pretty good. Thank you for the ideas!!! Jeff M. Brownstown, Mi
Estimated Cost
Wood 55.00
Handles 2 for 8.00
Stain ( left overs)
Barn door track 54.00
Total $117.00 and 10 % Military discount at lowes
Handles 2 for 8.00
Stain ( left overs)
Barn door track 54.00
Total $117.00 and 10 % Military discount at lowes
Estimated Time Investment
Weekend Project (10-20 Hours)
Finish Used
Minwax. Mix of Kona and Driftwood Grey
Recommended Skill Level
Intermediate
Doggy loft bed!
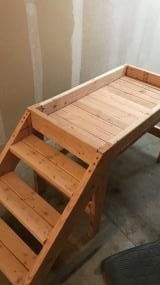
My dog loves to people watch all day while I'm at work and she needed a new bed so I took the plans for the lower platform and modified them so it would stand alone. Took the platform and put it on the bottom so that her bed would sit inside instead of on top where she could more easily fall off.
I tried building without PH screws at first and all I ended up with was a lot of cracked and wasted lumber. Got the PH jig and finished the whole build myself in 2 hours. Sanding, staining, and sealing tomorrow but I'm just so excited about it I had to post now!
Built from Plan(s)
Estimated Cost
With the two sets of lumber, having to buy the jig, hardware, stain, and electric sander it cost me about $130
Estimated Time Investment
Afternoon Project (3-6 Hours)
Recommended Skill Level
Beginner
Comments
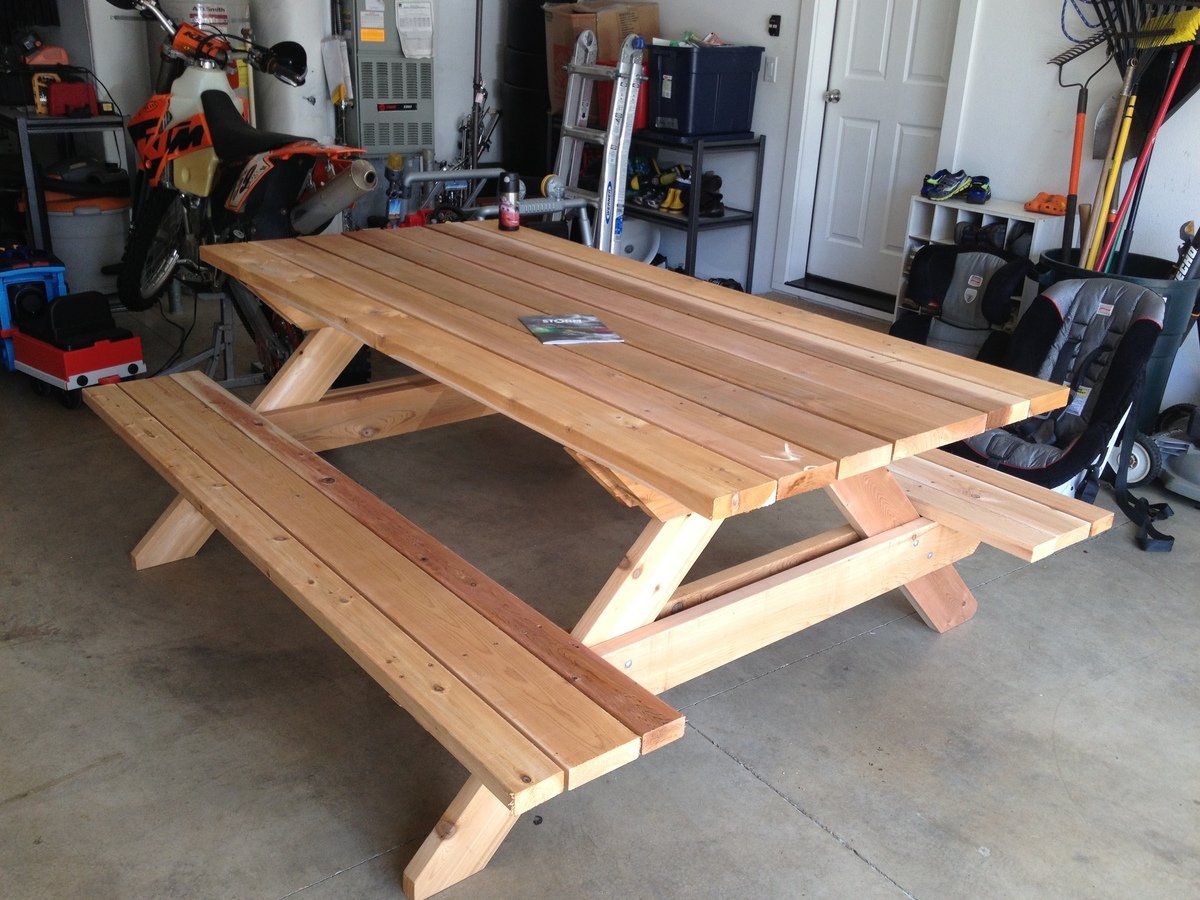
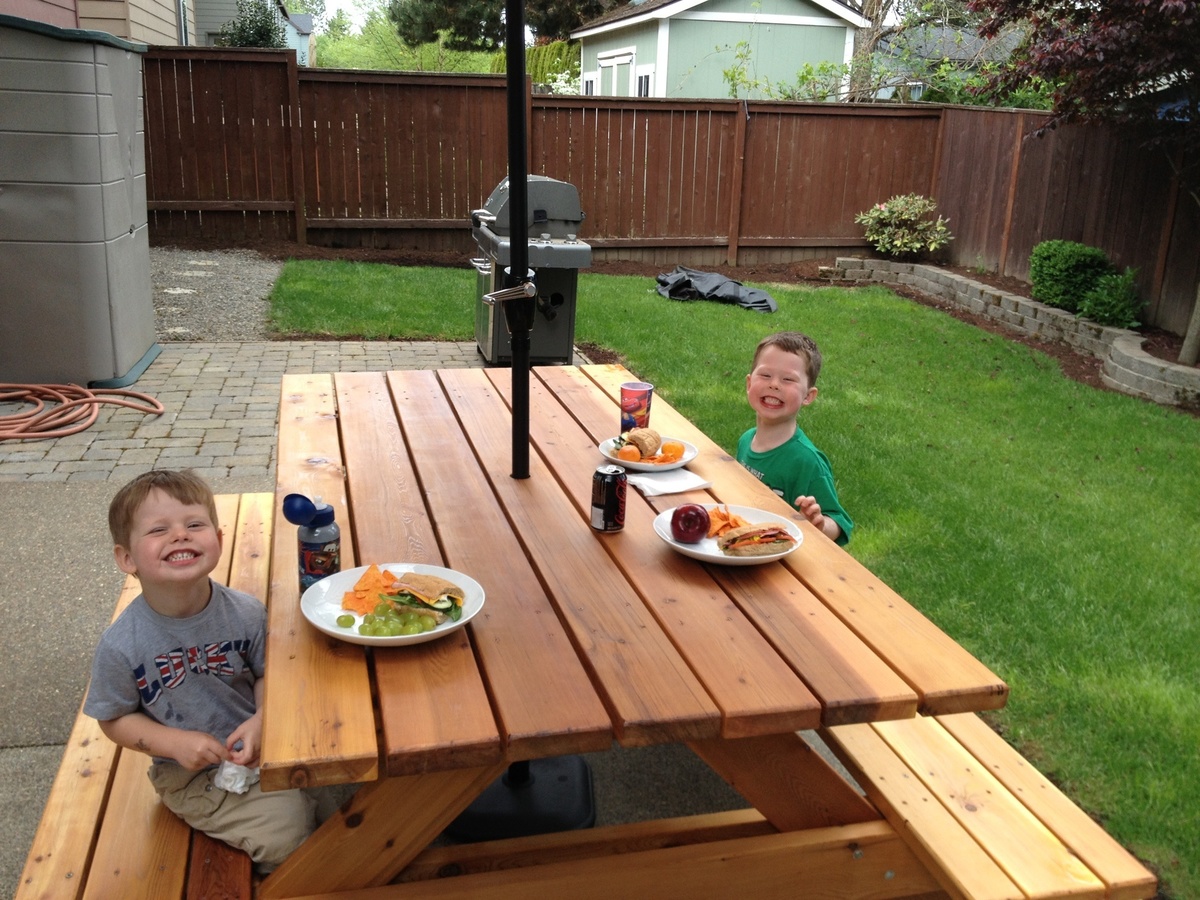
Picnic Table
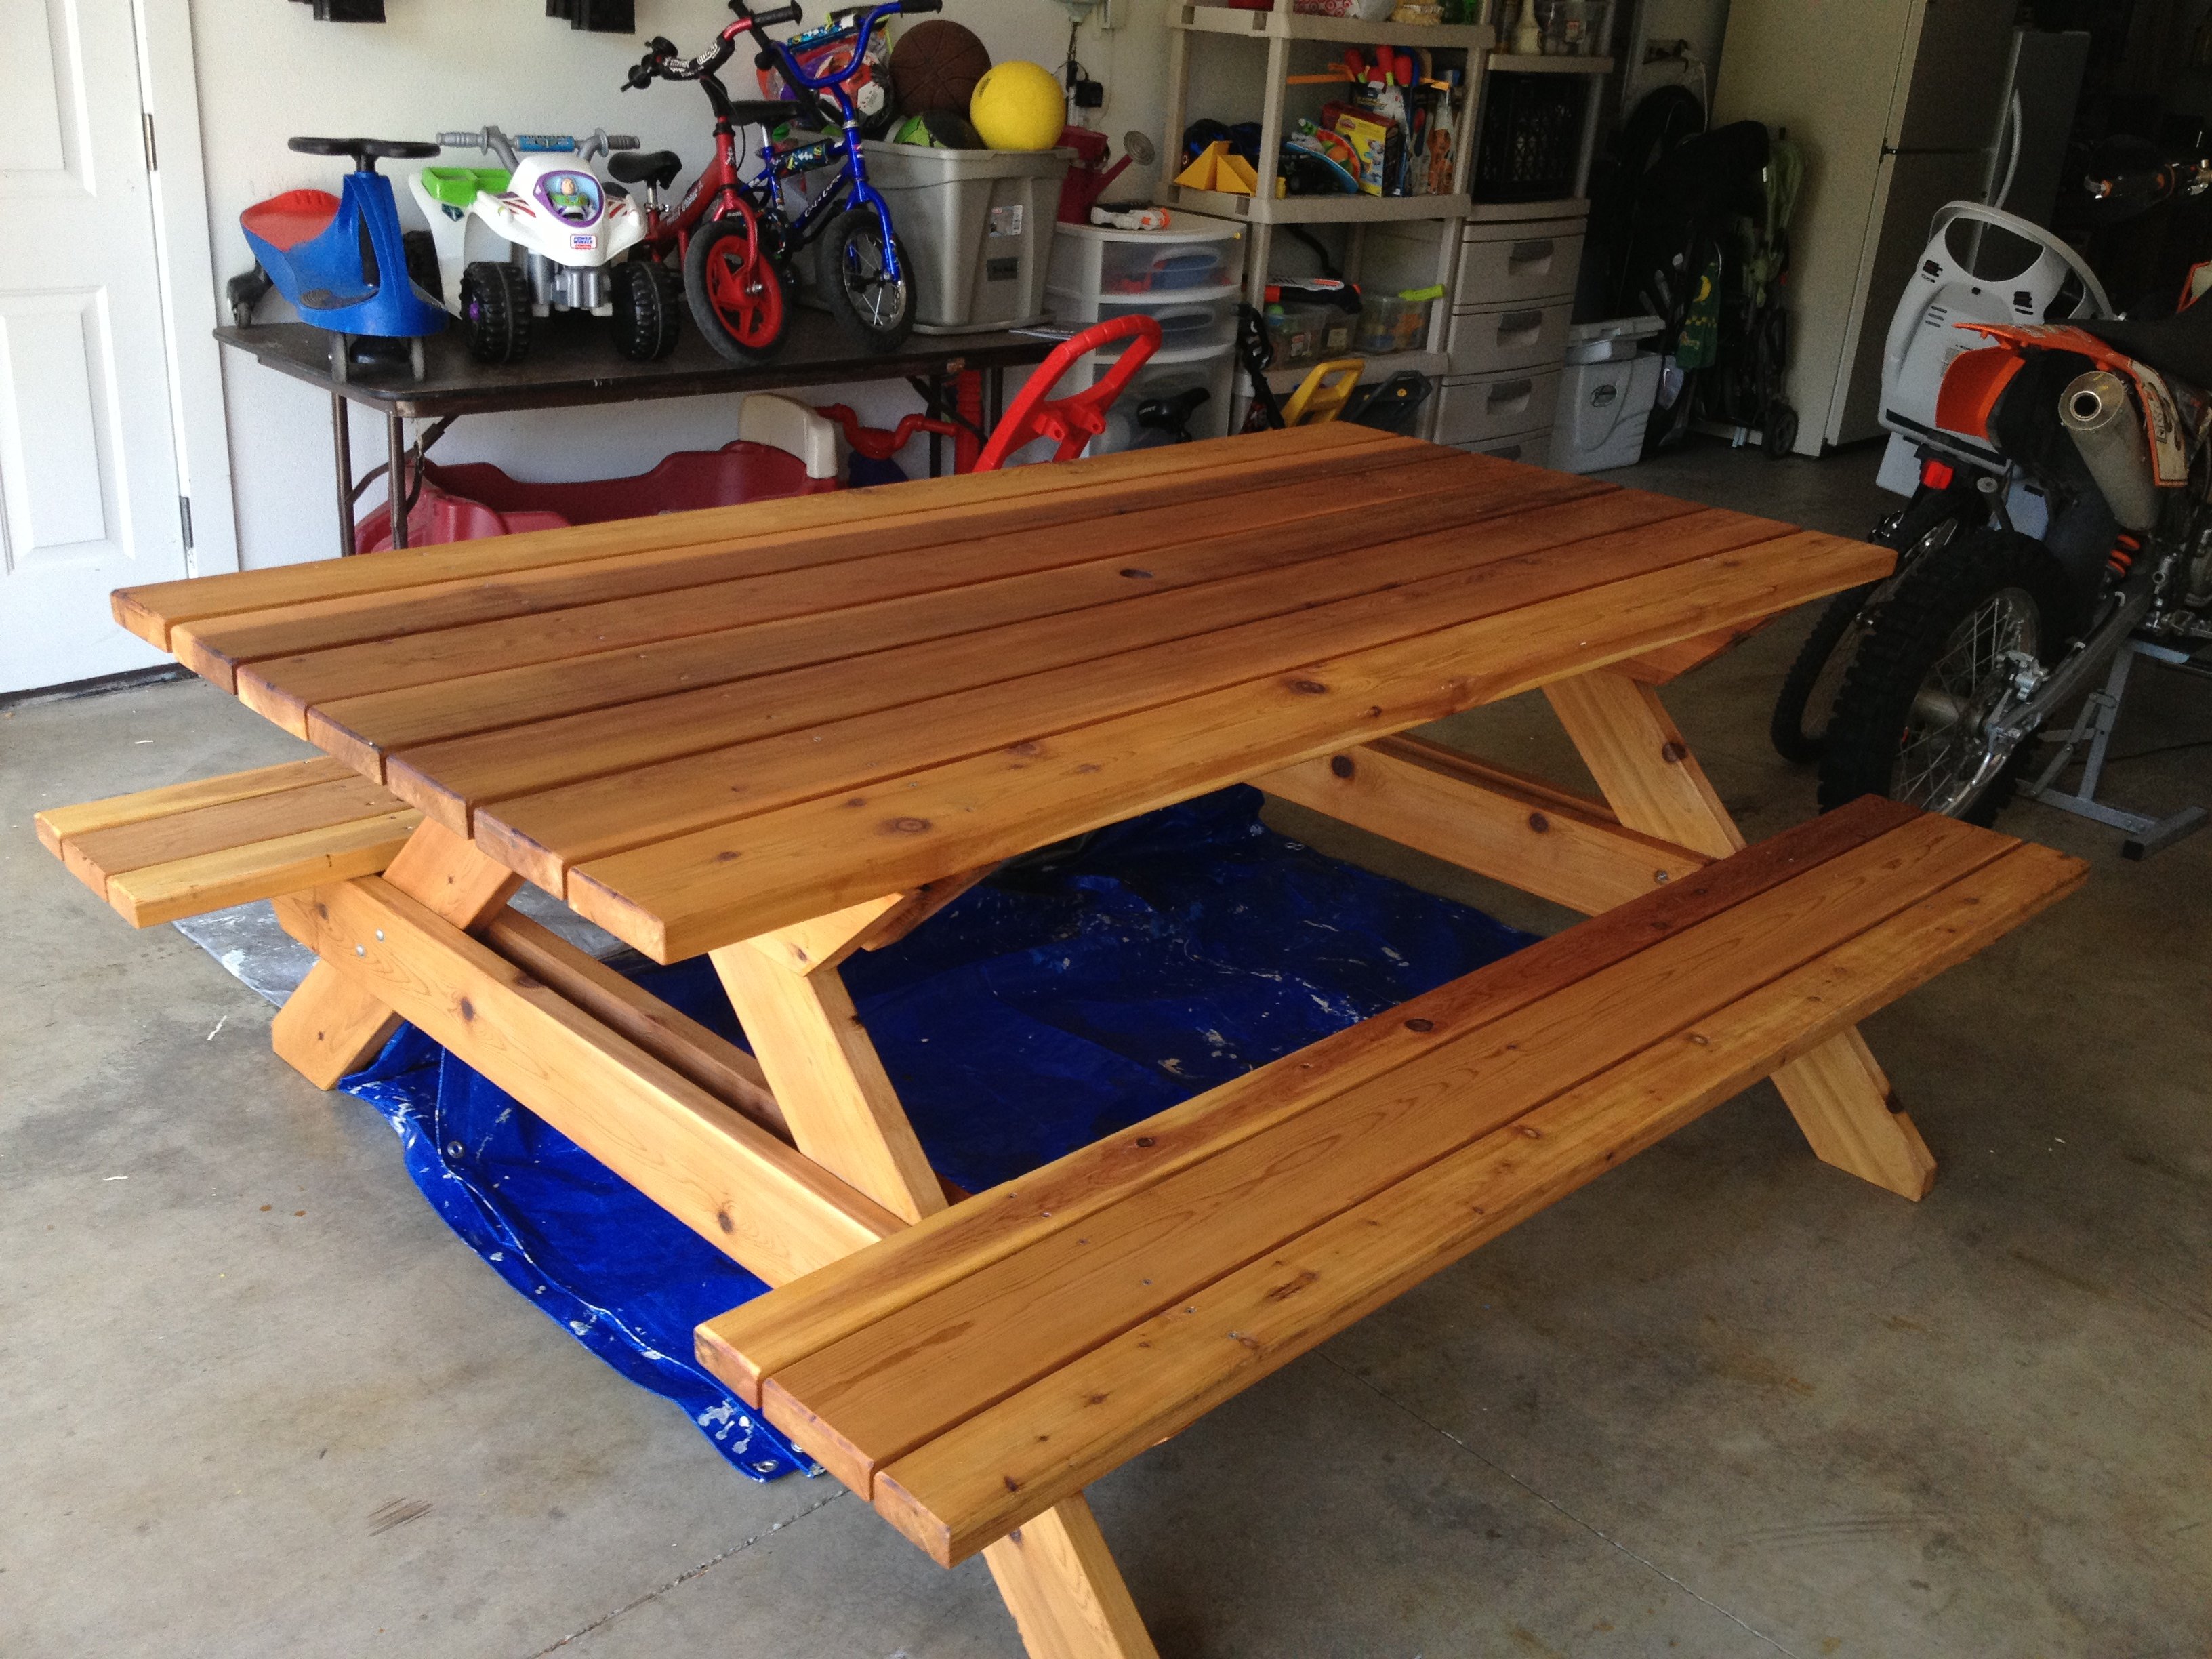
My wife started looking at expensive patio sets, which I thought were not worth the price, so I decided to build a picnic table. This is not the cheapest table out there, but it's built to last for years!! I used a high quality cedar as I got a price cut from a friend. I also used deck screws, so there would be no rusty screws!! The table top measures 7' long and looks like one you would see at a state park, notHome Depot!
Built from Plan(s)
Estimated Time Investment
Weekend Project (10-20 Hours)
Finish Used
Cabot Australian Timber oil: For this project I went with an oil project so I wouldn't have to sand it every year, like so many in my area with their decks. With this product, you simply clean the table and reapply!!
Recommended Skill Level
Beginner
Comments


Thu, 08/25/2016 - 09:48
lovely table but...
Really like the picnic table - do you have plans for this? (I'm new to this site so apologies if they are here but I just could not see where?).
best wishes
Gerry
Comments
Rentzm
Fri, 03/31/2023 - 04:23
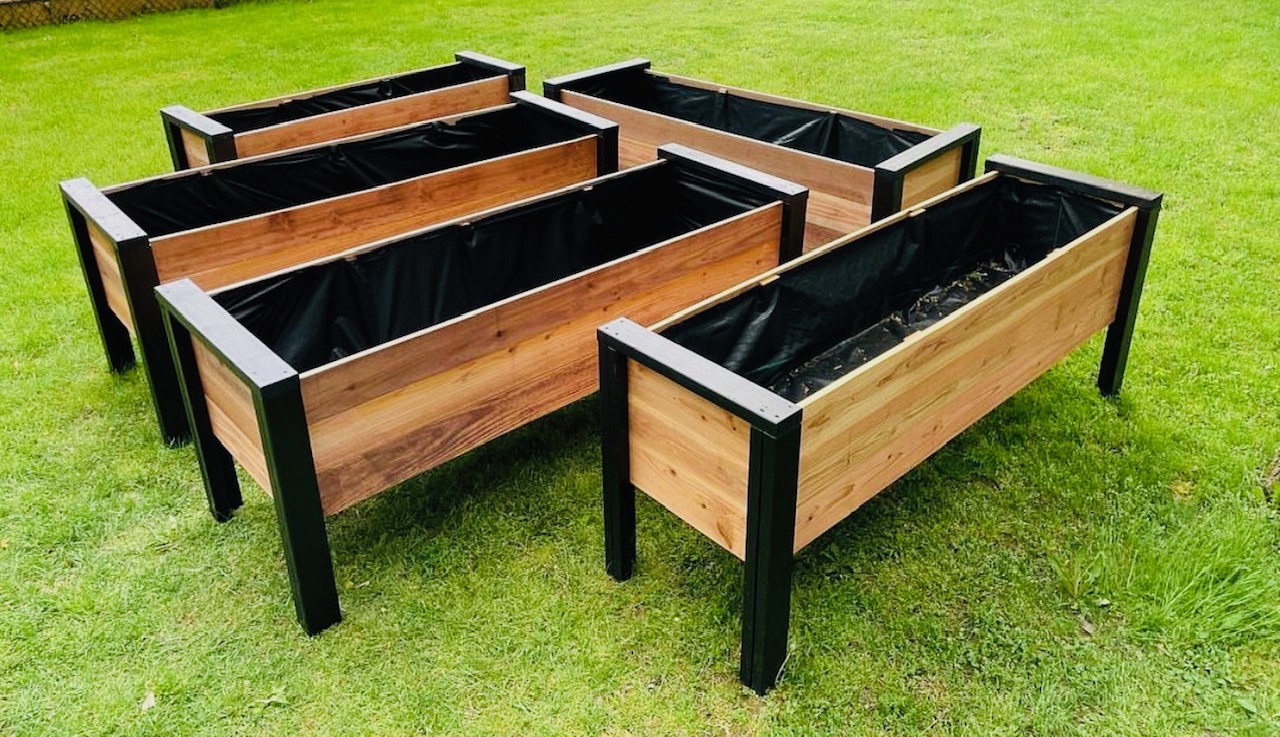
These are incredible. They…
These are incredible. They look a little deeper, and would be good for vegetables. How deep are they?