Community Brag Posts
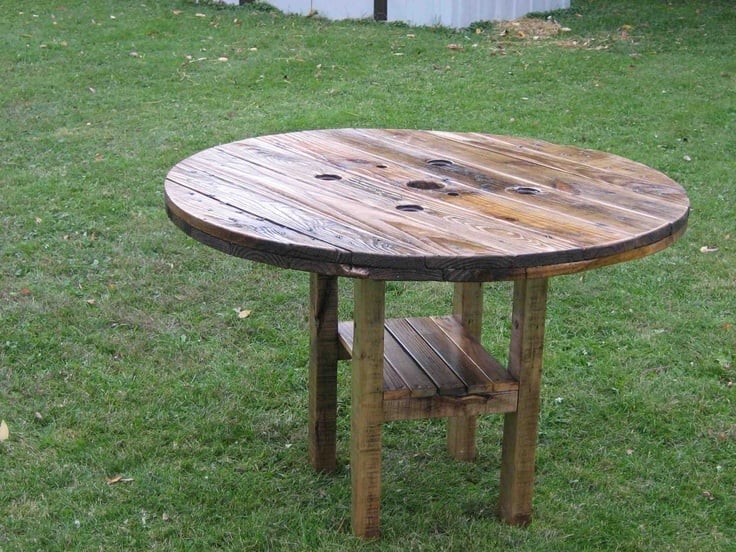
Rustic Patio Table

Well my wife and I wanted to create a patio table again for our daughters birthday. I spent some time looking for something that would spark some ideas and found an old wooden spool. So I brought it home also with a large quantity of various lumber, all reclaimed. So we put a plan together quickly and started tackling the project. So far I am 2 days in and have got it built and sanded.
This has been an interesting build thus far and some parts of it have required 2 people as the top is very heavy. Also was difficult to get the spool apart as the bolts were very rusted.
a few more days and I will have it finished being urethaned.
I am also going to use the other top of the spool and create 2 matching benches. This will likely add another 3+ days to the completion of the entire set
Update 05/06/2013
So I completely forgot about my brag post. I did not end up building any benches and also forgot to post the finished table. Here it is in all it's glory. It served it's purpose well.
Estimated Time Investment
Week Long Project (20 Hours or More)
Finish Used
Will be using gloss urethane and likely about 3 coats.
*It required all 3*
*It required all 3*
Recommended Skill Level
Beginner
Comments

Fri, 10/05/2012 - 13:11
Super cool!
I have a couple of spools that I picked up and have been deciding what to do with them. This table is awesome! I love it! Can't wait to see the benches!
Oak hall tree
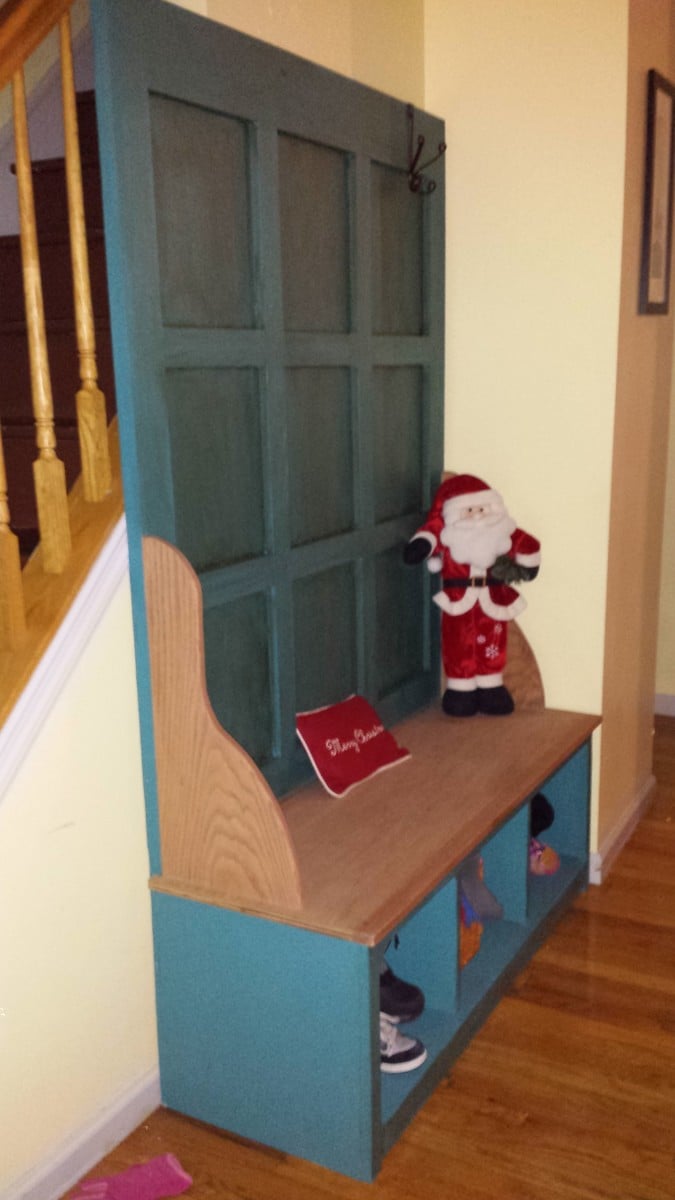
This was the first furniture project I have ever done. My wife seen this at Pier 1, of course it was all particle board and pine and "cheap feeling" but not cheap in price. She showed me the one on here and of course I was up for it. The deal was, I make it she paints it and of course I need a miter saw. Probably would not make this my first project because it was a bit challenging. Getting the long cuts square with a circular saw proved challenging and getting the squares on the back square was tough. With it being oak I learned that oak is not forgiving, especially without a nail gun. The pocket hole jig and their application are great and easy though. It did take me a while due to time constraints and the price to build may be off because I really didn't count as I bought things. All in all, I use this piece of furniture everyday. It is the first thing you see when you walk in the house and I am very proud of it, as is my wife. She did a great job with the finish and the glaze really gives it a nice look. The hooks are cast iron that we got at an antique store. This is the only picture I took, no in-process pics.
Built from Plan(s)
Estimated Cost
Not sure, maybe 200 bucks
Estimated Time Investment
Week Long Project (20 Hours or More)
Finish Used
Behr ultra Pacific Sea Teal with Rust-oleum decorative glaze, and Weathered Oak Stain with Polyurethane finish.
Recommended Skill Level
Beginner
Comments
Tower in the Czech Republic
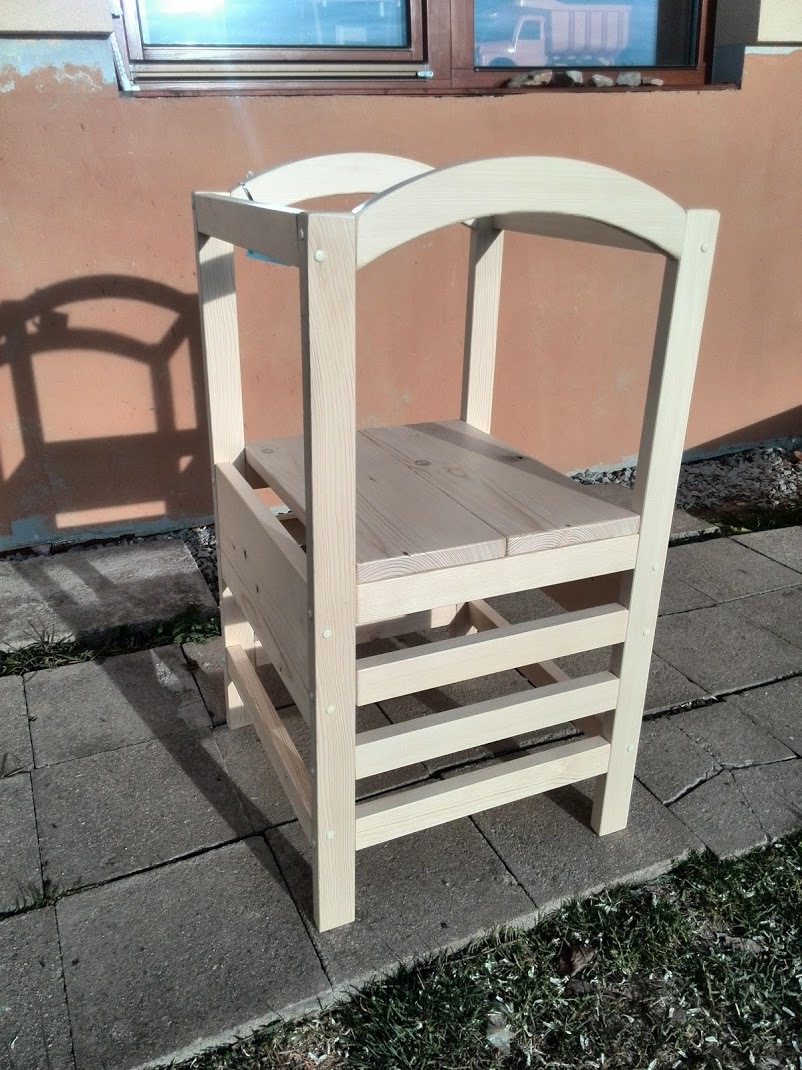
I built it twice for my son and nephew, both love it and use it every day.
Estimated Time Investment
Weekend Project (10-20 Hours)
Recommended Skill Level
Intermediate
Comments

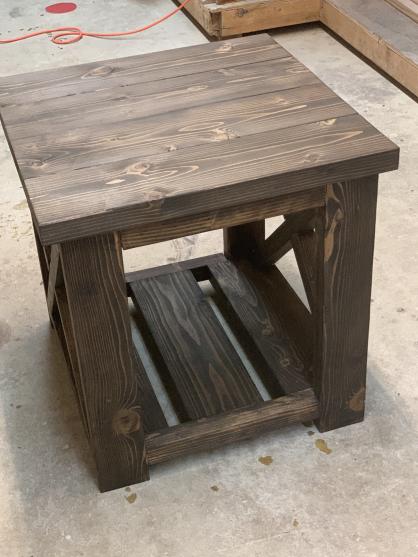
Farmhouse end table
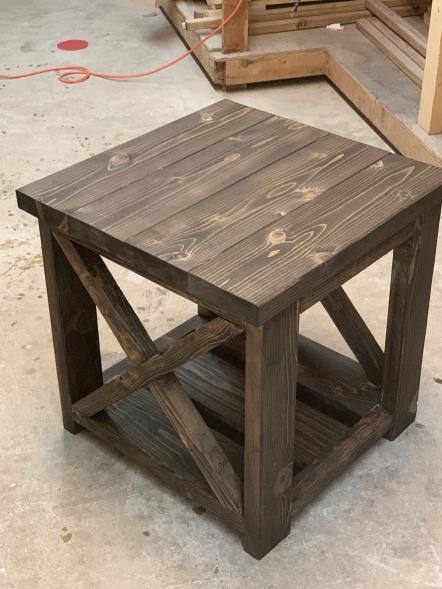
Made the smaller one from the plans and stained with Minwax jacobean.
My wood was pretty rough, so a lot of time was spent sanding. Other than that, pretty straightforward project.
Built from Plan(s)
Estimated Time Investment
Day Project (6-9 Hours)
Finish Used
Minwax jacobean
Comments
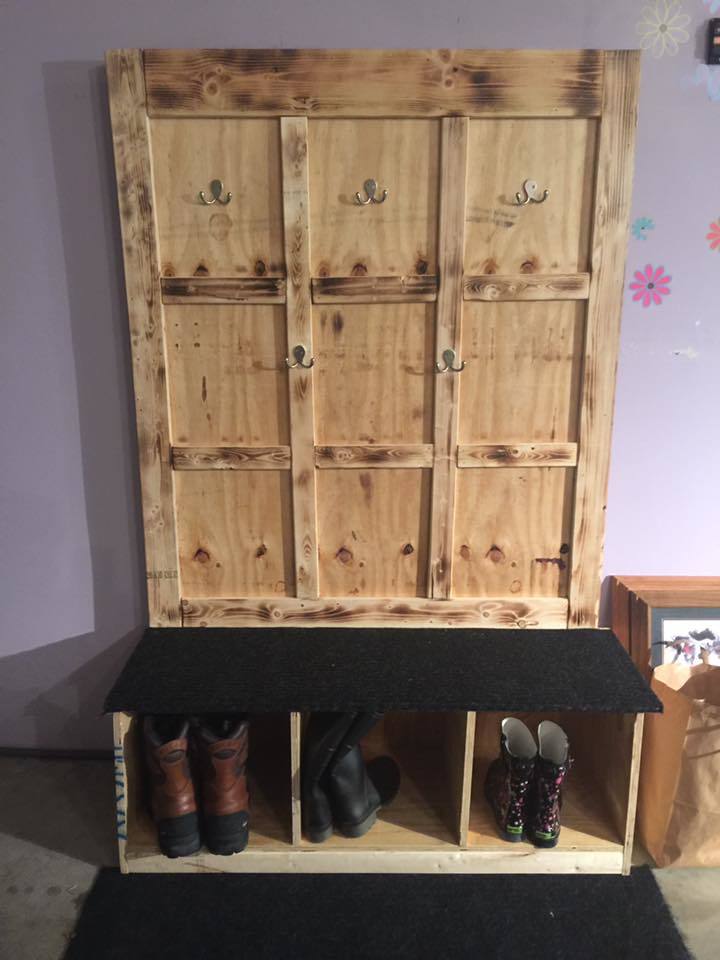
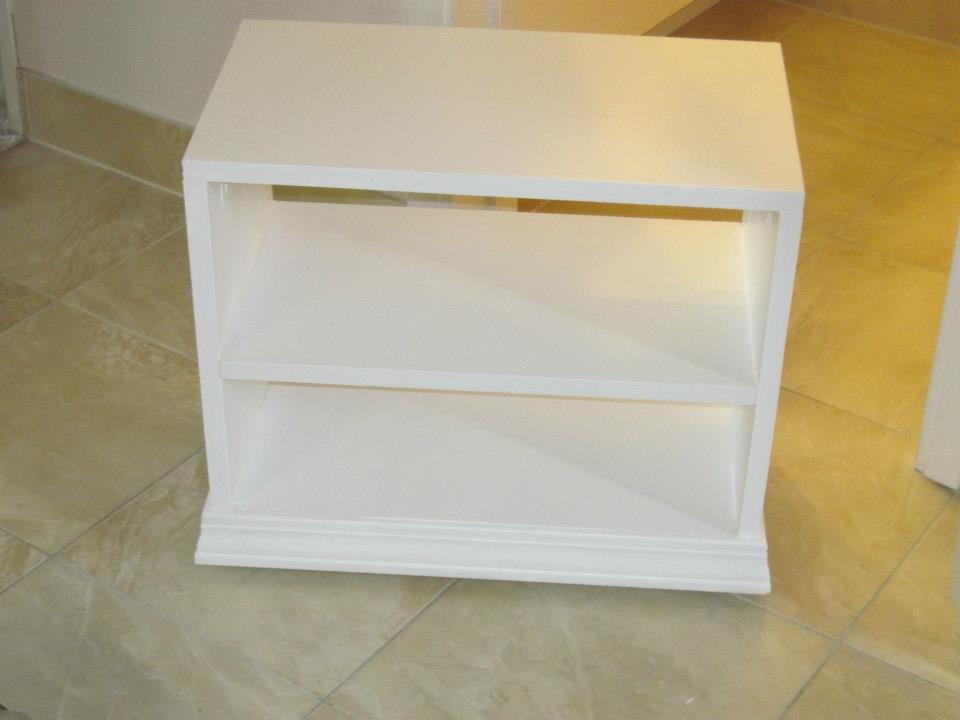
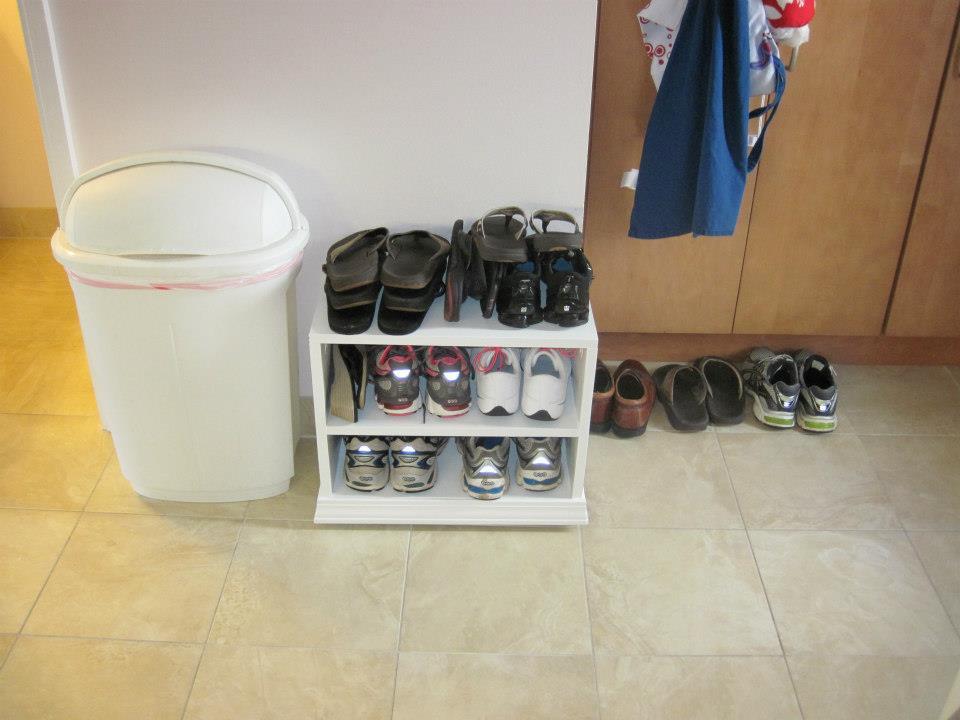
Shoe Organizer
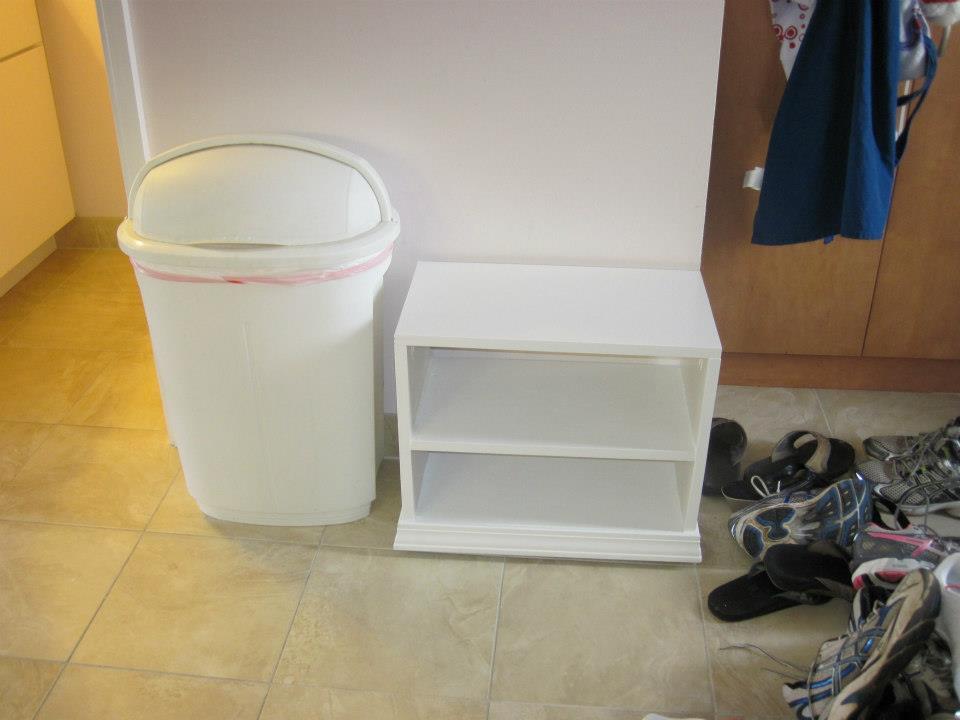
Between my husband and I, we routinely have 10 pair of footwear by the front door. In Hawaii, its tradition that you remove your shoes at the door. Unfortunately for us, our condo doesn't have much room by the door. As such, there would often be a pile of footwear as you entered the unit, which is the kitchen. I have tried various shoe organizers over the years, and none really fit the bill, or the space we had. So I built one myself.
Its a pretty basic box, with 1 fixed shelf. All joined with my Kreg jig (of course). I also attached some casters on the bottom to make it easier to move out of the way if needed. After assembling and painting, I picked up some moulding and added it to the bottom, which helped to hide the casters. Then I used some old liquid nail/caulk I had to fill in the holes.
Estimated Time Investment
Afternoon Project (3-6 Hours)
Finish Used
white paint
Recommended Skill Level
Beginner
An easy and special first birthday gift
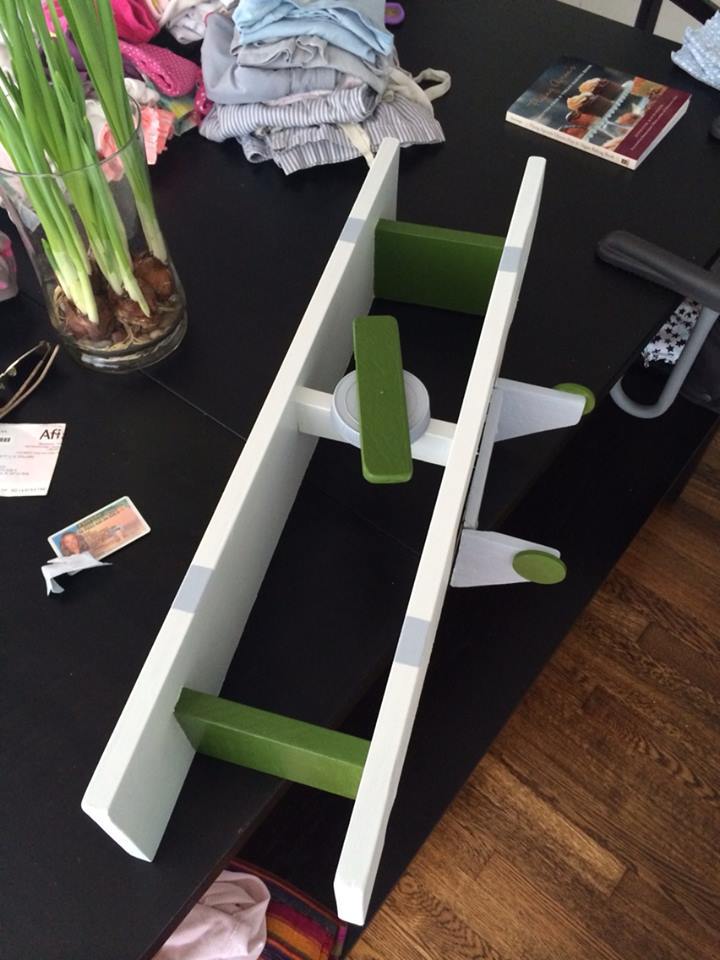
It was friends son's first birthday and had no idea what a could get a couple that didn't like gifts, or many toys for that matter. I search the site and stumbled upon this great addition to any little boys room, an airplane shelf! So it took me about 2 hours to make it with taking break for things to dry, and I didn't follow the exact directions just because I didn't have all of the items, in fact it was all from scraps I had around the house and the front round piece was actually the top of a peanut butter jar painted.
Estimated Cost
10.00
Estimated Time Investment
An Hour or Two (0-2 Hours)
Finish Used
basic glidden primer+paint
Recommended Skill Level
Starter Project
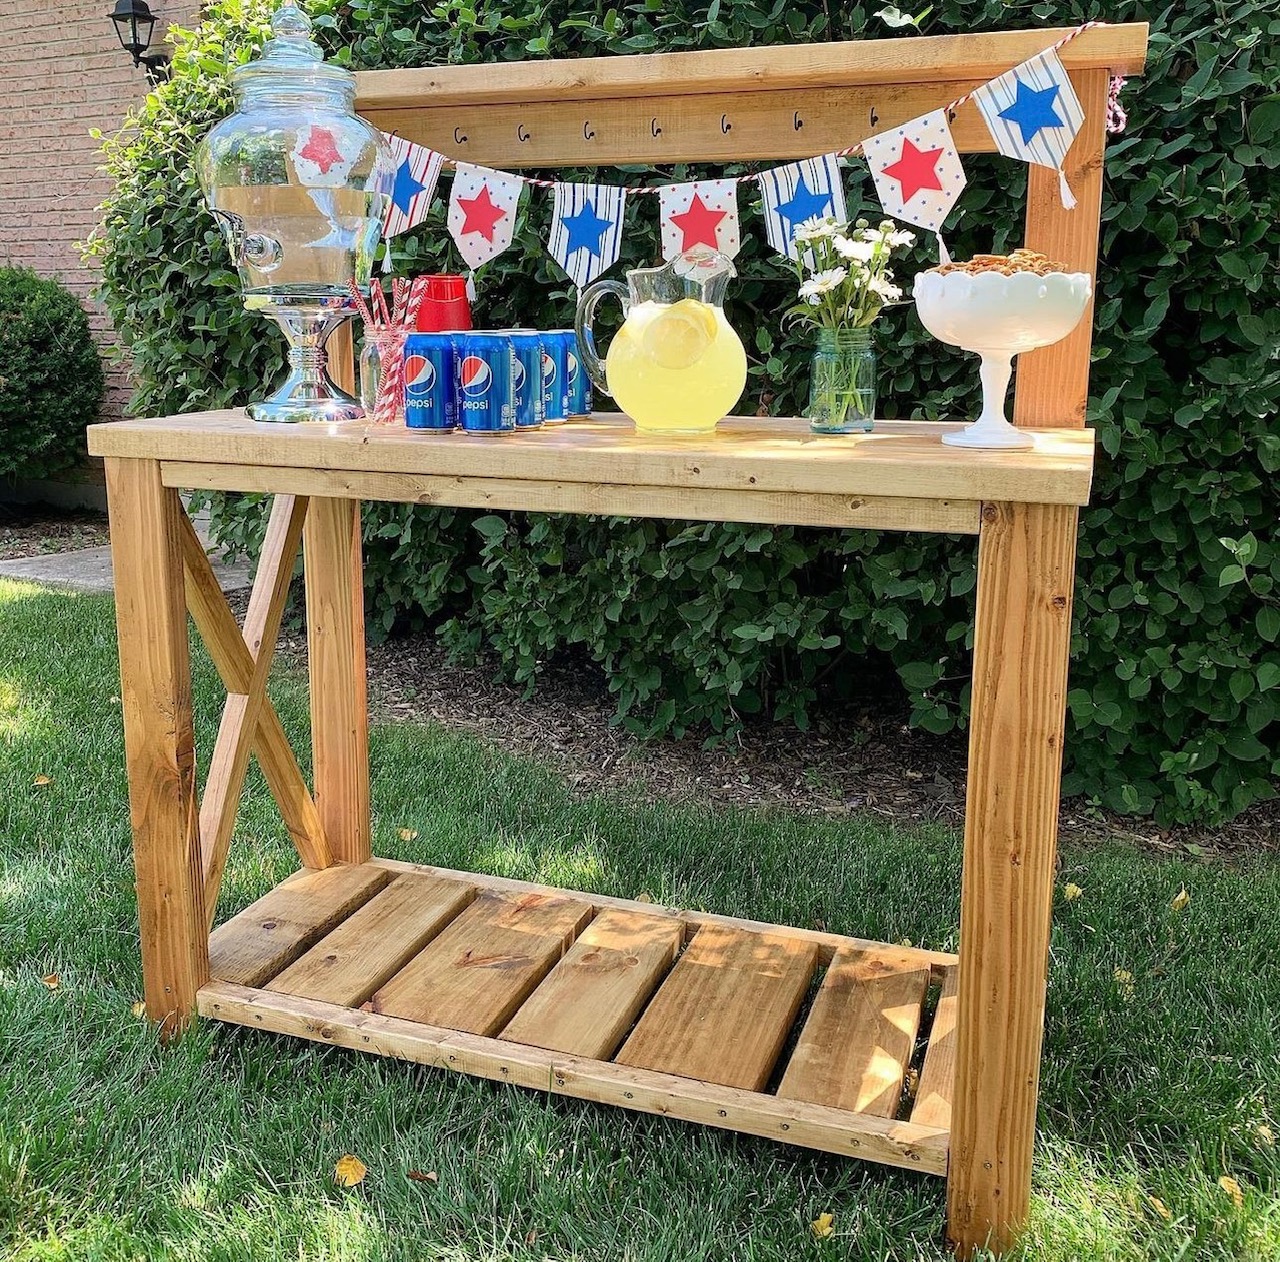
X-less console
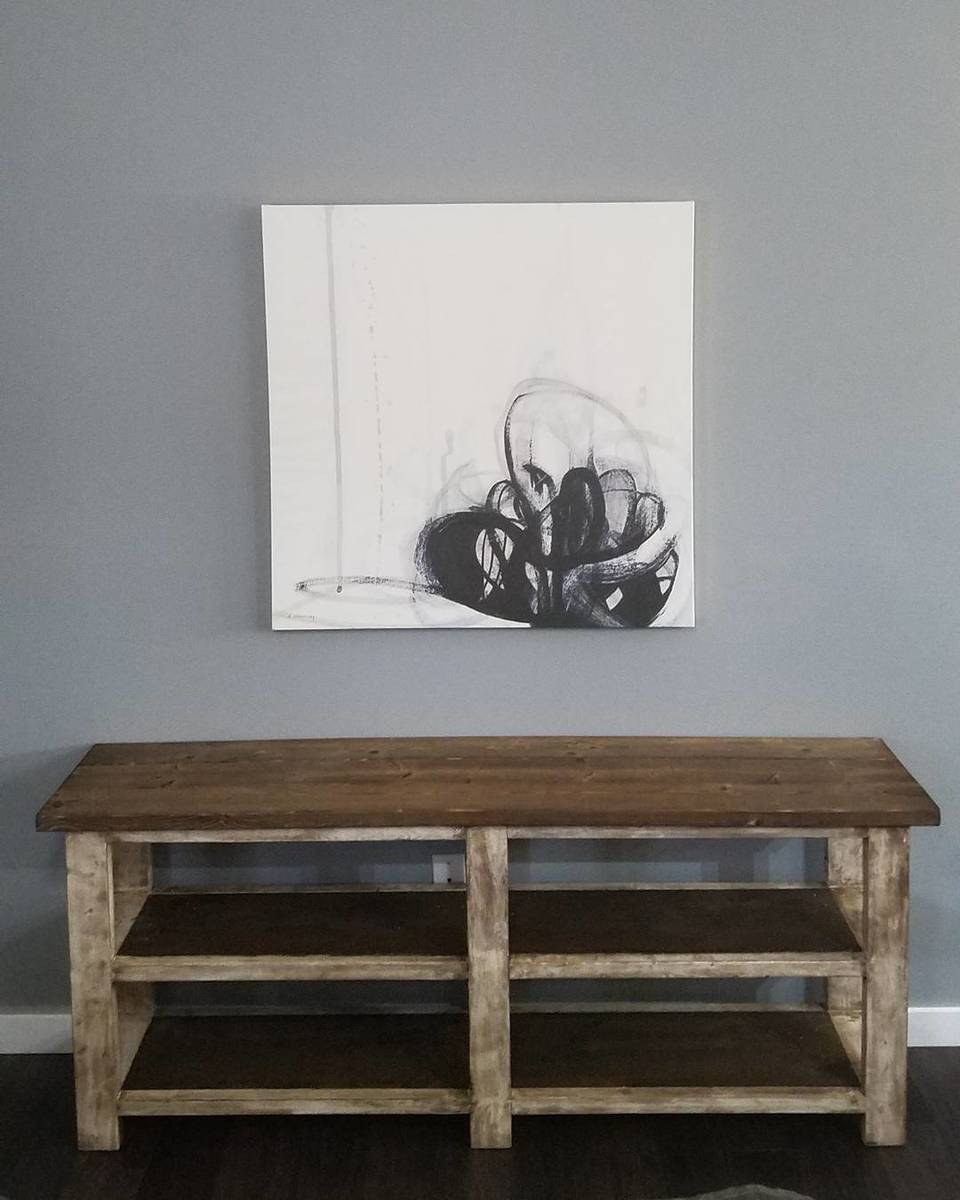
Used the plans for teh x-table, but left out the Xes and opted for 2x4 pieces on each side to fill the gap. Went "fancy" and made it two tone for added interest. Have developed my "signature look" of staining over paint for the base.
Built from Plan(s)
Estimated Cost
$70
Estimated Time Investment
Weekend Project (10-20 Hours)
Finish Used
Minwax espresso stain, and Glidden oil based furniture paint in antique white
Recommended Skill Level
Intermediate
Ipex Bookcase
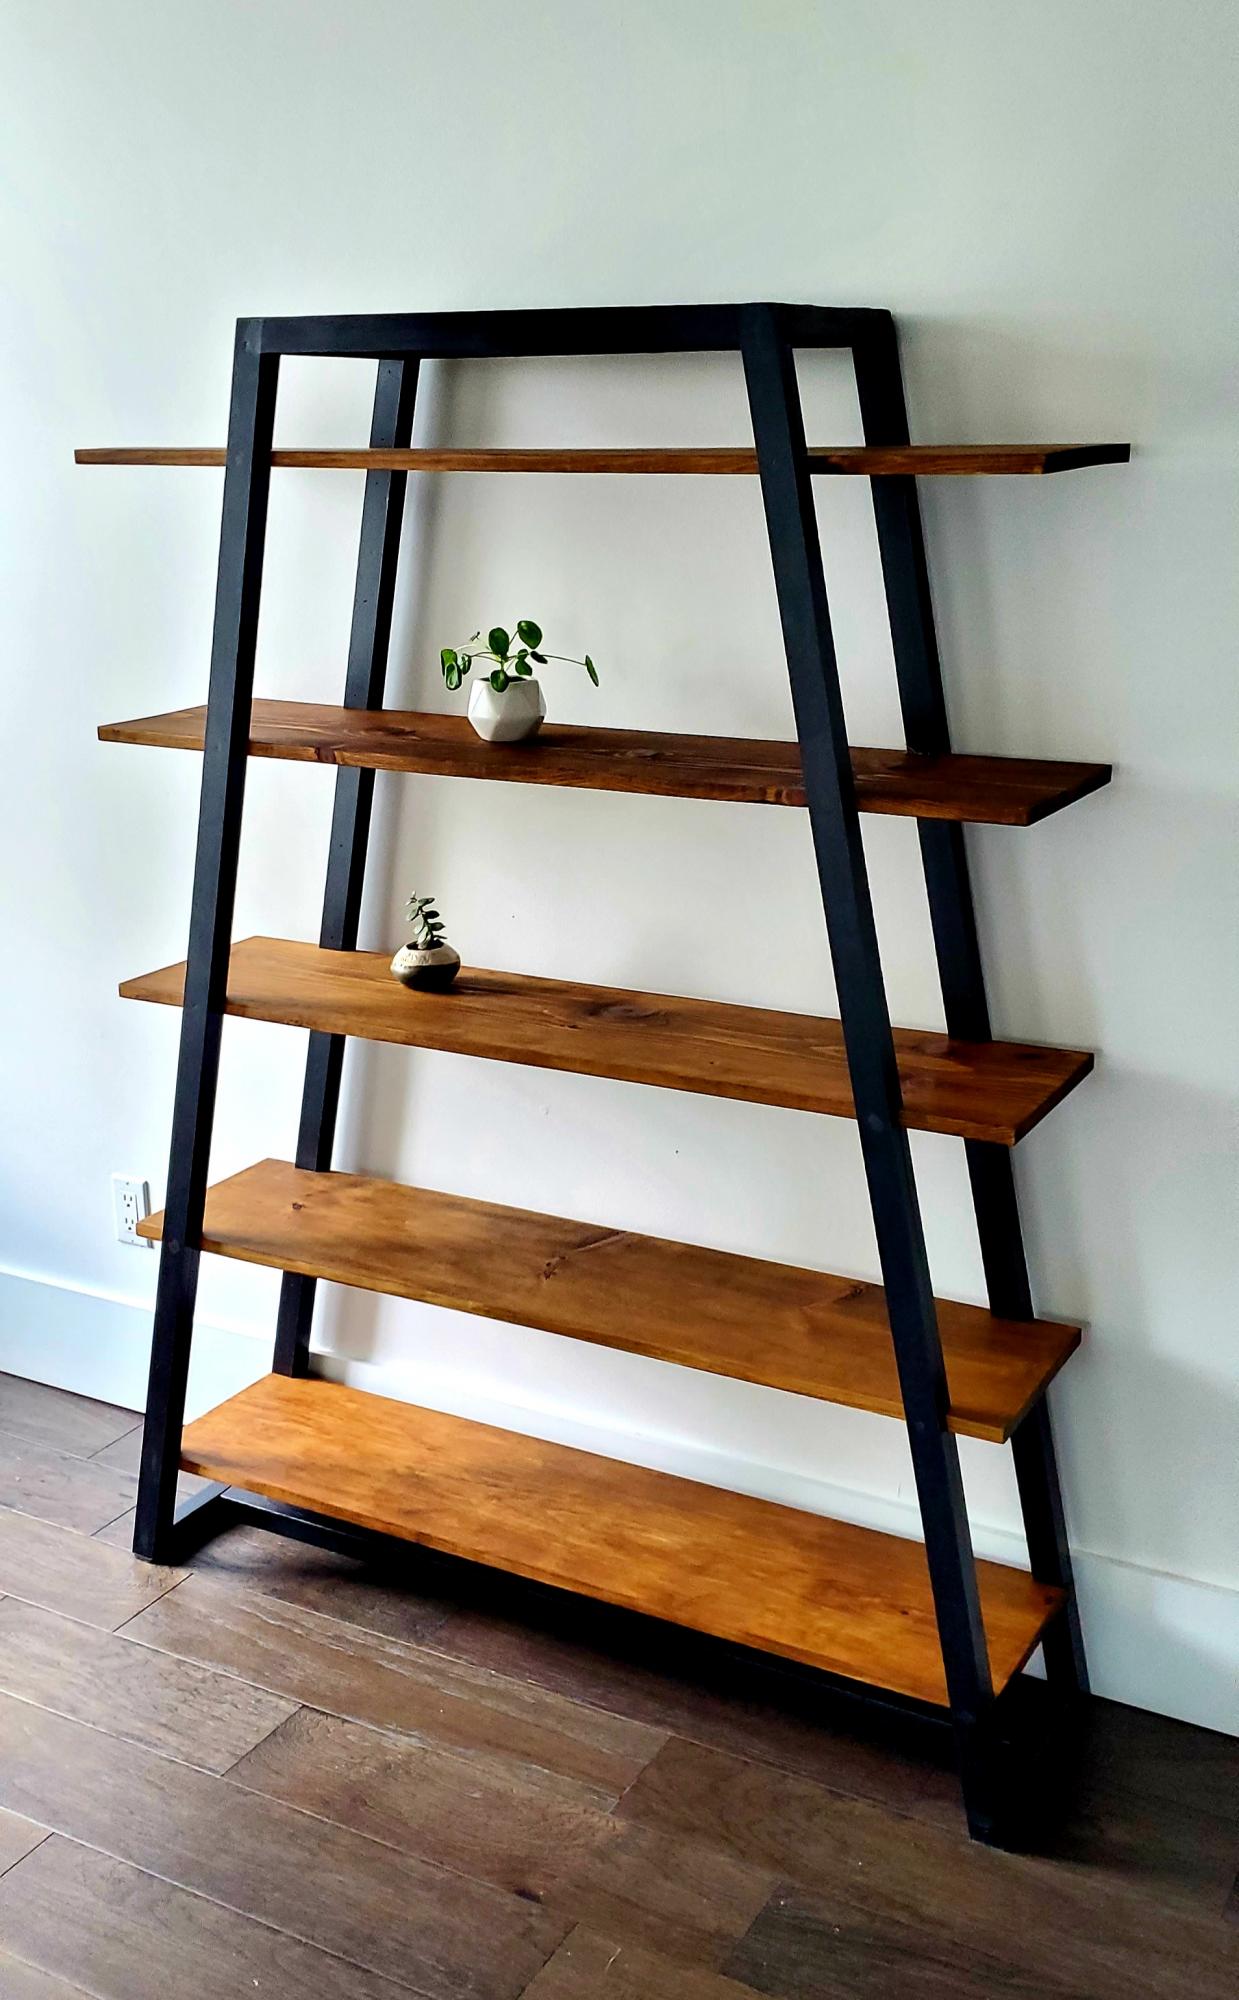
Painted the arms in a metallic onyx paint, shelves are Briwax dark brown.
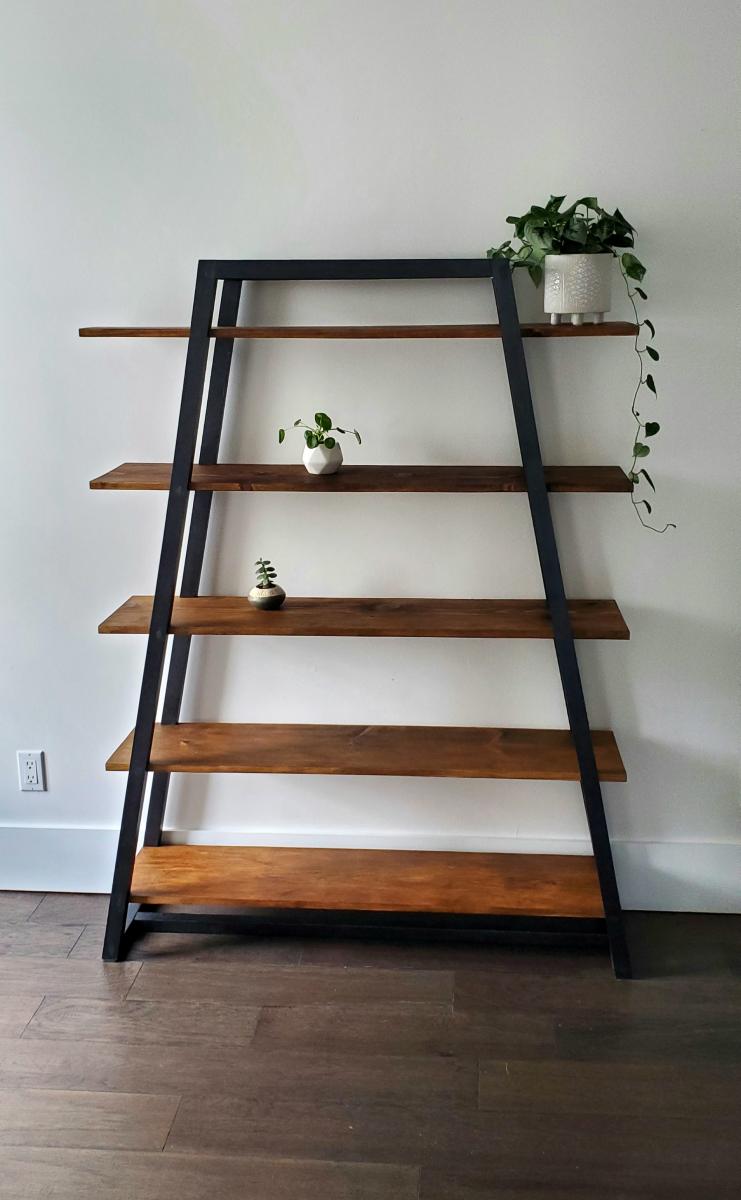
Built from Plan(s)
Estimated Cost
$100
Estimated Time Investment
Day Project (6-9 Hours)
Finish Used
Briwax dark brown, metallic onyx paint
Recommended Skill Level
Intermediate
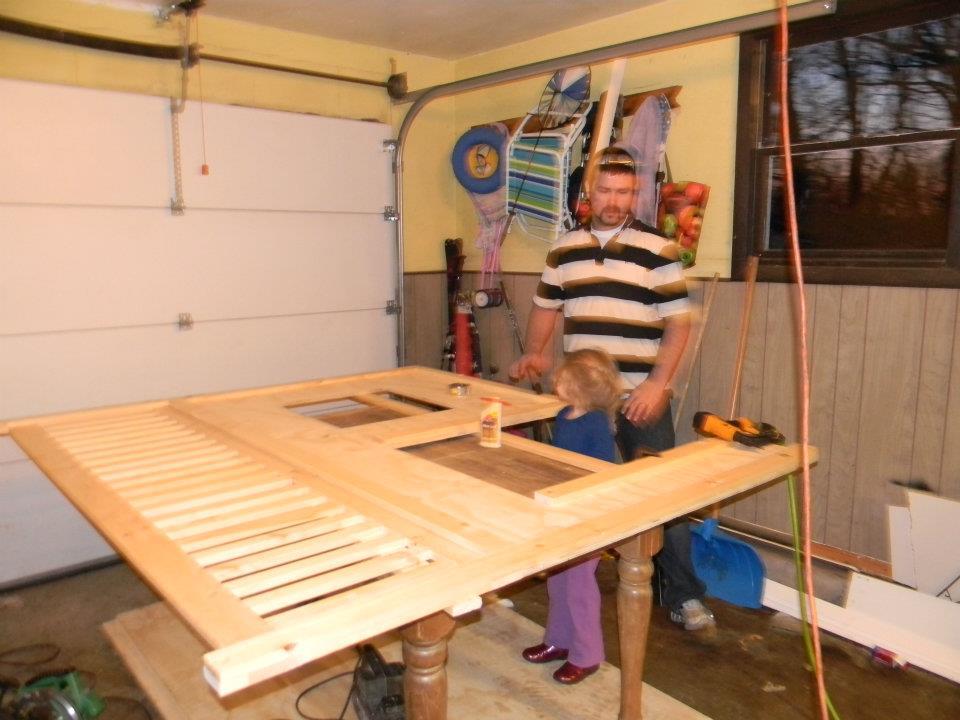
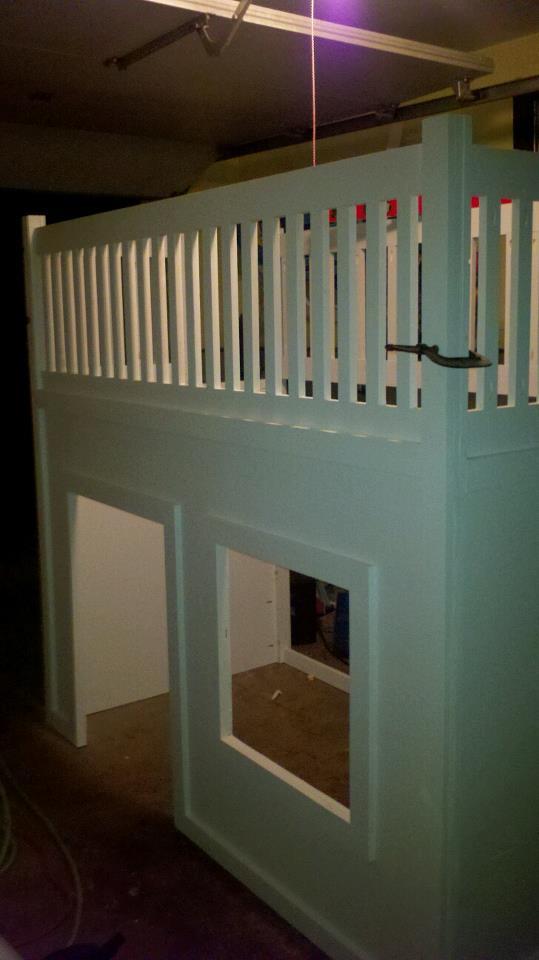
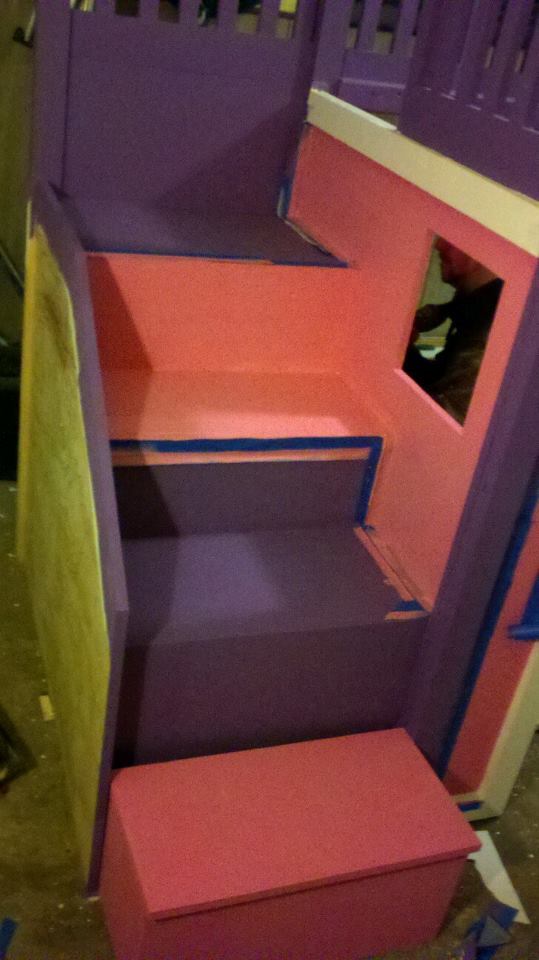
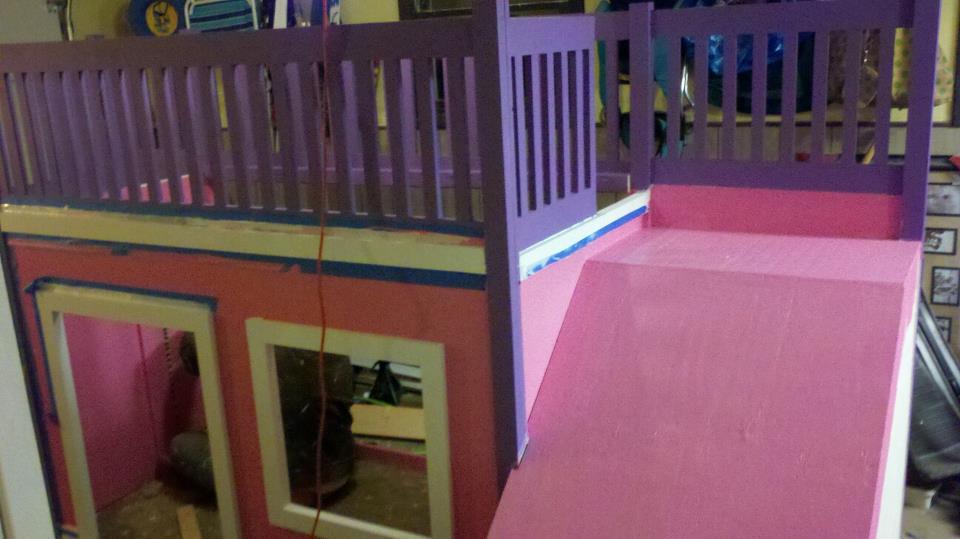
Lillian's bed
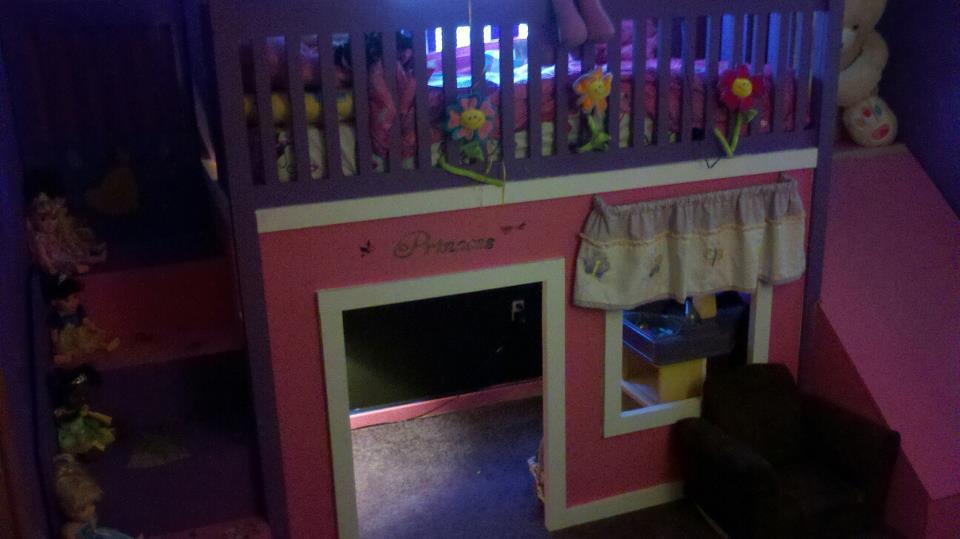
This is my first attempt at building furniture. My wife found the plans and after some research of how much it would be to purchase a bed that would be similiar, my wife decided I was building one. I must admit at the time I was not very thrilled about this idea, but I have experience with building so I thought I could handle the challange. My background knowledge is in framing and deck building, not so much furniture building and finish carpentry. I printed out the step by step plans for the bed from Ann's website and went to work. I added the stairs and the slide and build them to fit perfectly on one wall of her room. I built a small door so she has a hide out under the slide which she loves to go in and read. Under the stairs I built in some storage. After this was done, I was really happy with it. My wife, my daughter and my brother also helped during the process.My daughter loves this bed. For a week she was running around the house saying "I have the best dad ever!" and to this day the first thing my daughter says to people who come to our house is, "Do you want to see my bed?" Looking foward to building more.

Estimated Cost
550.00
Estimated Time Investment
Week Long Project (20 Hours or More)
Finish Used
The pink paint is called very sexy pink. (My daugher picked the colors) Latex based primer and paint.
Recommended Skill Level
Intermediate
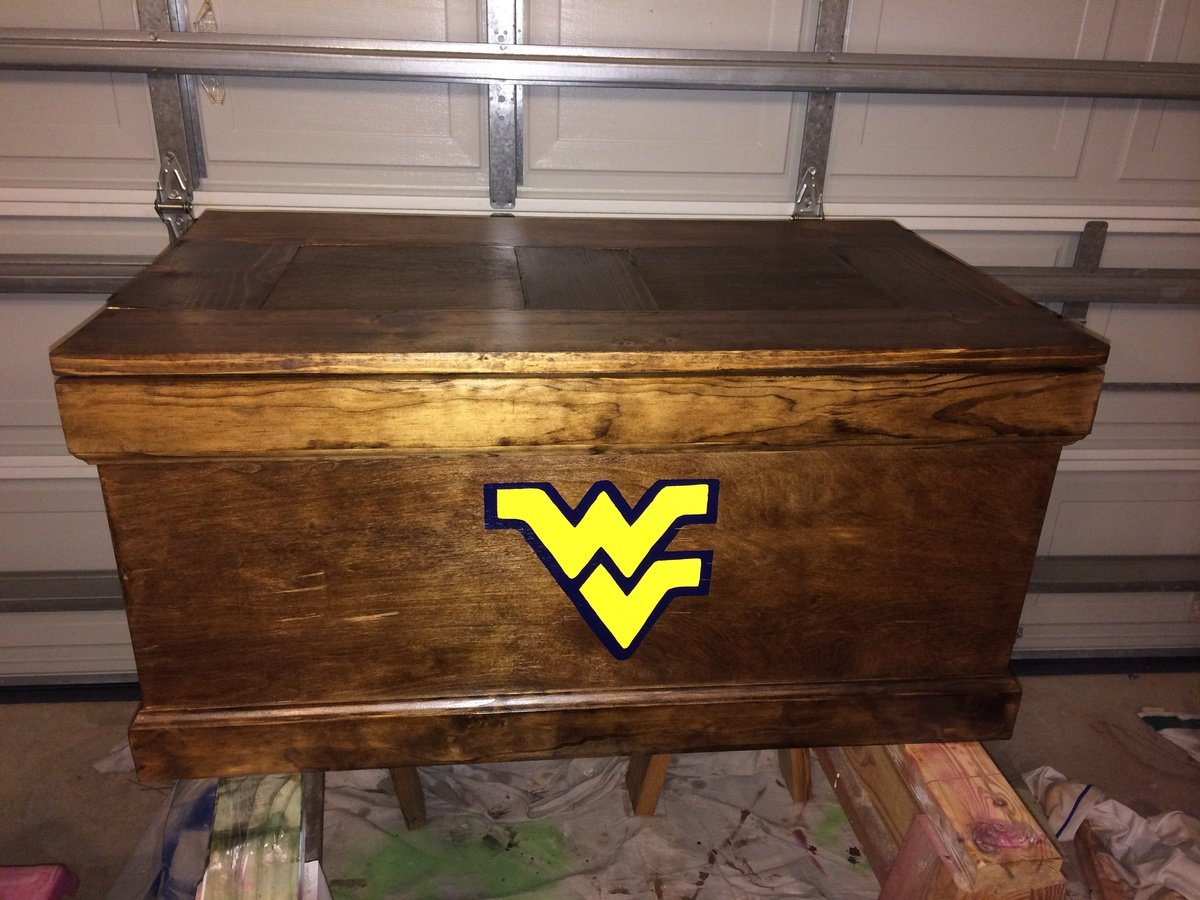
Our Toy Box
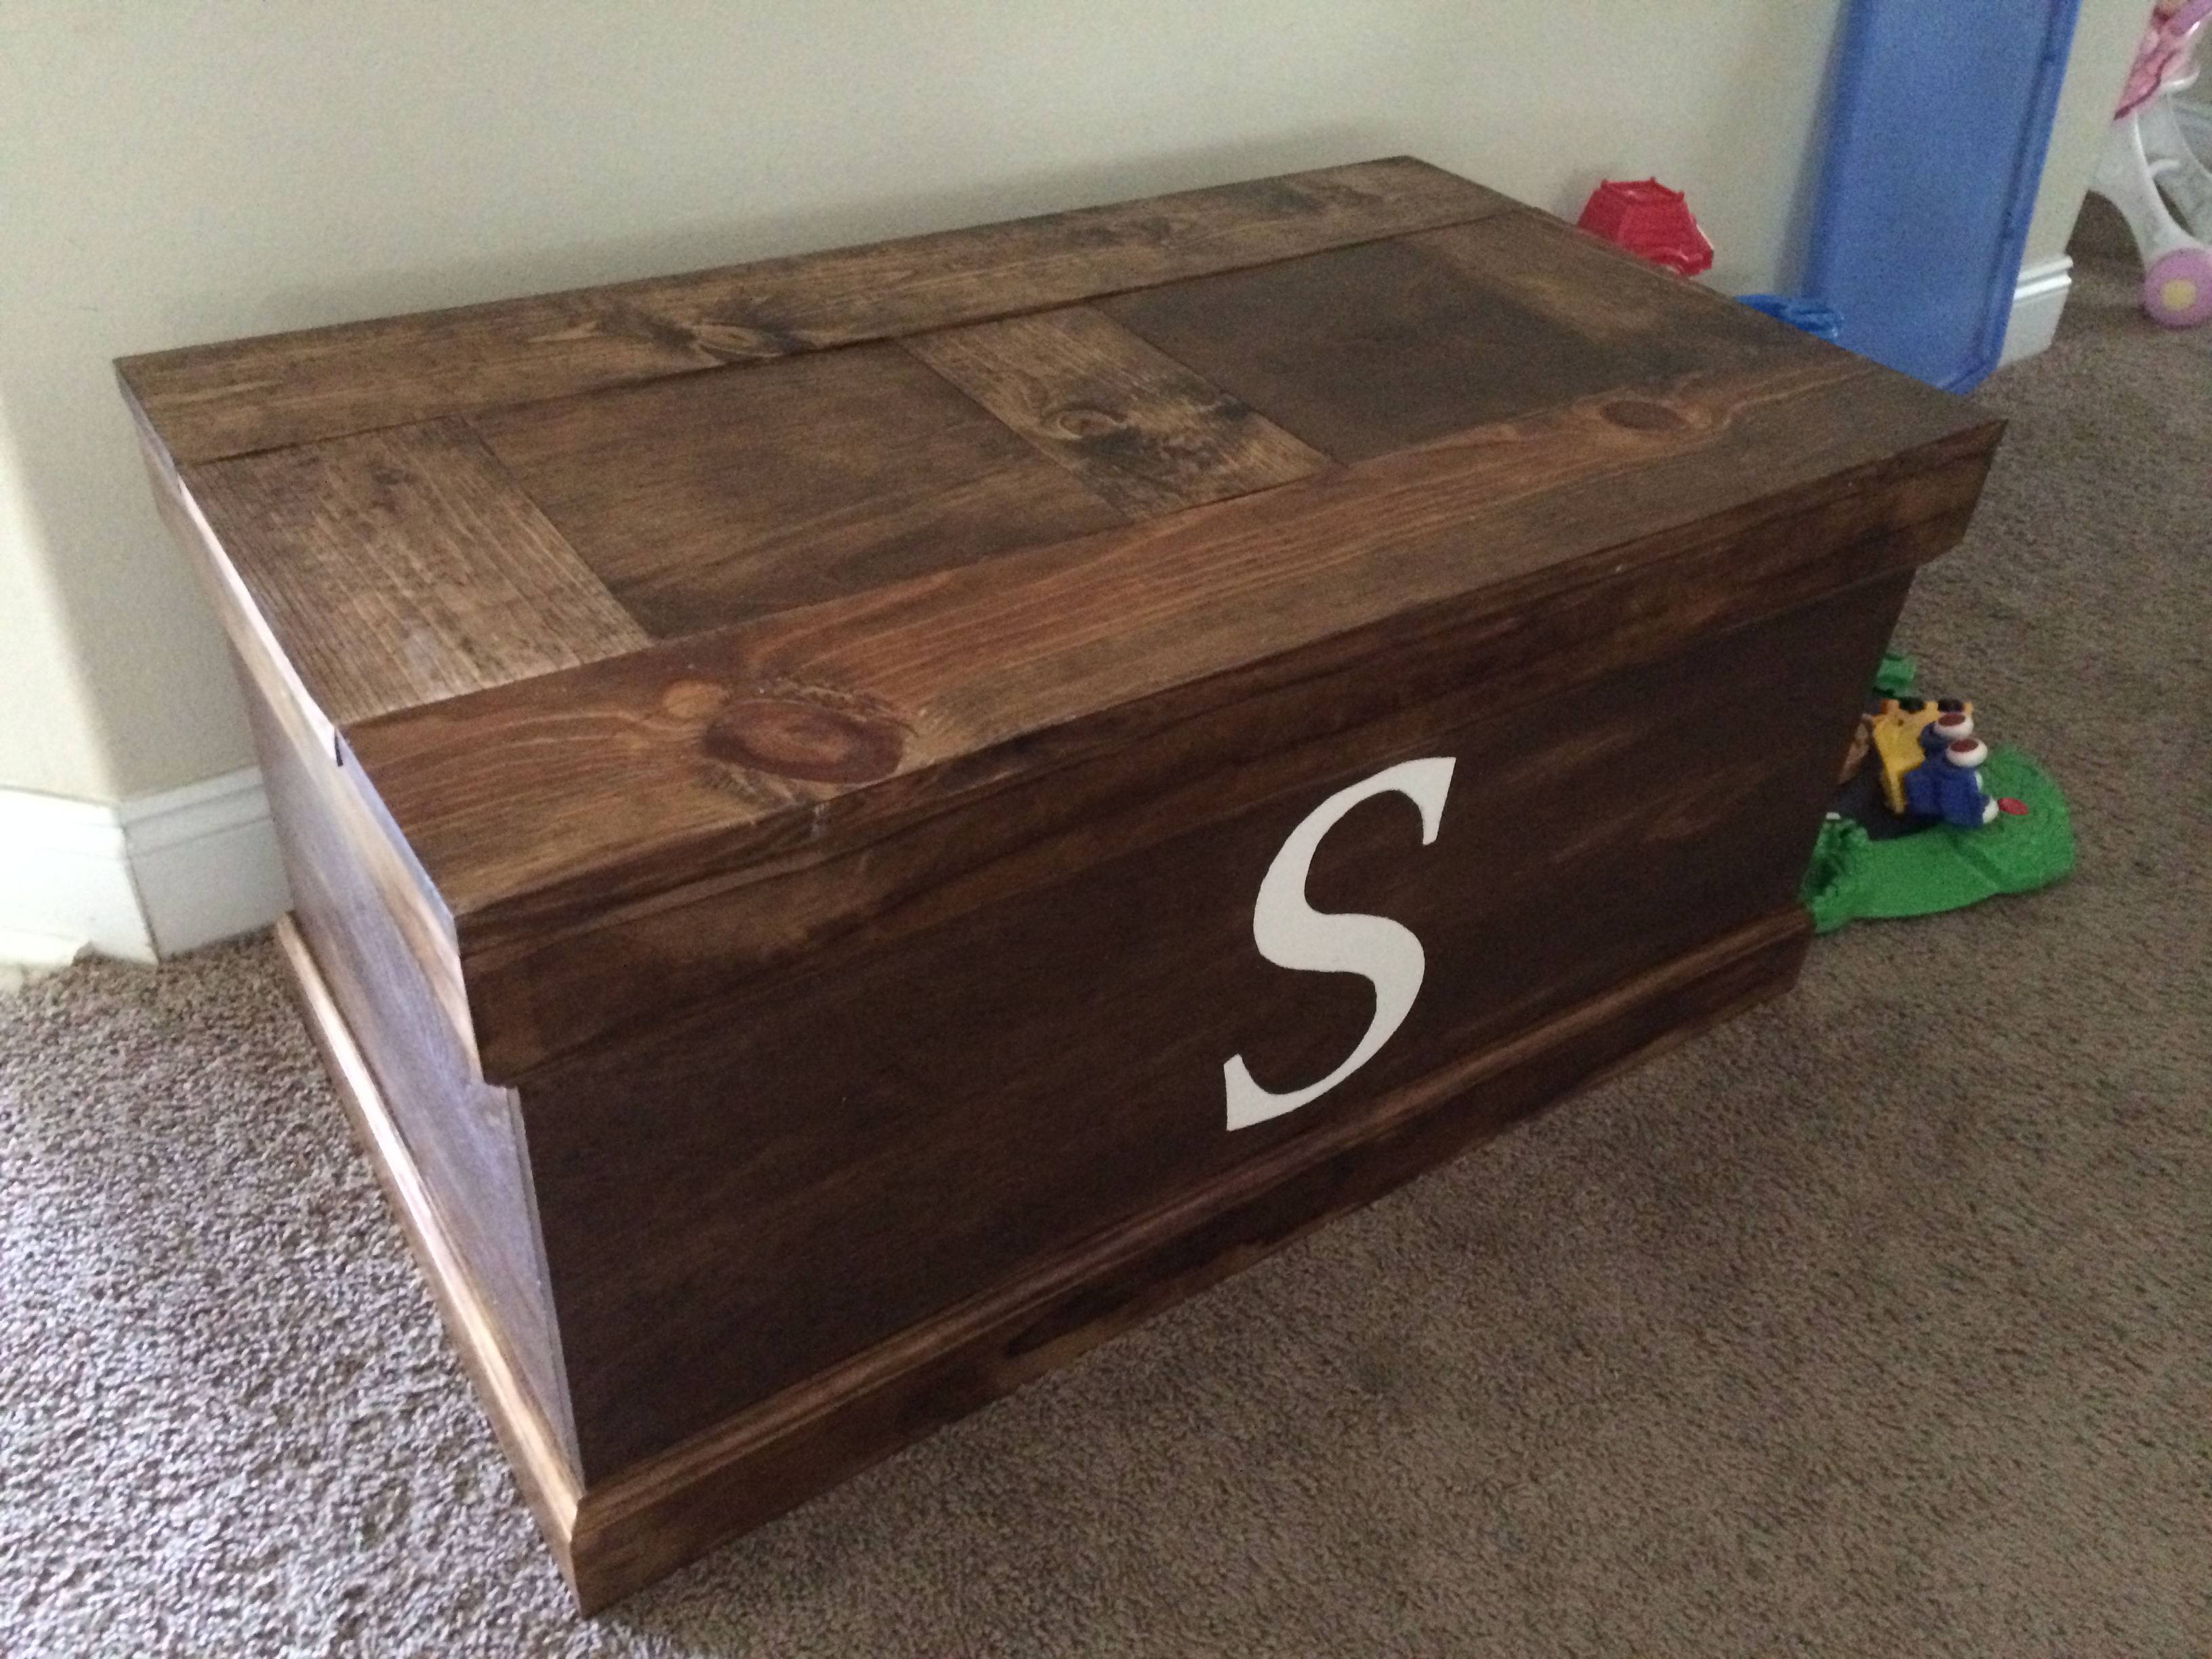
Toy box for our kids that someday will become a blanket box or something else around the house. Customized with the S for our last name. Use a piano hinge and folding lid support on one side. Made another for our friends with the West Virginia logo.
Built from Plan(s)
Estimated Time Investment
Day Project (6-9 Hours)
Finish Used
Provincial minwax stain, rustoleum spray paint for the S, and polycrylic clear coat.
Recommended Skill Level
Intermediate
Comments

Thu, 04/16/2015 - 08:37
soft stay hinges
Hello, I just built this same trunk and it turned out great. However, I had a hard time finding a set of soft stay support hinges for the inside. Did you install any and if you did could you tell me what kind (brand) and also a picture of how your hinges look on the back of the trunk and when it is open. That would be great. I went to the original site and asked but they don't respond.
Laundry Basket Tower
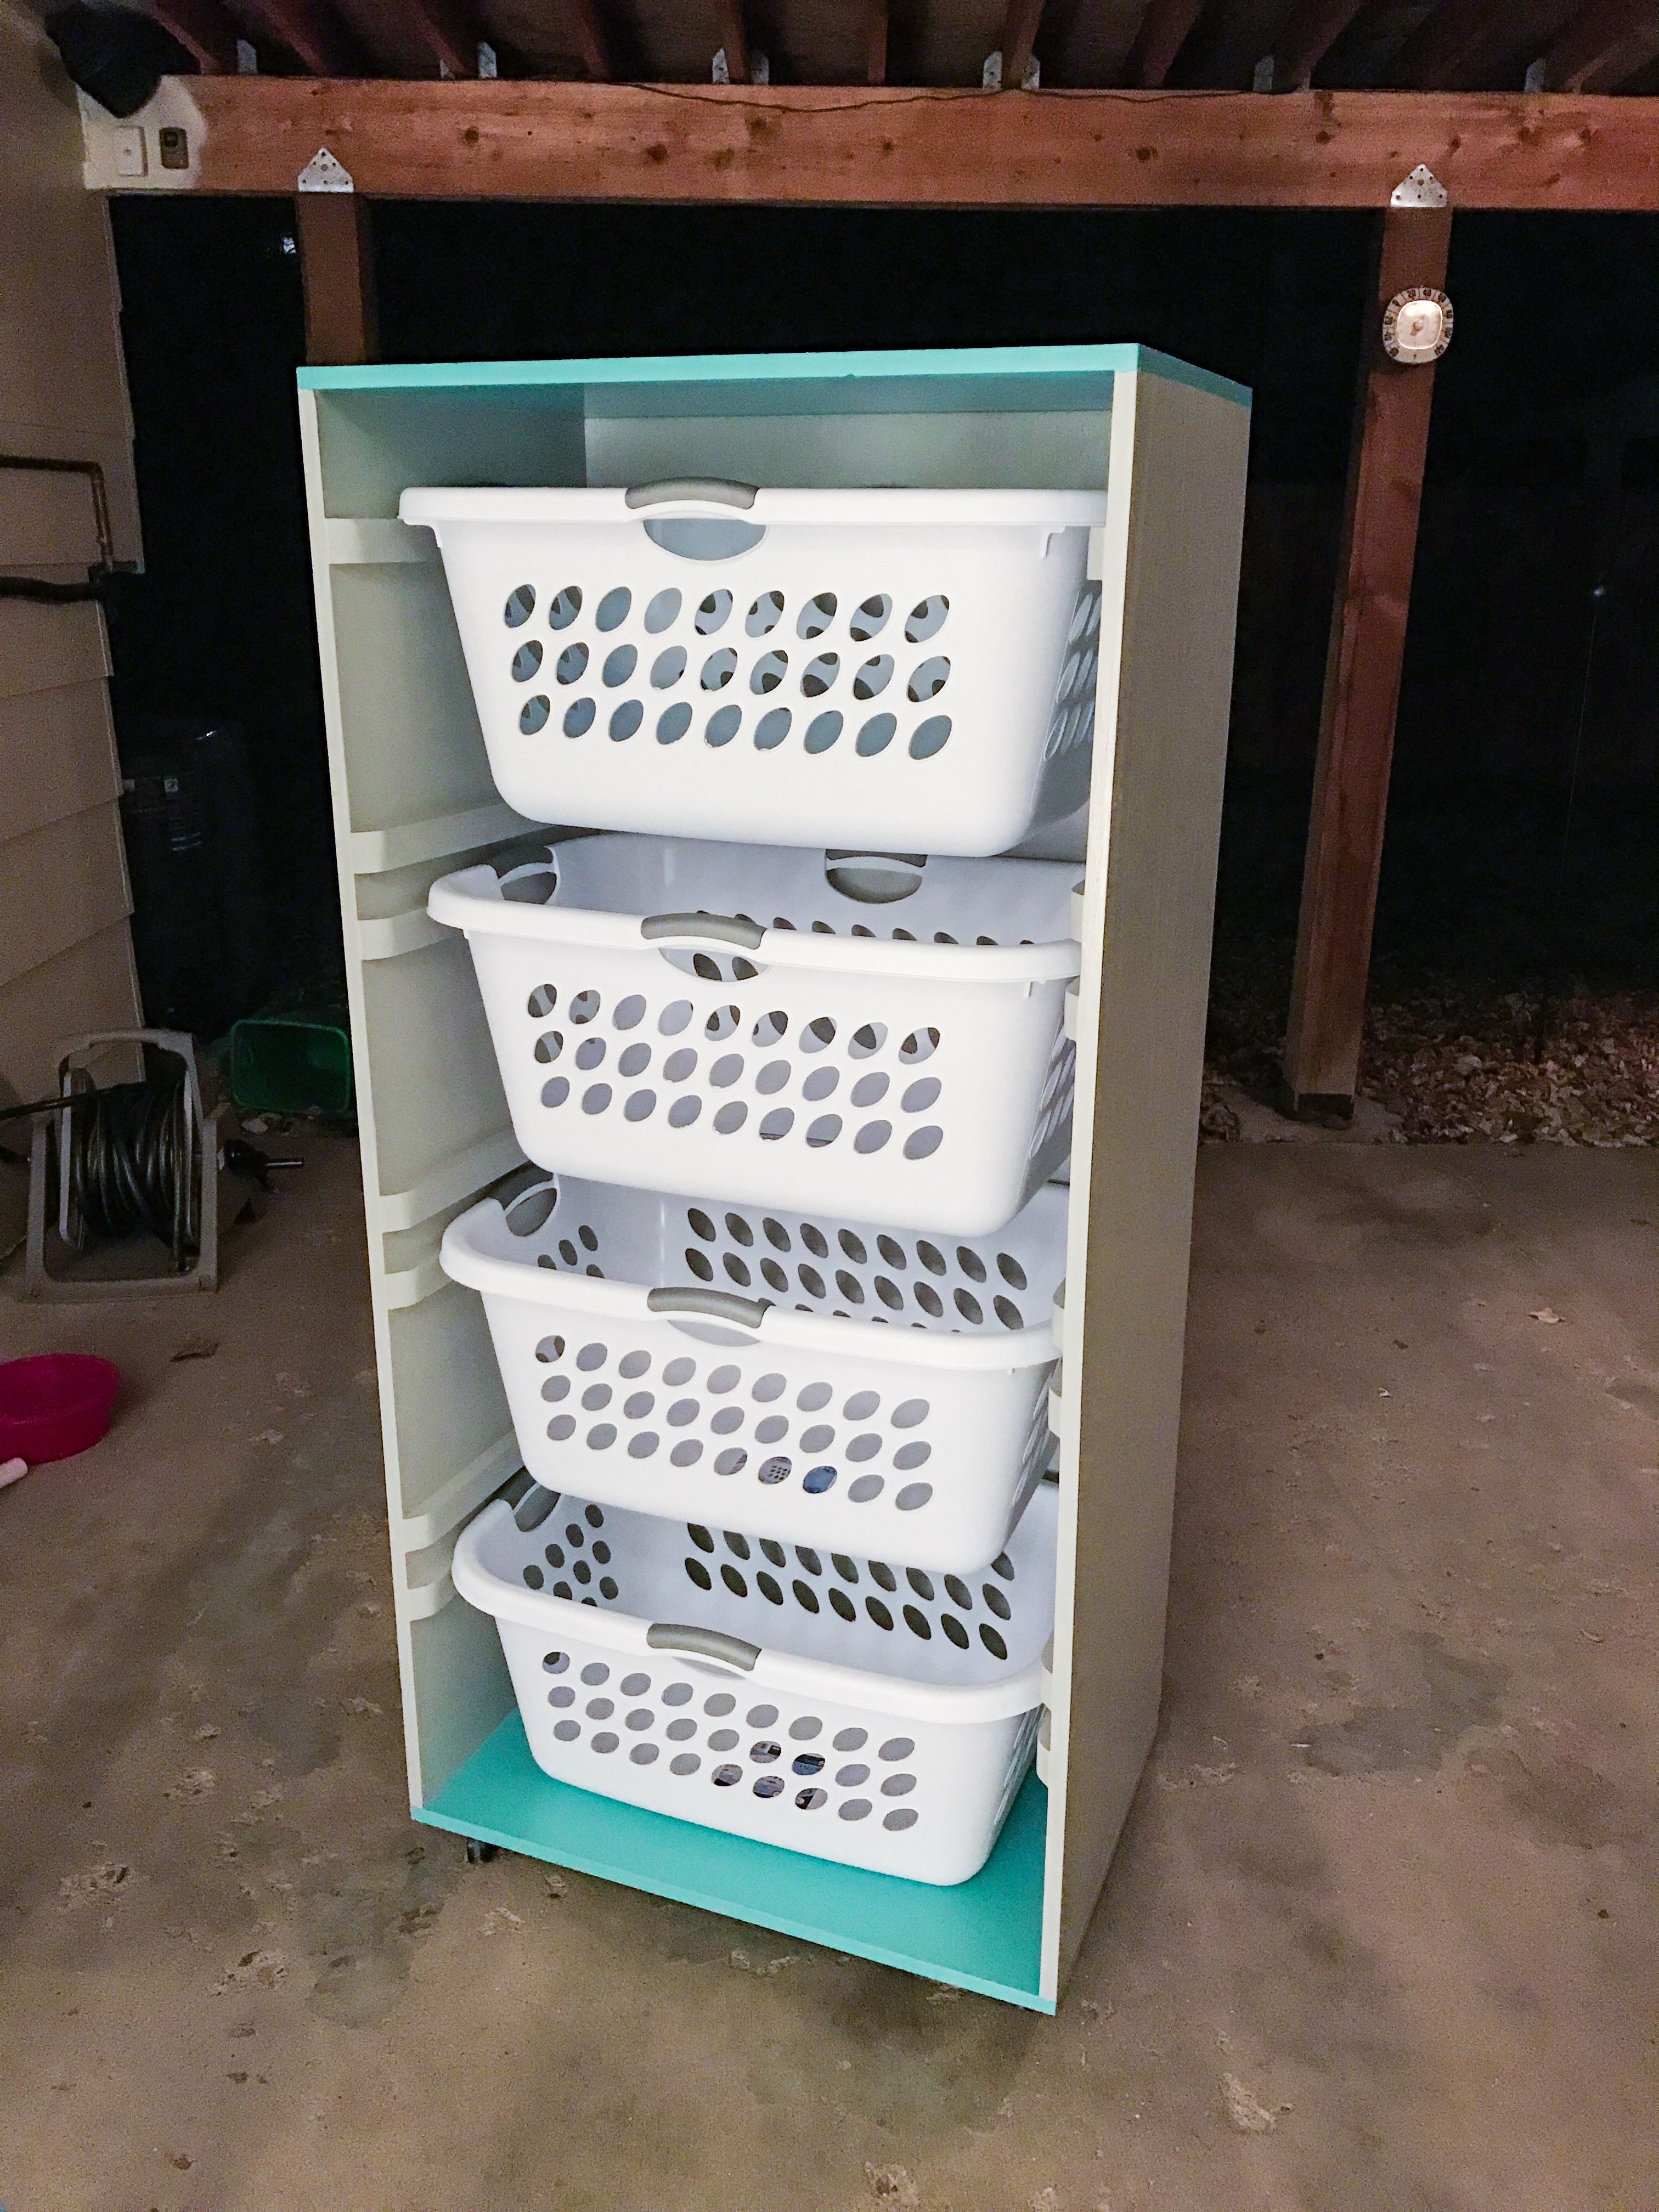
I built this for our laundry sorting needs using the Brook 4 tall and lengthwise plan. I modified the plan to take the baskets width wise, added a little more distance between baskets, and added guide rails above each basket (except the top one) to allow them to be partial pulled out without flipping out. I also beveled and slightly rounded the front of the guide rails just for looks. I think it turned out pretty good for my first woodworking project.
Built from Plan(s)
Estimated Time Investment
Weekend Project (10-20 Hours)
Recommended Skill Level
Beginner
Beach themed Adirondack chair
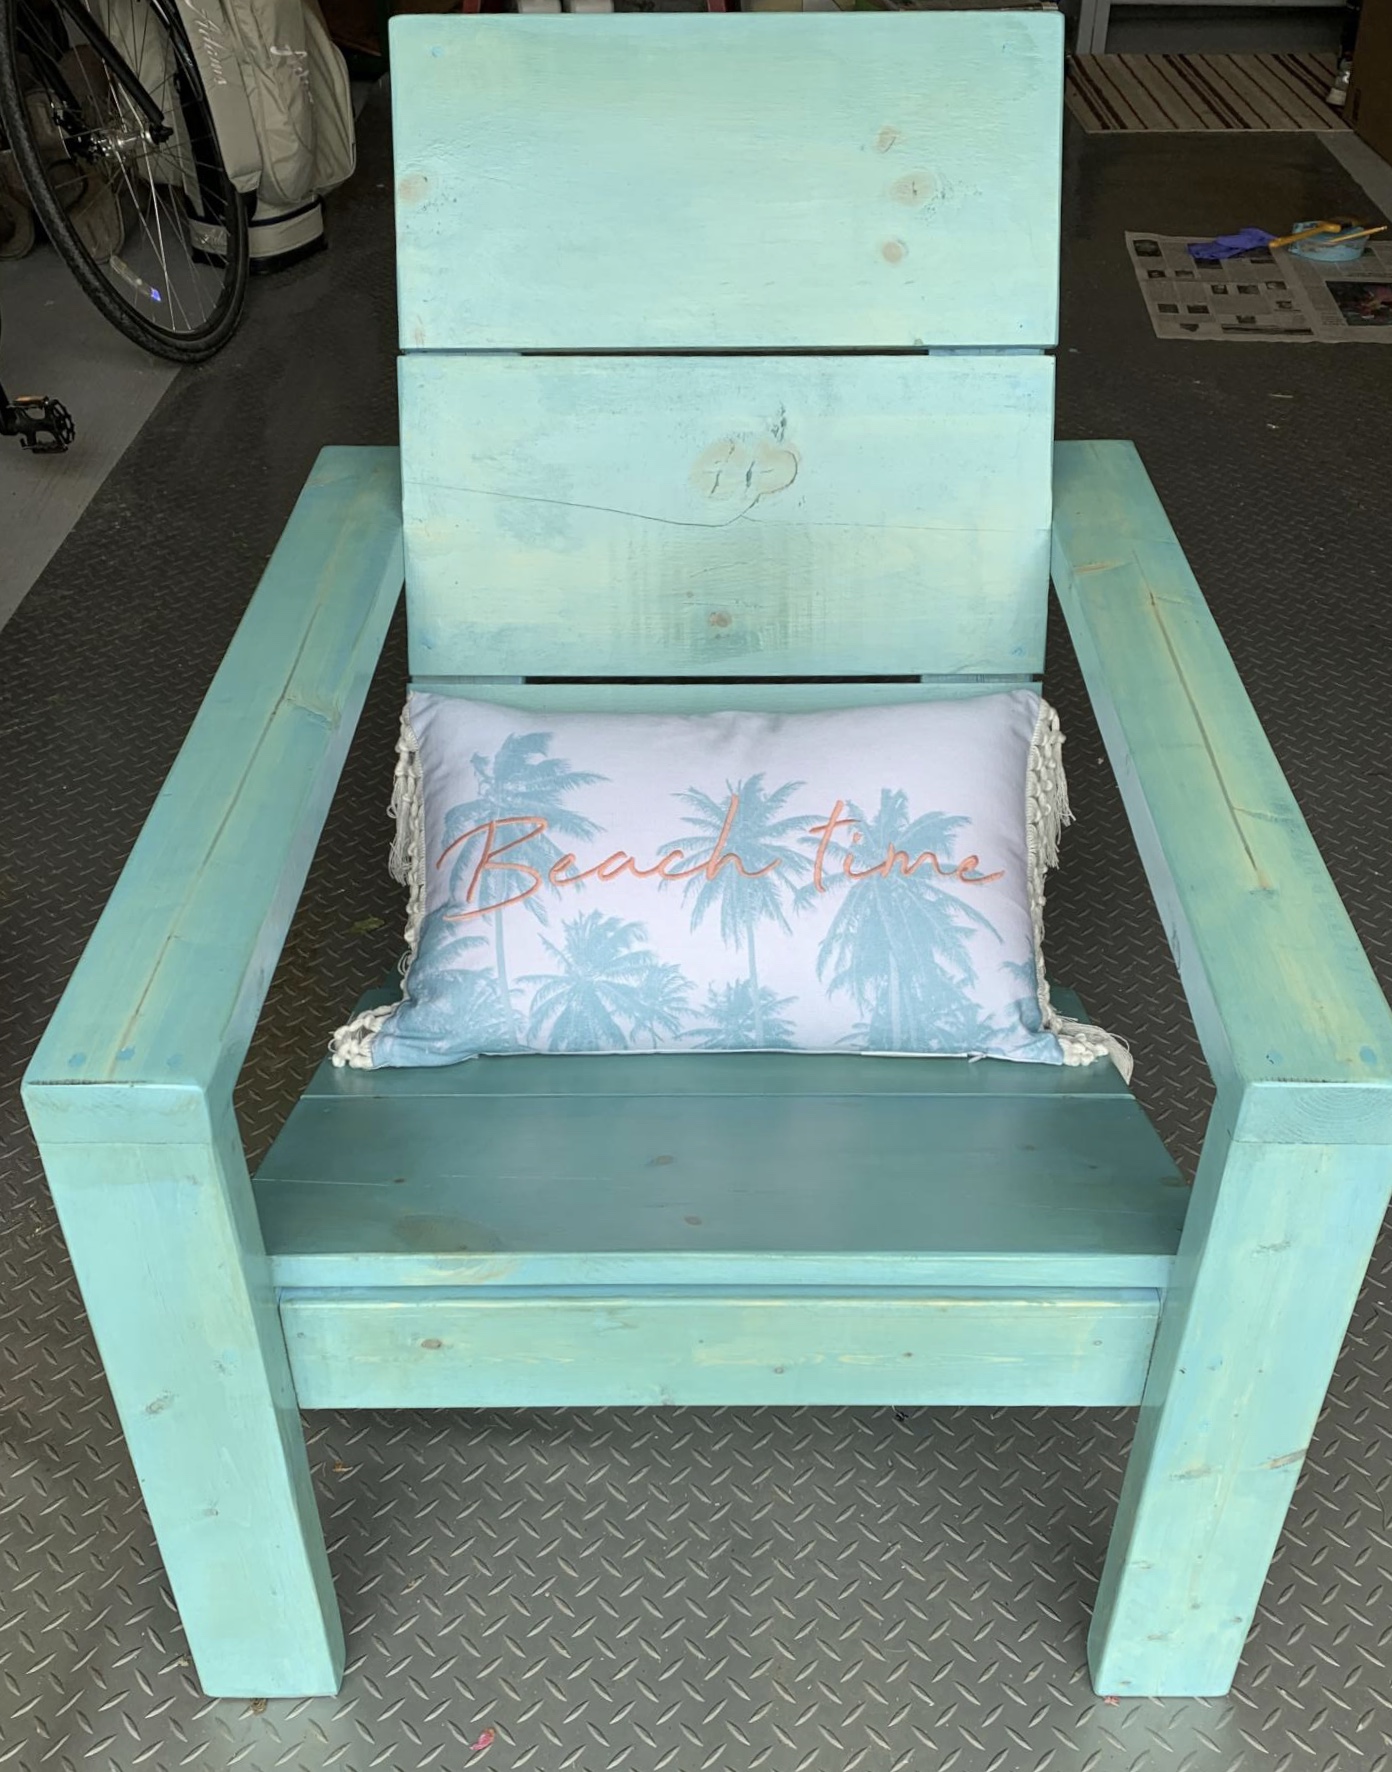
Built as a Birthday gift for my daughter-in-law. Hope she likes it.
Built from Plan(s)
Estimated Cost
$50
Finish Used
- Varathane Ultimate wood stain - Antique Aqua Blue.
- Minwax Helmsman Spar Urethane.
- Minwax Helmsman Spar Urethane.
Farmhouse Bed with Bookshelf Headboard
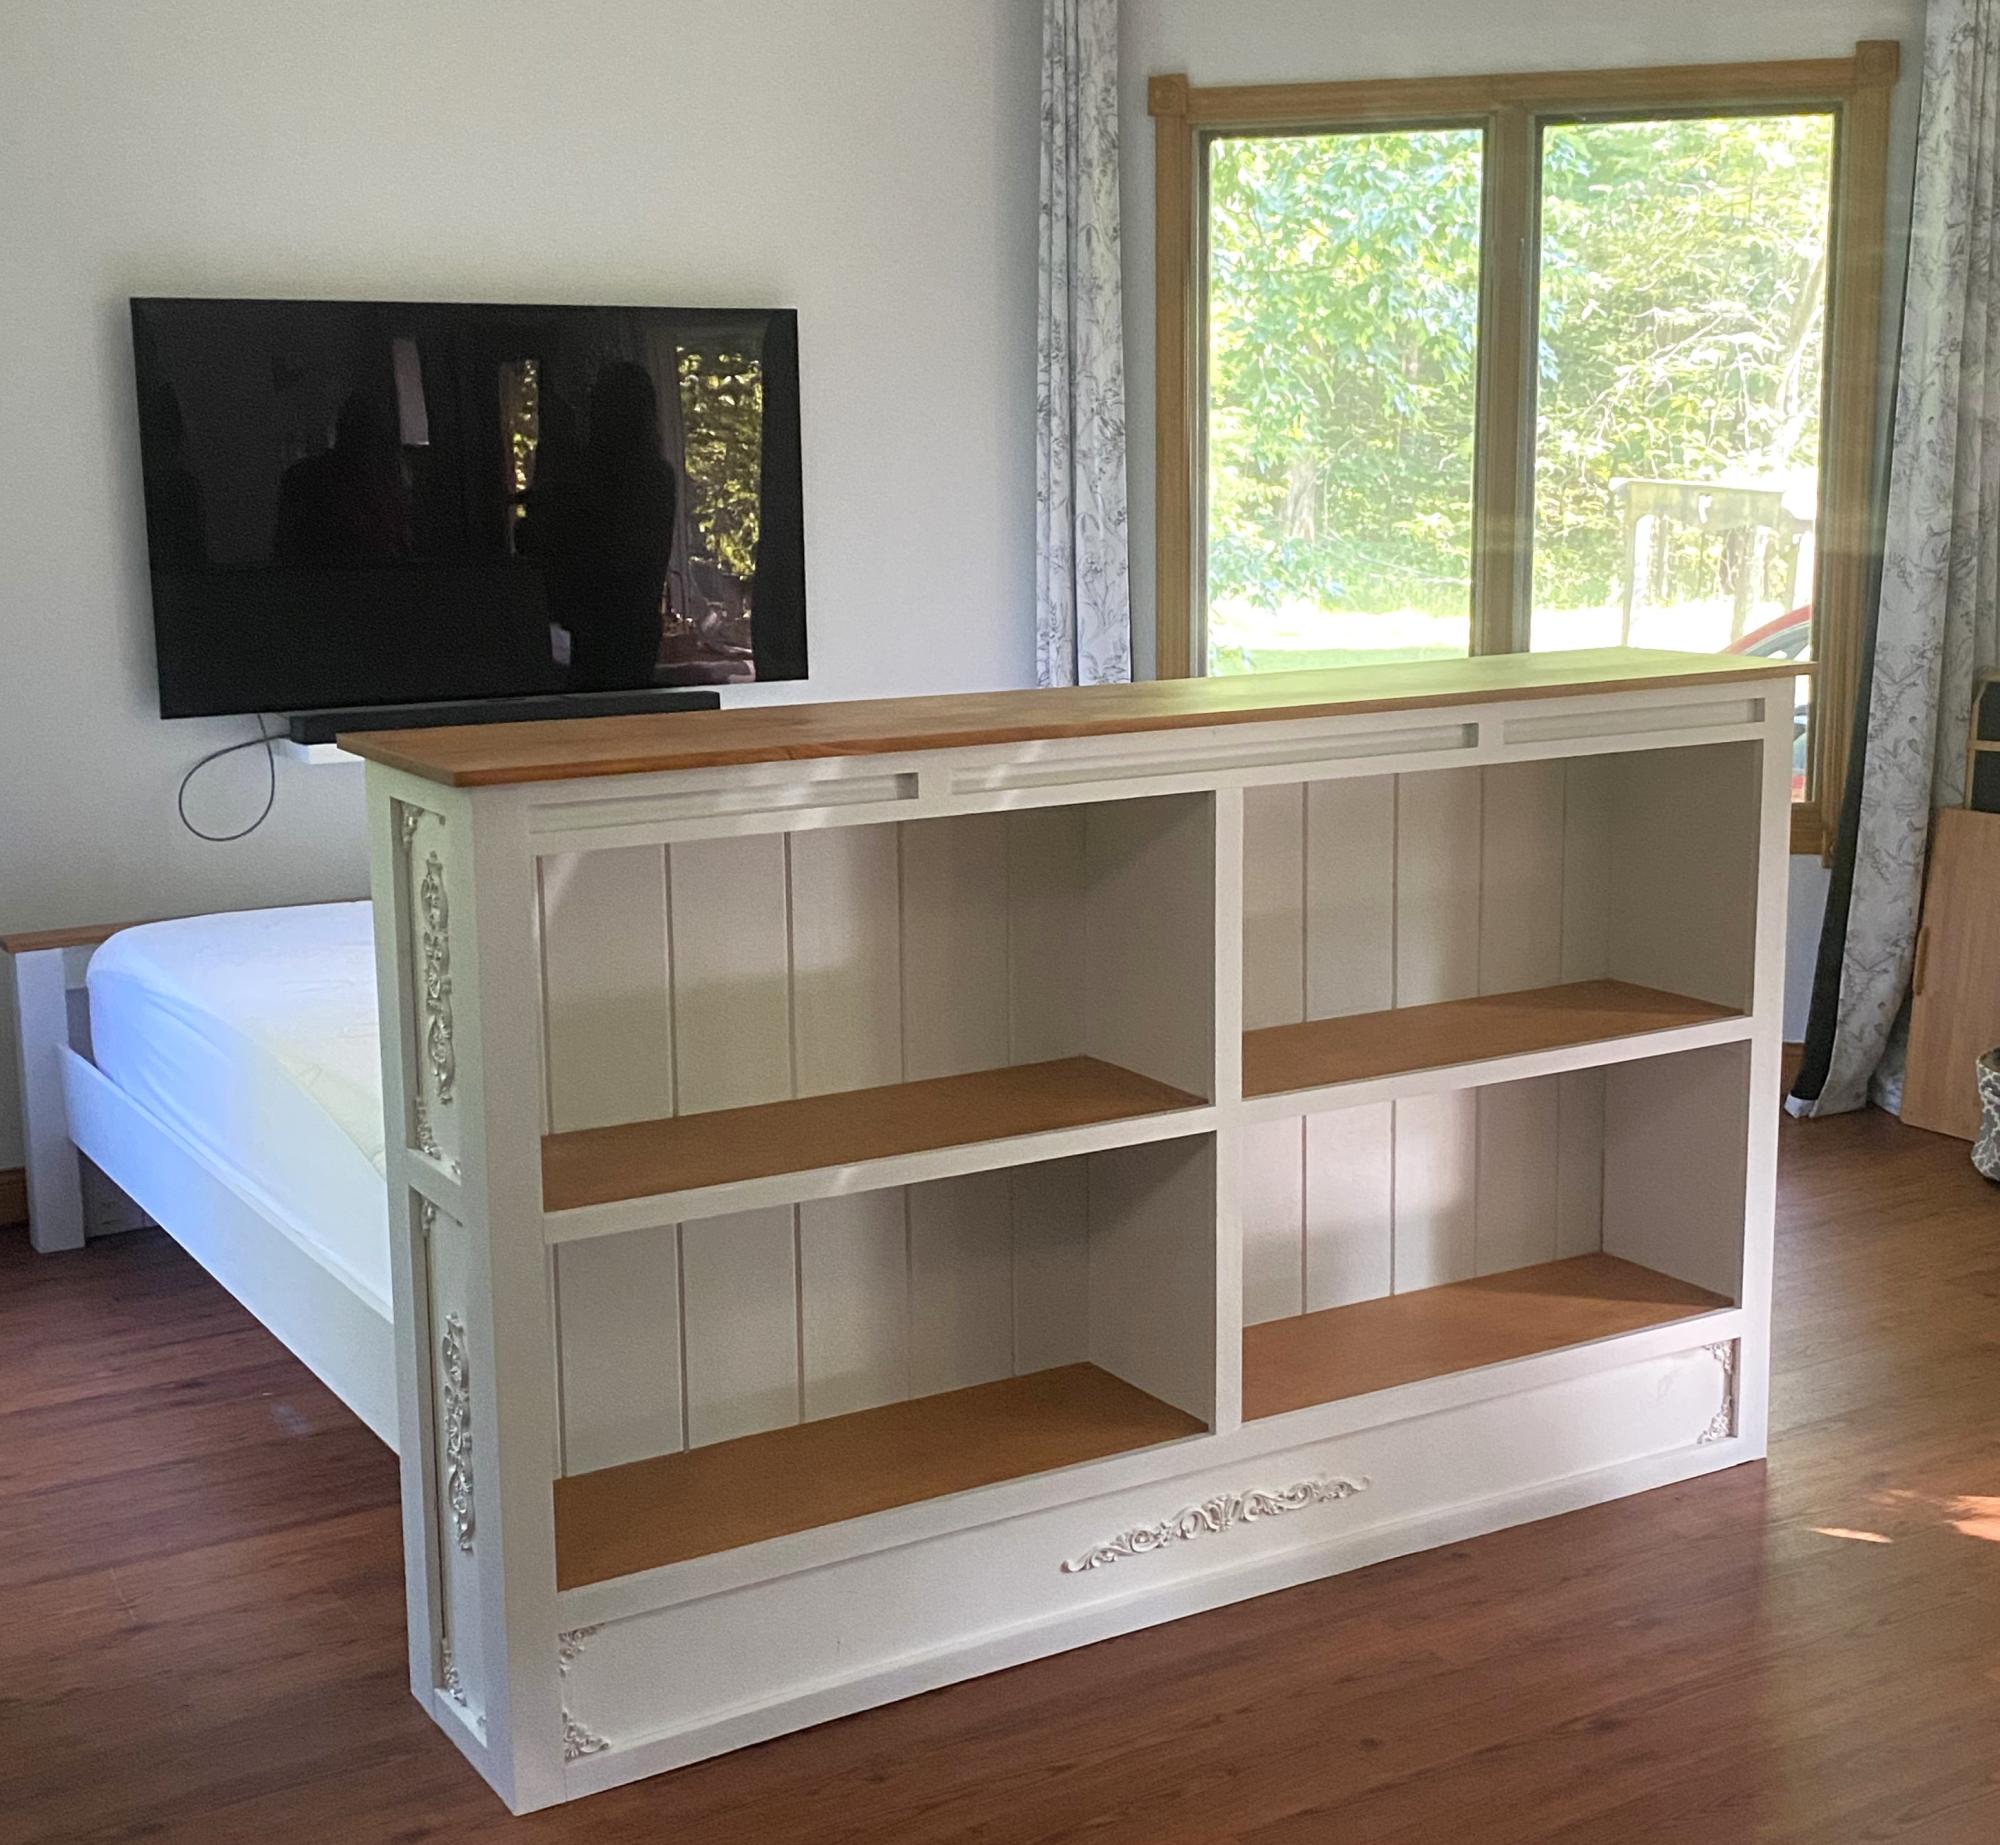
Made this for a friend…that had an oddly shaped room.
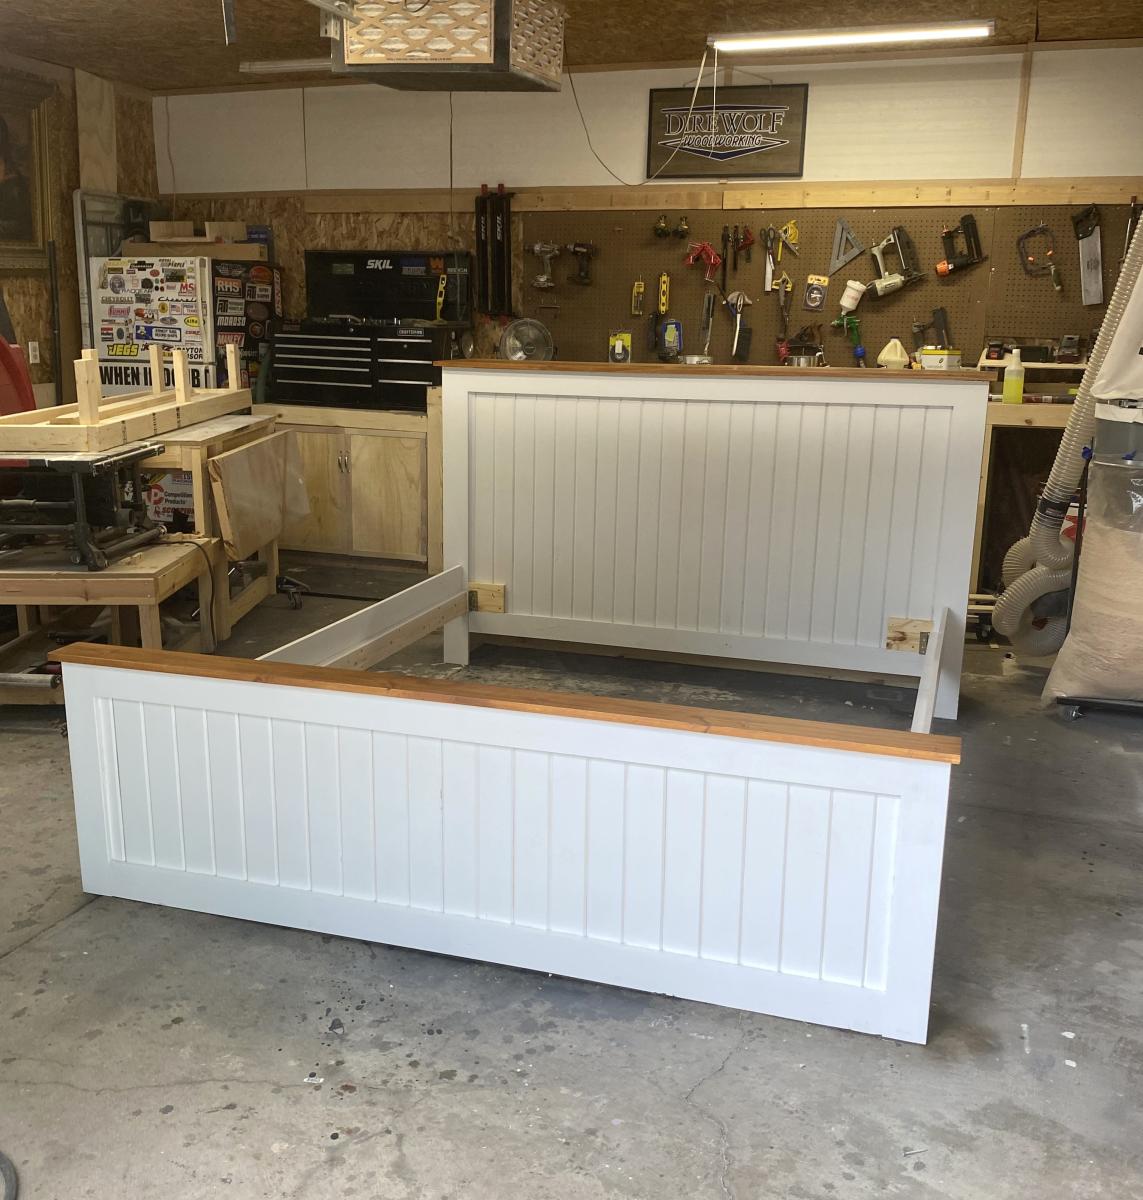
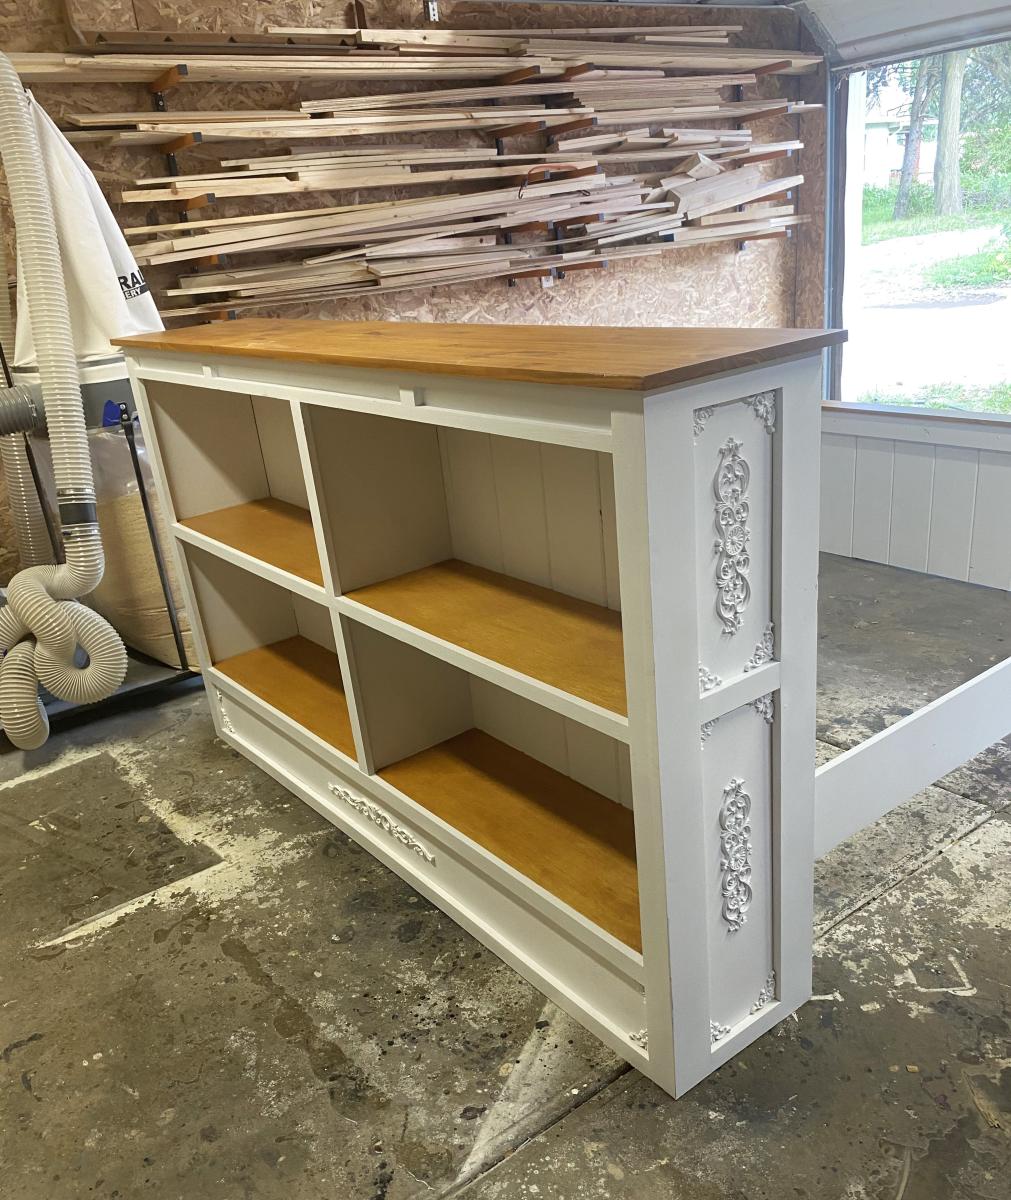
Built from Plan(s)
Trestle table
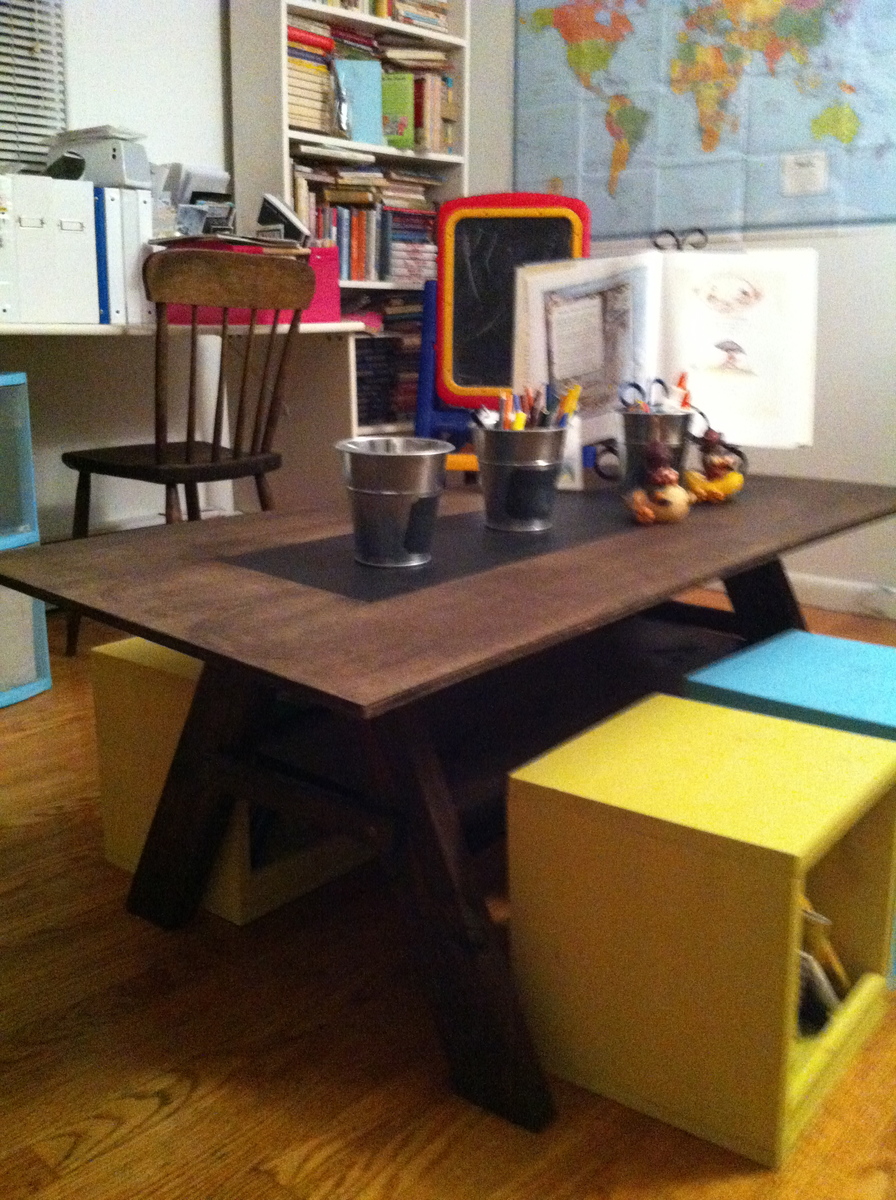
With two small boys it took me several days to make. I had some problems in the beginning because I cut the legs using a carpenter square and not a miter saw. But it worked out in the end. I love the way it came out!
Estimated Cost
60
Estimated Time Investment
Afternoon Project (3-6 Hours)
Finish Used
Miniwax Dark Walnut
Recommended Skill Level
Intermediate
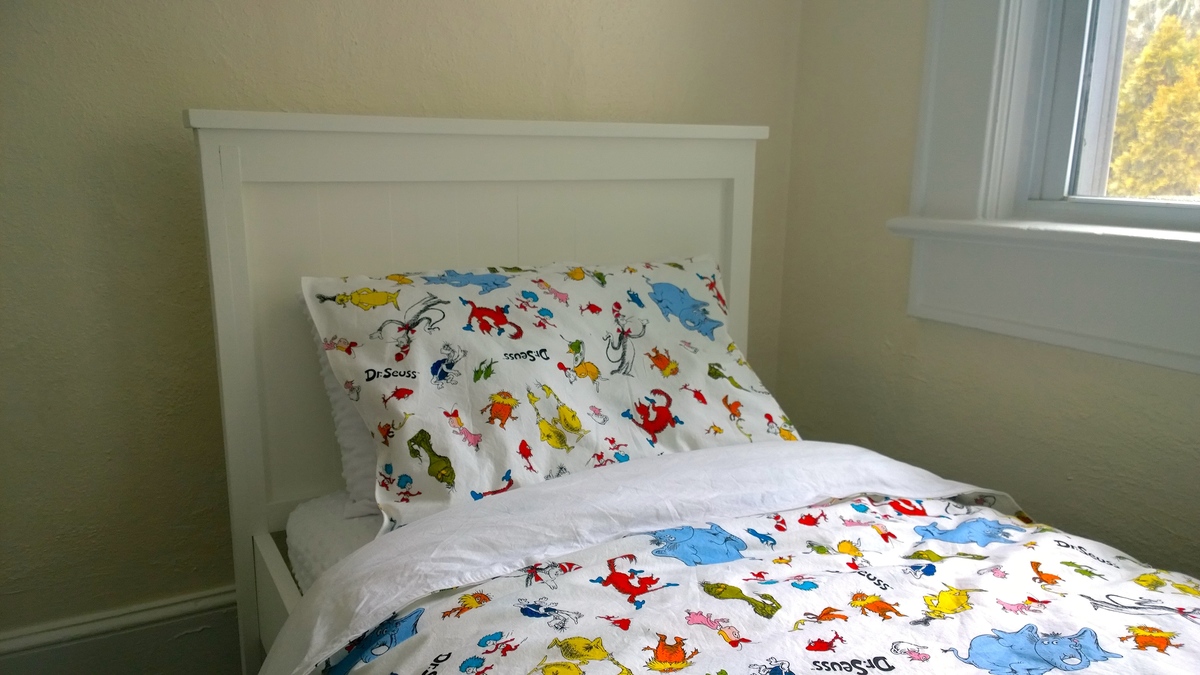
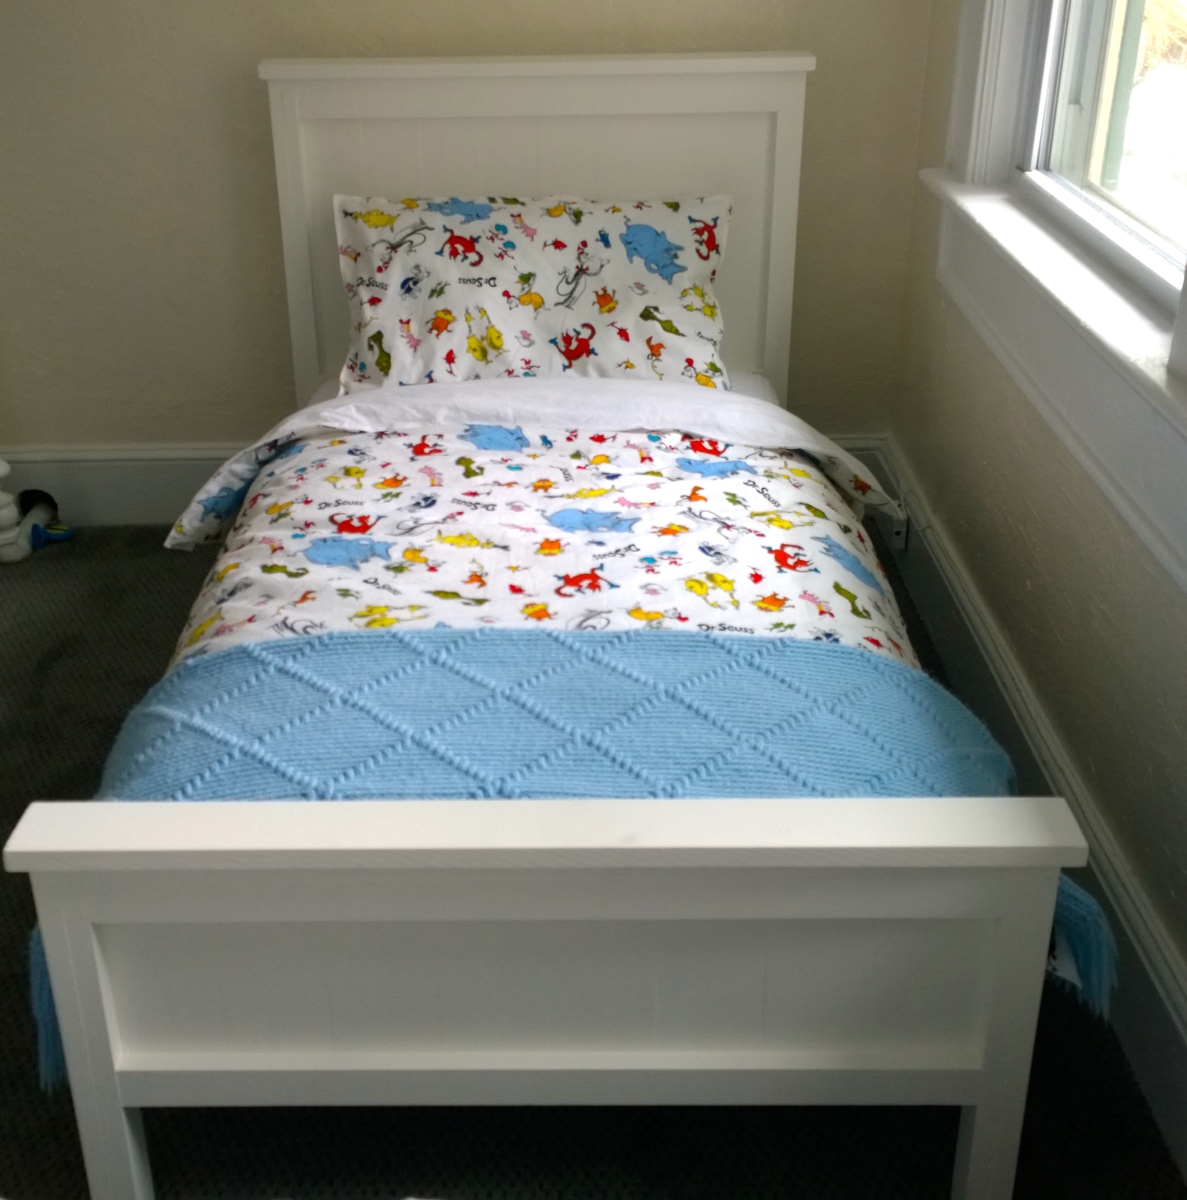
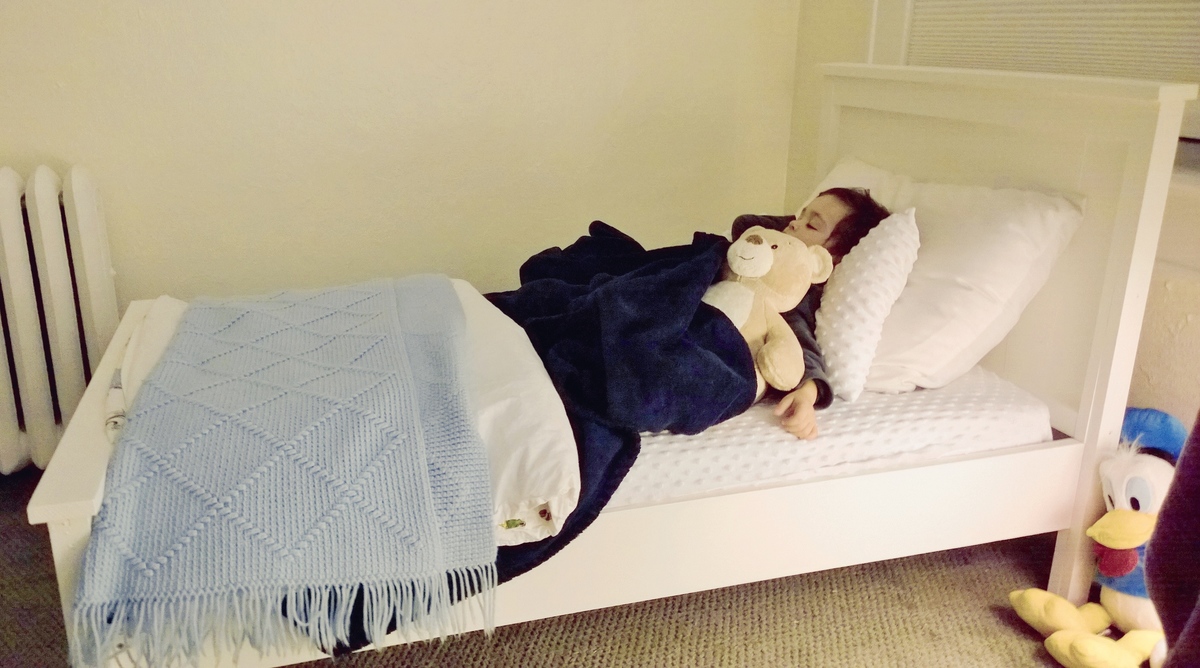
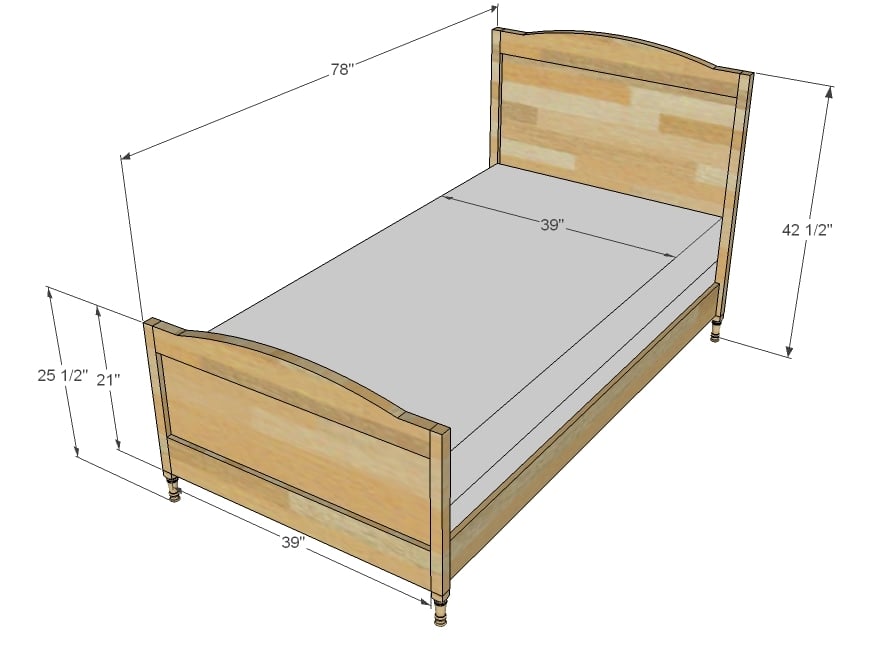
Toddler Farmhouse Bed
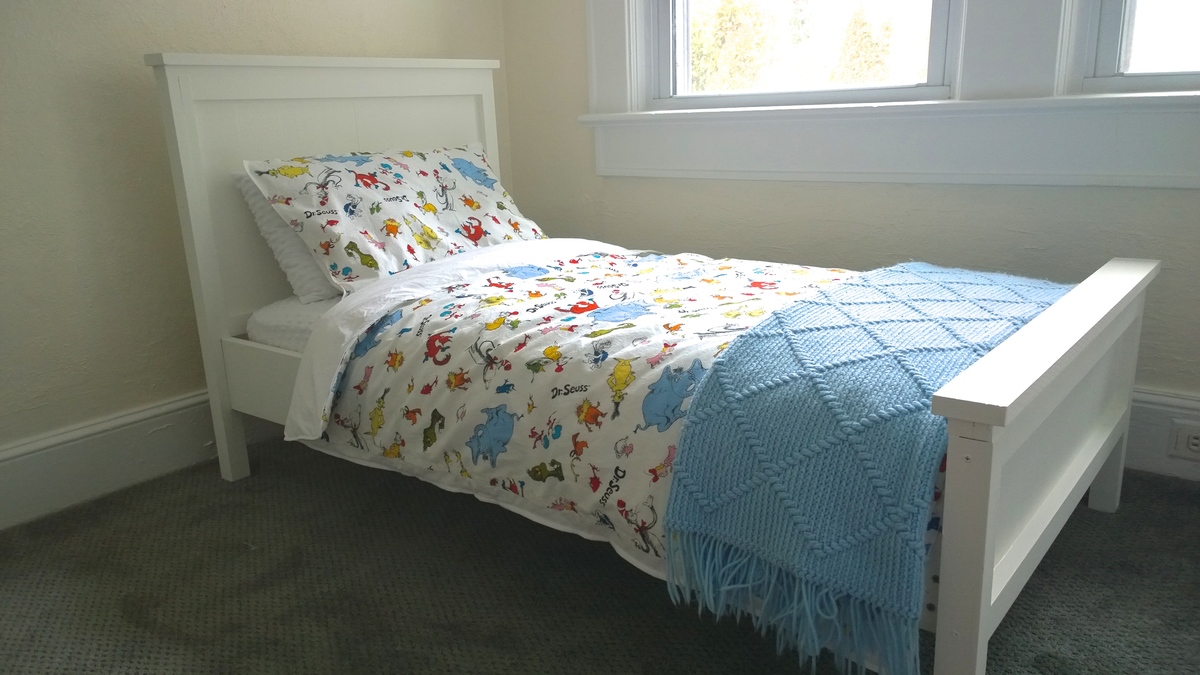
I gotta be honest, I'm kind in love with the farmhouse collection and when i saw this little bed i knew i had to build it for my 2years old and he loves it. It is so perfect for him, not too big and not too small. The bed was very easy to build, affordable and very strong ( trust me, my son makes me lay down there with him sometimes so he can go to sleep) . I changed the plans for a 28" wide crib mattress after reading all the comments, but it was really easy to do. I'm very happy how it came out.
Thank you Ana for sharing all the amazing plans with us and i'm looking forward to start building more furniture soon, my to-do-list is just getting longer and longer lol.
Thank You Ana XOXOXO
Estimated Time Investment
An Hour or Two (0-2 Hours)
Recommended Skill Level
Starter Project
Comments
Wed, 08/06/2014 - 07:17
It's beautiful. :) You did a
It's beautiful. :) You did a great job! I love the comforter.
In reply to It's beautiful. :) You did a by booksnotbombs
Wed, 08/06/2014 - 17:43
Thank you @booknotbombs
Thank you, i was looking for a Dr Seuss bedding and i saw this fabric, i made it myself, i think it looks nice.
American Girl Doll Horse Stable built for two
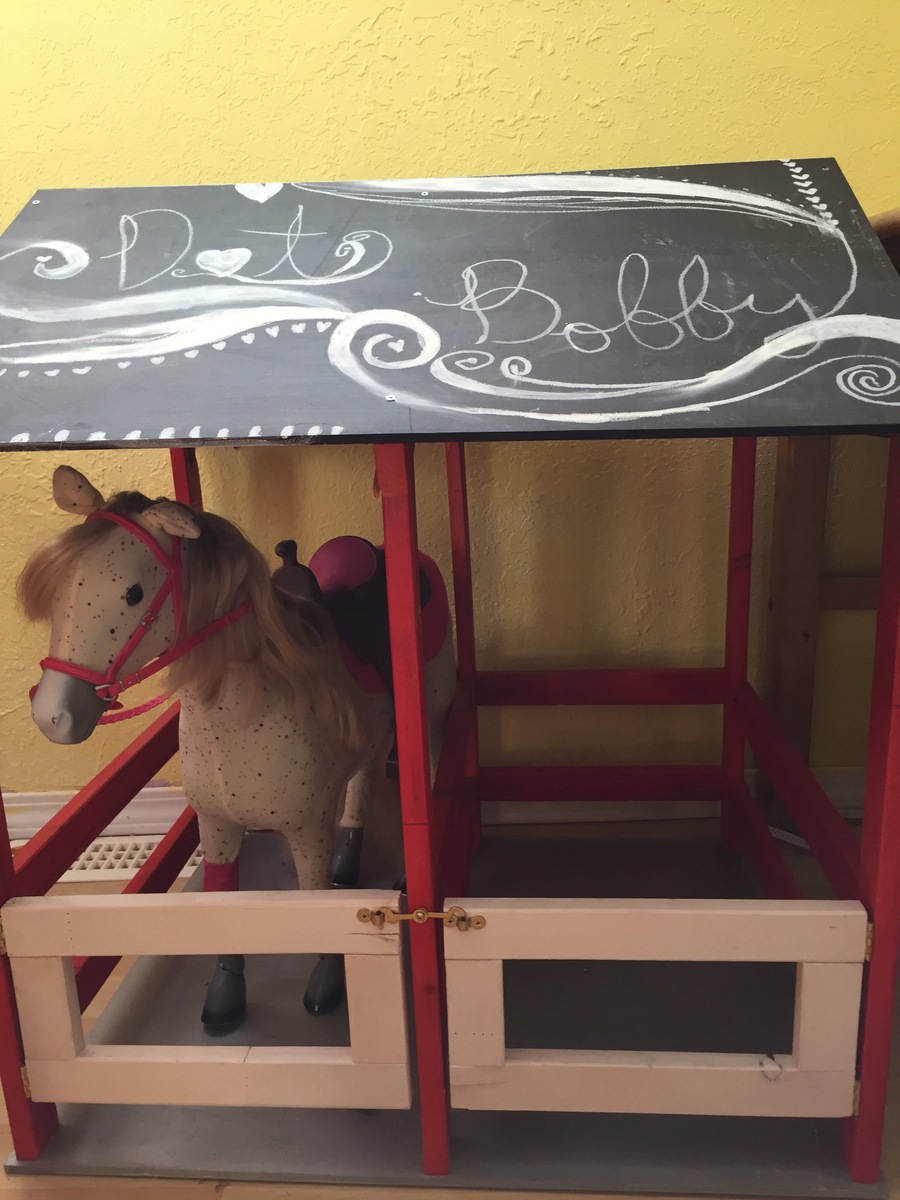
My husband made this for my daughter and her friend to have stables at each house for their horses. We painted the roof with blackboard paint to making decorating fun and creative.
Built from Plan(s)
Estimated Time Investment
Weekend Project (10-20 Hours)
Recommended Skill Level
Beginner
Comments
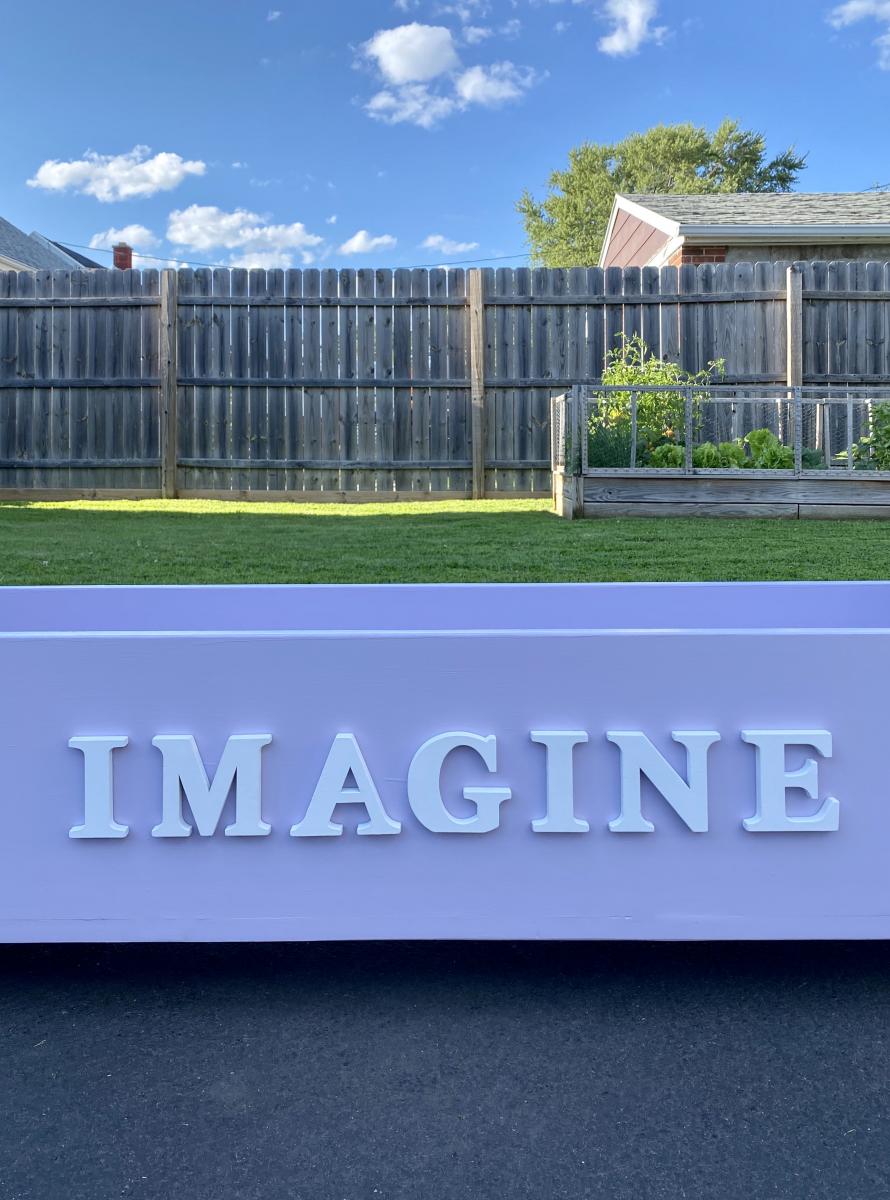
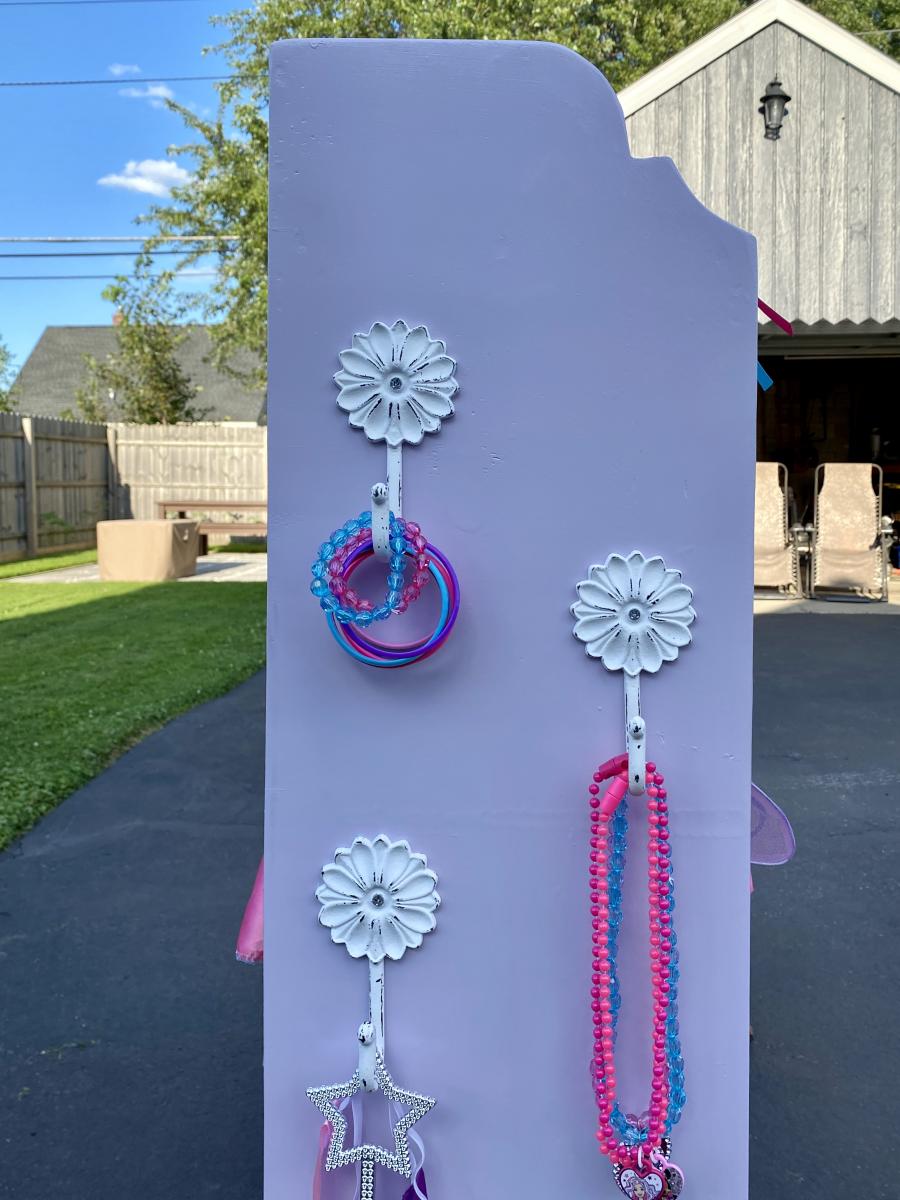
Dress Up Center for Peyton’s 3rd Birthday
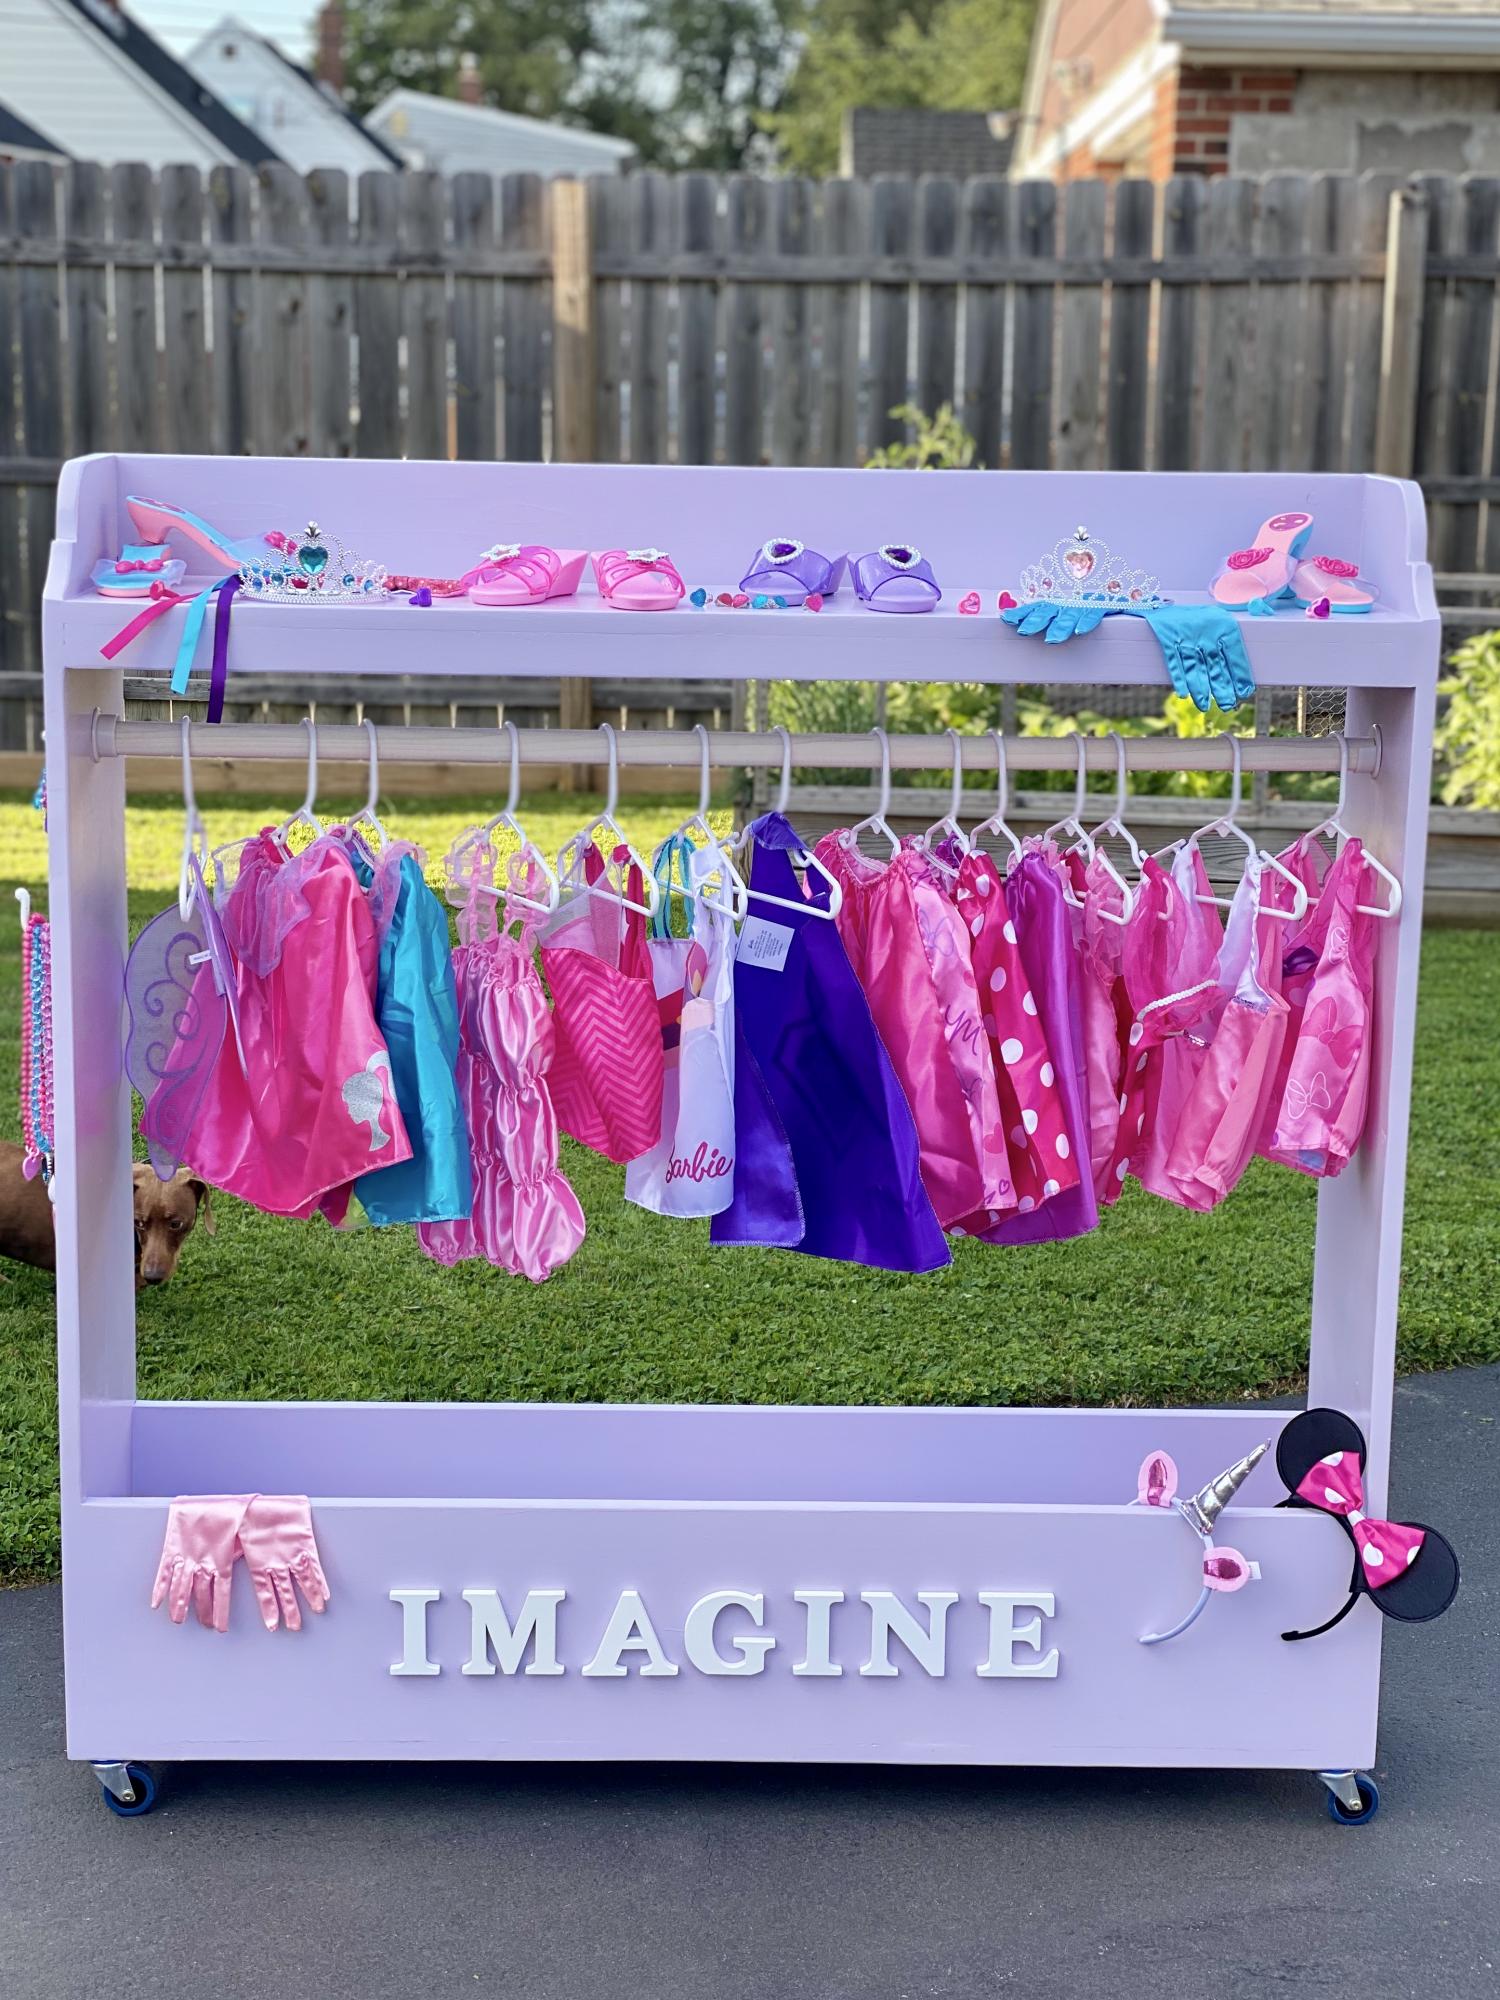
We made this adorable dress up center for my niece’s 3rd birthday. Peyton and her sister Ava will be able to use this gift for years to come! It’s strong and sturdy and built to last. The cart itself is quite large and will hold loads of dress up costumes. Can’t wait to give it to the birthday girl this weekend!
Built from Plan(s)
Estimated Time Investment
Afternoon Project (3-6 Hours)
Finish Used
Paint
Recommended Skill Level
Beginner
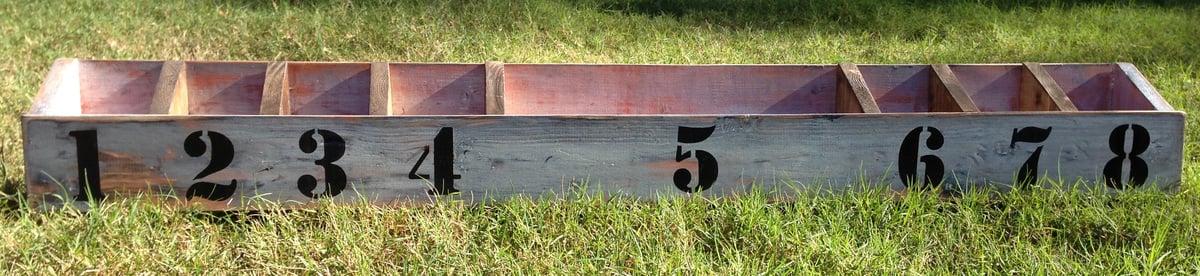
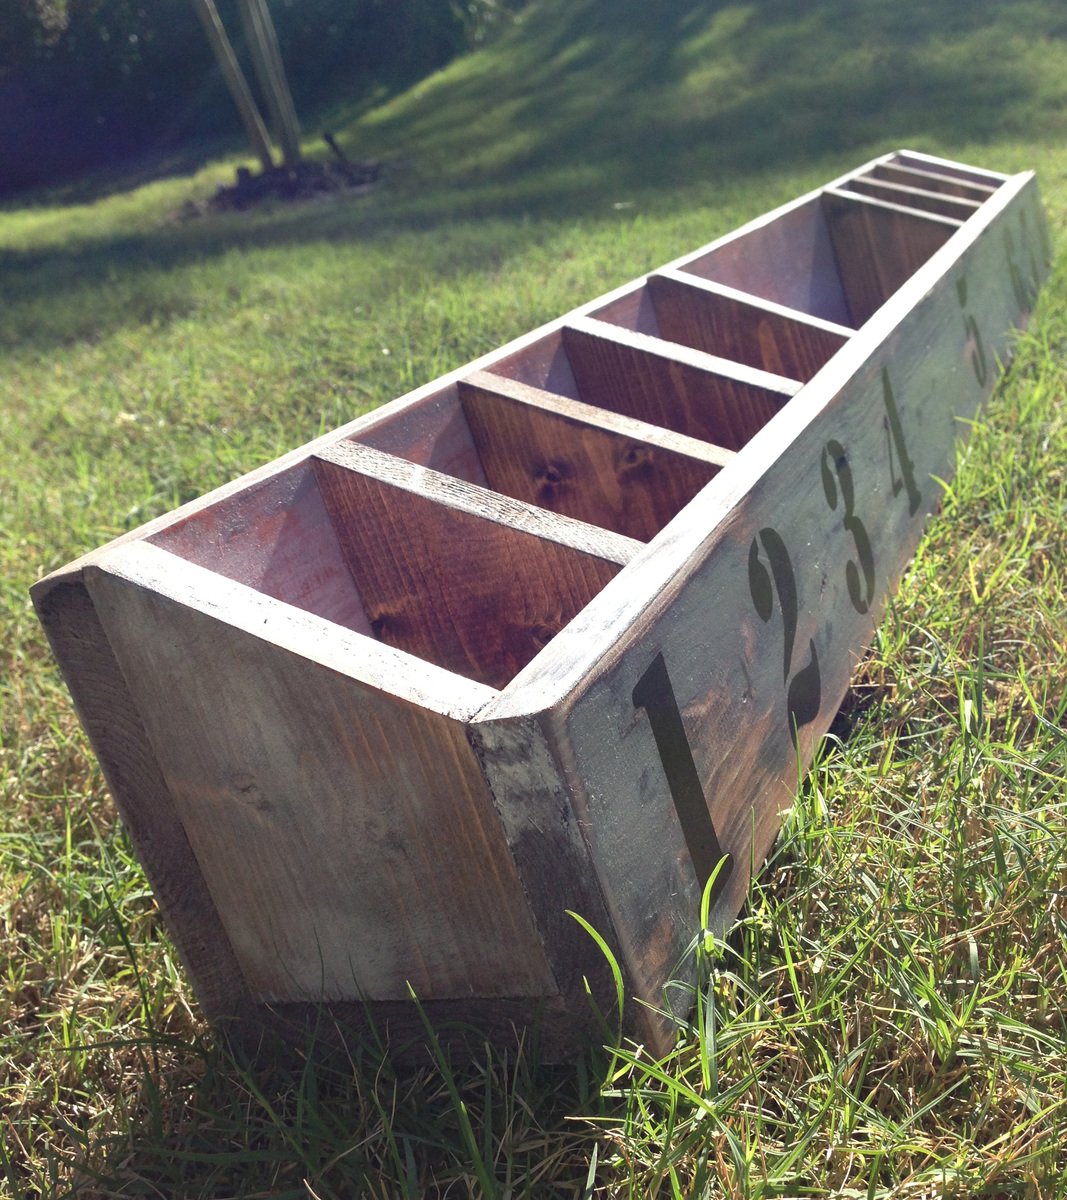
Wall Cubbies for Kitchen Chalkboard/Schoolwork
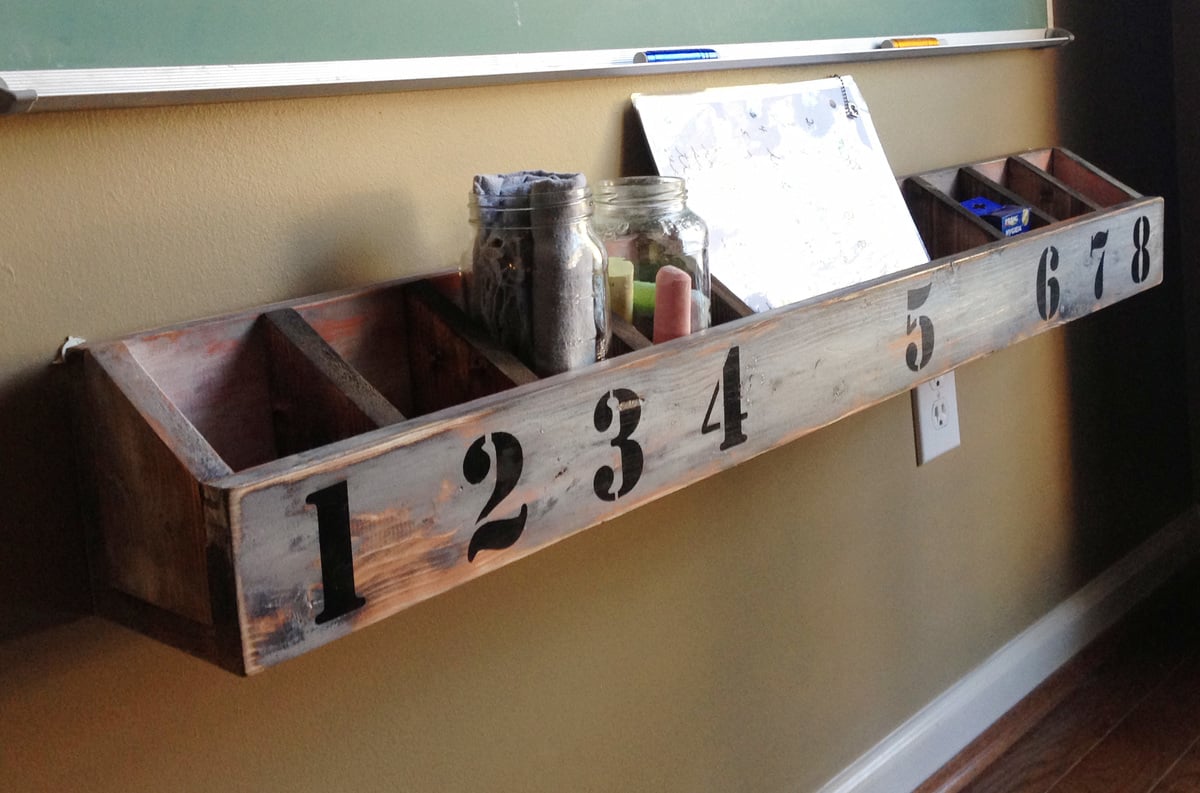
I loved Ana's cubbies the first time I saw them. :) I used different measurements and set mine for one large cubby to hold class papers and the others each fit a mason jar that holds chalk/ eraser cloth/ misc. Measurements/Wood Used: back: 4" x 1" x 44" bottom: 3" x 1" x 44" front: 3" x 1" x 44" I miter cut the insert separators to go edge to edge. Setting was 31 degrees and sanding to finish top point to back I added the inserts last after distressing the front/back/bottom assembled. I stained the inserts with no distressing and slid them in and used finishing nails to hold them to place front and back as my last step.
Built from Plan(s)
Estimated Cost
$20
Estimated Time Investment
Afternoon Project (3-6 Hours)
Finish Used
painted background with our closet/laundry room paint color to bring in that accent color (rusty orange) let dry completely. Added black acrylic to knots and edges and random places around the piece and then covered it all with our home trim paint and then sanded back with power sander to distress
Recommended Skill Level
Beginner
Comments
Tue, 01/22/2013 - 10:54
I love this project! You did
I love this project! You did an amazing job. I also love that you put the inserts in at the end, that would have been so much easier!
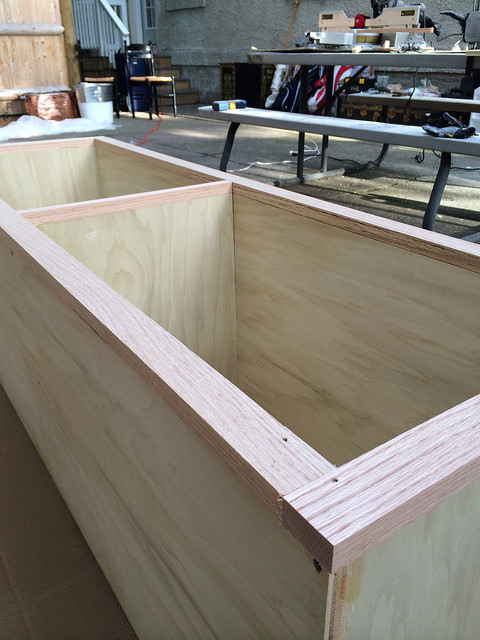
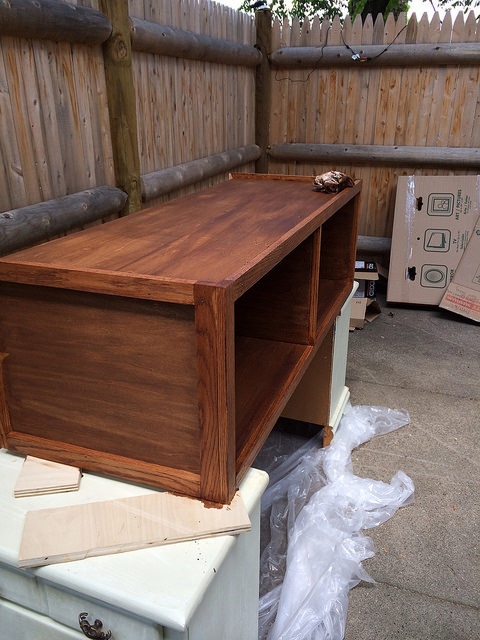
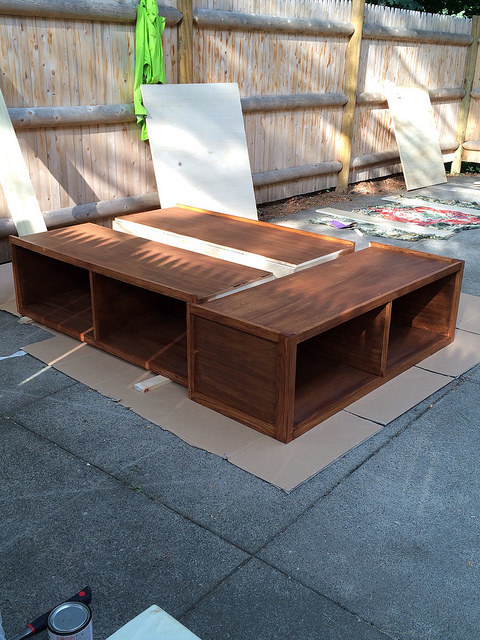
Storage Bed Success!
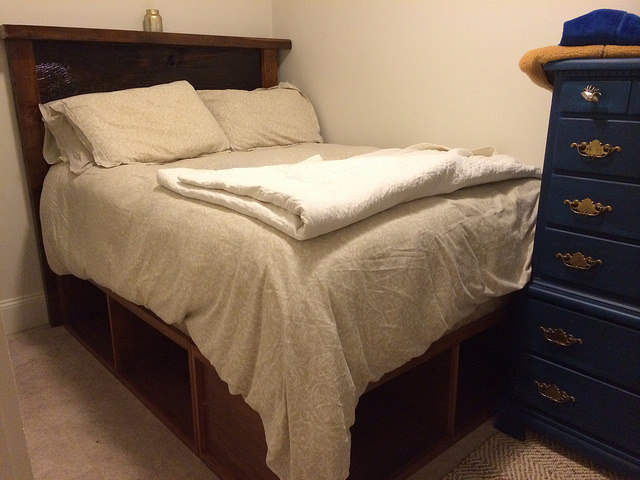
I took Ana's awesome queen-sized storage bed plans and jut made a couple minor tweaks for my full. Our bedroom is TINY, so I wanted queen (or king) sized drawers/cubbies, which means I kept 20" depth. The side boxes run 53" in length, 54" for the end. I used poplar ply for the boxes, red oak for the trim, and I stained everything with a Varathane Early American wood stain, followed by a couple coats of polycrylic. It came out beautifully, and I love how easy it is to move around and set up.
For the final step, I'm still debating adding drawers or doors, which would hinge on the bottom and secure with cabinet magnets. I'm leaning toward the latter just because our bedroom is so small it will make accessibility a bit easier.
Built from Plan(s)
Estimated Cost
$350
Estimated Time Investment
Weekend Project (10-20 Hours)
Finish Used
Varathane Early American; Minwax Polycrylic
Recommended Skill Level
Intermediate