Community Brag Posts
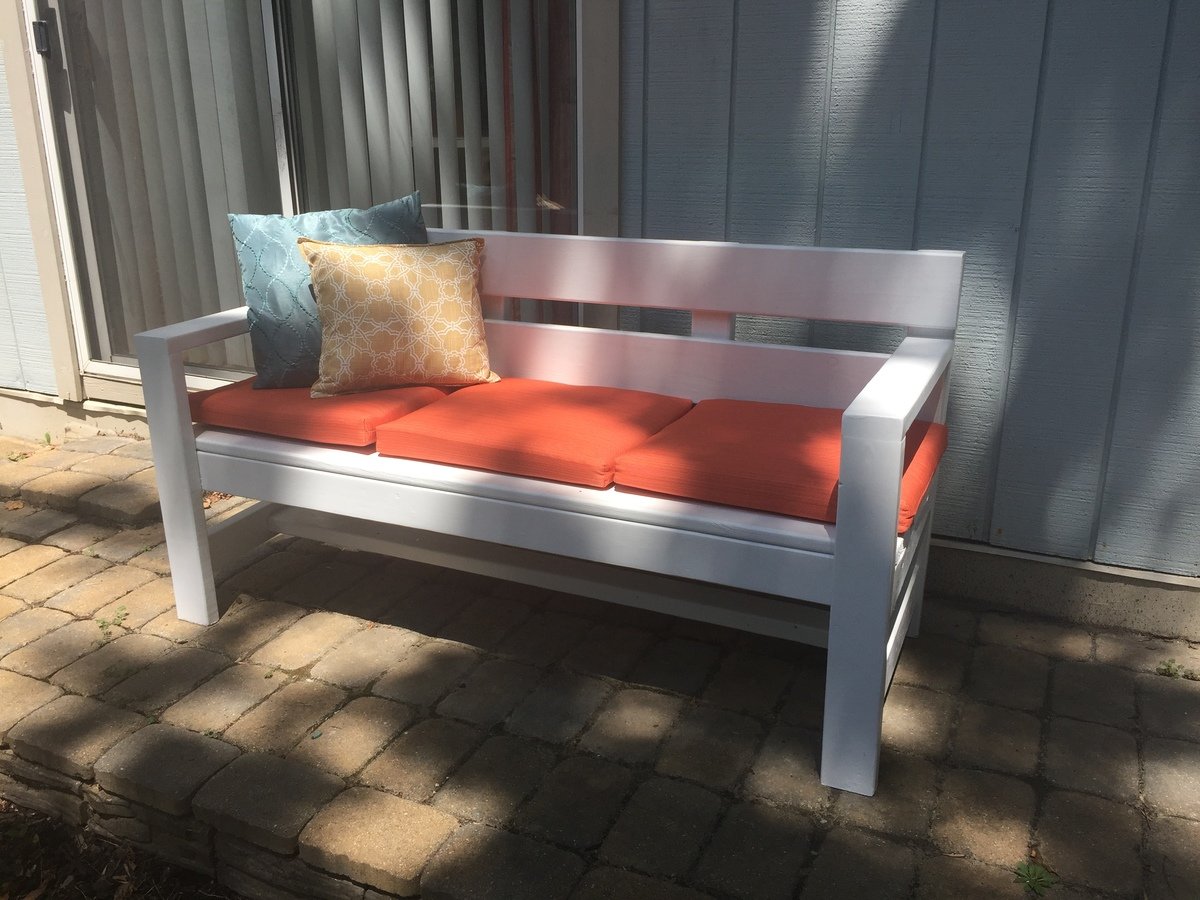
Love my bench
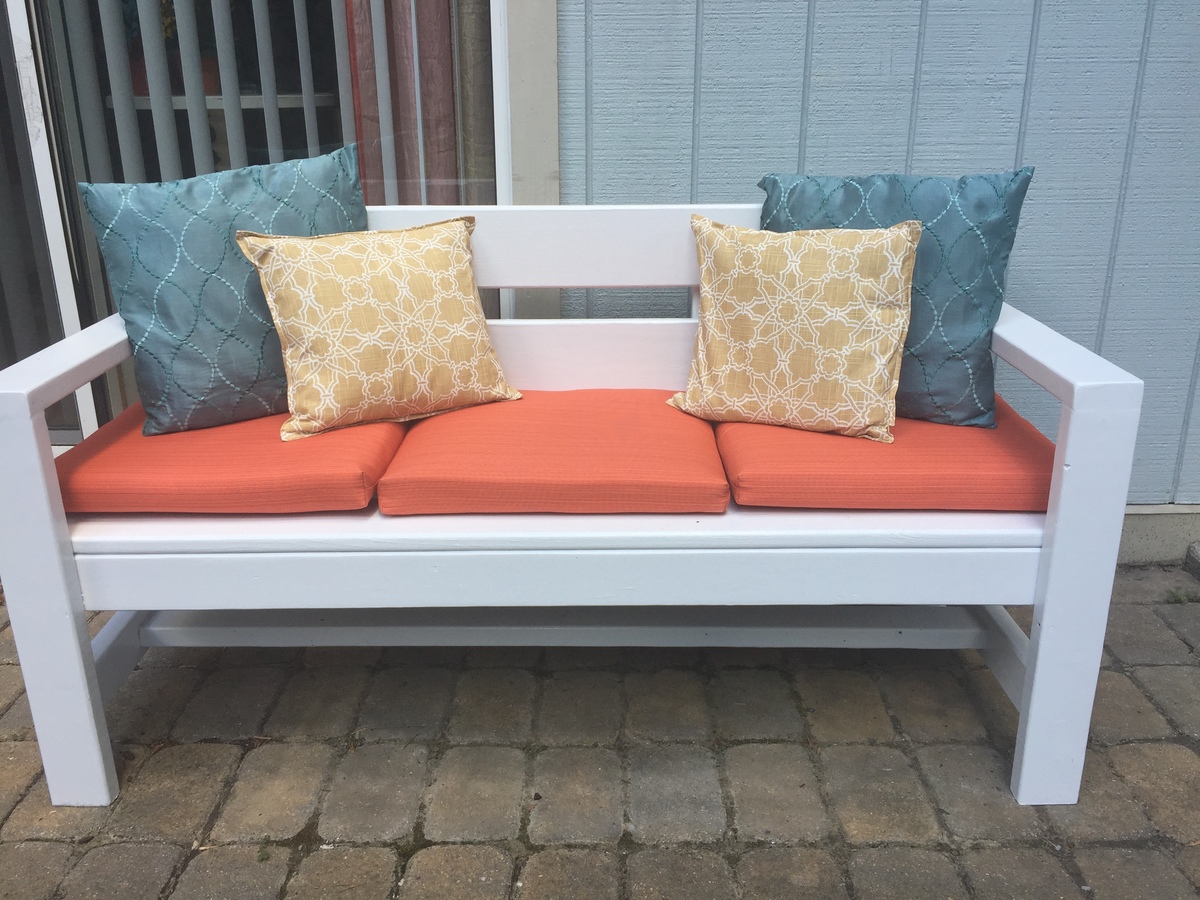
I changed the dimensions to make it a little smaller to fit the front of my house. My husband and I now spend our evenings sitting there drinking tea and enjoying the nice weather.
I spent close to $60 and ordered 3 cushions from target for $8.99 each.
Built from Plan(s)
Estimated Cost
$60
Estimated Time Investment
Day Project (6-9 Hours)
Finish Used
Rustoleum semi gloss in white
Recommended Skill Level
Beginner
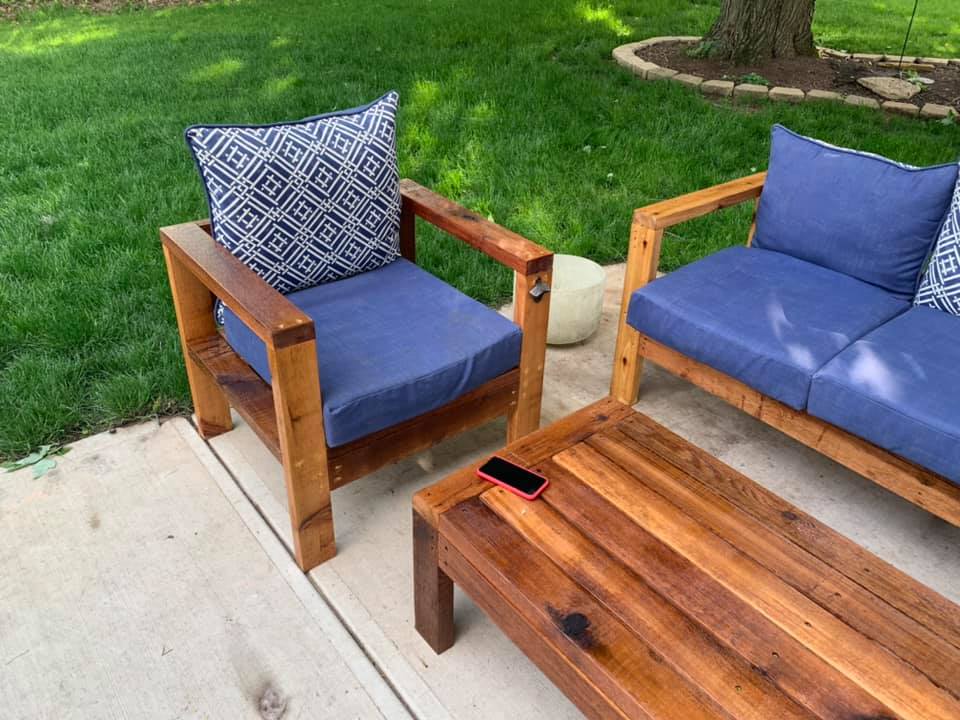
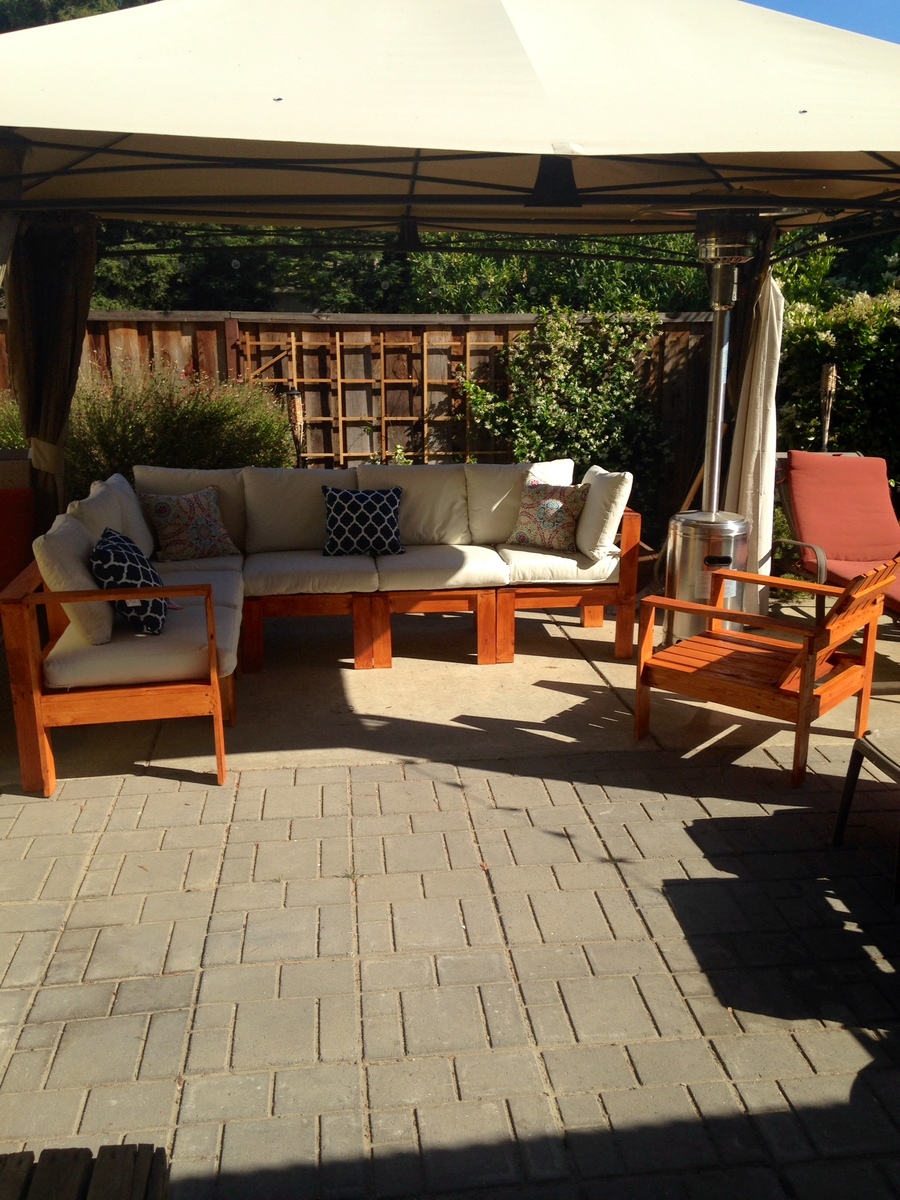
Better Than I Hoped!
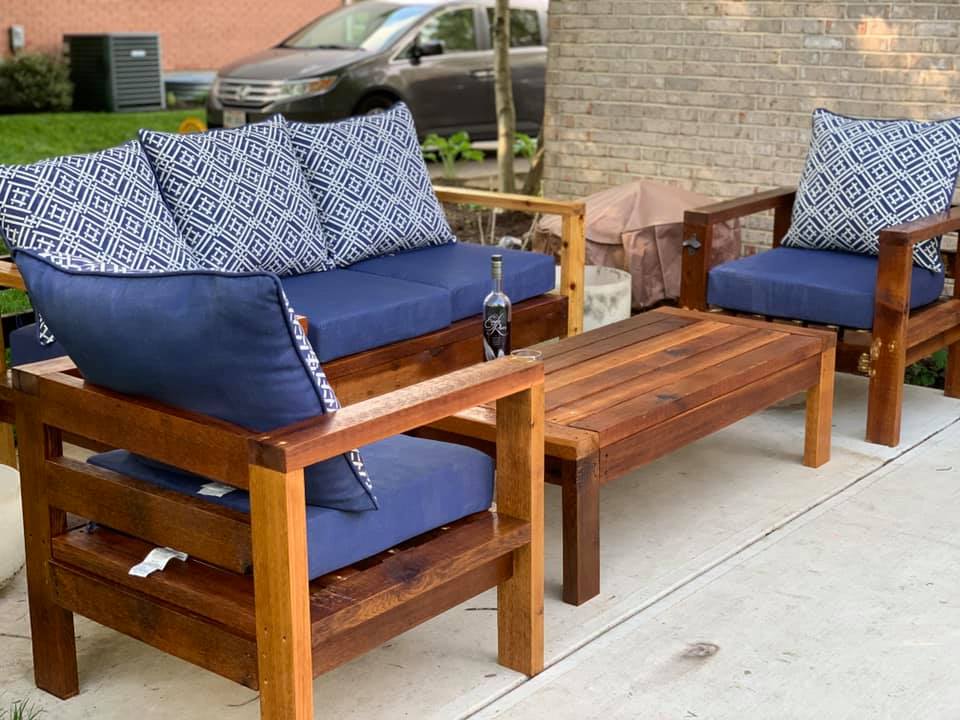
Been working from home for the past two months due to the health crisis. To stop from going crazy from being at home with my wife and four kids, I decided up pick up a hobby - here's where my homie Ana enters! I didn't want the sectional for my patio, but certainly the couch, chairs and table. The only mistakes had were my own (using wood putty, not sanding it well), but the plans were spot on. The only real issue I ran into was the cedar wood I used wasn't 1.5 x 3.5, but 1.75 x 3.5. This caused me to make additional cuts were I otherwise would not have needed it. Other than that, just remember to make the longest cuts first... I ended up needing to buy about five additional boards because it.
Built from Plan(s)
Estimated Cost
$350 (I used cedar, which is much more expensive)
Estimated Time Investment
Day Project (6-9 Hours)
Finish Used
Minwax Spar Urethane, clear
Recommended Skill Level
Beginner
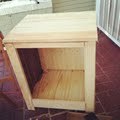
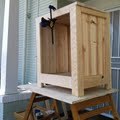
Farmhouse Medicine Cabinet
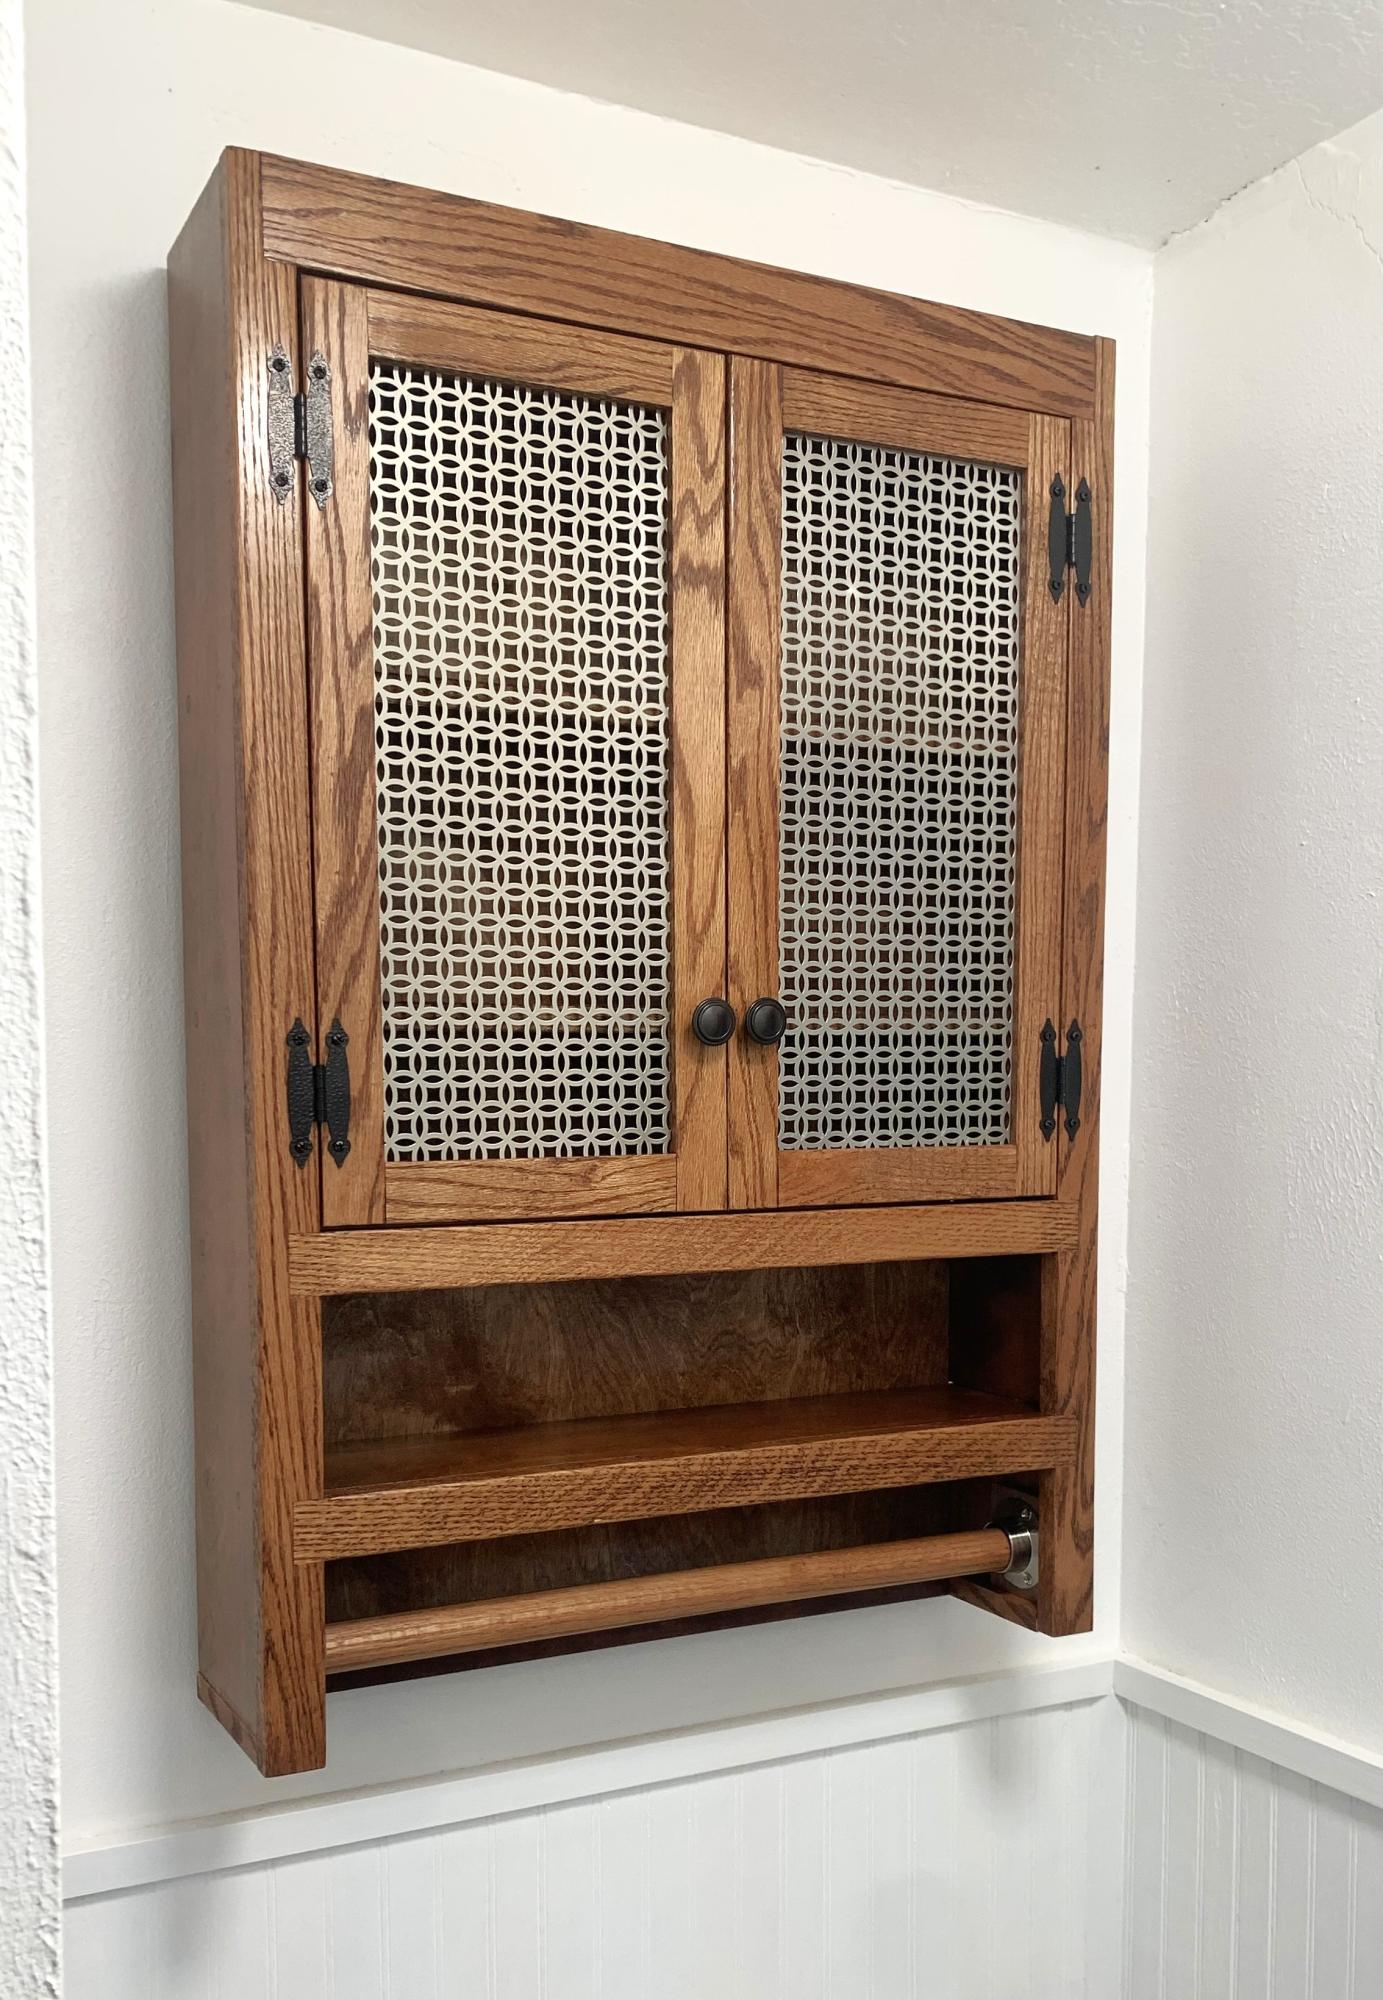
A medicine / bathroom vanity I built for my son’s master bathroom. Constructed of 3/4 oak veneer , 1x2 and 1x3 red oak for the face frames and doors. I used a combination of dowels and dominos to assemble. The metal for the doors was purchased at The HD. Finished off with Minwax English Chestnut stain and 4 coats of Shellac.
Gary Fox
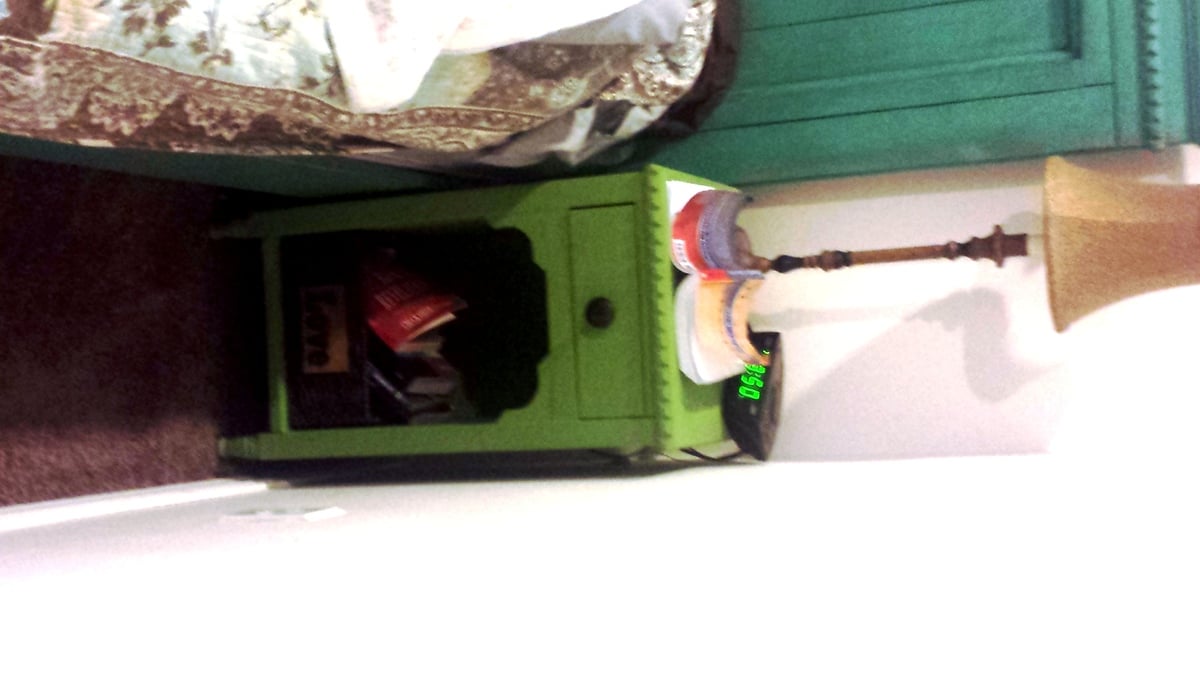
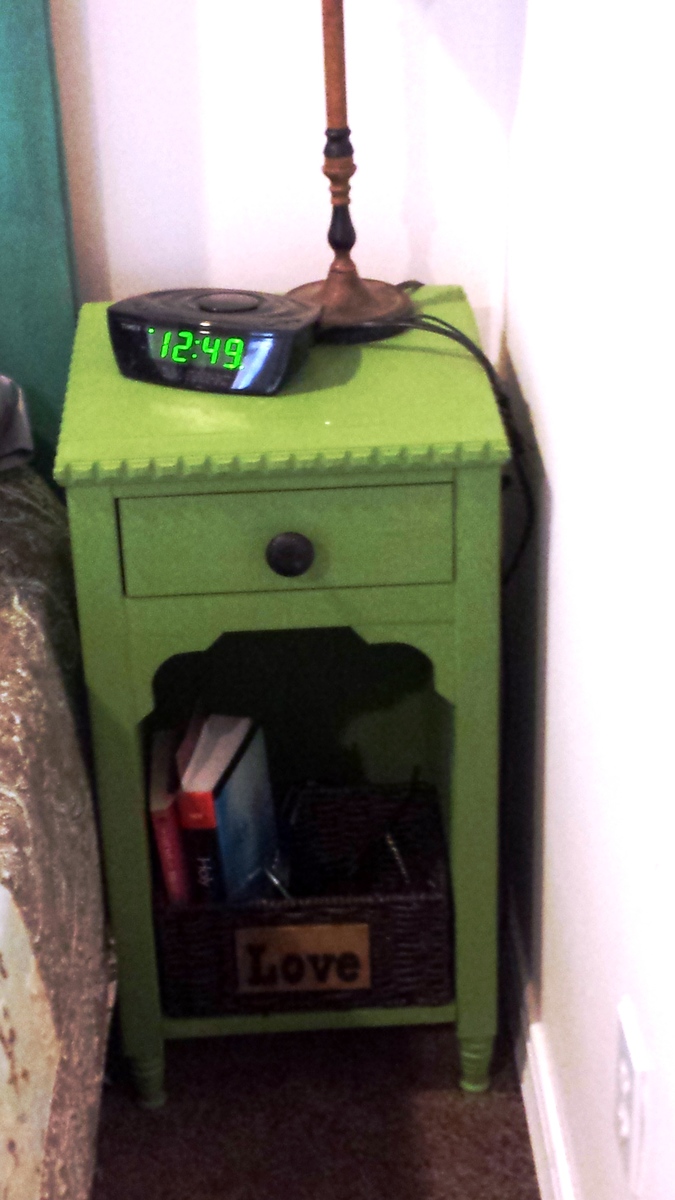
Kentwood Nightstand
Great nightstand/chest made form the Kentwood Nightstand plans on Ana-white.com. Thanks for the great instructions! I would have to add that I needed 5 1x3's to make the top, instead of the noted 4 in the plans.
Thanks again!
Estimated Cost
$50-$75
Estimated Time Investment
Afternoon Project (3-6 Hours)
Finish Used
Minwax's 2-1 Antique Mahogany Gloss + Polyurethane from Home Depot
Recommended Skill Level
Beginner
Comments
Fri, 05/10/2013 - 21:45
attaching the top?
The instructions I found for this are pretty vague as to what to do with attaching the top-- do the 4 (or 5 as it seems) boards somehow link onto eachother kreg-style? or...? Thanks!
Outdoor Sectional Set
Not as easy as everyone else said online. I had never used a kreg jig and it takes a bit more practice than I had patience for. one thing to note is the instructions screw lengths are for if you are NOT using a kreg. If you use a kreg, use the screw lengths they suggest. I used a deck stain and purchased the cushions on sale at Ikea ($22.50 per cushion)
Built from Plan(s)
Estimated Cost
$200-600
Estimated Time Investment
Weekend Project (10-20 Hours)
Finish Used
Deck stain with water repellent included. Cheapest cushions I could find were at Ikea by far.
Recommended Skill Level
Beginner
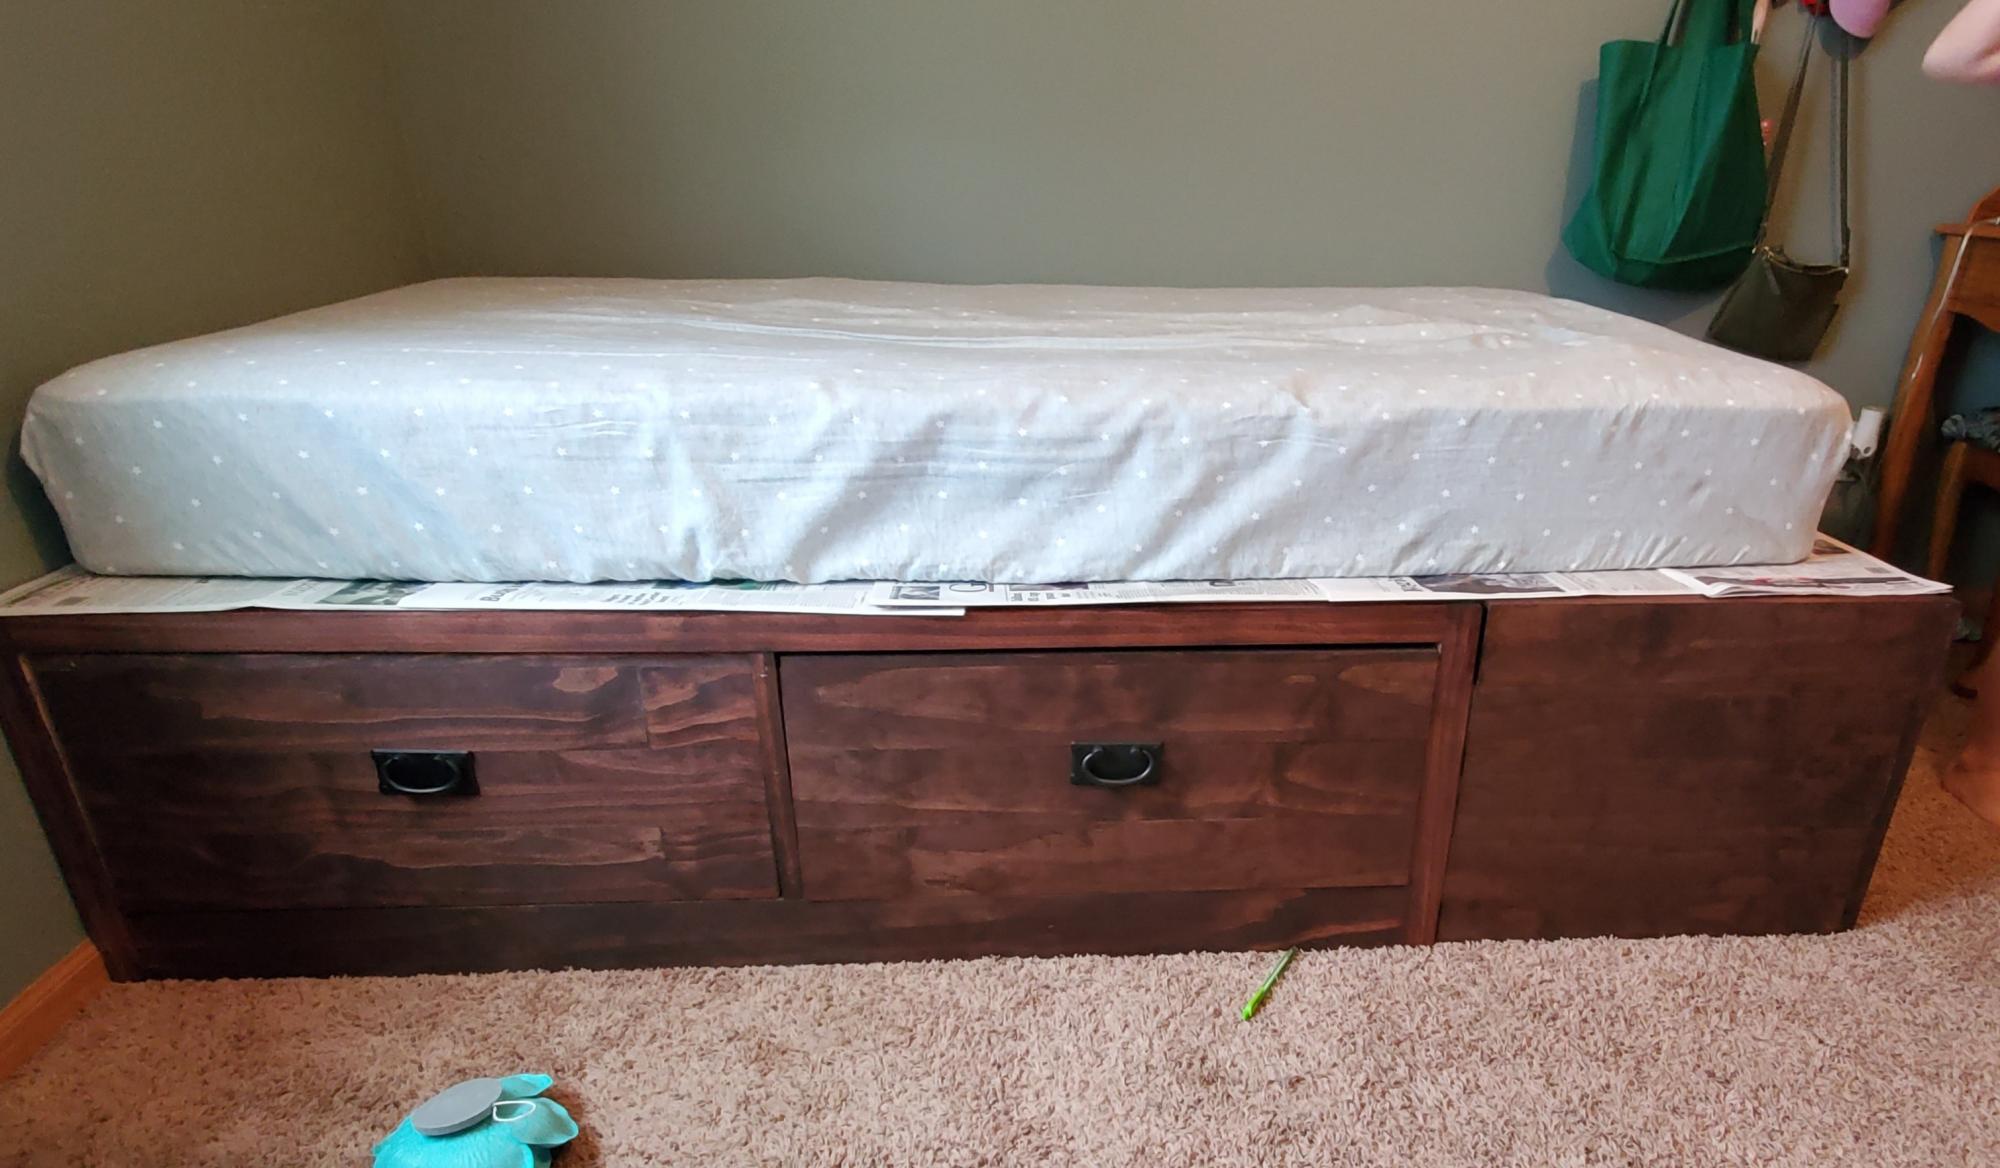
Alden's Bed with drawer
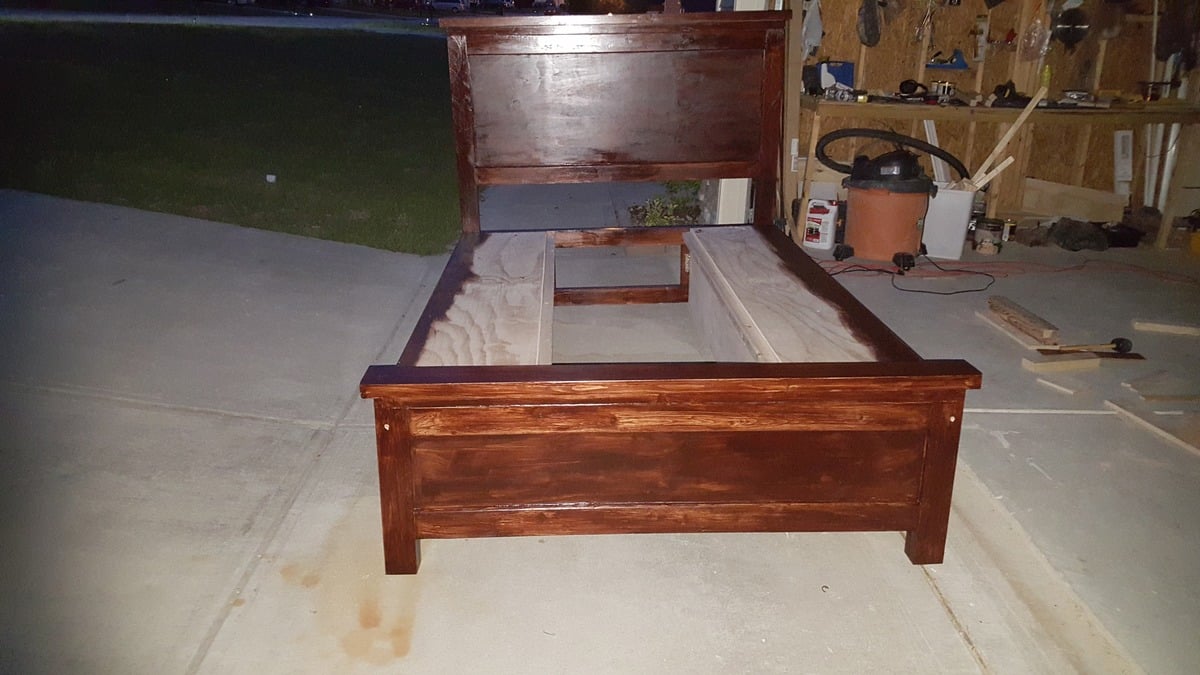
I built this bed to replace one of the kids twin bed. I wanted a solid wooden bed that would be around for a while and I did not wanted to pay Thousands of dollars.

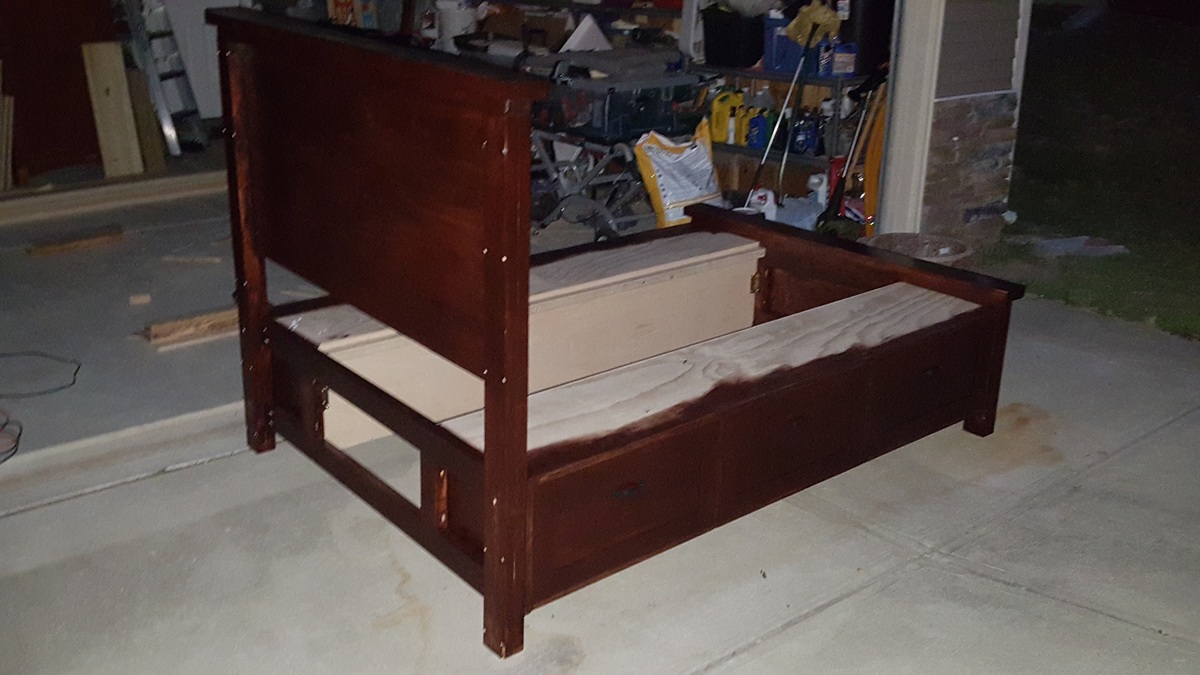
Estimated Cost
$250 - $300 depending on your material preferences
Estimated Time Investment
Week Long Project (20 Hours or More)
Finish Used
rustic mahogany wood stain.
Recommended Skill Level
Intermediate
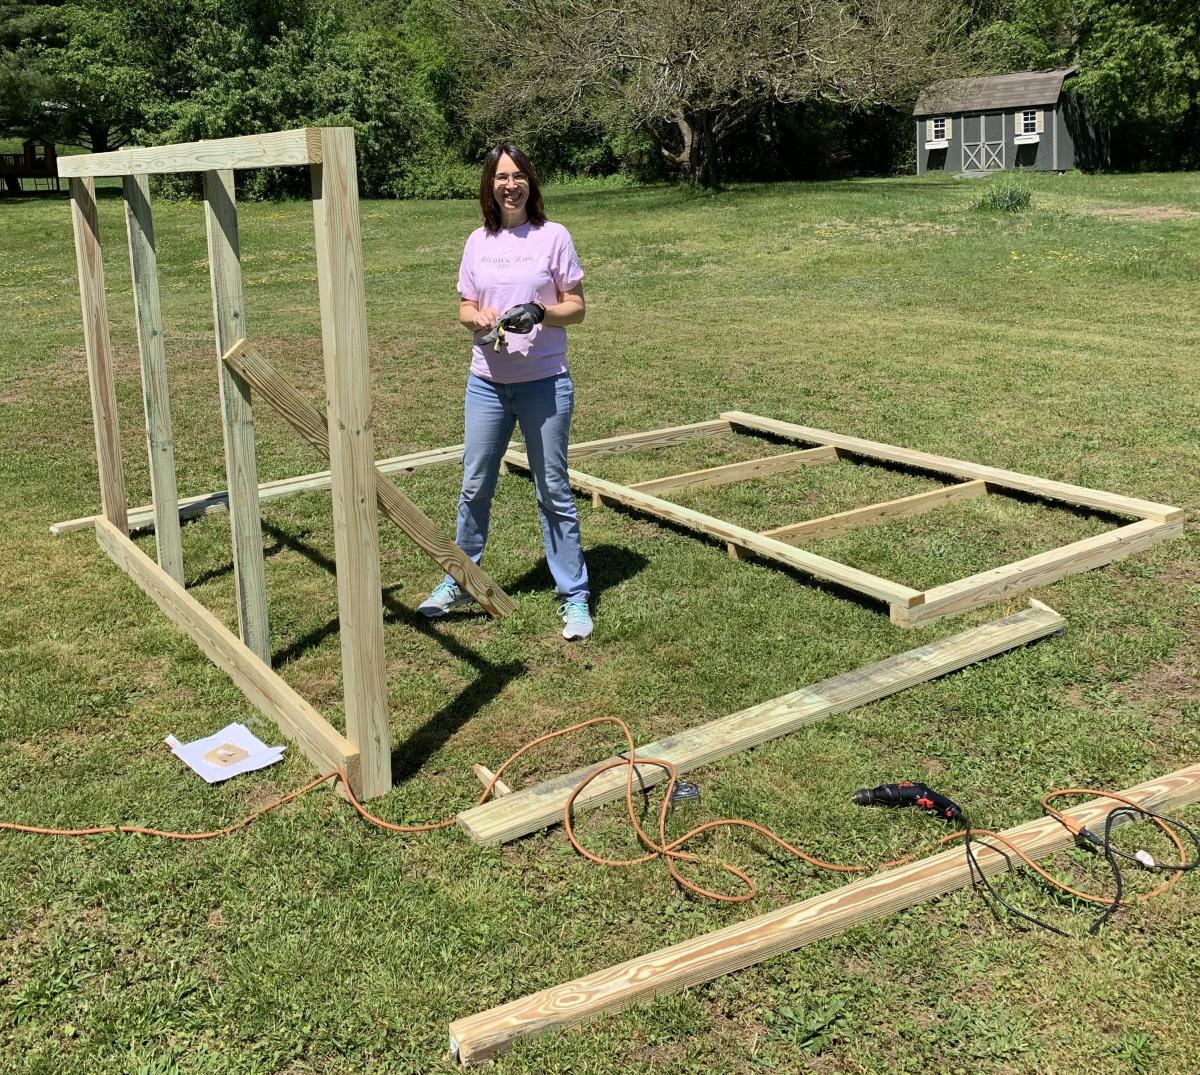
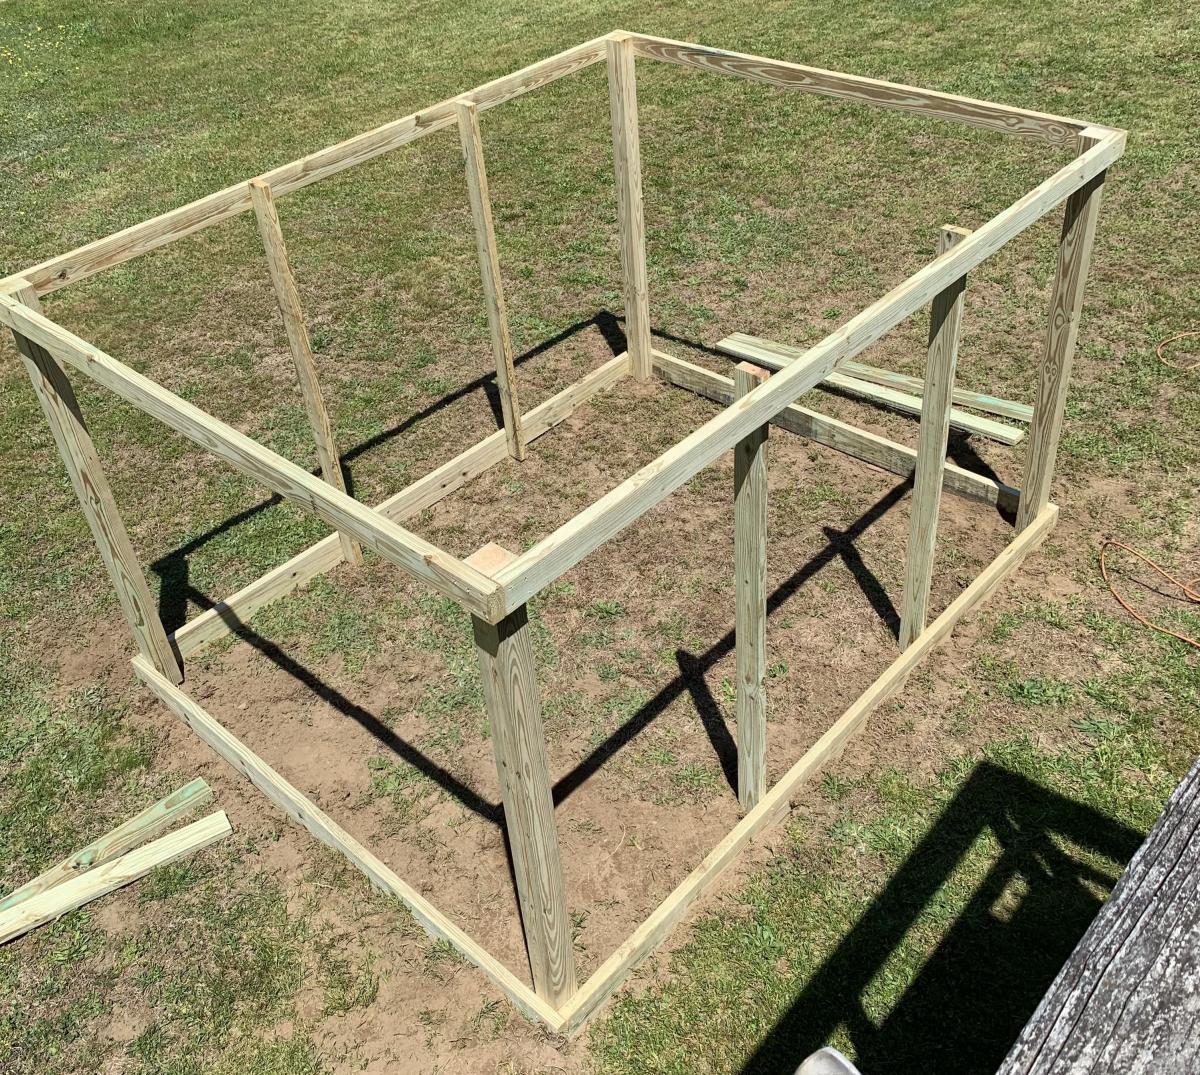
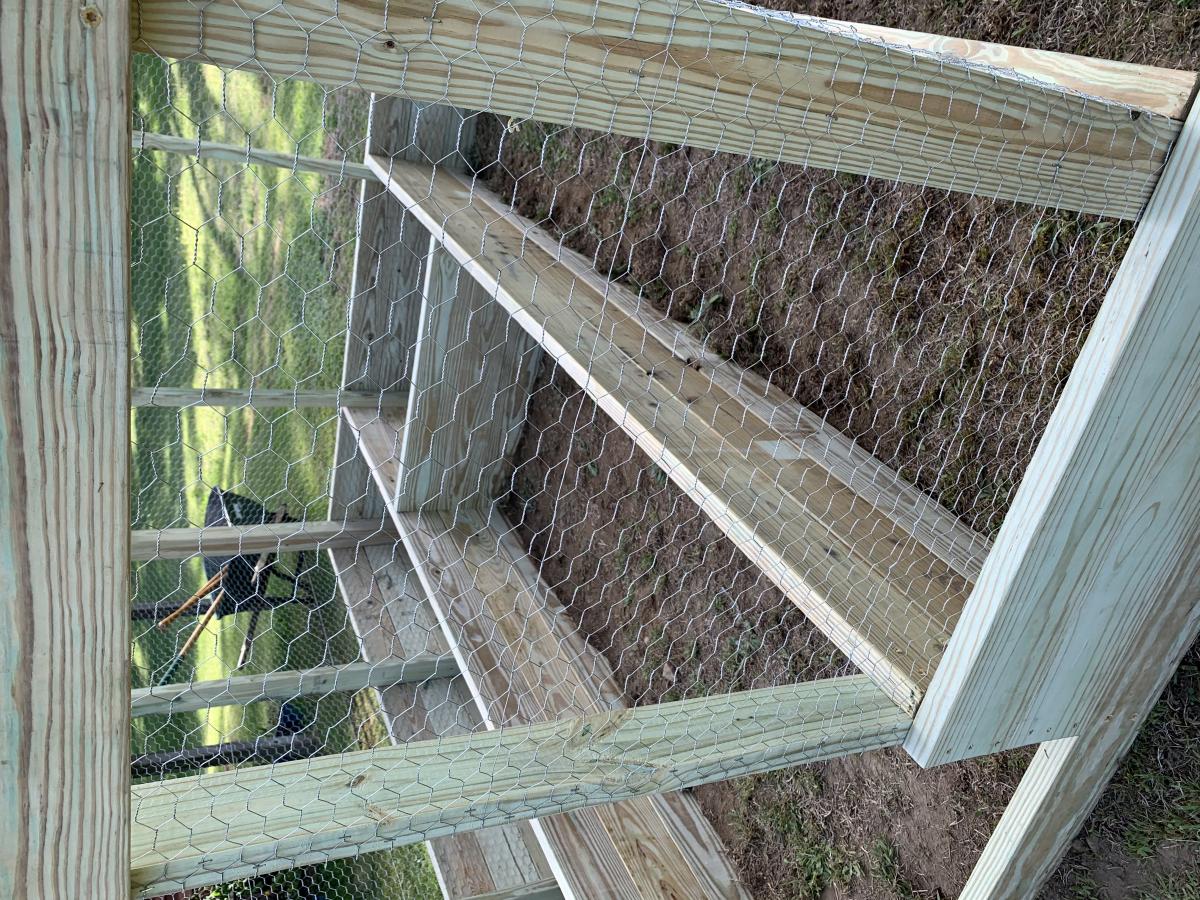
Raised Bed Garden Enclosure
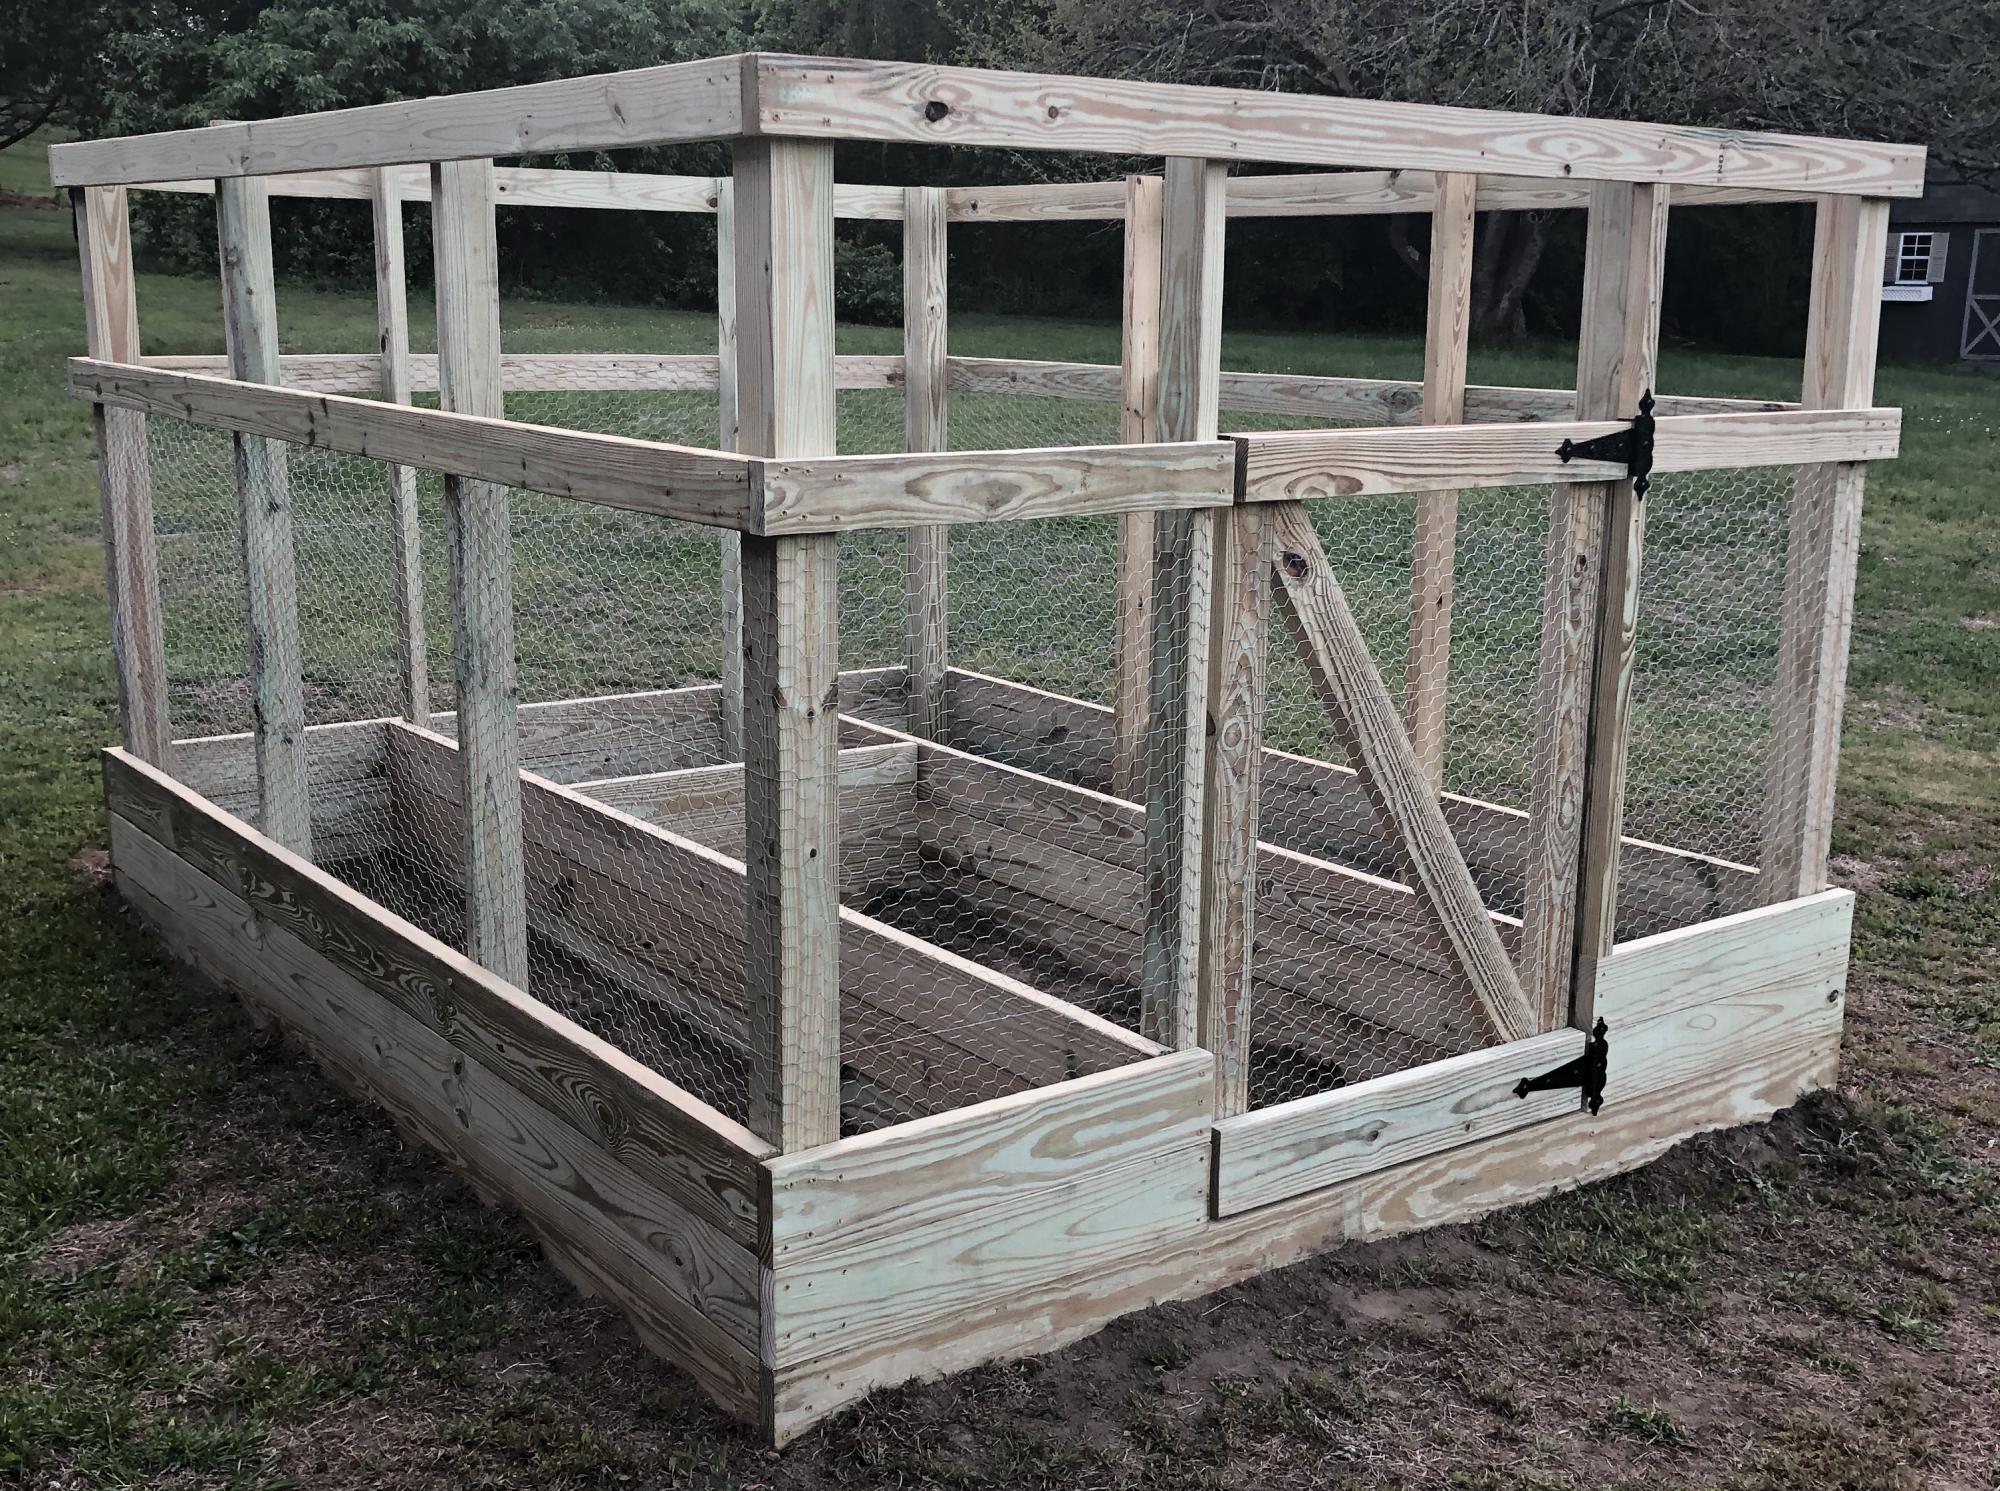
We perviously had a larger garden farther back in the yard, it was on the ground which is very hard and rocky. It was tough to till and maintain, so it was taken down a few years ago.
My wife and teenage daughter have green thumbs and have planted herbs and tomatoes in pots over the past few years, but this year they wanted something more substantial. After an online search we found this plan.
It was a bit small for what the girls had planned, so with a little bit of tweaking, we changed the depth of the enclosure to 10'. It was pretty easy to do. Also the girls wanted the beds to be a bit deeper, so we made them three 2x6's deep instead of two
It was built by my wife and I in one weekend, well actually the truth is we built the entire enclosure, minus the door on Saturday about 10am and finish up about 5:30pm. I built the door the next day and we hung it together.
Just an FYI, I have quite a bit of woodworking experience and have a workshop with table saw, band saw and much, much more. I did use the table saw for most of the cuts, with the exception of the gate support which I cut using the band saw.
One caveat, if you have the lumber yard cut any pieces for you, make sure all the lumber is the same length. It's kind os a nit picky thing, but none of the lumber was exactly the length shown on the labels. If you want all the joints to be "perfect" I suggest measuring and cutting all the pieces to the correct length to match the plans.
We also used an industrial hand held staple gun to fasten the chicken wire.
The cost of all the materials, including two sets of work gloves came out to $447.92 from Home Depot in 2020.
We are now waiting for a delivery of the top soil to fill the beds. Since we used weatherguard lumber, we are going to gat plastic sheeting and line the beds.
It was a fun project and my girls are looking forward to planting all their seedlings.
For fun we made a time lapse video, which I have uploaded to Youtube. If you watch closely, you will see that we started the build in one area of the yard and moved it because the ground sloped much more than we originally thought.
https://www.youtube.com/watch?v=h7vvBLy034U&list=WL&index=112&t=0s
I hope that our experience may help others in some small way.
Thank you Ana for making these plans available!!
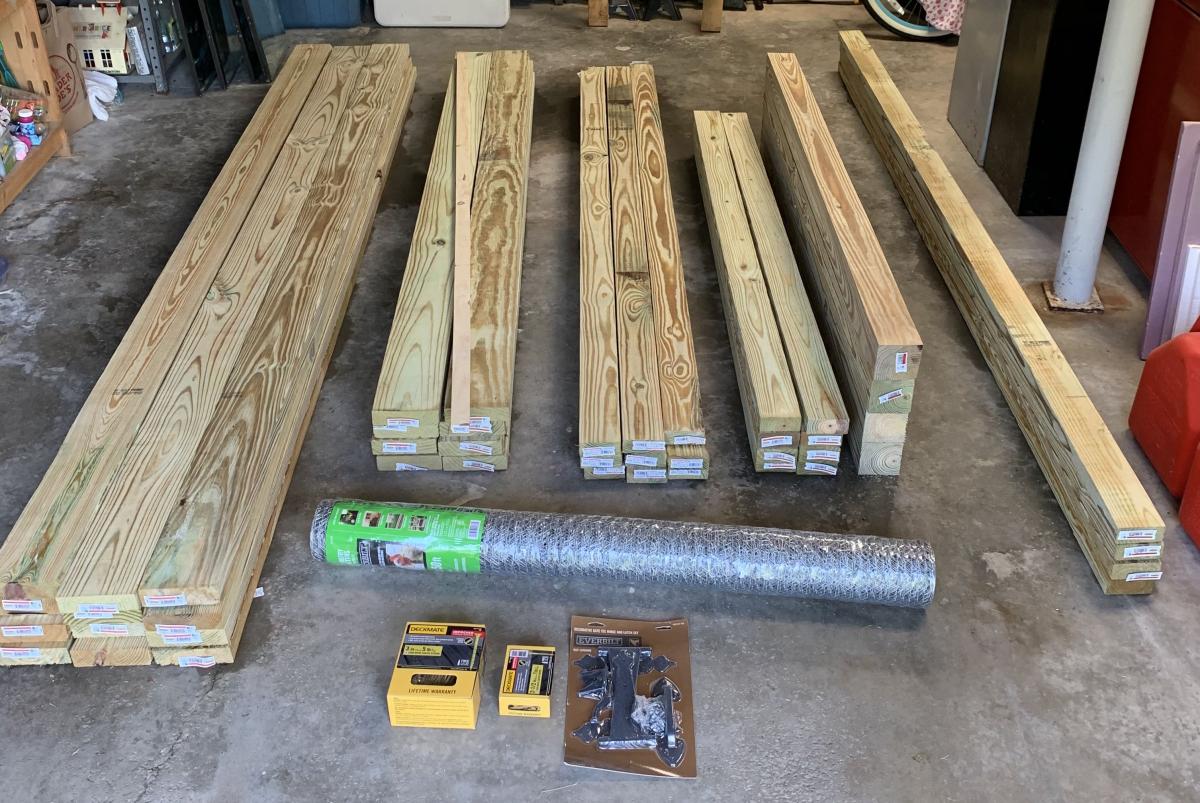

Built from Plan(s)
Estimated Cost
$447.92
Estimated Time Investment
Weekend Project (10-20 Hours)
Finish Used
None.
Recommended Skill Level
Intermediate
Comments

Sat, 05/30/2020 - 18:27
Love the added length! …
Love the added length! Thanks so much for sharing photos of your build!
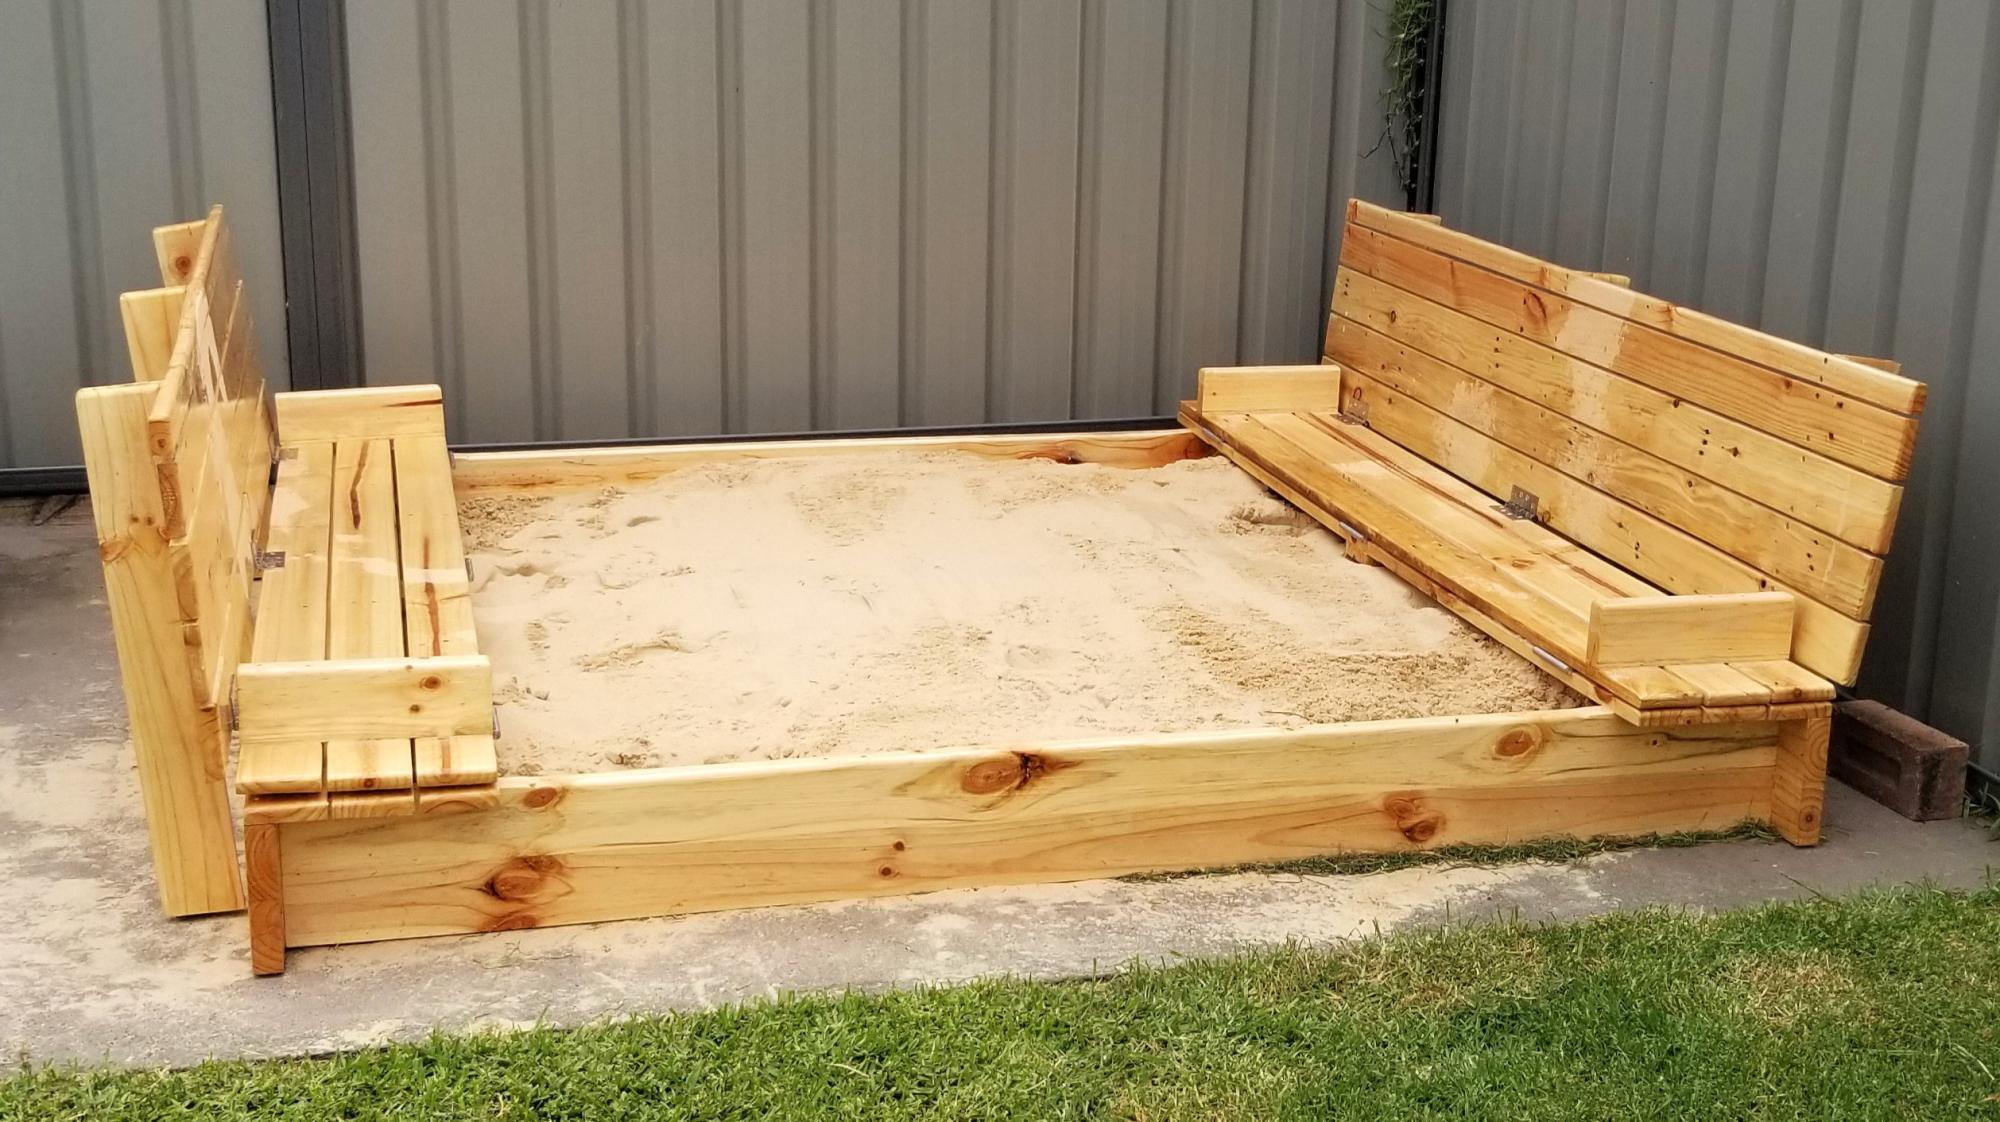
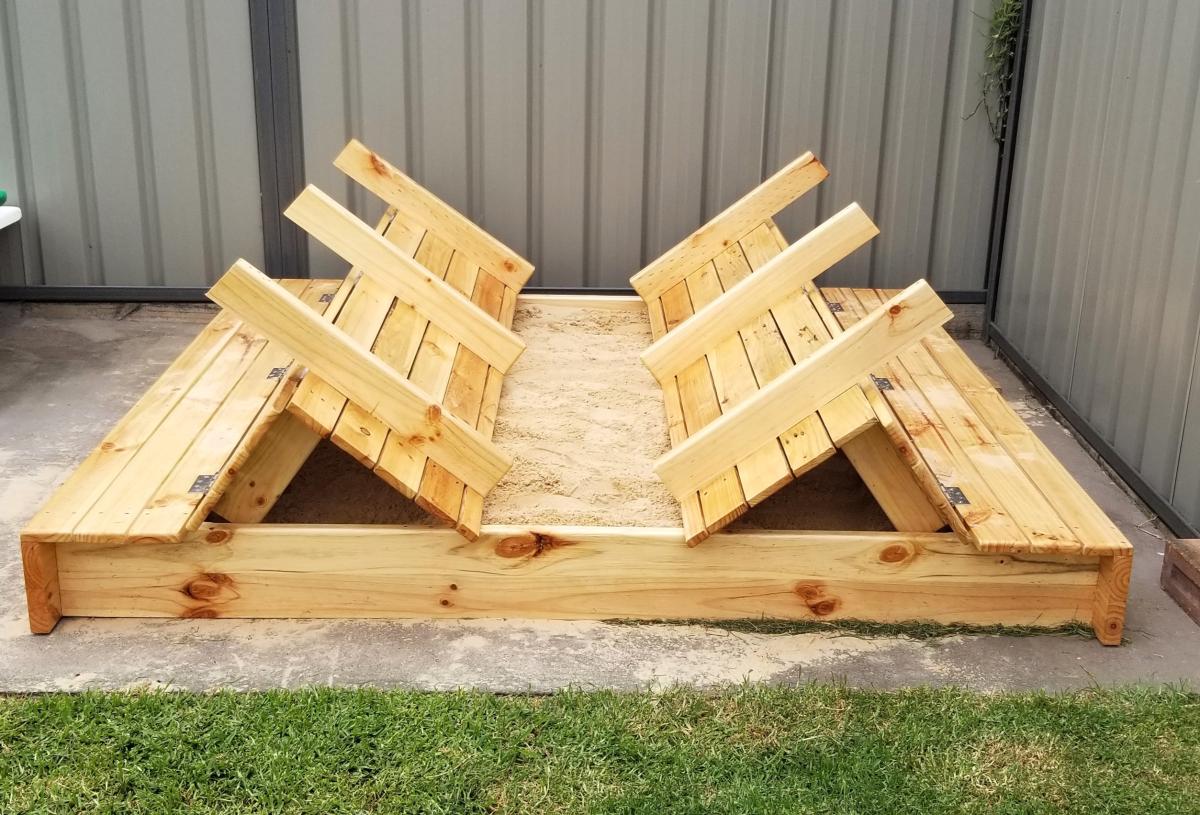
Wood Covered Sandbox with Built-in Seats
Hi Ana Chris Burt, Belmont NSW Australia
Well, was inspired from your plans on sand pits, so I made a custom one for my first Grandson Brax, it's around 2 meters square. With larger seats etc., was made completely out of recycled pine timber pallets. used waterproof glue, stainless screws and hinges as we live in Belmont NSW which we have lake Macquarie one side ocean on the other so it a battle with salt air. Finished it with a marine clear lacquer. Still lots to do like a pool fence keeps the dogs out and a shade over it. Love your site has great ideas and projects.

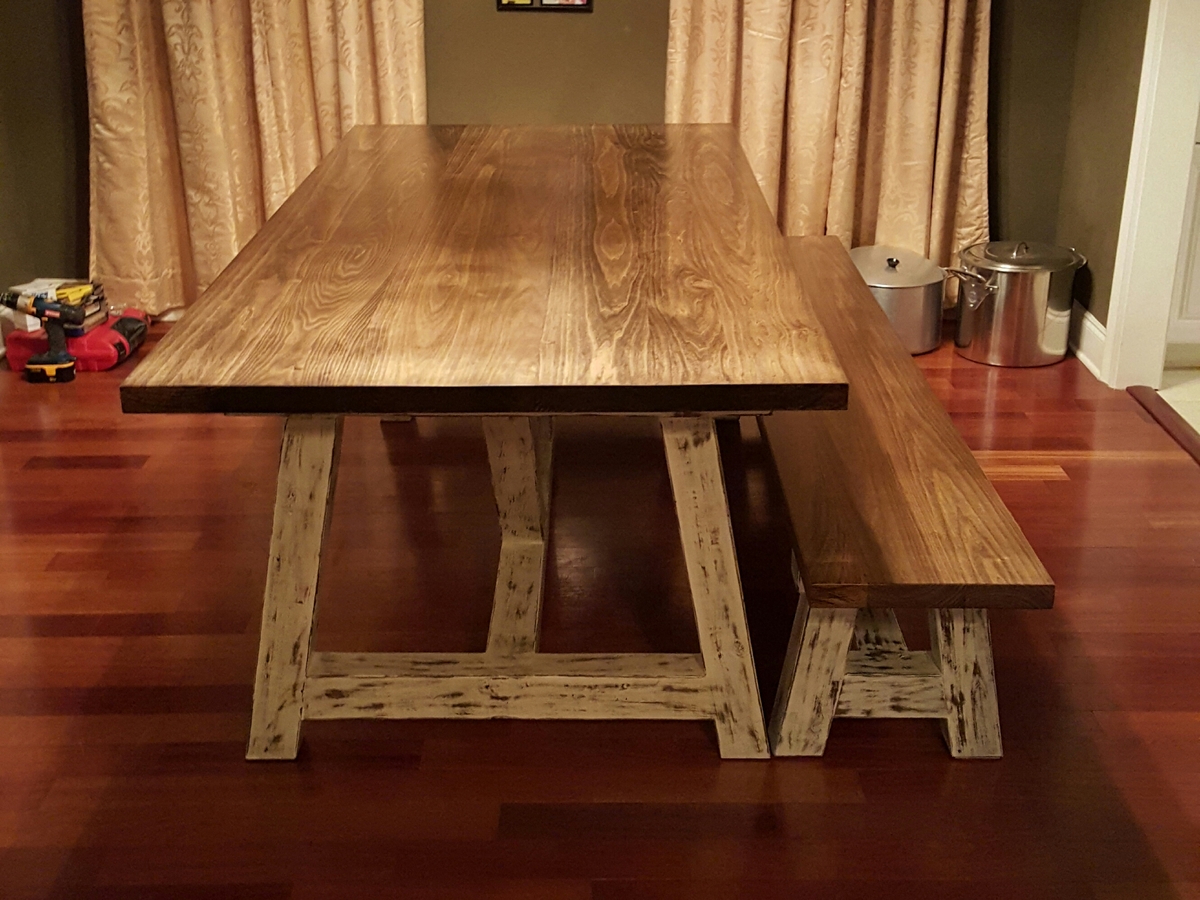
Finally, The Table of my Dreams
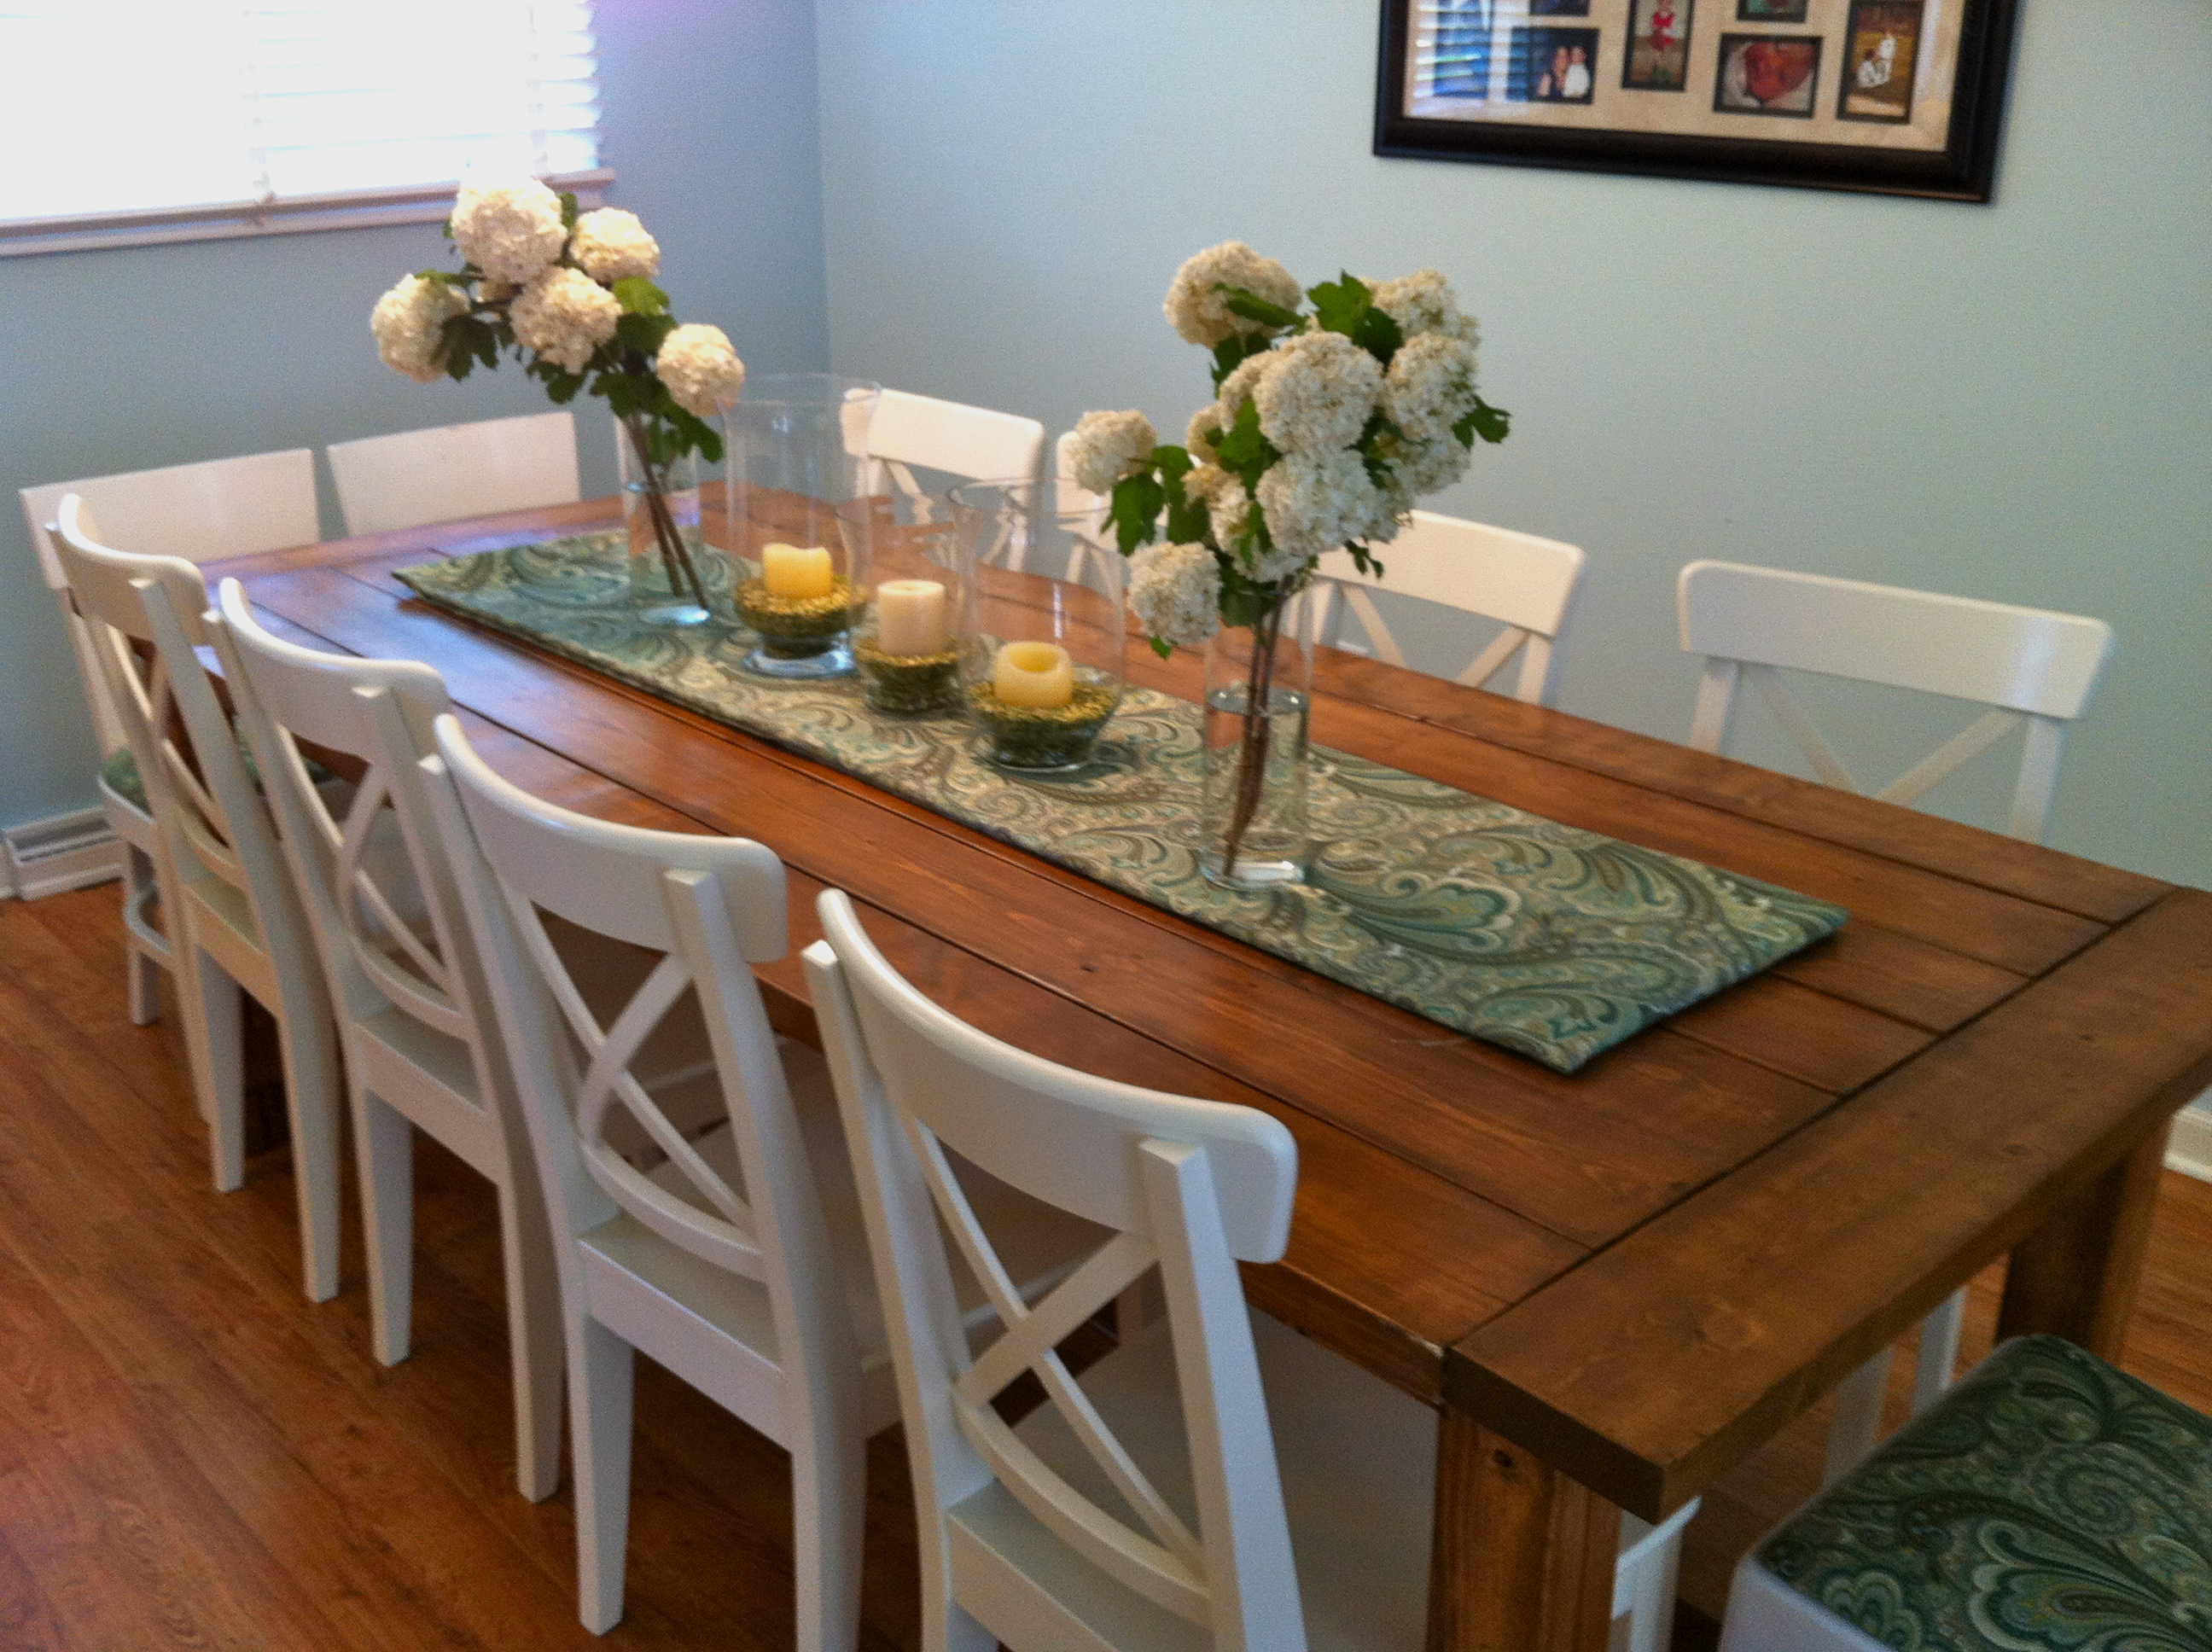
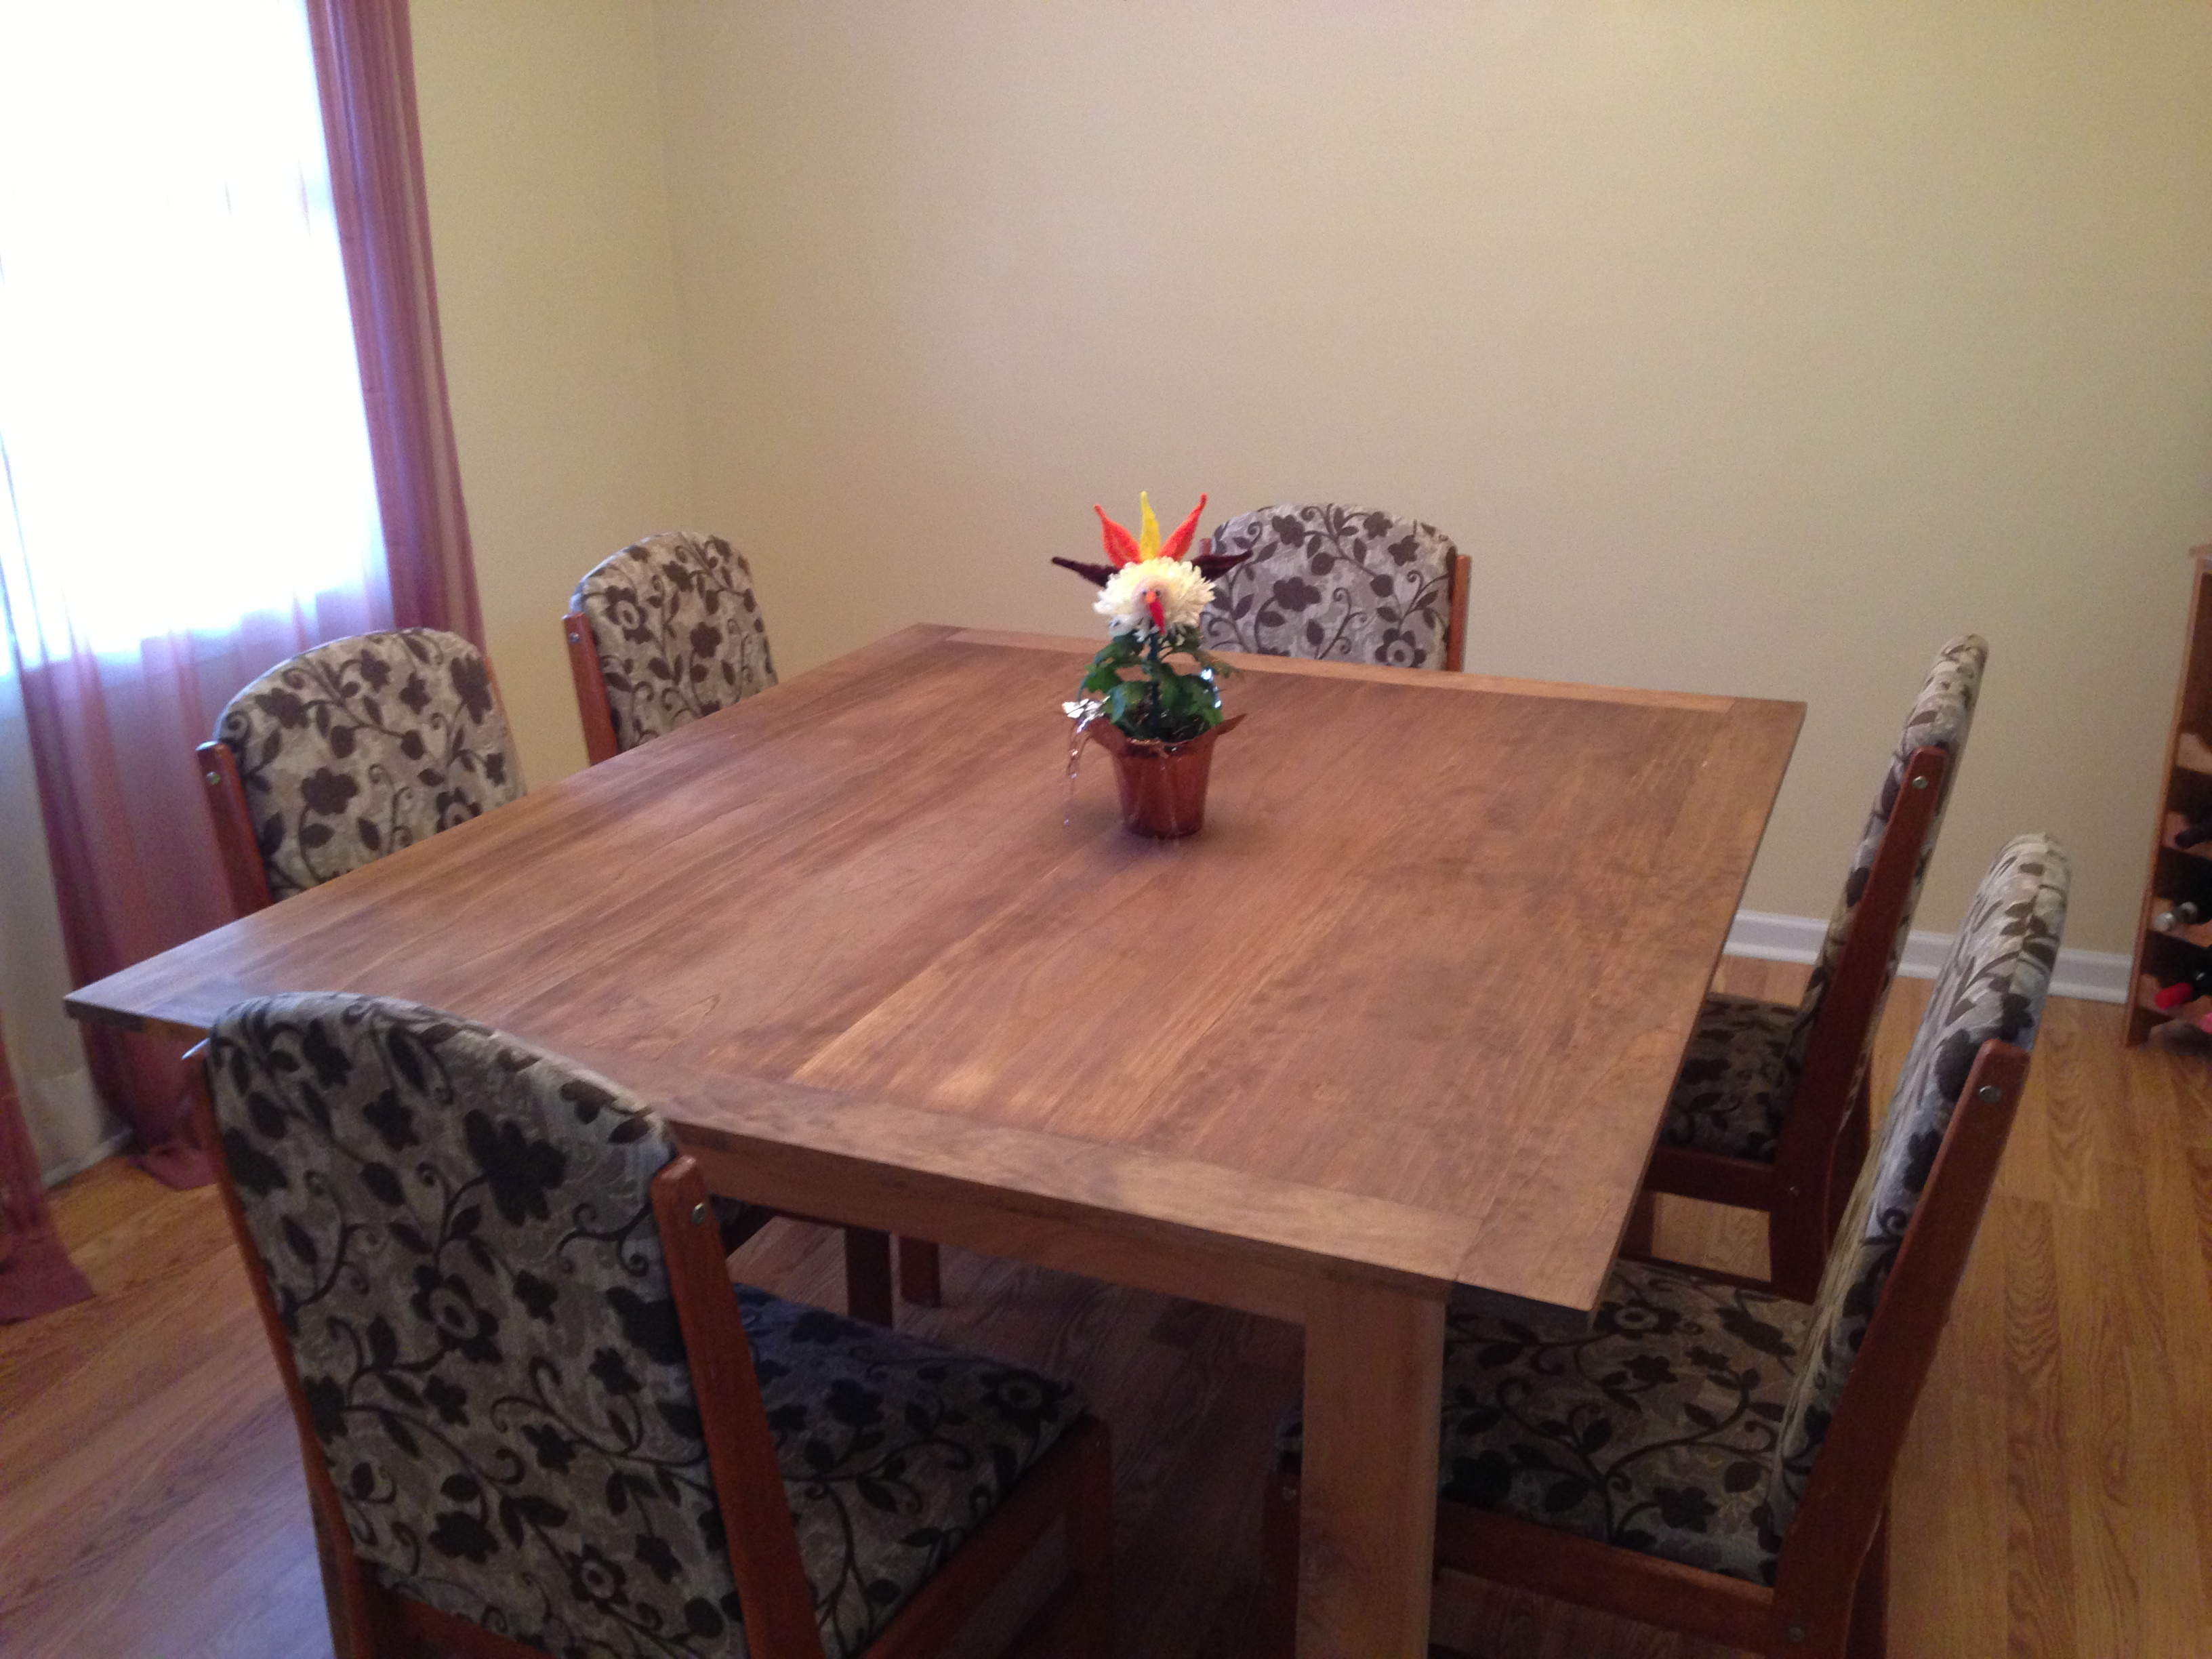
After years of pining (HA made of pine) for a farm style plank table, my husband and I worked together to build one. Thank goodness for Ana White. The plans were easy to follow, and with the help of a friend it didn't take long to build at all. This is the first time we have built anything. We have also altered the plans a bit, and my husband built a smaller one for a friend.
Estimated Cost
$110 on wood and screws and $40 for staining supplies
Estimated Time Investment
Weekend Project (10-20 Hours)
Finish Used
If you check out my blog, I have complete instructions and tips for how I finished this table. www.home-everyday.com
Recommended Skill Level
Beginner
Comments

Julia Nightstand
I used the Julia Nightstand plans but added textured wallpaper to the side panels and also decoupaged scrapbook paper on the inside of the drawer. The back was wainscoting which was painted the same color as the nightstand (this was a chalk paint). I added a thin support piece of wood above each side of the drawer to prevent it from flipping downward while it was open
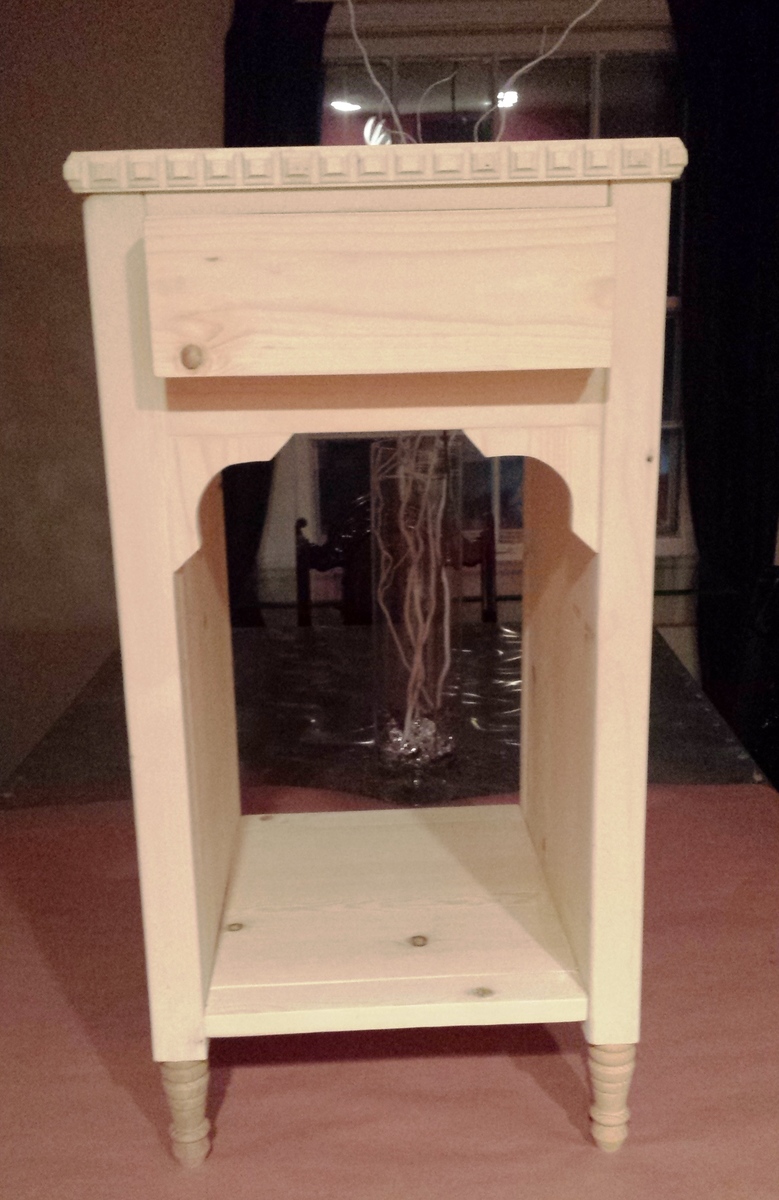

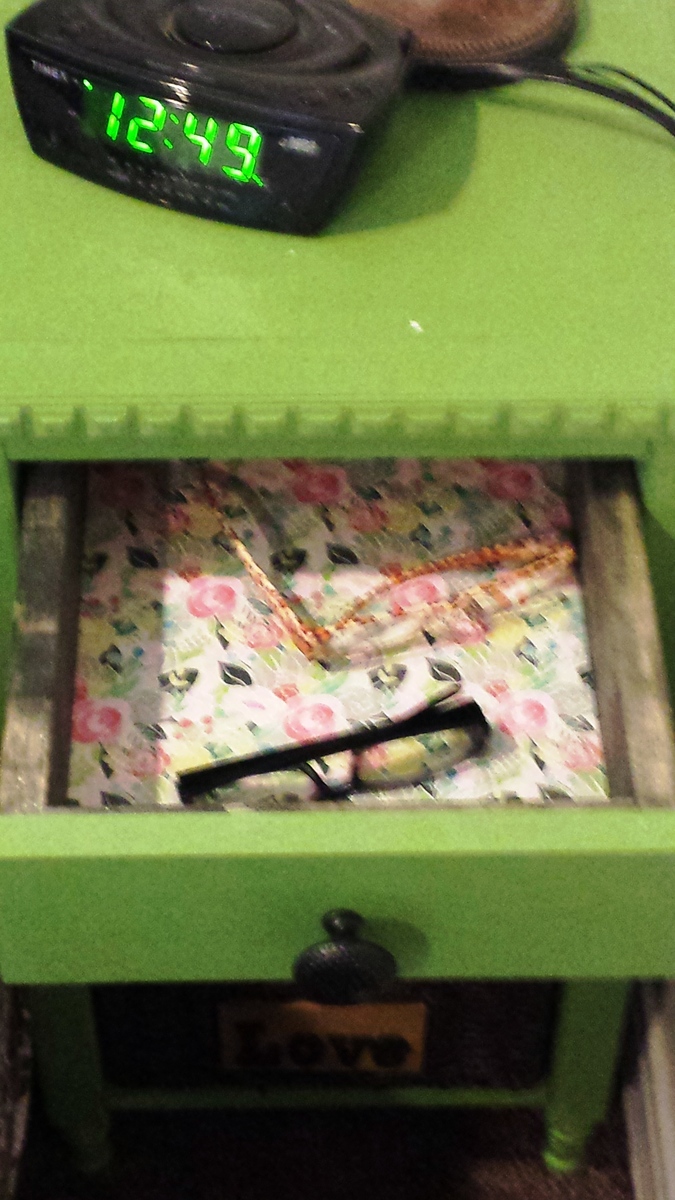
Built from Plan(s)
Estimated Cost
$30
Estimated Time Investment
Day Project (6-9 Hours)
Recommended Skill Level
Beginner
4x4 Truss Beam Table & Bench
When my wife and I moved we sold our old table and was in need of a new one. We've shopped around and didn't like anything we were seeing. She insisted that I build one but I never had any time due to my job. In the past it would've been easy because that's what I did was woodworking. So she researched and came across ana's plan and she loved it. Keeping the wife happy I made time. I made my material list & cutlist but was concerned with using construction grade lumber for the tabletop due to over time it likes to cup and warp in the right conditions. Instead I went with 8/4 Poplar which will make a solid tabletop and last forever. I was only able to work weekends on the project so it was finished in a month which I added the total hours & it equaled 1 week. She loves her new table and is now shopping for 5 canvas chairs to go with it. With her posting on social media I now have requests to build more. Where will I find the time?
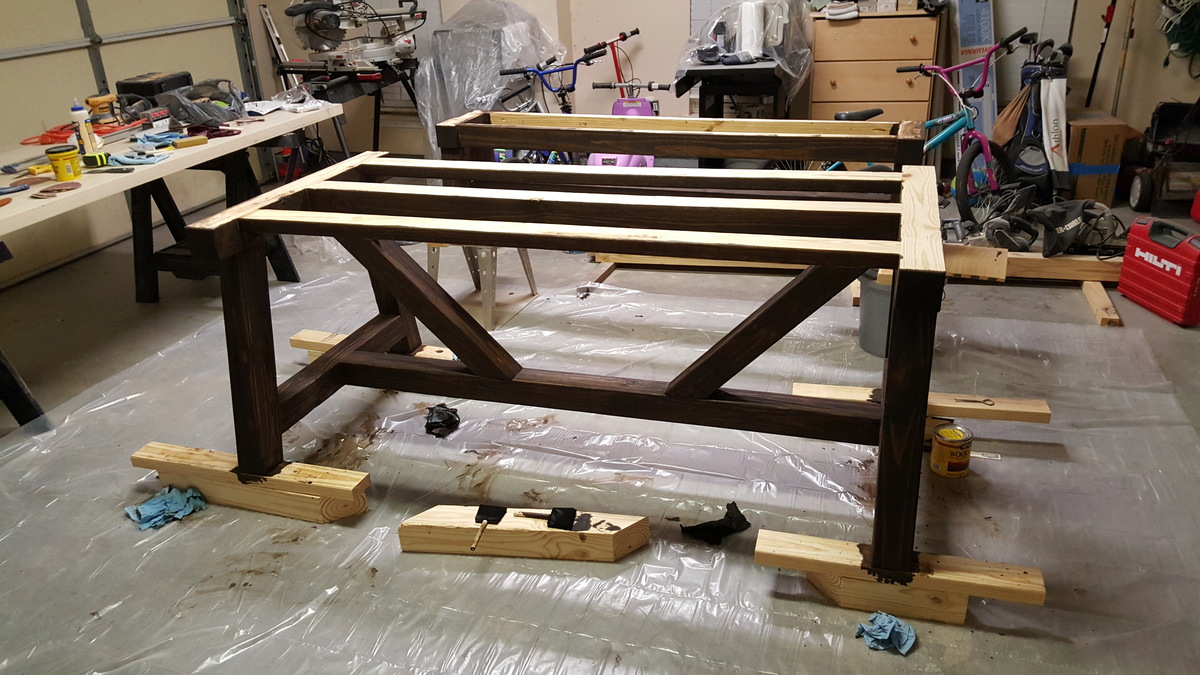
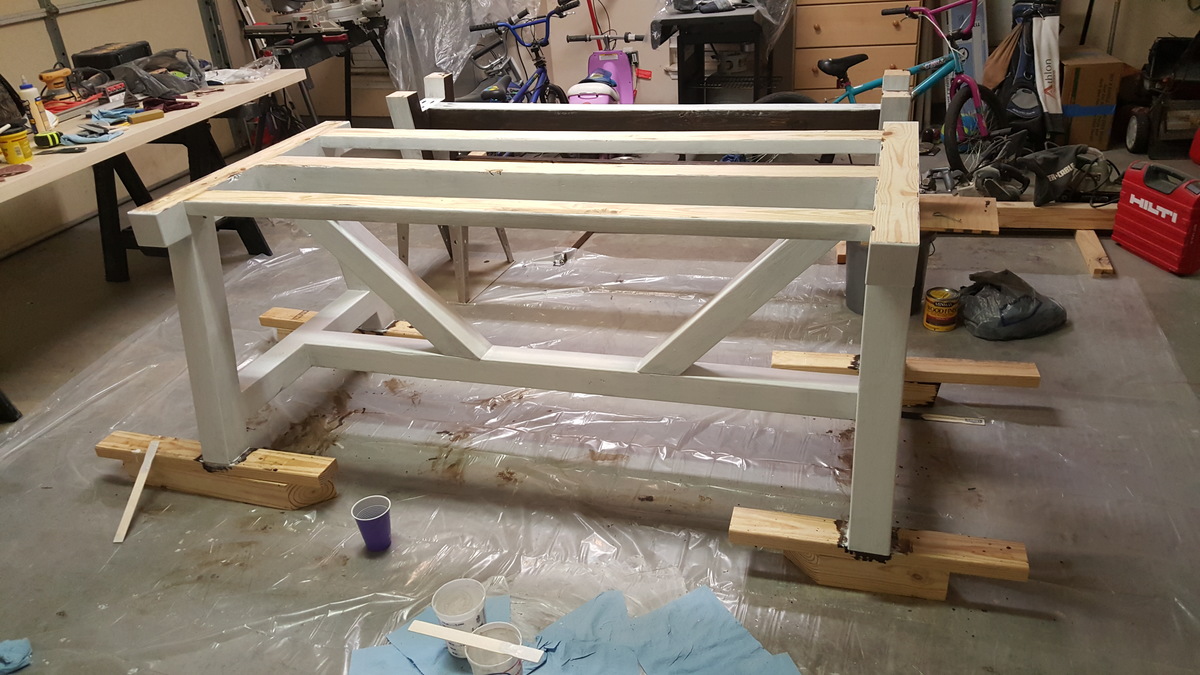
Built from Plan(s)
Estimated Cost
$375.00
Estimated Time Investment
Week Long Project (20 Hours or More)
Finish Used
I started with Minwax Espresso wood stain on the base of the table & Bench. I then applied 2 coats of Old Fashioned Milk Paint Snow White. Next I used 320 grit sandpaper to knocked any loose paint chips off & distress areas I wanted to antique. Finally I applied 3 coats of Minwax Polycrylic Matte, sanding with a 320 grit sanding block in between coats. The top I started with wood conditioner because poplar doesn't take stain well it is very blotchy. Next I used Minwax Espresso wood stain. Finally I applied 4 coats of General Finishes High Performance Flat while sanding in between coats using 320 grit sanding block.
Recommended Skill Level
Intermediate
Twin Beds
Saw plans on here and my girls loved the bed so we got rid of the bunk beds and now they have their own beds. The original plans were for a king or Queen so had to redraw the project out for twin size beds. I had never made drawers before so that was fun. Learned a lot and now onto the next project.
Estimated Cost
$250
Estimated Time Investment
Week Long Project (20 Hours or More)
Finish Used
Mahogany stain (minwax)
Recommended Skill Level
Intermediate
Living Room Fireplace with Shelvs

My wife and I built this fireplace wall using Anna White’s plans. We get complements by all that see it!
Keith
Built from Plan(s)
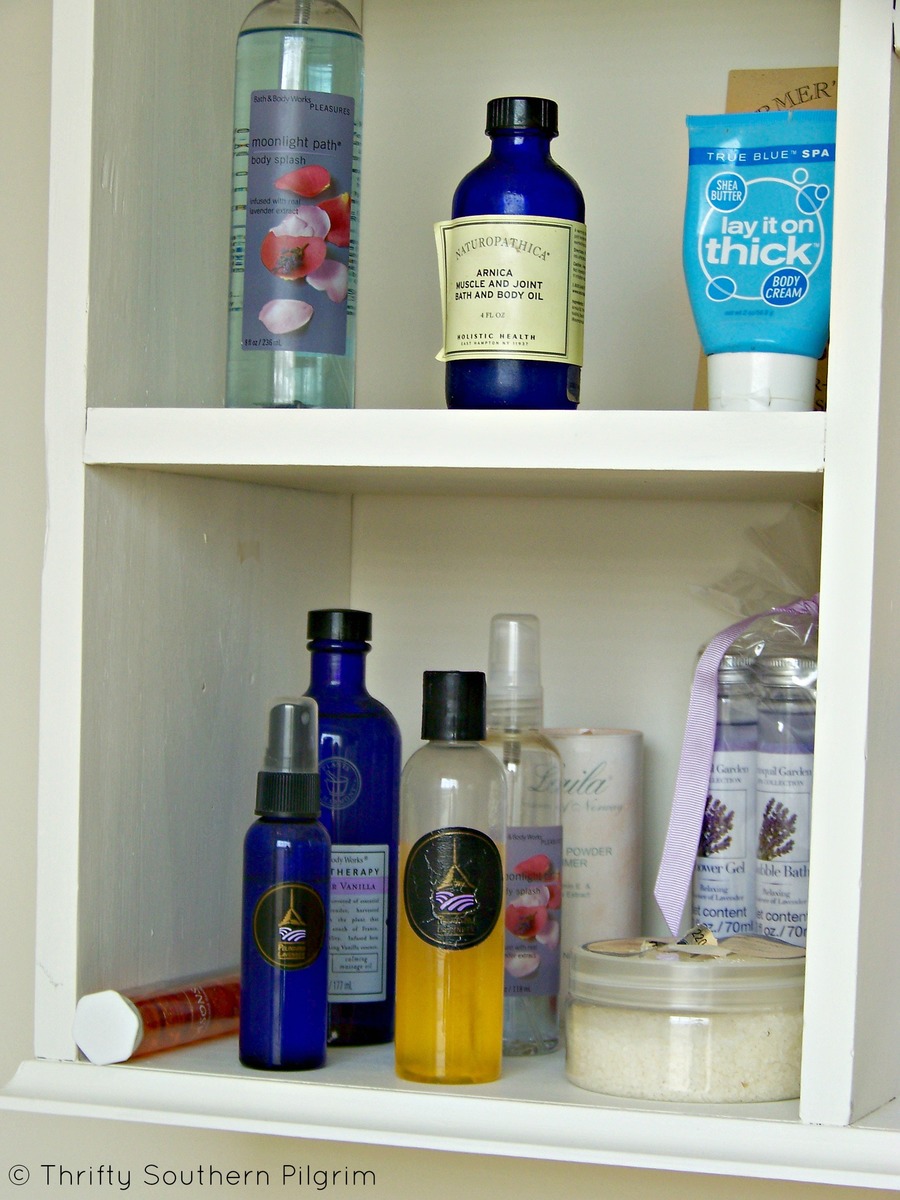
Bathroom Wall Storage Unit
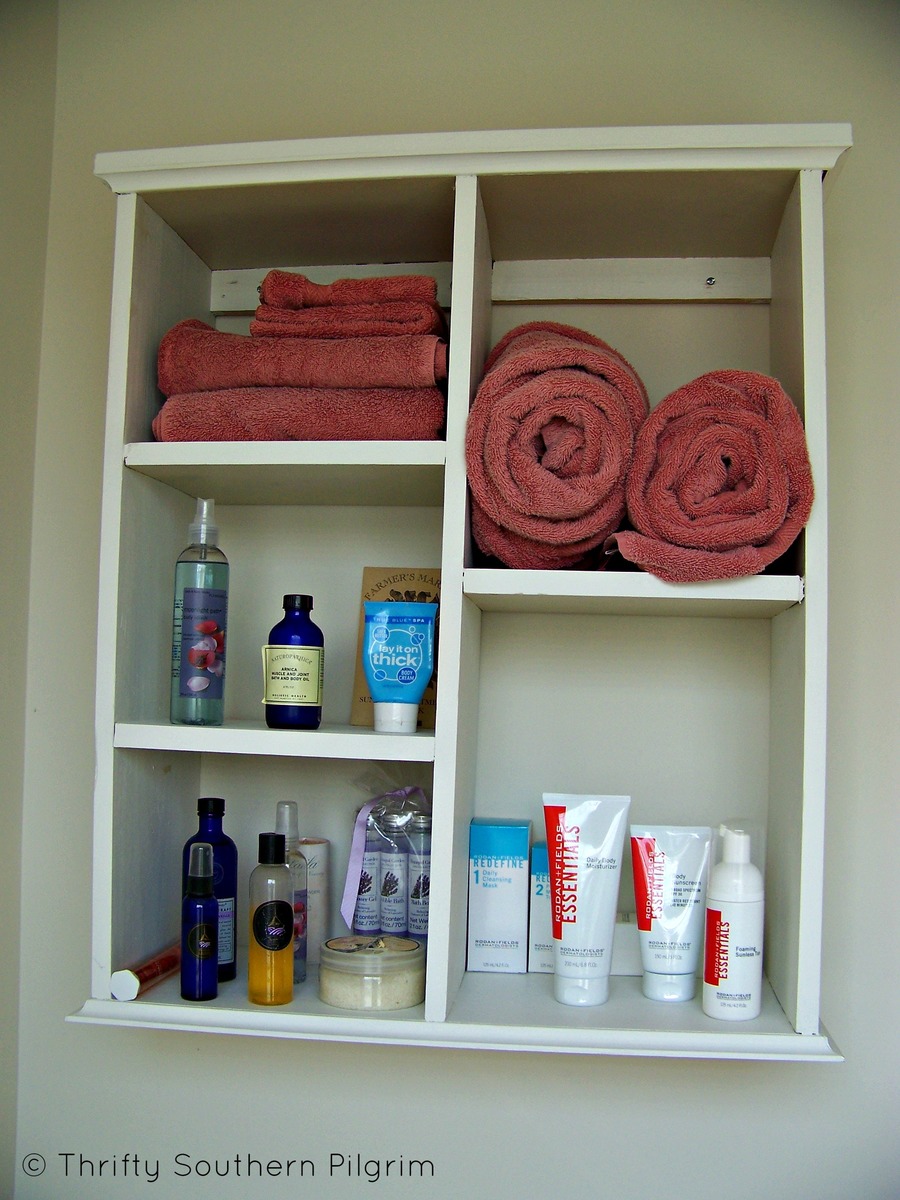
I built this storage unit for a bathroom in our new home from Ana White plans in her book, The Handbuilt Home. I had most material on hand, only having to purchase some trim. It was very doable and not difficult.
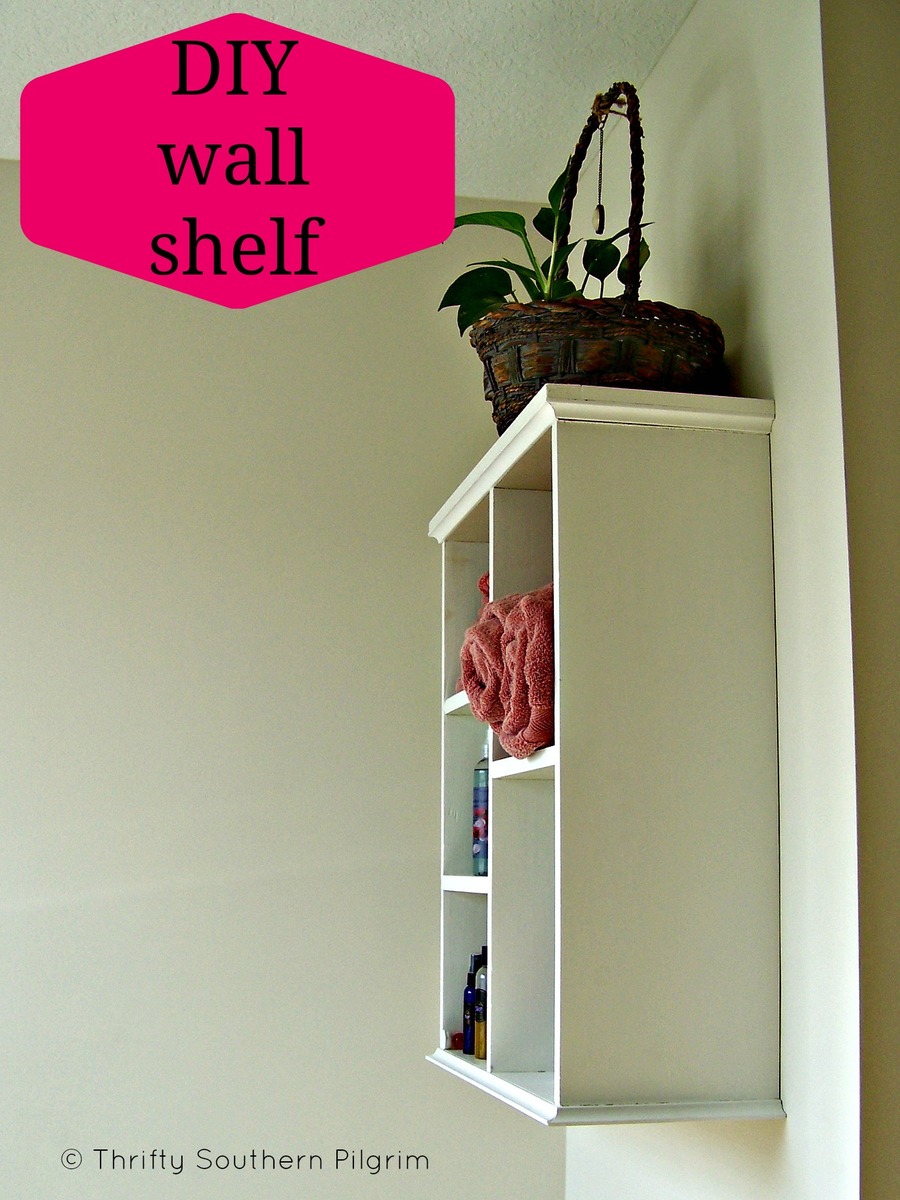
Estimated Cost
< $10
Estimated Time Investment
Afternoon Project (3-6 Hours)
Finish Used
Paint
Recommended Skill Level
Intermediate
DIY Longboard

I decided to make longboards as birthday gifts for some of my other nephews. I had made a regular skateboard prior, but I decided to try longboards this time and I'll probably make one for myself down the road since I'm a bit of a child myself :)
More details and photos on my blog:
http://www.woodworkingfourdummies.com/blog/diy-longboard
Cheers,
Ian
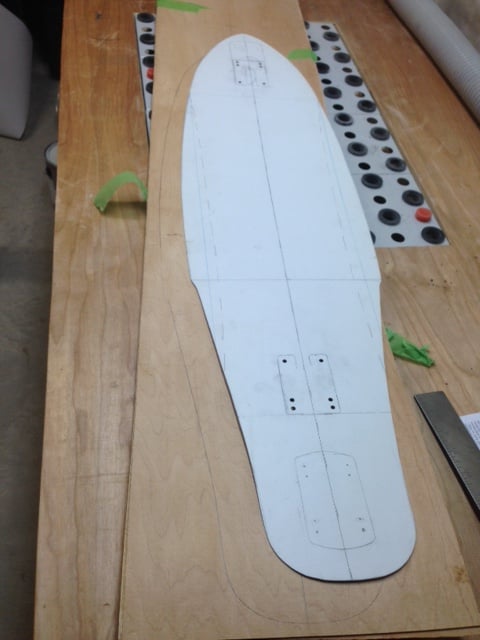
Estimated Cost
Around $40 just for the board (not including hardware - trucks, wheels etc..)
Estimated Time Investment
Weekend Project (10-20 Hours)
Finish Used
Stain and polyurethane
Recommended Skill Level
Starter Project
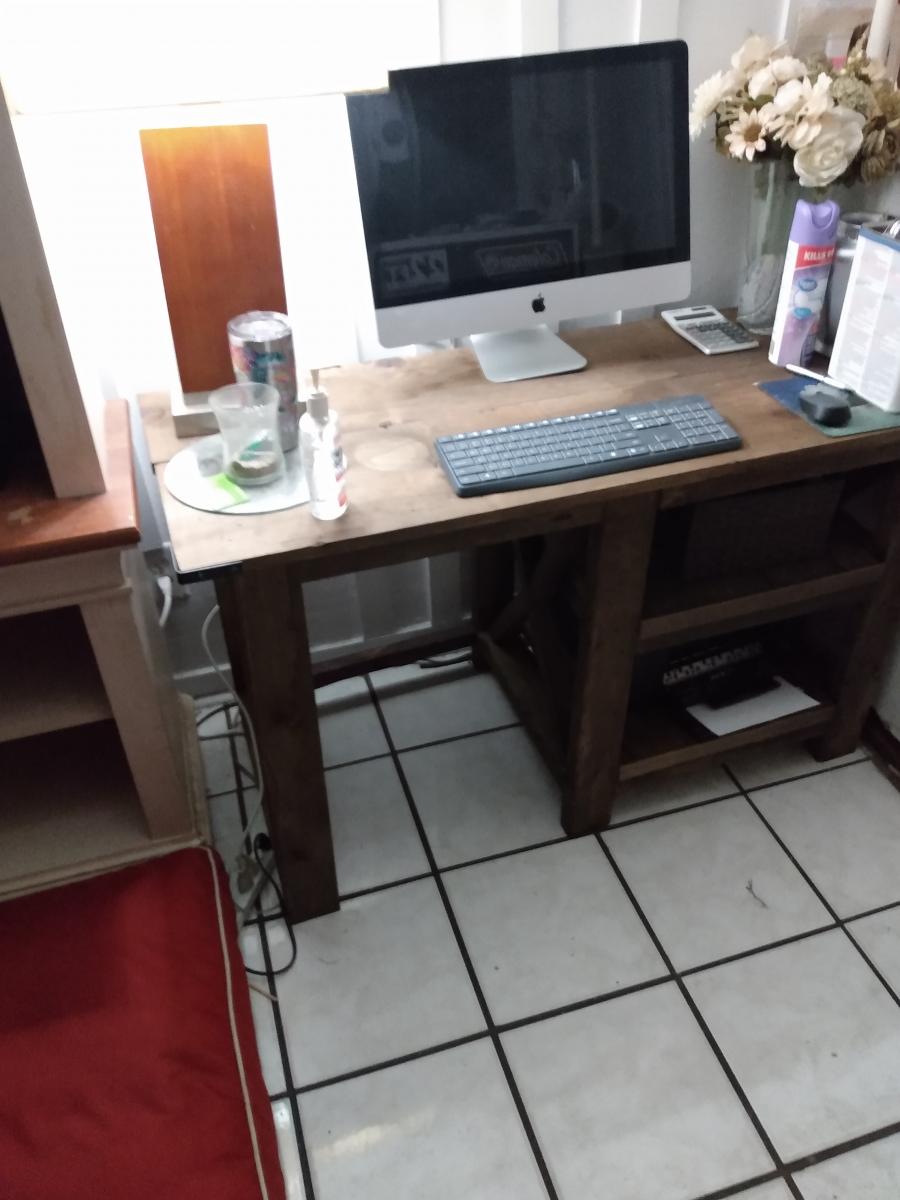
The x desk
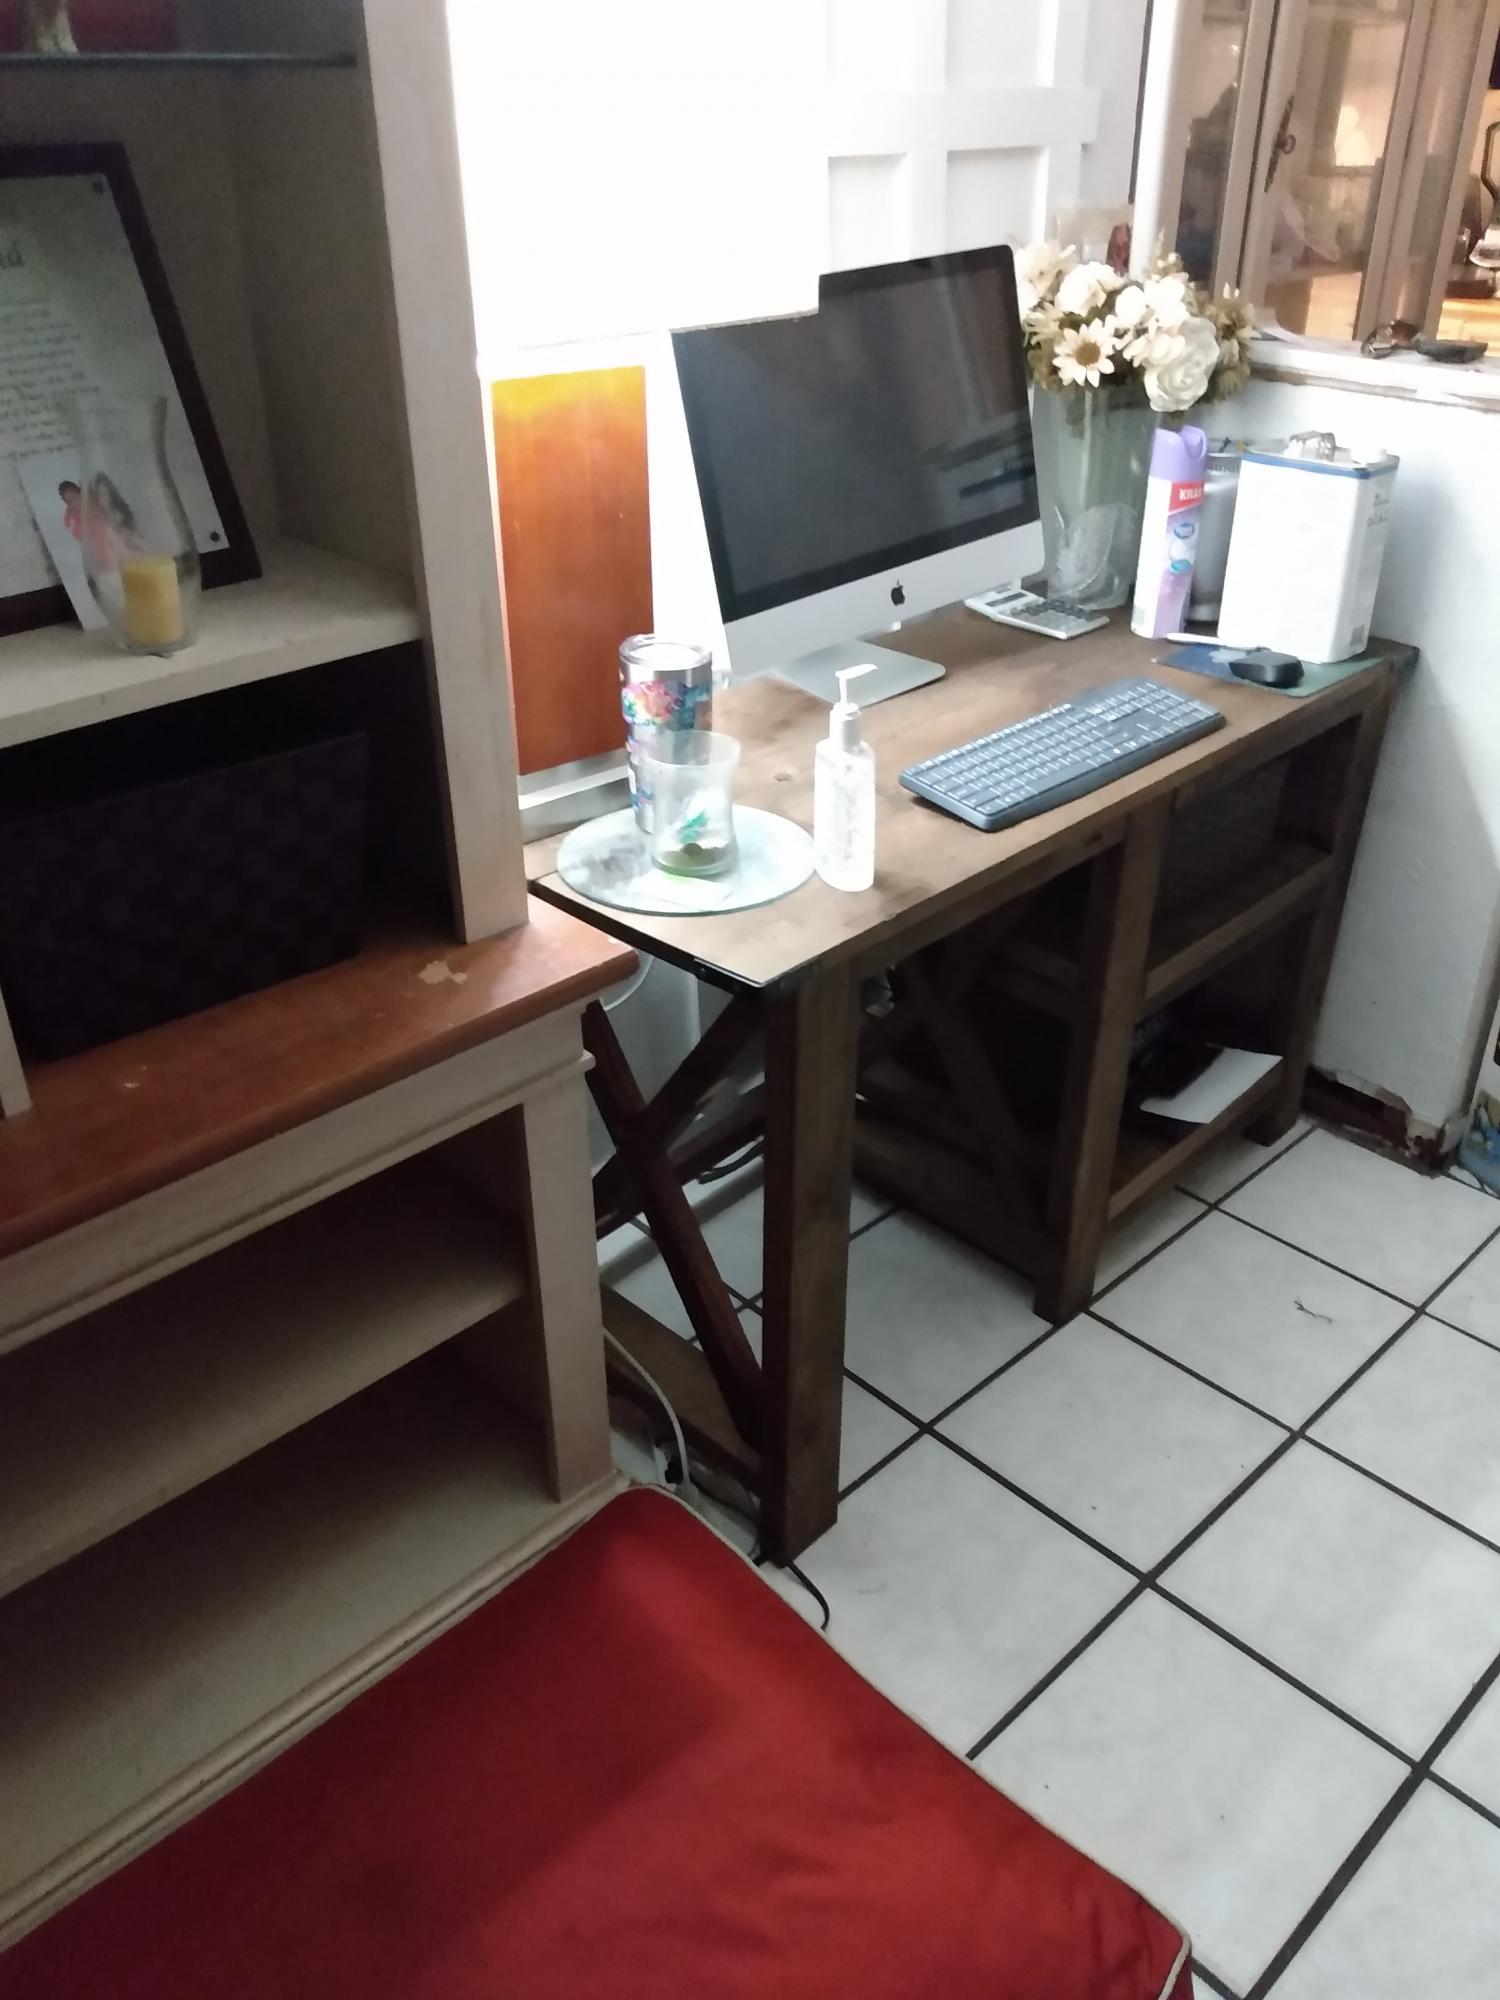
Had a little bit of time to do it


Built from Plan(s)
Tall Fancy Headboard

Upsized to a king. Couple of changes:
Mitered all the trim. Routed a rabbet in the back for the plywood panel. I mount to the wall with an offset to clear the baseboard (I attach wood blocks on the back and use adjustable furniture feet for leveling and floor protection.
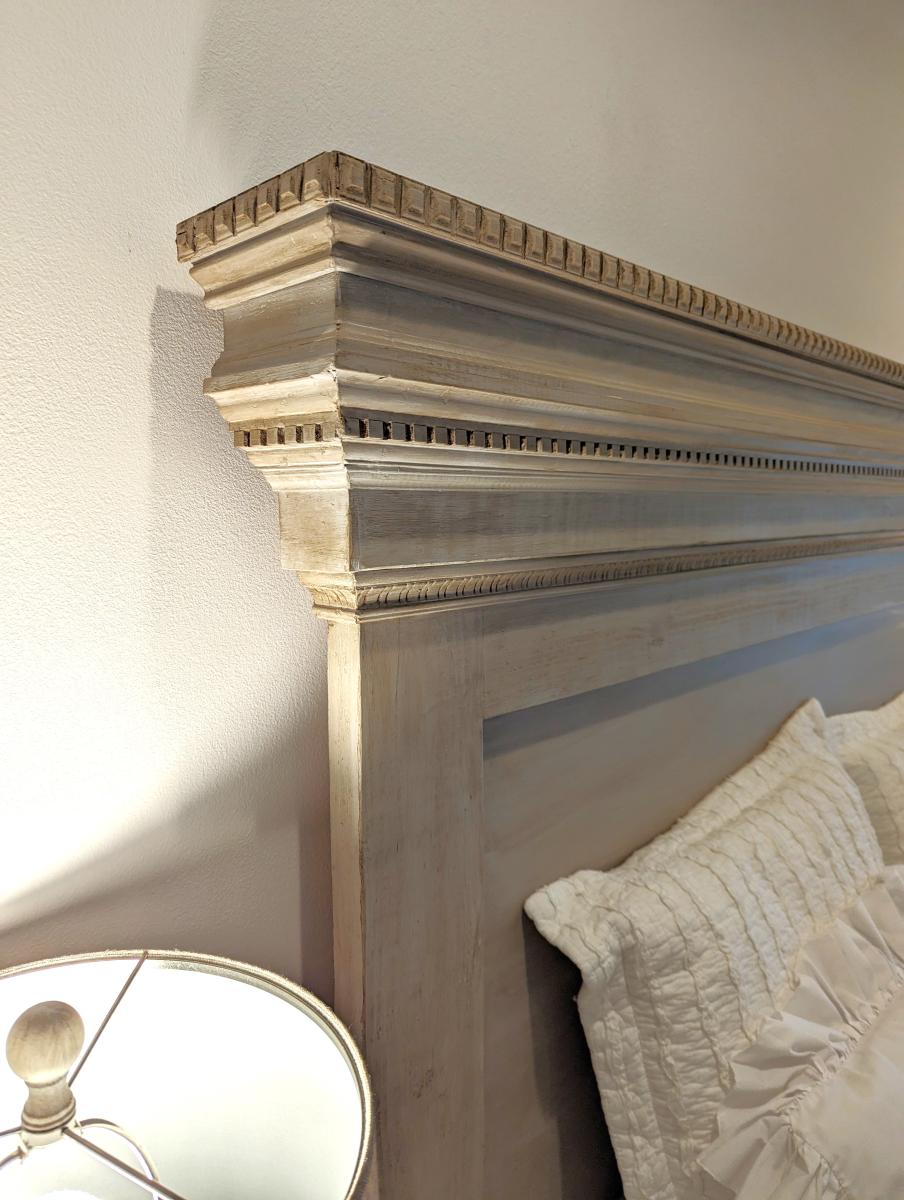
Built from Plan(s)
Bathroom Vanity

We purchased an unloved Victorian Farmhouse in 2008 and have been working on it ever since. The latest project is the main bathroom. It started out really small and dark. Like most rooms in the house we had to gut the room and start from scratch and like most projects the cost was much more than we anticipated. We had to come up with some creative ways to get what we wanted on a shoestring budget. Part of that creativity involved building our own bathroom vanity. I knew I wanted marble to compliment the marble floor we installed. I took to Craigslist and found a marble slab for 75 bucks. Then we scoured for plans and made modifications that would work with our ideas and dimensions. We still need to install the vessel sink and the wall-mount faucet to complete the vanity, but we are really happy with what we've created, and I don't think we could have found exactly what we were looking for anyway. I'm so grateful for this site and for the support everyone here offers!
We created the legs out of 3 - 1x3's that we glued and clamped together. We decided on a slat bottom shelf to help with any moisture issues that might happen in a bathroom. The drawers were probably the trickiest part of the build, but my husband says even those were not overly challenging. We just primed and painted to match the custom beadboard my husband also created in the garage. He also replicated and created period moldings for around the windows and doors. Finally, we built a custom built-in medicine cabinet that I will be posting in another brag post.
The bathroom really turned out better than I could have imagined and it was all built using materials from Home Depot - no special orders here!

Built from Plan(s)
Estimated Cost
$35
Estimated Time Investment
Day Project (6-9 Hours)
Finish Used
We topped the vanity with Cararra white marble, primed with Kilz and painted Behr's Silk Pillow in Satin finish. The chrome hardware is from the Martha Stewart line found at Home Depot.
Recommended Skill Level
Intermediate
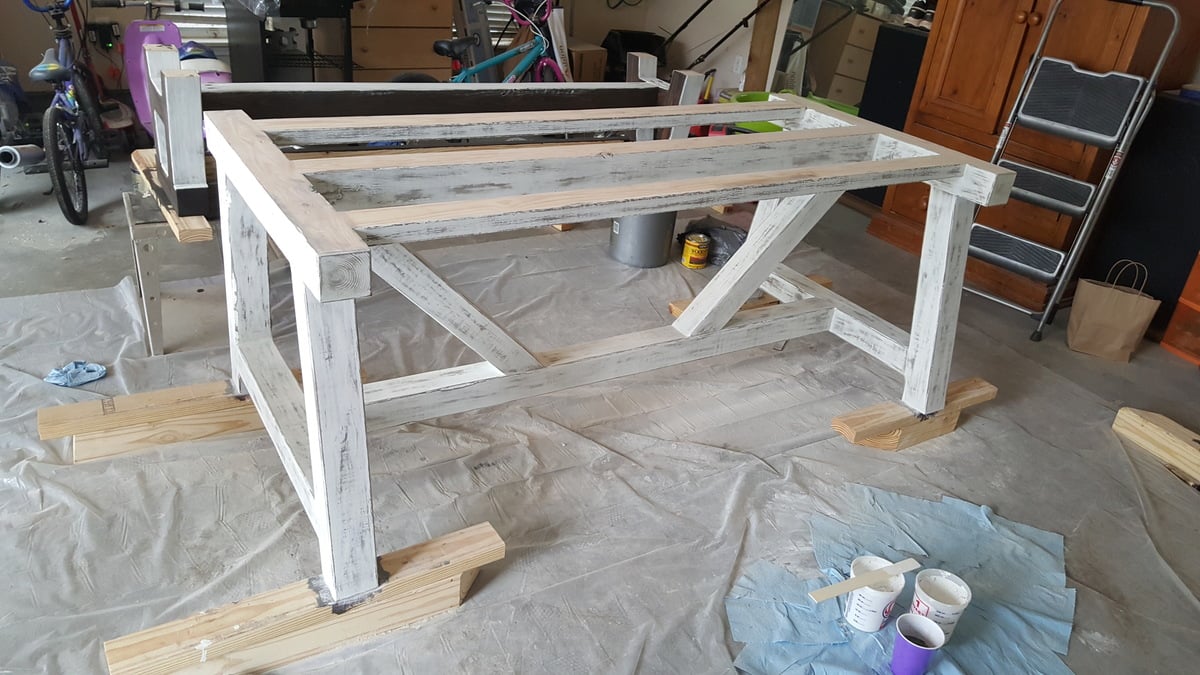
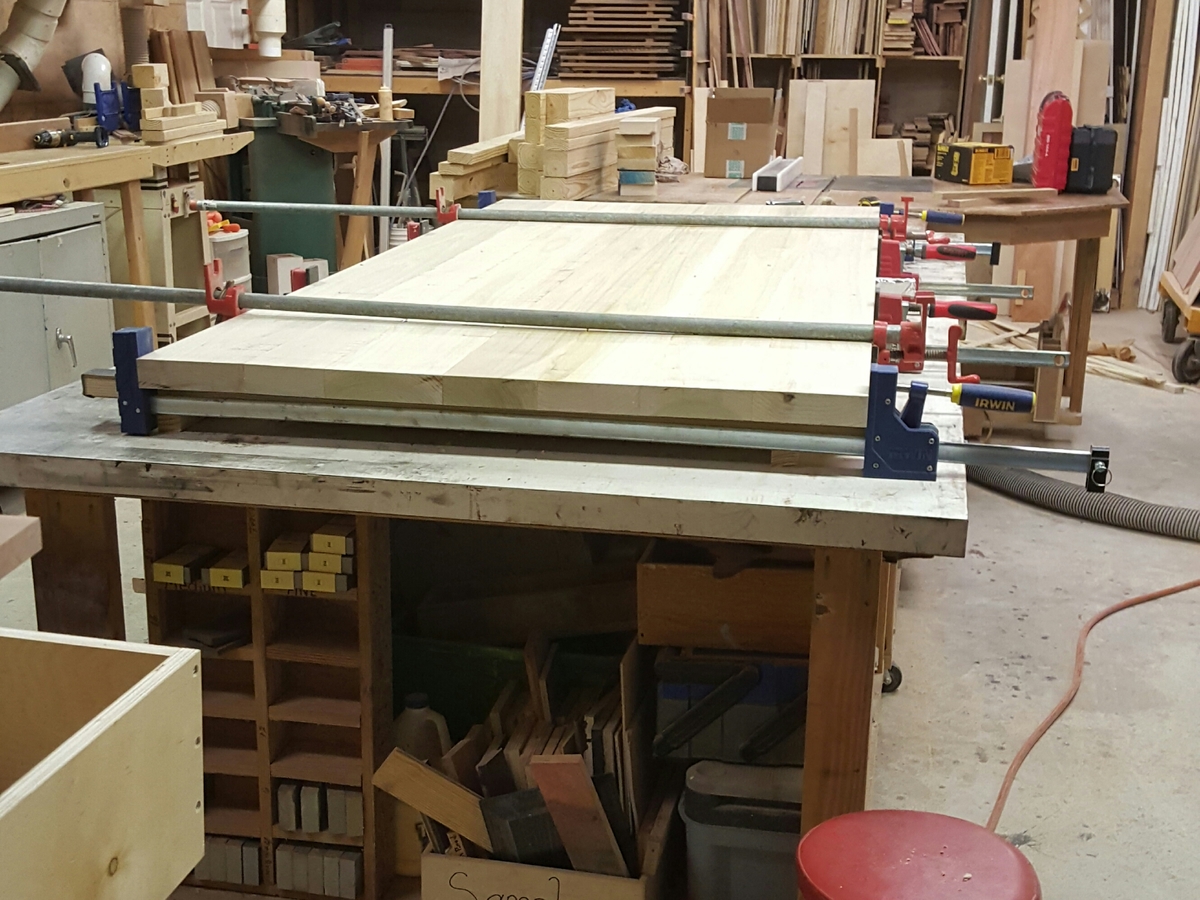
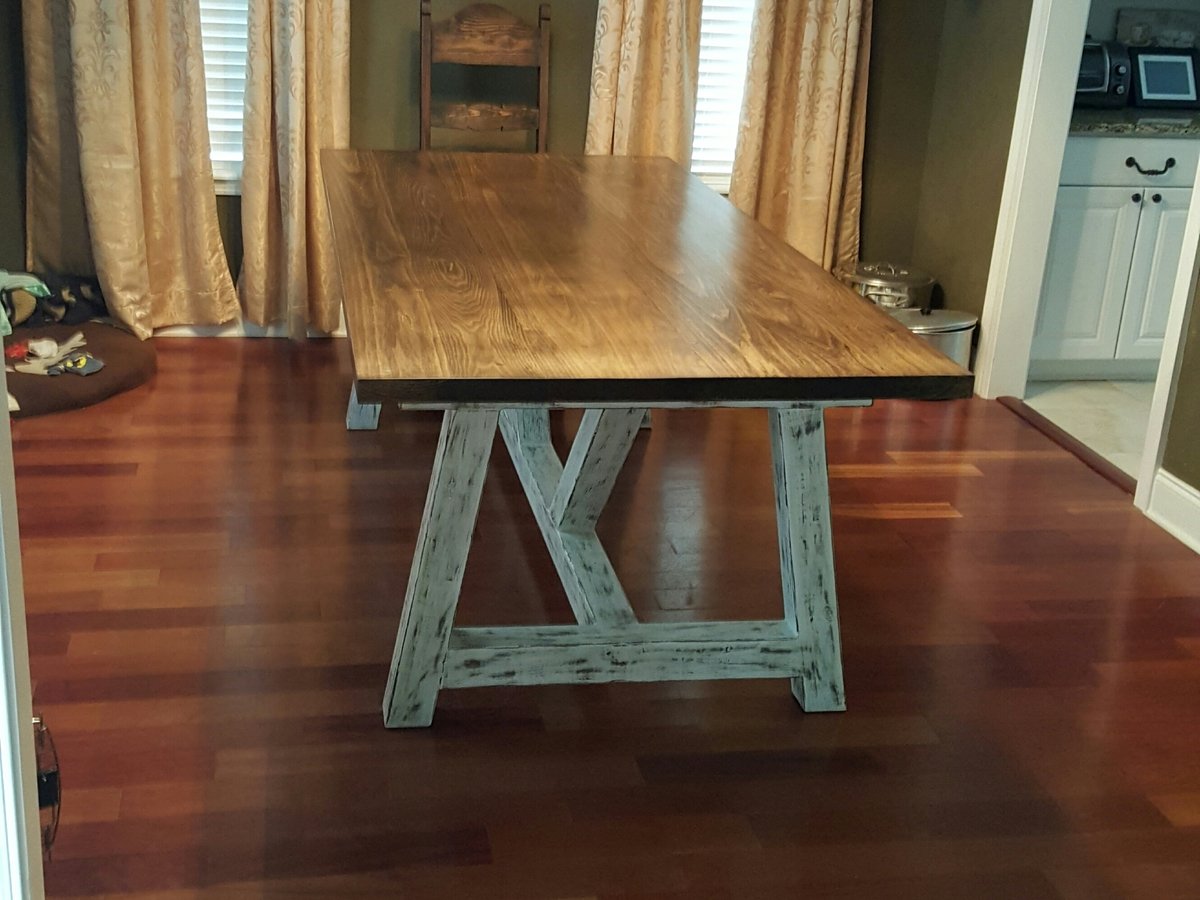
Modified farmhouse table
I combined a bunch of different table plans to come up with this. But essentially I used 4x4 cedar legs, 1x4 pine for the aprons, and 1x10 and 1x4 pine for the top.
Built from Plan(s)
Estimated Cost
$175
Estimated Time Investment
Weekend Project (10-20 Hours)
Recommended Skill Level
Intermediate