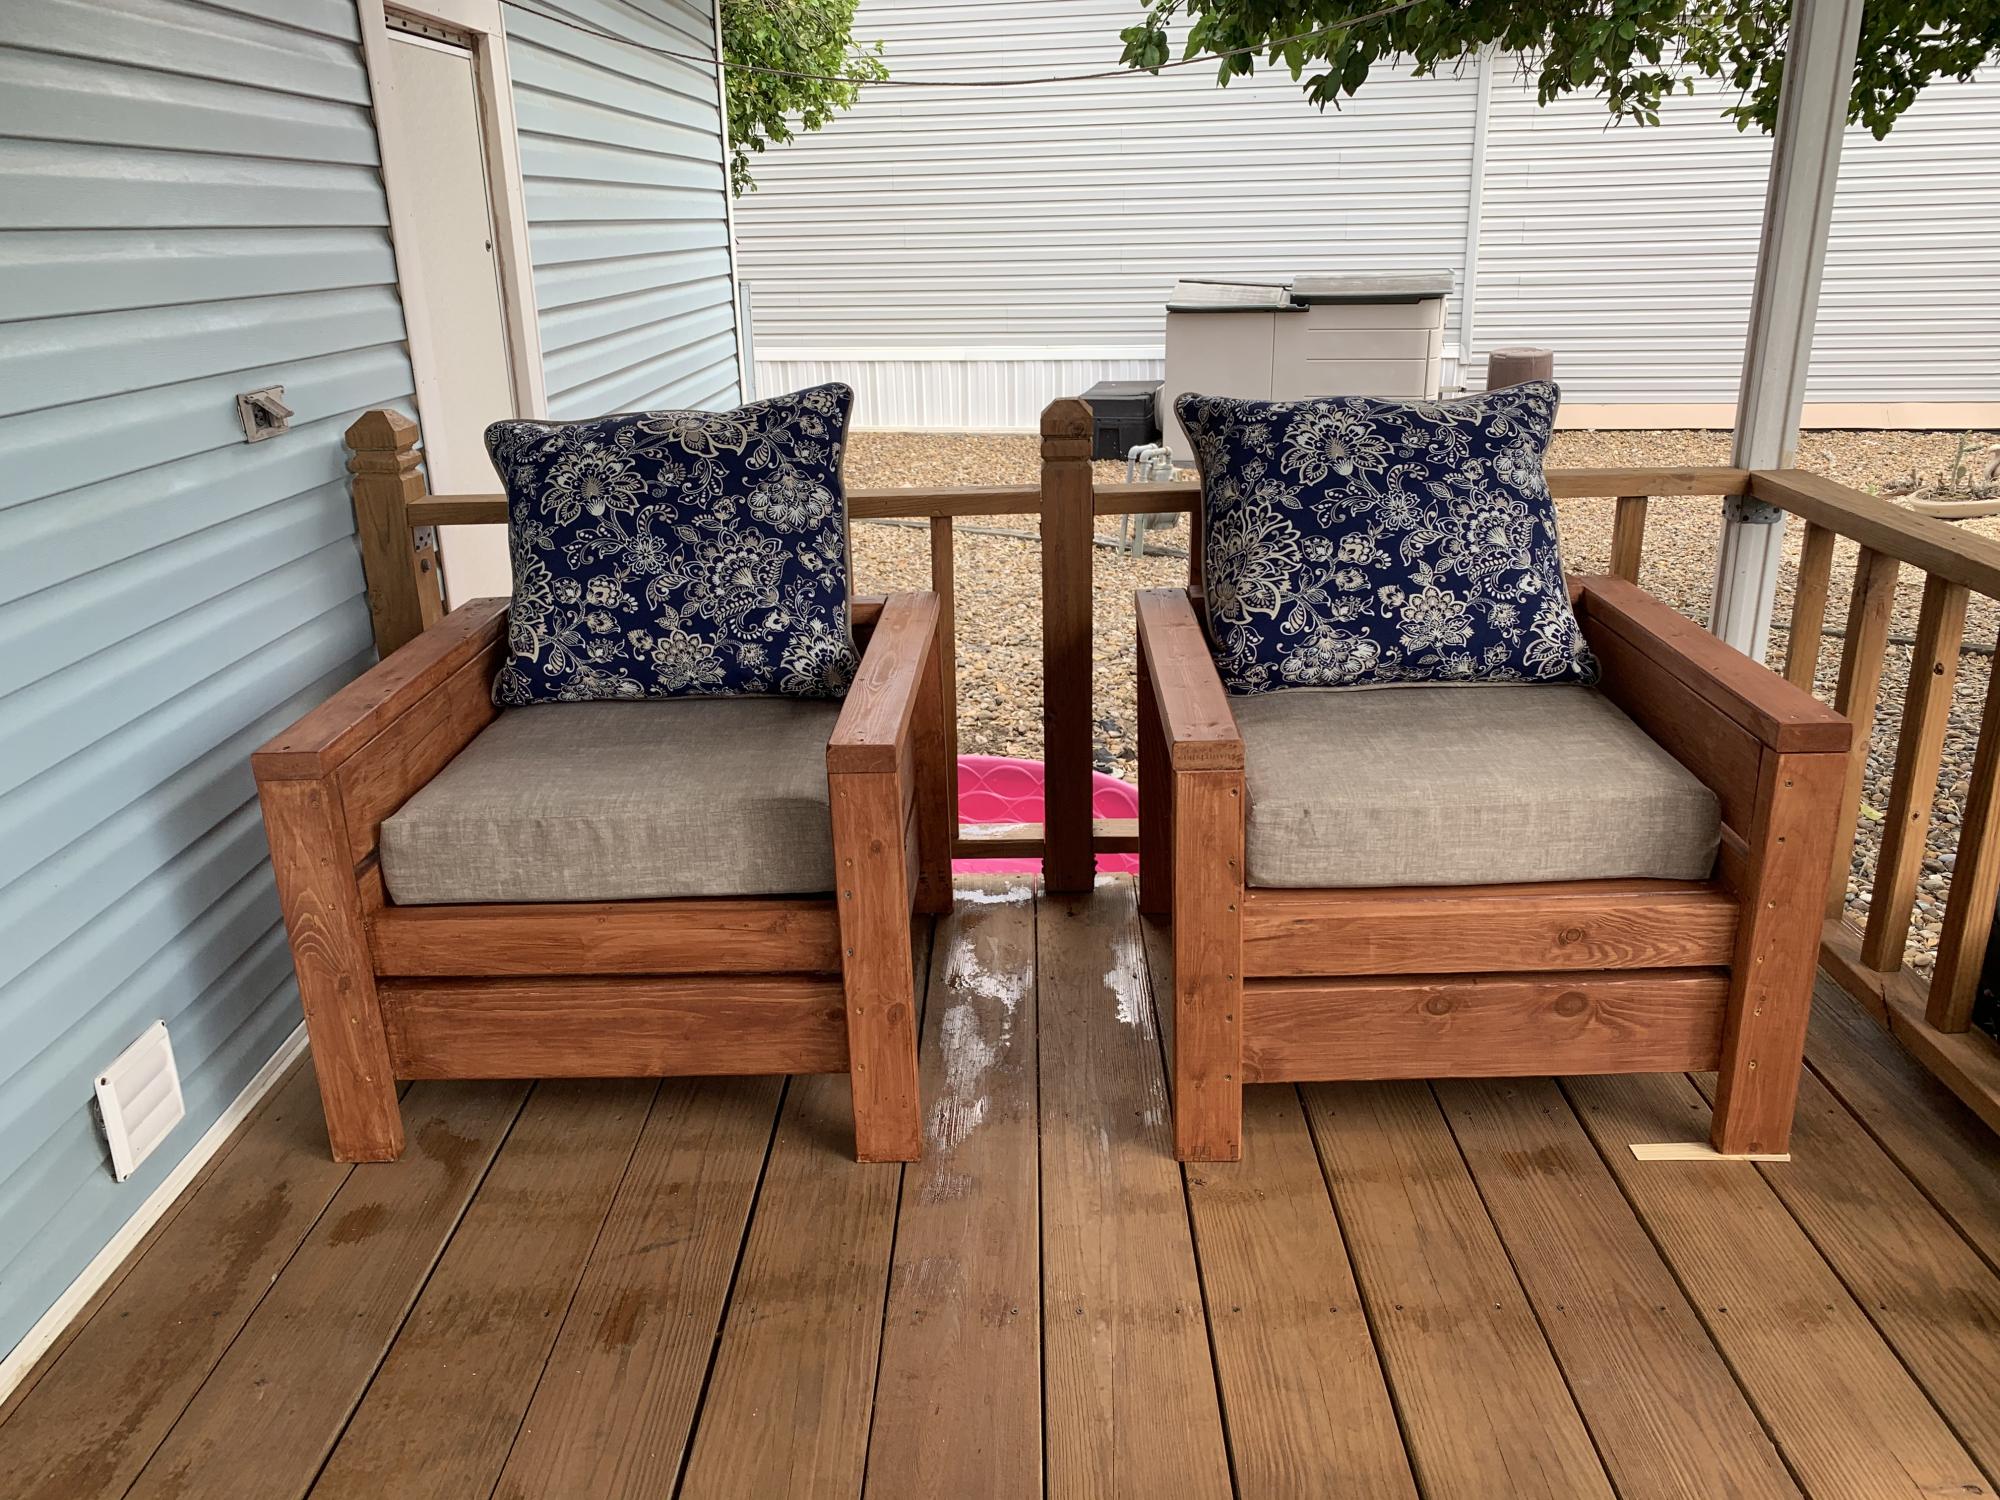
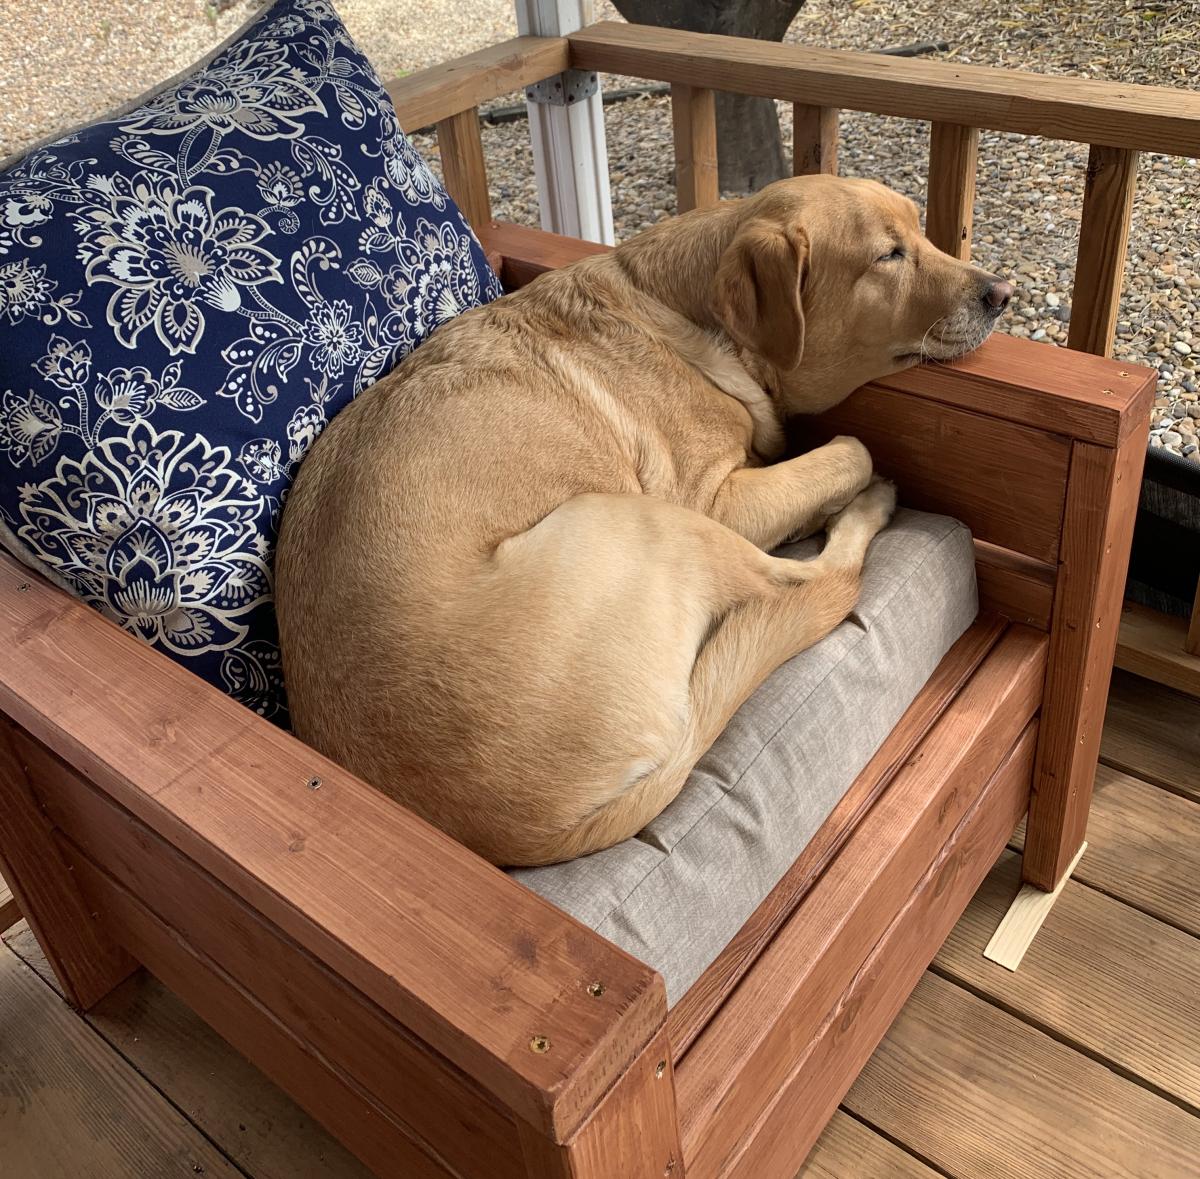
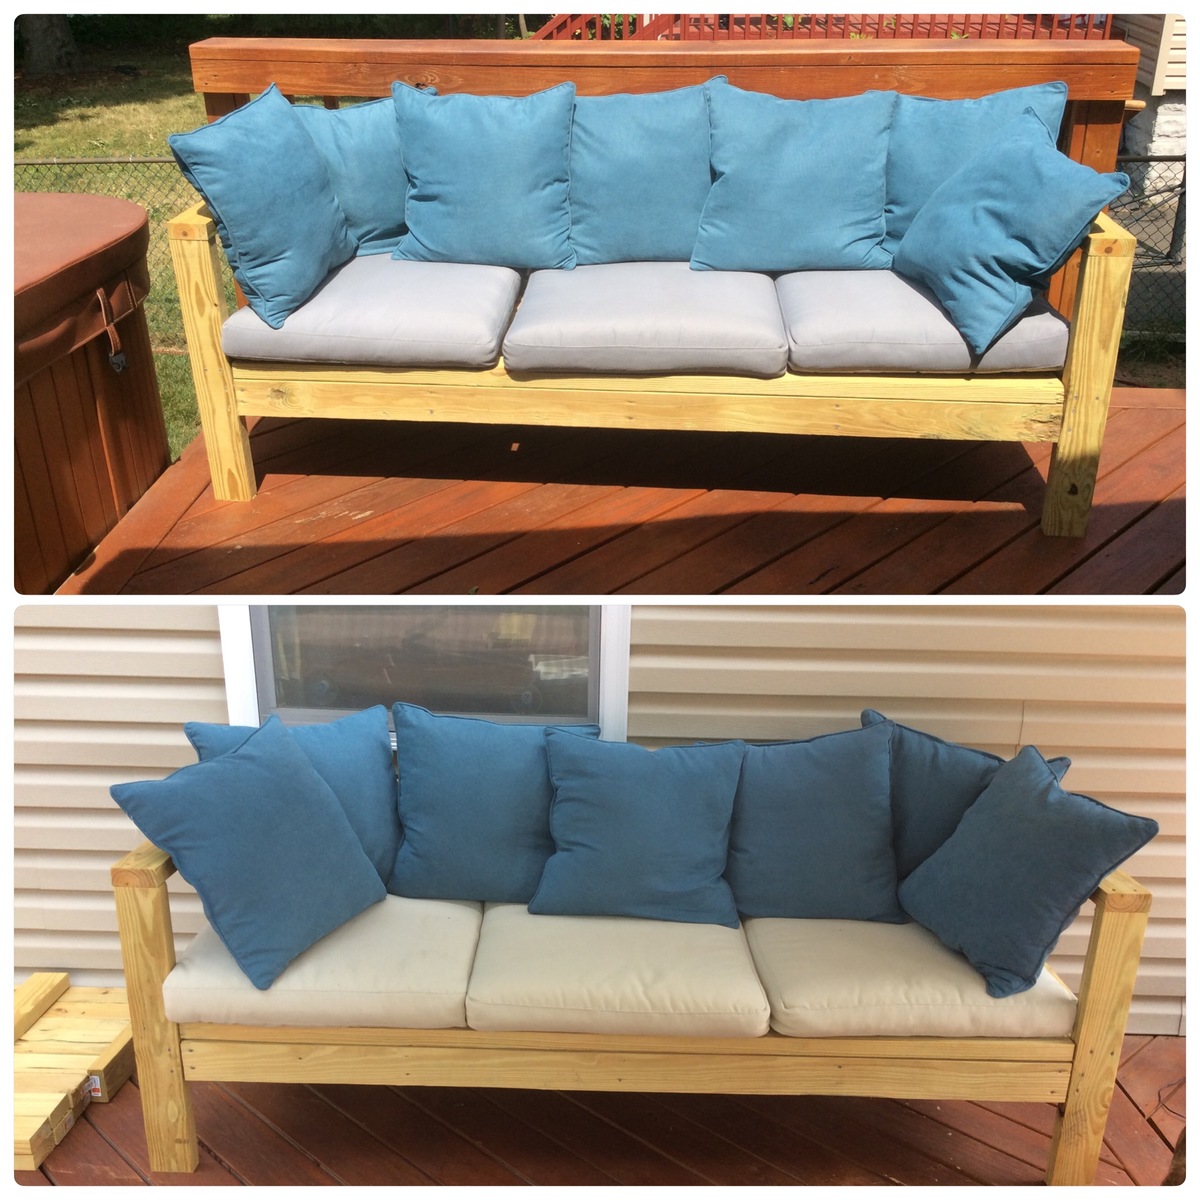
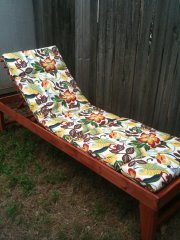
Community Brag Posts

Potting Bench

Submitted by Anonymous (not verified) on Tue, 04/18/2017 - 08:59

Made one or two changes to fit my needs. Came out nice. Thanks. -hs 

Recommended Skill Level
Advanced

My spin on the Counter Height Farmhouse Table from Amazon White’s free plans!

Submitted by Anonymous (not verified) on Sat, 03/20/2021 - 06:52

The counter height farmhouse table plans were so helpful! Thank you Ana White! I replaced plywood on top with 2x8s and added a shelf underneath the table for some kitchen storage! I am in love thanks again😍 Follow me on Instagram @abbbclark_homeee for more home renovations, decor and DIY!

Estimated Cost
$200
Estimated Time Investment
Day Project (6-9 Hours)
Finish Used
Weathered oak oil based stain
Recommended Skill Level
Beginner

Comments

Star Closet

Submitted by cawagner on Tue, 03/12/2013 - 12:39

My husband made two of these star closets for our girls and all of their American Girl Doll clothes and accessories. He added a drawer to the bottom so that they could fold pants, shorts, and swim suits and keep them there. He also built three small boxes to hold the smaller accessories, like shoes, hair bows, and hats. It turned out beautiful!

Estimated Time Investment
Weekend Project (10-20 Hours)
Finish Used
Stain and polyurethane
Recommended Skill Level
Intermediate

Comments

corner shelf

This was very easy to make. Stained with minwax dark walnut. It's very sturdy too.

Built from Plan(s)
Estimated Time Investment
Day Project (6-9 Hours)
Finish Used
Minwax dark walnut
Recommended Skill Level
Beginner

Comments

Nice stool chair/table

Submitted by Anonymous (not verified) on Thu, 04/20/2017 - 12:08

this is my first project, so some screw holes is appear on the legs, but now i bought hole pocket device to hide screws in next project

thanks a lot ANA for your demonstration

Recommended Skill Level
Beginner

Newbie

My first build in my new house I didn't think it would come out so well. Thanks for the plans. I love working with my hands

Built from Plan(s)

Comments

Puppet Stage

Submitted by jaime19861 on Thu, 03/14/2013 - 15:39

I changed the this plan to make it into a puppet stage for my niece's birthday.

I added a curtain rod and made some curtains to fit. I put two shelves in the back, but I put dowels in along the shelves so she could put her puppets on them for easy storage. I used a piece of a sheet of wainscotting for the front of the bottom.

I also put chalkboard paint at the top to allow her to write the name of puppet show that she is performing.

I was able to use some scraps that I had around for quite a bit of it, so it was pretty inexpensive.

The pictures are not great and I wish I would've taken pictures of the back before I gave it as a gift, but the kids are having lots of fun with it. I'll have to take some better pictures the next time I visit.

Estimated Cost
around $25, but I was able to use scraps that I had and paint that I already had.
Estimated Time Investment
Weekend Project (10-20 Hours)
Finish Used
Cabinet paint, chalkboard paint
Recommended Skill Level
Beginner

Christmas Chalkboards

Submitted by shellyward on Thu, 01/22/2015 - 09:56

I wanted something special to give the kids in our family for Christmas so I made them all these magnetic chalkboard easels.  I gave them chalk and magnetic alphabet letters to go with it.  The kids ranged from ages 6 months to 8 years and they all loved them!

Estimated Cost
$25/ea
Estimated Time Investment
Afternoon Project (3-6 Hours)
Finish Used
magnetic primer and chalkboard paint on the plywood and various colors for the frames
Recommended Skill Level
Beginner

Comments

shellyward

Mon, 02/02/2015 - 12:21

Thanks Ana! I am having so much fun using plans from your site. My husband created a monster in me when he helped me start learning how to use the power tools last Christmas. Now I just can't stop. currently my daughter and I are working on a large storage bed for her. You have inspired me that nothing is impossible!

justagirl322

Thu, 04/30/2015 - 01:19

Great idea to make these magnetic as well. I was just wondering if you would be willing to share what you used to make them magnetic. Thanks in advance
K

shellyward

Tue, 05/12/2015 - 05:31

sorry just saw this comment - I used the magnetic primer by Rust-Oleum. Used this in place of standard primer. You have to use at least 2 coats and even then, it won't hold a very heavy magnet. i would imagine the more coats you put on, the stronger it will be. It's not cheap, but was great for this application.

Shoe Shelf

Submitted by brittanyj on Sat, 04/22/2017 - 17:16

Husband wanted a shoe shelf for the back door entry, and I needed a quickie weekend project, so this fit the bill.  Adapted from fix this build that's plan, but modified for a smaller space and less shoe storage.  Easy project, and looks great.

Estimated Cost
$7- the project panel was on clearance at HD for the top, the rest was scrap lumber- ply, 2x2's and 1x2's.
Estimated Time Investment
Weekend Project (10-20 Hours)
Finish Used
kona stain, white paint, poly
Recommended Skill Level
Beginner

Cedar Herb Garden

Submitted by Anonymous (not verified) on Fri, 04/02/2021 - 06:43

I had the fun of working with my daughter on this project.We recently moved closer to her in Colorado and we are just starting to get into wood projects. Thanks for the great projects!
Aron

Estimated Time Investment
Afternoon Project (3-6 Hours)
Finish Used
Clear finish with a touch of Tung oil
Recommended Skill Level
Beginner

Comments

Kentwood bookcase - upsized

I made the original plan higher and wider, and added an extra shelf. Very pleased with the outcome!

Estimated Cost
AUD $200
Estimated Time Investment
Day Project (6-9 Hours)
Finish Used
Water-based stain (Walnut) & water-based satin varnish
Recommended Skill Level
Beginner

Comments

1x12 Wood Bulk Bins

Submitted by carongirls on Mon, 01/26/2015 - 05:42

I made my bins 36 incheg to fit my space.  My big box blue store has 1x12x8 utulity shelving boards for $13 compared to $27 for the 12 footers. 

Built from Plan(s)
Estimated Time Investment
Day Project (6-9 Hours)
Recommended Skill Level
Beginner

Comments

Fancy X Farmhouse Table

Submitted by Anonymous (not verified) on Mon, 04/24/2017 - 21:18

This is a table and bench that I built for our patio!

Built from Plan(s)
Estimated Cost
$200 (wood, fasteners, stain, urethane, sand paper, composite feet)
Estimated Time Investment
Weekend Project (10-20 Hours)
Finish Used
Minwax Ebony and Dark Walnut Stains, Minwax Helsman Spar Urethane.
Recommended Skill Level
Intermediate

Strawberry planters

Submitted by DevonWood on Thu, 04/08/2021 - 00:17

Using plans from this website here are pictures of two, five tier strawberry planters.
Each tier is wide enough for 4 plants in one litre pots.

Estimated Time Investment
Afternoon Project (3-6 Hours)
Recommended Skill Level
Intermediate

Comments

Workbench Console

Submitted by Jamaunzie on Tue, 03/19/2013 - 19:30

When I first saw this and showed it to my wife it became number one on my Honey Dew list. I did not like the open space between the bottom shelf and top, saw on this site where someone put a wine rack of shorts as a second shelf. So I did the same I used 1x4 instead of the 1x10 used on bottom shelf. I also used 1x4 for the top to help eliminate the gaps between the boards that the 2x4’s would cause. To help give something for the 2x4’s and the 2x6’s to attach to I screwed 2x2’s to the 1x4’s around the edge. Gives the illusion of 2x4’s and makes for a very smooth and flat surface for the top.

Built from Plan(s)
Estimated Time Investment
Weekend Project (10-20 Hours)
Finish Used
Sanded and Sanded started with number 60 grit and worked to 220 grit then used 320 grit by hand. I used one coat of Miniwax English Chestnut hand rubbed
I haven’t put on the Polyurethane yet due to Cold temps but will as soon as it warms up if that is ever going to happen
Recommended Skill Level
Intermediate

Comments

Jake

Fri, 03/29/2013 - 17:52

When I first saw your build I thought what a nice small workbench. You even put in places to store clamps!! Then I noticed the girly stuff on the top and realized that it was really inside the house. Really good work. When you can put the poly or antique oil on it the piece will really shine.

Jamaunzie

Sat, 03/30/2013 - 13:11

Thank You Jake yes my wife loves it I am finishing up on the hutch for the top now and soon I will get the poly on this and then if I can keep the wife from looking on here I might be able to build a work bench for the shop LOL

2x4 Little Car

Submitted by carongirls on Fri, 01/30/2015 - 06:04

Super Easy.  Warning the finished car weighs a ton so build in the room you want it in.


Estimated Cost
$40
Estimated Time Investment
Day Project (6-9 Hours)
Recommended Skill Level
Starter Project

Miter Stand and Rolling Storage Carts

Submitted by danicarby on Sat, 04/29/2017 - 11:21

I'm so happy that I found the plans for Ana's miter stand and rolling carts!  It was just what I needed for my garage shop... so everything can be organized and stored compactly but things can pull open and expand when I have a project (which is all the time, actually).

The actual miter stand was super easy to build - the carts took a few days working non-stop (when the kids permitted).


I made a few obvious changes from the plans:

-made deeper shelves on one of the carts

-added drawers on one of the carts

-added ped board on the end caps of miter stand


Something I didn't consider before building this was the slope of our garage floor.  There's a 3" difference from one end of the legs to the other so I had to use riser blocks to get everything perfectly level.  Unfortunately there's no way to level the carts as they aren't stationary but they slide in/out just fine.


I'd recommend this build to everyone!  Check Home Depot clearance often for deals on plywood!

Estimated Cost
It's hard to say as I used wood I had on hand, tried to buy clearance, etc. I'm estimating $200.
Estimated Time Investment
Week Long Project (20 Hours or More)
Finish Used
None
Recommended Skill Level
Intermediate

Comments

2 X 4 Adirondack Chair

I decided to try to do some chairs for my backyard , guess what ........ i end up with very nice chairs.
It's very comfortable and looks great. My friends already asked me to do some for them.
Thanks Ana White for the great free plan.

Estimated Cost
$60 Canadian dollar
Estimated Time Investment
An Hour or Two (0-2 Hours)
Finish Used
Behr Waterproof Stain and Sealer
Recommended Skill Level
Beginner

Comments

Farmhouse Style Rustic X Coffee Table

Submitted by petesveen on Fri, 03/22/2013 - 07:43

Ana's design caught my eye and I had to build one that was similar. I decided to modify the top because I really like the look of breadboard style tops. So the main difference is that I cut the top boards 41" long and added two 2x6 pieces for breadboards (about 27-27.5" long). So the total width still comes to 52". Turned out pretty cool!

Built from Plan(s)
Estimated Cost
$45 for wood - Stain/poly extra
Estimated Time Investment
Weekend Project (10-20 Hours)
Finish Used
I distressed it with nails, a hammer, some scratch marks, and a saw blade. I then used a vinegar/steel wool mixture to bring out the distressed areas a bit more. Then followed with 1 coat of dark walnut stain (applied with towel) and 3 coats of semi-gloss poly. I applied the first two coats with a brush and then lightly sanded between the second and last coat. The final coat was applied very thin using a towel.
Recommended Skill Level
Beginner

Comments

Courtlh

Sat, 03/30/2013 - 23:10

I have been looking through the brags to find one that had a color to go with our new couch...turns out you have the exact same couch as me!! It looks awesome! Now I have an awesome example to follow :)

$ 55 Fancy X Desk

My husband & my version of the fancy X desk.  I had a 1/4" glass top to make my writing area nicer

Estimated Cost
$ 55 plus cost of glass top if you like it $ 80
Recommended Skill Level
Beginner

Comments

roadtripmom

Thu, 02/05/2015 - 10:11

That desk looks incredible and the glass top really adds a beautiful element. This plan definitely going to the top of my list. You are a whiz at styling the space too !

Provincial Colonial Hybrid (Mortise and Tenon) end table

Submitted by Anonymous (not verified) on Mon, 05/01/2017 - 17:35

I built this for my girlfriend who specifically likes french provincial finishes but colonial farmhouse structure. There is absolutely no metal/screws in this build, frame assembled with mortise and tenon joinery and drawer is assembled with splines. I finished traditionally with a danish oil treatment for the top, and the frame/drawer was painted with Aubusson Blue chalk paint, corners sanded, then graphite washed, then waxed with a traditional paste wax and hand buffed. This is the first time I've built without pocket screws or modern finishes and I am hooked! It did take me four times as long though, so it's not for every project. Just the ones that are for someone special ;)

Estimated Cost
TOTAL: $207

Select pine: $110
Danish oil: $8
Paint/graphite wash/paste wax: $74 (plenty left for other projects)
Drawer pull (Rockler): $15
Estimated Time Investment
Week Long Project (20 Hours or More)
Finish Used
Danish Oil, Aubusson Blue chalk paint, graphite wash, soft clear paste wax
Recommended Skill Level
Intermediate